Close
0%
0%

Anna2 aka A2 the agbot!

Anna2 is a general purpose agricultural robot with an advanced vision system, OpenCV and deep neural network models.

Similar projects worth following
Anna2 is an agricultural robot built with a Raspberry Pi 3 model B and low cost components to make it an economical labor source. OpenCV and deep neural network models will be used to build the advanced vision system.

Anna2 aka A2 the agbot!

With a growing world population and concerns with the use of pesticides in industrial agriculture endangering bee populations, as well as expensive labor intensive organic farming, A2 will take on several world challenges with a single project.

Problem number 1 world hunger and a growing population:

With a growing world population and only so much available cultivatable land, newer techniques such as high precision agricultural techniques will need to be in use.

Problem number 2 Pesticide and chemical use:

It is believed that pesticide and chemical use could be contributing the bee and pollinator population decreases.

Problem number 3 labor intensive agriculture:

Organic farming and permaculture farming techniques could help the other problems. The problem is these techniques are labor intensive and result in a high price for the products, putting them out of reach for many families, as well as lower production.

A possible solution:

A2 will be a general purpose autonomous as well as tele-operated robot to help try to eliminate the problems. In order to help with high precision agriculture, a robot could give each plant more attention to increase crop yield. With greater attention to each plant, a robot could target specific insects which will help eliminate pests without targeting beneficial insects. It can also kill weeds without killing the crop.

I believe the key to accomplish these goals will be an advanced vision system and the ability to see and identify plants and insects in an agricultural environment. A2 will be built with a Raspberry Pi 3 model B and low cost components to make it an economical labor source. Open CV and deep neural network models will be used to build the advanced vision system.

  • Adding a webserver and webpage to Anna2 for an IOT user interface.

    Dennis06/12/2017 at 01:34 0 comments

    I have already setup remote desktop to talk to the Raspberry Pi. It’s great for writing code on the Raspberry Pi but is not great for running the code. Trying to display live camera feeds from the RPI on the remote desktop will work for a short time and then lock up.
    A webserver and a dynamic webpage should be a better choice, plus the webpage will allow the Anna2 to communicate with any web enable device. The Raspberry Pi makes this very easy.

    Here’s a nice step-by-step to load both:

    https://www.raspberrypi.org/learning/lamp-web-server-with-wordpress/worksheet/

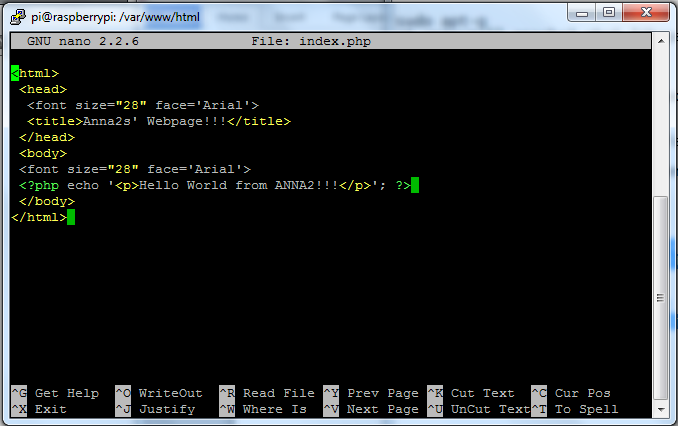
    I didn’t load Word Press yet. I’m thinking about writing a php enabled webpage from scratch. After loading Apache2 and php, you can navigate to the location of the site in terminal by entering “cd /var/www/html”. Open leafpad to edit the webpage with “sudo nano leafpad index.php” and add the script for the webpage. Save the new webpage as “index.php” and delete the original html site with” sudo rm index.html”.

    I entered the below script with leafpad and saved it as index.php to test the webpage.

    Then I opened a browser and entered the IP address my RPI is connected to on my WIFI router and the results are below. YAY success!!! Anna2 now has a Webpage!!!

  • Next step with Tensor Flow, Tflearn and Datasets

    Dennis06/08/2017 at 02:35 5 comments

    In order for a machine to harvest a crop it needs to be able to see and identify the crop. After putting together an algorithm to train a model, I found the raspberry Pi remote desk top I’m using doesn’t seem to get along too well with the model. Actually, it crashes during training. I decided it would be better to train the model on my laptop and run the model on the Raspberry pi.
    It was obvious python was not designed for a Windows machine and scipy turned out to be very difficult to load. I ended up loading WinPython 3.5.2 which had scipy preinstalled and it was easy to add tensor flow and tflearn after that.
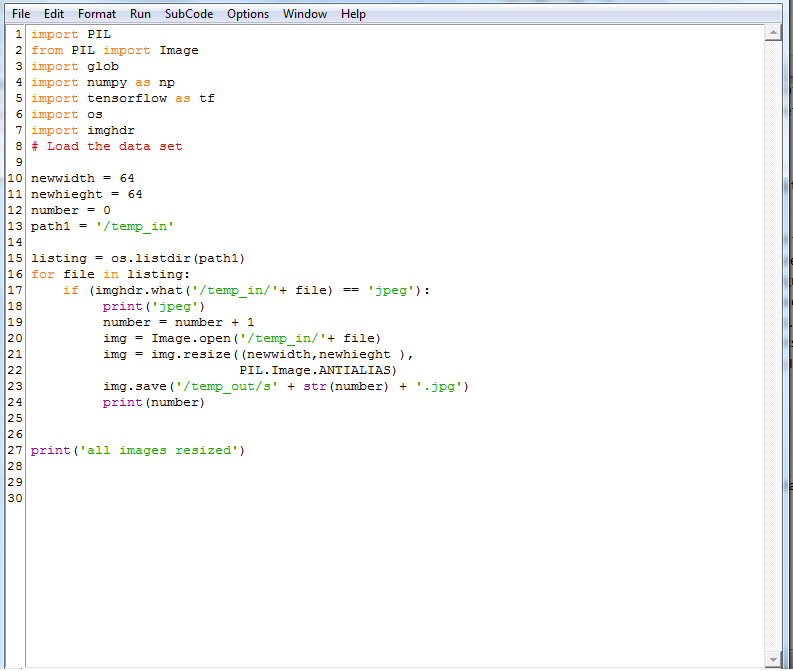
    Next, I wanted to be able to use my own dataset. I decided a strawberry would be a good target to start with. It would be very tedious to search and individually save the thousands of images needed to train a model. Luckily, I found a Google app called Fatkun batch download image and it worked great for saving the images. Next, I needed to resize them all to the same size. I started with a model based on cifar-10, with 32x32x3 size images. After testing, I had better luck with a larger image of 64x64x3. Below is a short program I wrote to resize the images for me. It not only resizes but also counts the images as it resizes them so I would know how many images I had. After the strawberry images, I also loaded additional images such as dogs, cats and birds and “non-strawberry” images.

    Below is the algorithm I’m using to train the model. It works but still needs some work. I loaded a few strawberry pictures in a test folder to test the model. It does identify most on the images as strawberries. It is a good start.

    from __future__ import division, print_function, absolute_import

    #from skimage import color, io
    #from scipy.misc import imresize
    import numpy as np
    from sklearn.cross_validation import train_test_split
    import os
    import scipy
    from glob import glob

    import tflearn
    from tflearn.data_utils import shuffle, to_categorical
    from tflearn.layers.core import input_data, dropout, fully_connected
    from tflearn.layers.conv import conv_2d, max_pool_2d
    from tflearn.layers.estimator import regression
    from tflearn.data_preprocessing import ImagePreprocessing
    from tflearn.data_augmentation import ImageAugmentation
    from tflearn.metrics import Accuracy

    # Load the data set

    strawberry_files = sorted(glob('/strawberry_64_sm/*.jpg'))
    nonstrawberry_files = sorted(glob('/non_strawberry/*.jpg'))
    n_files = len(strawberry_files) + len(nonstrawberry_files)
    print(n_files)
    size_image = 64


    allX = np.zeros((n_files, size_image, size_image, 3), dtype='float64')
    ally = np.zeros(n_files)
    count = 0


    for f in strawberry_files:
    try:
    img = io.imread(f)
    new_img = imresize(img, (size_image, size_image, 3))
    allX[count] = np.array(new_img)
    ally[count] = 0
    count += 1
    except:
    continue
    for f in nonstrawberry_files:
    try:
    img = io.imread(f)
    new_img = imresize(img, (size_image, size_image, 3))
    allX[count] = np.array(new_img)
    ally[count] = 1
    count += 1
    except:
    continue


    #######

    # test-train split
    X, X_test, Y, Y_test = train_test_split(allX, ally, test_size=0.1, random_state=42)

    # encode the Ys
    Y = to_categorical(Y, 2)
    Y_test = to_categorical(Y_test, 2)


    ###################################
    # Image transformations
    ###################################

    # normalisation of images
    img_prep = ImagePreprocessing()
    img_prep.add_featurewise_zero_center()
    img_prep.add_featurewise_stdnorm()

    # Create extra synthetic training data by flipping & rotating images
    img_aug = ImageAugmentation()
    img_aug.add_random_flip_leftright()
    img_aug.add_random_rotation(max_angle=25.)
    ###################################
    #
    ###################################


    # Define te network architecture:

    # Input is a 64x64 image and 3 color channels

    network = input_data(shape=[None, 64, 64, 3],

    data_preprocessing=img_prep,

    data_augmentation=img_aug)

    print('step one start')

    # Step 1: Convolution

    network = conv_2d(network, 32, 3, activation='relu')

    print('step 2 start')

    # Step 2: Max pooling

    network = max_pool_2d(network, 2)

    print('step 3 start')

    # Step...

    Read more »

  • Googles Tensor flow, Deep Learning Neural Network and Raspberry Pi

    Dennis04/08/2017 at 21:29 0 comments

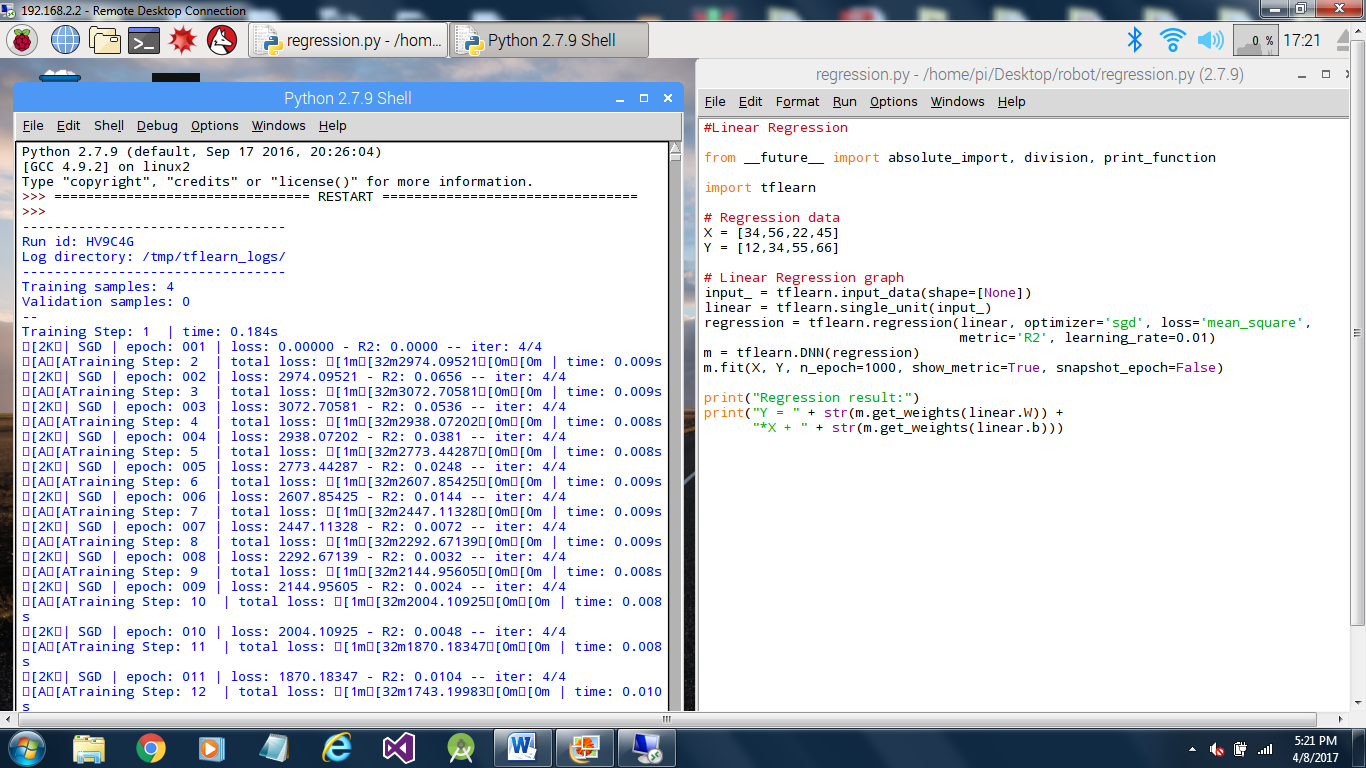
    I wanted to dive into deep learning networks on this project and decided Google’s Tensorflow would be a place to start with a lot of online resources available. I loaded tensorflow, tflearn and the dependencies. Everything seems to be working. Below, the Raspberry Pi is running a linear regression example.

    So far, so good!

  • First step--load the first tool OpenCV:

    Dennis03/31/2017 at 00:35 0 comments

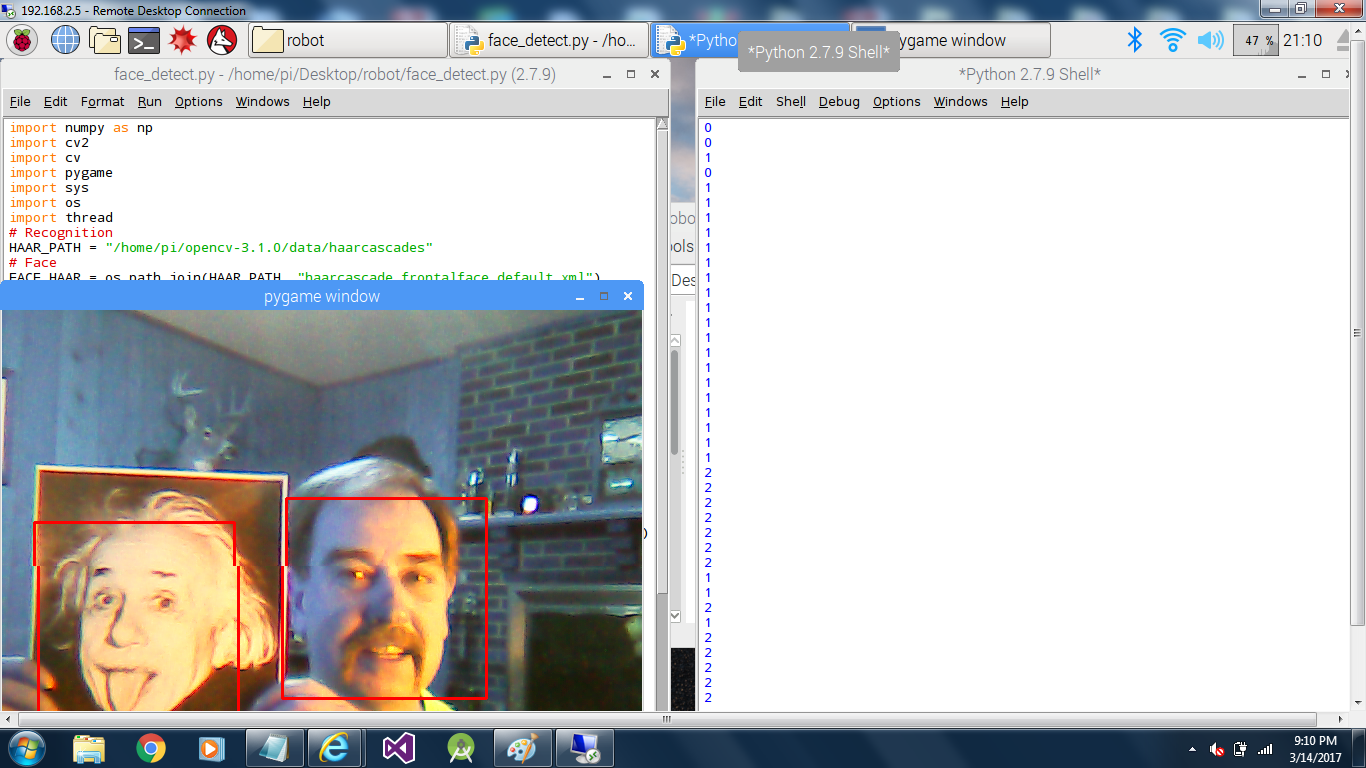
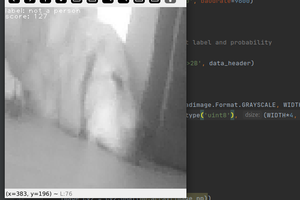
    I loaded OpenCV on the Raspberry Pi. I didn’t think there was a need to go through too many details with a lot of tutorials on loading OpenCV on Raspberrys online. Below is a short program to test OpenCV. I used pygame to display the results on my remote desktop.

    # Set up haarcascades
    HAAR_PATH = "/home/pi/opencv-3.1.0/data/haarcascades"
    # Face
    FACE_HAAR = os.path.join(HAAR_PATH, "haarcascade_frontalface_default.xml")
    face_cascade = cv2.CascadeClassifier(FACE_HAAR)

    #Set up cam and pygame
    cam = cv2.VideoCapture(0)
    pygame.init()


    #create fullscreen display 640x480
    screen = pygame.display.set_mode((640,480),0)

    while(True):
    ret, frame = cam.read()
    gray = cv2.cvtColor(frame, cv2.COLOR_BGR2GRAY)
    gray_small = cv2.resize(gray, (160,120))
    faces = face_cascade.detectMultiScale(gray_small, 1.3 , 5)
    for (x,y,w,h) in faces:
    cv2.rectangle(frame,(x*4,y*4),((x*4) + (w*4),(y*4) + (h*4)),(255,0,0),2)
    pg_image = pygame.image.frombuffer(frame.tostring(),(640,480) ,"RGB")
    screen.blit(pg_image, (0, 0)) #Load new image on screen
    pygame.display.update()
    print len(faces)
    for event in pygame.event.get():
    if event.type == pygame.QUIT:
    pygame.quit()
    cam.release()
    cv2.destroyAllWindows()
    sys.exit()

    I plugged in a USB Camera and ran the program.

    Here’s the results…It works!

View all 4 project logs

Enjoy this project?

Share

Discussions

mshani0331 wrote 09/21/2023 at 16:48 point

Anna2, or A2, appears to be an agricultural robot (agbot) designed to assist with farming tasks. The name suggests it might be a second version or an update of an original "Anna" model. https://foleyauctioneers.ie/sales/agricultural-sales/

  Are you sure? yes | no

Junglist wrote 10/14/2018 at 08:28 point

Awesome project! I am attempting to make an autonomous weed and slug killing robot for agriculture. Basically a very similar idea to the WEEDINATOR. Will add a project for it one day soon.  I haven't delved into the plant phenotyping part yet as am focusing on navigation and the physical field robot. When I got to needing it I was going to give this a try though. Maybe it will be of some help to you. 

https://github.com/p2irc/deepplantphenomics

  Are you sure? yes | no

Bill wrote 04/25/2018 at 00:51 point

I think I've seen this movie...

https://www.youtube.com/watch?v=pan5Jo91e8I

  Are you sure? yes | no

eotlf wrote 03/11/2018 at 12:49 point

Great project! We have a small organic farm and knowing what problems are occurring takes constant monitoring. Thanks

  Are you sure? yes | no

Capt. Flatus O'Flaherty ☠ wrote 05/19/2017 at 06:47 point

Thanks for the Weedinator like. Your Anna device may be exactly what we need on the Weedinator - We're concentrating on GPS navigation, stepper motor programming and heavy duty chassis design and hoping to add a camera operated weed/bug spotter at the next stage.

Please feel free to join our project.

Also, I'll have some SPI controlled stepper motor control PCBs available soon, once they've been tested if you want any? They're being manufactured right now.

https://hackaday.io/project/21744-weedinator

PS. We are a group of farmers/engineers growing organic vegetables on a field scale.

  Are you sure? yes | no

Dennis wrote 05/22/2017 at 00:30 point

Thanks TegwynTwmffat!
Sounds great!

  Are you sure? yes | no

Similar Projects

Does this project spark your interest?

Become a member to follow this project and never miss any updates