Tomek Szczęsny
-
First Boot and Thermal Considerations
an hour ago • 0 commentsI put the bare motherboard on my test bench, installed some spare DDR4 RAM, and booted it using a live Linux Mint USB drive. It worked perfectly!
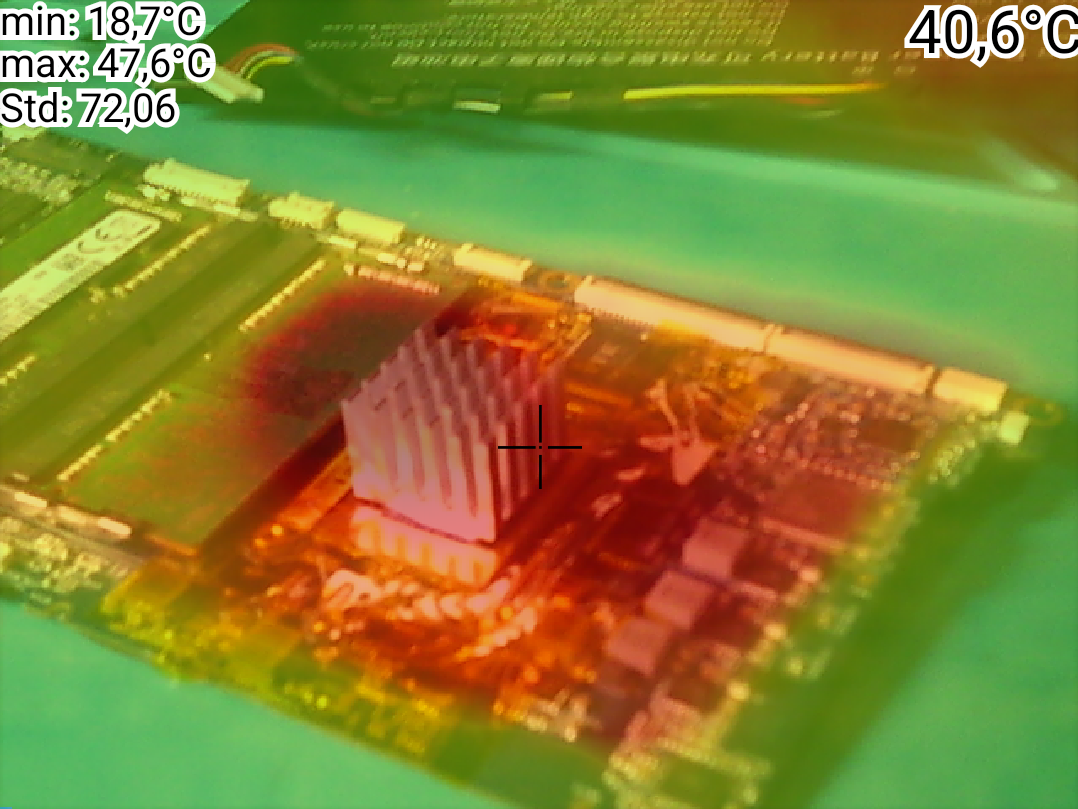
However, during CPU stress tests with a temporary cooler, I noticed that the three power delivery components (VRM inductors) next to the processor quickly heated up to 60°C, even at idle. This means my new cooling system must cover these components too.Pardon this poor visualisation, my thermal camera clearly has an offset between visible and thermal images.
I ran more tests using a Linux utility calledstress-ngwhile watching the processor speeds and temperatures. The results were strange at first. When I loaded only 1 or 2 CPU cores, they boosted all the way to 4.34 GHz at around 65°C. But when I loaded all 8 physical cores at the same time, the speed dropped down to 2.7 GHz, and the temperature actually fell to a cool 60°C.
Why would the chip get cooler when doing more work?
This test revealed that the laptop was hitting a strict power throttling ceiling (TDP limit) set by the factory, not a thermal limit. The processor is physically locked at 15 Watts (long term mean power). When all 8 cores are busy, all cores receive severe clock speed penalty!Discovering that power constraints—not temperatures—were the biggest bottleneck changed everything. I learned that I can completely override these factory power limits and push the Ryzen chip from 15W up to a sustained 25W or 30W, using a specialized firmware tool called
Smokeless_UMAF.
But running at 30W means the tiny, high-pitched factory laptop fan would turn into a screaming hair dryer. To prepare for this massive performance boost, I decided to build a high-performance wind-tunnel cooling setup with a much larger heatsink. -
Finding the Power Button (A Multimeter Trap!)
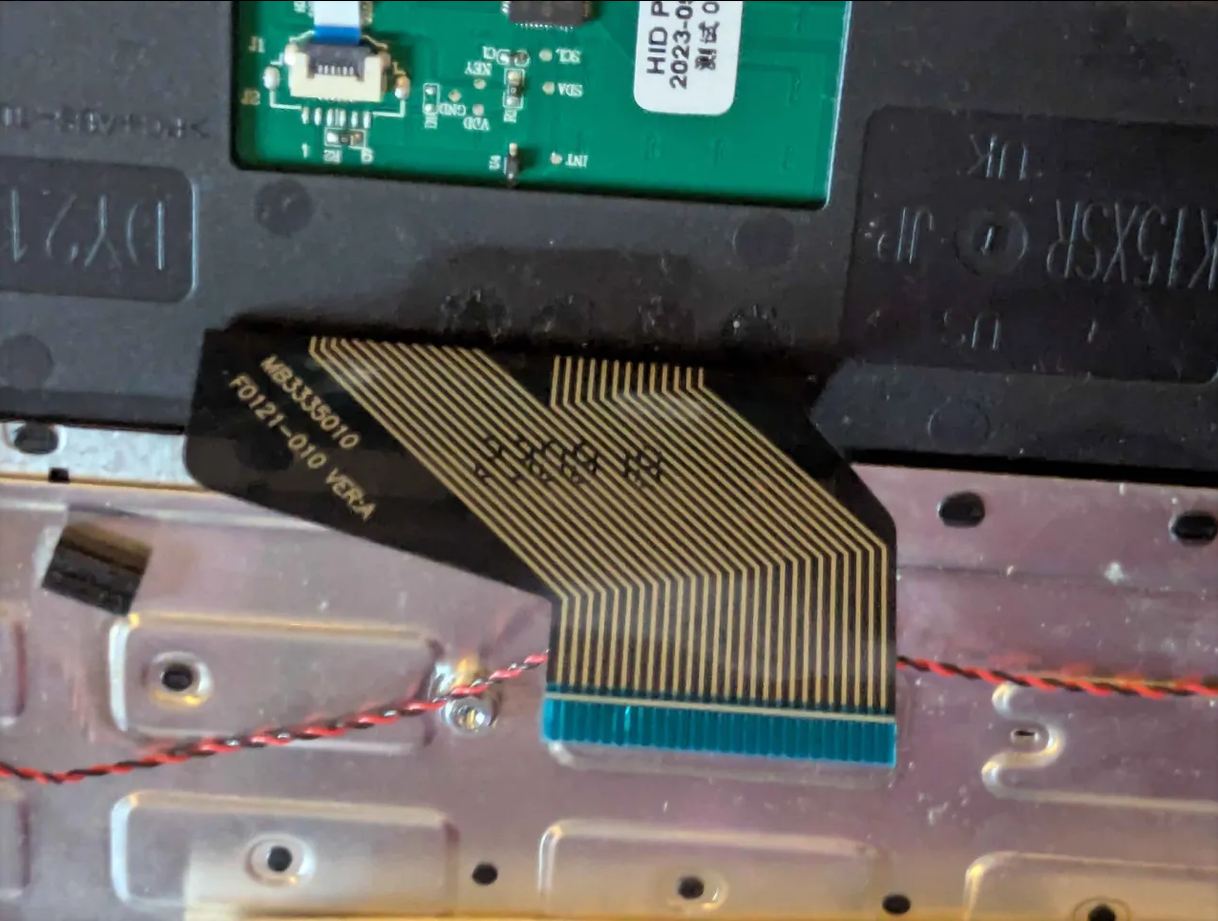
an hour ago • 0 commentsSince I plan to build a custom wooden case and mount the computer under my desk, I needed a way to turn it on without the original laptop keyboard. I had to reverse-engineer the 26-pin keyboard ribbon cable to find the power button traces.
This became an interesting electronics riddle.- At first, I used my digital multimeter (DMM) in standard "continuity beep" mode to scan the ribbon pins while pressing the power button.
- It failed. The meter did not beep at all.
- Why? Cheap laptop keyboards have poor membrane contacts. When you press a key, the resistance does not drop to 0 Ohms. Instead, it sits around 150 Ohms. Most standard multimeters only beep if the resistance is below 30 or 50 Ohms. They do not consider 150 Ohms a short circuit!
I switched my multimeter to Diode Test Mode with a fast screen refresh rate. This mode easily detects the voltage drop across a 150-Ohm resistance. Using this trick, I successfully located the power trigger on pins 1 and 2. With help of a breakout board, I will emulate this key with a larger button mounted on the case at the later stage of the project.
In the meantime, I have located a motherboard test point that acts as a power switch when shorted to GND, which I currently use for test launches.
-
The Donor Laptop
an hour ago • 0 commentsFirst, I had to find a cheap machine. I found a second-hand Cepter Cloud 15.6" laptop on a local marketplace. It cost me only 420 PLN (about $105 USD).
When it arrived, it was in a truly sorry state. Many chassis screws were missing, and someone had replaced others with the wrong types. The plastic case was completely battered. However, inside sat a great heart: an 8-core AMD Ryzen 7 5700U processor with Radeon Vega 8 graphics. It was the perfect candidate for an e-waste rescue.
Rożen (The Ryzen Mini-PC)
Turning a salvaged laptop motherboard into a portable mini-PC