-
2000 mAh battery option!
09/14/2021 at 22:02 • 0 commentsIt's well known that LiFePO4 cells have lower energy density than other lithium-ion chemistries that use cobalt. So I'm always very skeptical when I see LiFePO4 18650 size cells advertised with supposed 2500 - 3500 mAh capacities. Usually it's either a confusing ad from a seller who crams their ad title full of keywords and they are not actually selling a LiFePO4 but a cobalt-containing lithium-ion cell, or they are just plain lying about the capacity.
But a while back I was contacted by a company called OSN power who claimed that they had new LiFePO4 18650 size cells with 2000 mAh of capacity, versus the normal 1500 mAh. My interest was piqued because it seemed like a serious, reputable company, and the claim was not outrageous but within the realm of possibility considering technology is always improving. So I ordered 200 cells for testing.
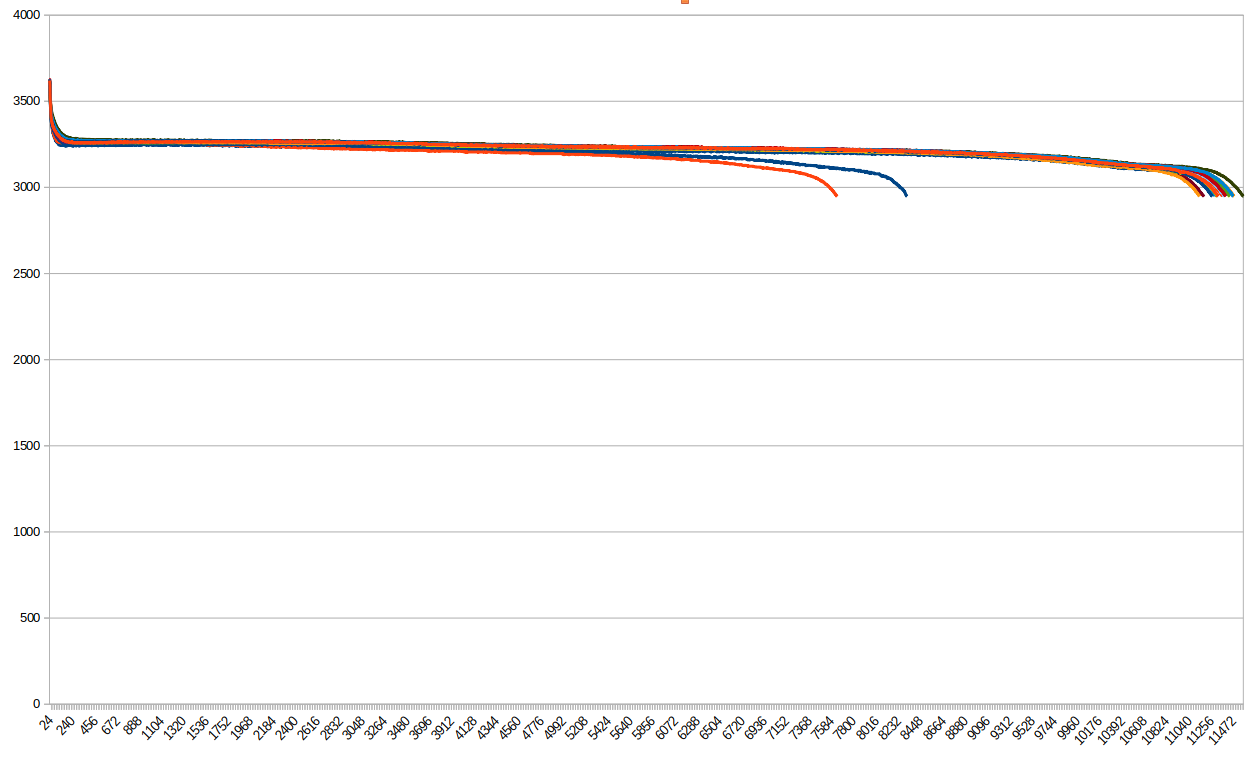
To be honest, I didn't have much time to actively spend on testing, so I did it in a way that would not take up much of my time but could run in the background while I was busy doing other things. I set up a logging script on a Raspberry Pi that would read and log the battery voltage. I would fully charge a battery, then start the script and run from battery until the system shut down because the battery was empty. I did this for a couple of my standard 1500 mAh cells to have a reference, and then for a bunch of the 2000 mAh cells to get an idea for how consistent they are. I tried to be consistent about not leaving the ssh terminal connected, but to be honest, I didn't do too well and introduced some variability because of that. Sorry, my brain power was mostly elsewhere. :) Still, all I wanted was data that would give me an idea of how much more capacity these cells had compared to my standard ones. Here is a chart with run times I collected:

Well, what do you know: the new cells indeed run the Pi for quite a bit longer. The two shorter traces are my standard 1500 mAh cells. Sorry for the variability between them, I accidentally left the ssh terminal connected for a while for the red trace. For the 2000 mAh cells, I had the procedure down a bit better so they don't show too much spread. Assuming my reference cells are indeed 1500 mAh, the new cells do seem to have 2000 mAh capacity or better!
I started offering these batteries as an option now in my Tindie store. If you want the higher capacity battery, choose the "High-capacity 18650 size 2000 mAh battery" option in the "Battery size" dropdown. Happy hacking!
-
More rev 7 testing with NVMe SSD
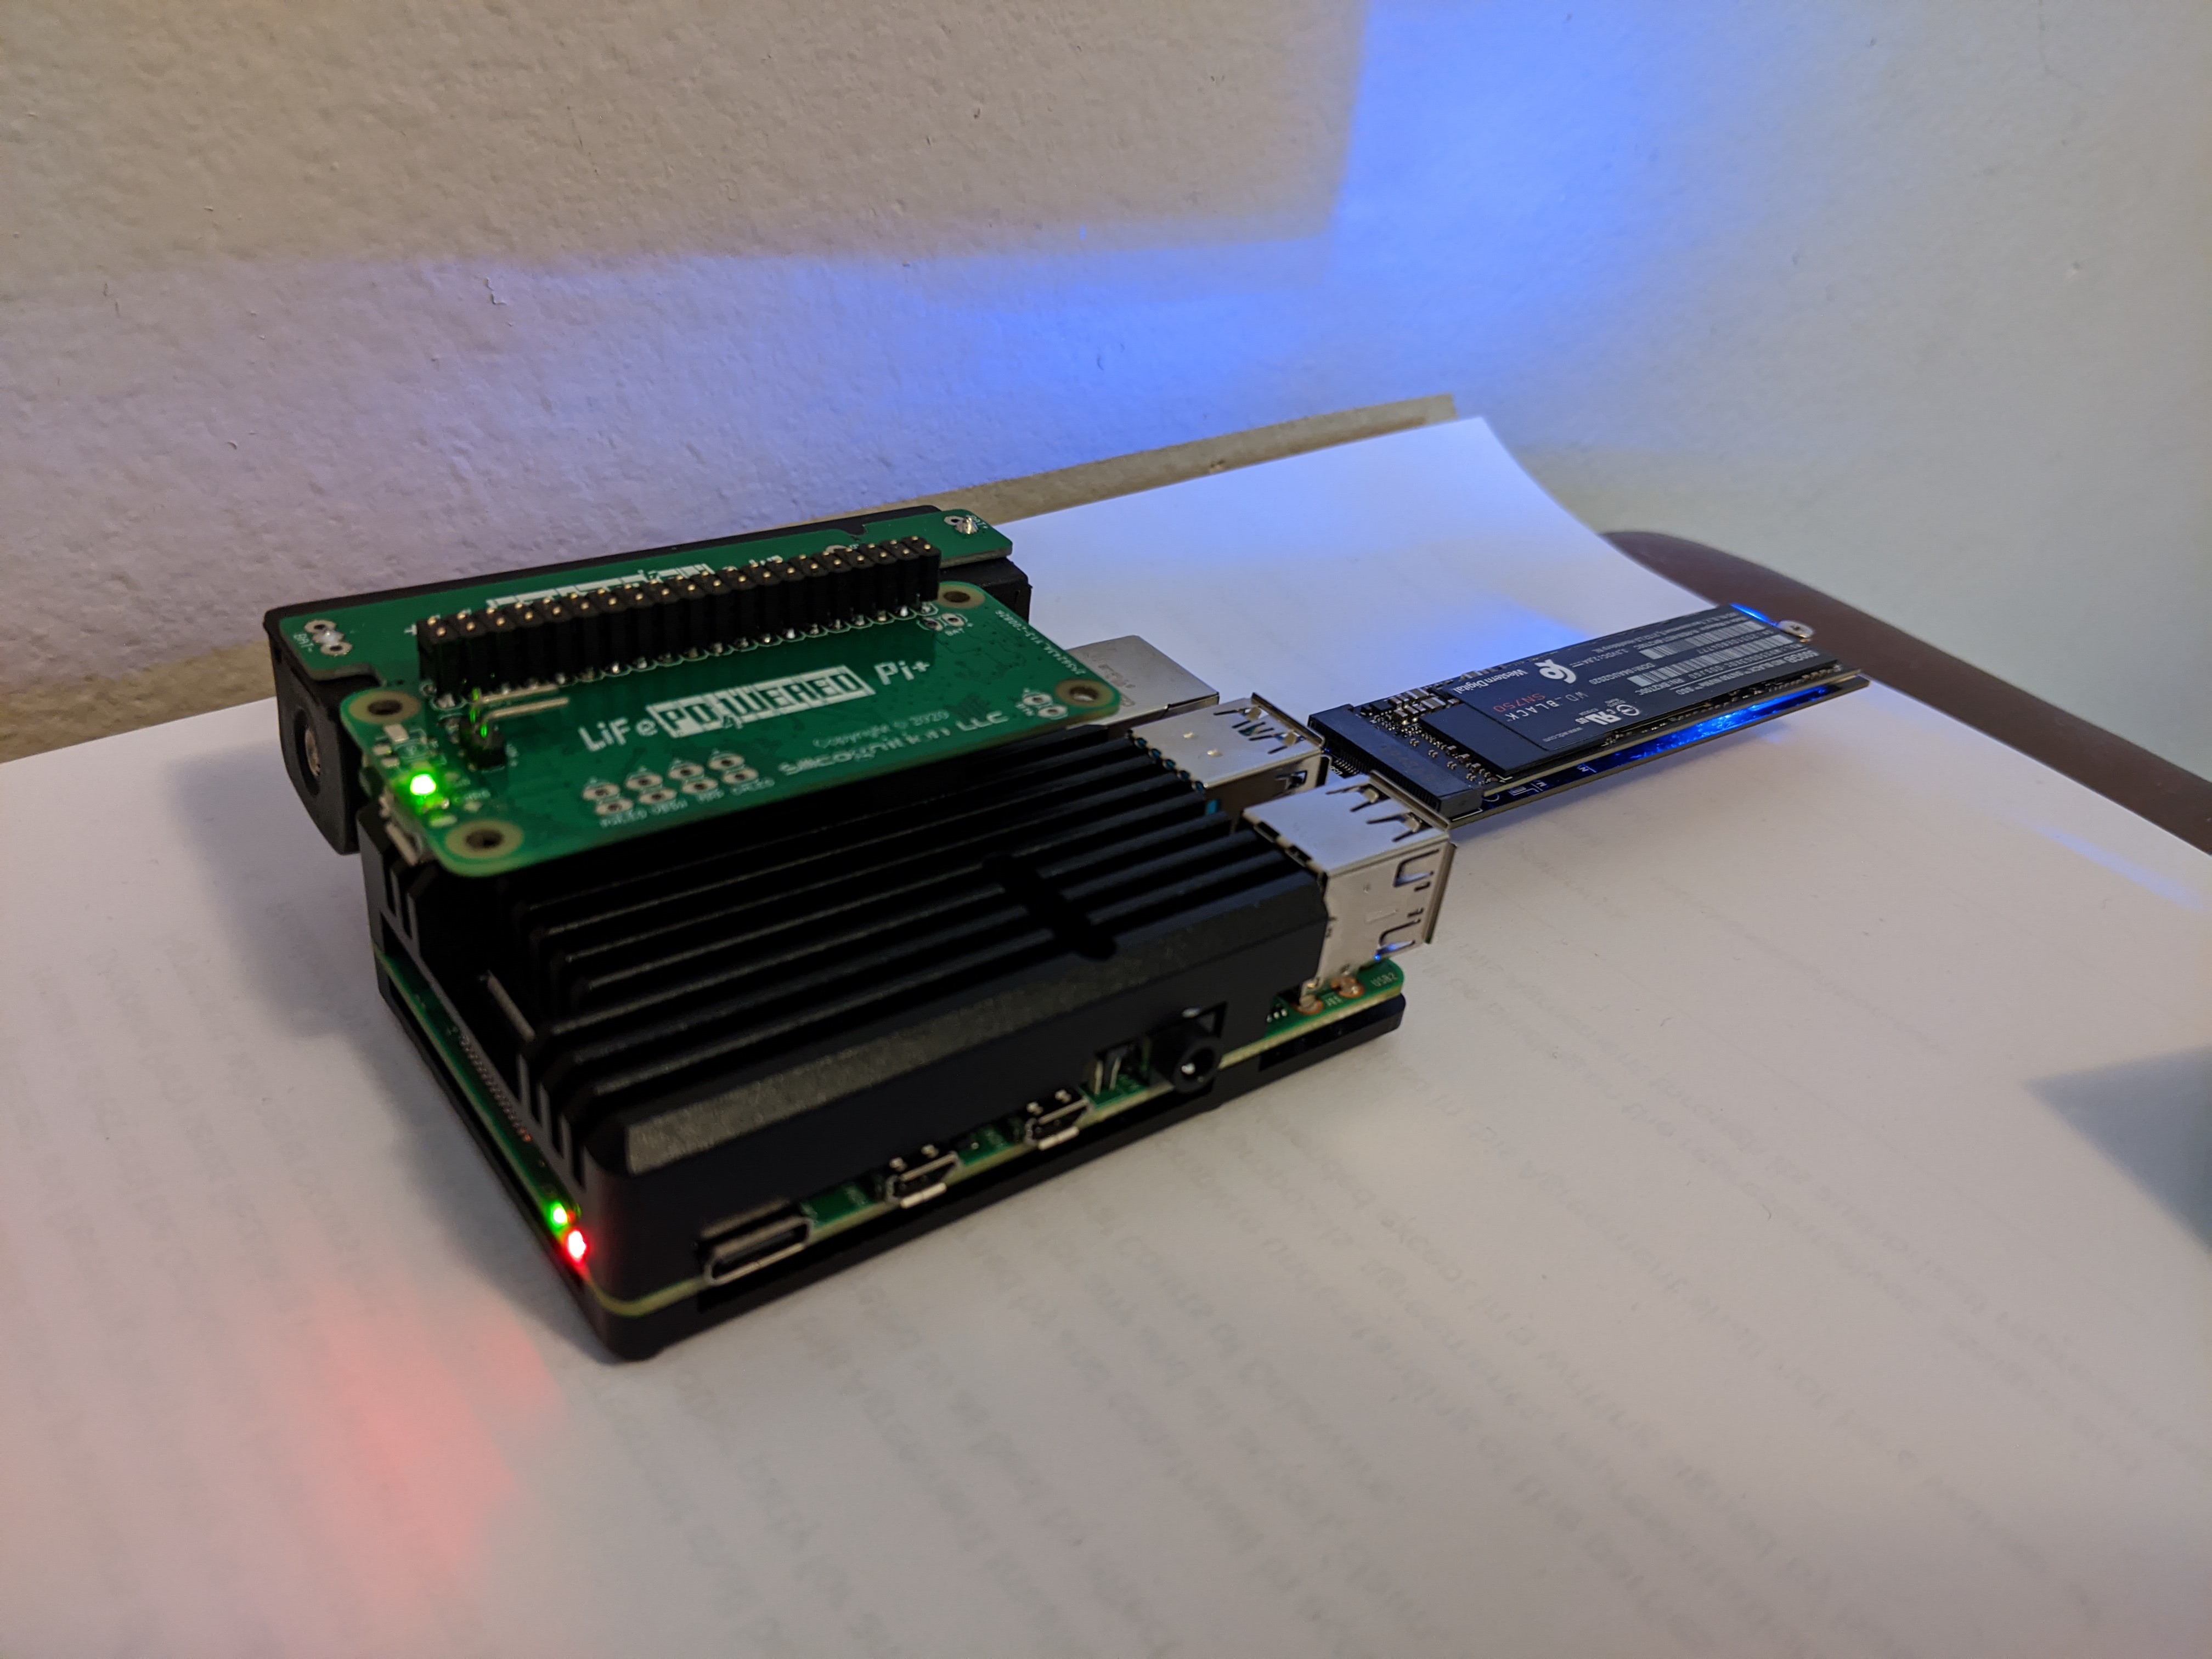
10/21/2020 at 18:06 • 0 commentsTo test a real world high load scenario, I set up a Pi 4 with large heat sink (to maintain maximum frequency) and configured it to run from a 500GB WD Black NVMe SSD using a USB to M.2 adapter. I also stressed the system with the following command:
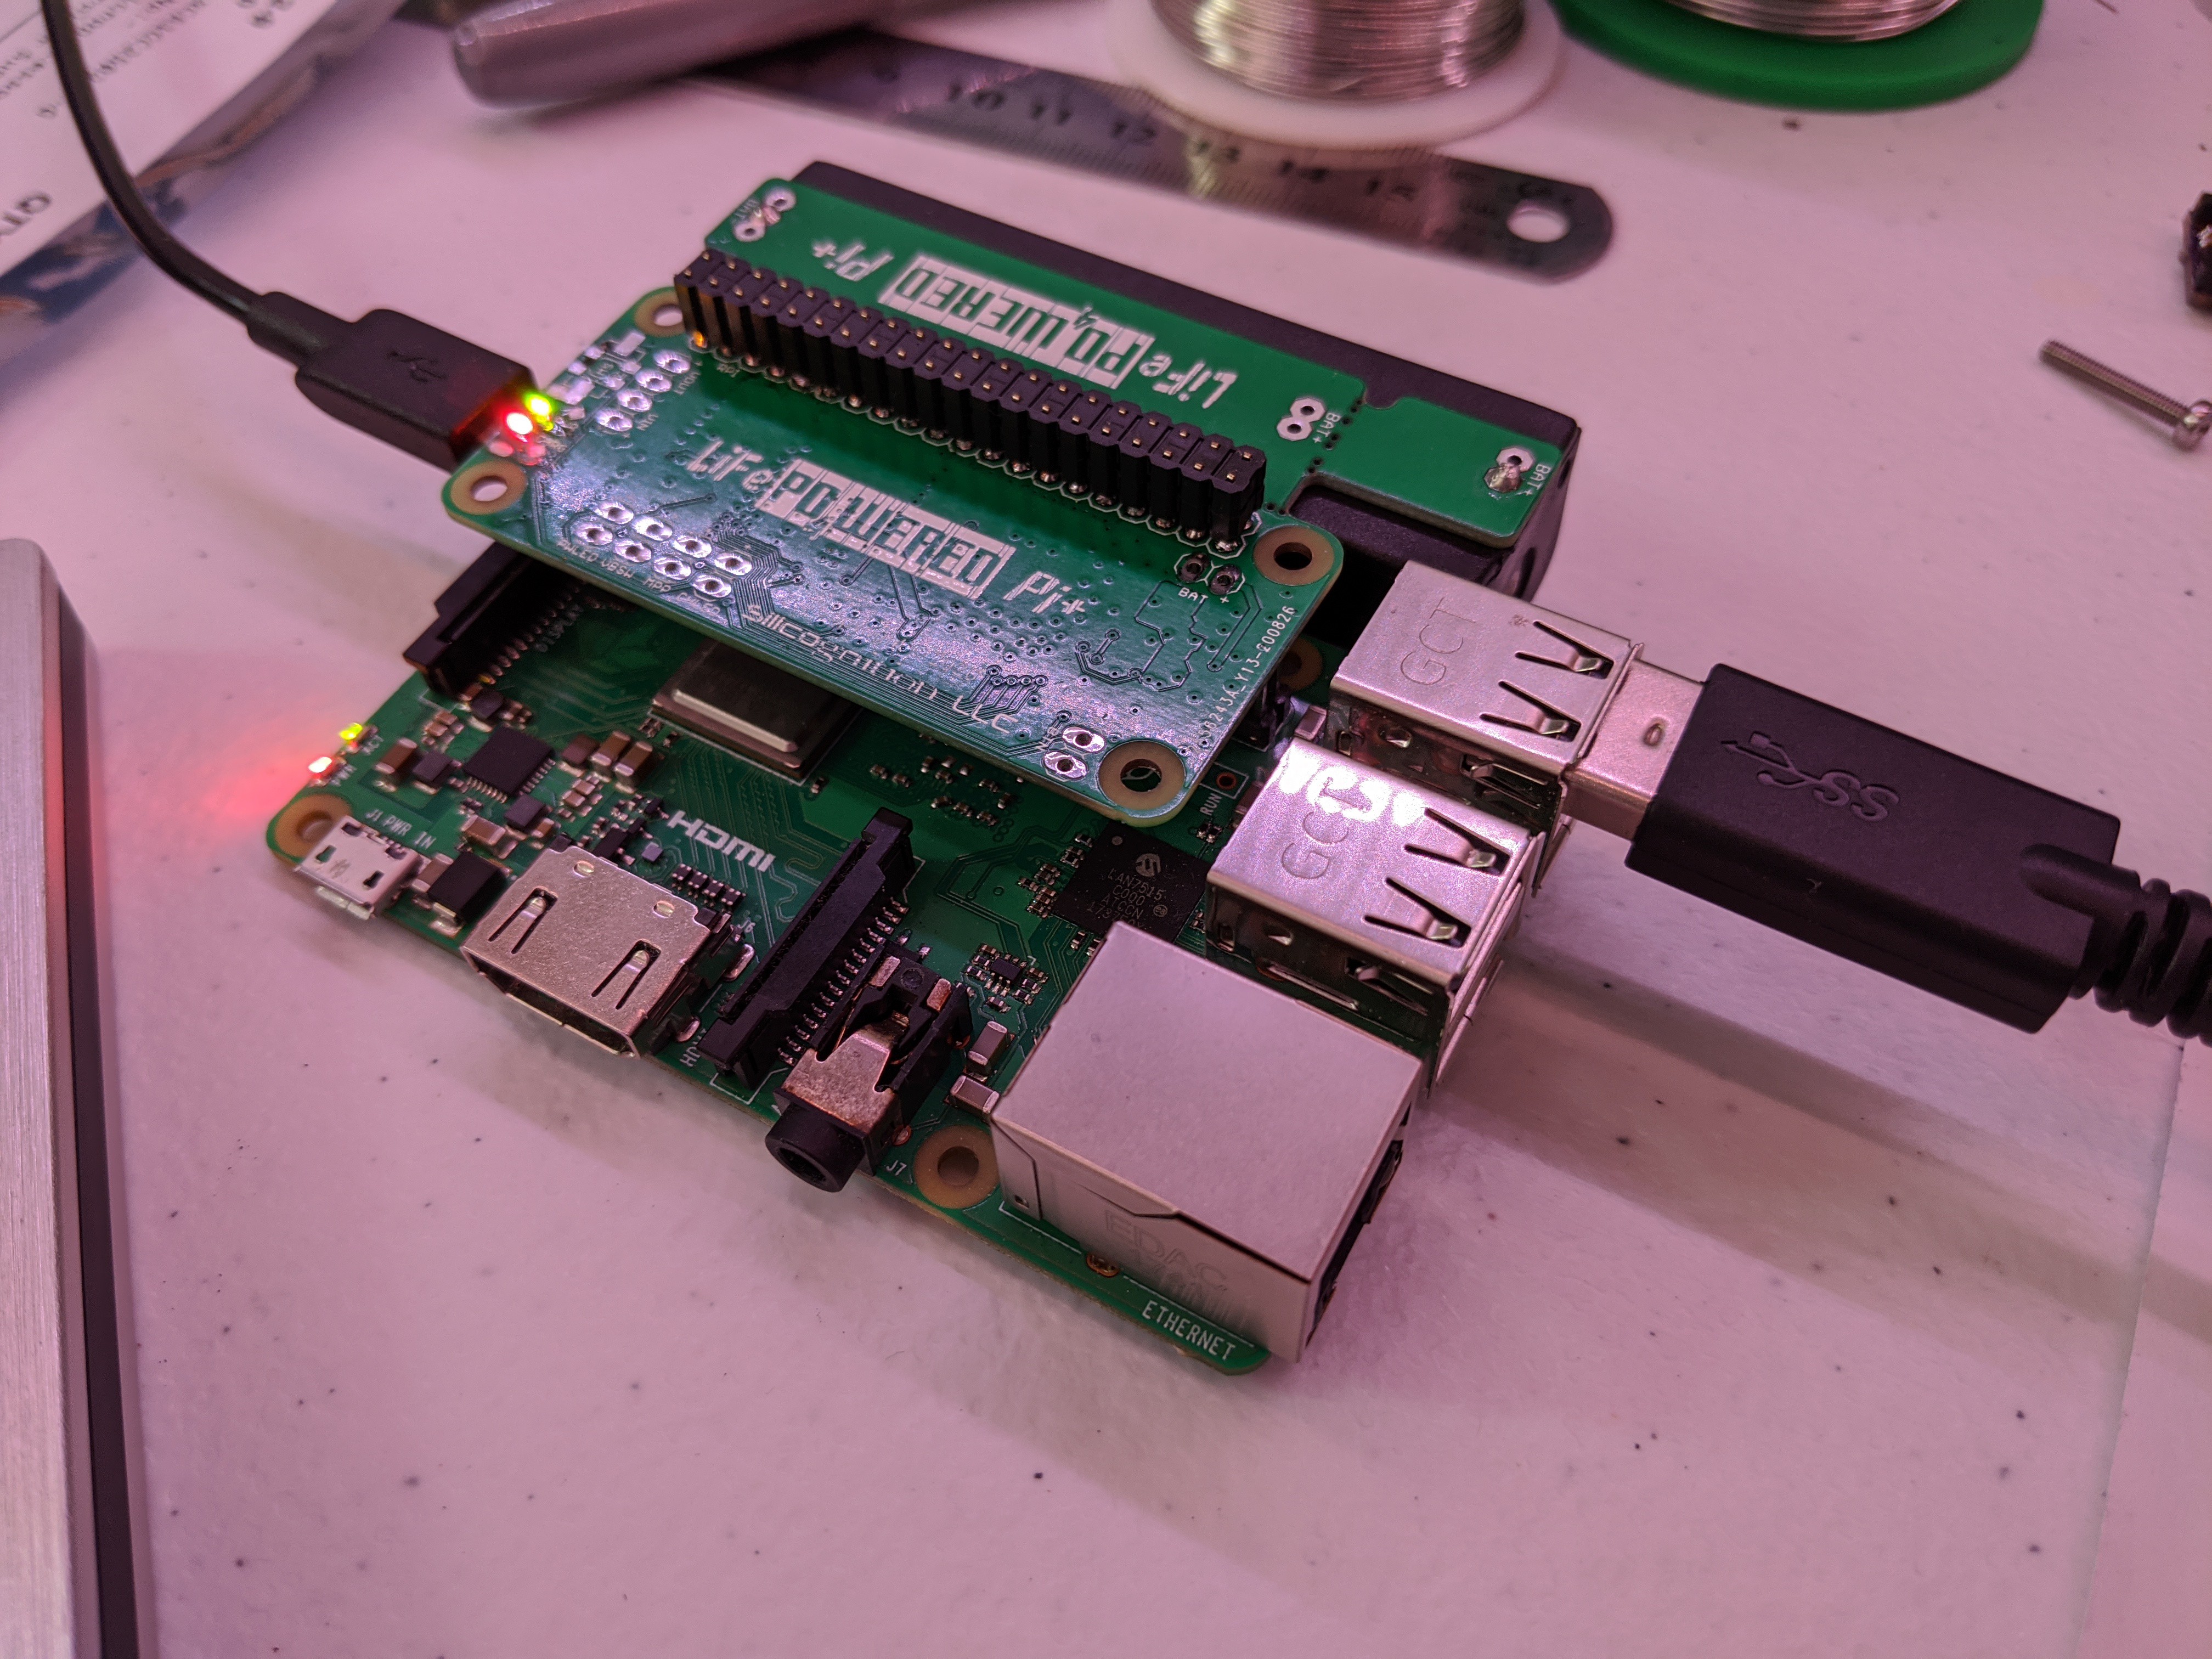
stress -c 4 -i 2 -m 2 -d 2I used an extra stacking header to make the LiFePO4wered/Pi+ fit above the heat sink. Here's the setup:
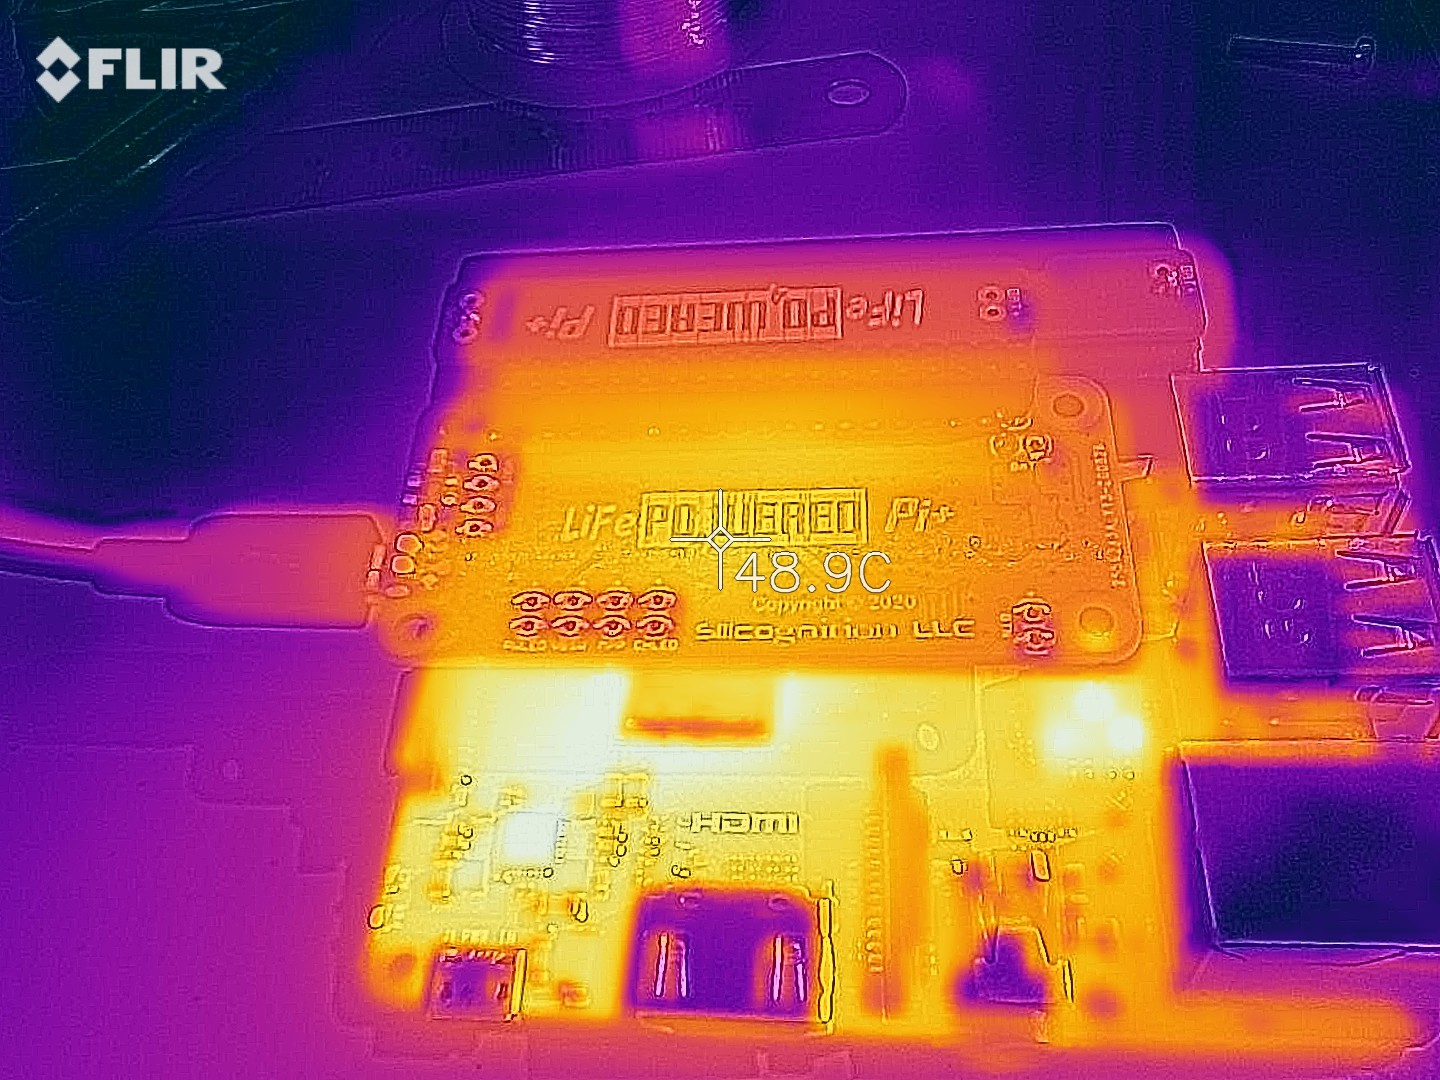
 I wanted to make sure the system would run stable from both battery and when externally powered, and switch seamlessly between the two. I also wanted to take some thermal shots in both conditions.
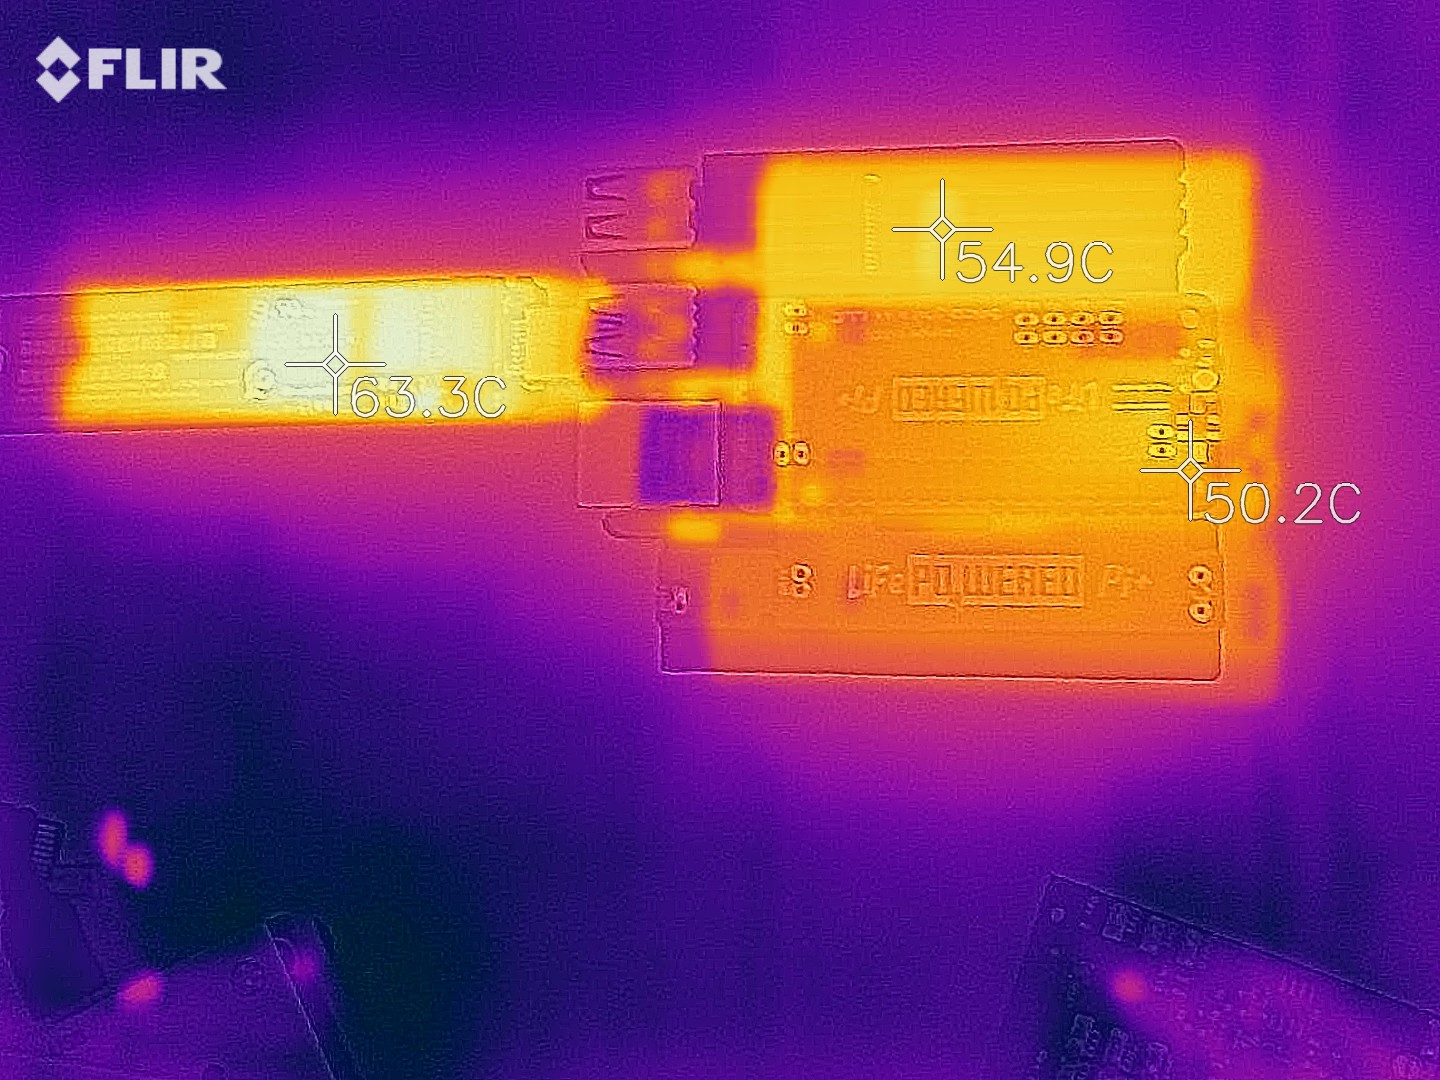
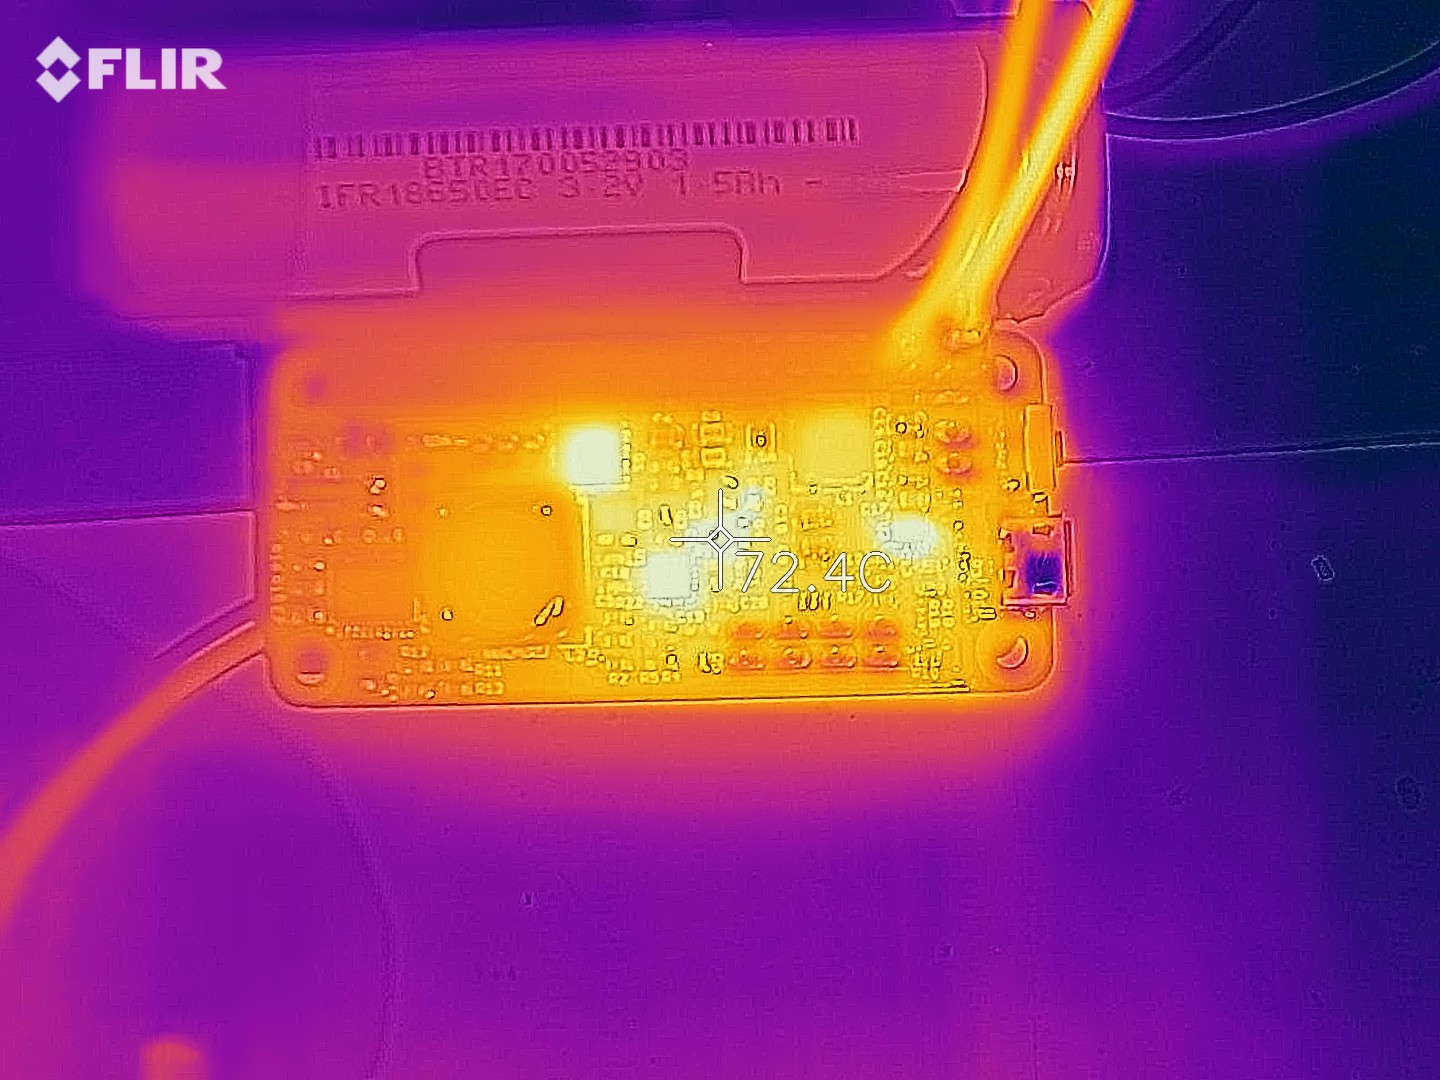
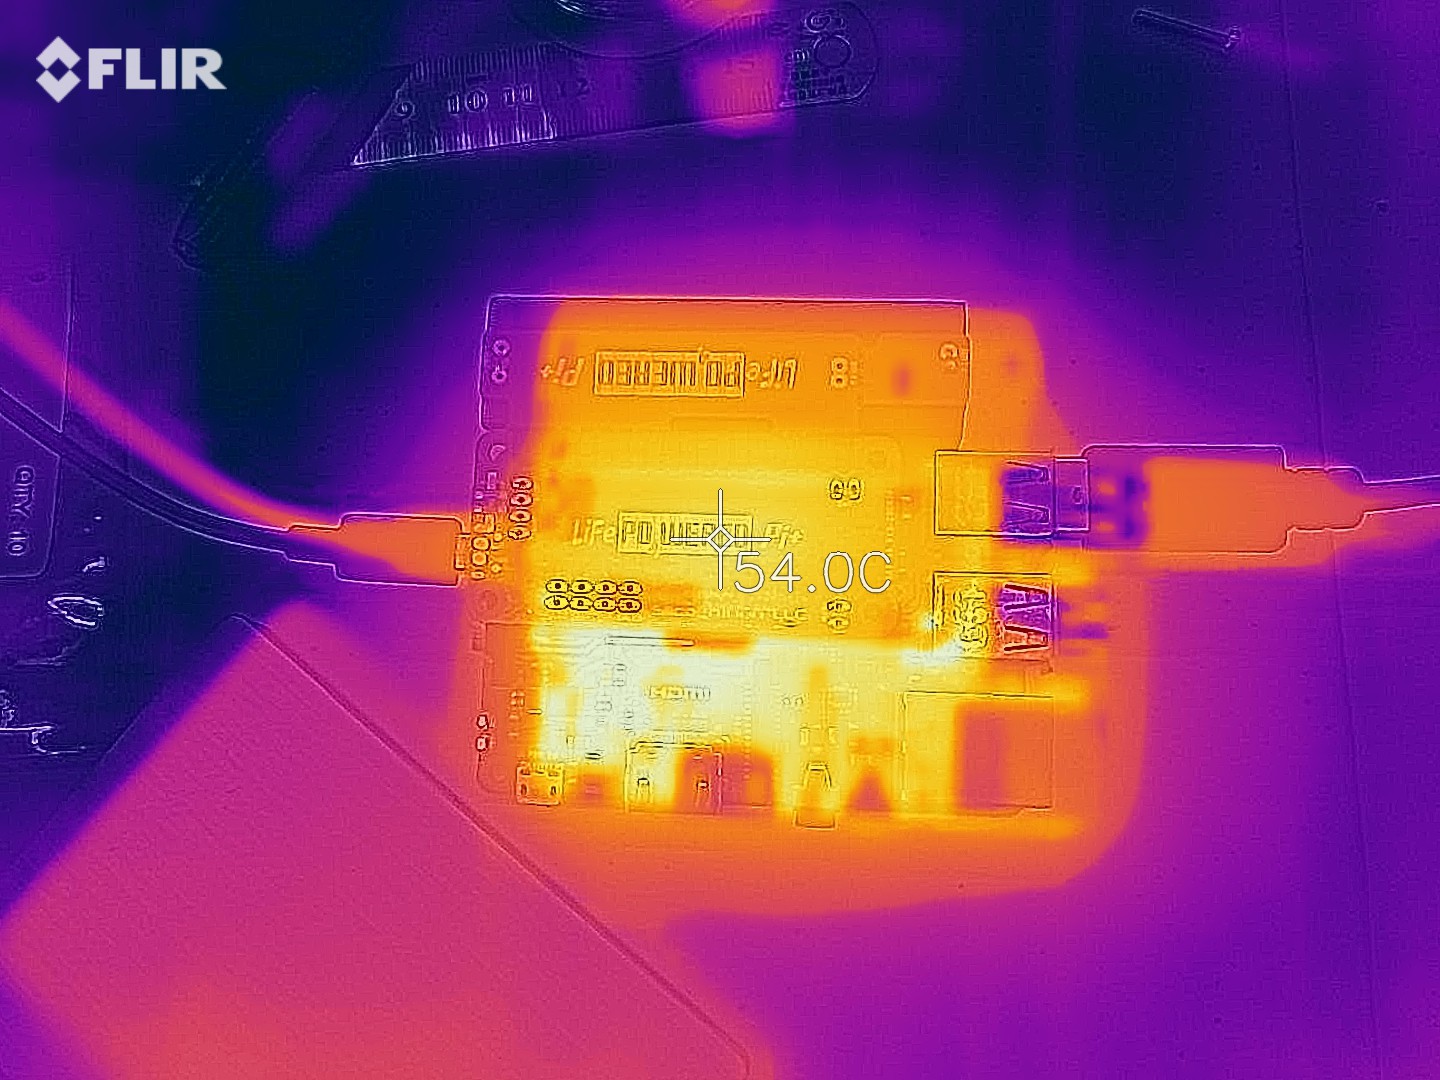
Here's the first thermal shot when running from battery: Sorry about the bad alignment between the thermal and optical in this image.
It shows that the temperatures at reasonable levels. The SSD is the hottest, but keep in mind that that Pi benefits from a huge heat sink while the LiFePO4wered/Pi+ and SSD have to make do with whatever heat transfer to the air their parts and PCBs can manage. If the Pi didn't have the heat sink, its CPU would be the hottest. In fact, the command:/opt/vc/bin/vcgencmd measure_temp
showed it at 73°C in this setup. The load current would fluctuate between 1.6 A and 1.8 A.
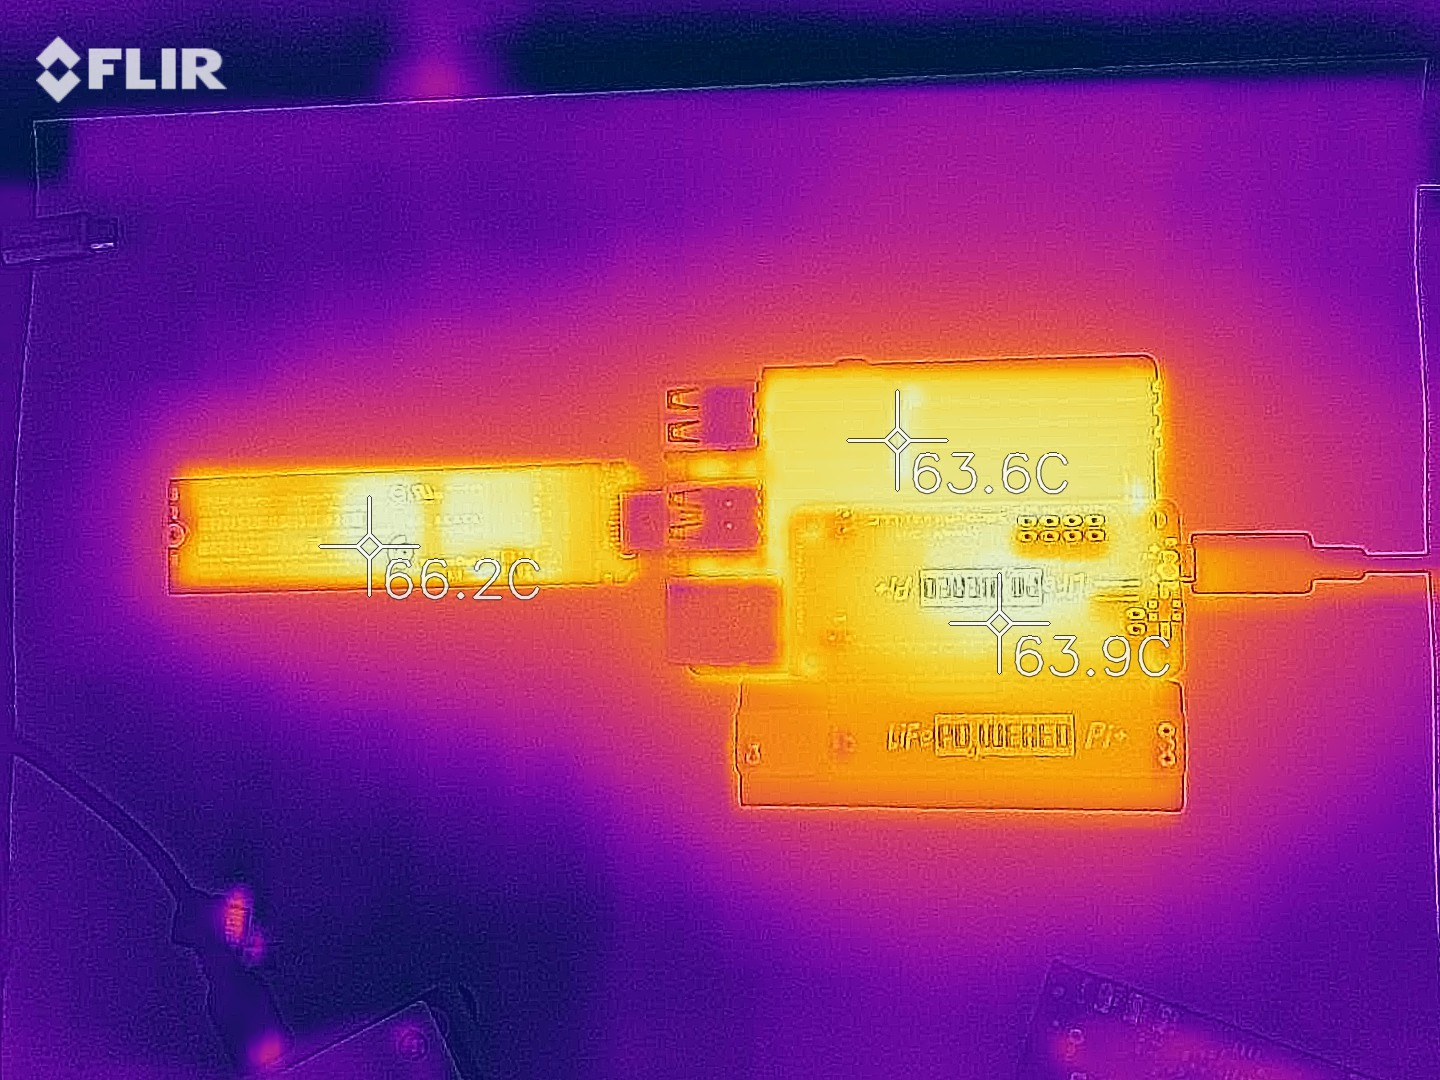
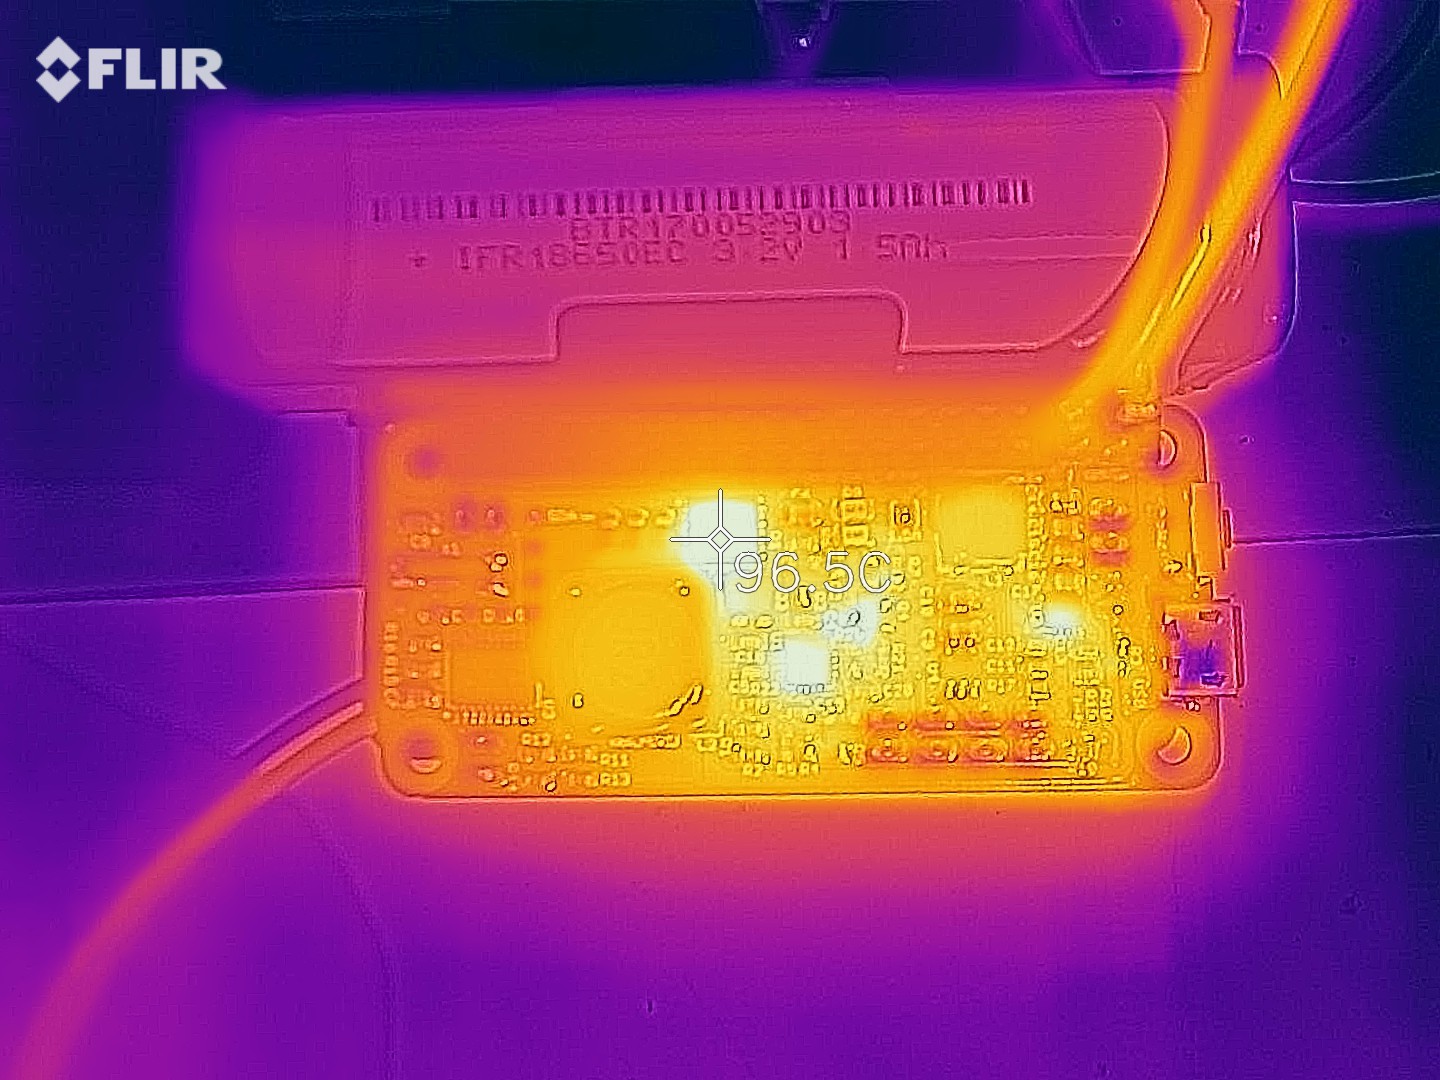
When the battery was getting low I plugged it in to external power and waited a while to let the temperature stabilize:

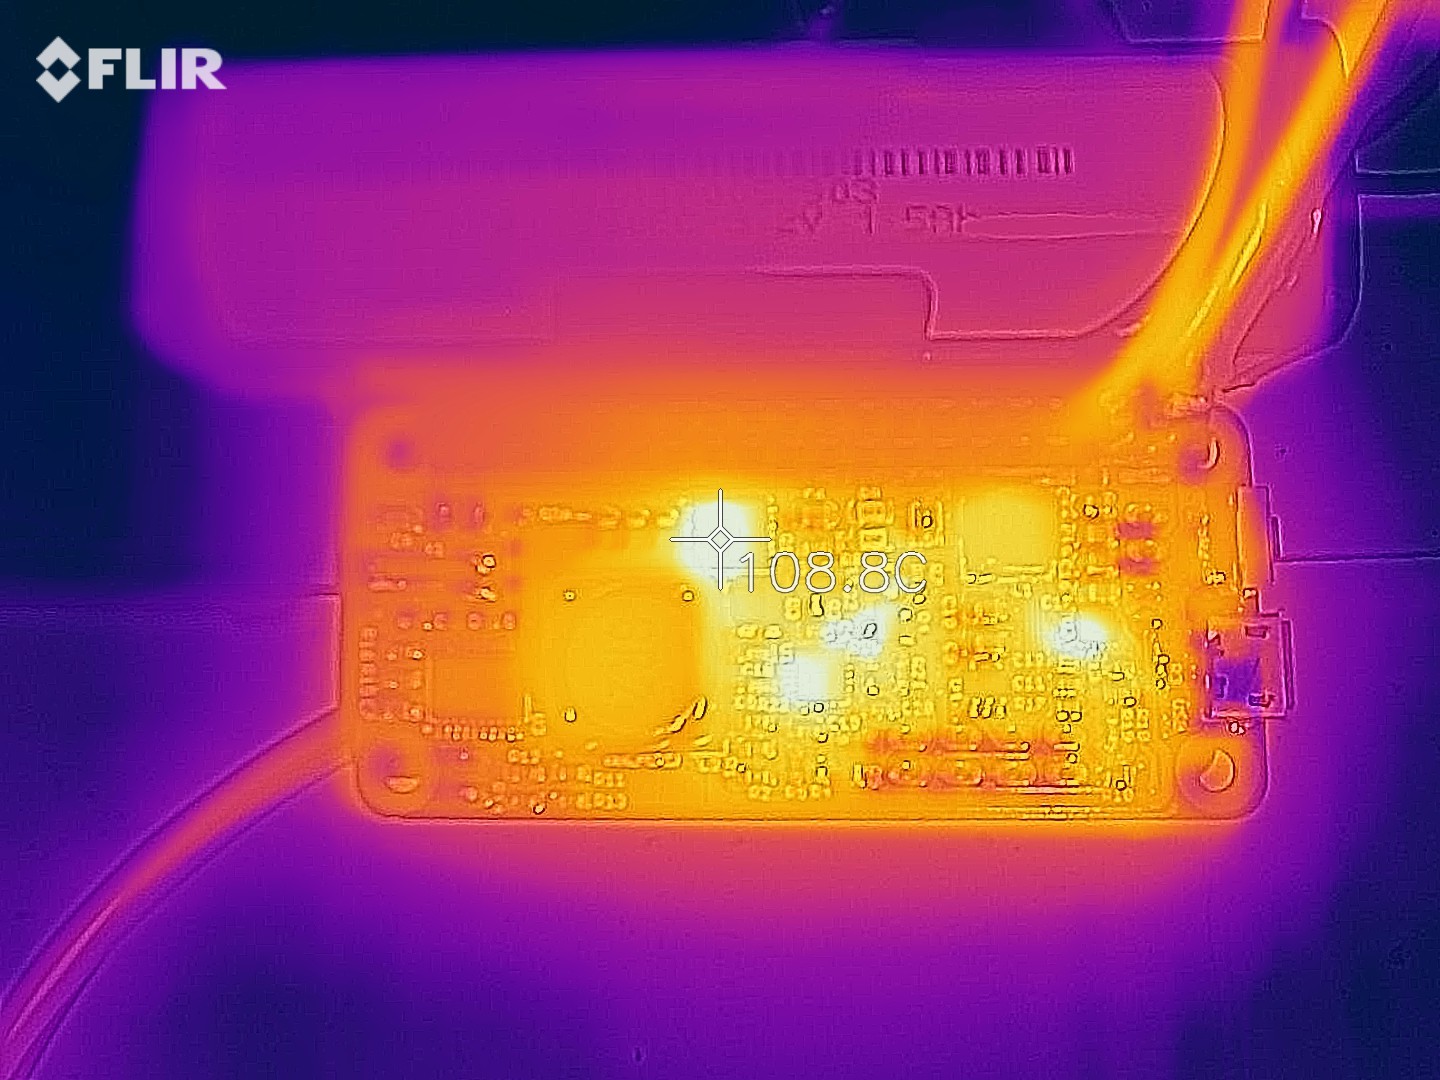
I'm not entirely sure why the Pi's temperature would go up, it might just be that I hadn't let it settle for long enough in the first picture. The SSD temperature is similar and the LiFePO4wered/Pi+'s temperature is higher because it now is also converting input power. Still, all these temperatures are completely reasonable for a system under high load.
I plugged and unplugged external power a whole bunch of times to ensure the UPS would do its job as expected and saw no issues. Then I let the battery run out and observed that a clean shutdown was performed. Everything working as expected!
-
More rev 7 testing
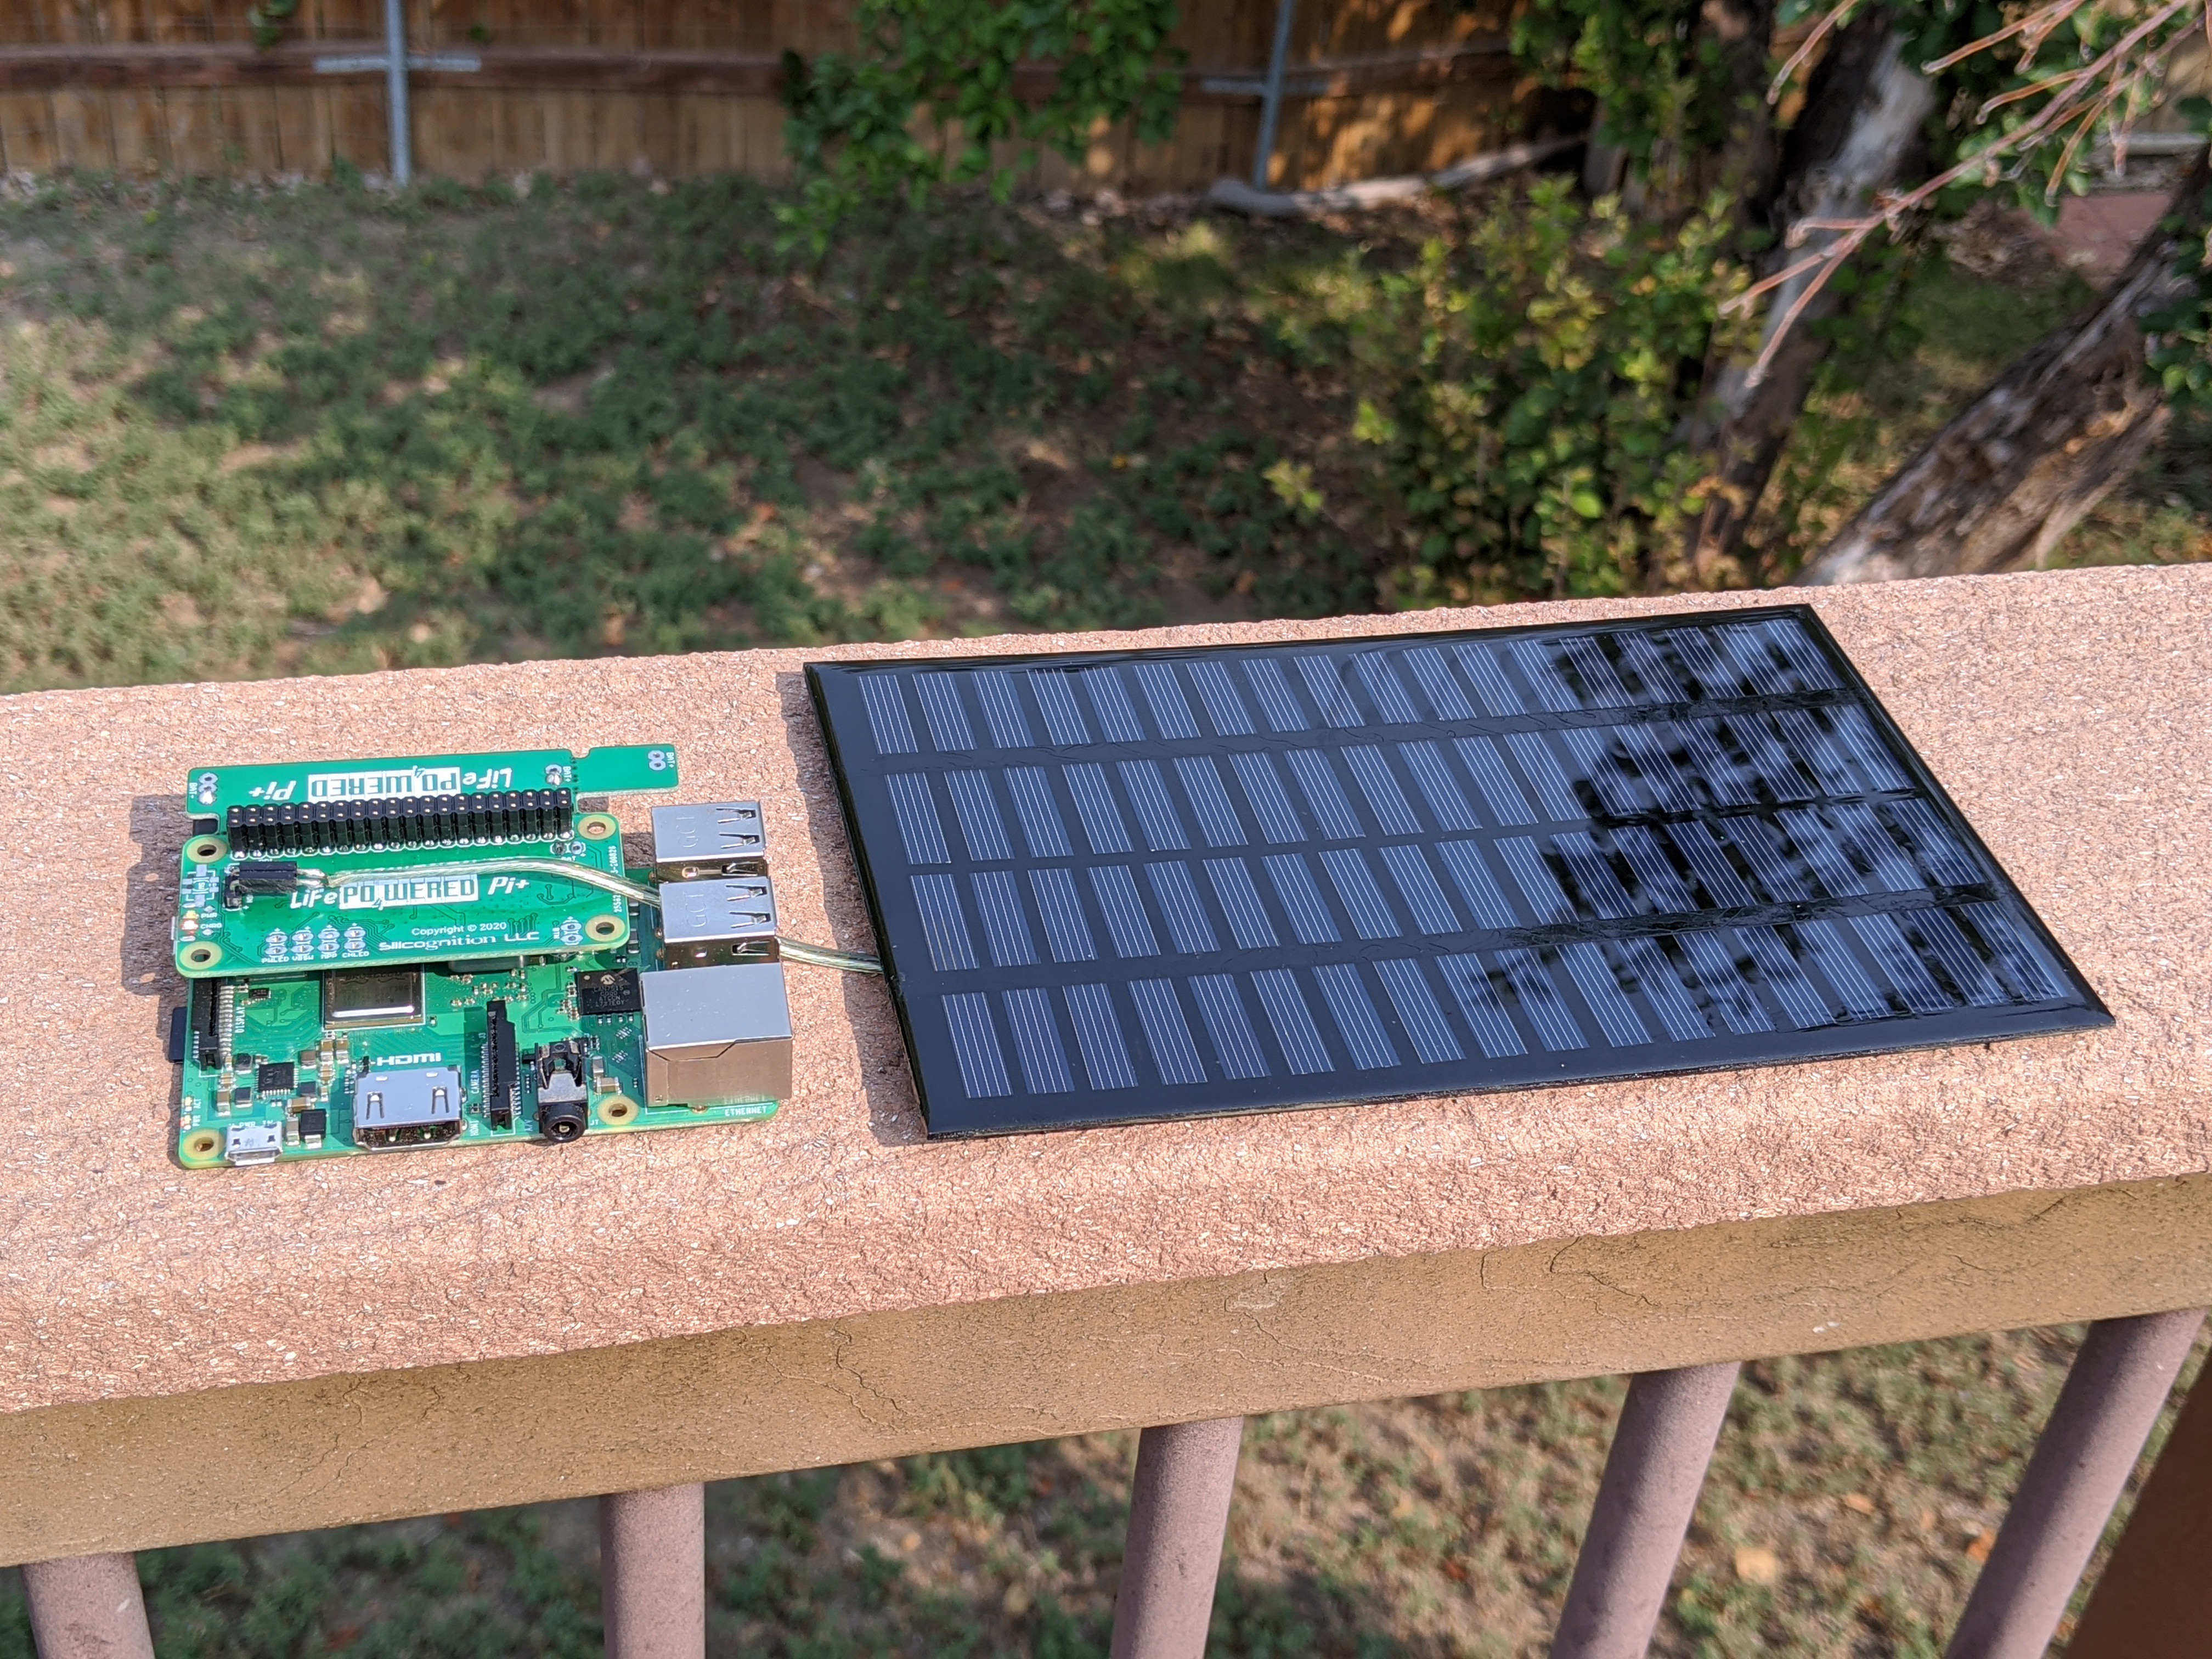
09/19/2020 at 00:10 • 7 commentsI checked the solar charging capability with a 18 V nominal panel. The MPP voltage for this panel is 15-16 V, so I added a 4.7 kΩ resistor to the MPP pads, which sets the MPP voltage to 14.6 V and put it outside.

I measured that the solar voltage was being regulated to 14.7 V, close enough considering part tolerances. Note that the panel in the picture was for testing only, this panel is too small to keep a Pi running. It kept the charge up jut barely with a Model B+ in direct sunlight, a Pi 3B+ was too much. For practical use, you need a bigger panel, or use a lower power Model A+ or Pi Zero.
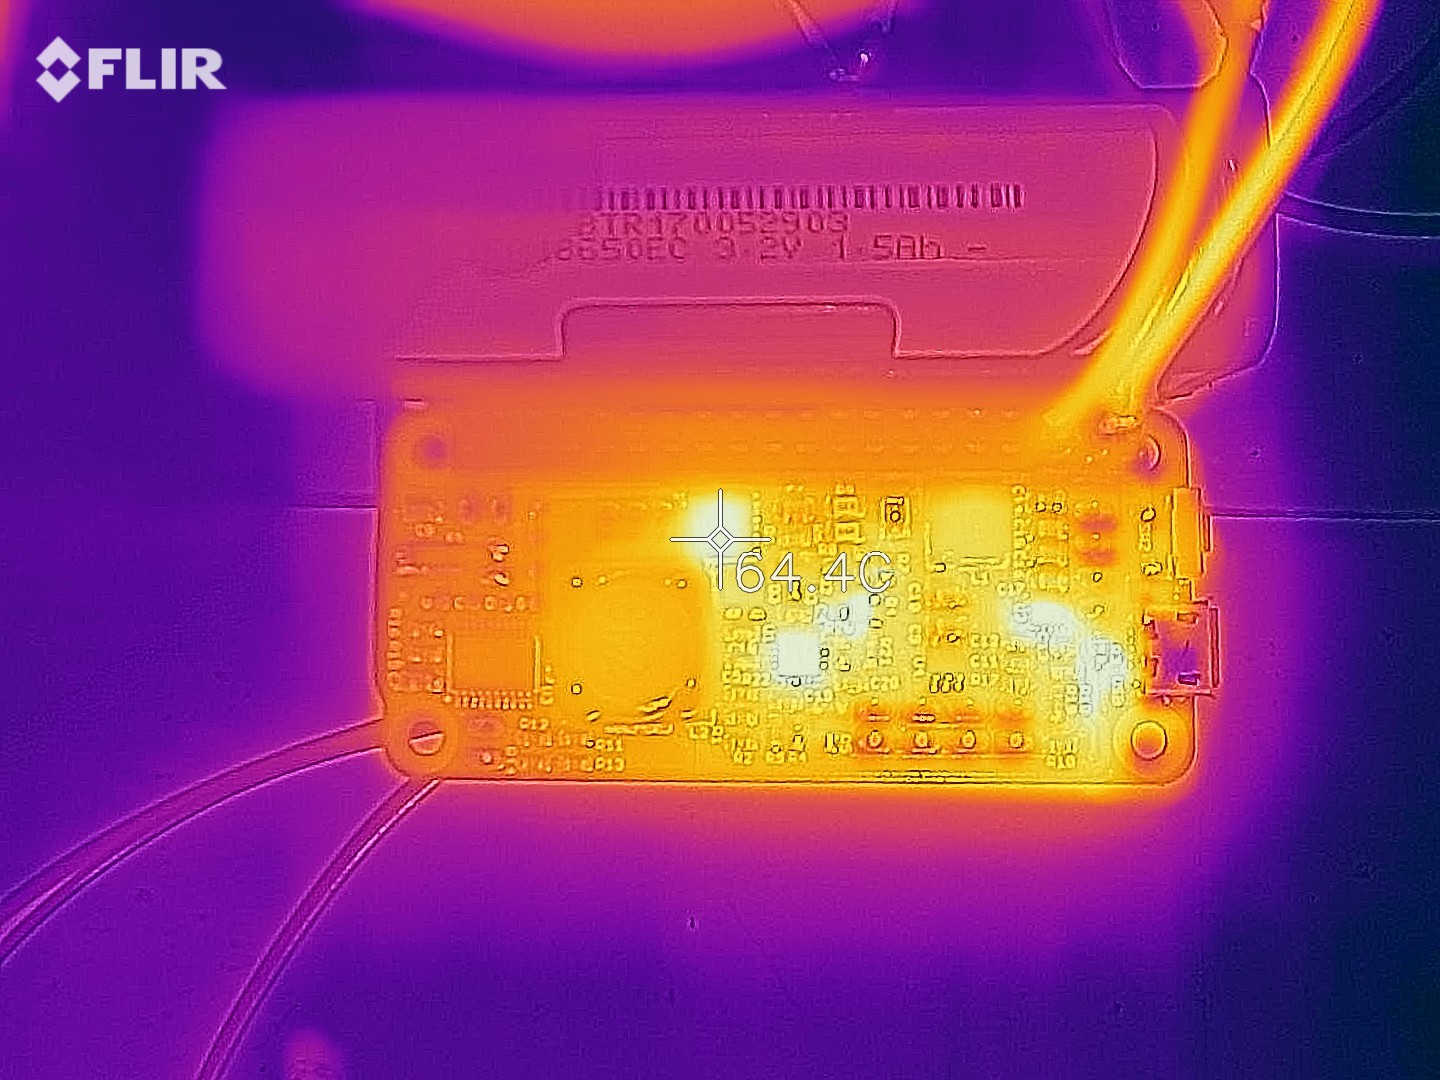
Next up, I tested heat generation under high load with high input voltage. I applied 20 V on the input with 2 A load using my electronic load:

The switching transistor, which was a hot spot in the old asynchronous design with high input voltage, is running at 64 °C, which is just fine. Other hot spots are the charging chip (not entirely expected), the pass transistor and boost converter (expected), and... what's that hot spot near the USB connector? Oh, the charge LED current limiting resistor.
How much is that thing dissipating? A quick calculation shows at 20 V input, this resistor dissipates about 0.36 W. Oops, it's a 0.1 W resistor! :) Gotta do something about that. The 19 mA or so flowing through the LED may also be part of the reason the charge chip is getting hot, but most likely it's due to the built-in linear regulator that needs to drop 15 V at 20 V input.
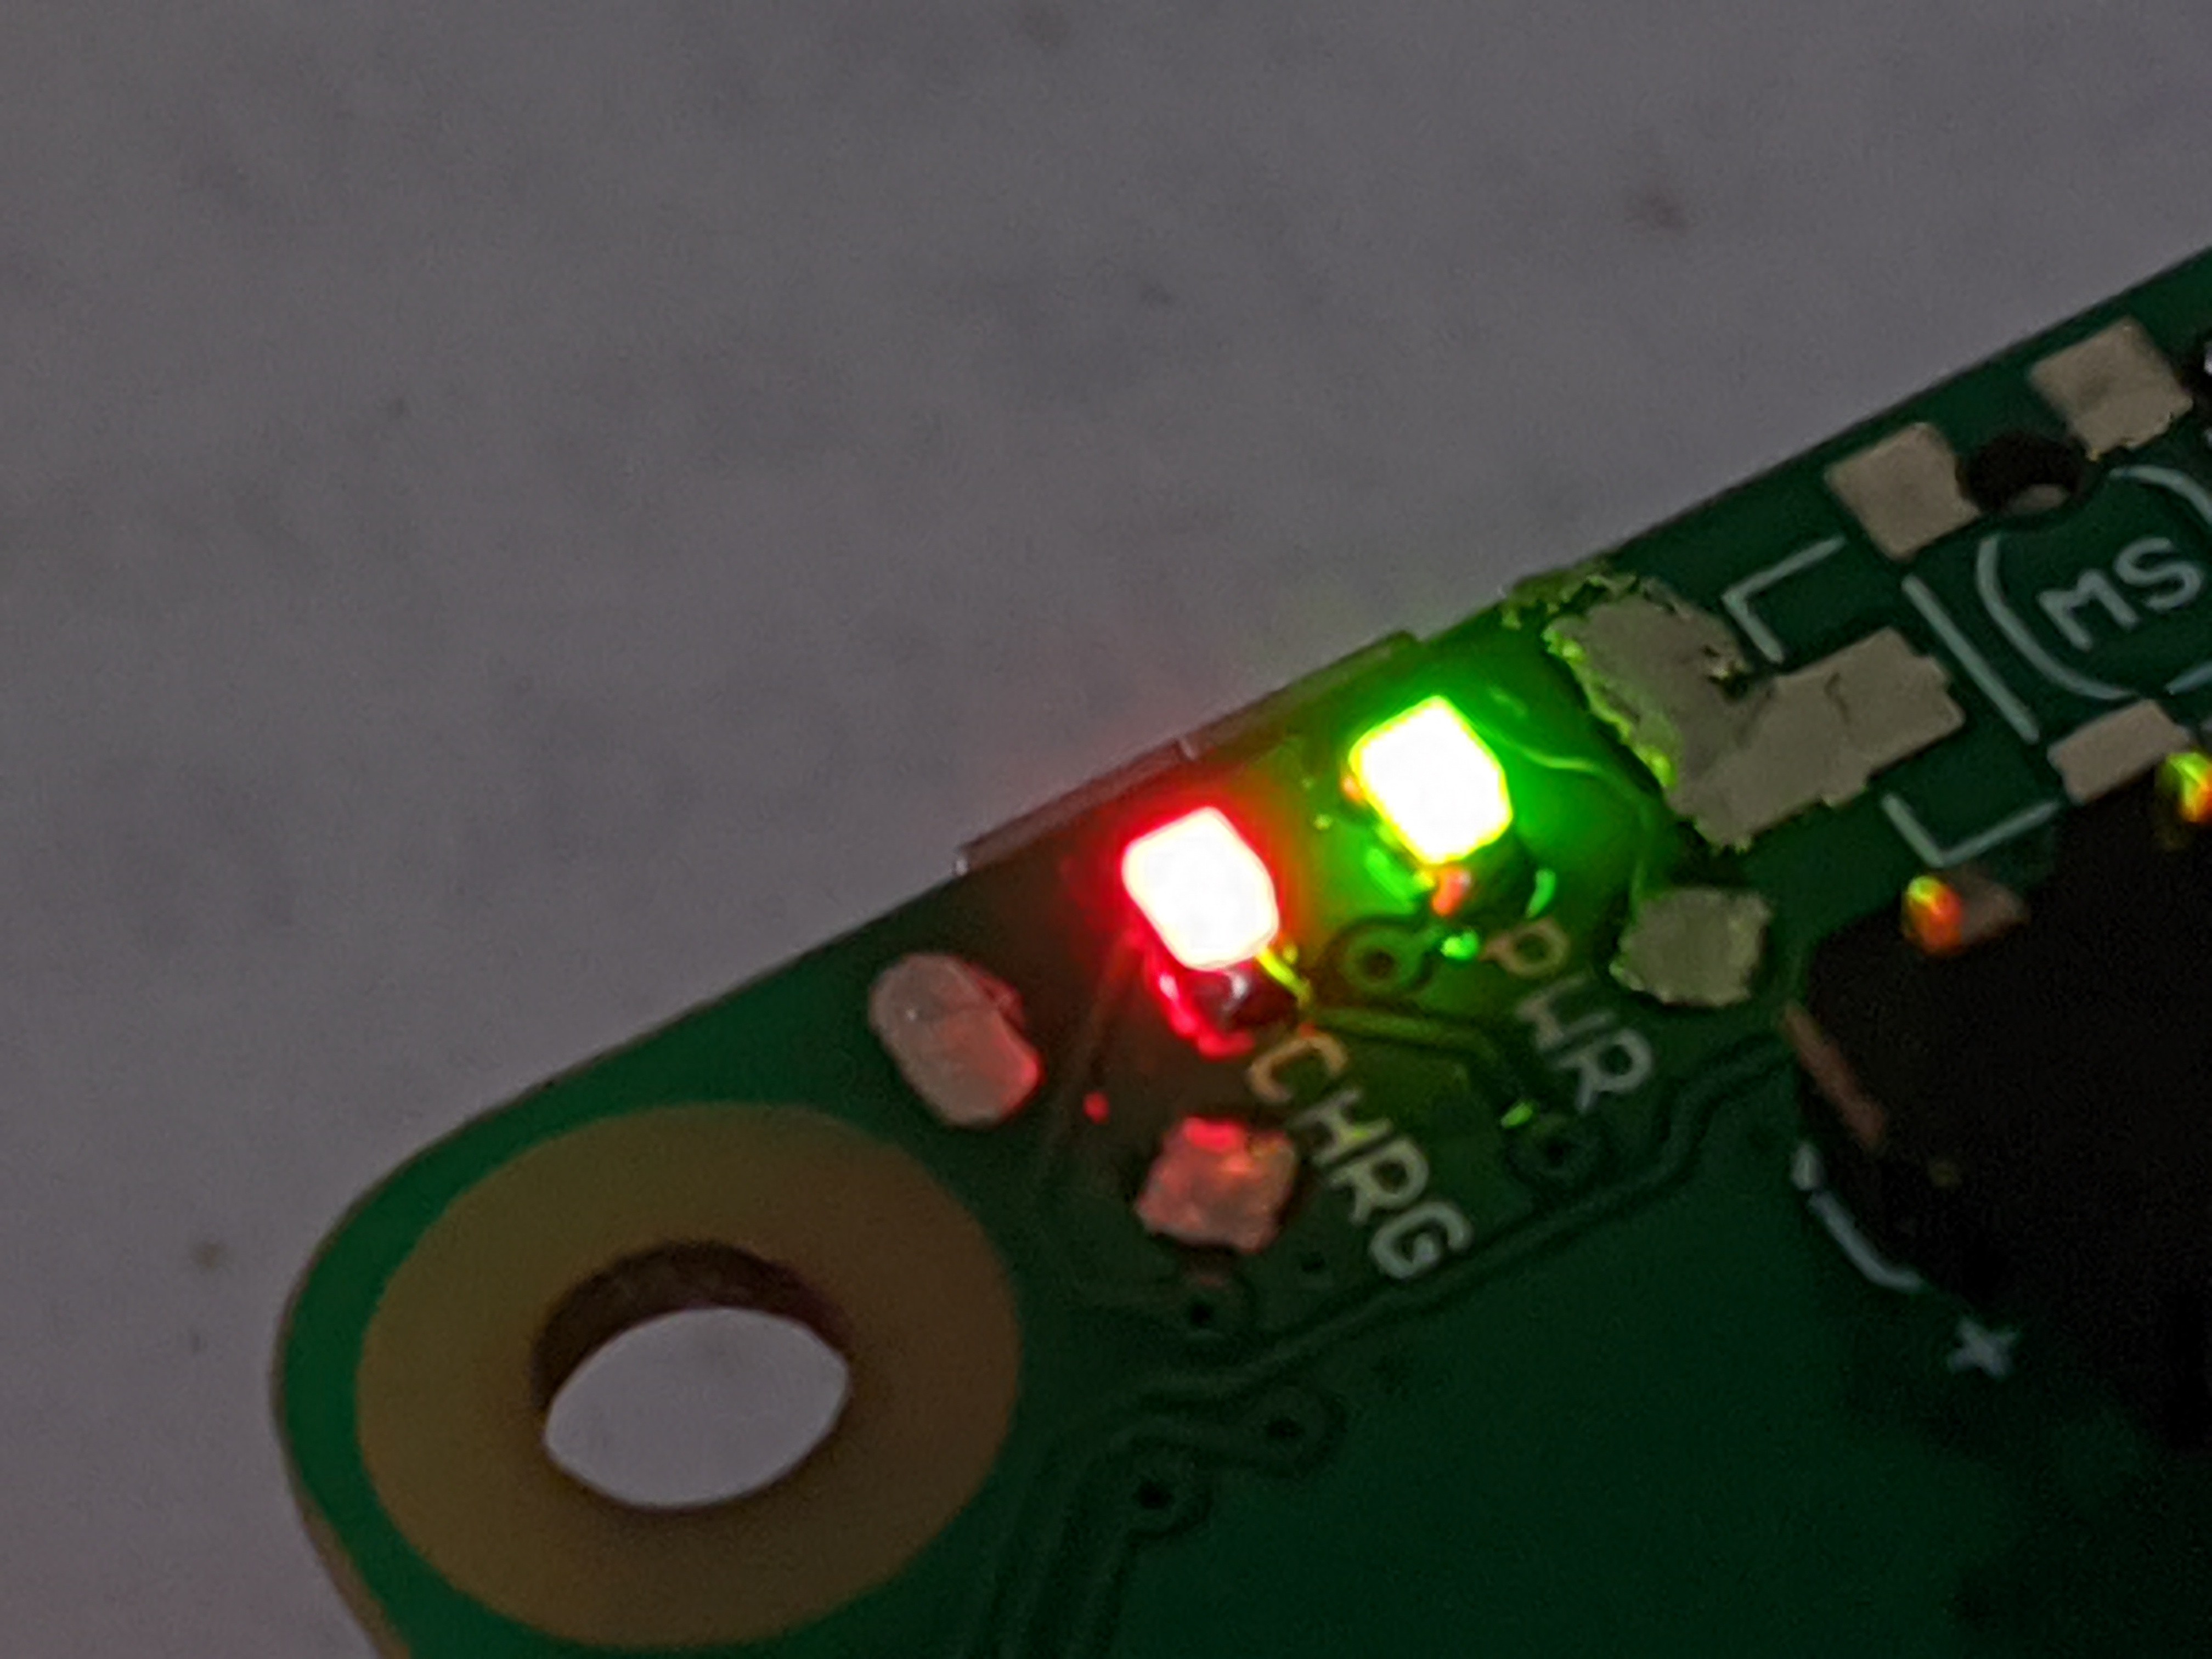
I changed the LED current limiting resistor from 1 kΩ to 4.7 kΩ, which should keep the current low and the dissipation in check at 20 V input. On the other hand, at 5 V the current may become so low (less than 1 mA) that the LED is very dim. Let's check that:

Looks alright to me, the red CHRG and green PWR LEDs seem to be about the same brightness.
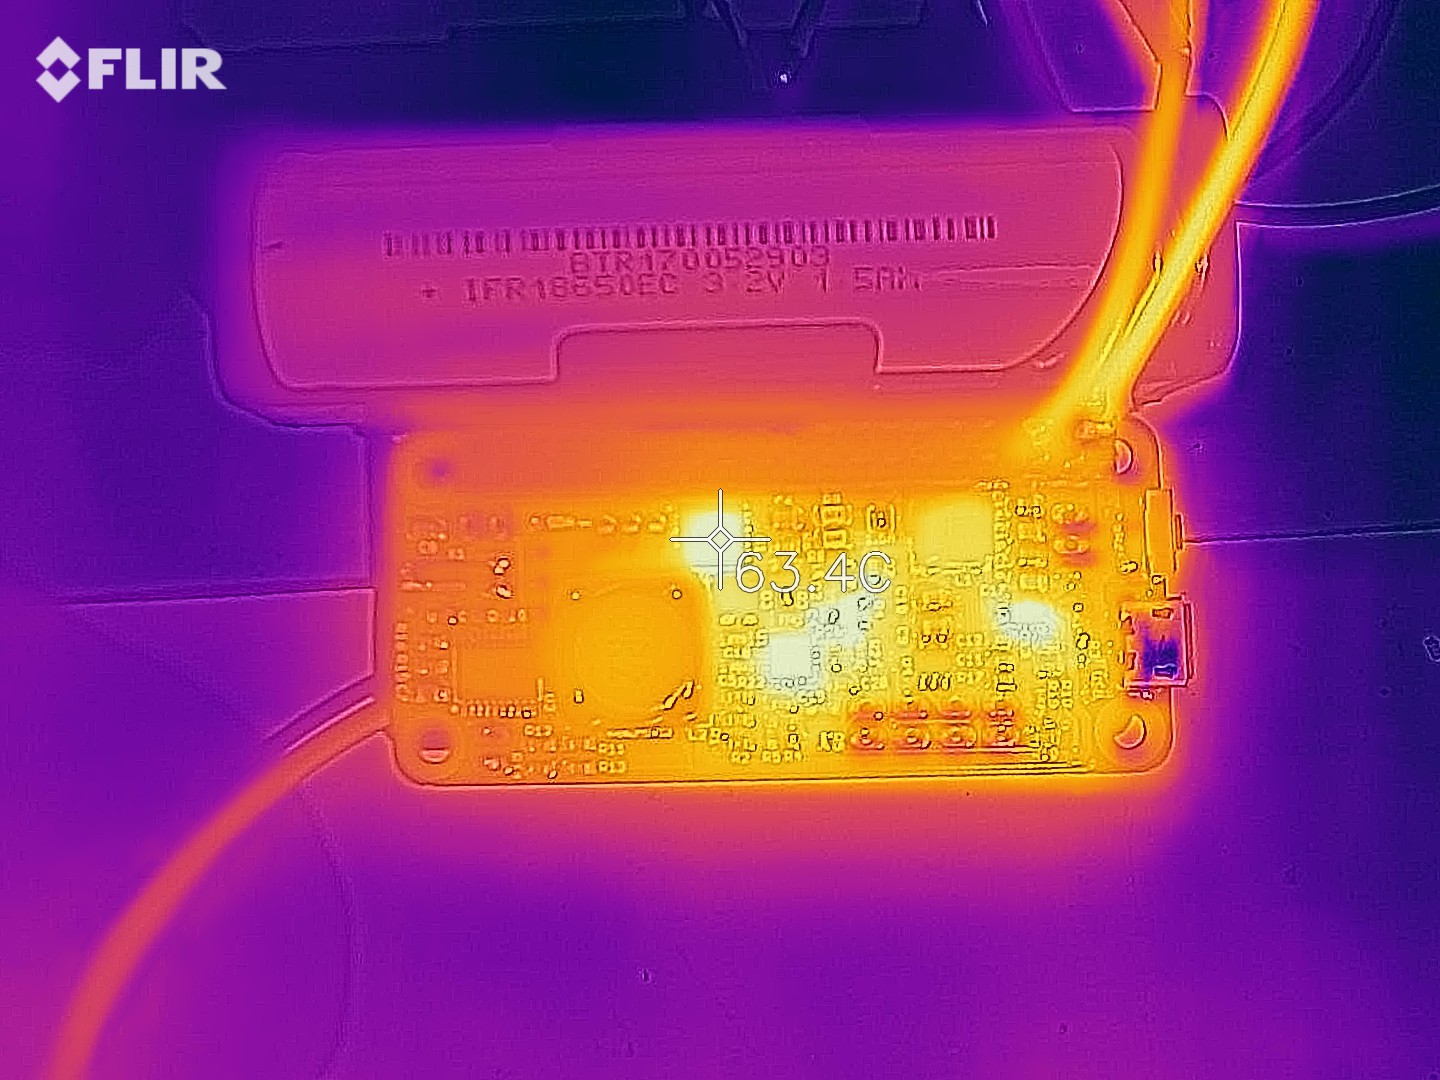
Time to redo the high voltage input load test. This time though, I also discharged the battery all the way, so the system has both charging to do and the load to supply. Not sure if it made much difference, but hey, let's try to do it right:

First thing of note is that the hot spot near the LED current limiting resistor is gone. Good. The switching MOSFET's temperature is about the same as before. The hottest spot is actually pass resistor Q4:

Maybe I should investigate if there's a part with lower RdsON than the SSM3J338R,LF I'm currently using? On the other hand, the temperature it's at isn't really much to worry about.
Let's see what happens if we bump the input voltage up to 24 V. In the previous asynchronous design, things would get hot enough I feared for thermal runaway.

As expected, the switching transistor is the hottest spot now. Too toasty for comfort, but it seems stable.
Let's be really mean and also bump our load current to 2.5 A at the same time!

Ouch, hot! Seemed stable though. But don't do this, that's just mean. I just do it to prove the design has plenty of headroom.
One important thing to note in all these tests is that the prototype boards I ordered are standard boards with 1 oz copper, while production LiFePO4wered/Pi+ boards have always used 2 oz copper for improved thermal performance. So I consider what I'm seeing here quite good, and it will only become better on a production board with 2 oz copper, lower conduction losses and better thermal conductivity.
-
Rev 7 prototypes
09/18/2020 at 04:17 • 0 commentsMy stock was getting low, so I faced the question whether I would just build more of the rev 5 boards, or if I was going to make any changes.
I'm very happy with the LiFePO4wered/Pi+, and my customers seem to be happy with it as well, but one thing that still bugged me was heat generation in the asynchronous charge converter using the CN3801. The asynchronous rectifier's Schottky diode drop is set in stone by physics unfortunately. Since the diode is always going to have 0.5 V or so across it, power dissipation quickly gets high as currents increase.
So I had been on the lookout for a drop-in replacement that would use a synchronous converter. In a synchronous converter, the rectifier is implemented by another MOSFET driven by PWM, which reduces losses a lot due to the low RdsON of the MOSFET.
For instance, when using a Schottky diode in an asynchronous converter with a charge current of 4 A, the 0.5 V drop would cause power dissipation of 2 W. When instead using a synchronous converter with a MOSFET that has an RdsON of 11 mΩ, losses would be reduced to 0.176 W. A huge improvement!
I finally found a drop-in replacement that would mostly be transparent to the user in the TI BQ24650. It is a synchronous converter, but for the rest it has all the features I could provide with the CN3801, such as smart current sharing, MPPT for solar and to protect weak power supplies such as PC USB ports, and similar charge LED behavior. In addition, the current sense regulation voltage drop is only 40 mV, versus 120 mV for the CN3801. This may not sound like a big deal, but due to the way the smart current sharing works, part of the current sense resistor is in series with the battery when the system is running from battery power, so any reduction in voltage drop there is beneficial.
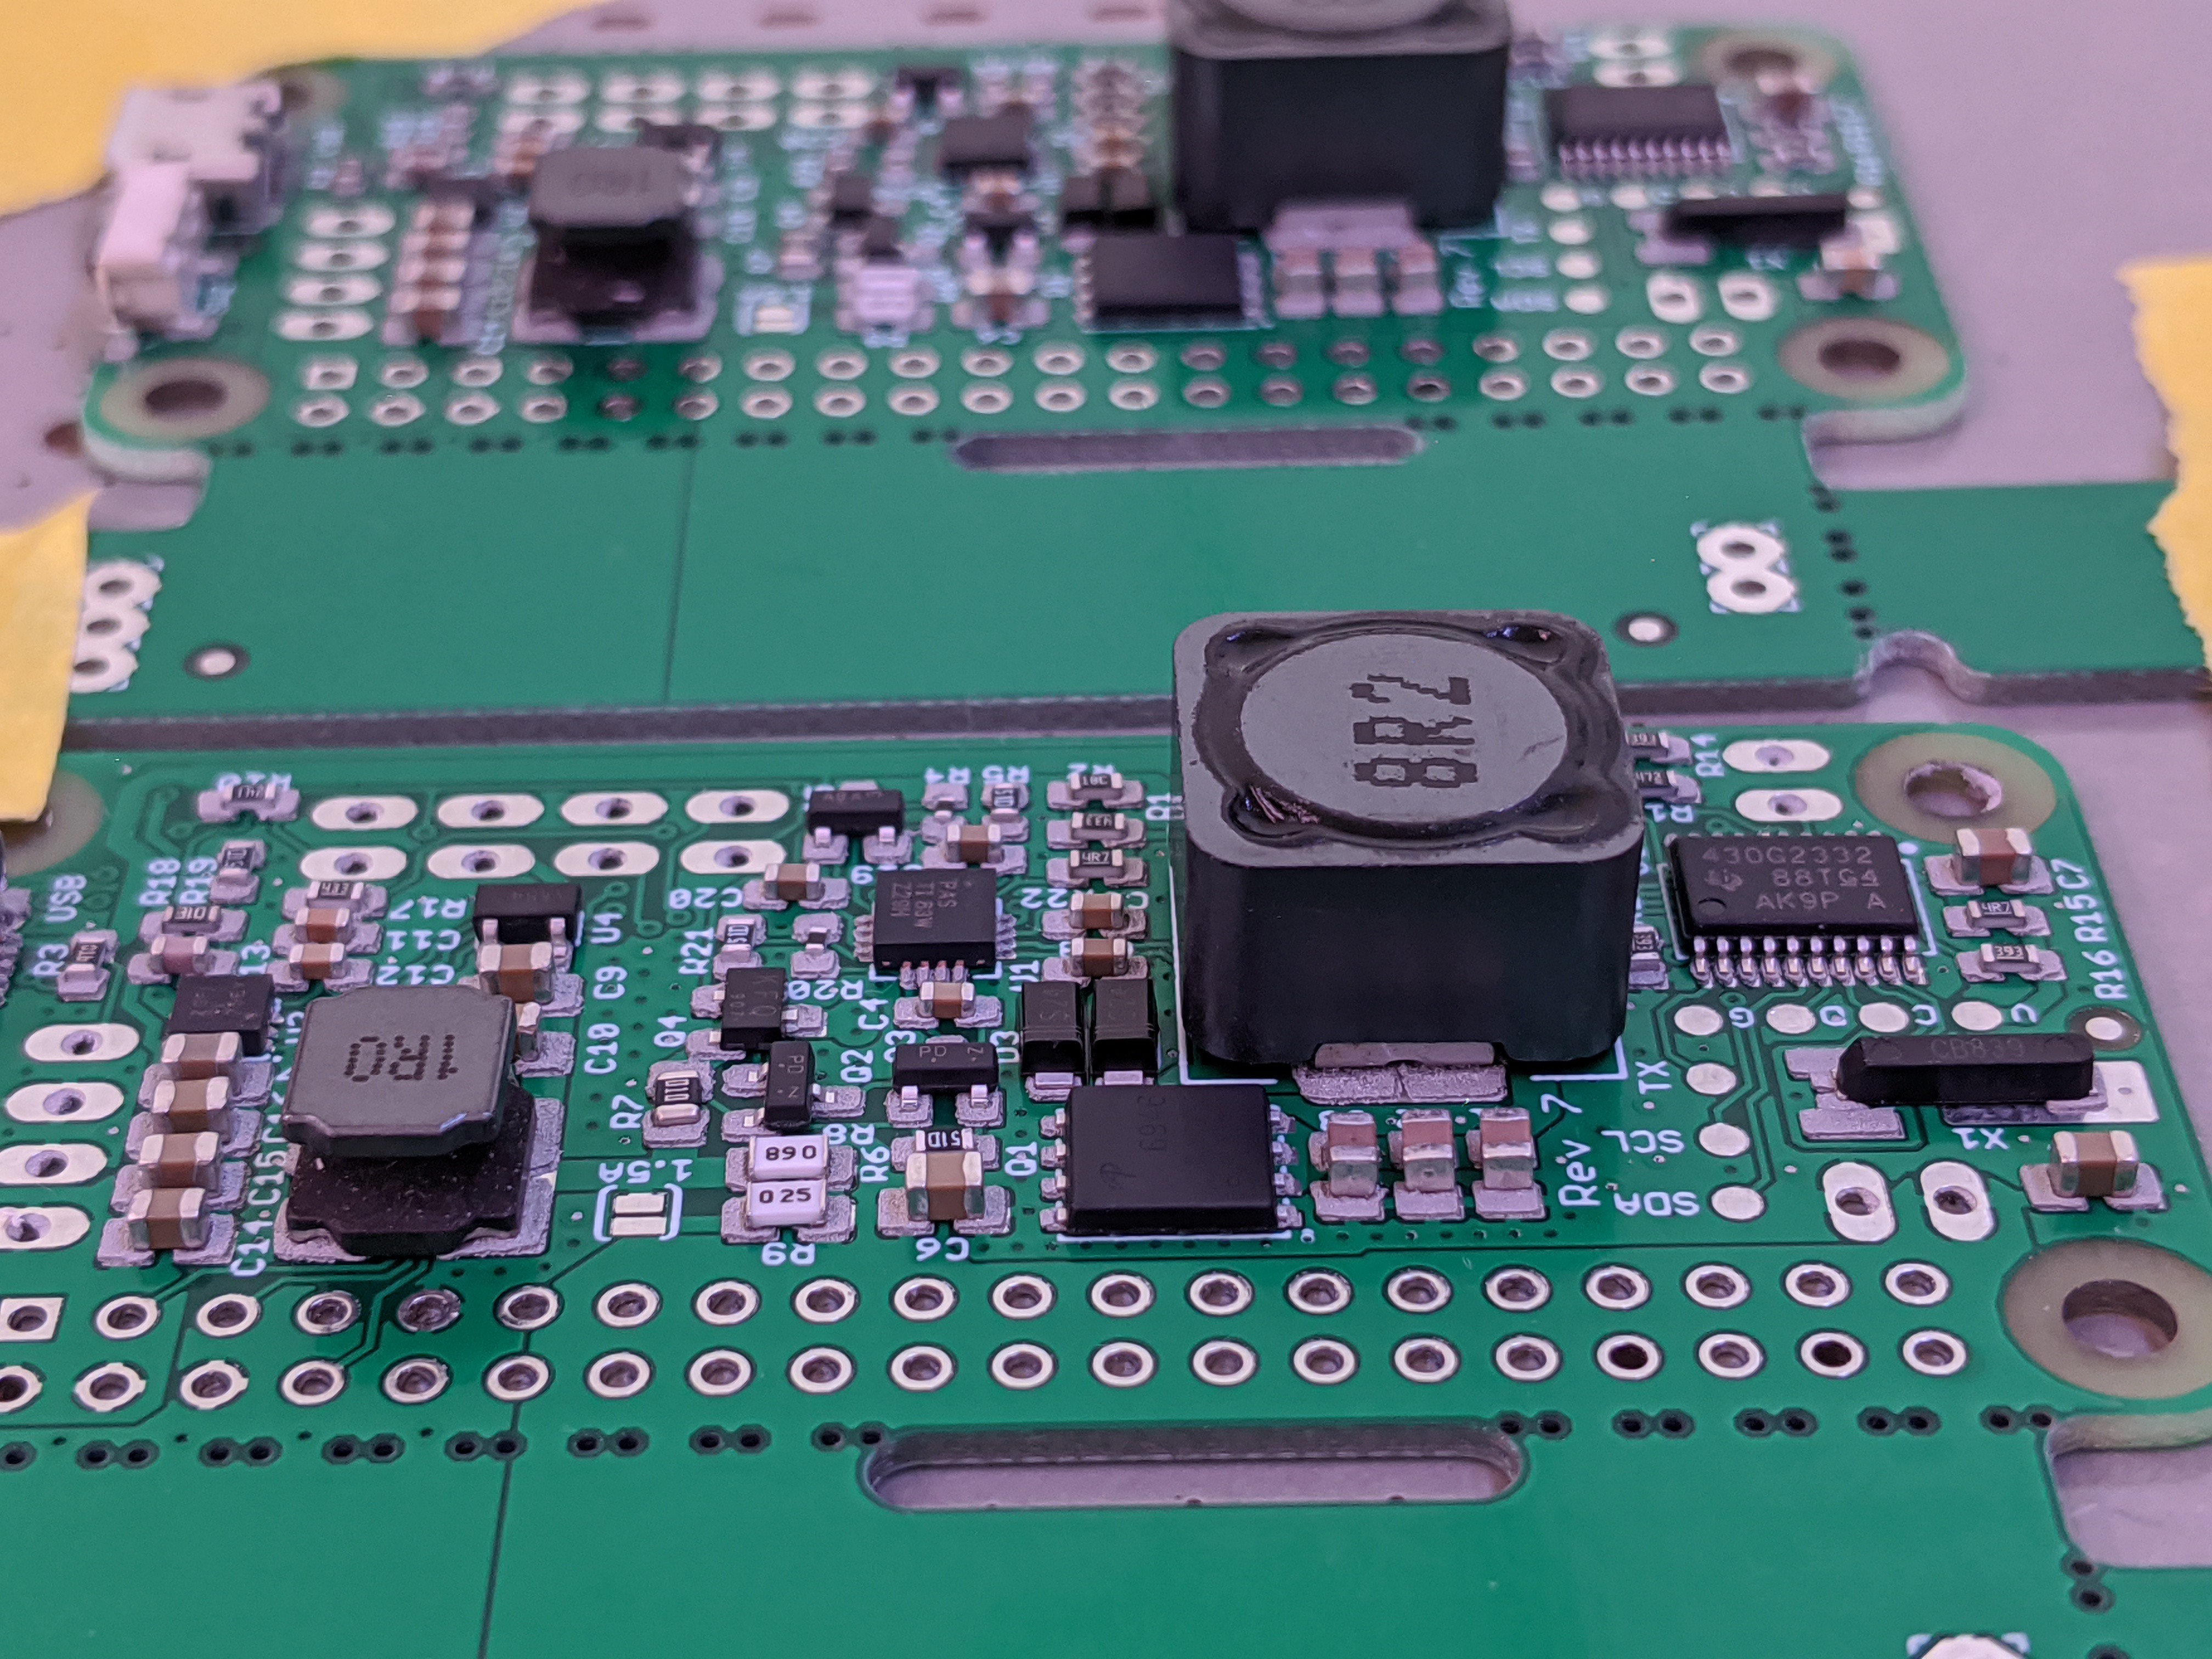
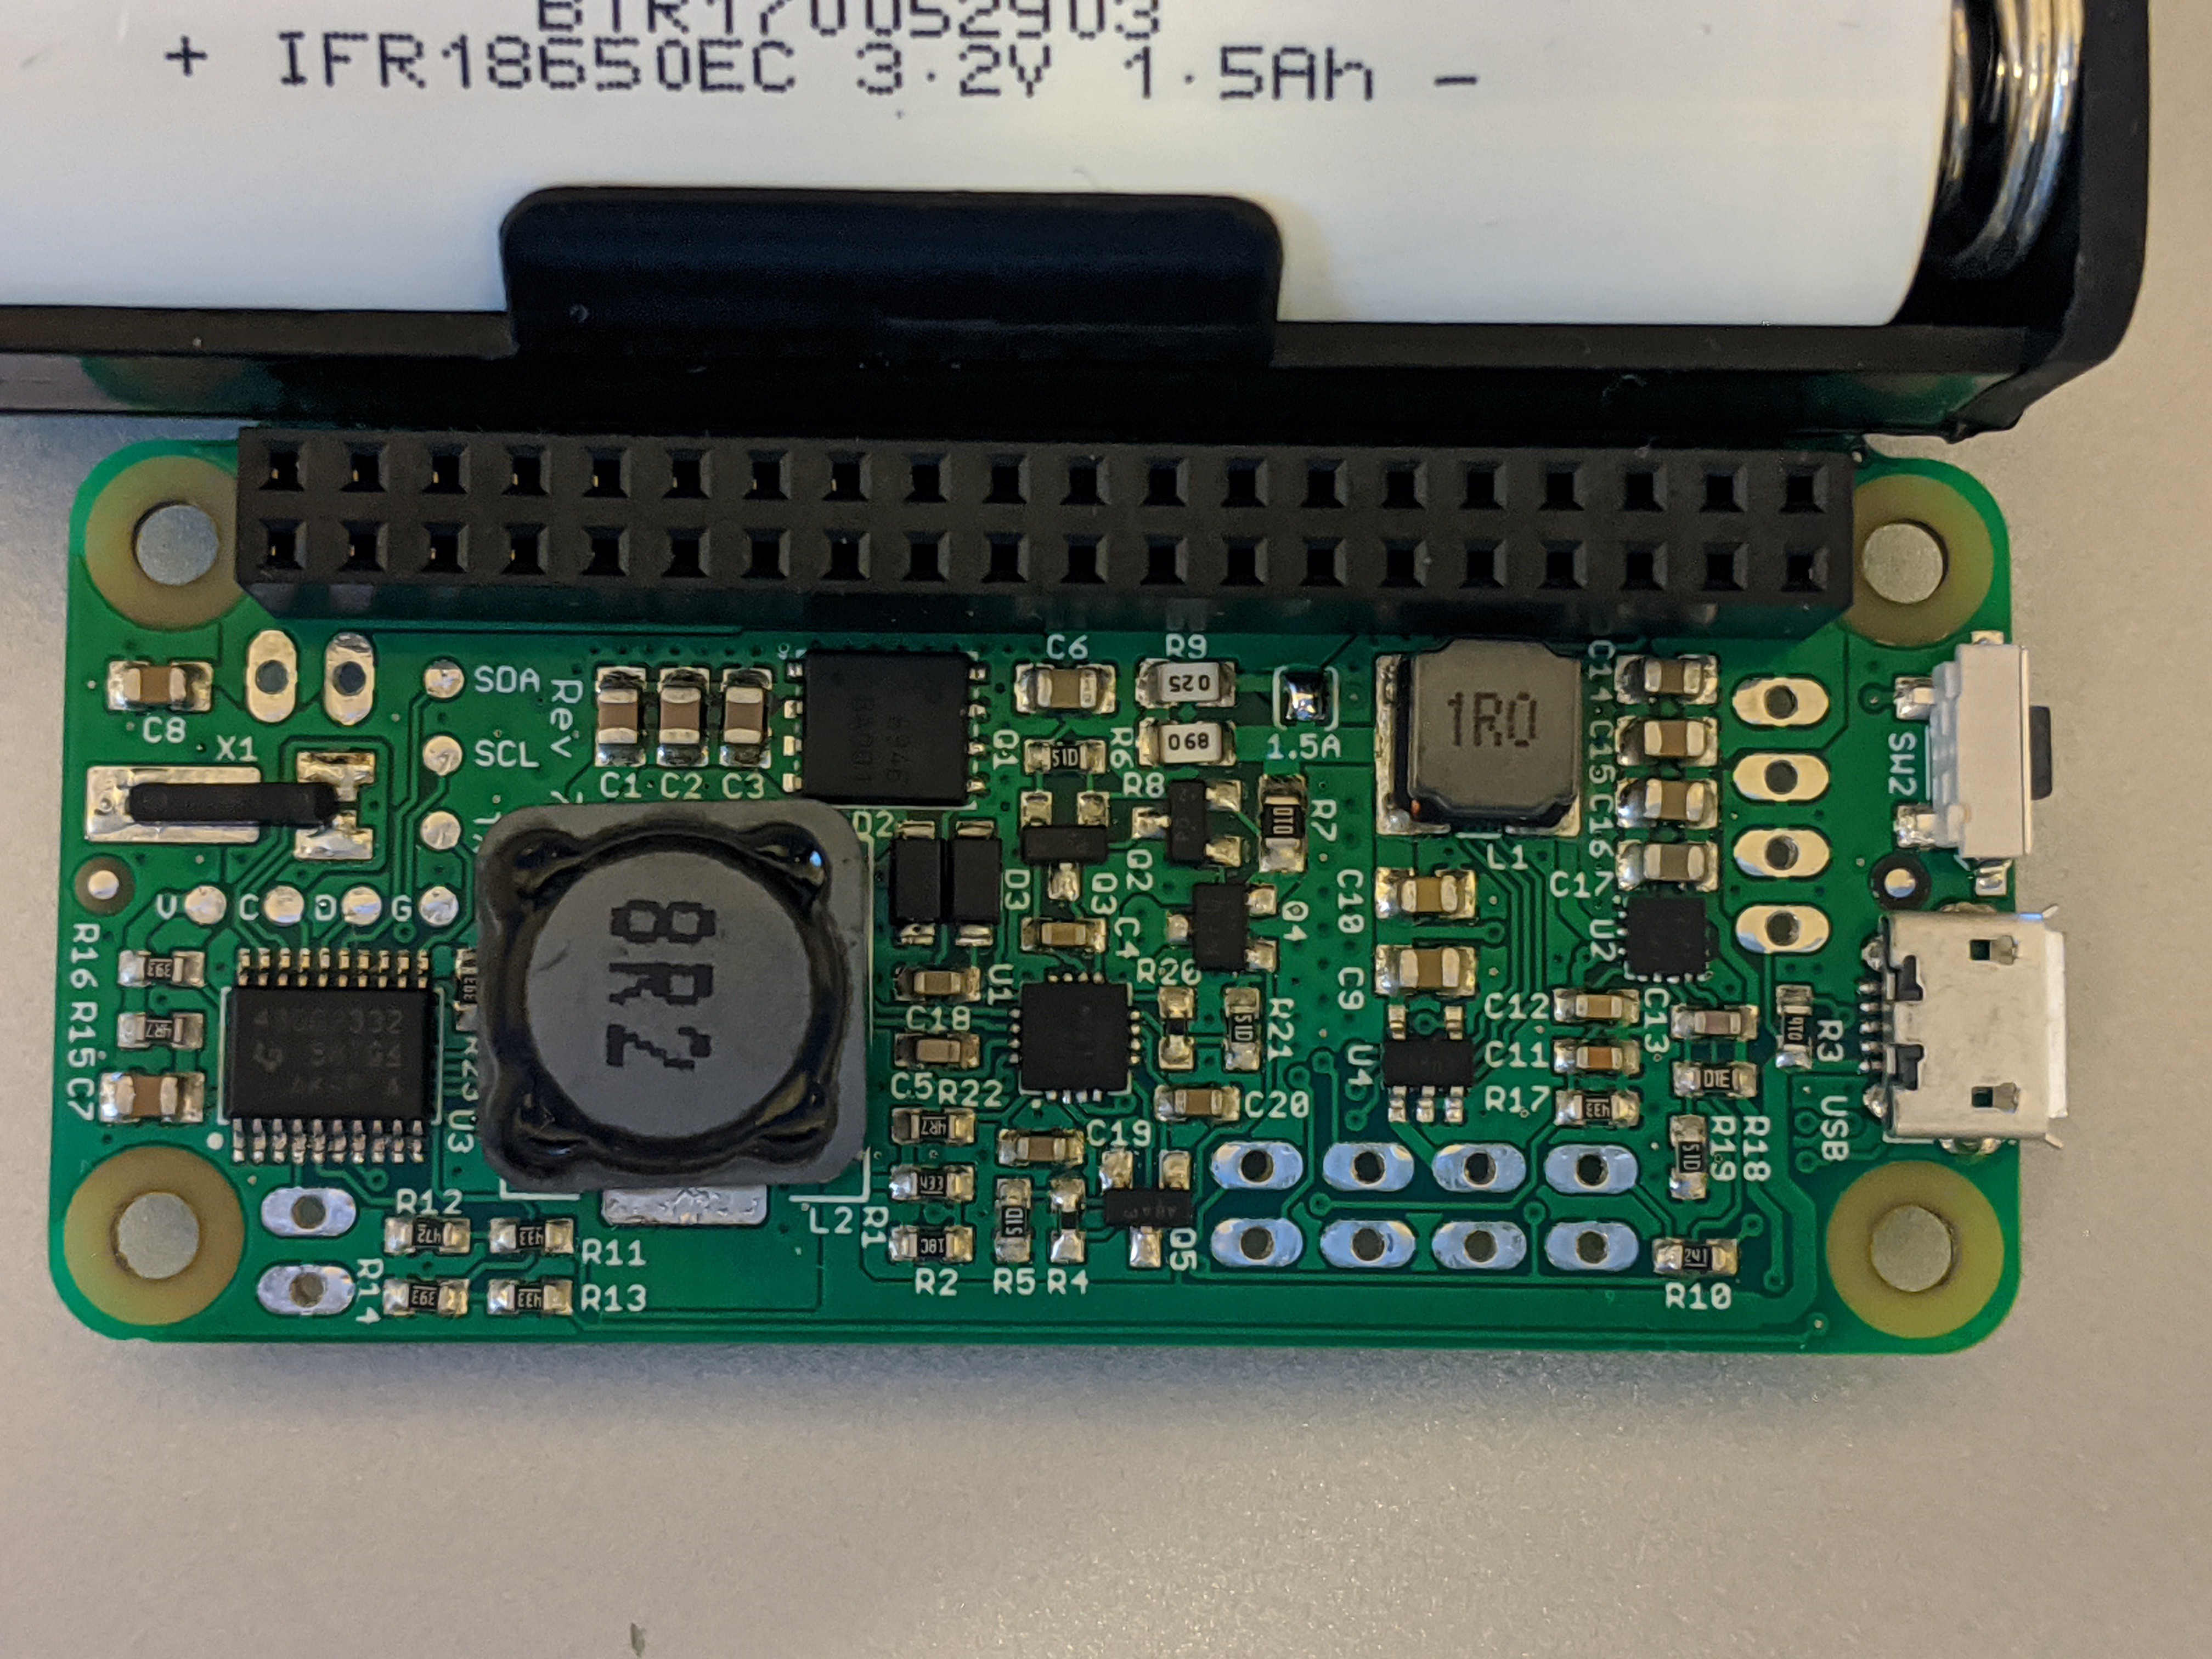
So I designed a rev 7 layout, ordered boards and parts and finally found the time to build it today:


They worked right away!

Power down current looks good, still ~4 uA with the same MOSFET disconnect circuitry as before. A prototype with 14500 battery was able to boot a Pi 3B+ from battery power, something that didn't tend to work with the rev 5 design and 14500 battery. Likely the lower current sense resistance makes the difference here. The MPPT feature seems to work and kept the input voltage at 4.69 V when powered from a laptop's USB.
Time to check heat production at higher load. Let's first run it with a Pi under stress test:

Heat production is minimal, there are no hot spots on the board. Likely the board is mostly heating up from the Pi baking under it. Let's add a little more load in the shape of a USB hard drive:

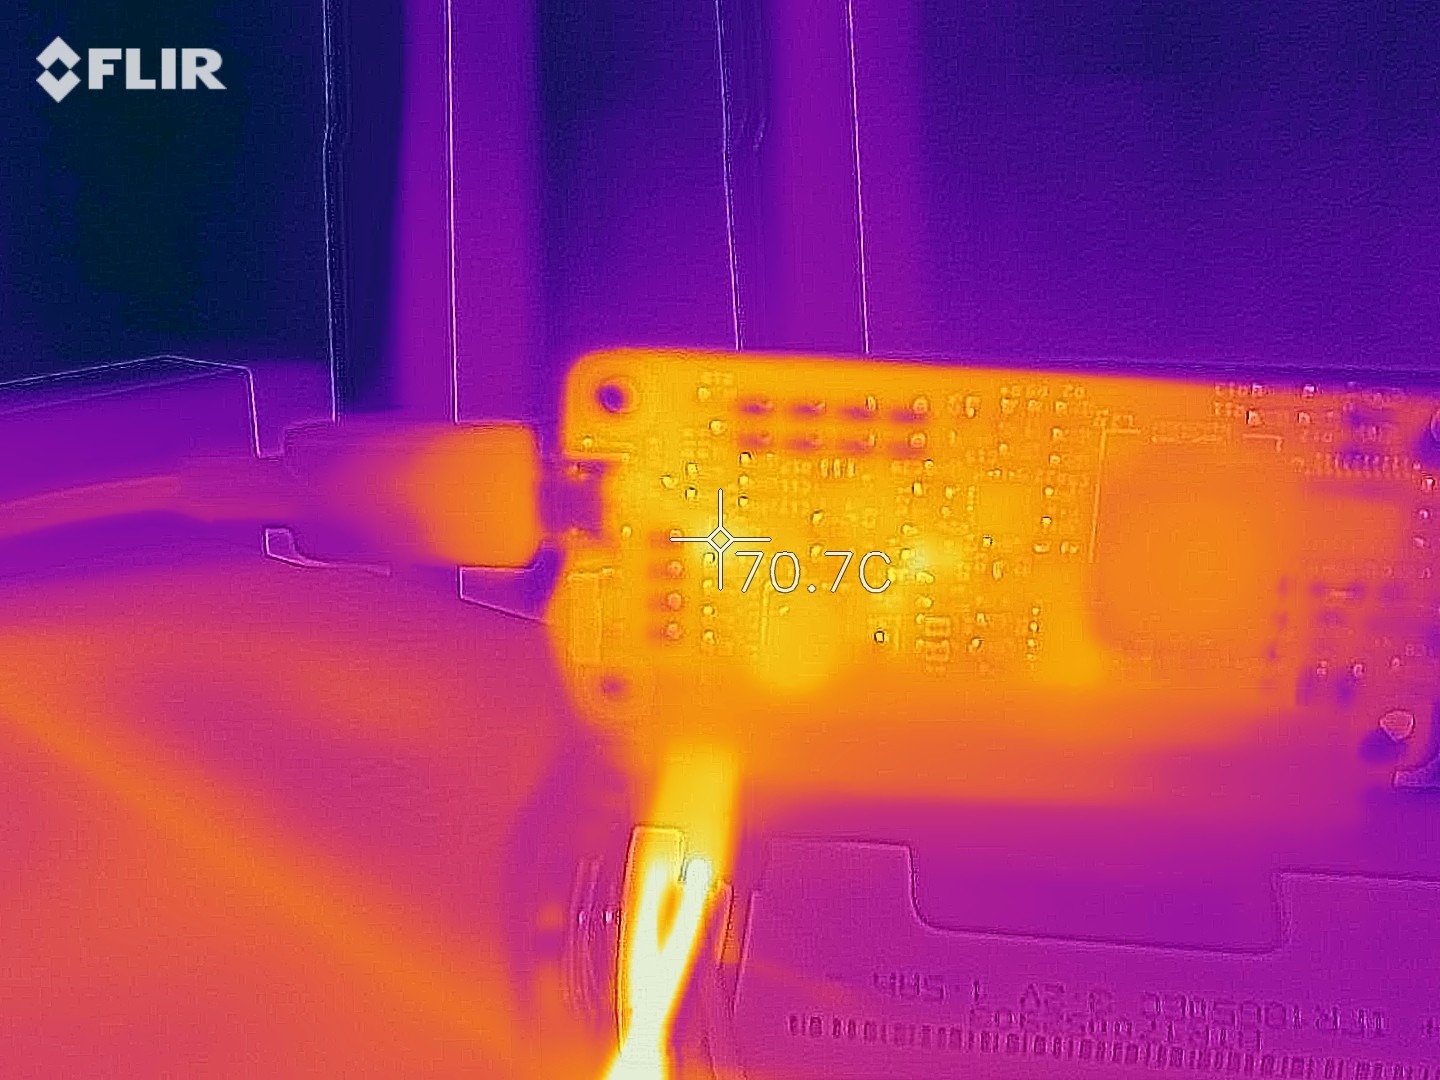
Not much difference. OK, let's take off the Pi and attach my electronic load instead, pulling 2 A:

The hottest spot is the TPS61236P boost converter, at 70 °C. There is hardly any heat being produced in the charger section. Compared to the same test done on the asynchronous design, this is a big improvement. This is all done with 5 V input power, if you want to compare. The boost converter is cooler, 70 °C vs 85 °C before, likely because with the asynchronous converter the board was just hotter overall.
Let's push the current up to 2.5 A:

This load is not in spec (2 A is the specified max), but the board handles it, and no hot spots in the charger section. Notice the load wires in the front glowing though. I should know better than to pull this kind of current through some cheap Dupont wires. I stopped the test when the wires started to smoke. :)
I have not noticed any downsides with this change yet (except somewhat higher cost), so things are looking good for this change. But there's still a bunch of testing to do before I pull the trigger on it. The next test up is high load current with high input voltage. This scenario would produce the highest amount of heat in the asynchronous design, let's see how it does with this new synchronous design.
-
LiFePO4wered/Pi+ on Mouser!
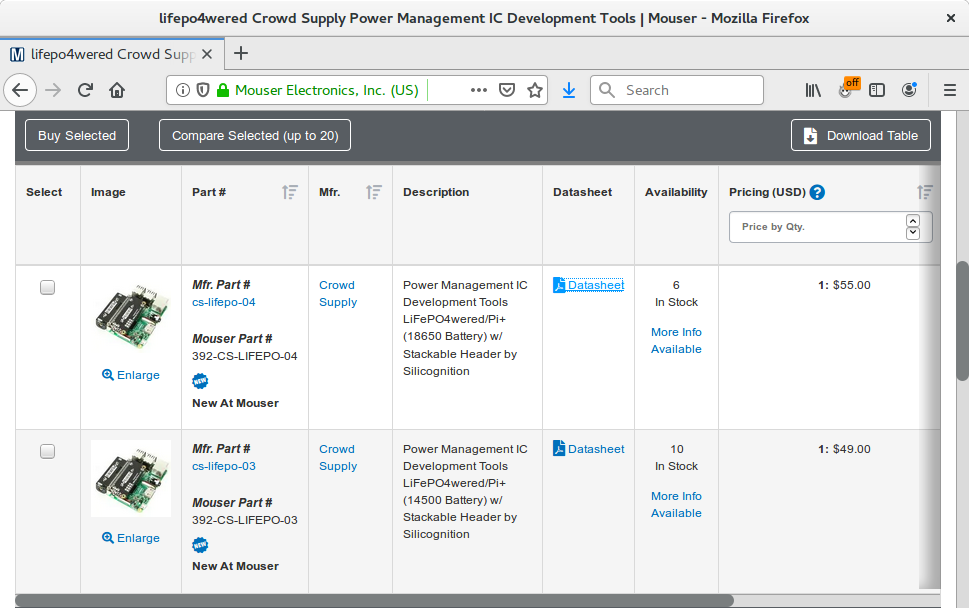
10/01/2019 at 16:30 • 0 commentsThanks to Crowd Supply, you can now buy the LiFePO4wered/Pi+ on Mouser! :) They seem to be selling well and stock is getting low, so if it's more convenient for you to order there, you might want to get one soon before they run out.

I just shipped more stock to Crowd Supply so this may be refilled soon, but since all of this is handled internally between Crowd Supply and Mouser I have no visibility on when that might happen.
-
Manufacturing status
10/01/2019 at 16:24 • 0 commentsI've been putting more updates on Crowd Supply on the state of manufacturing etc, while keeping things here on Hackaday.io more technical, but I thought I should put something about it here as well. Manufacturing is an important part of every project that makes it to becoming a product, so it's important to share the good and the bad of that as well.
After some initial stumbles with the quality of the first article, PCBWay did better on the second try so I had them produce the rest of the 1000 piece order. So after not too long a wait I received a large shipment:
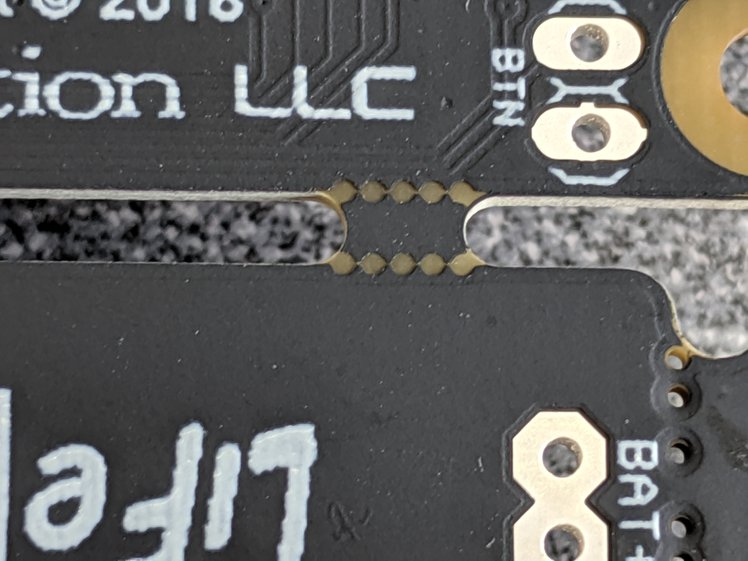
 Very nicely packaged. And good quality product. I have not run into too many issues after testing and final assembly of several hundreds of these boards. I had one board that needed reflow of the TPS61236P boost converter. A couple of panels had this weird issue where the mouse bites to separate the boards weren’t all drilled:
 And there was one board that had some cosmetic damage:
 But overall, production has been running smoothly. The red light issue fix I implemented on the revision 5 boards seems to have completely solved that problem, which is a relief. Demand for the product is looking good and with the quality boards we received we are able to keep up with it comfortably.
 -
Raspberry Pi 4 Compatibility
07/03/2019 at 16:50 • 0 commentsWith the surprise release of the Raspberry Pi 4, I started receiving questions about compatibility with the LiFePO4wered/Pi+. Here’s what I found out!
Surprise Raspberry Pi 4 release
Like most people, I hadn’t really expected to see a next generation Raspberry Pi until next year. Unlike most people, for whom a new Pi release is invariably a delightful event, I experience them with some trepidation. I don’t have any special relationship with the Raspberry Pi Foundation. On the contrary it seems sometimes, since they studiously refuse to acknowledge the existence of my hardware, talk about it, or promote it in any way while they’ve done so repeatedly for my competition. So I have no advance warning, and when a new release drops, I need to scramble and find out if the new thing works with my existing hardware or if my stock suddenly has become significantly devaluated.
In this case, the release happened on June 24 and I finally managed to pick up a unit from Micro Center on Friday June 28. I had some reasons to be worried since the new recommended power supply for the Pi 4 is a 5V/3A USB Type-C, and early reports indicated the new Pi to be a power hog. So I did some testing over the weekend.
Testing the LiFePO4wered/Pi+ powering a Pi 4
The first thing to check was whether the host software would work on the new Raspbian Buster which is required to support the Pi 4 hardware. On that front, everything went smoothly: the host software works just as it did before, and I had the system running from the LiFePO4wered/Pi+ in no time.
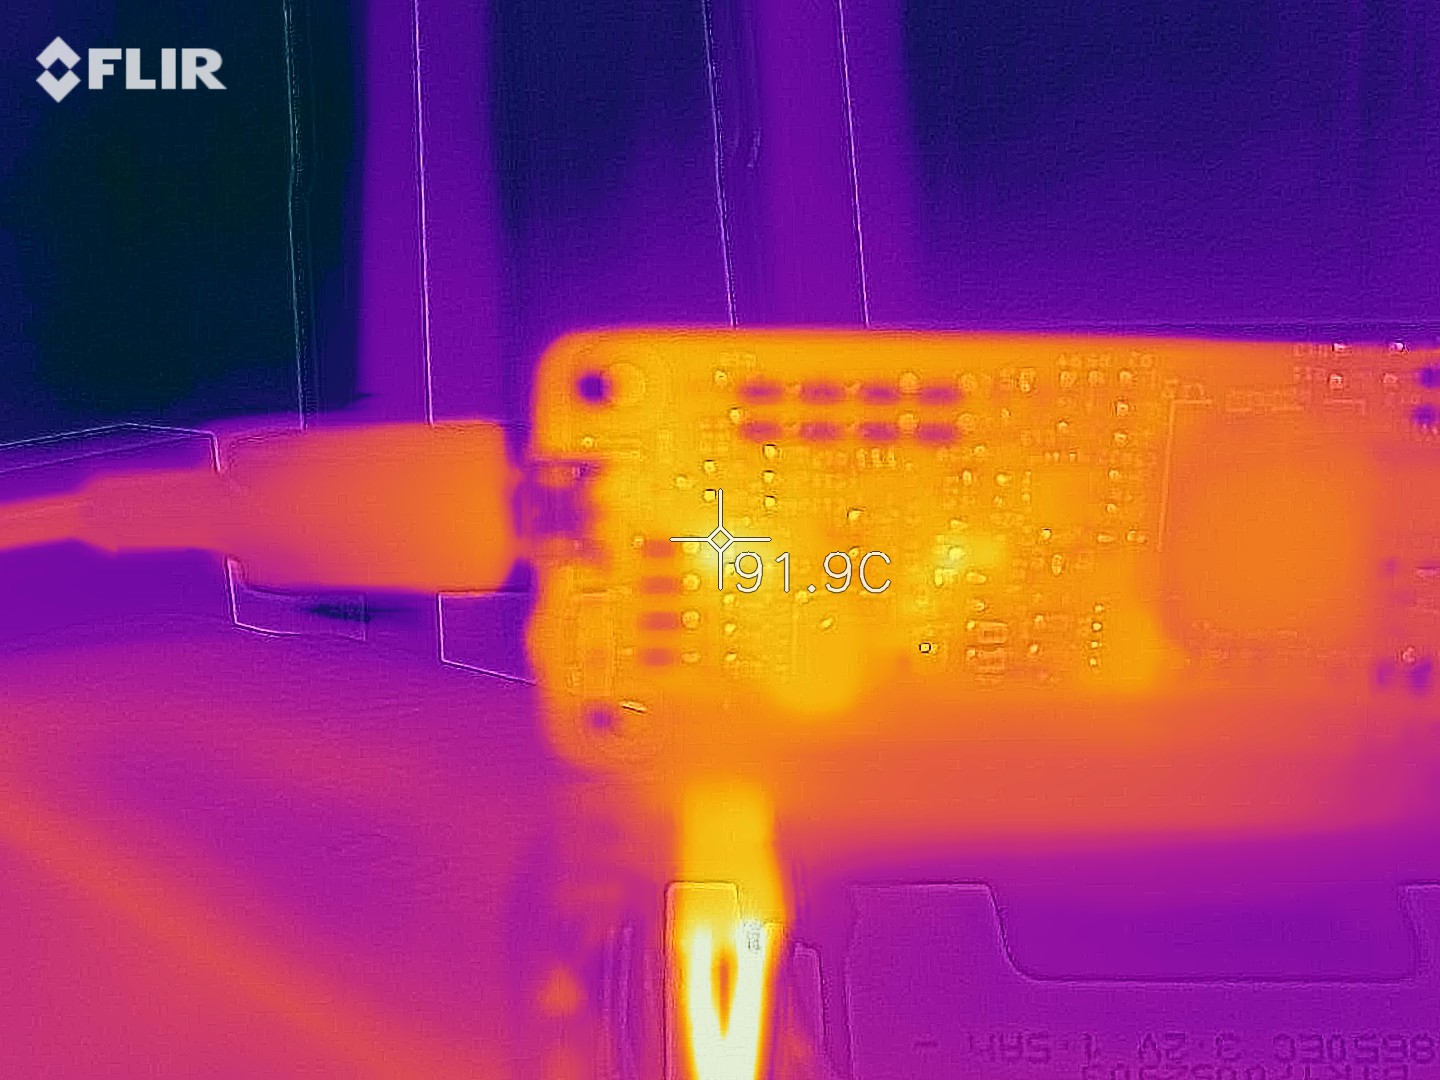
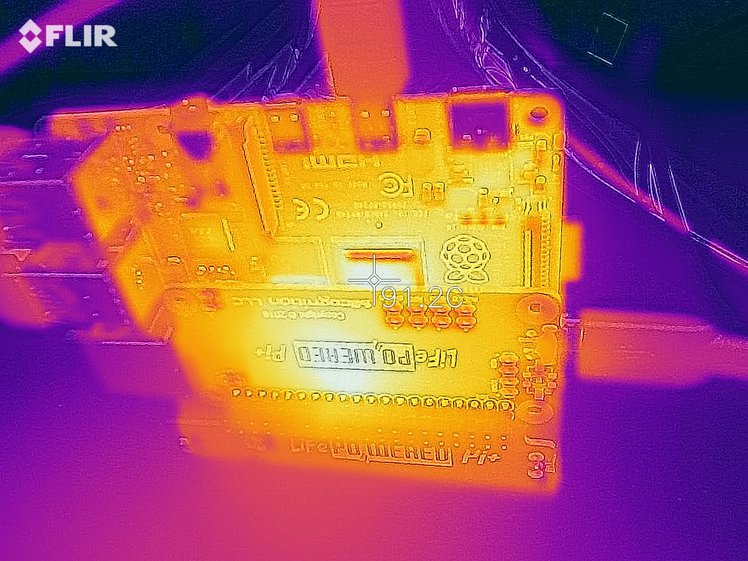
 Then came the time to put some load on it. I used the stress utility to load the CPU, memory and I/O subsystem and ran continuous YouTube videos playing full-screen to add some load to the GPU. I also connected a USB hard drive for good measure, while I already had a backlit USB keyboard and mouse connected as well. I kept this running for over a day, with no issues other than that the system indicated with the on-screen thermometer icon that it was thermally throttled. The LiFePO4wered/Pi+ had no issue charging the battery (I was using a 3A charger) and reported a load current to the Pi of about 1.5 A. Since the LiFePO4wered/Pi+ is rated for a continuous output current of 2 A, this presented no issues, other than heat, as the thermal image below shows:
 Both the Pi 4 CPU and the LiFePO4wered/Pi+ settled at a temperature of around 90˚C. When using a system like this at high load, it would obviously be wise to add cooling, but for testing, we like to abuse things. :)
All this testing had been done with the LiFePO4wered/Pi+ plugged in, which is the thermal worst case since the charging system adds its own heat. Now it was time to test whether the system could run from the battery and survive the transition from external power to battery power, which oddly some competing so-called “UPS”es have trouble with.
Below is a YouTube video of how that worked:
No issues! The system runs through the transition as if nothing happened, which is how it should be. I didn’t do a battery run-down test yet, but based on the load current I’m seeing, the 18650 battery should be able to keep running for about 15-25 minutes from battery power at this load, before initiating a clean shutdown and cutting power when shutdown is finished. The 14500 battery is not recommended for a high-power system like this and will likely not work reliably. If you need longer run-times, the LiFePO4wered/Pi+ can of course be used with a large external 3.2V LiFePO4 battery as well, and then it just becomes an issue of how much space you have available.
I will continue to do more testing, but it looks like the LiFePO4wered/Pi+ with 18650 battery is good to go for powering Pi 4 based systems. The only exception may be systems under super high load doing AI, GPU encoding at the same time with multiple high power USB devices attached, but I haven’t been able to make my Pi 4 draw that much current yet, and these should be exceptional cases. With the load currents I’ve seen, on what I consider a heavily loaded system, the LiFePO4wered/Pi+ still has 0.5 A to spare.
My design survived this possible bump in the road and the 1000 new units that are coming from China as we speak should be able to provide your new Pi 4 based systems with clean, reliable power as you’ve come to expect. Enjoy and go build some cool stuff with it! :)
-
Fixing the "red light" issue
05/10/2019 at 19:19 • 0 commentsSince I was running out of bare boards from the second production run of 1000, and I was intending to do another run of 1000 built completely at PCBWay, I needed to have a solution for some problem that had popped up in some units from the second production run: the "red light" issue.
"Red light" issue
Some boards were returned because the red CHRG light would come on (though usually very faintly) even if the battery wasn't being charged. None of the units from the first batch of 300 ever exhibited this issue, but either having a different batch of components or just the higher volume made this pop up in a couple percent of units of the second batch of 1000.
For users who mostly use the LiFePO4wered/Pi+ as a UPS the issue isn't really a big deal, but for shelf life and users who use the LiFePO4wered/Pi+ in sleep mode it would be a big deal since it would increase the power consumption in sleep more from around 5uA to several hundred uA. I really didn't want to build another 1000 units that could have this problem, so a fix was urgent.
"Red light" fix
It took a while to come up with a good solution, but I’m pretty sure I figured one out. I reworked 10 boards that had been returned for this reason with my solution, and they all ended up working fine.
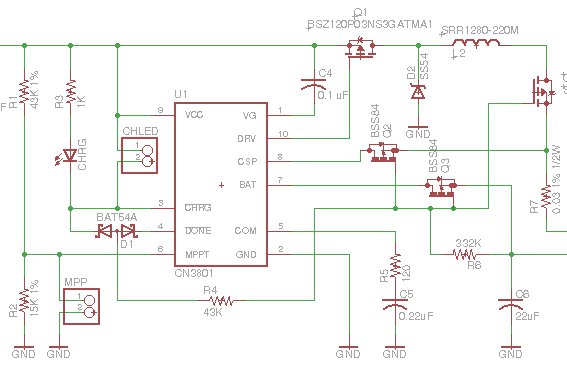
The problem existed in the circuitry I was using to disconnect the charger from the battery when not charging to reduce leakage current. I use three MOSFETs to do this, and in the old circuit they were driven through dual diode D1 from the CN3801’s CHRG and DONE pins:
 In all the LiFePO4wered/Pi3’s and the early LiFePO4wered/Pi+ batch I made, this always worked as expected. The CN3801 has an under voltage lockout at 3.8 V nominal, 3.1 V minimum, and my assumption and experience up till then was that this would keep the CHRG and DONE pins from turning on when the only voltage powering the CN3801 was battery voltage leaking back to this circuit through the diode drop of Q1’s body diode. The pass transistors would be turned off and the circuit would not leak back to the charge input.
But what I’m learning as I’m scaling to higher volumes is that you always run into new unexpected issues as you scale up. When you make 10 prototypes that work great, you will probably run into some 1 out of 20 problems when you make 100 units next. When you have fixed those problems, your next 1000 unit batch will still have some 1 out of 200 problems. And so on. The upside is that the circuit and your yield improves with every step in this cycle until it is high enough you can live with it. Of course, this also depends on component batches etc., so you might have a 1 out of 200 problem even after you’ve done a batch of 300 previously as was the case here.
In this case it seemed that not all CN3801’s would keep their CHRG pins from turning on in the under voltage condition. To be honest, the spec never said that they would, this had been an assumption on my part confirmed by experimentation on an apparently too small number of samples. I have now changed the driving circuit for the MOSFETs to what’s shown below:
 The circuit with zener diode and pre-biased transistor doesn’t depend on variations in the CN3801 anymore. Instead it depends on variations in the zener and transistor thresholds. Which can be just as problematic of course. But I think I’ve calculated the tolerances well enough to be pretty confident it will work as expected. Being based on a current driven device like an NPN transistor with pull-down on the base has the added benefit that it presents a bit more load than the purely MOSFET based circuitry I had before, which could more easily be turned on by small leakage currents.
Thanks to the use of a pre-biased transistor, the new circuit fits where the old one was so from a user perspective nothing will be different in this revision, and hopefully the "red light" issue will be a thing of the past. :)
-
Production progress
05/10/2019 at 19:01 • 0 commentsOof, I really haven't been keeping up with updates here. Too much to do, sorry!
When I wrote the last project log here, the Crowd Supply campaign was still going on, yikes! That's been a while. Since then, the campaign got successfully funded (including pre-orders over 500%!) and I've been scrambling to meet demand. Since last week, finally all backer rewards and pre-orders were filled. Crowd Supply decided to stock the LiFePO4wered/Pi+ and now I'm hard at work to build up their stock.
If you want to catch up on what's been happening, I did write a bunch of project updates over on Crowd Supply:
https://www.crowdsupply.com/silicognition/lifepo4wered-pi-plus/updates
-
Watchdog feature guide
08/28/2018 at 23:51 • 0 commentsThe Crowd Supply campaign is going very well! Already over 200% funded and still 21 days to go, yay! :)
As part of the campaign I'm supposed to post useful or interesting weekly updates. This week I decided to explain a feature that may cause some confusion: the application watchdog. Since it's not related to the campaign per se, but explains a feature, I decided to reproduce it here as well. Enjoy!
If you are an applications developer for embedded systems, sending your solutions to remote locations where they can’t be reached for reset or service, this update is for you.The LiFePO4wered/Pi+ has many helpful features for different use cases. Some people like to use the on/off button to boot and shut down their Pi, while others turn on auto-boot and/or auto-shutdown to get on/off behavior based on external power for their application. The wake-up timer feature is really cool and helpful in low power, low duty cycle applications, and it’s pretty easy to understand what it does and how to use it.
One feature that people have more trouble with is the application watchdog. Unless you come from an electronics or embedded systems background, you may not be familiar with what a watchdog is or does. So in this update, I’ll explain what it is, why you want it, and how you can use the one provided by the LiFePO4wered/Pi+ to make your Raspberry Pi-based project more reliable.
The Wikipedia article on watchdog timers explains that a watchdog timer is “an electronic timer that is used to detect and recover from computer malfunctions.” Let’s face it: computers are complicated beasts with many moving parts that all need to work correctly. There will always be bugs (or cosmic rays) that will cause something to act up at some point. If your computer is on your desk, you can reboot it when this happens, but what if you are using a computer like a Raspberry Pi in an embedded system? What about in something that needs to run automatically and reliably, may be hard to reach inside a machine, or is located far away in a remote location? The Wikipedia article notes that “watchdog timers are essential in remote, automated systems,” giving the example of a Mars rover. If your Mars rover’s computer crashed, who would go reboot it?
Watchdog timers are usually extremely simple, and this is a good thing. It’s the complexity of computers that makes them susceptible to crashes and hangups, so it makes sense that the system that watches over them should be less susceptible to these issues, hence simpler. Ideally, watchdog timers are implemented in hardware. In the LiFePO4wered/Pi+, the watchdog is implemented in firmware. Not quite as desirable as hardware, but if you compare the complexity of the firmware on the LiFePO4wered/Pi+ (4 kB) with that of the Linux system running on the Pi (4 GB), it’s orders of magnitude simpler.
The basic concept of a watchdog timer is that the software running on the system needs to regularly reset the timer (commonly referred to as “kicking” or “feeding” the dog, depending on how you feel toward dogs), because if you fail to do so, it will reset you instead (the dog will “bite” you) when the time runs out. This ensures that if your system hangs, it can be reset and brought back to a responsive state.
In the LiFePO4wered/Pi+ implementation, by default the watchdog is off (
WATCHDOG_OFFor0). This is because it’s conceived as an application watchdog: it’s not just there to ensure the Linux system is up, but also to ensure that whatever application you are running is behaving as it should. So how you implement this is up to you as a developer and depends on what functionality is critical to your application.The watchdog can be set to two levels by writing to the
WATCHDOG_CFGregister. The first level,WATCHDOG_ALERT(1), is useful during development or when the Pi system is within view of an operator who can take action. At this level, the PWR LED will start flashing the fast error flash when the timer expires. The second levelWATCHDOG_SHDN(2) will trigger a Raspberry Pi shutdown when the timer expires, and is most likely what you want in production systems. Note that all it does is trigger a shutdown – nothing more. This means you still benefit from the nice shutdown behavior you expect from the LiFePO4wered/Pi+: it will always try to do a clean shutdown first (your application may have crashed but the Linux system may still be running, so why risk corrupting it by doing a hard reset if you don’t have to?). If the clean shutdown doesn’t succeed though, power will be forced off after the settable shutdown timeout (in case the whole system was locked up). Unless the proper response to a watchdog timeout for your application is to turn completely off and stay off, you should use one of the auto-boot settings to turn the shutdown into a reboot instead so you get the system back up.To prevent the watchdog from biting you, your application needs to write a timeout value to the
WATCHDOG_TIMERregister, and keep doing so before the time that was written last expires. The register can also be read to see how much time is left and counts down with ten-second resolution. The timeout value you want depends on your application, or even the specific thing you are doing in your application. You need to find the balance between how long you can allow your system to stay unresponsive if something is wrong, and how long you can expect certain operations to take if everything is working.The simplest watchdog example application in Python would be something like this:
from lifepo4wered import write_lifepo4wered, WATCHDOG_TIMER
from time import sleep

while True:
  write_lifepo4wered(WATCHDOG_TIMER, 10)
  sleep(5)
Of course, this example would have limited use in the real world. It only ensures the Linux system is alive, your Python installation is working and the Raspberry Pi and LiFePO4wered/Pi+ can communicate. Please resist the urge to just add a process like this to your system and think the watchdog is now guarding your application. To be really effective, the watchdog reset calls need to be intertwined with your application logic, and depend on its correct behavior.
Here’s a better example. Imagine you have a Raspberry Pi-based system that reads sensor data and sends it to a cloud server over a cellular modem. Without getting lost in implementation details, this would be an effective use of the watchdog:
from lifepo4wered import write_lifepo4wered, WATCHDOG_TIMER
from time import sleep
from sensor import read_sensor  # Part of your app
from cloud import send_to_cloud # Part of your app

while True:
  data = read_sensor()
  if data.read_success:
    if send_to_cloud(data):
      write_lifepo4wered(WATCHDOG_TIMER, 120)
  sleep(10)
Here the watchdog guards many more potential error conditions. First of all, the watchdog will never be reset and will therefore reboot the system if for some reason we can’t talk to the sensor. The sensor itself may contain firmware that could have crashed, so by powering down the system and restarting, the sensor might be returned to a working condition. The same for the cellular modem. If we fail to send data to the cloud because the modem has locked up, we may recover by powering down and back up again.
Note that the watchdog timer value is set much higher than the expected loop time. This allows the system some time to work through adverse conditions without getting rebooted all the time. For instance, if the cellular modem suffers from a bad connection, it may take a while to get the data out. In this case, we’ve decided that if the system isn’t responsive for two minutes, something must be wrong and we let the watchdog reboot us.
There is one last register related to the watchdog that I want to touch on:
WATCHDOG_GRACE. This provides a grace period after the system has booted until your application has the chance to write to theWATCHDOG_TIMERregister for the first time. You can think of it as the initial value for theWATCHDOG_TIMERregister after boot. Depending on how heavy your application is, it may take a while to start and you wouldn’t want the watchdog to reboot the system before your application is ready to go.The
WATCHDOG_TIMERregister is the only one your app should have to deal with. TheWATCHDOG_CFGandWATCHDOG_GRACEregisters are supposed to be configured and written to flash withCFG_WRITEbefore deployment. This ensures the watchdog is always active with the right configuration so you don’t depend on the system you’re trying to protect to launch the thing that’s supposed to protect it… which might not happen if something is wrong.Full details on how to use the watchdog registers (or any register for that matter) can be found in the LiFePO4wered/Pi+ Product Brief. I hope this guide can help you build reliable Raspberry Pi-based systems by using the watchdog!
LiFePO4wered/Pi+
Next Gen LiFePO4 battery / UPS / power manager for Raspberry Pi, ideal for headless and IoT use
 Patrick Van Oosterwijck