Close
0%
0%

rDUINOScope Boiana

FREE and Open Source, Arduino Due based Telescope Control GOTO

Similar projects worth following
THE WORLD'S FIRST STAND ALONE ARDUINO BASED TELESCOPE CONTROL GOTO.

The initial idea was to create cheap and easy to build alternative of commercially available GOTO hand controllers, but in a better, feature rich way. In the heart of the system is the rDUINOScope Software, some 2500 rows, controlling all HW components and handling communcation with external devices (Stellarium, SkySafari and others) .

rDUINOScope is a stand-alone device! On the opposite side, currently available open source telescope GOTOs either use Raspberry Pi, which consumes a lot of power, or uses Arduino as extension to a computer, smart phone or tablet. rDUINOScope can do both!

The best part of rDUINOScope is that it is an OPEN SOURCE SOFTWARE and HARDWARE! You can redistribute it and/or modify it under the terms of the GNU General Public License as published by the Free Software Foundation (version 3 or later).

rDUINOScope is an Open Source, Arduino Due based Telescope Control System (GOTO). Drafted as stand alone system, rDUINOScope does not need PC, Tablet or Cell Phone, nor Internet connection in order to operate and deliver stunning views! It does however supports Bluetooth and LX200 protocol to connect and be controlled by smart devices!

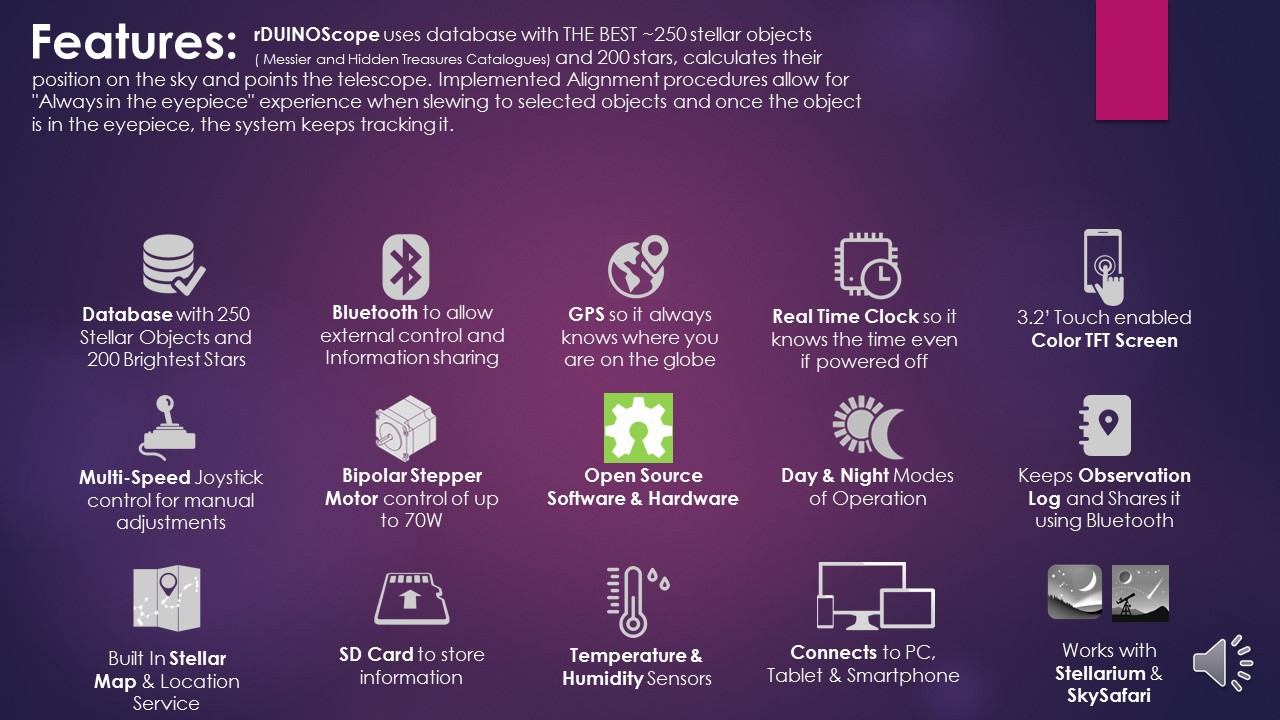
rDUINOScope uses database with THE BEST ~250 stellar objects ( Messier and Hidden Treasures Catalogues) and 200 stars, calculates their position on the sky and points the telescope. Implemented Alignment procedures allow for "Always in the eyepiece" experience when slewing to selected objects and once the object is in the eyepiece, the system keeps tracking it.

Functionality:

  • Best ~250 Stellar Objects database - Messier Objects and Hidden Treasures;
  • 200 Brightest stars from Northern and Southern hemispheres;
  • Works with Stellarium, SkySafari 5 and PC over Bluetooth;
  • Calculates the Local Sidereal Time and Hour Angle and points the telescope;
  • Hemisphere independent - works on both sides of the globe;
  • Auto Tracking, Auto Meridian Flip, Auto Stop when object below horizon;
  • "Observation Log" is kept for each observation, including temperature, location and etc
  • Supports Bluetooth commands, based on MEADE LX200 protocol;
  • Stand alone operation ... or/and... Computer/Tablet aided operation;
  • Complete NGC & IC catalogue via "#rDUINO Controller" Software and Bluetooth;
  • Fancy Joystick multi speed manual control;
  • Day/Night mode of operation of the screen;
  • Precise and Quick Alignment methods for "Always in Eyepiece" experience;
  • ... and many other small geeks which I consider useful :)

  • What's inside the rDUINO SCOPE

  • Arduino DUE Microcontroller Board (~ 500mA) ;
  • TFT Touch Screen (240 x 400 px);
  • PS2 joystick;
  • GPS uBlox Neo 6M - GPS Module;
  • DRV8825 - Stepper motor drivers capable of passing 2A current;
  • HC-05 - BlueTooth module working as "Master";
  • PCB Mount Buzzer for Sound Alerts;
  • RTC DS3231 - clock to store Date and Time even when disconnected from power supply;
  • DHT22 - Temperature & Humidity sensor to show and record environment variables during observations;

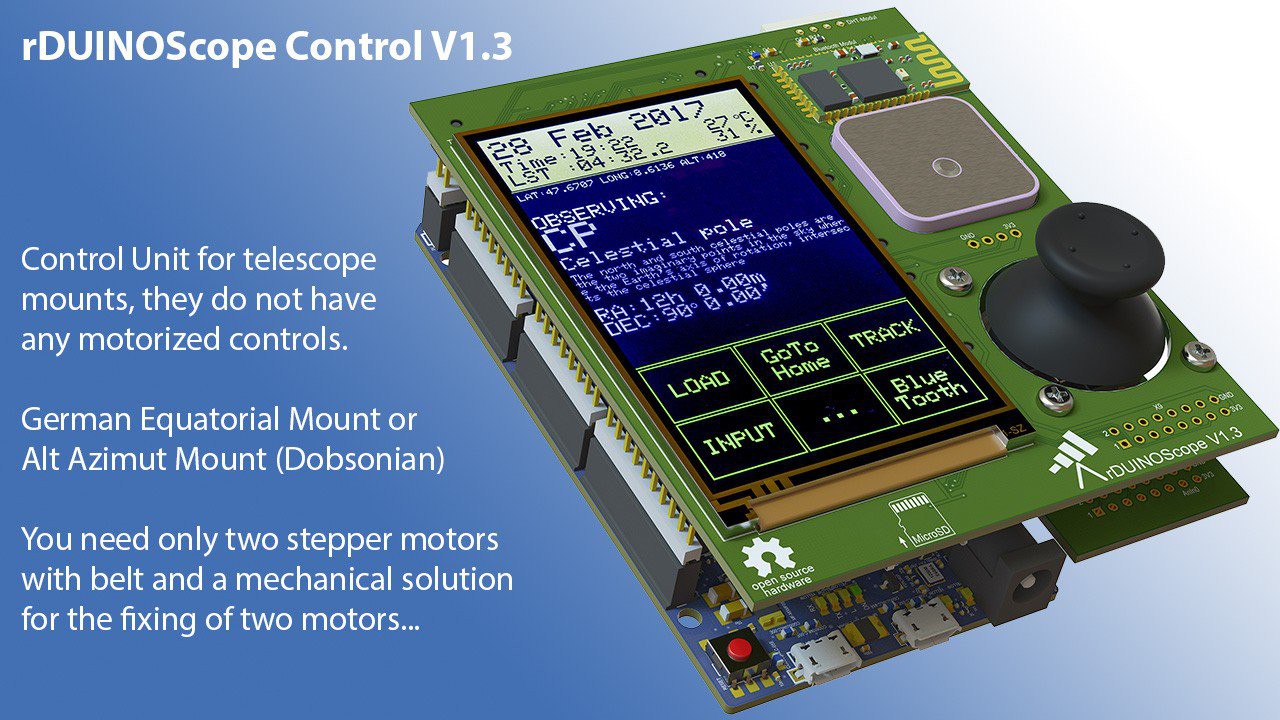
  • Because this is an Open Source project, Otto Winter redesigned the HW part and come up with his own professional version: https://hackaday.io/project/21397-rduinoscope-control-v13


    The challenge the project addresses:
    Every amateur astronomer knows the trouble of finding an object to observe, when starting in the hobby. It is the steep learning curve that one needs to overcome, that makes most people give up after few unsuccessful tries. To overcome this roadblock, telescope manufacturers come up with idea to computerize a telescope and make it GOTO telescope. One simply pushes a button ....and voila – The Great Orion Nebula is in the eyepiece!

    Those computerized (GOTO) telescopes unfortunately are proprietary and are quite expensive on top of the Euro/Dollar you already spent for your tube and optics. You can’t simply buy the cheapest GOTO and put it on your mount, as they are specific for each telescope. Maybe you aquired an old mount and find out that it is no longer supported for a GOTO ... or that existing GOTOs keeps their high prices!

    If you however decide to buy a new shiny GOTO Telescope, you will be amazed to discover that most of them are old looking, feature phone like handhelds, and most importantly all the goodies are sold separately like:

    • No graphical screens or touch screens;
    • GPS sold separately or enter the coordinates manually;
    • Connection to PC or Bluetooth devices are sold separately;
    • To use your smartphone application you need to buy additional hardware;
    • Not possible to share your observations with your favorite social media,
    • …. And many more restrictions simply not acceptable for the amount you pay!

    That’s why I decided to create rDUINOScope, a computerized telescope GOTO controller system, which fits every telescope mount.

    It is an Open Source Software and Hardware, which means it is free. I wanted it to be even better than what you can buy on the market, so I have implemented...

    Read more »

    _2.3_Boiana_EQ.ino

    New Version: #rDUINOScope v2.3 Boiana EQ

    ino - 58.10 kB - 06/14/2017 at 11:11

    Download

    regular_updates.ino

    ino - 8.31 kB - 06/14/2017 at 11:11

    Download

    touch_inputs.ino

    ino - 33.11 kB - 06/14/2017 at 11:11

    Download

    BT.ino

    ino - 15.26 kB - 06/14/2017 at 11:11

    Download

    graphic_screens.ino

    ino - 31.27 kB - 06/14/2017 at 11:11

    Download

    View all 6 files

    • 1 × Arduino Due from http://www.arduino.cc
    • 1 × 3.2" TFT 400*240 SD Touch Module With Shield for Arduino Due I used the one from Elechouse
    • 1 × RTC DS323 Real time clock from Ebay
    • 1 × GPS uBlox Neo 6M GPS module from Ebay
    • 1 × PS2 joystick for Arduino again from Ebay

    View all 12 components

    • Two fantastic new clones emerged

      Dessislav Gouzgounov09/26/2017 at 14:30 0 comments

      In the recent days two new wonderful clones of the rDUINOScope software emerged. As you probably know, low level coding is closely related to the hardware you are using, thus it is not so easy to simply swap a TFT screen for example and use the one you have around in the workshop.

      Thanks to Khairey Nouhe and Giacomo Mammarella we now have two clones of the software dealing with different TFT screens.

      First one that Khairey did woks with Adafruit 3.5" 320x480 Color TFT Touchscreen using HX8357 chip and SPI mode. His adaptation of the code also benefits from the large size of the screen, without compromising on new features in v2.3.1. Check out the GitHub link: https://github.com/KhaireyNouhe/rDUINOScope_Adafruit3.5-_TFT_SPI_V2.3.1

      The other clone made by Giacomo uses LI9488 480x320 px. display in SPI, instead of the original HX8352B 400x240 px, so bigger screen and less pin used. You can check the GitHub link: https://github.com/giacu92/rDUINOScope

      Both makers have not only translated the code to talk to a different hardware, but also added functionality and cool graphics!

      rDUINOScope Boiana is now truly an Open Source Project!

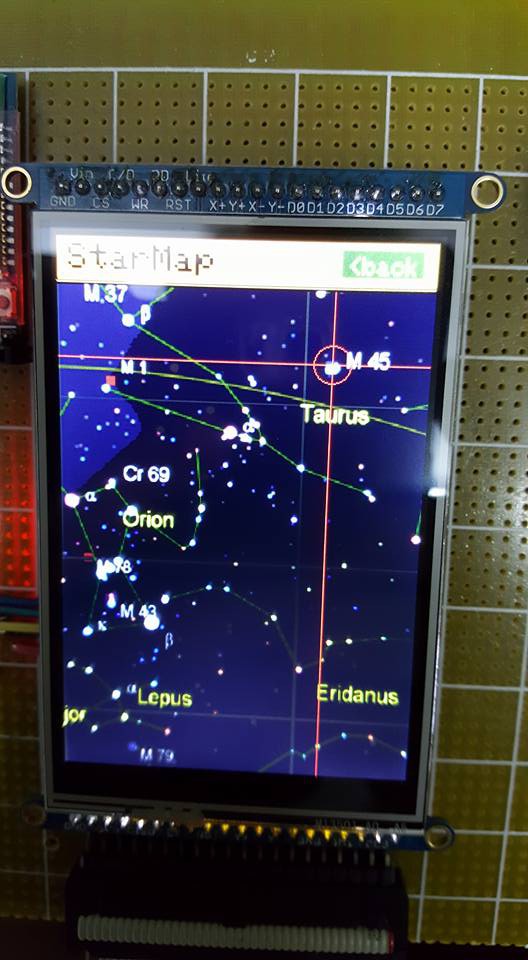
      Here are few screenshots from Khaire's port of rDUINOScope Boiana v2.3.1

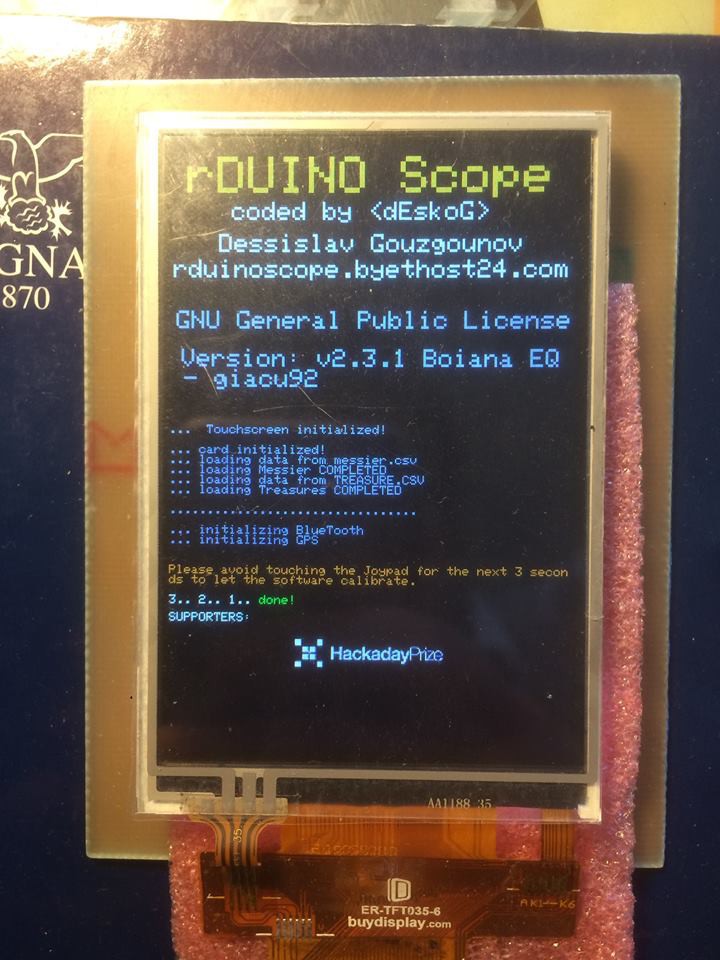
      Here is a screenshot from Gigi's port of rDUINOScope Boiana v2.3.1

    • V2.3.1 Released

      Dessislav Gouzgounov08/23/2017 at 11:22 0 comments

      Dear All,

      The new incremental version of the software is available for download now on the project's website. It addresses few changes in the hardware, so be aware when you update:

      The following changes apply:

      • RA motor mode pins 11 and 12 have been swapped:
      • Introduced a new FET transistor to power the DRV8825 drivers from the software;
      • New schematic for the TFT LED pin allowing brightness control from the software and Auto backlight Off; 

      Some of the new features:

      - Added additional Bluetooth commands to allow "blind" (no screen) operations using rDUINOScope Controller software;

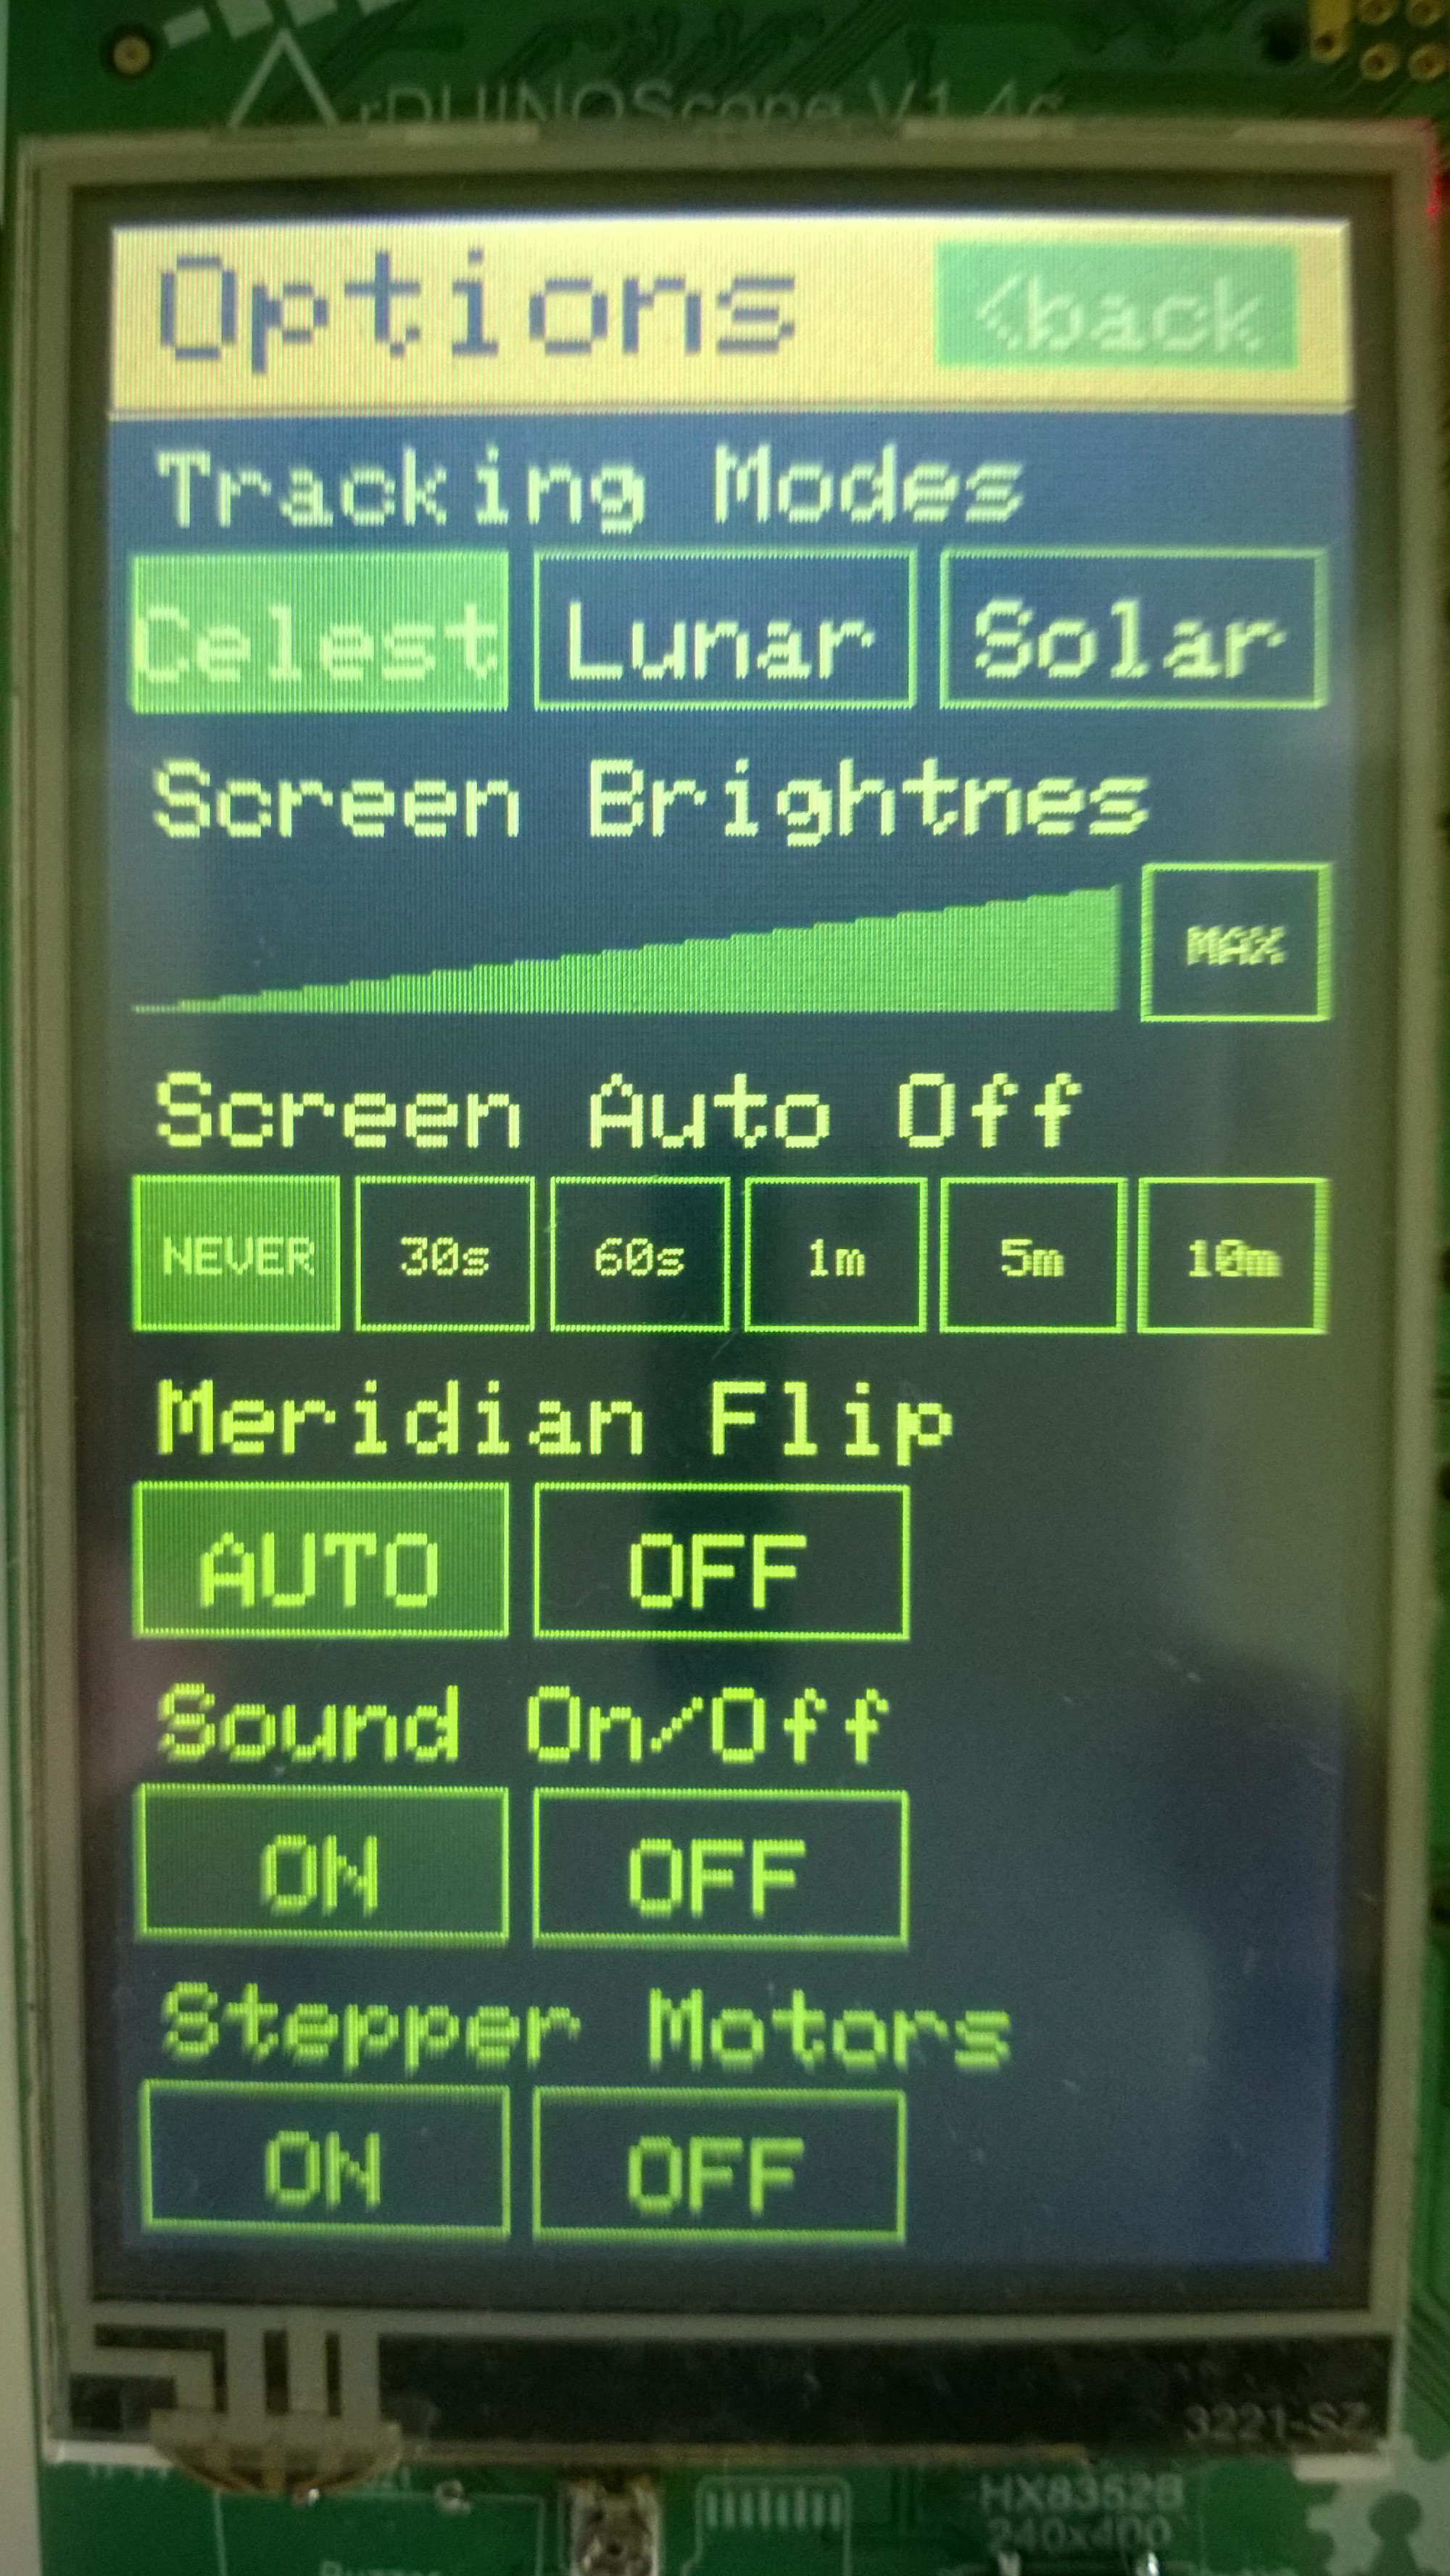
      - Added support for powering down the stepper motors;

      - Added support to control Screen brightness and Auto power off;

      - Added support for additional touch controller (supports ads7843 and XT2046);

      All the schematics you will need will be added shortly to the instructions, so be patient :)

    • How to connect rDUINOScope to Stellarium using Bluetooth

      Dessislav Gouzgounov08/09/2017 at 11:19 0 comments

      I have received number of questions regarding BlueTooth connection with Stellarium on PC. Thus I created a video showing a step-by-step approach and explaining aome of the pitfalls you might encounter.

      Enjoy, and let me know your comments!

      Thank you.

    • The very first presentation of rDUINOScope

      Dessislav Gouzgounov07/28/2017 at 20:54 0 comments

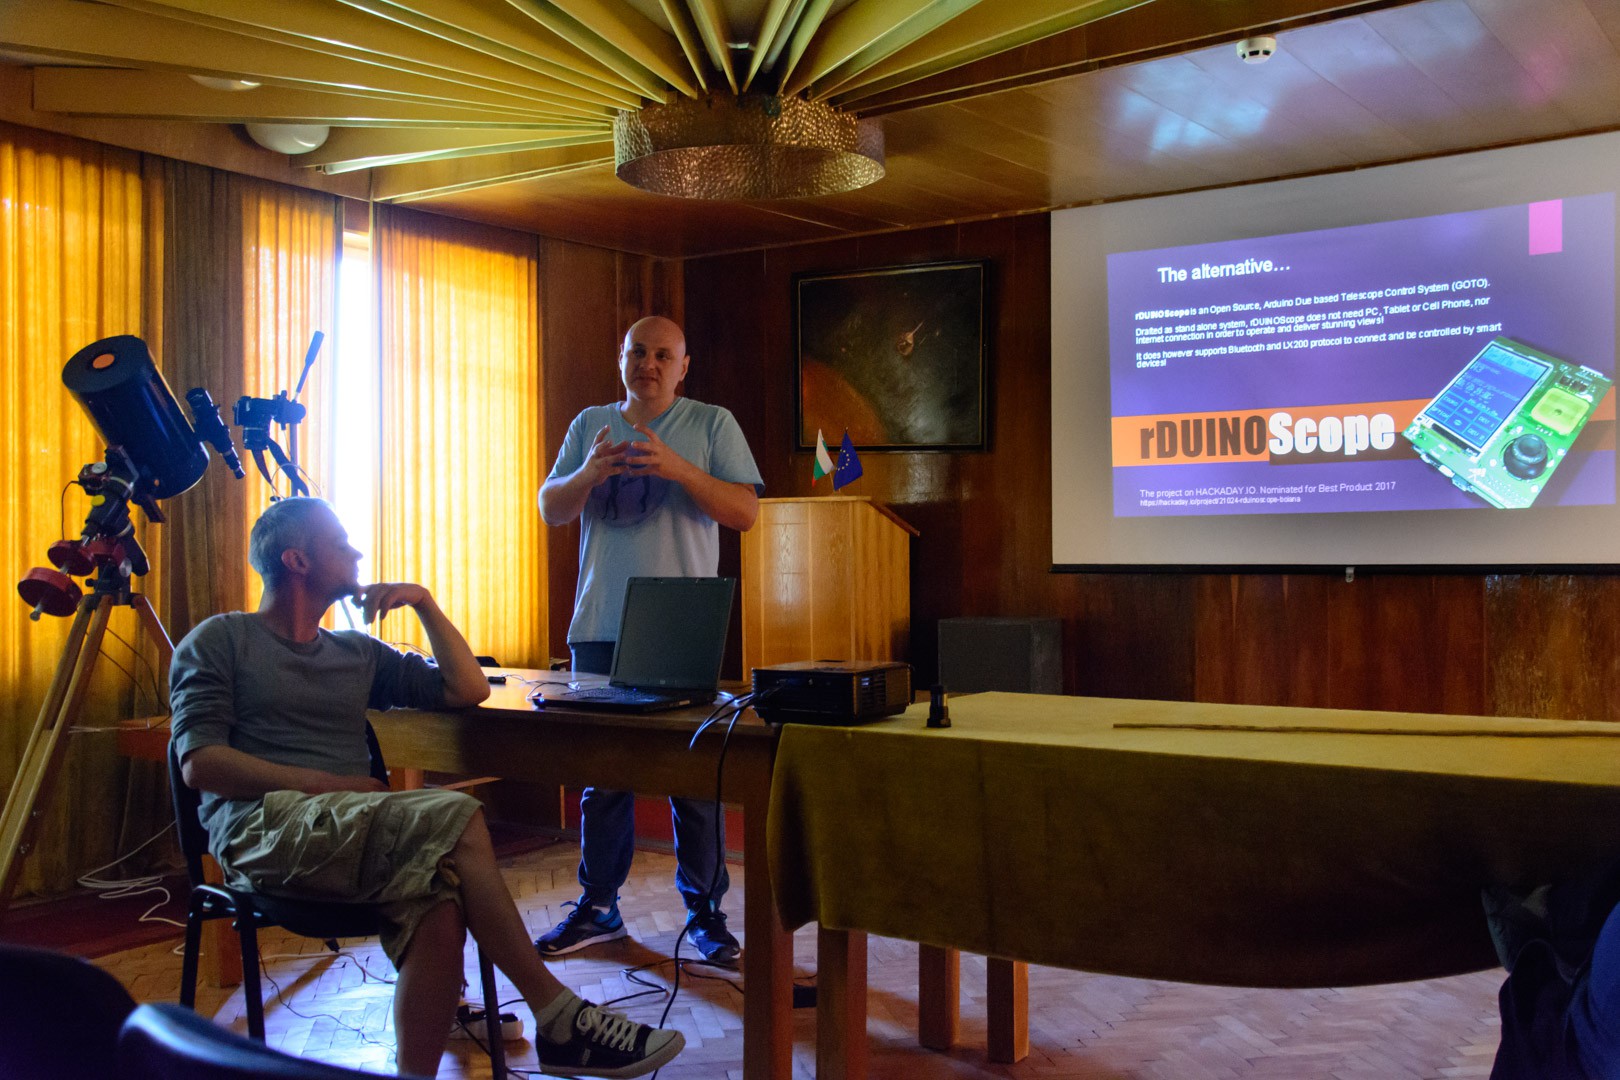
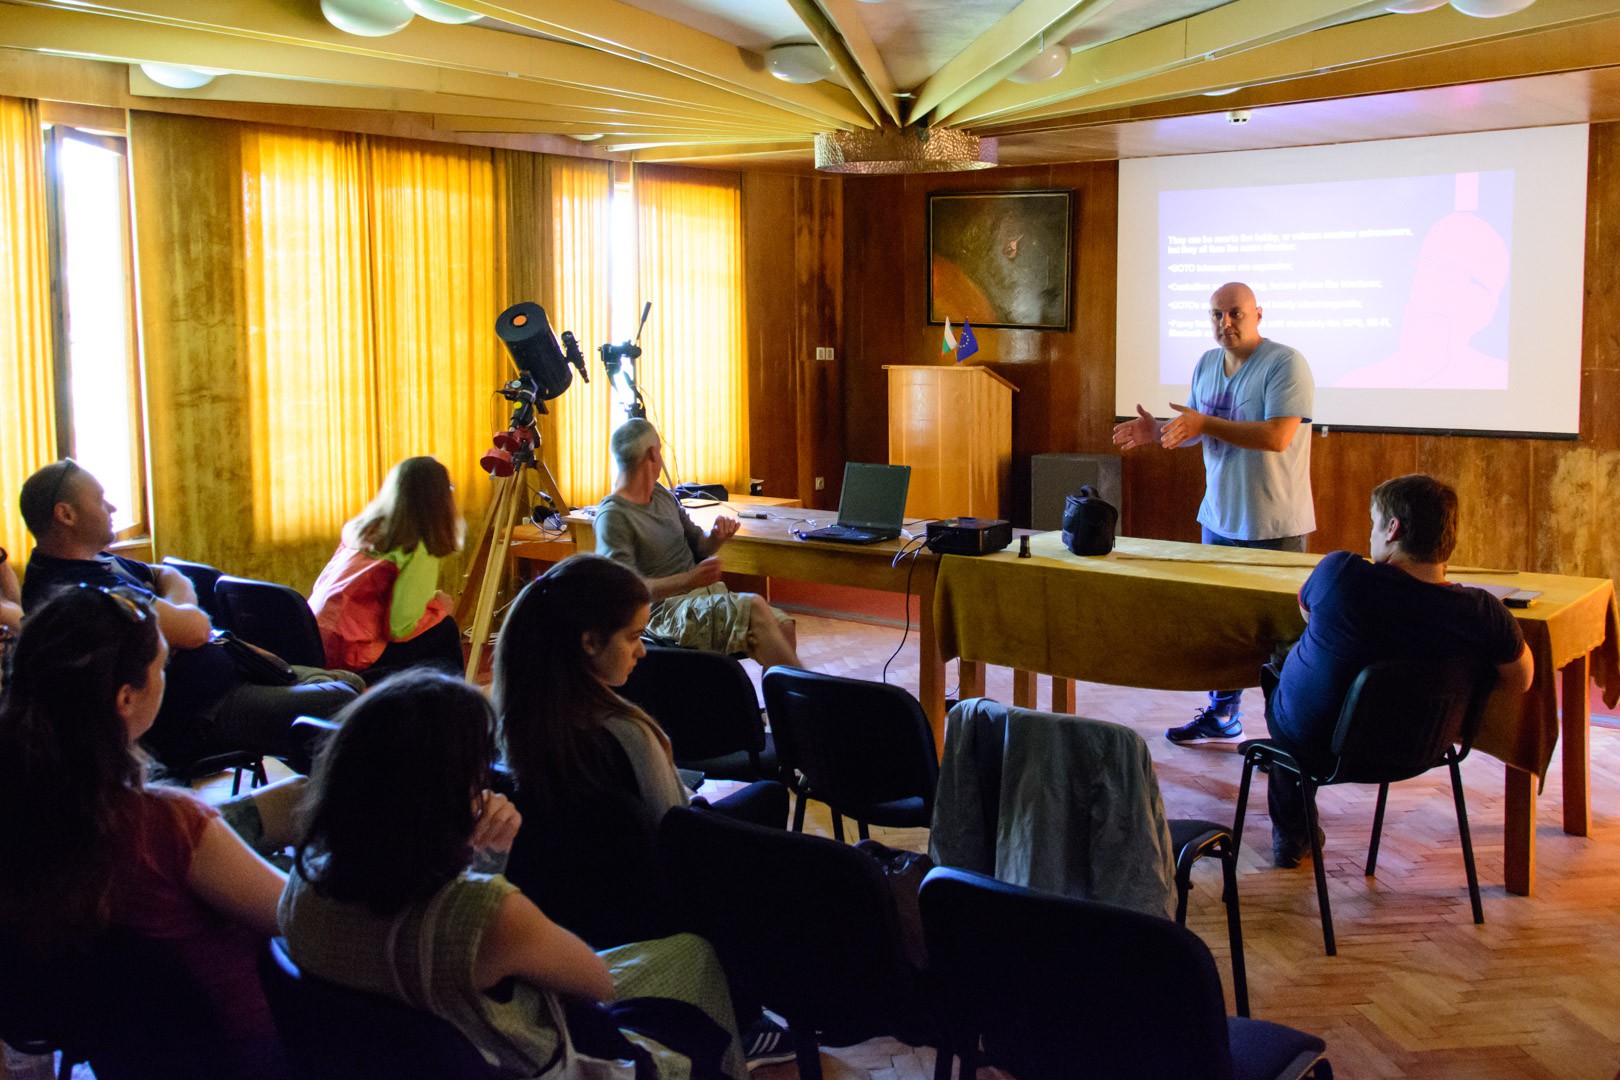
      The very first presentation of rDUINOScope on annual amateur astronomers gathering on peak Rojen, Bulgaria. It was on the site of our national observatory (http://nao-rozhen.org/index_en.html)

      During that event were also presented APT - Astro Photography Tool  (http://www.ideiki.com/astro/) and INDIGO (http://www.indigo-astronomy.org/) - projects with Bulgarian roots. 

    • Working on a presentation...

      Dessislav Gouzgounov07/18/2017 at 18:17 0 comments

      I'm working on a presentation for rDUINOScope to be delivered on the anual amateur astronomers week on peak Rojen, Bulgaria. We expect also astronomers from Ukraine, Macedonia and Poland.

      Enjoy the slide!

    • Holiday season

      Dessislav Gouzgounov07/13/2017 at 16:15 0 comments

      I have decided to put development on hold for the holiday season. I'm planning to participate few star parties and deliver presentations about rDUINOScope. I hope that many new people will become interested in the project and thus we will gain additional support.

      This means that the Alt/AZ version is put on hold (... yet again unfortunately), along with the new revised HW and SW versions.

    • Testing some ideas...

      Dessislav Gouzgounov07/05/2017 at 04:40 0 comments

      I and the project team are now discussing some new ideas and possible opportunities. We hope that some changes in the code and probably the screen, will allow us to have animations and great new design.

      Sorry that animated GIF cannot be uploaded as the earth's rotation is spectacular on the background of the screen!

    • Want to get involved? Patronize rDUINOScope

      Dessislav Gouzgounov06/21/2017 at 13:49 0 comments

        There are some advanced options to support this project, in addition to sharing, writing articles and/or donating!

        We call this Patronizing the Project !
        When you patronize rDUINOScope, your name and/or the name of your business is bond to the enrichment and positive influence that the project brings to the Amateur Astronomy World. Your name becomes a synonym to all the great benefits and opportunities that this project creates and last but not least, your contribution will be acknowledge on every advertising material we create!


        You should choose the best way to patronize this project! It could include:

      • funding the next R&D cycle;
      • fund and become godfather of release version;
      • fund specific features;
      • become a longtime supporter and bond your name with the rDUINOScope code for eternity!
      • Contact us using messaging system on HACKADAY.IO or by visiting the project website: http://rduinoscope.byethost24.com/patronage.html


    • The New v.2.3 of rDUINOScope is available

      Dessislav Gouzgounov06/14/2017 at 11:15 0 comments

      #rDUINOScope v2.3 Boiana EQ
      Release date: 10 June 2017
      Status: RC
      Author: Dessislav Gouzgounov / Десислав Гузгунов /

      New features added in v2.3:

      • Code Optimization for Performance (SlewTo now capable of speeds > 3 deg/sec);
      • Added Celestial, Lunar and Solar tracking speeds;
      • Added new Main Menu system for more functionality;
      • Added control on 2 external devices (DEV 1 & 2 - you can hook your Heater, Fan and etc);
      • Added support for SkySafari 5 (smartphone software);
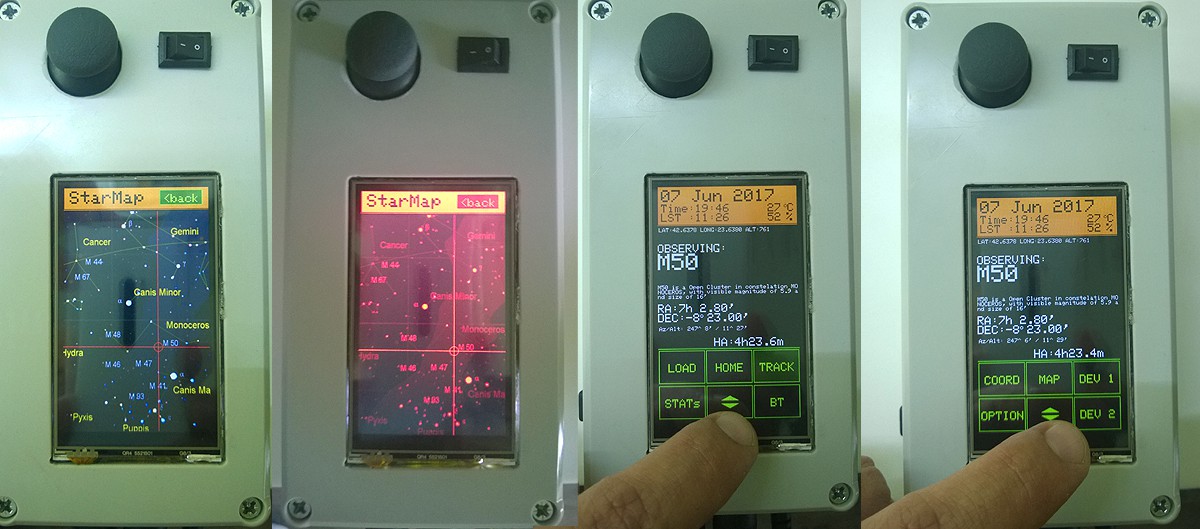
      • Added build in Star Atlas showing current telescope position;
      • Shows current Firmware version on Loading screen and on Bluetooth request using LX200 protocol;
      • Bug fixes:
        • Wrong DEC movement for negative DEC values passed over Bluetooth;
        • LST revised in the format XX:XX;

    • What's cooking ? ...rDUINOScope v2.3

      Dessislav Gouzgounov06/07/2017 at 17:10 1 comment

      - What's cooking ?
      - The new version of rDUINOScope!

      Working on the new version of rDUINOScope v2.3 Boiana EQ... and it's new features:

      • Star Map on screen (browsable with current telescope position);
      • Supports SkySafari;
      • New Main Menu system;
      • Performance Improvements (SlewTo speed increased to 3.2 deg/sec);

    View all 14 project logs

    • 1
      Step 1

      STEP 1 Preparation

      Before we start, it is important that you understand how the software works in order to be able to make changes and customize it for you. After all this is one of the most significant strengths of this project!

      To understand this part you need to download the code from the Project Files, along with the "libraries" files ... or simply download the whole package from : http://rduinoscope.co.nf/downloads.php. All referenced row numbers are according the code of V2.1. Boiana EQ

      You should know how the Arduino code works... Usually Arduino program have 2 sections- SETUP(); and LOOP();
      SETUP() is executed at the beginning of the program and basically it utilizes the system;
      LOOP() is a constant loop function which fires multiple times per second. So in order to assure we have screens, touch inputs and etc. and the screen not flickers because of the LOOP() we need to invent a mechanism to let Arduino know what is the User expects it to do. Thus in the LOOP() section you will see a very small portion of the code that only says "Consider Touch.. or Consider Time ..." and etc. The rest of the activities happen within those functions which allows us to alter the flow of the program so that the screens are not refreshed multiple times per second.


      Calculations: I have used some information found on internet on how to calculate position of stellar objects. Most of the information I collected from the following link: http://www.stargazing.net/kepler/altaz.html - Describes needed formulas and approach to calculate Hour Angle (HA), knowing location, current time, and stellar object RA and DEC.

      Once I created the code to calculate HA /row 678: void calculateLST_HA() /, I used this page to check if it works OK: http://www.jgiesen.de/astro/astroJS/siderealClock/ , and on a later stage when I added the DB with Messier Objects I used Stellarium (http://www.stellarium.org/) application for the same checks.

      The main issue I found was not the formulas themselves, but the way Arduino deals with variable types and in particular the precision of the calculations.

      Now once we have the HA and DEC calculated for a given object, we want to make the mount point the telescope and to do so, we need to somehow know how much exactly motors needs to turn. To succeed in this I need to know what is the worm to gear ratio – i.e. how many turns should the worm do in order that the gear makes 360°. I have Vixen Super Polaris and quick search on internet revealed that it uses 144 tooth gear for both RA and DEC shafts.
      I have created a simple Excel file (*.XLS - http://rduinoscope.co.nf/downloads/Gears_Stepper_Calculation.xlsx) to calculate how much the motors should turn once I calculated HA and DEC, and also how often to "fire" motors in order to compensate for the Earth rotation.

      The same mathematical model I used in the XLS is also implemented in the code, so what you need to do is simply substitute the values for your mount in the beginning of the code (rows 34 to 37).

      // HERE GOES THE Mount, Gears and Drive information.
      // ... used to calculate the HourAngle to microSteps ratio
      // UPDATE THIS PART according to your SET-UP
      // ---------------------------------------------
      // NB: RA and DEC uses the same gear ratio (144 tooth in my case)!
      //----------------------------------------------
      int WORM = 144;
      int REDUCTOR = 4;  // 1:4 gear reduction
      int DRIVE_STP = 200;   // Stepper drive have 200 steps per revolution
      int MICROSteps = 16;   // I'll use 1/16 microsteps mode to drive sidereal - also determines the LOWEST speed.

      Now once we calculated ratios, the code will know how much to turn the motors in order to point the telescope to the corresponding coordinates and also what is the clock speed so that the mount can track the object. Functions taking care of the above starts at row 906 and row 917:

      void Sidereal_rate(){
      }
      void cosiderSlewTo(){
      }

      Considerations: You know, this is not a consumer ready product. It allows you to customize it for your needs and thus is very flexible, but with the flexibility comes some drawbacks. I have included this “considerations” section in order to make sure those are not dropped from your To Do list.

      - Mounting motors is a simple task, which however impact the way your calculations should work. In my scenario Vixen Super Polaris have their original gears put on the right side of the worm shaft. I however found those shafts to be short in order to replace the gears with pulleys and thus moved the pulleys on the opposite side of the shaft (left). This caused that the motor actually needs to turn backwards in order to increase telescope position and thus I had to revise the original code I have created. You should definitely revise the directions you motors turn other ways you will end up with wrong counting of the steps, thus wrong position. Let me show you what I mean: See row 1028 where I command motor to STP_BACK, but on row 1031 I increase the counter +=...... (All referenced row numbers are according the code of V2.1. Boiana EQ)

      if (SLEW_RA_microsteps > RA_microSteps){
           digitalWrite(RA_DIR,STP_BACK);
           digitalWrite(RA_STP,HIGH);
           digitalWrite(RA_STP,LOW);
           RA_microSteps += RA_mode_steps;
      }else{
           digitalWrite(RA_DIR,STP_FWD);
           digitalWrite(RA_STP,HIGH);
           digitalWrite(RA_STP,LOW);
           RA_microSteps -= RA_mode_steps;
      } 
      

      ACTION: Revise the following parts of the code: void consider_Manual_Moveint xP, int yP), void cosiderSlewTo() and void Sidereal_rate()

      - Northern VS. Southern Hemispheres: The code also inverses the FORWARD move depending on the hemisphere you are located. This is done in a part of the code, where I take care of the Touch inputs. You might need to revise the code section.

      - Gearing on DEC and RA axis: My code works assuming that both DEC and RA axis use 144 tooth gear. This is the case for Vixen Super Polaris. In case you have a different setup you might need to revise some portions of the code. If you have issues to identify those parts of the code, drop me a message and I’ll try to help you out!

      Plan your activities: Now we reached a point where we need to plan our activities to actually build the rDUINO Scope GoTo system. Rough estimation is that you should be able to complete the system in 2-3 days considering you have everything needed (HW, Tools and Materials). It took me something like 4-5 months to complete it, considering I was only able to work during the night (not every night), and also I needed to do a lot of research. Putting it all together took me like:

      - 1 day to build the Shield board and live up the system;

      - 1 day to pack everything in a box;

      - 1 day to fix motors and pulleys to the mount.

    • 2
      Step 2

      STEP 2 Materials

      Now, as we know how basically the program works, you need to plan your procurement and obtain needed materials.


      When this project started the HW was created using pre-assembled componets like GPA board, RTClock, DHT sensor and Populou DRV8825. This is an open source however and as it started to grew in popularity some people created a better HW architecture with their own custom boards and elements. You now can have 2 approaches:

      1. Buy pre-assembled boards (as I did), or...
      2. Create your own custom board as Otto Winter did in his project. The project is Open and you can either download files and create it yourself or purchase one pre-assembled unit from Otto: https://hackaday.io/project/21397-rduinoscope-control-v13


      Bill of Materials: Most of the materials I used are bought from Chinese suppliers on Internet. Few of them however I decided to buy locally mostly because they were considered good to have and I wanted to avoid delays: GPS, Bluetooth and Joystick. It cost me roughly $190 USD to get all this, so tit is really a low cost compared to how expensive is to buy such system from manufacturers.


      You can find list of materials along with their prices and where you can buy them on the project website: http://rduinoscope.co.nf/rDUINO_step2.html, but the list is also available on this website in the "COMPONENTS" section.

      If you can find them cheaper or deliver them faster I strongly suggest you do so.

      Additionally depending on your design, you might need 40 pin. cable with connectors for the TFT, some plastic bolts to fasten the joystick, USB cable to ensure the Arduino Due is still programmable when enclosed in the box, fan and others.

      If you don’t have those at home (as I didn’t) you should also buy some soldering materials, solder, nippers, digital multimeter, and others.


      Software you will need: One important part of building your rDUINOScope is to download and install the Arduino IDE and all related Software (drivers, board definitions and libraries). Follow the below list in order to install needed on your computer:

      1. Go to Arduino website and download the IDE: https://www.arduino.cc/en/Main/Software. Install the software – Once the software is installed it will also install drivers needed so that your computer recognizes the Arduino board when connected.
      2. Run the Arduino IDE and navigate to: Tools -> Board -> Boards Manager, once there Download and install Arduino Due board definition “Arduino SAM Boards (32-bit ARM Cortex-M3)”;
      3. Download the libraries pack that I used as part of the program and copy-paste them in the “libraries” folder of your Arduino IDE installation. (NOTE: "libraries" is a folder on your computer, but it is also a folder within the COMPLETE PACK available on the project website: http://rduinoscope.co.nf/downloads.php, so what you need to do is to download the pack, rename the extension to .ZIP, open it and copy the content of the "_libraries" folder from the ZIP to the "libraries" folder on your computer.)
      4. Restart the IDE and open the main program file - “_02_Boiana_EQ.ino”. You will noice that 4 more files will open in a separate TABs. Those are supporting files taking care of different parts of the software.

      You should be able now to compile the code and load it to the Arduino Due board after connecting Arduino to your Computer.

      Note: In case you are not aware of how the Arduino IDE works and what needs to be done in order to program Arduino, refer to website and tutorials: https://www.arduino.cc/en/Tutorial/HomePage

    • 3
      Step 3

      TEP 3 Assemble
      For more detailed instructions, please visit the Project Website : http://rduinoscope.co.nf/rDUINO_step3.html

      Now is the time to create the Shield board. A Shield board is a board with pinouts which you stack on top of the ArduinoDUE board.
      Some of the components needs to be on that board and some are better positioned on the enclosure box instead. My split goes like this:

      • Shield Board holding: both DRV8825 drives, RTC3231 clock, Bluetooth module HC-05, Piezo speker, Connector for 12V and pinouts for the remaining components;
      • Monthed on the box components are: GPS Module NEO 6M - RX so that the antenna can always points toward the sky, DHT22 temperature sensor sticked outside of the box through a hole, PS2 Joystick , the TFT Screen and all switches (ON/OFF switch and Day/Night Mode switch). Additionally I have drilled holes for the Motor Drives connectors, 12V power supply connector and a USB cable port that goes to ArduinoDUE Native port to allow for Software updates without opening the box.


      How to connect components to ARDUINO DUE board:

      Component Hardware Pin Arduino Pin
      GPS (VCC: +3.3V) GPS NEO 6M - RX 16
      GPS NEO 6M - TX 17
      RTC (VCC: +3.3V) RTC DS3231 - SDA A4
      RTC DS3231 - SCL A5
      Bluetooth (VCC: +3.3V) BT HC-05 - TXD 14
      BT HC-05 - RXD 15
      DHT (VCC: +3.3V) DHT22 - out 3
      Speaker Piezo Speaker 2
      PS2 (VCC: +3.3V) PS2 joystick - VRx A1
      PS2 joystick - VRy A0
      Declination DRV8825 DEC DRV8825 - STEP 6
      DEC DRV8825 - DIR 7
      DEC DRV8825 - FAULT +3.3 V
      DEC DRV8825 - M0 10
      DEC DRV8825 - M1 9
      DEC DRV8825 - M2 8
      DEC DRV8825 - ENABLE
      DEC DRV8825 - RESET DEC DRV8825 - SLEEP
      Right Ascention DRV8825 RA DRV8825 - STEP 4
      RA DRV8825 - DIR 5
      RA DRV8825 - FAULT +3.3 V
      RA DRV8825 - M0 11
      RA DRV8825 - M1 13
      RA DRV8825 - M2 12
      RA DRV8825 - ENABLE
      RA DRV8825 - RESET RA DRV8825 - SLEEP
      TFT Screen use with TFT Shield pins (22-53) + SPI
      Day/Night (VCC: +3.3V) Mode Switch A3


      Right... Now we are ready to assemble the Shield Board.
      Get a prototyping PCB and assess how to cut it, so that it can hold all components, to have some room for wiring and have the pinouts soldered in such a way that it can be stacked on top of Arduino. Please note that you need to solder all the pins used by Arduino and connect them either to the components on the Shield board, or to a connector on this shield bord so that components put on the box itsels can be connected too.

      I'm including some photos below of the process:


      Once those were done, I connected the board and tested the shield! ... It wasn't working! :(
      I checked the wiring and it turned out that I have created a bridge between 2 connections and I had to fix it. Please note that as of this moment I started to check every soldering for issues as I really got lucky to not burn my Arduino or anything else with the wrong wiring.

      NB! - Make sure you check all connections!

      Make sure you follow the following wiring diagram for the DRV8825 and motor drives as it is important....


      Make sure you use suitable power adapter (12V, 1.6A) and connect the motor drives before the power is ON! NB!: Never connect motor drives when DRV8825 is under load as it might burn the drivers!

      Now as all components are soldered in place, I suggest you to also connect the motor drives, load the software to the Arduino board and test the entire setup. It should work without glitches at this point.

      You should now be able to play around with the software and get to know the User Interface.

      In order to help with the interface I have created a USER'S GUIDE page on the project's website: http://rduinoscope.co.nf/guide.html

      Your setup should look something like this:

    View all 5 instructions

    Enjoy this project?

    Share

    Discussions

    taharock42 wrote 06/30/2020 at 13:22 point

    can i use it on alt az mount

      Are you sure? yes | no

    catalin.caciuleanu wrote 02/12/2019 at 18:36 point

    Hello, I discovered by chance this excellent project. Congratulations, great job!

    I am thinking to build that for my telescope as well, but I have a question: I have an EQ-1 mount, for which I have already a motorized drive (this one: https://teleskop-austria.at/RAeq1_EQ1-Schrittmotorsteuerung-mit-Handbox  ; the mount I have is this one: https://teleskop-austria.at/EQ1_EQ1-Montierung-auf-Alustativ-51mm-Synta#m ).

    So my EQ1 mount has only one motor, and I see that the rDuinoScope needs two.

    Is thare possible that I can adapt it for my type of single-motor  mount ?

    Thank you in advance.

      Are you sure? yes | no

    Artmoh wrote 01/15/2019 at 20:09 point

    Excellent work
    We wish you success

      Are you sure? yes | no

    Glenn wrote 11/29/2018 at 02:55 point

    Hi Dessi. Im looking at changing the stepper drivers to allow larger current steppers to be used. Ive found it a bit hard to get anything under 2Amp as the weight of my scope(DOB) requires a larger stepper to counter the stiction in the turntable and the tube. Have you looked at any other drivers with your project i.e TB6600 drivers. Can you point me in the area of the code i need to make some changes. Looking forward to making this work as i feel its a GR8 project you've created.Cheers Glenn

      Are you sure? yes | no

    Andrew wrote 09/02/2018 at 04:37 point

    Can this be used on a standard EQ2 / EQ3 type mount ? How is the information about the current position of the scope fed back to this unit ?

      Are you sure? yes | no

    Everton Ghignatti Jr wrote 08/02/2018 at 16:43 point

    Dear all,

    Sorry, I'm new here. What arduino IDE version should I use? I'm not been able to compile the code.

      Are you sure? yes | no

    juan.crx wrote 12/21/2017 at 15:07 point

    Dear all,

    I have purchased the suggested screen from Emartee. Everything is fine but the touchpad that detects wrong position (seems to be inverted). Any suggestion to update the touch calibration parameters?

    The screen seems not to work with the UTFT lib (so I cannot calibrate with Utouch calibration) and I haven't found any calibration example for  ads7843 lib...

    Thank you for your help

    Juan

      Are you sure? yes | no

    Alexander wrote 01/30/2018 at 17:13 point

    I have the same issue! Can you help with the solution Dessislav Gouzgounov? Thanks! 

    Alex

      Are you sure? yes | no

    juan.crx wrote 02/11/2018 at 11:35 point

    Hello, I solved the problem. 

    I got the solution for both versions, 2.1 (ads7843.h) and for 2.3.1 (Utouch.h)

    For the 2.3.1 Boiana Otto version, I only swapped x and y, as written hereunder:

    ty = (myTouch.getX());
    tx = 240-(myTouch.getY());

    For the 2.1 version (ads7843.h), I made two changes:

    First inside the ads7843.h , I replaced the line 19

    int16_t x, y, z;

    by

    int16_t y, x, z;

    Also, in the main code I replaced

    tx=240-((p.x- 310)/14);
    ty=400-((p.y- 150)/9);

    These changes may be helpful for other users. I'll try to post them in Facebook too.

    Cheers

    Juan

      Are you sure? yes | no

    rederikus wrote 11/01/2017 at 21:22 point

    Teriffic project.  I too am interested in the AzEl version.  Do you please have any more news on this?  I think that I shall probably buy the CHF 325,- kit but mu scope is AzEl.  Thanks.

      Are you sure? yes | no

    Daniel Zhou wrote 09/19/2017 at 14:49 point

    Ii is an amazing project and found on google, because I tried to find a related GOTO project, I am very luck to find this. So I bought Arduino DUE, GPS module, BT module, and very hard to find the HX8352A chip driving TFT LCD, most of the TFT LCD is drove by HX8352C, and the seller tell me that it can not work on the software for 8352A, finally I found 8532A TFT mudle but it not as same as yours, it is just a TFT PCBA without shield, I have to build my own shiled for the TFT PCBA..I wonder if the 1.4D ver PCB is open source or not? IF yes, I am going to order a formal PCB in Chinese. If it is not open source, i have to use my homemade PCB with much wires.

    Thanks al lot.

      Are you sure? yes | no

    Phillip wrote 09/03/2017 at 03:57 point

    Any progress on the AltAz version of this?

      Are you sure? yes | no

    Dessislav Gouzgounov wrote 09/03/2017 at 08:42 point

    Yes, last week I have re-started my work on Alt/Az version. Combining the code from v2.3.1 with changes for Alt/Az mounts. At the end there will be " One source to rule them both" :)

      Are you sure? yes | no

    Lee Maisel wrote 07/14/2017 at 03:03 point

    At the risk of sounding stupid, I am now thinking the pulleys are actually 3:1, as there is a 60 tooth pulley for the worm gear, and a 20 tooth pulley on the stepper motor.  I was going by apparent size, but is this right?

    Thanks

      Are you sure? yes | no

    Dessislav Gouzgounov wrote 07/14/2017 at 06:43 point

    Yes, pulleys are calculate the same way as the gears - number of teeths. They however have additional requirement for minimal distance between the pulleys. 

      Are you sure? yes | no

    Lee Maisel wrote 07/14/2017 at 22:39 point

    because of stretch I assume?

      Are you sure? yes | no

    Dessislav Gouzgounov wrote 07/15/2017 at 07:08 point

    I believe it is because if less than 5% of the average of pulleys diameter, both might clash.

      Are you sure? yes | no

    Lee Maisel wrote 07/12/2017 at 02:50 point

    I'm VERY Excited about this!  I have been wanting to upgrade my old CI-700 mount for years!     I ordered 10:1 gearbox steppers (will need the extra torque) and the timing wheels are 4:1 so how do I setup the spreadsheet calc?  would that end up being 40:1?

    THanks!

      Are you sure? yes | no

    Dessislav Gouzgounov wrote 07/12/2017 at 08:15 point

    Thank you for supporting my project Lee! 

    Your calculations are correct, you will have 40:1 reductor (need to write 40 in the cell). Also you need to add the RA tooths (180 I believe) and data for the stepper to play around wiht precision. Please, note that gaining precision will decrease slew speeds and vice versa! So take time to find your sweet point assuming that when SlewTo is activated the motors does ~500 RPM in full step mode.

      Are you sure? yes | no

    Wellingtonsmoura wrote 07/03/2017 at 15:43 point

    Does this design support other tft lcd's? Because I have other models with the same specification and the one used in the project is not in stock.

      Are you sure? yes | no

    Dessislav Gouzgounov wrote 07/11/2017 at 11:52 point

    Unfortunately the Size, TFT and the Touch controller chips needs to be the same to work without any modifications. 

    In case the HW is different the Software needs to be change accordingly

      Are you sure? yes | no

    Lee Maisel wrote 06/26/2017 at 21:32 point

    Is anyone selling these as completed units?  I would love to buy one. 

      Are you sure? yes | no

    Dessislav Gouzgounov wrote 06/27/2017 at 06:34 point

    Yes, there is. Have a look at the below project link and contact the manufacturer for prices and availability!

    https://hackaday.io/project/21397-rduinoscope-control-v13

      Are you sure? yes | no

    Tyberius Prime wrote 05/23/2017 at 11:45 point

    I'm going to build one!

    Alas I have trouble sources the TFT - how much work would it be to adapt to one with a SSD1963 chip?

      Are you sure? yes | no

    Dessislav Gouzgounov wrote 05/23/2017 at 12:01 point

    Good for you! I'm really looking forward for images of your build :)

    Revising the code to work with different screens is a serious effort. I'm planning to do this for later versions in order to incorporate smarter, faster screens but this will be probably in the next year. 

    In the meantime try Aliexpress: https://www.aliexpress.com/wholesale?catId=0&initiative_id=SB_20170523035523&isPremium=y&SearchText=3.2+inch+TFT+LCD+Arduino+DUE

    This is the original screen I'm using and the software works with it: http://www.elechouse.com/elechouse/index.php?main_page=product_info&products_id=2217 

      Are you sure? yes | no

    Tyberius Prime wrote 05/23/2017 at 12:41 point

    The original is out of stock, and ali will take a while to ship to germany (or be expensive).

    I'll give it a go, it's apperantly mostly a question of replacing (or shimming) the adafruit-gfx library with UTFT.

      Are you sure? yes | no

    Dessislav Gouzgounov wrote 07/12/2017 at 13:10 point

    basically YES.... You need to replace the UTFT library and play around with the code a bit. I think it should be a simple change once you revise the Initialization and Touch inputs in the Setup() and Loop(). 

    You can however try asking in the Facebook group... I know a few guys who have revised the code to use UTFT library.

      Are you sure? yes | no

    Dessislav Gouzgounov wrote 05/01/2017 at 11:15 point

    Great News: rDUINOScope have just reached 400 downloads on both project websites!

      Are you sure? yes | no

    Dessislav Gouzgounov wrote 04/27/2017 at 19:37 point

    GREAT NEWS: Otto Winter took the schematics
    into his hands and have come up with a brilliant All-In-One solution for the
    hardware part of the rDUINOScope. Check out his open project too: https://hackaday.io/project/21397-rduinoscope-control-v13

      Are you sure? yes | no

    Dessislav Gouzgounov wrote 04/12/2017 at 15:10 point

    Fellow astronomers, 

    Before all, I'd like to thank you for your interest in rDUINOScope. It really feels great.

    I'd like to share with you that the free hosting I used for the project website exceeded allowed bandwidth of 5GB in just a few hours and the site went down. Thus I have created a mirror website wth all instructions and files to download.

    Mirror Website: http://rduinoscope.byethost24.com

    Once again, thank you for the support!

    Warm Regards,
    Desso

      Are you sure? yes | no

    Similar Projects

    Does this project spark your interest?

    Become a member to follow this project and never miss any updates