Close
0%
0%

Arcus-3D-M2 - Liquid Cooled Stepper Drivers

Got moving water? Might as well use it.

Similar projects worth following
This is the build out of the 3 axis stepper drivers used on the Arcus-3D-M2.
A bit of copper pipe soldered to the backplane allowed us to liquid cool our DRV8825 drivers so we could run them at their full 2.4A rating without heating.

Prior to this, an additional fan/heatsink was required just for these drivers, and when we closed the lid, they would still shut down due to overheating.

This allowed us to cheaply drive our Nema23 steppers at near their rated 2.5A current and achieve reliable 500mm/sec motion.

DRV8825 stepper modules are low cost and high power.

These tiny chips are rated at a whopping 2.5A per phase, with the sense resistors dropping the overall module output to 2.4A per phase. 2.4A is enough current to fully drive a small Nema23 stepper.

A small Nema23 stepper (at 186oz/in@2.5A) has over twice the torque rating of a large Nema17 stepper (at 86oz/in@2.2A). You may loose a bit of overall unloaded top speed in that trade, but you will gain the ability to throw around more mass and to accelerate that mass much faster.

The DRV8825 is currently the highest power chip you can get in this form factor, but they are pushing the limits of cooling to do it. In a well ventilated case with a heatsink/fan you can generally keep them cool enough to work properly, but they will still get hot enough in normal operation to burn you.

Liquid cooling keeps them solidly at room temperature, and the exposed solderable backplane makes it easy to do it.


They are a bit slower (step timing requirements) than the A4988 based modules, and also have some flaws when it comes to microstepping.

With a high current draw (which is why you are probably using these to begin with), they can end up producing a repeating pattern on the sides of your parts. For a linear delta 3D printer this results in concentric circles, whereas on a standard cartesian 3D printer, this will generate vertical lines. This is due to how they are programmed to handle the mixed-mode decay, which can result in missed microsteps.

Switching the chips to 'fast-decay' mode solves this issue for the most part, but you will pay for it with some added hissing noise coming from your steppers. I've included this minor hack (tying pin 19 of the chip high) in the build.


For what you get for your money, the DRV8825 chips are still on the top of my list for stepper drivers.

  • 1 × 1/4in soft copper tubing 6 inches long. Any hardware store will have this.
  • 3 × DRV8825 modules, with no pre-soldered header pins. Get them here: https://www.pololu.com/product/2977

  • 1
    Step 1

    Straighten out the middle section of the copper pipe.

    Putting it in a vise with jaws shorter than the pipe itself and repeatedly just slightly crushing it works well.

    Center the pipe in the vise so the ends stick out. It's less work when you connect your hoses if you don't touch the ends.

    Tighten, loosen, rotate 90 degrees, repeat.

    You'll need a mostly planar surface to solder to later on.

  • 2
    Step 2

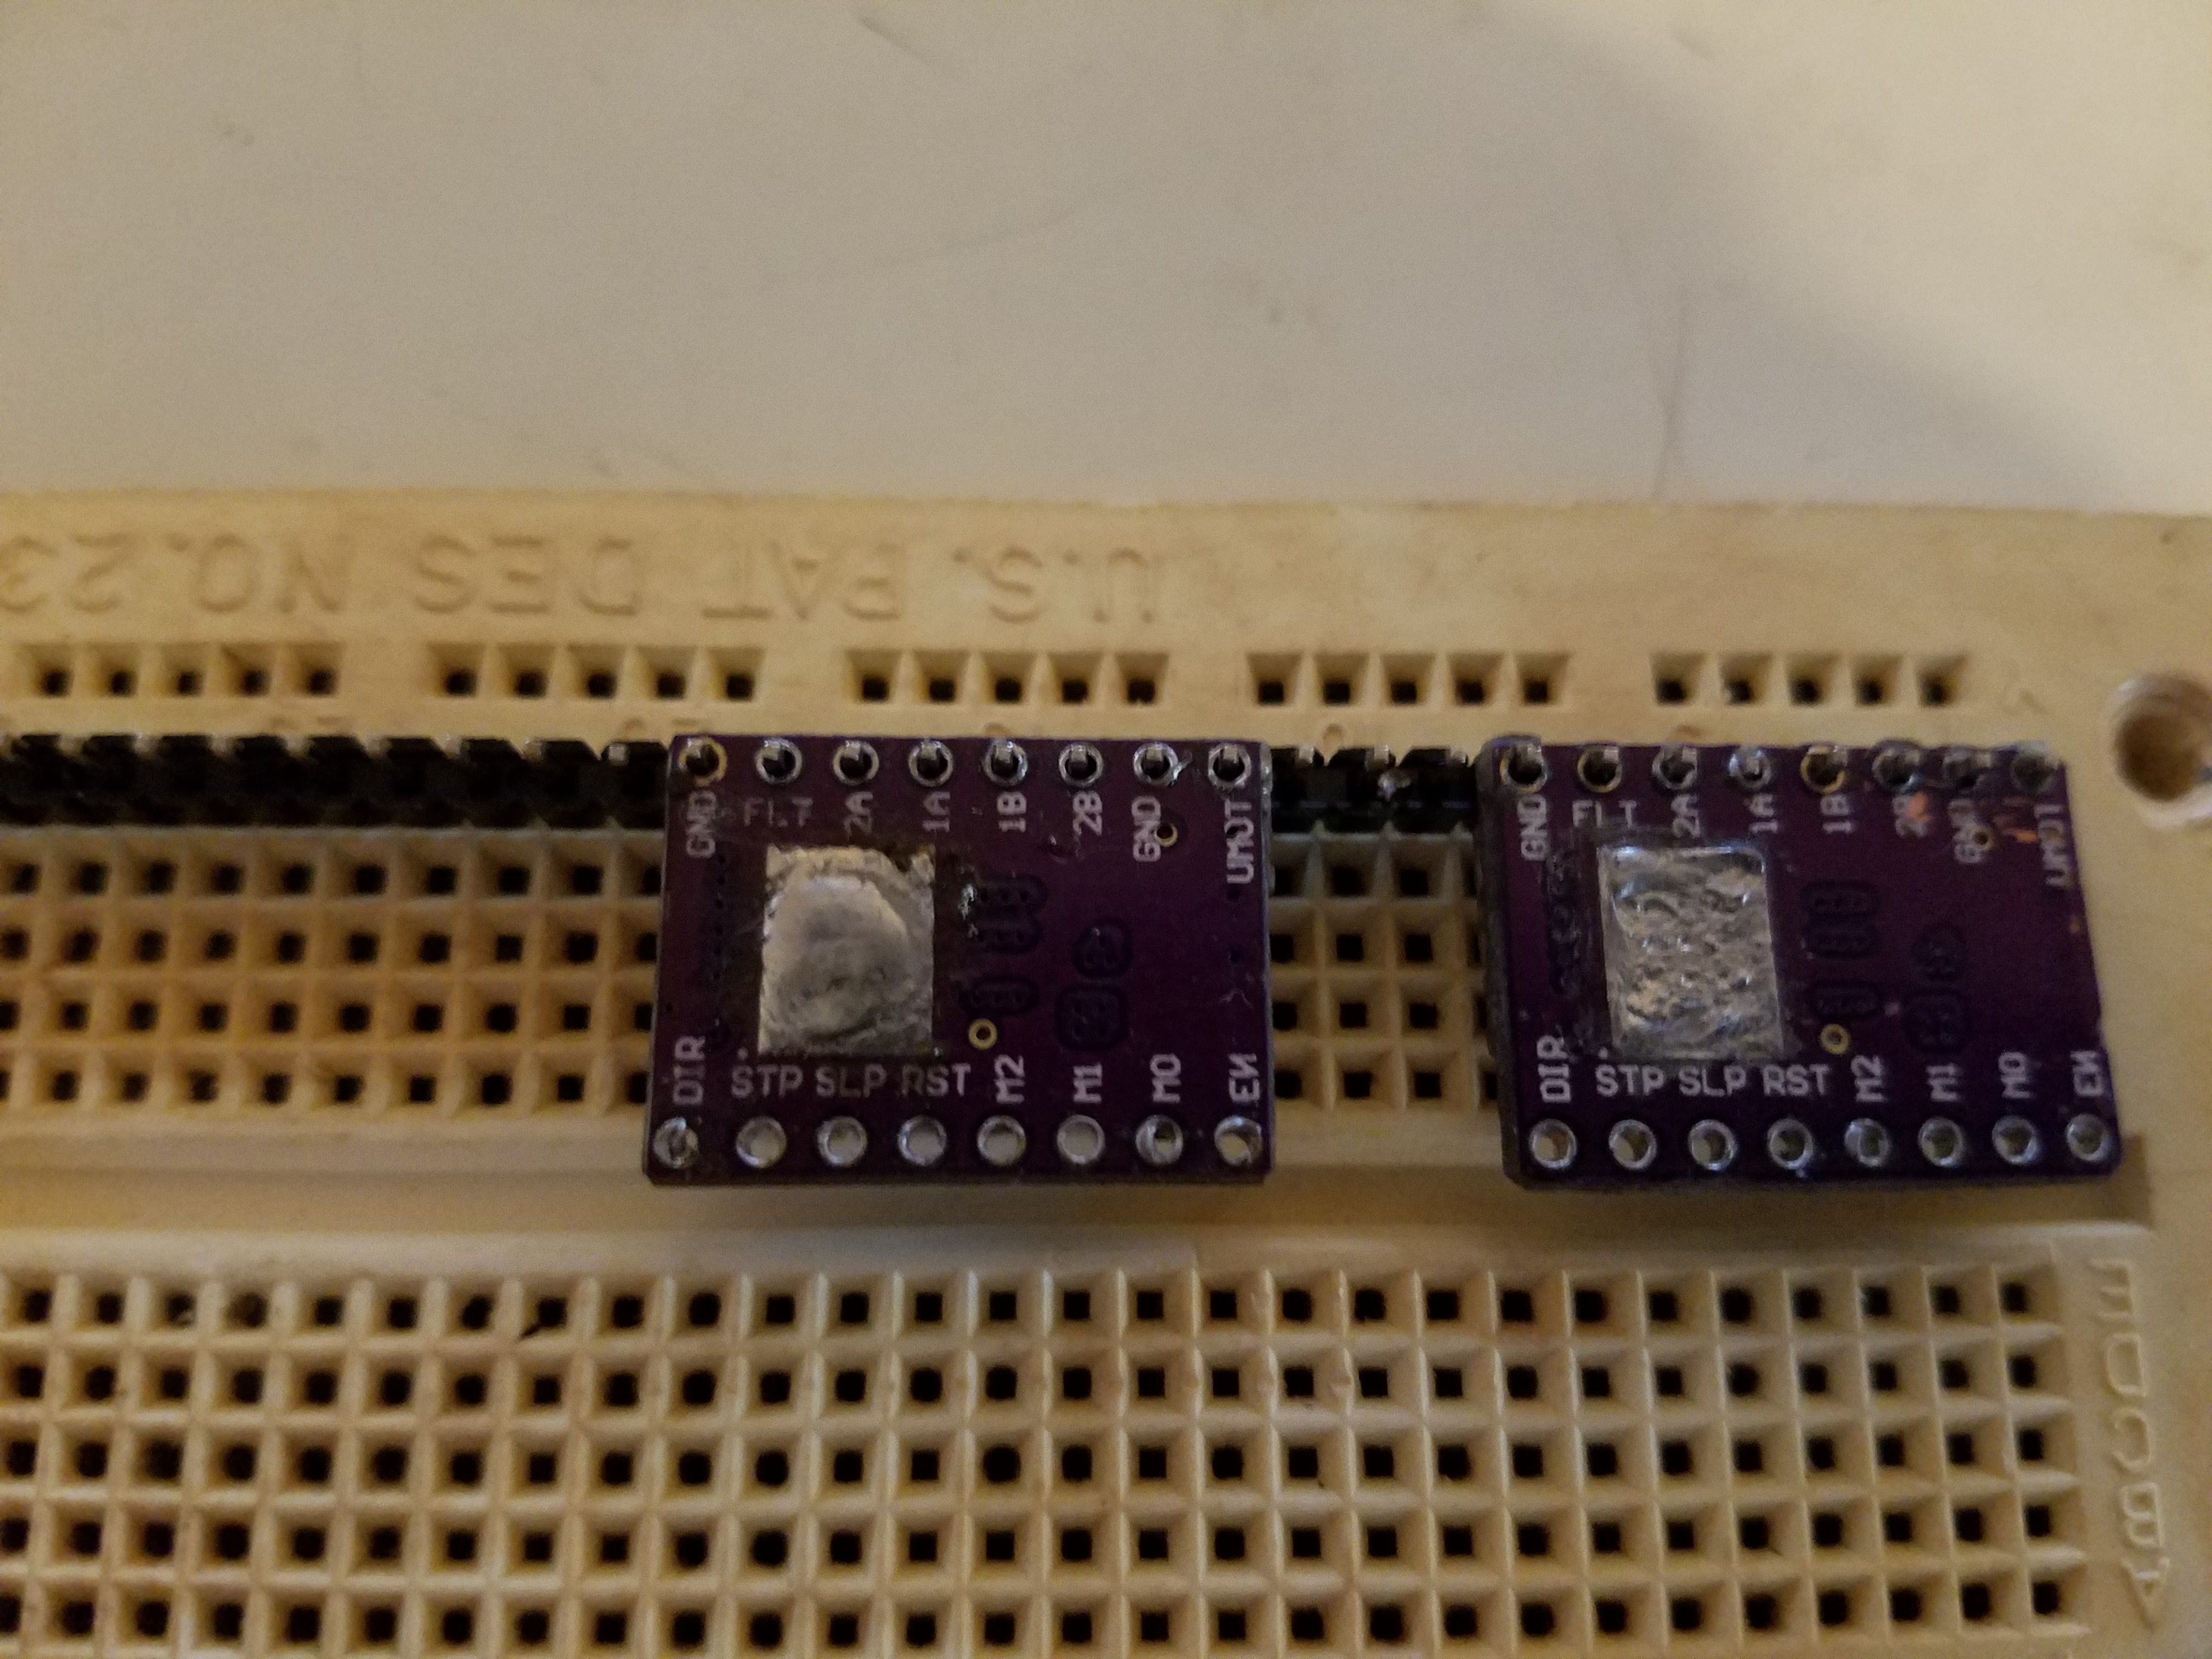
    Get a breadboard and put a row of header pins in it.

    Put your DRV8825 modules upside down on the header pins at a spacing that makes you happy. Do not solder them on.

    Place your copper pipe next to the modules, and mark the pipe in the areas where the exposed backplane of the modules lines up with the pipe.

  • 3
    Step 3

    Take the pipe back to the vise, and slightly crush the areas of the pipe not marked.

    The pipe is soft enough to do this with just a pair of pliers, but you'll drive yourself mad trying to keep it straight then.

    You are creating a raised bump in the areas which need to contact the modules.

View all 8 instructions

Enjoy this project?

Share

Discussions

Similar Projects

Does this project spark your interest?

Become a member to follow this project and never miss any updates