-
1Cylinder
Preface
If you are lost or don't understand the guide completely take a look at the A360 site.
Cylinder
To assemble the cylinder you will first have to assemble the pistons. You will need 2 or 4 M6 threaded rods per piston. You will also need one nut gear for every rod (3d print the cylinderNutGear.stl file and tap the hole in the middle with an M6 tap).
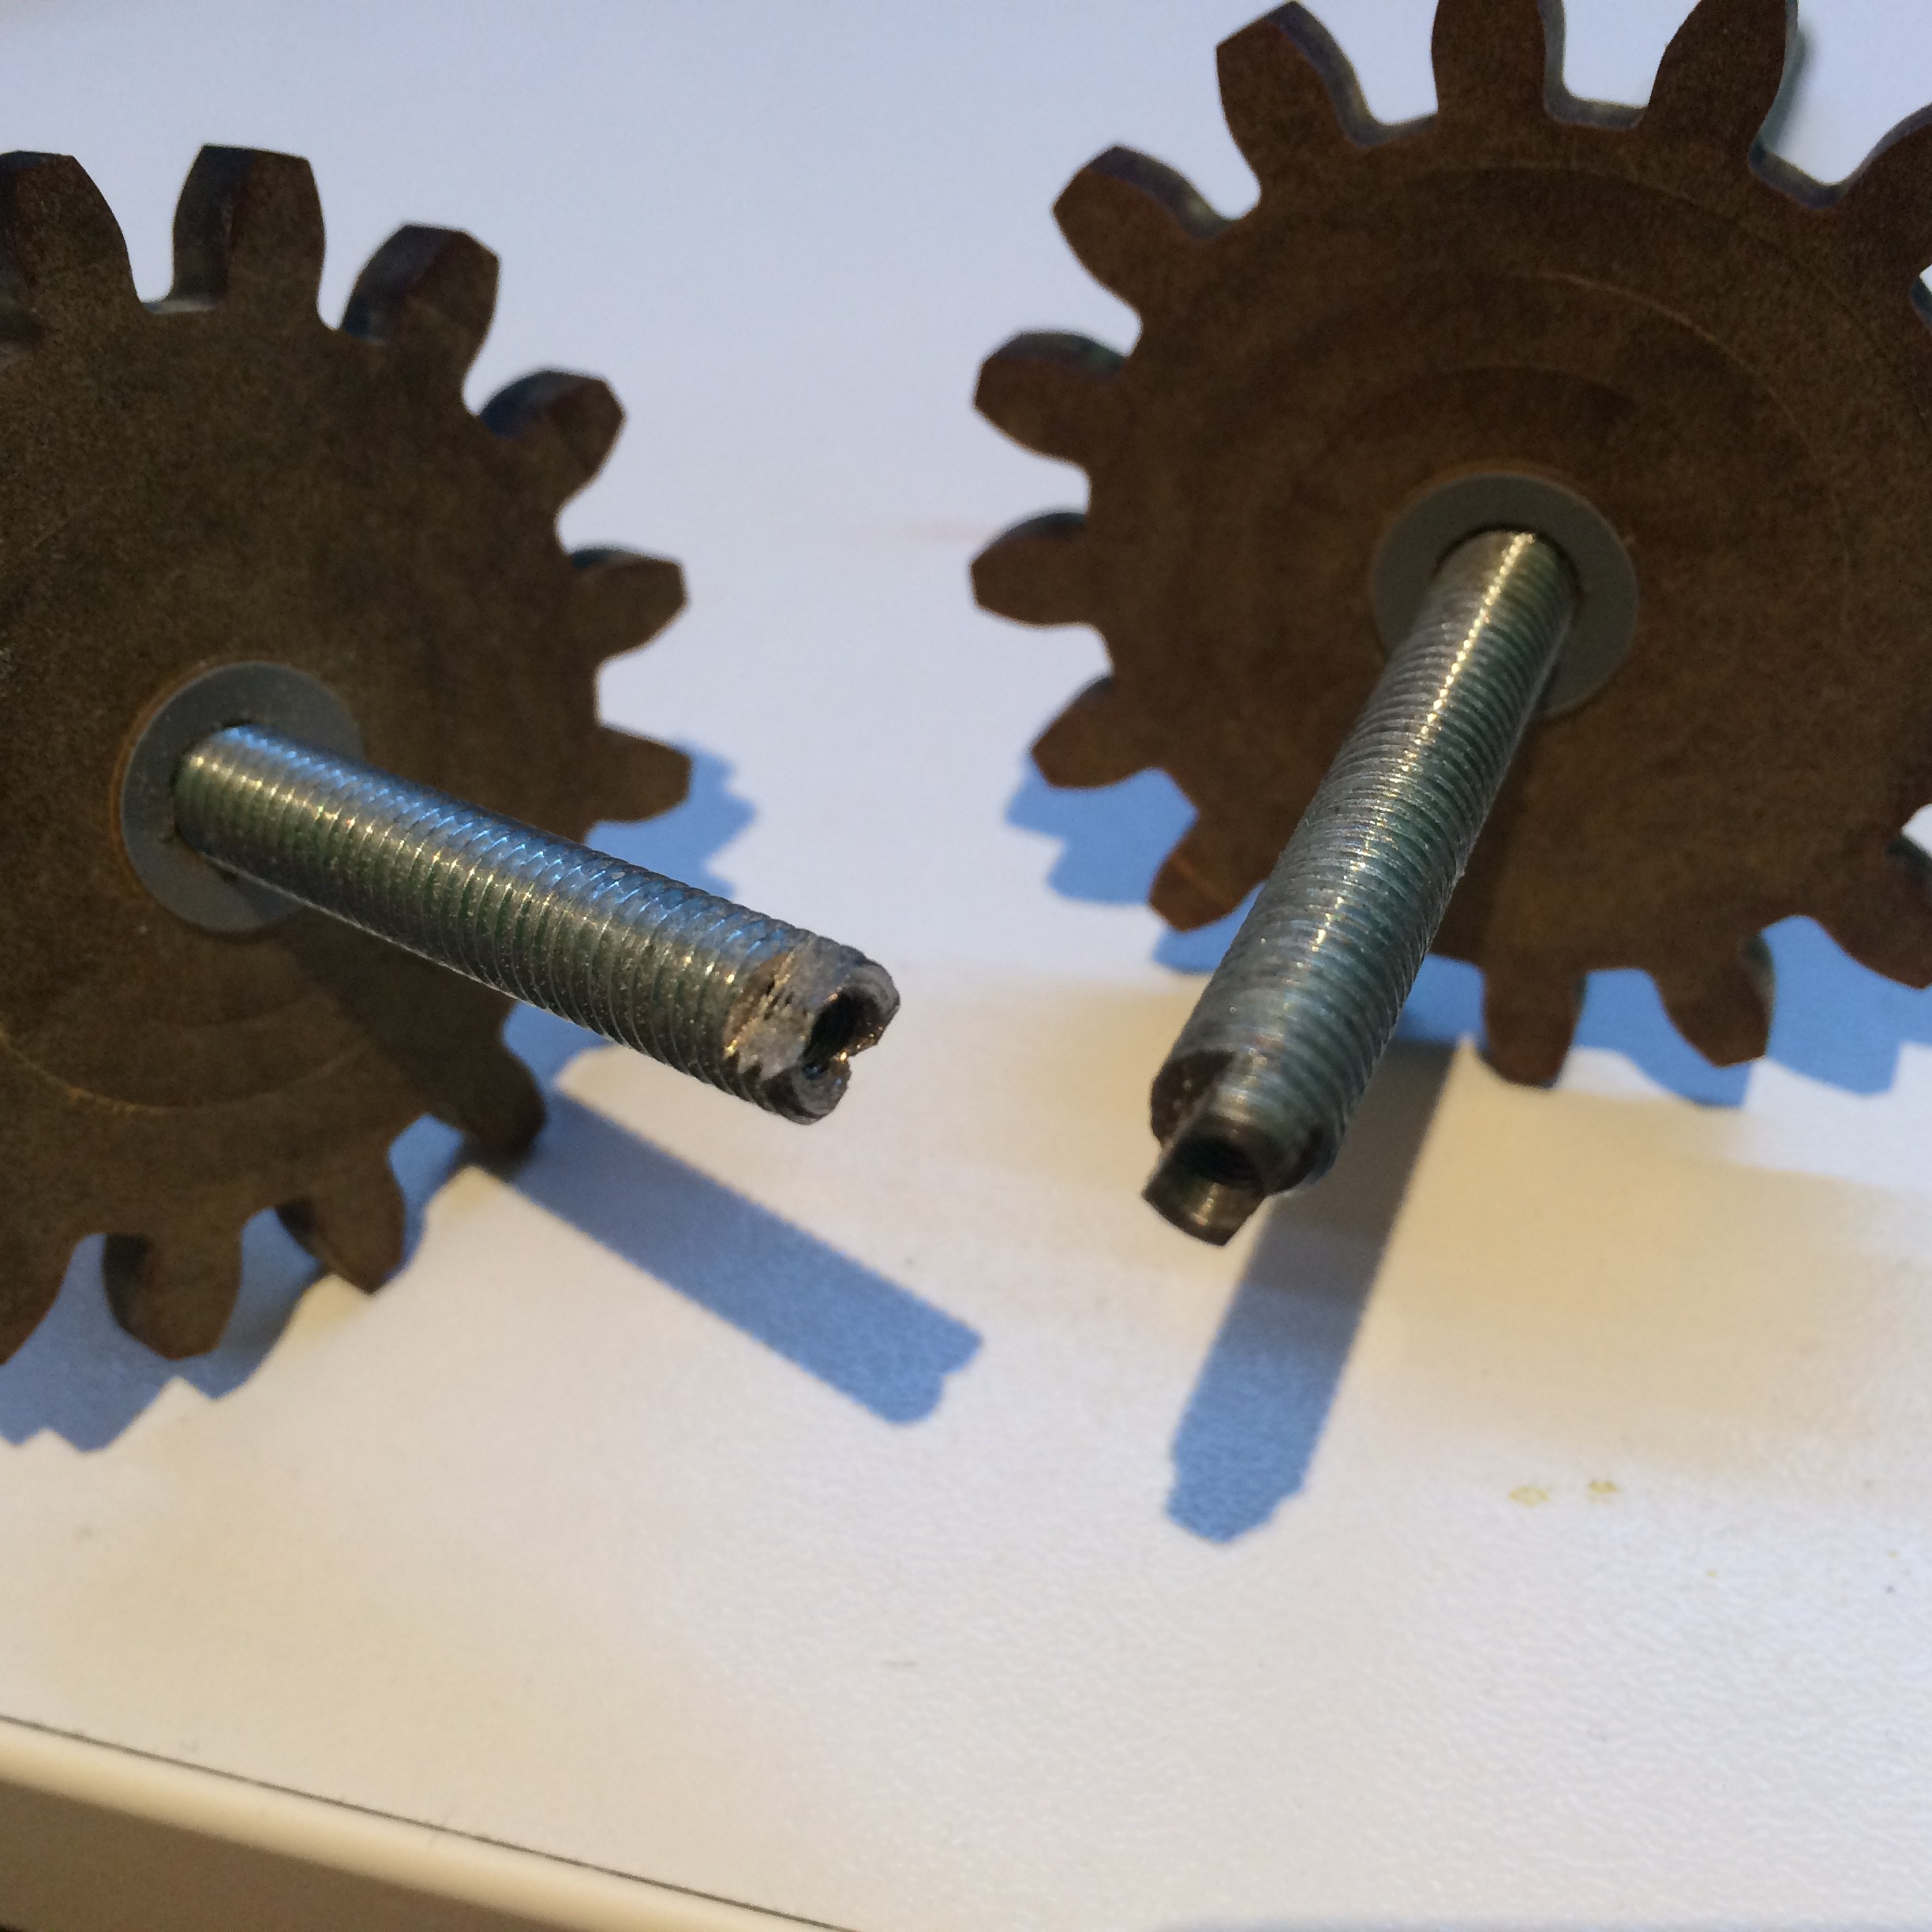
![]()
You will have to drill and tap a M3 hole in the center of the threaded rod. Then you will have to grind about 0.5-1mm deep and 2.5mm long on opposite sides tangent to the rod (image above shows how it should look). Then you will put the ground sides of the rods into the slots in bottom plate of the piston. Then you should screw them using M3 screws. On top of the plate add 102X102mm piece of felt (it functions as a seal so make sure it overlaps on every side for at least 1mm). Add the top plate to the piston and bolt everything together.
After that you shoul put both cylinders trough the bottom plate of the cylinders. Gently screw on the nut gears and tighten them just a little bit. Then you should assemble the Motor plate by screwing on 2 Nema 17 motors and putting motor gears (cylinderMotorGear.stl) onto the shafts, use loctite or a setscrew to tighten it down.
After that you put the two assemblies together so the gears are between motor plate and cylinder bottom plate. Then you can easily assemble the cylinder by gluing (or if you drill and tap holes you can bolt it together), the front, back and middle plate and then you just add the two side plates.
-
2Gantry
For the gantry you should assemble all of the carriages first. Then you just put the 2 rods and the roller trough the designated guides one of the y carriages and. Add the x carriage on to the rods. At last you add the final x carriage. All you have to do next is to tighten every bolts. There are square holes designed for nuts where the screws are not going trough the whole item.
Finally you should add the endstops. X axis endstop can be mounted on top of one of the y carriages. There is a hole on top of a x carriage that is meant for an adjustment screw that pushes the endstop. Y endstop should be mounted at the bottom of the linear guide clamp
-
3Final touches in mechanical assembly
Mount the cylinder to the base plate byput the cylinder in the groove and drilling and tapping the marked holes (holes in the base plate). Then you should assemble the y rail mounts. After that bolt them to the base plate. Put the y rail rods trough the mounting holes but leave 10cm between the next mount. put the gantry in between. Feed the rods trough the guides and mounting holes. That is it.
Add the belts, pulleys, wiring. Use springs for belt tensioning. After that you should mount the printer on a fixed plate like a piece of mdf. If the base plate is bending use screws or double sided tape. Connect the motors and electronics (refer to the uploaded schematics).
-
4Finishing
Install the firmware plug the vpph to a 35V (1.5A at least) supply and vppl to a 35V (low noise low current) supply. Connect the stepper drivers to motor supply voltage. Connect the arduino to a pc and update the com port in the python files. Position the (reservoir with distiled water around 10cm under the nozzle plate). Apply pressure to the reservoir (up to 1 bar) for 5 seconds, repeat few (3-5) times. Now you have purged the nozzle
-
5Finishing
Install the firmware plug the vpph to a 35V (1.5A at least) supply and vppl to a 35V (low noise low current) supply. Connect the stepper drivers to motor supply voltage. Connect the arduino to a pc and update the com port in the python files. Position the (reservoir with distiled water around 10cm under the nozzle plate). Apply pressure to the reservoir (up to 1 bar) for 5 seconds, repeat few (3-5) times. Now you have purged the nozzle
-
6Printing
Slice the wanted file to svg by using slic3r. Enter the location of it in the python script. Fill the feed cylinder and move the build cylinder to the top. Now just start the python program and hey presto that's it.
-
7Printing
Slice the wanted file to svg by using slic3r. Enter the location of it in the python script. Fill the feed cylinder and move the build cylinder to the top. Now just start the python program and hey presto that's it.
Printing bones on a DIY powder bed 3d printer
This project focuses on using building a budget powder bed 3d printer capable of printing bones, and creating the needed ink and powder.
Discussions
Become a Hackaday.io Member
Create an account to leave a comment. Already have an account? Log In.