Christine
-
An overview of Sotto
10/15/2017 at 19:47 • 0 commentsTo answer the ultimate question: "y tho?"
-
Sotto Is Done!
10/15/2017 at 19:43 • 0 commentsHi all!
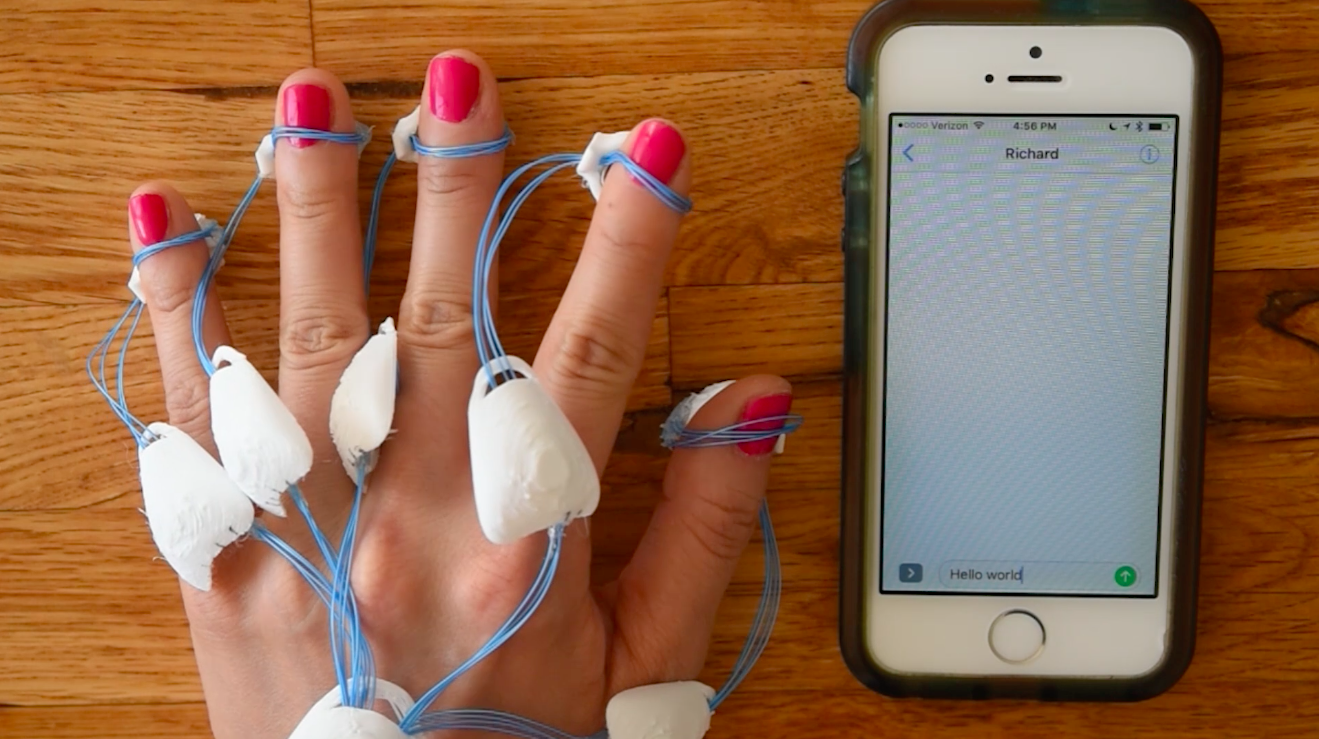
Ready to type chorded-style?
![]()
Here's the how-to for Sotto, the one-handed bluetooth chorded keyset that writes and reads with haptic feedback.
You can see from past logs that I played a lot with different inputs for Sotto, but in the end I wanted to make something that was going to be extremely easy for any of you to build immediately, without having to go pick up specialized parts. So this final version uses stuff you probably already have lying around-- push buttons, vibration motors, wire, and JST headers.
I've posted instructions on how to get it working, but I suggest you check out this video, which will make the instructions a lot easier to follow:
-
Reliable, 5-fingered readability
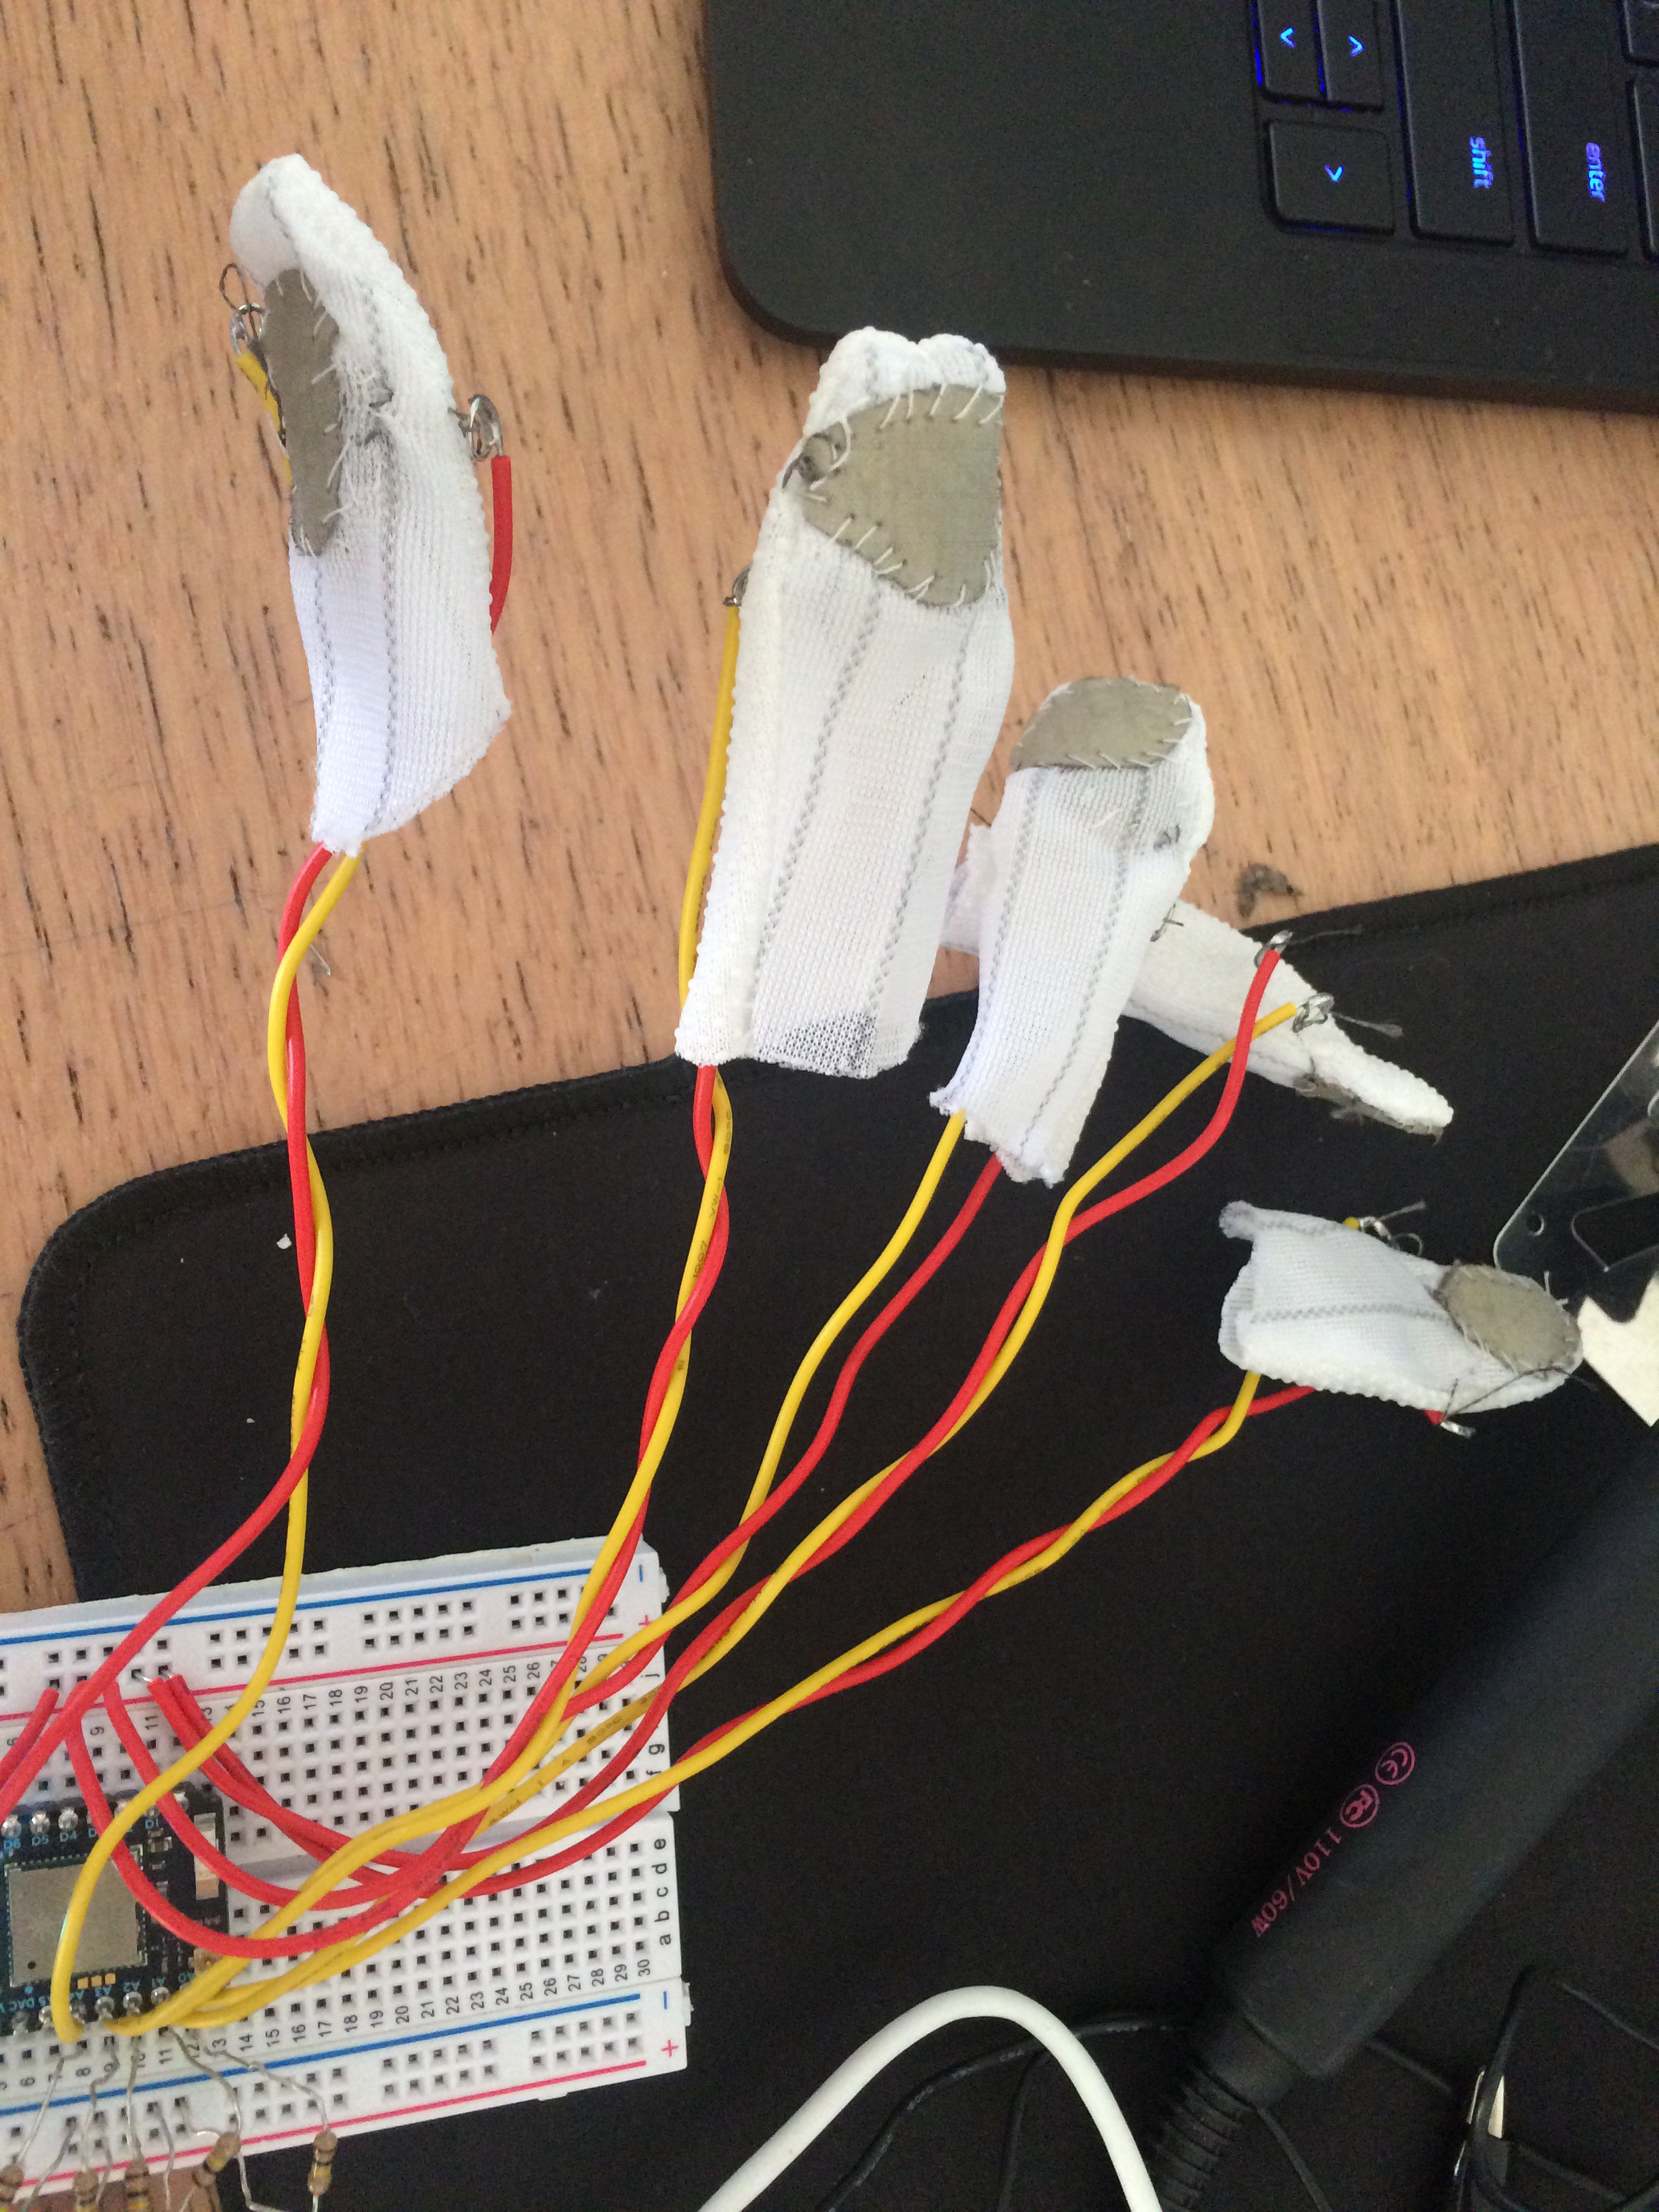
09/04/2017 at 00:01 • 0 commentsHere's a super hacky wire/conductive pad version of Sotto:
![]()
Each finger pad is soft and not too noticeable, and also highly reliable and subtle. Plus, it's cheap and easy to make! Super excited to design a good enclosure here that is going to make it easy to access the guts and have more modularity on how many fingerpads are used, so it can be easily repurposed as a fast, on-the-go braille writer.
-
Conductive thread, and a sewn Sotto
09/03/2017 at 03:30 • 0 commentsHello, fantastical experiments with conductive thread and softer components.
![]()
Finished unpacking a whole room, decided to reward self by working on a sewn version of Sotto. The output is a lot junkier than I'm used to seeing with wires, and without the sewable microcontrollers, it seems pretty susceptible to shorts in a way that makes me a tad nervous. I also used larger swaths of conductive fabric, which worked a lot better than the smaller bit I used earlier. So I think I'll cut the fingers off of this one and try it with some wires connecting to a wristband holding the microcontroller. You know, after more boxes happen.
-
Anti-static gloves FTW
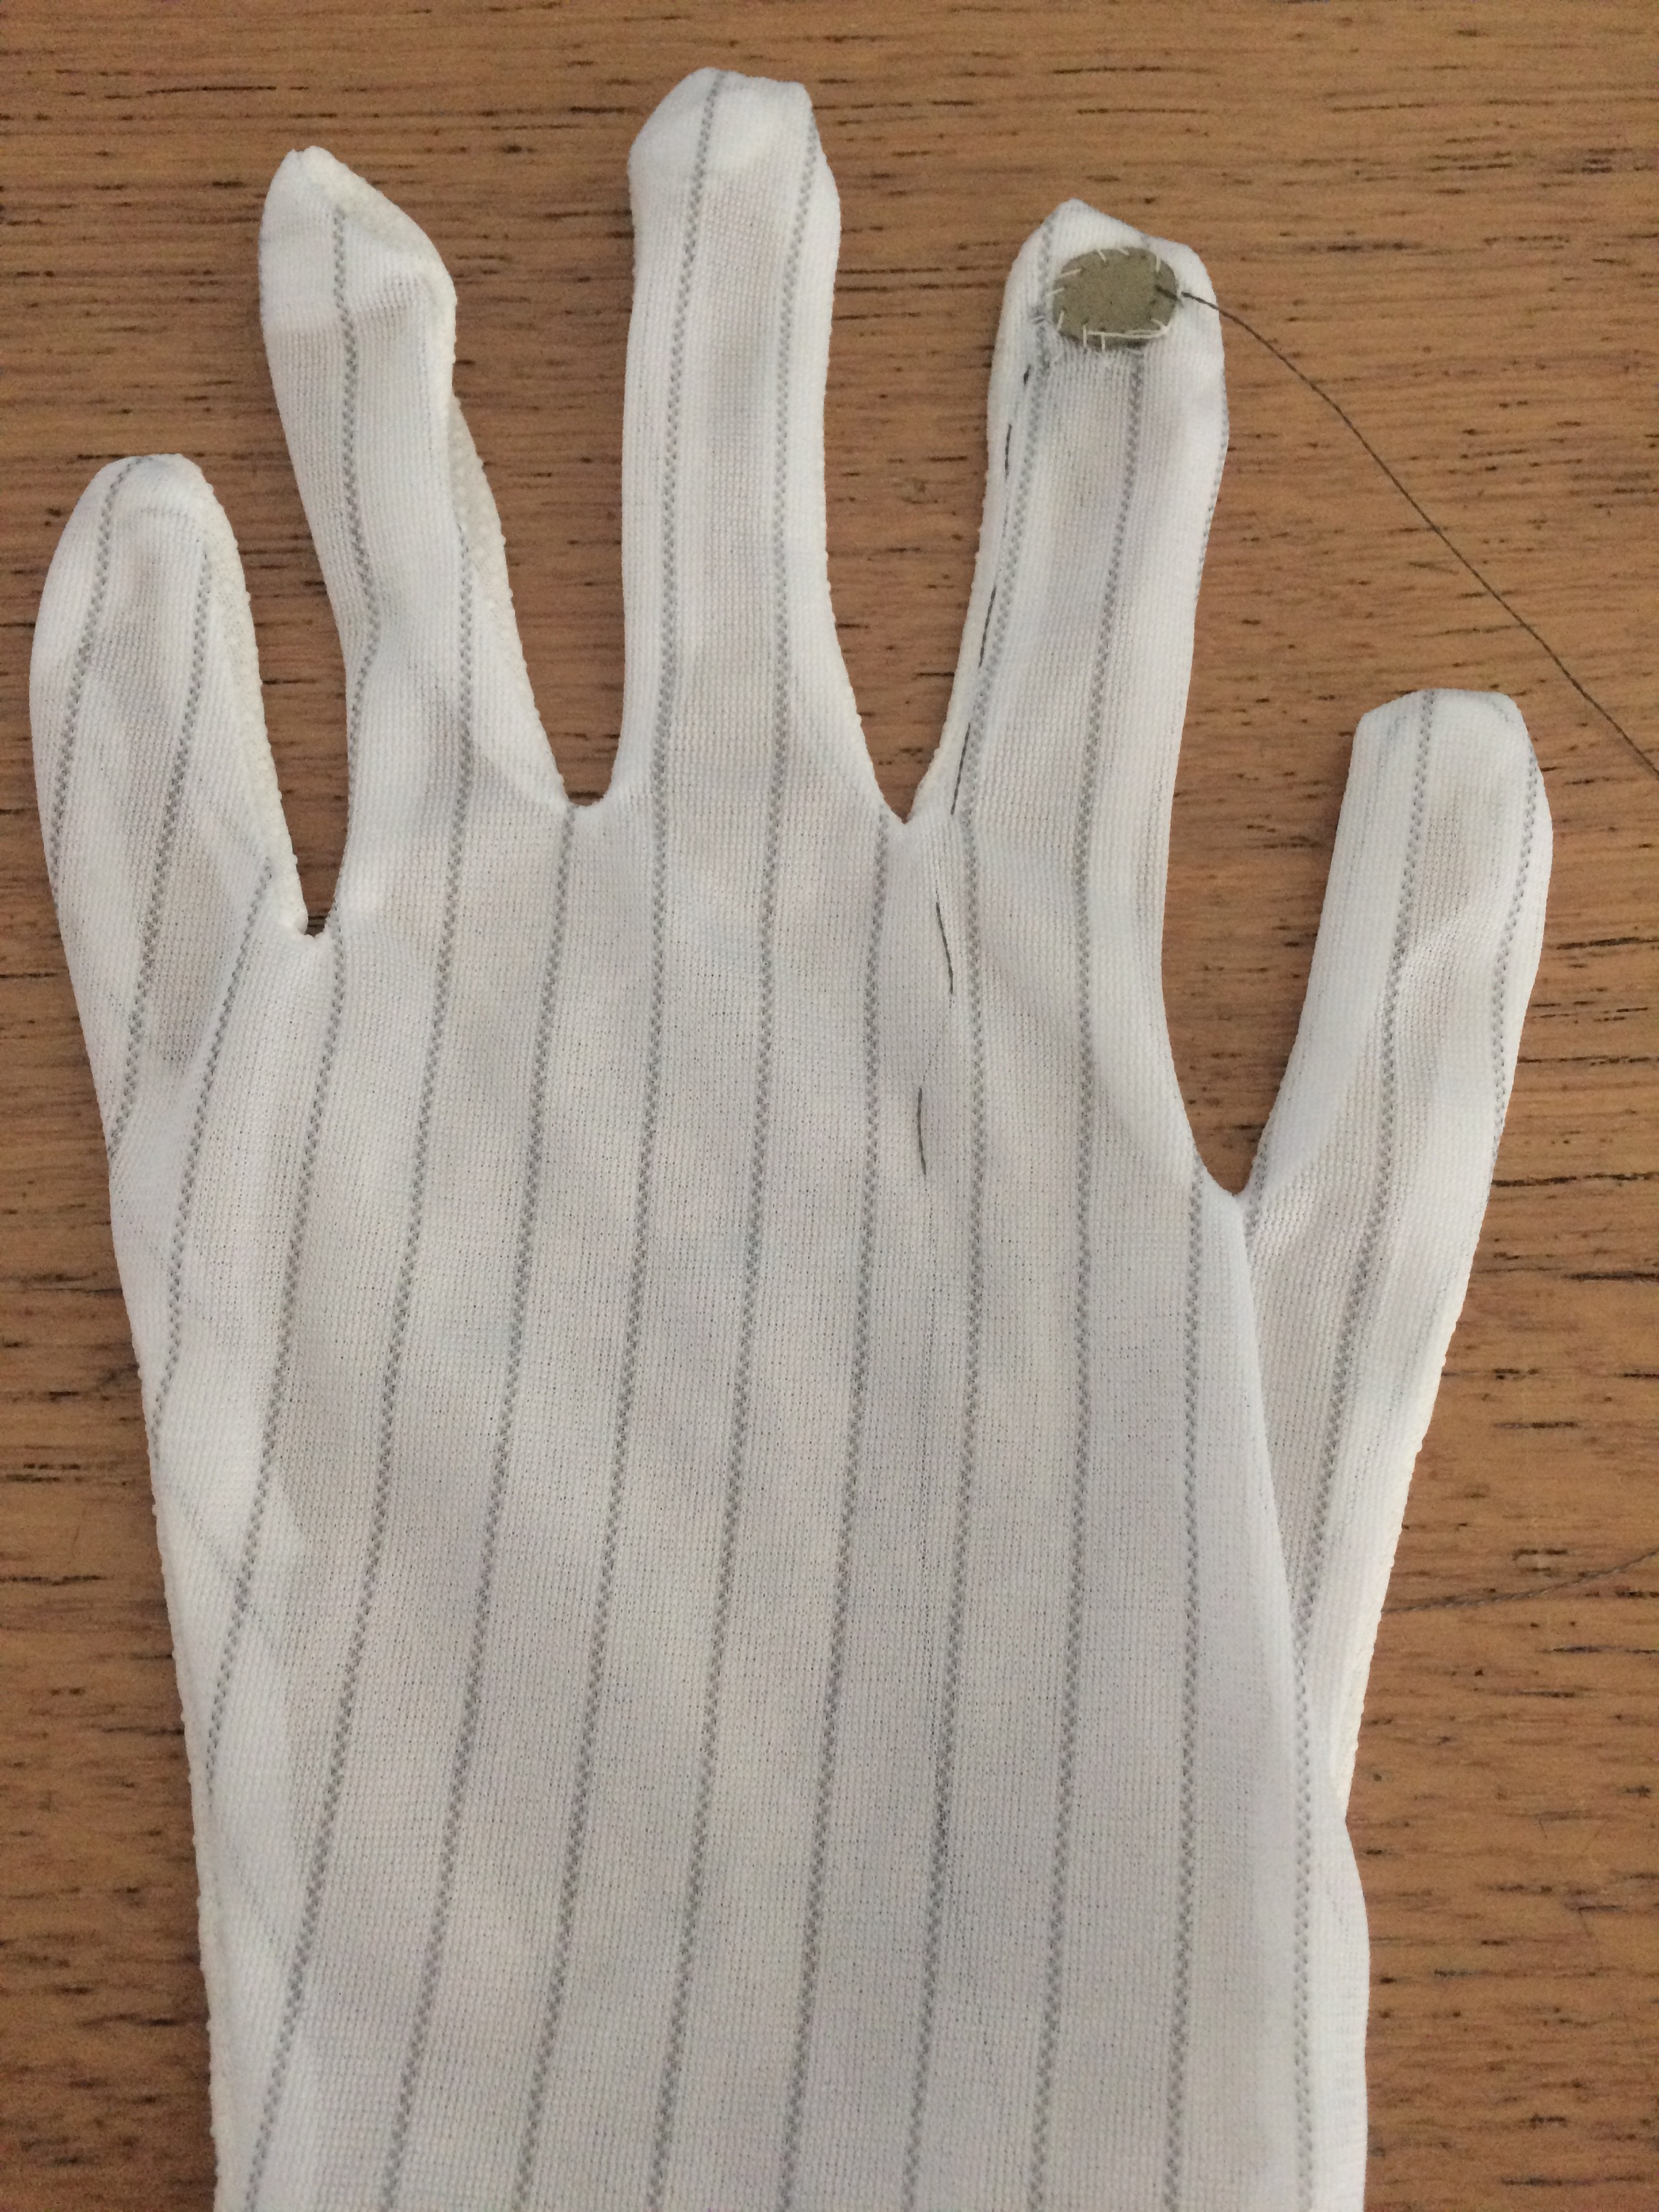
09/02/2017 at 16:57 • 0 comments![]()
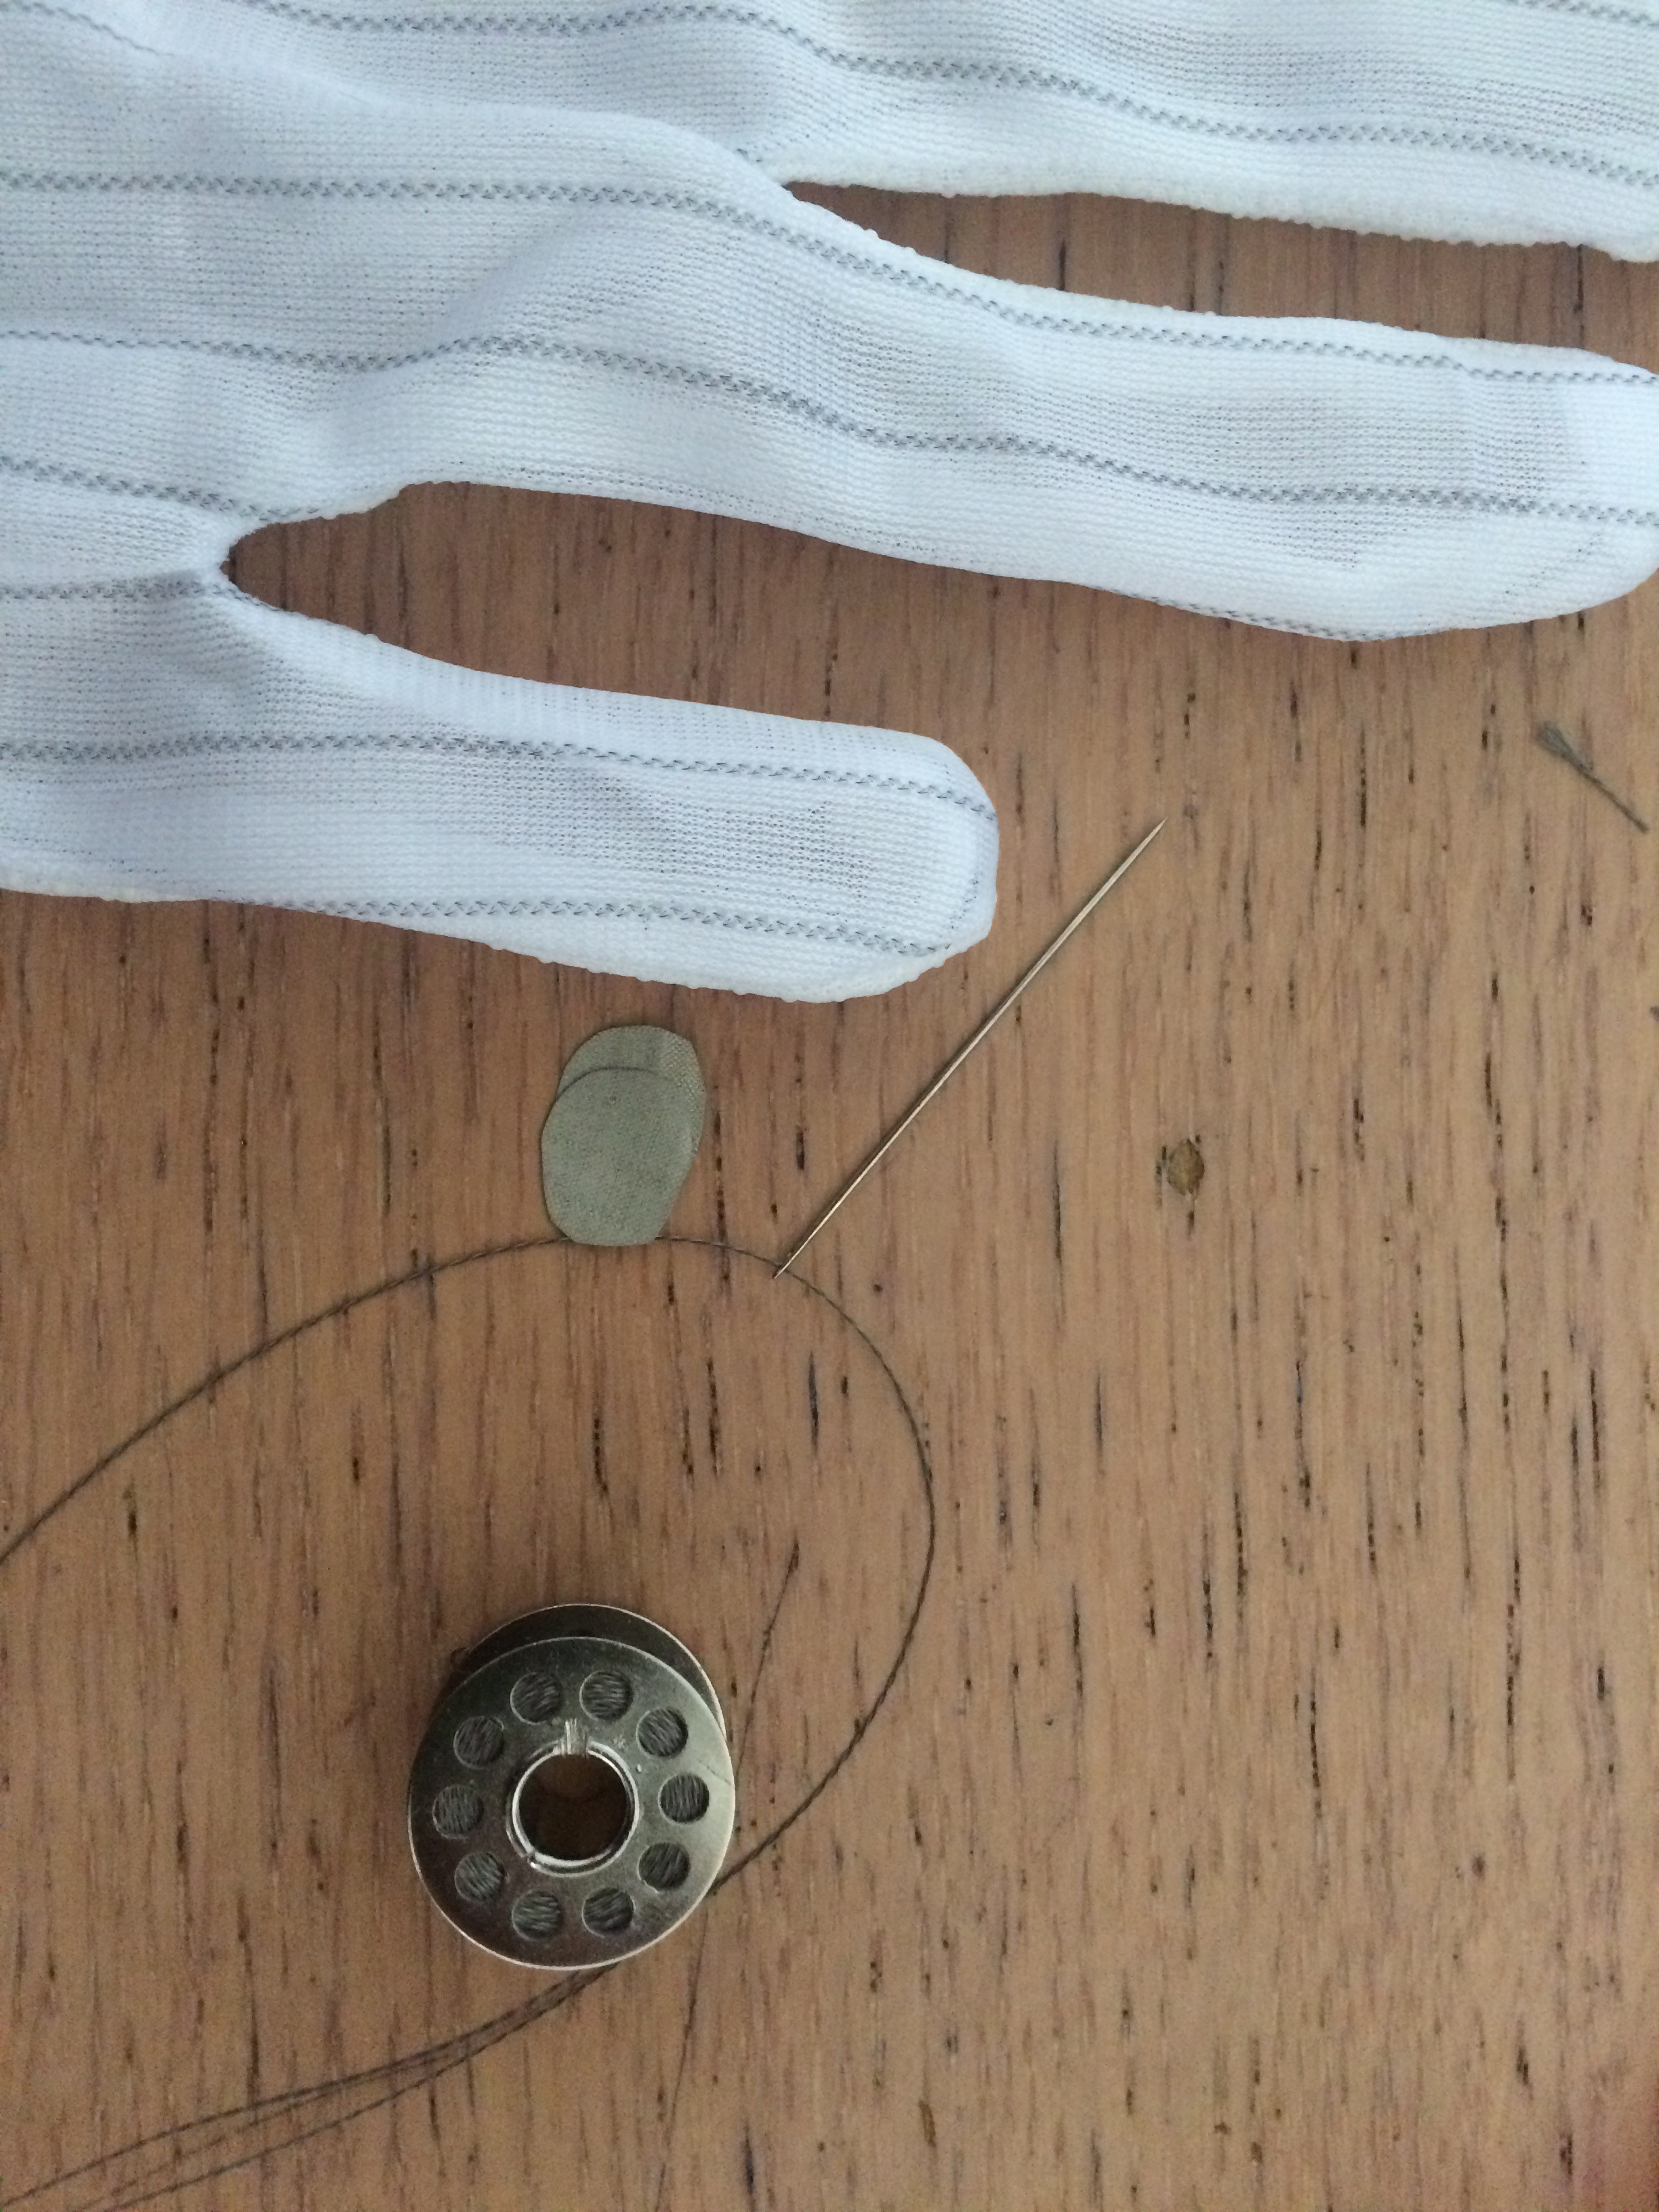
While unpacking this morning, I found a bag of anti-static gloves we got from Ali-Express that don't seem to actually have conductive thread at all but do seem to be made of anti-static material. Since this seemed like it would be better and more reliable than the anti-static bag, I got out a needle and thread, conductive thread, and conductive fabric and went to work.
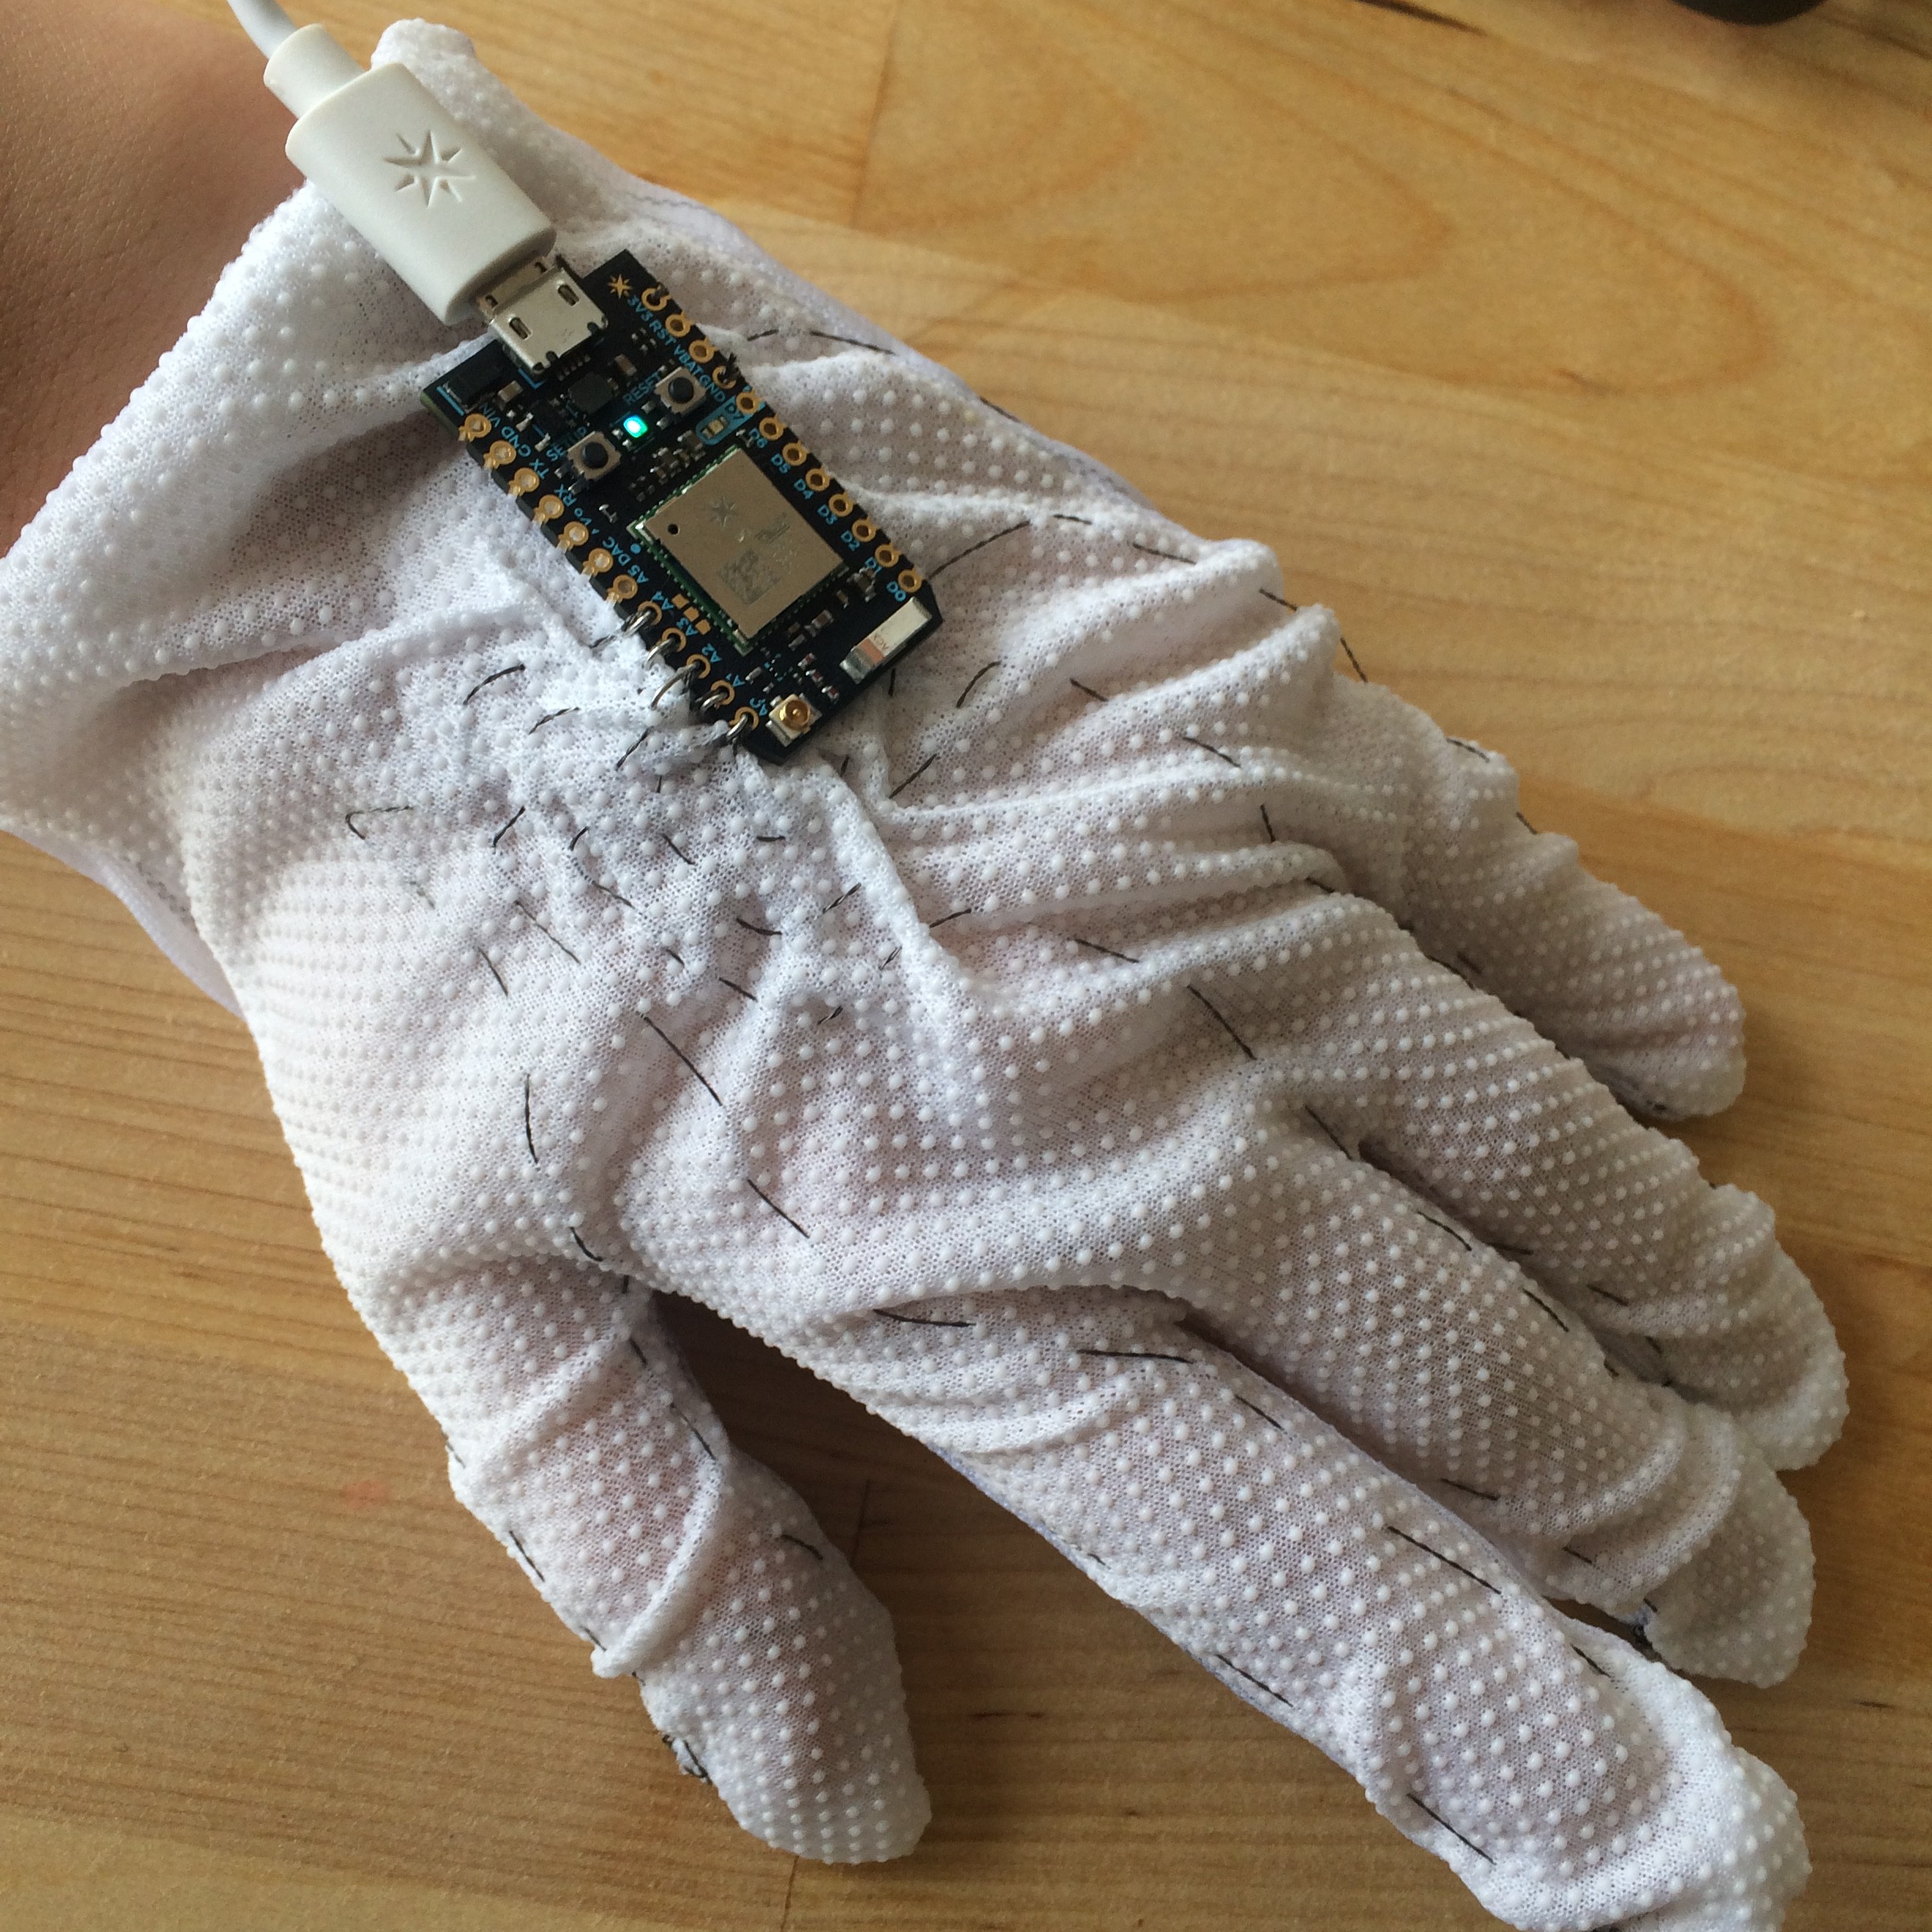
![]()
After a really small amount of super simple stitching, I ended up with something that fit my hand perfectly and worked really reliably for gentle pressure. (Every time the value goes into the triple digits in the serial dump below, that's a tap.)
![]()
This is a super and super reliable way to make a small, wearable chorded keyset that you can activate by pressing your fingers lightly and subtly into a table, your leg, etc, without having to wear a series of odd rings or other contraptions. Next step: entire glove.
-
I'm back, and so is Sotto
09/02/2017 at 05:19 • 0 commentsFirst log in a while, between some busy-ness at the day job and a crazy move from San Francisco to Los Angeles. Moving two cats for 6 hours in a car is no joke.
In the meantime, I've been thinking a lot more about Sotto and how to integrate it more naturally into the hand. These thoughts are based on where to place sensors, and what feels the most natural when it comes to typing-like actions.
Chorded keysets should work similarly to playing the piano-- but when playing the piano, pressing keys, and more, there is a certain amount of resistance and haptic feedback that occurs. I'm more comfortable (and certain of what I'm typing) when I tap the "right letters" lightly against my leg or a desk, barely moving my fingers, than I am when I type by wiggling my fingers indiscriminately in the air. It's difficult to isolate a single finger movement in the absence of resistance and feedback.
With this in mind, I'm reimagining/evolving Sotto to account for movements that feel a bit more like button pushing. Starting with some crazy attempts at makeshift FSRs, from my half-unpacked boxes.
![]()
Here's two pieces of conductive fabric, not touching each other, with a piece of anti-static bag separating them. Plus, some adorable tape I was using to label my moving boxes :) I also threw in a pulldown resistor (not pictured).
![]()
I'm getting a lot of junk over serial, but when I'm pressing the improvised FSR, the average reading is definitely higher. I'm thinking about what these would look like stitched into the end of a glove, or at the very least, taped to the ends of my fingers. I'm gonna go unpack more boxes and think about it. Stay tuned.
-
A basic sottotype, now on GitHub
06/11/2017 at 03:43 • 0 comments![]()
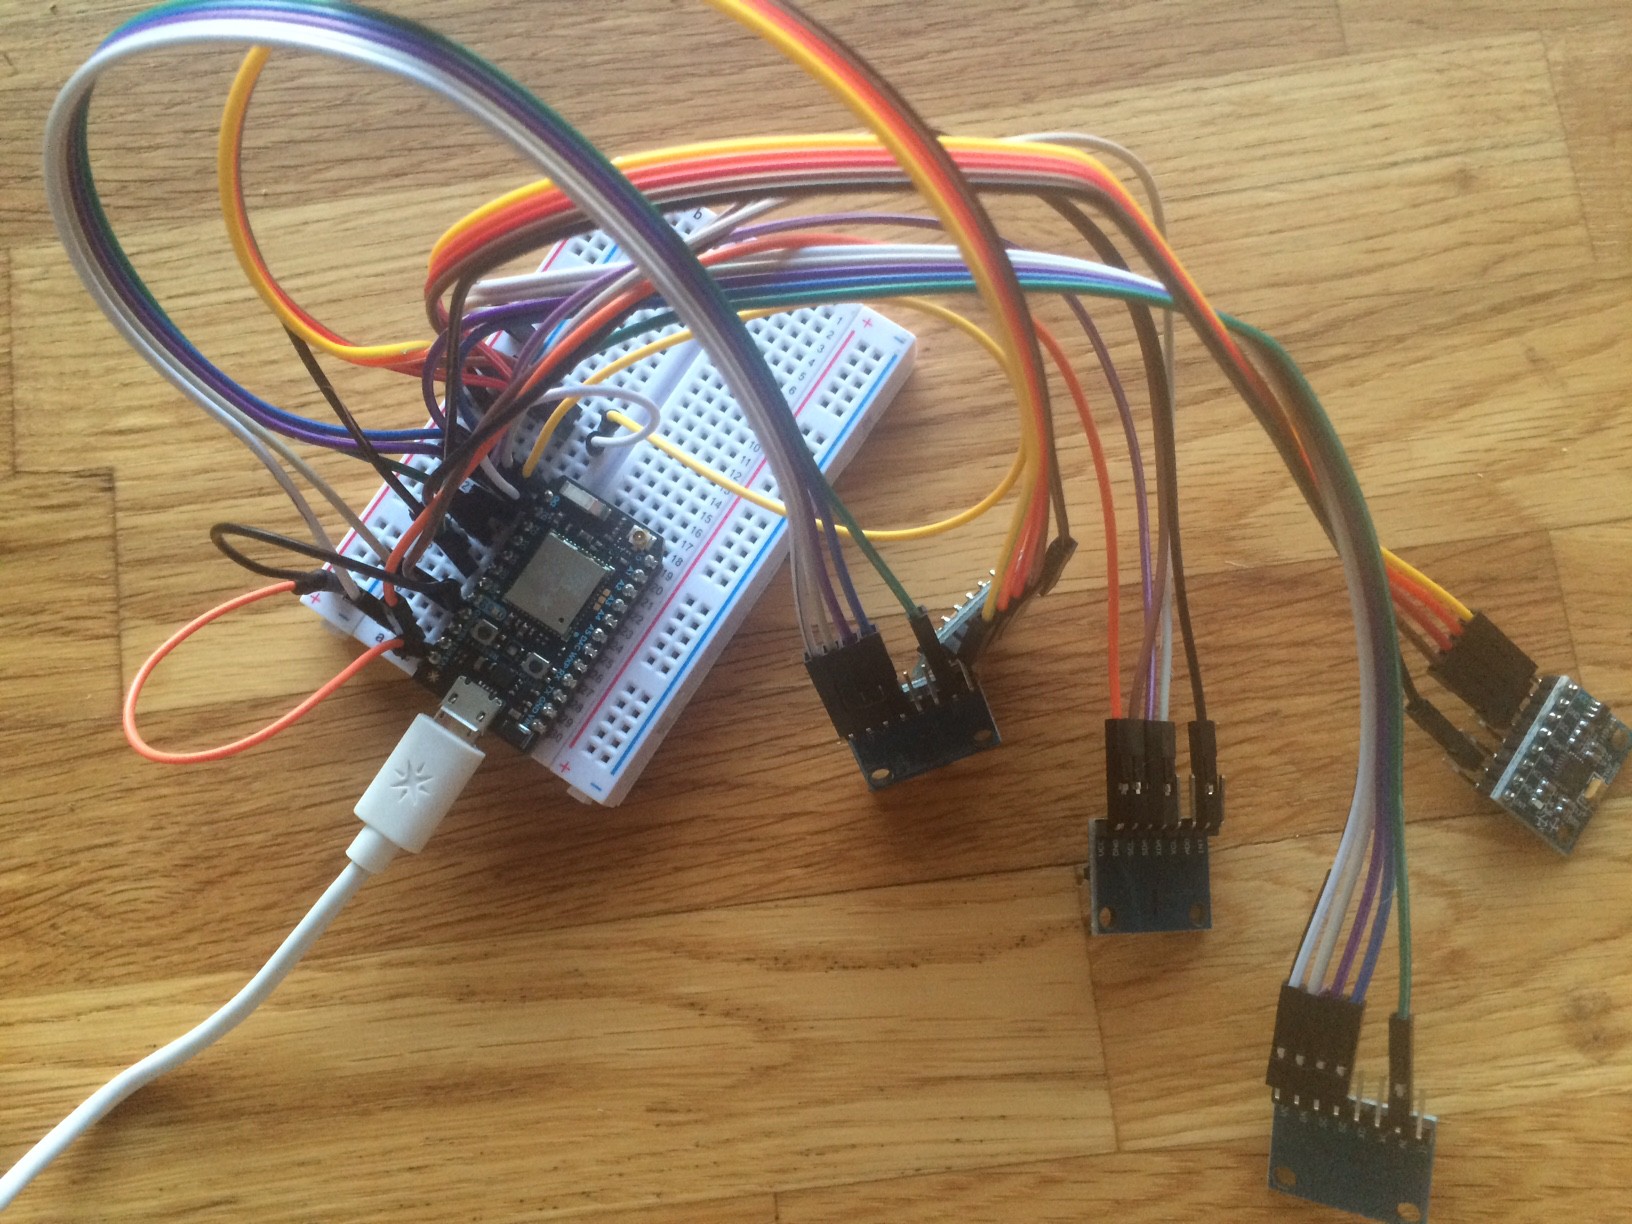
Ready for a sottotype?? (sotto prototype)
Using MPU6050 accel/gyros and a Photon, you can now detect 5-finger combinations! It uses the same binary-based input as this chorded keyset emulator.
Next up: actual typing, glove form-factor, and bluetooth connectivity
-
Sotto and the Internet of Useful Things
06/08/2017 at 07:40 • 0 commentsThis contest is called the Internet of Useful Things, and I’m going to take that title to heart. In order to be optimally useful, an Internet of Things Thing must connect to the internet in the best-suited way possible. If you’ve been on HackPretty, you know I like to talk through concepts in case beginners are listening, so feel free to skip this log if you’re already an expert!
Connected microcontrollers are tools. They come in several shapes and varieties: bluetooth, cellular, Wi-Fi, and more. If you’re prototyping in a hurry, you’re likely to use whatever’s available. (I have like 20 Particle Photons in a drawer, so I'm often using those.) But if you’ve got a little time, you should try to use the tool that is fit to the job at hand. You wouldn’t use a pair of pliers to hammer in a nail, unless you were really in a bind. If you’ve got a choice between Wi-Fi and bluetooth, you want to pick the right one.
In general, I think of this as:
- Wi-Fi: Power consumptive, range-restricted to router. (Photon, ESP8266, etc.)
- Smart Home devices
- Lamps and Clocks
- Stuff plugged into the wall
- Bluetooth/BLE: Power-light, range-restricted to phone. (Bluno Beetle, Redbear Duo, etc.)
- Wearables
- Accessories
- Cellular: Power-light, range-restricted to cell towers (usually very wide range) (Particle Electron, etc.)
- Asset Trackers
- Remote data-gathering tools
- Easy-onboarding devices (while Wi-Fi and bluetooth need to be set up to your router or device, cellular stuff can turn on, connect, and work.)
Sotto is a chorded keyset for input on the go. So this means we’re either going to want either bluetooth or cellular. I’m a fan of Sotto running on BLE, since I expect that it will always be in range of your phone and sometimes working directly with your phone apps.
Bluetooth has a bunch of different protocols for communication. Since Sotto is a chorded keyset, I’m going to need one mode to be through an HID (human input device) profile-- the standard profile you see used for bluetooth keyboards. The Adafruit Bluefruit has a built-in keyboard example, which we’re going to hack for the first prototype of Sotto.
More to be posted soon here. I'll also try to cross-post fundamental basic concepts to HackPretty when they come up-- I have a nice outline for a simple post about gyros I need to get working on!
- Wi-Fi: Power consumptive, range-restricted to router. (Photon, ESP8266, etc.)
-
All the gyros ever, forever and ever...
06/05/2017 at 17:58 • 0 commentsThe MPU-6050 is an InvenSense sensor with a MEMS accelerometer and a MEMS gyro. It's available as a breakout from SparkFun for ~$40/board, but I needed at least 5 of them. Ebay/amazon/aliexpress was happy to help! These other breakouts were mega cheap and so far I've only had one failure out of 6. Not bad for the price.
The MPU-6050 communicates over I2C, so we need to be fancy with the addresses if we're going to read 5 at a time. I ran into this issue with the IR temperature sensors for the Starfish Cat, and solved it by manually changing the addresses on the MLX90614 and editing the library to allow for multiple addresses. It's not as easy to reprogram the address on the MPU-6050, but you can shift the address dynamically by writing the ADO pin low (0x68) or high (0x69).
If you attach ADO to your digital pins and only turn one on at a time, you can scan through the sensors to grab data before switching the address again. This is a recommended trick for the MPU-6050 on the Arduino Playground. Your granularity will leave something to be desired, but if your goal is to read extreme motions like finger strikes, then you’re probably okay. Here’s an example of this method employed with the Particle Photon.Stay tuned! More updates soon.
-
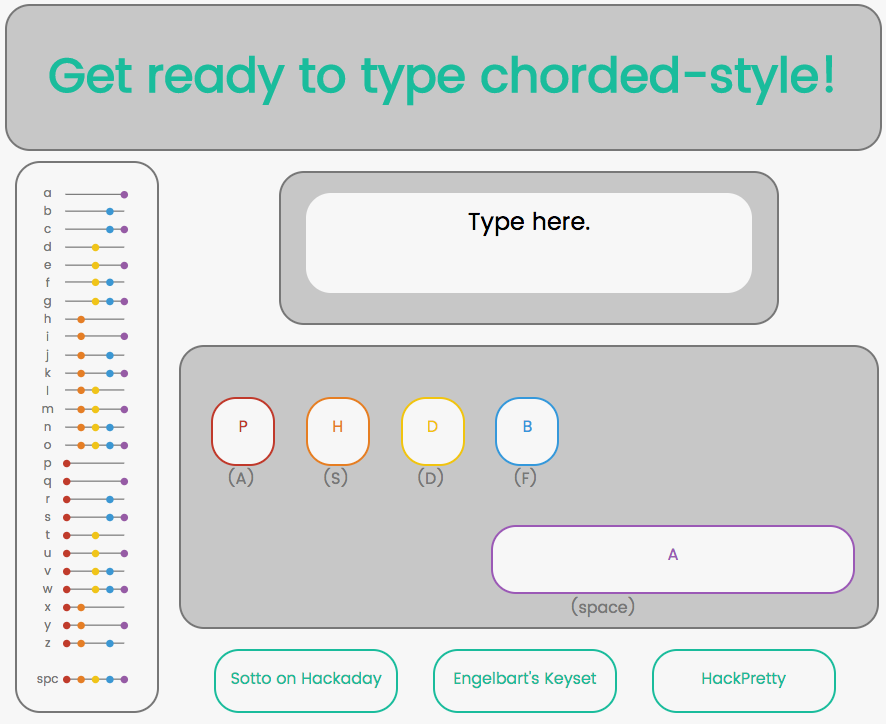
A Chorded Keyset Emulator
05/30/2017 at 15:52 • 0 commentsI'm piecing together the hardware for Sotto now, but in the meantime I thought it'd be fun to have a chorded keyset that people could try online, to test out the idea. Hooray for the speedy nature of javascript!
![]()
If you're listening, dear Internet readers, please try out the keyset emulator and let me know what buttons and features you'd like in a portable hardware version! (I'll eventually add lowercase, punctuation, and number settings to both the emulator and hardware versions!)
Sotto: A Silent One-Handed Modular Keyset
The essential input you never knew you needed. Sotto is a portable, wearable, more subtle way for you to text and type on the go.