Guillermo Herrera-Arcos
-
Ergonomic tests with a child
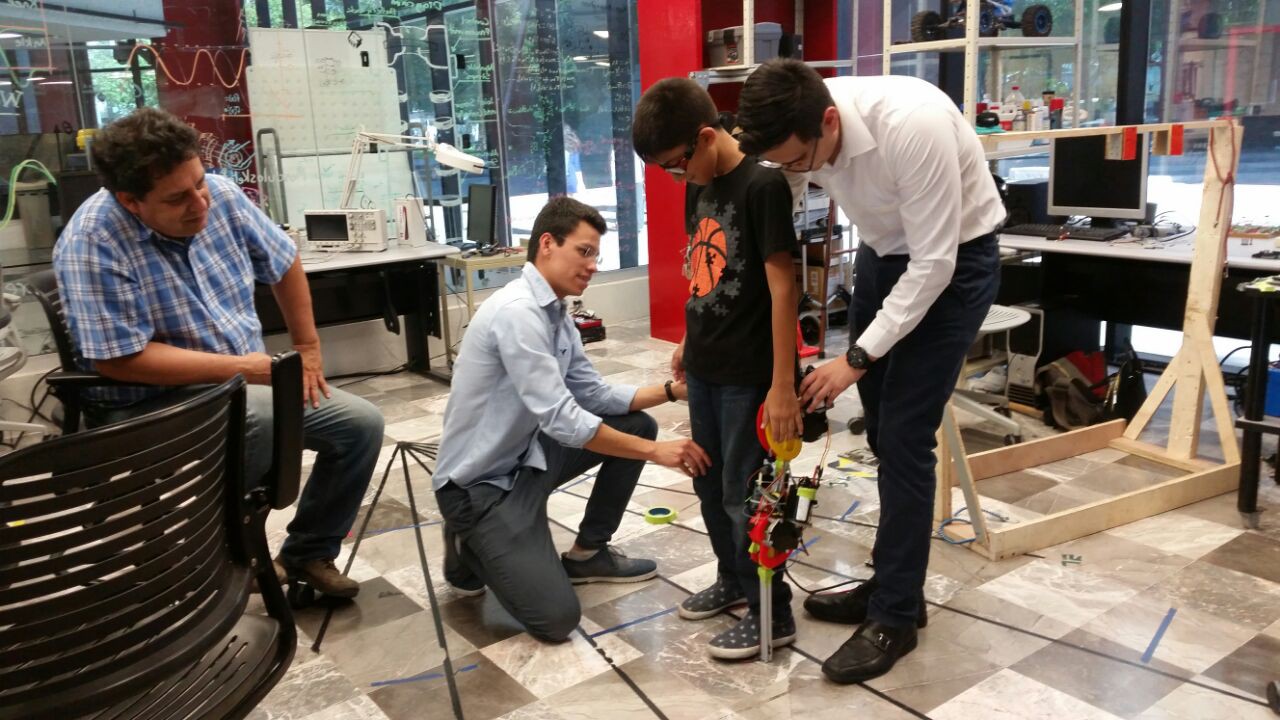
10/16/2017 at 12:13 • 0 commentsWe are thrilled to share with you the ergonomics tests we did with a healthy child. These tests were done to see how confortable and secure our device is, and helped us to realize some enhancements we can do related to ergonomics.
Here are some pictures:
![]()
Our exoskeleton being fitted to the child.
![]()
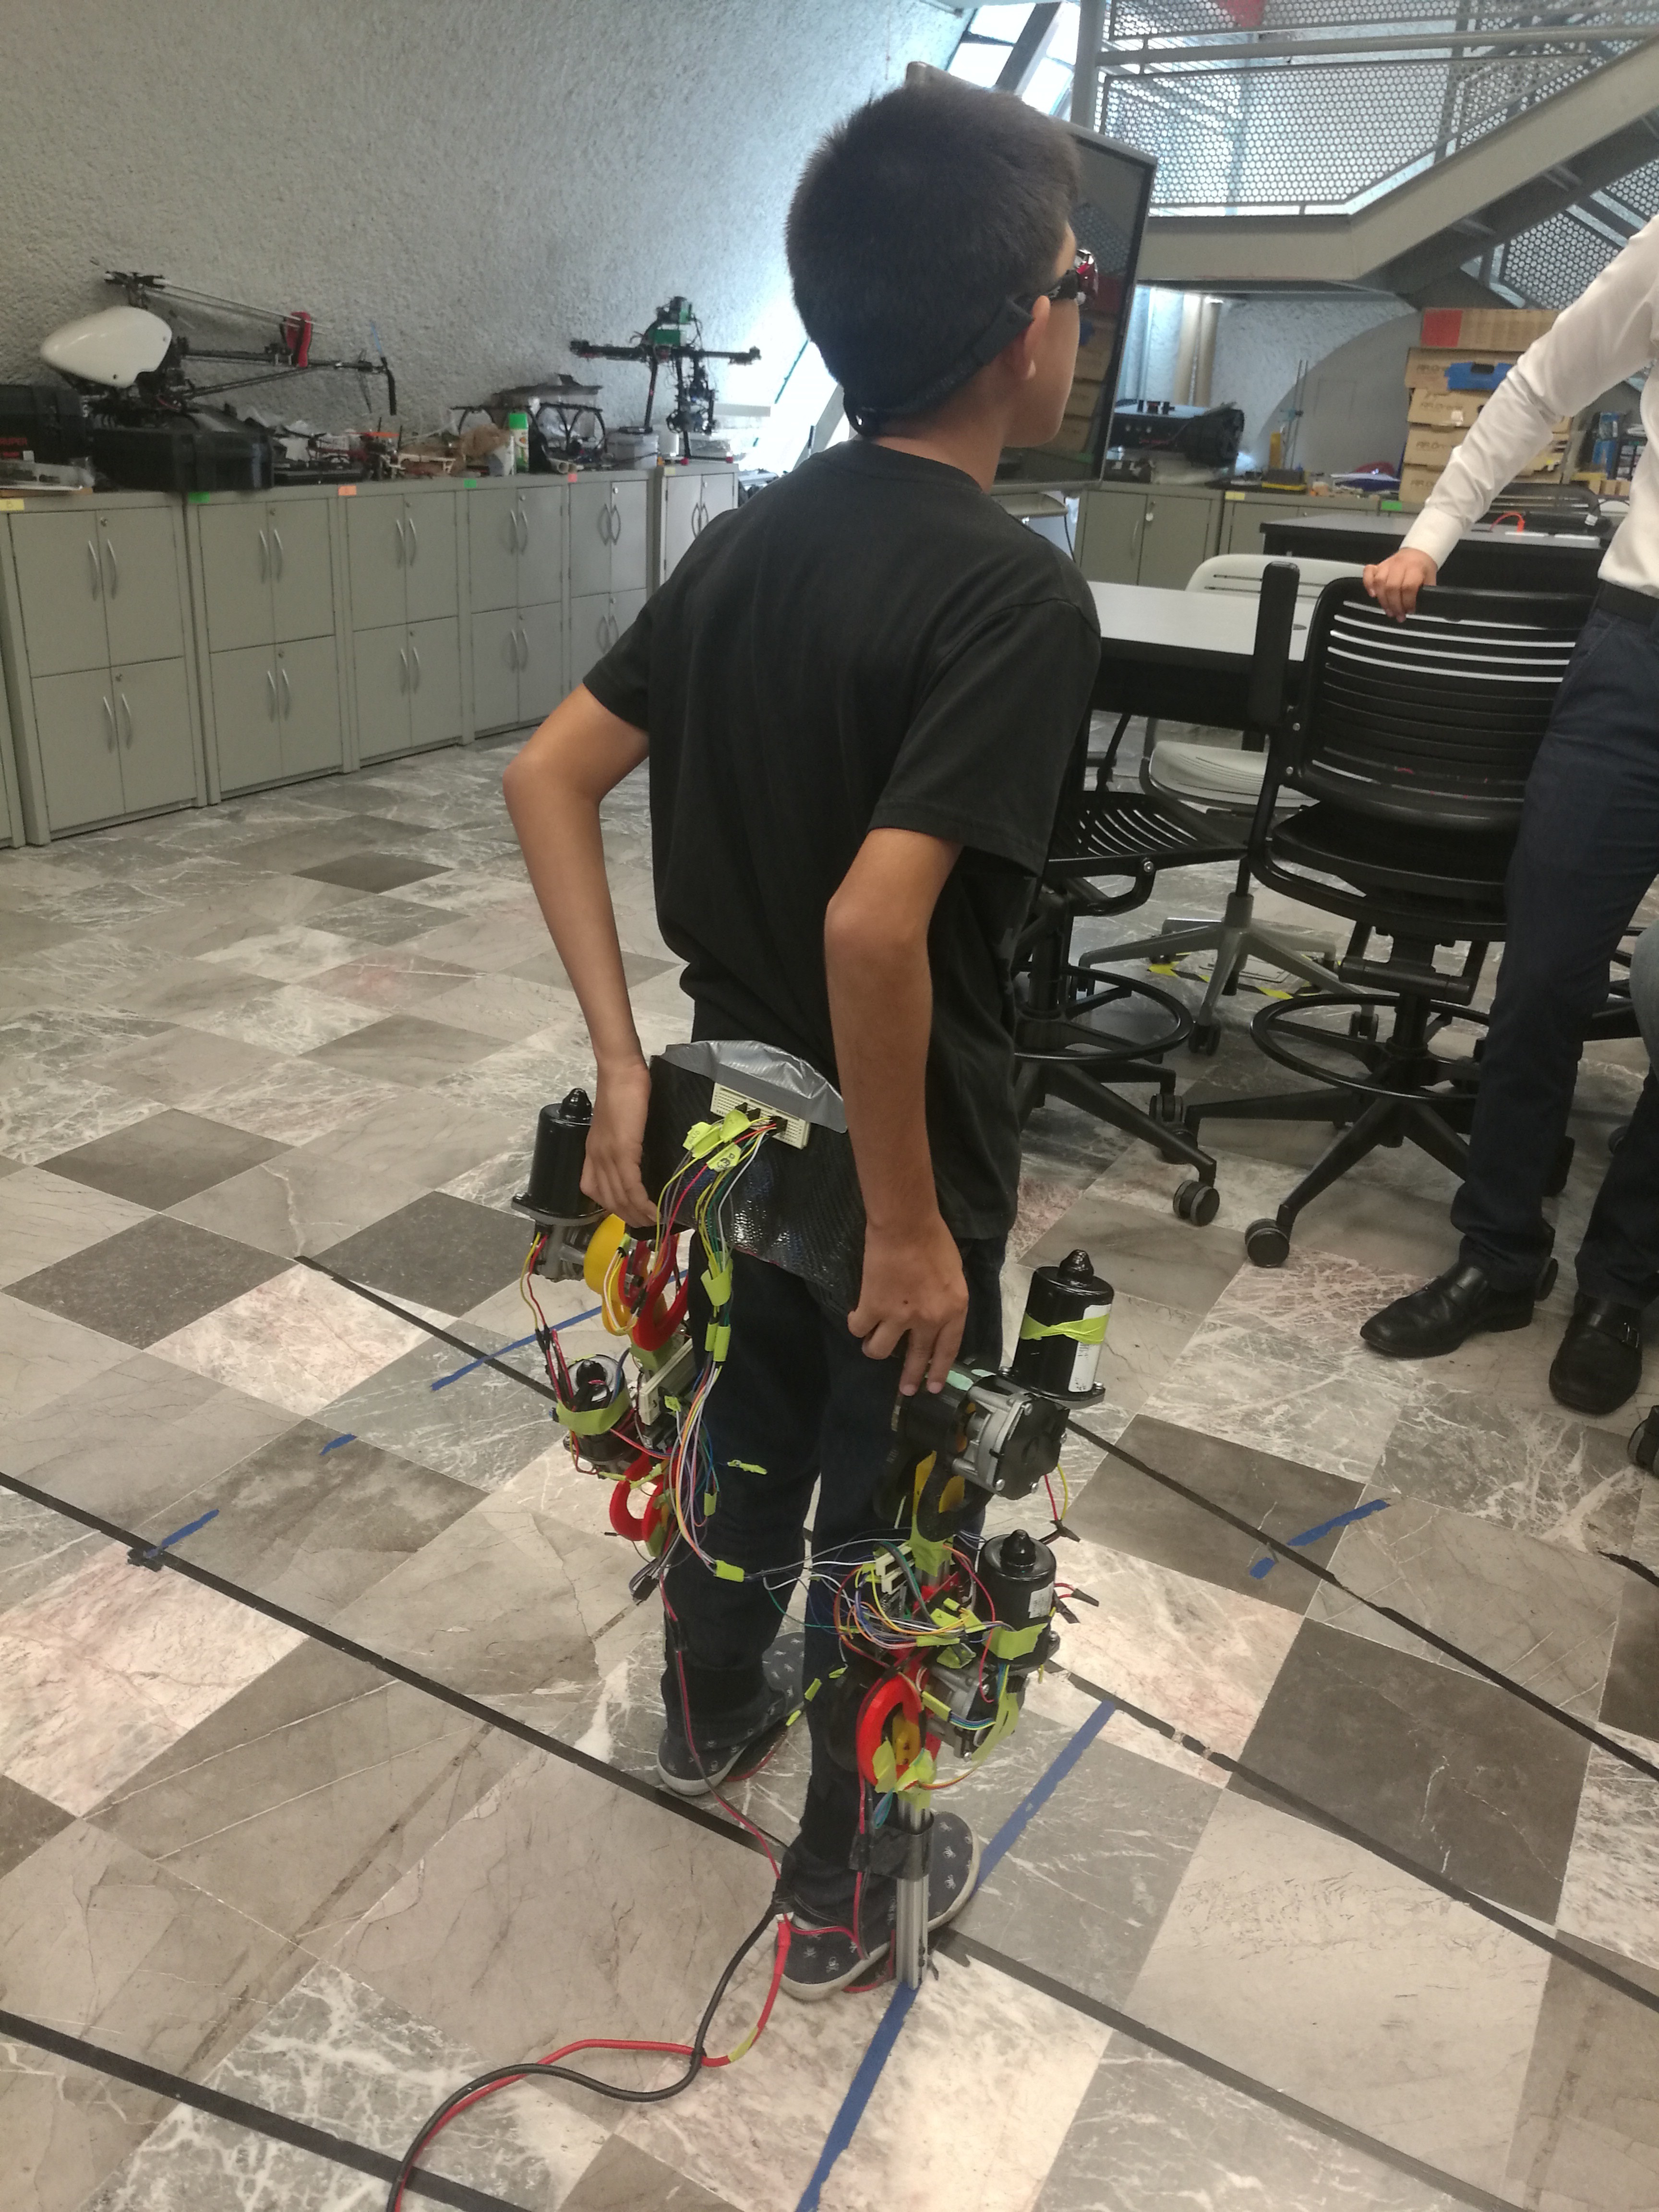
Our exoskeleton viewed from the back.
![]()
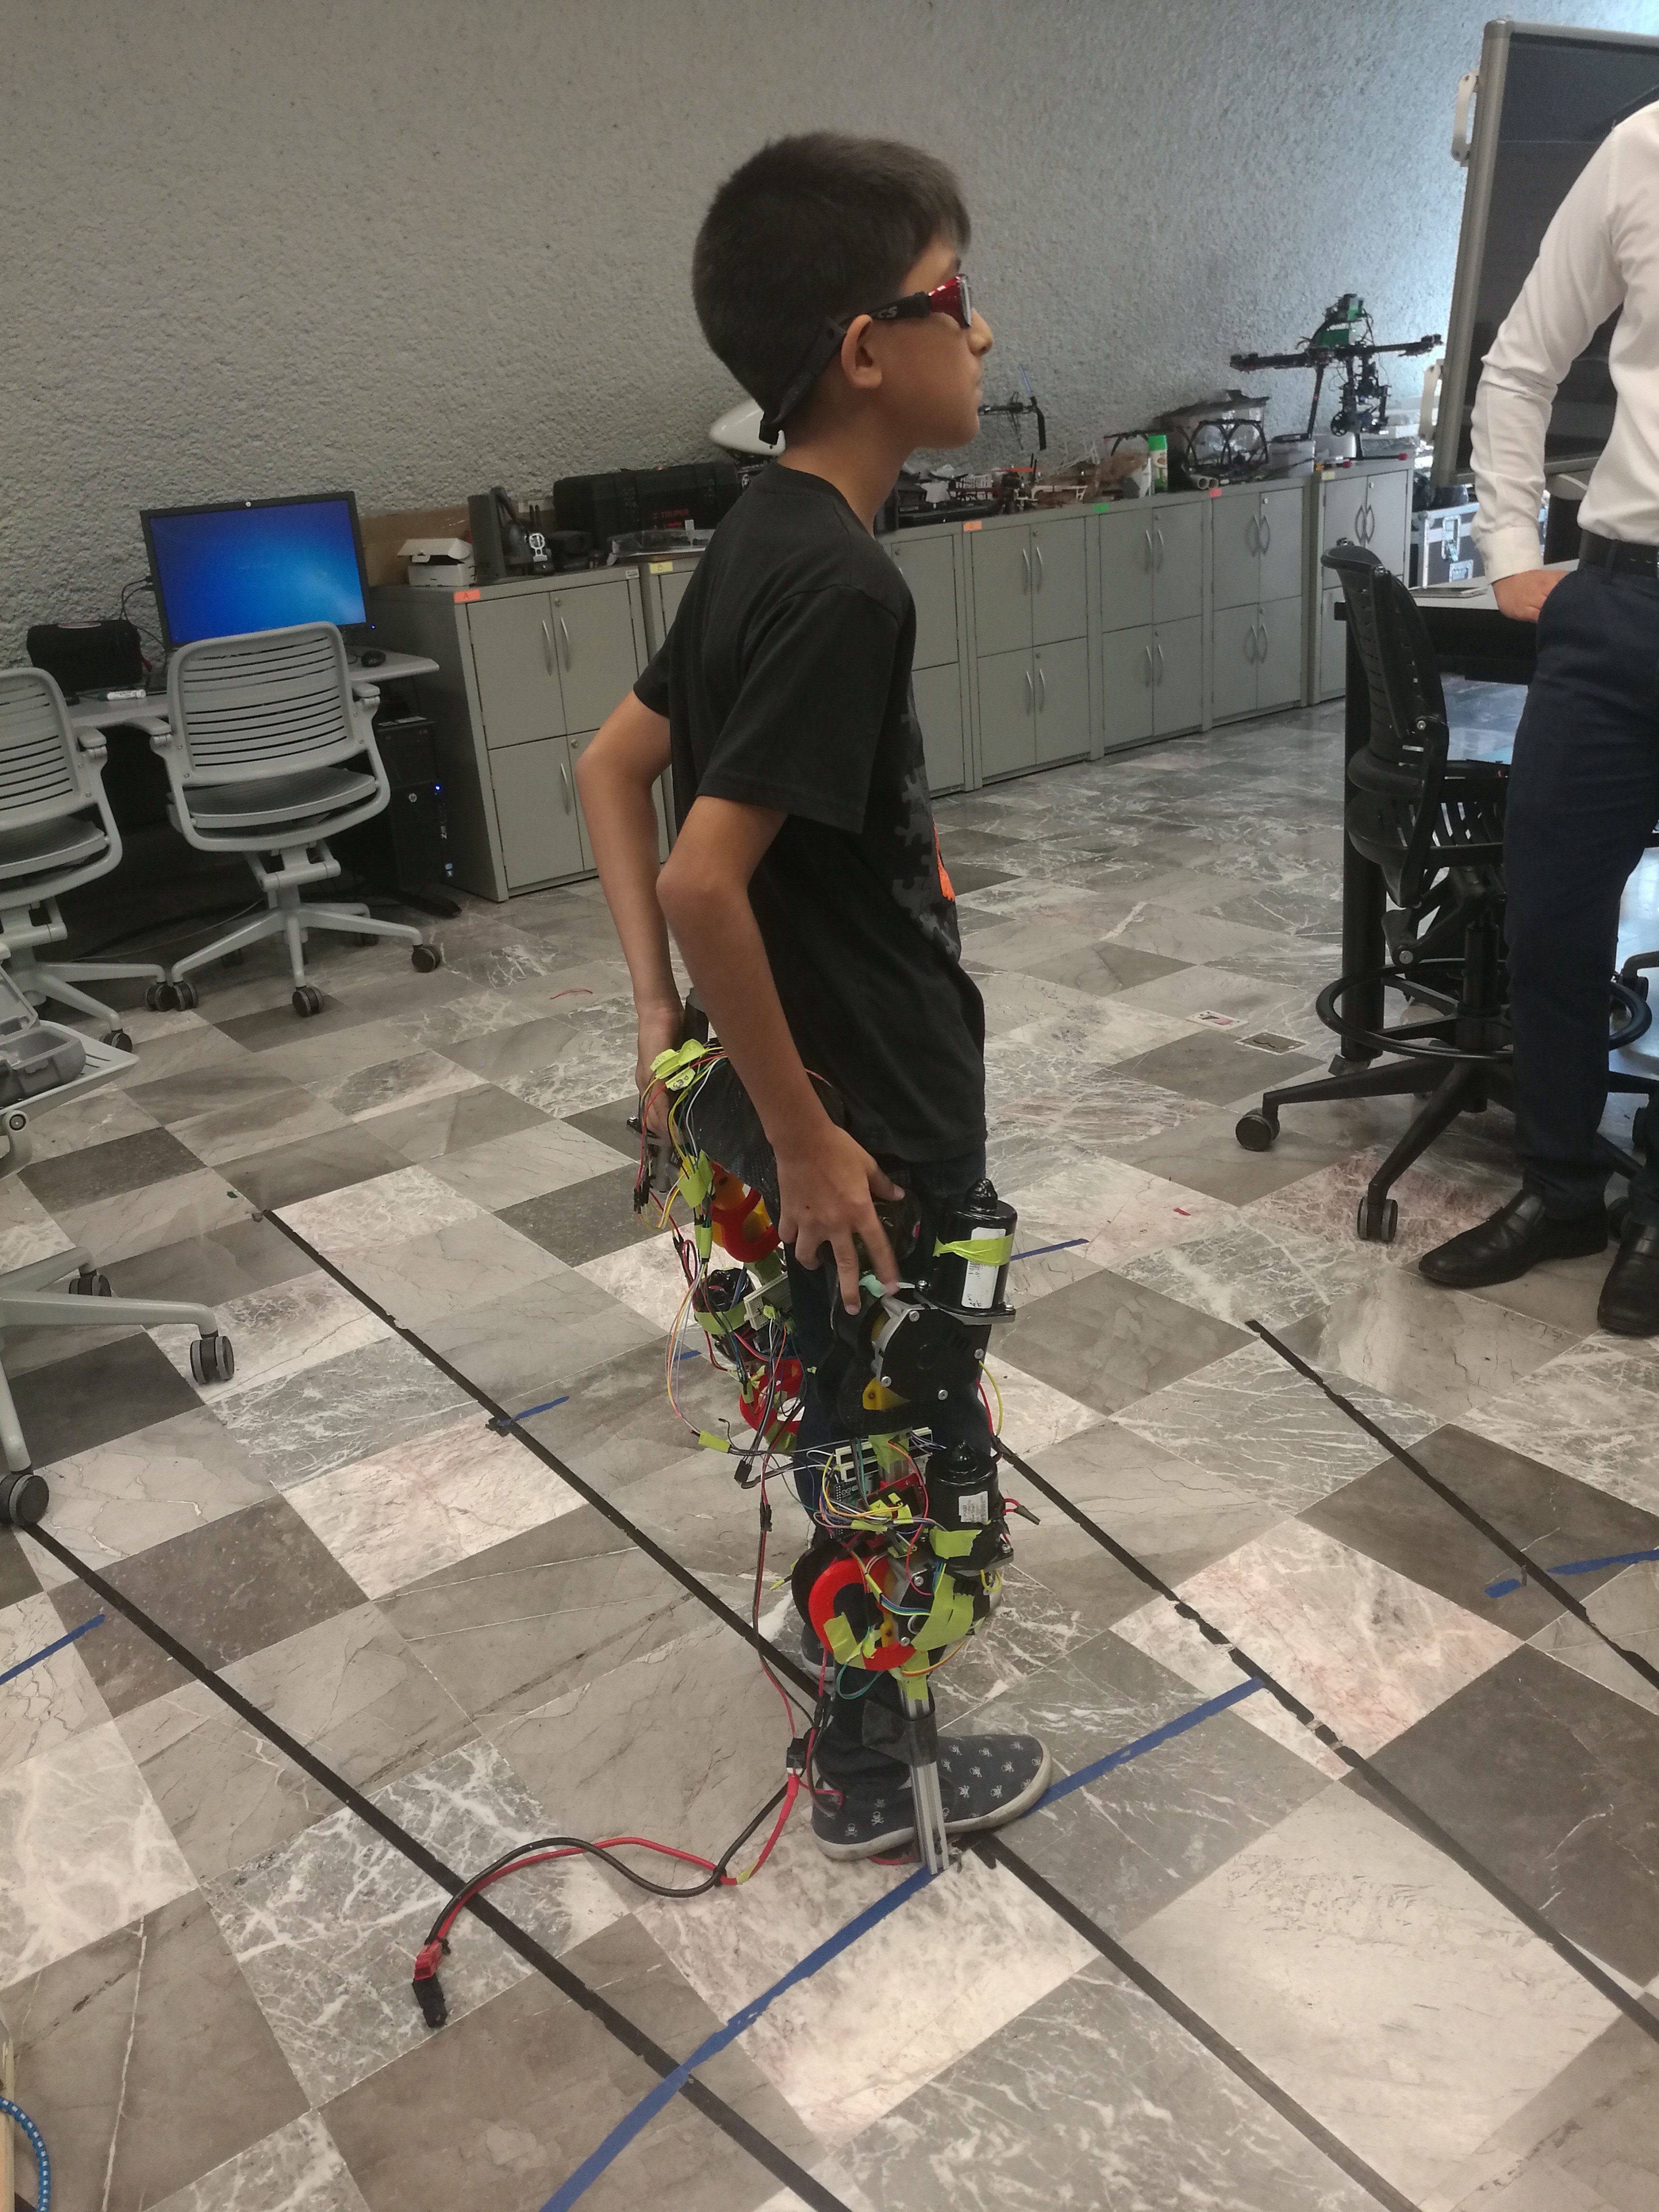
Our pilot was very excited to wear it.
Definetely our device looks good, and it's a good option for motion assistance and rehabilitation in hospitals. We can't wait to see this device in the legs of every children in need of it.
Soon, we will share detailed instructions for the construction a robotic exoskeleton.
Thanks for reading.
-
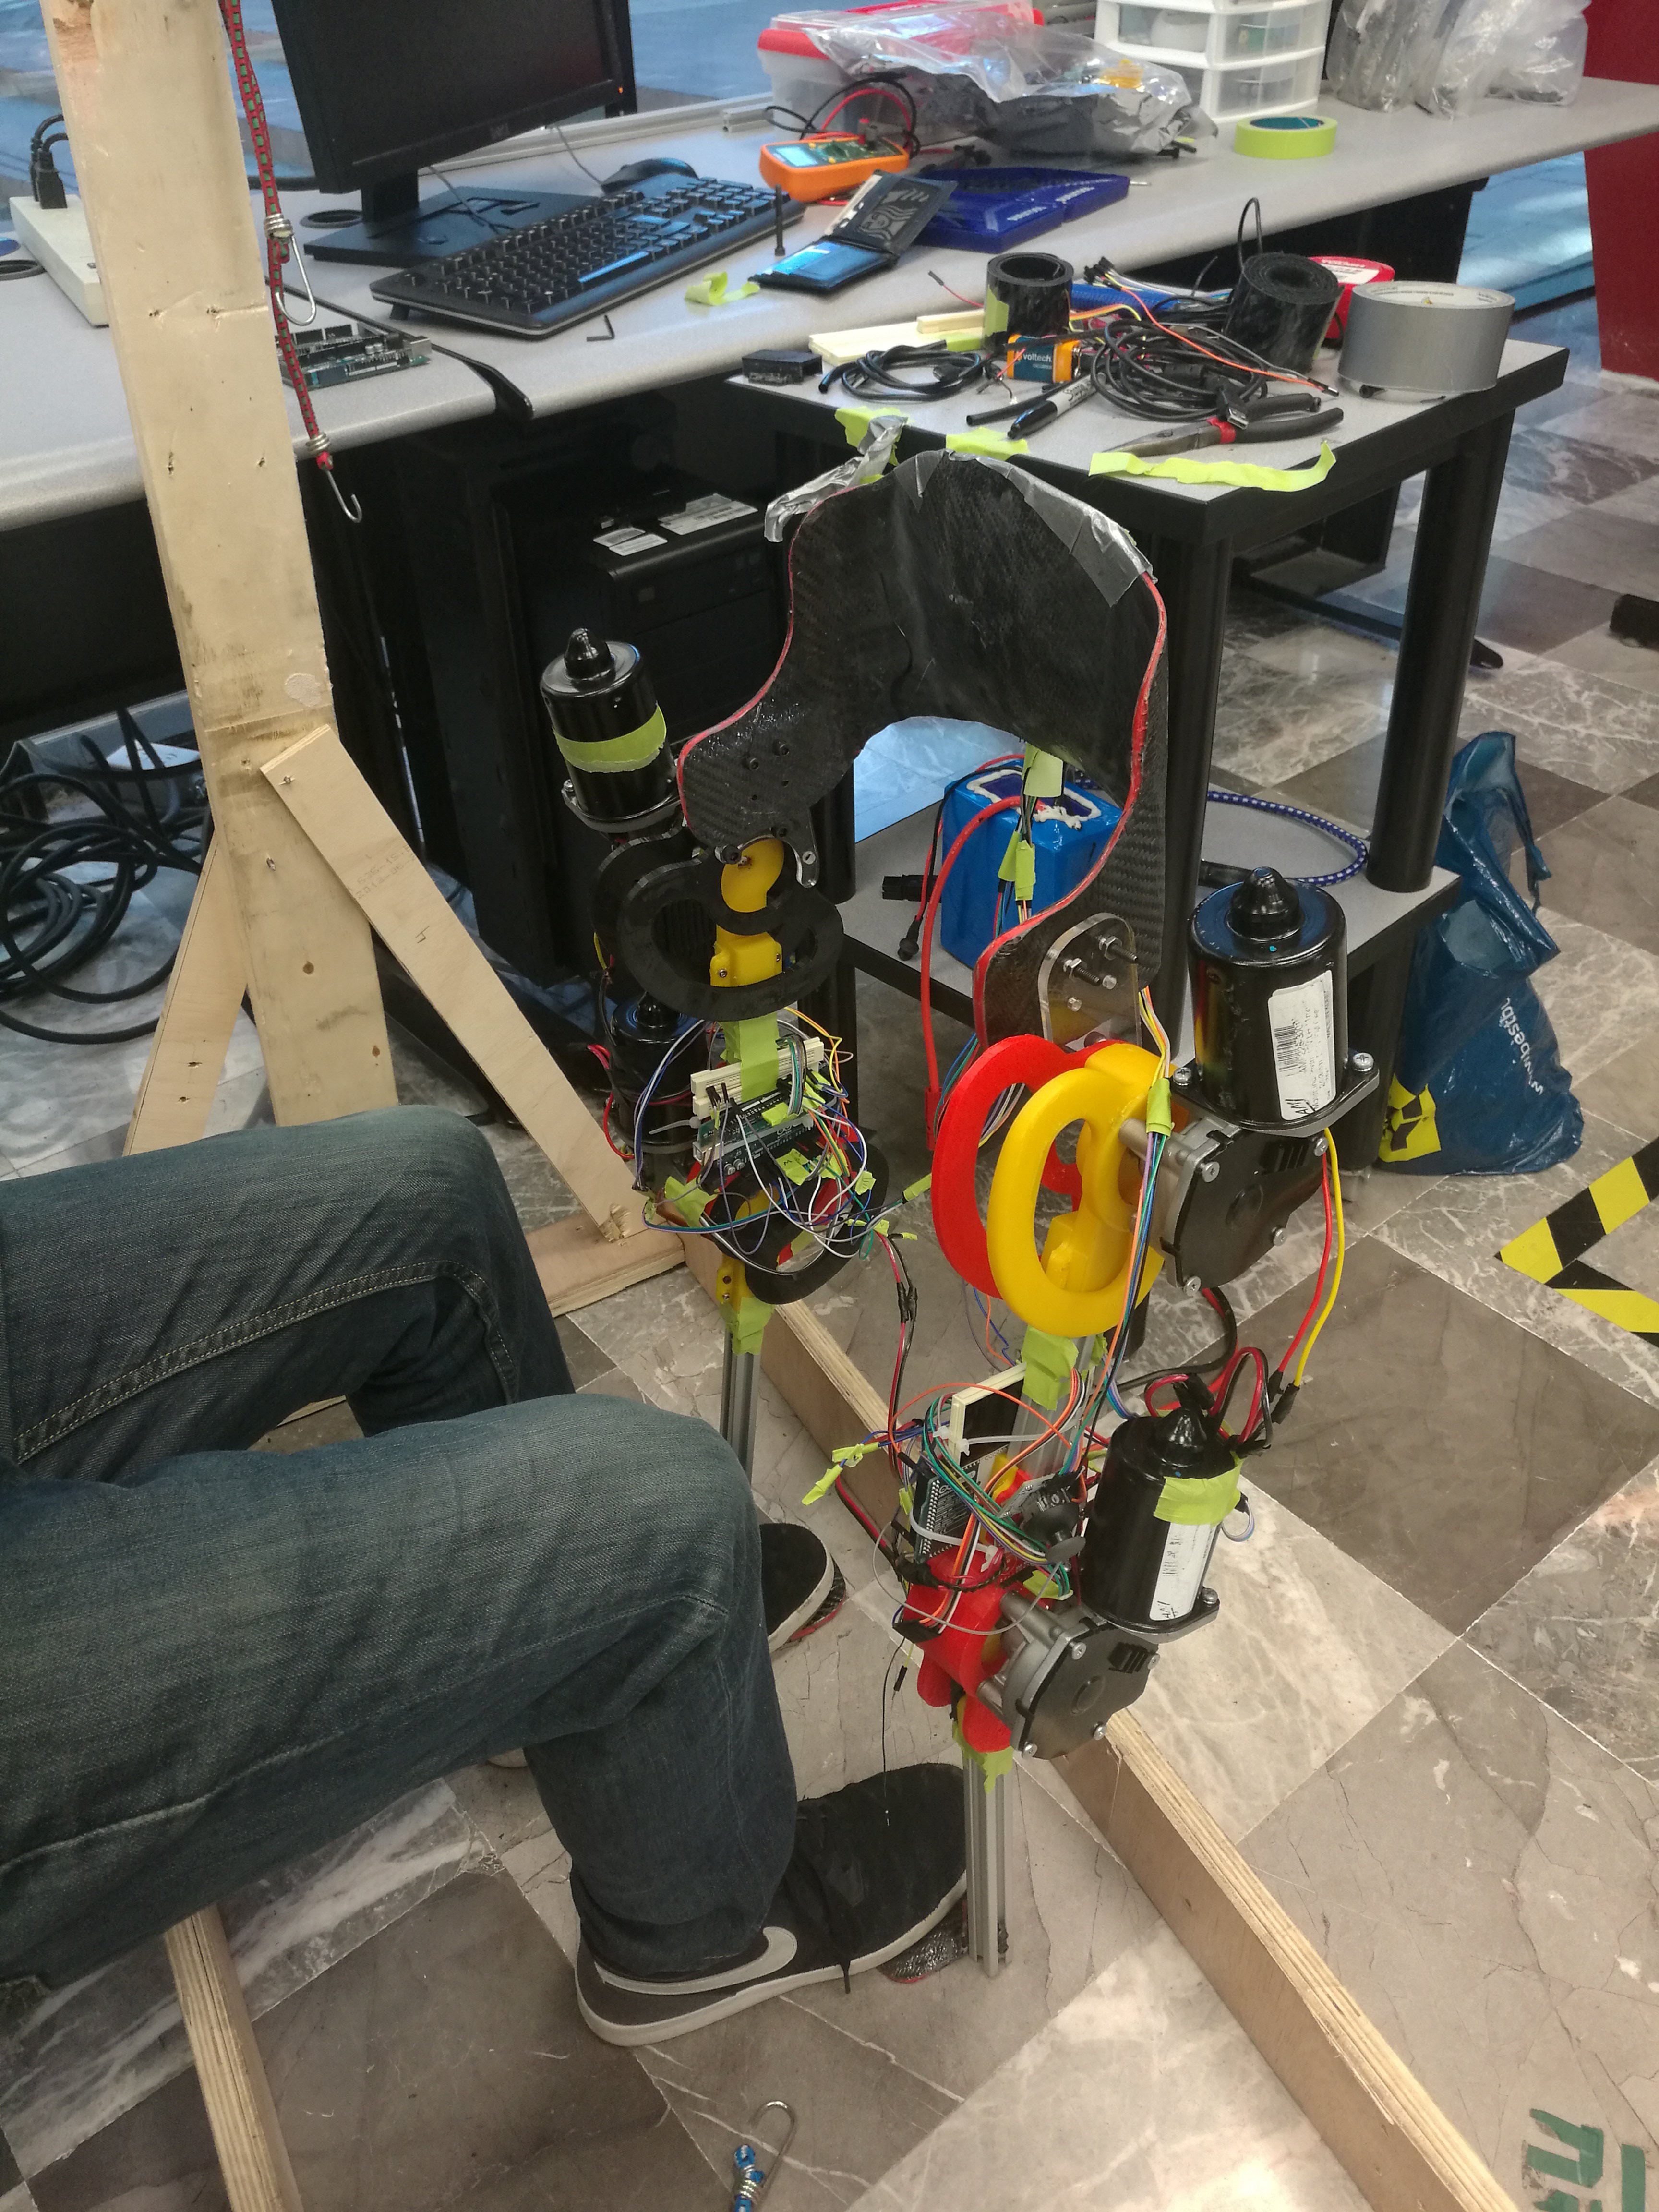
Hip finished and Exo assembled
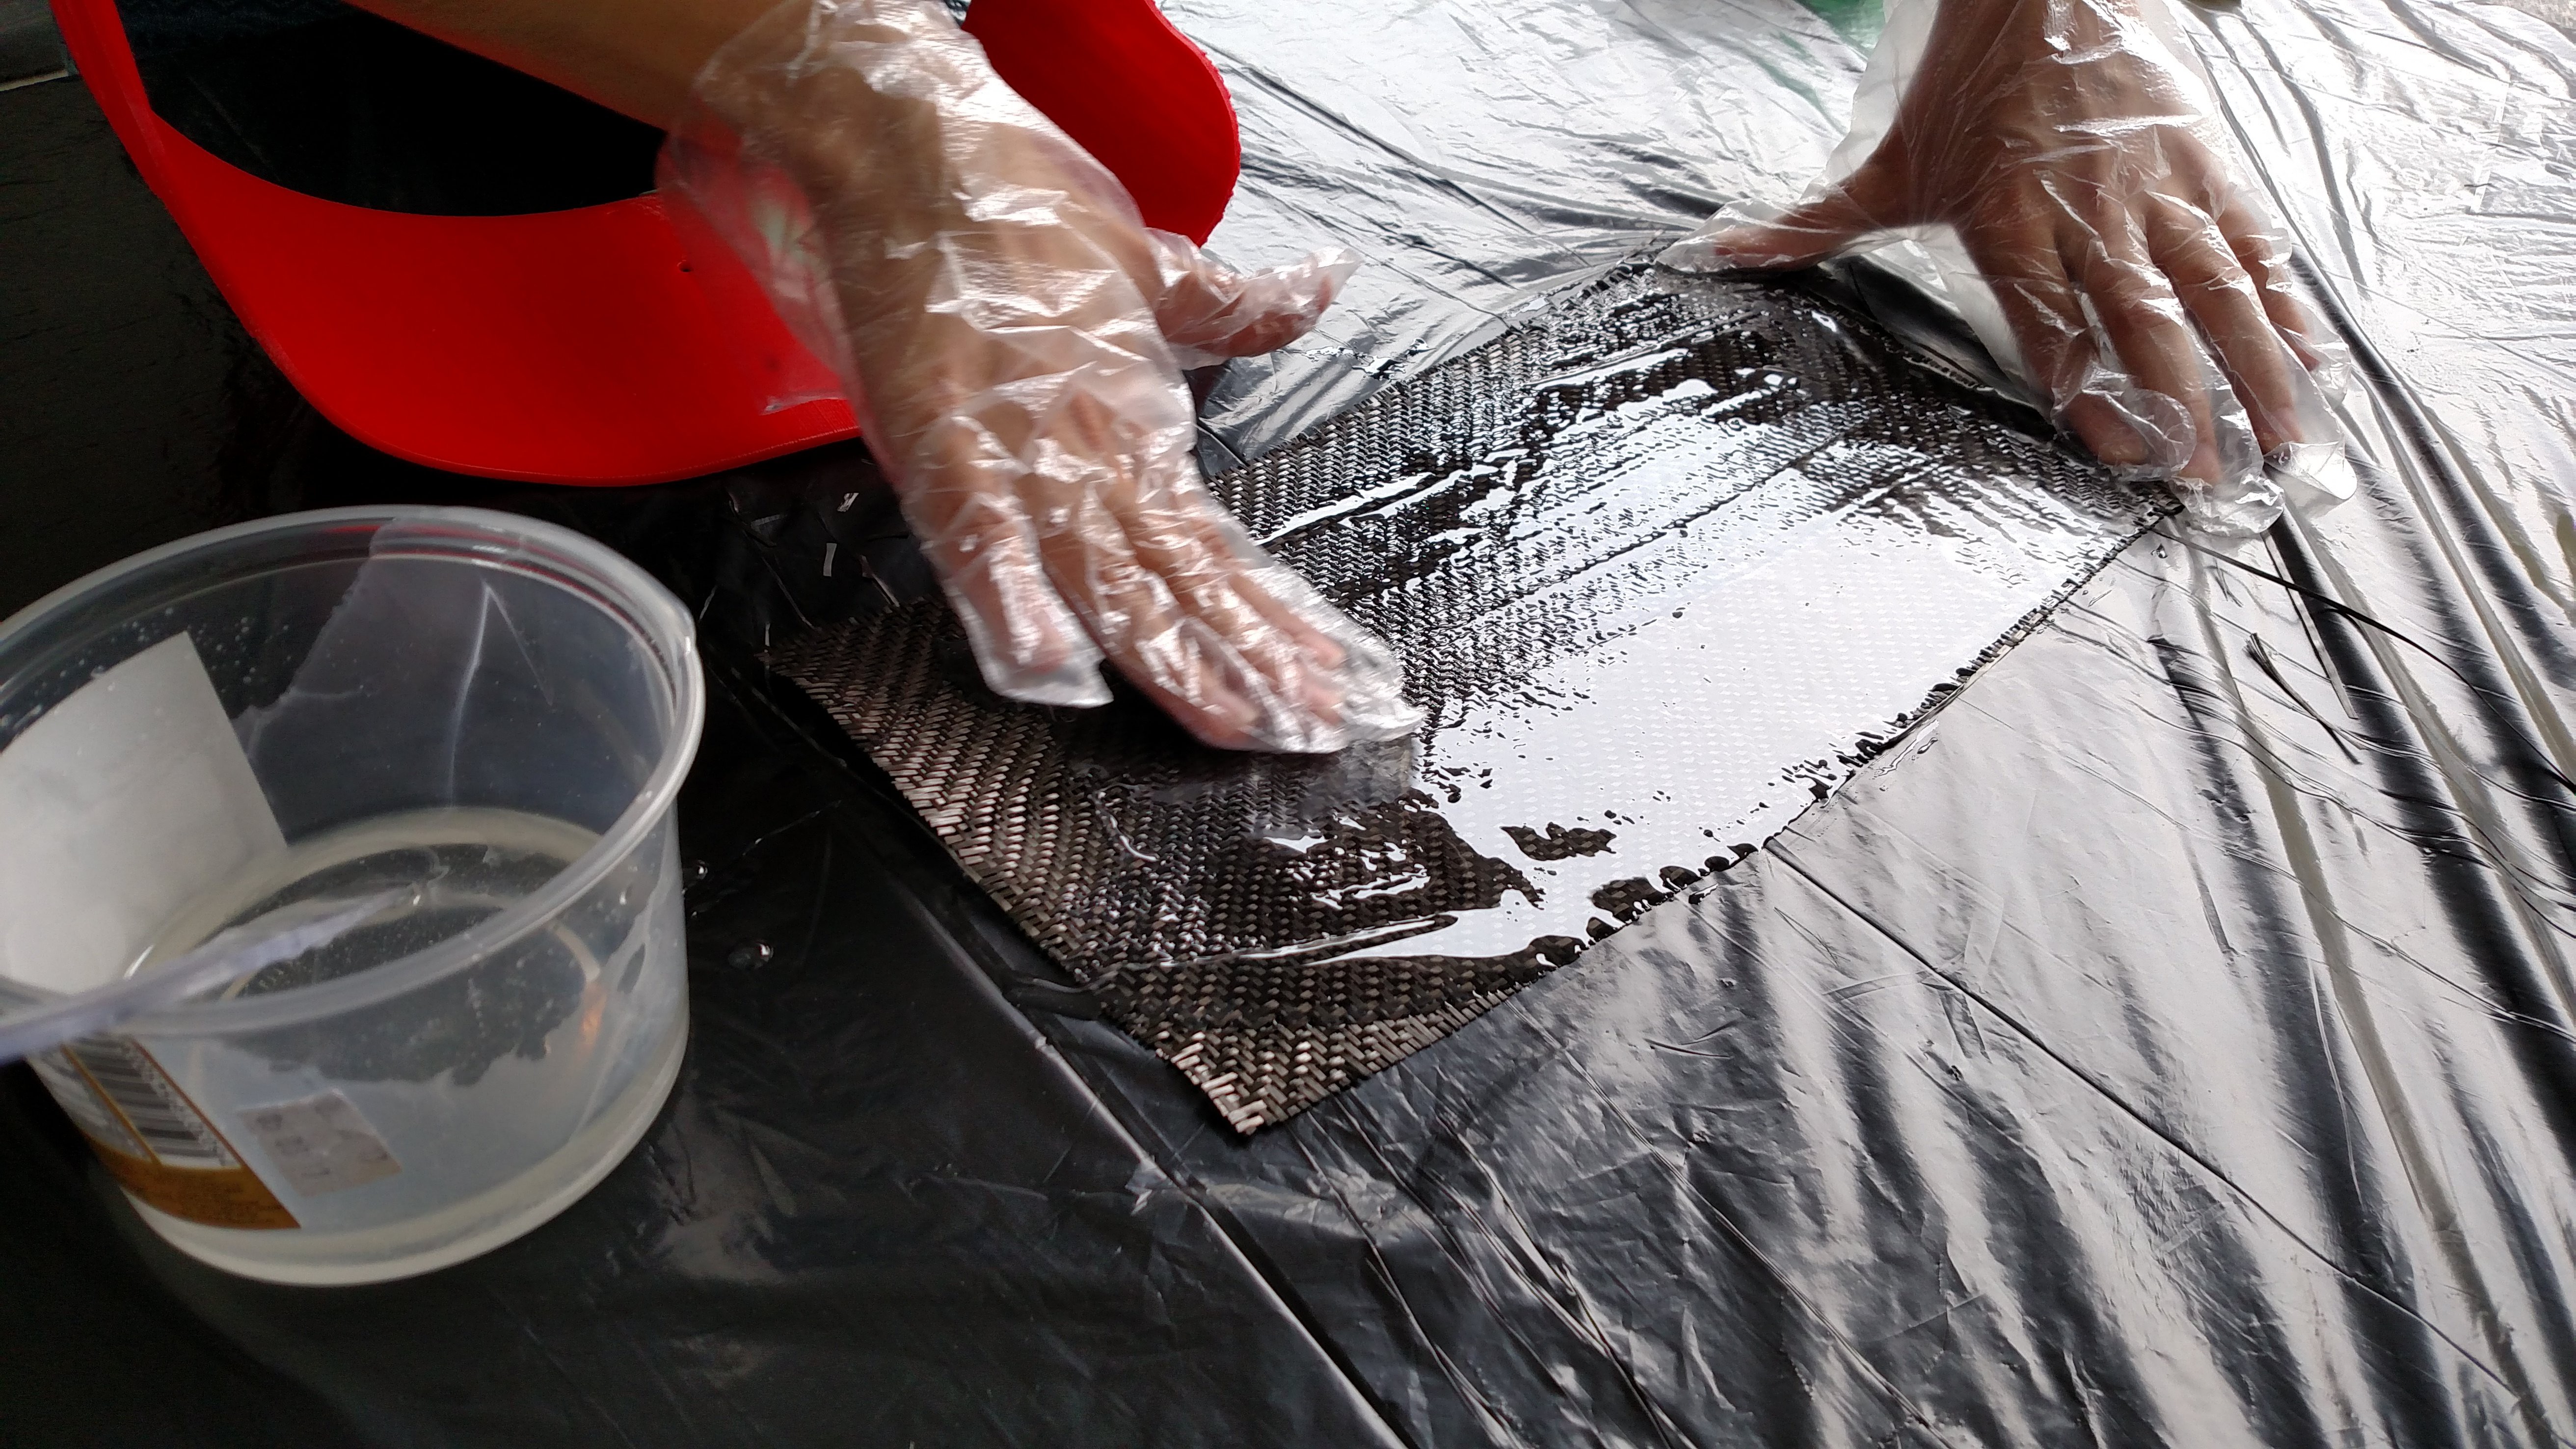
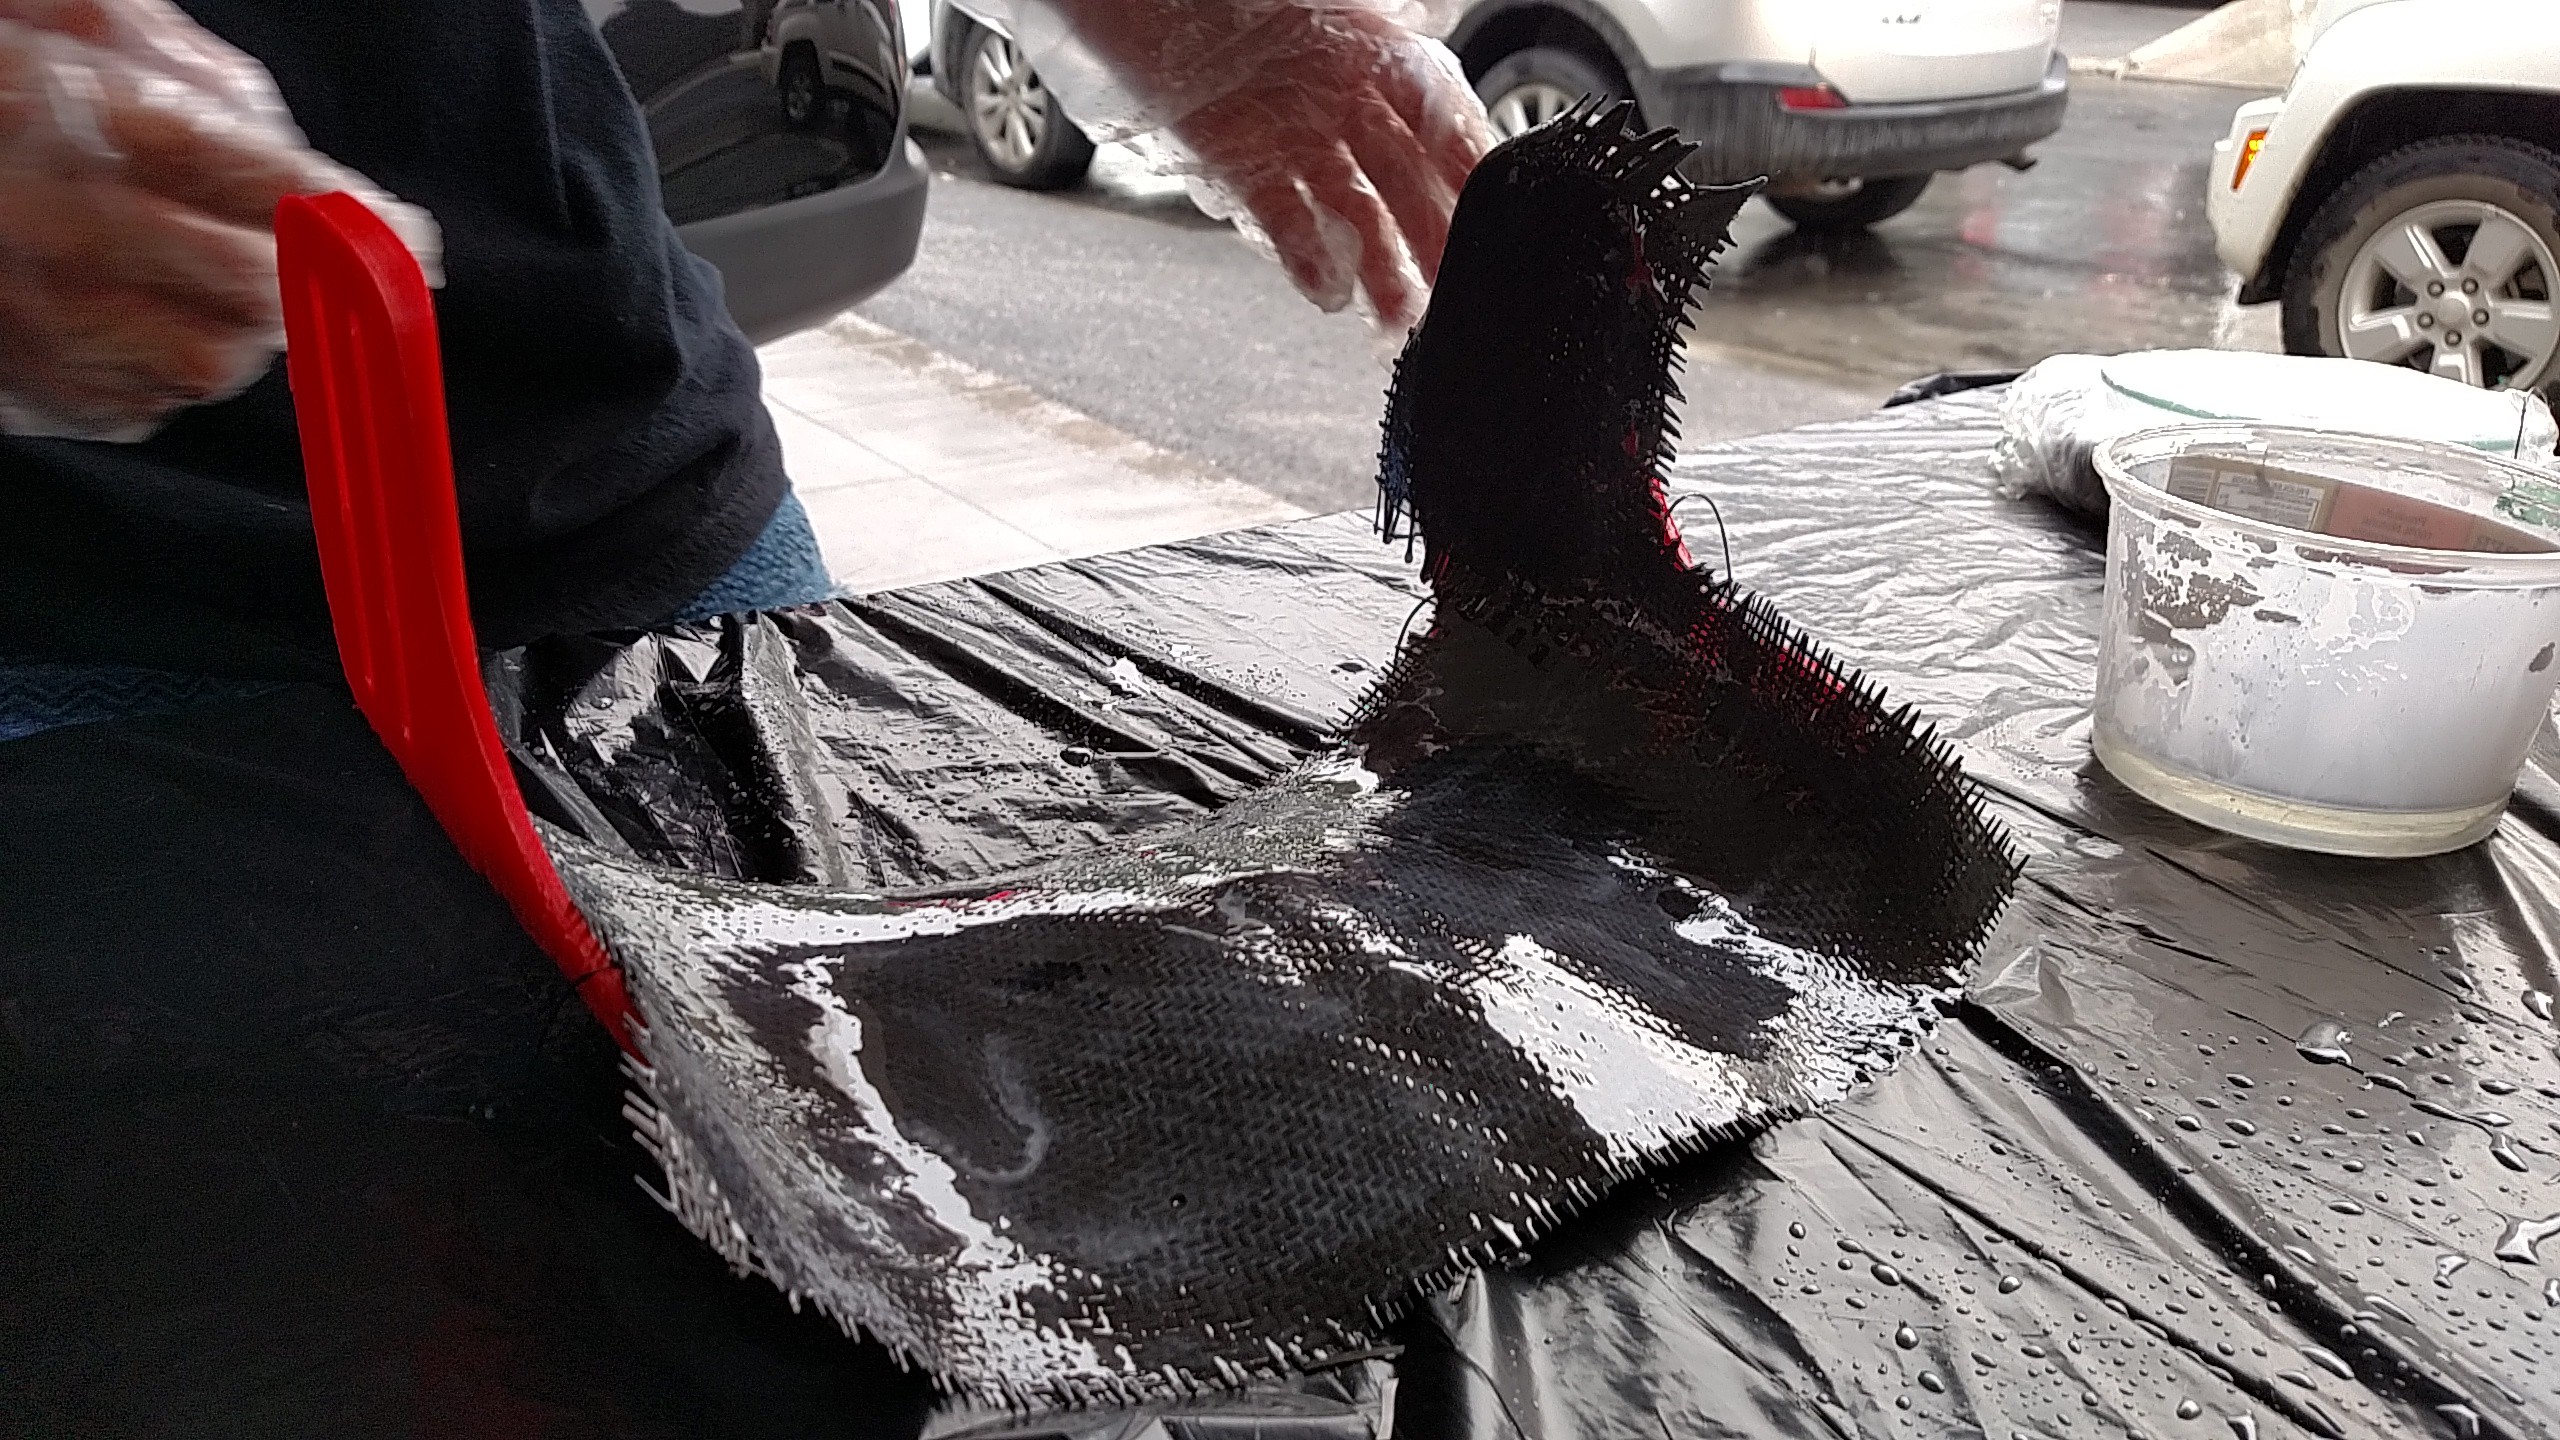
09/03/2017 at 22:06 • 0 commentsWe have just finished the hip manufacturing. Our hip combines 3D printing technology and carbon fiber, a novel process that enhances the contact interfaces stifness. The feet and hip were made with this manufacturing process.
Here are some pictures:
![]()
![]()
After finishing the feet and hip manufacturing, we assemble the robot and it looks like this:
![]()
What's next? Ergonomic tests with a child.
Thanks for reading.
-
Two-legged locomotion algorithm
08/31/2017 at 00:04 • 0 commentsIn the last log, we explained how the accelerometer-based algorithm works in one leg. Now, we are showing the implementation of this algorithm in both legs, being controlled by a programmable joystick. In this case, when you move the joystick to the right, the robot will move the right leg and when you move the joystick to the left, the robot will move the left leg, this allows the user to have control over the exoskeleton, deciding when to move each leg.
Here's a video demonstrating the two-legged locomotion algorithm in action:
Now, we are building the hip for our robot. Soon we will be able to do ergonomic tests with an user.
Thanks for reading.
-
Accelerometer-based control algorithm
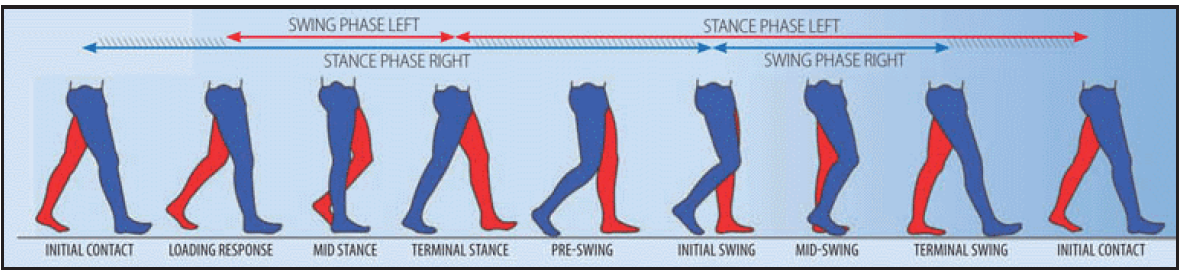
08/27/2017 at 00:11 • 0 commentsWe are very excited to share our progress. After we finished the wood stand for our robot, we started working in the control algorithm. I'll explain briefly how the algorithm works; the algorithms it's based on a 4-state machine and it's an accelerometer-based algorithm, meaning that when certain position is achieved by the leg, the algorithms knows the position and executes the next state. The 4 states described in our algorithm, are based on the Perry gait model (http://ieeexplore.ieee.org/document/7287961/).
![]()
In this video, you can appreciate how the microcontroller reads the accelerations and executes the next state only if the desired position is achieved by the leg.
Once the arduino codes are finished and documented, I'll post all of them on my github.
Now, we'll be working in the two-legged locomotion algorithm.
Thanks for reading.
-
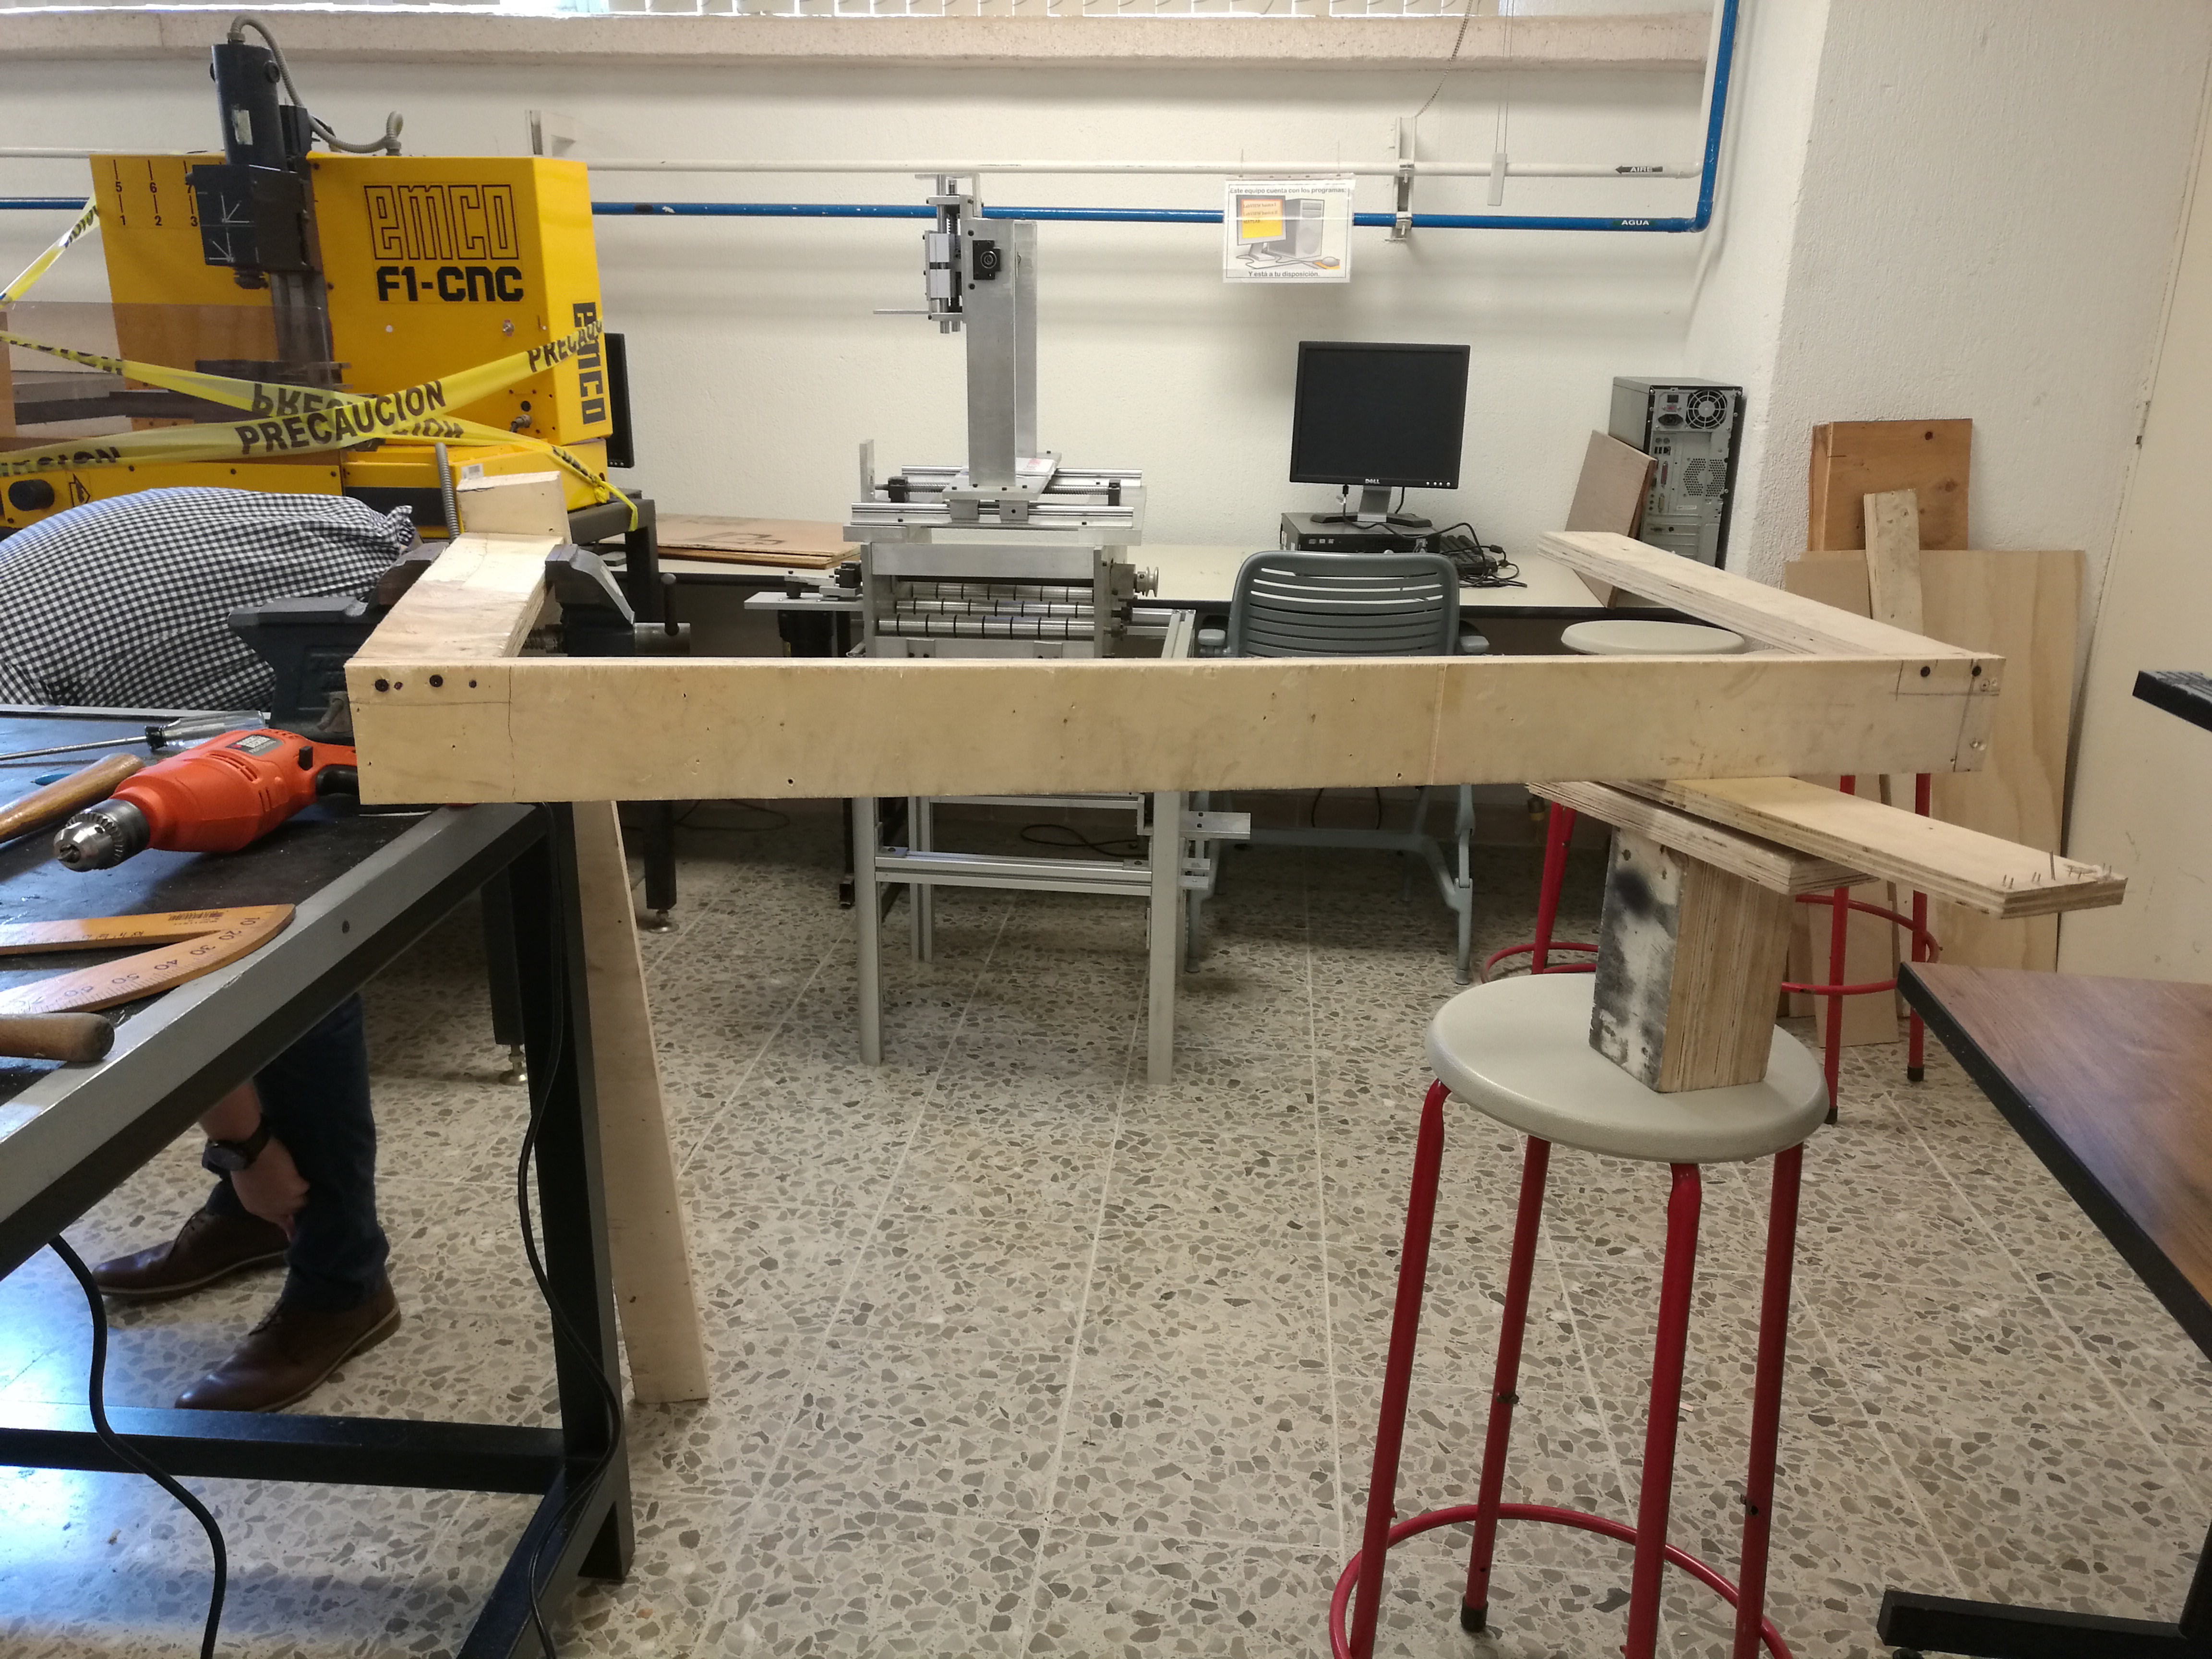
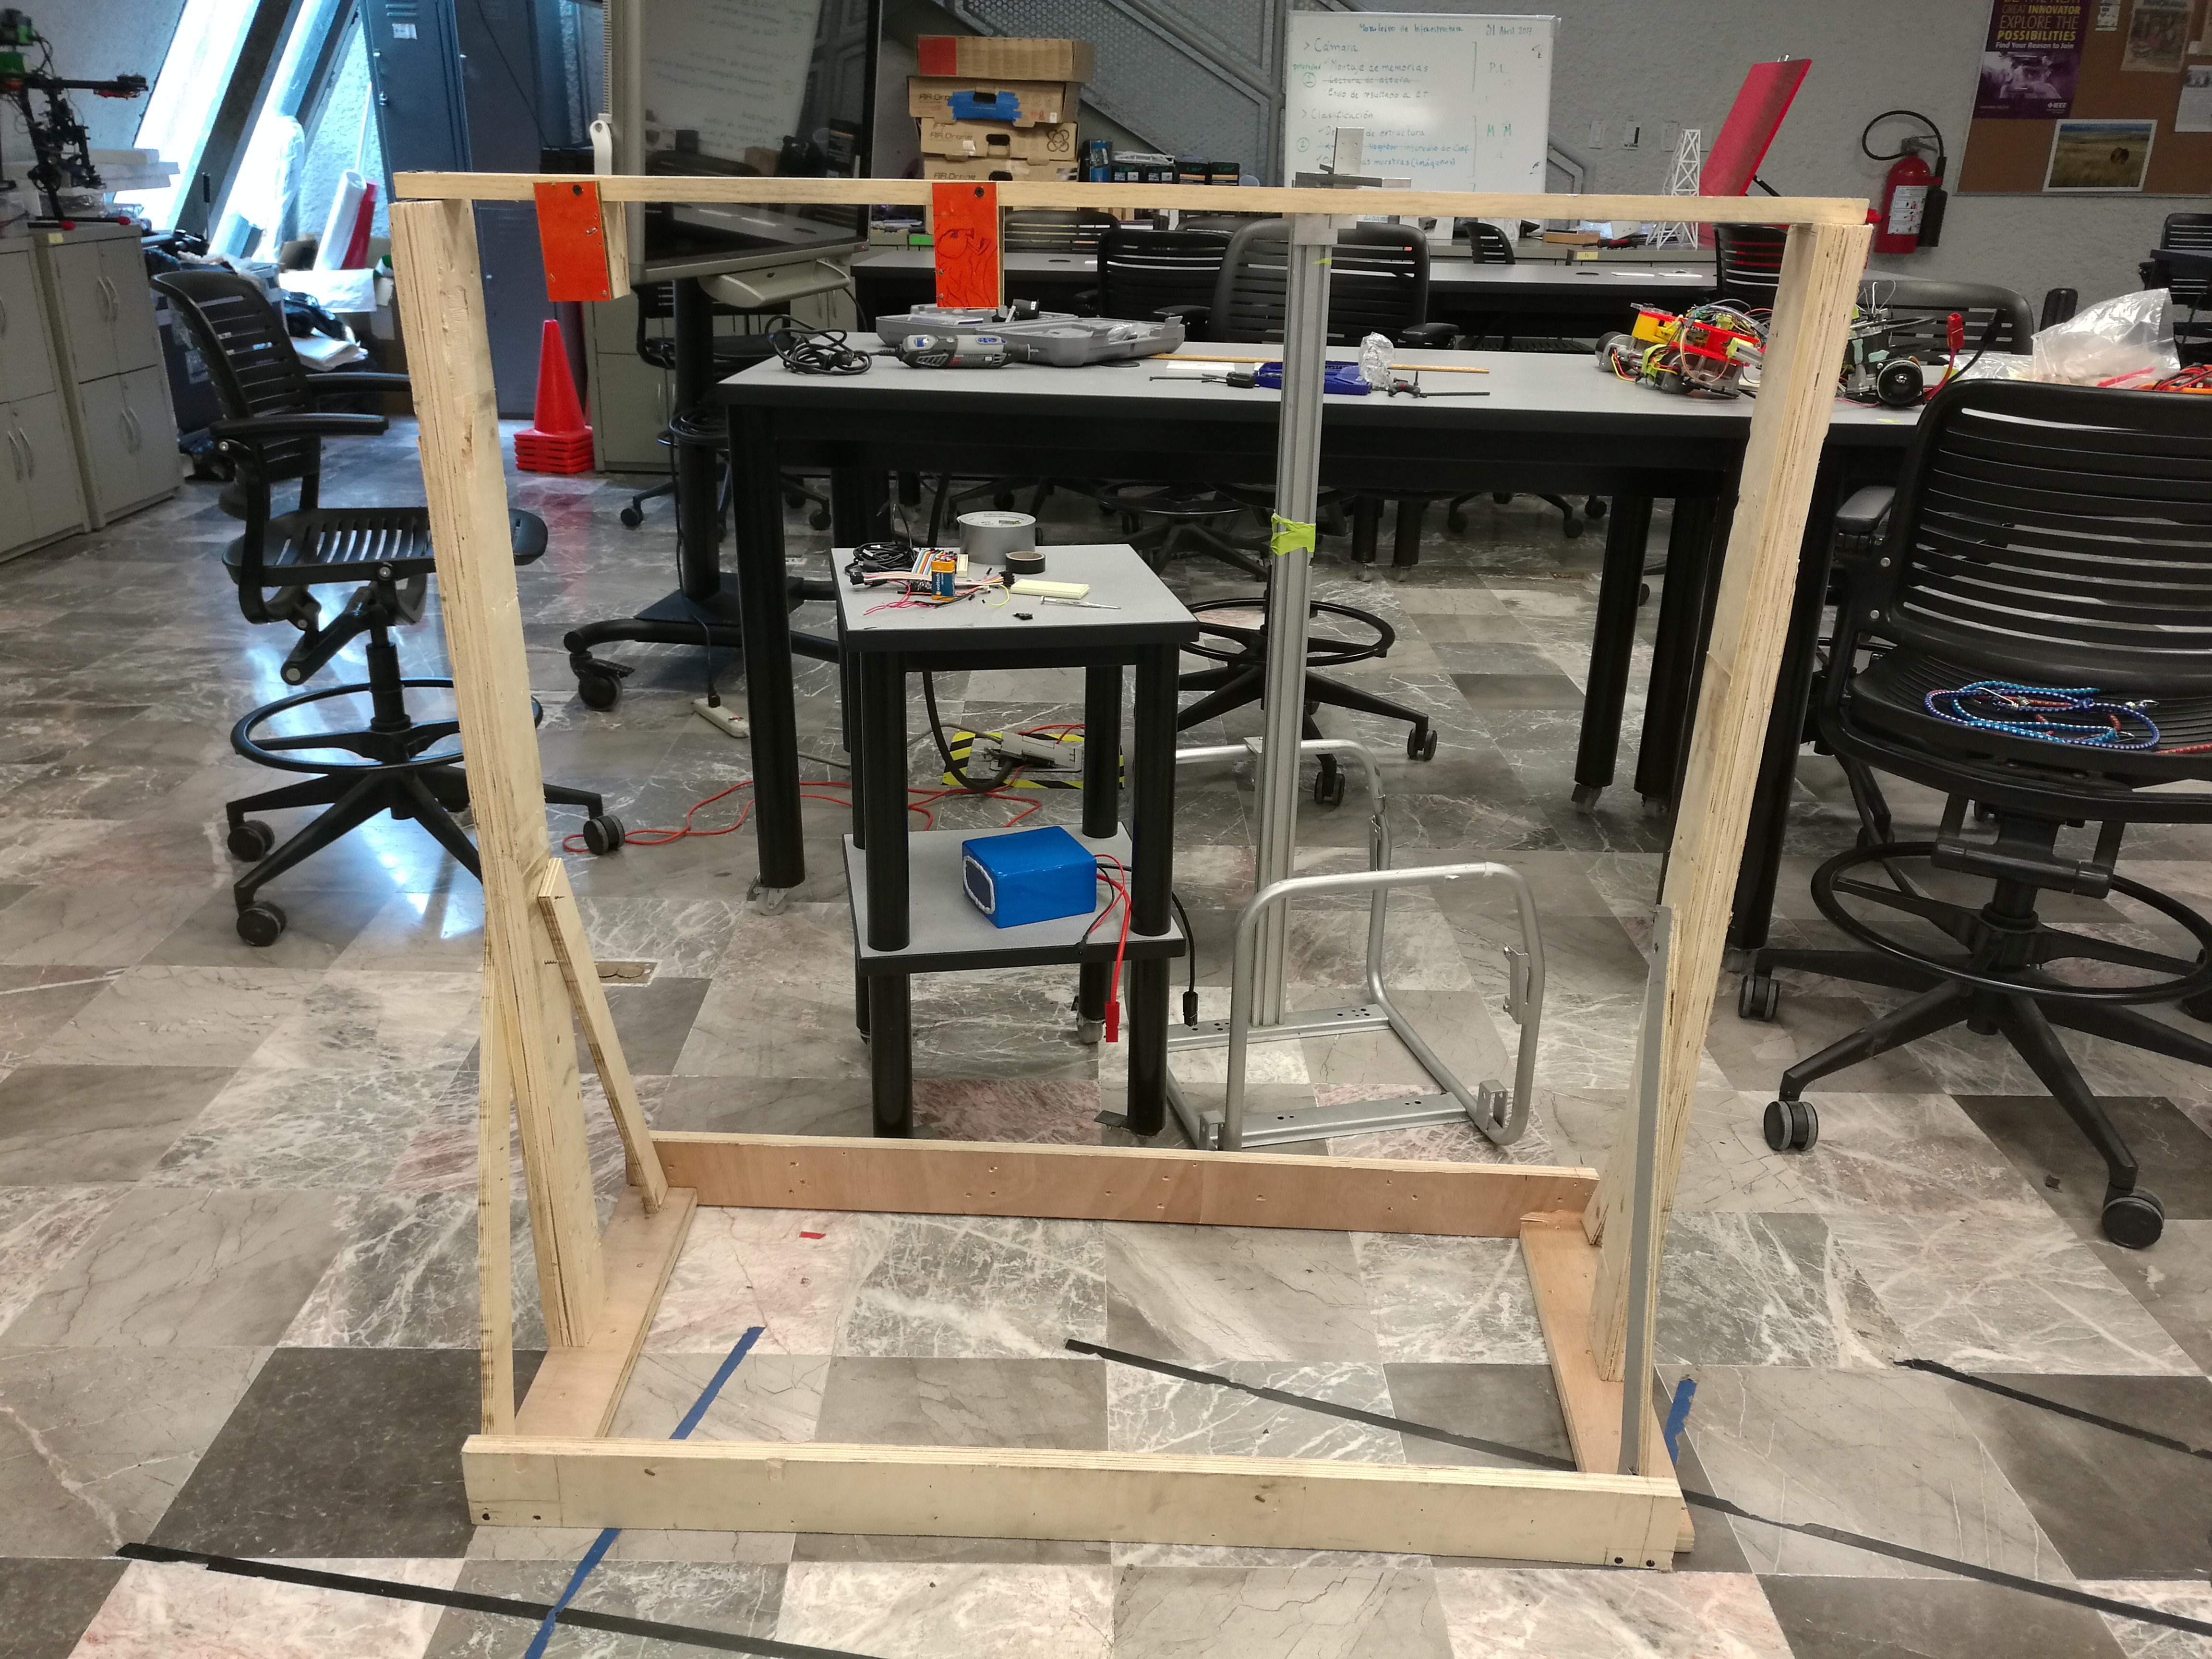
Wood stand for Exo ALICE
08/08/2017 at 17:02 • 0 commentsIn the last days, we have been working on a wood stand for our robotic exoskeleton. While doing tests with both legs, we realized we needed more space so the legs could move with more liberty.
Here's a picture of day 1:
![]()
We finished the wood stand in only two days. Here's a picture of our stand:
![]()
Now, we will put the legs in the stand and try our two-legged locomotion algorithm.
Thanks for reading.
-
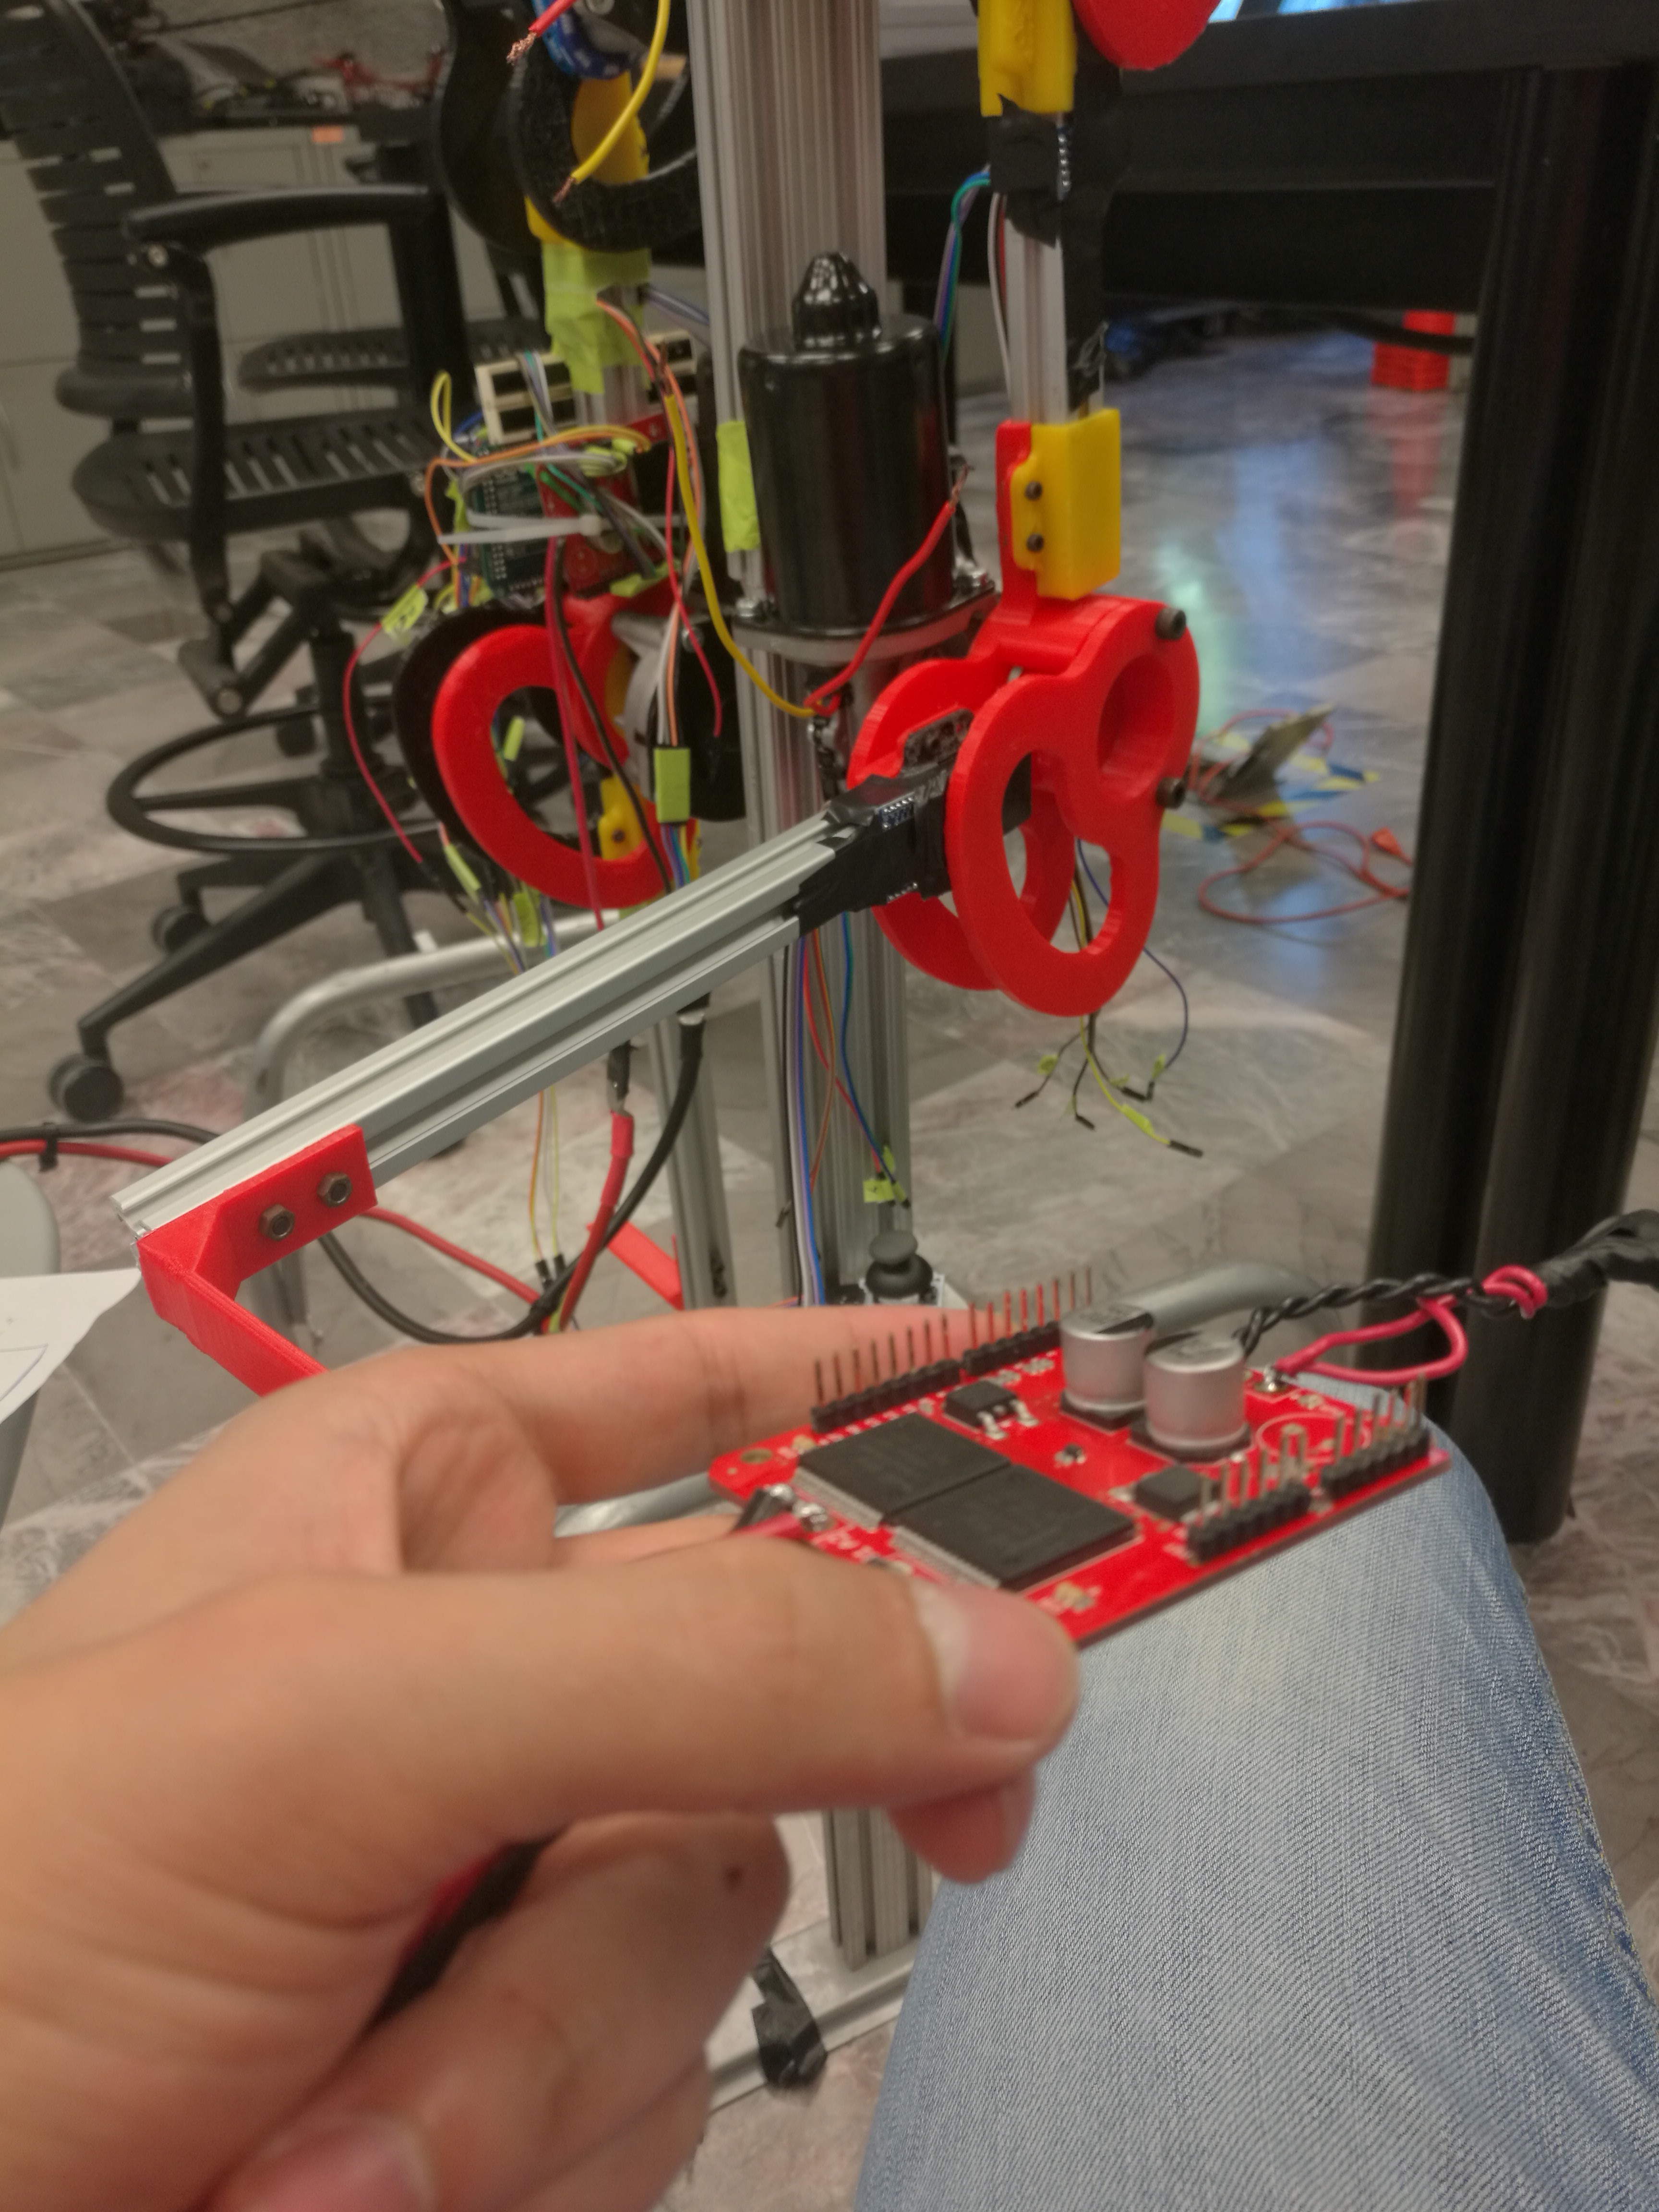
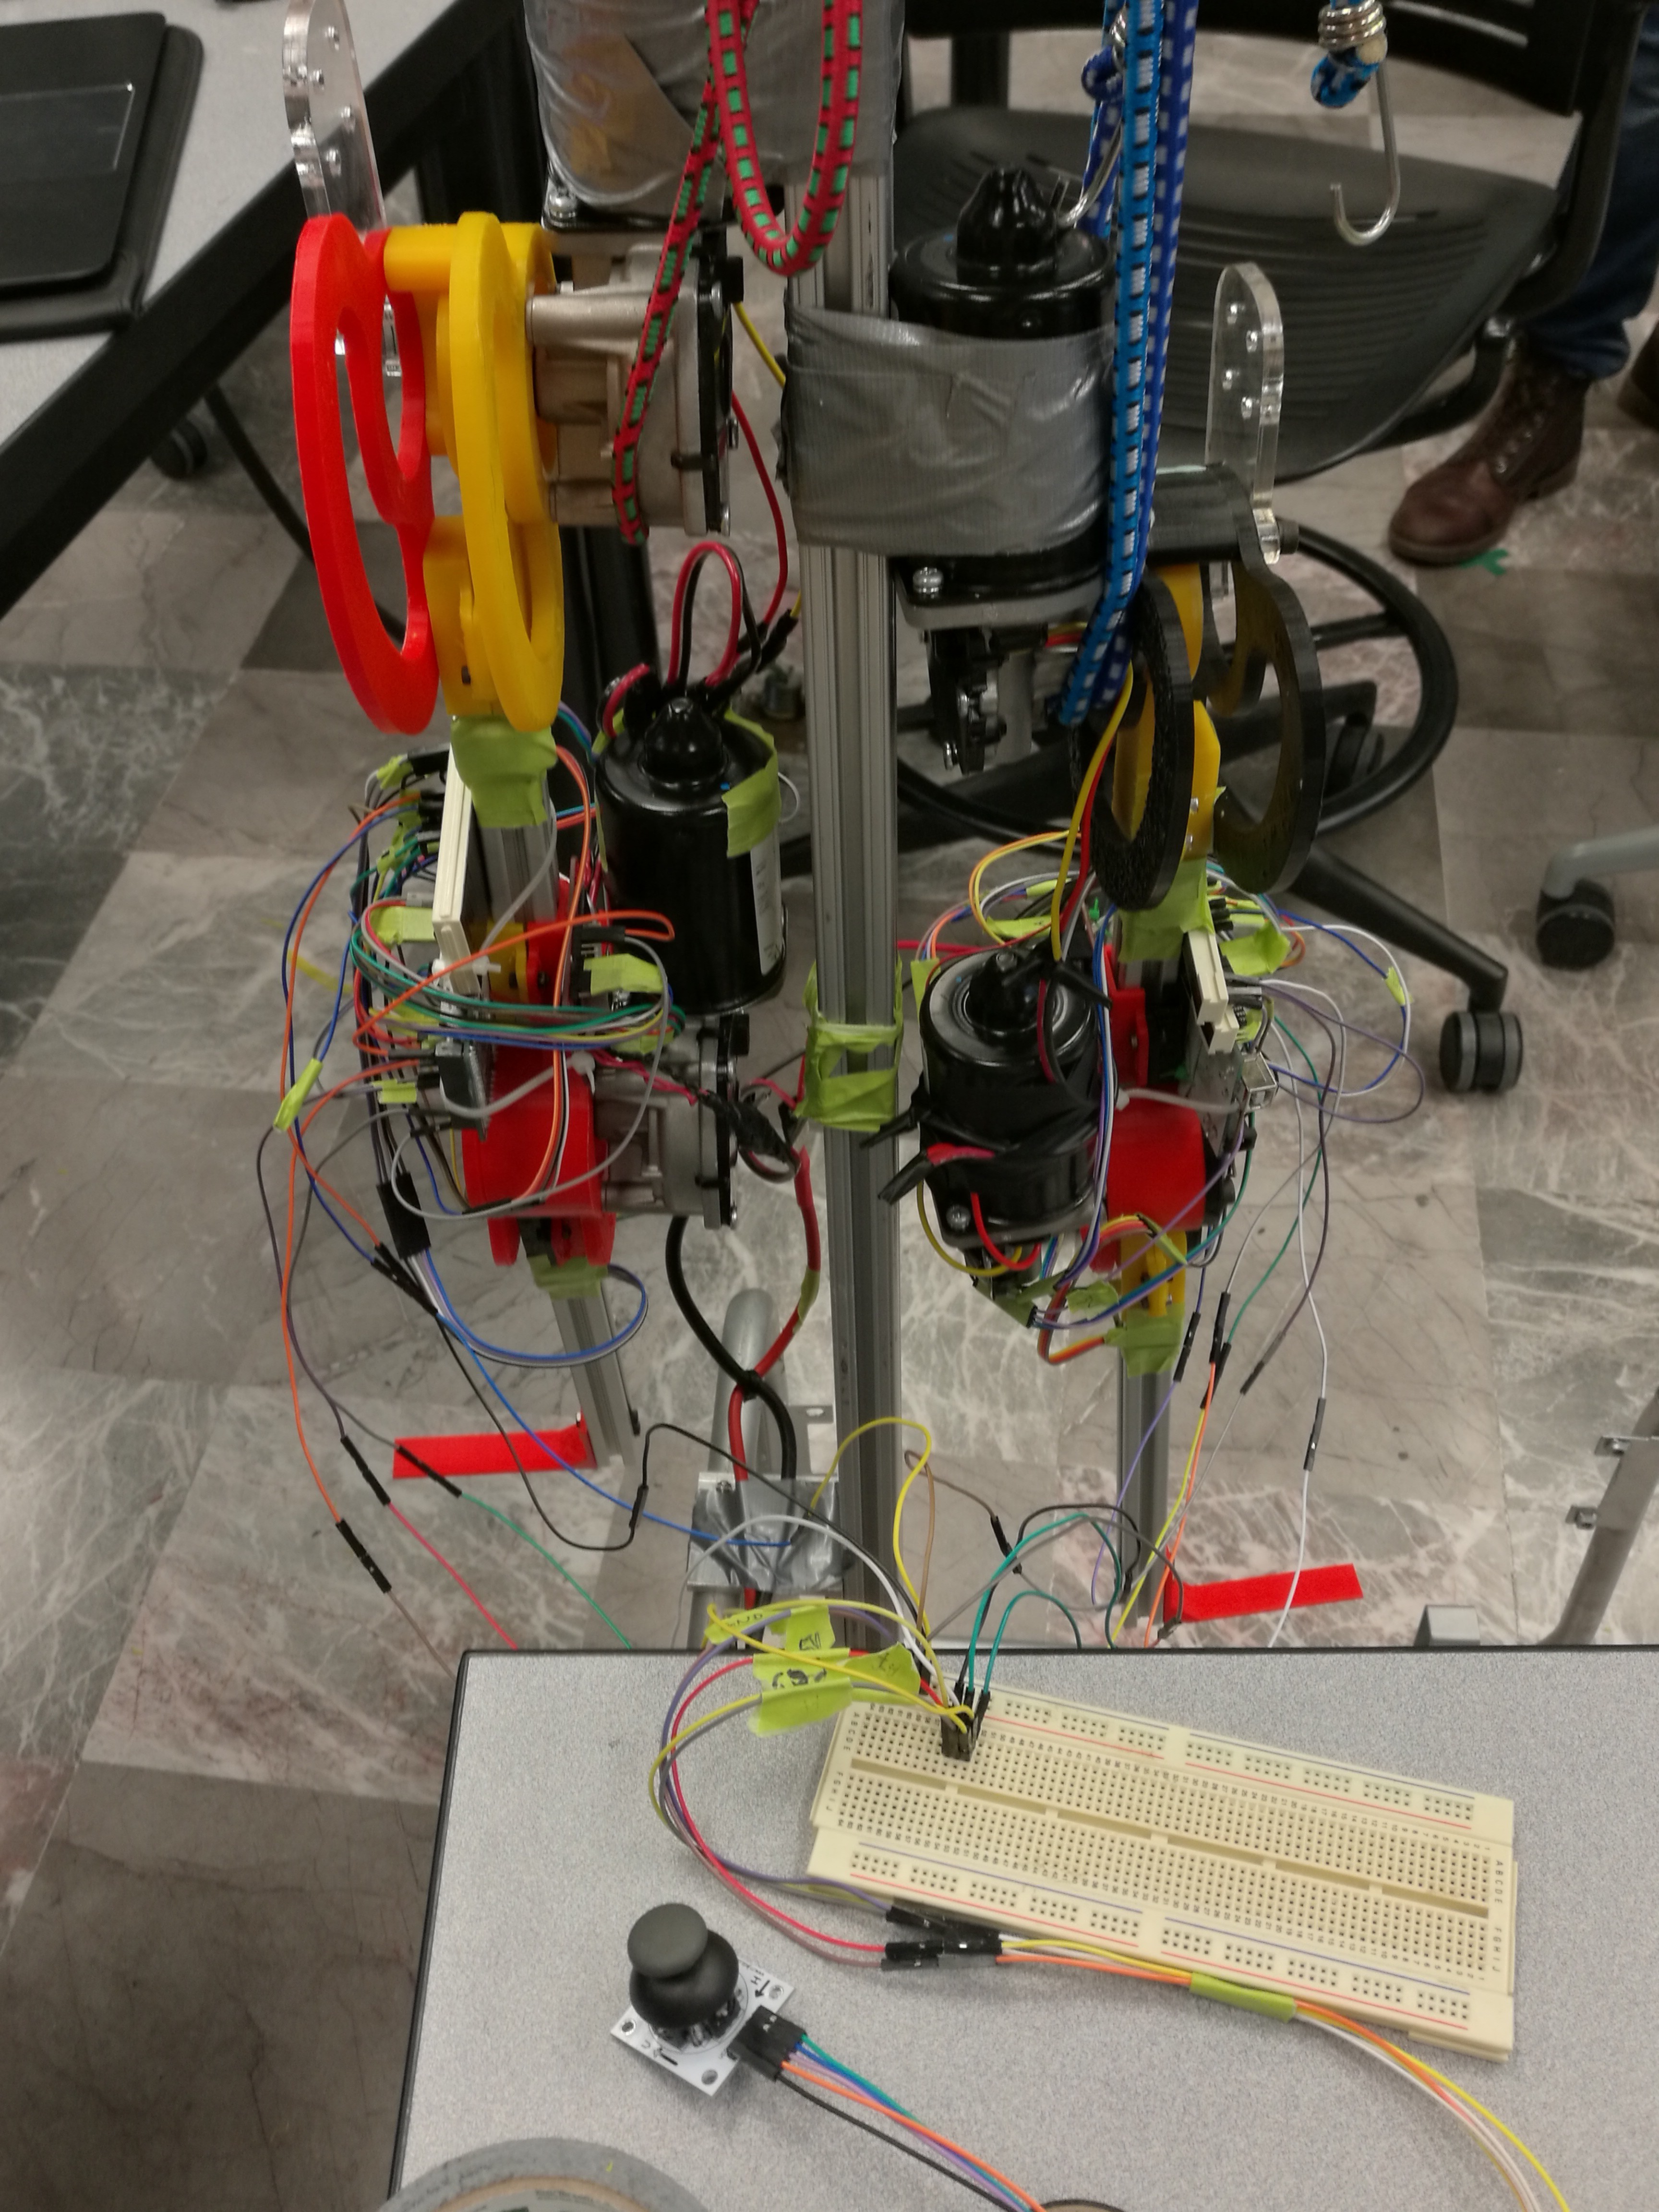
Legs with the electronics ready for tests
08/03/2017 at 01:27 • 0 commentsAfter some tests with the Knee of our exoskeleton, we have assembled the two legs and implemented the electronics on them. We have put most of the the micrcontrollers, drivers and cables on the exterior of the exoskeleton, for better user's ergonomy and comfort.
This is me, figuring out how to put all the electronics:
![]()
Now, our prototype looks like this:
![]()
We have started the tests regarding the two-legged locomotion. Soon, we will share our progress.
We are very happy and proud to announce that our Exo was one of the 20 finalists in the Wheels, Wings and Walkers portionf of the Hackaday Prize. We sill continue working to open new opportunities for the people in need of these devices.
Thanks for reading.
-
Enhanced Control Algorithm
07/22/2017 at 16:52 • 1 commentThe enhanced version for our control algorithm is ready. Thanks to accelerometers, we can detect the exact position of the leg and implement a closed-loop control system for the movement of the leg. Here's a demo of the movement of Exo ALICE leg:
Thanks for reading.
-
Control Tests
07/10/2017 at 17:50 • 0 commentsWe have started some control tests with our Exo ALICE knee prototype. Our control algorithm is based on the position of the knee using a joystick. For these tests, we are using a Monster Moto Shield connected to an Arduino Due to control position and speed.
Here's a video:
What's next? Enhanced version of the control algorithm based on accelerometers.
Thanks for reading.
-
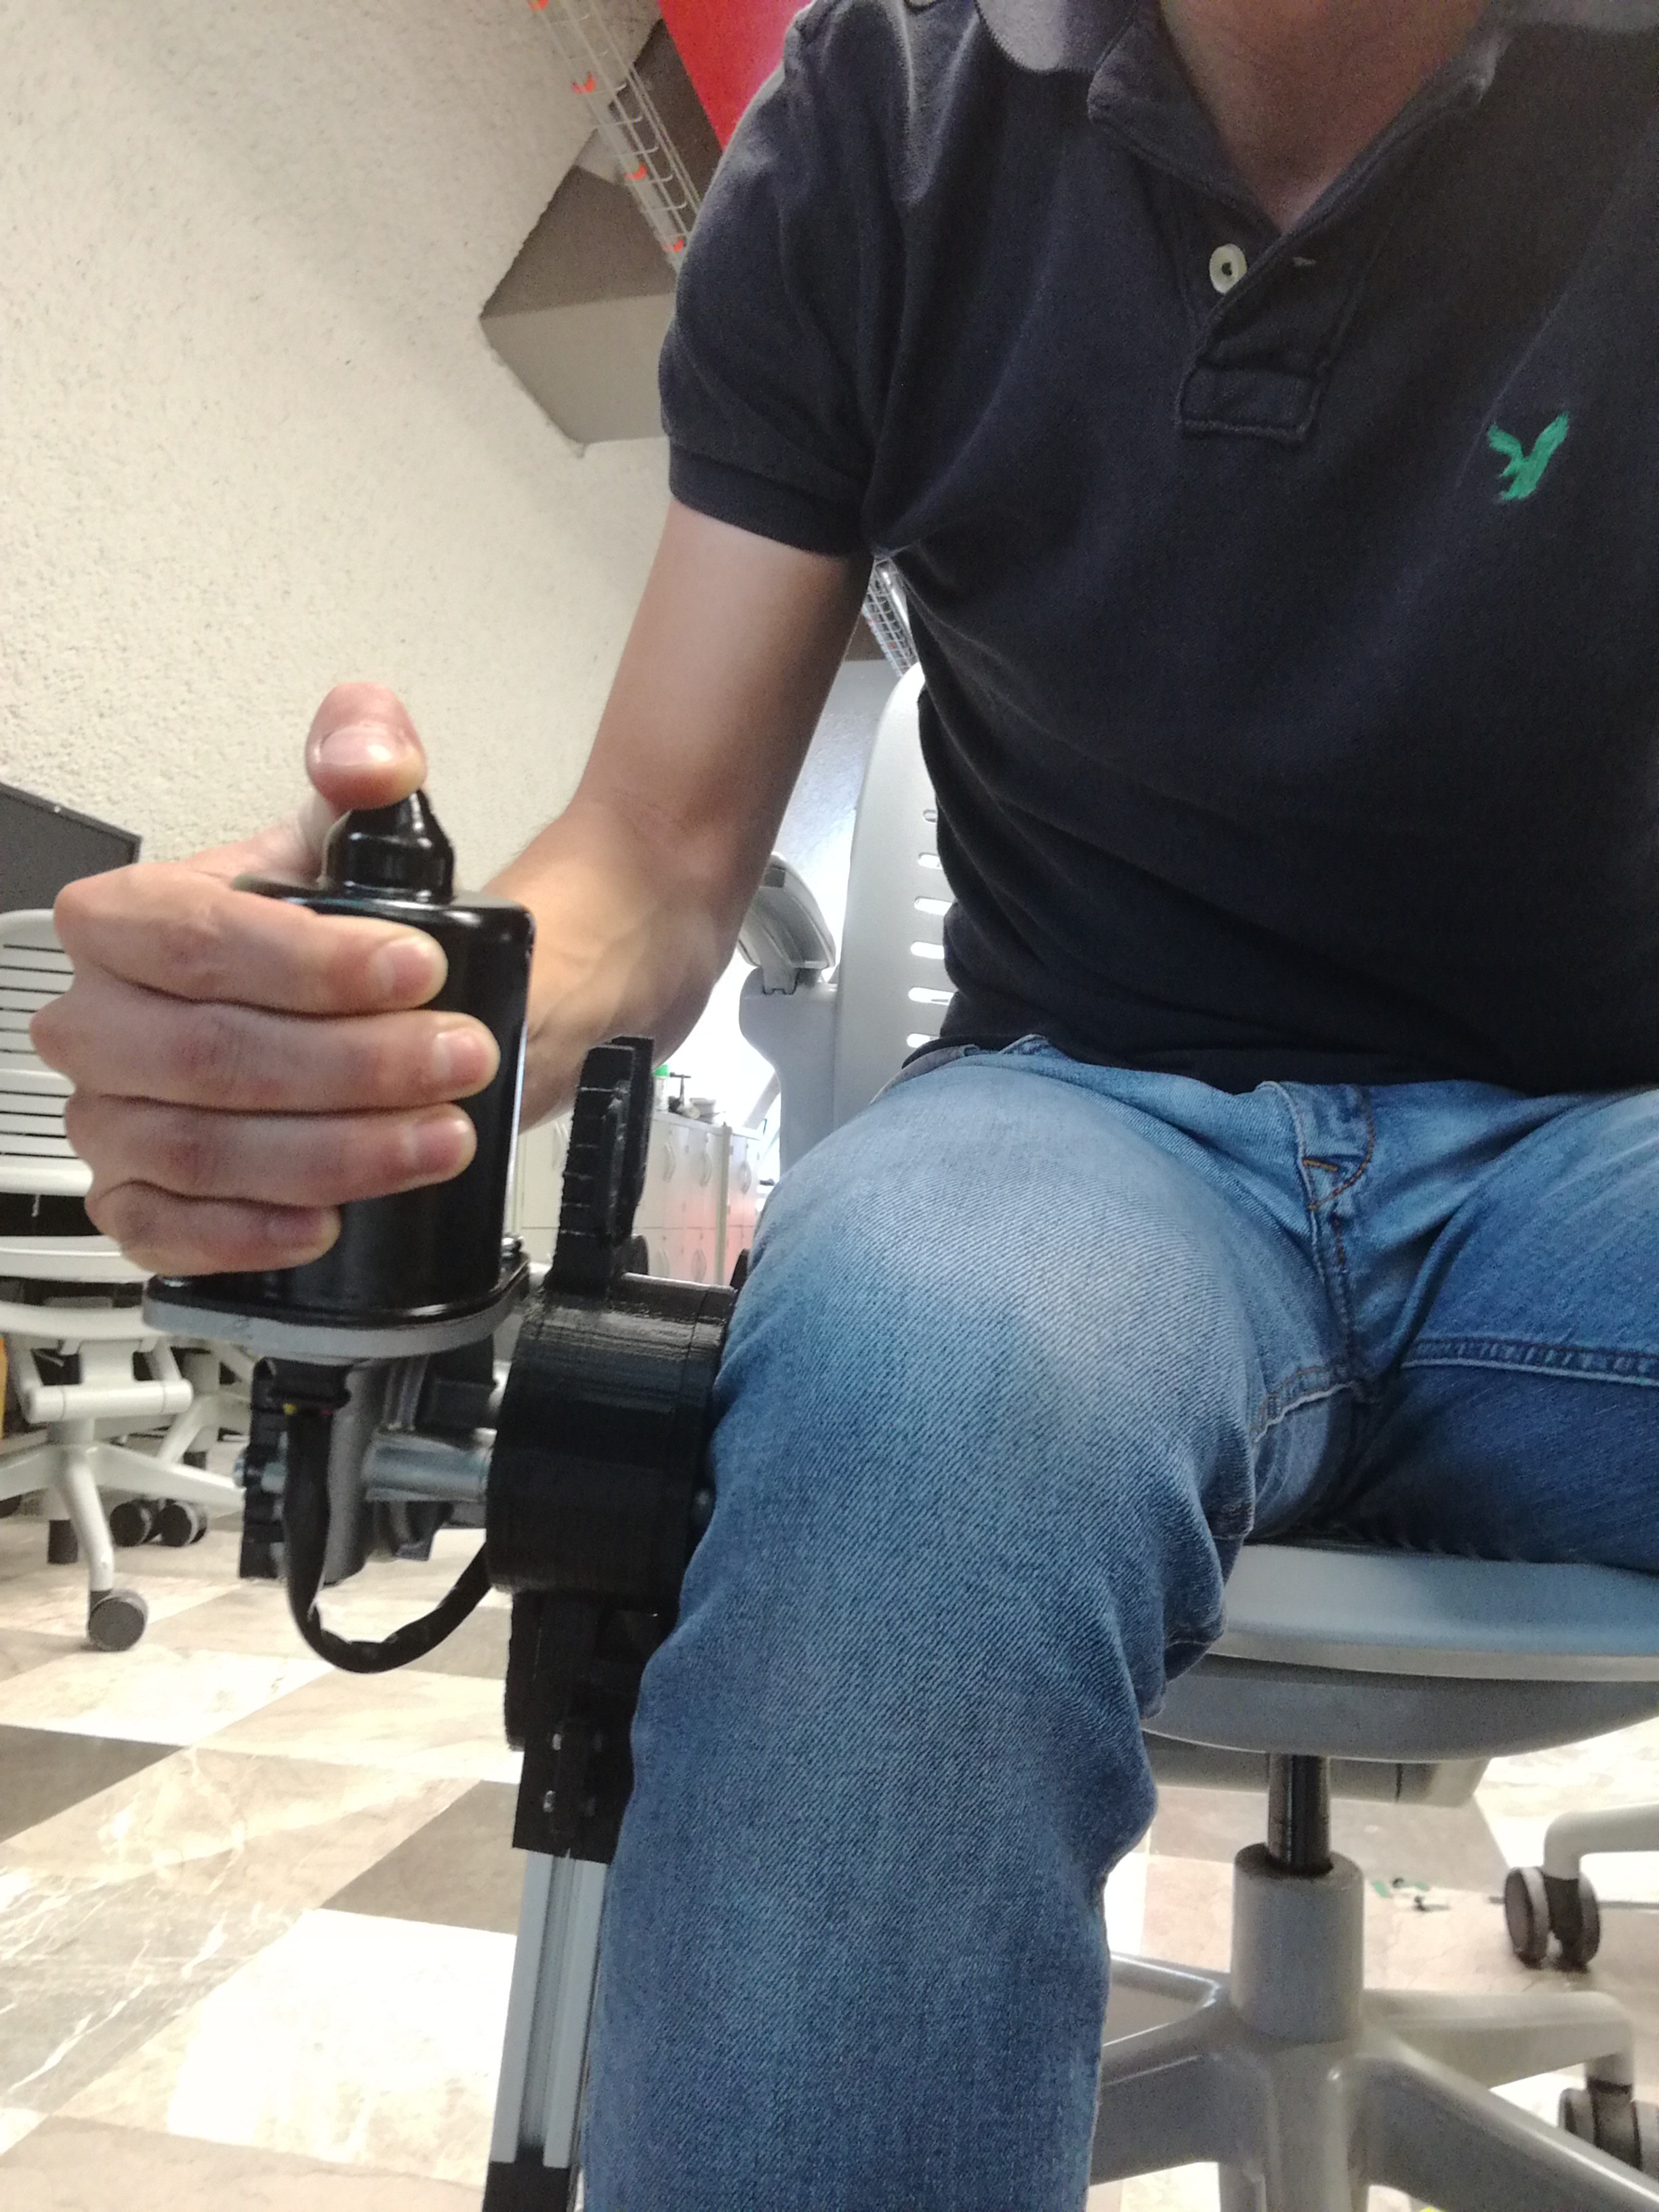
Excited for wheels, wings and walkers
06/22/2017 at 15:32 • 0 commentsWe are very excited to continue working on our robotic exoskeleton, a walker device that will help millions of people around the world with mobility problems.
In the last days, we finished our right knee exoskeleton prototype. We assembled the 3D printed parts and make some mechanical tests, everything seems perfect. Here's a picture of the right knee.
![]()
Now, we are working with the electronics and motor control. Soon, we will publish the list of all the materials needed for building a robotic exoskeleton.
Thanks for reading.
-
3D printing exoskeleton parts
06/14/2017 at 15:03 • 1 commentOne of the main goals of this project, is to make it low-cost so people all over the world can afford it. 3D printing technology is essential for rapid prototyping and for reducing costs.
After several hours of 3D printing, right knee parts for our robotic exoskeleton prototype are ready.
We used PETG material for higher stiffness.
Here's a video of the right knee efector in layer mode before printing the piece:
And here, a picture of the 3D printed parts:
![]()
What's next? Mechanical assembly and tests.
If you are interested, feel free to leave a message.
Thanks for reading.
ALICE: Robotic Exoskeleton
The first 100% open-source lower-limb robotic exoskeleton.