Close
0%
0%

An Unfortunate SMD Project

If you like happy, easy to build projects, this is not for you. This project is only for people who like to be miserable and frustrated.

Similar projects worth following
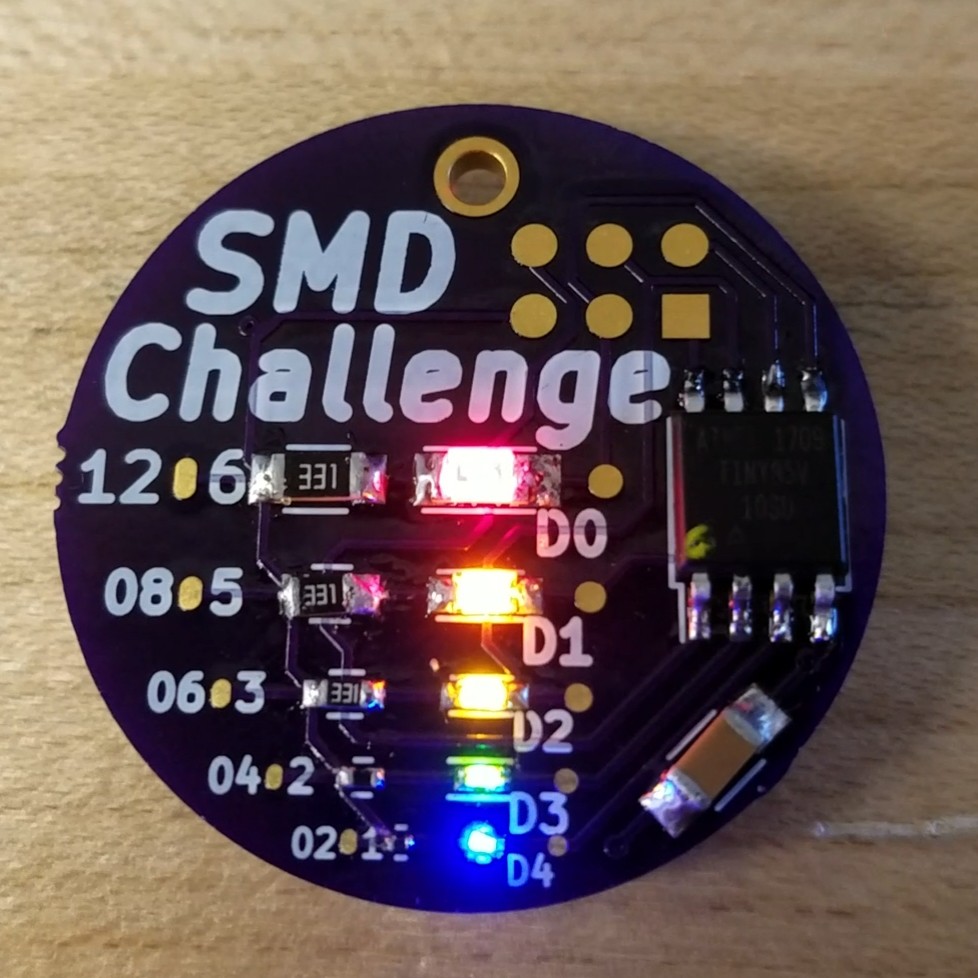
Test your surface mount soldering skills out, starting with a 1206 package and work your way down into an oblivion of frustration. Powered by a CR2032 coin cell and Attiny 85 SOIC.Be warned that trying to hand solder a 0201 package, which is just slightly larger than a grain of sand, may be considered evidence of insanity and get you committed to bad places by your loved ones and/or arch nemesis.I have submitted to request from miserable people to make this an unfortunate kit. Don't think I'm doing you any favors: https://www.tindie.com/products/MakersBox/smd-challenge/

Making LEDs blink is what people think make Makers happy, but they are wrong. Makers want to be miserable. They like to make mistakes and to have to try things over and over again. That which does not kill us, makes us stronger. This project will make you strong!

Hand soldering a 1206 is easy and makes me happy, so I decided to see how far down the package sizes I could go before I was reduced to tears. I can do a 0402 package by hand, but it isn't pretty.

My biggest hurdle was determining orientation of the LEDs. You need to refer to the datasheets because each one has different markings. You will also need a USB microscope or really good magnifying glass for the smaller packages.

You are also going to need a good set of tweezers. Robots, who will rule us shortly, have no trouble picking and placing these devices (without error or complaint I might add), but shaky hands and faulty eyes make this a sad affair all around for us miserable mortals. If your luck is as bad as mine, you will spend lots of time frustratedly looking for microscopic dots when they fling out of your tweezers. Buy several extras of each size because the universe will go out of its way to make sure you will need them.

SMD_challenge_Cylon.ino

New firmware that flashes LEDs in a less unfortunate order, like the Cylon Warriors who try and hunt humans into nonexistence in our miserable future.

ino - 1.84 kB - 03/29/2018 at 15:25

Download

SMD_challenge mask.svg

This is the SVG file which can be used to laser cut a mask. Why would I encourage this sad behavior?

svg+xml - 8.36 kB - 07/27/2017 at 04:37

Preview

mask-F.Mask.gts

This is the gerber file of the top mask which can be uploaded to OSH Stencils to have a mask made, or if you are unfortunate enough to have a laser laying around the house.

- 1.68 kB - 07/27/2017 at 04:37

Download

SMD_challenge.png

A very poor excuse of a schematic for those of you depressed enough to be interested.

Portable Network Graphics (PNG) - 88.86 kB - 06/05/2017 at 03:31

Preview

SMD_challenge.ino

The sad original firmware that blinks LEDs in a very unfortunate random pattern.

ino - 3.41 kB - 06/05/2017 at 03:17

Download

View all 14 components

  • Official Toorcon Badge?

    MakersBox09/16/2018 at 03:01 0 comments

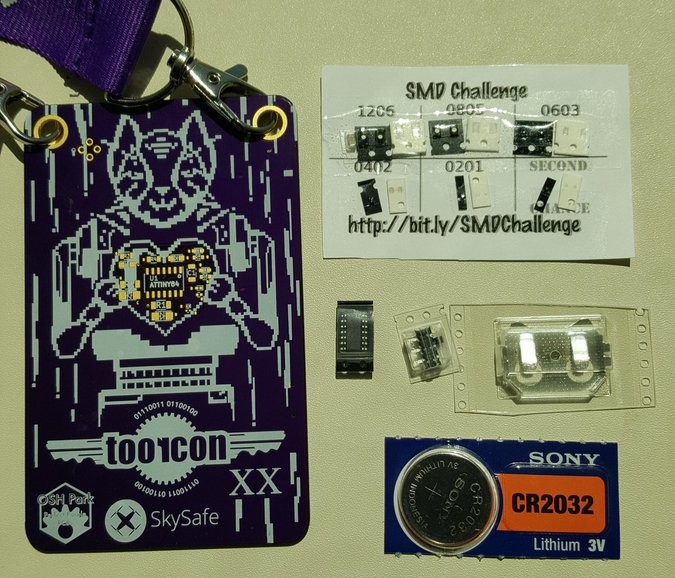
    The SMD Challenge had already spread misery to poor attendees of ToorCamp this year, and no good deed goes un-punished, so I was greatly disheartened when a request for more SMD Challenges for this year's ToorCon became a request to help with the official badge?  Four hundred kits.  Woe is me.

    Luckily for attendees, the SMD Challenge is actually just a small part of this badge.  There are all sorts of codes in all sorts of places.  I'm not sure what they all mean, or what you get if you figure them out.  I was sworn to secrecy, had my eyes gouged out, and was forced to burn all my gerber files.  I'm not responsible for the beautiful 8-bit art (obviously, because it is not miserable), nor do I know what "Toor" and heart cats have in common.

    This SMD Challenge is more miserable than other because it features eight, not six, SMD LEDs.  It is only by my distaste of handing the smaller parts (and their greater expense), that only one of the LEDs is of the 0201 variety.  Why eight?  Sworn to secrecy.

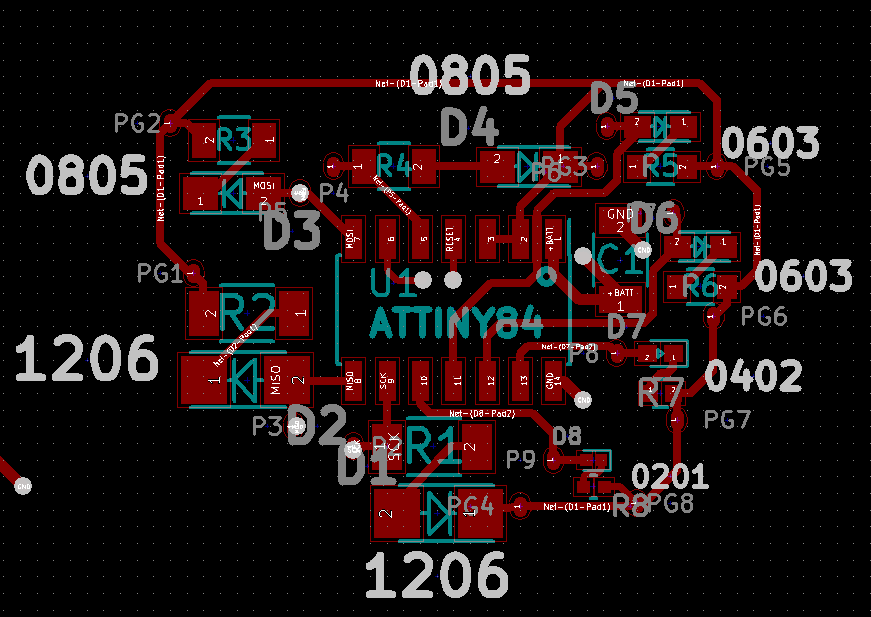
    Ironically, the beautiful artwork made identify component placement a bit ugly.  I'm also not sure what bit of insanity made me switch LED orientation based on what side of the heart the part was.  I'm obviously not doing anyone any favors, but here is a clear PCB screenshot, sans artwork and secrets, showing size and orientation.

    If you are struggling to even get started on this, Piotr Esden-Tempski has done an excellent video.  One hint for the initiated:  Get the Attiny in the right orientation, or it will go up in smoke.  Wait, that is the Attiny85.  This one used a more forgiving Attiny84, so it will be just a non-functioning piece of 8-bit art.

    If you are heartless enough to want to include some misery in your next event, please don't contact me.  Because apparently I can't say no.

  • Apparently competitive soldering is a "thing" now.

    MakersBox08/30/2018 at 21:59 0 comments

    Don't blame me.  I just wanted so see what small SMD parts looked like up close.

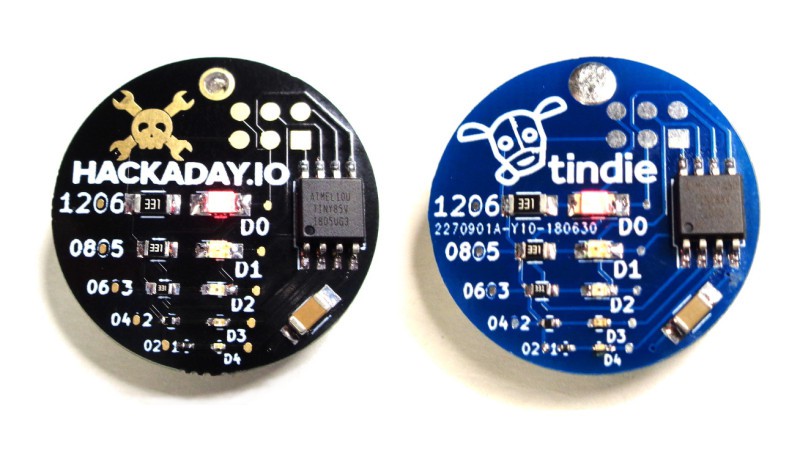
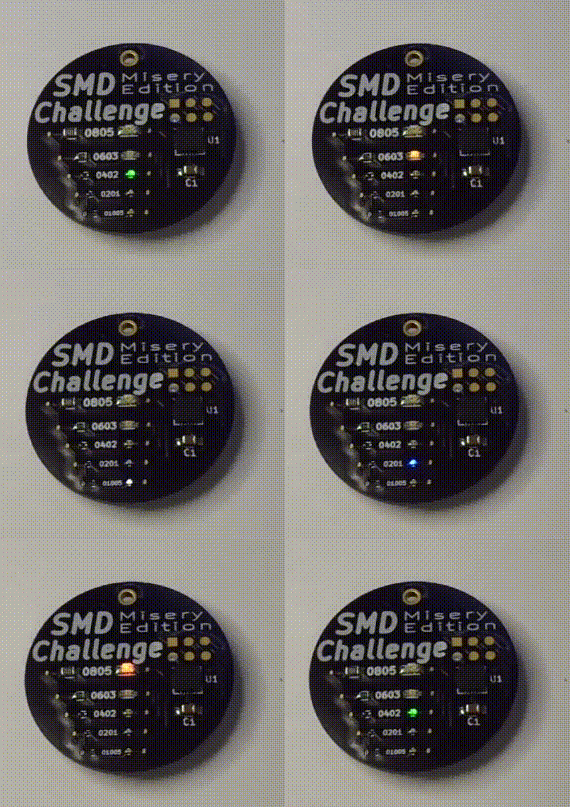
    Tindie, who I sell my kits through, contacted me about some custom kits for DEFCON, and I was eager to see the board in different colors.  I think they turned out nice:

    I kitted 100 of each.  DEFCON turned it into a contest with a time limit and scoring system.  I'm sure I wouldn't score in the top group, but it sounds like it was a success. 

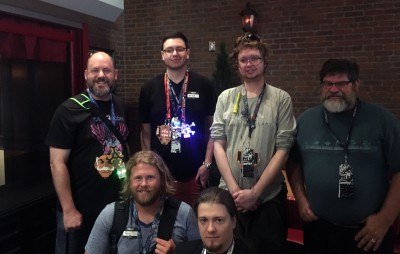
    The winners of the soldering challenge, at the Hackaday Breakfast Meetup at DEF CON 26.


  • Outdoor Misery

    MakersBox07/01/2018 at 18:33 0 comments

    Will C. (@WillCaruana), who I met at Teardown, decided to spread the misery to the great outdoors, more specificly ToorCamp.  And what to do we do when we are miserable?  Drink?  Will reported:

    The Toorcamp SMD Challenge was free form competition. There was no order that needed to follow for soldering on components. Attendees didn't learn about the challenge until they arrived on the island. They were welcome to use any gear they wanted (Though every one is camping so they didn't bring much.) The camp did supply soldering irons and flux on a first come first serve basis. One person did end up bring a hot air station. We had about 20 contestants all of them sharing equipment. Everyone was given 6 beers you had to finish one beer before you could solder the next two components. Bunny won completing the board in 1 hour and 2 minutes literally crushing his beers along the way.

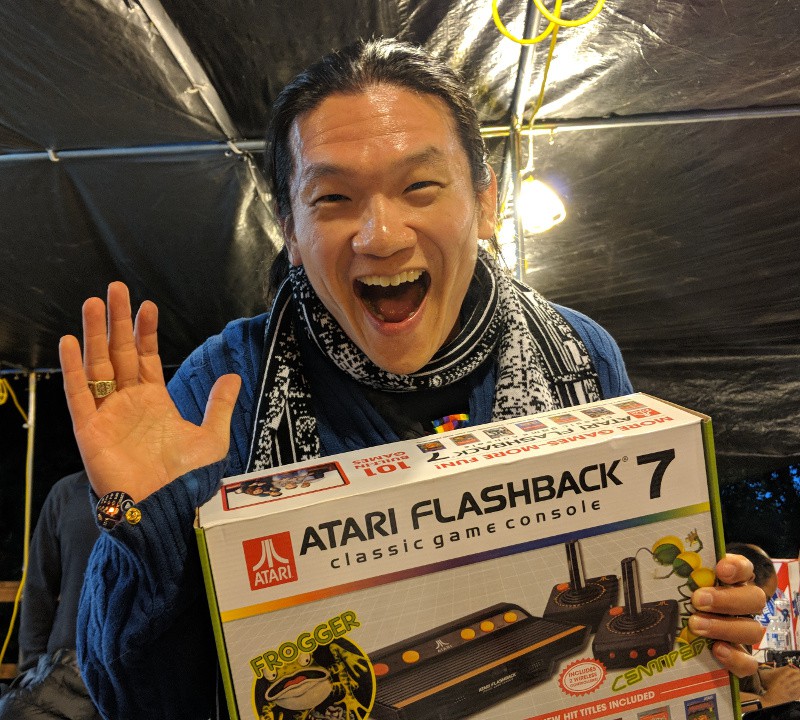
    I believe Bunnie (@bunniestudios) is now the most prominent member of the 0201 Club. He was, incidentally, the keynote at Teardown, where he talked about his current project and his lawsuit to reform the DMCA.

    You can see the special edition ToorCamp Challenge pinned to the wrist of his sweater.  Now why doesn't he look miserable?

  • An Unmiserable Artist

    MakersBox04/08/2018 at 16:02 0 comments

    This person is an artist.  And flux is your friend . . .

  • Can it get any more miserable? Yes.

    MakersBox03/31/2018 at 12:13 1 comment

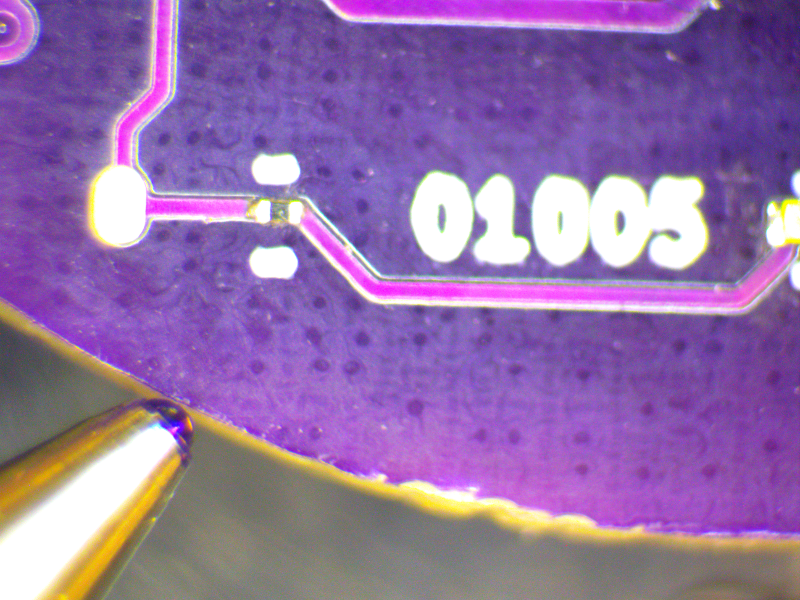
    I originally didn't think that hand soldering a 0201 component was possible.  Several dozen people have proved me wrong.  Can I make their life more miserable?  Enter the "01005" package:

    Yes, that is a ball-point pen tip. And yes, it is hard to get good photographs of things this small.

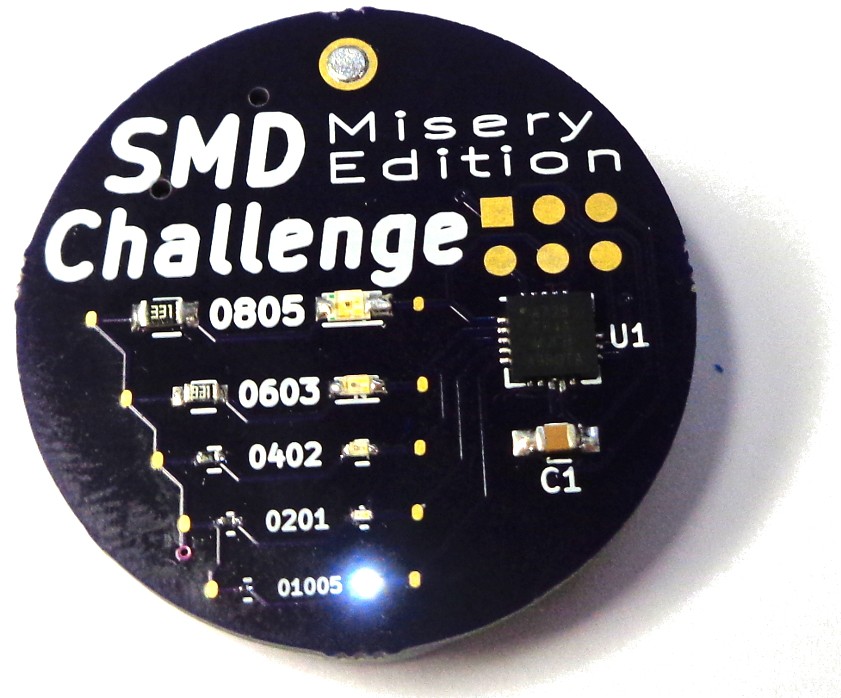
    The Misery Edition of the SMD Challenge now includes a Attiny84 QFN20 package and a 01005 size resistor.  Since I haven't found a matching LED for it yet, I added another 0201 LED, but being a heartless and cruel man, I selected a diffuse one so you can't determine orientation visually (assuming you even have magnification available).

    I am not totally devoid of feeling, so I have designed it so that a backward LED will still light, but you will be denied the joy of witnessing the full terror of the Cylon sequence.  As a further enticement, I've included a power switch to save battery life.

    Green 0402 LED Reversed

    I assume you miserable people will want to celebrate your successful struggle, so there will be a 01005 Club, but don't think you can be the first, because some sorrowful sole found my evil designs on Github and made one on their own.  Truly depressing.

    You can induce your misery straight from source here: https://github.com/aspro648/KiCad/tree/master/projects/Attiny/AttinyChallengeMisery, or just buy a kit of pain on Tindie here: https://www.tindie.com/products/MakersBox/smd-challenge/ (select "Misery Edition").  It would save the terror of trying to flash an Attiny and help me pay off the $80 programming socket I needed to preload the firmware.

  • 0201 Club

    MakersBox12/25/2017 at 06:42 4 comments

    As the misery spreads, it seems only fitting that we should recognize those who are unfortunate enough to suddenly complete the SMD Challenge.  To be included in this club, you must submit photographic evidence (or link thereof) of a working SMD Challenge to 648.ken@gmail.com, for which you will receive inclusion on this list and a digital copy of a frame-worthy certificate of your skill and/or insanity.

    Members:

  • A Miserable Competion

    MakersBox12/07/2017 at 05:58 0 comments

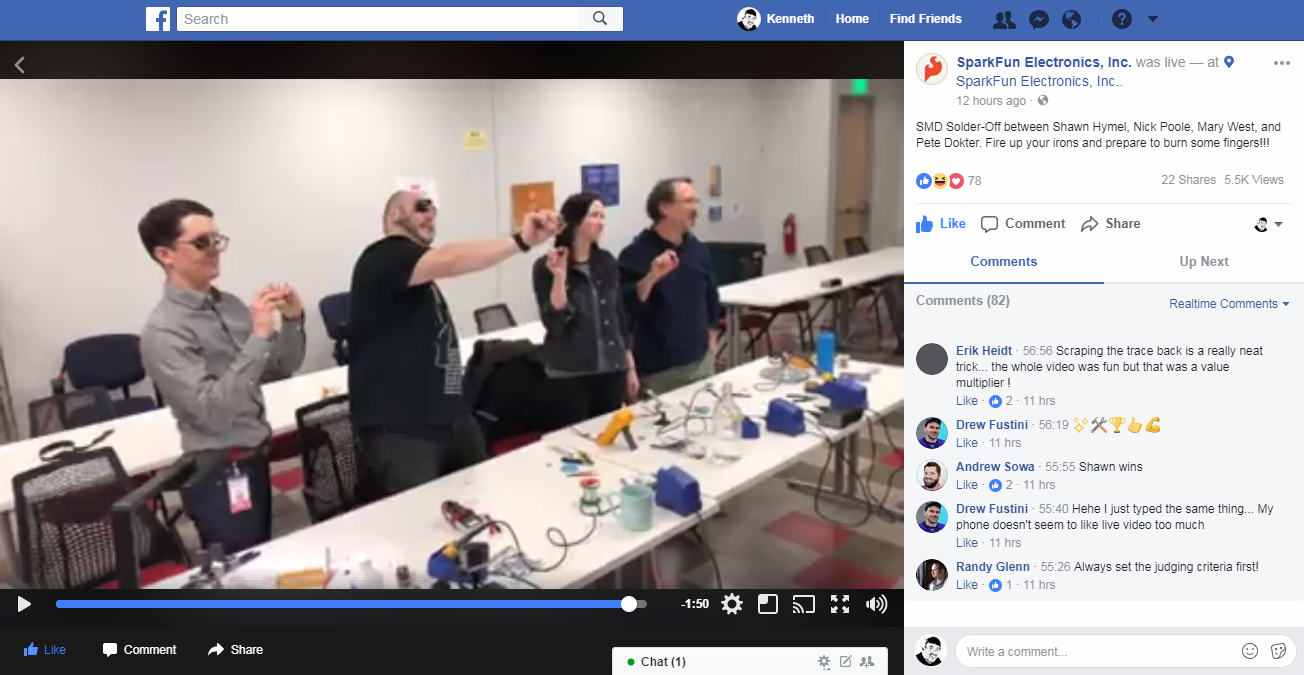
    I don't know how this keeps happening, but the misery spreads despite all my warnings.  The latest victims include four hands from SparkFun.  You think they would have known better:

    https://www.facebook.com/SparkFun/videos/10156329586911416/

    What I learned from watching the pros at work:

    •  I used the stock KiCad 0201 footprint (which I may or may not have verified against the data sheet).  This is appropriately inappropriate for hand soldering. 
    • You don't need the data sheet if you test your components.
    • Speed is good, but attention to detail is King.
    • There is far less swearing at SparkFun than at my workplace.
    •  I've got to get me a loop!
    • My chance at getting hired on at SparkFun may have significantly decreased.

  • Lousy Firmware Update

    MakersBox11/05/2017 at 21:33 1 comment

    This project shared firmware with the much less miserable I Can Surface Mount Solder one.  Both projects have a 1206 LED that flashed with a heartbeat.  On the SMD Challenge, the additional LEDs blinked randomly.

    Thinking it would be more frustrating to have it quite obvious when you invariably mess up an LED, I decided to have them flash in sequence, much like the cold and heartless Cylon Centurions

    If you want to learn more about how sadly slow our eyes are compared to computers, check out http://www.makersbox.us/2013/12/arduino-beyond-blink-how-fast-is-fast.html.

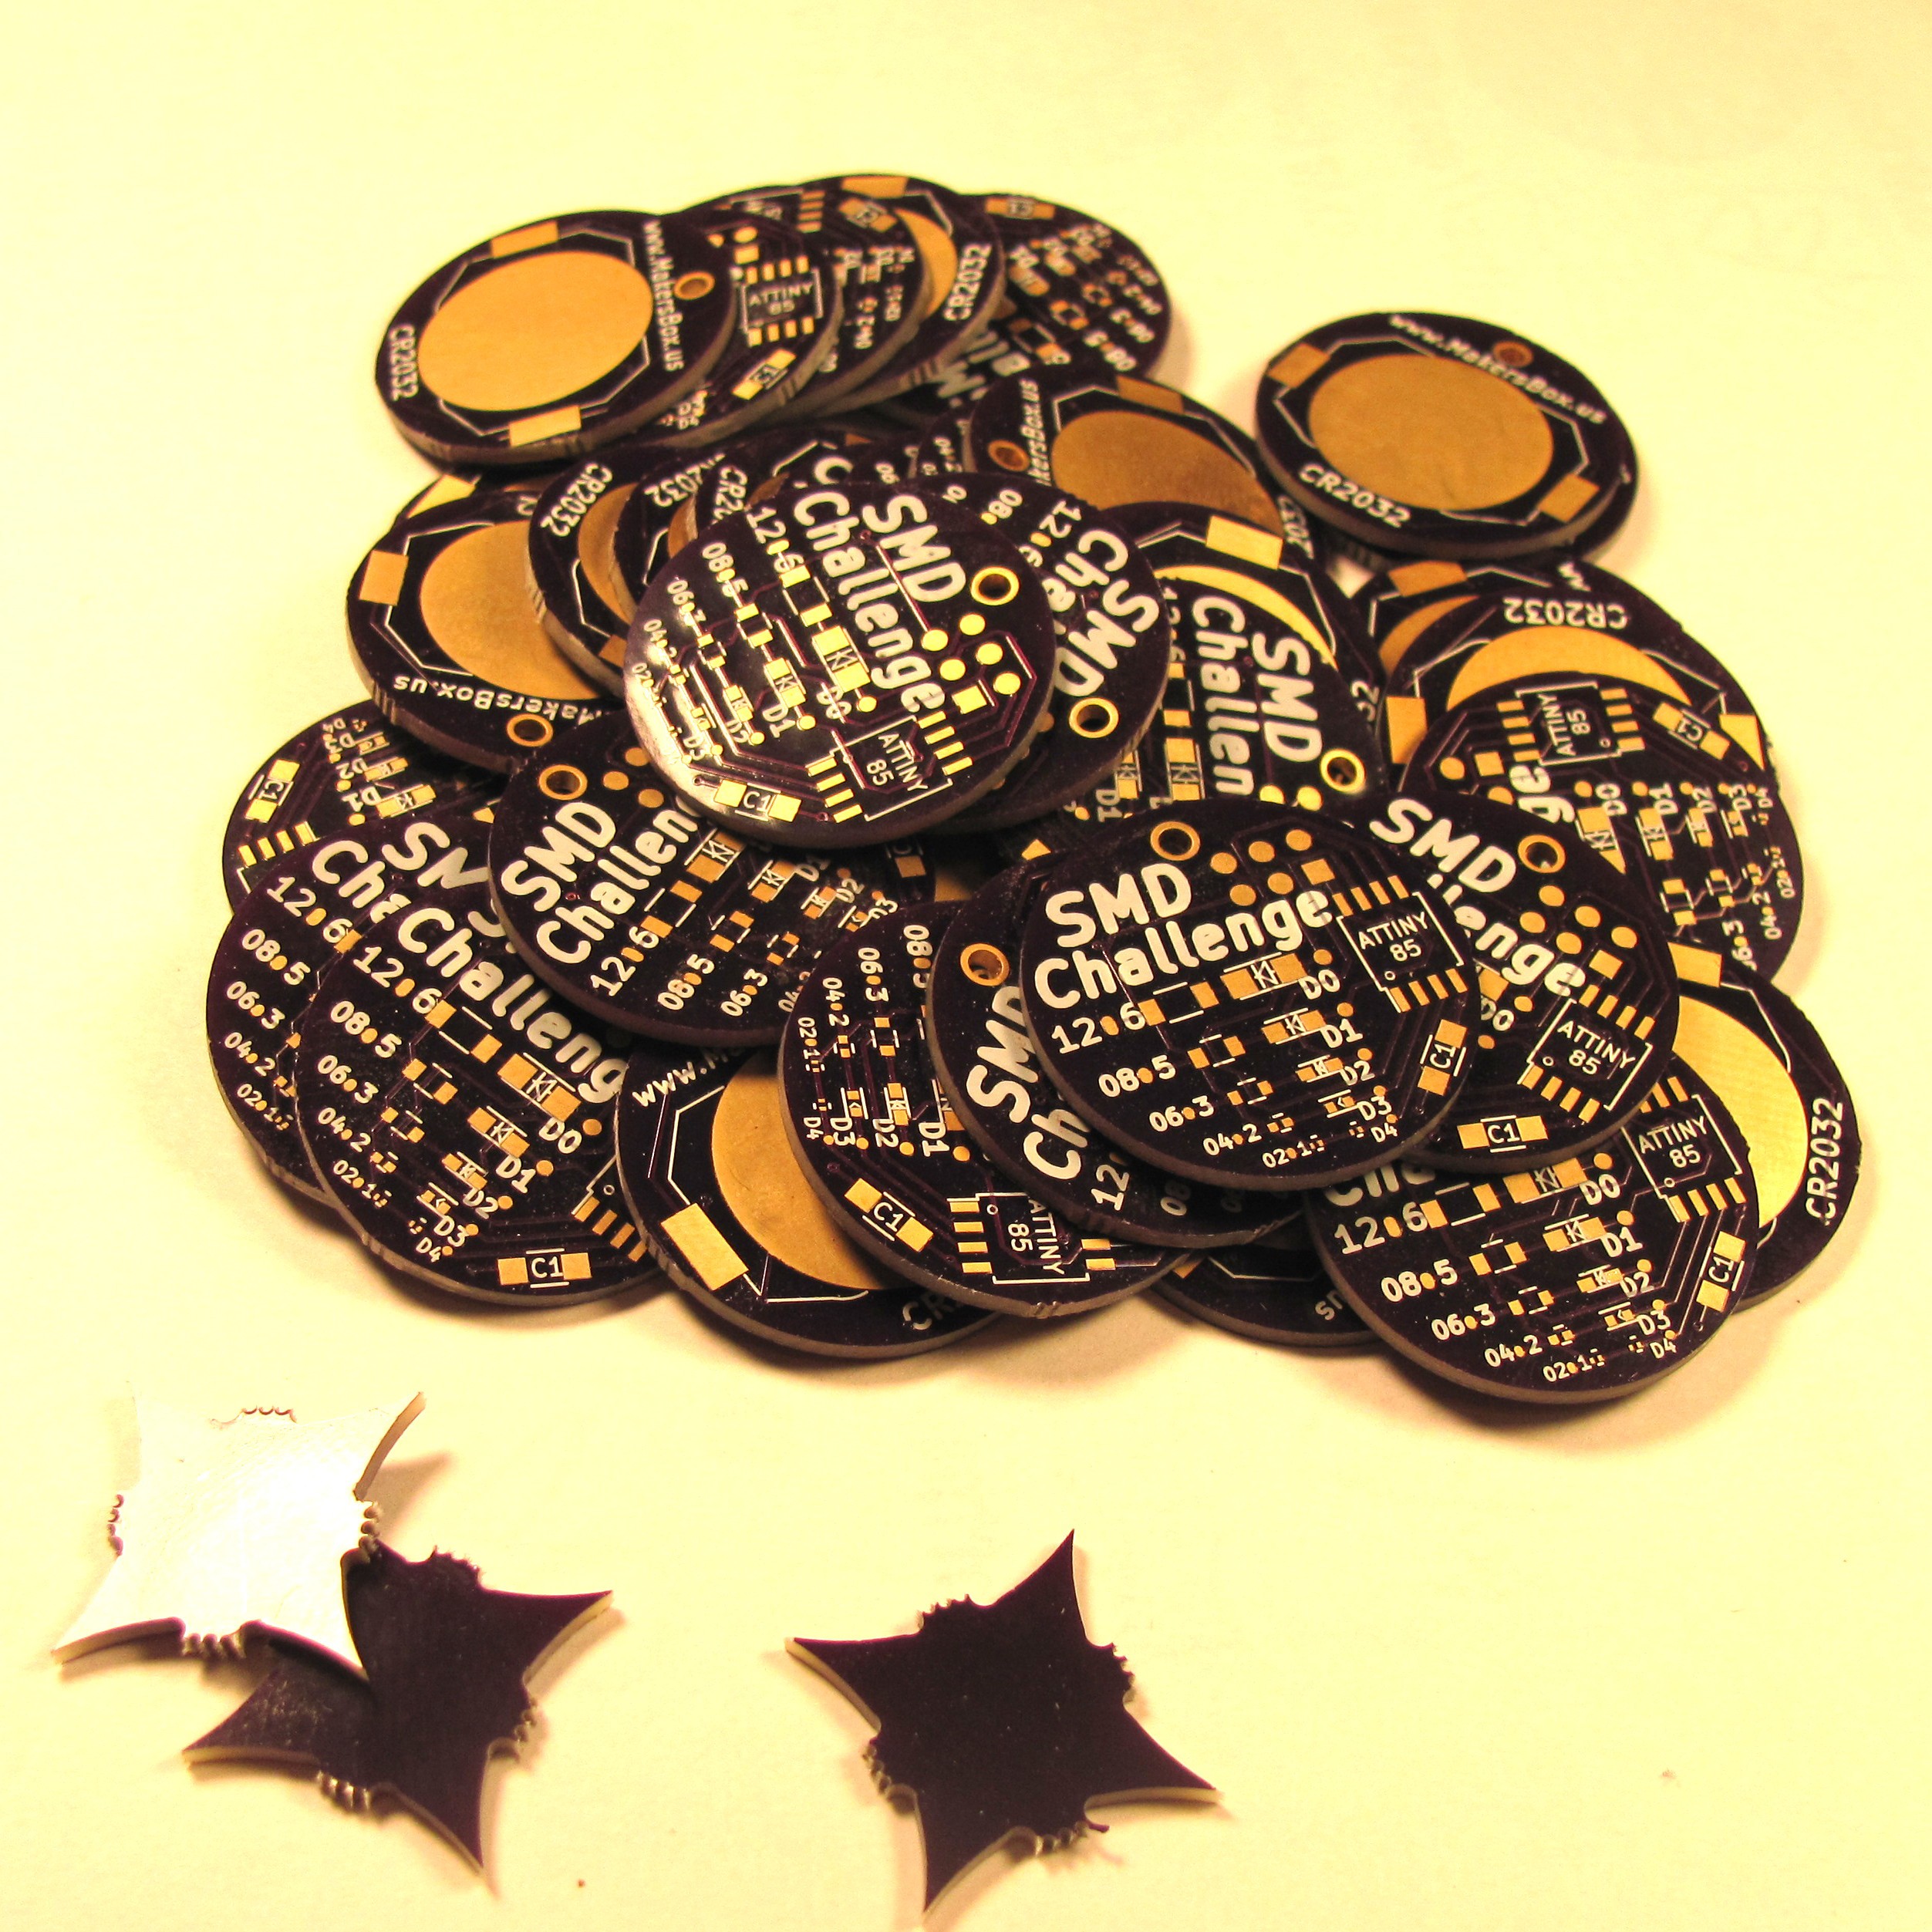
    Unfortunately, I had to make another set of kits.  There must be a lot of miserable, frustrated hobbyist out their willing to pay for some woe.  The PCBs came in groups of four with an boring star-shapped cut out in the middle.  I promptly punctured my finger on one, so if there is blood on your kit, know that I share your pain.

    I should have left the mouse-bite edges on there to punish you further, but decided to coat my table and lungs with fibreglass to add to my own misery.  You are welcome.

  • Influencing Digkey Search Results?

    MakersBox10/17/2017 at 04:28 1 comment

    An Unfortunate SMD Challenge Participant Reported:
    On DigiKey, when I was searching for the 754-2022-1-ND (the 0201 LED), I
    noticed that in the "you might be interested in" results from DigiKey,
    they listed:

        BAT-HLD-001 - Linx Technologies Inc. | BAT-HLD-001-ND DigiKey
        Electronics
        BAT-HLD-001
        Linx Technologies Inc.
        HOLDER BATTERY 20MM COIN
        Unit Price 0.28000
        BAT-HLD-001-ND

        ATTINY85V-10SUR - Microchip Technology | ATTINY85V-10SURCT-ND
        DigiKey Electronics
        ATTINY85V-10SUR
        Microchip Technology
        IC MCU 8BIT 8KB FLASH 8SOIC
        Unit Price 1.25000
        ATTINY85V-10SURCT-ND

    So it would seem that the SMD Challenge orders have affected the DigiKey
    search results...  though, who else would be ordering 0201 LEDs, right?
    LOL

  • It Can Be Done!

    MakersBox09/13/2017 at 04:59 7 comments

    I wouldn't believe it if I hadn't seen it my self.  Hand soldering a 0201.  A miserable young whelp of an Electronics Technician.  Proved me wrong.  Photographic proof submitted to boot:

    He did use a microscope.  And a JBC station with a 0.2mm tip.  But still, it can be done.  Misery upon us all who don't have young eyes and steady hands.

    I've been thinking about scoring. 

      + 50 points for attempting this project (or being foolish).

      + 10 points for getting one LED to blink (you got the Attiny in correctly and can tell the polarity of an LED).

      + 5 for the 0805 lighting up (Give me a break, it is not much smaller than a 1206).

      + 10 for the 0603 (so you have an unfortunate set of tweezers on hand).

      + 10 for the 0402 (alright, we getting serious up in here).

      + 15 for the 0201 (you got lucky, punk).

      - 5 for using a microscope unless you are over 50.

      - 10 for using a paste and a mask (hey it works, but you cheated).

    By this method, my young unfortunate friend scored a 95.

    And I have scored an 85 and 90.  Yes, I used a mask, but I need to prove the circuit and code worked, right?

    So, to break the record, submit miserable proof of all LEDs blinking, without a mask, and without a microscope, unless you are unfortunate to be over 50 years of age.

View all 14 project logs

  • 1
    Step 1

    You should not build this. It is impossible to complete, so why bother. The picture is probably photoshoped to show it working, as is this video:

  • 2
    Step 2

    If you want pain in your life, do not read the datasheets. They contain very sad information. The pictures are also miserable. You have a 50-50 chance of getting the alignment right, so why even try?

  • 3
    Step 3

    Soldering by hand is impossible, so don't even try. It will only make you rant. It is unlikely that this video will help either:

View all 4 instructions

Enjoy this project?

Share

Discussions

mnielsen wrote 01/31/2020 at 02:10 point

Hello, has anyone found an inexpensive QFN-20 4x4 Socket for the Misery Edition? I found one from Microchip for $150 but that's too expensive for me. I'd like to pre-program for my users so that the lights will come on right away without doing in circuit programming.

Mike

  Are you sure? yes | no

Dave Adams wrote 06/04/2019 at 16:30 point

Just completed the Misery Challenge.  Was not too bad.  The worst part was getting the components off of the tape without them going flying.  Is there a 1005 Club?

  Are you sure? yes | no

Lloyd Longsworth wrote 05/25/2019 at 05:47 point

https://youtu.be/A-OGf4hJqs4

This is my video evidence of the completed project- I will upload pictures to another location soon as in process images.

So, there's a 0201 club, is there a 01005 club too?

  Are you sure? yes | no

Matthias Welwarsky wrote 03/04/2019 at 12:49 point

I took the challenge! Here's my entry for the "misery edition" of the kit. Assembled with manually applied paste from a syringe, a hot-air gun sourced from Aliexpress, some generic tweezers and a head-band attached magnifying glass:

https://photos.app.goo.gl/BXNfdBmRrqjELhMG6

  Are you sure? yes | no

k1200s wrote 02/08/2019 at 21:46 point

The available file to PCB is only for the 0201 size. Is there any for the 01005?

  Are you sure? yes | no

Daniel wrote 05/01/2018 at 15:51 point

It's just 0402, but soldering on PCB is lame :D
https://photos.app.goo.gl/eh8u4V6dY9Czkq7A7

  Are you sure? yes | no

zakqwy wrote 05/01/2018 at 18:27 point

I support this method <3

  Are you sure? yes | no

ActualDragon wrote 05/01/2018 at 18:36 point

"it's just 0402"

  Are you sure? yes | no

Ward wrote 03/18/2018 at 07:51 point

One other tip: on every SMT LED I've ever seen, the die (square, light-emitting bit) sits on the cathode side, and the anode is wire-bonded.  Come to think of it, this was true with the old leaded ones back in the day too...the die sat on the larger cathode flag, visible through the side of the LED.  If I'm hand assembling I don't even look at the datasheet to discern markings any more, I just look through the lens.

  Are you sure? yes | no

Ward wrote 03/14/2018 at 01:46 point

Here's my entry, which worked well on first power-up.  To add to the challenge, I built a ring of 10 0.3pF 008004 capacitors around the 0201 resistor.  Equipment was an Amscope stereo assembly scope, Ikea LED lights for illumination, EFD pneumatic paste dispenser with 27 gauge needle and type-5 paste, and a no-name hot air gun.  For the caps, I used paste and a Metcal with a fine tip.

https://www.youtube.com/watch?v=hvQ_tuST5bI

  Are you sure? yes | no

MakersBox wrote 03/14/2018 at 02:31 point

Unbelievable amount of misery.  Even for an Oregonian.  Welcome to the club.

  Are you sure? yes | no

Ward wrote 03/06/2018 at 07:55 point

So just to be clear, a microscope (for assembly, not just inspection) and hot air reflow are allowed?  Is there an 01005 class?

  Are you sure? yes | no

MakersBox wrote 03/06/2018 at 15:19 point

There are no real rules.  You can decide how best to make yourself miserable.  I am testing out a 01005 version called "Misery Edition", so stay tuned.

  Are you sure? yes | no

Ward wrote 03/07/2018 at 06:57 point

Fantastic!  Kit's on order, let the games begin.

  Are you sure? yes | no

Ward wrote 03/09/2018 at 10:27 point

Also, I just got my muRata 008004 cap kit from the local rep.  Looking forward to playing with those.

  Are you sure? yes | no

Pedro wrote 02/05/2018 at 06:05 point

Hi fellow Hackadayers. I completed the SMD Challenge along with another two members of our Facebook group, FC Builders and Hackers Cooperative (Tyler Folmer and Gary Baynes with Adam Madron still to finish his soon) I used solder paste and hot air and am lucky enough to own an Amscope optical microscope as I do quite a lot of SMD work. I also found the hardest part is getting the 0402 and 0201 components out of the tape without them jumping to oblivion, never to be seen again. I lost one 0201 LED but luckily had the foresight to buy the second chance kit as well. Determining the polarity of the LED's in the two smaller sizes was also challenging but I got all of them right on the first try. Thanks for organising this and it was certainly demanding and great fun. Here is my video https://www.youtube.com/watch?v=lWoL0ZN9CCc

  Are you sure? yes | no

jlbrian7 wrote 01/30/2018 at 01:10 point

Being arrogant I opened up my kit thinking "I got this."  Even though I have absolutely nothing to base that on, as this is the first time I have even attempted to solder 0201, but I went straight to work starting out with the 0201 components, and it went better than I could have expected.  The resistor and LED went on beautifully, so I pulled out  the multimeter to see if it worked as good as it looked, and to my surprise it worked beautifully... if you switch the positive and negative leads on the multimeter.  FAIL!   Removing the LED was a destructive process, and this would have been a total fail without the second chance kit.  

The solder job didn't look nearly as nice the second time around, but I was able to get it! WHEW!!

I had ordered a second kit, because I knew that if I only did it once I would always believe that it was just a fluke.  The pressure was really on now though, I had already blown through my second chance kit.  I struggled way more the second time since I was more nervous, but it all came together.

Thanks for making the kit, it was a lot of fun.

https://youtu.be/UBlBFgN90Yg

  Are you sure? yes | no

valerio\new wrote 09/20/2017 at 15:51 point

I took the challenge (result here https://ibb.co/gsmQik). Soldered everything by naked eye with a medium conical tip (the one that comes with hakko fx-888d). For the 0201 components i used a x10 goldsmith magnifying glass. 

Now i'm having some troubles with the firmware. 

I've installed the suggested core in the arduino IDE, loaded the Arduino as ISP example into my arduino UNO, done all the required connections to the board (seems like the pin 1 of the onboard icsp contacts is marked wrong) and loaded the firmware. 

I only get led D1 and D2 blinking fast and nothing else. 

Am i missing something? 

  Are you sure? yes | no

MakersBox wrote 12/25/2017 at 06:48 point

Not well documented, but the square pad is VCC.

  Are you sure? yes | no

Blackfire_tx wrote 07/03/2017 at 10:04 point

Well... ordered the parts from Mouser today. Will probably be trying to have it working in time for DEFCON. (as a badge of honor)

  Are you sure? yes | no

Blackfire_tx wrote 07/08/2017 at 11:21 point

Seems as if the programming is all that is holding mine up. Arduino seems to not to want to play nice.

  Are you sure? yes | no

Blackfire_tx wrote 07/12/2017 at 00:09 point

Ok... note: Set the clock to 1mhz or you'll be pissed off for a while as it won't program.

  Are you sure? yes | no

Yann Guidon / YGDES wrote 06/16/2017 at 21:52 point

Rename this as "Badge of Horror" and they'll sell like hot cakes during hackerfests and faires !

  Are you sure? yes | no

oshpark wrote 06/17/2017 at 06:35 point

Nice name!

  Are you sure? yes | no

zakqwy wrote 06/09/2017 at 14:47 point

Gah, 0201! I picked up a handful of those Kingbright LEDs (in yellow rather than blue) and was able to reflow a few in my toaster, but they are a real pain to deal with. 

  Are you sure? yes | no

K.C. Lee wrote 06/09/2017 at 11:19 point

Should try to pack the layout to really pack these parts tight and/or use them on the worse solder mask alignment from some cheap Chinese PCB board house.  
Now that would be a better challenge. :)

  Are you sure? yes | no

MakersBox wrote 06/09/2017 at 14:37 point

Oh, the missery . . .

  Are you sure? yes | no

Yann Guidon / YGDES wrote 06/09/2017 at 18:12 point

Do you speak from experience ?....

Because you sound like you speak from experience.

  Are you sure? yes | no

Yann Guidon / YGDES wrote 06/09/2017 at 08:44 point

Next version: introducing 01005

  Are you sure? yes | no

Yann Guidon / YGDES wrote 06/09/2017 at 08:44 point

How do you even get 0201 parts ?

  Are you sure? yes | no

MakersBox wrote 06/09/2017 at 15:42 point

Links in the BOM.

  Are you sure? yes | no

Yann Guidon / YGDES wrote 06/06/2017 at 23:52 point

OK so when do you sell kits ?

  Are you sure? yes | no

MakersBox wrote 06/07/2017 at 05:40 point

This project has made me miserable enough without profiting off other unfortunate, misguided Makers.  You should be paying me not to post this type of project!

Although, if you do want to throw away your money, I sell kits for other, less unfortunate projects at https://www.tindie.com/stores/MakersBox/.

P.S., I've provided everything you need to do this yourself in the BOM.  The boards would only be $6 for three, and the rest would be about $10.  Small price to pay for the frustration of a life-time (or the ultimate bragging rights if you accomplish the impossible).

P.P.S. Oh, wait. You still have to program the chip.  Will the misery never end?  Maybe I should just sell programmed chips.  No tech support though. You'd only have yourself to commiserate with.

  Are you sure? yes | no

Yann Guidon / YGDES wrote 06/17/2017 at 11:53 point

Yes, please sell programmed chips. The misery should only be about soldering, not dealing with software etc...

  Are you sure? yes | no

oshpark wrote 06/06/2017 at 20:34 point

What adapter do you use to program the AVR?

  Are you sure? yes | no

MakersBox wrote 06/06/2017 at 21:26 point

I'll have to do a post on that, but the short answer is using an Arduino and an ISP shield (https://www.tindie.com/products/MakersBox/yet-another-programming-shield/) and either a SOIC adapter to program the chip before soldering, or a pogo adapter (https://www.tindie.com/products/nsayer/avr-isp-pogo-adapter-kit/) to connect with the ISP pads on the PCB after the chip is soldered.  It is easier than it sounds.  Both tools mentioned are Purple!

  Are you sure? yes | no

oshpark wrote 06/06/2017 at 22:38 point

Awesome, thanks

  Are you sure? yes | no

Similar Projects

Does this project spark your interest?

Become a member to follow this project and never miss any updates