Close
0%
0%

SumoRobot

Enabling children to learn basics of programming and electronics in a fun, interactive and collaborative way.

Similar projects worth following
The project is about developing a open-source SumoRobot platform. The platform includes the SumoRobot electronics kits, its programming interface, course curriculums and workshops. The SumoRobot kit is designed as a DIY kit, so the children and teenagers can learn different aspects of electronics and software (soldering, assembly, programming). The SumoRobot, is a tool which allows two robots to compete on a SumoField, in a similar fashion to the sport of sumo.

The challenge is involving children in educational activities in a fun, interactive and collaborative way. Children are more than ever immersed in the virtual world which makes them lack communication and social activities between each other. Moreover technical subjects seem often complicated and boring to children as they can't see the practical use of it. Using the robot they will be able to learn useful digital skills combined with team work and peer to peer learning as well. 


The aim of the project is to design an intuitive programming interface that requires minimal setup. The children can program the robot from the browser on their own computing device. They can use either the graphical or the textual programming interface.


During the workshop the children learn the basics of programming in a fun, interactive and collaborative way. First they learn the basics of robotics and programming, then they form teams and dive into the world of programming. The teams give name to their robot and define its personality by programming it. The children try to figure out the best algorithm while testing their robot. In the end of the workshop there is a competition between the teams.
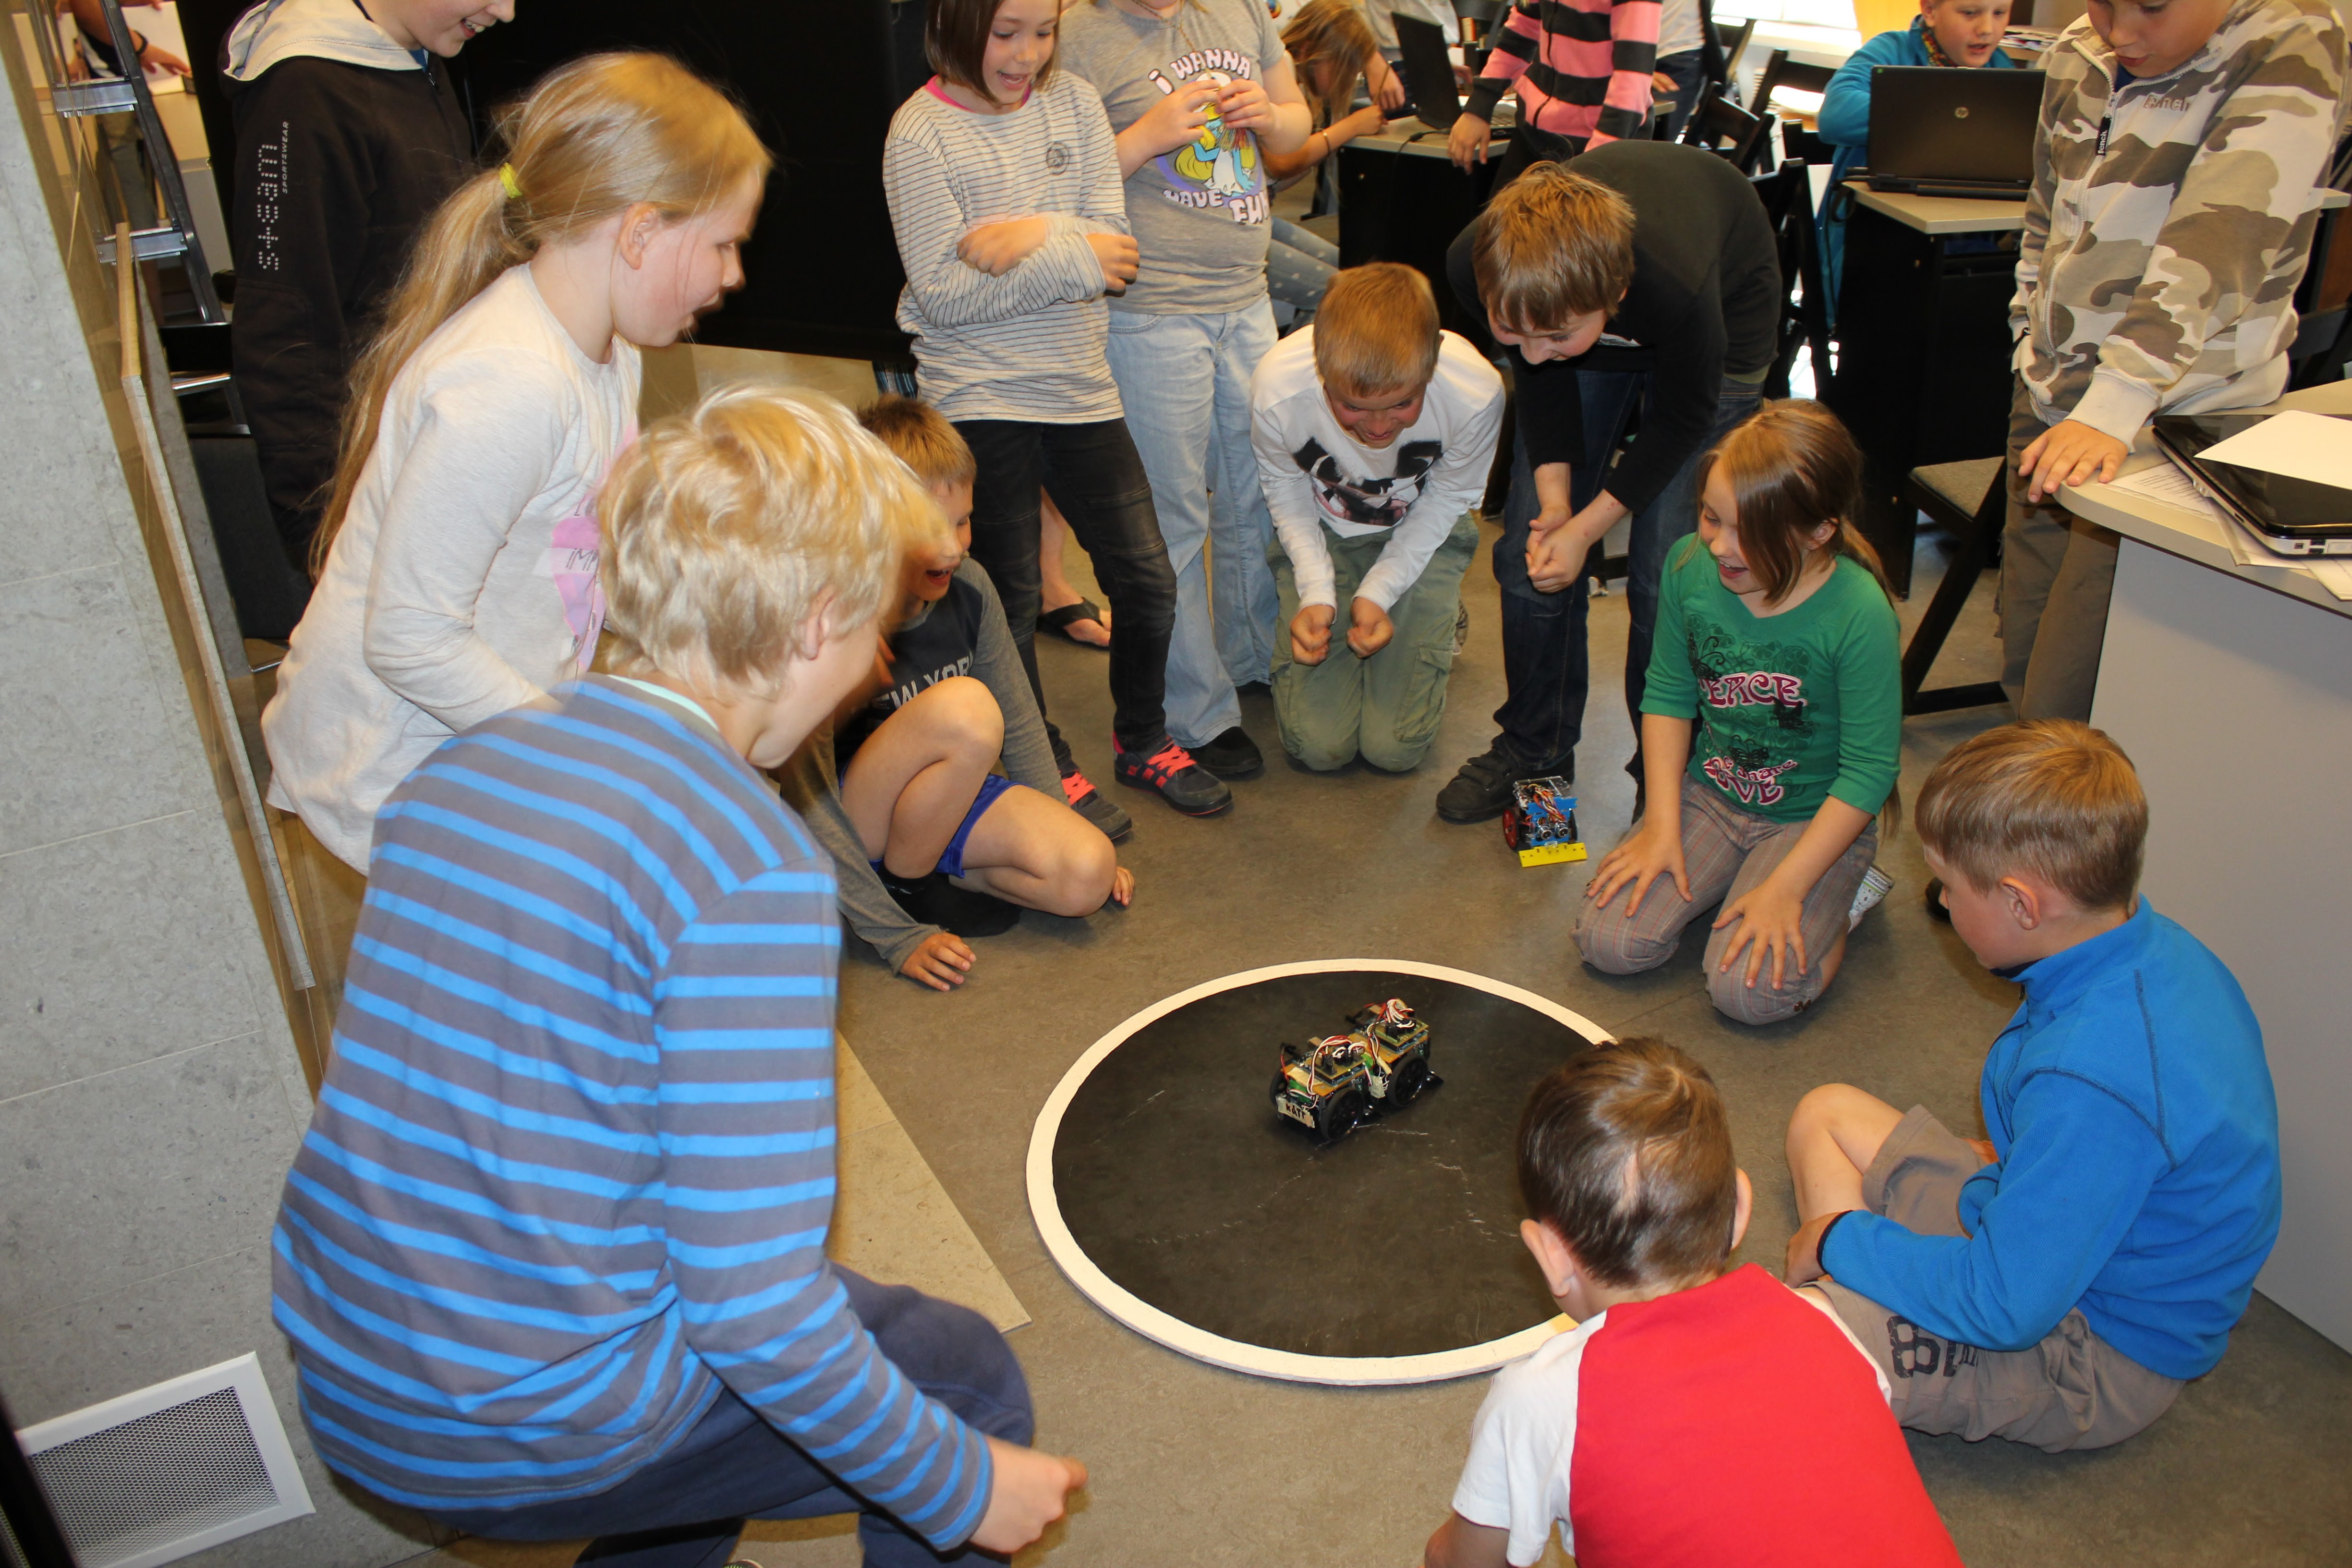
The self assembly sumorobot kit enables the children to learn basic engineering skills, like soldering and assembly. The ultimate goal is to enable the children to learn how to design their own programs, electronics, mechanical components and robots.

kicad_project.zip

KiCad board and schematics

Zip Archive - 95.10 kB - 10/14/2017 at 19:59

Download

sumoboard_v0_2.zip

gerber files of the Sumoboard v0.2

Zip Archive - 124.32 kB - 10/14/2017 at 19:59

Download

wemos_sumorobt.FCStd

FreeCAD 3D model of the robot

fcstd - 4.53 MB - 07/23/2017 at 21:50

Download

View all 16 components

  • 4 robots ready

    RoboKoding LTD09/23/2017 at 20:19 0 comments

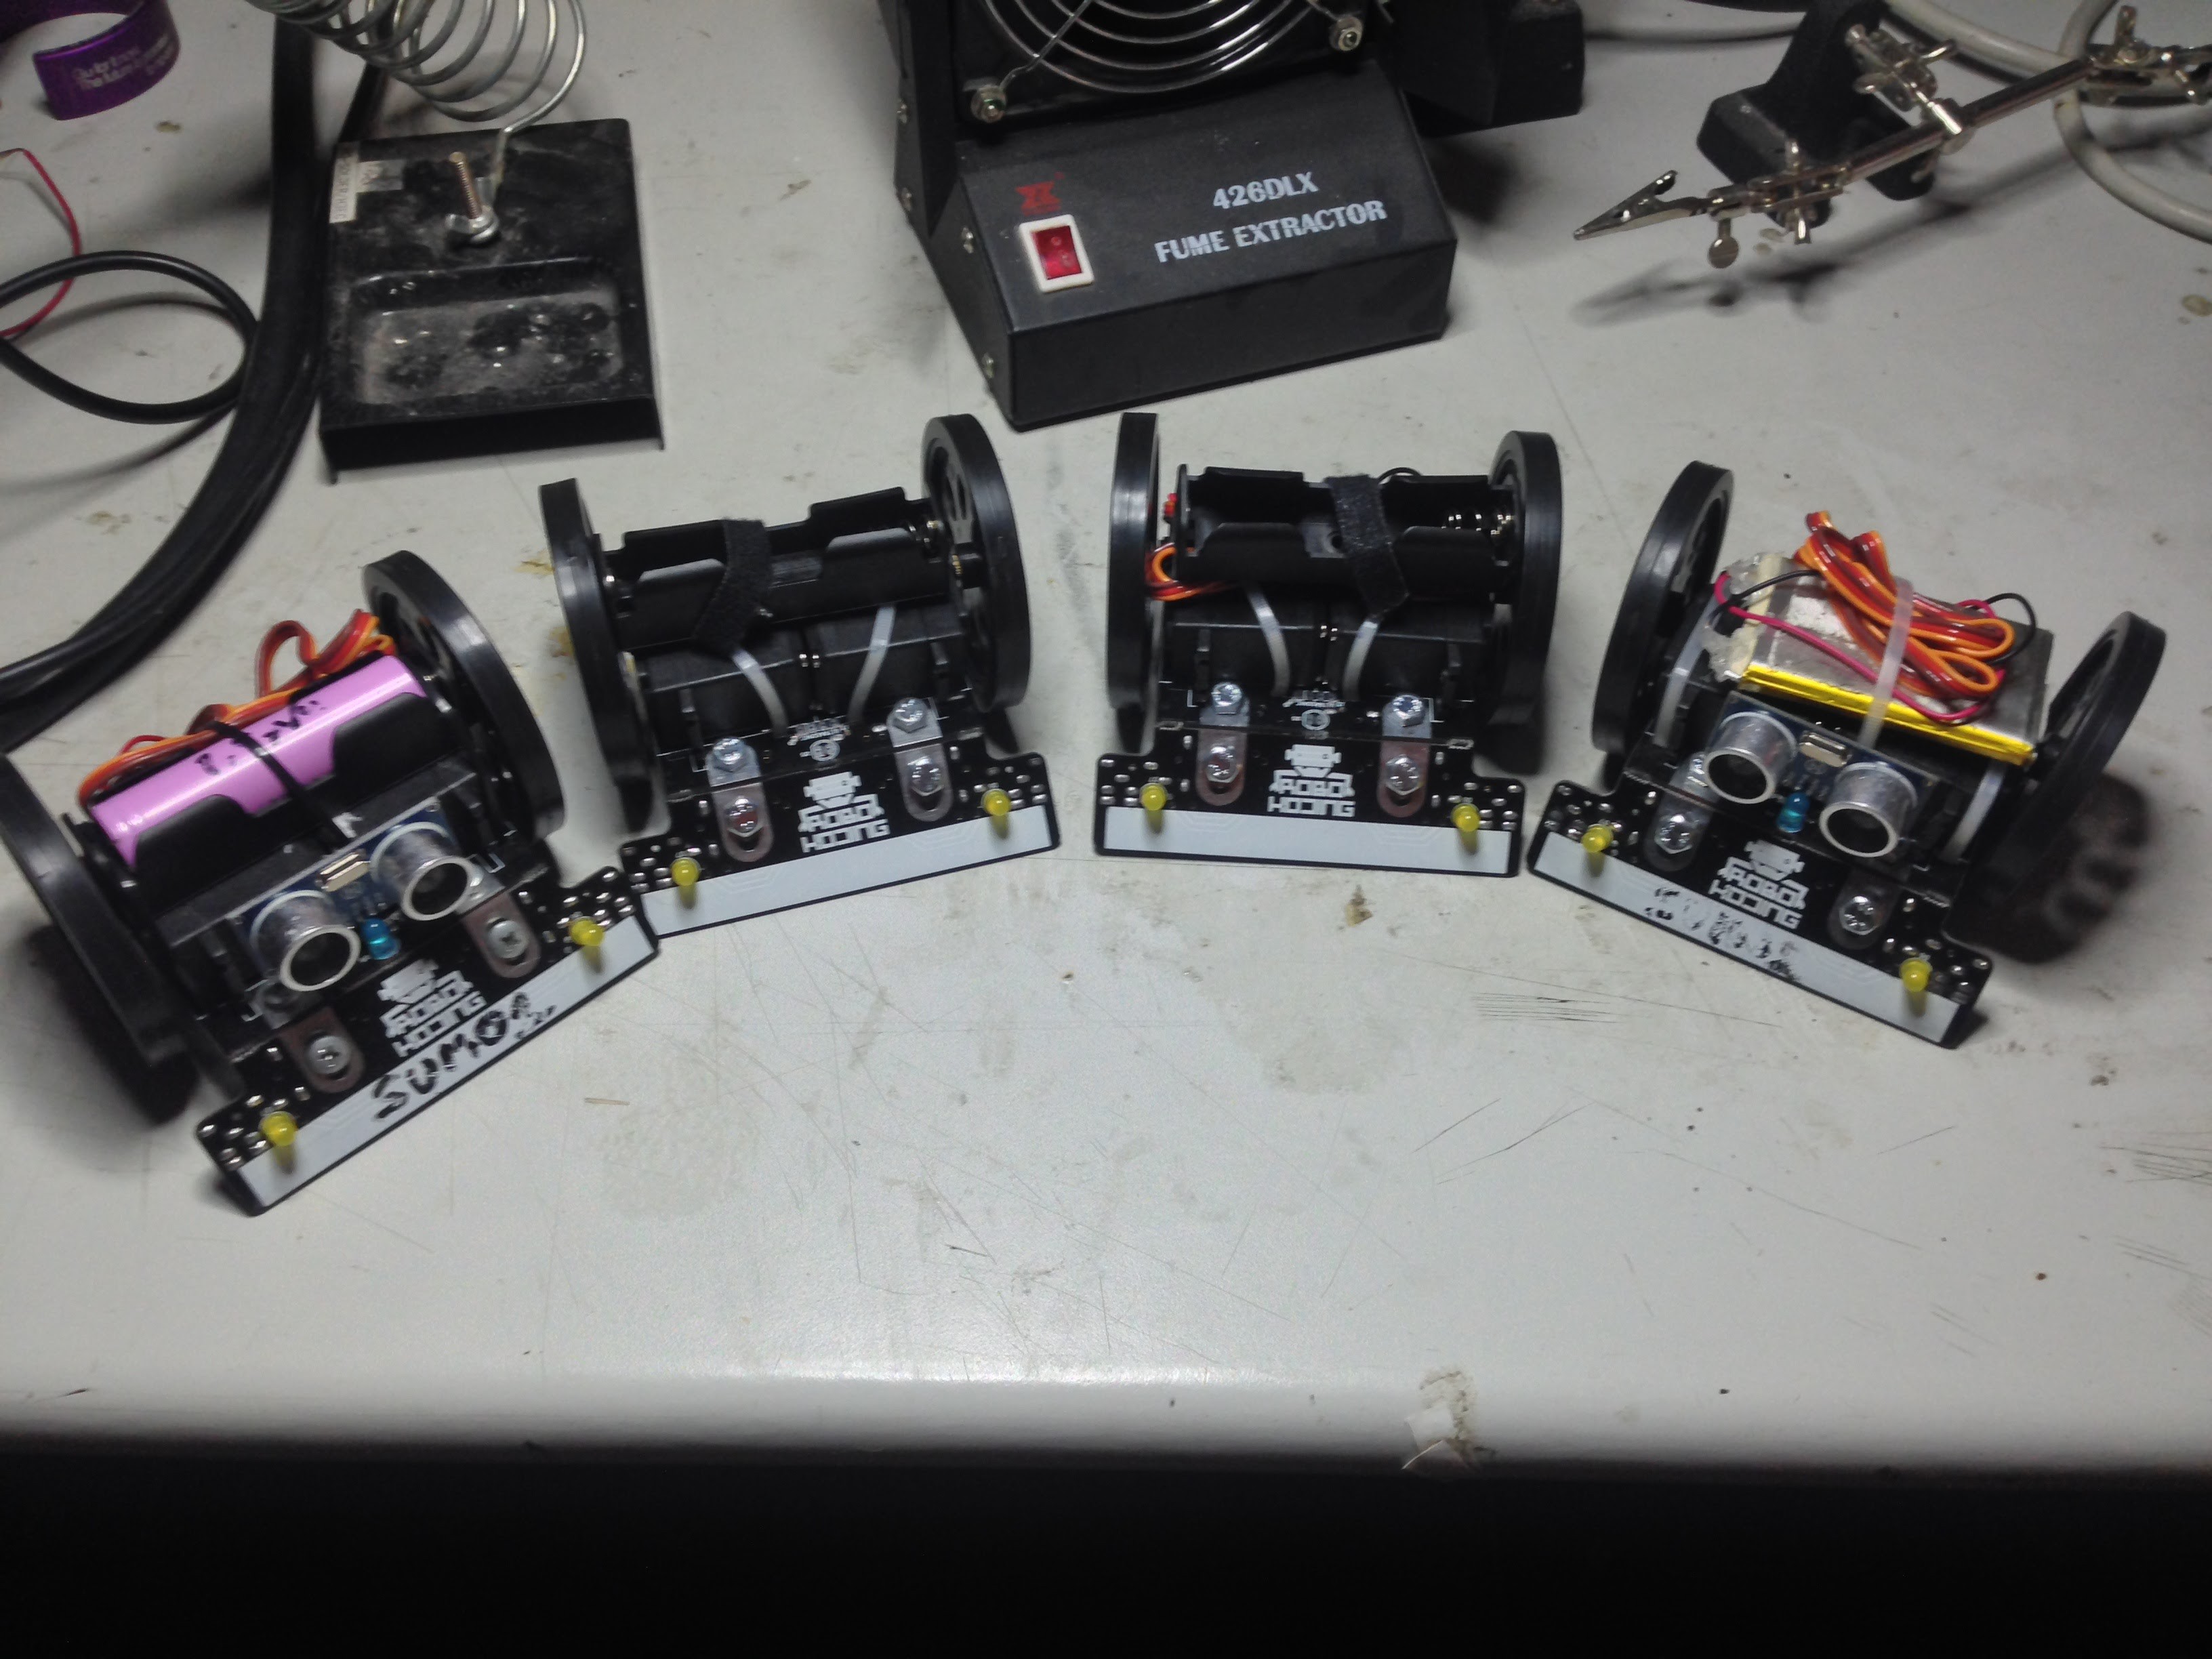
    Finished building 4 new sumorobots for testing and using them in workshops. During the soldering and assembly, quite some ideas came up for improvements. Also later while testing the robots some cons came out that could be improved. Check out the list of thought written here. Also worked a bit on the programming interface, making it now possible to connect to 5 robots from one browser makes testing easier and is also useful for the workshops. The hope is to use the same interface for the end user. Happy programming!


  • WEMOS LOLIN32

    RoboKoding LTD07/24/2017 at 09:25 0 comments

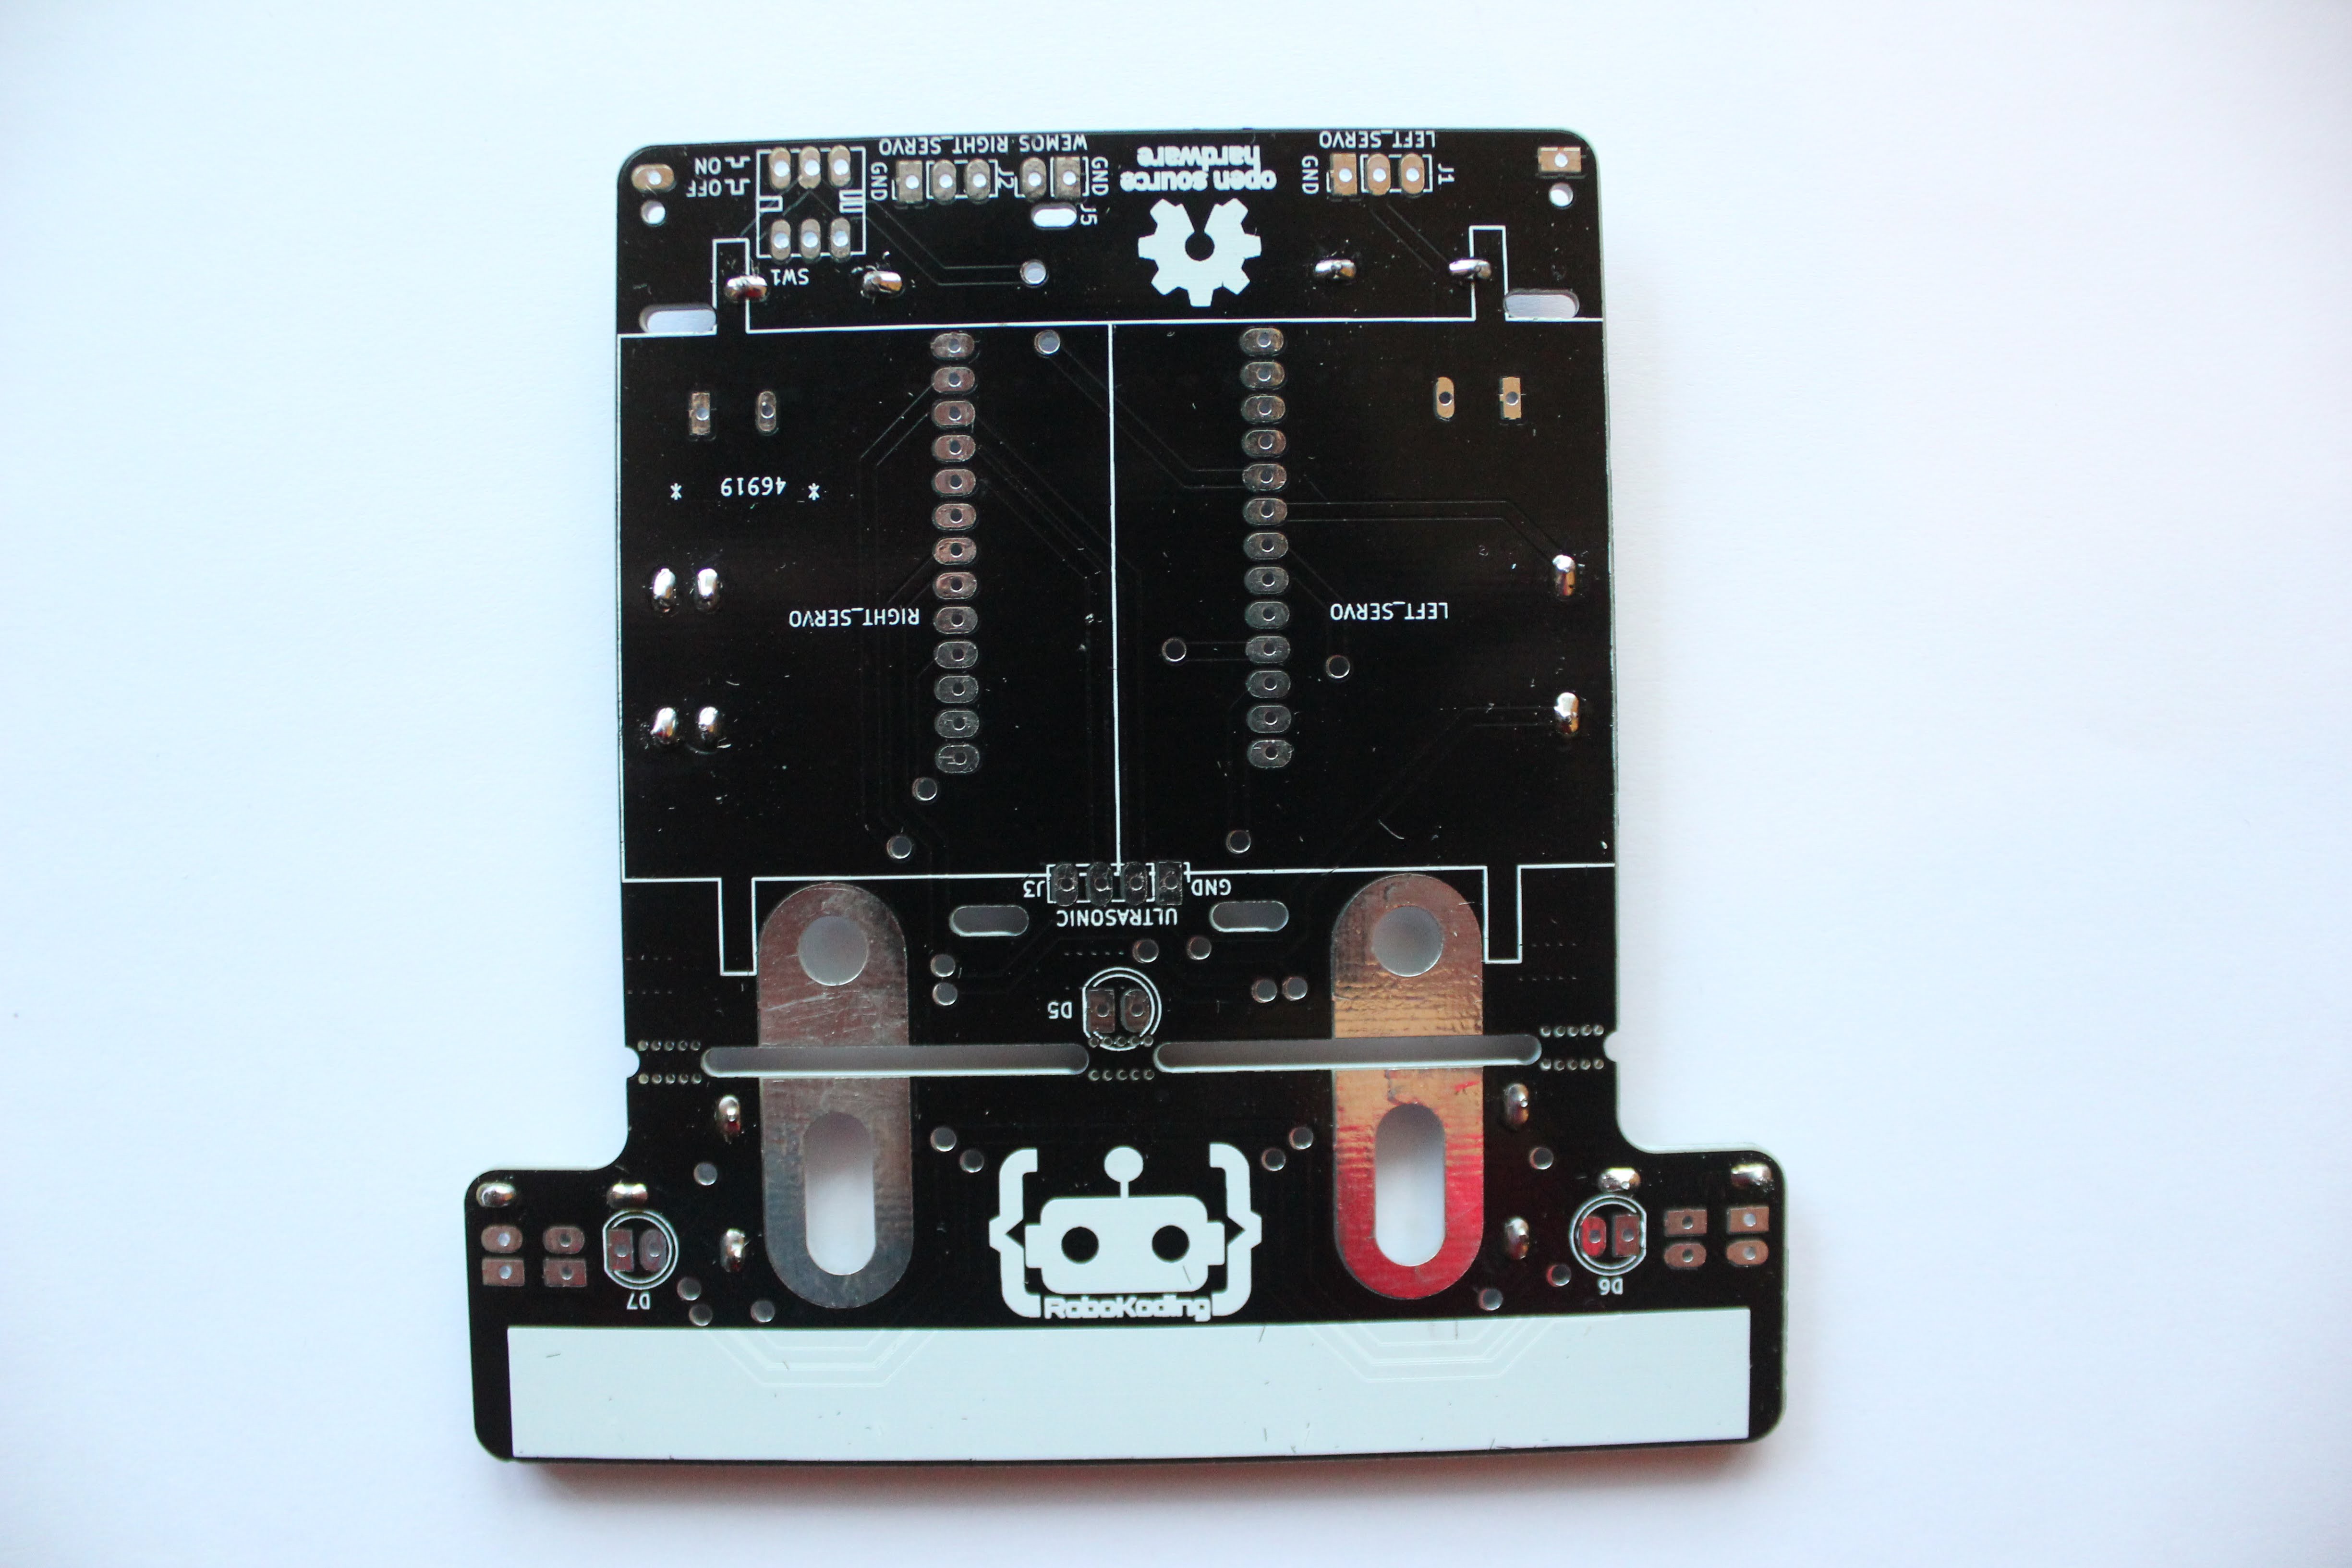
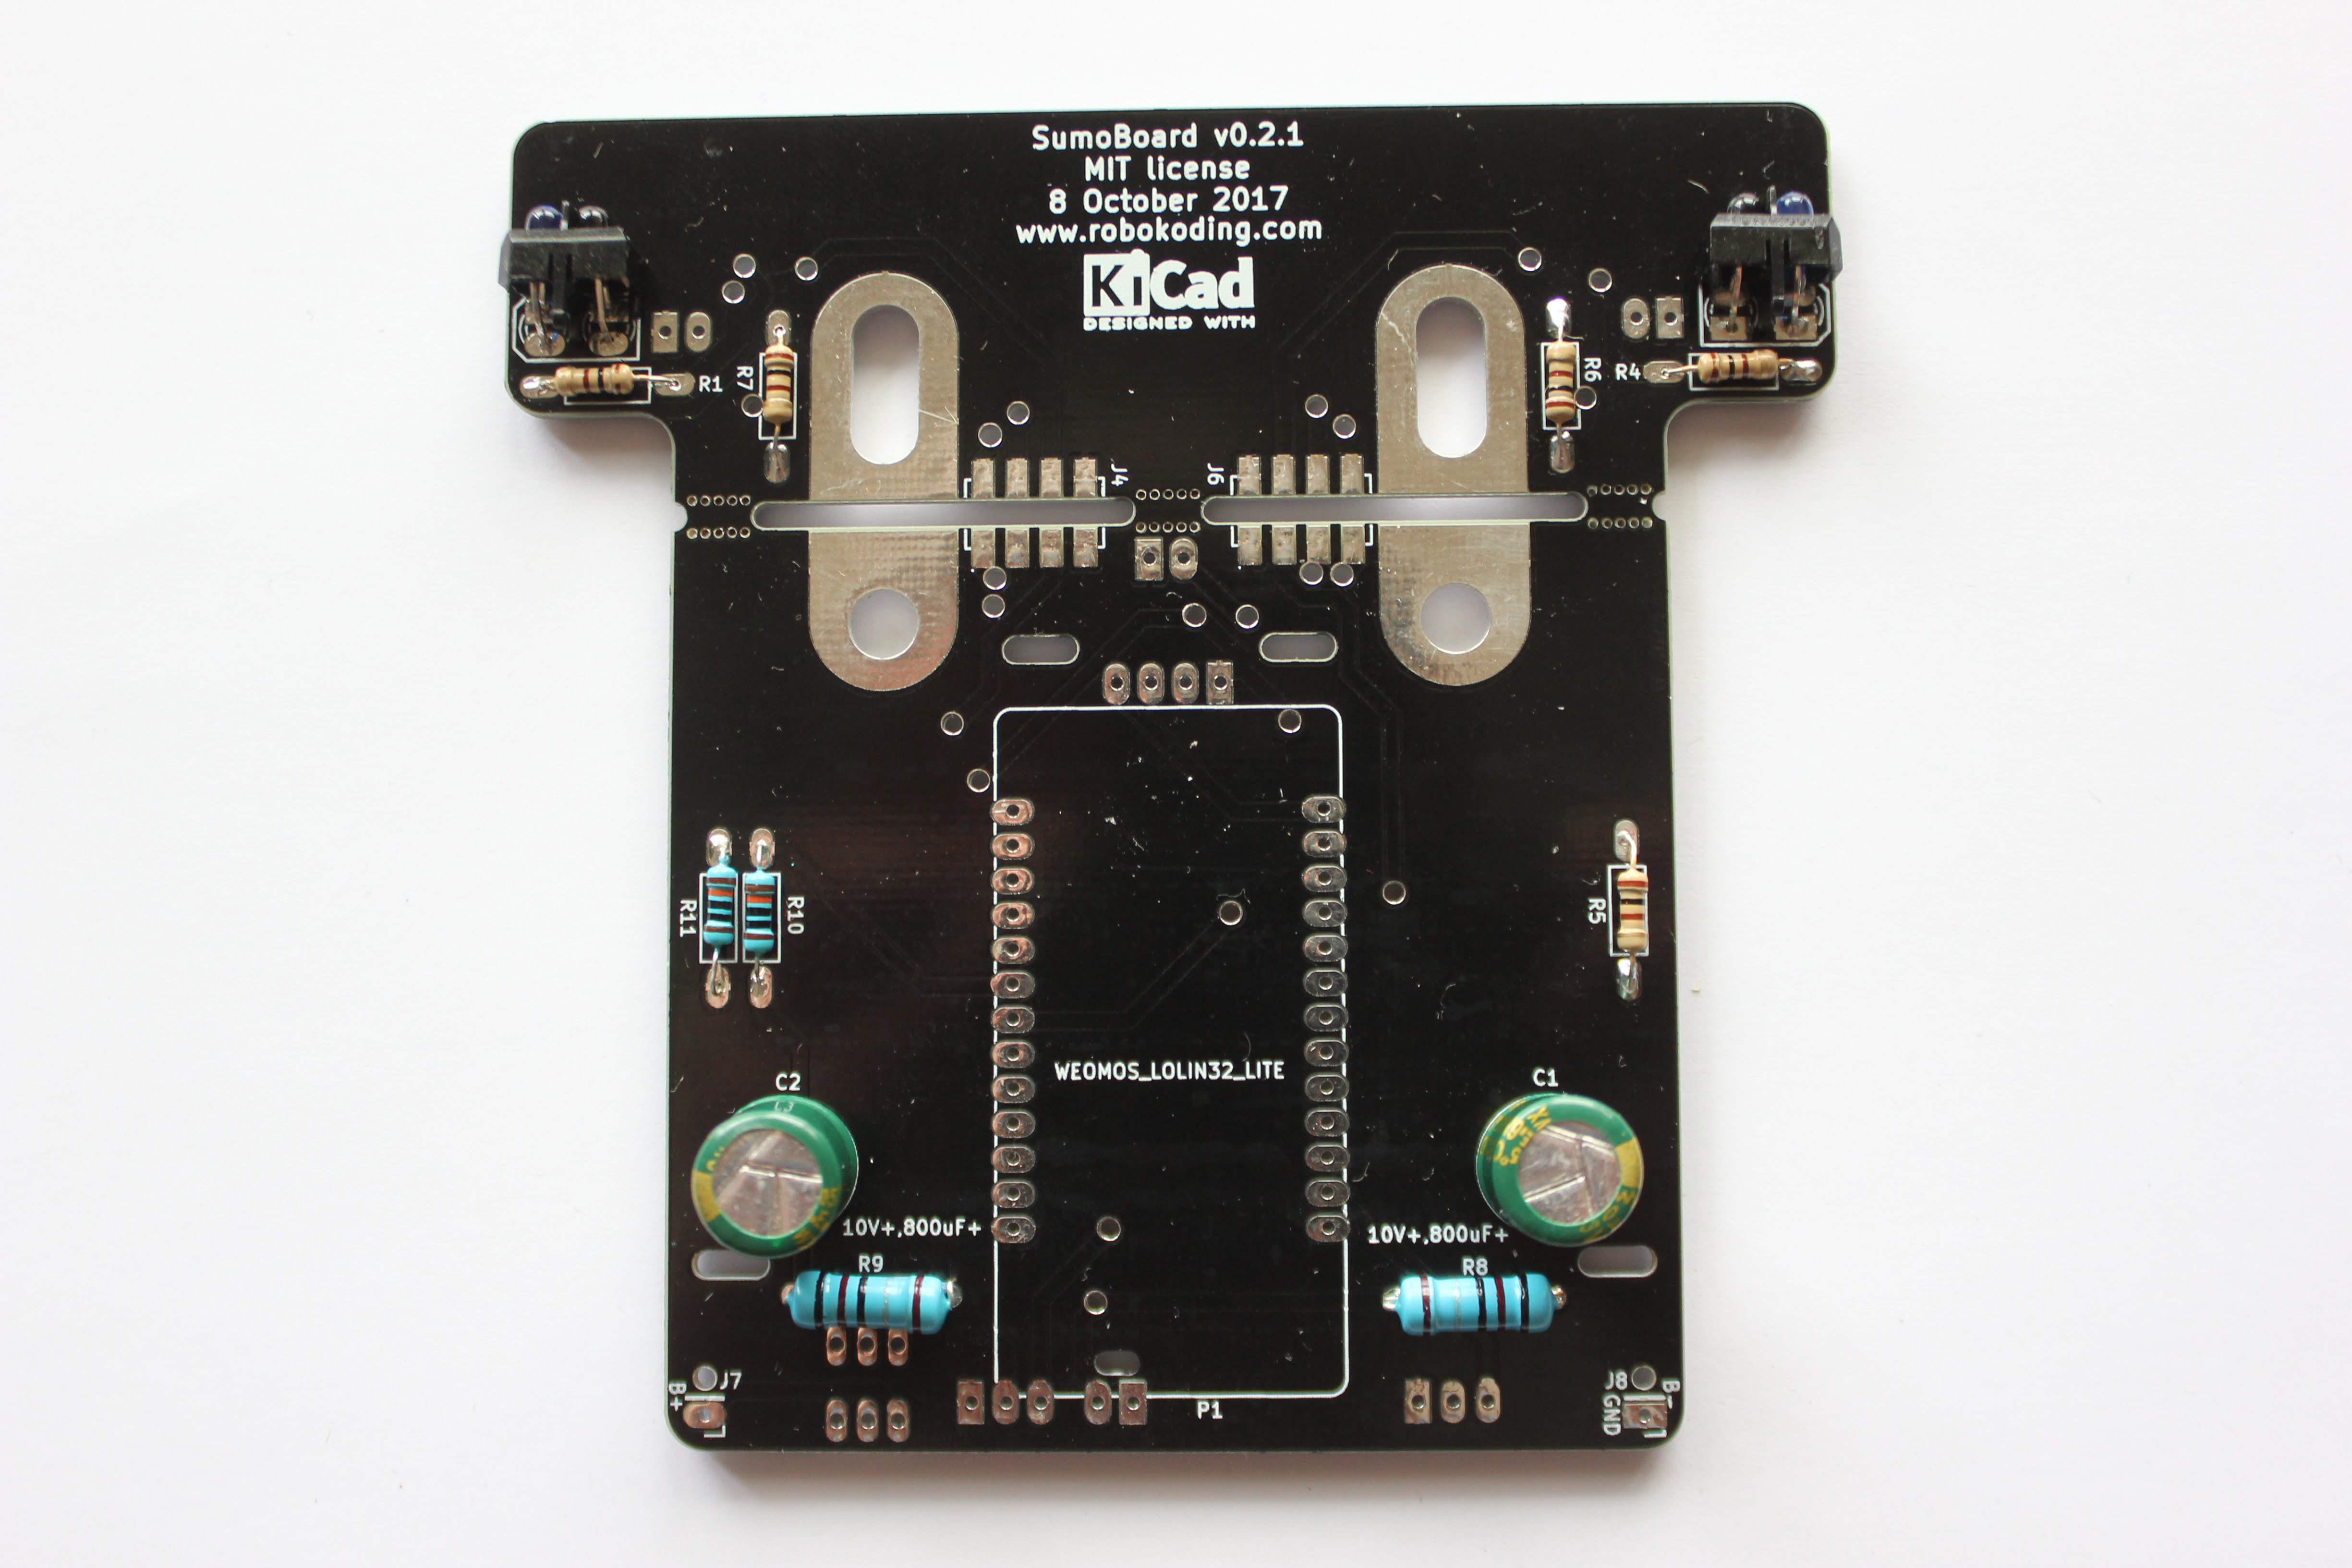
    All the parts for the new design of the robot arrived. The idea of the new design is to use the mainboard as a chassis for the robot. In front on the plow we have the white area so the children can name the robot. The new robot uses the WEMOS LOLIN32. There is still a lot of testing todo, the goal is to use MicroPython on the ESP32. For power it uses the 18650 Li-Po cell, commonly found in laptop batteries. So in case you have an old laptop battery, don't throw it out yet, you can recycle it for your sumorobot!

  • WEMOS D1 pro mini test

    RoboKoding LTD07/24/2017 at 09:04 0 comments

    While testing the WEMOS D1 pro mini with WebSocket and the web server Google Blockly was quite slow to load and also the Websocket got disconnected at times. This might be because of some delays in the code as the ESP8266 has a single core and all the WiFi protocol is running on that. So in case of delays the connection might drop.

  • Google Blockly on WEMOS

    RoboKoding LTD07/24/2017 at 08:56 0 comments

    Using the PlatformIO it’s easy to program any ESP8266 based platform and upload files to it’s on board SPI flash memory. When your platform has 4MB SPI flash memory you can also use over the air programming, which is very nice. Without configuring anything Google Blockly fits without all the media files on the WEMOS D1 mini pro SPI flash memory and can be served from it. When using no compression while compiling Google Blockly, the essential files will be around 800KB. Check out the WEMOS code and the Google Blockly for sumorobots.

  • WEMOS D1 mini Pro

    RoboKoding LTD07/24/2017 at 08:47 0 comments

    It’s really easy to program the WEMOS D1 mini pro using the Arduino IDE or PlatformIO. Just install the USB to UART driver for it and it is ready to go. For the sumorobot purpose it’s interesting to try the over the air programming (OTA) and loading Google Blockly to it’s on board SPI flash memory, so it can be served from the sumorobot.

View all 5 project logs

  • 1
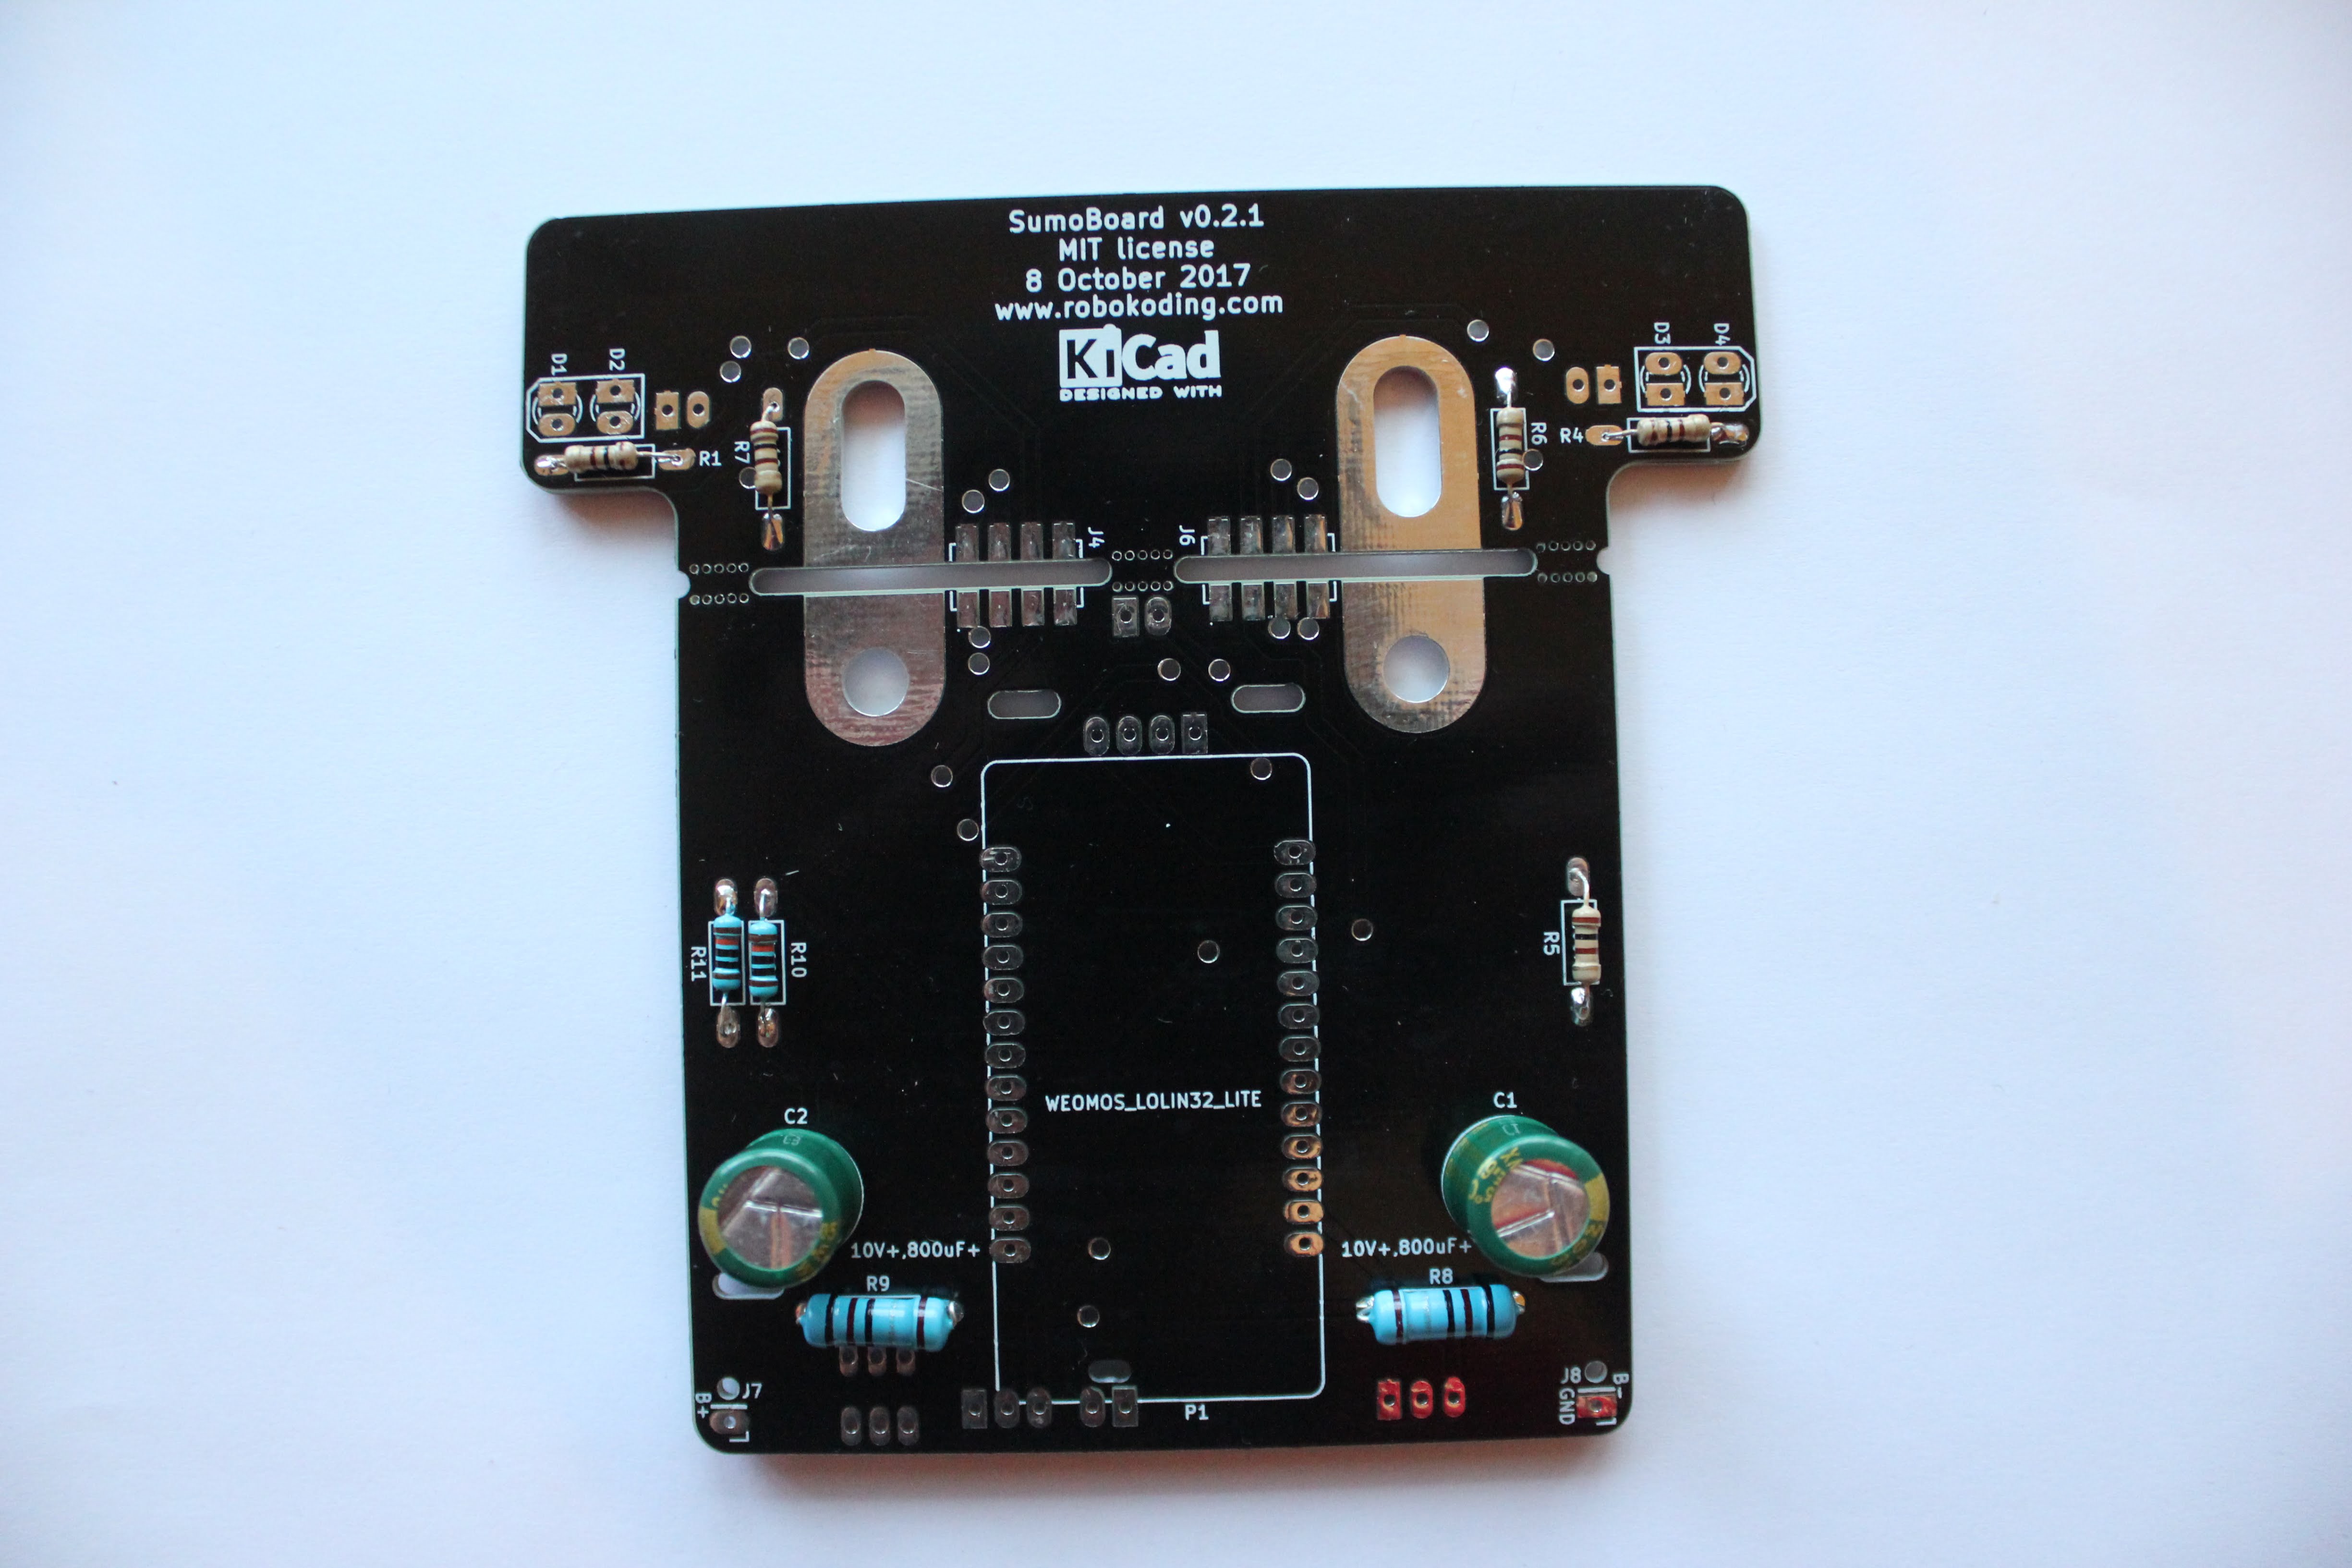
    Solder the resistors

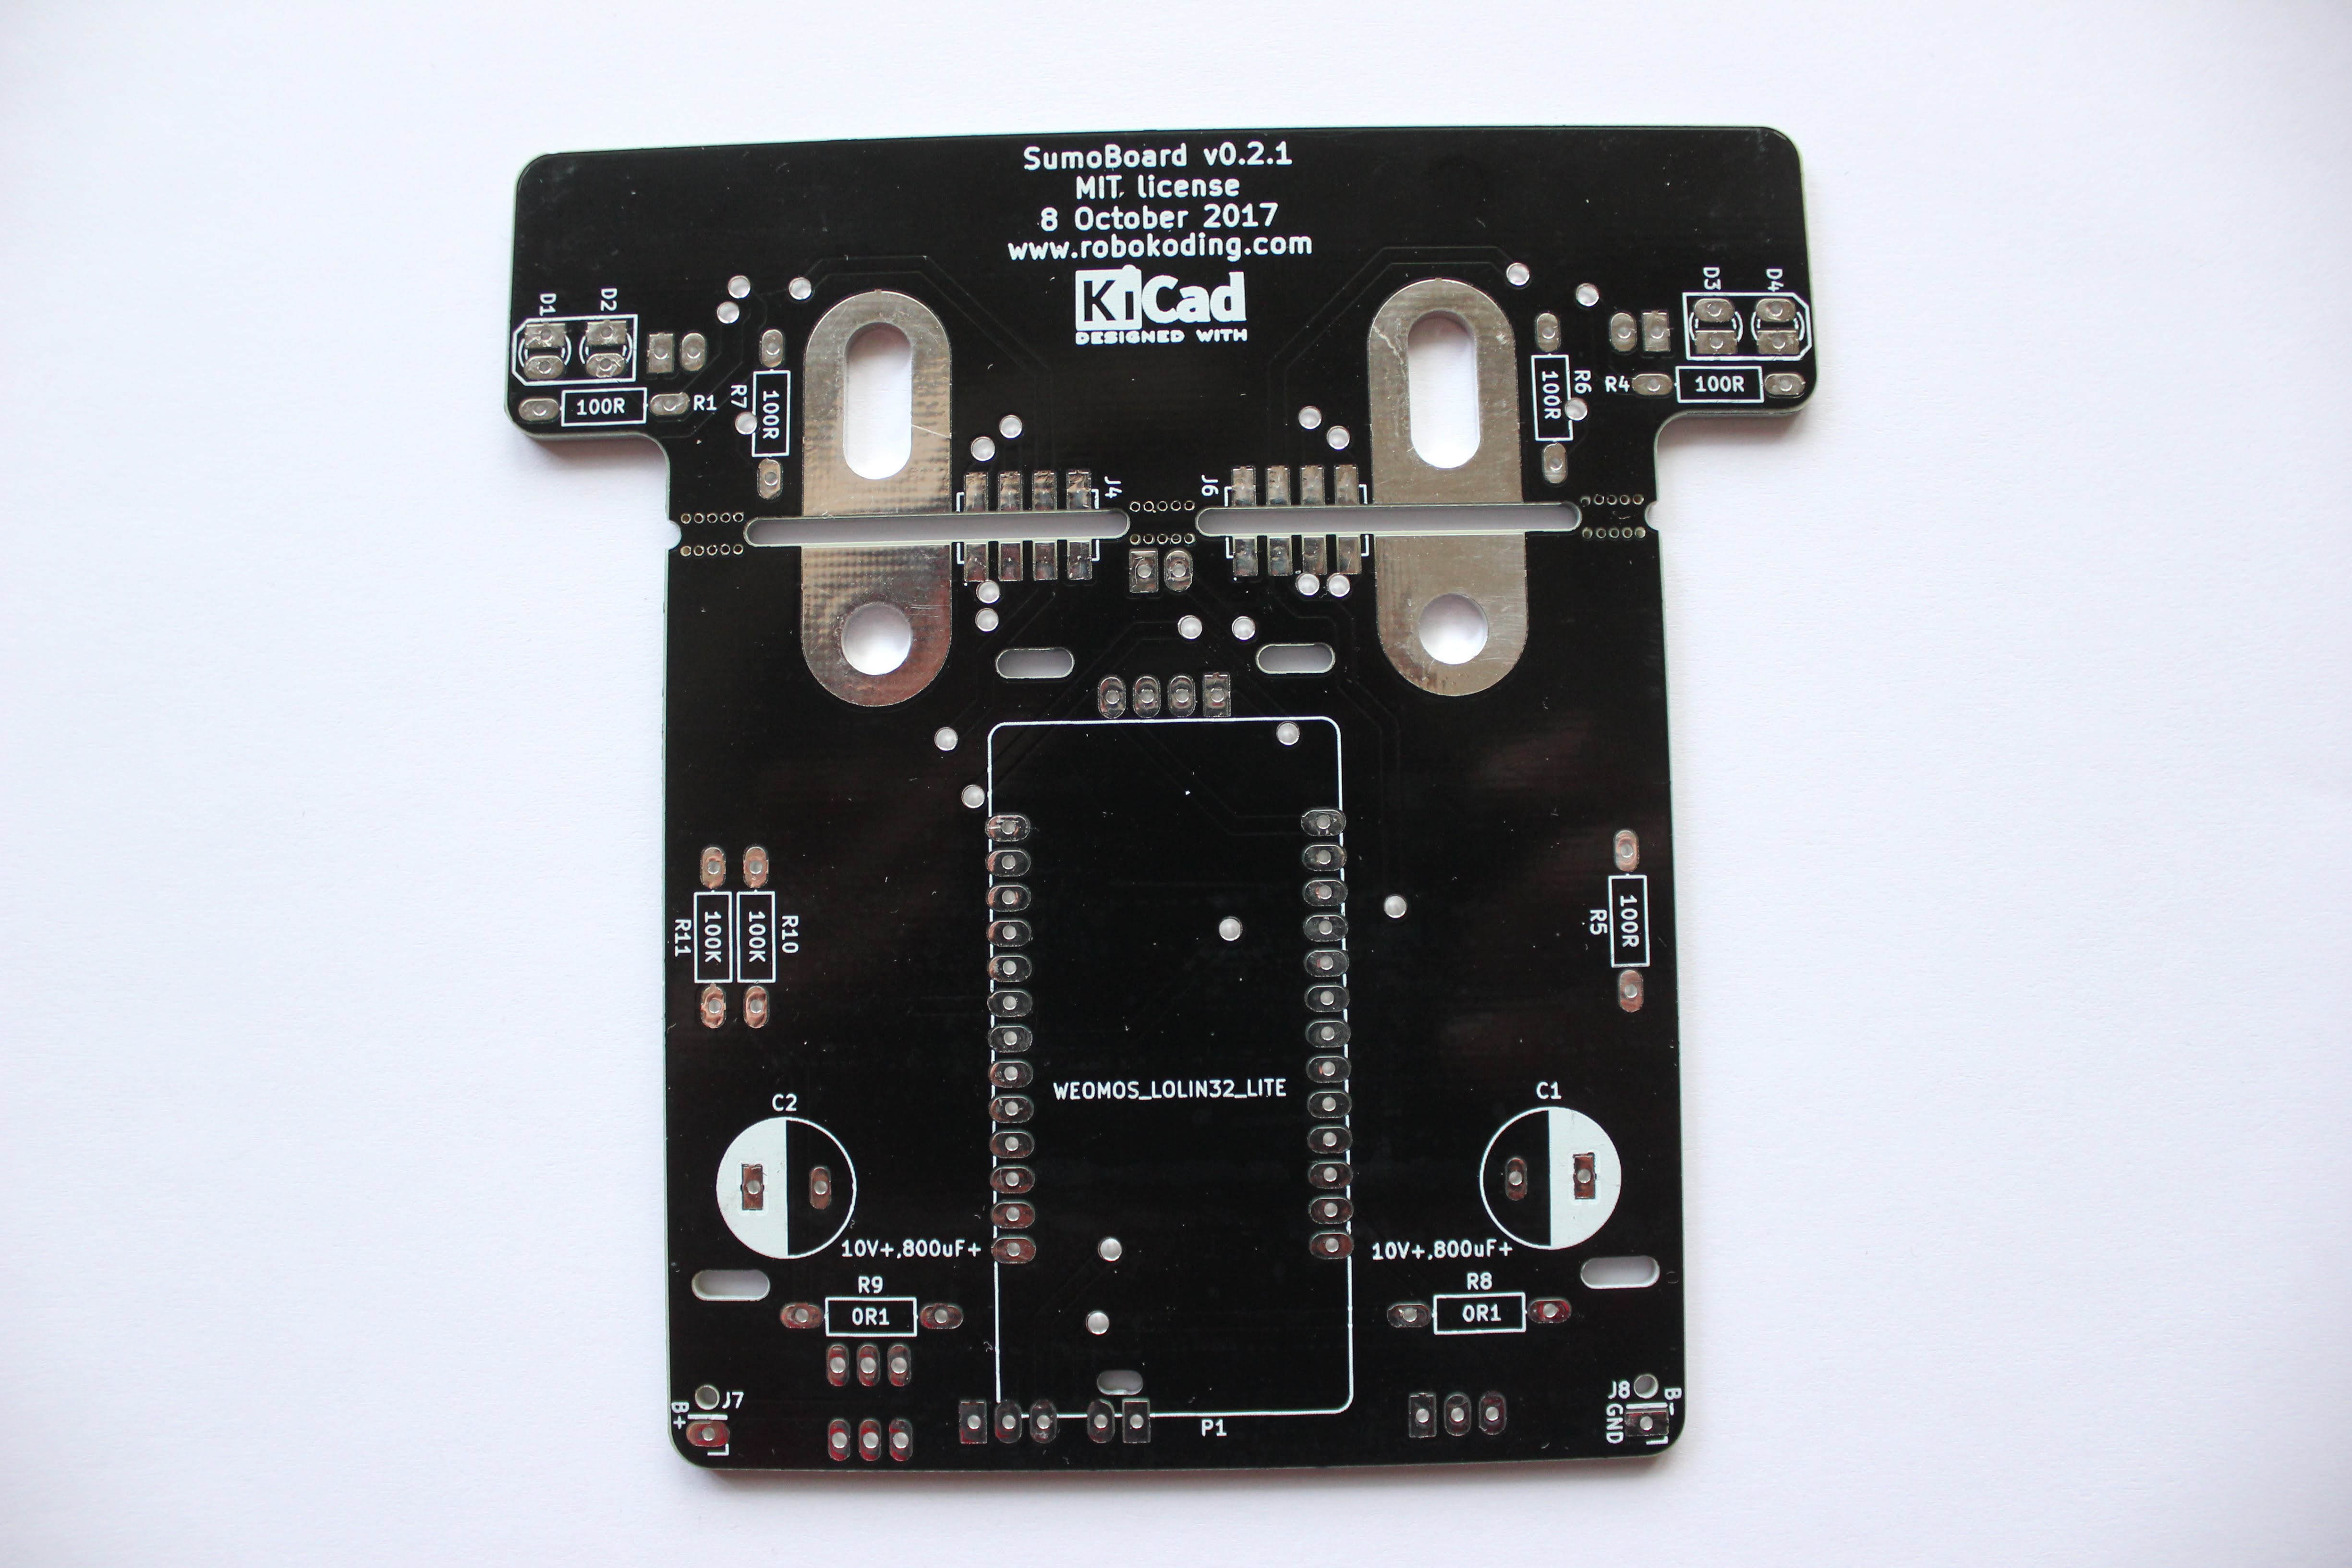
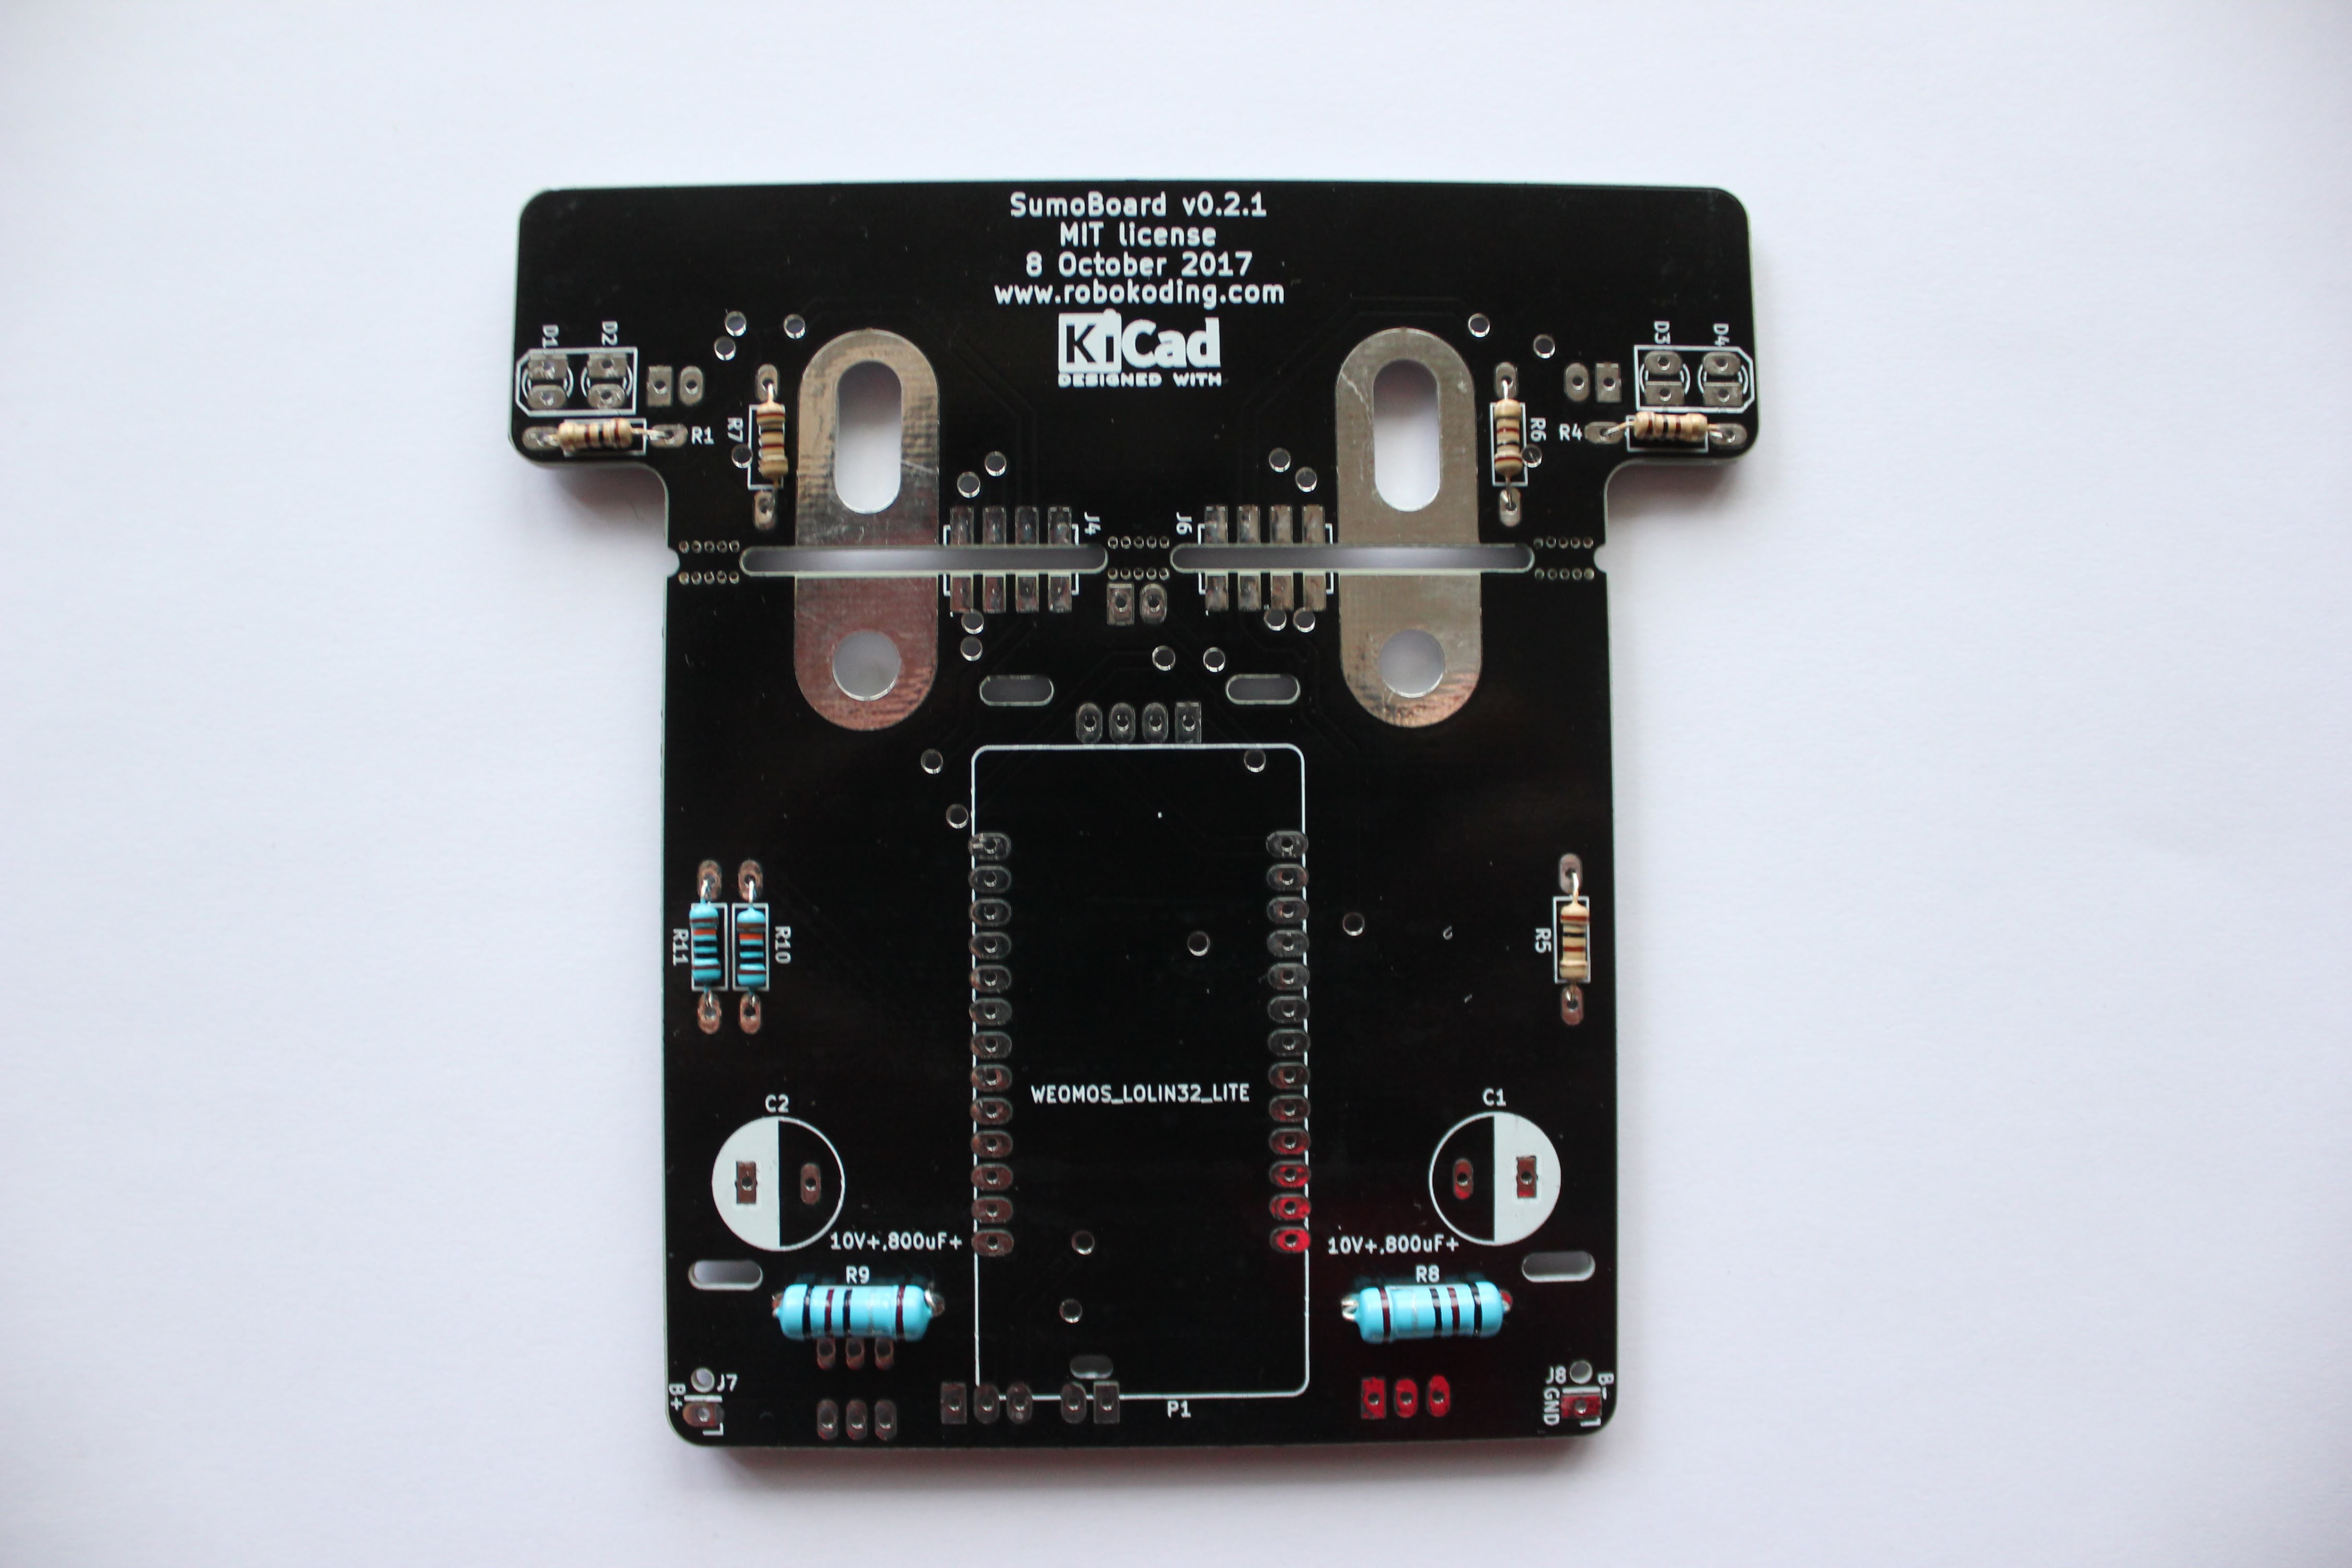
    Turn the SumoBoard to it's backside.

    R8, R9 = 0.1 ohm (big blue resistors)
    R1, R4, R5, R6, R7, = 100 ohm (small light grey resistors)
    R10, R11 = 100K ohm (small blue resistors)

    It is probably easiest to place the resistors and solder them one by one. Bend the resistor legs 90 degrees and place them trough the SumoBoard. The resistors don't have polarity, you can place them any way you want.

    BUG: The holes for the big blue resistors are a bit narrow (will be fixed in the next version).

    Once the resistor(s) is(are) in place, try to hold it in place with your finger (or keep the SumoBoard pushed against the table) and turn the SumoBoard around to solder the resistor from the other side and cut the remainder of the resistor legs.

    TIP: For best soldering results preheat the resistor leg and the pad with the tip of the soldering iron few seconds before and then apply solder wire. Add enough solder wire to make a mountain around the resistor leg and then remove the solder wire and leave the solder iron tip for few seconds on the pad. Then remove the solder iron and you should have a nice shiny solder connection.

  • 2
    Solder the capacitors

    The 2 green cylinders are the capacitors. On one side of the capacitor body there is a yellow/brown side with stripes. The capacitor leg with the striped side goes into the SumoBoard hole which is surrounded by a white half circle under the C1 and C2 labels. Place the capacitor and solder them one by one.

    BUG: Try to leave some space between the SumoBoard and the capacitor. So that the capacitor doesn't touch the SumoBoard. This makes one of the coming steps easier. This is a bug and will be fixed in the next hardware version.

  • 3
    Solder the phototransistors

    The phototransistors are the dark blue and black LED combined with the black chassis. Here again the polarity is important, so mind the white drawing on the SumoBoard to see which way they go to the holes of D1, D2, D3, D4. The cut corners of the phototransistor go towards the edge of  the SumoBoard, so that the dark blue LED is closer to the edge of the SumoBoard. Solder the phototransistors one by one.

View all 11 instructions

Enjoy this project?

Share

Discussions

RoboKoding LTD wrote 03/23/2018 at 12:12 point

We already announced the first kit.
https://www.tindie.com/products/robokoding/sumorobot/

  Are you sure? yes | no

Craig Hissett wrote 07/23/2017 at 22:55 point

This is great! I'd love to get hold of two of these; one for meach to build with my son, and one just for me:-)

  Are you sure? yes | no

RoboKoding LTD wrote 07/24/2017 at 11:24 point

Awesome, we can let you know once we start selling it on www.tindie.com : )

  Are you sure? yes | no

Craig Hissett wrote 07/24/2017 at 11:31 point

I look forward to it buddy :)

  Are you sure? yes | no

Similar Projects

Does this project spark your interest?

Become a member to follow this project and never miss any updates