Close
0%
0%

Yet Another Fidget POV (YAFPOV)

Call me Slow-on-the-Draw if you like, but I think there's a lot to be learned from this project even if it's a me-too.

Similar projects worth following
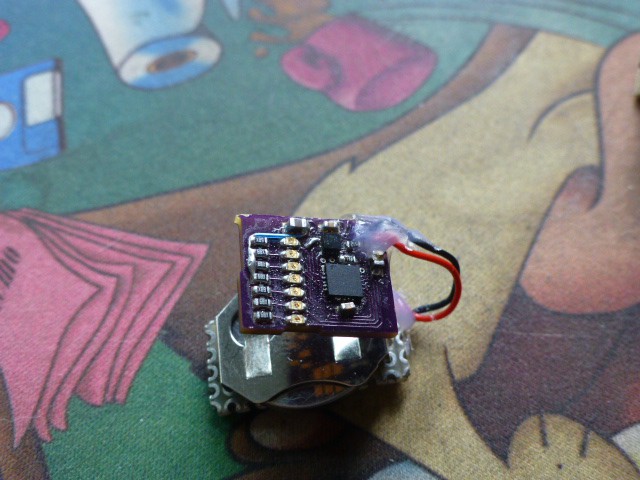
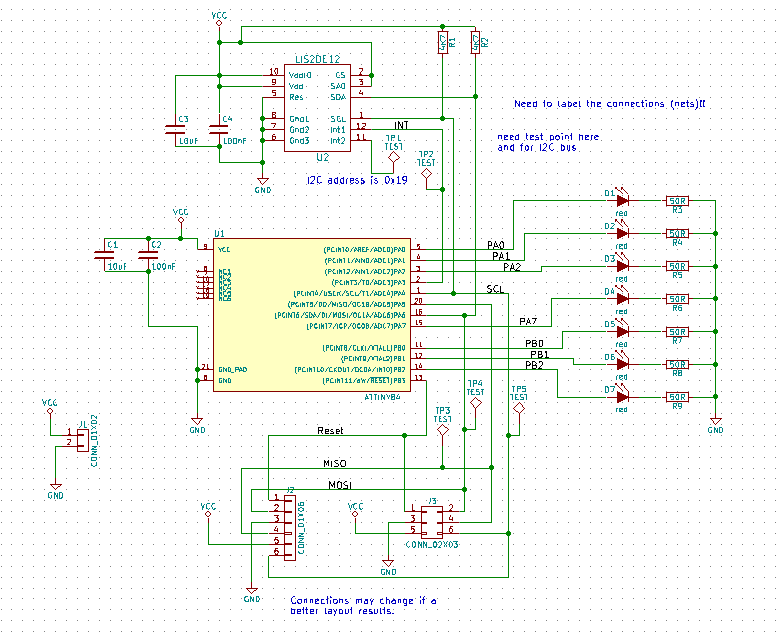
A small but functional POV display to fit on a fidget spinner. Uses an ATTINY84 in an SMT package. An accelerometer is included to wake the ATTINY84 from sleep when the fidget spins; it sleeps to save the battery. Since it's all SMT, a novel scheme for the programming header is implemented. Bright SMT leds are used for the display. Power is from a CR2032 lithium coin cell.

Here are the things I hope to learn creating this project:
- The electronics should be small. Ideally, they would fit into a hole on the fidget usually reserved for a bearing. So I intend to use an SMT design and an ATTINY processor.
- To get a nice display, seven LEDs should be used, not the typical 5. Means that an ATTINY84 should be used, not an ATTINY85. Seven pins are used for the LEDs, leaving a few extra.
- I don't want to fool with a switch, so an accelerometer will be included to turn on the POV when the fidget is spun. Those extra IO pins mentioned above will be used here for the I2C bus. Including an accelerometer has legs beyond the fidget. It can be used to turn on the processor when it is picked up, moved, or repositioned. I think this is a powerful feature that has not been explored much at all.
- To program the ATTINY84, yet keep the board compact, the usual programming header will be eschewed. Instead, a spring contactor will be used. This could be the Fail-of-the-Week, but I think it's worth a shot. Two different contactors are available and both will be tried. Again, this technique has legs well beyond this project any time a very small Arduino is desired.
- Sleep mode will be required to save power, so that will be experimented with also.


That's a decent list and more than justifies the design and development effort!

POV_footprints.zip

Kicad footprints for POV. Unzip these into lib_fp.pretty in the project directory

Zip Archive - 5.07 kB - 11/04/2019 at 01:36

Download

T84_POV.kicad_pcb

Kicad PCB

x-kicad-pcb - 83.19 kB - 11/04/2019 at 01:31

Download

T84_POV.net

Kicad Netlist

net - 14.81 kB - 11/04/2019 at 01:31

Download

T84_POV-cache.lib

Kicad schematic library

lib - 5.35 kB - 11/04/2019 at 01:31

Download

T84_POV.sch

Kicad Schematic

x-kicad-schematic - 15.70 kB - 11/04/2019 at 01:31

Download

View all 22 files

  • Kicad Files posted

    doctek11/04/2019 at 01:45 0 comments

    This posting may seem a little late, but getting this info together is actually a bit of work. But now someone has actually expressed interest in making one of these so I feel I have an obligation to post the design files.

    Now I don't have much experience posting a Kicad design, so please bear with me. If there are files or info that are missing, just tell me what they are and I'll try to post them. I apologize for any inconvenience. It is my intent to reveal the design, not hide it. I just need to know what's needed.

    Please see the files section for the actual files. You should create a Kicad project directory to hold them. I'm sure you'll have to mess with the paths and possibly the project file name. Next I'll try to get a parts list together.

  • Controlling the Fidget POV

    doctek09/12/2017 at 23:22 0 comments

    Initially, I thought I could just use acceleration on the z axis to turn the POV on and off. Since acceleration due to gravity was large compared to other accelerations (I thought), the z axis should tell me when I had picked up the POV (z acceleration low since the z axis would be perpendicular to gravity) and when I had put it down (z acceleration about 1G). What I quickly learned was that the force of my finger giving the POV a spin caused z accelerations as well as rotational accelerations. Although they didn't last long, they messed up my clever on-off scheme. Putting in time delays impacted the POV display and still didn't make it work.
    Since I couldn't solve the on/off problem, I decided to split it into two problems: turn on and turn off. Reading over the accelerometer data sheet suggested a reliable way to turn the POV on: use double-tap. The ATTINY84 goes to sleep when it shuts off (discussed next), then the accelerometer issues an interrupt when it senses a double-tap. After spending some time tuning the sensing constants, I got this working reasonably well. Sometimes takes a few taps to get it going, but that's only mildly annoying. I'm sure more tuning could make the double-tap work better; I just wanted to get on with the project.
    Once I understood how the accelerometer actually worked, it wasn't hard to get a turn off algorithm working. Acceleration of 1G on the z axis is sensed as originally implemented, but I also check that the x axis acceleration is small. That only happens when rotation has stopped. Basically, these two conditions mean that the POV must be laying on it's side and stopped. Now z accelerations which occur when the Fidget is given a hard spin don't cause a shut off. When the turn off condition is sensed, the ATTINY84 enters sleep mode and waits for the double tap event to occur.
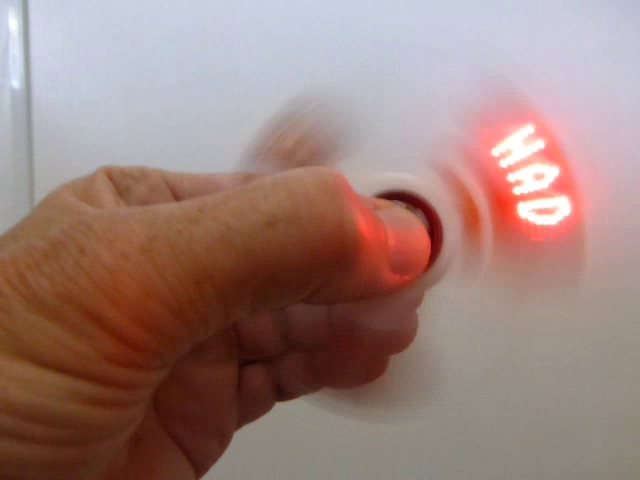
    The final control problem was to start the text display at a consistent location in the rotation to stabilize the display. Before I really understood the accelerometer response, I tried to use the 4D motion sensing capability of the accelerometer to determine when to display the text. But the algorithm uses only one value as a limit. If that is exceeded either by x or y accelerations, then the 4D interrupt is activated. Since y was always large, it dominated the response and kept 4D from being useful. Once I understood the accelerometer response, then I was able to just use an x value to position the display. That worked quite well and is part of my final program, T84_POV_Click_Text.ino. I'll create a video soon to show the POV in action.

  • Programming the Accelerometer

    doctek09/12/2017 at 04:37 0 comments

    Soon, I will add a complete parts list, but I intend to provide Digikey links and that will take some time to put together. For now, it's perhaps helpful to say the accelerometer I'm using is the LIS2DE12 by ST. It's tiny (2mm square), cheap (< $2 in onesies), and has an easy I2C interface. Three tasks seemed reasonable for the accelerometer: Turn on the Fidget POV when I want to play with it, put it to sleep when I'm done, and stabilize the display of the text. (This last task is one I didn't anticipate until I actually put up the first letters. When I saw how they jumped around, I realized that stabilization was necessary!) Easy enough, I thought. But I soon discovered that accelerometers are not intuitively understood devices, at least not by me. What I will discuss in the following took me almost a month to figure out. I'll try to spare you all the sordid details, but still hit the key points.
    My initial assumptions included:
    - radial acceleration due to rotation was small - less than 1G.
    - tangential acceleration due to rotation was negligible.
    - the positive directions for sensing were as shown in the accelerometer data sheet.
    Based on these assumptions, I selected the +/-2G scale and expected mostly positive values of acceleration. But nothing worked as I expected! So I had to do some testing. (Those last two sentences took a couple of weeks of experimenting!) There was no easy way to read out exact values of acceleration. Storing values in EEPROM and reading them back with avrdude was considered, but I couldn't figure out how to start gathering data at an "interesting" point. Then I realized that I could use the leds to indicate acceleration levels! Turned out to be a great idea and guided me to an understanding of the accelerometer. For anyone who would like to repeat my experiments, have a look at T84_POV_Test_Accel_Max.ino. You should be able to easily see where to change the accelerometer configuration (mainly the range) and how to adjust which axis and what values light the various leds. The accelerometer returns an eight bit result for each axis in two's compliment form. Since this is just what C uses as a signed number, no further manipulation is required. Just remember you're dealing with a signed number when you do comparisons.
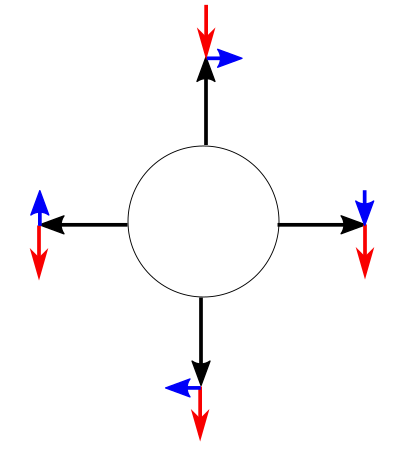
    To reach a workable level of understanding of the accelerometer, I also had to think carefully about exactly how the accelerations acted on it. The figure below shows the accelerations that act on the POV as it rotates, at four points in a rotation.

    The black arrow is the radial acceleration, the blue arrow is the tangential acceleration, and the red arrow is gravity.
    Skipping a lot of confusing experiments, here's the results:
    - radial acceleration due to rotation is large - exceeding 16Gs if spun very hard. And it's in the negative y direction. Rotation must be nearly stopped before the rotational acceleration drops below 2Gs.
    - tangential acceleration is small - less than 1G mostly - but not negligible.
    - the positive axes directions for x an y are opposite those shown on the data sheet.
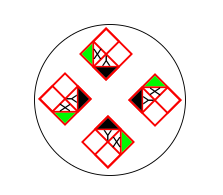
    You can see that my assumptions were completely wrong! Convincing myself that my results were correct was probably the hardest part. The following figure shows the orientation of the accelerometer at four points in one rotation.

    The positive sense directions are shown as the colored triangles. Comparing this to the figure above showing the accelerations acting on the POV, we can conclude that acceleration along y will always be large (like maximum negative value kind of large) and negative until the rotation is nearly stopped. So all control needs to be done with x values. The x values stay within +/-4Gs.  Fortunately, that works great and results in a stable display of the POV text.

  • New Fidget Body

    doctek09/11/2017 at 04:11 0 comments

    A new body was needed for the fidget so that the battery and the board wouldn't fly off so easily when I spun it. The design was quickly done in FreeCAD and printed. The FreeCAD and STL files are both attached.

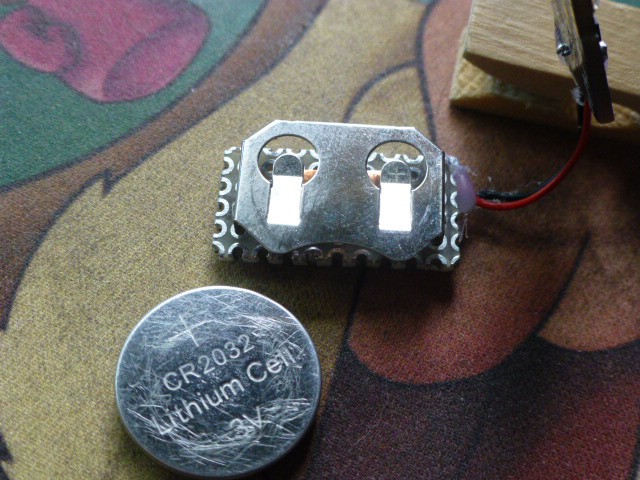
    Have a look at the battery carrier as well. The part number is in the Parts List; I simply mounted it on a bit of perf board and ran a couple of wires to the main PCB. I put a small square of copper tape with some solder on it in the center of the perf board to serve as the negative post. Note the hot melt glue which provides strain relief and prevents fatigue failures of the wire.

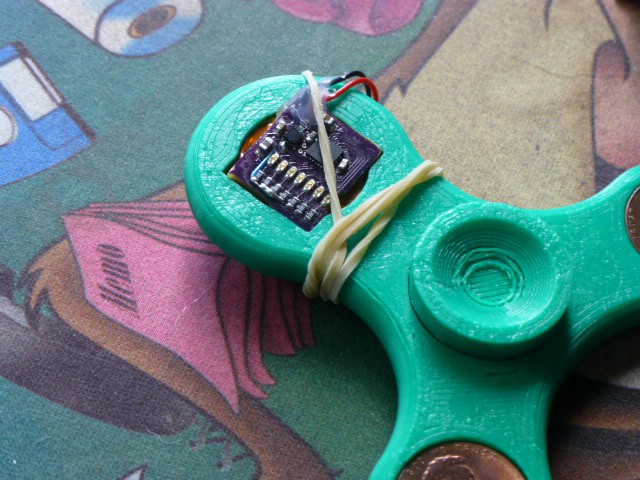
    Here's how it all fits together. I'm still using a rubber band to hold the battery and pcb in place while I bend the software.

  • Reinstall and Test Accelerometer

    doctek09/10/2017 at 03:35 0 comments

    The accelerometer was removed because of shorting under it, but now it was time to re-install it. I cleaned up the solder pads for the accelerometer - both the ones on the accelerometer itself and the ones on the PCB. A short length of finely stranded wire with a drop of liquid flux on it made a great solder braid for these tiny pads. The accelerometer was placed carefully back on the pads for a quick trip to the toaster oven for reflow. I was hoping there was enough solder left to make the remount work.

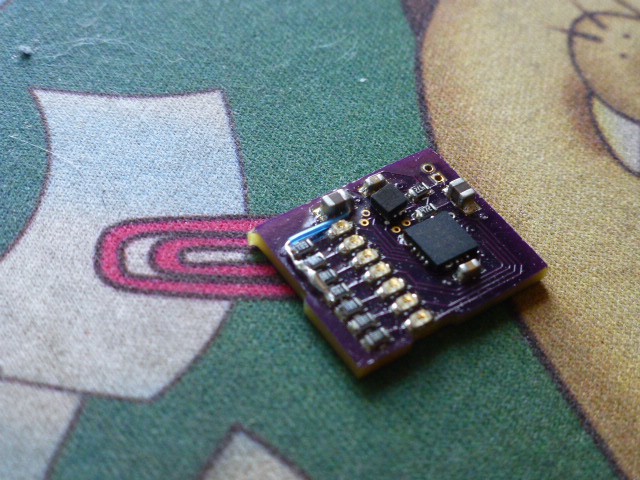
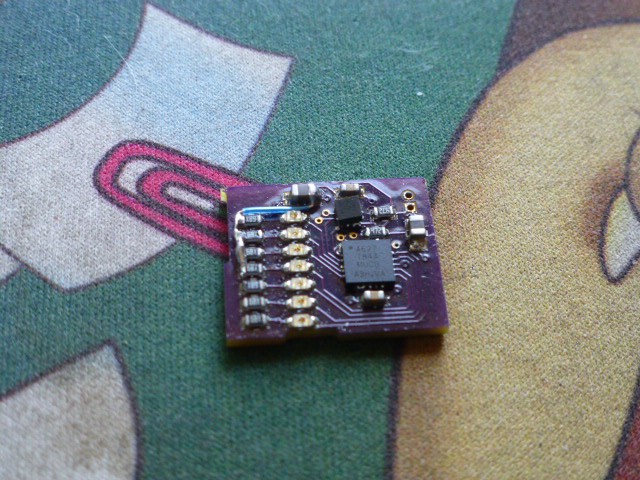
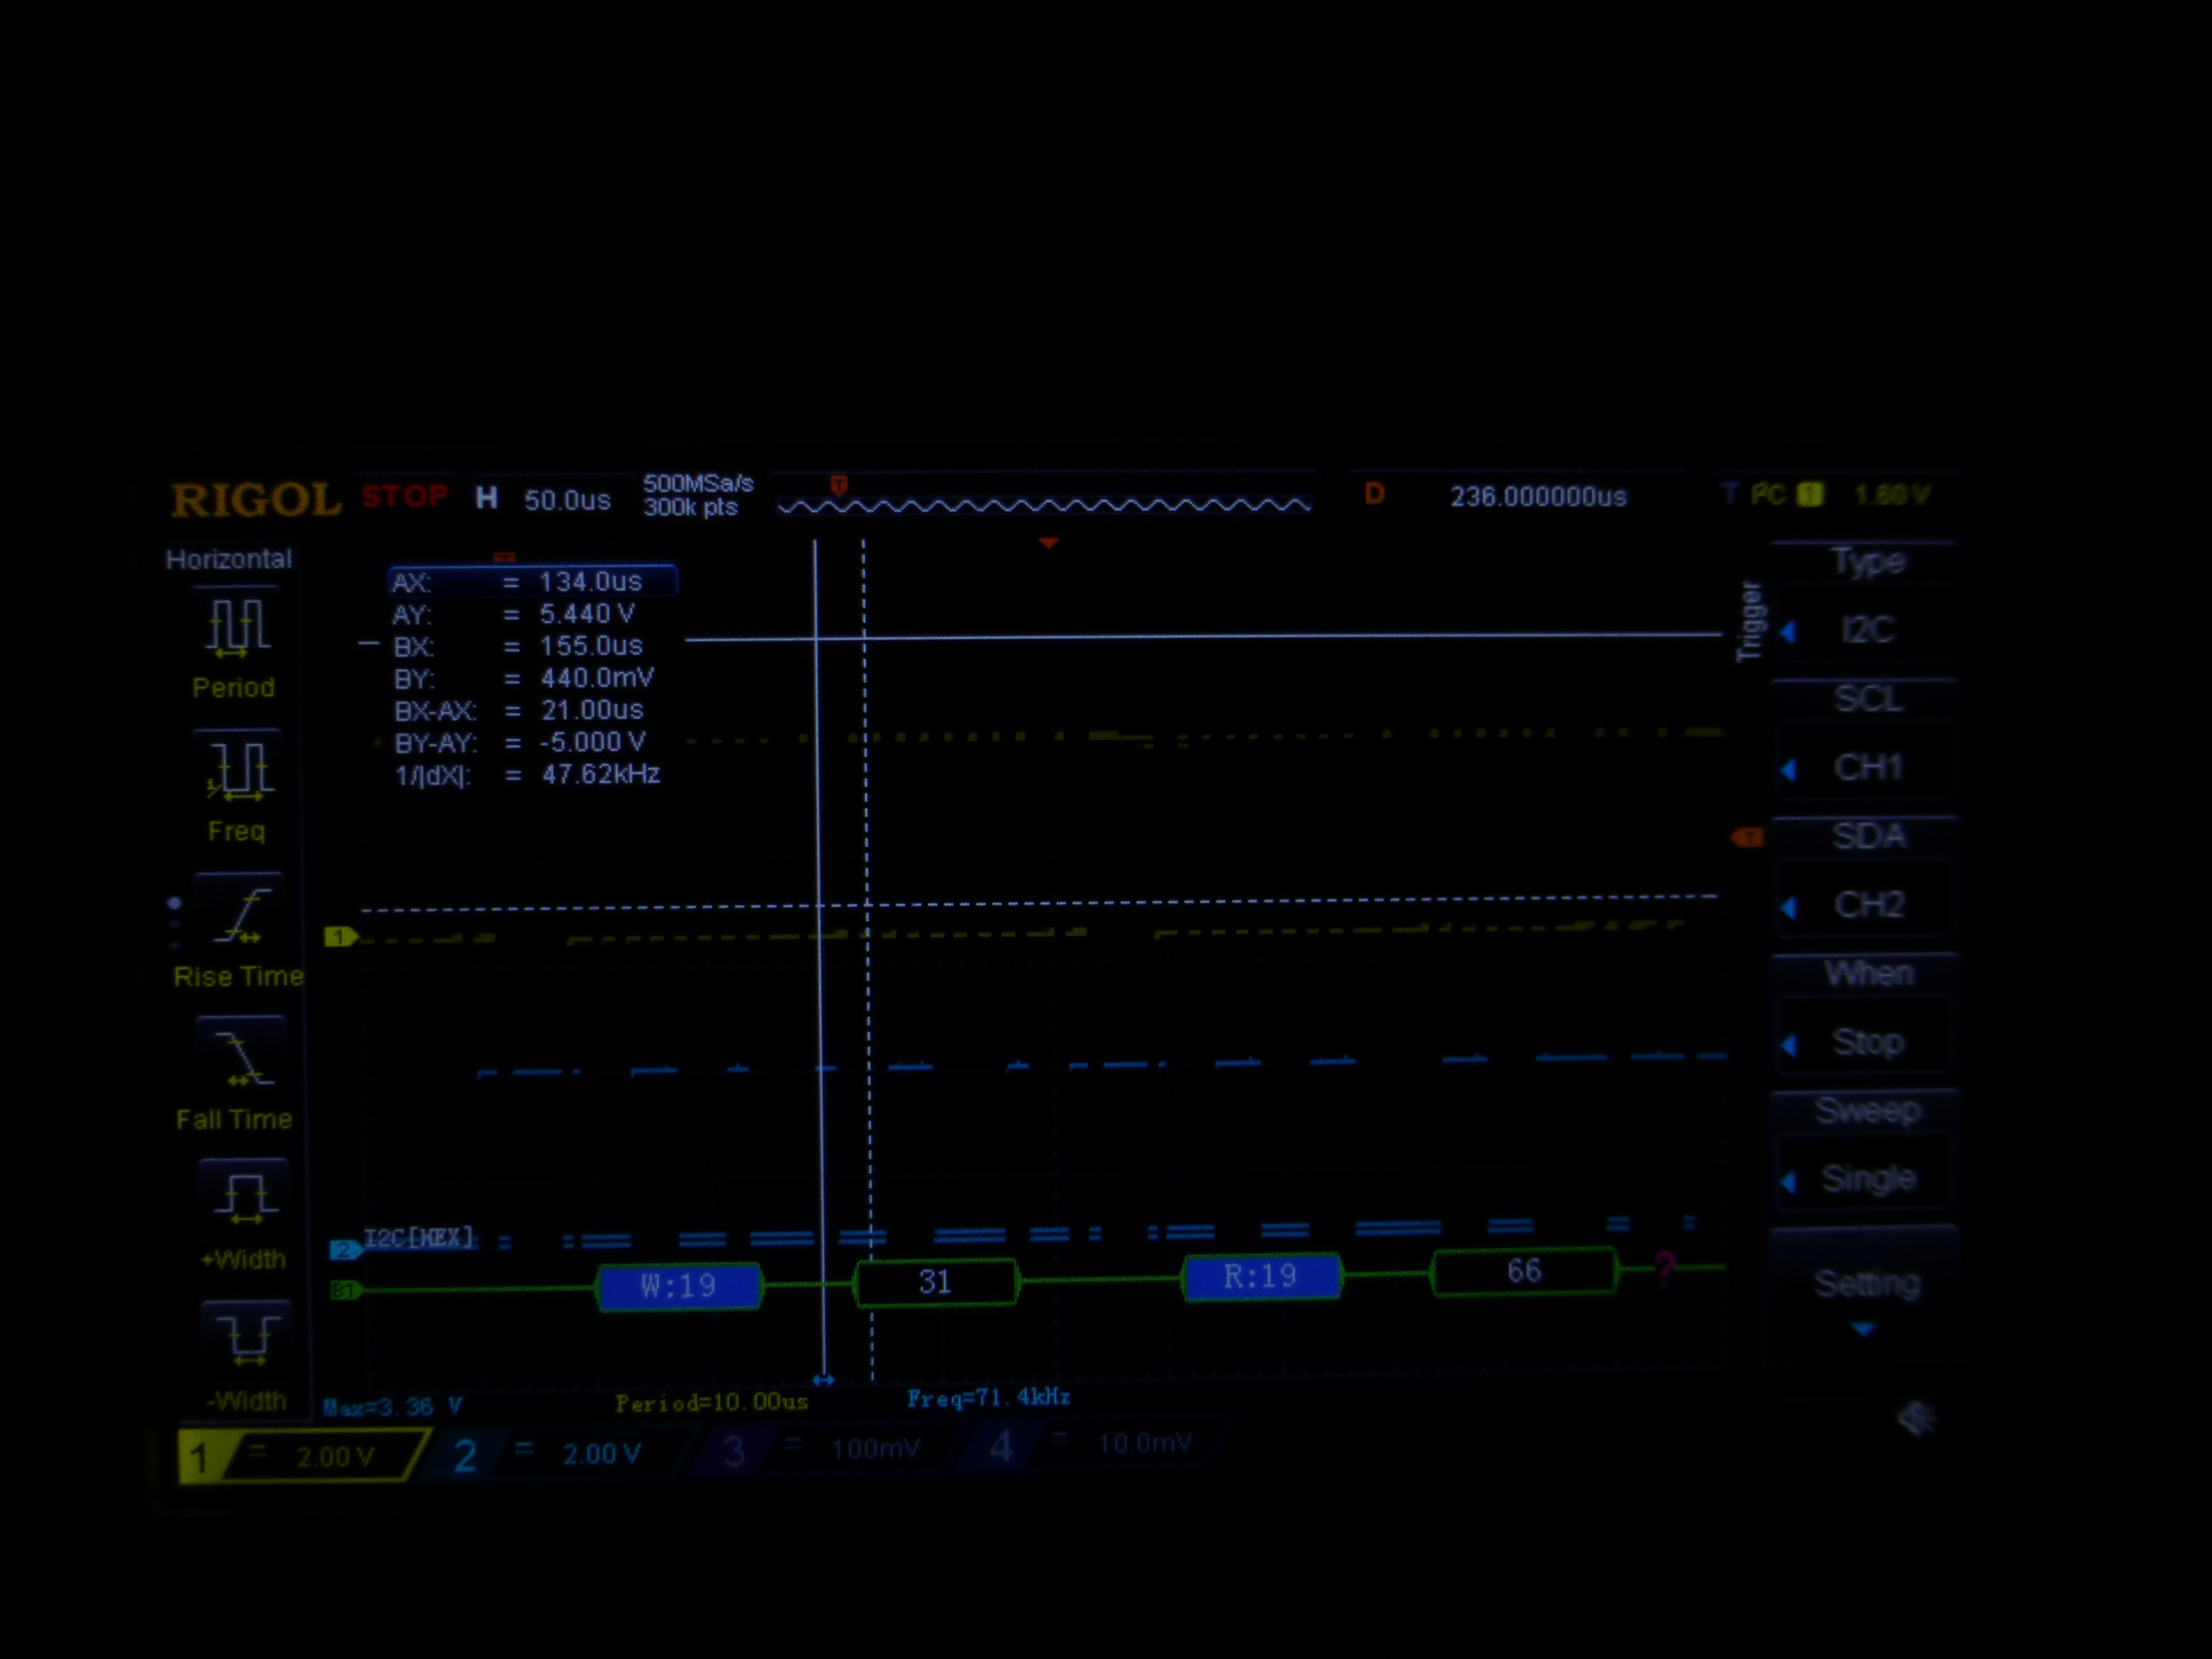
    "Hope" is never a good strategy, and, indeed, the accelerometer would not answer up on I2C. (Although it did at least stick to the pcb.)  Hooking up the scope verified that. Either the SDA or the SCL, or both, were not connected. As a last hope, I used a straight pin to put a tiny amount of solder paste on the side of the accelerometer with pins 1 and 4 (yup, that's SDA and SCL) and a bit of liquid flux everywhere else. Then into the toaster oven again. Success! I2C queries now got correct responses. Picture shows the board all together with the accelerometer and the Interrupt 2 jumper (described next).

    With I2C working, I could configure the accelerometer, but for it to be useful, the interrupt needed to work. Without trying anything so complicated as configuring and triggering an actual interrupt, I was able to test the operation by changing the polarity of the interrupt pin using the I2C bus. Doing this, I quickly discovered that the Interrupt 1 pin did not seem to be connected either! Rather than trying another repair, I used a stand-by scheme I had planned. Interrupt 2 was pinned out to a via on the board which could be routed to a via in the Interrupt 1 trace. So I verified that Interrupt 2 could change level under I2C control, then shorted the vias. Now Interrupt 2 was connected to the ATTINY84. Yahoo! With thanks to STM for their design, I found that all functions that Interrupt 1 could perform could be performed by Interrupt 2. The accelerometer was now ready to use.

  • Displaying Text

    doctek09/10/2017 at 03:30 0 comments

    Now that I had Blink running and could program the ATTINY84 at will, developing the text display routine was easy. The first program is included as  T84_POV1.ino. The algorithm is obvious, and the timing used is shown. See the picture. I'll add a video soon. Since this was my first POV device, I mistakenly thought I was nearly done. Next up was to try to put the accelerometer back on the board and use it for wake up.

  • Using the uProgrammer

    doctek08/02/2017 at 23:33 0 comments

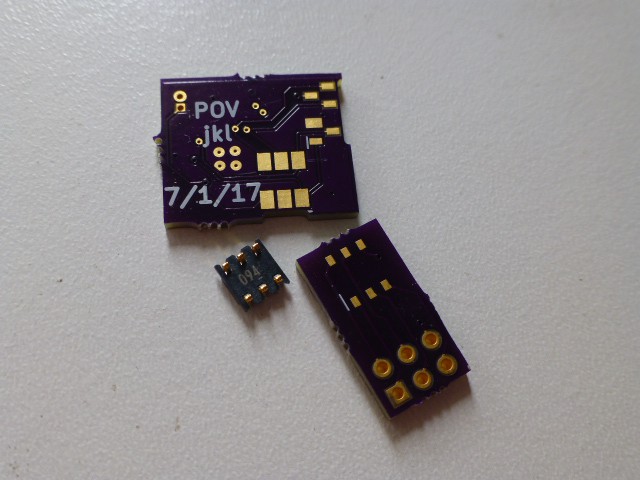
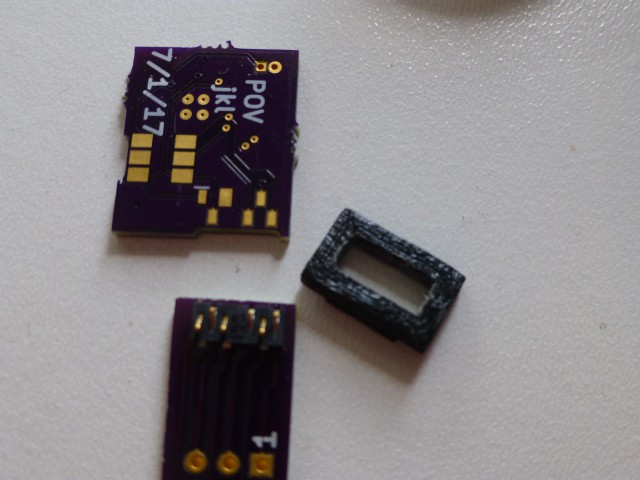
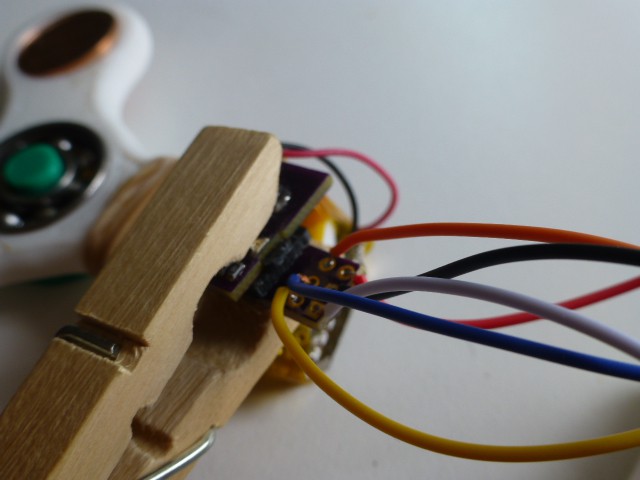
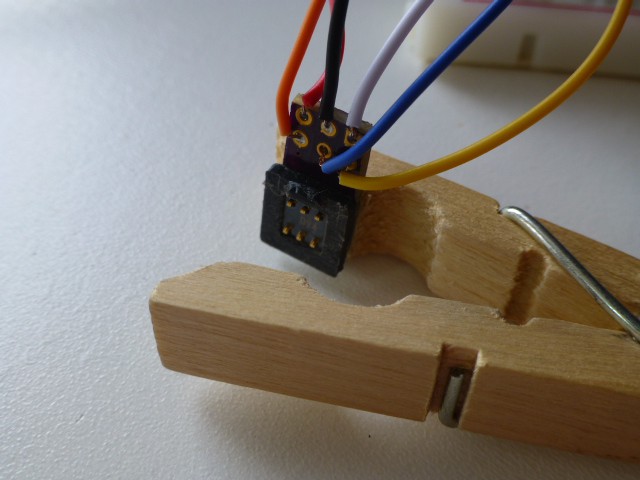
    A short aside here to discuss the uProgrammer. In the last post, I kind of brushed over the uProgrammer, although it was an area I was very worried about. If it hadn't worked, the whole project would have been a Fail-of-the-Week! The concept was discussed in the Circuit Board and Programmer Project Log, but now that I know it works, I can talk about the implementation. The idea was to use a spring contactor to provide the connection to the board with the microprocessor on it. A footprint for the contactor contacts to hit was included in the microprocessor board design. As previously mentioned, a frame was 3D printed to provide the spacing between the contactor and the footprint so the contactor could be reused.A small notch in the board mates with a tab on the frame for easy alignment. These pictures should help you to get the idea.

    This scheme turned out to work really well! A clothes pin works as a clamp to hold the microprocessor board and the uProgrammer together.

    Since this approach allows building very small "Arduinos", it may be the most useful part of this project.

  • Board Build and Bring-Up

    doctek08/02/2017 at 23:29 0 comments

    My Perfect Purple PCBs showed up a few days ago, so it was time to build and bring up the boards. (OK. It's really been a few weeks ago. Never claimed I was quick.)  I cut the solder paste stencil using my Silhouette Portrait and 3.5 mil overhead transparency film (mylar). Cleaning the chad out of the stencil holes took a bit of effort, especially on the tiny holes for the accelerometer. I broke one of the spaces between the holes, but thought it would be OK to have a tiny bit of extra solder paste. Reflowed in my toaster oven and began check-out.
    Looking at the board, I noted that the accelerometer was skewed - both twisted and tilted.

    Looked like that extra solder paste came back to bite me! I proceeded with check out any way. Power and ground were not shorted! That's always a relief. But then things got interesting. To check out anything more, I needed to program the ATTINY84. It was time to build at least one of the uProgrammers. I chose the 2x3 version since the pads on the POV board were larger. Here is the uProgrammer mounted to the exotic clip I fashioned to hold the programmer in place. Worked fine.

    In the process of checking the board, I looked closely at the board design in KiCad and noticed to my dismay that I had left a section of ground plane floating free. You'll notice the bit of blue wire on the board to fix that. The problem happened when I added the uProgrammer positioning notches. Fortunately, the fix was easy. I fixed this before I did any other board testing.
    In short order, I established that the contactor and spacer used for the uProgrammer had continuity. The signal paths from the wires on the uProgrammer to the POV board tested solid. But there was at least one obvious problem. The MOSI line should have shown a 4.7K resistance to Vcc, but instead was shorted. Checking the accelerometer footprint, Vcc and MOSI were next to each other in the corner that had the extra solder paste. Uh-oh! The only way I could think of to clear the short was to use my hot plate and unsolder the accelerometer. I did that and the short was obvious. I used my soldering iron to remove the extra solder paste and clear the short, but I haven't put the accelerometer back on yet. Lots I could test without that complication for now.
    Moving ahead, I verified that the programming signals (Vcc and ground, MOSI, Reset,and SCLK) all looked good. But the part wouldn't program and MISO clearly was not sending the correct levels back. What could be wrong? I didn't know. After pondering the situation a while, I decided to take a look at the signals while programming the DIP version of the ATTINY84. Of course, these looked fine, so the next step was to try to mess them up and see if I could get MISO to look like what I saw on the POV. Disconnecting MISO was a possible, but I thought that might be too easy. Disconnecting VCC was another way, and this seemed more plausible - especially when I looked carefully at the pads around the ATTINY84. It appeared that the Vcc pad did not have any paste on it. I made the pad-to-pin connection with a pin point and got Blink to program! So I knew this was the problem. A little work with a very tiny soldering tip, a bit of paste and some liquid flux, and the joint looked better and the ATTINY84 programmed! On to developing the POV program.

  • Accelerometer Experiments

    doctek07/30/2017 at 20:45 0 comments

    The accelerometer I'm experimenting with is the STM LSM330DLC. Although this is an older design, it's convenient since I have an IMU I designed nearly 5 years ago with that part on it. It's similar enough to the part on my new design that I can do useful experiments. Most applications using accelerometers and Arduinos involve implementing IMU functions, and most drivers support simply reading the data back quickly. But that's not how I plan to use the accelerometer in this application. What I want the accelerometer to do is to wake the ATTINY84 when the fidget is spun, then let it go back to sleep when spinning is over. Getting it all to work as desired will take some testing, but I can start now to get a feel for how to control the accelerometer.
    With the accelerometer hooked to the Teensy2, I tested it's ability to generate interrupts to wake the Teensy. This was easy. The data sheet was very clear on how to configure the control registers. Next was how to know when to go back to sleep. My first approach was to read the interrupt status register on the accelerometer since that tells which interrupt (X, Y, or Z) was above or below threshold. However, this register is only updated when an interrupt occurs; useless for showing status otherwise. So I read the X and Y values, convert from two's compliment, and do the compare in the ATTINY84. Currently, the limit is arbitrary and will have to be tuned on the POV board. But it works! And it also works when ported to the ATTINY84. The code for the ATTINY84 is one of the files.
    Quick battery life calculation: The CR-2032 battery is rated at 210mAh @ 15K load. With 3.0 V and 15K load, the rated current drain is 200uA. The STM LIS2DE12 accelerometer that is on the POV board draws 4uA at 25 samples per second (to watch for a spin) and the ATTINY84 draws 0.1uA in sleep mode. Life is then 210,000/4.1 > 50,000 hours or about 6 years. Conclusion: no power switch is needed.

  • Pictures as Promised

    doctek07/30/2017 at 20:43 0 comments

    Here are the pictures I mentioned in the first two logs. These are also included as files.

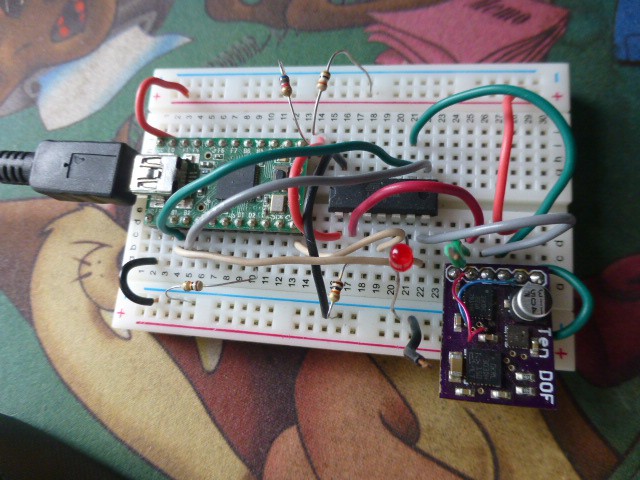
    Experimental Breadboard showing Teensy2, ATTINY84, and the IMU.

    Rigol Scope I2C Capture and Decode.

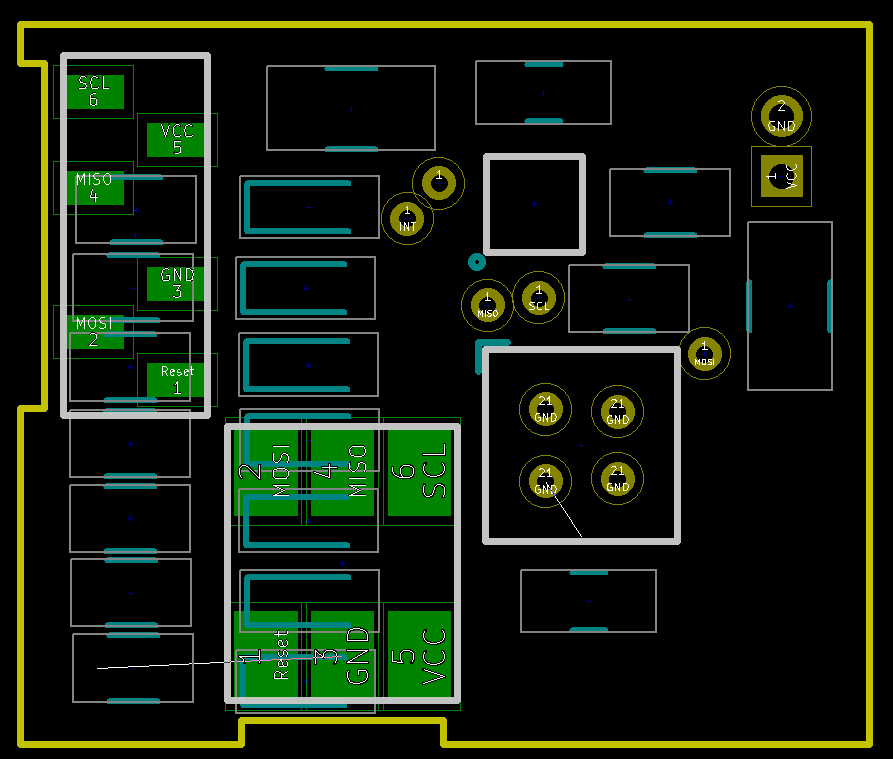
    Connector Board Design and Schematic. This shows the pad footprints that are on the back side of the POV board. The locating notches are shown in the board outline.

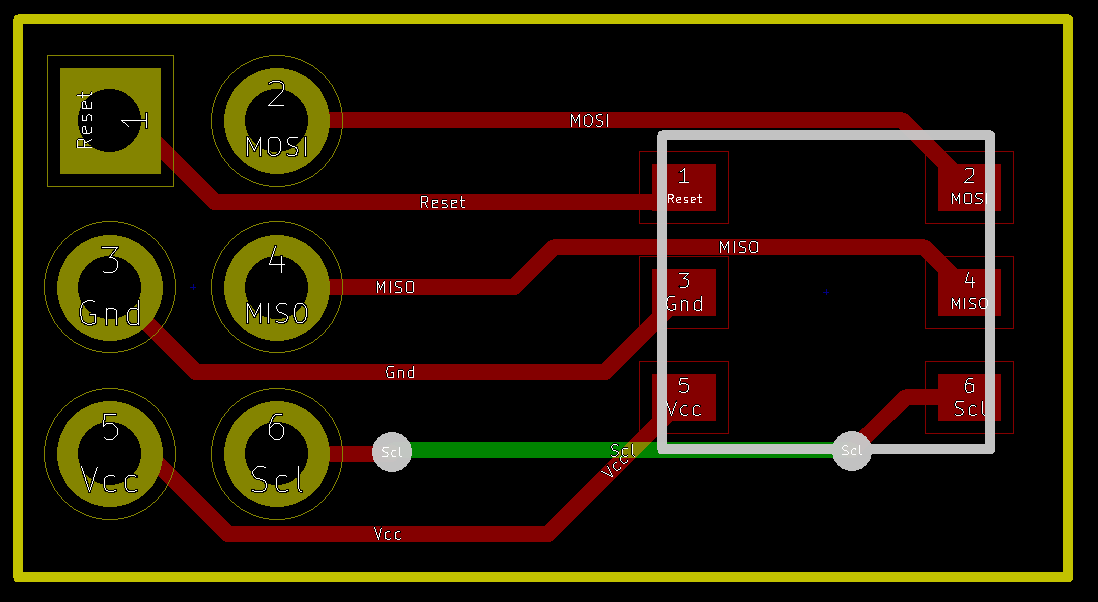
    This is the board design for the 2x3 uProgrammer. All it does is carry the contactor and provide connection points.

    This  shows how the uProgrammer pads are included in the schematic.

View all 12 project logs

Enjoy this project?

Share

Discussions

Similar Projects

Does this project spark your interest?

Become a member to follow this project and never miss any updates