Tim Wilkinson
-
Software: The very, very basics
11/19/2014 at 06:01 • 0 commentsI thought it's time to say a little about the software. There's no way I can possibly do justice to it in one post. It's a complex, flexible, well engineered application with many, many pieces to understand. But let's start with some basics.
You'll need a Windows PC to run the software. I'm a Mac person, so I had to go out and buy a cheap PC (I ended up with a low-end Intel NUC - small and cheap but effective). The software declares that it requires Windows XP, but in reality its just fine with Windows 7. Maybe Windows 8 is okay too, but I haven't tried that. I was glad Windows XP wasn't necessary because finding hardware that still runs it has gotten difficult.
The software, which comes on the DVD included with your machine, is mostly in Mandarin. You'll open up the DVD and see this:
![]()
Not the friendliest screen. The top left and top right folders contain videos demonstrating the machine (narrated in Mandarin). I decided it would be useful to get a transcript of these video in English then I could follow along. I'll post these once they're completed. The bottom left folder contains a PDF file which describes (I think) how to assemble the machine. It also contains a couple of sub-folders of HTML document which I think are some sort of manual. I've not had chance to translate any of that yet (Bing and Google translate are your friends). The top middle folder contains some administrative stuff and images. Finally, the bottom right folder contains the actual software.
This software is divided into two pieces. One is the USB driver for the machine. This appears to be a USB-to-serial driver. Windows 7 has one of those built-in. The second folder contains the pick and place application. There doesn't appear to be an installer, so you simply drag this folder to where you want it. Probably best to rename it too.
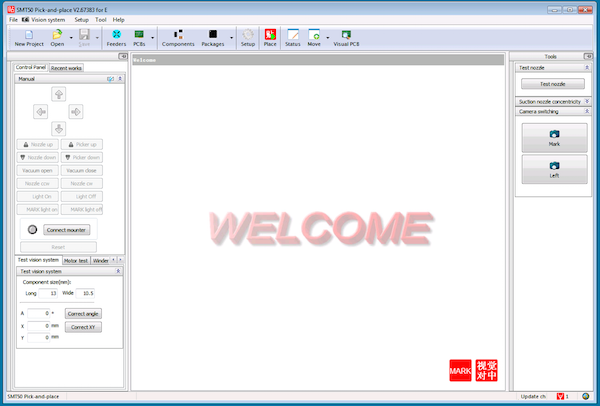
Inside the app folder things are mostly in English. The main application is "OURSMT.exe". You can check out their website if you're interested (http://oursmt.com). When you launch the app you'll see something like this:
![]()
I *think* it will launch in English by default. If not, on the bottom right of the window you can see a tiny globe symbol. If you select this you can change the language. By default the app comes with "chinese_big5", "chinese" and "english_new". At this point you'll start to notice that the english translation is not the best. It's all rather literal and probably the result of someone feeding the chinese strings to Google Translate and simply pasting the results (my apologies if this is not the case ... but it does rather look like it). So, one of the big tasks has been to generate improved english translations. This is an ongoing process and I keep my latest translations on GitHub here - http://github.com/aanon4/SMT50. The directory structure should map directly to the OURSMT app and create a new translation called "english_tim". Selecting this will make things a little more comprehensible.
-
USB and Vision
11/18/2014 at 07:30 • 0 commentsBefore buying this machine, I had the company send over the installation manual. To be honest, it was only slightly informative given my lack of mandarin, but I did learn that you need 3 USB ports for this machine:
- To control the pick and placing
- For the two vision camera
- For the USB software dongle
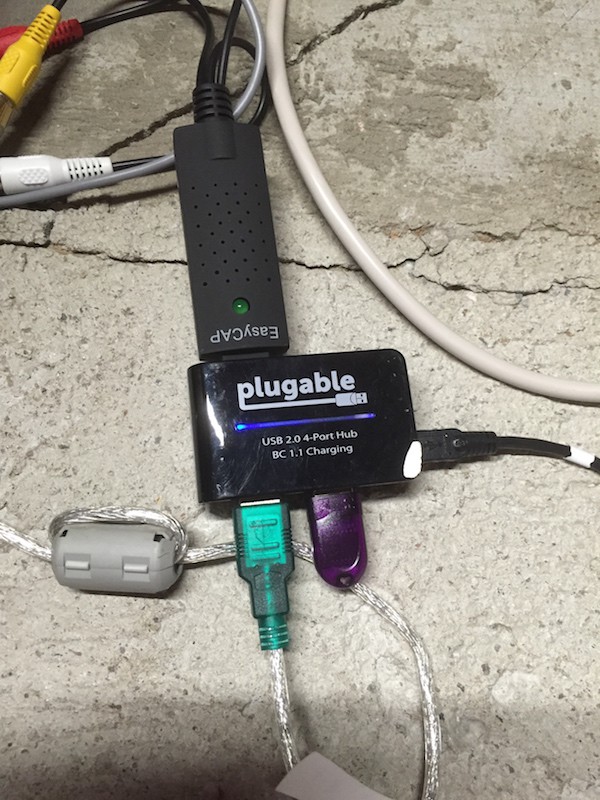
Consequently, depending on what Windows PC you end up using, you might need a USB hub to get everything plugged in at the same time.The USB cable is fairly obvious. When you attach it to your PC it will install a driver which makes it look like a serial port. I guess the actual hardware is serial! You will also get a video-to-usb box with three cables: yellow, red and yellow. Plug the yellow cable into the video cable from the machine (the others are audio inputs which we're not using). Finally, plug the USB dongle (a little purple thing) in too. Below is everything attached to a USB hub:
![]()
-
Air
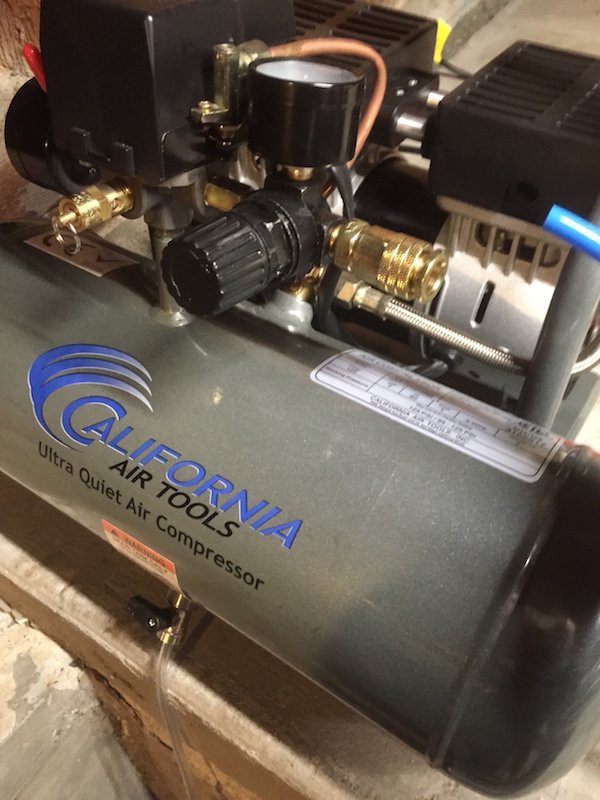
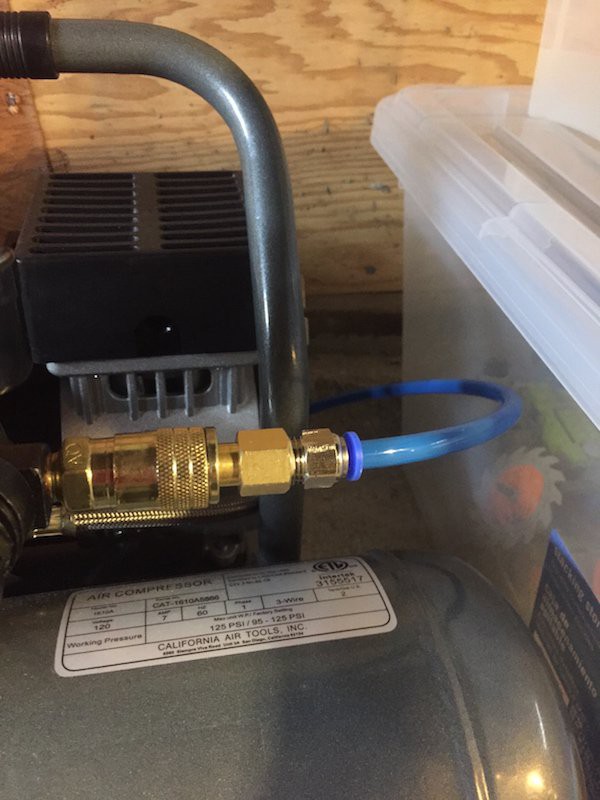
11/18/2014 at 01:25 • 0 commentsThe SMT50 requires it own compressed air supply. It's definitely a bit of a downside with it; it's not like I have a compressor kicking around my place. I suppose one advantage is that I could buy the quietest compressor I could rather than put up with whatever was built-in (which might be noisy). I ended up purchasing the California Air Tools CAT-1610A Ultra Quiet compressor from Amazon (http://www.amazon.com/California-Air-Tools-376-Accessory/dp/B008FCSQ1U) for about $200. This might be overkill. The machine is speced for 60psi, but the compressor will do twice that; but I wanted quiet and this looked like the best choice. You can go with a medical compressor which I'm told are virtual silent. That seemed a little overkill given the 5x price tag for things.
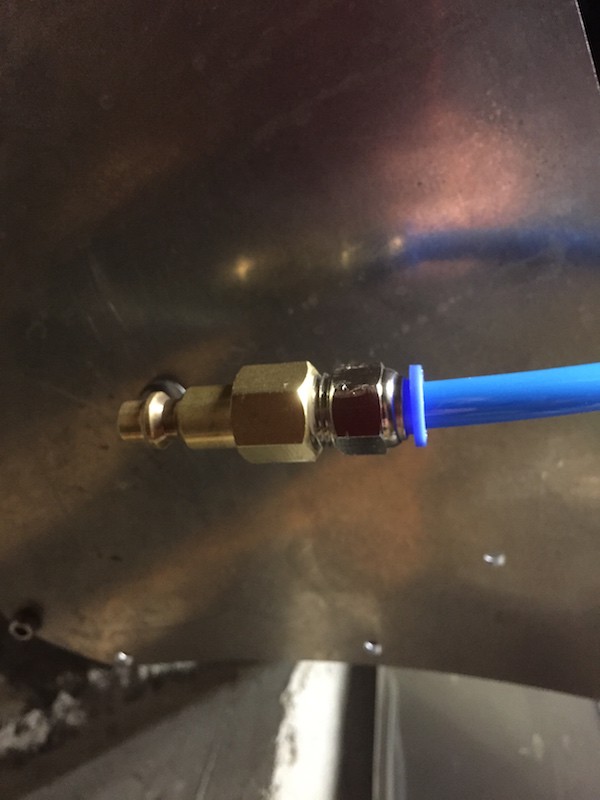
You then have to connect the compressor to the machine. This was bizarrely difficult. The compressor has a female 1/4" NPT coupler, so you need a 1/4" male NPT connector to 8mm. This was surprisingly hard to find. Buying a male NPT to female screw connector was easy, but finding a male to 8mm pipe connector was a nightmare. I tried two different Home Depot store plus my local Ace Hardware and the I never found the correct part. What I wanted was a connector where you simply push the 8mm hose into one end, and screw the other part into the NPT adaptor. I could only find such a thing on eBay (like this one http://www.ebay.com/itm/260506833459). I believe there are other connectors called "Hose Barbs" and they might work well if you can find the correct size. I never did.![]()
Below are the final connector pieces joined together, then with the air hose from the machine attached, and finally with the hose plugged into the air compressor.
![]()
![]()
![]()
-
Feeders
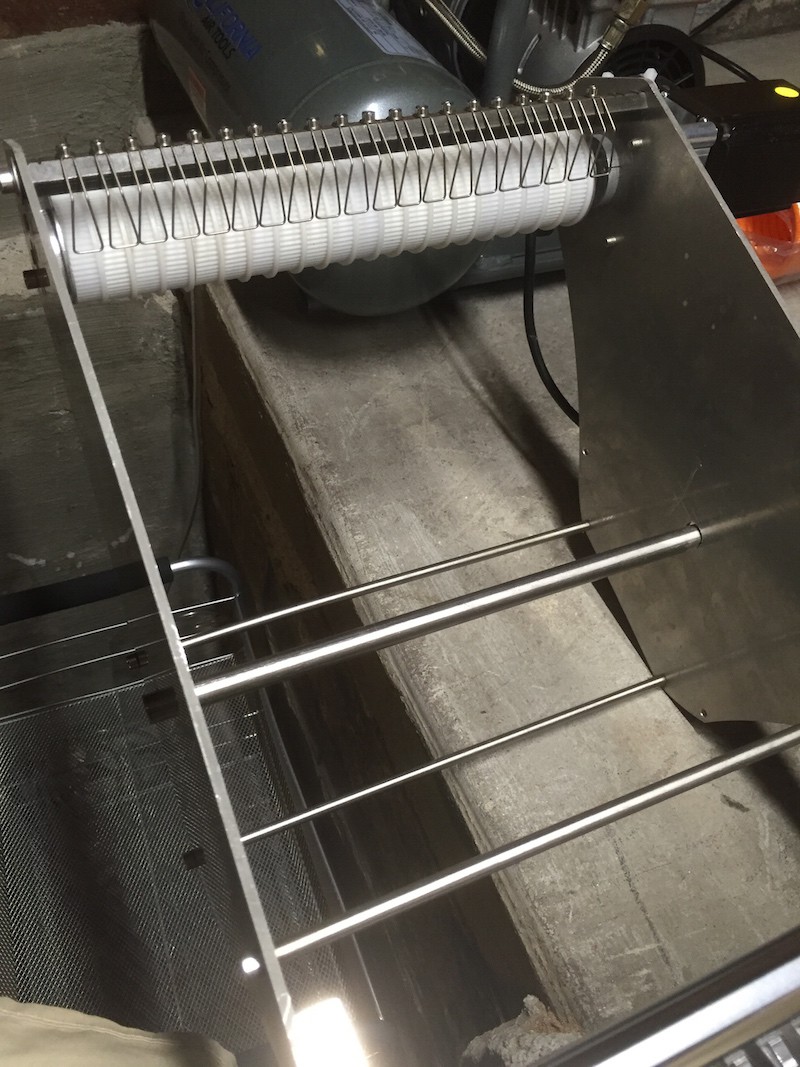
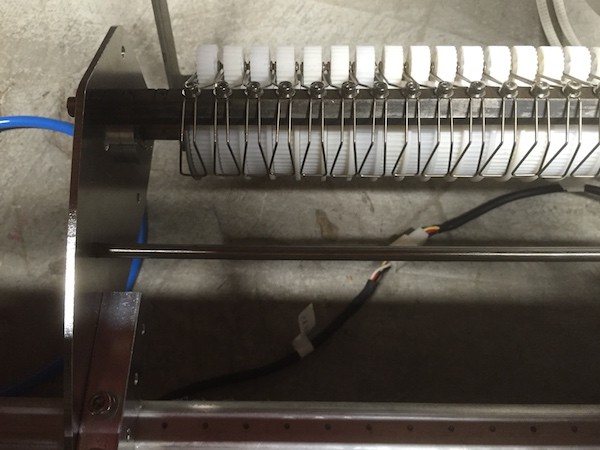
11/17/2014 at 07:38 • 0 commentsThe basic machine comes with one feeder which is mounted on the left (referred to as the West) side of the machine. This feeder handles 20x 8mm tapes. I also order an additional feeder with fits on the top (North) side of the machine. This supports additional 8mm as well as a few 12mm and 16mm tapes.
![]()
The West feeder is an all-on-one tape mount which also pulls back the plastic film which protects your components. The tapes are mounted on a central metal rod. The white cogs in the picture pull the tape covering.
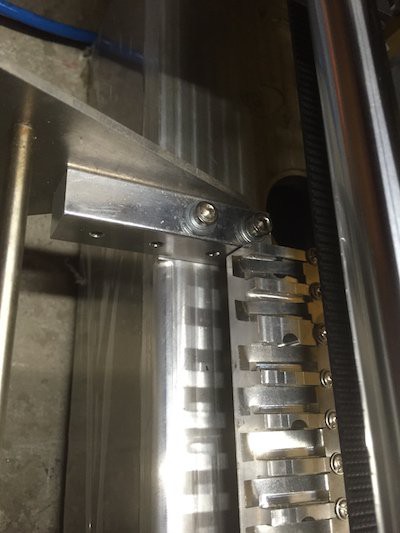
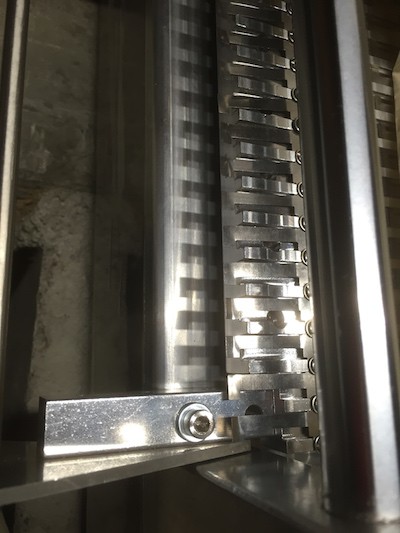
The feeder is not attached to the machine when it is shipped to you, which make sense. You attach them using 4 supplied screws. The first time I tried to do this I noticed two things:
- Realistically you can only use 3 screws to attach it. The fourth screw is buried under the tape feeder guides on the machine making it inaccessible unless I want to disassemble things (I don't).
- After attaching and making sure everything is tight, the feeder still has some play in it. So, the second time I assembled it, I used two washers on each screw. This resulted in a much tighter and firmer fit.
![]()
![]()
The North feeder screws onto the back of the machine in a similar way. In this case, it's easy to use all four screws. Again I used a couple of washers for a better fit. This feeder is not the same all-on-one unit as the West one. This one is in two parts - the white cog part for pulling the tape covering, and a free-standing metal V like structure for mounting tapes.
![]()
![]()
Initially I thought this was a bit cheap, but in reality it been better. I have a few tapes containing common components (e.g. 0.1uF capacitors) which are very big; each tape holding about 10,000 pieces. These tapes are too big for the West feeder, but fit perfectly on the North one.
Each feed has a single stepper motor which is used to turn the cogs, putting tension on the tape covering and pulling it away from the main pick and place area as the tape advances. The stepper motor has a single white connector which mates with a similar connector on the machine (the machine having two). You can see it snaking underneath the rack in the above, left photo. There doesn't appear to be any keying on these connectors to tell you which socket is for north and which is for west When I later tests these motors they were activated at the correct moment, so it's possible I accidentally plugged them into the correct sockets first time (which isn't usually the way it works even though it should be 50/50) or the electronics identifies and moves the correct motor. Either way, no damage could be done if you got them mixed up and they're easy enough to swap.
-
110V/220V Power
11/17/2014 at 02:21 • 0 commentsThe SMT50 is advertised as needing 220V to operate. This was a bit of a concern because I'd have to run a special outlet. I was assured by the company that I could "convert" the machine to 110V. Turns out that just meant flipping a switch on the power supply.
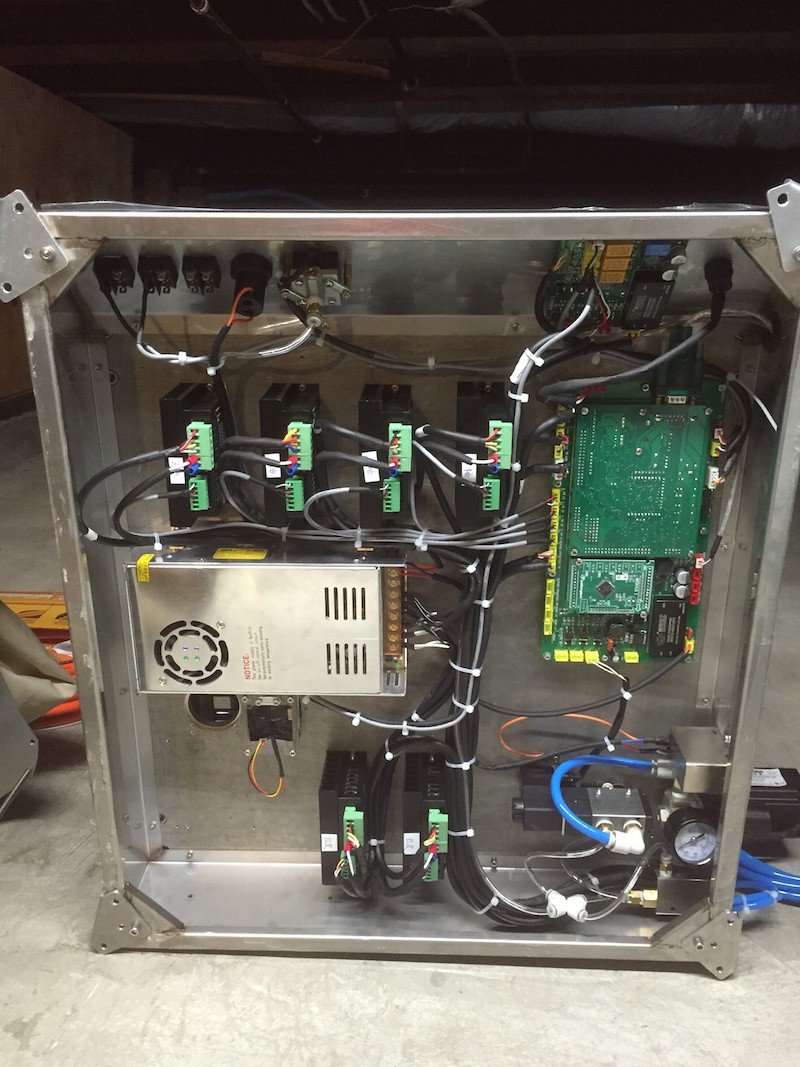
![]()
In the above photo showing the underside of the machine, the power supply is the silver box, middle left. On the side of it (and difficult to see) is a recessed switch to switch between 220V and 110V. Move the switch right (as seen in his picture) for 110V operation. It would have been helpful if the company had been more clear on this point.
-
Leveling
11/17/2014 at 01:20 • 0 commentsI had decided to install the pick and place machine in my basement for a number of reason. Primarily it didn't seem like the sort of thing which should be sat in my upstairs office, even if I had the space. Also, I'd read that for best accuracy the machine should be level and shouldn't move. Things with large stepper motors pushing around lumps of metal do tend to move around. I'm old enough to have witness ancient drum drives (ask you grandparents kids) which, with careful programming of data access patterns, could be persuaded to walk around a machine room. I reasoned that in my basement I could mount the thing on my house foundation which definitely won't move ... until the next earthquake anyway.
To install the machine, you need to remove the transportation brackets used to attach it to the packing crate, and attach the rubber feet.
![]()
As you can see, these are attached to the machine with a hex bolt. I'm not sure what size the head is (sorry) but it's a perfect fit for the Ikea hex tool. You probably have 50 or so of them around the house.
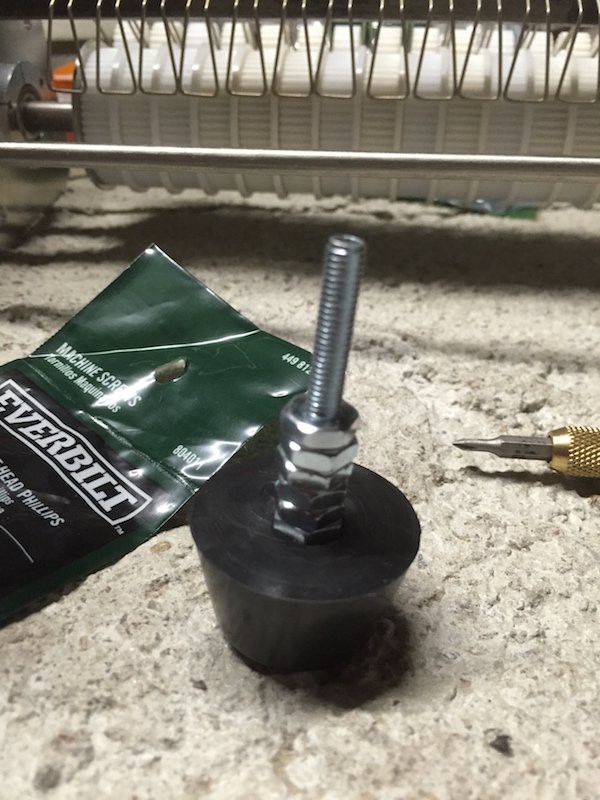
Once removed, the rubber feet should be attached. These come with the machine, and include the nuts and bolts to attach them. I'd expected these feet to be adjustable so you could use them to level the machine. However, they're not, and the bolts aren't long enough to do that job anyway. However, adjusting the feet still seemed like the best way to level. So, a quick trip to Home Depot (other home supply stores are available) later I'd bought a box of #10-32 screw nuts, various length flat headed #10-32 phillips screws, and a packet of appropriately sized washers. #10-32 is the same spec as the bolts that come with the machine.
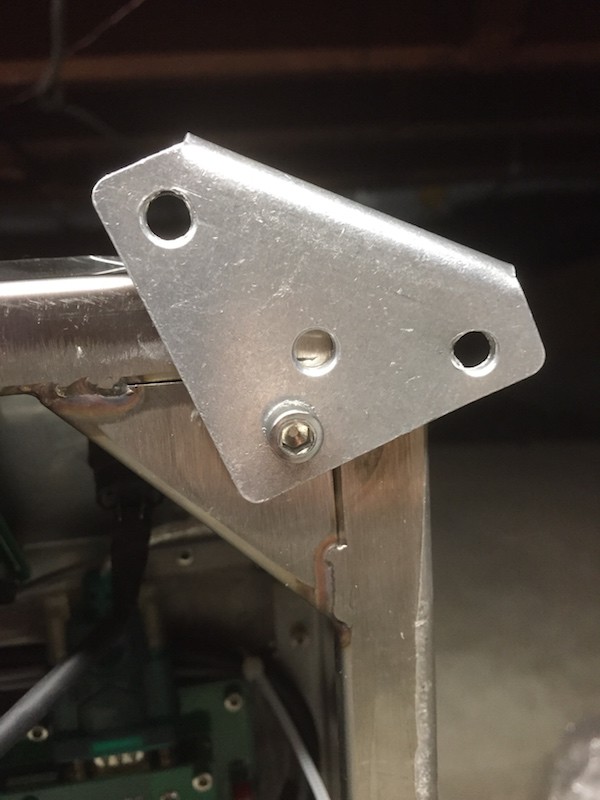
I then placed a Level on top of the machine, and proceeded to make "pillars" with the feet, screws and nuts, such that when they were all attached, the top plate of the machine was completely level. Here's the tallest of the feet:
![]()
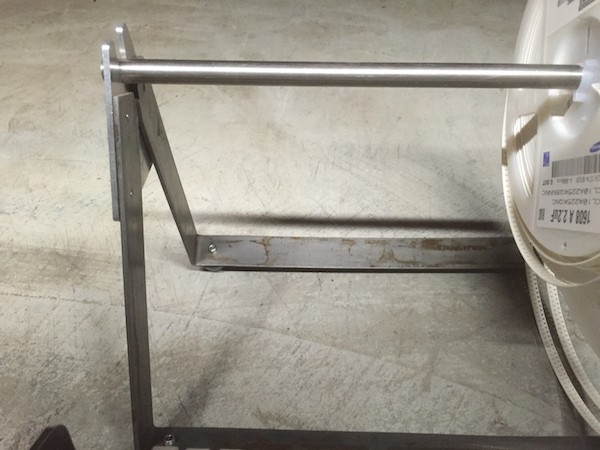
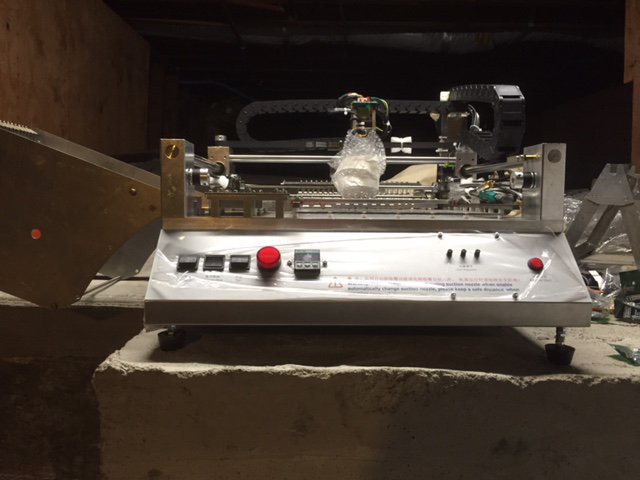
And here's a side view of the machine, mounted on my foundation, with all feet attached:
![]()
The one question about this arrangement, which I'll only know in time, is whether this levelling method keeps the machine stable enough for accurate placement.
-
Arrival
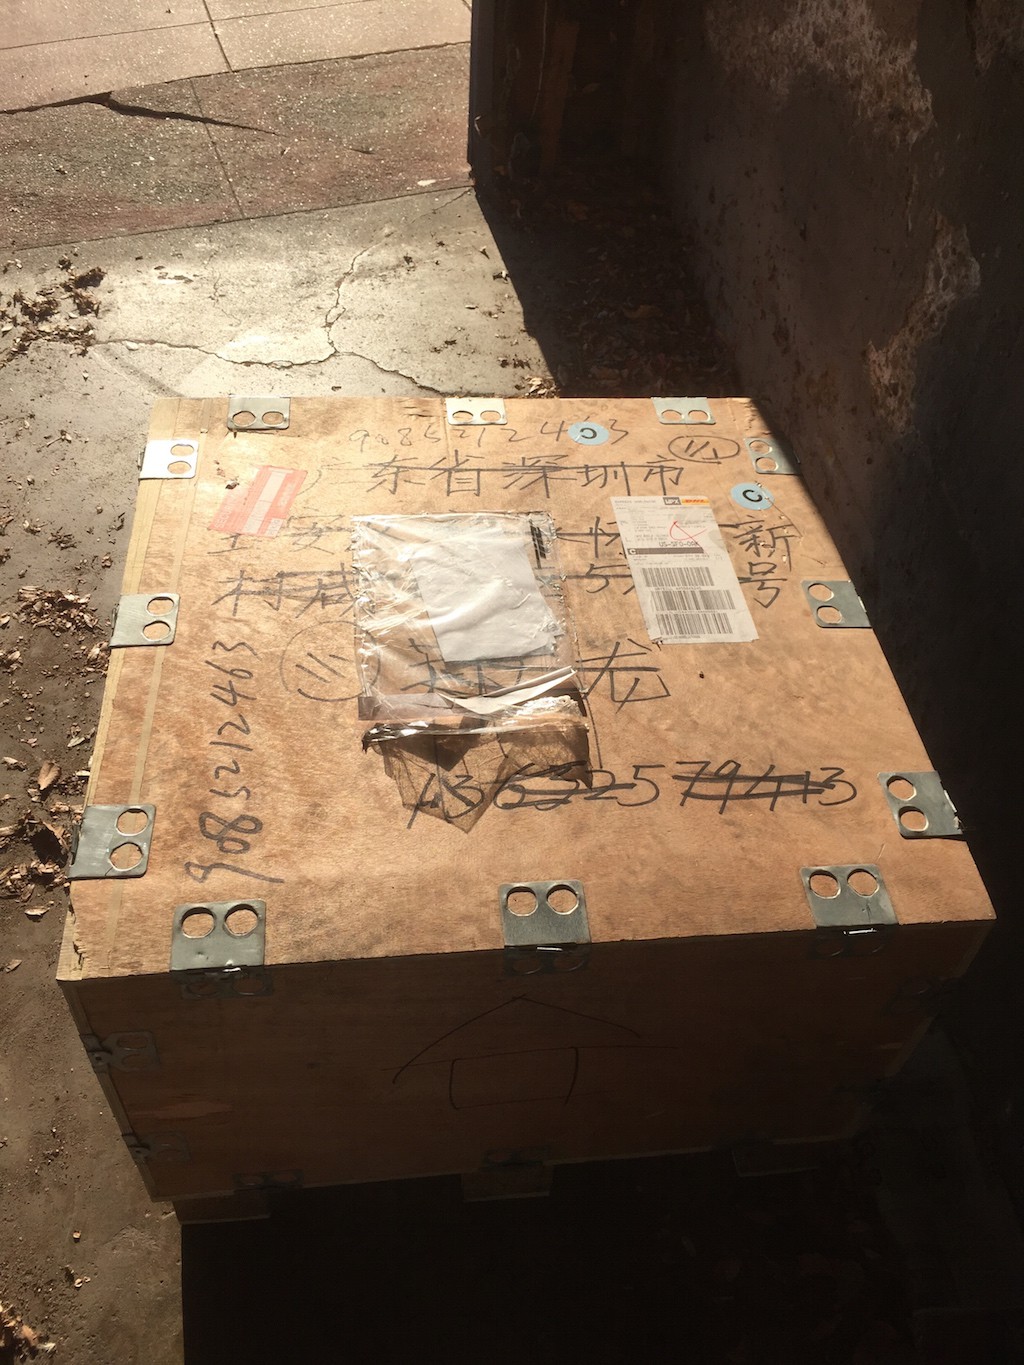
11/16/2014 at 22:51 • 0 commentsDHL will deliver the crate to your house, but they won't deliver it to where you want the machine to live. At my place, I have about 20 steps up from the road to the house. DHL is not going to carry the crate for you; they will leave it at street level. Fortunately (a) I have a garage they could put the crate in so it wasn't left on the street, and (b) the crate is so heavy it's not like anyone was going to run off with it.
![]()
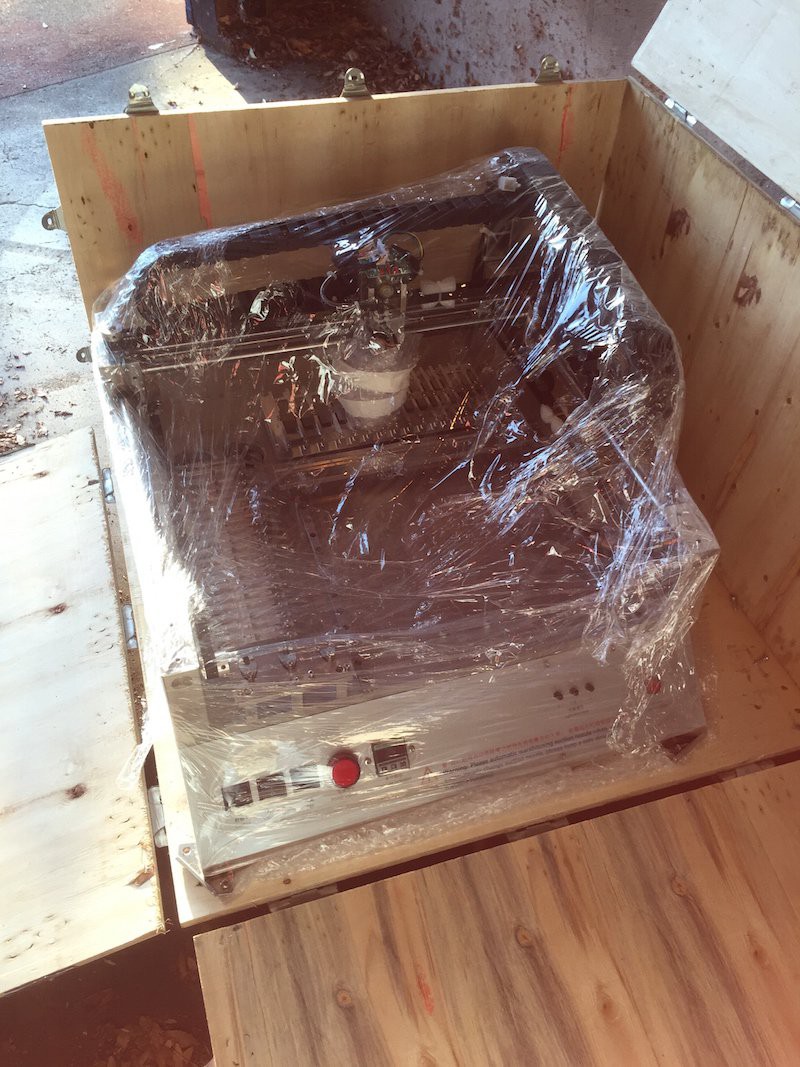
My original idea was that I'd get a couple of friends to help me move the crate into my basement. However, I knew the machine would be in pieces so I also wondered if it might be possible for one person to carry it piece by piece and assemble it where I wanted it. Turned out that yes you could.
![]()
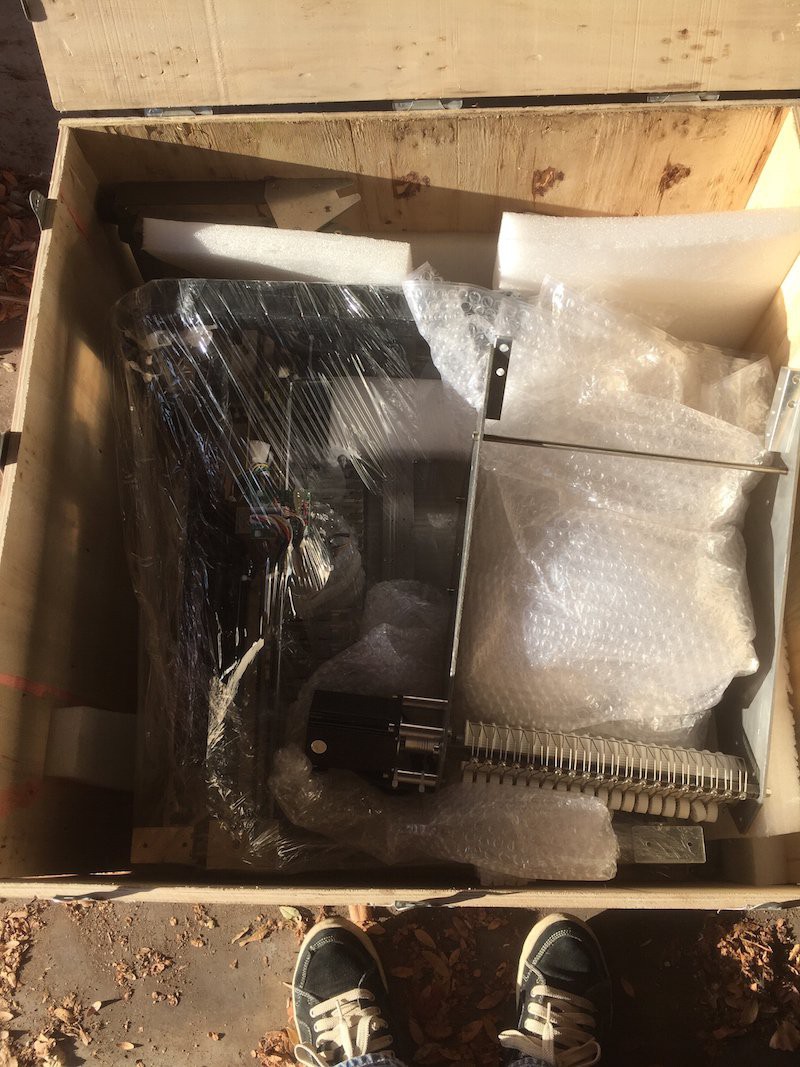
The crate contains various pieces. The main machine was screwed to the bottom of the crate and covers in lots of bubble wrap. The feeders were separate and also heavily wrapper. There was also lots of foam packing around everything. All good stuff. The case itself was wooden and held together with these interesting metal "hook-and-eye" clips. To open the case required quite a large screwdriver to bend apart the metal fastenings. But unpacking was relatively easy. And yes, because the machine is in parts, it was possible for one person to move it into the basement, bit by bit. The main robot was the heaviest and a little awkward to lift, but possible for one person to carry.
![]()
-
Shipping
11/15/2014 at 20:17 • 1 commentHot Hot, like almost everyone else it seems, uses DHL for international shipping from China to the US. However, first there's a bit of internal shipping to get the machine from the warehouse to the airport. This was by a company called China Deppon Logistics (http://www.deppon.com). They're very impressive. The shipment was GPS tracked at all times, with updates automatically every hour if not more frequently. Are you listening to me UPS?
Once the crate reached the airport, it switch to DHL. I was somewhat concerned about how long it would take to clear Chinese customs. I'd recently had a bunch of PCBs stuck in customs for a week for no obvious reason. However, customs was quick and no additional fees appeared. Onwards to the US.
Once the crate arrived in the US, things slowed down a bit. The package went into customs and then just stopped. DHLs favorite status update was "Clearance event" which they added to the tracking information once a day. After sending email and eventually phoning them, I had the assigned import representative call me back. In order to clear customs they needed various pieces of information. Notably they wanted my social security number (no idea why) as well as a complete description of what was in the crate. The latter somewhat surprised me because I assumed the shipping manifest would have that information already; but it was easy to supply and not too much detail was necessary (I did include a link to the relevant web pages for the machine in case of questions). Unfortunately that information didn't make it to DHL until late Friday, so nothing happened until early that Monday when the machine was released by customs. Again, no additional fees or tariffs.
At this point it was still in Los Angeles. DHL moved it quickly to San Francisco and I expected it to be delivered Wednesday (and DHL called me to confirm this). However, once it reached San Francisco it just sat at the depot and didn't do anything. Again, more emails to DHL to work out what was going on. The national customer service seems a little less helpful. Initially I got various emails telling me, in essence, that they were glad I'd contacted them. But that was about it. It was now Friday, and after much nagging (and a few pushy tweets), they finally told me it was being delivered that day. This was despite the online status claiming it was still in the San Francisco depot for unspecified reasons. So I was skeptical, but it was indeed delivered that Friday.
So, total shipping time was about 2 weeks; or a week longer than promised. I'm happy enough with that but it pays to keep a close eye on the importing process otherwise I suspect it might drag on a while longer than it should.
-
Machine selection
11/15/2014 at 19:22 • 0 commentsI wanted to buy a pick and place machine to help me assemble a small batch of boards for my Blue Basic project. On the one hand the obvious machine to select is the TM240A which many hobbiest have recently purchased. It has the advantage of lots of community support and it only costs $4000 on eBay. This compares very favorable to US commerial machine which easily cost 10x that. While I can justify paying 4K for a hobby machine, 40K is another matter.
However, I've always been reluctant to get the TM240A because it lacks a vision system. After reading Felix on LowPowerLab I've become convinced that vision is essential to building boards reliably. So I spend many month hanging around on eBay before someone pointed me at Alibaba. Now Alibaba has always made me feel a little apprehensive because so many vendors don't quote a fixed price and because I kept hearing horror stories of people buying thing they never received (and PayPal not being terribly helpful when it happened). But despite these misgivings, I kept looking and one day came across a company called Hot Hot SMT Machine Company Ltd in China. They made a vision enabled pick and place machine for $5000. Okay, that's $1000 more than the non-vision machine, but it also came with multiple nozzles and, importantly I felt, software that ran on a PC rather than embedded in the machine itself.
If you contact Hot Hot, you'll probably talk to someone called Sunny. Sunny is super helpful and can provide lots of information about the various options available. The machine has a few optional extras which it's worth looking at. For example, I bought both a west feeder and a north feeder (the north feeder is extra). There are also a few things they don't list on the website that are important. First, they say you need Windows XP. That's really hard to come buy these days, especially if you're buying a new PC to run the machine (I bought a cheap Intel NUC which I highly recommend). Turns out that the software is quite happy to run on Windows 7. I can't comment on Windows 8 because I've not tried. Second, the list the machine as needing 220V but can be "converted to 110V". This sounds very scary but it uses a fairly basic switch mode power supply which a voltage selector switch on it. Just switch it to 110V and you're done. Third, you need to provide air to the machine which means you need an air compressor. These can be quite loud I discovered, but you can get a good quality ultra-quiet model for ~$150. Apparently you can go with a medical quality device for silent operation, but they're quite pricy.
Once the details were worked out, I placed the order! There's a couple of fees to be aware of. First, if you PayPal the money (the simplest and fastest), PayPal charge the vendor a 5% fee which Hot Hot will ask you to pay. Fair enough. There's also shipping costs. I suppose it varies depending on where you are, but for me it was about $800. That seems like quite a lot, but then it is a rather heavy piece of kit, and it is being shipped from China. But that's it. There are no import fees, duties or tarrifs. I did worry about that, but they never happened.
Next up - what happened during shipping.
SMT50 pick-and-place
Describes my experiences buying, setting up, and using the SMT50 pick and place machine