-
SDA Mk. 2 Overview
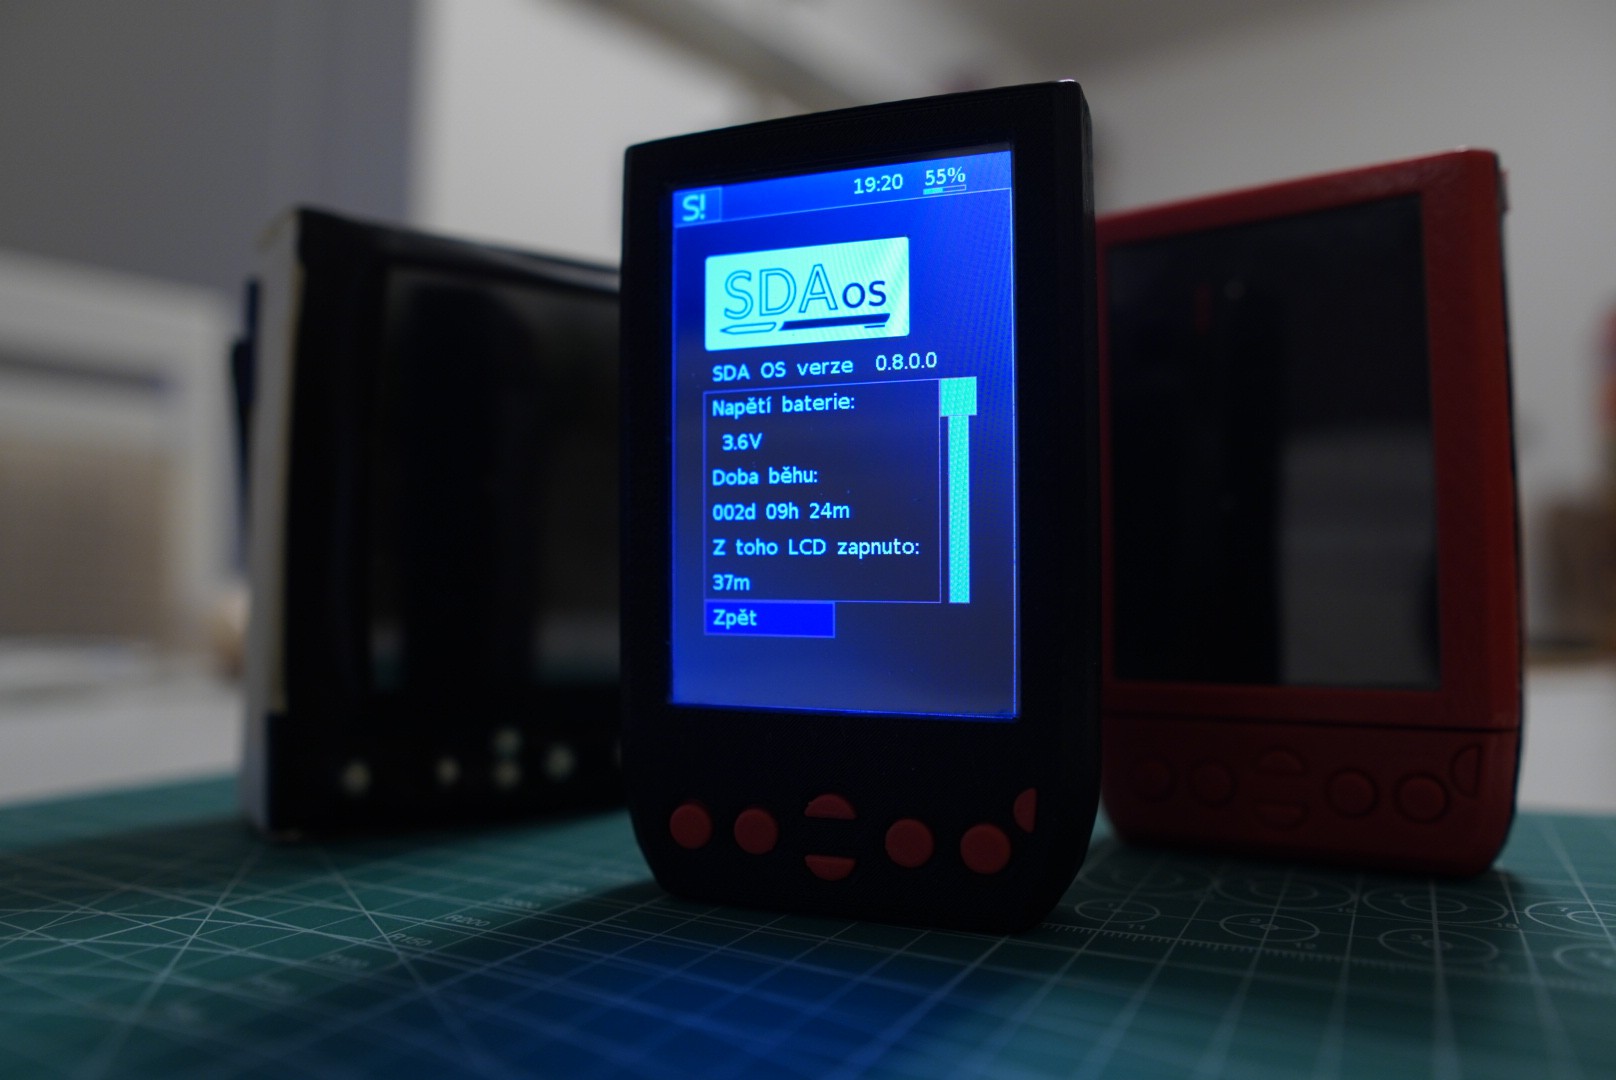
03/06/2024 at 19:28 • 2 commentsJust a quick update: I finally managed to make a video presenting the current state of the SDA. After five years of the device's existence, I guess it's about time.
The video doesn't go too in depth, it shows what the SDA looks like, compares it to the previous "model" and again to the Handspring Visor. The bulk of the video is devoted to the evolution of the software, which is where most of the changes have taken place over the past few years.
In the video I also briefly show the "Smartphone" version of the SDA (It has a SIM800 GSM module inside), but that probably deserves its own video when it's fully operational. I'm still a bit surprised that the SDA OS software stack is already working reliably enough that I would somewhat trust it to take my calls.
Last year before Christmas we started thinking about a new version of the SDA hardware. If any of you follow my github, you might have a clue. The new hardware hasn't left the drawing board yet, and I don't really know if it will work the way I envision. For now, the only thing I'll reveal here is that it will have an usb-c, that I know for sure.
Anyway, now I have more time for the SDA project, so expect some updates here or maybe in a new project here on hackaday.
-
Keyboard Addon
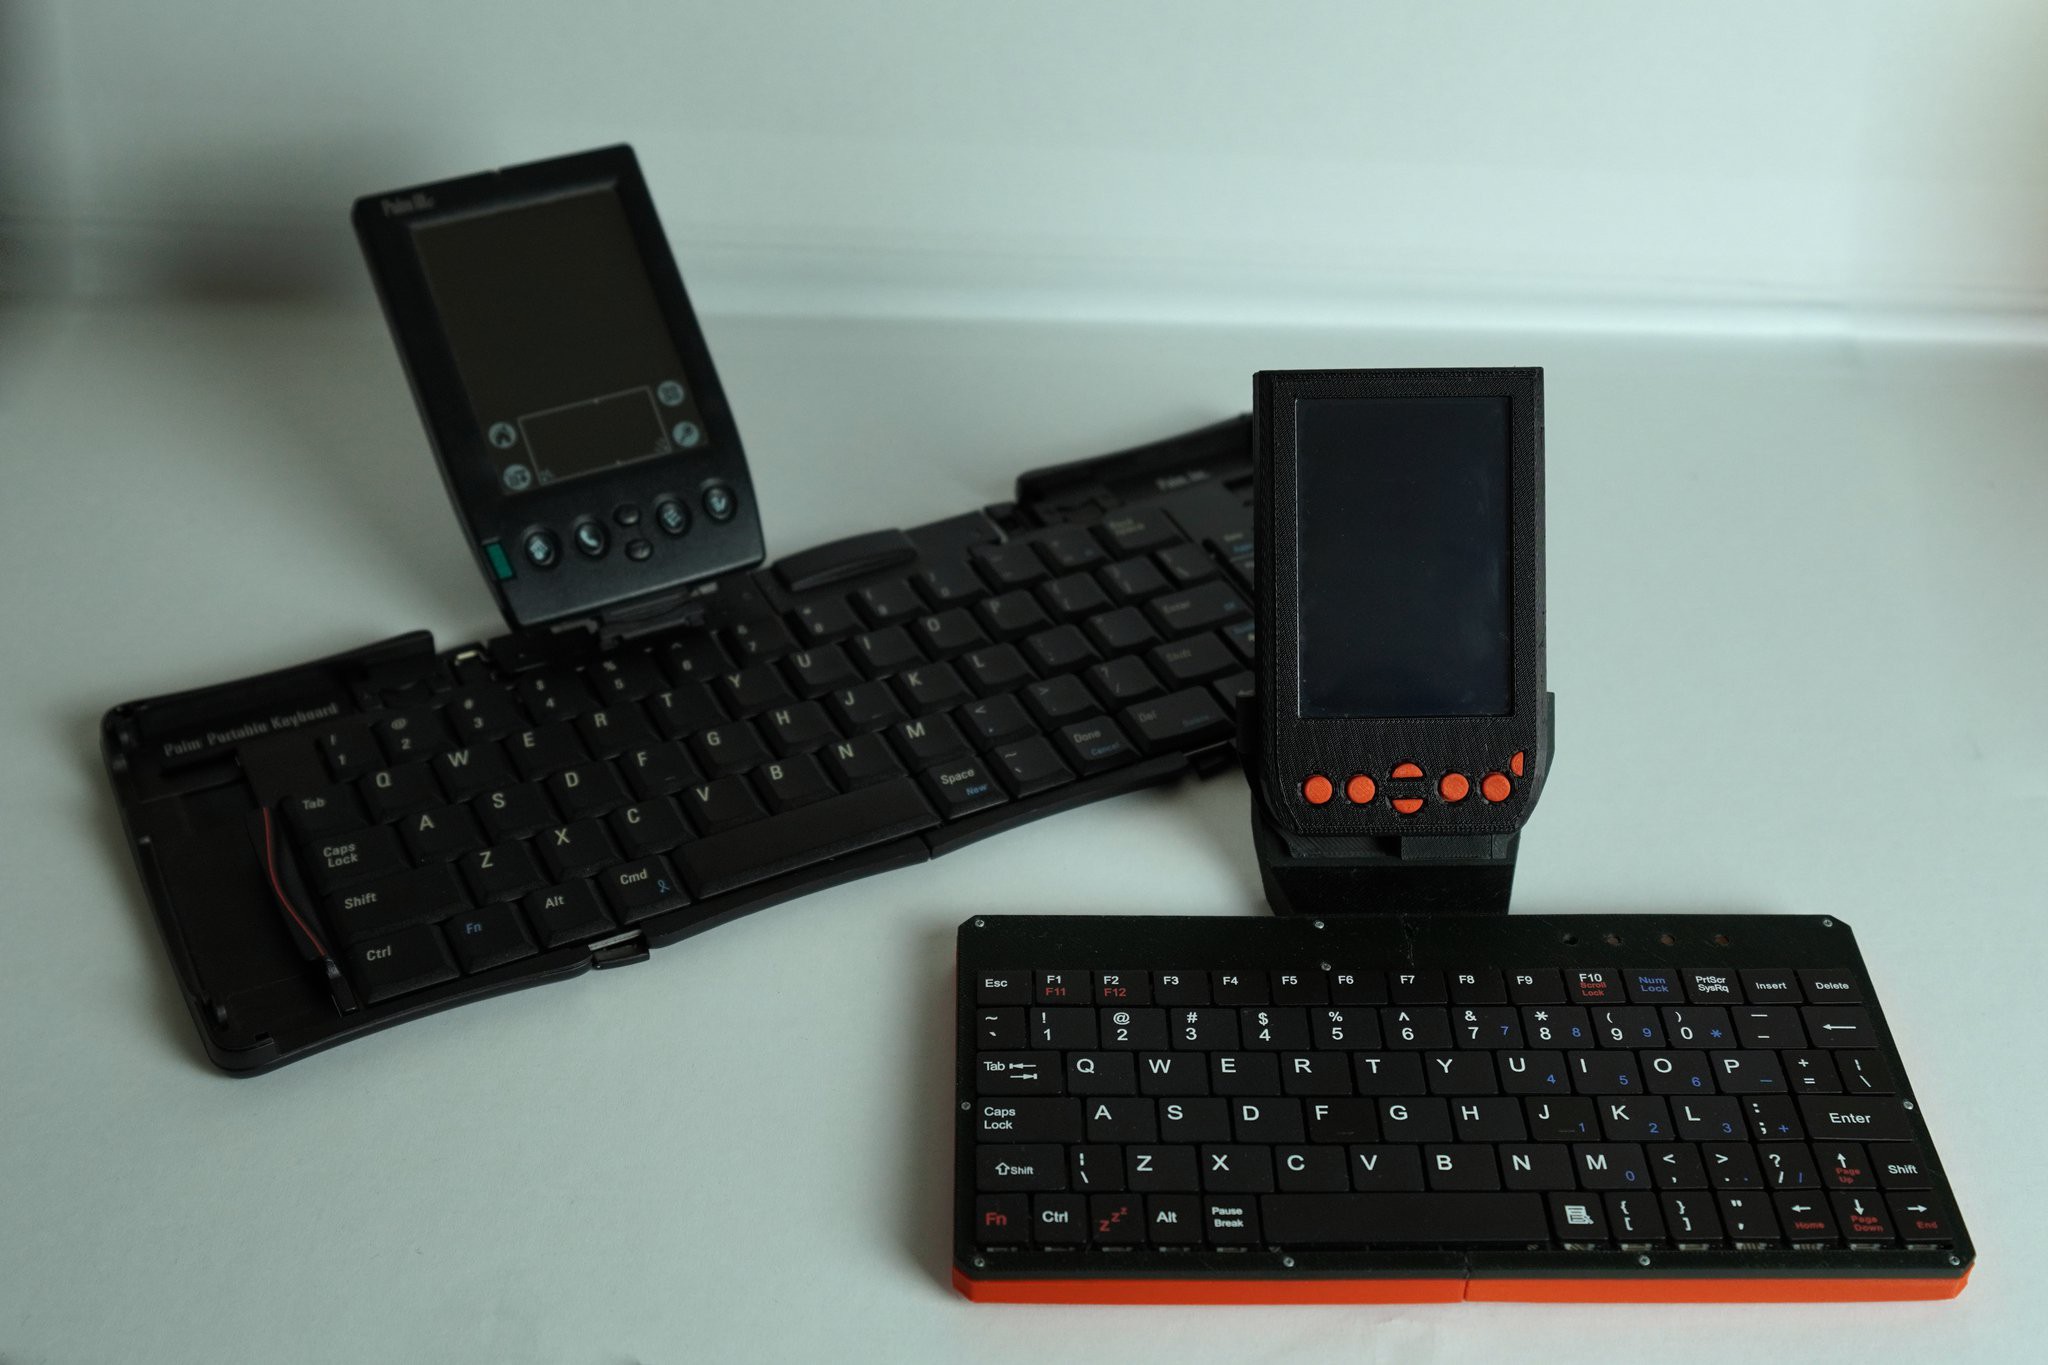
06/24/2023 at 22:58 • 0 commentsSince the last update three years ago, I made mostly software updates for the SDA and I will do an OS walk-through log at some point. This log is about a new hardware extension. I always liked the Palm portable keyboard and wanted something similar for my PDA.
When I got the Palm portable keyboard, I was mesmerized. It is quite a good keyboard and it makes a great tool to input text in the little device, way better than the graffiti or on-screen keyboard.
![]()
Adapting the Palm keyboard might be a good approach. It communicates over serial port, making some sort of an adapter and reversing the protocol shouldn't be hard. But my device has some troubles. Flex cables inside are a bit broken and few of the keys work only sometimes. So I left the Palm keyboard on it's shelf and went with something different.
Keyboard
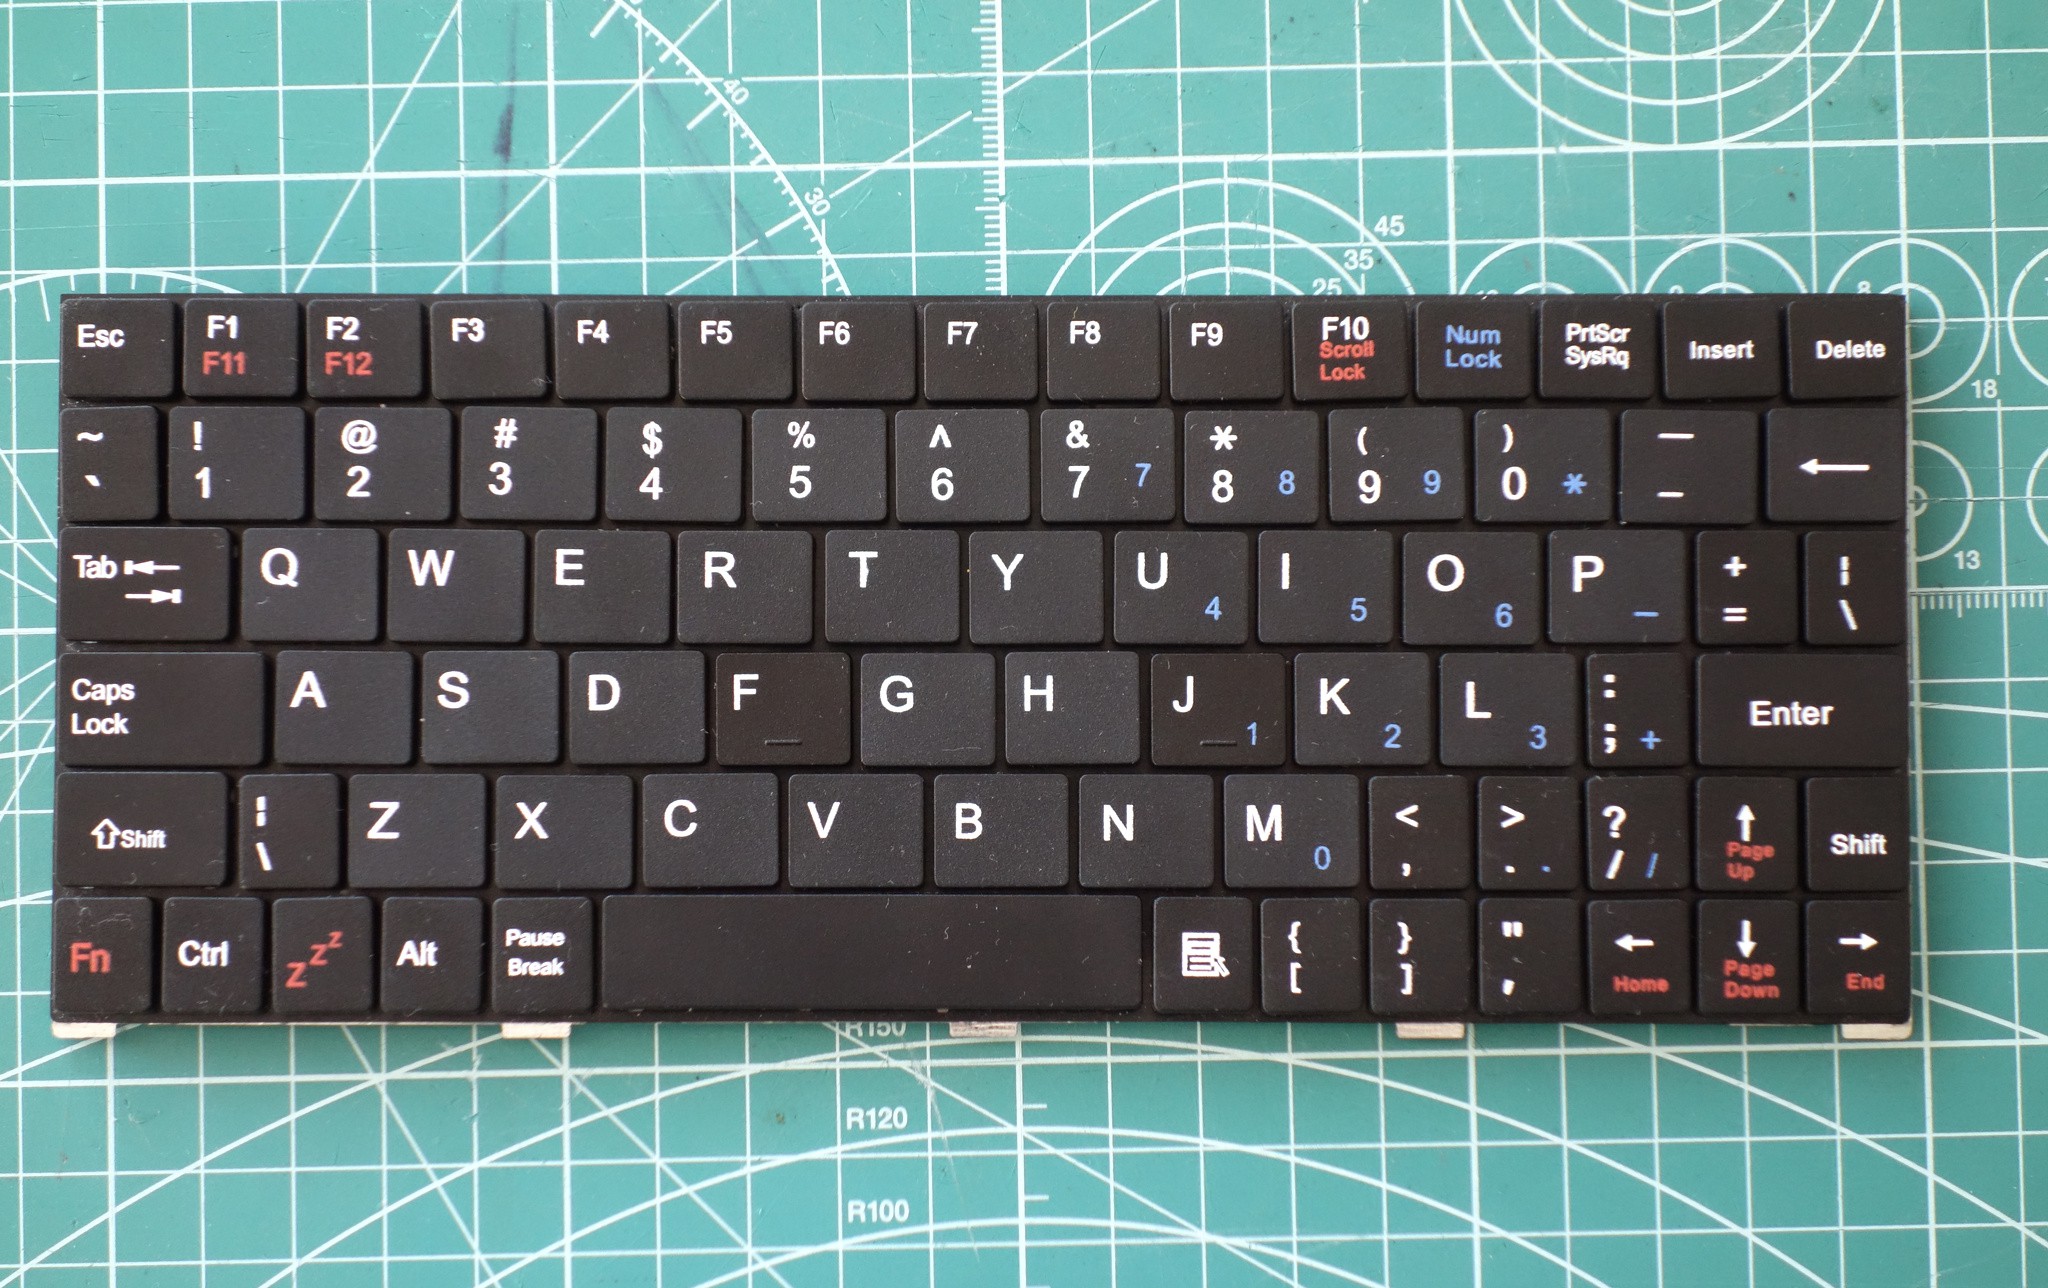
I ended up using this keyboard, that I already had for some other forgotten project. It's from a keyboard tablet case that i bought from aliexpress.
![]()
It's nice for the price, but as a keyboard it's not great. The buttons are a bit flimsy and some of them are too small for adult human fingers. I didn't expect to type a novel on it anyways. For a proof-of-concept it's good enough.
Prototype
The original PCB from the keyboard have a nice set of test pins and after a quick modification can be used as a breakout board (just saw of the part with the controller). I connected this to a STM32F0 discovery board to figure out the schematics of the keyboard matrix. After that I worked on the keyboard firmware and its communication with the PDA. Firmware ended up being a simple loop that reads the keys and when key is pressed, hold or released, it sends the key id and key string over the serial. Firmware also manages the keyboard layouts for Function keys, Alt keys and Num keys. I did this to simplify decoding on the PDA side and because the keyboard has a bit too much of a computing power.
Sadly I don't have any pictures of the prototype.
PCB design
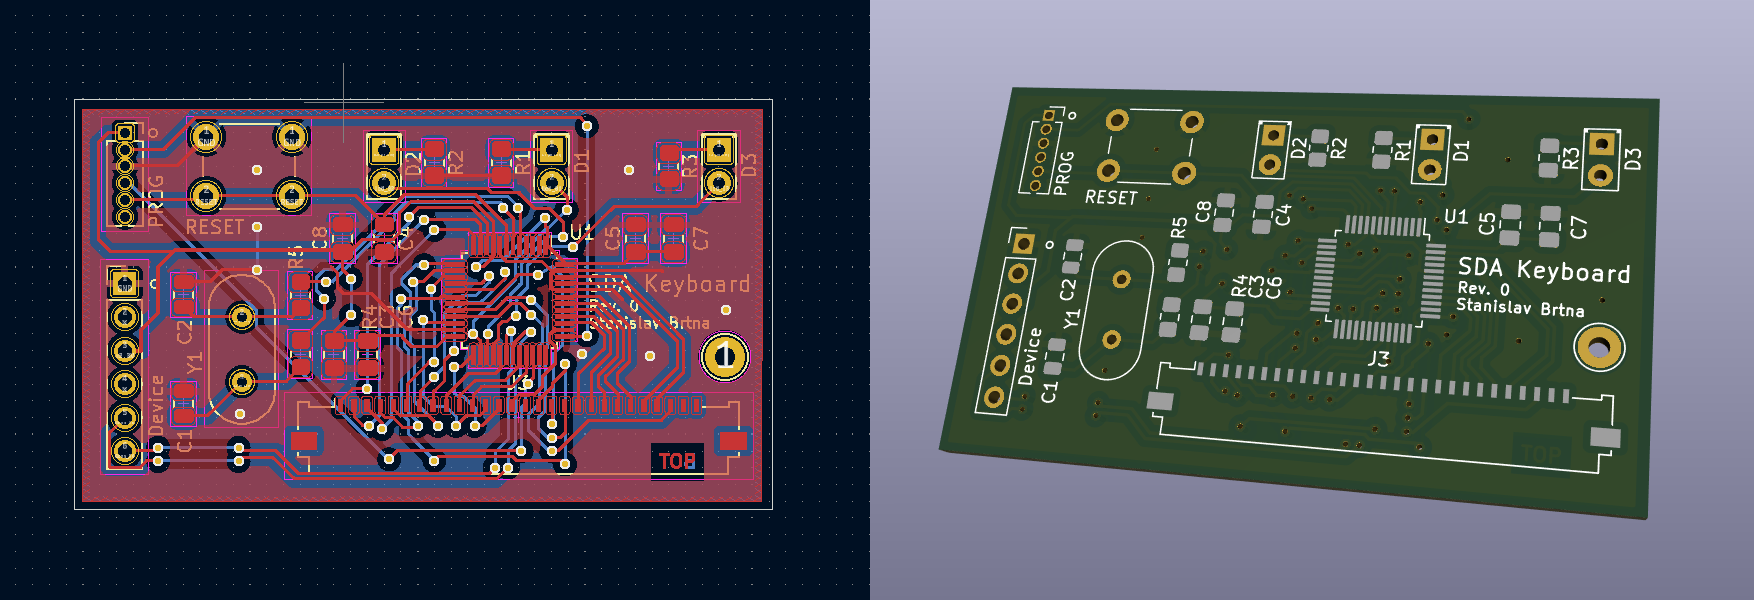
Nothing really interesting here. I went mostly with parts I had in stock. The board is just the MCU with few LEDs, reset button and connections to the keyboard, PDA and st-link. Circuitry for the external oscillator is left unpopulated.
![]()
JLCPCB made the boards and they worked fine. Firmware needed few updates because the prototype schematics was a bit different from the final boards.
![]()
Case design
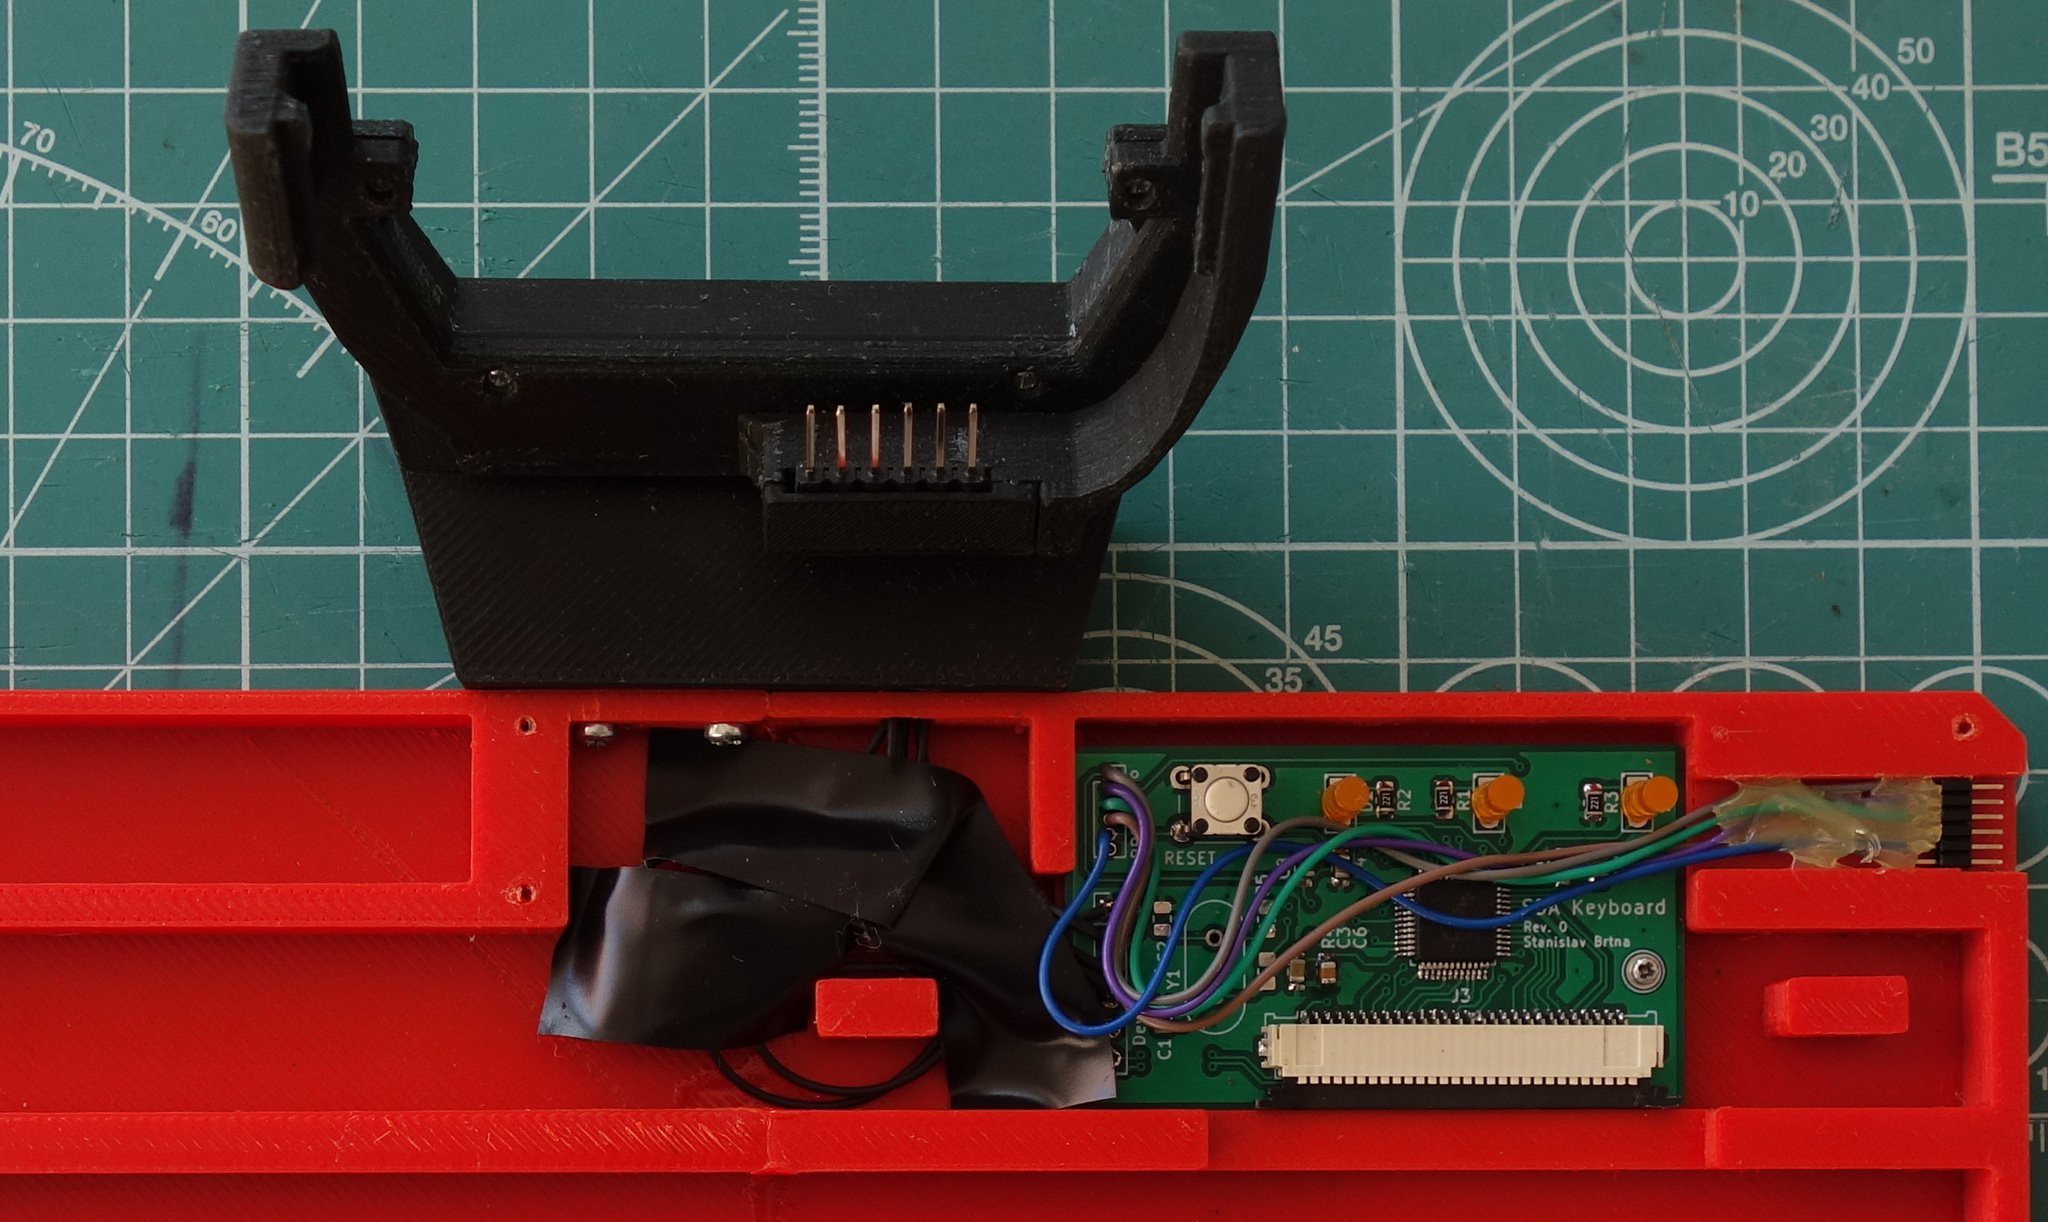
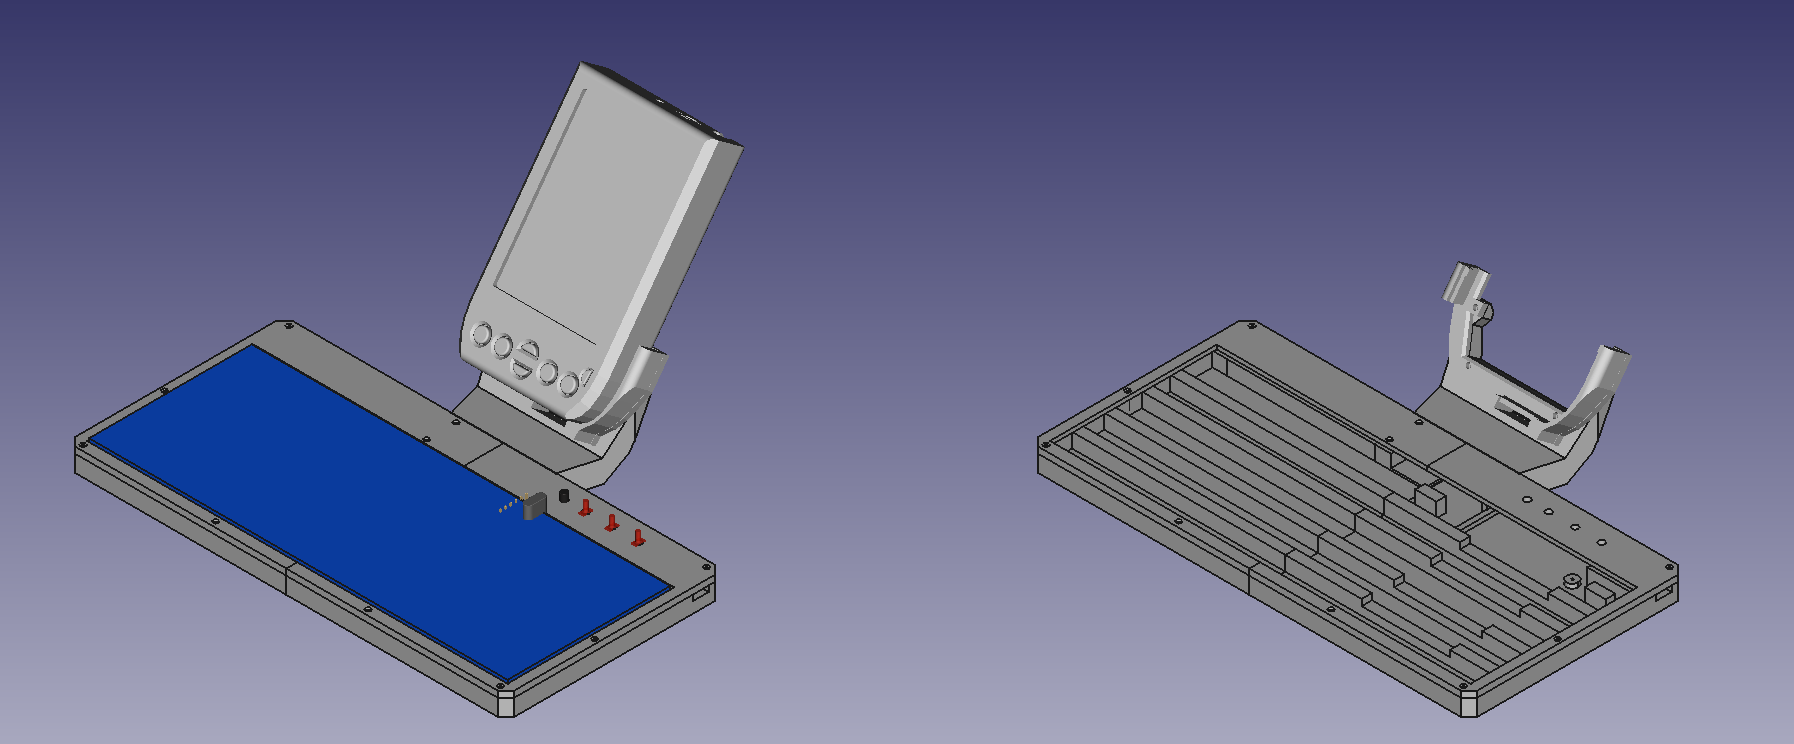
This was also straightforward. the only complication is that my 3D printer has 120mm maximum print size. I experimented with printing the keyboard in more parts that will be screwed together. This didn't work well enough and designing it to the level of complexity at which it would have worked just wasn't worth it. I ended up with a design where the large parts are glued together (printed in ABS and then glued with acetone) and then its assembled with a few screws.
![]()
It's not perfect, mainly the PDA stand needs to be fold able for the thing to be practical to carry. Also the text editing app now supports landscape mode and this keyboard obviously does not.
I might fix this in some later revision.
The final thing
In the following video you can sort-of see how it worked out. It works, but it's not perfect. The non-foldable stand for the PDA is not very ergonomic. The keyboard driver is on the application side. This approach pushed the whole software stack to its limits, that lead to lots of improvements in the SDA OS, but in the end it still isn't fast enough for quick typing. I will move the driver to the OS in some future update.
-
Final log?
01/22/2020 at 18:37 • 0 commentsIt's two years after I presented my PDA here on hackaday and it's about two and a half years since I started carrying and using some version of SDA every day. I am really happy with it, the hardware is holding up better than I expected and I tweak the software a bit from time to time.
I don't think that the SDA is finished, it's a hobby project (and by far my greatest hobby project) and projects like these are never truly finished, but I don't think there will be many new things about SDA in the future.
If you want to build your own, or if you have any sort of question, you can contact me here.
-
Few new bits and bobs
02/08/2019 at 17:30 • 0 commentsI don't spend too much time on the development of the SDA, because it now does more or less what I wanted it to do. Last year I moved from messy red prototype to more refined "SDA mk.2". This new hardware platform meets most of the goals that I gave myself in this post and I am very happy with it. I already did one video on how it's soldered and another on the final assembly.
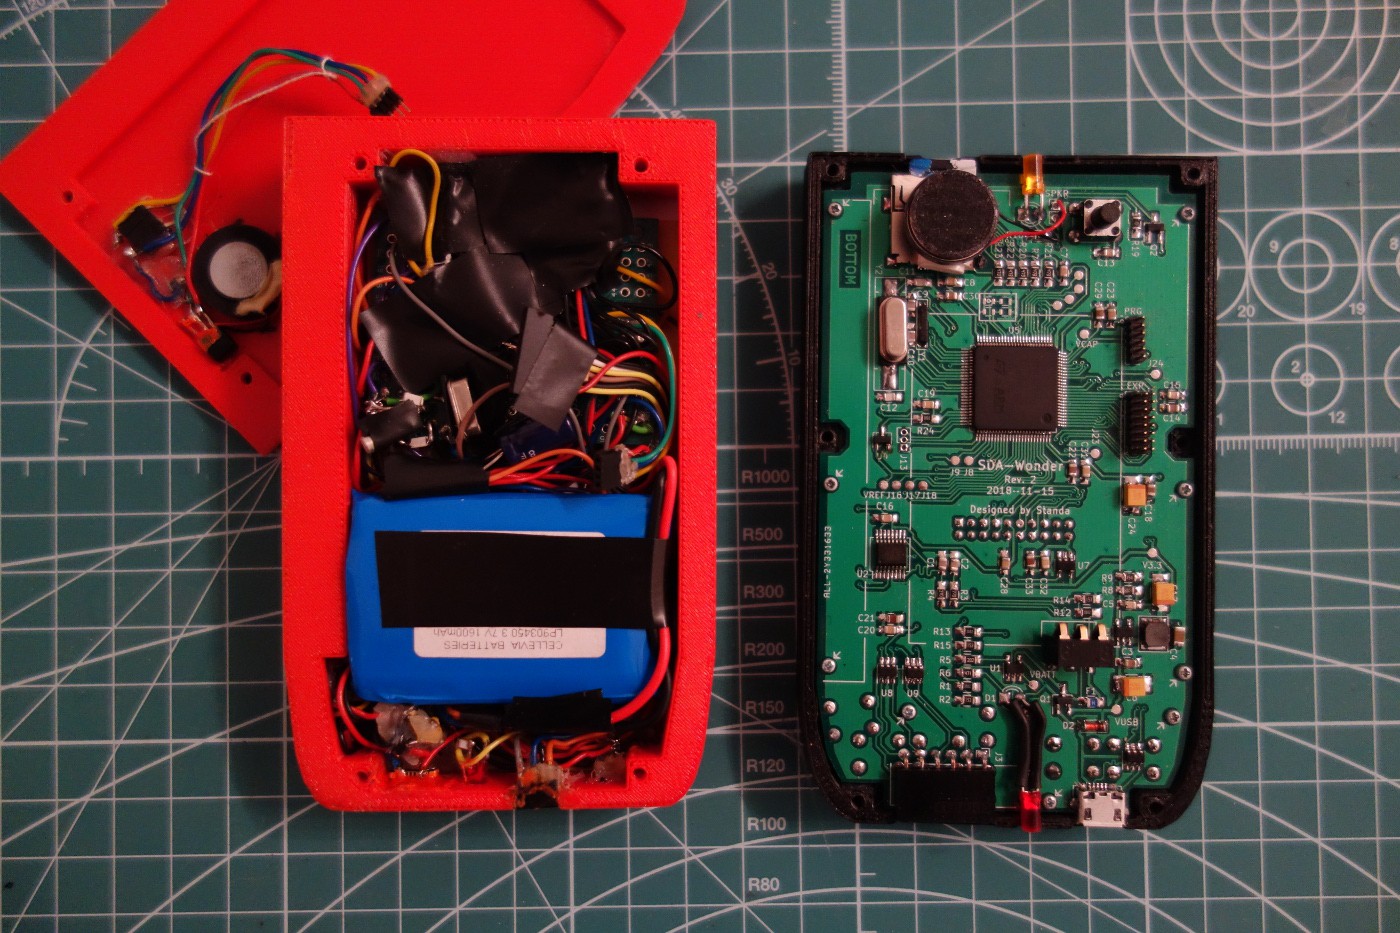
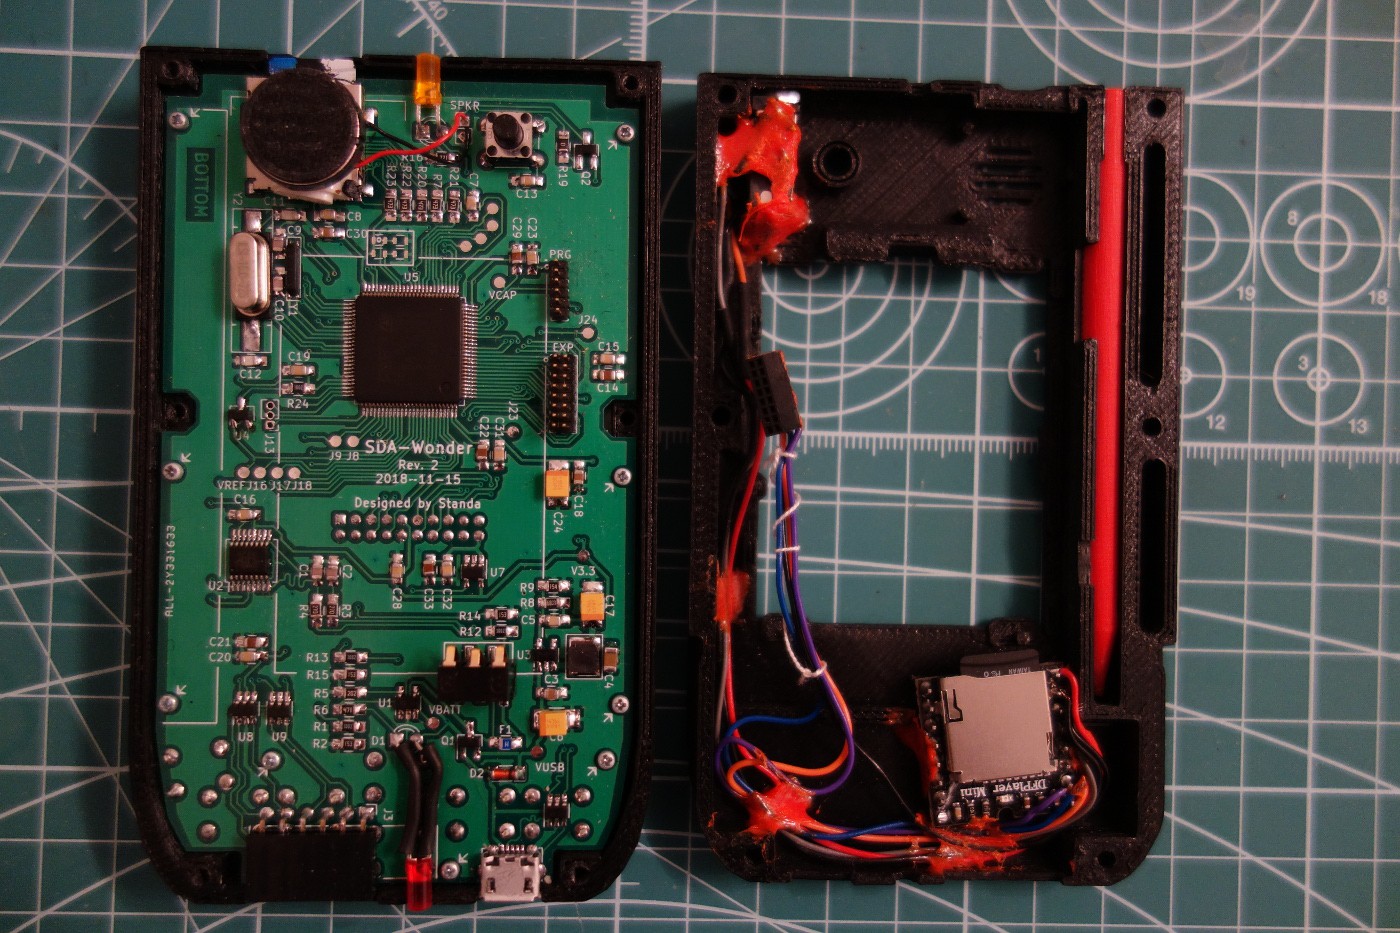
Messy mess of wires vs. the tidy new PCB DFPlayer again
One of the great things on the mk2 SDA is its internal expansion slot, so in next iteration of the DFPlayer extension I connected it internally and the module is now part of the back enclosure. It looks very neatly from the outside and the external expansion port can be used for other things. Inside the SDA is now enough space for similar add-ons that could be connected to the internal header and if more space is needed, one can get the FreeCAD files and redesign the back part of the enclosure. I really like this kind of hackability and expandability.
With MP3 player as an internal expansion. Software upgrades
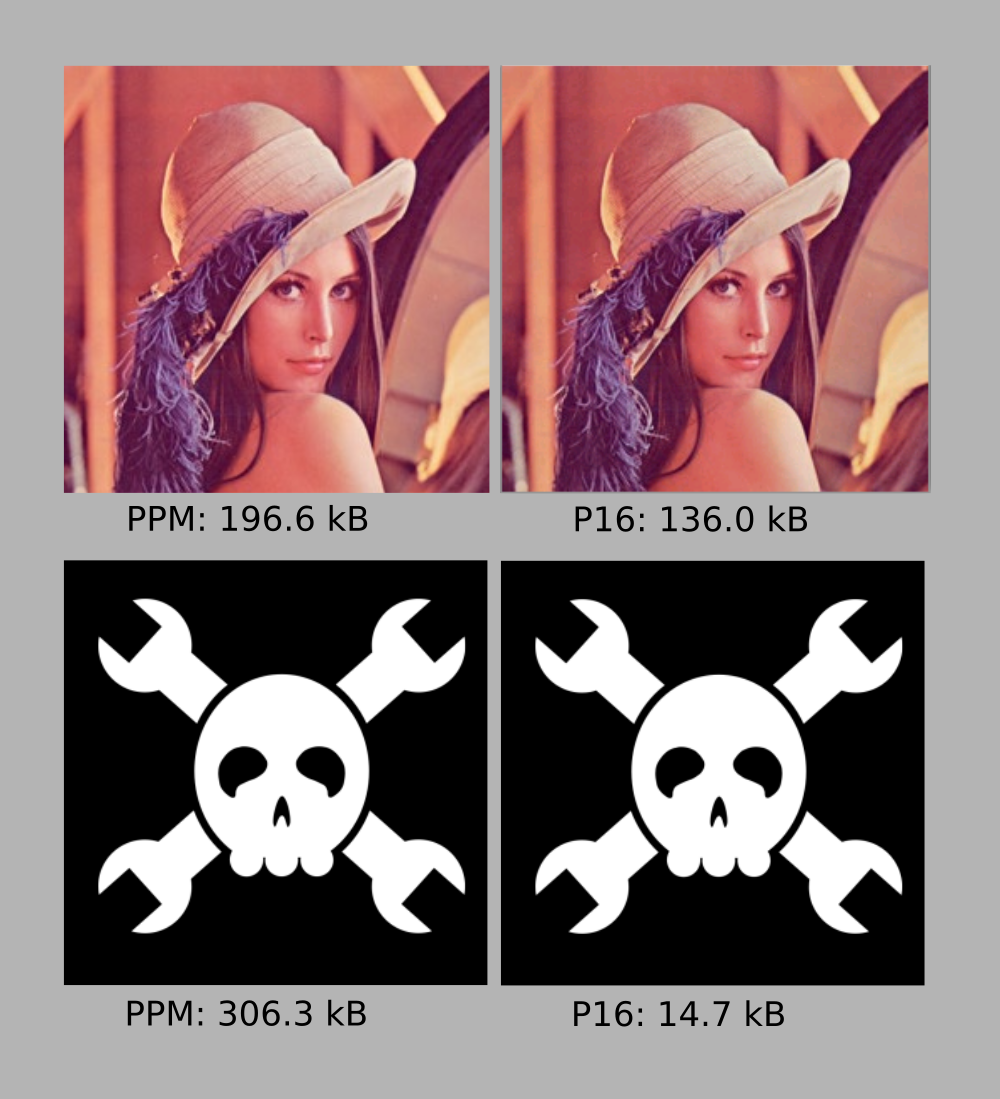
For the past two weeks I was working on the SDA OS. I was addressing some of the minor issues like messy applications folder and no way to define state of expansion pins after boot. This will be fixed in version 0.7.2 wich will also introduce new default image format. I was using binary ppm for the system icons and other images.
It is easy to parse and gimp can generate it easily, but the resulting image is quite big and it takes too much time to read it from the SD card. I looked for some compressed image format, but didn't find anything useful, so I went the custom way. My new image format is just as simple as binary PPM, but uses only 16bit color depth instead of 24bit, SDA works with 16bit color anyway, and this saves about 1/3 of the file size. Also all the graphics used in the SDA_OS has big portions of the images filled with same-colored pixels, so I went with really simple compression scheme, that works rather well on most of the images used (about 1/7 compression ratio). It is rather stupid and can generate compressed image larger than uncompressed, but it will never be larger than the same image stored as PPM, so that's good. (It supports compressed and uncompressed mode, so in a case of bad compression ratio, I will just disable compression)
![]()
Images: uncompressed vs. compressed a little The web simulator got new looks
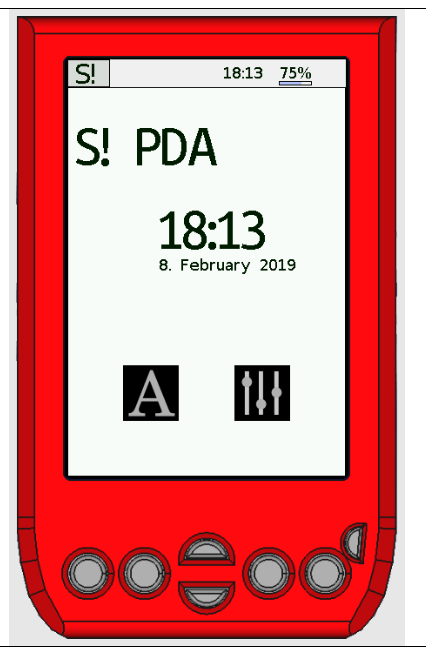
I worked a bit on the simulator and it now looks more like an actual SDA. It still does not work flawlessly in the browser, but the errors are bit strange and I don't know how to fix them. It looks like compiler optimizations throwing code away, but turning the optimizations off doesn't help, setting things volatile doesn't help, printf the missing data miraculously helps, but it's stupid... Also SDA_OS works reliably with -O3 enabled on the stm32 and native linux, so it should also work on the web. I am really out of ideas here. If you had and fixed similar problems with emcc, please let me know.
![]()
Simulator now looks like this. -
SDA Assembly
01/18/2019 at 14:10 • 0 commentsIn the previous video I shown how to assemble and verify operation of the PCB. In this next video I will fix some details on the PCB and show how the SDA is assembled.
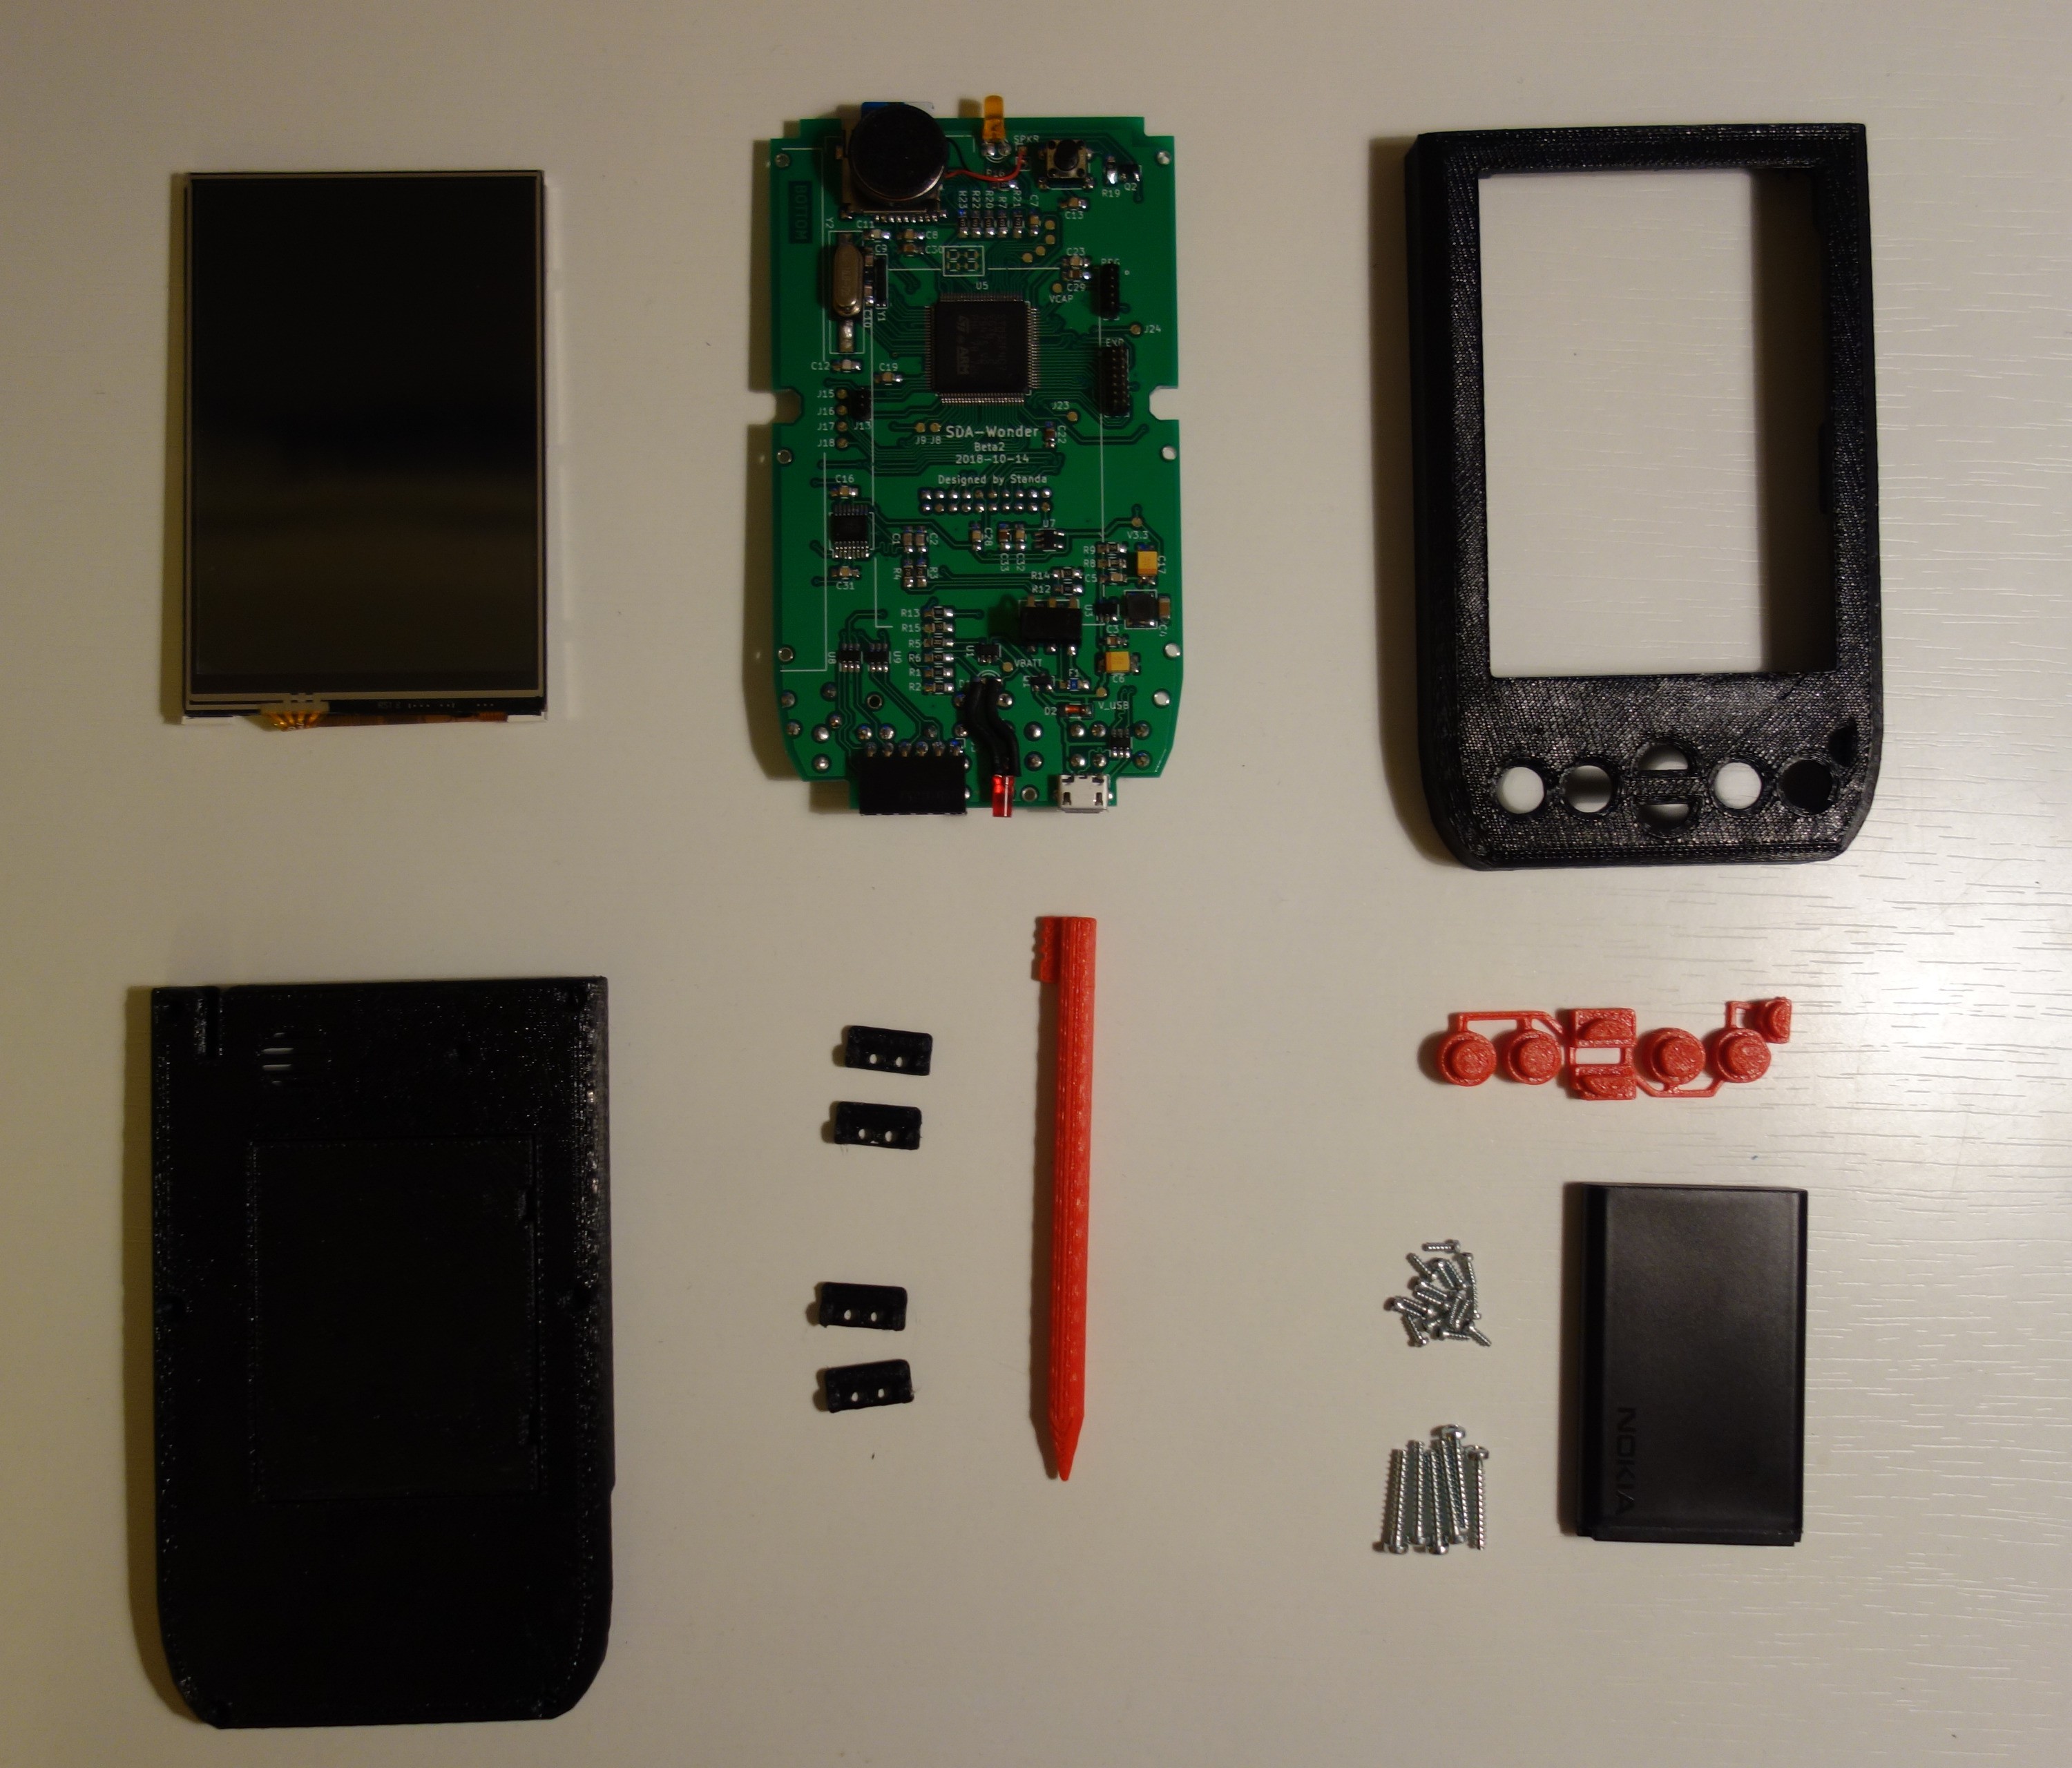
I did previously show some pictures of the parts for the new SDA, now you can see how it fits together. There are few quirks to the assembly, mostly because of imperfect 3D prints. But overall the assembly is quite simple and it can be also easily disassembled for modding or service, which is one of its main features.
-
Becoming a web developer, SDA in a browser
11/26/2018 at 21:11 • 0 commentsFor a long time I was looking at all the cool web interfaces that (nearly) all the new hardware projects have. The idea of having an IDE inside a web page is great for people who want to just try to code or drag-n-drop together simple program without the need to get any software installed on their system.
When I saw the Dodo playground for the Dodo: 6502 Game System here on hackaday, I knew that I have to create something similar for the SDA.
How to do it
First thing is to have a simulator running in a browser. I could like rewrite the SVS language interpreter and rest of the SDA_OS in javascript, but that would mean maintaining two codebases and I can imagine that the compatibility would bee poor.
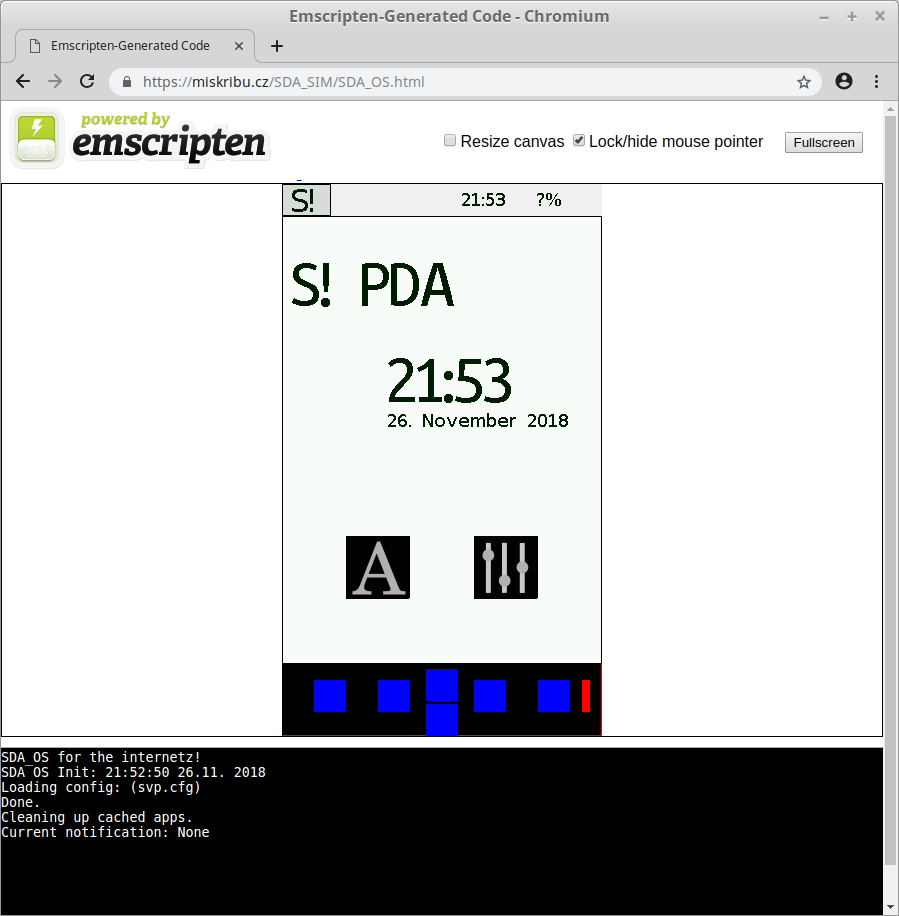
Instead of it, I went with Emscripten, which is basically a compiler that makes C or C++ code run in a modern web browser (using javascript, webassembly and black magic I imagine). The best thing is that it already supports SDL2 and in theory I can just compile the existing SDA_OS linux port and be ready to go.
SDA simulator in a browser
First thing I did was to set up the emscripten using their documentation, I ran the helloword and it hellowed the world, that is always a good sign. Next I tried to compile the SVS interpreter, with some changes so that it would execute all its poor self-tests. Emscripten also emulates filesystem for your app and you can pack all the needed files in the web-enabled "executable", so I packed the self-tests with the SVS binary and it worked, so far so good.
Then I tried to compile the SDA_OS and I ran out of beginners luck. It was crashing the browser tab. Solution was relatively simple, SDL programs are usualy running in a infinite loop, but you can not have this kind of loop inside browser. Emscripten will help you with this, look for emscripten_set_main_loop in their docs. So after some minor changes I ended up with a running SDA_OS in a browser. But It was running at something like 0.5 frames per second.
![]()
It turned out that SDL_RenderDrawPoint, function that I used to draw everything is somewhat slow in emscripten. In the SDA_OS SDL base I have internal framebuffer that emulates the ili-like LCD, so the rest of the graphics stack can remain the same. This framebuffer was redrawn with the slow sdl function. After some attempts to make redrawing quicker I ended up using a texture, this texture is filled from the LCD framebuffer and then drawn on the SDL renderer, this is much quicker both on the web and on the PC.
So now I have a mostly working SDA_OS simulator for your web browser. It still has some problems, just refresh the page in case of errors. (also you need to have a mouse, on touch devices it loads, but ignores touch input)
You can try it here: SDA_OS Simulator
As you can see, it is work in progress, but now I am much closer to some sort of web IDE for the SDA. At least I now have a simulator that anyone can run.
In the future I will add something like a code window and a big red run button to run the new code in the simulator.
And again, sources are available on github.com/stanislavbrtna/SDA_base_sdl2.
-
Soldering the PCBs
11/23/2018 at 14:24 • 0 commentsI got the second board revision made and I already soldered and tested it. I made a video of the process. It is really long and boring, because it is meant more like a video tutorial for anyone interested in building the SDA. I go through the tools needed for the job, I do some basic debugging of the board and I finish it with a working board for the new SDA.
-
SDA Mk.2 goes Open Source
10/30/2018 at 13:53 • 0 commentsThe PCB is fixed
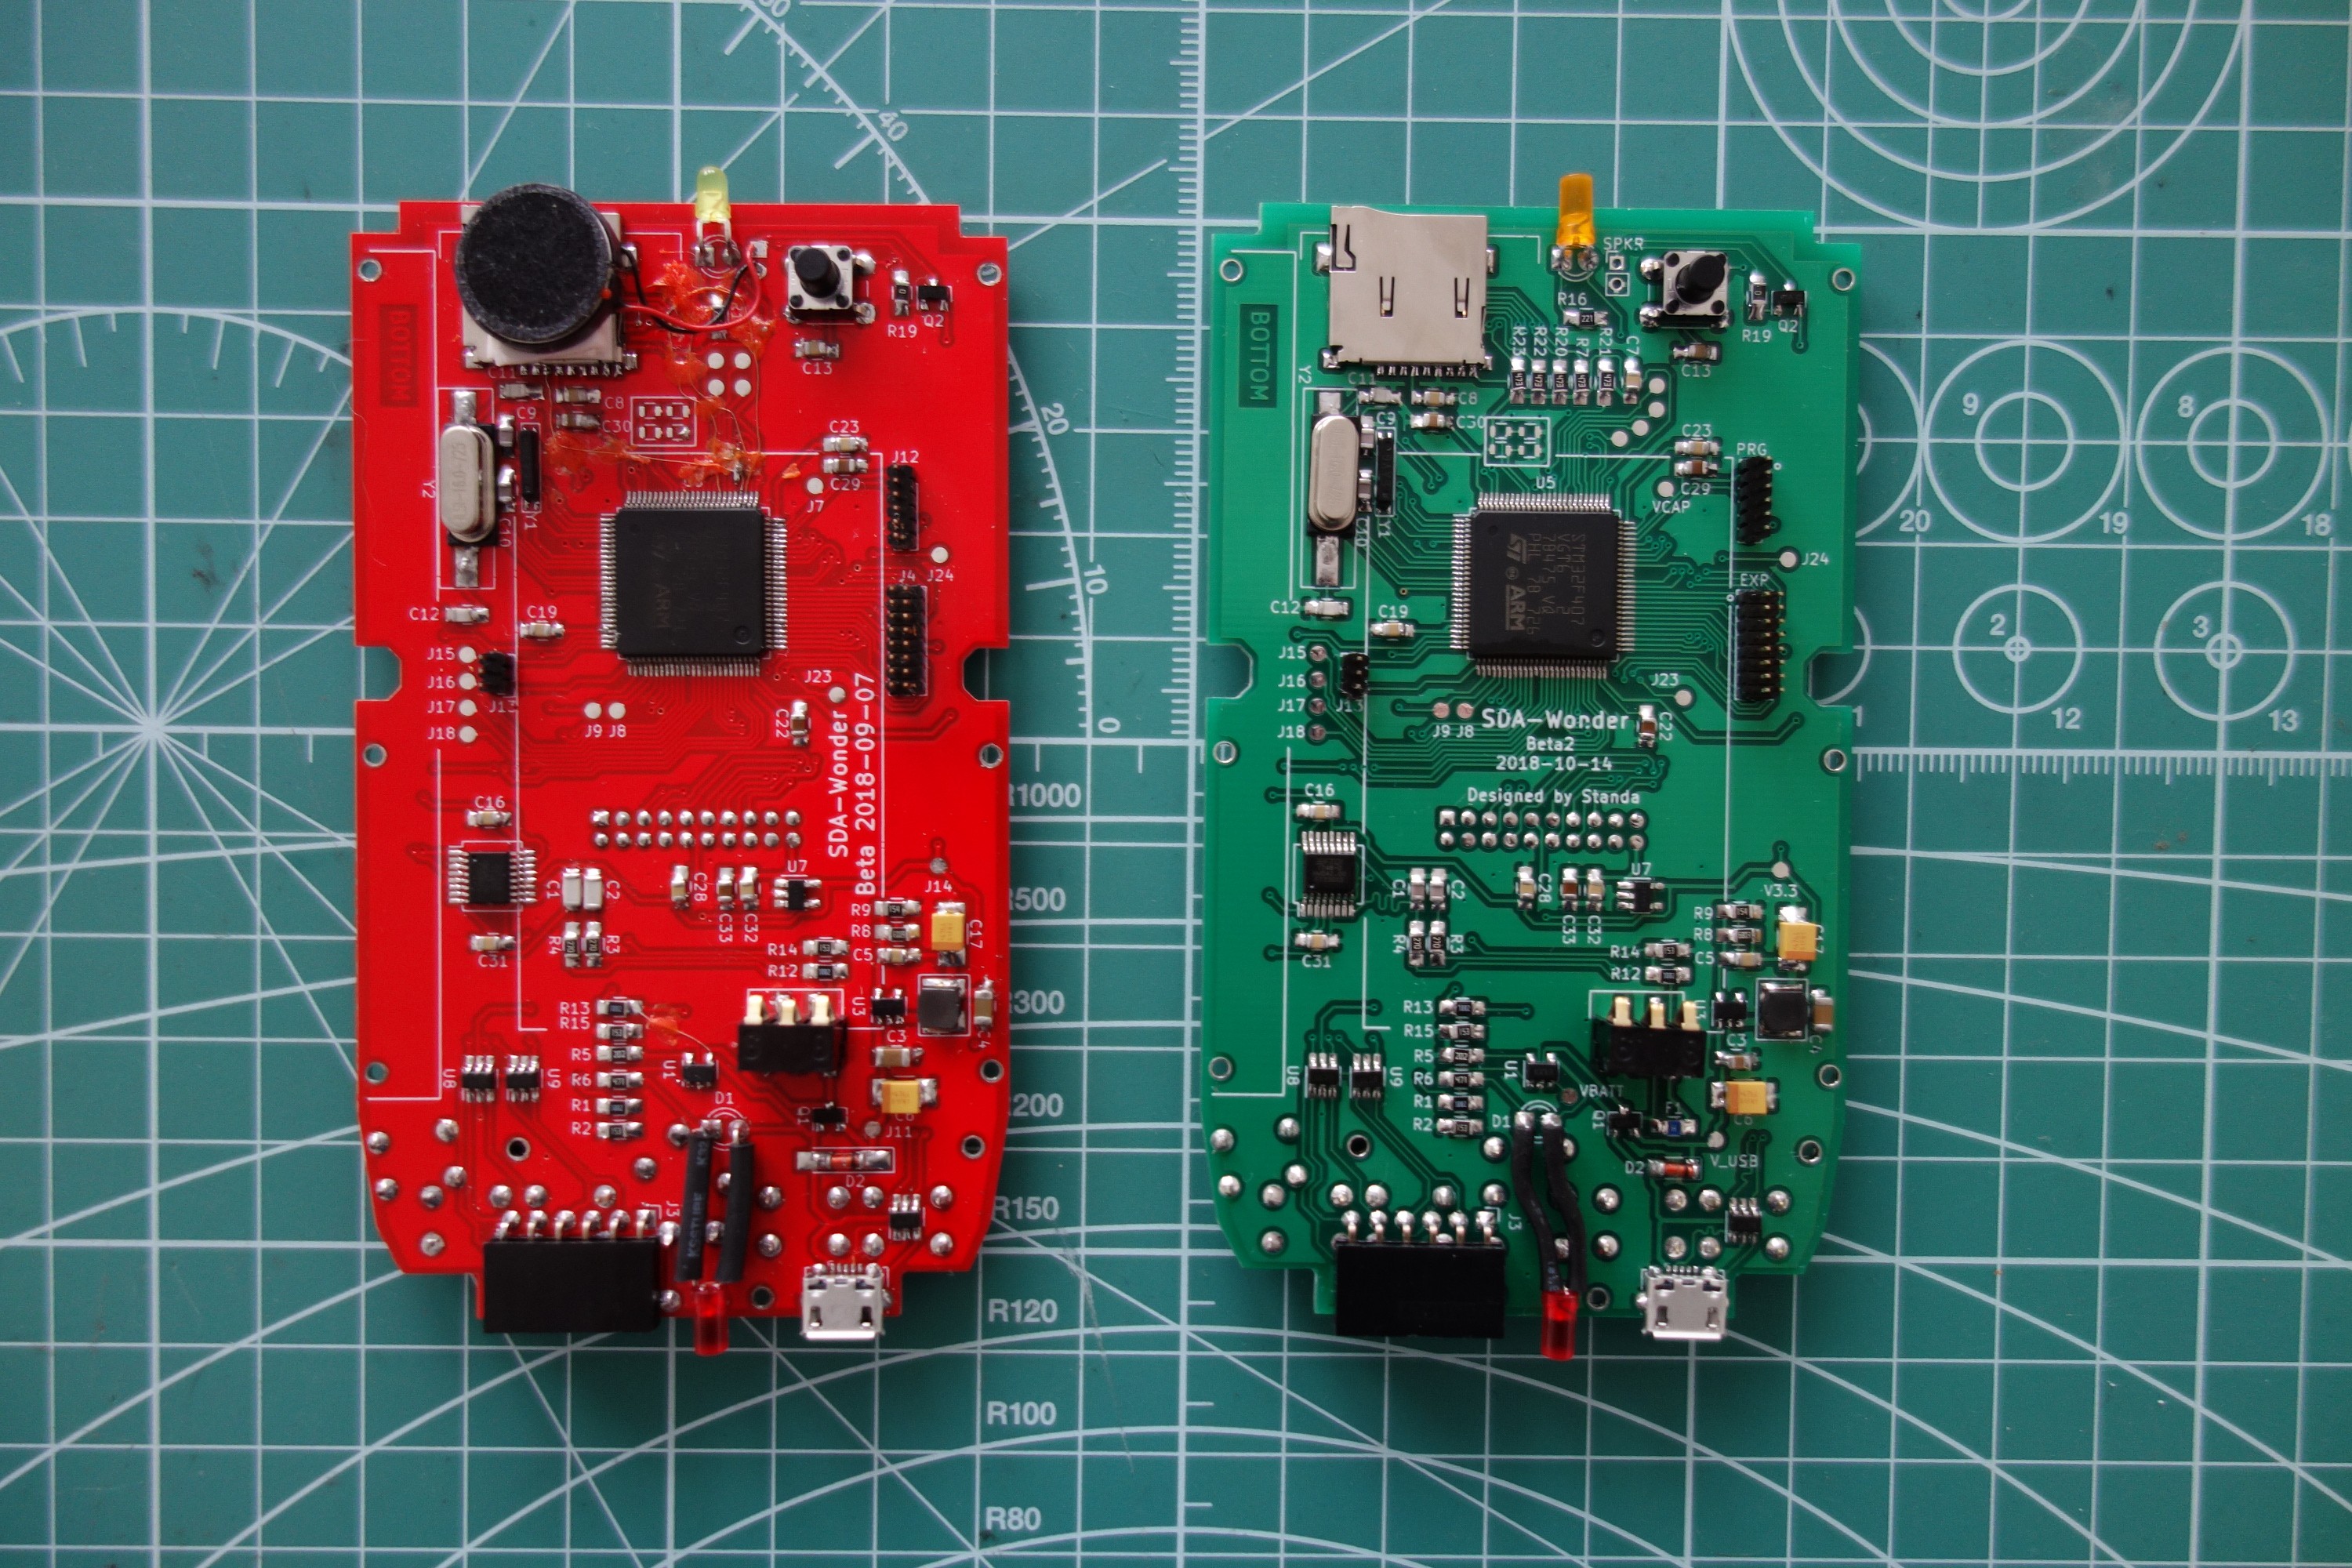
I fixed the PCB layout from the previous post, it seems to work well enough.
Red is the old one, green is the new one. What is tested and working:
- LCD + Touch
- SDIO connceted SD card
- Power + charging
- Speaker
- Buttons
- Onboard FTDI
Not tested:
- Internal and external expansion ports.
Known bugs:
Vcc is used as voltage reference, so when the battery goes under 3.3V it measures battery voltage incorrectly. The device works until about 2.7 V (battery voltage) and then it became a bit buggy and occasionally crashes filesystem on the SD card. If you keep the device charged, then you don't experience these bugs, but I wil be fixing them in a next board revision anyway.
Known bugs will be posted or removed from readme file in the hw repo.
Where to get the KiCad files & gerbers?
On the SDA Hardware GitHubUpdate on the case
I also updated the case and printed it in black (I run out of red filament). You can get the .stl files and the FreeCAD project on the SDA Hardware GitHub.
The SDA, now without hotglue. -
SDA has its boards
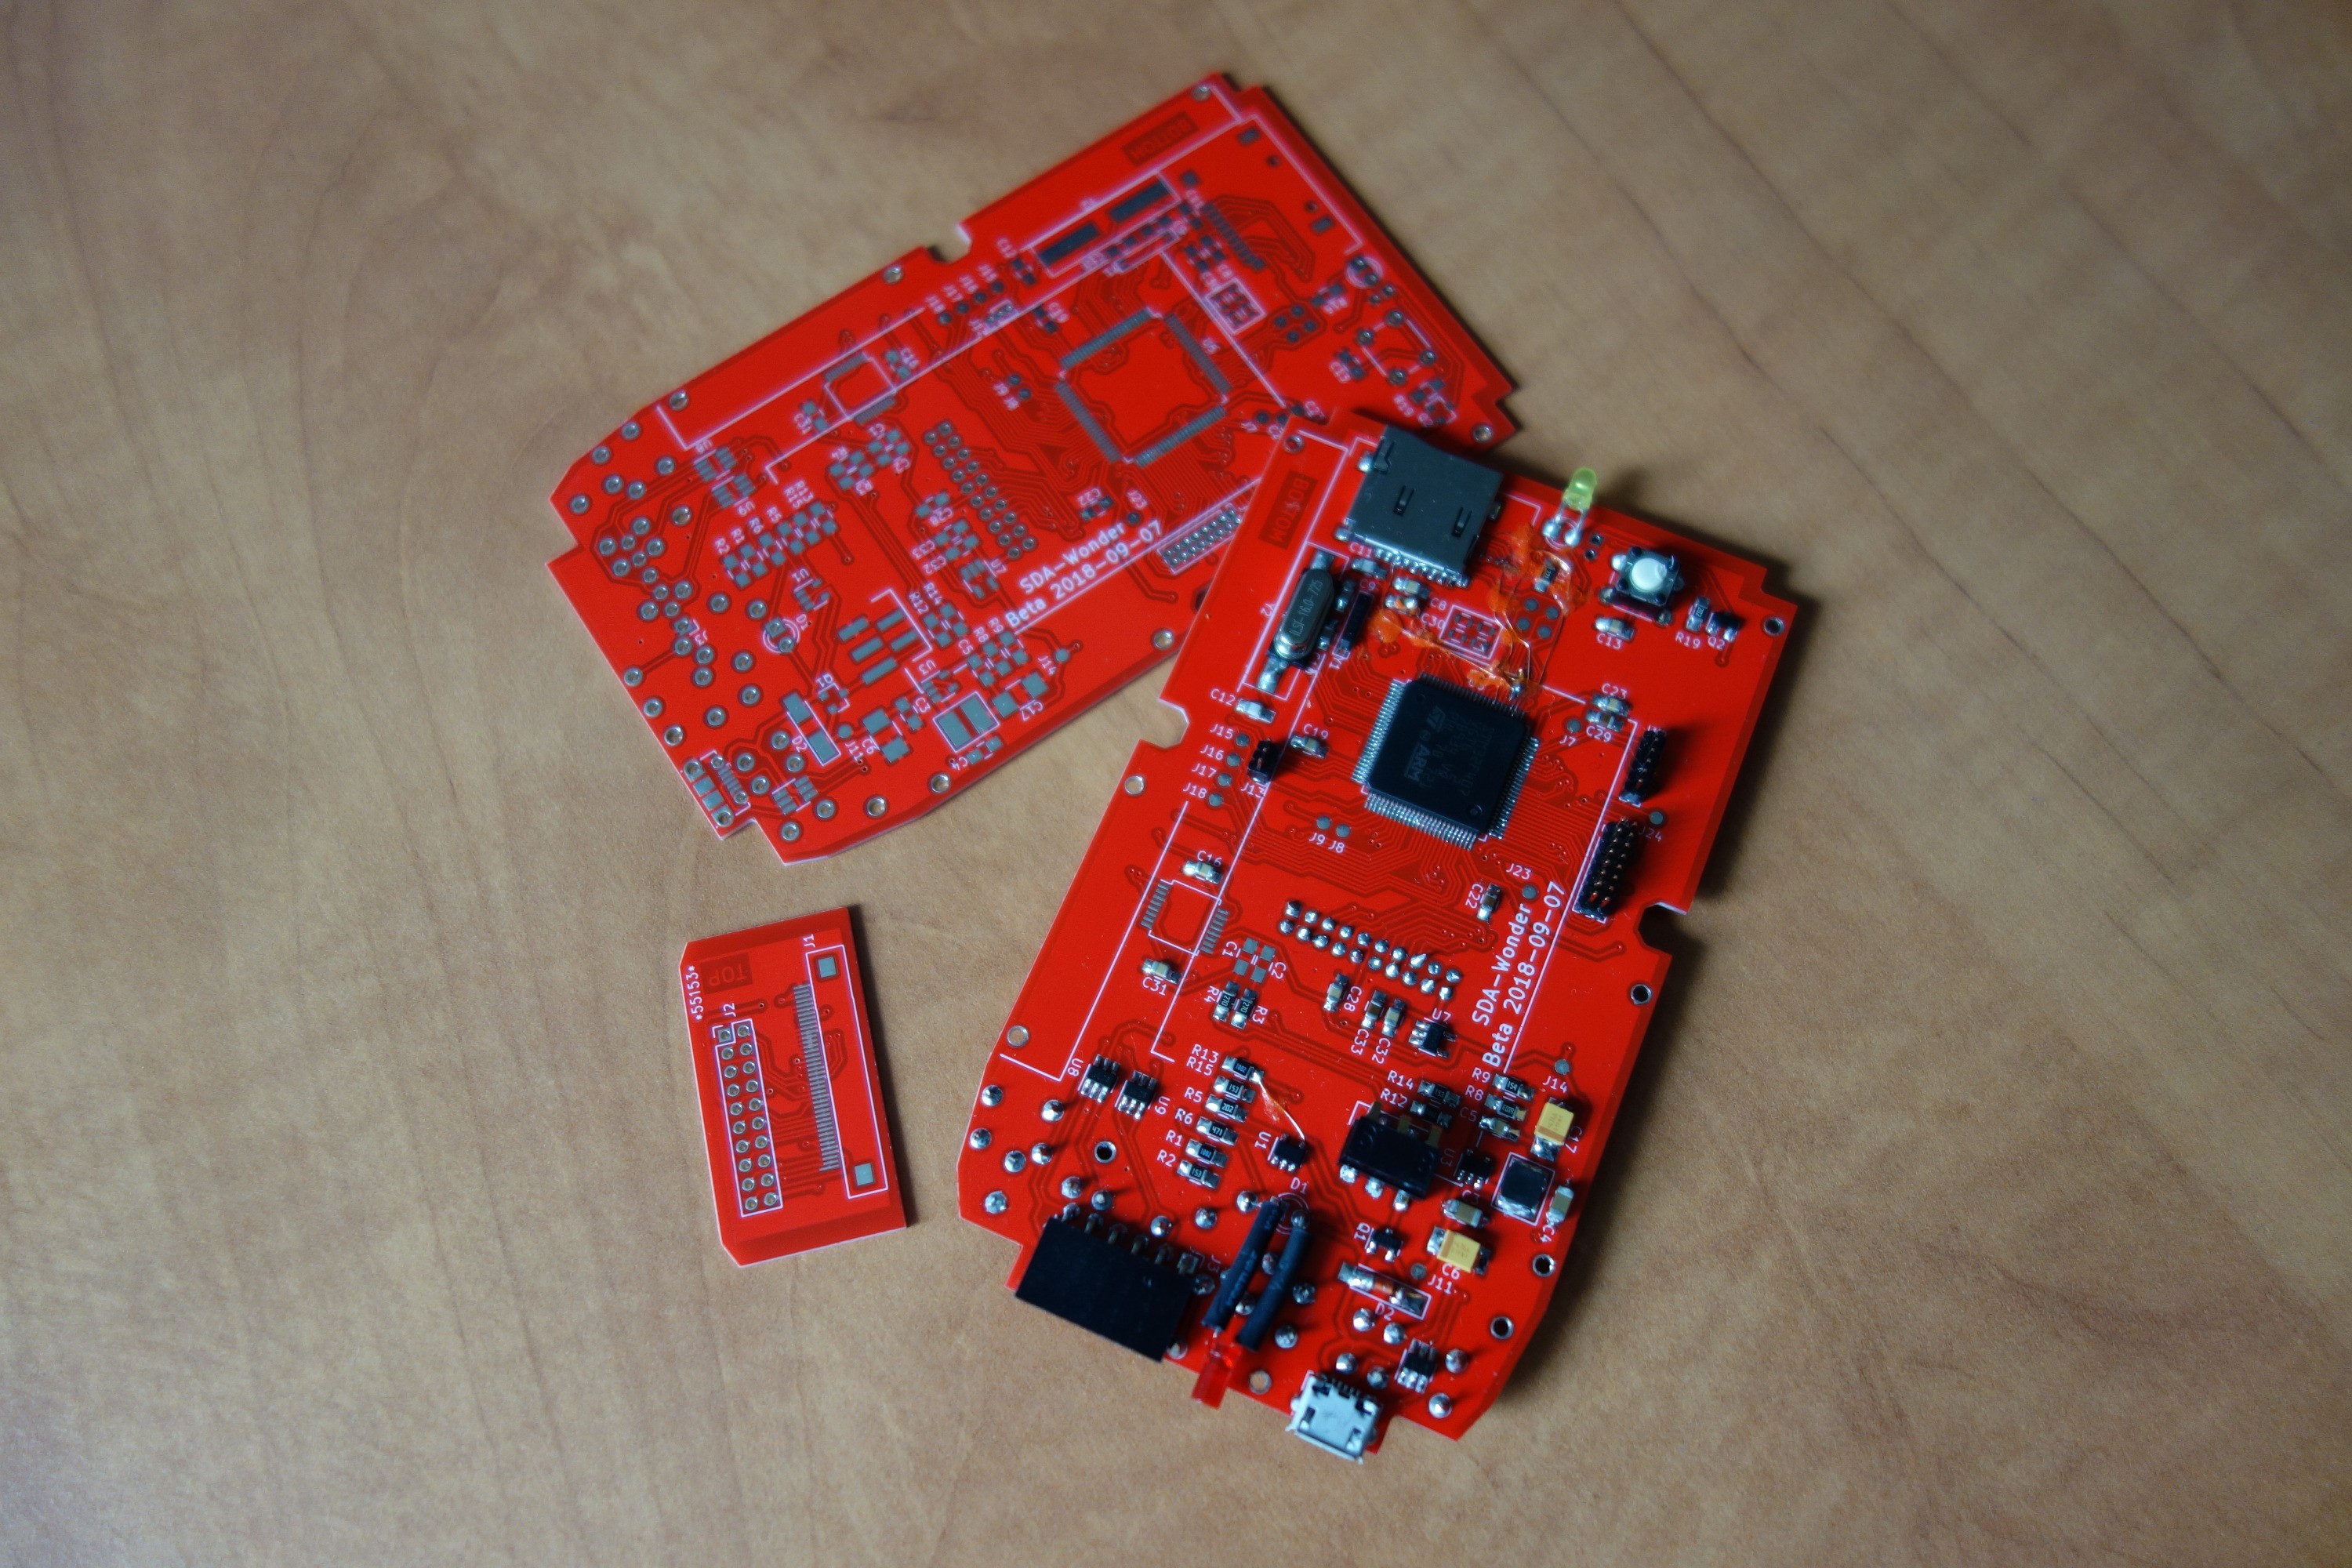
10/12/2018 at 16:56 • 0 commentsThe new hardware is here! SDA is now officially a big boy project with it's own printed circuit boards! I got the PCBs from dirtyPCBs and they look just fine.
PCBs were designed in KiCad, I was working on them for a long time, so they mostly work. Mechanically it is a good fit in the case, but there still are some PCB bugs and I will go through them.
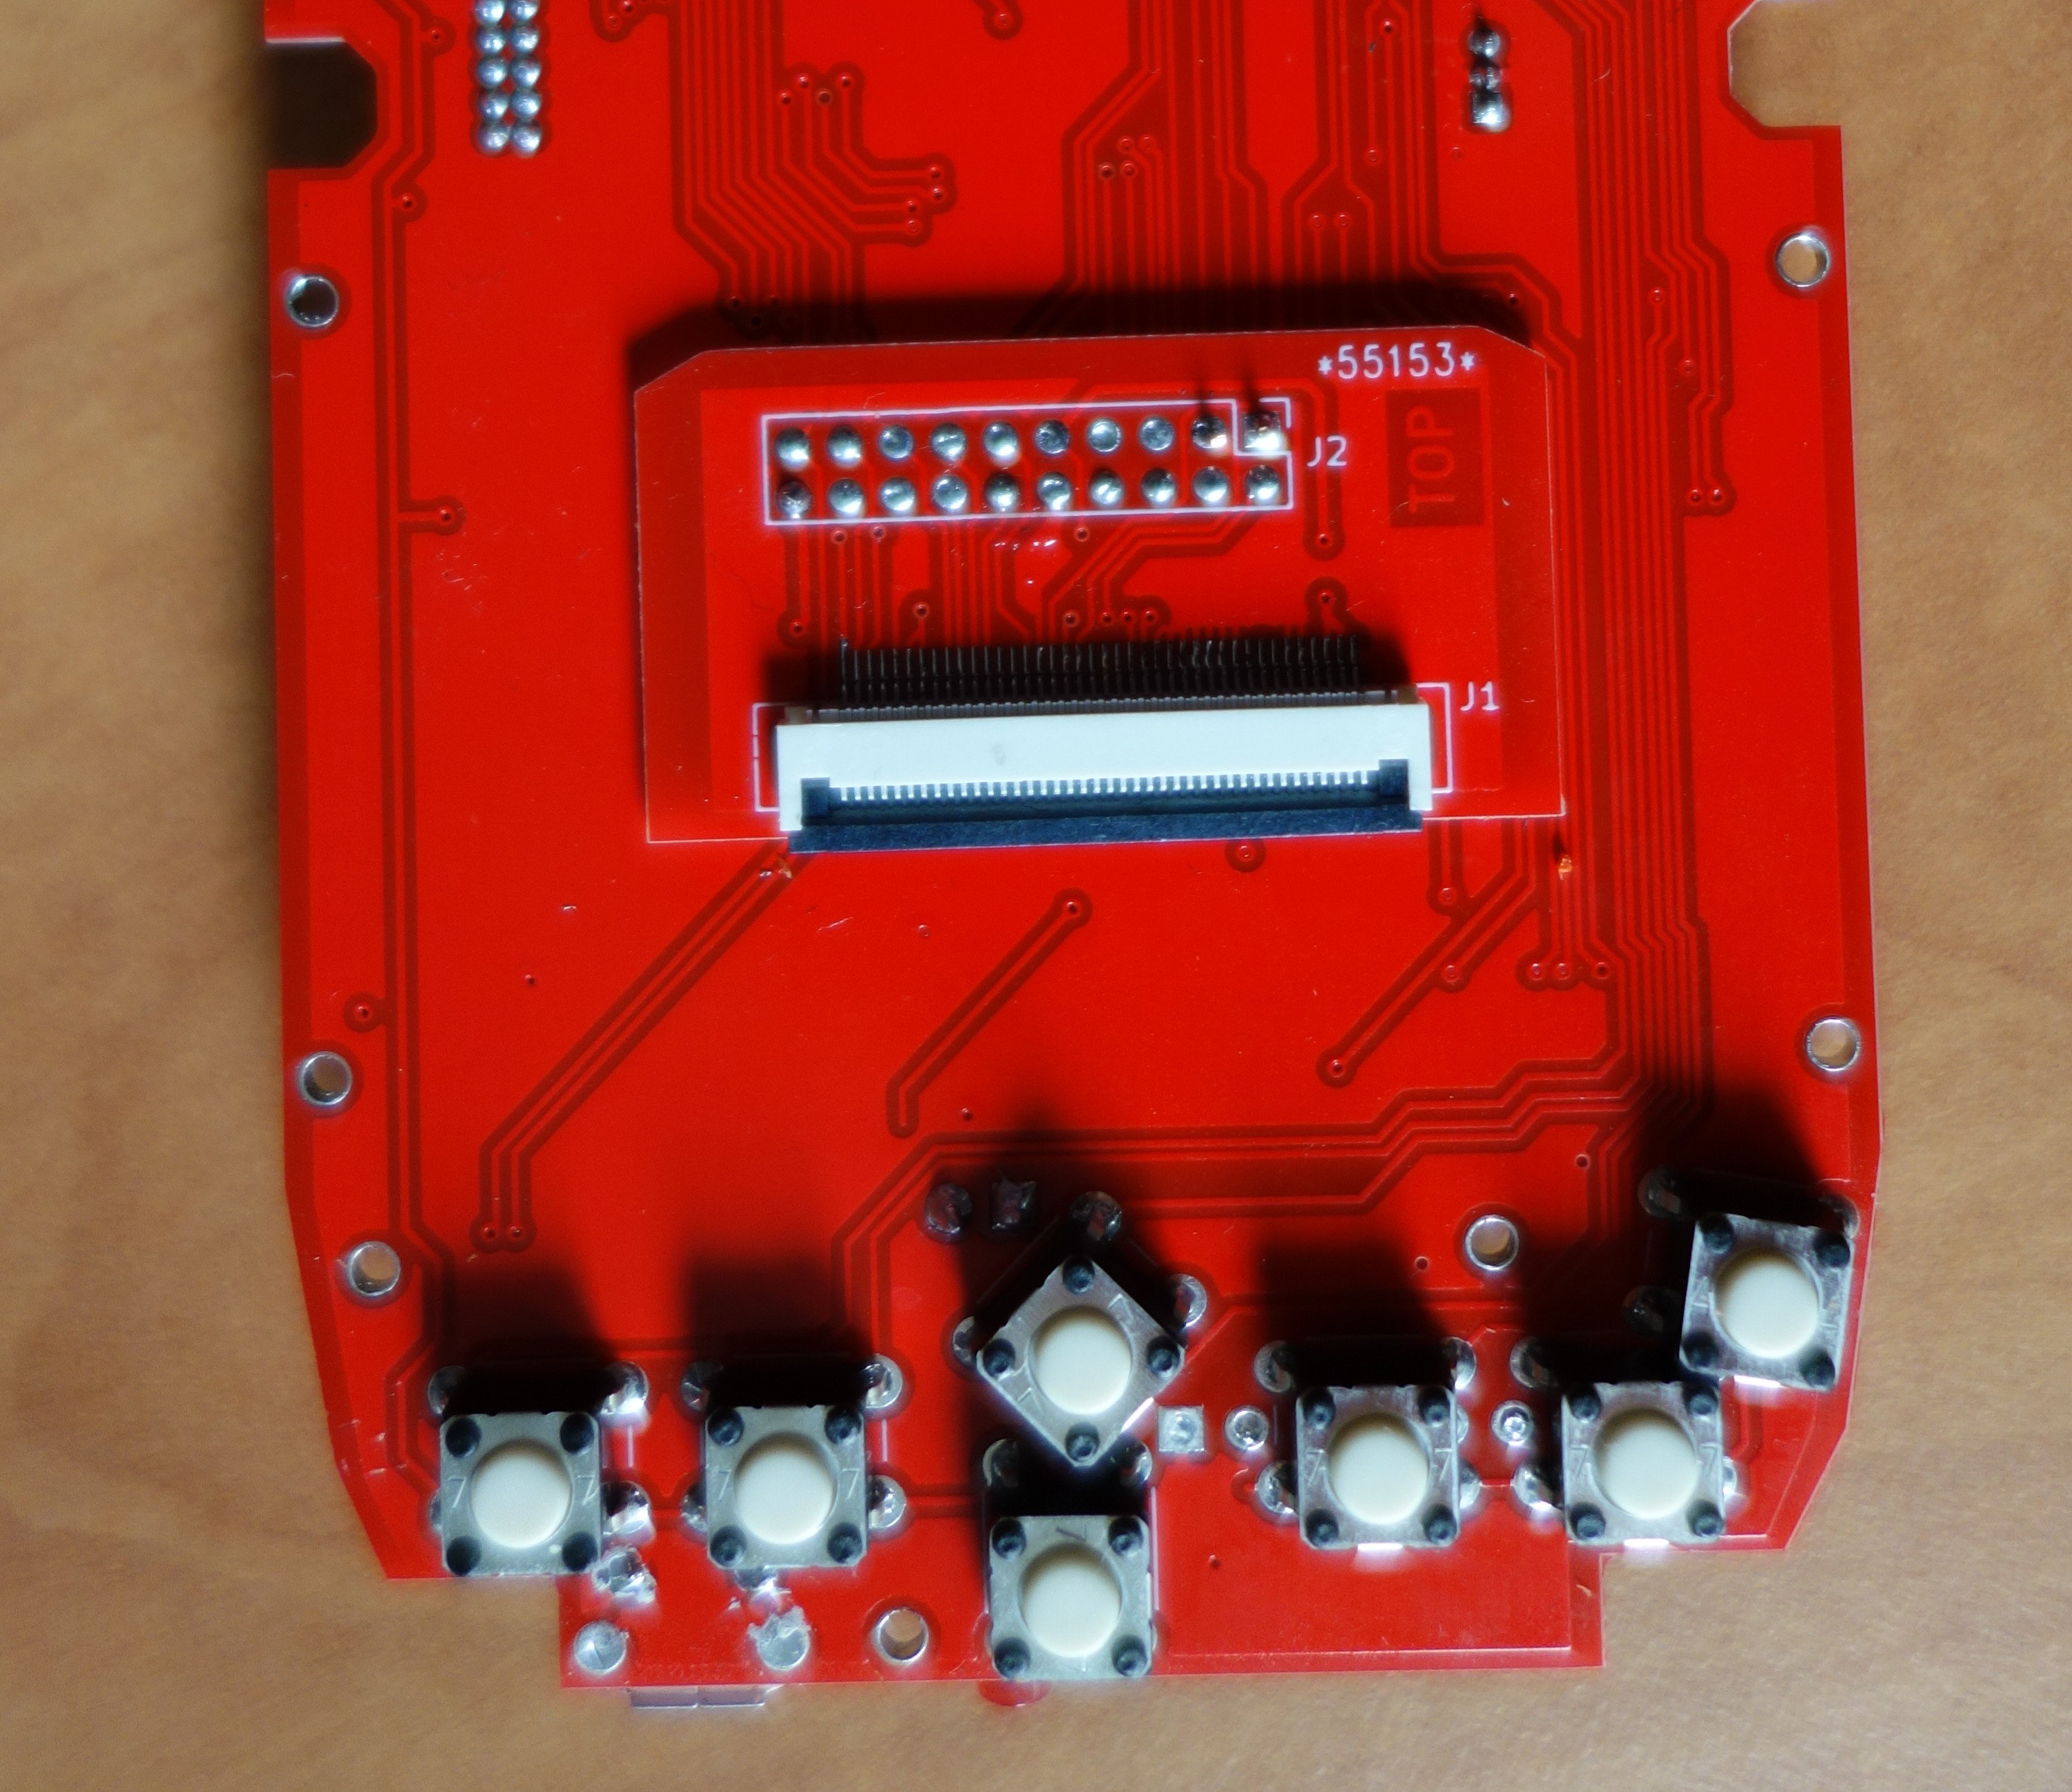
I am using two boards soldered together (kinda like iPhone X :D ). I went with this type of construction for two reasons:
- Volatility of the display market. Chinese sellers will eventually run out
of the right type of display with the right flex cable. If the display connector was on the board itself, it would be cleaner and neater, but I would need to re-design whole board for every type of display connection. - I wanted all SMT components to be on one side of the board. This way I can do that without the need of big hole in the middle of the board.
This stacked PCB solution complicates the final assembly for a bit, but I think that its manageable.
PCB Bugs
Here are few of the mistakes I made on the first version of the PCB.
ADC Vref
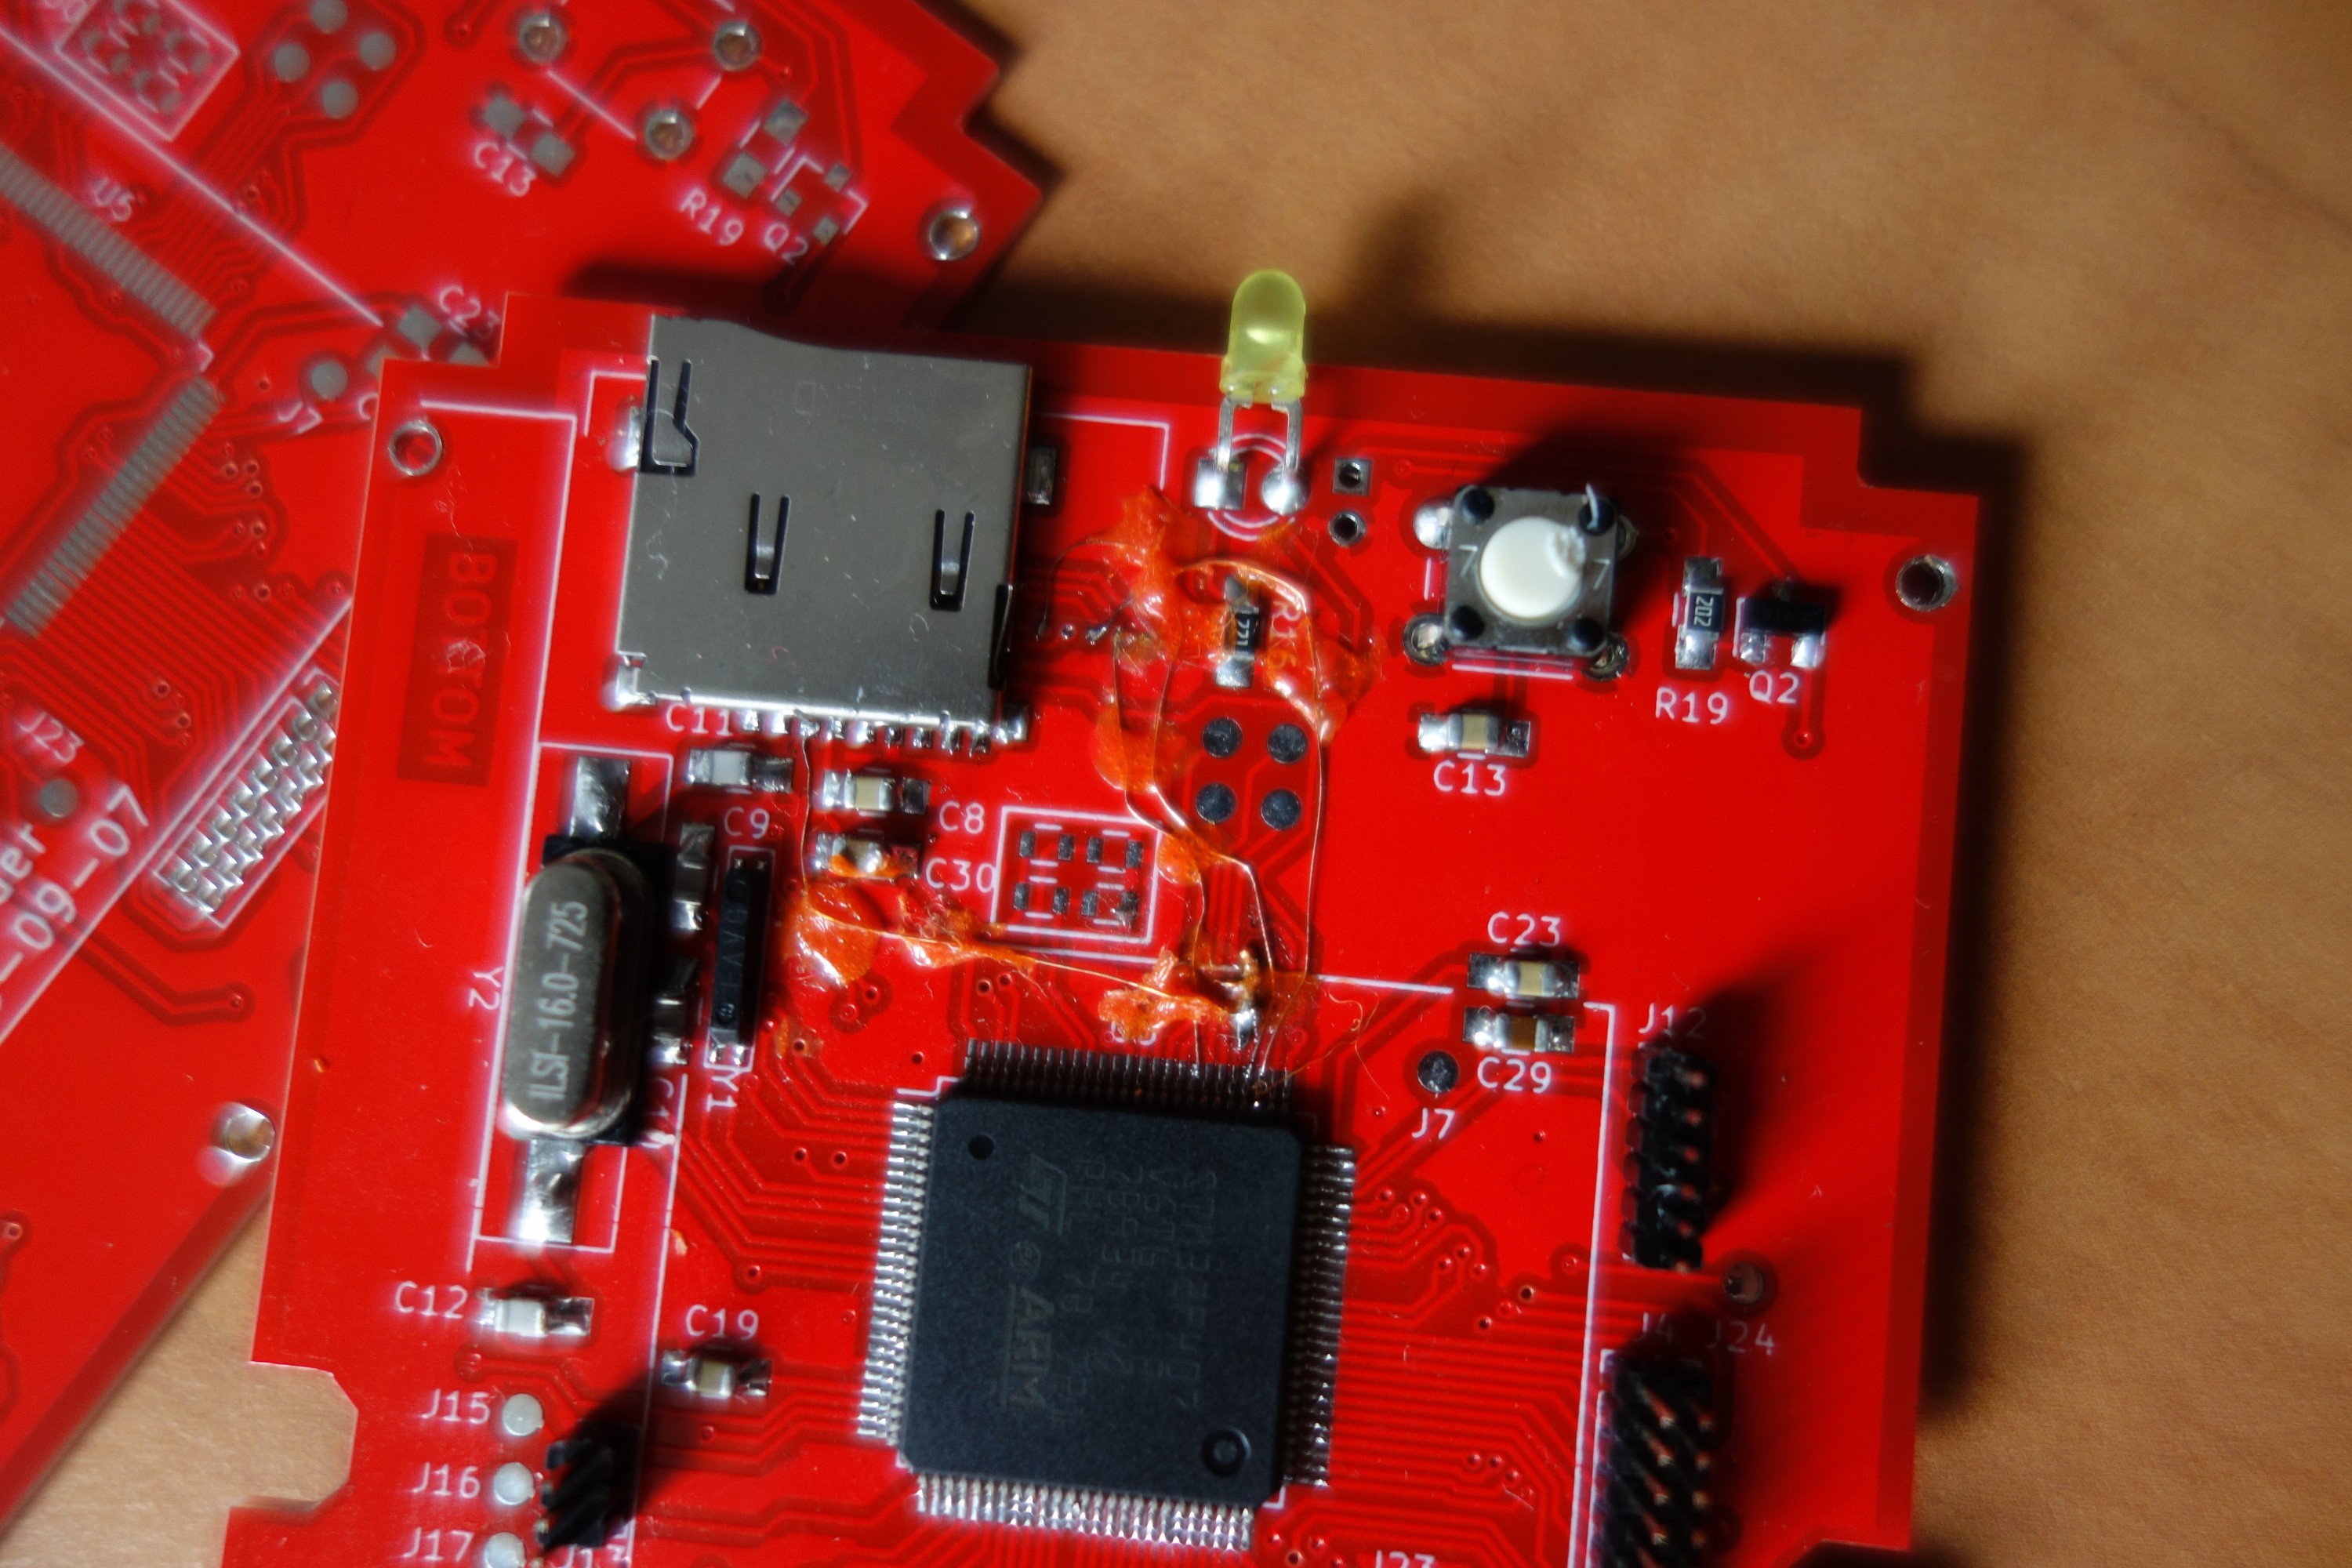
Do not forget to connect voltage reference pin to some voltage. I will read the datasheet properly next time. It was actualy easy fix on the prototype PCB, I soldered the Vref pin on the mcu to the analog voltage source pin that is right next to it.
Missing via
I am still learning with KiCad DRC, short bodgewire fixed that.
SDIO is not SPI
The SDIO bus turned out to be quite different from the SPI. SDIO is the bus for quick communication with the SD card and it has its specifications that I did not read and so the SDIO is not working on the current PCB. Firstly my schematics was wrong (missing pull up and termination resistors) and I routed the SDIO traces carelessly over the board. I bodgewired it to the point where reads from the card were working about 20% of the times, that was not acceptable. I ended up rewiring the SD slot to use SPI for testing and I will be fixing it in the next board revision.
What now?
I got the hardware working in the end and that is what counts. I written drivers and base functions for SDA_OS to run on the new PDA and I will be using it for some time to test it. After the testing I will do second revision and if that works I will opensource the design.
- Volatility of the display market. Chinese sellers will eventually run out
-
Another boring SW log
10/09/2018 at 20:16 • 0 commentsWhile I was waiting on the PCBs for the new HW, I focused my attention to SDA software stack. I think that the code has matured enough to put most of it on github. The code is split to multiple repositories, I don't know if it is the best solution, but it is a solution for now. Currently you can build SDA_OS simulator and run (or develop) applications in this simulator.
Disclaimer:
This log is written in a way that you maybe could try to clone, compile, run and develop apps for the SDA_OS, but reality is that you will most likely find out that it is broken in some way and get frustrated. I am the only developer and user for about a two years and I am walking around bugs and bad architectural decisions all the time. Do not expect a good experience.SDA Repos on github
There are separate repos for each part of the software stack.
SVS Script
SVS can be used separately, so it makes sense to have it separate.GR2
The graphical and GUI library for SDA_OS. It was previously used in my other projects, so it is in a separate repo. It is written to be more or less platform independent it needs external functions to draw on the physical screen.SDA_OS
This repository contains most of the SDA_OS code, the API for most of the functions and SDA_OS specific extensions to the SVS. This part is platform independent, it also needs external functions to handle the touch input and the filesystem.SDA Applications
Default applications for SDA_OS, they are platform independent and run on top of SDA_OS.SDA_OS SDL2 base
This provides all the functions to run SDA_OS on a PC with some distribution of GNU/Linux. Browser based simulator is also based on this code.Sources for the SDA_OS base for SDA mk. 2.
Why is it this way
I set it up in a way that you clone the base repo from git and all other system things are in this repo as submodules. You can build the SDA_OS base to get the executable. Applications directory is in gitignore, so you can separately clone the app repo as APPS directory or you can create it empty and fill it with your own apps. I do not know if specific version of applications for SDA will be dependent on a specific version of the base, so it is not a submodule for now.
Edit: While I was debugging the new main board for new SDA, I found out that building SDA_OS from scratch is not super simple, so I will simplify the process with something like make it-working option in the makefile, that will rename all .example files and do all other boring stuff.
SDA - The best new PDA
Do you miss those old small devices in your palm? Don't be sad, you can always build your own!
 brtnst