Close
0%
0%

Arduino Video Terminal

PS/2 keyboard that displays keys pressed on a TV; like a word processor.

Similar projects worth following
Uses a PS/2 Keyboard and a ATMEGA328 to run BILLYTERM which displays the text on the screen and will soon have special functions. Has a piezo speaker for audio and RCA jack for black and white video out.

Uses a PS/2 Keyboard and a ATMEGA328 to run BILLYTERM which displays the text on the screen and will soon have special functions. Has a piezo speaker for audio and RCA jack for black and white video out.

  • 1 × ATMEGA328 Microprocessors
  • 1 × 10K Resistor
  • 1 × 1K Resistor
  • 1 × 470 Ohm Resistor
  • 1 × Piezo Speaker or speaker

View all 8 components

  • First Build

    billybobpickle12/22/2014 at 01:41 0 comments

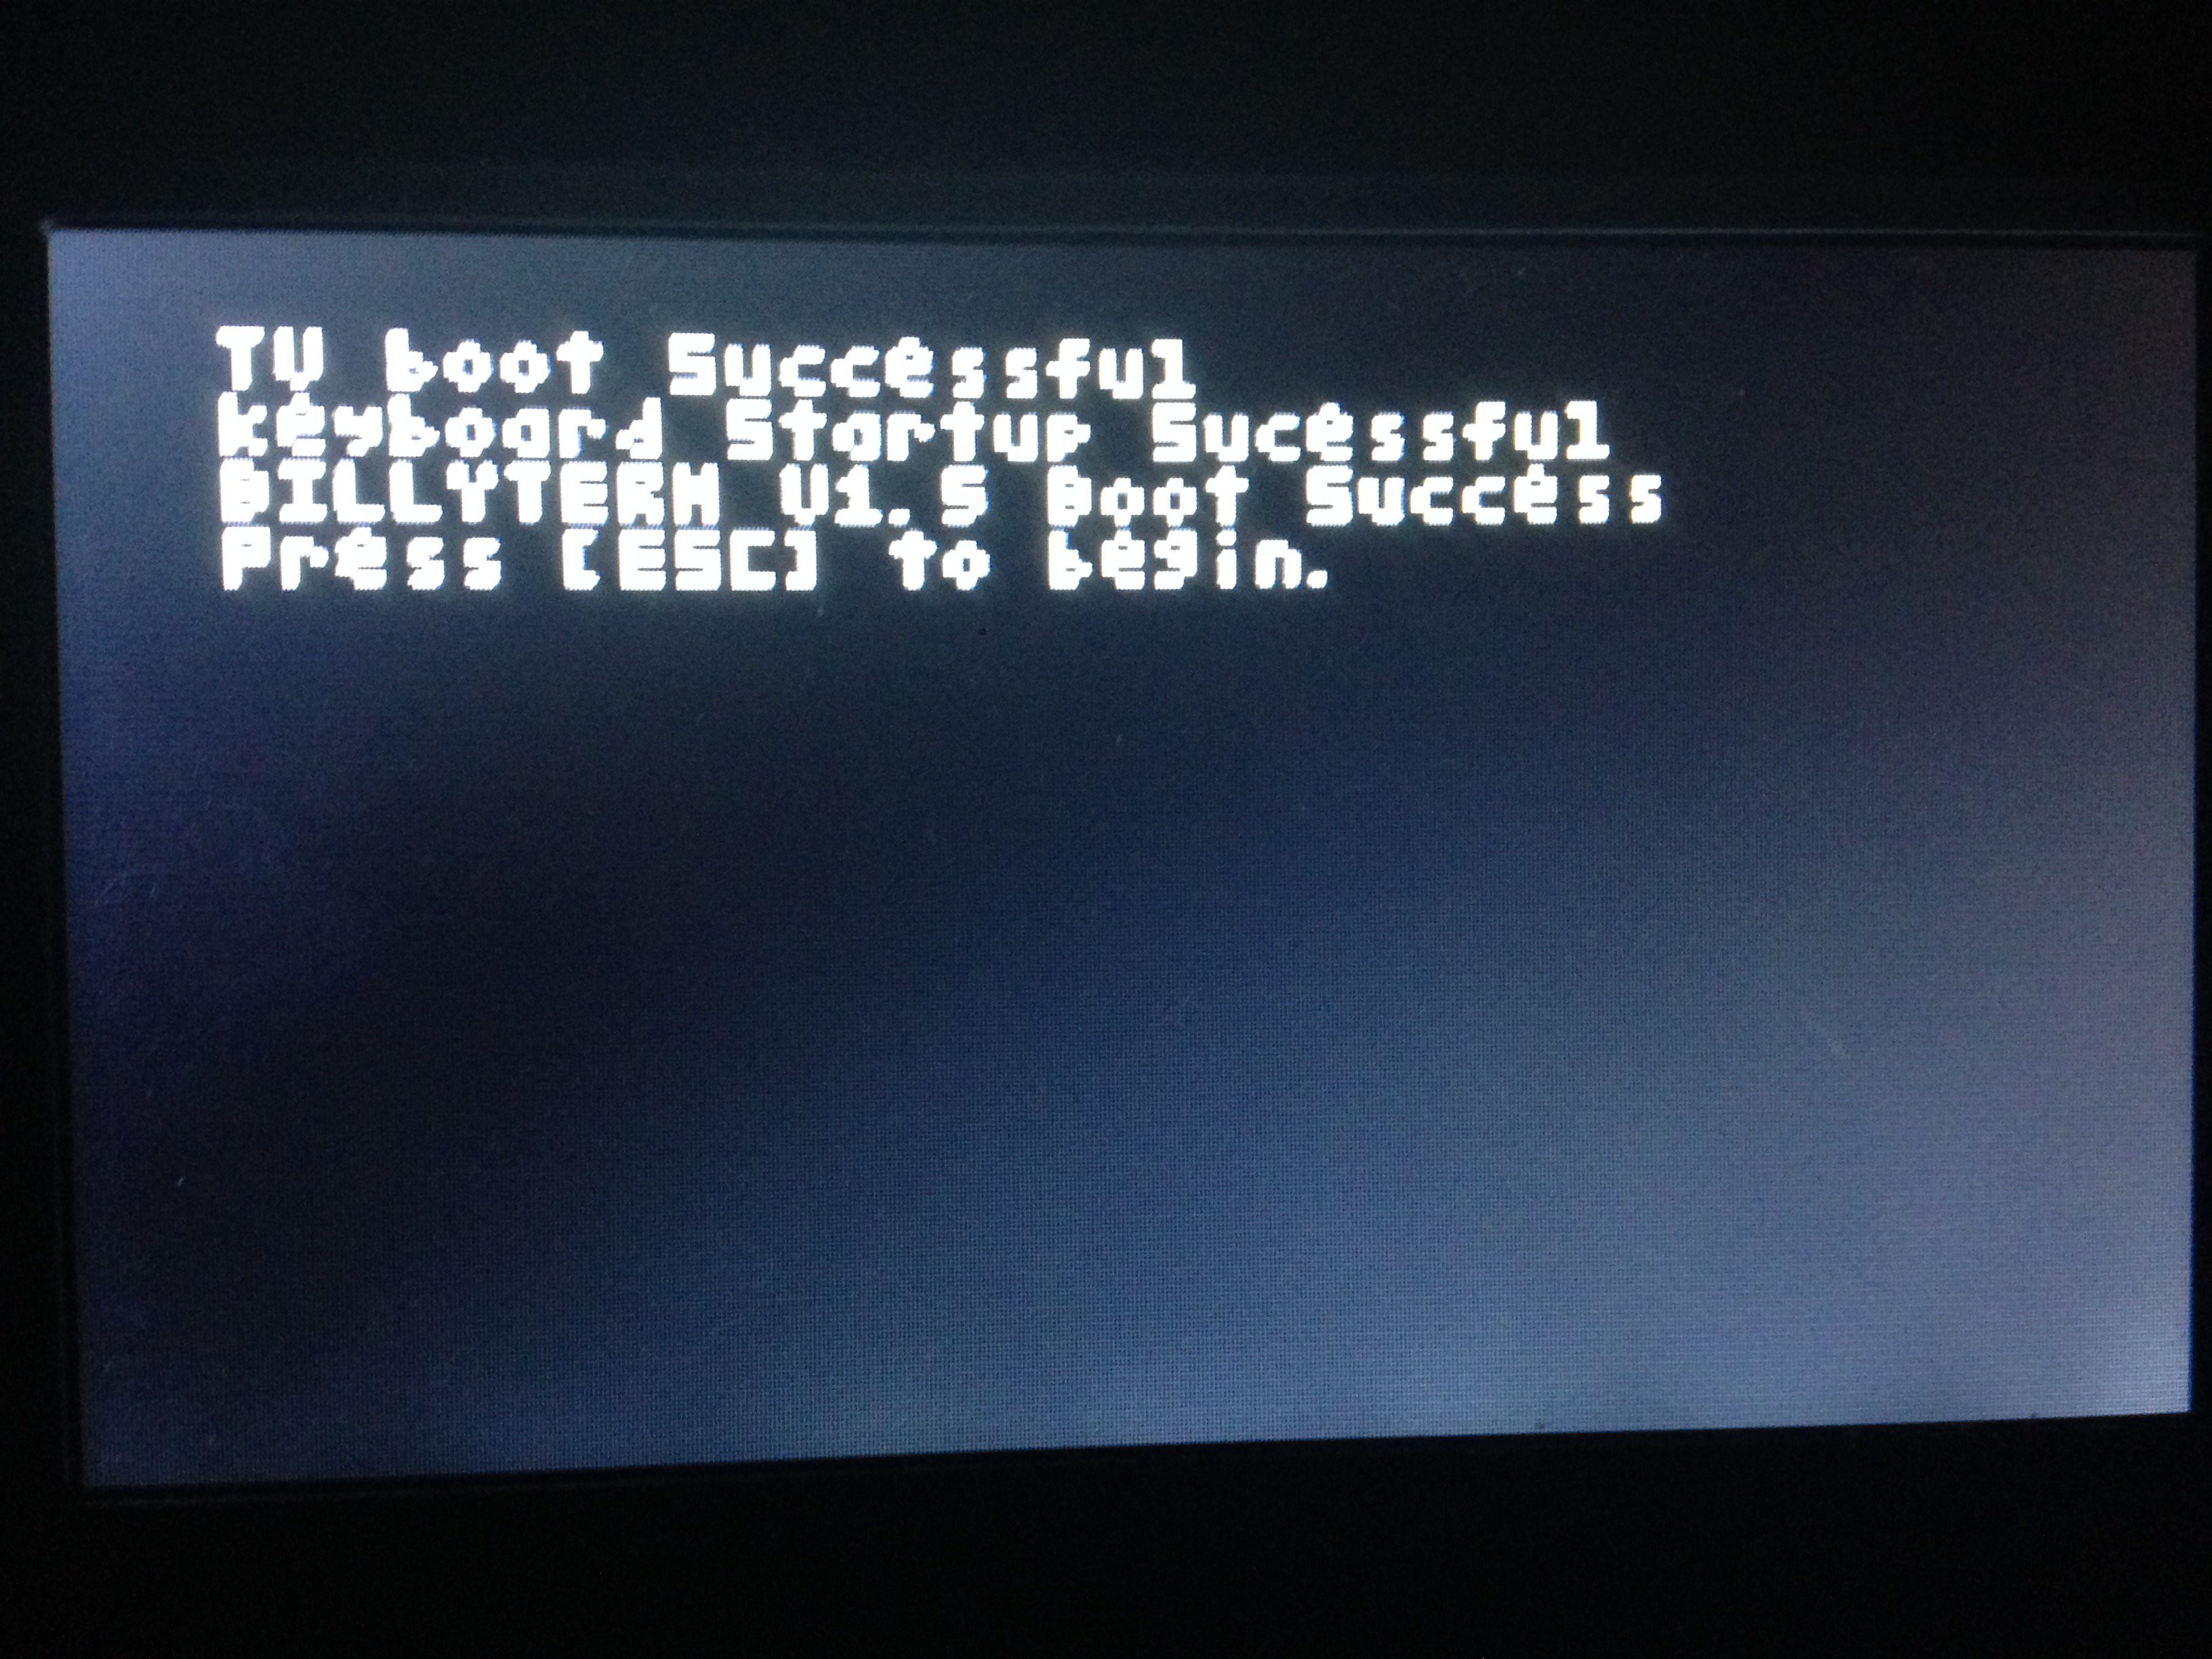
    1. Got to BILLYTERM V1.5; coming good, instructions coming soon. TAB key resets the arduino and ESC clears the screen and starts the keyboard.
View project log

  • 1
    Step 1

    You'll need to install support for an additional hardware configuration to run without the big external clock circuit:

    1. Download this hardware configuration archive: Breadboard.zip
    2. Create a "hardware" sub-folder in your Arduino sketchbook folder (whose location you can find in the Arduino preferences dialog). If you've previously installed support for additional hardware configuration, you may already have a "hardware" folder in your sketchbook.
    3. Move the "breadboard" folder from the zip archive to the "hardware" sub-folder of your Arduino sketchbook.
    4. Restart the Arduino software.
    5. You should see "ATmega328 on a breadboard (8 MHz internal clock)" in the Tools > Board menu.

    Once you've done this, you can burn the bootloader and upload programs onto your ATmega328 as described above. Be sure to select "ATmega328 on a breadboard (8 MHz internal clock)" when burning the bootloader. (If you select the wrong item and configure the microcontroller to use an external clock, it won't work unless you connect one.)

  • 2
    Step 2

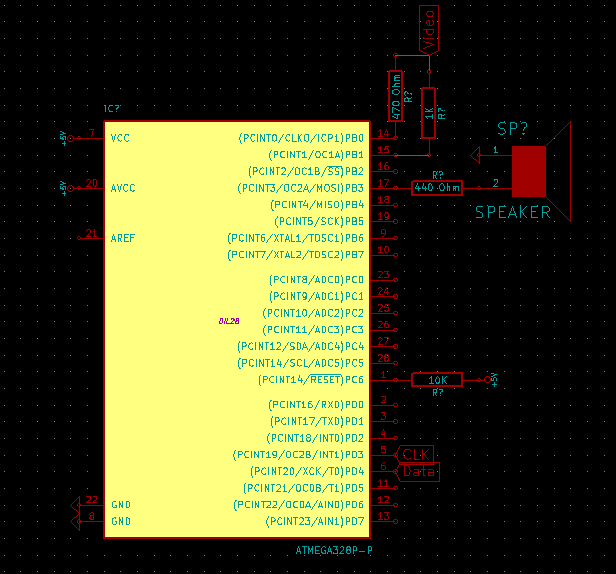
    Wire the circuit like this,

    Connect the [Video] in the picture to the inside ring of the component RCA jack. Connect the outer ring to ground. The CLK and DATA is shown how to be wired on the second picture shown above. Connect the speaker up to the resistor and ground. Your BILLYTERM is ready to be programmed.

  • 3
    Step 3

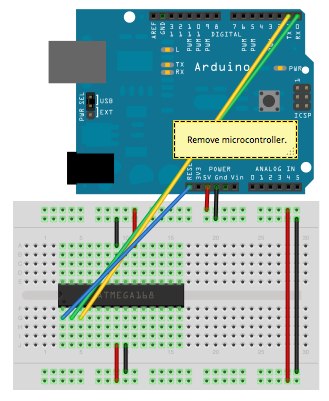
    Download the Source code from https://github.com/billybobpickle/BILLYTERM and wire an arduino and the BILLYTERM like so:Upload the sketch and it should be good to go. BILLYTERM V1.5 Boots like so:


View all 3 instructions

Enjoy this project?

Share

Discussions

Reinoud de Lange wrote 01/14/2020 at 14:55 point

how did you connect the keyboard?

  Are you sure? yes | no

billybobpickle wrote 12/22/2014 at 12:35 point
Yes, actually 2 wonderful colors of black and white 120x76 and it is not resource intensive. Using 2 pins, 9 and 7 with resistors hooked up to it

  Are you sure? yes | no

zakqwy wrote 12/22/2014 at 12:33 point
I've never used the TVout library--does it just emulate a composite video out on an I/O line? Is the library fairly resource intensive?

  Are you sure? yes | no

Similar Projects

Does this project spark your interest?

Become a member to follow this project and never miss any updates