Lumor
Lumor-
Video [New screens]
10/22/2015 at 11:55 • 5 commentsMy new screens finally arrived from China, i will test them both and decide which one i want to use.
On the website it said both screens have a 640*480 resolution but the boxes say something different. The box of the 4,3" screen says it's 480*272 and the box of the 5" screen says it's 800*480.
I think i'm gonna use the 5" screen (if it works).
![]()
EDIT :
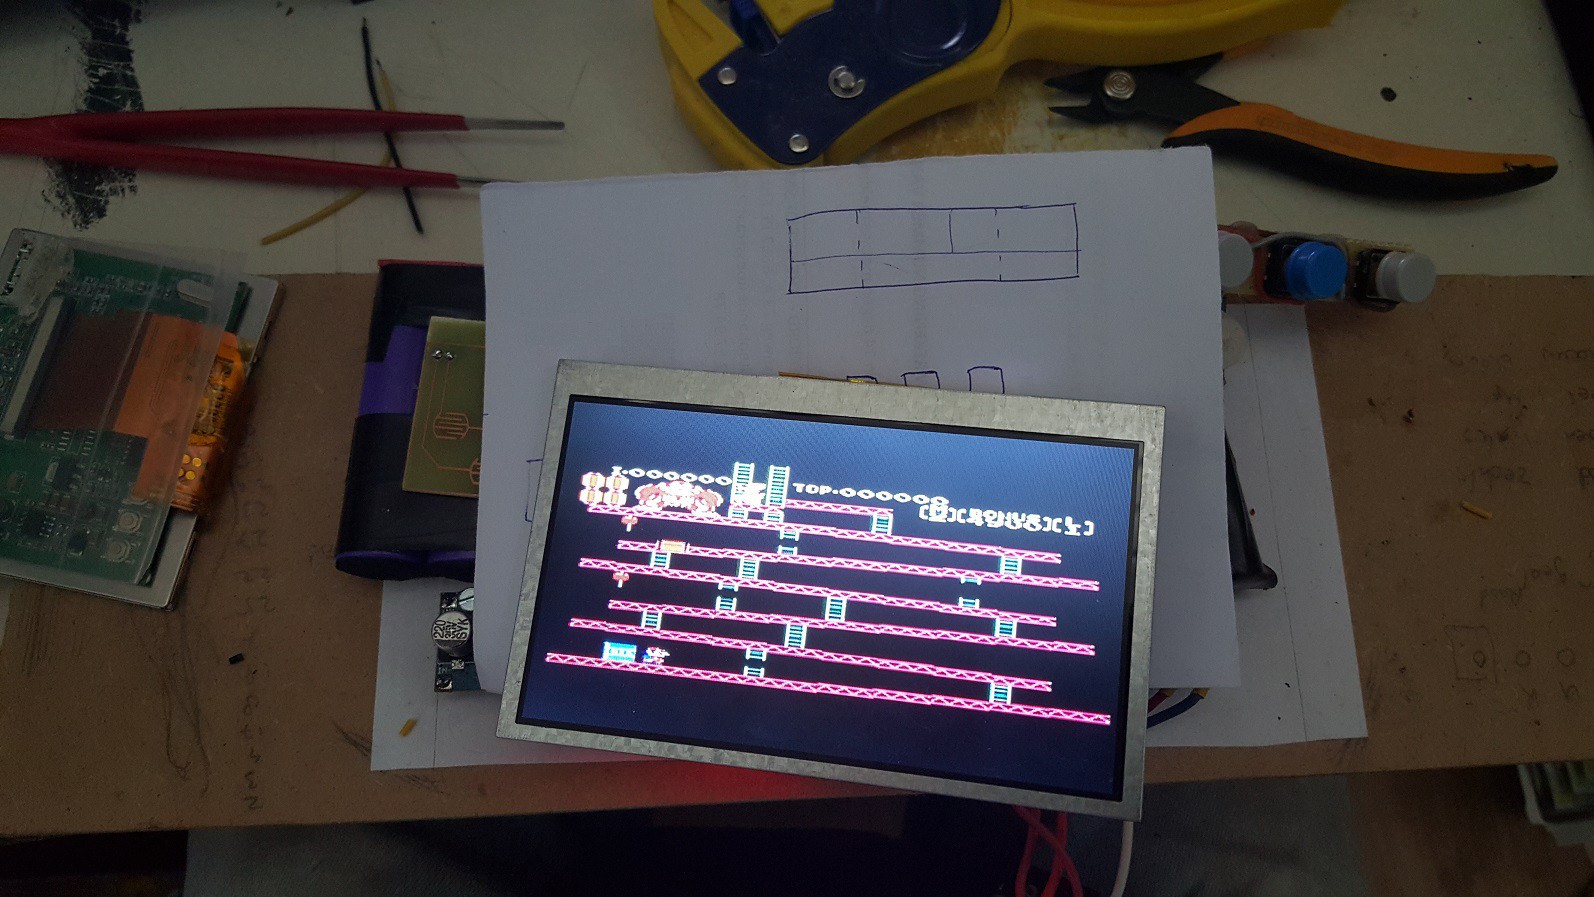
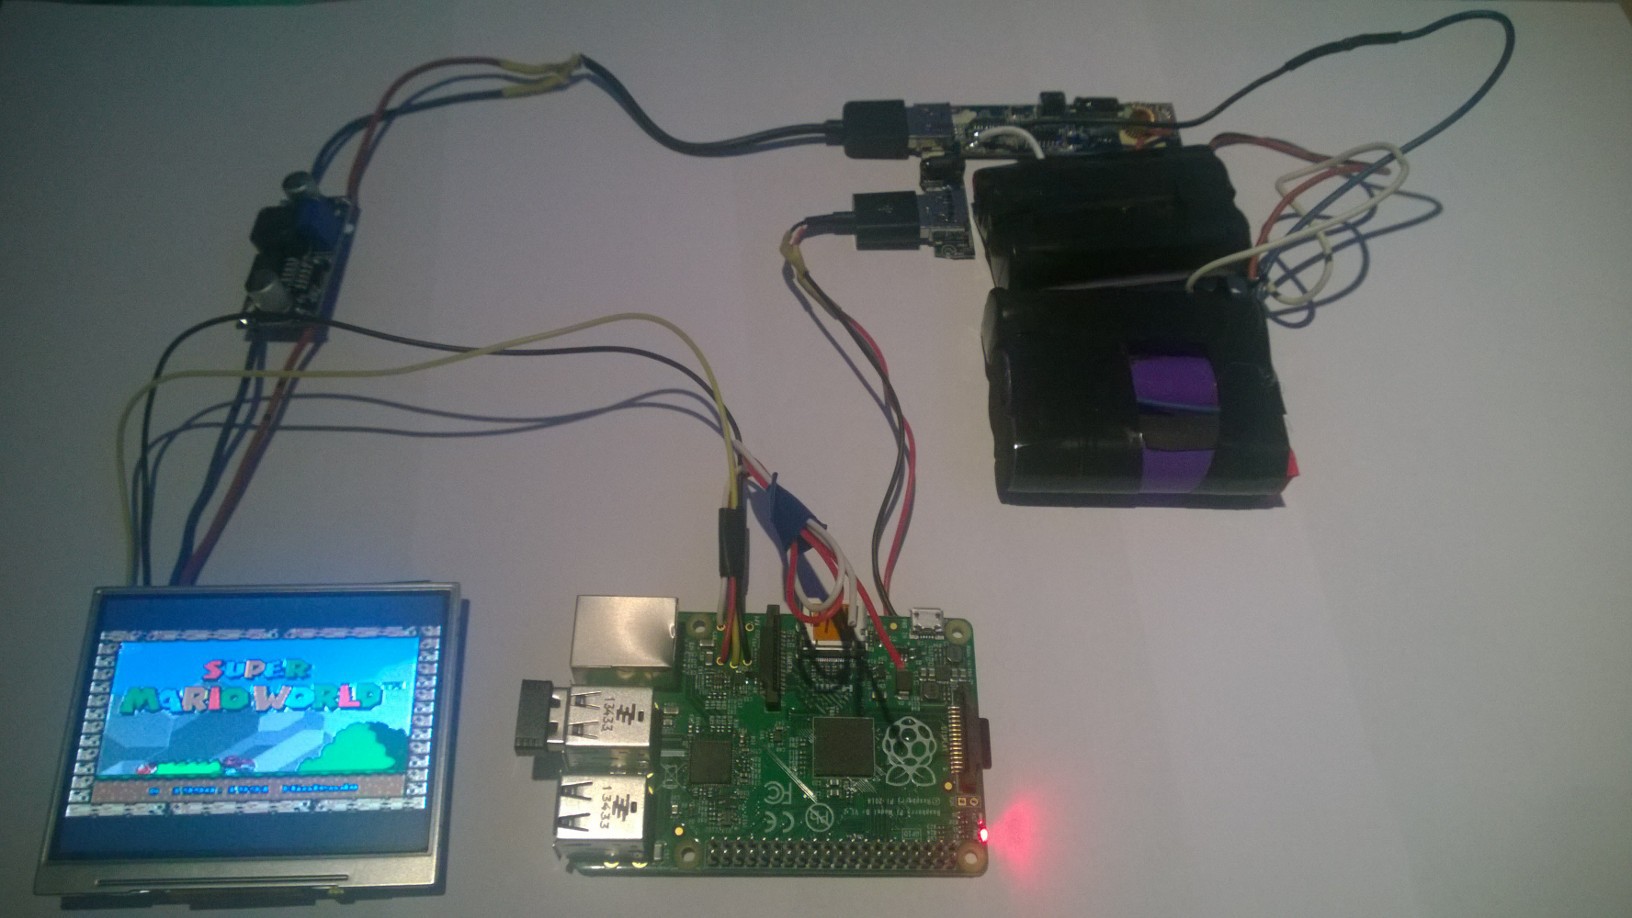
I tried testing the screens with the raspberry pi from my arcade cabinet, but for some reason i wasn't getting any video input. So i just hard-wired it into the portable and it worked! I need to adjust some contrast / brightness settings but besides that it's looking pretty good.
![]()
-
Wiring [Buttons]
09/25/2015 at 01:16 • 0 commentsFinished wiring and testing all of the buttons except the L/R triggers, i'm waiting with those because i'm not sure yet how i'm gonna position those.
The etched D-pad PCB works great, i didn't have high hopes for that one but it worked out perfectly.The next-and-last thing to do is build an amplifier + speakers and wire those in the portable. After that i can begin making the case. In the meantime i'll be searching for a better screen but they're hard to find.
I'm not really happy with the current screen, it has a low resolution and it is a bit small in my opinion.
![]()
-
Controller [Etching PCB for Dpad]
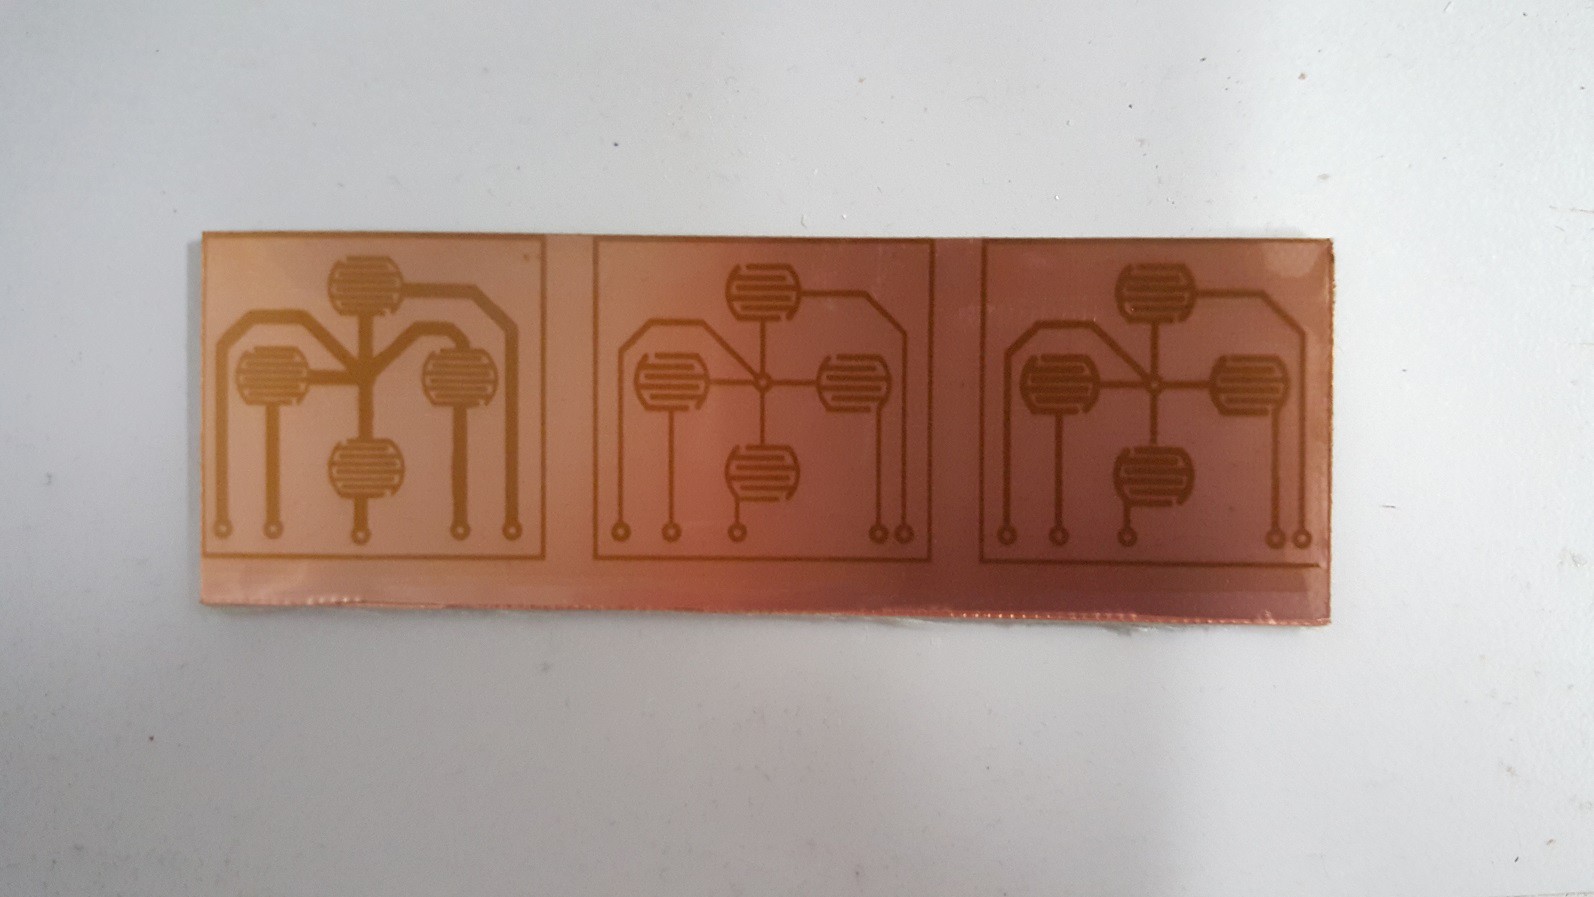
09/18/2015 at 15:35 • 0 commentsThe Dpad PCB that i took out of the SNES controller stopped making good contact, i think i spilled some superglue on it or something. Nothing to worry about, i just etched a new board as replacement.
Here are some pictures of the process :
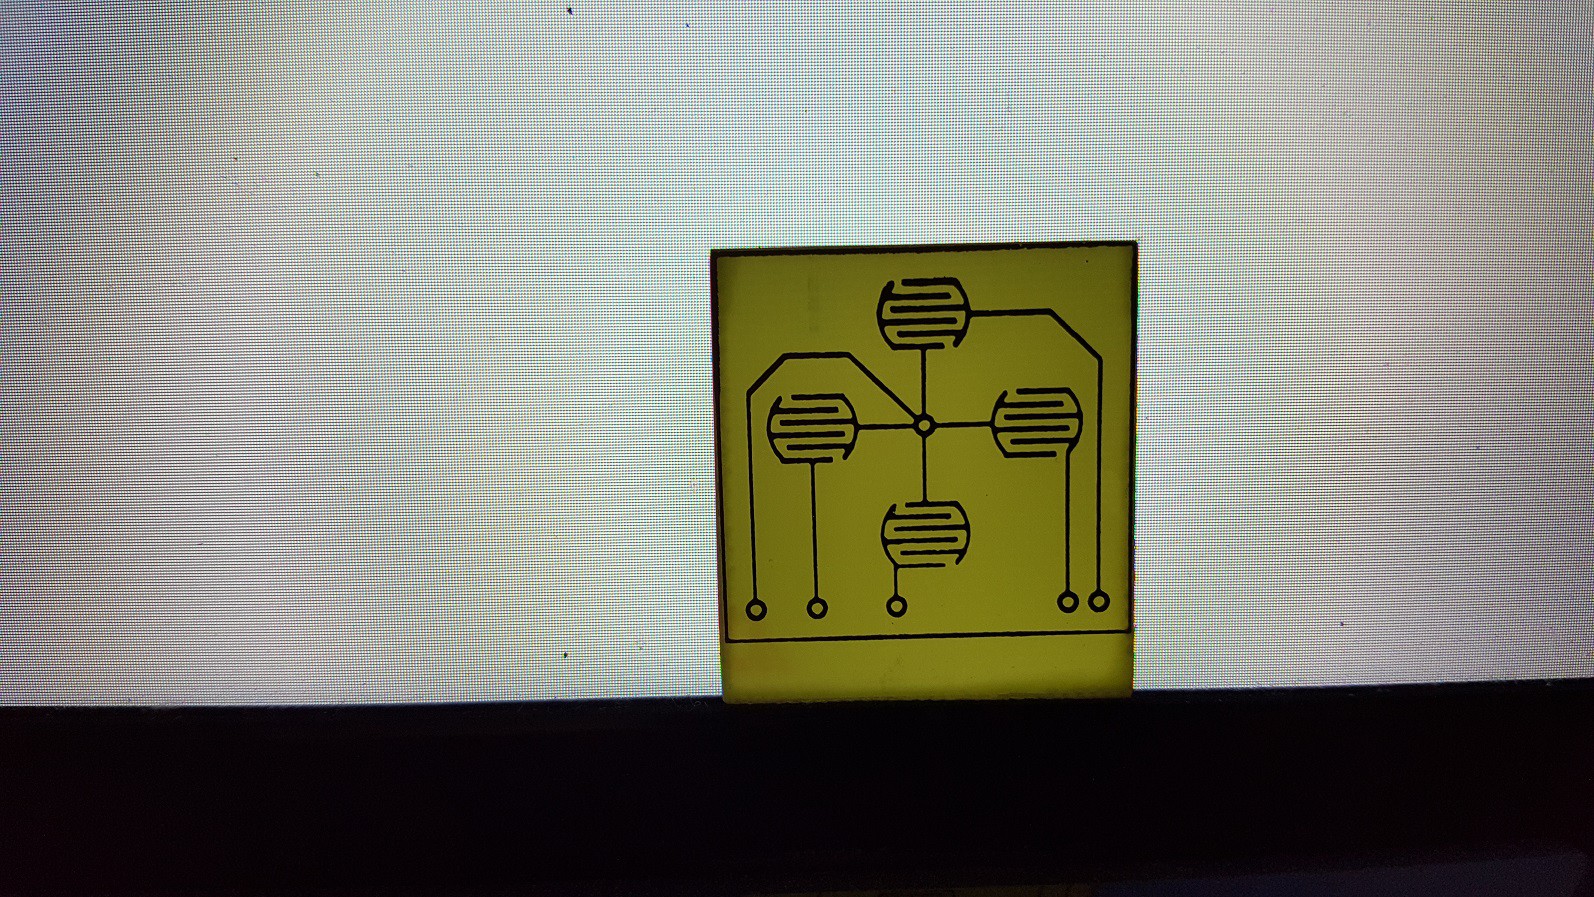
(This picture is taken after the photoresist developer. I tried 3 different designs each with different line-thickness. The middle one turned out to be the best choice)
![]()
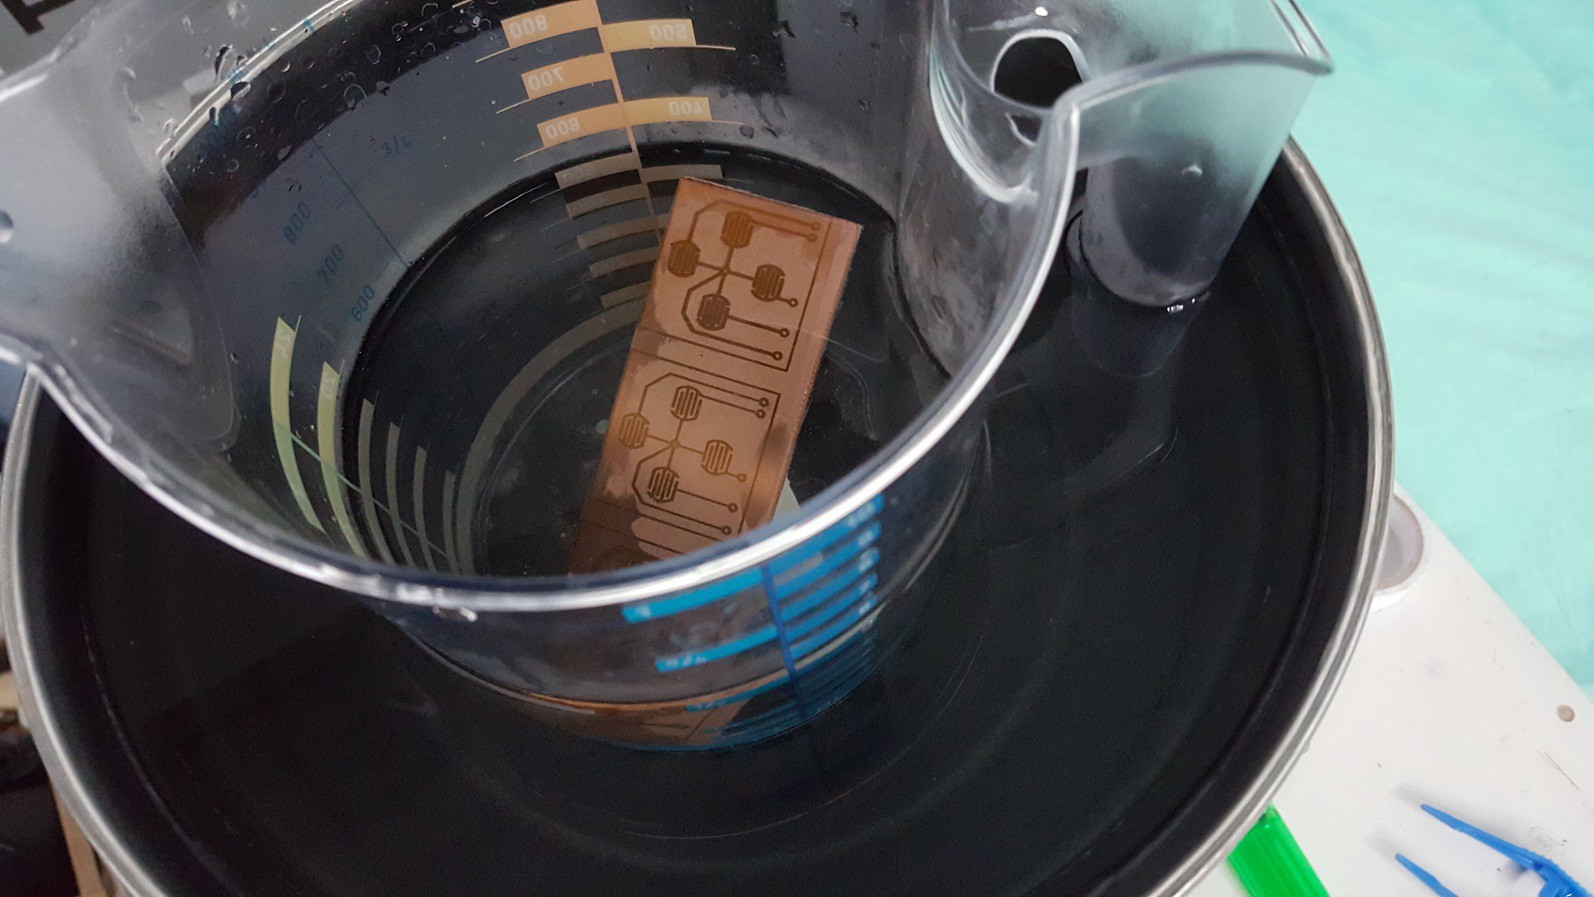
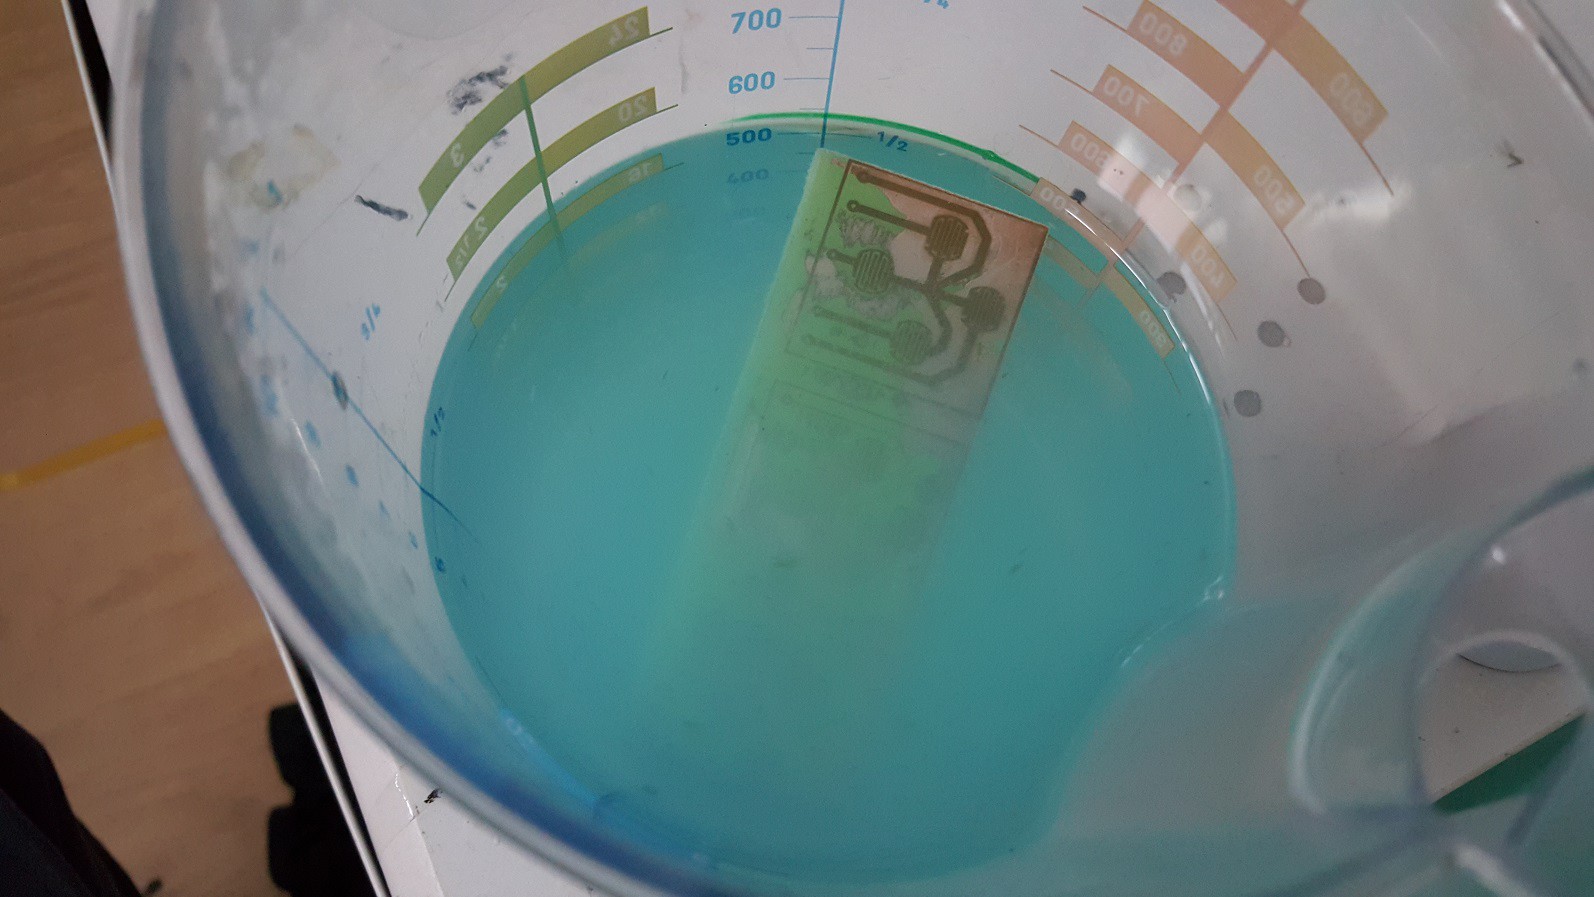
(Keeping the etchant warm au-bain-marie style)
![]()
(A few minutes into the etching process, parts of the copper are already etching away)
![]()
(Finished product. I'm in dire need of a new printer so it didn't came out perfect, but it's good enough)
![]()
All that's left to do is drill holes, solder it to the portable and hope it works.
-
Casing [Measurements]
08/13/2015 at 21:17 • 0 commentsI made some measurements of all the holes that are going to be mounted to the bottom of the case, here are the steps i followed :
Step 1 : Made measurements of all the holes and created a printable template in ExpressPCB (PCB software makes it easy to print acurate measurements)
![]()
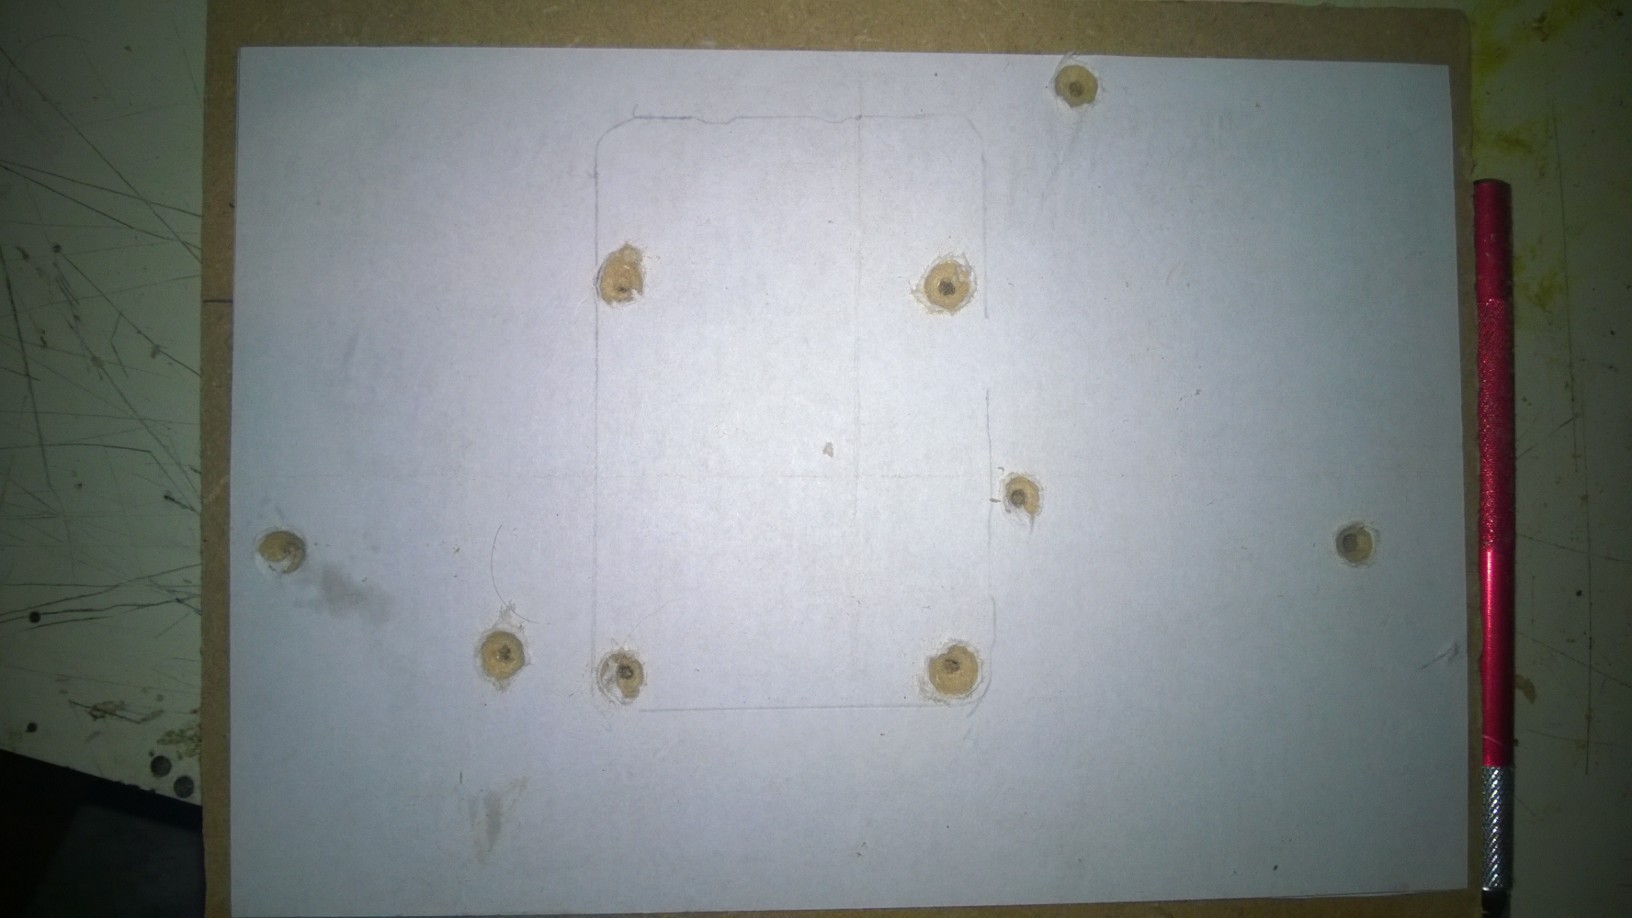
Step 2 : Print the template and drill the holes.
![]()
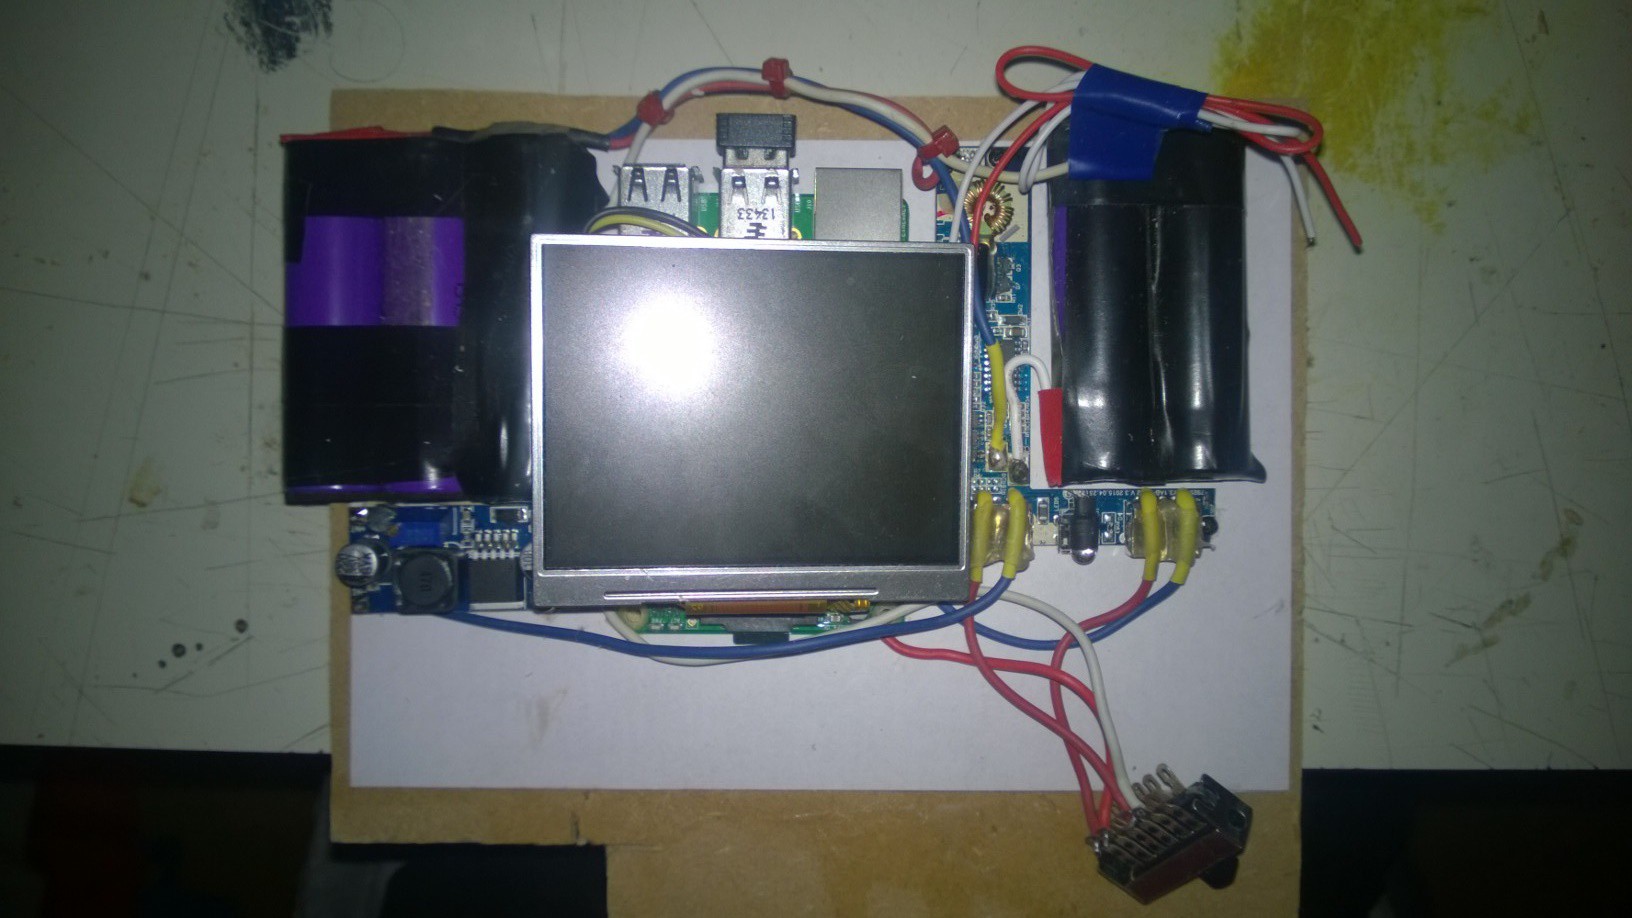
Step 3 : Mount PCB's to the MDF board to see if it fits.
![]()
Now i can use this template to create my case, the bottom part atleast.
-
Wiring [Connecting directly to USB, Power switch added]
08/03/2015 at 15:40 • 0 commentsContinued wiring everything together as tightly as possible, i've also shortened allot of wires. I also wired the power cables for the screen and the RPi directly to the powerbank, this will save allot of space although the way i did it might not be the most elegant way. It looks solid enough.
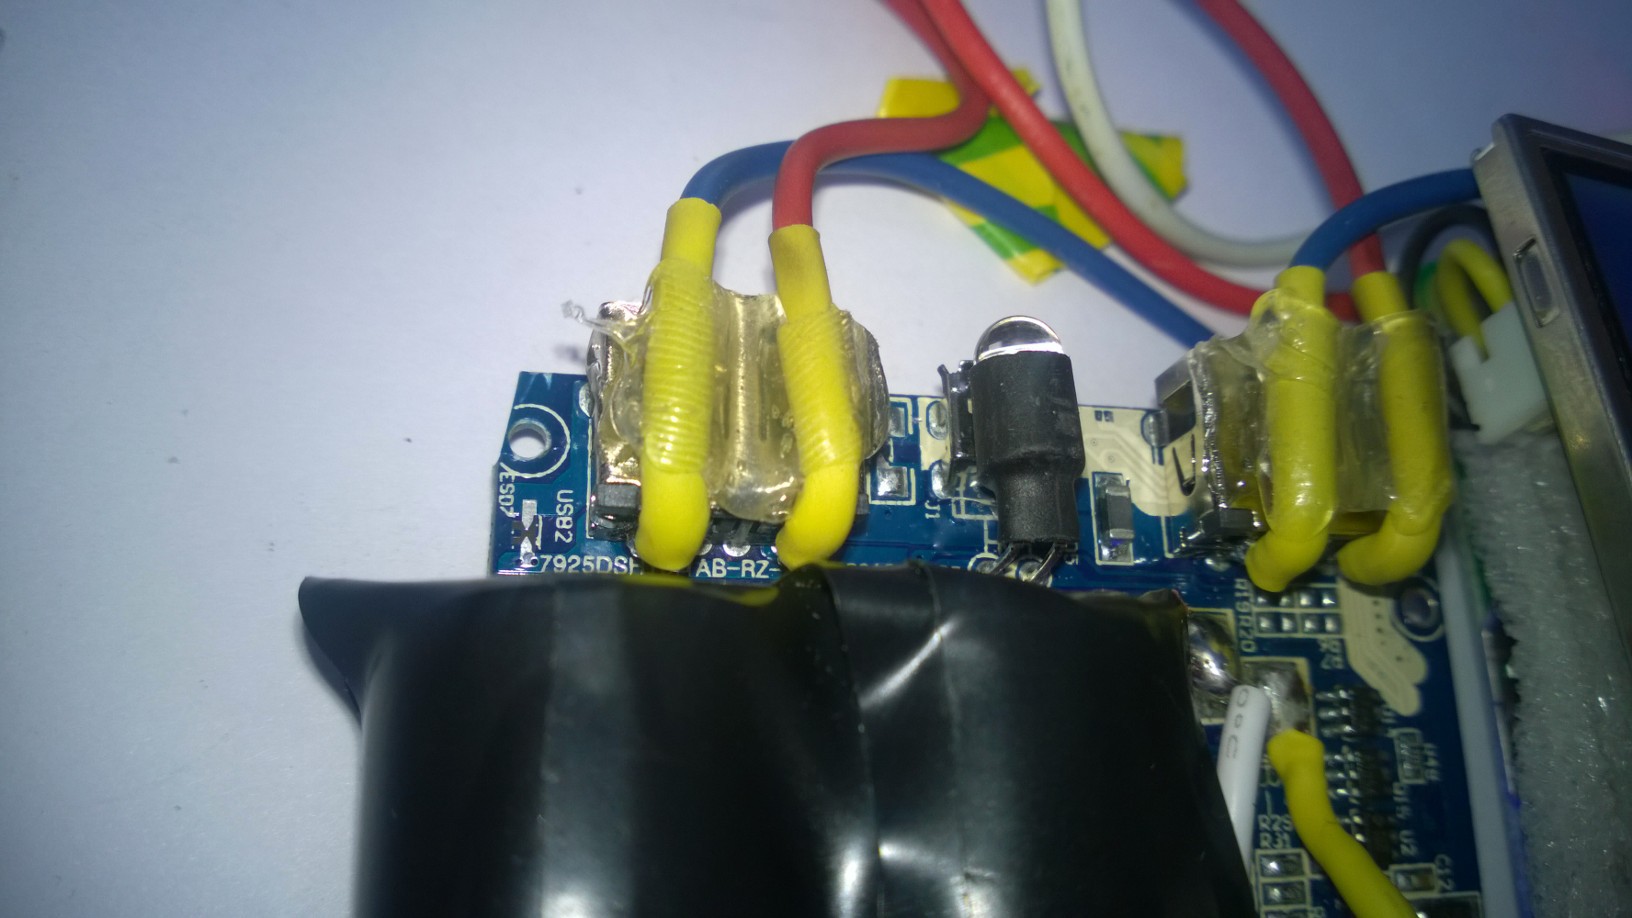
(I soldered the power wires to the back of the USB connector, added some shrink tube around it for extra safety and hot-glued it all to the connector itself. These wires won't move anytime soon.)
![]()
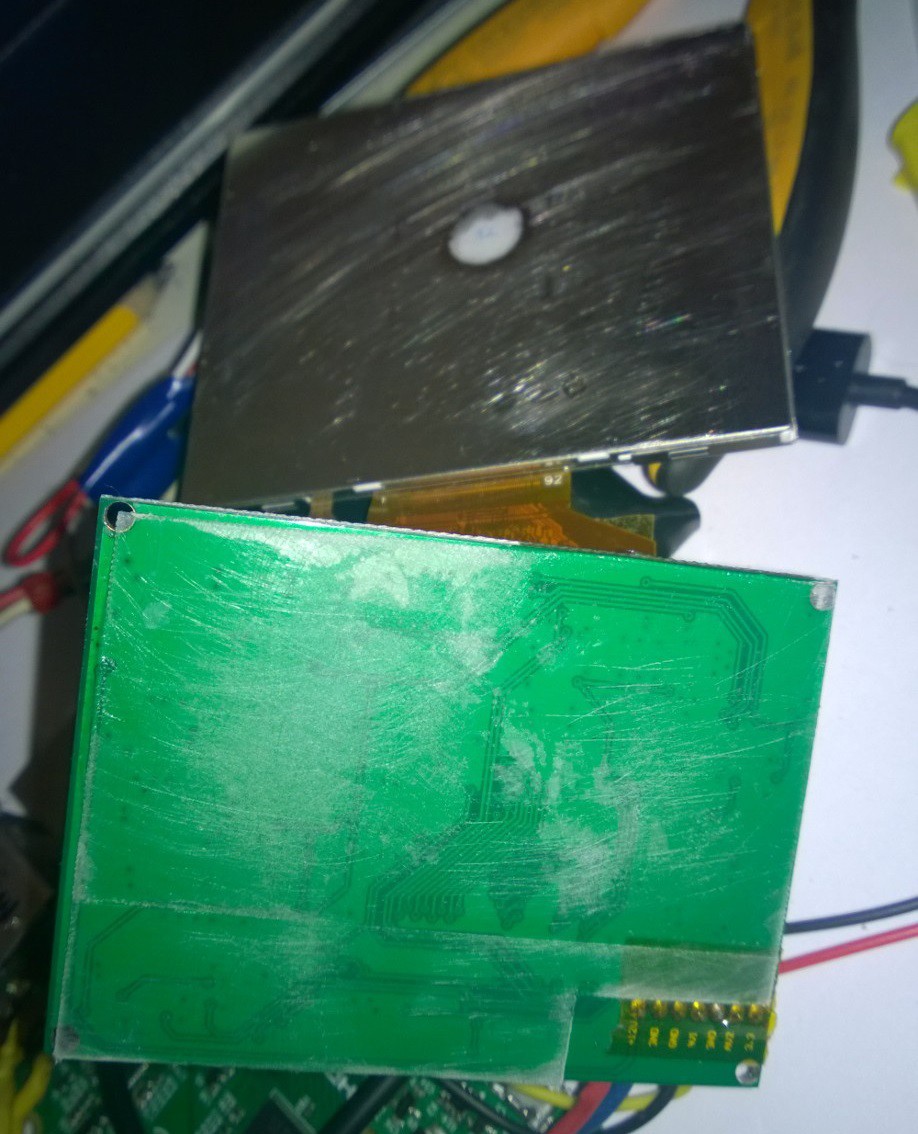
I superglued the screen to its PCB, it was flopping around too much and i started to worry about the flatcable. I had to superglue a piece of spacer plastic between the screen and the PCB for full contact.
![]()
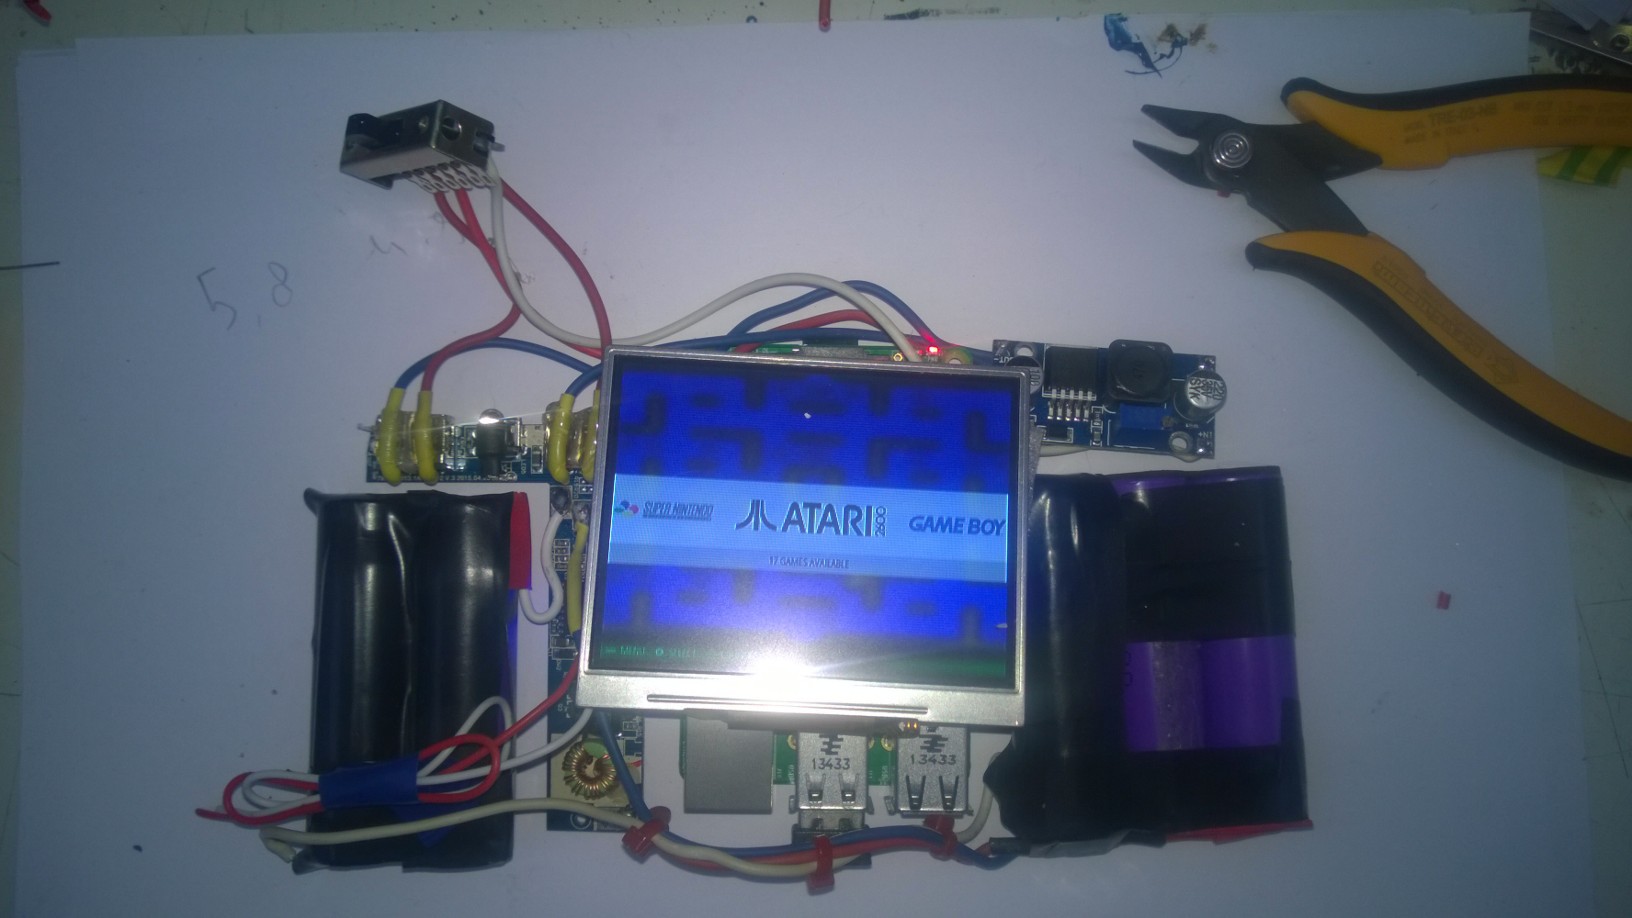
Here below you can see the layout all wired up, i added a power switch (may be replaced, it's what i had laying around). It's all still loosy-goosy, but once all the PCB's are bolted down it will be very solid.
(The white/red wire bundle at the bottom-left is the audio-output of the RPi, these will be connected to the amplififer as soon as i've build it.)
![]()
-
Wiring [Removing A/V jack and TFT connector]
08/01/2015 at 17:16 • 0 commentsI've gone back to using my other TFT screen for now because i found out the PiTFT i had bought (the 3,5" version) doesn't really work great with Retropie yet, i think they are working on an update for it.
I'm thinking of buying a bigger screen because i'm using the composite video connection anyways.
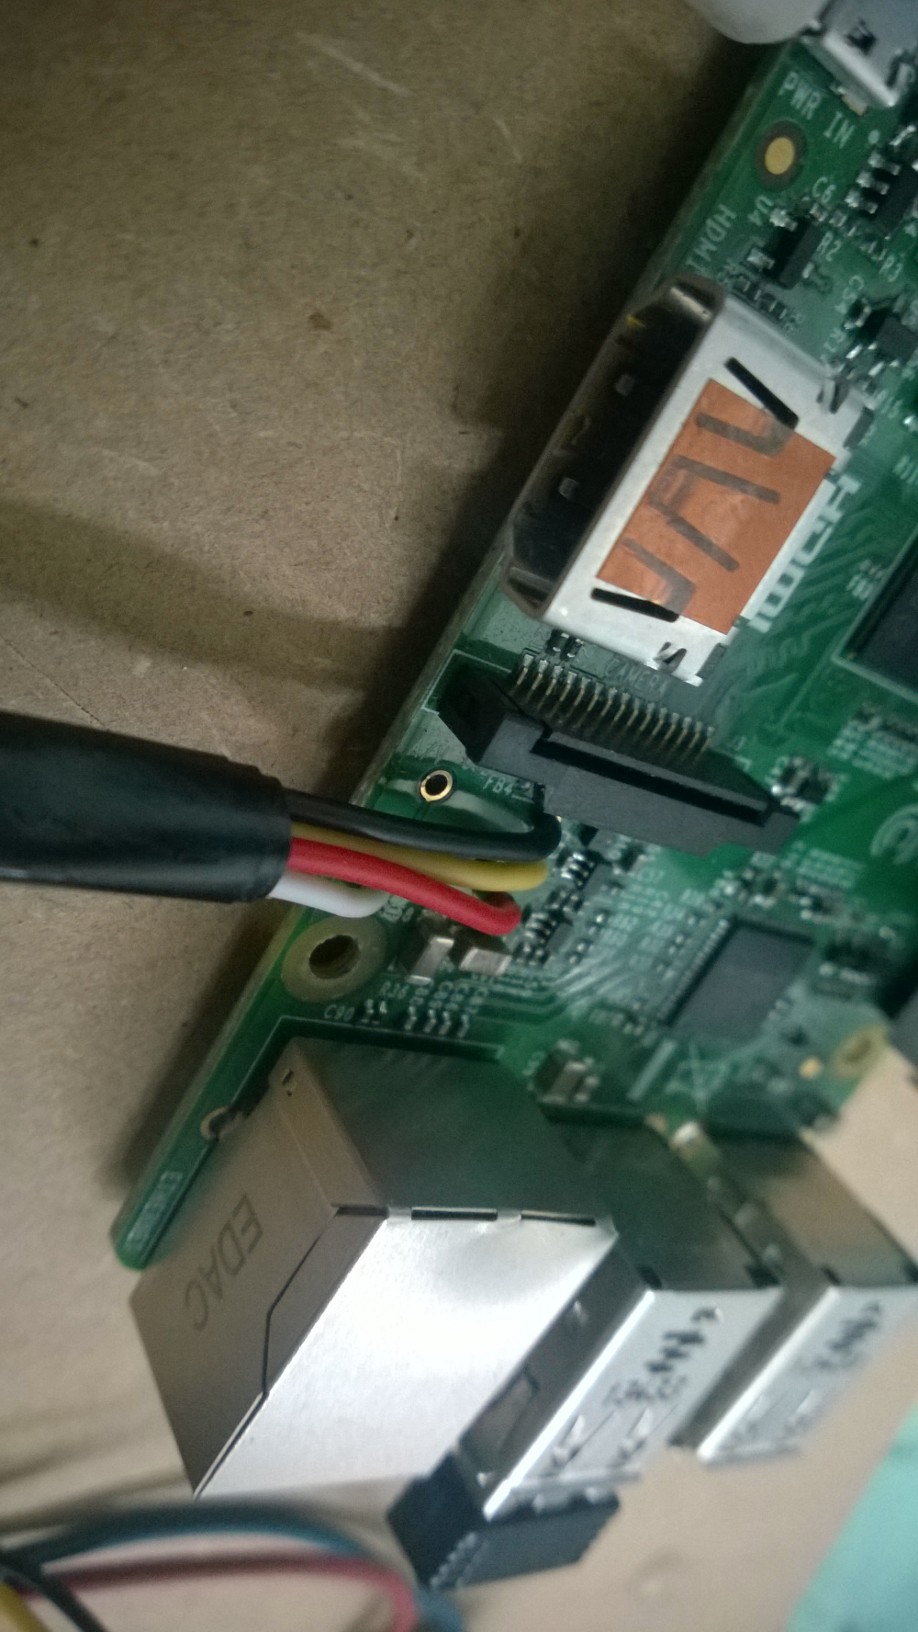
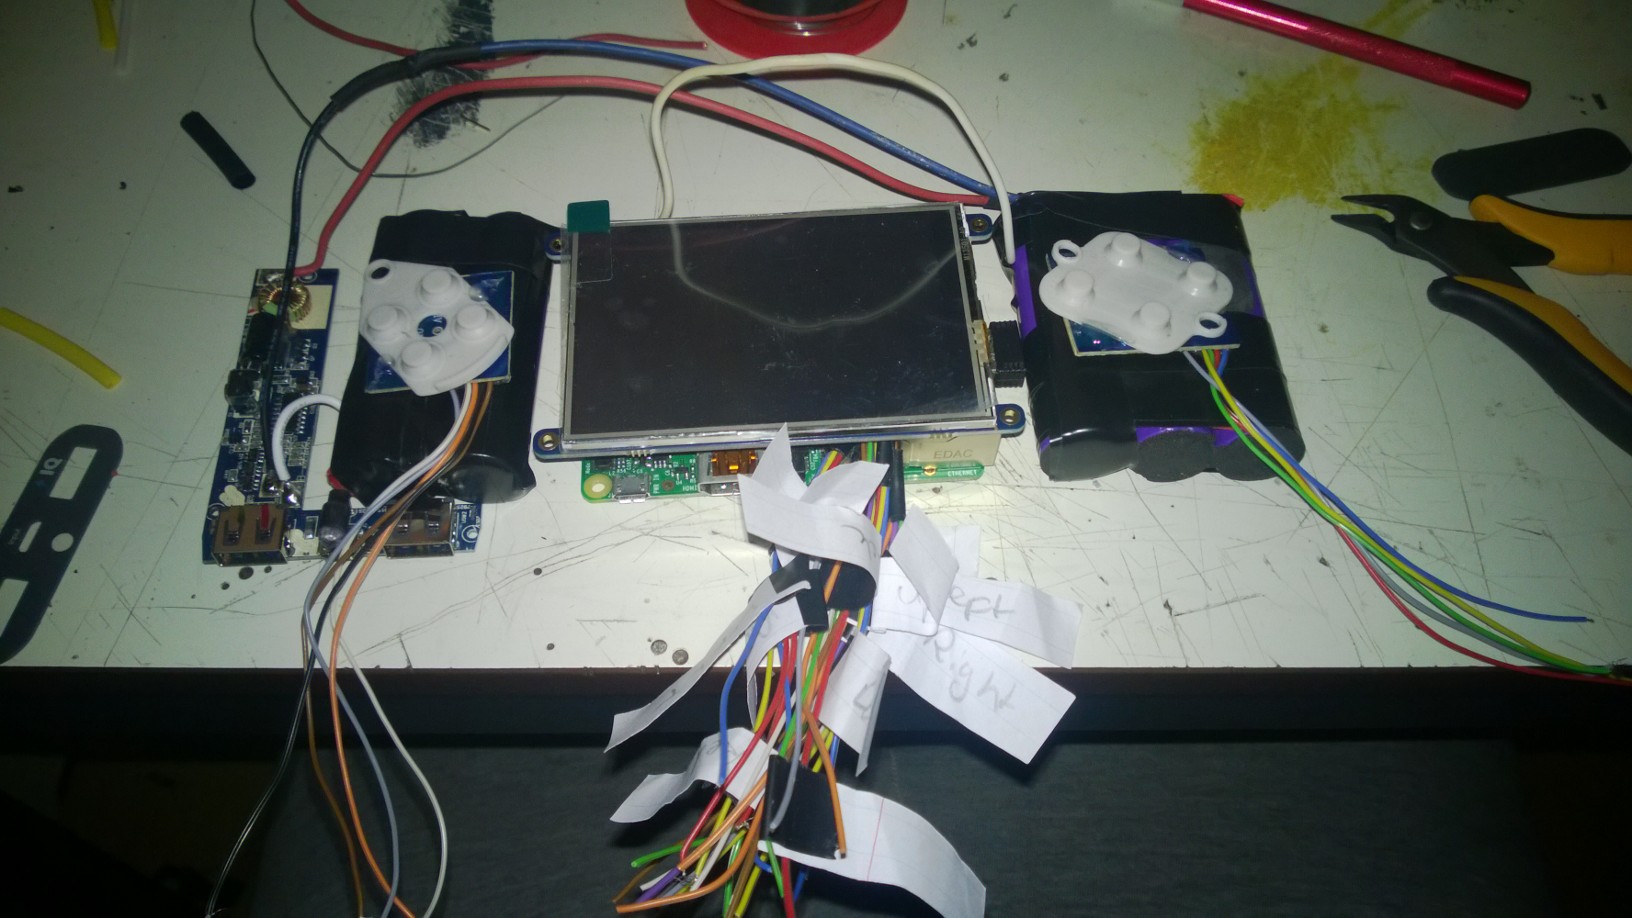
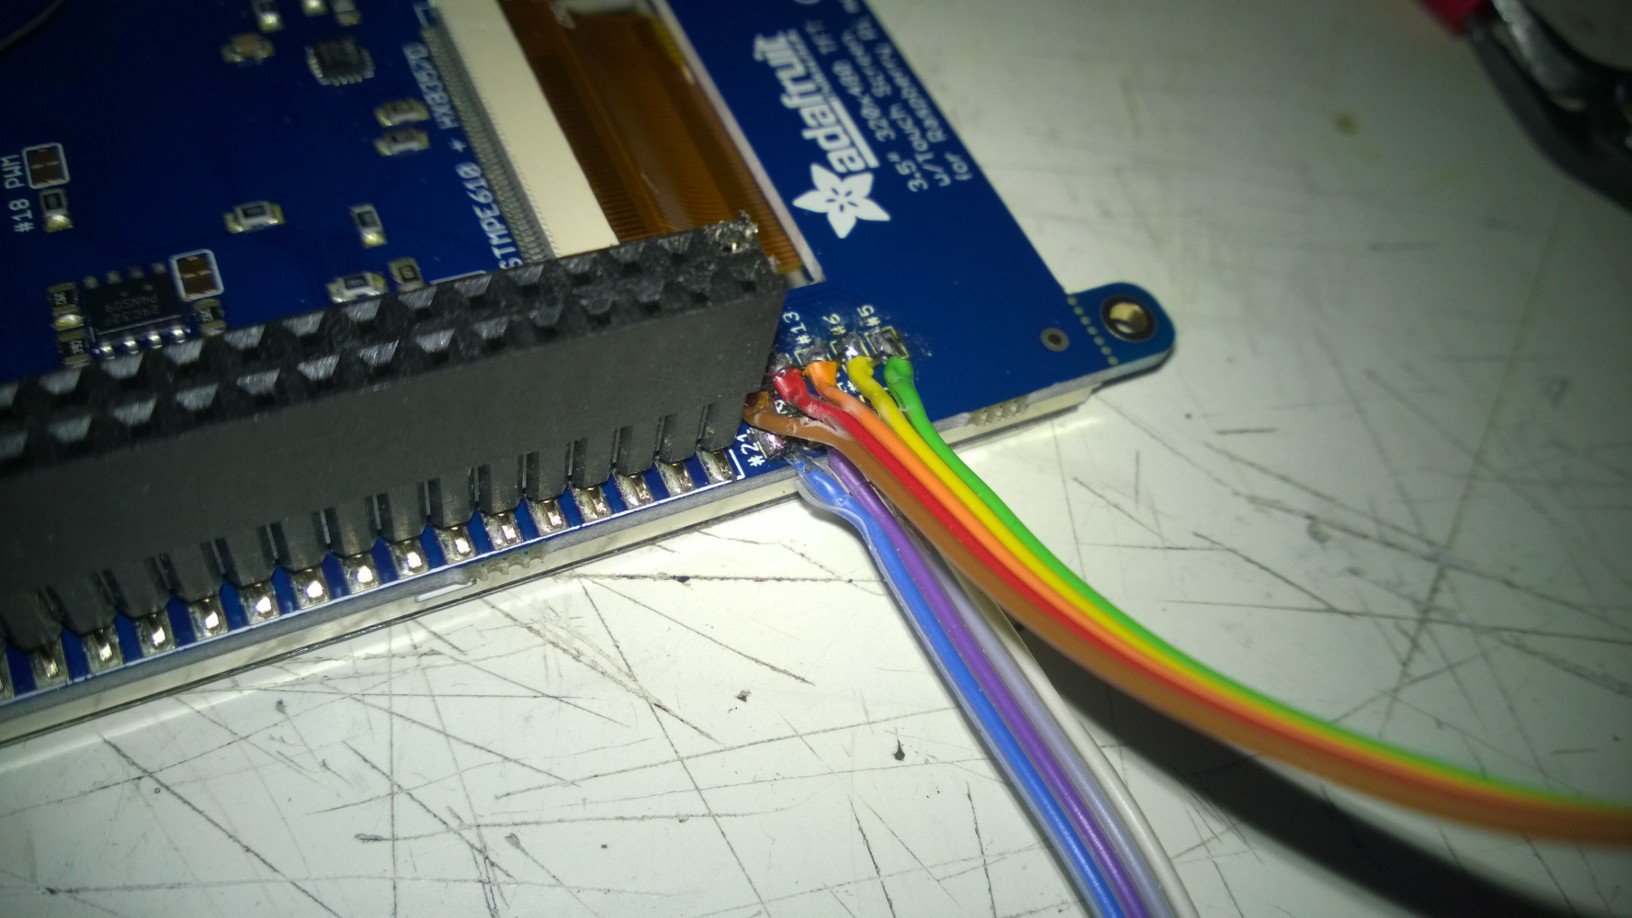
I soldered the RPi directly to the TFT screen, the original connections made bad contact. I also soldered the power wires directly to the pi instead of using the micro usb port, both these things save a lot in space.
I would like to desolder the USB ports from the powerbank and solder the wires directly to it, but it's tricky and i don't want to fuck it all up. It would safe up allot of space though so i'm going to look into it.
![]()
(I don't know why there are black bars showing when playing games, the main menu is fullscreen.... Maybe some emulator setting.)
![]()
-
Casing [Component layout & 4 extra buttons]
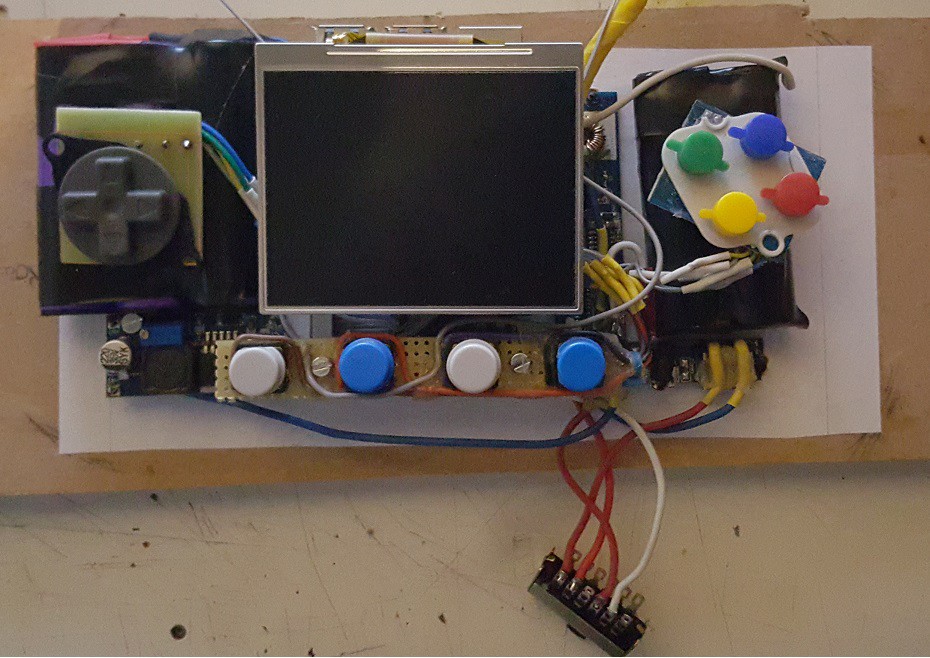
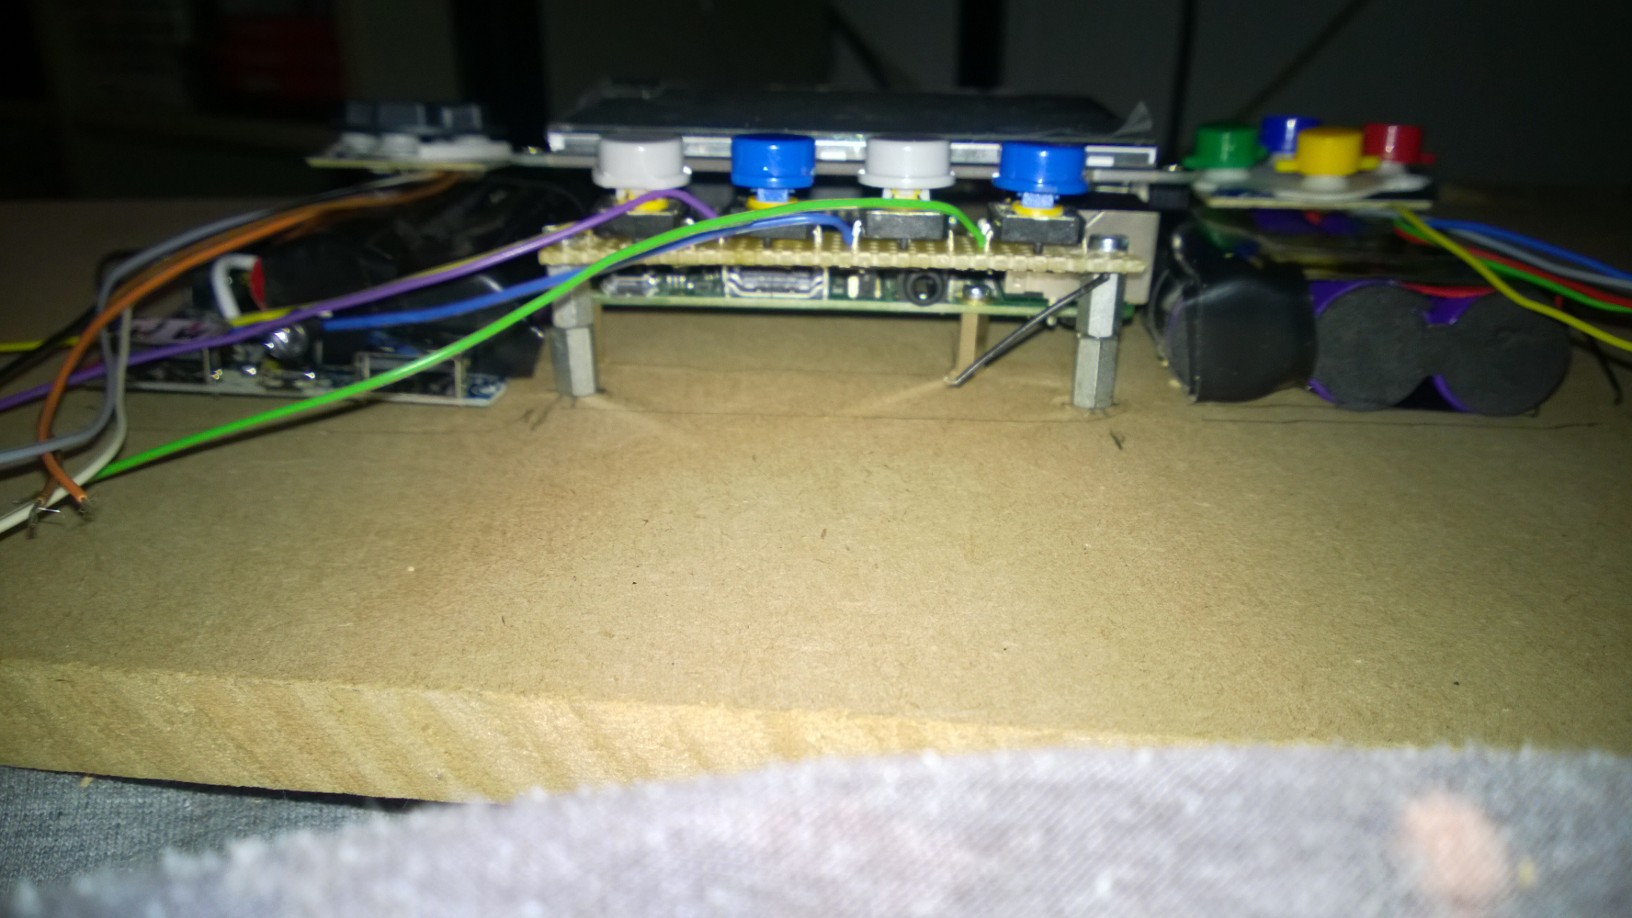
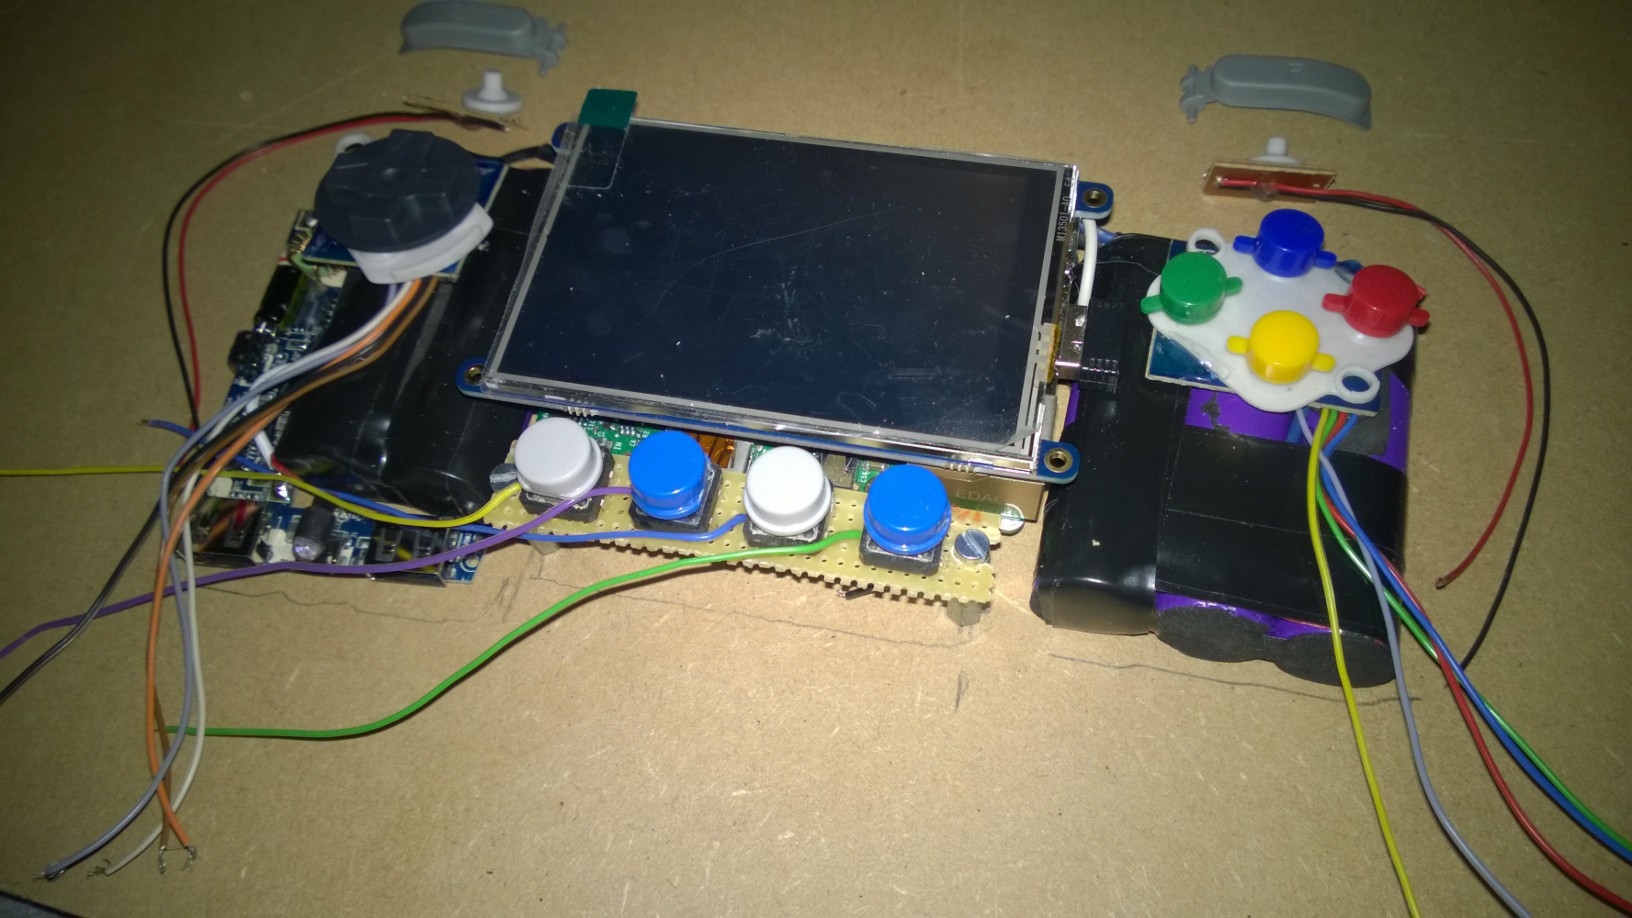
07/30/2015 at 23:37 • 0 commentsI grabbed a piece of MDF wood and started mounting things to it, i figured i could use it later as a guide to make the casing. It also helps with cutting the wires at the right length while connecting them to the GPIO.
At the bottom you can see 4 extra buttons i soldered onto their own board, these will be the buttons for "start", "select", "options" and "menu".
As you can may or may not see, all the controls have enough space on top of the batteries, these will probably be mounted to the top part of the case.
(The screen and the buttons at the bottom are placed higher than it's gonna be, that's because i don't have smaller spacers at the moment, but it will still work. Button colors will change too)
![]()
![]()
-
Power [Modifying the powerbank]
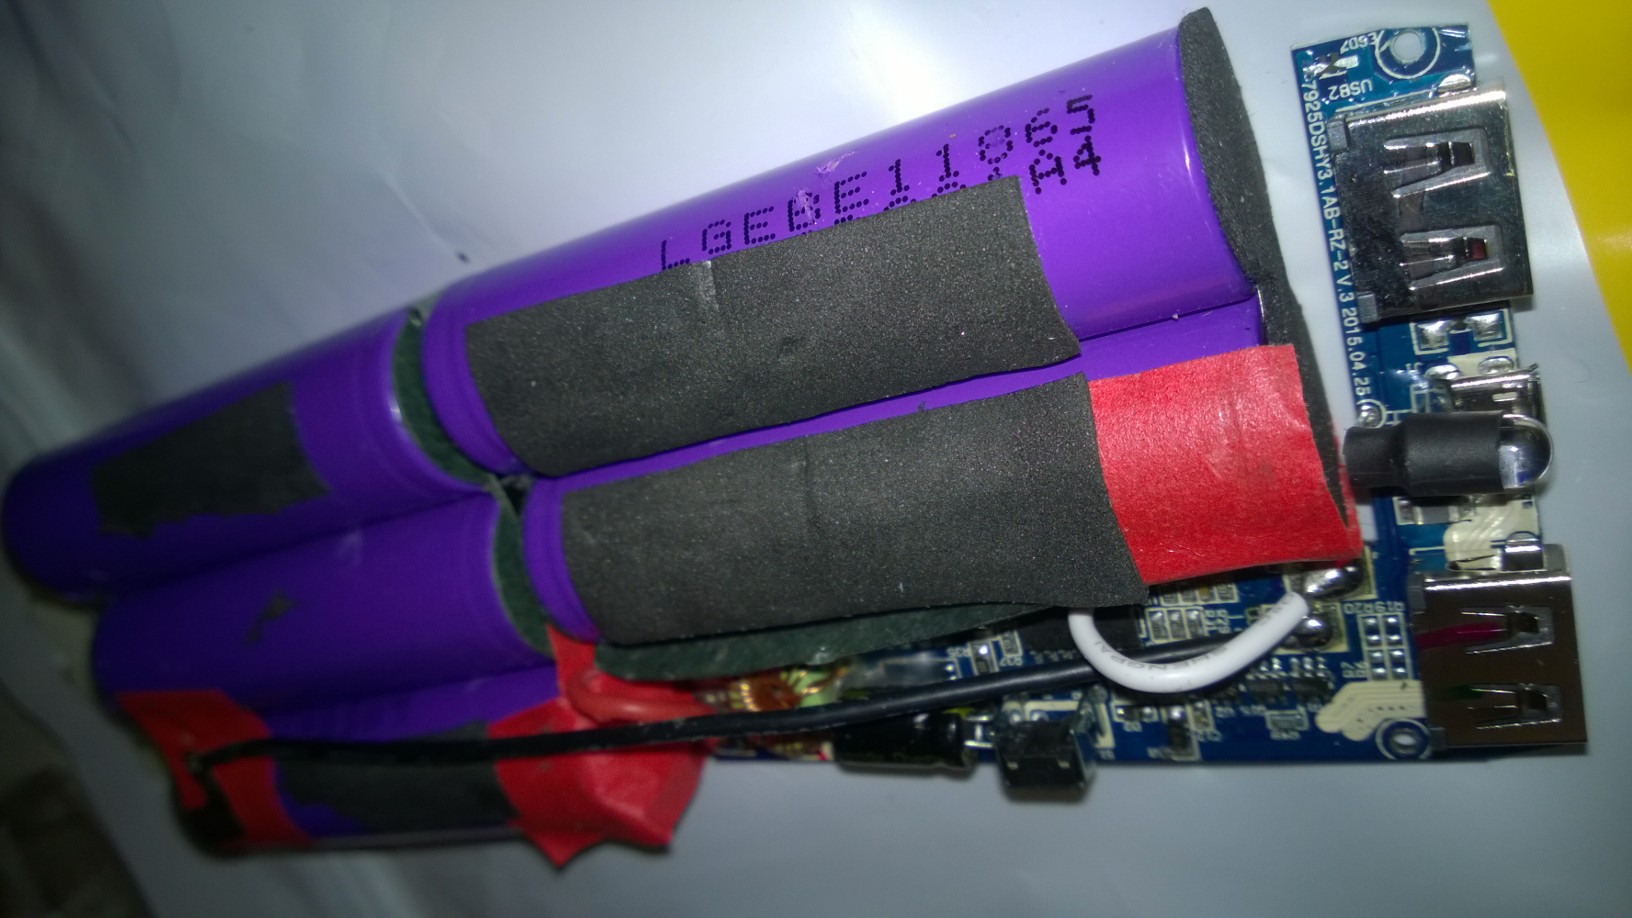
07/30/2015 at 20:38 • 0 commentsI finished modding the powerbank, i had to extend two wires (blue and red wire) and cut a metal tab in half and solder a wire (the white wire) between them.
As you can see in the photo, everything is layed out much better now.
Everything still works and i'm still alive :D.
![]()
I used electrical tape on the batteries to cover all the exposed metal area's and it also keeps the wires secure.
I'm not sure what i'm gonna do about all the USB wires, using regular USB cables will take up allot of space but i'm not so excited about wiring them manually.
(I needed to solder some extra wires to the PiTFT (for extra GPIO access) because the PiTFT takes up too much GPIO pins. These will be connected to various buttons)
![]()
-
Power [Opening the powerbank]
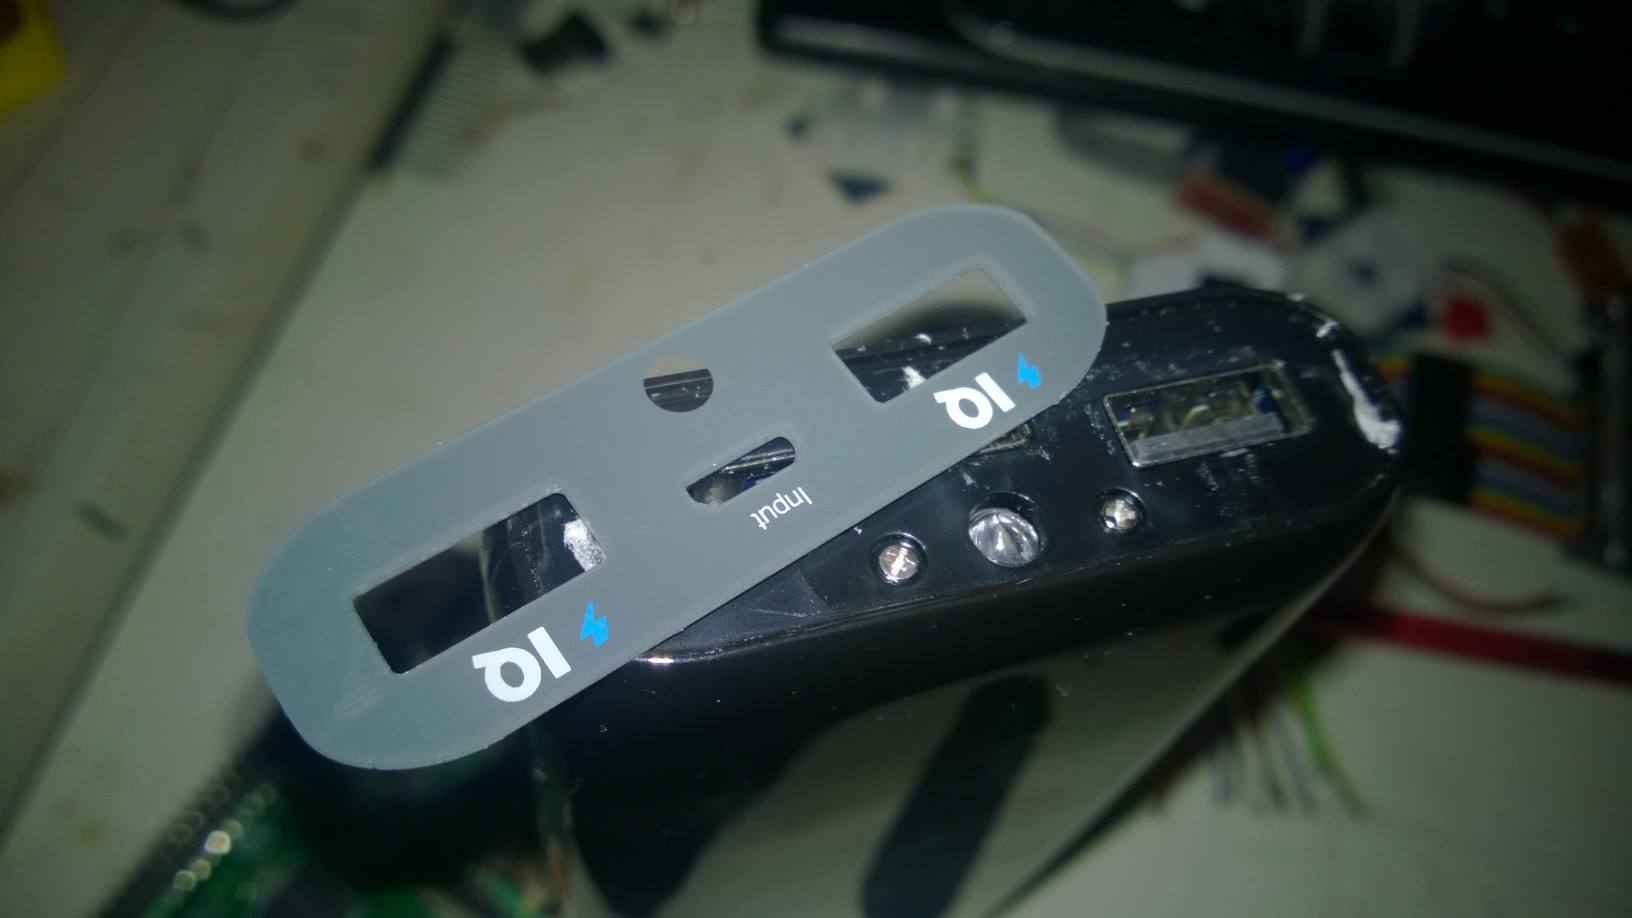
07/30/2015 at 00:51 • 2 commentsI managed to break open my powerbank, there are 4 screws but those didn't really help much in opening it. I probably did it wrong.
Anyways, now that the case is removed, i can arange the batteries however i want. All i need to do is extend some cables.
If i don't do this the portable will either be thin but square-shaped, or rectangle-shaped but very thick. I don't really like either off those options so i decided to break open the powerbank.
(Here are the screws.)
![]()
![]()
I hope increasing the length of some wires wont cause any issues. I also have to be super carefull not to short anything or the powerbank (and possibly me) is done for.
-
Power [Analyzing the powerbank]
07/28/2015 at 23:59 • 0 commentsI tried both the powerbanks i had bought using only the pi (using the TV instead of TFT screen) . Playing a game worked fine and without crashes. So that's a good start. I have not yet installed the PiTFT drivers on an image, so we'll see how the powerbank will react then, should be fine.
The Anker Astro E5 is obviously the best. The reason i bought two powerbanks is because of the fact that they all behave differently, i hoped to get one that could charge and be charged at the same time but it's not a major loss, it's hard to find powerbanks that can do that. My feeling is that the 'smarter' a powerbank is, the more it's gonna do what you don't want it to do.
Also, 16000 is ALOT. I'm pretty sure this will power my portable for many hours, so not being able to play while it's being charged has less of an impact. I bought a 2A charger, this is the max charging rate of the Anker Astro E5, this will ensure fastest charging speed possible.
Unfortunately the powerbank is very solid, which means it's very hard to take apart. No screws, no gaps, only a thin split along the side. I was hoping to take it apart to reduce the size of my portable but i don't think it can be done without permanently damaging the case.
Anker Astro E5 16000mAh
- pro's
The powerbank starts charging when usb is inserted, this is good, it means i don't have to rewire the button from the powerbank itself but instead wire the button between the [powerbank] and the [pi, screen and amp].
It won't have a "smart" shutdown button so i'd have to do a hard shutdown every time i wanna shutdown the device which is not good for the pi nor the sd card (but relativly safe). The alternative is to do a software shutdown (which is very easily found in the main menu of the software i'm using) followed by a hardware shutdown (a switch).- con's
Cannot charge and be charged itself at the same time, the charging stops immediately upon inserting the charger.
A bit heavy, but what do you expect from a 16000mAh powerbank...
Trust Urban Revolt 8800mAh
- pro's
....
- con's
Cannot charge and be charged itself at the same time, the charging stops immediately upon inserting the charger.
Portable Raspberry Pi gaming handheld
Made from a Raspberry Pi 2 B, a 4,3" TFT screen, a powerbank and a modified SNES controller.