Close
0%
0%

The Temperizer

Wearable biofeedback device to help people manage stress, panic, and anger!

Similar projects worth following
The Temperizer will be a tiny wearable device that supports the growing need-base of individuals who have panic disorders, anxiety disorders, or anger management issues. Its purpose is to monitor the wearer's personal stress level and keep them informed of when their stress level is noticeably out of bounds for the individual. The end product will have beeps, vibration, and a "hot spot" (used only for legally mandated anger management cases) to encourage the user to step away from the stressful situation before it comes to a head.

I am excited to inform you that this can be done by monitoring only a few aspects of a person's physiology and can be done on almost no electricity (I use a 2032).

August 2015 Update: Teensy-LC version built, tested, scanning. Now to optimize the code!

This began as a hackathon entry but is evolving into something more mature. I have selected components for prototyping but will eventually need someone with hardware expertise to help with preparation for mass production. The MCU used has way too many features which makes its PCB too bulky for prime time even if it would keep the initial costs down.

I studied methods for non-invasive measurement of body metrics in great detail and have settled on a particular technique involving a simple sensor and some sophisticated, yet non-processor-intensive calculus (my specialty).

Now I'm hoping to elect you to help improve the device. Not only will you be able to build your own on any Arduino and $1 worth of parts, but you'll be able to download the newest code sketch to see if it calibrates itself successfully to your body.

One of the most difficult parts of this task so far has been developing algorithms which

  1. Calibrate themselves to their wearers' baselines,
  2. Accurately detect changes in stress level and monitor those for out-of-bounds changes in a variety of environments, and
  3. Effectively squelch false positives so the device isn't going off all the time unnecessarily.

Future needs will include:

  • Play testers!
  • Data logging and processing techniques, including Internet data compilation and visualization of results for each user and for the connected service as a whole
  • Custom electrode design for comfort, compactness, and accuracy
  • Sensor improvement by EE experts (which I am not)
  • Medical experts who keep up with the journals to provide latest breakthrough information so we can factor it into our product

The current iteration uses finger scanning but the end goal is a product you stick to your abdomen or side. I realize this means collecting more data and reconfiguring our software for each possible electrode / skin area combination. This will lead me to developing a 'standard' placement location for a 'standard' electrode type.

You'll notice in a link a medical devices group tried to do this using a zigbee, computer, and a bunch of other stuff. They have a very high precision, but as far as I can tell that's wholly unnecessary for the more subjective sensing I'll be doing. Their device would work great in the medical industry (specifically AT a medical FACILITY), when you need to stress test a patient or monitor someone who's been admitted; but my idea is to help people in their homes and in outside situations in the wild.

UPDATES TO AUGUST 2015:

1) New sensor components:
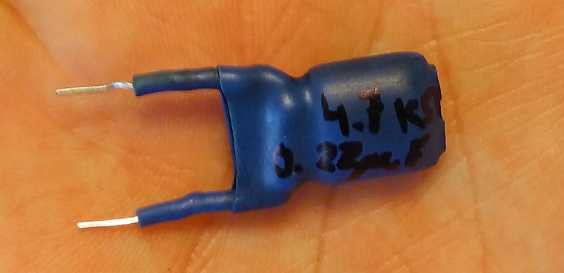
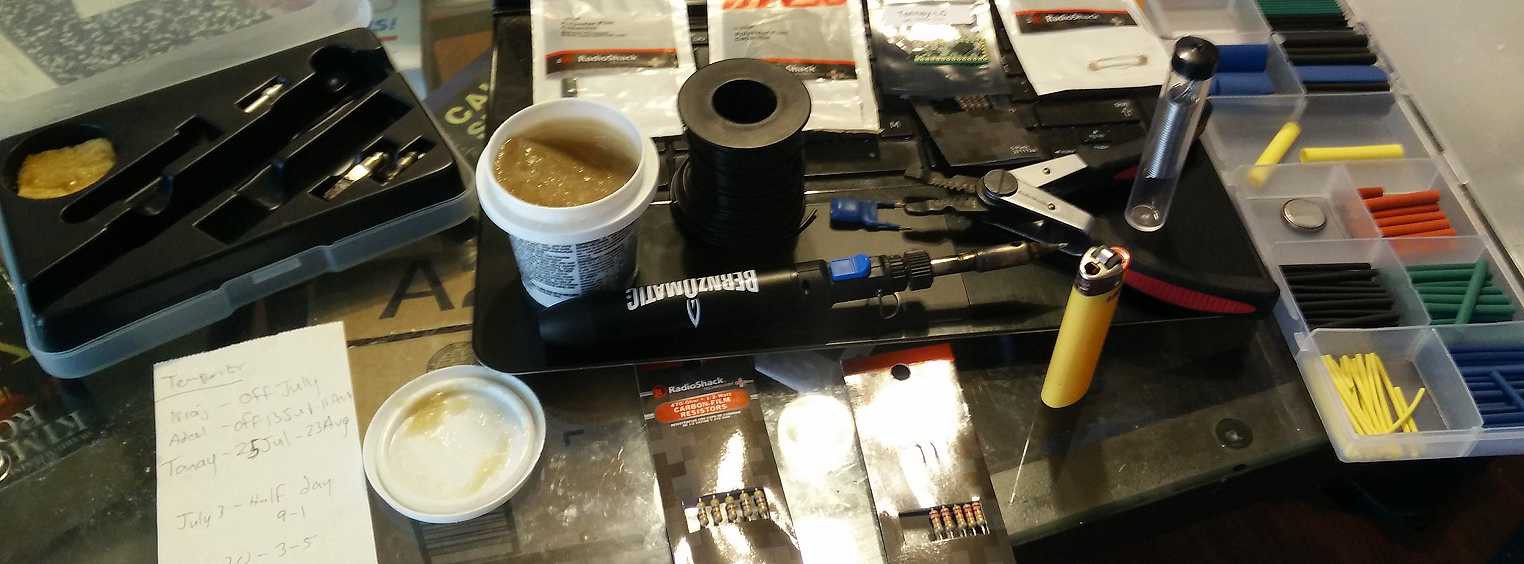
2) Necessary tools. My parents still have my self-start torch :(
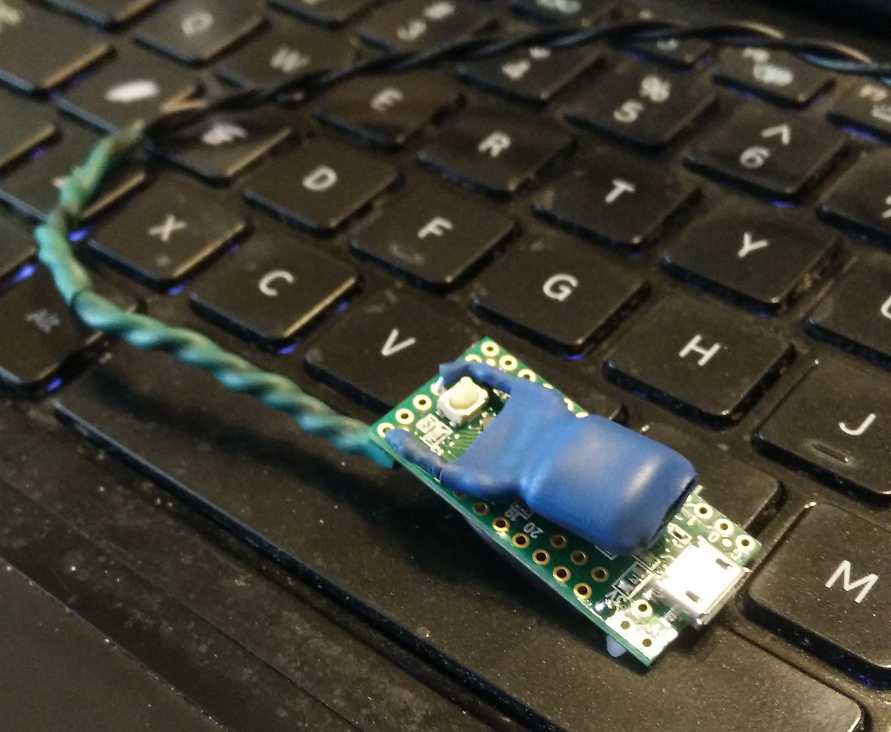
3) Here's how the sensor electronics look, mounted on the Teensy-LC we won!! I should have positioned it differently but I was just so excited to get everything hooked up for programming...
Everything has to be tuned differently but I believe I should get a more sensitive device using this combination.

I need to program it. I believe I have a slightly smarer algorithm for smoothing. I still have no squelching solution (because i don't know enough about what the noise looks like).

Stay tuned for... TUNING ahahahaha

  • 1 × Arduino Micro With USB
  • 1 × 28ga wire 2ft minimum
  • 1 × Resistor 8k-10k Ohm
  • 1 × Capacitor 0.1 or so microfarad
  • 1 × electrode in my prototype, it's made of foil and straps

View all 8 components

  • Source Code

    Dan Fruzzetti05/01/2015 at 19:19 0 comments

    /* Dan Fruzzetti 2014
     * Temperizer code sketch
     * Version 0.8
     */
    
    // ----- GLOBAL -----
    
    // skin sensor pin assignment
    float sensorPin = 0;
    
    // Accommodation of last few values for smoothing algorithm
    float SV1 = 0;
    float SV2 = 0;
    float SV3 = 0;
    float SV4 = 0;
    float SV5 = 0;
    float SV6 = 0;
    float SV7 = 0;
    float SV8 = 0;
    
    // buzzer pin assignment
    int buzz = 12;
    
    float C = 3;
    int debug = 0;
    
    // SVriable to store the SVlue coming from the sensor
    float voltage;
    
    // Time SVriables
    unsigned long time;
    
    // Reassignable per hardware / sensor needs
    float secForGSR;
    float curMillisForGSR;
    float preMillisForGSR;
    
    // ----- END GLOBAL -----
    
    
    // initial conditions and one-time setup
    void setup() {
    
    // Switch commented lines to toggle debugging output (1 = yes; 0 = no)
    debug = 0;
    // debug = 1;
    
    // Prepare serial port output
    Serial.begin(9600);
    
    // Frequency of sensor data acquisition (in seconds)
    secForGSR = 0.125;
    curMillisForGSR = 0;
    preMillisForGSR = -1;
    
    }
    void loop() {
    
    // Uncomment for buzzer and light test at power-up
      /* digitalWrite(buzz, HIGH);
       * digitalWrite(3, HIGH);
       * delay(1000);
       * digitalWrite(3, LOW);
       * delay(1000);
       */
    
    // define extrema
    float maximum = 0;
    float minimum = 1290;
    
    /* Prior code versions used these
     * time = millis();
     * digitalWrite(12, HIGH);
     * SV1 = analogRead(A0);
     * curMillisForGSR = time / (secForGSR * 1000);
     * if(curMillisForGSR != preMillisForGSR) {
     * Read GSR sensor and send over Serial port
     */
    
    // acquire SVlue # 1
    SV1 = analogRead(sensorPin);
    
    // debugging block
    if (debug == 1) {
      Serial.print("SV1 == ");
      Serial.println(SV1);
      }
    
    delay(SV2);
    
    // acquire SVlue # 2
    SV2 = analogRead(sensorPin);
    
    // debugging block
    if (debug == 1) {
      Serial.print("SV2 == "); Serial.print("    TEST SV2 - SV1 == "); Serial.print(SV2 - SV1); Serial.print("  And SV2 == ");
      Serial.println(SV2);
      }
    
    if((SV2 - SV1) >= 1) {
      digitalWrite(3, HIGH); 
      digitalWrite(12, HIGH);
      }
    
     delay(SV2);
     digitalWrite(3, LOW);
     delay(SV3);  
     digitalWrite(12, LOW);
    
    // acquire SVlue # 3
    SV3 = analogRead(sensorPin);
    
    // debugging block
    if (debug == 1) {
      Serial.print("SV3 == ");
      Serial.println(SV3);
      }
    
    if((SV3 - SV2) >= 1) {
      digitalWrite(3, HIGH);  
      digitalWrite(12, HIGH);
      }
    
     delay(SV3); 
     digitalWrite(3, LOW);
     delay(SV4);  
     digitalWrite(12, LOW);
    
    // acquire SVlue # 4
     SV4 = analogRead(sensorPin);
    
    // debugging block
    if (debug == 1) {
      Serial.print("SV4 == ");
      Serial.println(SV4);
      }
    
    if((SV4 - SV3) >= 1) {
      digitalWrite(3, HIGH); 
      digitalWrite(12, HIGH);
      }
     delay(SV4);
     digitalWrite(3, LOW);
     delay(SV5);  
     digitalWrite(12, LOW);
    
    // acquire SVlue # 5
    SV5 = analogRead(sensorPin);
    
    // debugging block
    if (debug == 1) {
      Serial.print("SV5 == ");
      Serial.println(SV5);
      }
    
    if((SV5 - SV4) >= 1) {
      digitalWrite(3, HIGH); 
      digitalWrite(12, HIGH);
      }
    
     delay(SV4);
     digitalWrite(3, LOW);
     delay(SV5);  
     digitalWrite(12, LOW);
    
    // acquire SVlue # 6
    SV6 = analogRead(sensorPin);
    
    // debugging block
    if (debug == 1) {
      Serial.print("SV6 == ");
      Serial.println(SV6);
      }
    
    if(((SV6 - SV5)) >= 1) {
      digitalWrite(3, HIGH); 
      digitalWrite(12, HIGH);
      }
    
     delay(SV5);
     digitalWrite(3, LOW);
     delay(SV6);  
     digitalWrite(12, LOW);
    
    // acquire SVlue # 7
    SV7 = analogRead(sensorPin);
    
    // debugging block
    if (debug == 1) {
      Serial.print("SV7 == ");
      Serial.println(SV7);
      }
    
    if(((SV7 - SV6)) >= 1) {
      digitalWrite(3, HIGH); 
      digitalWrite(12, HIGH);
      }
    
     delay(SV6); 
     digitalWrite(3, LOW);
     digitalWrite(12, LOW);
     delay(SV7);
    
    // acquire SVlue # 8
    SV8 = analogRead(sensorPin);
    
    // debugging block
    if (debug == 1) {
      Serial.print("SV8 == ");
      Serial.println(SV8);
      }
    
    if(((SV8 - SV7)) >= 1) {
      digitalWrite(3, HIGH); 
      digitalWrite(12, HIGH);
      }
     delay(SV6);
     digitalWrite(3, LOW);
     delay(SV7);
     digitalWrite(12, LOW);
    
    // clean-up
     digitalWrite(3, LOW);
    
    // preMillisForGSR = curMillisForGSR;
      /*Convert the analog reading (which goes from 0 - 1023) to a voltage (0 - 5V):
       print out the SVlue you read:*/
       
       /*if ((SV2-SV1) > 0){
    
         digitalWrite(buzz, HIGH);
     digitalWrite(...
    Read more »

  • Initial Build Info and Plan for 2015

    Dan Fruzzetti04/23/2015 at 22:20 0 comments

    October: conceived of the idea

    October: built the first prototype

    December: miniaturized the prototype

    January through March: absolutely nothing

    April: revisited the math and improved the stress-sensing algorithm (which code will eventually be made available publicly as soon as I master the squelch algorithm; anyone who wants to help can have it now).

    By August 2015: to complete the three main tasks required.

    By November 2015: to complete playtesting with a statistically significant number of individuals from all subgroups (that's a large number).

View all 2 project logs

Enjoy this project?

Share

Discussions

henrry43 wrote 03/17/2021 at 08:23 point

you are working on a very different and unique idea its really interesting I am also working on the new project you can see here https://herborganic.co.uk/

  Are you sure? yes | no

Dan Fruzzetti wrote 07/04/2015 at 04:00 point

Parts are ready.  It's time to decide exactly what combination of parts to use on our new sensor for the Teensy, so out come the experiments!  FOR SCIENCE@@@

  Are you sure? yes | no

Dan Fruzzetti wrote 06/11/2015 at 15:26 point

TOTALLY EXCITED!  Over the course of the next week we'll be rebuilding the Temperizer using our brand-new Teensy-LC.  This will require one analog input, two digital outputs, and a bit of solder.  One of the biggest snags we ran into using the Arduino Uno and Micro was that while it would easily drive the speaker at full volume with simple code for beeping, as soon as we installed our more mathy code sketches (either the published one or our latest version), the speaker would become almost inaudibly quiet.  And then, even if you flashed the original beep code back to it, the speaker would never recover its original volume.

Does anyone know what this phenomenon is about?

  Are you sure? yes | no

Dan Fruzzetti wrote 05/21/2015 at 17:49 point

Update: Our Teensy-LC came from http://hackaday.com yesterday.  It REALLY is teensy!  It makes the Arduino Micro look oversized!

  Are you sure? yes | no

Dan Fruzzetti wrote 05/08/2015 at 16:54 point

One of the coolest developments we've made so far: when my high school team (DV Wildcats from The Deconstruction 2014) created their first draft of the GSR sensor's electronics package, they had a 1" square PCB and several components.  I did some math and found that their package was electrically equivalent to two components in parallel.  We had a breakthrough because I was able to significantly miniaturize this necessary feature (see image for blue shrink wrapped package).  

  Are you sure? yes | no

Dan Fruzzetti wrote 05/01/2015 at 16:51 point

Here is a quick introduction to how this project was born:

http://thedeconstruction.org/team/dv-wildcats/

I was working with my AP Calculus BC students to create something useful for The Deconstruction 2014.  We chewed through about nine ideas and settled on three.

The Deconstruction is a hackathon based upon repurposement.  Most teams were working on hardware or software.  At the highest level of abstraction, I was working on my students.  To me, the students' minds were being hacked: I was installing new schema, toolsets, thought processes and abilities to several teenagers.  To the students, the three creations we made were the 'hacks.'  

Of the three, the Temperizer seemed like it would be worth maturing.  The photo I've attached is of my second draft of the machine.  However, the first one was made on an Uno R+ and used two 9V batteries.  It was big and wouldn't cut it as a wearable.

My second version builds upon what I did with my high school team and aims to grow into a medically relevant product.  I am using fancy mathematics to do something other GSR-based scanning devices simply aren't able to deliver.

  Are you sure? yes | no

Similar Projects

Does this project spark your interest?

Become a member to follow this project and never miss any updates