MakerBlock
-
Repair # 4: Closet Guides
02/18/2018 at 03:15 • 0 commentsDate: ~December 2015
![]()
![]()
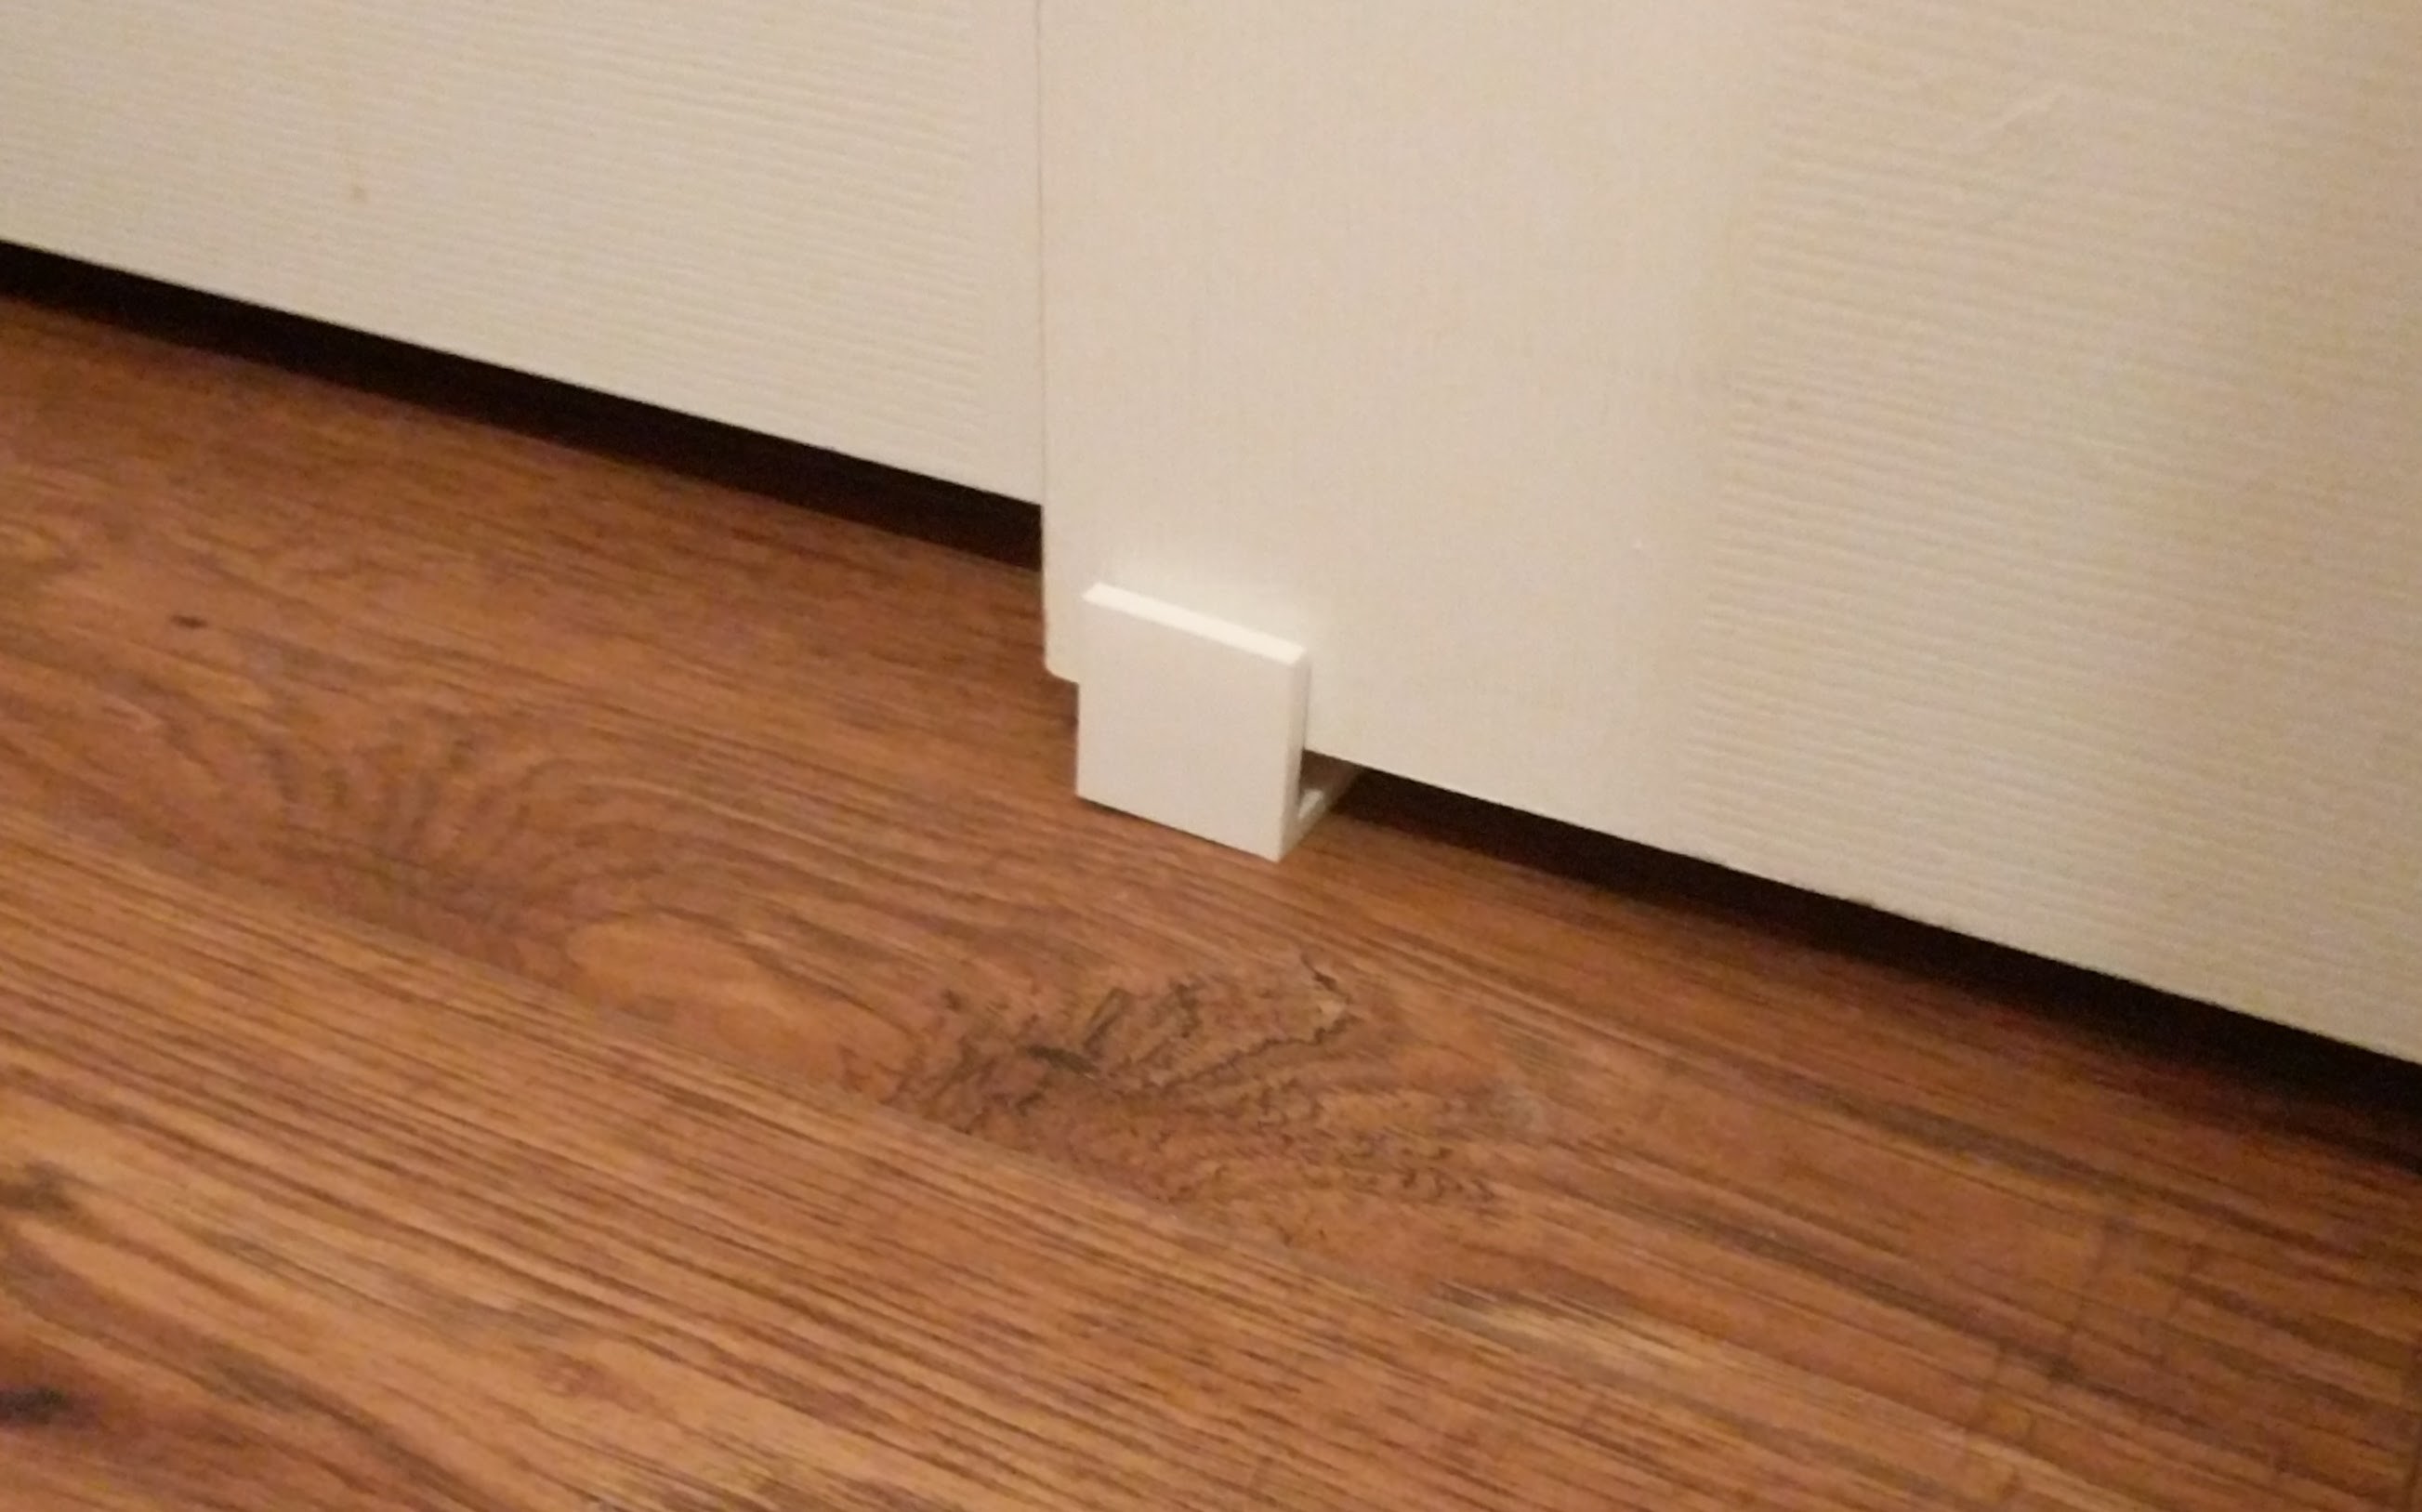
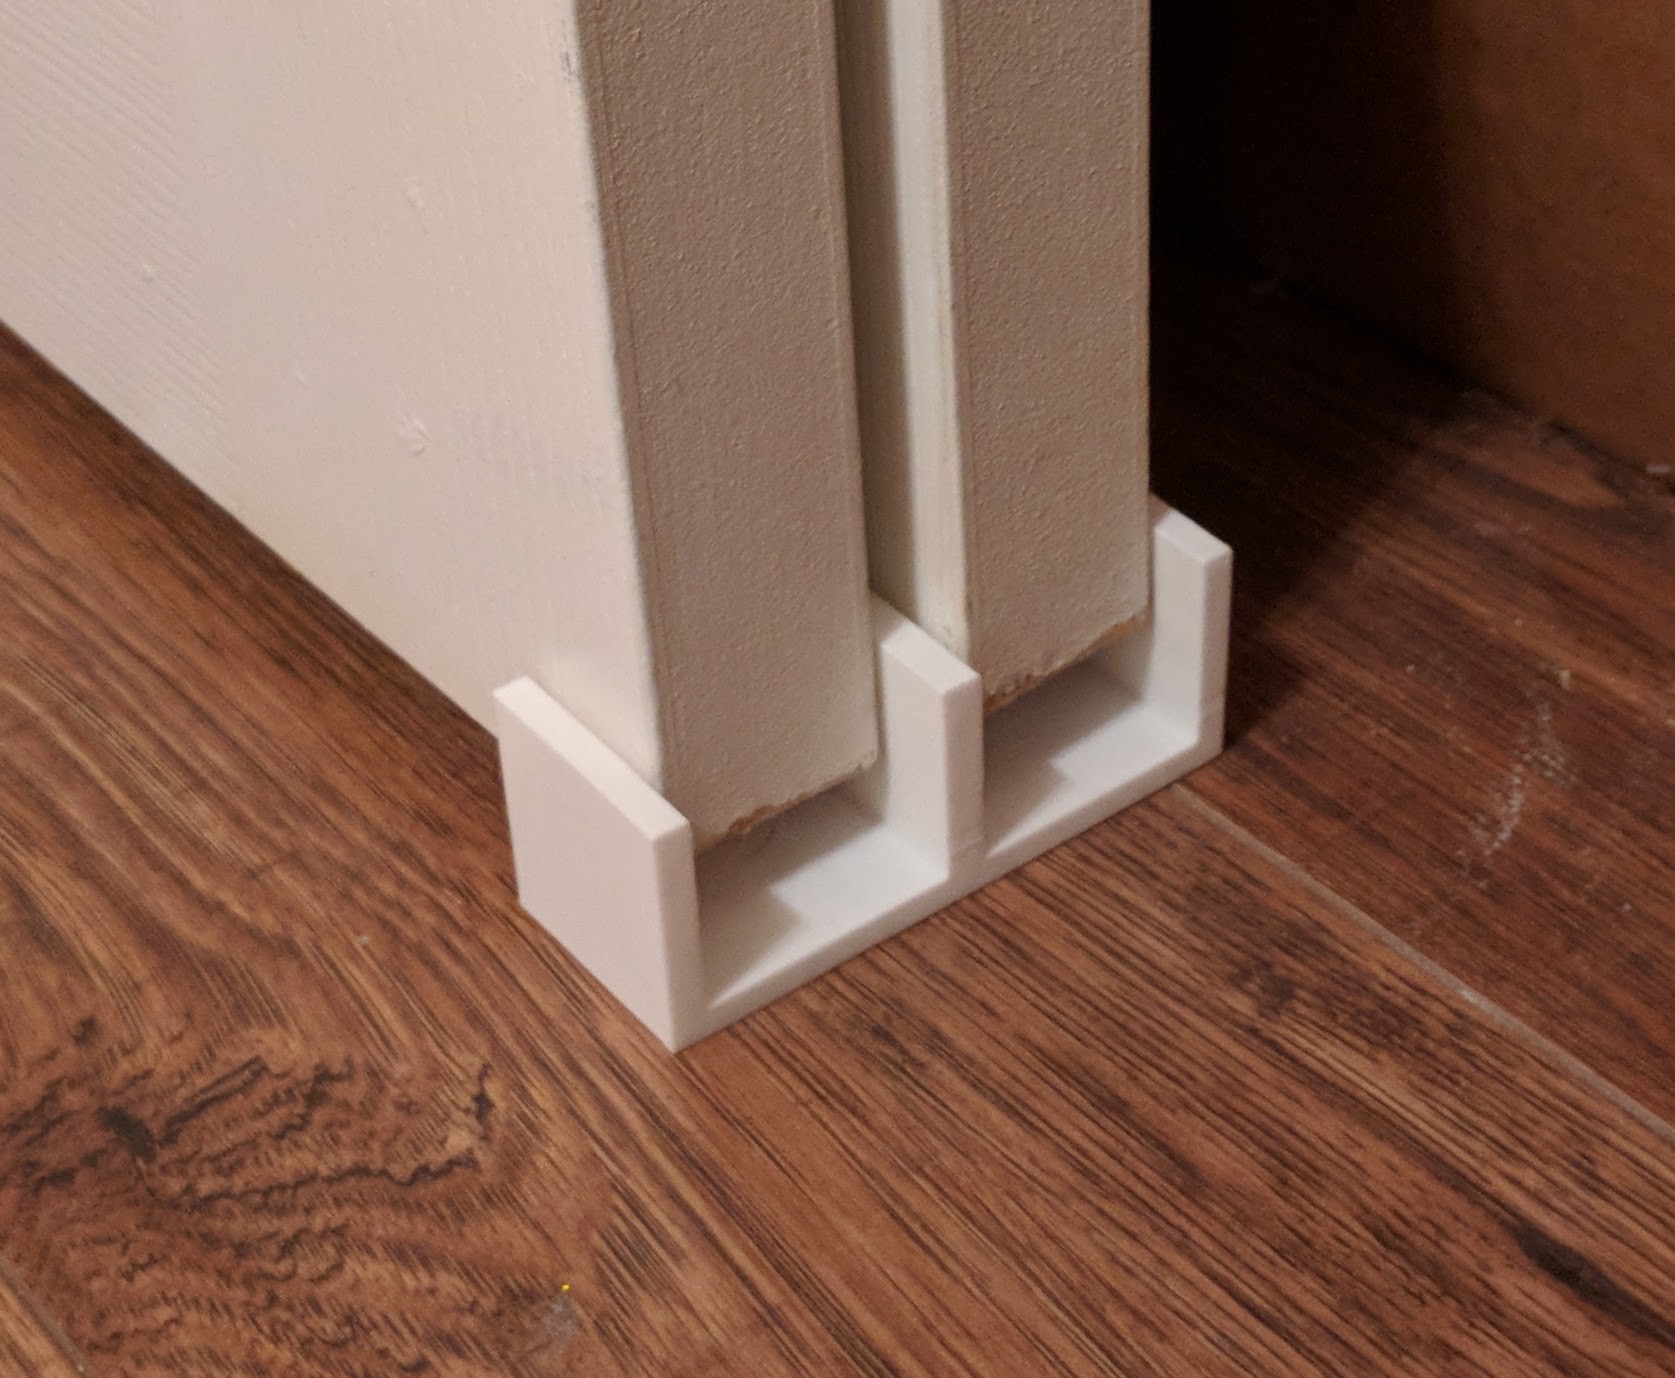
We discovered the closet door guides in our new home were all either damaged or missing. Tasked with fixing them, I grabbed my trusty calipers and whipped up some closet guides of our very own.
These are pretty simple in design - basically a letter "E". The only trick to these was making sure there was enough clearance for the doors to slide smoothly on either side. Installing was a snap. I cleaned the floor thoroughly with some floor cleaner, then added some glue dots which kept them in place. One for one bedroom, two more in the master bedroom.
-
Repair # 3: Plastic Horn Cap
02/18/2018 at 03:09 • 0 commentsDate: ~December 2015
![]()
We have a hand-me-down plastic play structure in our backyard. The kids love it - but the center horn on the steering wheel broke - leaving sharp and jagged plastic edges.
My wife requested I fix this... somehow. I opted to create a black plastic cap. To ensure a good fit, I took a "straight on" photograph of the cracked center of the horn. This was then traced in GIMP, traced in Inkscape into an SVG, and then extruded through a thin plastic disc. From there all I had to do was line of the new part to fit neatly into the cracked edges and add copious amounts of hot glue.
-
Repair # 1 & 2: Finial and Curtain Rod Holder
02/18/2018 at 02:59 • 0 commentsDate: ~December 2015
![]()
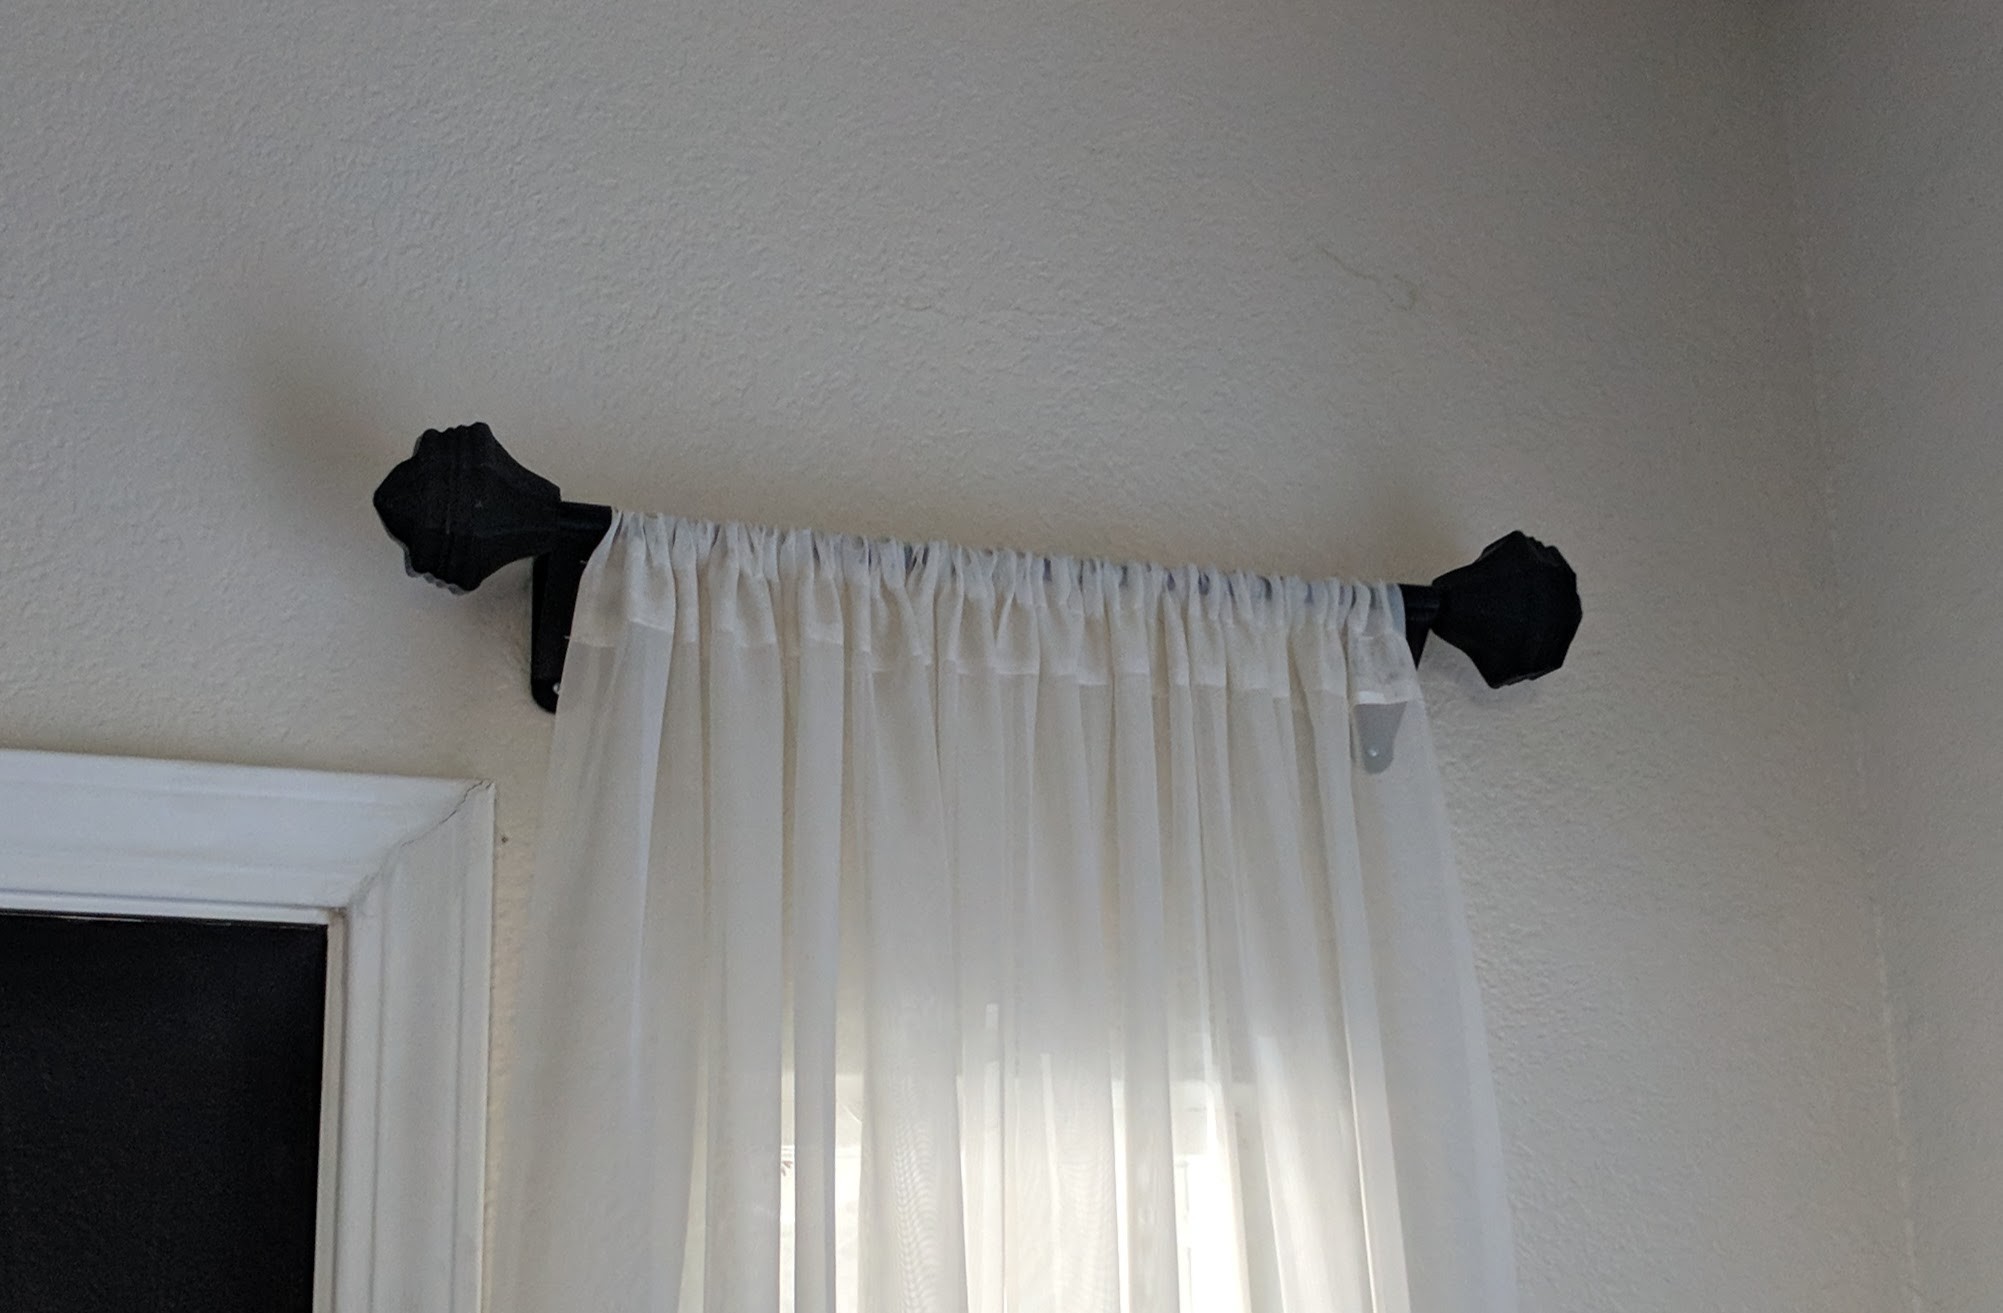
When we first moved into our new home, the curtain rod and hardware for the narrow window near the front door was missing. My wife tasked me with fixing this. The result was a wooden dowel (painted black), two simple brackets to hold the rod up, and two very special finials on either end.
For the finials, I took a picture of my daughter's profile in front of a bright background, traced the image in Inkscape, and used the rotate extrude function in OpenSCAD to make it a solid. If you tilt your head, you may be able to make out her profile.
Home Repairs with a 3D Printer
Since moving into a new home a little over two years ago, we've been fixing and improving things all over