Leon Bataille
-
Reverse Engineering the Steering Column Switch
10/22/2019 at 06:19 • 1 commentAs mentioned before in my last project log, I used the long silence to dive deeper in the electronics of the Polo 6R.
In this project log I want to share some details regarding the Steering Column Switch (or in German “Lenkstockschalter”).
Its Task is to measure the rotation position of the steering wheel and it provides the switches for wipers, turning signal and light options.
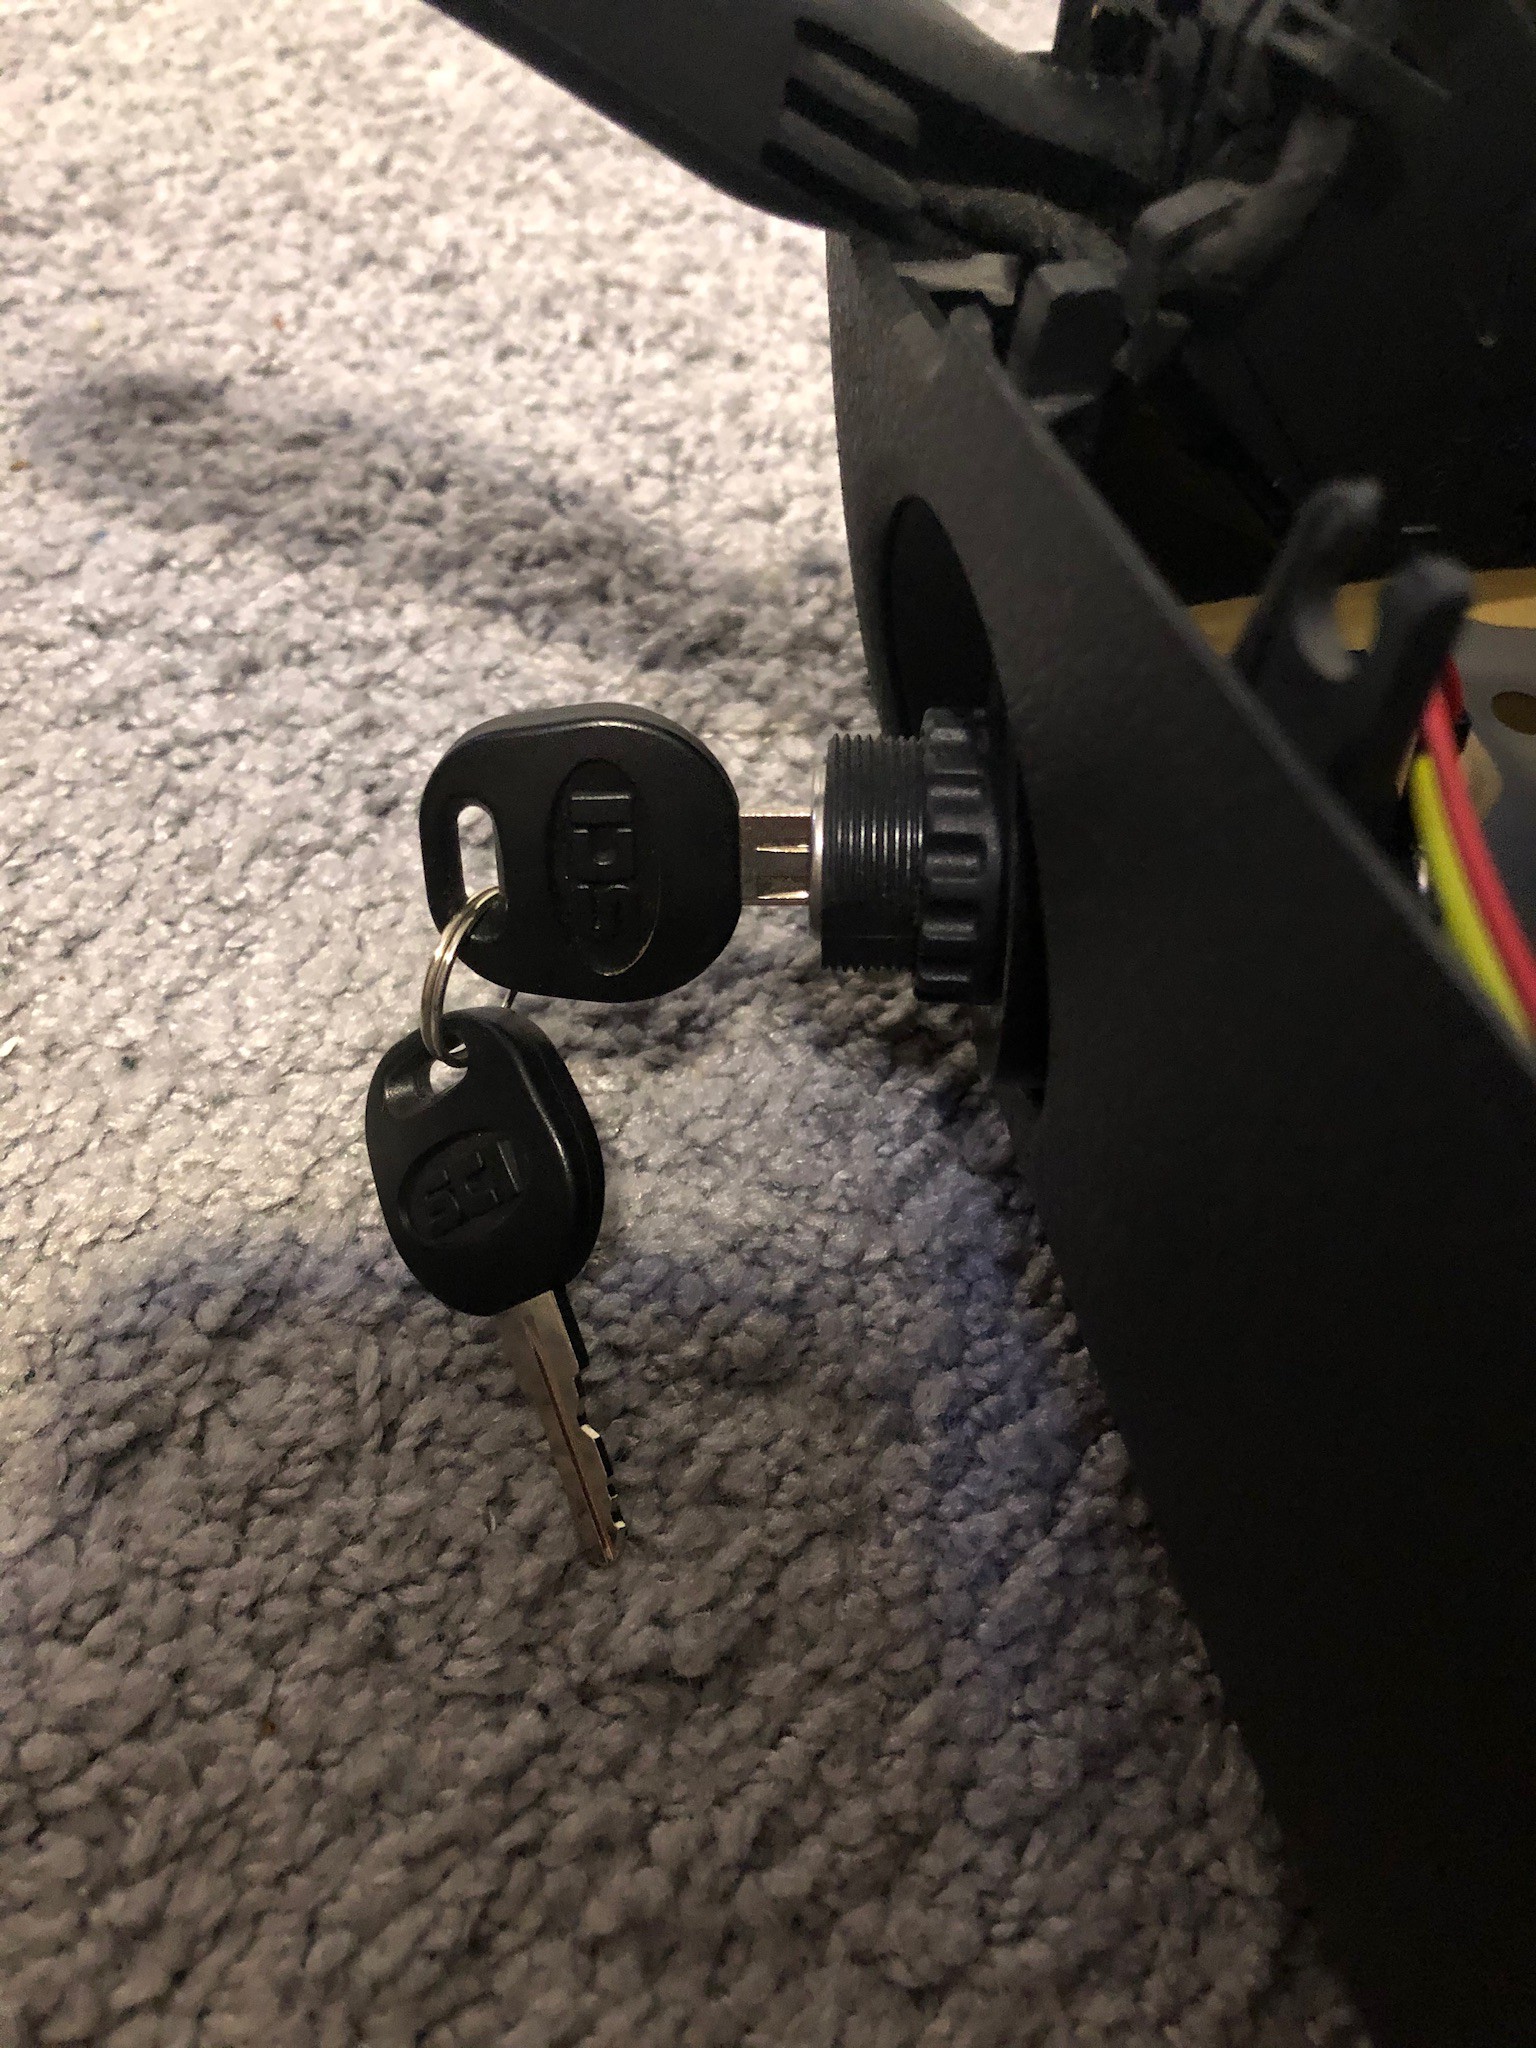
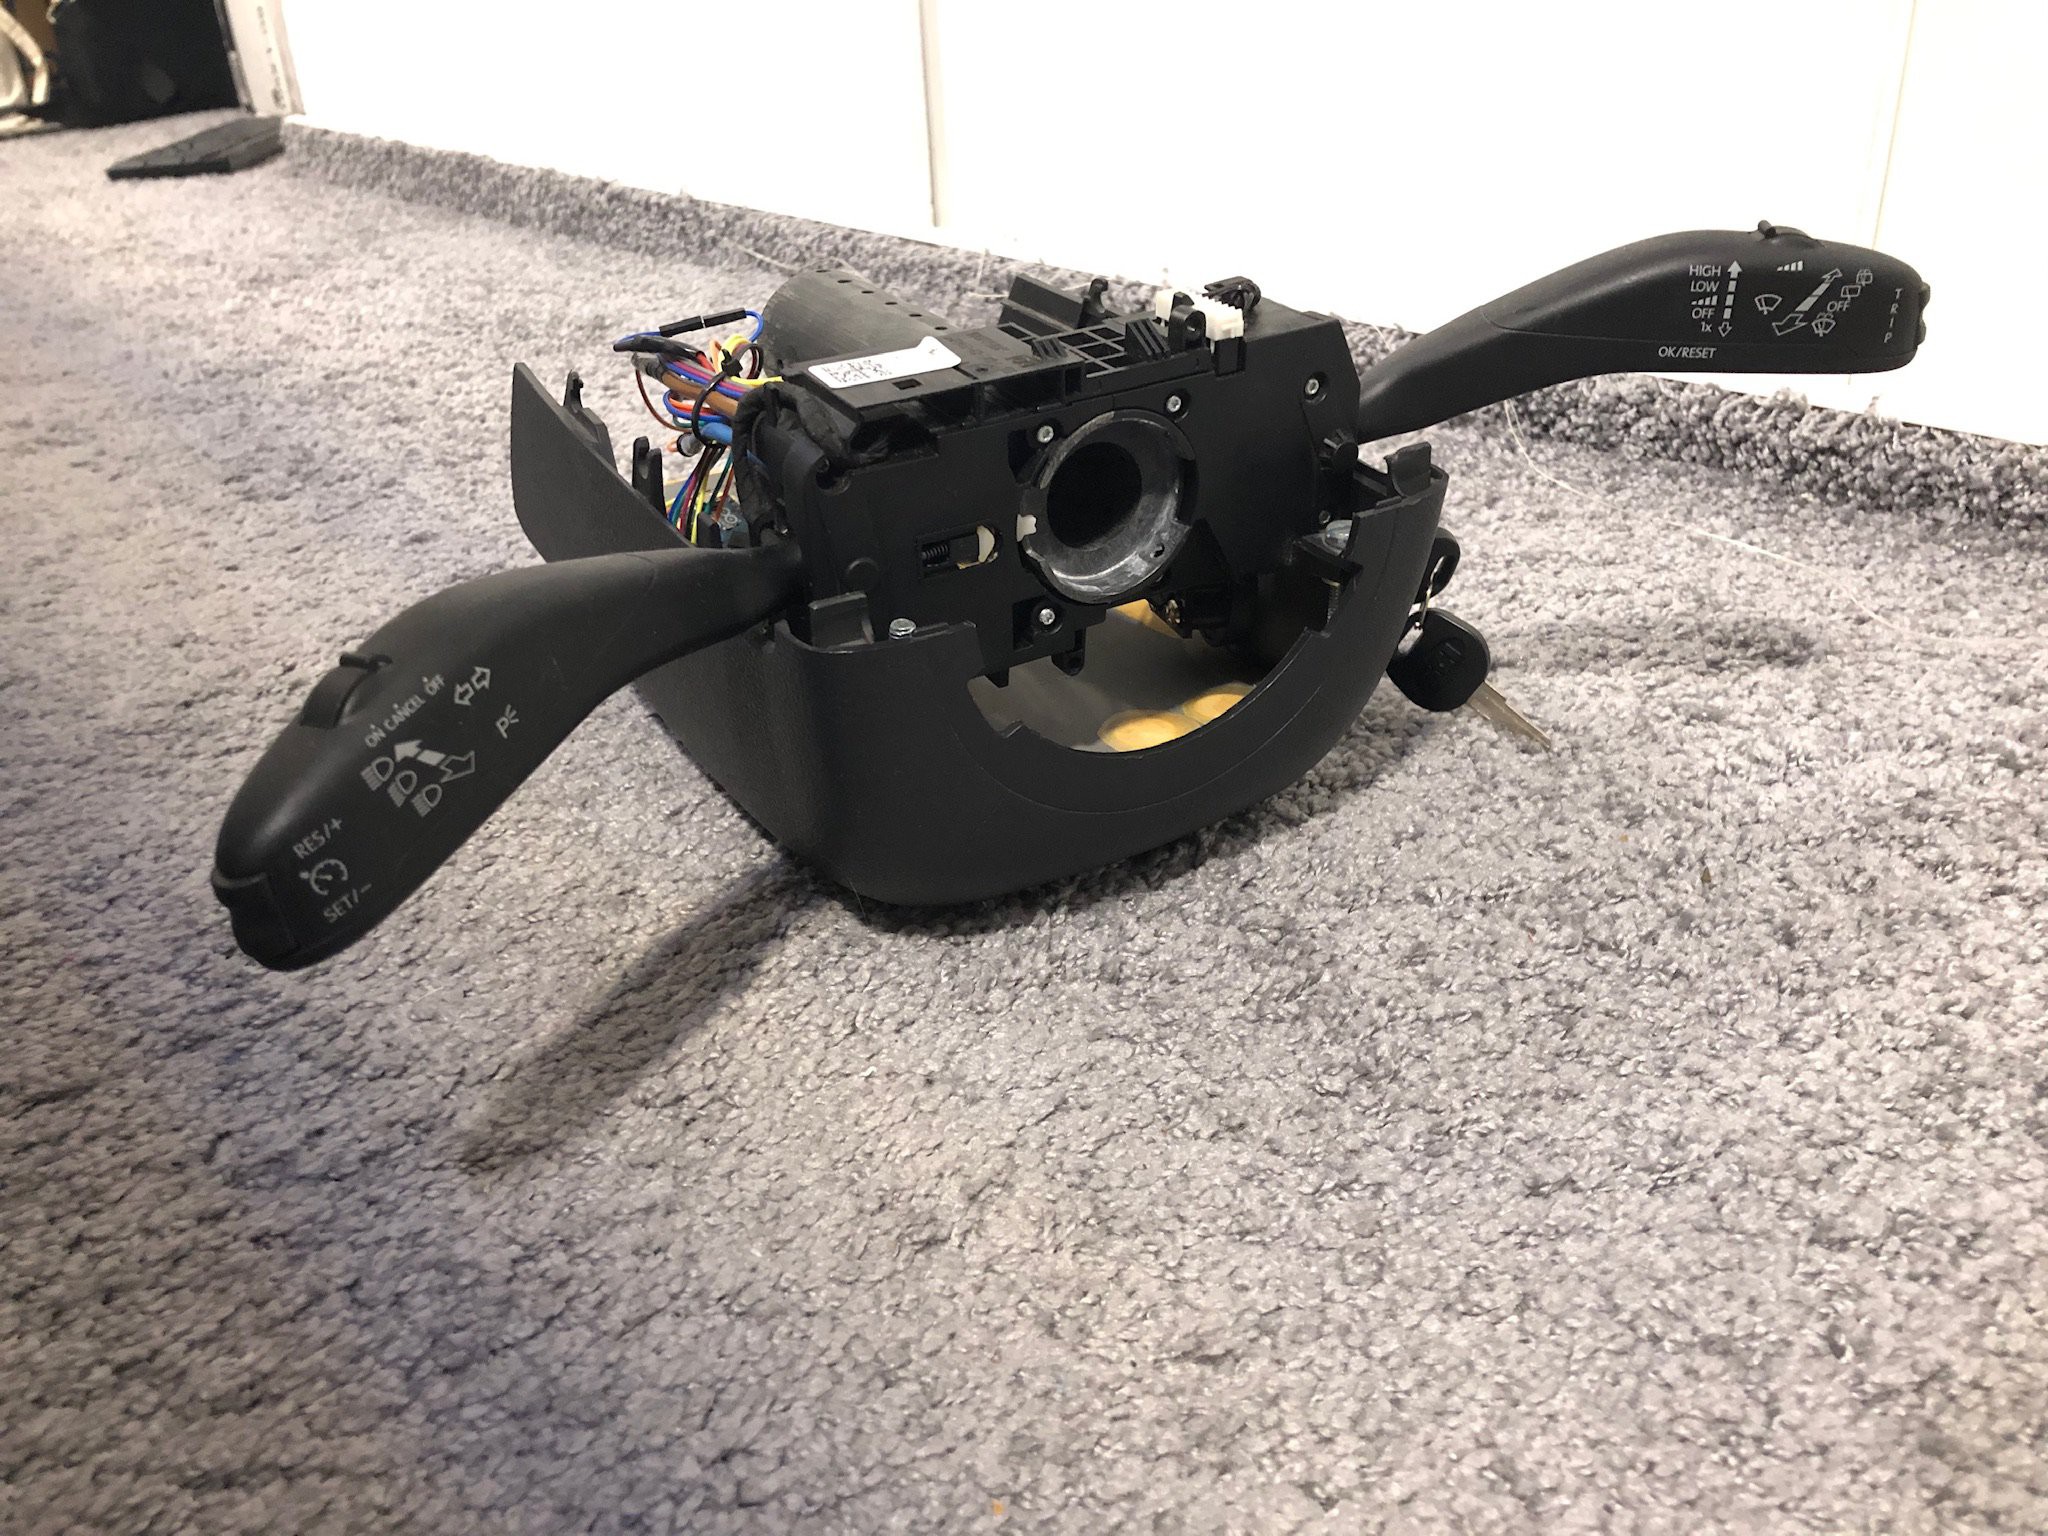
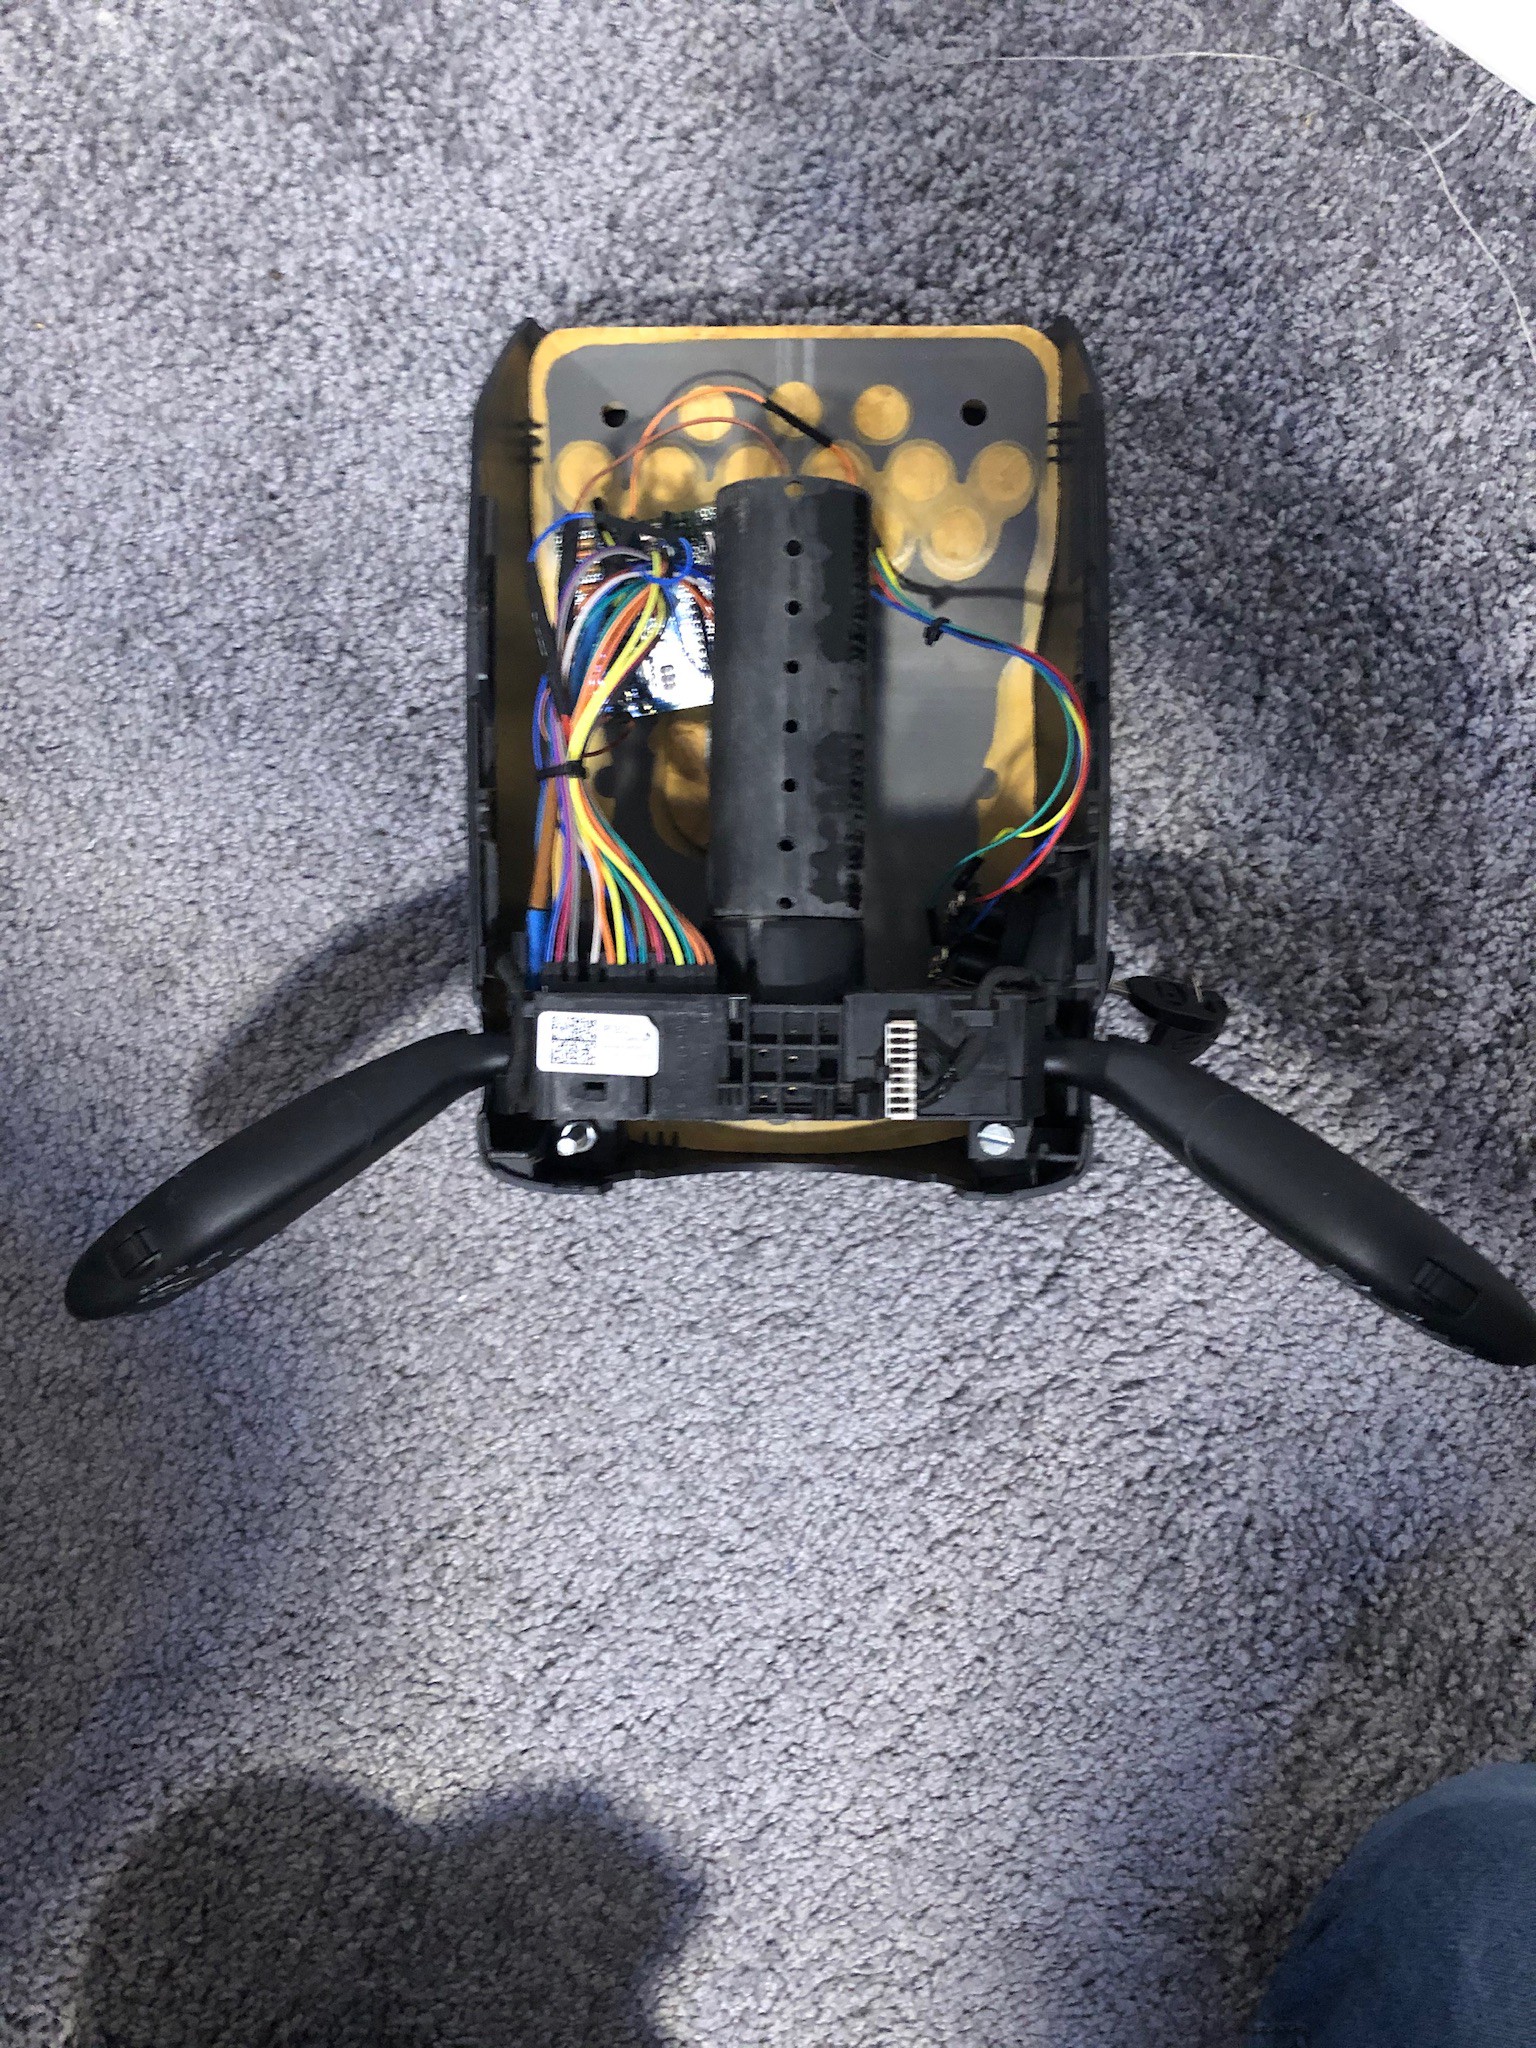
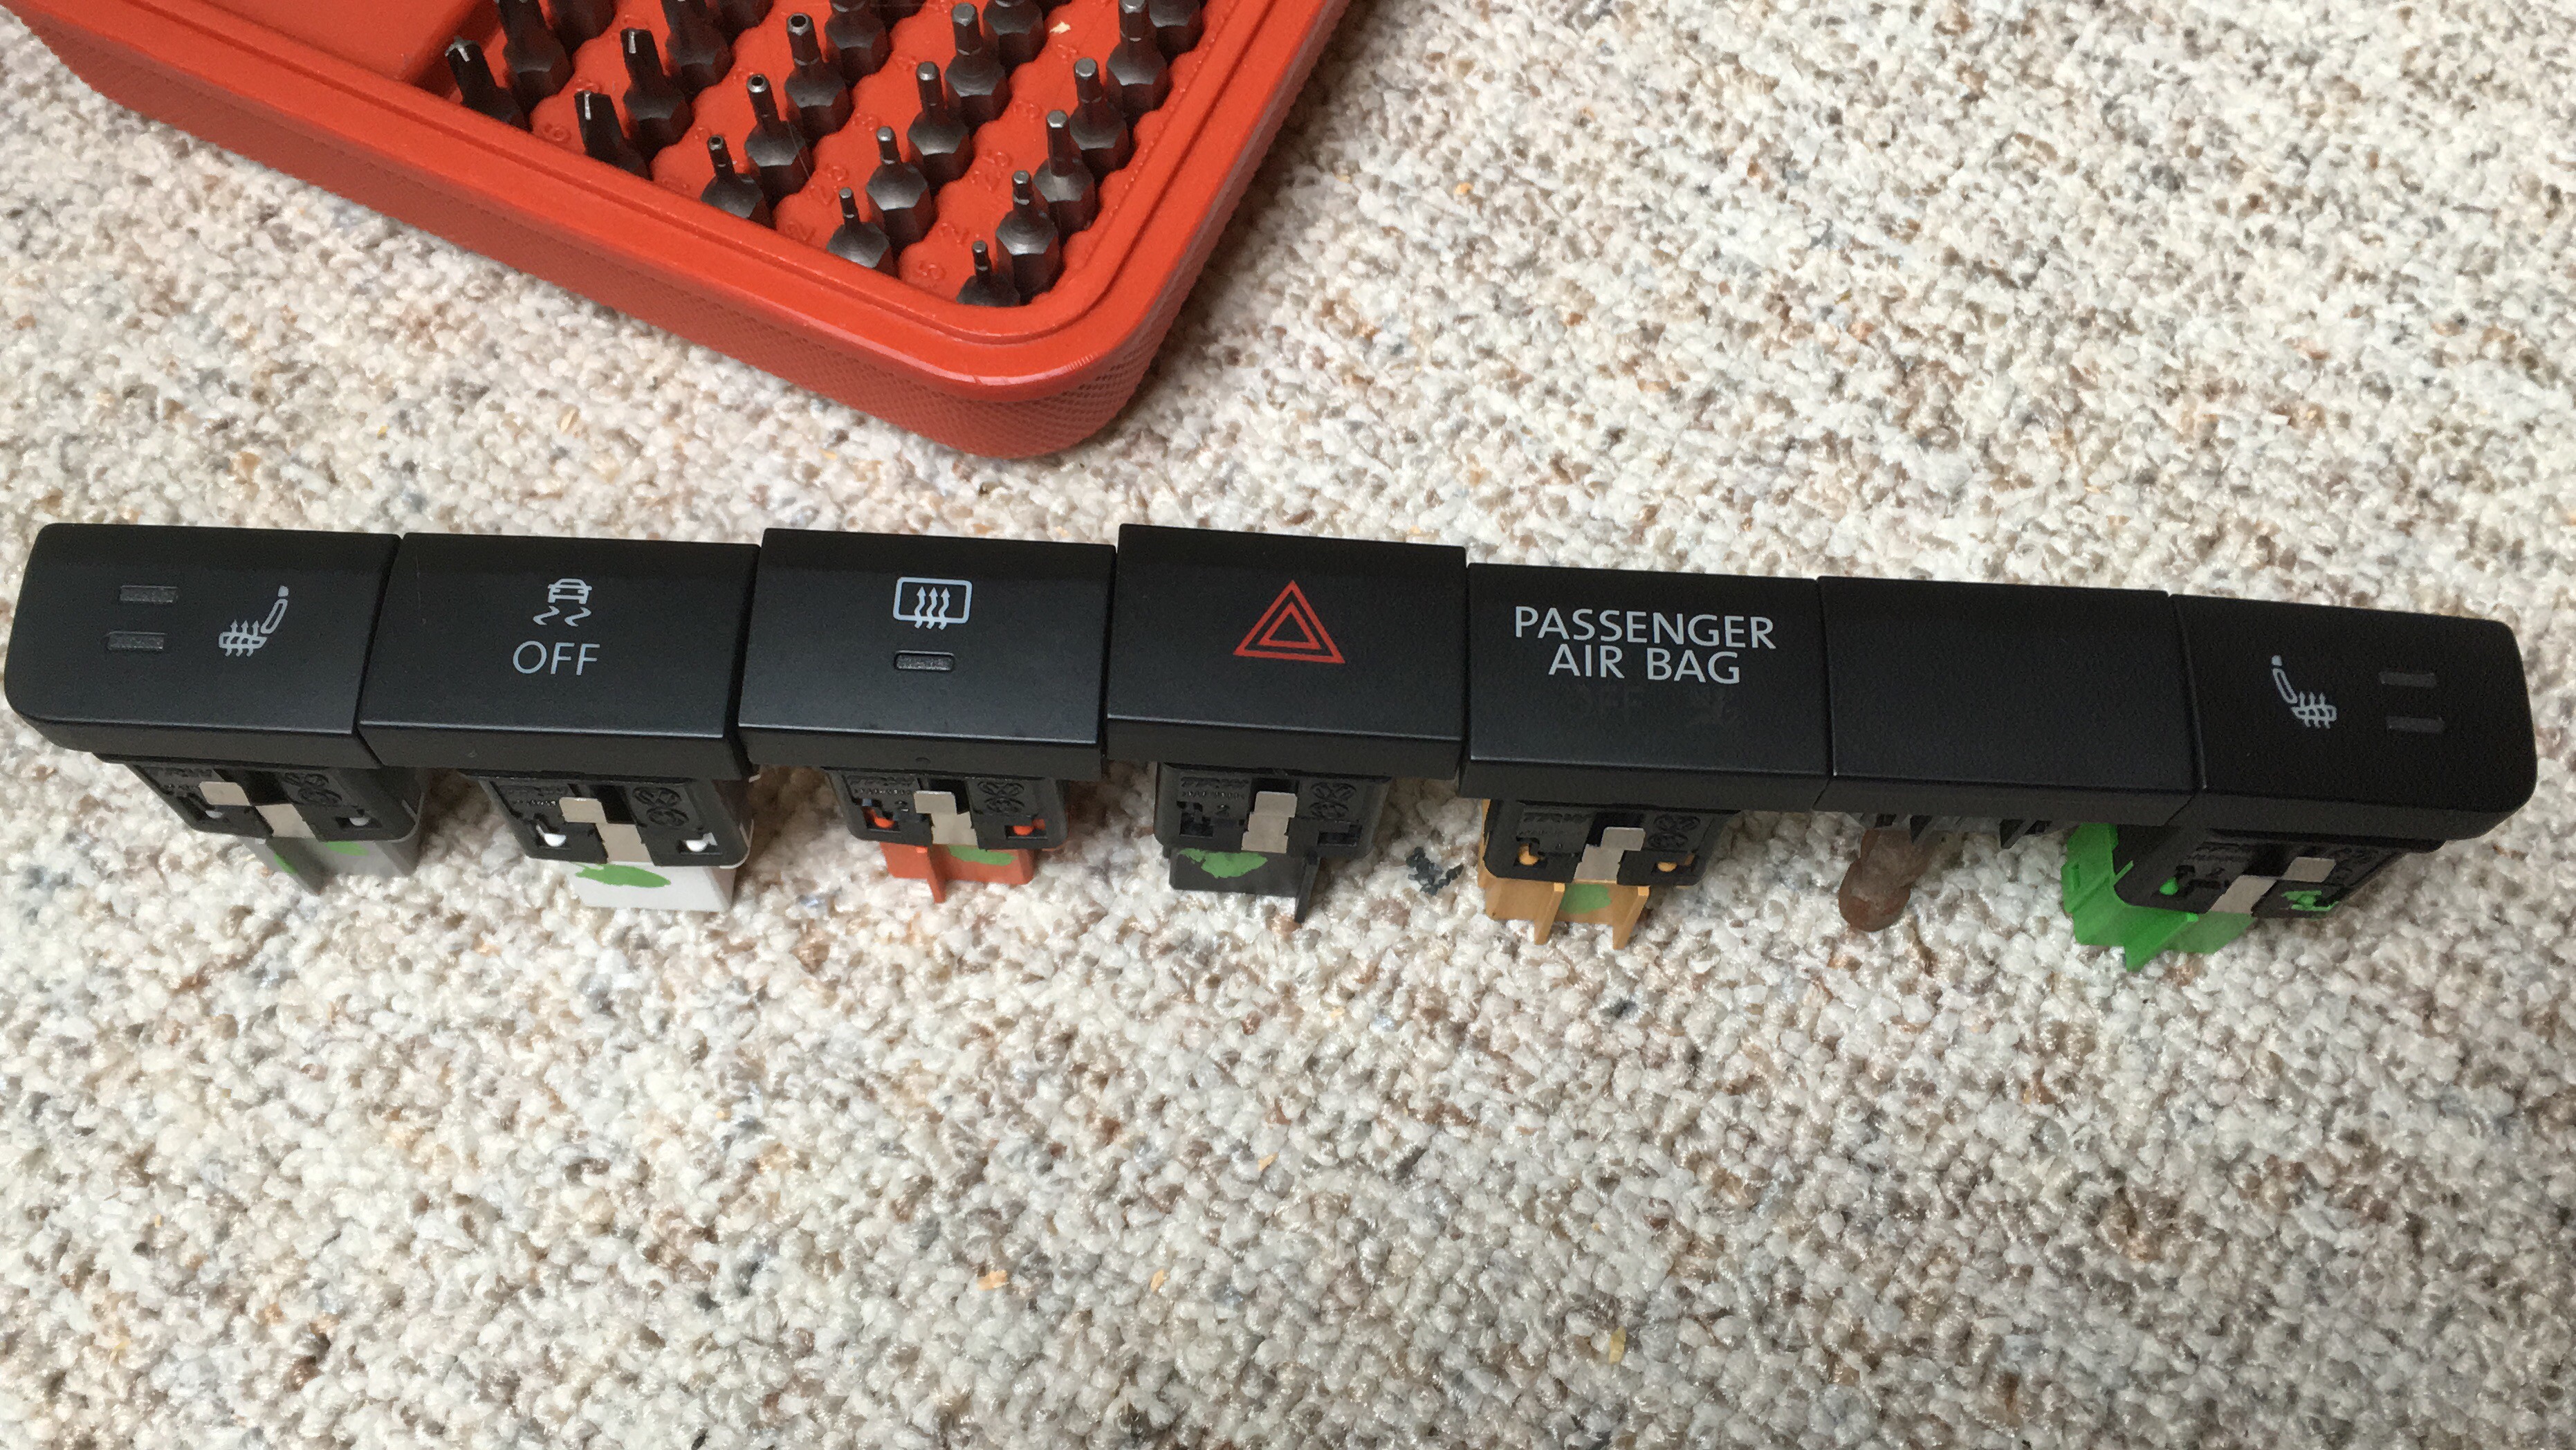
A while ago I bought an old steering column switch from eBay as well as the case for it. I also bought a key switch for usage as a ignition lock.
Here’re some photos:![]()
![]()
![]()
![]()
What I wanted to build was an USB interface which connects to the PC running the simulation game. That way you could control the corresponding functions with the simulation game.
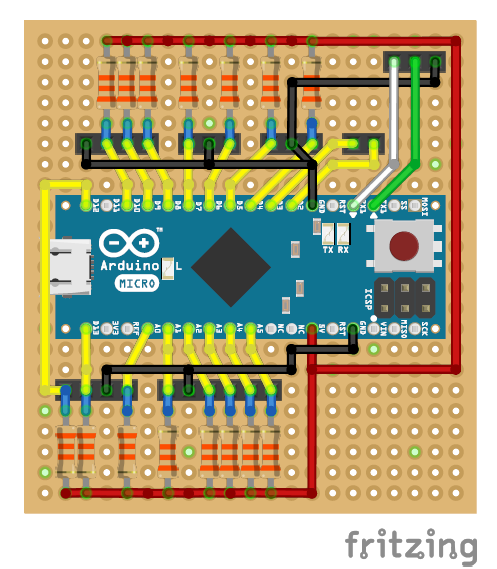
I used an Arduino micro which can use USB HID profiles, so that it will be recognized as a keyboard by my PC.
Now my task was to find out the pin assignments for the column switch, which you can find below.![]()
If you want to build this part of the project as well, here’s the Arduino sketch and the wiring diagram for it./* VW Polo 6R - Lenkstockschalter - Controller Software by Leon Bataille Version 1.0 Last modified: 04.07.2017 Pin assignments: A0: HW (FSW Wischwasser) A1: 53c (HSW) A2: (R) (MFA OK/Reset) A3: I (SW Intervallschaltung) A4: 1 (SW Wischer-Stufe 1) A5: 2 (SW Wischer-Stufe 2) D2: SDA - I2C Arduino Communication D3: SCL - I2C Arduino Communication D4: L (Blinker links <-) D5: R (Blinker rechts ->) D6: 30 (Klemme 30: Lichthupe) D7: 56 (Klemme 56: Fernlicht) D8: 7 (GRA Reset/+) D9: 8 (GRA Set/-) D10: 3 (GRA an) D12: auf (Trip/MFA+ auf) D13: ab (Trip/MFA+ ab) More information on my hackaday project site: https://hackaday.io/project/6288 */ #include <Wire.h> #include <Keyboard.h> //Pin Definitions //-Inputs int SW_WW = A0; int HSW = A1; int MFA_OK = A2; int SW_INT = A3; int SW_lv1 = A4; int SW_lv2 = A5; int tisch_hoch = 0; int tisch_runter = 1; int blnk_l = 4; int blnk_r = 5; int licht_hupe = 6; int licht_fern = 7; int GRA_plus = 8; int GRA_minus = 9; int GRA_an = 10; int MFA_auf = 11; int MFA_ab = 12; bool state_GRA = 0; bool lastState_SW_WW = 0; bool lastState_HSW = 0; bool lastState_MFA_OK = 0; bool lastState_SW_INT = 0; bool lastState_SW_lv1 = 0; bool lastState_SW_lv2 = 0; bool lastState_blnk_l = 0; bool lastState_blnk_r = 0; bool lastState_licht_hupe = 0; bool lastState_licht_fern = 0; bool lastState_GRA_plus = 0; bool lastState_GRA_minus = 0; bool lastState_GRA_an = 0; bool lastState_MFA_auf = 0; bool lastState_MFA_ab = 0; void setup() { // put your setup code here, to run once: //PinModes //-> Alle Eingänge sind mit Pull-Up-Widerständen verbunden //Siehe: https://electrosome.com/switch-arduino-uno/ pinMode(SW_WW, INPUT); pinMode(HSW, INPUT); pinMode(MFA_OK, INPUT); pinMode(SW_INT, INPUT); pinMode(SW_lv1, INPUT); pinMode(SW_lv2, INPUT); pinMode(blnk_l, INPUT); pinMode(blnk_r, INPUT); pinMode(licht_hupe, INPUT); pinMode(licht_fern, INPUT); pinMode(GRA_plus, INPUT); pinMode(GRA_minus, INPUT); pinMode(GRA_an, INPUT); pinMode(MFA_auf, INPUT); pinMode(MFA_ab, INPUT); pinMode(tisch_hoch, OUTPUT); pinMode(tisch_runter, OUTPUT); Keyboard.begin(); Wire.begin(); } void loop() { // put your main code here, to run repeatedly: //MFA_OK if (digitalRead(MFA_OK) == LOW && lastState_MFA_OK == 0) //If the switch is pressed { lastState_MFA_OK = 1; Keyboard.print("i"); } else if (digitalRead(MFA_OK) == HIGH && lastState_MFA_OK == 1) //If the switch is released { lastState_MFA_OK = 0; } //SW_lv1 if (digitalRead(SW_lv1) == LOW && lastState_SW_lv1 == 0) //If the switch is pressed { lastState_SW_lv1 = 1; Keyboard.print("w"); } else if (digitalRead(SW_lv1) == HIGH && lastState_SW_lv1 == 1) //If the switch is released { lastState_SW_lv1 = 0; } //blnk_l if (digitalRead(blnk_l) == LOW && lastState_blnk_l == 0) //If the switch is pressed { lastState_blnk_l = 1; Keyboard.print("y"); } else if (digitalRead(blnk_l) == HIGH && lastState_blnk_l == 1) //If the switch is released { lastState_blnk_l = 0; Keyboard.print("y"); } //blnk_r if (digitalRead(blnk_r) == LOW && lastState_blnk_r == 0) //If the switch is pressed { lastState_blnk_r = 1; Keyboard.print("x"); } else if (digitalRead(blnk_r) == HIGH && lastState_blnk_r == 1) //If the switch is released { lastState_blnk_r = 0; Keyboard.print("x"); } //licht_hupe if (digitalRead(blnk_r) == LOW) //If the switch is pressed { Keyboard.print("j"); } //licht_fern if (digitalRead(licht_fern) == LOW && lastState_licht_fern == 0) //If the switch is pressed { lastState_licht_fern = 1; Keyboard.print("k"); } else if (digitalRead(licht_fern) == HIGH && lastState_licht_fern == 1) //If the switch is released { lastState_licht_fern = 0; Keyboard.print("k"); } //GRA_an if (digitalRead(GRA_an) == LOW && lastState_GRA_an == 0) //If the switch is on { lastState_GRA_an = 1; state_GRA = 1; Wire.beginTransmission(8); Wire.write("CCt_1"); Wire.endTransmission(); //GRA_plus if (digitalRead(GRA_plus) == LOW && lastState_GRA_plus == 0) //If the switch is pressed { lastState_GRA_plus = 1; Keyboard.print("+"); } else if (digitalRead(GRA_plus) == HIGH && lastState_GRA_plus == 1) //If the switch is released { lastState_GRA_plus = 0; } //GRA_minus if (digitalRead(GRA_minus) == LOW && lastState_GRA_minus == 0) //If the switch is pressed { lastState_GRA_minus = 1; Keyboard.print("#"); } else if (digitalRead(GRA_minus) == HIGH && lastState_GRA_minus == 1) //If the switch is released { lastState_GRA_minus = 0; } }//Ende GRA_an else if (digitalRead(GRA_an) == HIGH && lastState_GRA_an == 1) //If the switch is off { state_GRA = 0; Wire.beginTransmission(8); Wire.write("CCt_0"); Wire.endTransmission(); lastState_GRA_an = 0; } else //GRA_aus { //GRA_plus if (digitalRead(GRA_plus) == LOW && lastState_GRA_plus == 0) //If the switch is pressed { lastState_GRA_plus = 1; Keyboard.print("c"); //Transmit CC Status if (state_GRA == 0) { state_GRA = 1; Wire.beginTransmission(8); Wire.write("CCt_1"); Wire.endTransmission(); } else { state_GRA = 0; Wire.beginTransmission(8); Wire.write("CCt_0"); Wire.endTransmission(); } } else if (digitalRead(GRA_plus) == HIGH && lastState_GRA_plus == 1) //If the switch is released { lastState_GRA_plus = 0; } } //MFA_auf if (digitalRead(MFA_auf) == LOW && lastState_MFA_auf == 0) //If the switch is pressed { lastState_MFA_auf = 1; Keyboard.print("ü"); } else if (digitalRead(MFA_auf) == HIGH && lastState_MFA_auf == 1) //If the switch is released { lastState_MFA_auf = 0; } //MFA_ab if (digitalRead(MFA_ab) == LOW && lastState_MFA_ab == 0) //If the switch is pressed { lastState_MFA_ab = 1; Keyboard.print("ä"); } else if (digitalRead(MFA_ab) == HIGH && lastState_MFA_ab == 1) //If the switch is released { lastState_MFA_ab = 0; } }![]()
That’s it for today. The next project log will be about the new instrument cluster setup.
Thanks for your support! -
Back again...
10/20/2019 at 12:43 • 4 commentsHi there,
here're some updates regarding the project after long two years of silence and some explanation.
So, why isn't there an up-to-date source code available?
As the project has grown over time, I got some help of very capable people and was able to develop the source code further with them. We squished most of the known bugs like the wrong blinking turning signal or randomly flashing oil indicators and added many new indicators and functions to the project. But the problem is that the source code of the project is open source on this page (which is good of course) but unfortunately I am not allowed anymore to release the source code in its current state due to copyright problems.
I reverse engineered the dashboard first by myself which is completely fine.
But later on I got information from other people and specifically these information mustn't be published here.
So what's the solution to this problem?
Yeah, that's the point at the moment. I don't know...
What else did you do in the meantime?
I changed some essential parts of the project to not only work with the ETS2 game but also with many other simulator and racing games by using another component between my adapter board and the PC.
I'm using a RevBurner Pro from SymProjects (no sponsoring here). Their software collects through game plugins or APIs the telemetry data from the games and transfers them to the RevBurner. More about this in a future update.And now...?
I will release further project updates regarding the general state of the project, some wiring diagrams, as well as the new parts I'm using for this. But as mentioned before I cannot post any more source code for this project.
Thanks for your understanding.
-
Circuit Board Source online
12/19/2017 at 09:16 • 0 commentsHi,
I just uploaded the source files for the circuit board which connects the instrument cluster with the CAN-BUS Shield. You can find it in the Download section of this project.
I hope this clears the questions about connection problems in the comments.
I wish you all merry christmas and nice holidays!
-
New Version of VWRadio available (v1.2.1)
06/12/2017 at 14:55 • 0 commentsI've just released a newer version for the VWRadio software.
I fixed several small bugs. Especially the loop after the first launch without a prior configuration file has been fixed.
There's now the option to enable a graphic visualization for music playback in the lower left corner.
You can now also shut down your computer within the program. Therefore you have to go to the settings menu and click on exit. There you're can choose either to exit the program or to completely shut down your PC. I'll show you this feature in a future video. But at the moment it's a surprise for what I implemented it in the software.
-
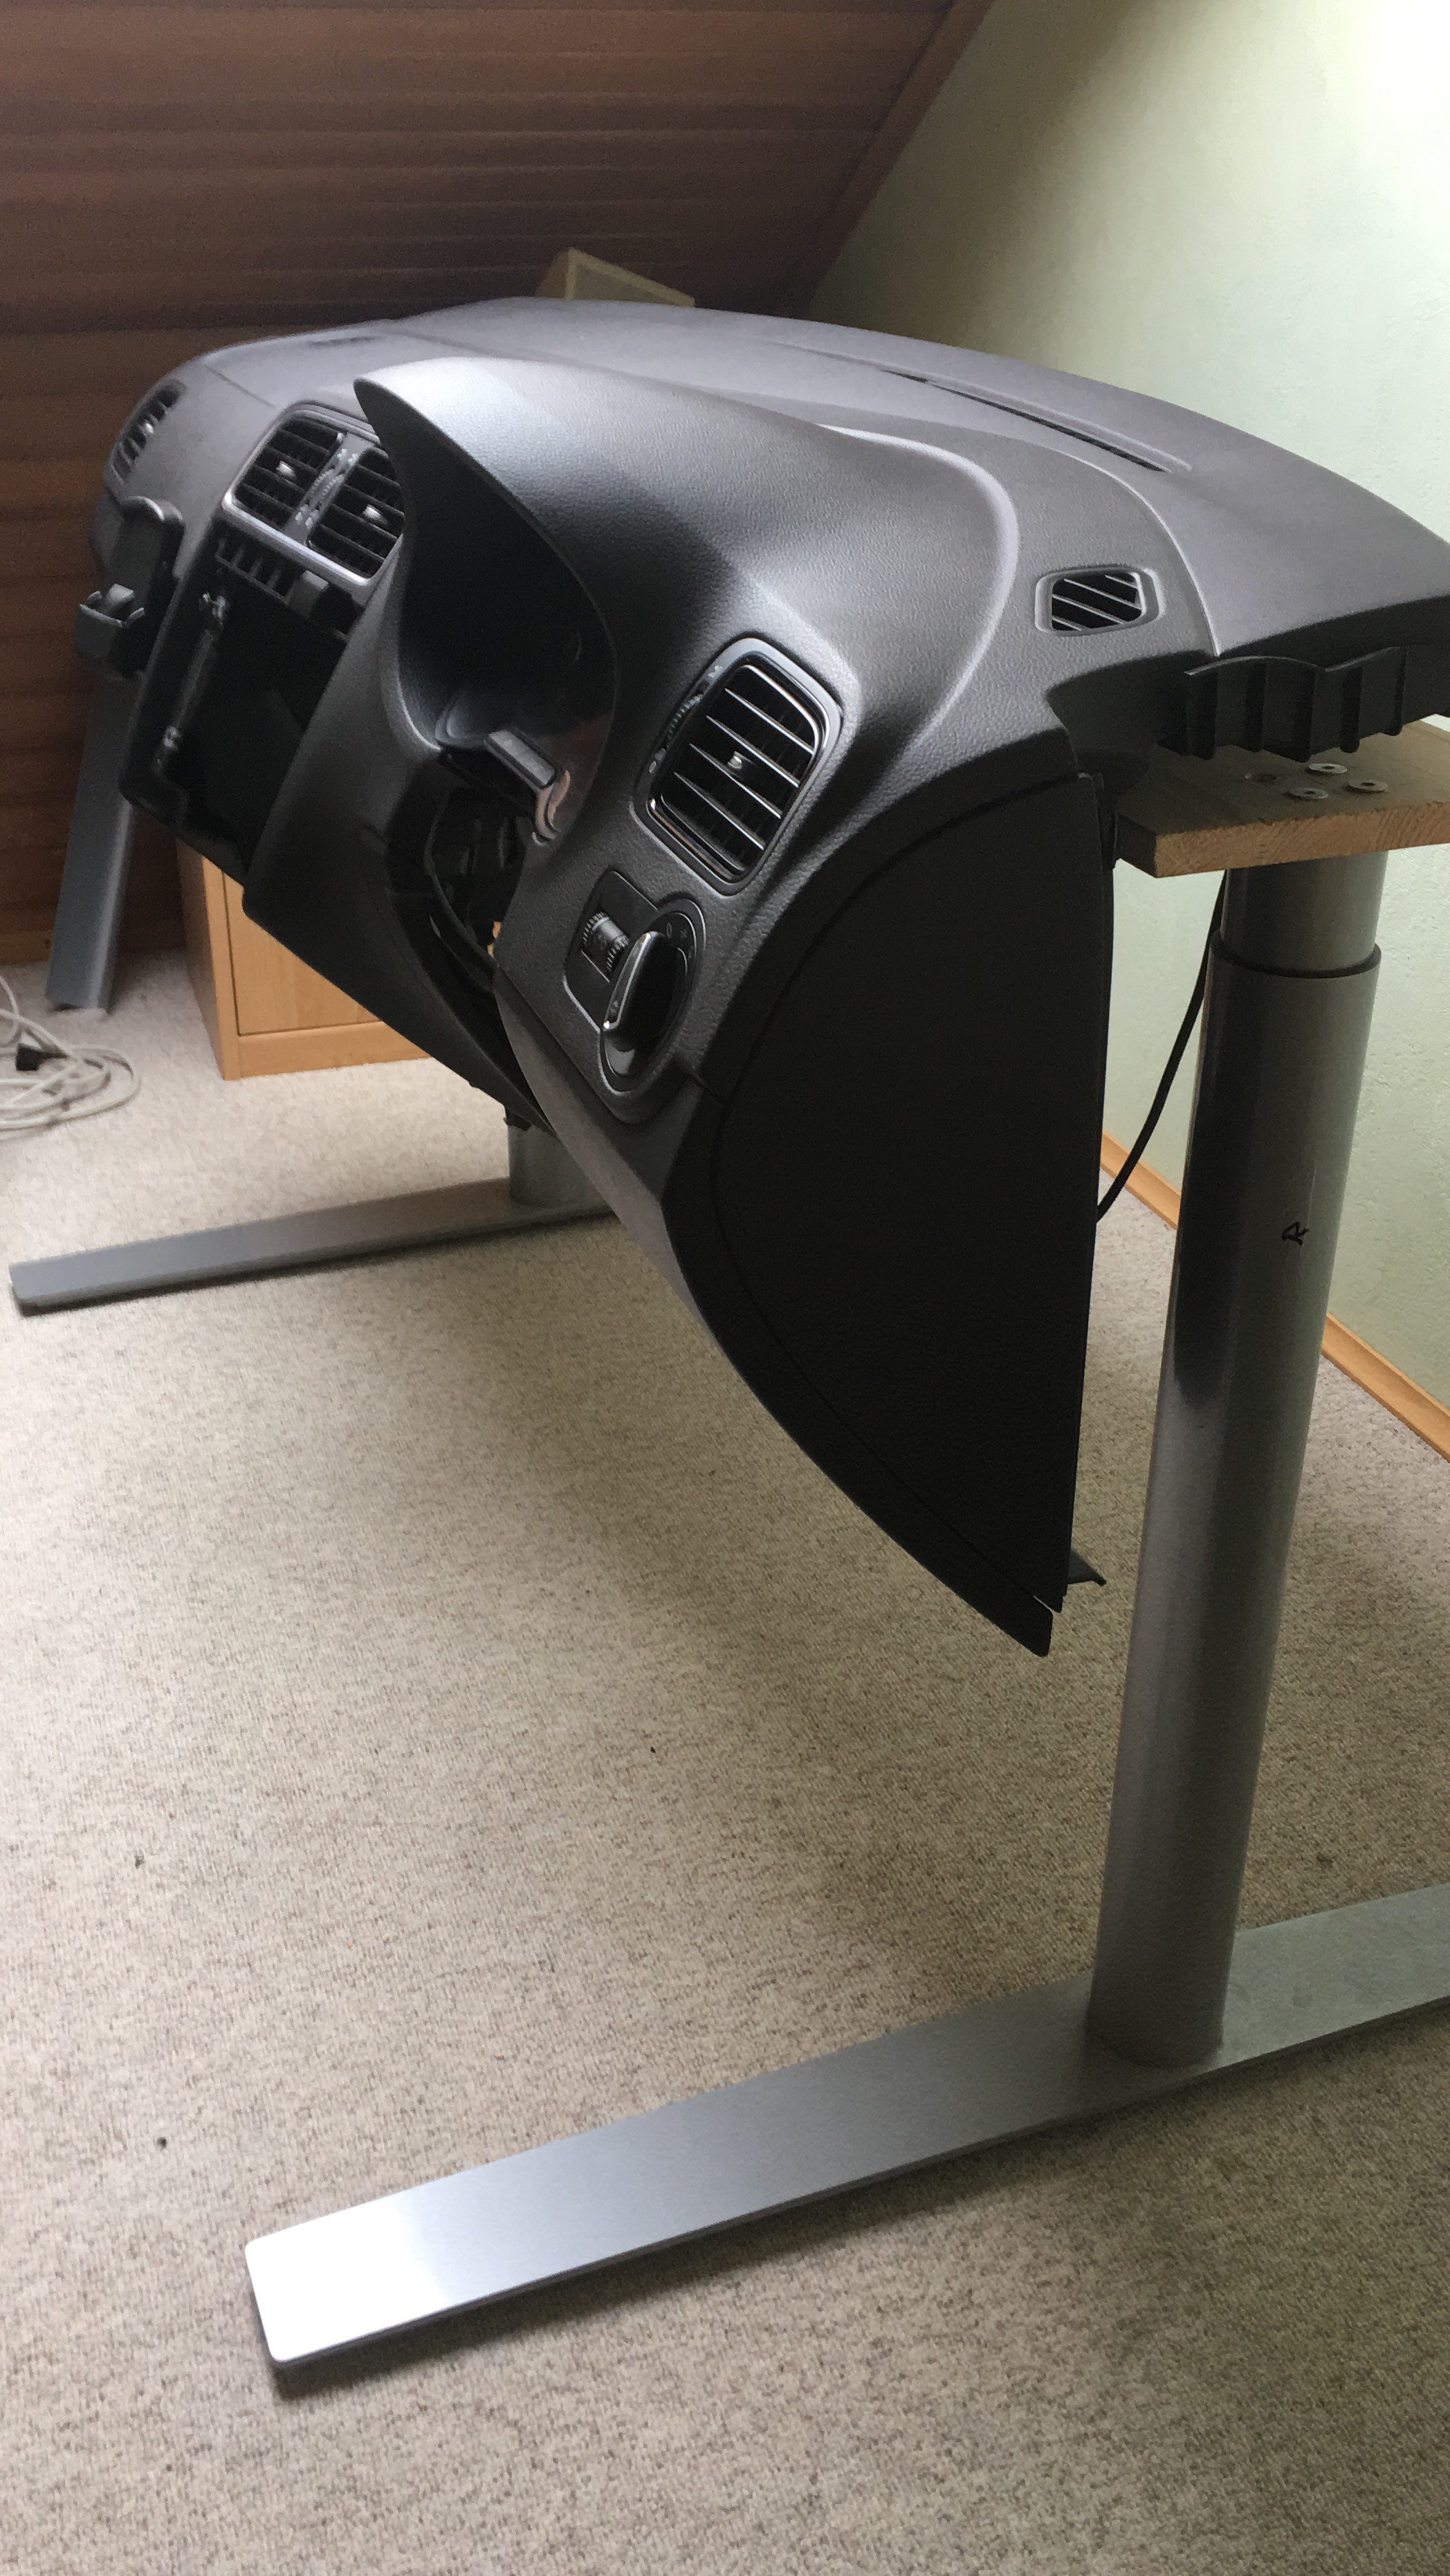
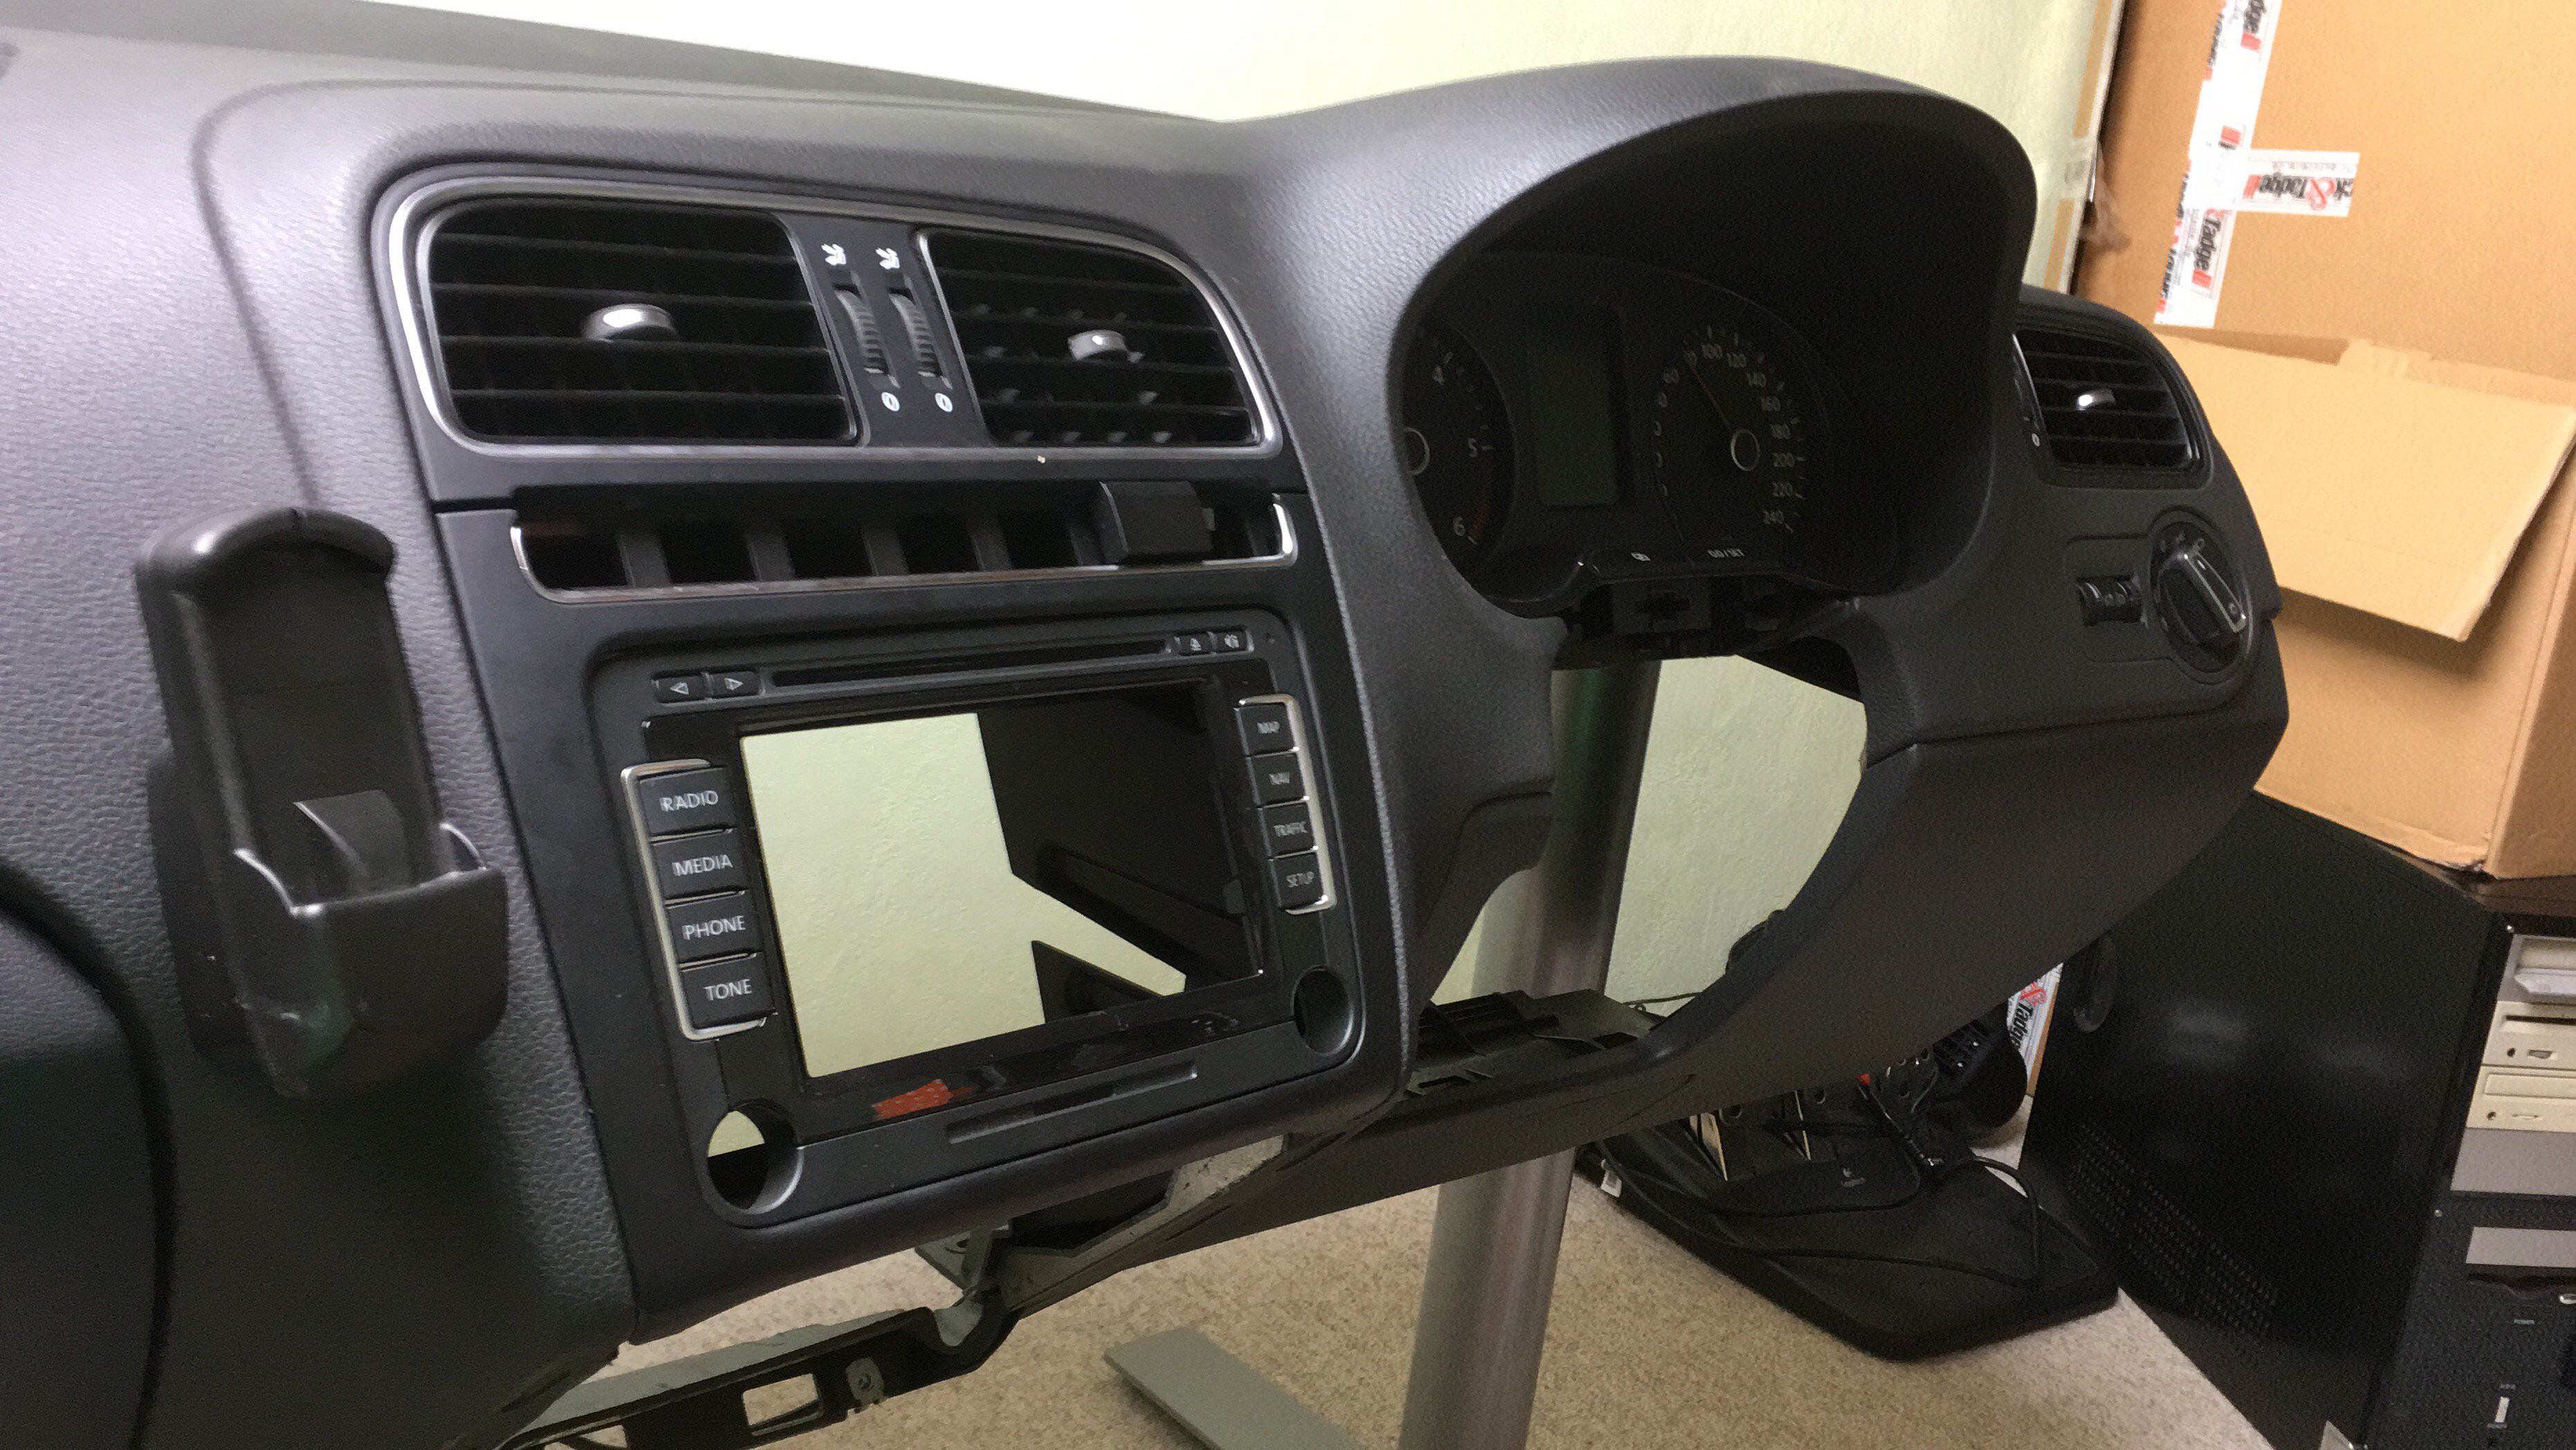
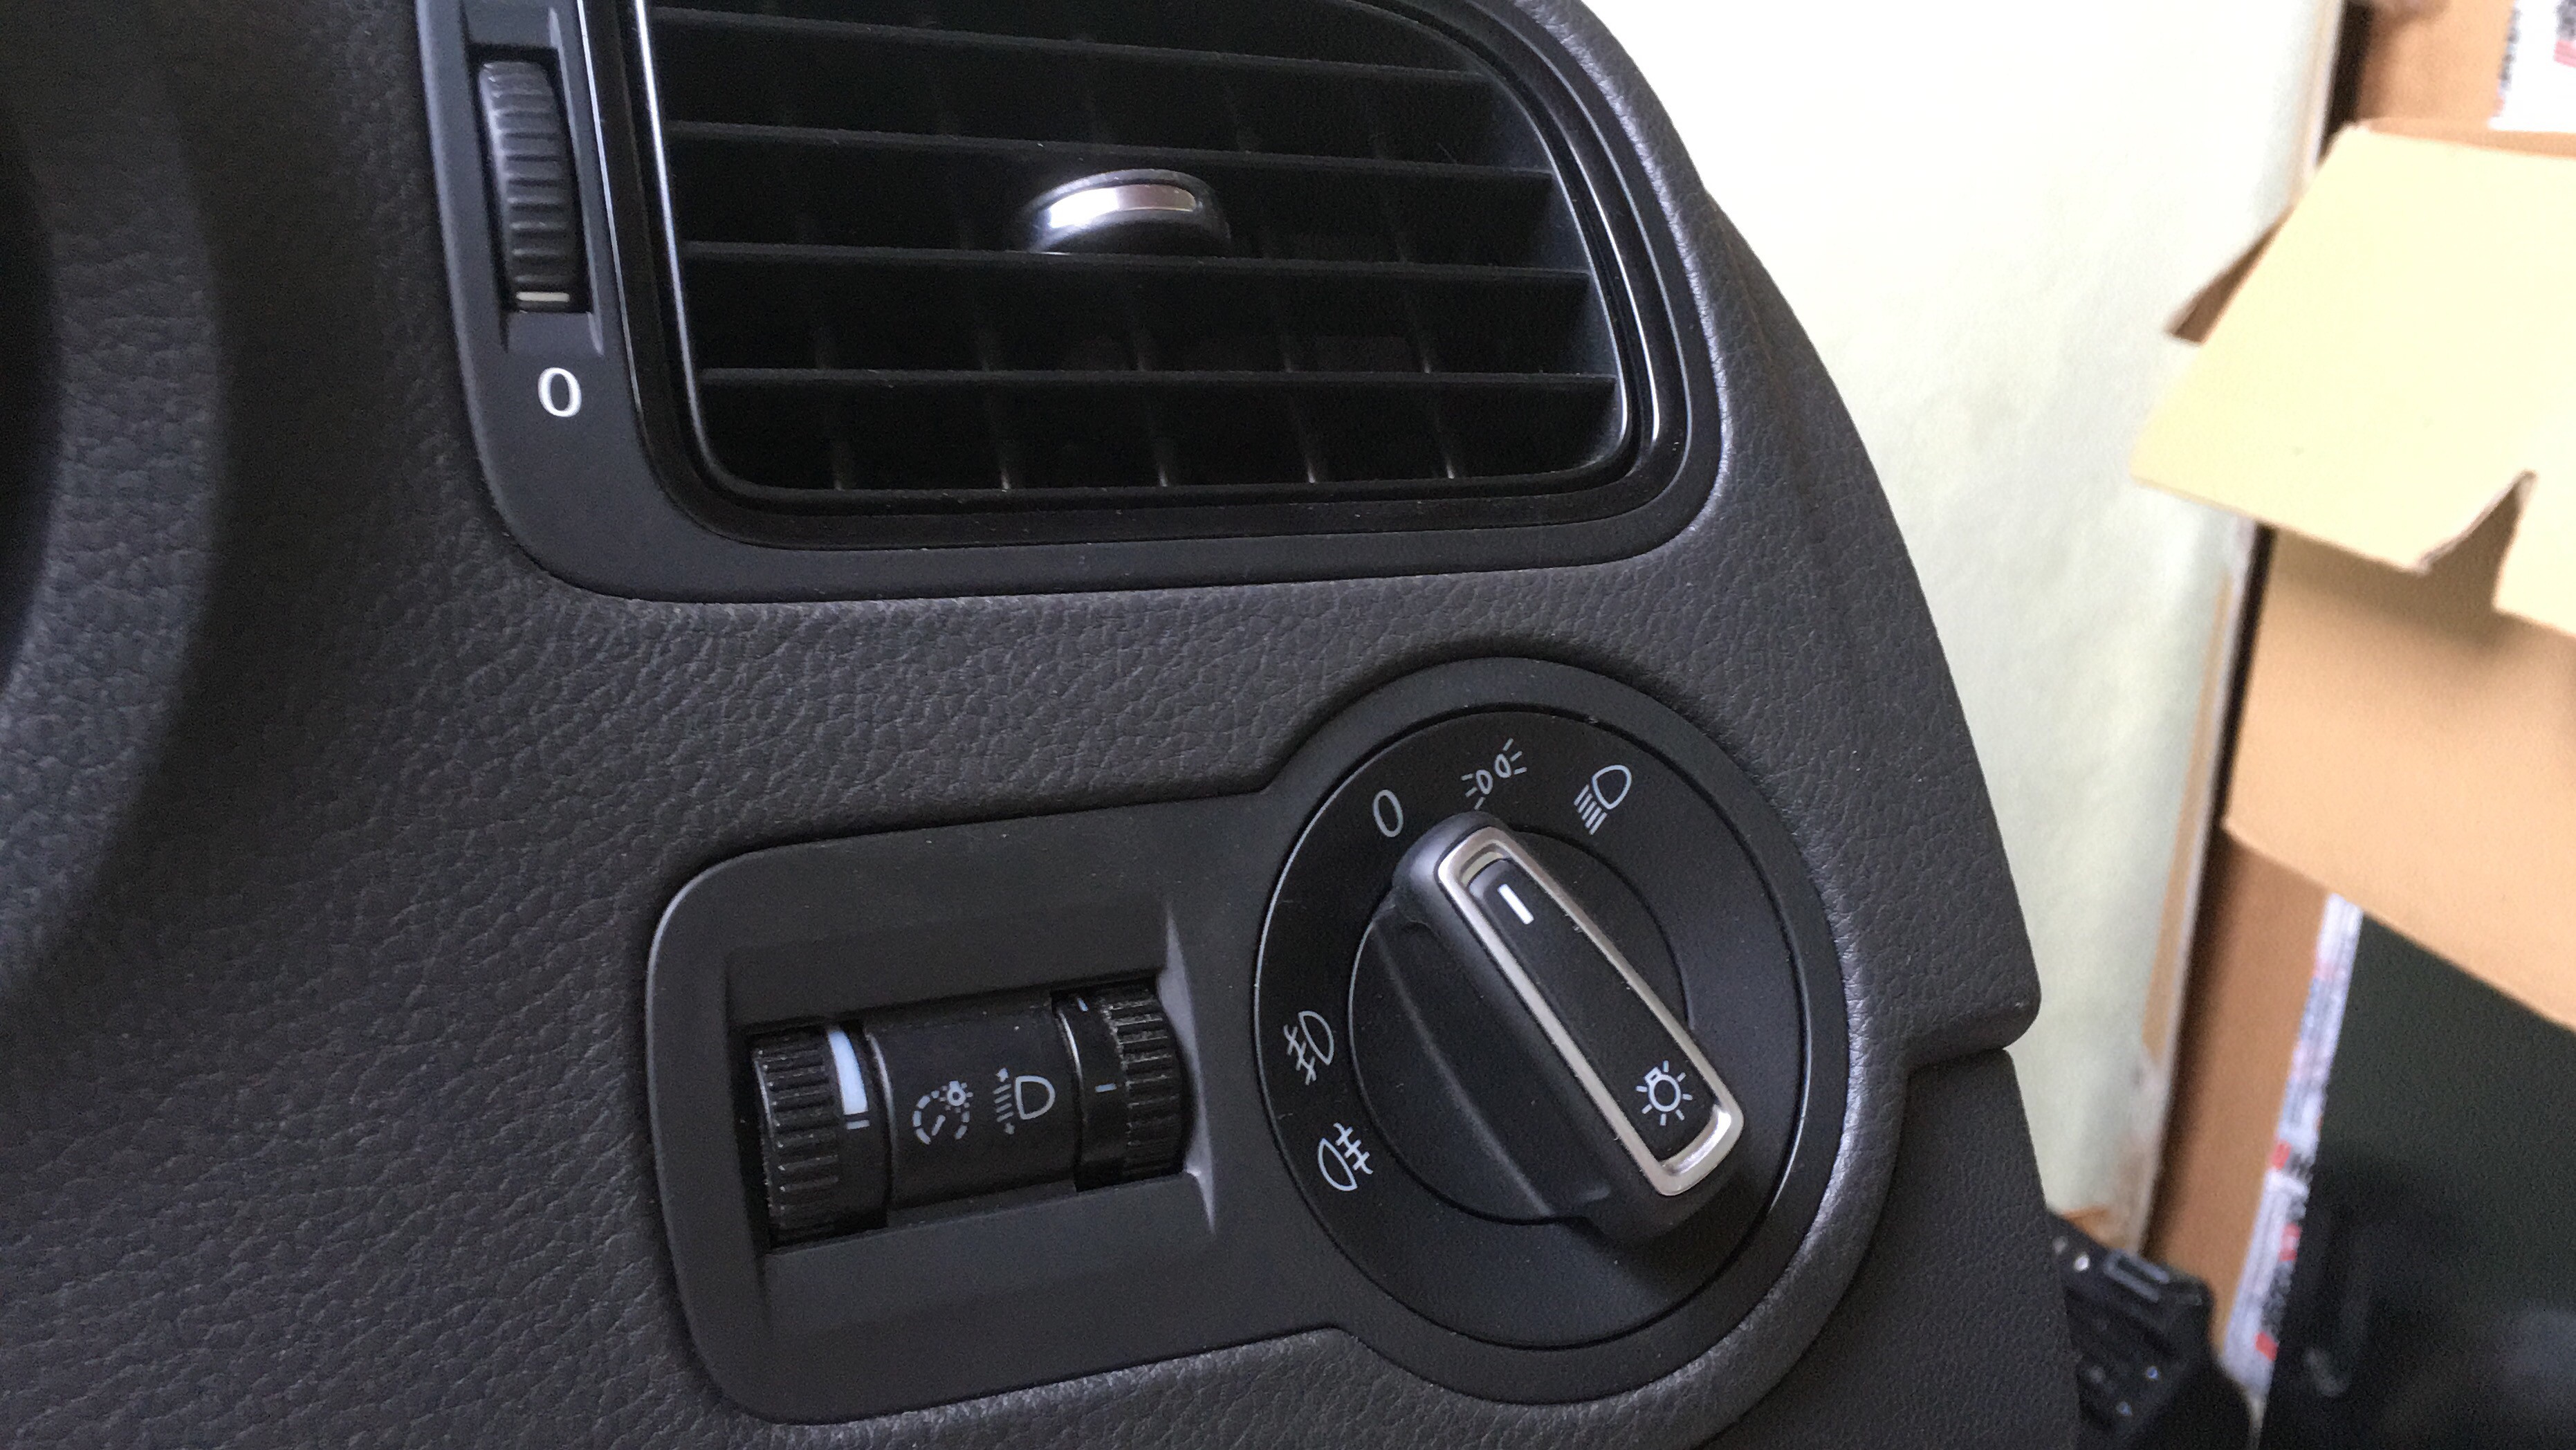
Building a dashboard desk
06/09/2017 at 17:12 • 1 commentHi there.
It's been a long time since the last update.
I'm back with some great news and some exciting plans.At the moment I'm building a new desk out of an Polo 6R dashboard. All buttons of the dashboard shall be used as controller in ETS2 and other simulation games.
Even the Navigation System will display the map of the game (at least that's my goal).
So here're some pictures of my new sub-project:
![]()
![]()
![]()
![]()
-
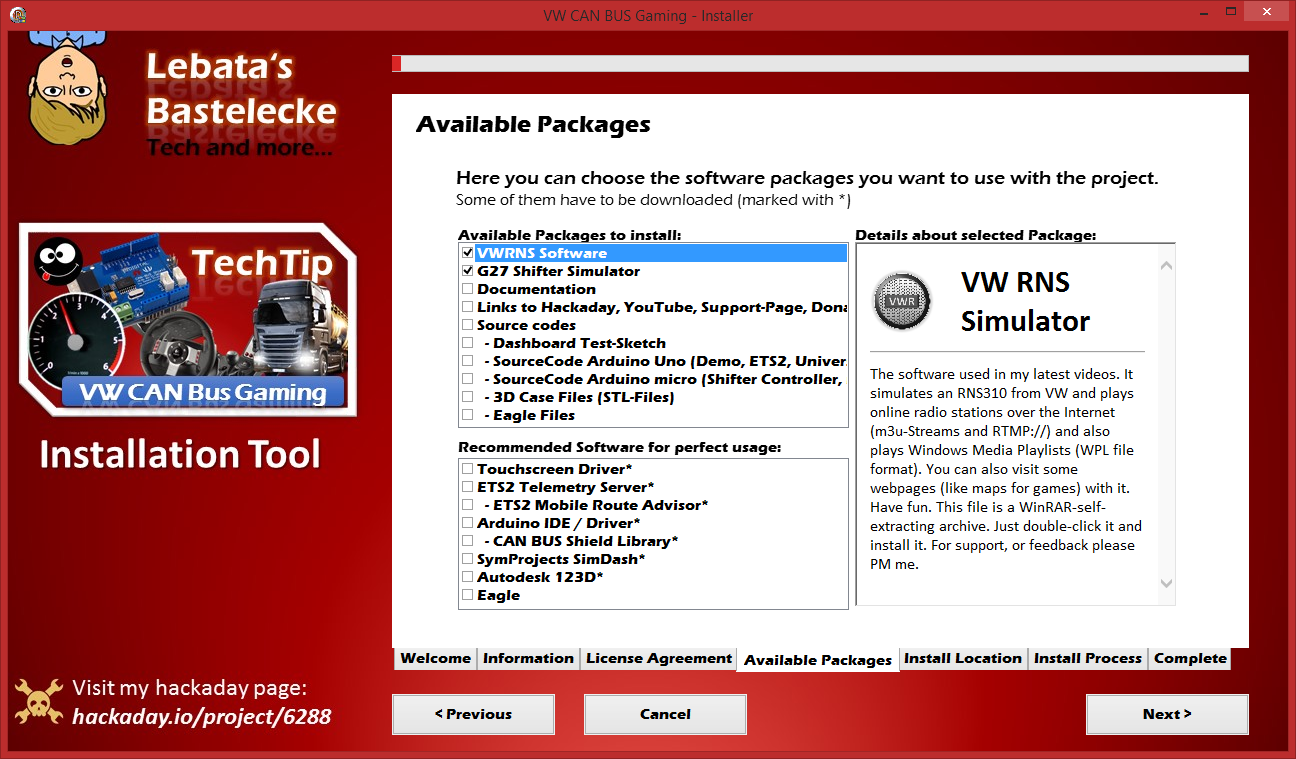
Creating an automatic Install and Setup Tool
05/08/2017 at 11:39 • 0 commentsI'm in the process of building an Installation and Setup Tool for those of you, who wanted a detailed instruction on how to set everything up. This software does the job for you!
I hope to complete this Setup Tool as fast as I can.
Here's already a screenshot (You can manually choose the packages which you want to install)
![]()
-
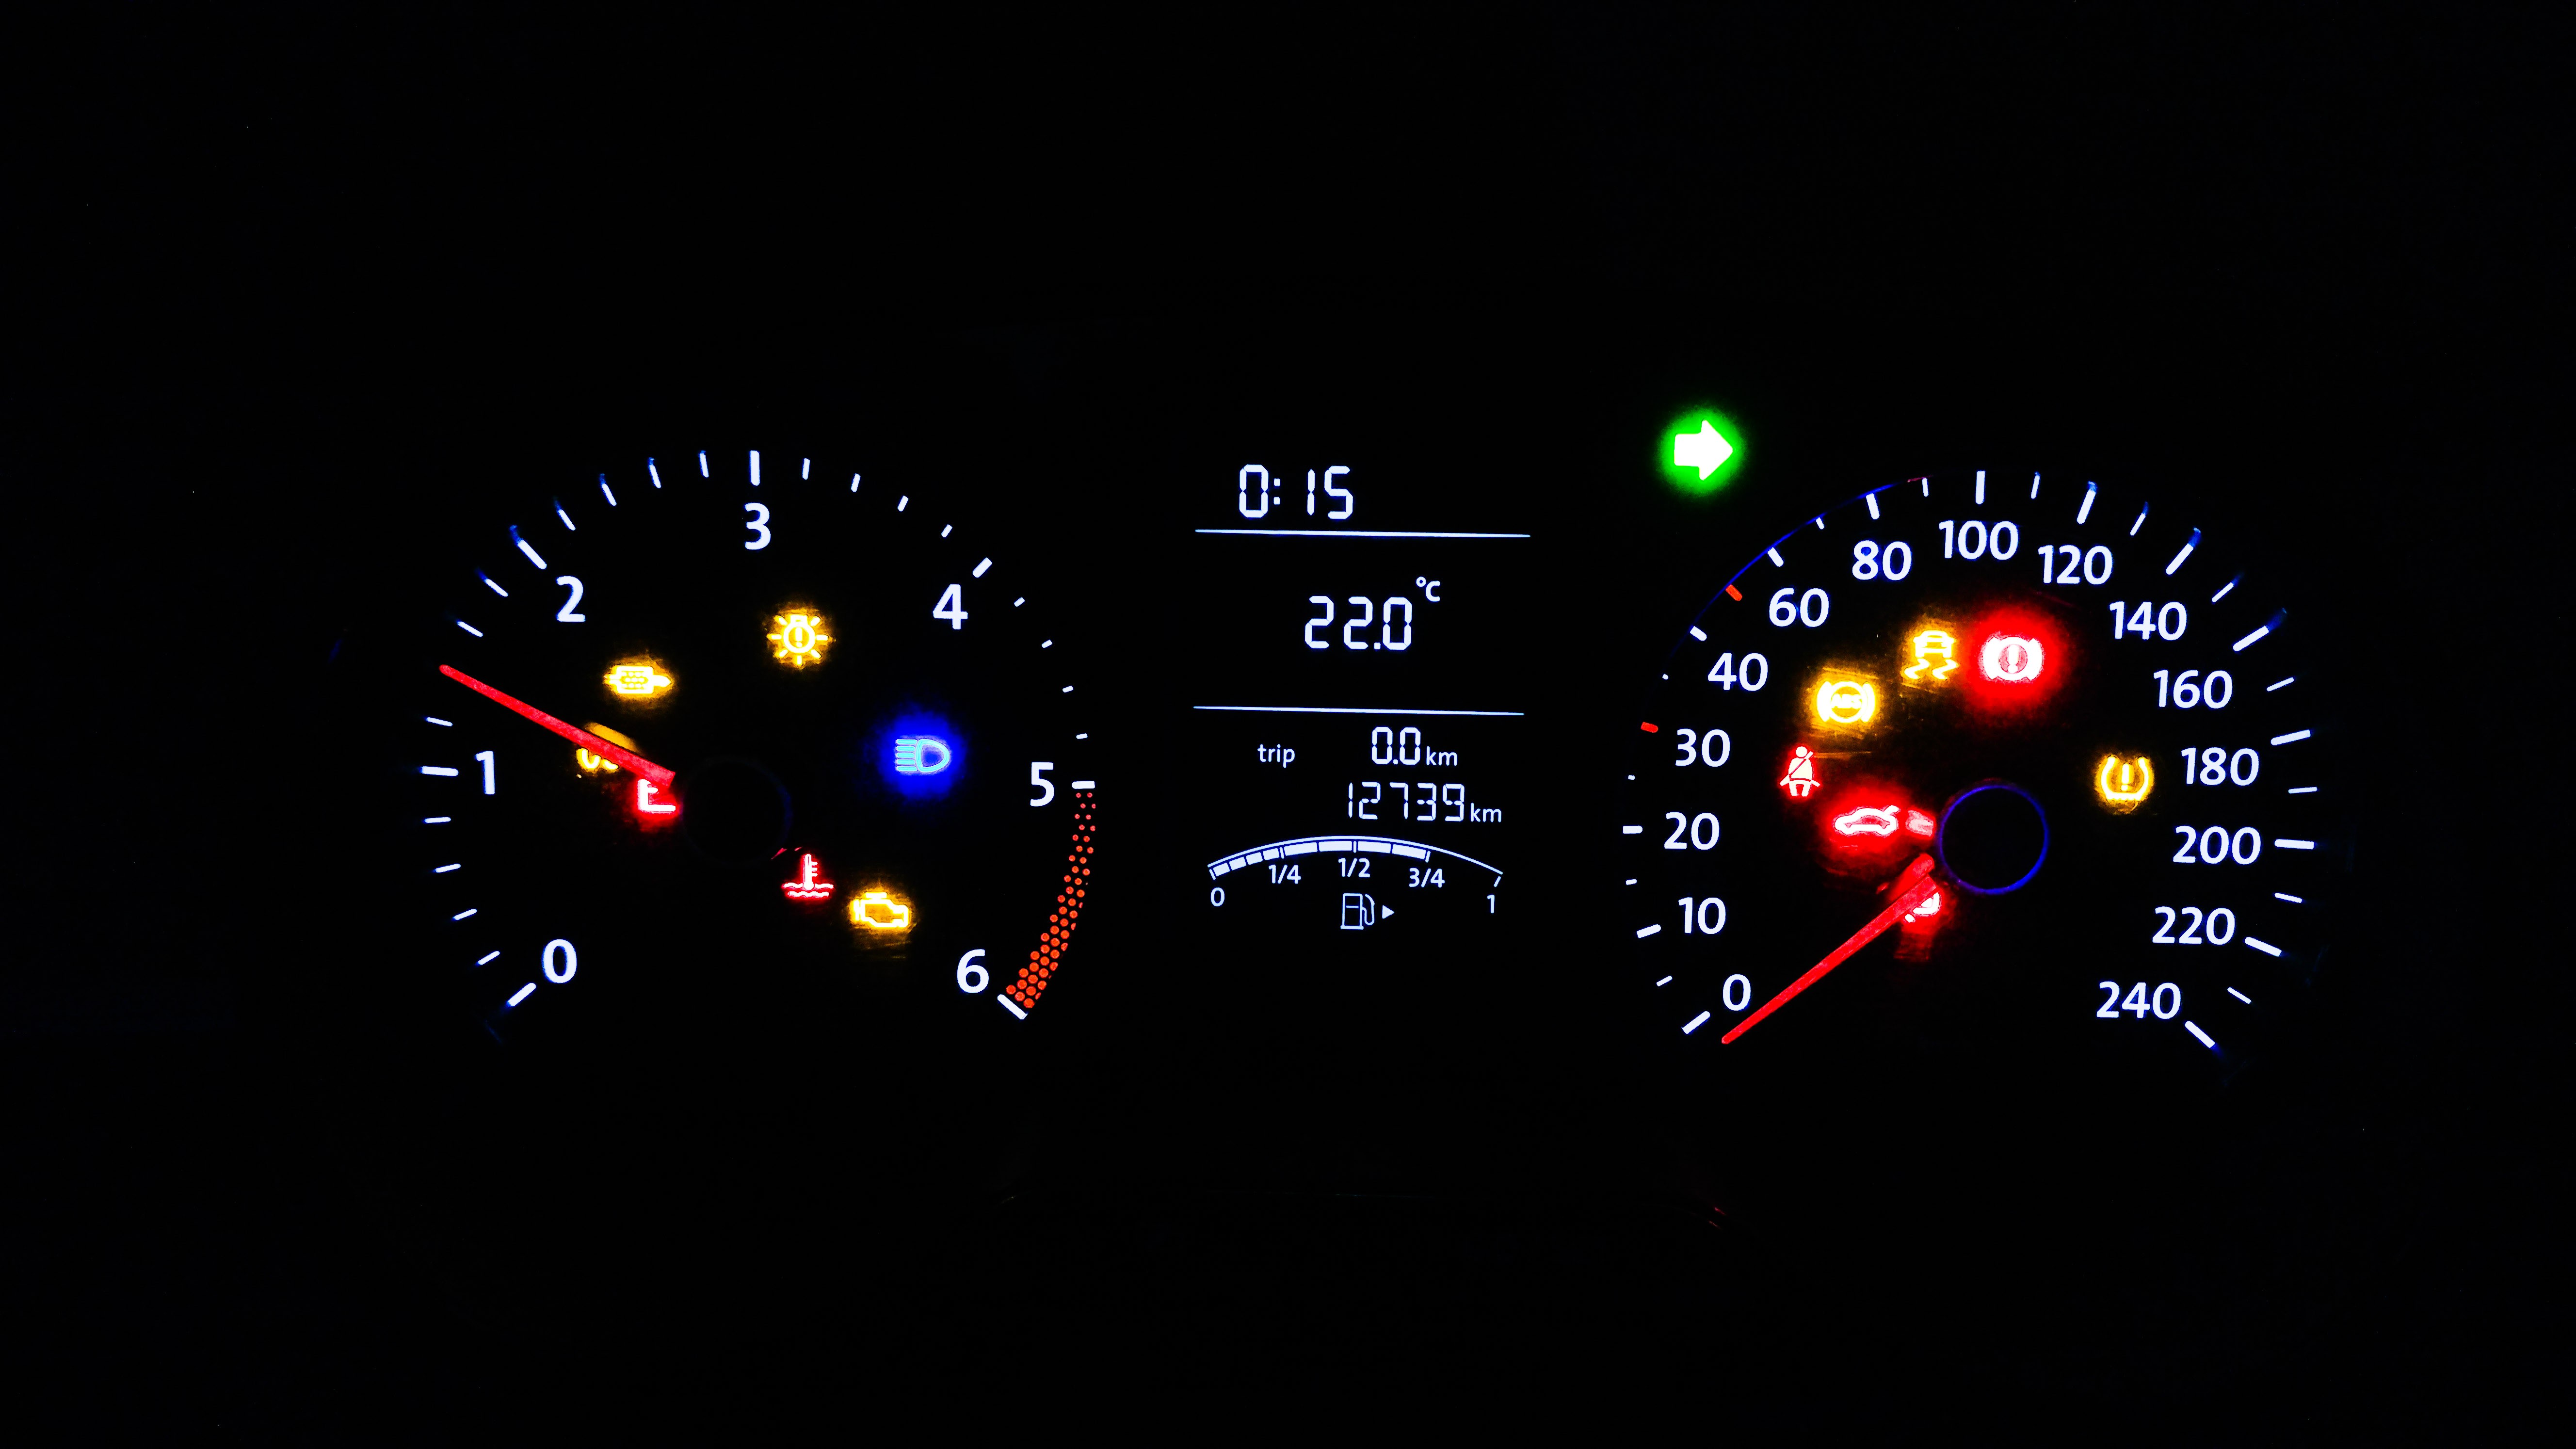
New Demo-Sketch for Dashboard
12/30/2016 at 15:32 • 3 commentsHi!
Just as promised a few days ago: Here's the new version of the test sketch.
It contains more CAN BUS functions (such as much more LEDs to switch on or off) and is completely rewritten for a better structure and easier usage.
These are the LEDs you can manually turn on or off in the sketch
![]()
There's also a new section where you can setup a userdefined setup for testing your dashboard's functions!
You find the new sketch in the download section of this project,
or directly here.
Best regards, and a happy new year!
-
More dashboard functions found
12/27/2016 at 21:20 • 2 commentsHappy Holidays to all of you!
The last few days I worked pretty hard on finding new functions of some CAN Commands for the dashboard!
New functions I found:
- Battery low warning
- Fog Light
- High Beam
- ABS signal
- Seat Belt warning
- Hand brake
- Low tire pressure warning
- Offroad mode
- Diesel particle filter
- Diesel preheater
- Water temperature alarm
I also rewrote the hole demo script with more explanations and comments. The speed needle should also be more accurate (but sadly still not perfect yet)
I will release the new demo source code in the next few days, so stay tuned.
And I wish all of you a happy new year!
-
It's been a while
07/27/2016 at 11:36 • 5 commentsAfter moving to antother city and my exams there's now time again for hackin'!
So expect frequent updates from now on.
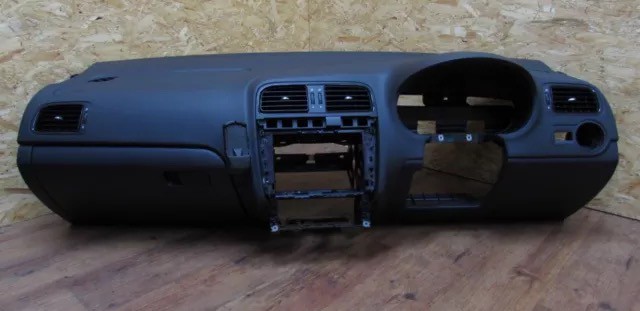
I've bought a real dashboard from a VW Polo 6R and I want to build something like a desk out of it. So you can play great racing games and work on it.
![]()
I'm really excited about the next months and hope to get everything working :D
-
Dashboard Photoshoot
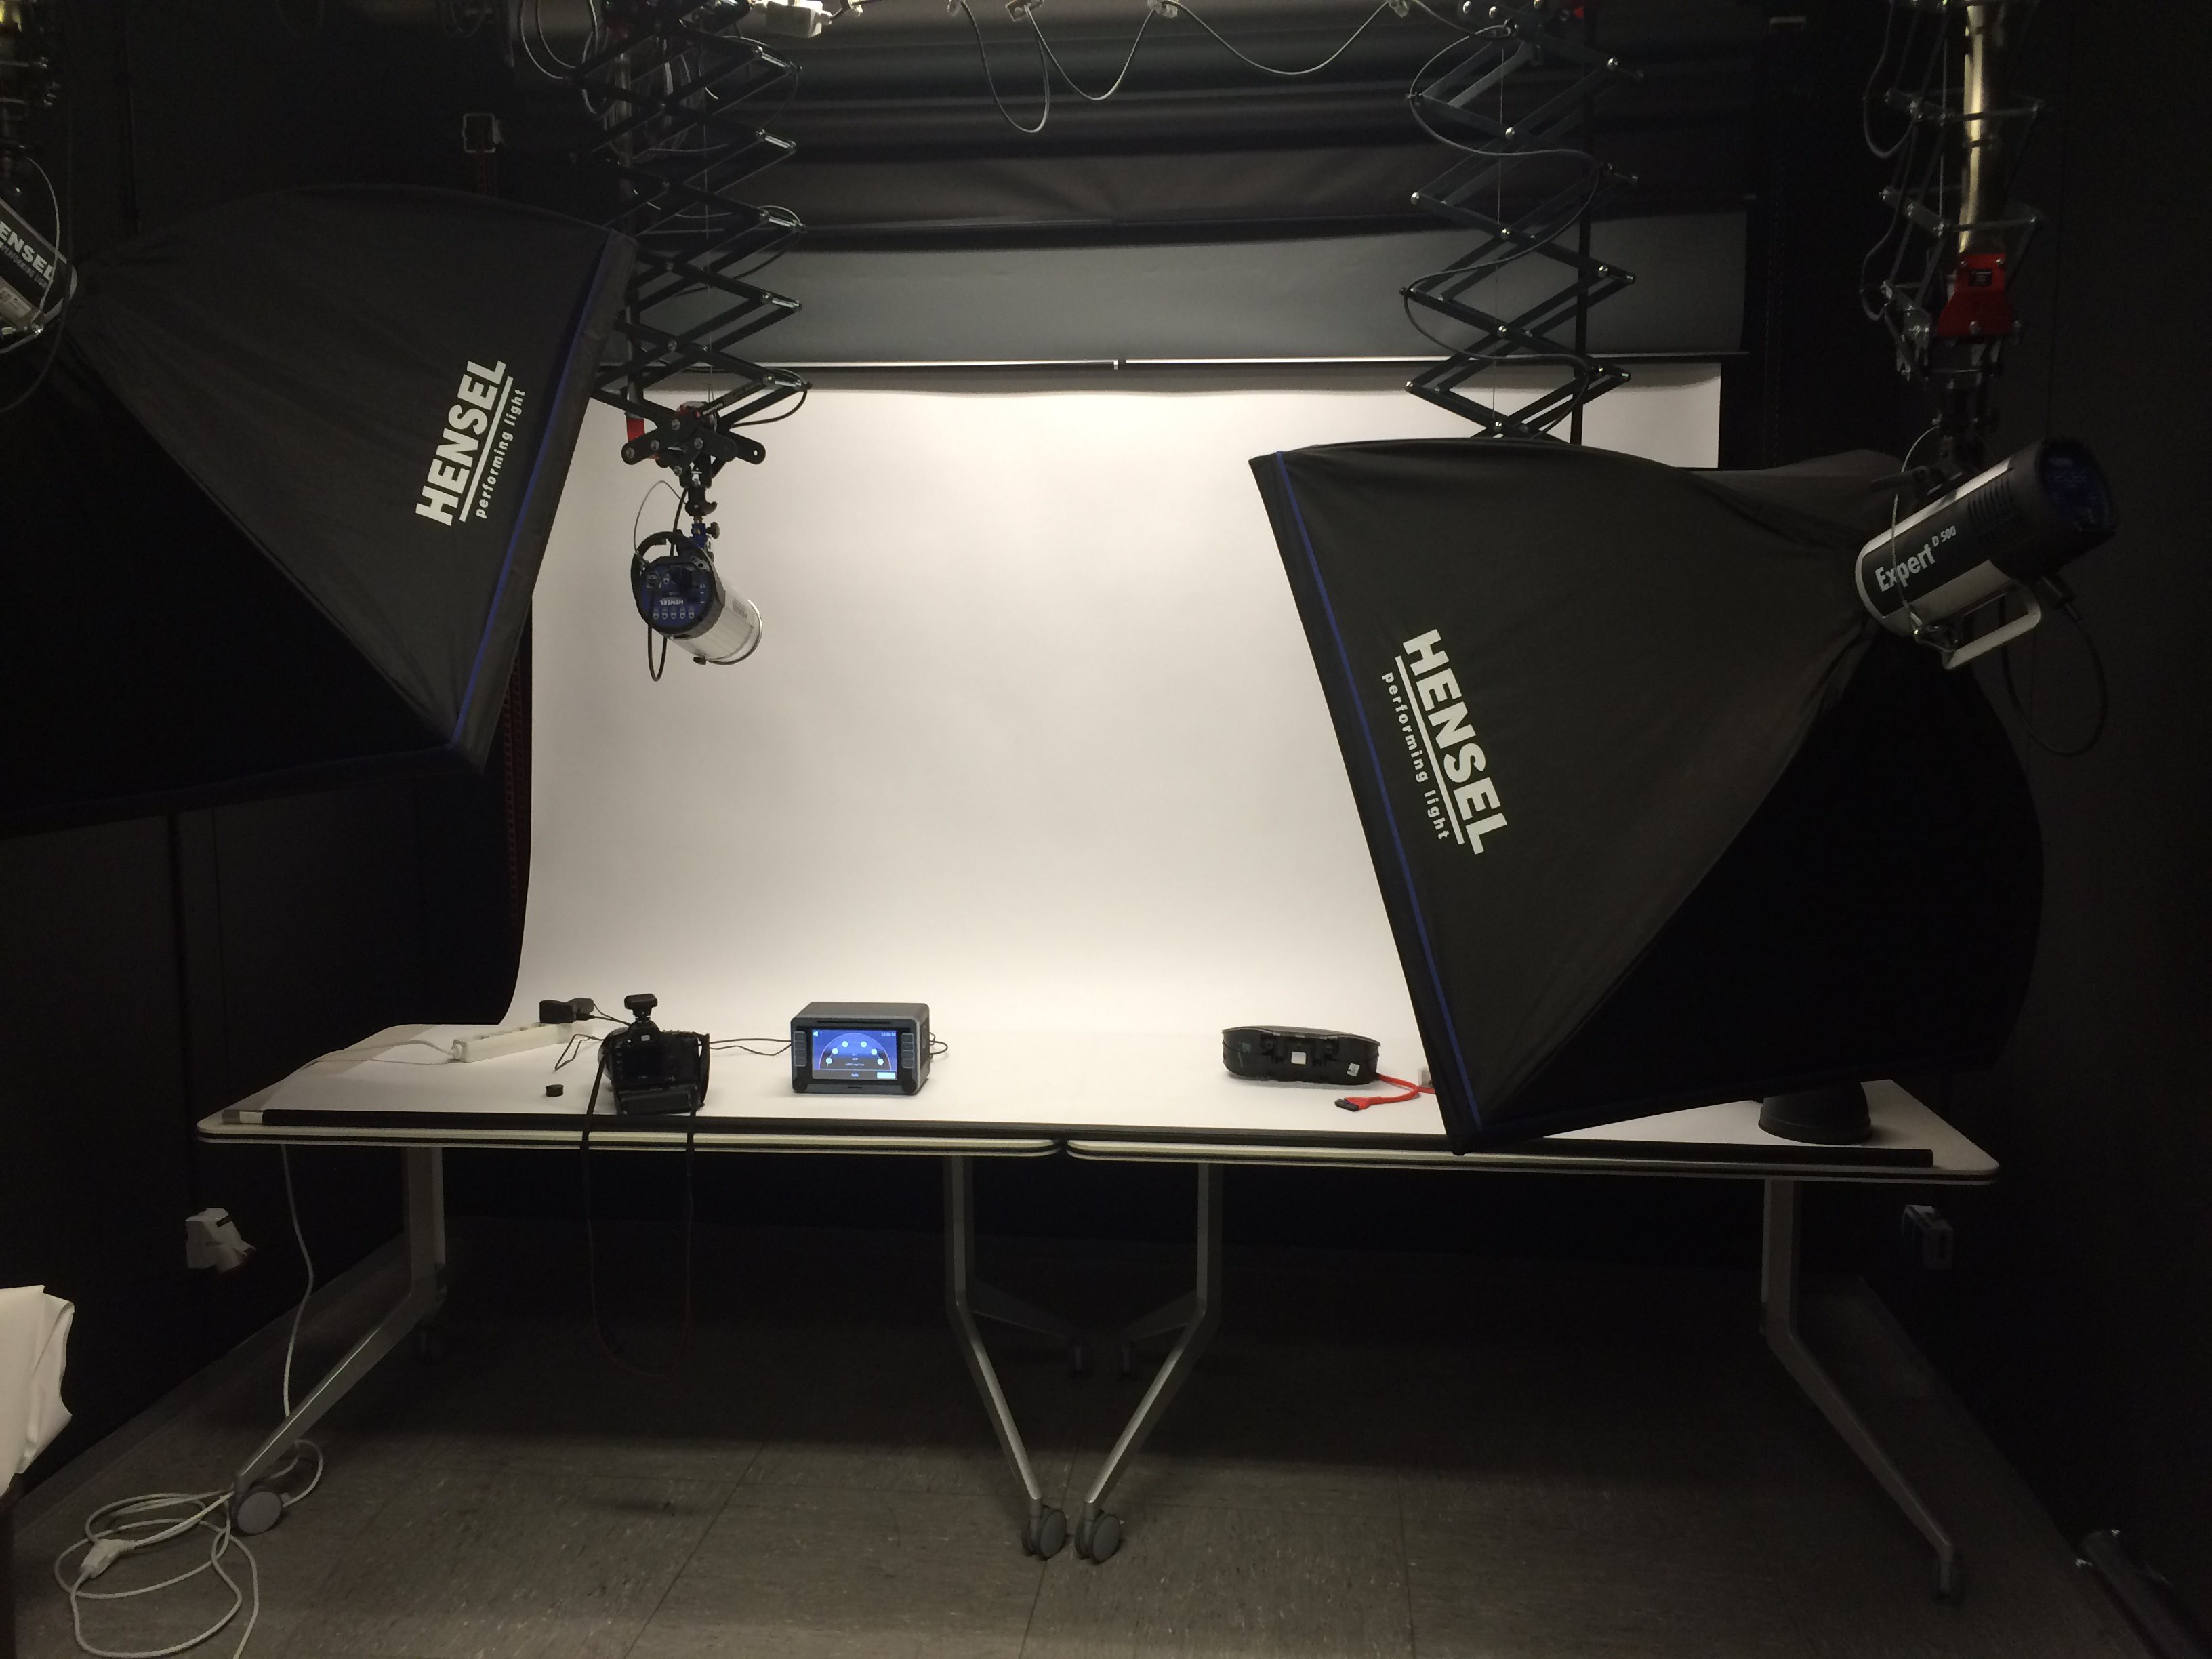
04/18/2016 at 11:45 • 0 commentsHello Tech-Enthusiasts!
I just updated the thumbnails for this project. Therefore I got help in a photo studio to take some better profile pics. I hope you enjoy them!
![]()
CAN BUS Gaming Simulator
Controlling a VW CAN BUS dashboard of a Polo 6R with an Arduino and a CAN BUS shield using the Telemetry API of Euro Truck Simulator 2