-
41Step 41
Electrified Activated Carbon Pod
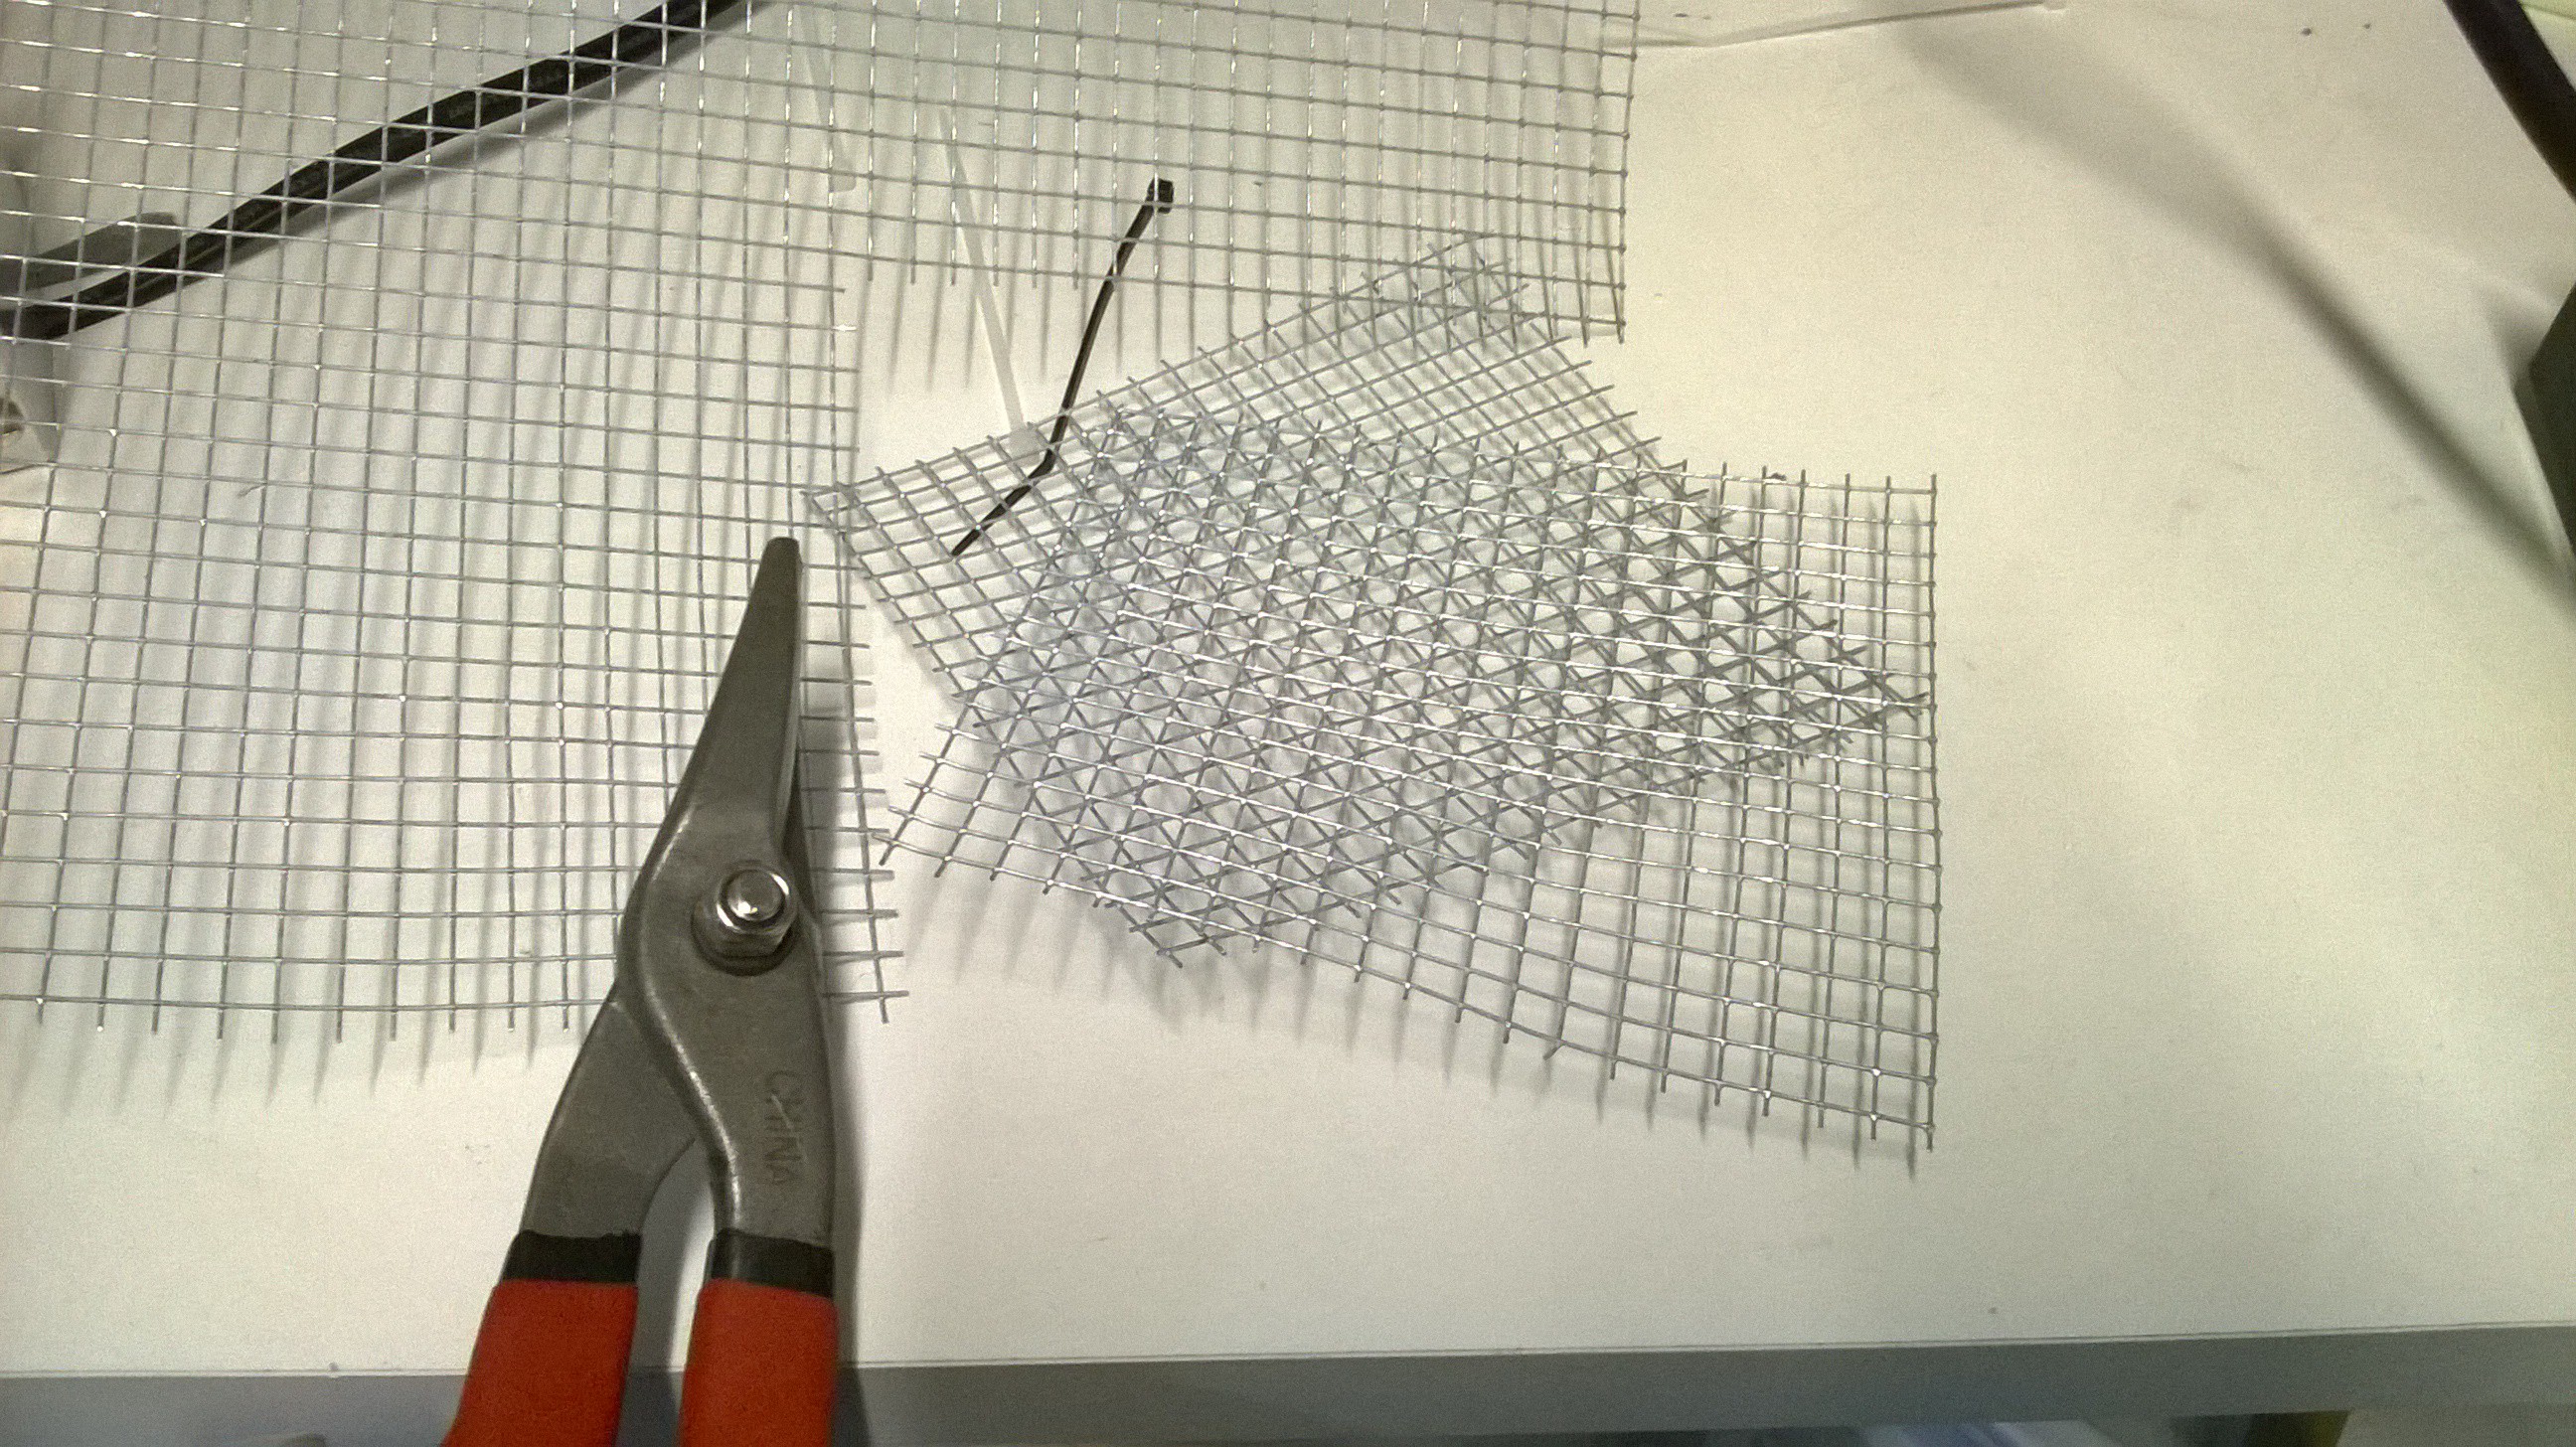
Now since activated carbon is conductive, I chosen to electrify the pods to act as additional collection surfaces for ultra-fine partciulates. A wire will needed to be added to the pod that is connected to a metal grid so it can touch the activated carbon. Cut a square grid section, this can either be another sheet of aluminum screen or another type of metal grid. I chose to use 1/4" galvanized steel grid fencing.
![]()
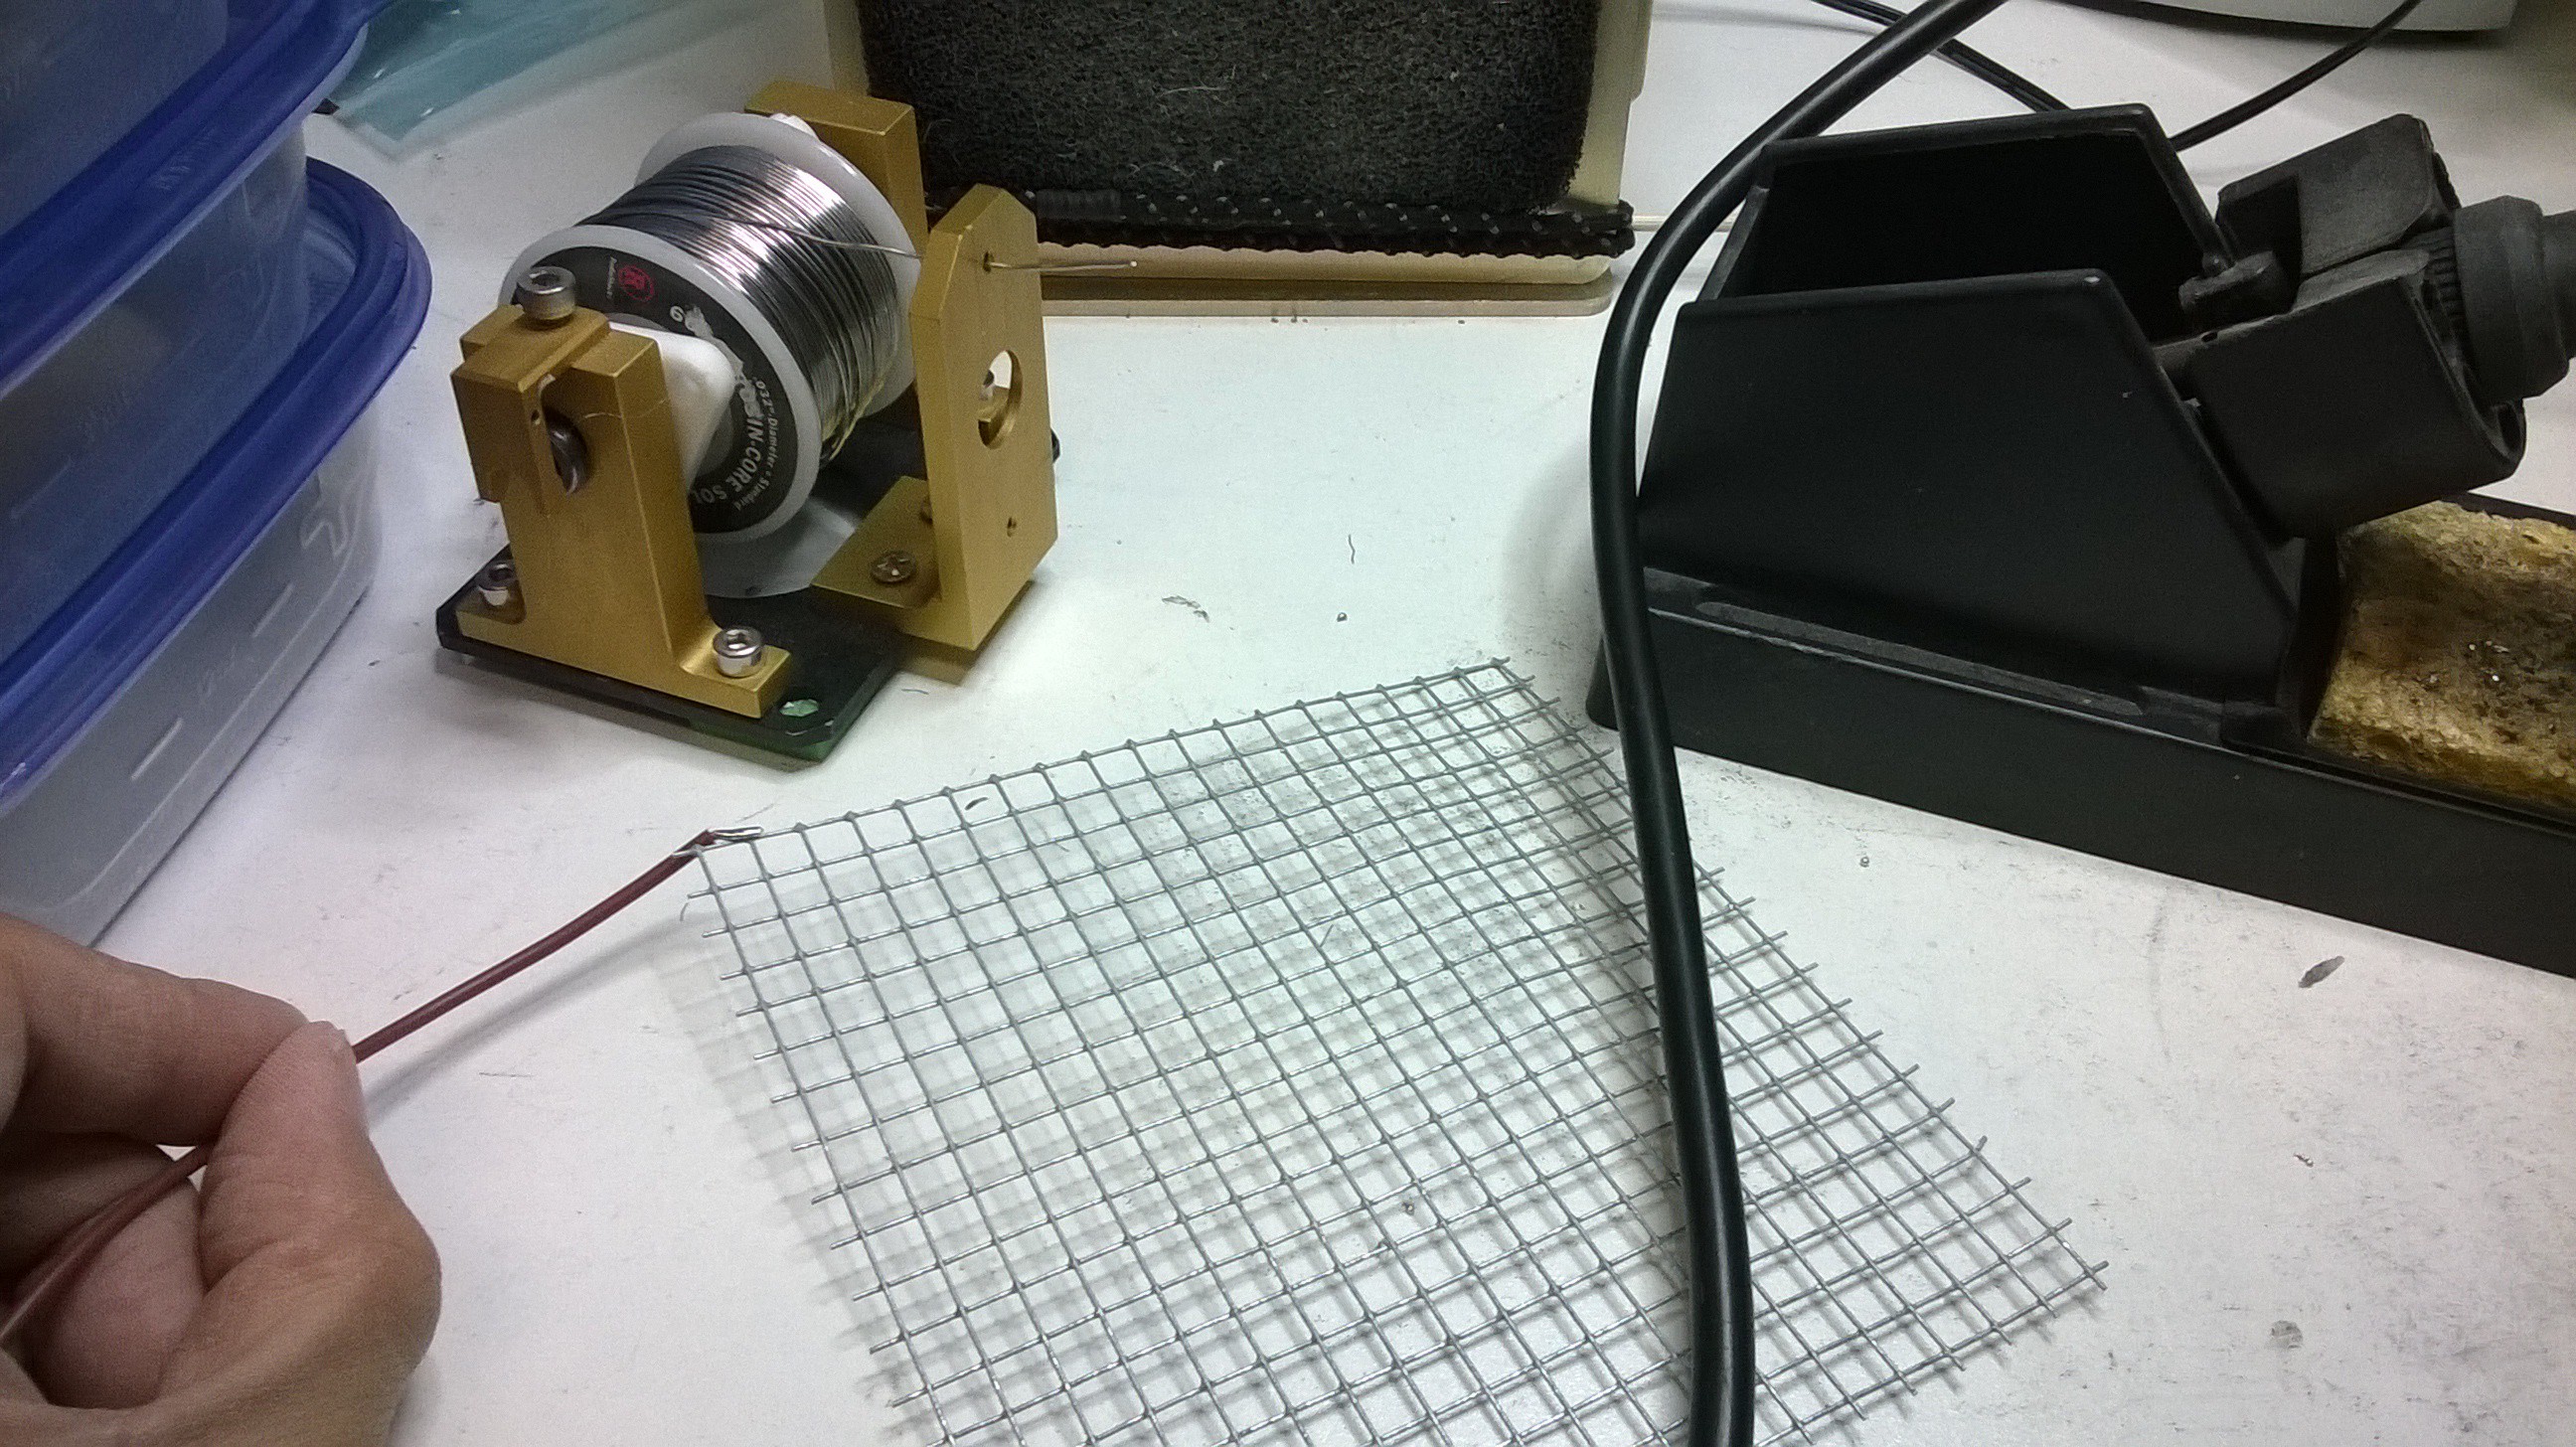
Then solder a piece of wire to that grid.
![]()
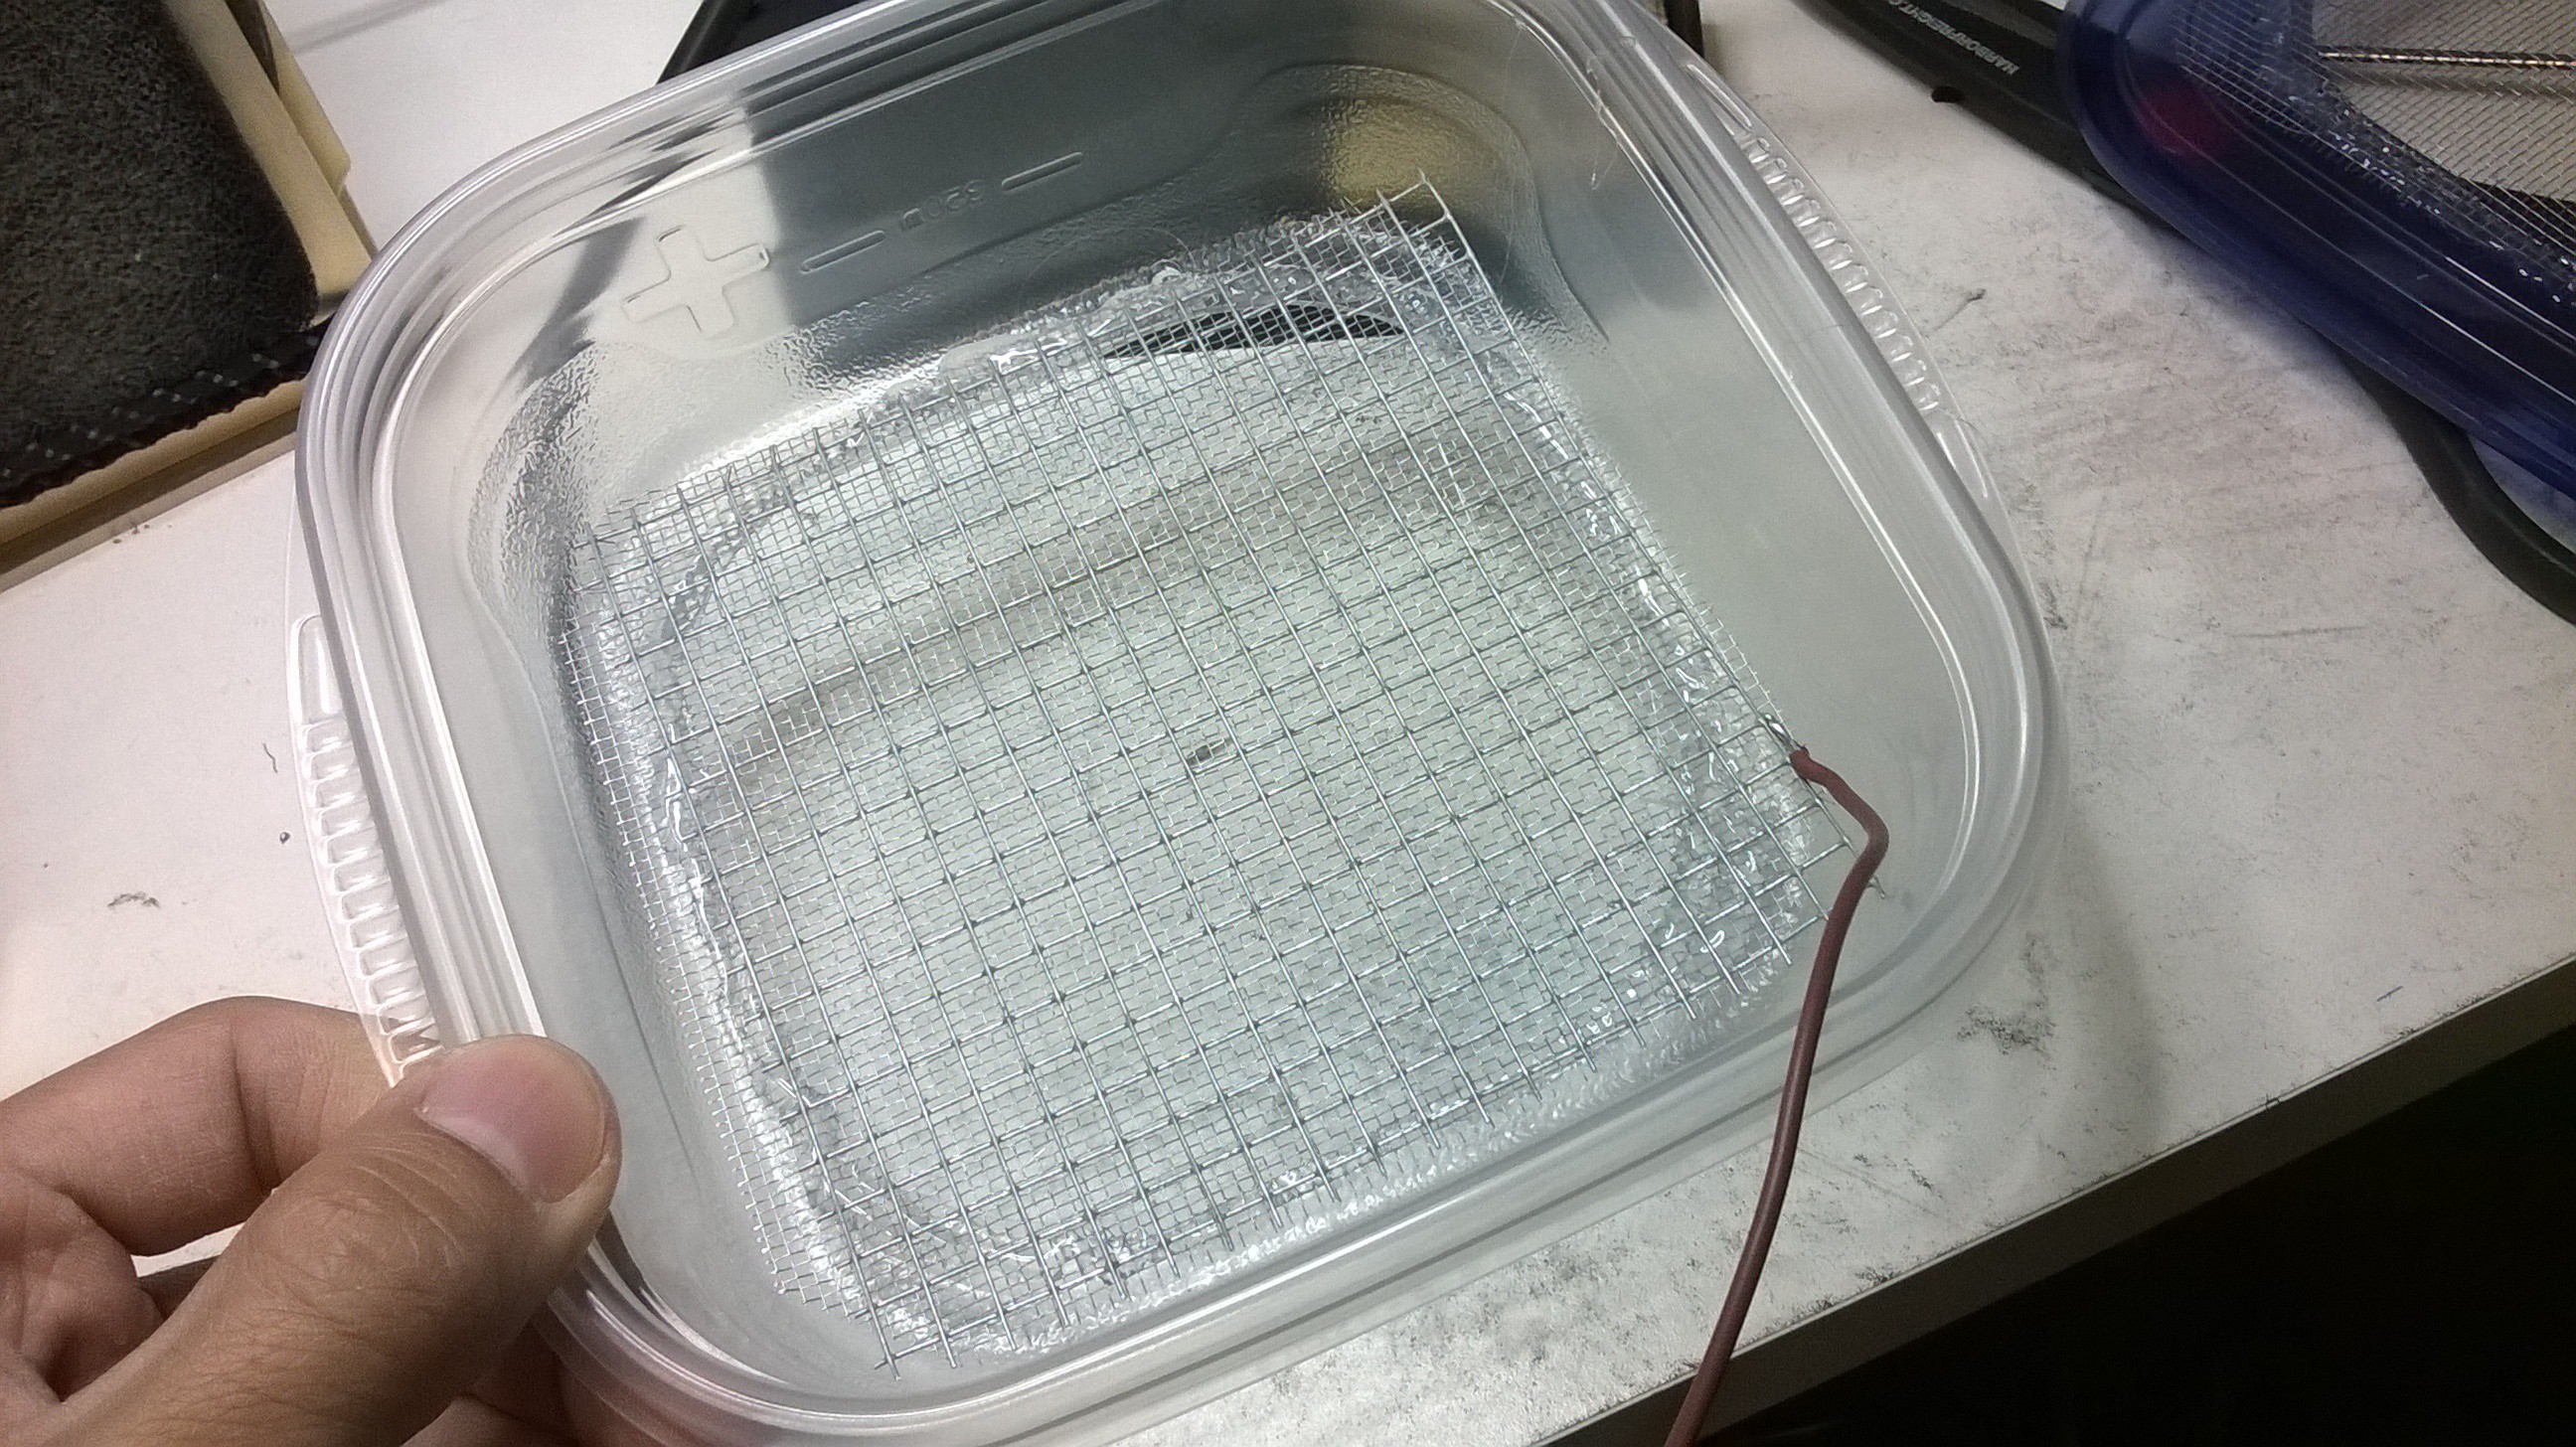
Place it the grid in the bottom of the container.
![]()
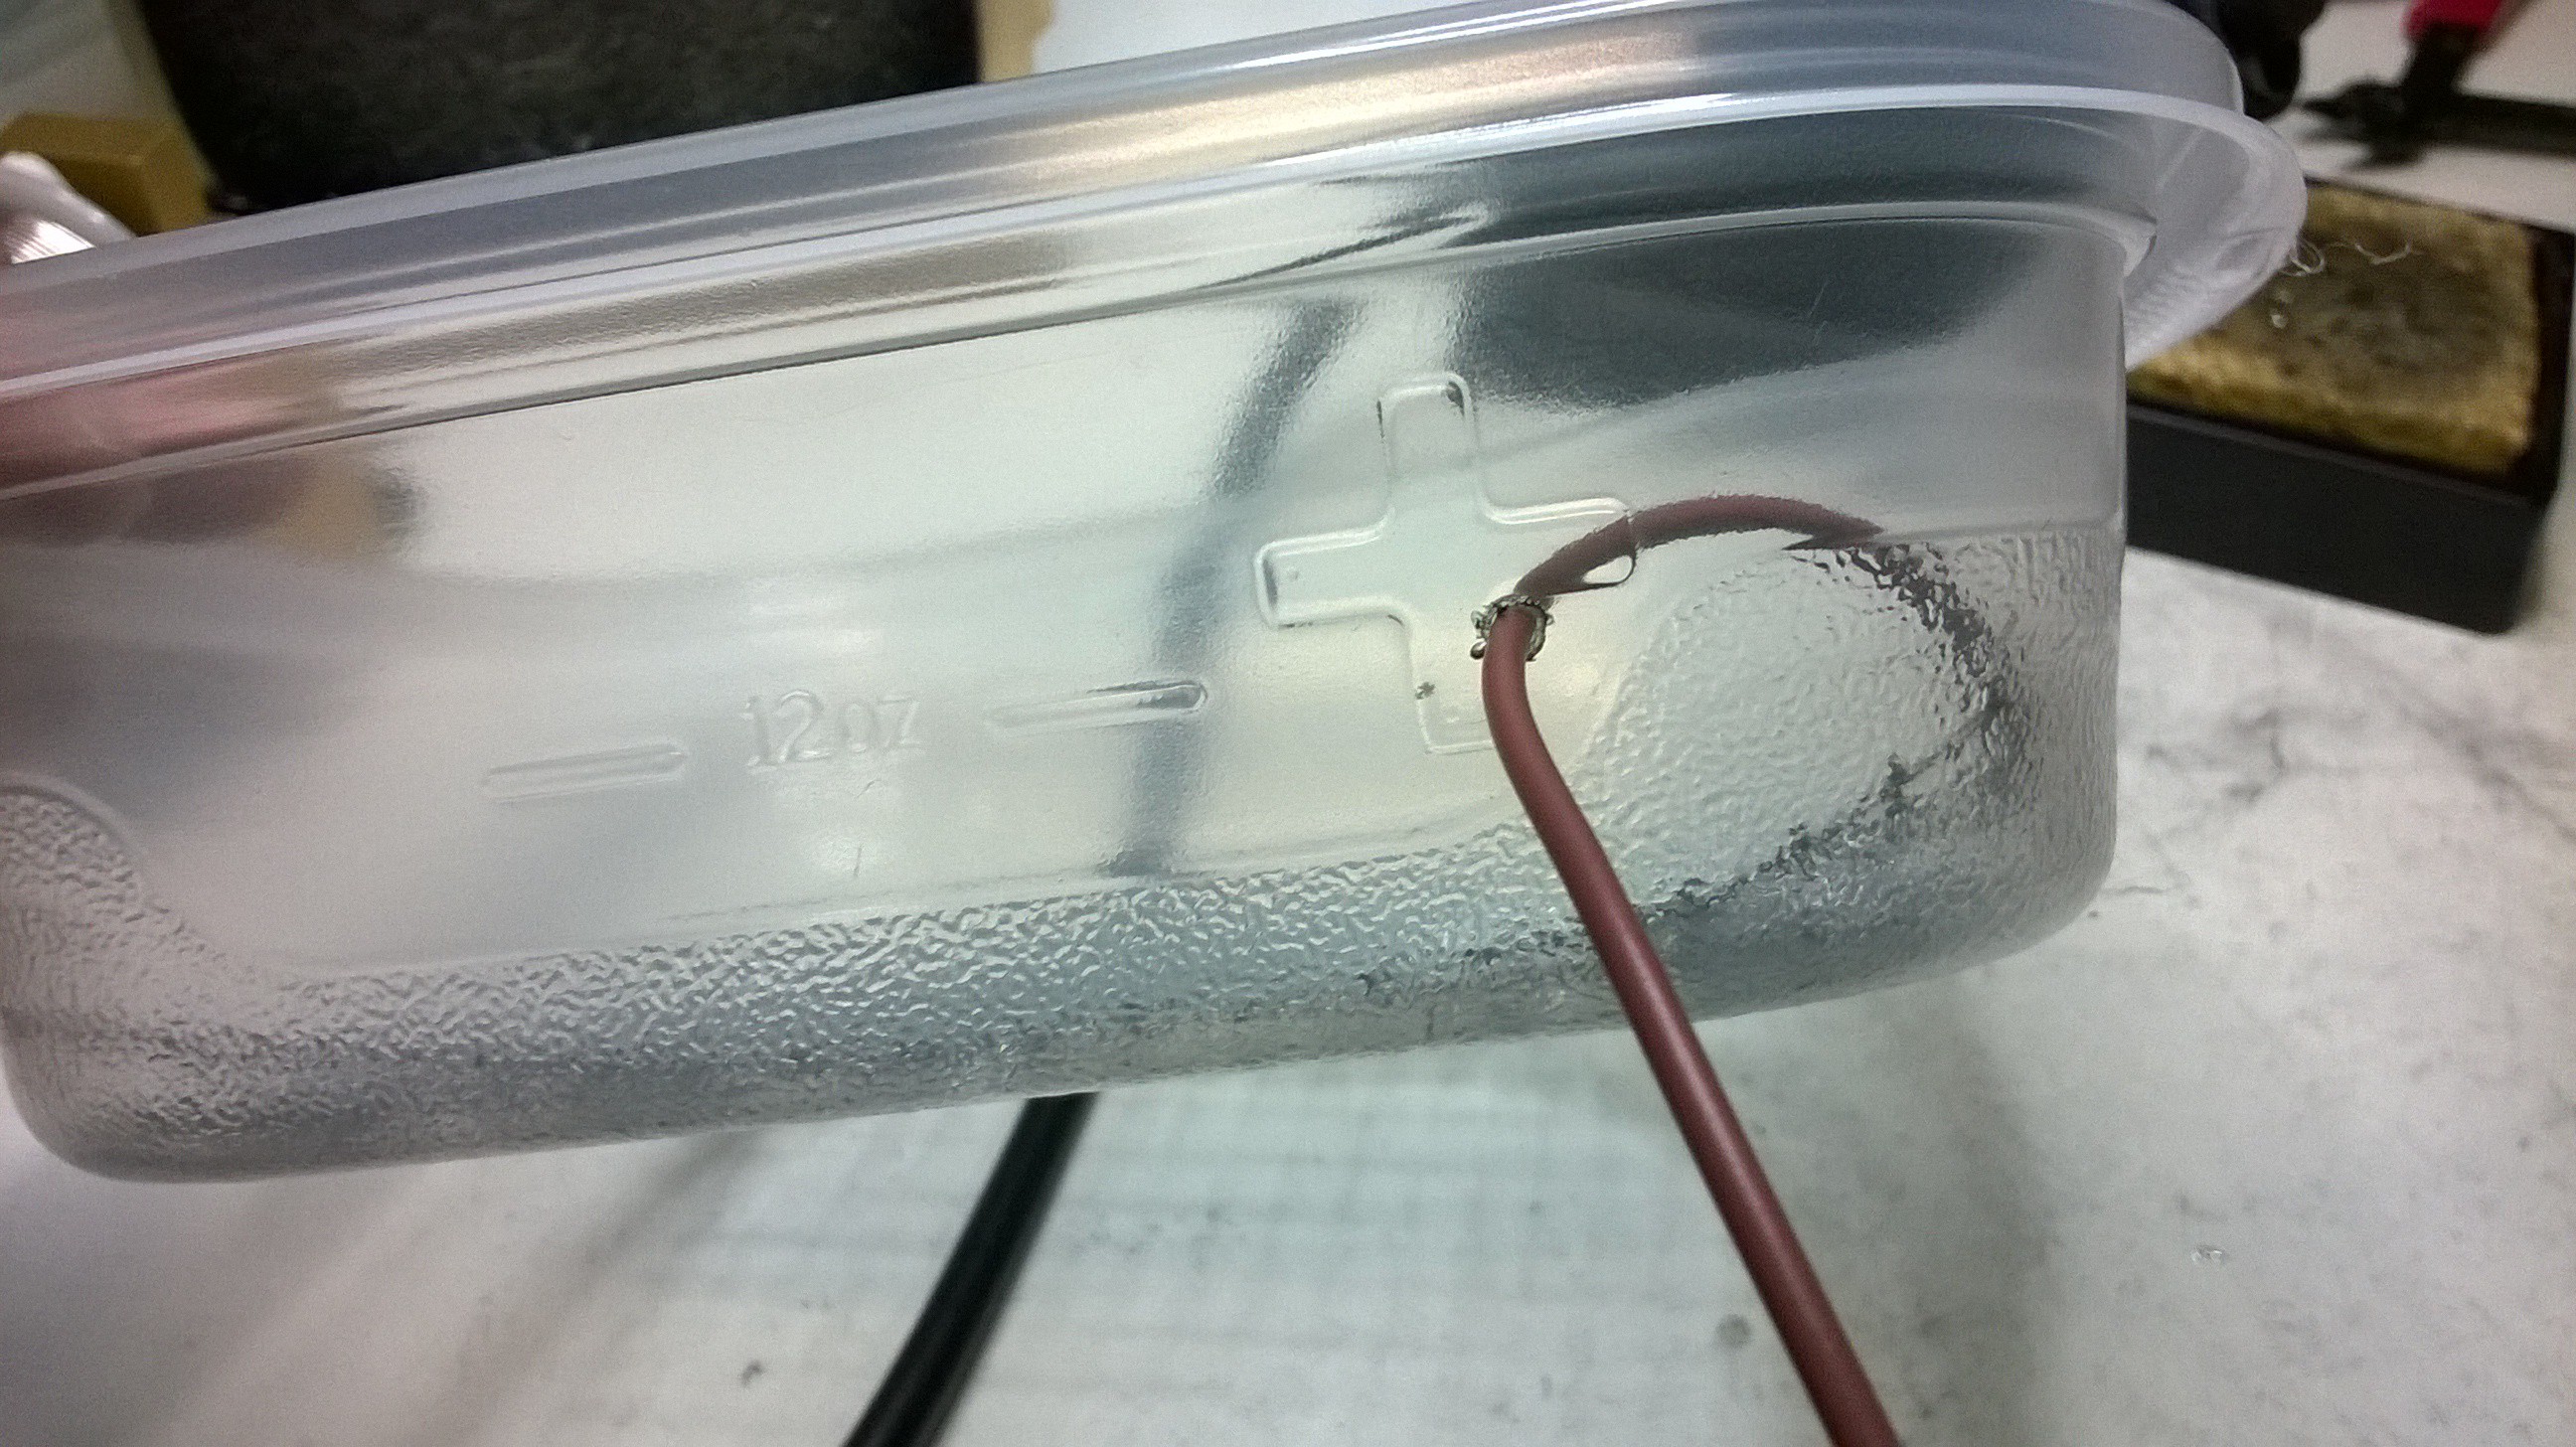
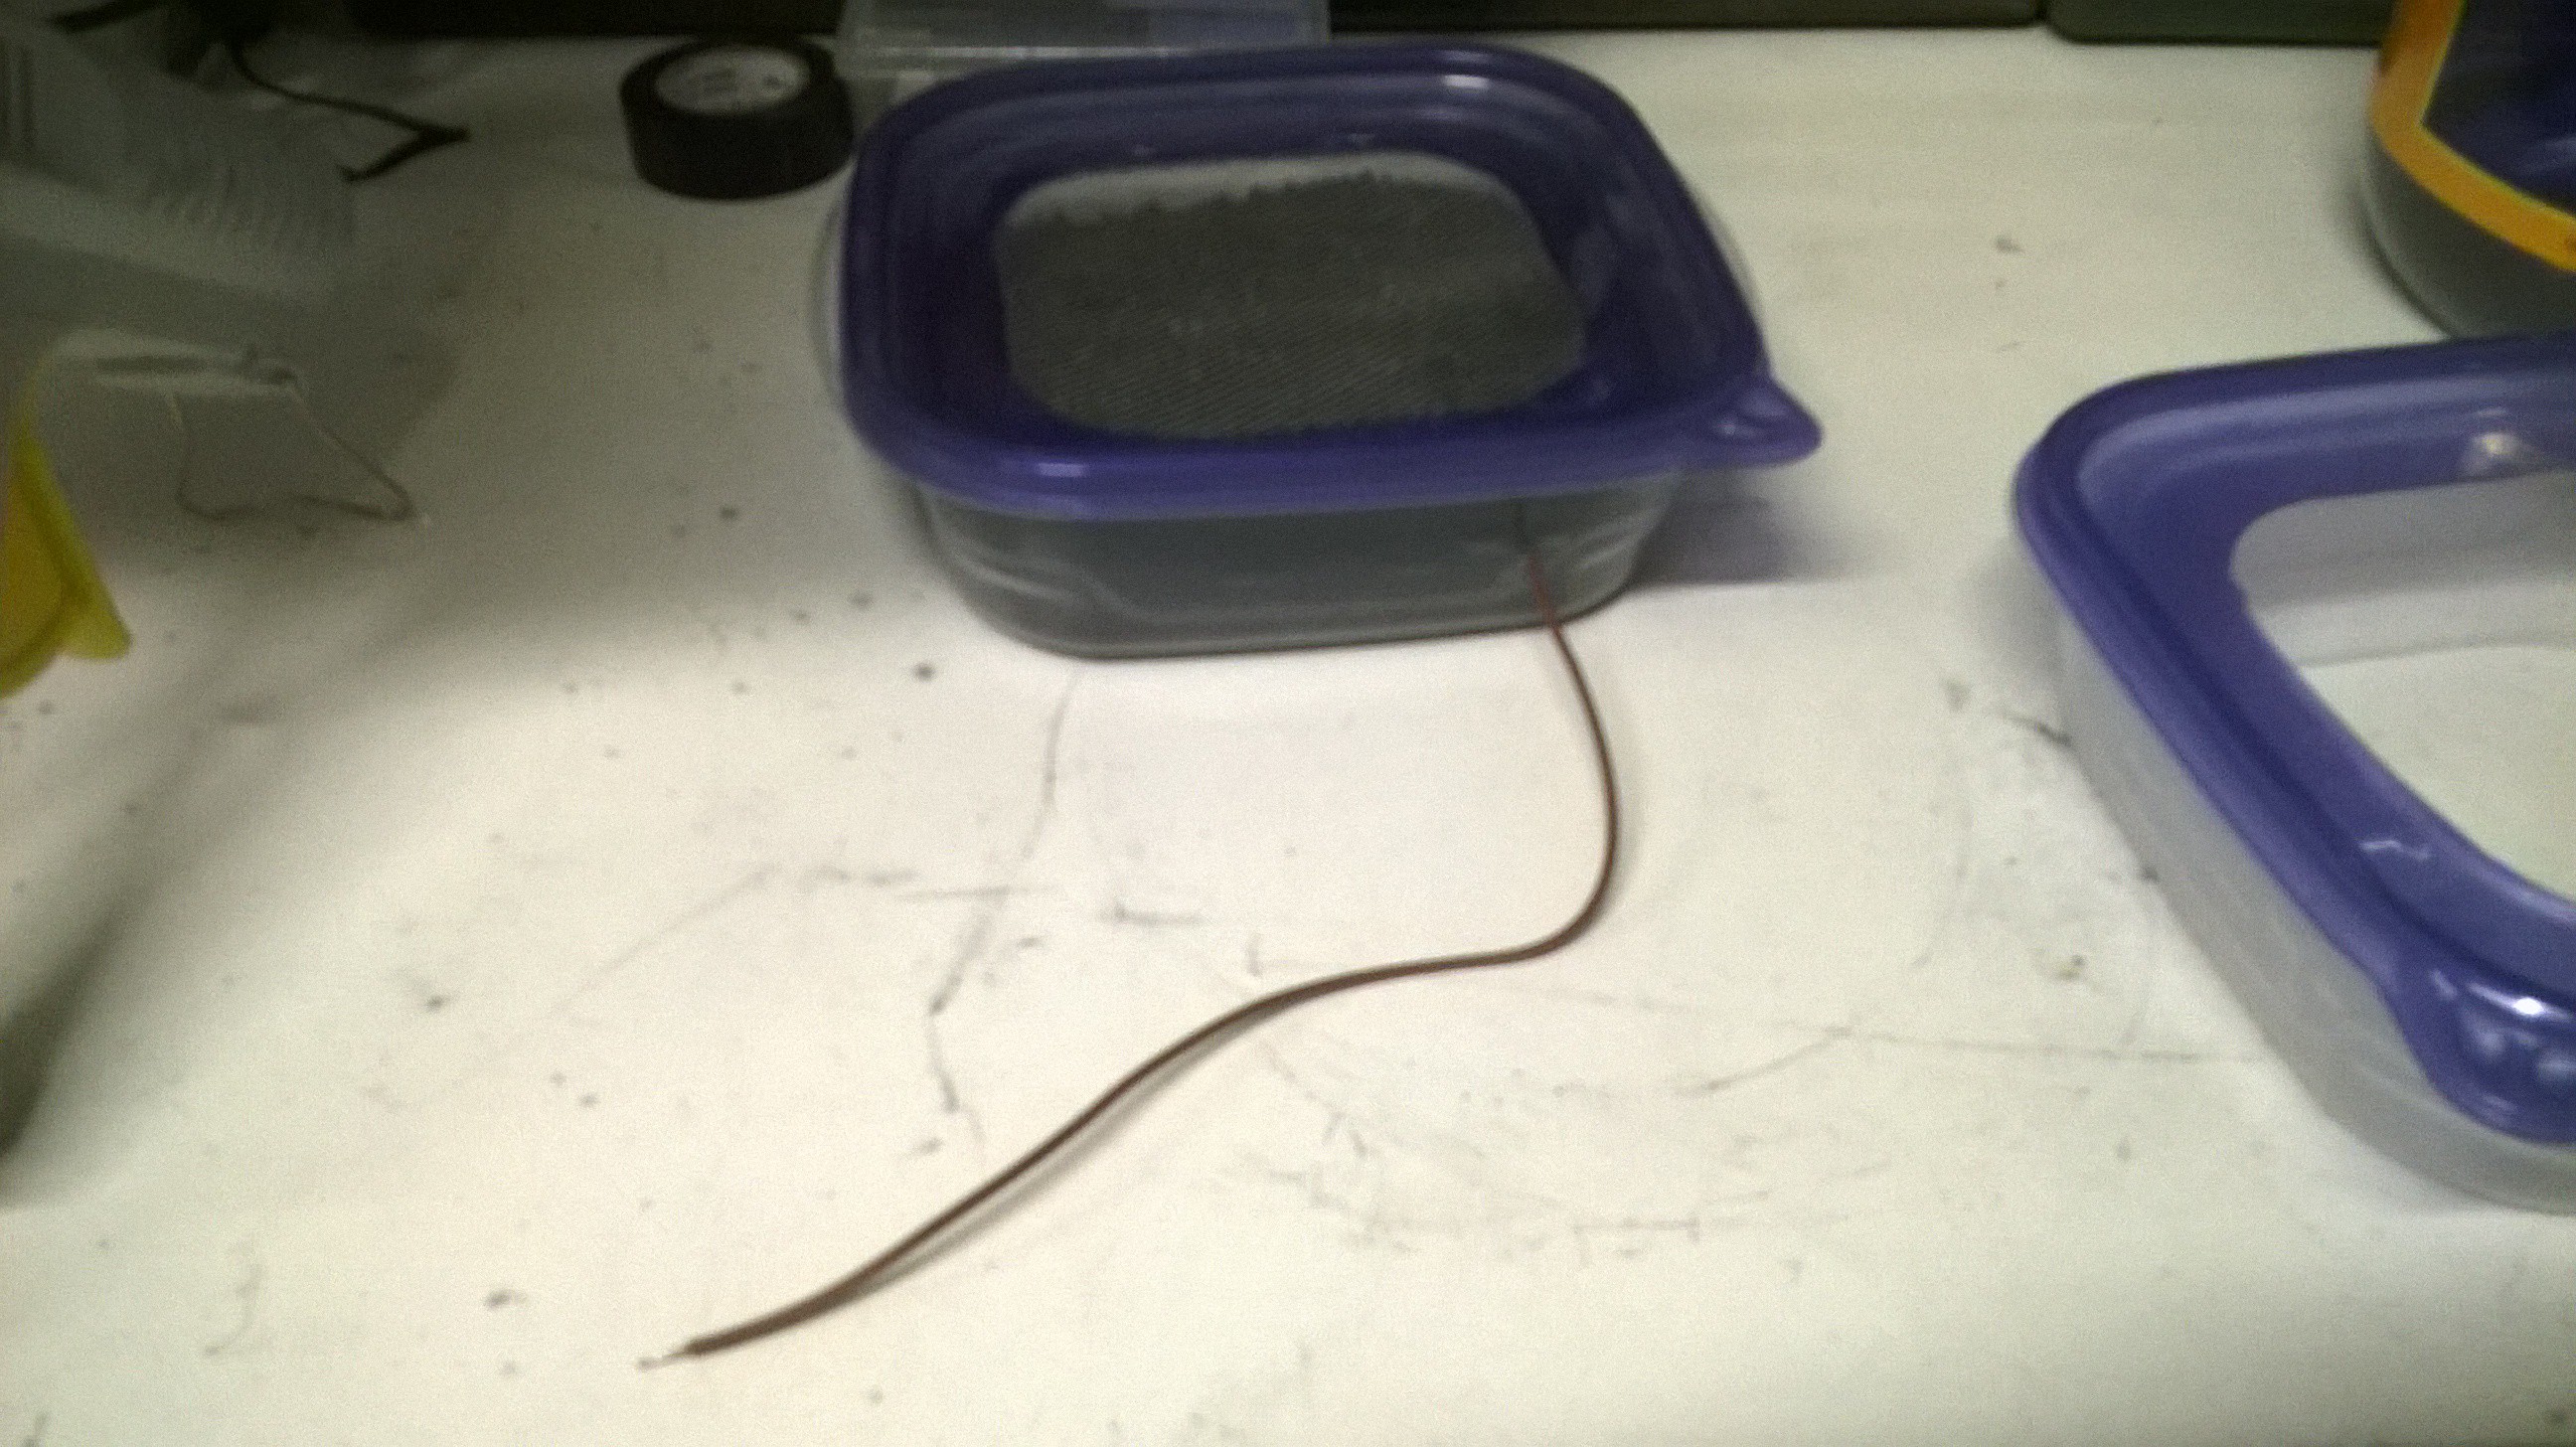
Create a small hole on the side of the container so the wire can be routed through it. A soldering iron works well to make small holes in plastic.
![]()
-
42Step 42
Now fill the container with activated carbon.
And place the lid on it. You now have a finished Electrified Activated Carbon Pod.![]()
![]() The wire would be connected to the same high voltage polarity as that electrostatic precipitator tube walls to act as additional collection surface. You can stack as many of these pods as you like. Just remember to glue them together when it is time to use it otherwise there will be many air leaks.
The wire would be connected to the same high voltage polarity as that electrostatic precipitator tube walls to act as additional collection surface. You can stack as many of these pods as you like. Just remember to glue them together when it is time to use it otherwise there will be many air leaks.![]()
-
43Step 43
Overall System Assembly
Now it is time to connect all of the systems together. It is your choice on what order the stages are in. The best would to always have the activated carbon as the last stage. The wet scrubber and the electrostatic precipitator can either be the first stage or the second stage depending on the application. Having the electrostatic precipitator first can minimize ozone as it is absorbed by the wetscrubber. The ozone also would help keep the wet scrubber sterile.
I believe the best order is to have the wet scrubber first, the electrostatic precipitator second, and the activated carbon last as the system will filter the largest particles down to the smallest particles and down to the gasous pollutants in that order.
The stages are simply routed together with PVC pipe and PVC joints or is physically attached to one another.
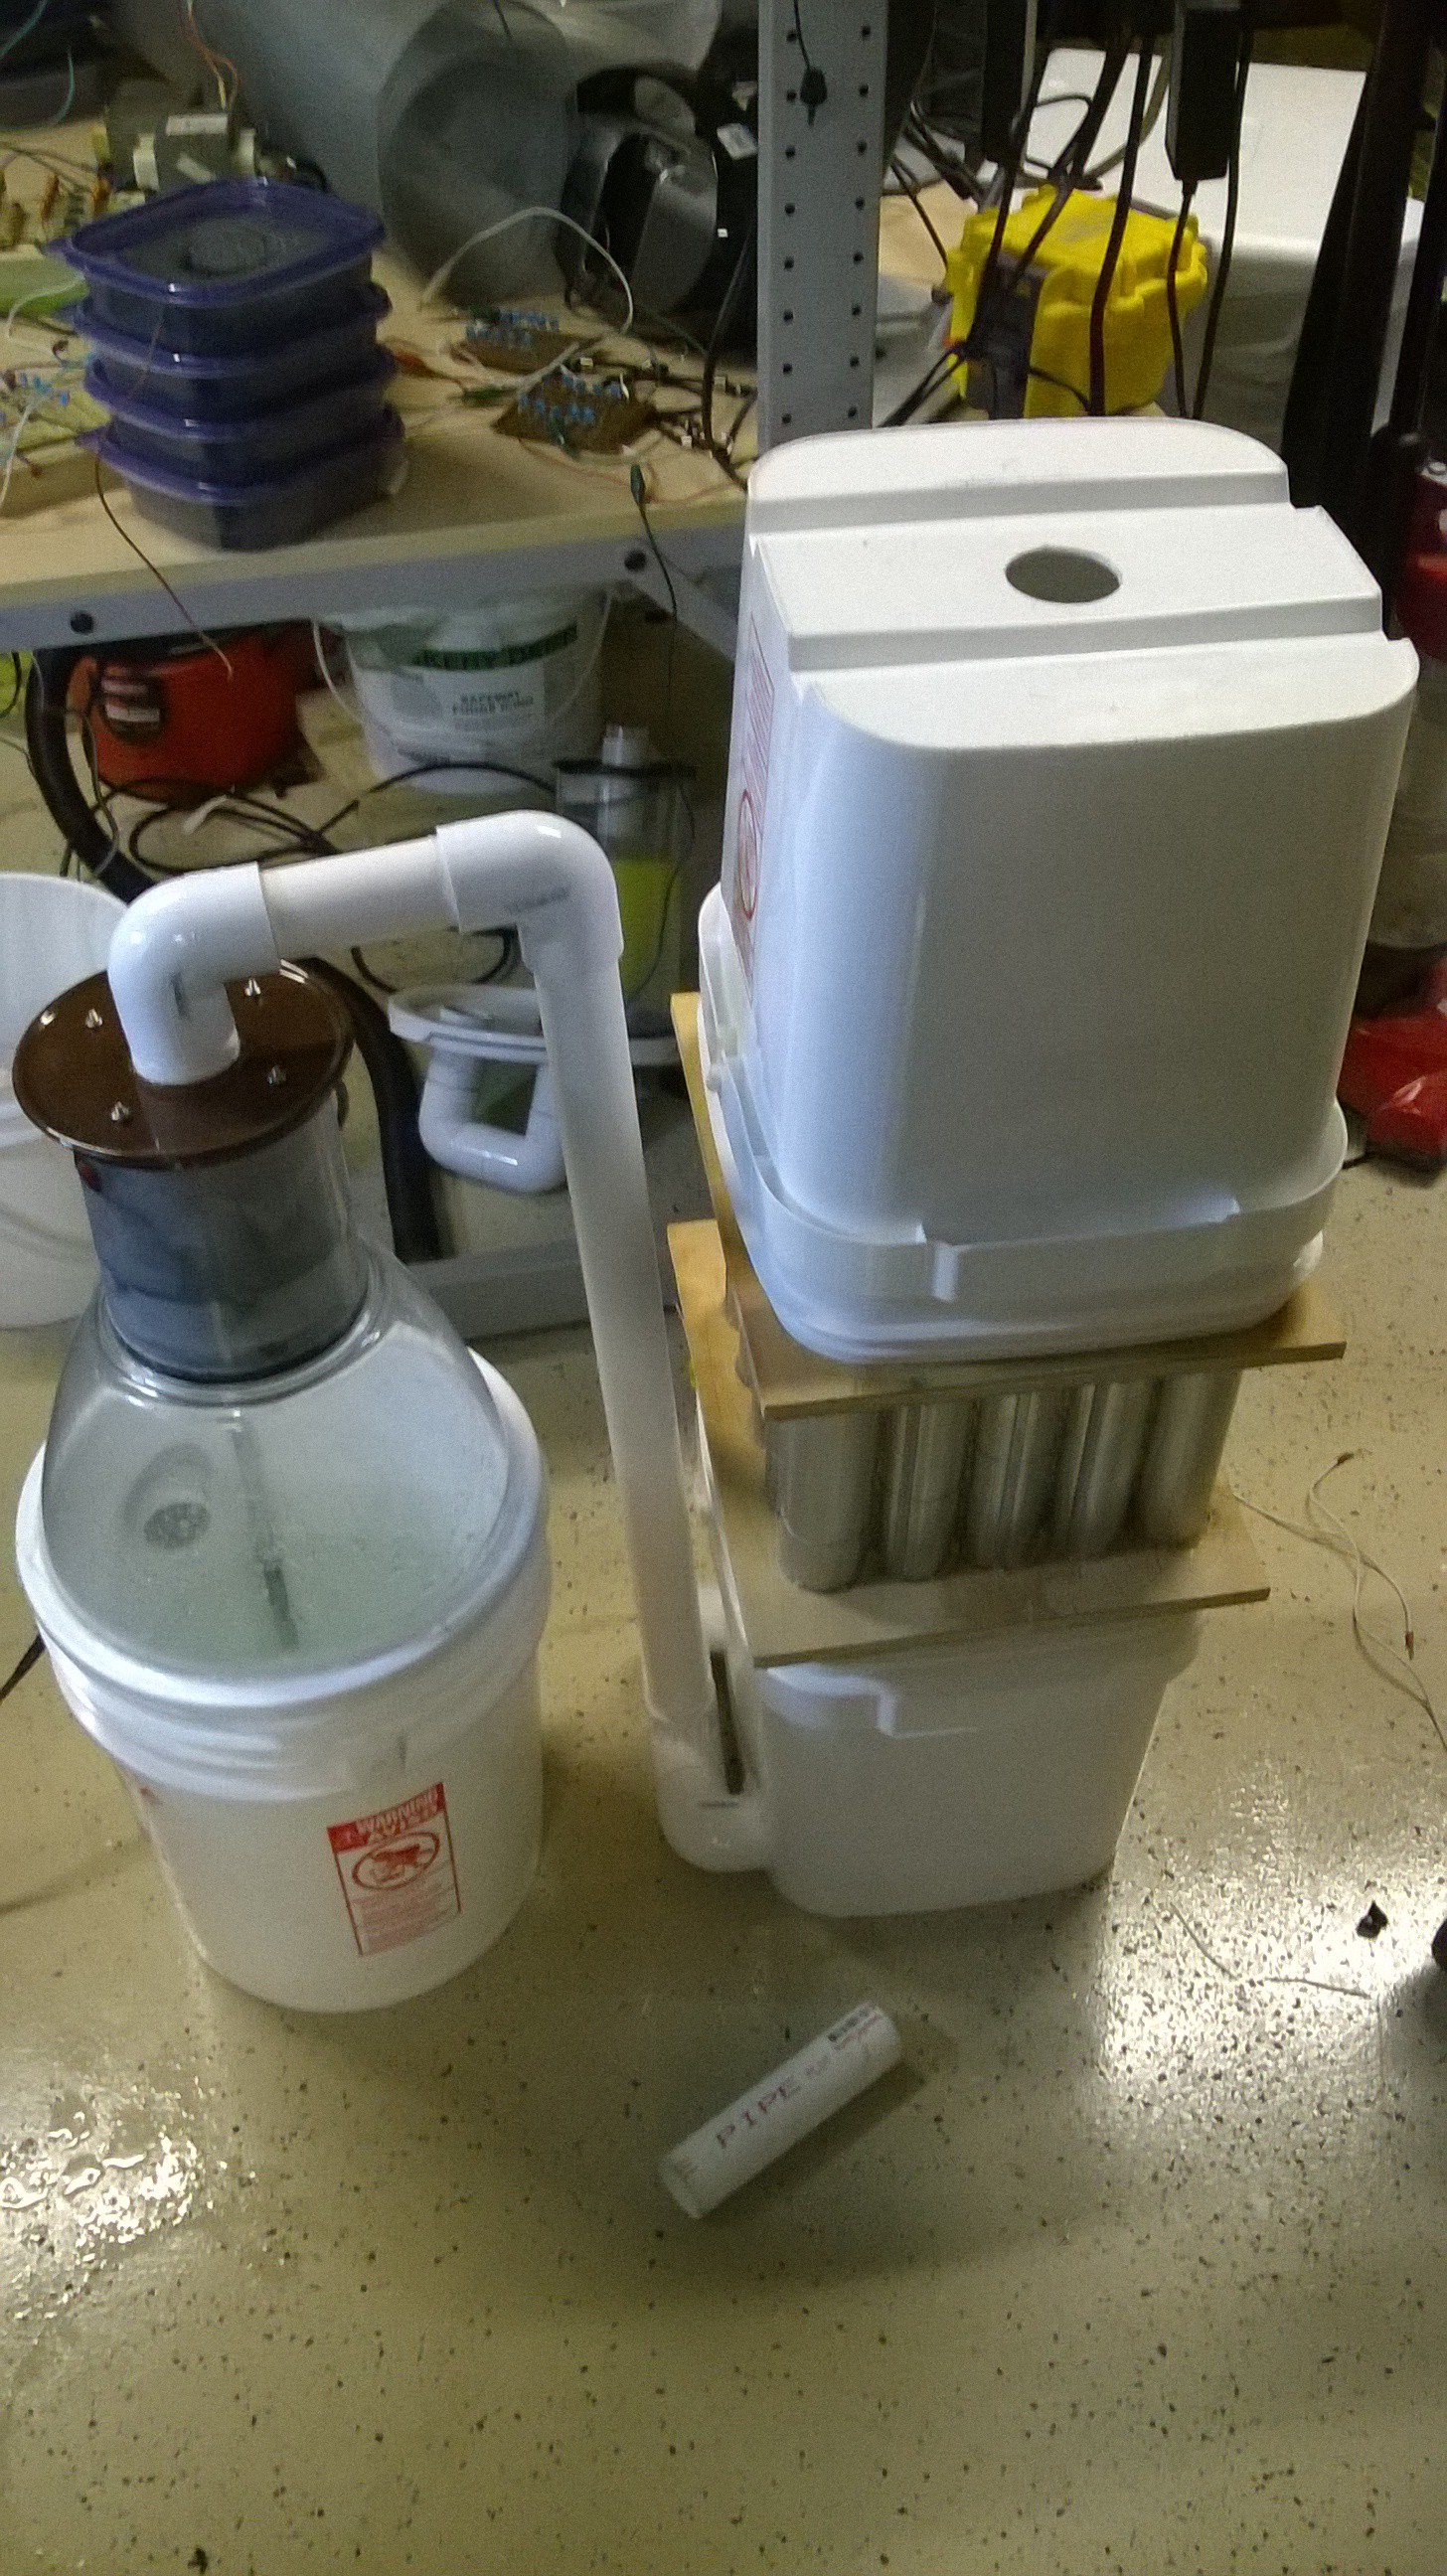
First connect the wet scrubber's output to the electrostatic precipitator's input port using PVC pipe and PVC elbows.
![]() The top of the electrostatic precipitator should have a sandwich container glued to it. Simply seal the activated carbon pods (should now be glued into a module) on top of the electrostatic precipitator. If using the electrified variant of carbon pods, connect the pods to the tube walls.
The top of the electrostatic precipitator should have a sandwich container glued to it. Simply seal the activated carbon pods (should now be glued into a module) on top of the electrostatic precipitator. If using the electrified variant of carbon pods, connect the pods to the tube walls.![]()
![]() Now connect the high voltage circuit to the electrostatic precipitator. To reduce Ozone production connect the positive lead to the central tube wires and the negative lead to the tube walls.
Now connect the high voltage circuit to the electrostatic precipitator. To reduce Ozone production connect the positive lead to the central tube wires and the negative lead to the tube walls. -
44Step 44
Operating Instructions
MAKE SURE YOU ARE WELL CLEAR OF THE HIGH VOLTAGE CIRCUIT AND THAT THE WIRES FROM THE CIRCUIT IS NOT NEAR ANYTHING AND WILL NOT SHORT OUT WITH EACH OTHER.
The high voltage circuit and vacuum motor should have their own router speed controls or dimmer switches.
First turn on the high voltage circuit via the router speed control on variable mode and listen to the sound of the "hiss" dial the power up until it is at its loudest. DO NOT SET IT AT FULL POWER.
Next turn on the vacuum motor at its desired speed and use scrubber device for its intended purpose.
When finished using the device. Discharge the high voltage leads to each other using a long insulated stick.
Household Electrically Enhanced Wet Scrubber
A household air purification unit for kitchens, labs, & smokers used to scrub fine particulates and VOC's out of the air.

 The wire would be connected to the same high voltage polarity as that electrostatic precipitator tube walls to act as additional collection surface. You can stack as many of these pods as you like. Just remember to glue them together when it is time to use it otherwise there will be many air leaks.
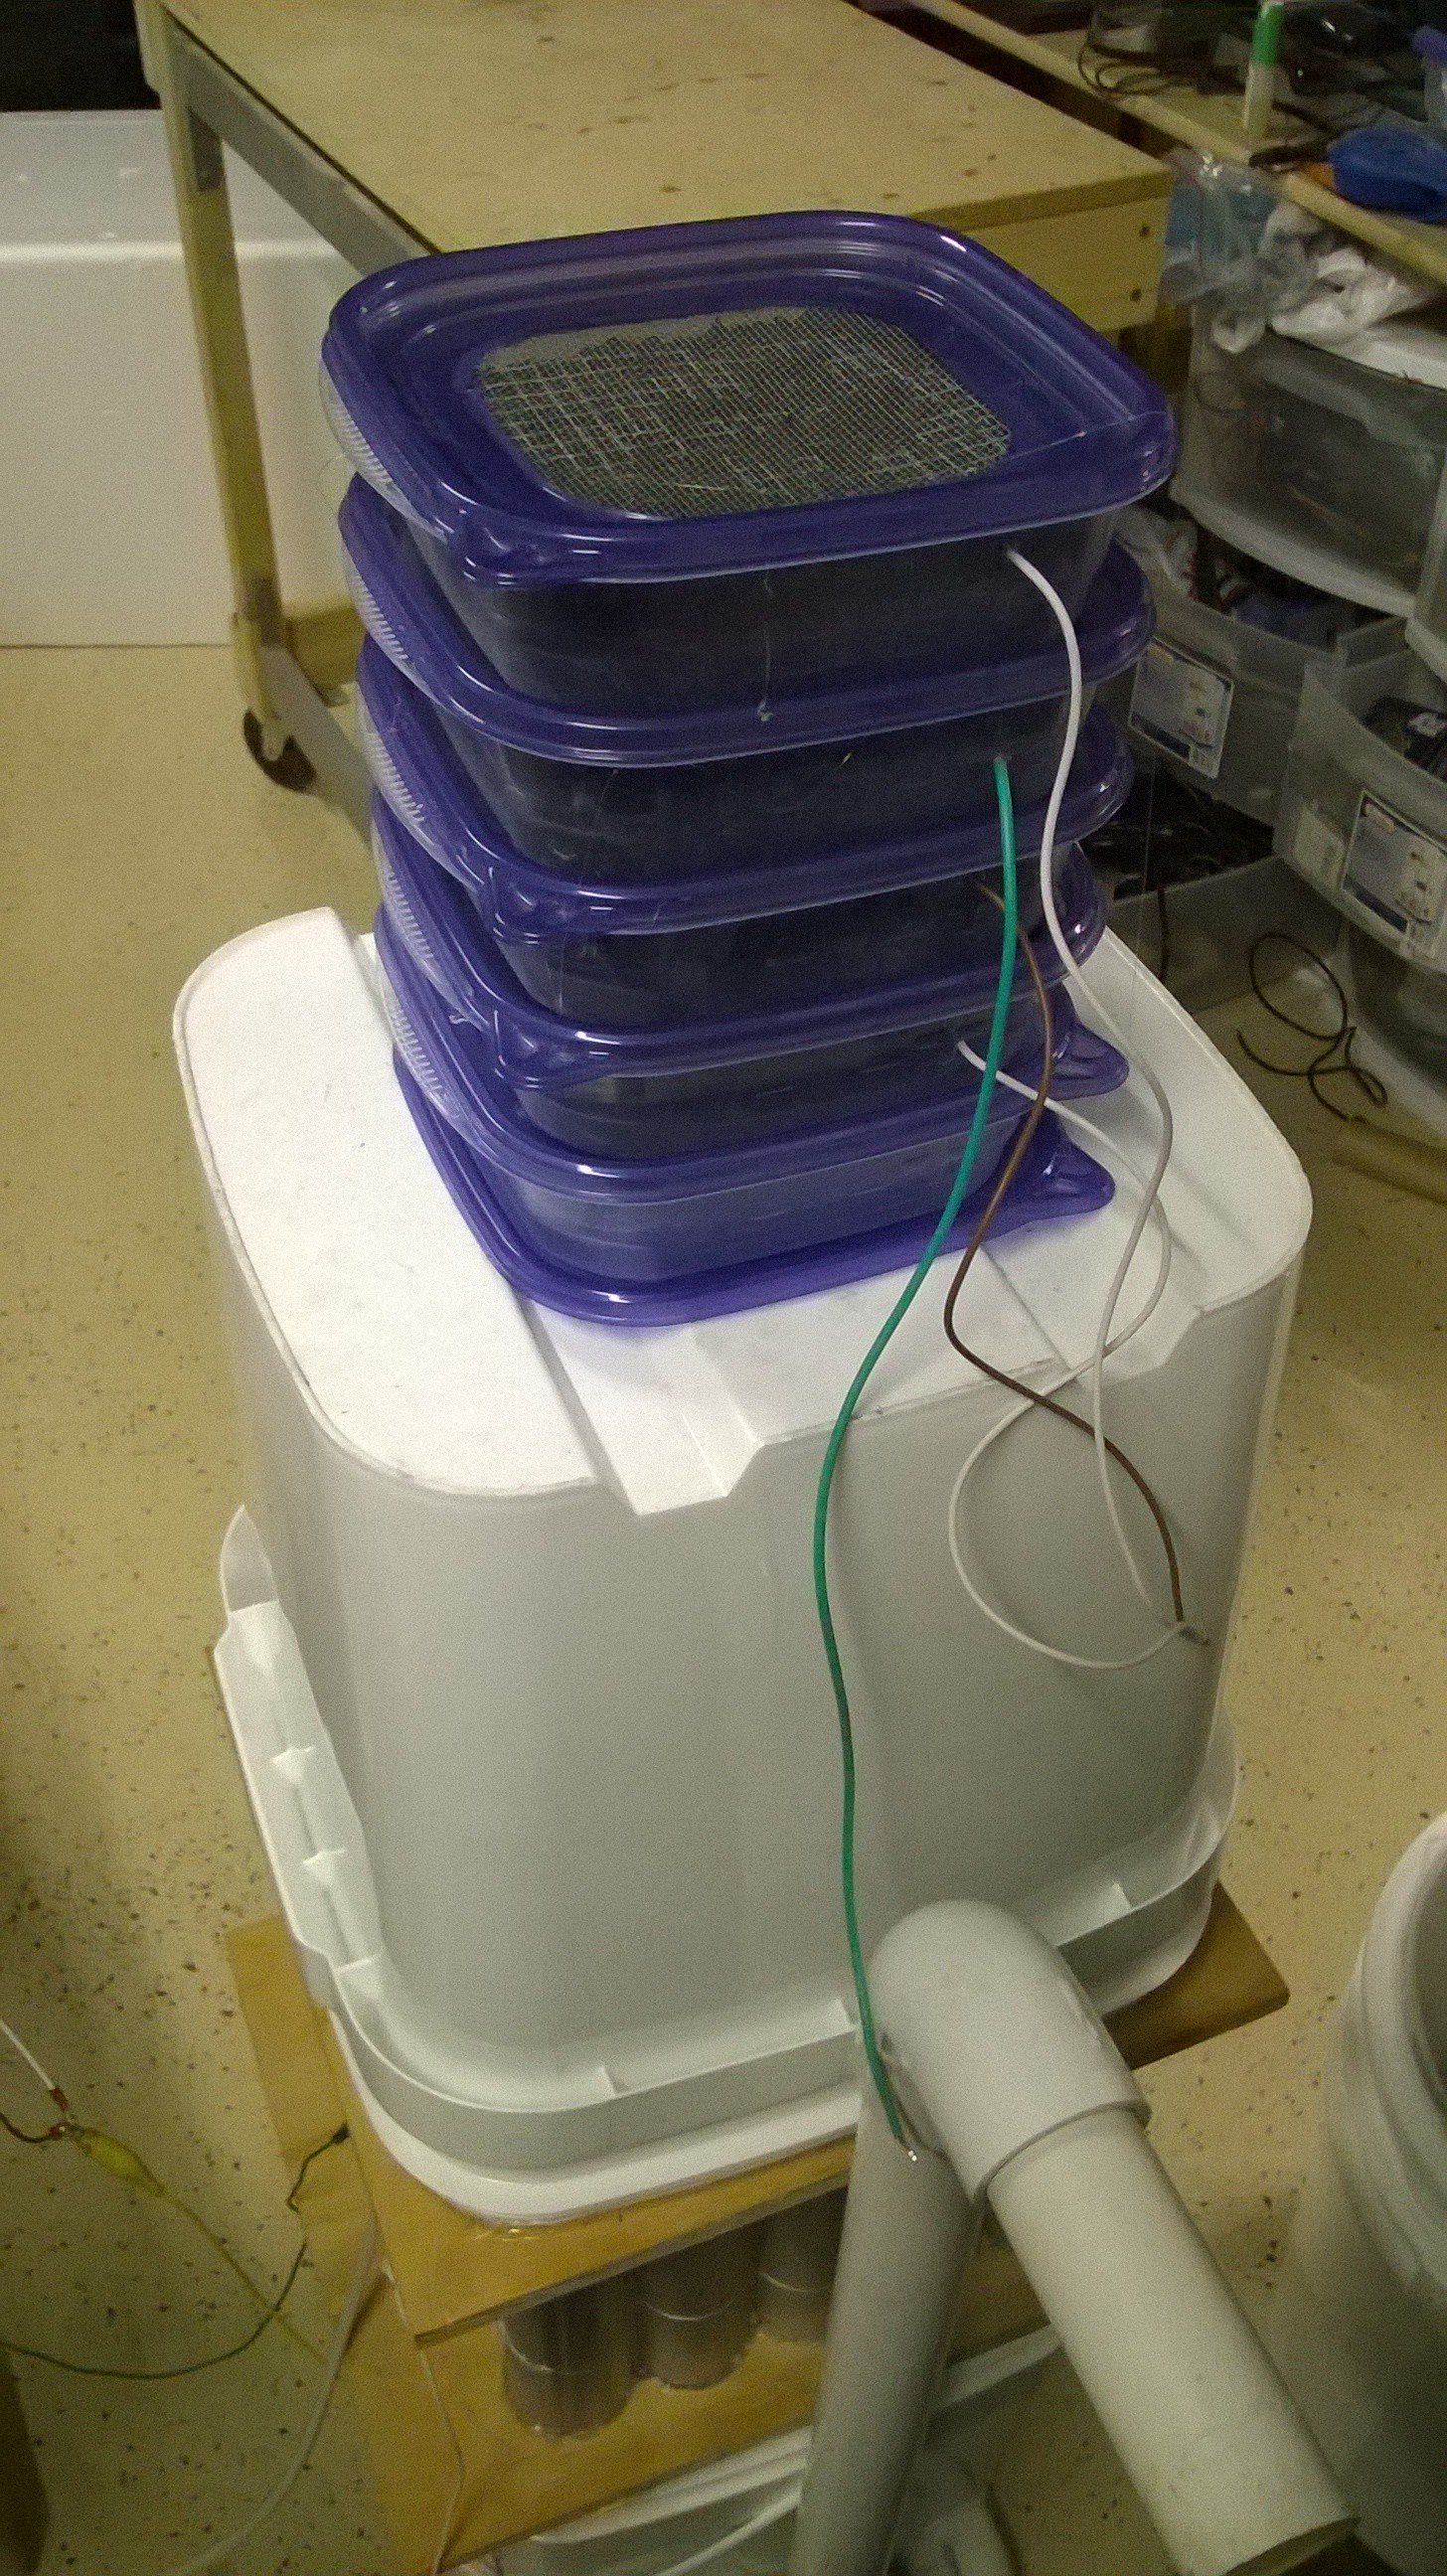
 The top of the electrostatic precipitator should have a sandwich container glued to it. Simply seal the activated carbon pods (should now be glued into a module) on top of the electrostatic precipitator. If using the electrified variant of carbon pods, connect the pods to the tube walls.
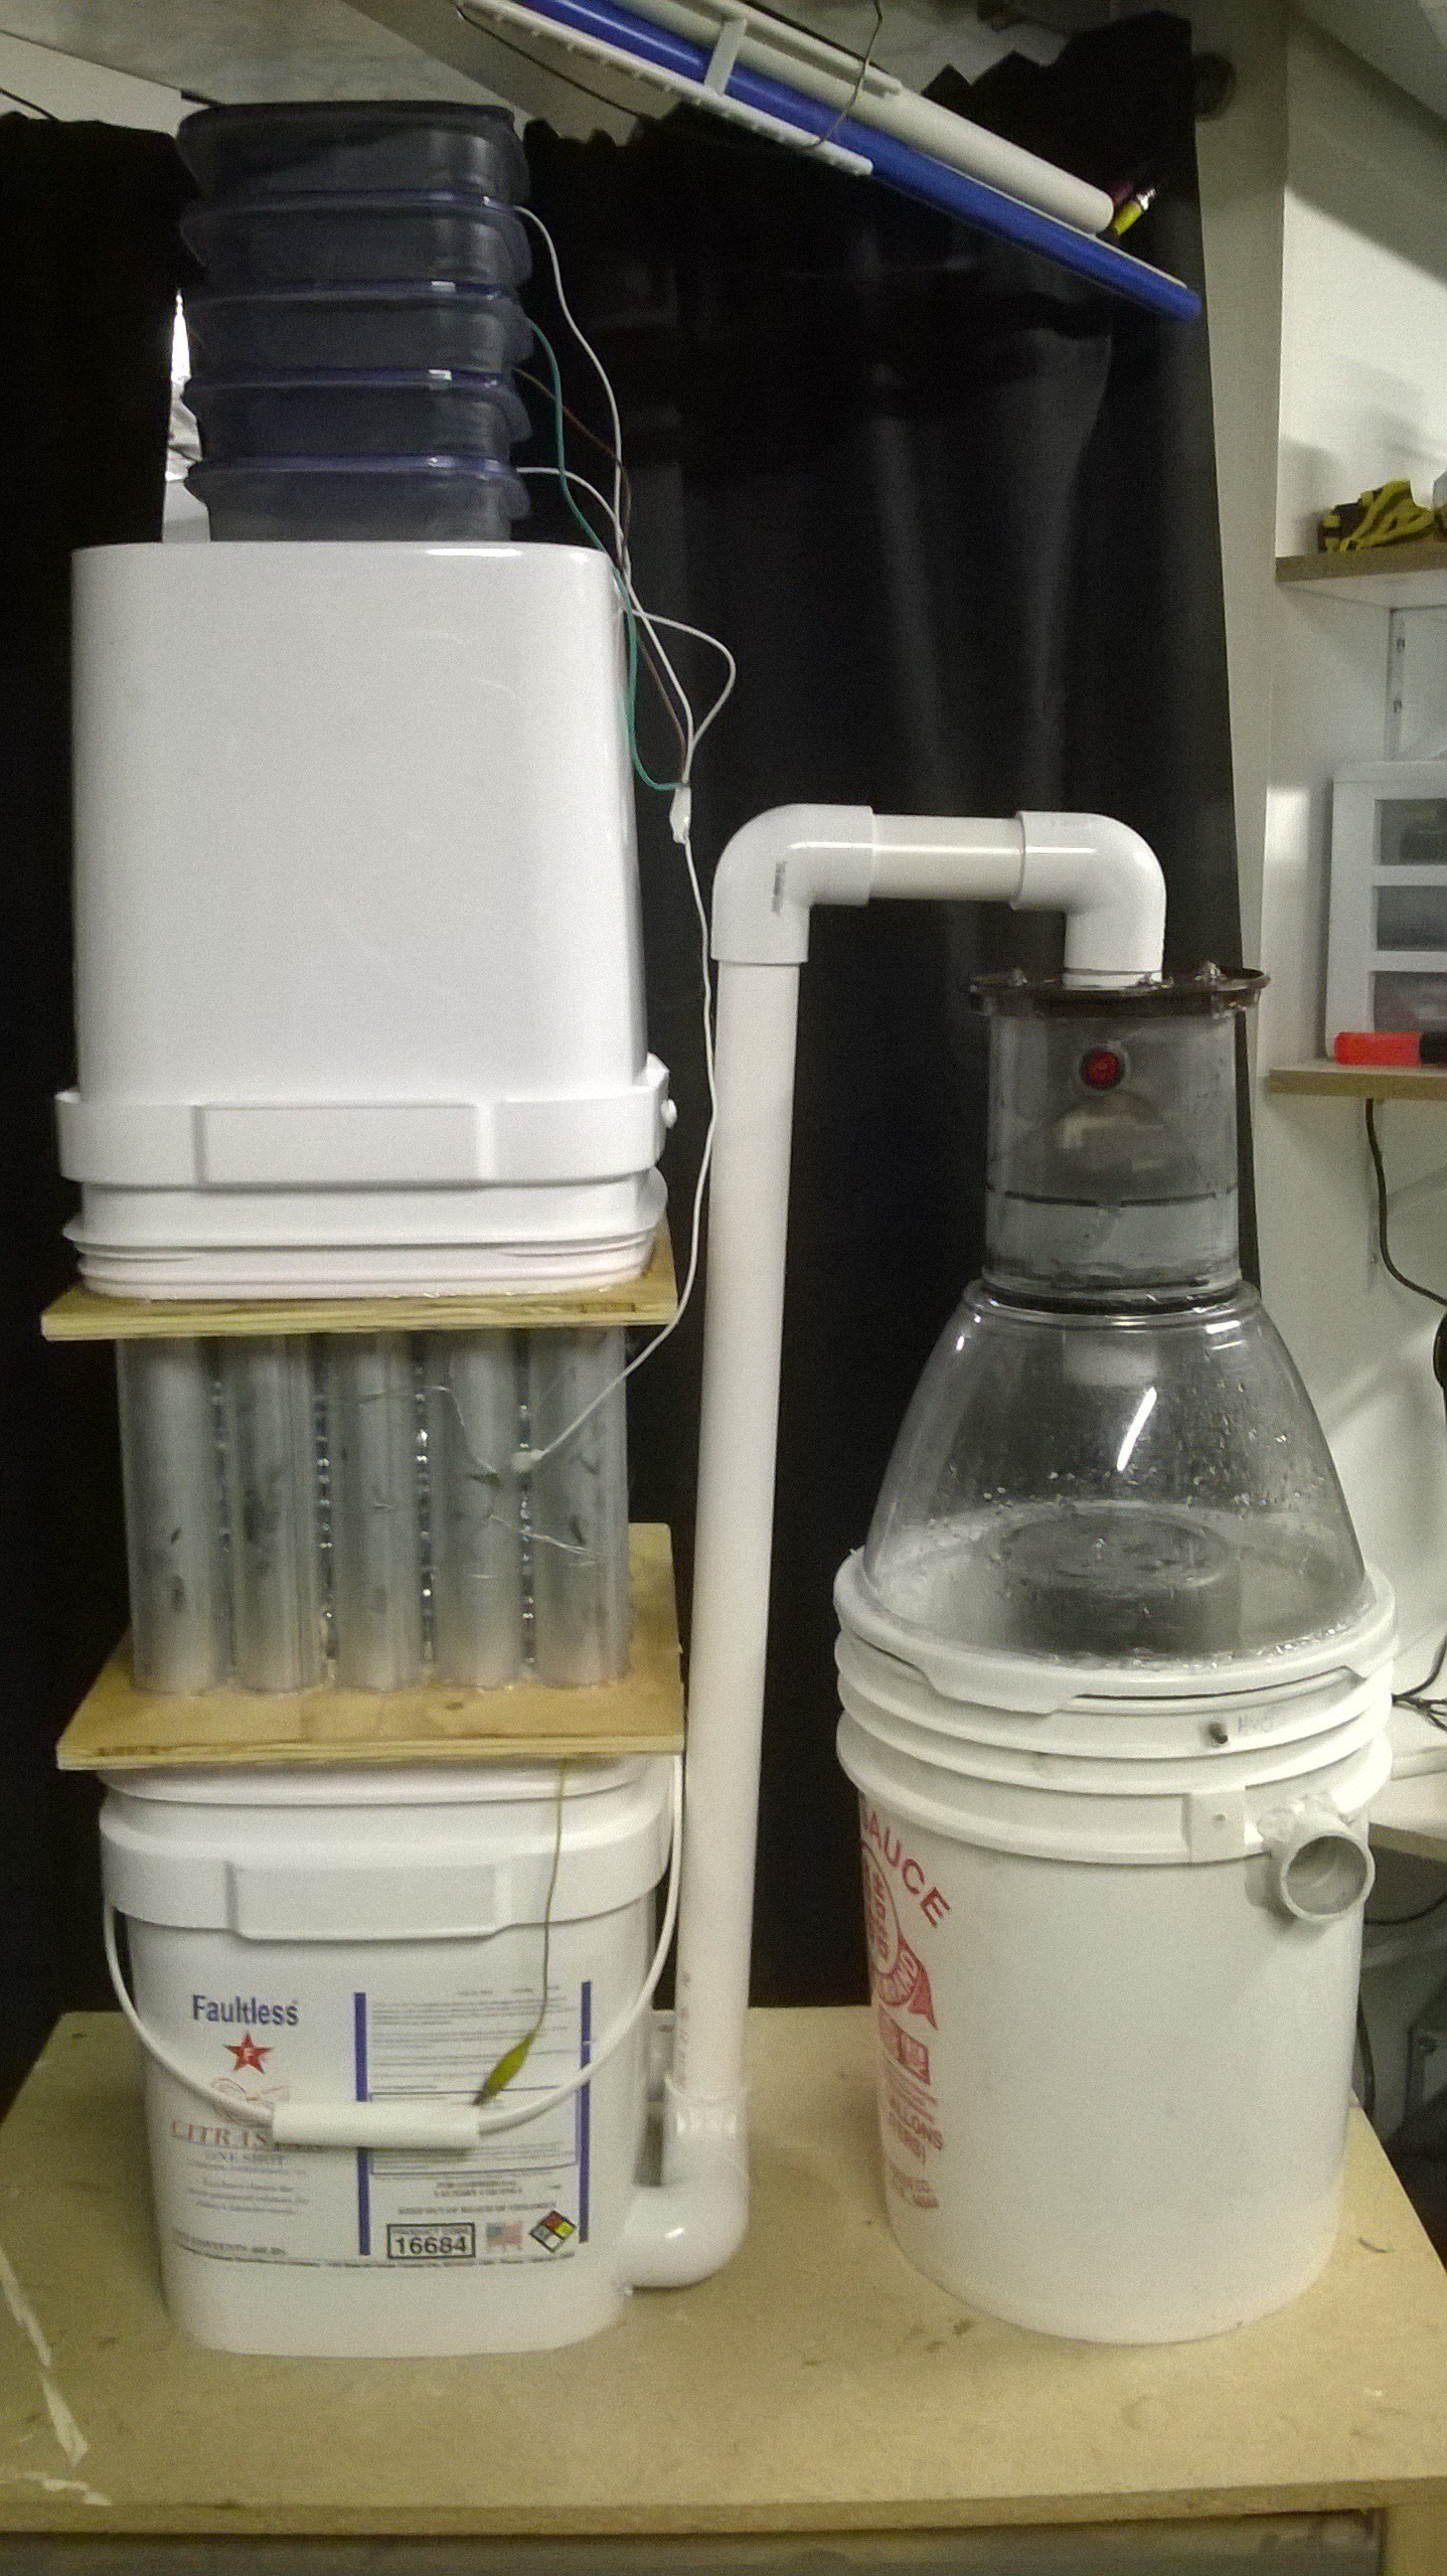
 Now connect the high voltage circuit to the electrostatic precipitator. To reduce Ozone production connect the positive lead to the central tube wires and the negative lead to the tube walls.
Discussions
Become a Hackaday.io Member
Create an account to leave a comment. Already have an account? Log In.