Les Hall
-
Ivan Making a Straight Shape
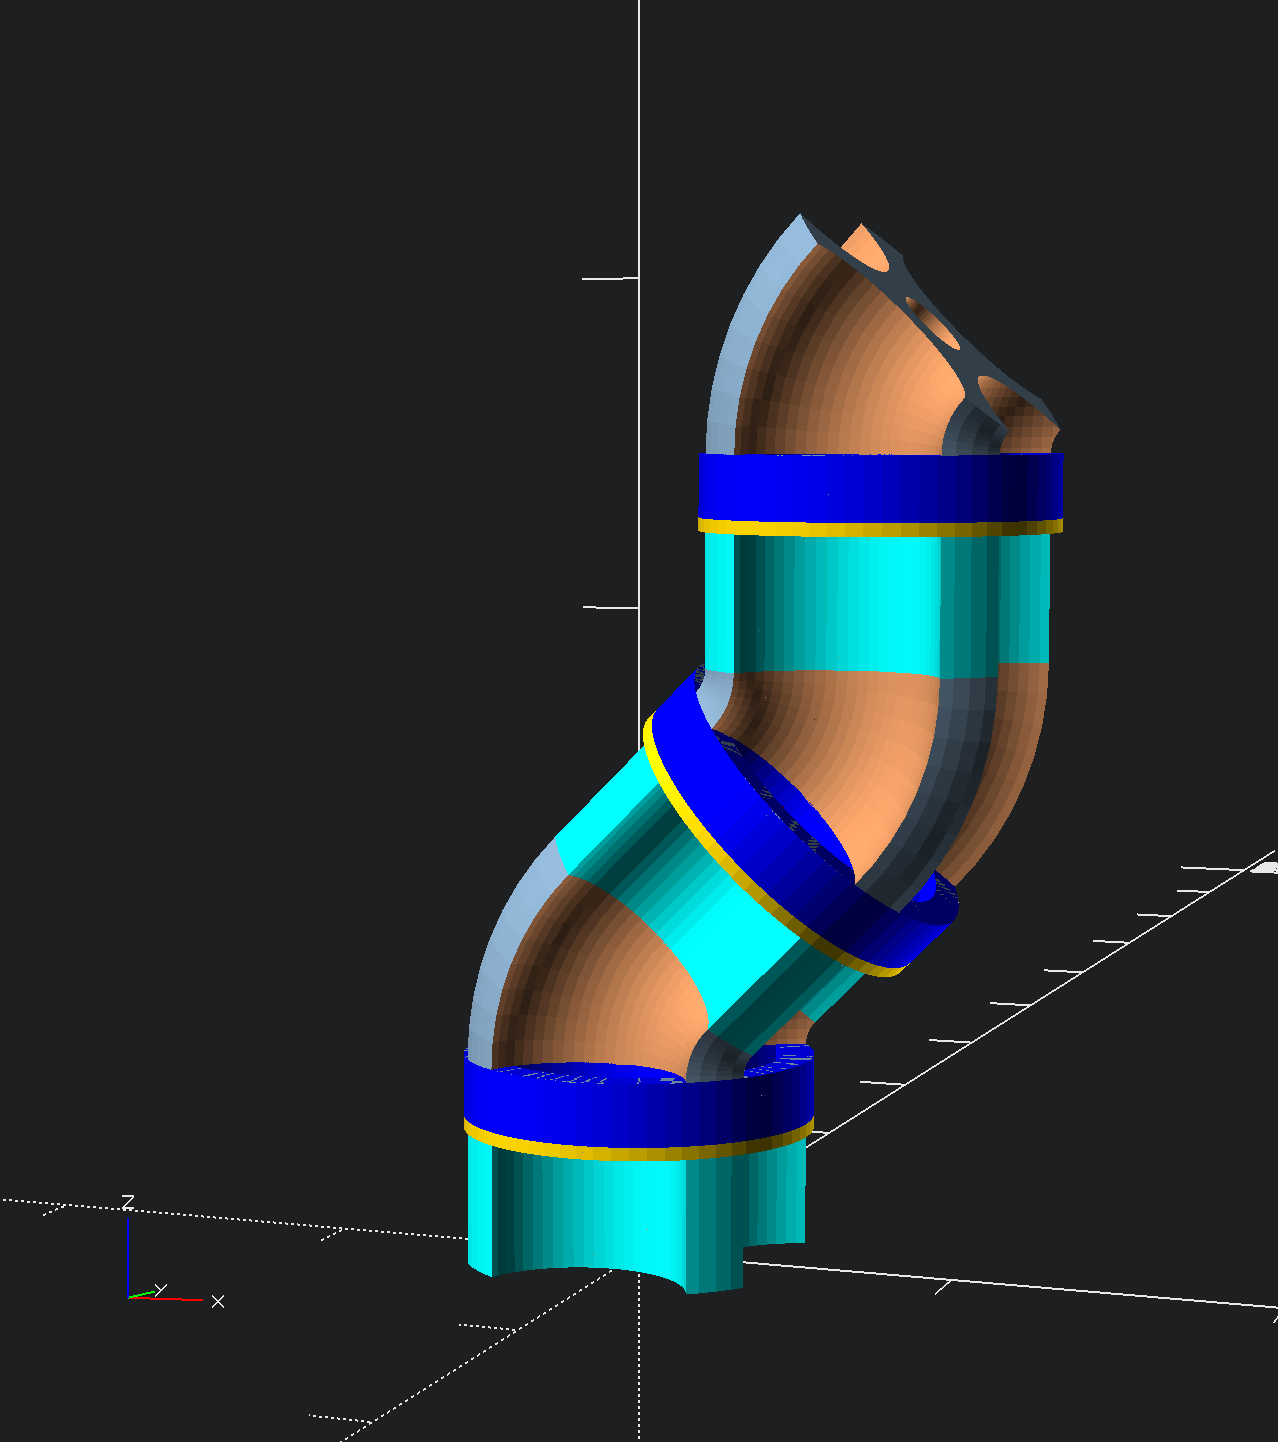
09/08/2015 at 11:54 • 1 commentHere is Ivan making a 180 degree angle, or straight line. Not very straight, is it?
![]()
Maybe if I increase the diameter of Ivan's planetary gears then Ivan's NEMA 17 stepper motors will fit in the beige and gray angle bends and the cyan straight sections can be removed? Larger diameter also means we can up the gear ratio of the planetary gears from 3:1 to 4:1 or perhaps 5:1. There is an upper limit, though, because my printer only has a 6" cubed build volume so the outside diameter of the blue gear cannot exceed 6" which is 152.4mm. With skirt as part of the printing process that number is more like 140mm.
-
Ivan Draws a Shape
09/08/2015 at 08:35 • 6 comments![]()
Here we see Ivan in his current form with three segments drawing a shape. His motion is sinusoidal as we imagine a rotary toolhead with carving bit at the end of his arm. The angle of each segment is adjustable by parameterization.
-
Ivan the Segmented!
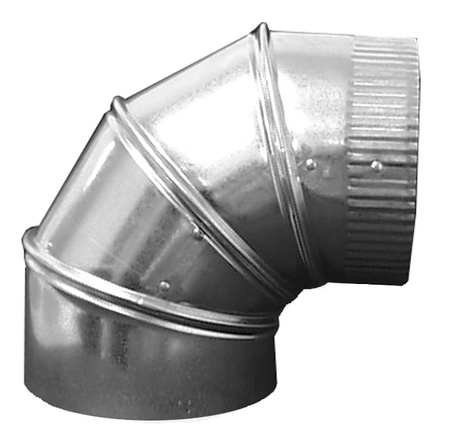
09/07/2015 at 13:38 • 1 commentWe had great fun in the TeamChat for this project - Frank, Eric, JB, and myself - discussing the future of Ivan. A few ideas emerged and we were unsure of Ivan's form and function until Frank posted the following photo.
![]()
Once that ductwork image was shown, we all immediately realized Ivan's form. If you read back in the logs and comments, you'll see how we were hinting and guessing at something of this sort, however there is nothing like a photo to really express an idea like this. So after some enjoyable convo among us, I slept and then upon waking CADed up the following design.
![]()
![]()
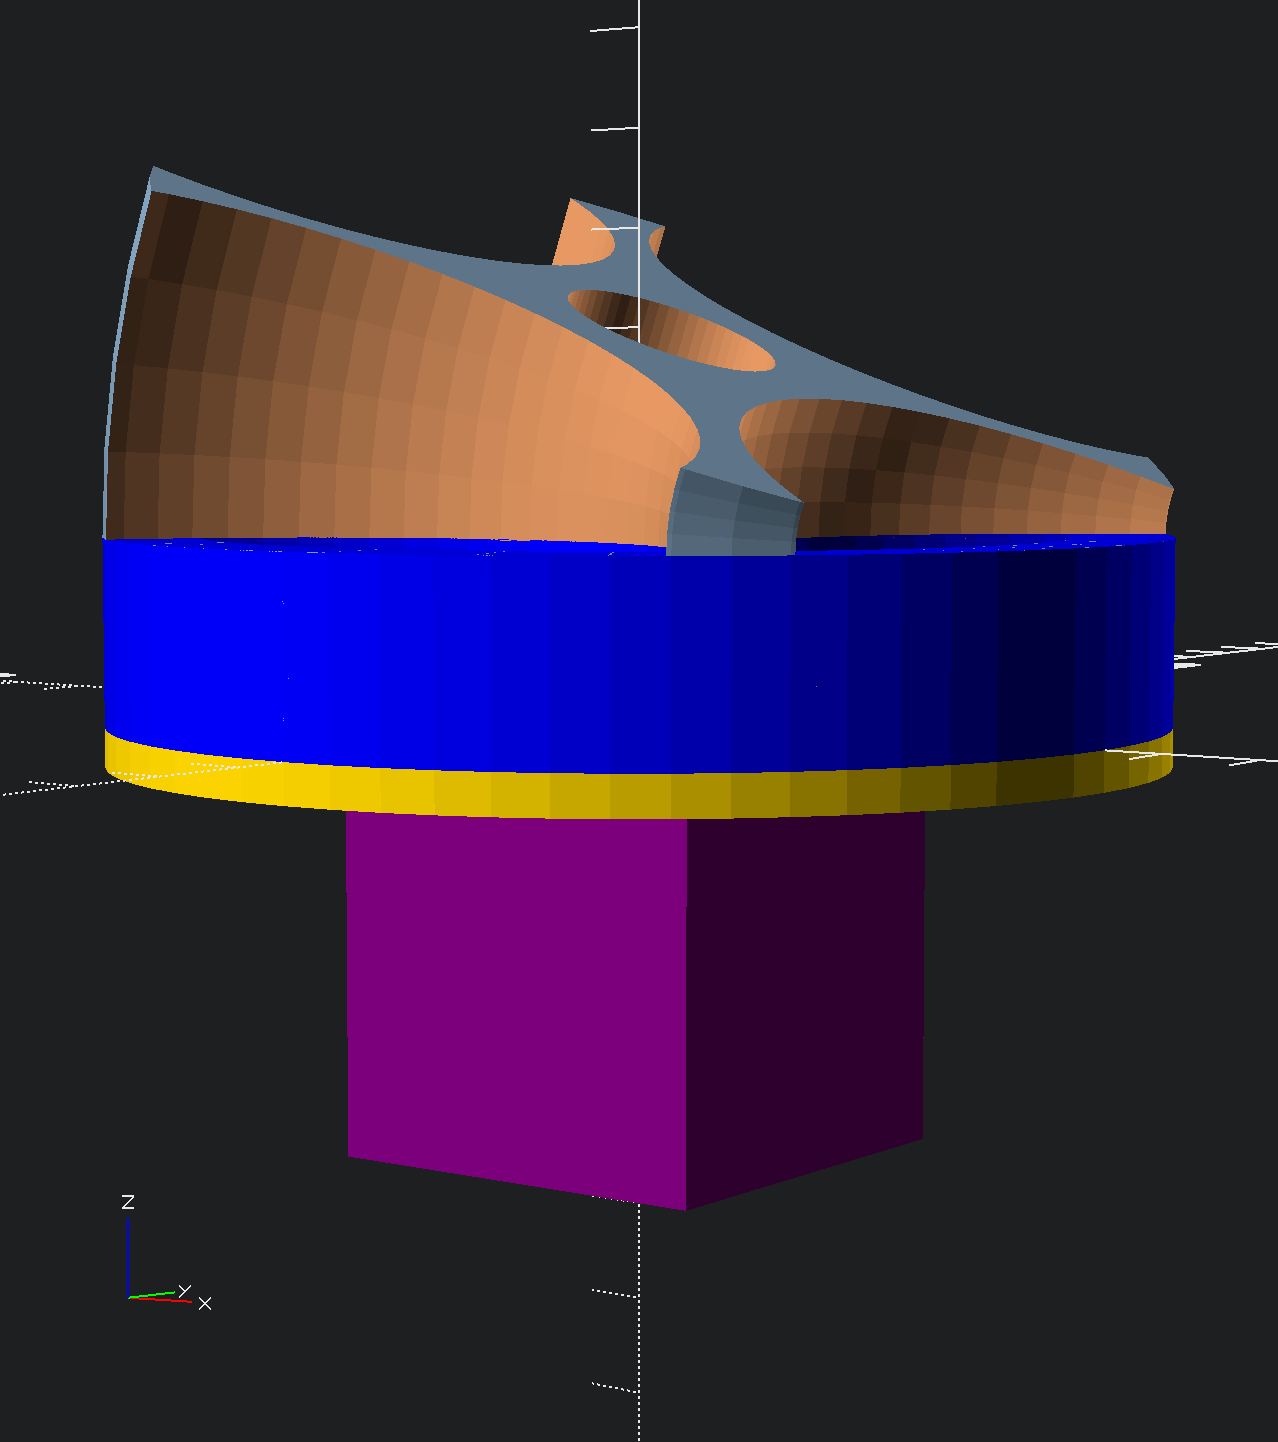
This stylish adapter plate (screw holes missing) performs the support function necessary while also offering a nice view on those way cool gears that we worked so hard to set up earlier. Hey, you can't hide cool stuff in a gearbox, can you?
The only thing remaining is the holes and also the stand that mounts onto the base plate and also onto this adapter. After some peer review and posting the files and such, it will be time to fire up the printer and crank out some plastic yet again!
Les
-
Ivan the Unimaginative!
09/06/2015 at 20:43 • 0 comments![]()
I got this far with the design, and thanks to my friend Dennis for suggesting the use of only two solenoids per segment and even one is possible! Dennis is getting into making custom 3D printers and I'm buying one from him, they rock!
OK, so this Ivan is getting closer with it's blue flexible bases and red bobbins and grey cores, but I can't help think of myself - oh how unimaginary! I mean, solenoids are solenoids so why not just BUY a bunch of ordinary solenoids instead of this monstrosity of bad solenoids 3D printed with cylindrical shapes! The whole concept should be something creative with shapes that can only be made on a 3D printer! bah, i trash the design yet cling to the concept!
Perhaps what would be cool would be to return to the way nice planetary design we have created and duplicate it along a tentacle-like linear shape. Maybe just chaining them together will do the trick? What is the goal? Unspecified! So no wonder there is floundering! So what we need is a goal for Ivan. I put this question out for group discussion in the comments! What is Ivan's design objective?
-
Tentacle Emerges
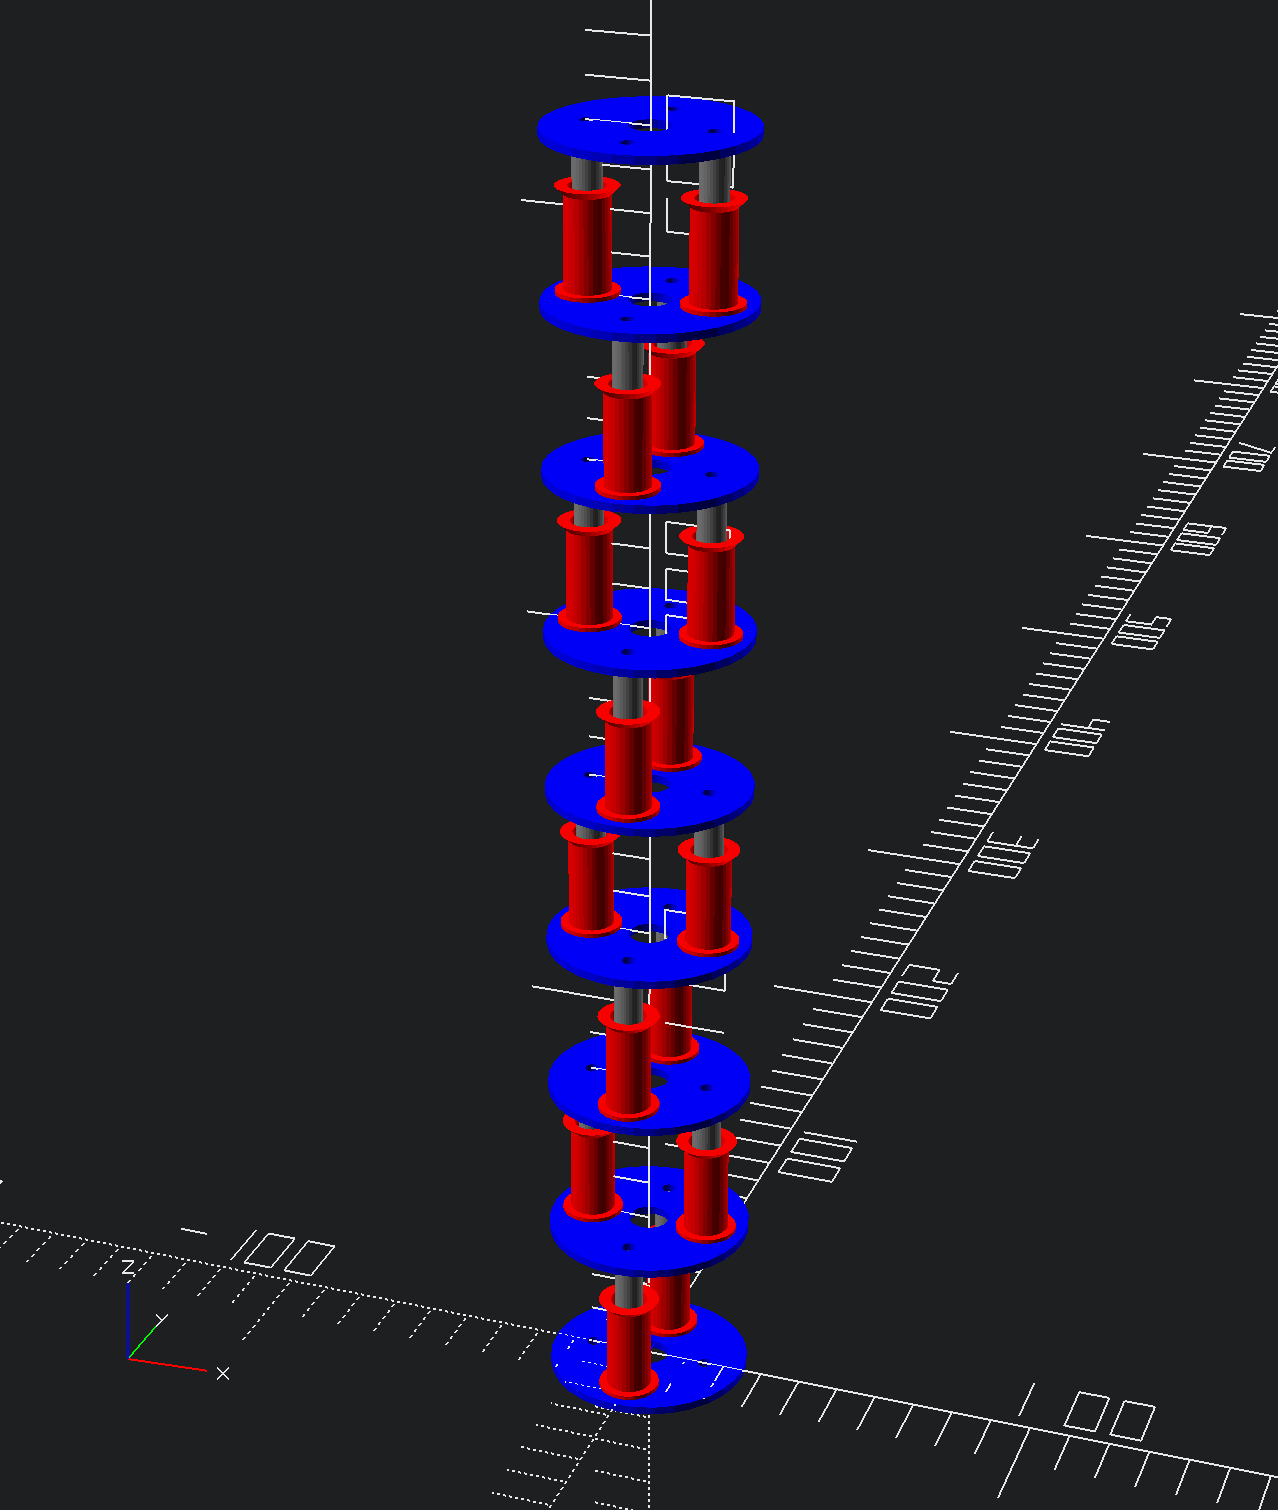
09/06/2015 at 08:00 • 1 comment![]()
Above we see a roughly sketched out tentacle arm with three solenoids per segment and five segments. The value of l is the length of each solenoid, which varies linearly. The height of each solenoid is given by z, which is an integration of l plus added thickness for the base. The printer is capable of printing flex, magnetic iron, and carbon Fiber PLA among other materials, so we can make all the single-material parts we need for this design.
-
Ivan with Bearings!
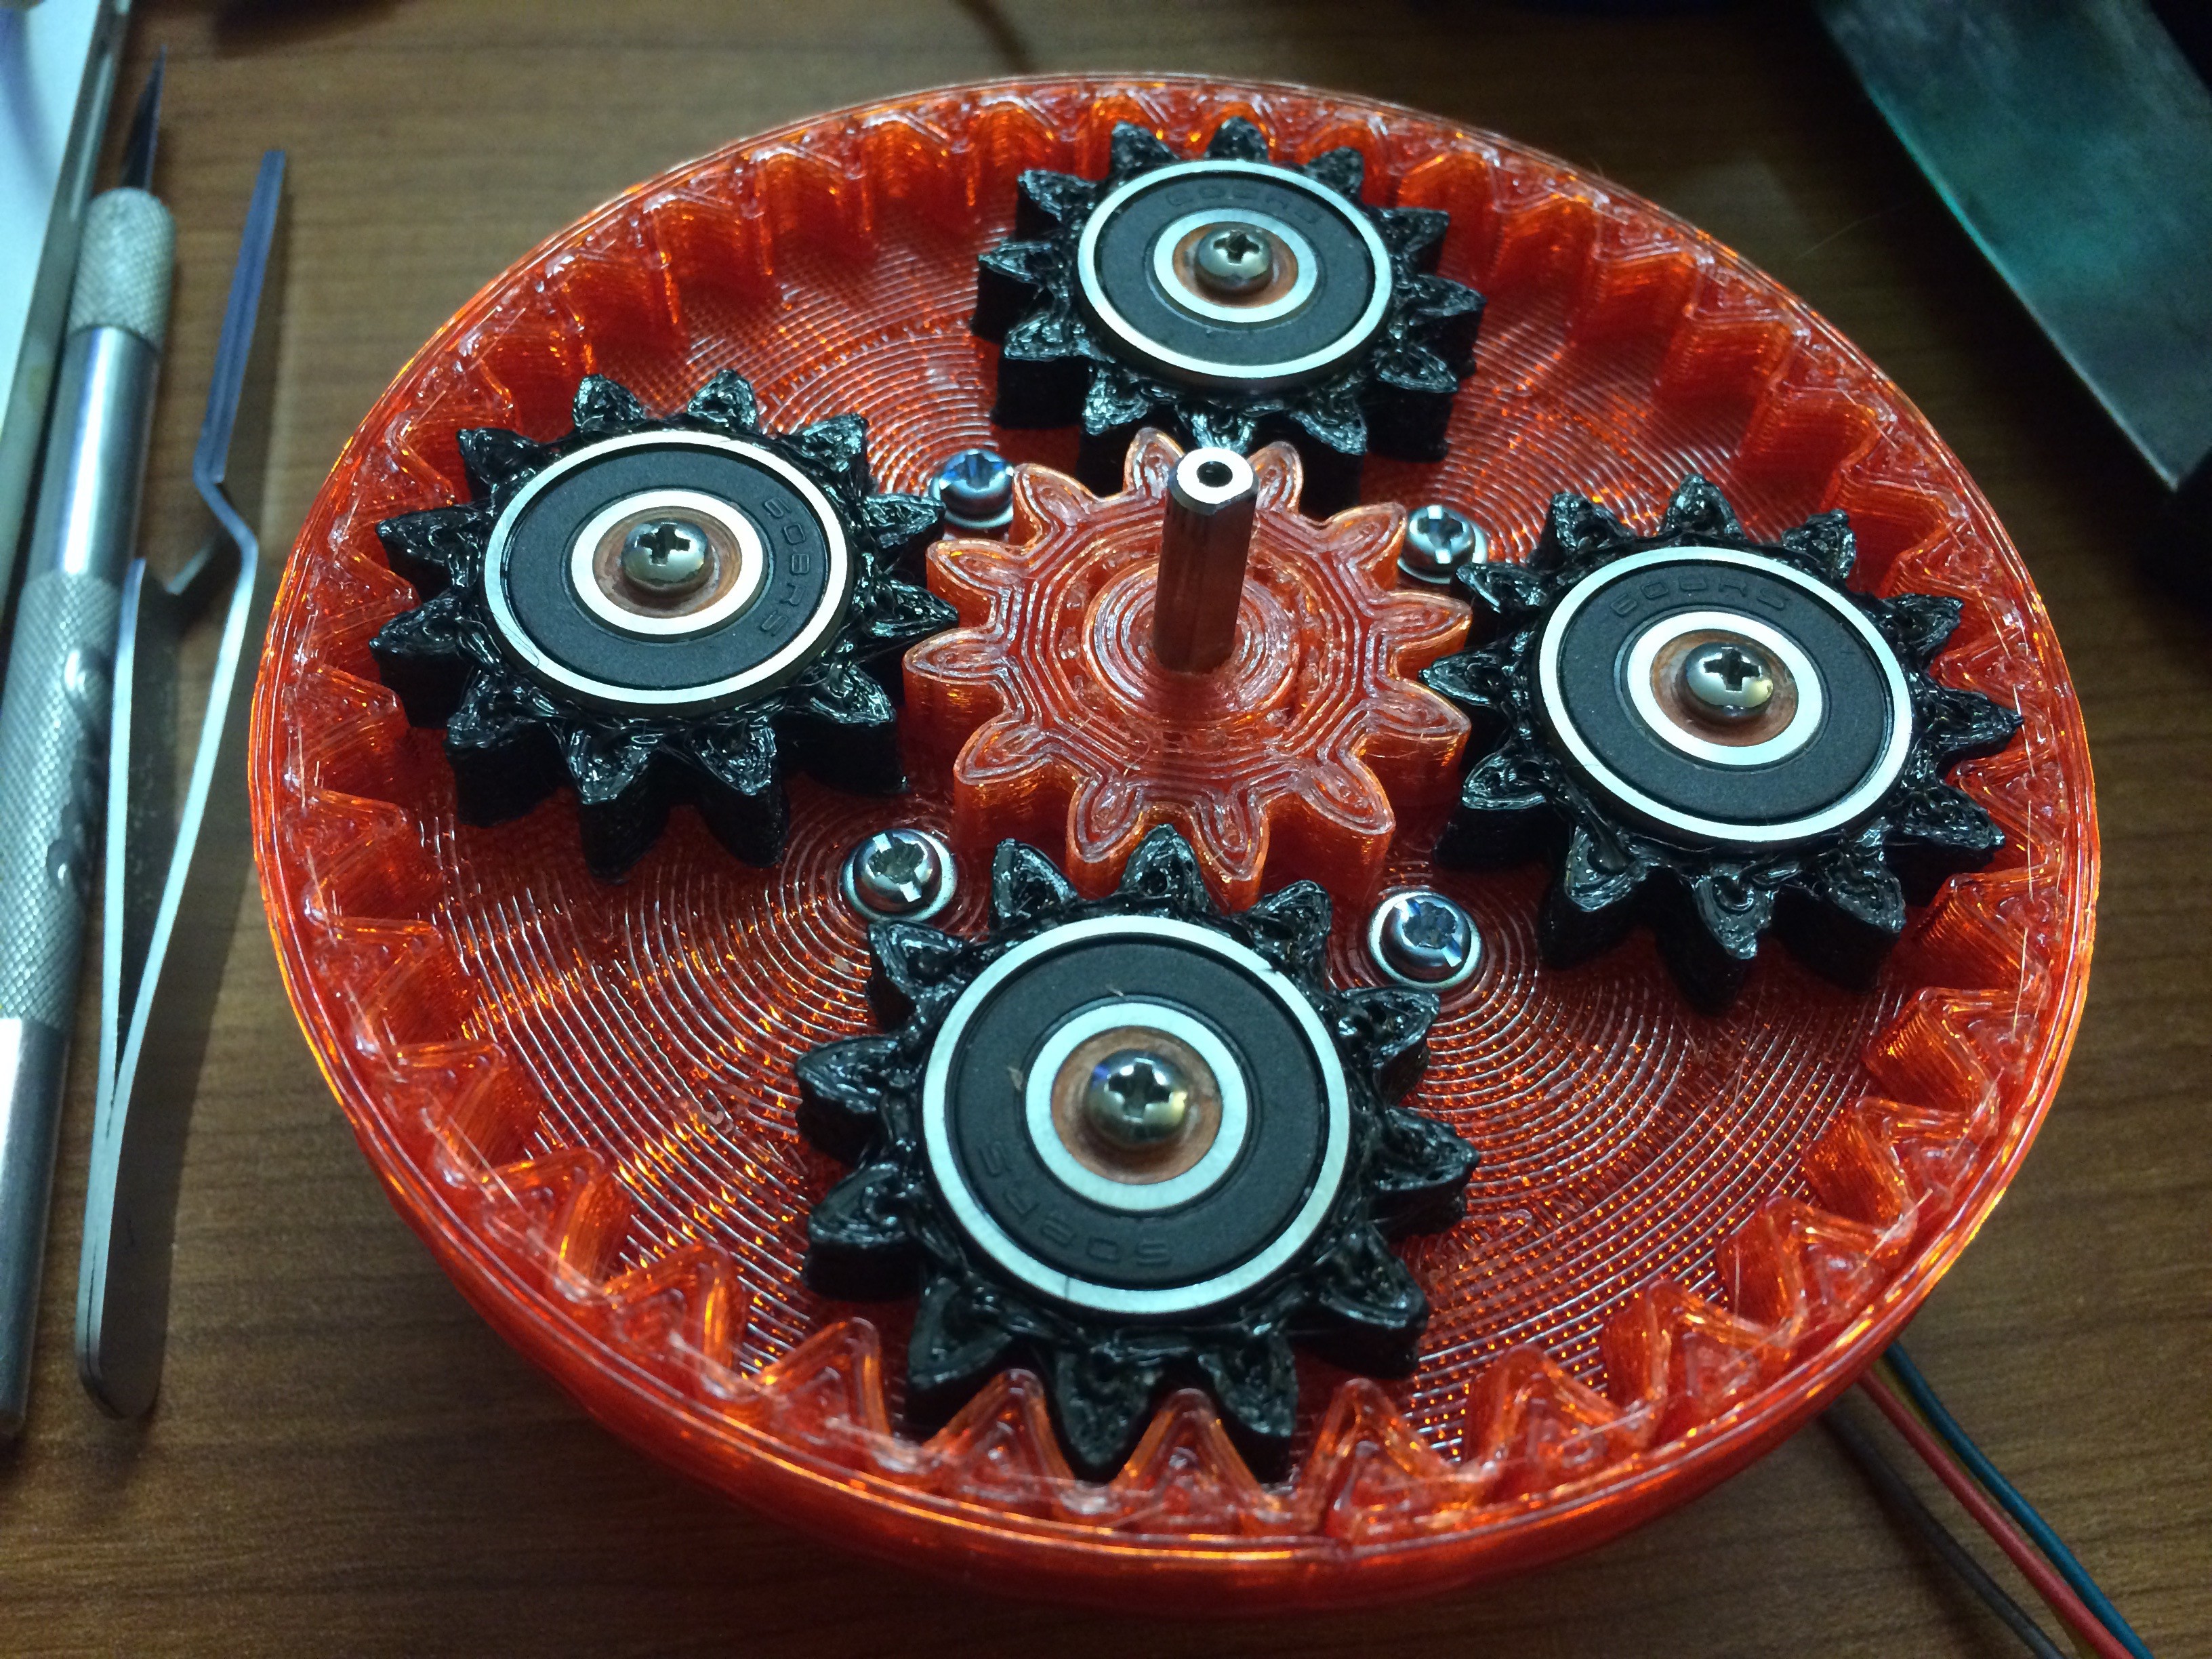
09/05/2015 at 09:56 • 6 comments![]()
The photo above shows Ivan printed with a 0.75 mm nozzle for strength and speed, plus his new design has 608ZZ standard skateboard bearings on the planetary gears and filaflex teeth on the same planetary gears. The flexi teeth are better than plain old PLA, especially when mated to PLA as shown, however there is a better solution: nylon. I plan to order some nylon-ish filament from www.printedsolid.com, the Taulman alloy 910. The bearings have two washers under them to "float" them above the surface of the support disc so that the flexi-gears will spin freely without gripping the surface.
At this point I am open to suggestions on how to proceed with the design in terms of an orthogonal rotation arm, a slip ring possibly made of graphene filament, and the base stand. Let's make our suggestions in the comments and decide where to go from here!
-
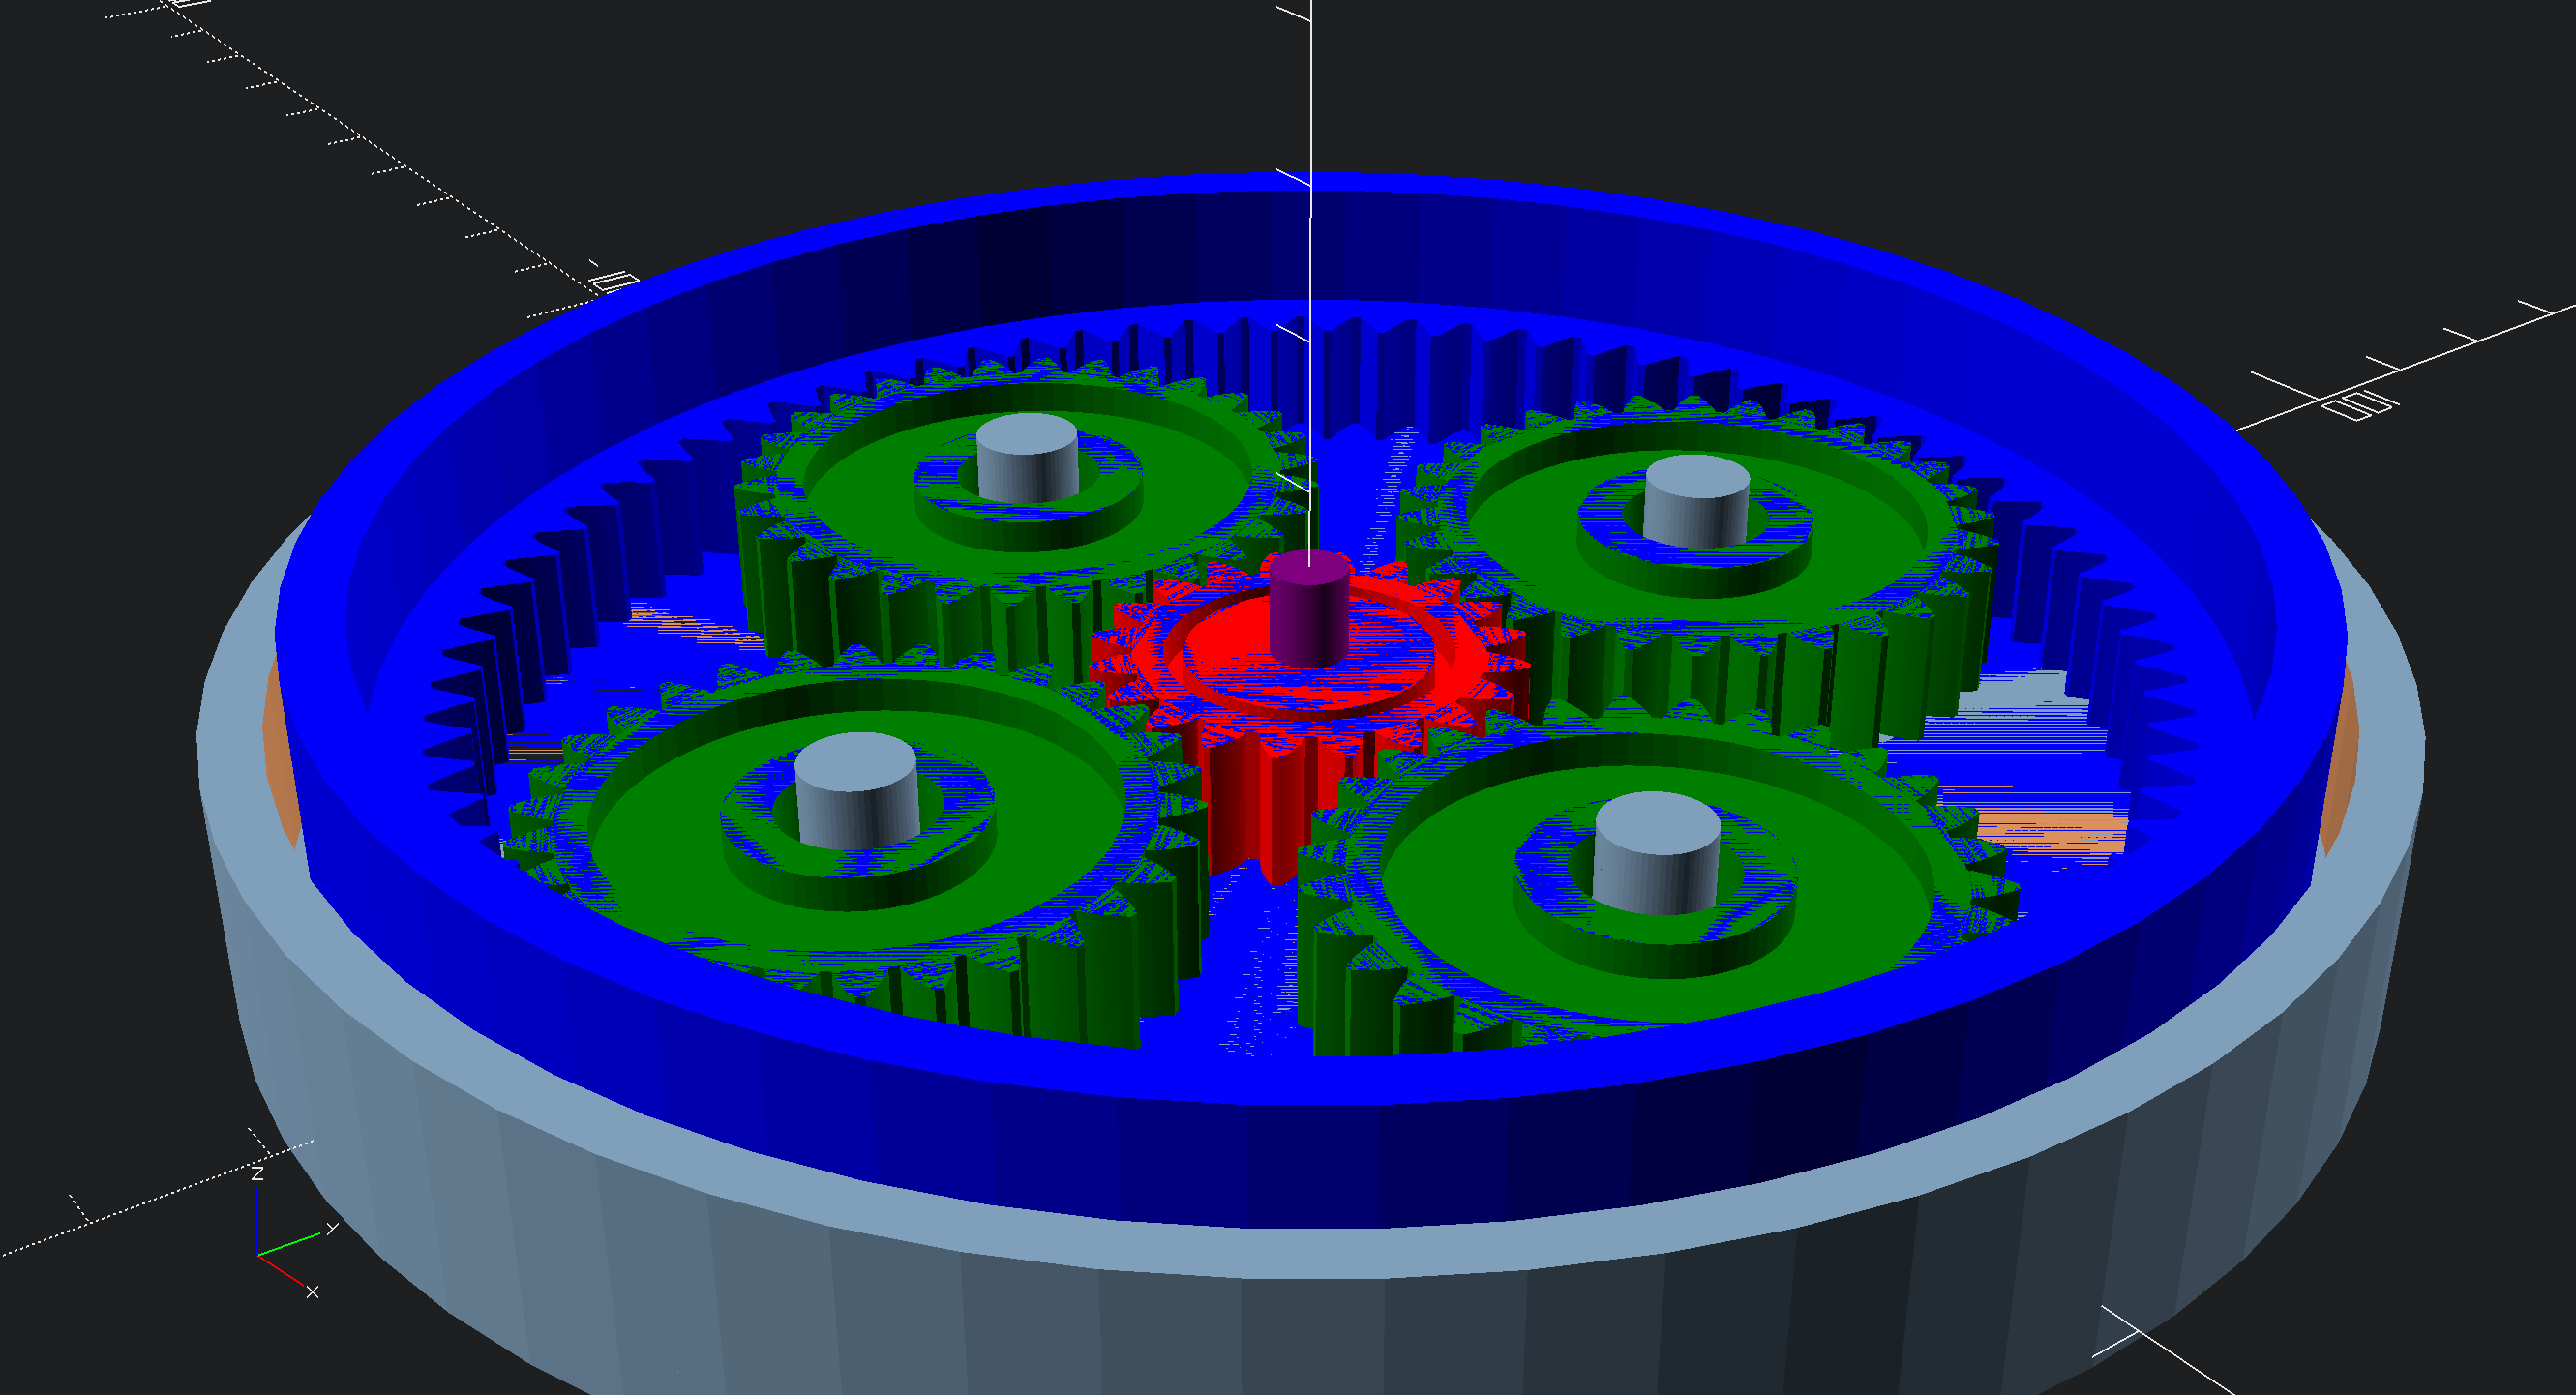
Rotating Base Designed, 3D Printing has begun!
08/29/2015 at 11:30 • 0 comments![]()
It was davedarko in the comments who suggested that we build a robotic arm and that's what we are doing. I tried to develop a rotary arm segment that could be repeated but when I showed it to someone with pretty good robotics knowledge he shot it down for a few good reasons.
So then I printed out a planetary gear system and mucked with it until it was 4:1 gear ratio. I thought about it and planned where to put the motor then added that to the OpenSCAD file. One thing led to another and next thing I knew I had a rotating base which I am printing out now.
I had to tweak the gear height and wall thickness to minimize the print time of course. I'm printing the base with the motor mount first, then the gears. I'll later CAD up a cover so the whole project has a PLA case and support rather than sit on on the motor for support, but that is another design!
Thanks to frankstripod for joining the project and davedarko for the original idea of what to build.
Ivan the Teambuilt Robot
An e-NABLE robotics project to give hands to those without use of their hands. Designed with your help.