Close
0%
0%

Mechaduino

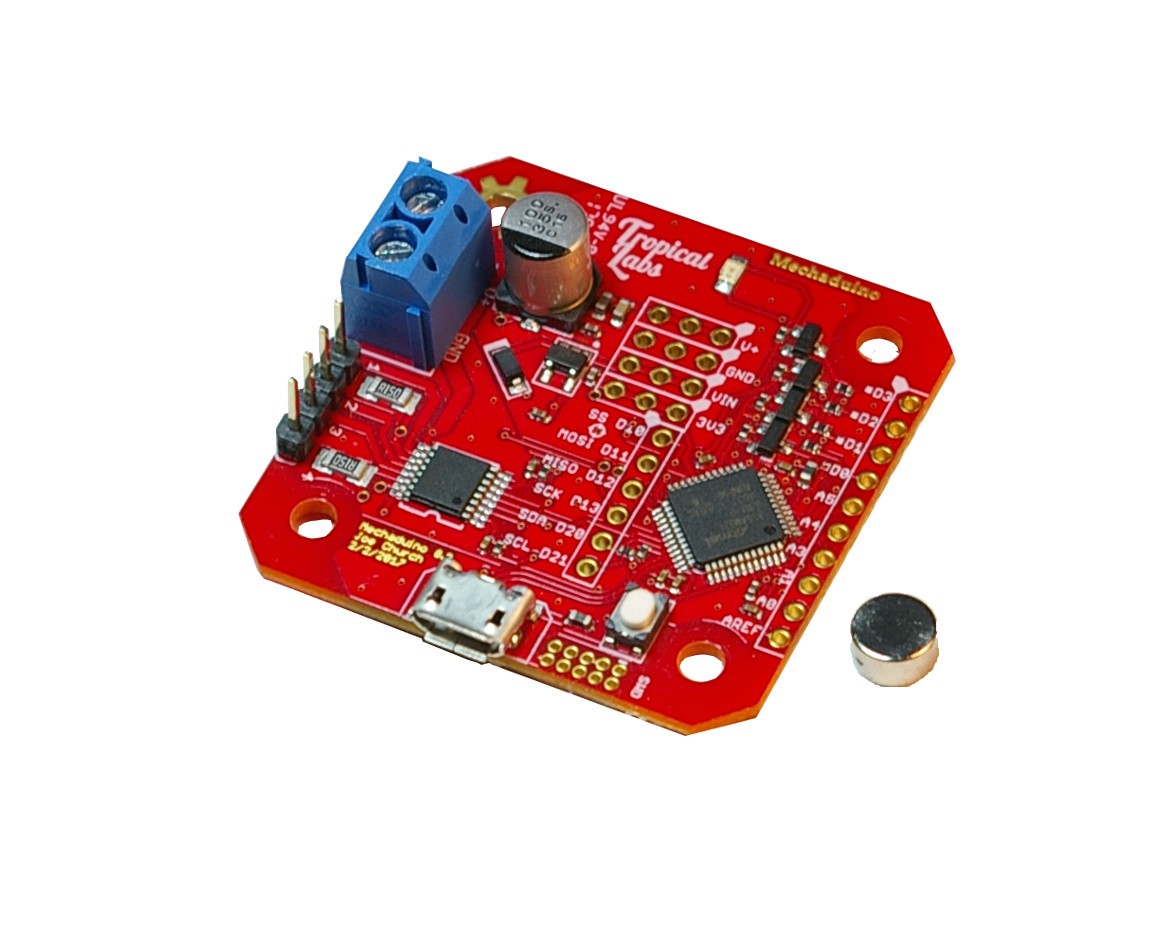
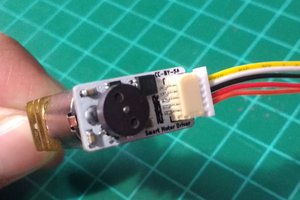
Mechaduino is an affordable, open-source, industrial servo motor. Position, torque, velocity, and custom modes. Arduino compatible.

Similar projects worth following
Engineers use servo motors to achieve the precision motion required in applications such as robotics, automation, and CNC manufacturing. Like RC servos, industrial servos actively correct for external disturbances. Unlike RC servos, industrial servos can provide very accurate motion, and often support advanced motion control modes. Unfortunately the cost of industrial servos is prohibitive to the individual maker (thousands of dollars per motor).

We've been developing an affordable open-source industrial servo motor, opening the door to sophisticated mechatronics applications. Our design leverages the low cost of mass produced stepper motors. We are able to achieve very high resolution via 14b encoder feedback (after calibration routine!). For more information, including demos of our working prototypes, check out the external links (below to the left).

Kickstarter campaign successful!

Missed the Kickstarter? Mechaduino is available for pre-order here!

Goals: (in no particular order)

  • Position, velocity, torque loops
  • Step & direction inputs for drop-in compatibility with stepper motors / step stick
  • I2c, serial inputs
  • Customizable/open source with access to internal variables
  • Transparent and user-definable control algorithms (commercial servos often lack this)
  • Arduino compatible with easy to use interface
  • High resolution pointing (sub 0.1 degree)
  • Low cost (should not be a huge leap from stepper+stepstick cost)
  • Serial interfaces for inter-motor communication
  • On-board processor allows for stand alone for simple applications
  • Adjustable commutation profiles
  • PID auto tuning
  • Anti-cogging capable
  • Open to customization. Outside of our firmware, we see Mechaduino as a very useful hardware package. If you would like to use the stepper motor in open loop mode w/ encoder to verify location, you can do that.

We also see could see Mechaduino as an educational tool. Since all the hardware is on one board (sensor, processor, motor driver), set up time is very low, and students can focus on playing with the controller.

Mechaduino 0.1 Hackaday Prize Video:


Mechaduino 0.0 Prototype:


Strategy:

An industrial servo motor can be broken down into four main components (below). First we looked at each of these components and tried to piece together an affordable breadboard-level prototype. After some experimentation, we were able to distill out a working lineup of components. From there, we've been iterating on our design, working out all the kinks, and tuning the control loops. It's starting to come together!

...Back to those four main components:

1) The actual motor, usually of the brushless dc variety. When you look at industrial servo motors, a big chunk of the cost is the motor itself. They are often custom built, or at least built in limited quantities, which means $$$. Watt for watt, I'd guess that a mass produced NEMA 17 or NEMA 23 stepper motor is between a tenth and a hundredth the cost of the BDC motors used in industrial servos. Although their design is optimized for "stepping," stepper motors are really just 50-pole brushless dc motors. They can be controlled exactly like a more traditional 3 phase BDC motor with more poles. So that's the plan. It's working!

2) A sensor for feedback, usually an encoder. Optical encoders are pretty standard, but get quite pricey if you want high resolution and/or absolute position information. We were intrigued by some of the cheap, high resolution magnetic encoders offered by vendors like AMS. It turns out that although they claim 12 and 14 bit resolutions (that's 0.09 and 0.02 degrees respectively), they suffer from non-linearities on the order of a degree or so! However, we found that this non-linearity is very repeatable, and we were able to develop a quick, self contained (on motor) calibration routine that restores resolution to better than 0.1 degrees. (More on this later. This was a significant design effort and is worthy of its own build log!)

3) Drive circuitry/power electronics to excite the motor windings. Many industrial servos use discrete H bridges. Each phase requires it's own H bridge ( for a two phase motor... half bridges for each in a three phase motor), which consists of at least 4 if not 8 (...including freewheeling diodes) discrete switching devices. Throw in gate drive circuitry, and things start to get expensive. We hoped to find a single-chip, integrated solution that would allow for current feedback, and we found just that in the A4954 dual full bridge PWM driver.

4) Control Electronics. Usually a microcontroller or FPGA. Early on, we decided that Arduino compatibility was a must in order to make the firmware as accessible as possible. We chose to use a SAMD21 ARM M0+ (Arduino Zero compatible) processor to balance cost and performance. Our breadboard prototype system verified that this processor was more than capable of executing the necessary algorithms....

Read more »

MechaduinoManual.pdf

Adobe Portable Document Format - 1.51 MB - 01/02/2017 at 21:42

Preview

Mechaduino01.sch

Eagle schematic

sch - 2.46 MB - 04/22/2016 at 19:35

Download

Mechaduino01.brd

Eagle board

brd - 858.11 kB - 04/22/2016 at 19:35

Download

Mechaduino_01_Schematic.png

schematic image

Portable Network Graphics (PNG) - 174.33 kB - 04/22/2016 at 19:35

Preview

  • 1 Ă— ATSAMD21G18 Arduino Zero compatible uC
  • 1 Ă— AS5047 14bit absolute magnetic encoder
  • 1 Ă— A4954 Dual full bridge PWM driver
  • 1 Ă— Stepper motor NEMA 17 or other w/ adapter
  • 1 Ă— Magnet: Diametrically Magnetized NdFeBr We are using a D42DIA from K&J Magnetics

View all 7 components

  • Hardware Available & New Firmware!

    jcchurch01/04/2019 at 19:48 1 comment

    After dealing with some parts shortages in 2018, We've finally completed another batch of Mechaduinos!

    Fully assembled Servos are now available here!  PCB kits are available here!

    We also released an update to the firmware!  The calibration table can now be stored in flash memory!  The Mechaduino Manual has also been updated (links below).

    Quick Links:

  • Mechaduino 0.2 PCBs Available

    jcchurch05/06/2017 at 06:55 1 comment

    The updated Mechaduino 0.2 PCB kit is now available for purchase here. A list of updates is available in the latest version of the Mechaduino Manual, and all source files are available on Github.

  • Update!

    jcchurch04/09/2017 at 22:44 0 comments

    We have another batch of Mechaduinos in production that will be available for purchase on our website in a few weeks. Sorry for the delay. We decided to add a couple of improvements to the boards which slowed things down a bit. We will be posting details about the improvements shortly in an updated version of the Mechaduino manual. We'll upload the updated source files to github as soon as we've polished them up.

    -Joe

  • Improved firmware released

    jcchurch11/25/2016 at 19:13 0 comments

    Hi all,

    We've uploaded a significantly improved version of the Mechaduino firmware. It is available here (master branch of our repo). Older versions of the firmware are still available here and here.

    Improvements include:

    -Menus now work!
    -Faster control loop (running 6kHz by default)
    -Ability to adjust PID gains from menu (does not use non-volatile memory yet, so you do have to update firmware for permanent changes, but this makes tuning a lot easier).
    -Generate sine/commutation table on startup, this makes it easy to experiment with different commutation profiles
    -Lots of documentation in code
    -Much cleaner code ( no more "magic" numbers, etc)

    We are almost ready to release a Mechaduino Manual that covers hardware, firmware, and example code. Please stay tuned!
    -Joe

  • CW & CCW Pins Example

    jcchurch11/22/2016 at 01:51 2 comments

    Here's a quick example showing one way to configure two digital IO pins to control the Mechaduino. Pull pin 2 low and the Mechaduino moves CW, pin 3 and it moves CCW:

    First, run the calibration routine and copy the lookup table in to parameters.cpp.

    Next, add the following code in the bottom of the setup function in Mechaduino.ino:

        pinMode(3,INPUT_PULLUP);  //pin for + direction
        pinMode(2,INPUT_PULLUP);  //pin for - direction 
        
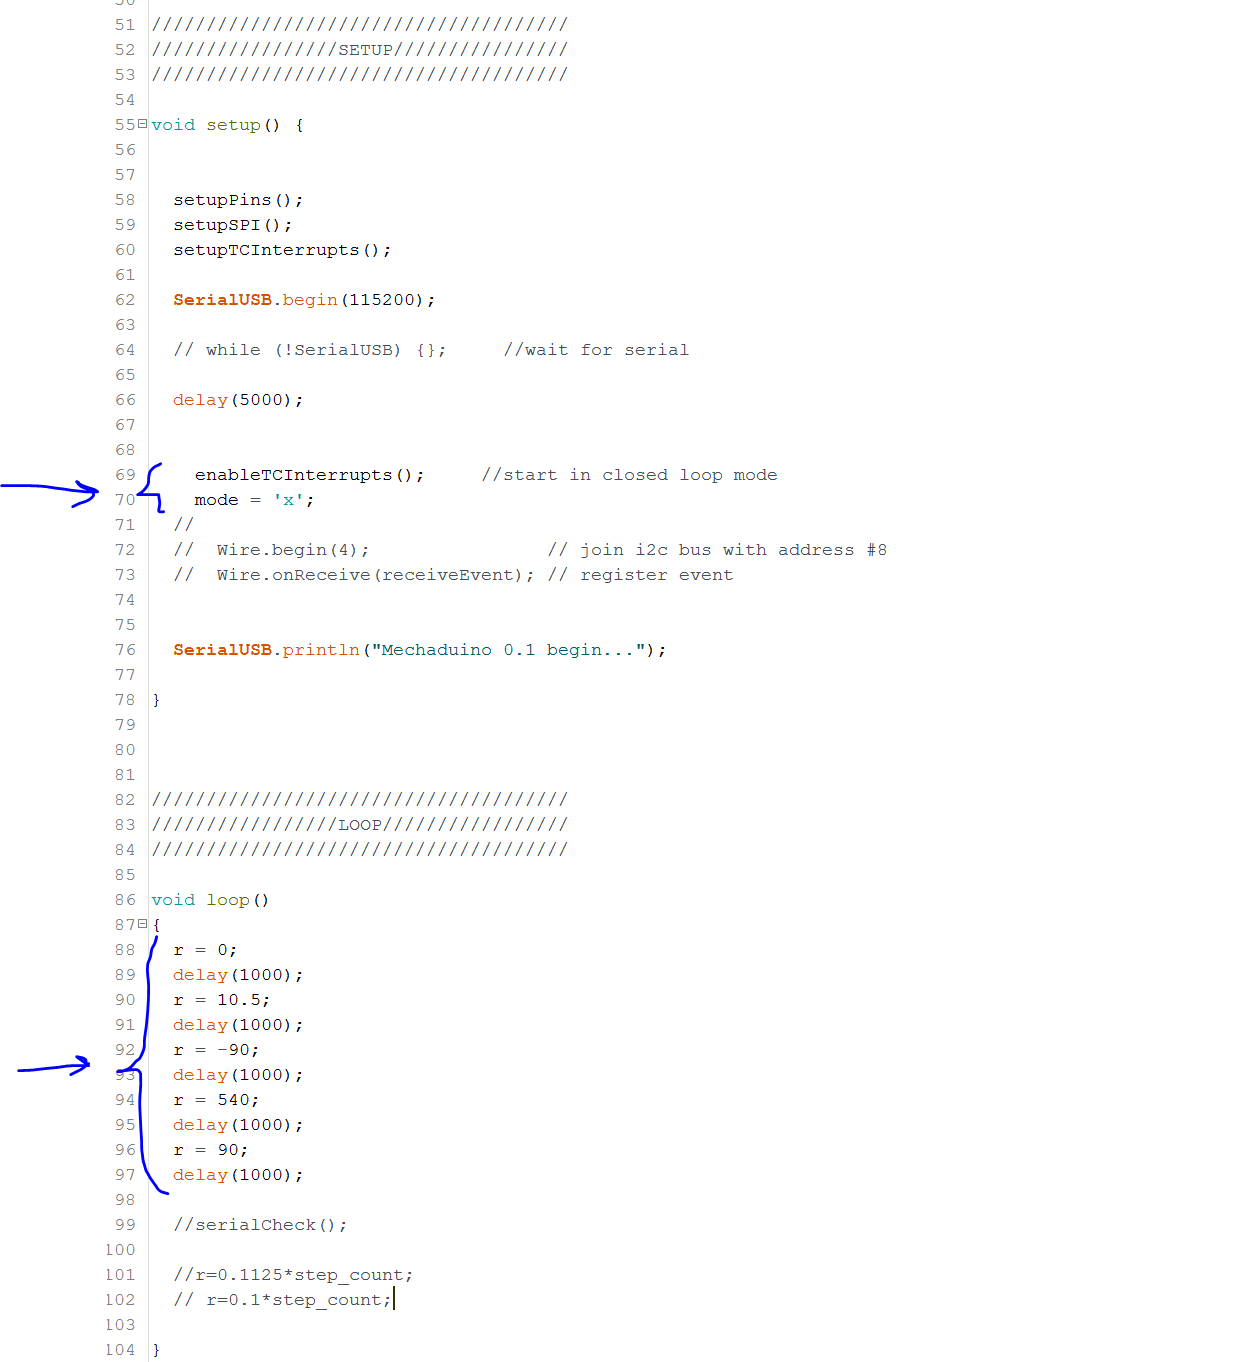
        enableTCInterrupts();     //start in closed loop mode
        mode = 'x';

    ...and then enter this code in the loop:

    void loop()
    {
      if (digitalRead(2) & !digitalRead(3)){
        r+= 0.01;
      }
      else if (digitalRead(3) & !digitalRead(2)){
        r-= 0.01;
      }
      delayMicroseconds(5);
      //serialCheck();  
      //r=0.1125*step_count;
    }

    In this example we use the position mode 'x', and increment/decrement the setpoint based on the pin state. You could also use the velocity mode 'v' and set the setpoint to a velocity based on the pin state.

  • Position loop example: setting angle in code

    jcchurch10/25/2016 at 23:18 1 comment

    Here's a quick example demonstrating how to change the setpoint of the position control loop:

    This motion was implemented as shown below. "r" is our global setpoint variable. Since the control loop is implemented using interrupts, you don't really have to worry about it in your main loop once it is enabled!

  • Mechaduinos in the wild?!

    jcchurch10/09/2016 at 12:01 0 comments

    If you ordered Mechaduino hardware through our Kickstarter, you should receive your reward any day now (If you haven't already)! Sales from our website should start to appear next week! We've also heard from quite a number of folks who couldn't wait and built there own! If you would like to share your Mechaduino applications or design modifications, please feel free to post below in the comments!

  • Shipping Kickstarter Mechaduinos!

    jcchurch10/01/2016 at 05:29 0 comments

    We began shipping our Mechaduino Kickstarter rewards this week!

  • Step/Dir Interface Demo

    jcchurch09/15/2016 at 13:07 2 comments

    I've created a little video demonstrating one way to configure a Mechaduino to work with the popular RAMPS 1.4 3D printer shield. Check it out:


  • Automation!

    jcchurch08/21/2016 at 21:31 0 comments

    From the beginning, we have seen Mechaduino as a way to make motion control for automation accessible. Industrial motion control systems are pretty far outside of the budget of most makers and small businesses. By creating an open source servo motor that is affordable and programmable in the familiar Arduino environment, we hope to give makers a powerful tool to design their own automated systems.

    As a simple example, here's how we used a Mechaduino to help us automate the assembly of (you guessed it!) Mechaduinos! For each motor, we need to replace the stock screws with our custom screws/standoffs. This fixture helps to streamline the process. Though simple, we estimate that this fixture saves us about 10 seconds per motor... that adds up when you have to repeat a process 1000 times!


View all 26 project logs

  • 1
    Step 1

    OVERVIEW:

    Here are some preliminary instructions on how to get your Mechaduino up and running.

  • 2
    Step 2

    ASSEMBLY:You will need to mount the magnet to the back of the motor shaft. Note: the magnet must be diametrically magnetized, as opposed to axially magnetized. The magnet may naturally stick to the shaft, but we recommend a dab of epoxy or super glue to hold it in place. The magnet should be fairly centered, but the calibration routine will correct for minor misalignment.

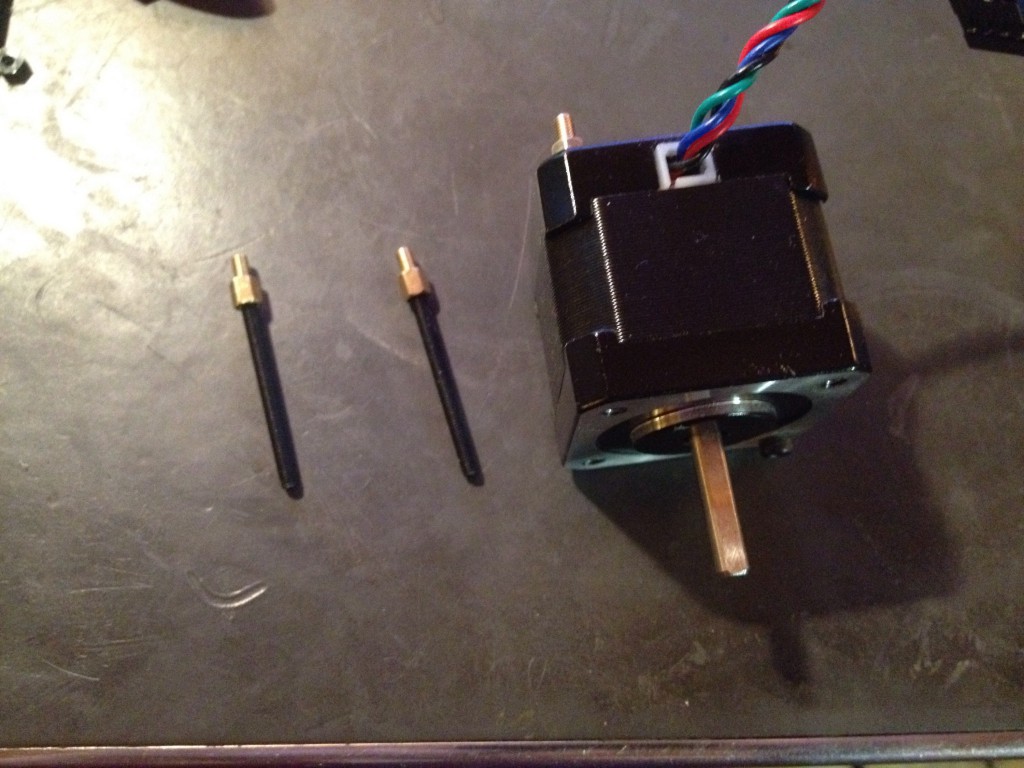
    The Mechaduino PCB must be mounted so that the magnet is directly under the encoder chip (Very close but not touching. See the AS5047 datasheet for details). We replaced the standard motor hardware with M3 threaded rods and short standoffs to mount on our Mechaduinos, but there are other ways this could be done.

    When wiring your motor up to the Mechaduino board, please make sure that one phase is connected to ouputs 1&2, and the other phase is connected to phases 3&4.

  • 3
    Step 3

    BOOTLOADER:

    You will need to make sure your Mechaduino has the latest Arduino Zero bootloader. If you are getting a Mechaduino as a reward from our Kickstarter, it will already have this! Otherwise you will need an Atmel-ICE or similar SWD programmer...

View all 8 instructions

Enjoy this project?

Share

Discussions

jcchurch wrote 10/25/2016 at 23:59 point

Hi david,

Please see our latest build log (above)!

-Joe

  Are you sure? yes | no

david wrote 10/25/2016 at 14:16 point

Hi,

I assumed the firmware would support a 'Go to angle: x' function but I can't see any example?

  Are you sure? yes | no

Ben Holmes wrote 11/05/2016 at 21:55 point

There doesn't seem to be any 'angle' function but there is a 'position' function.

  Are you sure? yes | no

edkirk1 wrote 10/23/2016 at 19:33 point

also noticed you have 250000 for baudrate.  My driver is maxed out at 115200.  does that matter?   Thanks, Ed

  Are you sure? yes | no

edkirk1 wrote 10/23/2016 at 19:31 point

l tried to upload but got 'serialEvent' declared void

  Are you sure? yes | no

[deleted]

[this comment has been deleted]

Simon Benoit wrote 10/29/2016 at 23:23 point

Did you tune the PID to make it work at 4500hz ?
Do you get error and oscilliation when the motor reach its setpoint ?? I can't get rid of that

  Are you sure? yes | no

nicolas.rambaud.95 wrote 10/30/2016 at 14:07 point

I've had good results with  a nema 17 42BYGHW804 (200 steps/turn, 1.2A) and these PID settings:

Kp:30

Ki:0.1

Kd:30.0

Frequency: 3000

I reduced a lot the noise and vibration levels but i haven't checked on scope if i had any mechanical oscillations

The best would be to find out a way to have an pid auto tune as marlin firmware has

  Are you sure? yes | no

Simon Benoit wrote 10/30/2016 at 15:25 point

I was going to make an iterating PID setting and count the oscillation to try to converge to a good value. The best way would be to consider the dead zone of the motor and the non linearities. I had a class on tuning with servo motors. I should take a look at my notes when i'll find them :P

  Are you sure? yes | no

Ben Holmes wrote 11/05/2016 at 21:54 point

Also remember, it's only useful to tune PID while the motor is mounted in-line. Tuning PID without the motor hooked up to anything is like choosing a toothpick as a lever to move a 50 pound boulder, it doesn't really mean anything.  I'm not talking about any initial configuration to get everything to move, I'm talking about tuning.

  Are you sure? yes | no

adamfilip wrote 10/15/2016 at 22:46 point

Why wasnt a convienient 4 pin plug added to plugging the mechaduino into a ramps/rumba is very simple and wouldnt require any soldering. seems like missed opportunity

  Are you sure? yes | no

Simon Benoit wrote 10/29/2016 at 23:24 point

Just do it ...

  Are you sure? yes | no

flai wrote 10/15/2016 at 08:12 point

Hi,

Does anyone have experience using Mechaduino (step/dir) for controlling their CNC milling machines with Mach3?

  Are you sure? yes | no

edkirk1 wrote 10/17/2016 at 01:25 point

I have, I used Mach3 on a CNC Router but changed it to Flashcut CNC because I already had a machine with Flashcut and like it much better.  Anyway they are both the same when it comes to step/direction which are controlled by a controller board and wiring connections.  The stepper drivers (board or boards) may be part of the main board but more likely they will be separate.  There are a number of possibilities, look for some printing on the components which have some reference to enable/step/direction and power connections, hopefully 12 or 24 VDC.  The four wires from the stepper motor will connect to this board (or maybe even a box).  There may be a large bundle of wires with a DB25 plug (the old parrallel cable) on one or both ends.  You need to figure out what you have before proceeding. 

There may be some changes required in the software. 

Ed

  Are you sure? yes | no

flai wrote 04/04/2017 at 08:32 point

Hi Ed,

Thanks for your reply. So you propose driving the stepper driver using step/dir from the mechaduino? So I would e.g. use two of the phase outputs to generate the step and dir signal?

  Are you sure? yes | no

edkirk1 wrote 04/04/2017 at 13:41 point

Hi flai,

No, I used Flashcut to drive my CNC router and Smoothie Board to drive my 3D Printers.

I gave up on Mechaduino and went back to step/direction from the Smoothie Board.

Ed

  Are you sure? yes | no

flowduino wrote 10/14/2016 at 21:01 point

My computer does not recognize my mechaduino. Followed the instructions line by line. When I plug in the device thru USB the device manager does not register. I have tried two computers (WIN_10_64b) and several cables. I confirmed power is getting to "all" chips. Perhaps there is no boot loader, however because this is a kick-starter shouldn't there already be a boot-loader on this product already? Thanks::: flowduino

  Are you sure? yes | no

jcchurch wrote 10/14/2016 at 21:52 point

Hi flowduino,

Apparently the arduino zero drivers do not always automatically install. Please take a look at these instructions:
https://www.arduino.cc/en/Guide/ArduinoZero
I have had issues where it will show up in the device manager,
but not as a COM port(as an unidentified device).If this is the case, the bootloader is present, but the drivers have not installed properly.

If nothing shows up at all, then it probably is a bad or missing bootloader.  If that is the case, I'm very sorry!  Please contact me directly at tropicallabsdc@gmail.com, and we will sort this out!

-Joe

  Are you sure? yes | no

edkirk1 wrote 10/12/2016 at 16:08 point

I haven't received boards yet but have a question, can calibration be done with motor mechanically connected to drive components or do I need to disconnect mechanics to have free running shaft?

Thanks, Ed

  Are you sure? yes | no

jcchurch wrote 10/14/2016 at 01:34 point

Hi Ed,  

You will want to disconnect any significant load for best results.  You could probably still calibrate "in system" if you just loosen any set screws so that the motor shaft can move relatively freely.

-Joe

  Are you sure? yes | no

n_cristian wrote 10/11/2016 at 15:05 point

does anybody know the value of D1?

  Are you sure? yes | no

changfrancis wrote 10/10/2016 at 13:22 point

Hi jcchurch,

Will there be any chance you can add an enable pin to the code ? I was hoping to temporary disable the pid loop for manual moving. 

Many thanks.

Francis

  Are you sure? yes | no

jcchurch wrote 10/11/2016 at 14:02 point

Hi Changfrancis,

I'm away from my lab this week, but I can post an example showing how you can do this this weekend.

-Joe

  Are you sure? yes | no

Testermonkey wrote 10/04/2016 at 15:49 point

Default files fail to compile - 'TC5' was not declared in this scope

1 - Installed Arduino 1.6.12

2- Copy bits to Documents\Arduino\libraries\Mechaduino_01\Mechaduino_01

3 - Added board dependent bits for Arduino/Genuino Zero

4 - Opened Mechaduino_01.ino

5 - Click verify

Expect to see default files compile.

Windows 10 1607 - Build 14393.187

Actual - sketch\Controller.cpp: In function 'void TC5_Handler()':

Controller.cpp:32: error: 'TC5' was not declared in this scope

if (TC5->COUNT16.INTFLAG.bit.OVF == 1) {  // A overflow caused the interrupt

 ^

exit status 1
'TC5' was not declared in this scope

What am I missing?

  Are you sure? yes | no

jcchurch wrote 10/05/2016 at 04:54 point

My guess is that you may not have selected the right board. Please select "Arduino/Genuino Zero (Native USB Port)" under Tools>Board. 
-Joe

  Are you sure? yes | no

Testermonkey wrote 10/05/2016 at 15:31 point

Update & Resolution to:

on a clean install of latest Arduino bits, Mechaduino_01 fails to compile. 
'TC5' was not declared in this scope 


Problem: Wrong port selected - Arduino/Genuino Zero (Programming Port)
Solution: Select correct port - Arduino/Genuino Zero (Native USB Port)


Thanks all for your contribution.

  Are you sure? yes | no

jcchurch wrote 10/04/2016 at 07:46 point

Hi Francis,

They will ship later this week!

-Joe

  Are you sure? yes | no

changfrancis wrote 10/04/2016 at 07:23 point

Hi,

Do you know when tropical lab will start shipping non-kickstarter orders ?

-Francis

  Are you sure? yes | no

jcchurch wrote 10/03/2016 at 08:56 point

Ed,

Step/Dir control signals need to be referenced to ground.  The logic and power grounds are tied at a single point on the Mechaduino board.  Steps are registered on the rising edge of the step pin by default, but you can configure the Mechaduino to behave however you like.   Voltage regulator connections are pretty straight forward and are described in our step/dir wiring diagram.  I can try to post a diagram when I have a chance.

Depending on the address, our Kickstarter rewards were shipped using USPS or DHL.  Yours were shipped with USPS.

-Joe

  Are you sure? yes | no

edkirk1 wrote 10/01/2016 at 15:53 point

I have reviewed your video "Alright!  Closed-loop control!" and have some questions.

I have a very nice machine I designed and built using Teknic ClearPath servos so I am quite familiar with setting up both steppers and servos with a Rambo 3 board and a Smoothieboard.  I really like the Smoothieboard, both boards have separate pinouts for step/dir and enable.  I also have a new machine almost identical to the servo machine with steppers constructed just for your Mechaduino boards to be installed when I get them.

OK, the schematic you posted showing step/direction has three wires for control; 5V - Step - Dir.  In the video it looks like 4 wires coming from the printer board, positive, negative and the step/direction for control (I have experimented with this arrangement).  Does your board use positive or negative to complete the control circuit?  The Smoothieboard can do either with just a minor code change.  I can figure it out but it would be a great advantage to know the setup so I don't have to do the trial and error thing.

Also could you provide a wiring diagram with the voltage regulator installed.  I don't want to damage the electronics by miss wiring things since I am using 4 motors driven by one control board.

PS.  Which carrier was used to ship the boards so I know who to look for?

Thanks, Ed

  Are you sure? yes | no

n_cristian wrote 09/24/2016 at 09:34 point

to Simon Merrett there are various ways to synchronize things a very simple one would be (assuming fairly reliable xtals) to sync the start and the steps per unit of time. this way the motors would not need any further sync until the next command.

  Are you sure? yes | no

RigTig wrote 09/27/2016 at 13:35 point

n_cristian, please explain how to start 3 or 4 Mechaduinos executing a specific GCODE line at the same instant. You mentioned there are various ways to synchronise, so could you please provide some descriptions and comparisons of the techniques (the good and the bad). I can see that each Mechaduino has to calculate what all the other Mechaduinos have to do based on the maximum head speed and so derive its own stepping frequency so each Mechaduino finishes the move at the same instant. I'd be very surprised if the xtals were too unstable to achieve satisfactory timing for each GCODE line, but I'm having trouble with the algorithms for the starting synchronisation.

  Are you sure? yes | no

Simon Merrett wrote 09/21/2016 at 12:02 point

Perhaps this is a little bit hypothetical (bear with me) but if the microcontroller had more DAC outputs, how many motor controllers could be run from one microcontroller? The reason I ask is that I think mechaduino is ripe for a desktop cnc/ 3d printer controller board (integration with smoothieware?) and I wondered how you could reduce the parts count and simplify  firmware updates. Is anyone thinking of doing this and how would you approach it? I'm happy to be shot down with "but you need an encoder breakout and mount" argument but very curious about what configurations people see working for this concept. 

  Are you sure? yes | no

jcchurch wrote 09/21/2016 at 23:29 point

I think performance would suffer if you tried to execute more than one motor control loop on this processor simultaneously...  On a related note, I have been thinking about ways to directly parse g-code on each individual Mechaduino.

  Are you sure? yes | no

Simon Merrett wrote 09/21/2016 at 23:56 point

Would they need to synchronise if each is taking one part of the gcode line?

  Are you sure? yes | no

RigTig wrote 09/22/2016 at 02:25 point

I agree with you about the processing time being the limiting factor. One way to avoid waiting loops is to use interrupts, but you still have only a single CPU to handle the opcodes so you have to plan carefully to make sure nothing gets held up beyond what can be tolerated. Another way is to further divide the task into pieces and give those pieces to individual CPUs.

So, what is needed to have each Mechaduino handle one degree of freedom specified in each GCODE line? The normal interpretation of a GCODE line is to make the straightest line from the previous point to this point. The usual algorithm is a Bresenhaum approximation, which keeps the line 'straight' by coordinating the movement of each degree-of-freedom with all the other degrees-of-freedom. So, to answer Simon Merrett's question, I believe that it is necessary to have synchronisation so the lines are straight enough.

This is an issue I've struggled with a bit with for my big 3D printer (https://hackaday.io/project/13420-rigtigs-big-3d-printer), so if anyone can show me how independent motors can work unsynchronised for a GCODE line, then that will be a great step forward for both projects (and a few others).

I've added a log about 'Drawing a line' to the description of my big 3D printer (https://hackaday.io/project/13420-rigtigs-big-3d-printer) to highlight the interdependencies of the motors using known techniques. But i'd still love to have another solution.

  Are you sure? yes | no

Simon Merrett wrote 09/22/2016 at 06:25 point

Thanks RigTig, sounds like an obstacle which needs to be overcome. After posting, I wondered if there's an opportunity to let the machine decide how fast to execute the moves, based on the constant current/ torque ideas that the mechaduino team have already discussed. That way a part could be made as fast as possible within individual motor current limits. The closed loop control could even monitor where steps start skipping and try to keep below a threshold ratio of steps skipped to steps correctly executed. 

  Are you sure? yes | no

RigTig wrote 09/22/2016 at 15:29 point

Simon, it is my experience that the motors driving the movement are not the limiting factor to speed of 3D printing using thermoplastic filaments.

In a filament extruder, it takes a certain time to heat the filament through so it can be extruded. Some thermoplastics have enough thermal conductivity to heat quickly enough to be extruded at 150mm/sec from a 0.4mm nozzle, and many do not. For example, printing some flexible filaments requires reducing the printing speed down to as low as 15mm/sec so a reliable extrusion flow is achieved. It is not just the heating issue either, but also the physical strength of the filament to be pushed by the extruder motor and the physical characteristics of the 'melt'. [Yes, I know thermoplastics do not actually melt, but you get the idea.]

Another design restriction on 3D printers is the mass of the moving part. The faster the head is moving, the greater the force needed to change that movement in a given timeframe. It is the acceleration that is a real limiting factor in the construction of a 3D printer (F=ma), since we do not want the unit to shake itself to bits or even fall off the table. Yes, a lower moving mass means the acceleration can be greater (and thus the effective speed can be greater), but there are design compromises to be made and physical limitations to be avoided in a practical design.

  Are you sure? yes | no

edkirk1 wrote 09/22/2016 at 16:44 point

I have been experimenting with servos (Teknic Clearpath) they are strong, smooth, fast and very quiet.   Printing results are outstanding, but limited by speed, the machine will really shake, I attached it to the wall in the garage and the whole house vibrated.  I built a CoreXY to reduce the moving mass, it has 1/8 inch MXL belts and pulleys, very smooth.  I built the same machine with nema 17 steppers and got a much less smoother surface in the prints.  Changed to Smoothieboard which resulted in smoother prints.  Looking to install the Mechaduino driver boards on the nema 17 steppers to see if they help with vibrations from the steppers.  I think some of the notchy results are coming from the Arduino based boards.

My servo machine - http://hackaday.io/project/12618

Ed

  Are you sure? yes | no

gumush wrote 09/20/2016 at 07:13 point

Hi , i like this project and i want to try that. But i have a question. Is there anyway to use mechaduino with external motor driver. ( just use as encoder and pid controller to use with other motor drivers ? ) 

  Are you sure? yes | no

jcchurch wrote 09/21/2016 at 23:23 point

You could configure some of the unused I/O pins to send phase current commands to an external driver board.

  Are you sure? yes | no

Similar Projects

Does this project spark your interest?

Become a member to follow this project and never miss any updates