body interaction team
-
Antenna
05/25/2016 at 20:57 • 0 commentsThe body interaction vibrator development board can communicate with any other body interaction board with the on-board RFM12b module. This module is a transceiver: it can send out data and receive data. This can be used to control a vibrator or sync to vibrators. The code at Github (the "p5" script enables this feature).
This works well without antenna when both board are in a short distance. If you want to enhance the range you should add an antenna.
The antenna is just a short wire. Solder the wire to the pad "ANT". The length of the wire is very important. The RFM12b is available in 2 frequencies: 915MHz (US and Australia only) and 868 MHZ. The length of the wire for 915 modules is 82mm. For 868 modules the length is 86mm. Check out the Jeelab site for more information.
-
Alternative hardware
05/23/2016 at 14:56 • 0 commentsThe body interaction vibrator development board is a tiny and simple board to build vibrators. It is based on the ATtiny 84 microcontroller.
If you prefer a standard Arduino controller you could take the JeeNode USB and the Gravity plug (actually the body interaction board is based on JeeNodes). You can connect small vibration motors directly to the output ports of the JeeNode.
If you are looking for a basic and cheap variant you can try this: Leave out the LiPo battery as well as the RF connectivity and connect the molded vibrator to a USB hub.
You need:
- Arduino Nano
- USB connector
- Accelerometer: Buy a break out board with a accelerometer. You could use any break out board with a BMA020 IC which is used for the body interaction development board. Or you use the very popular low-cost LIS3DH IC or any other accelerometer (the code has to be modified for another accelerometer). Before buying look for a free Arduino library for the selected accelerometer.
- any encapsuled low-power vibration motor (max 40mA)
Then change the source code to adapt to the new accelerometer.
-
Build a charging station!
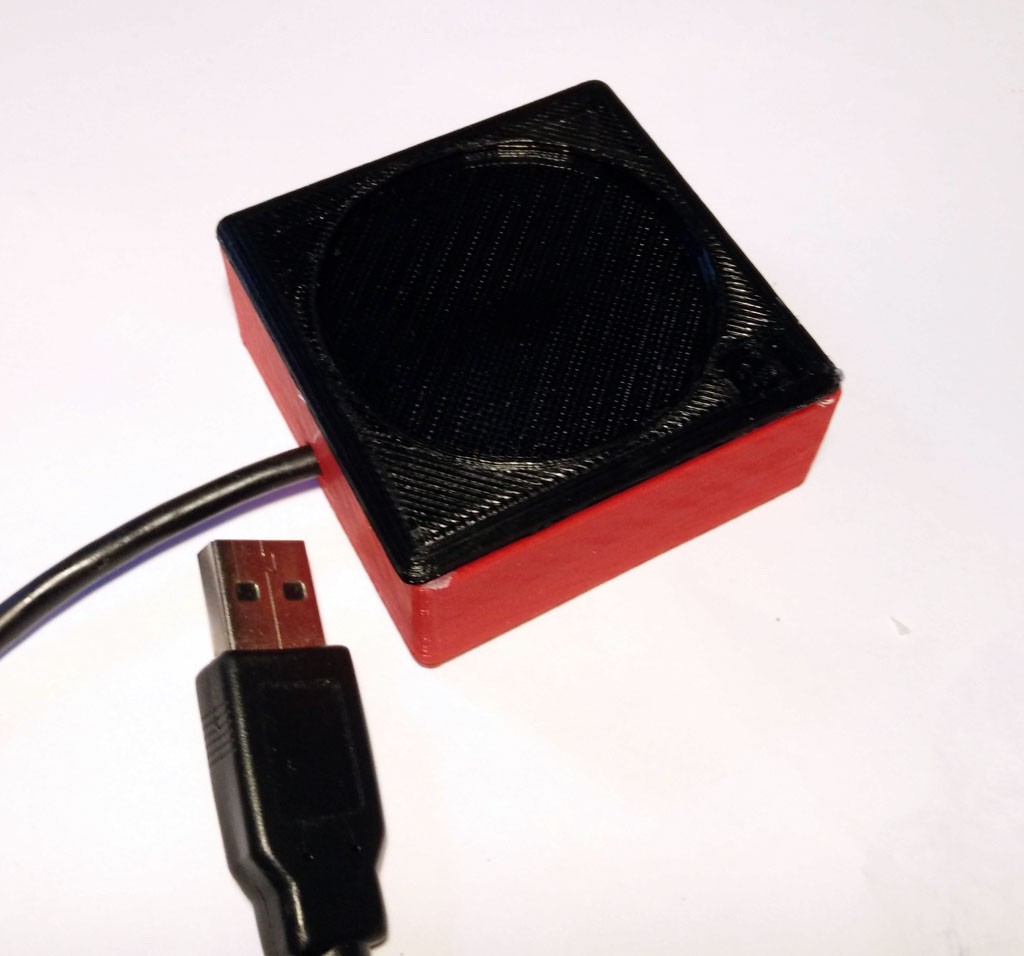
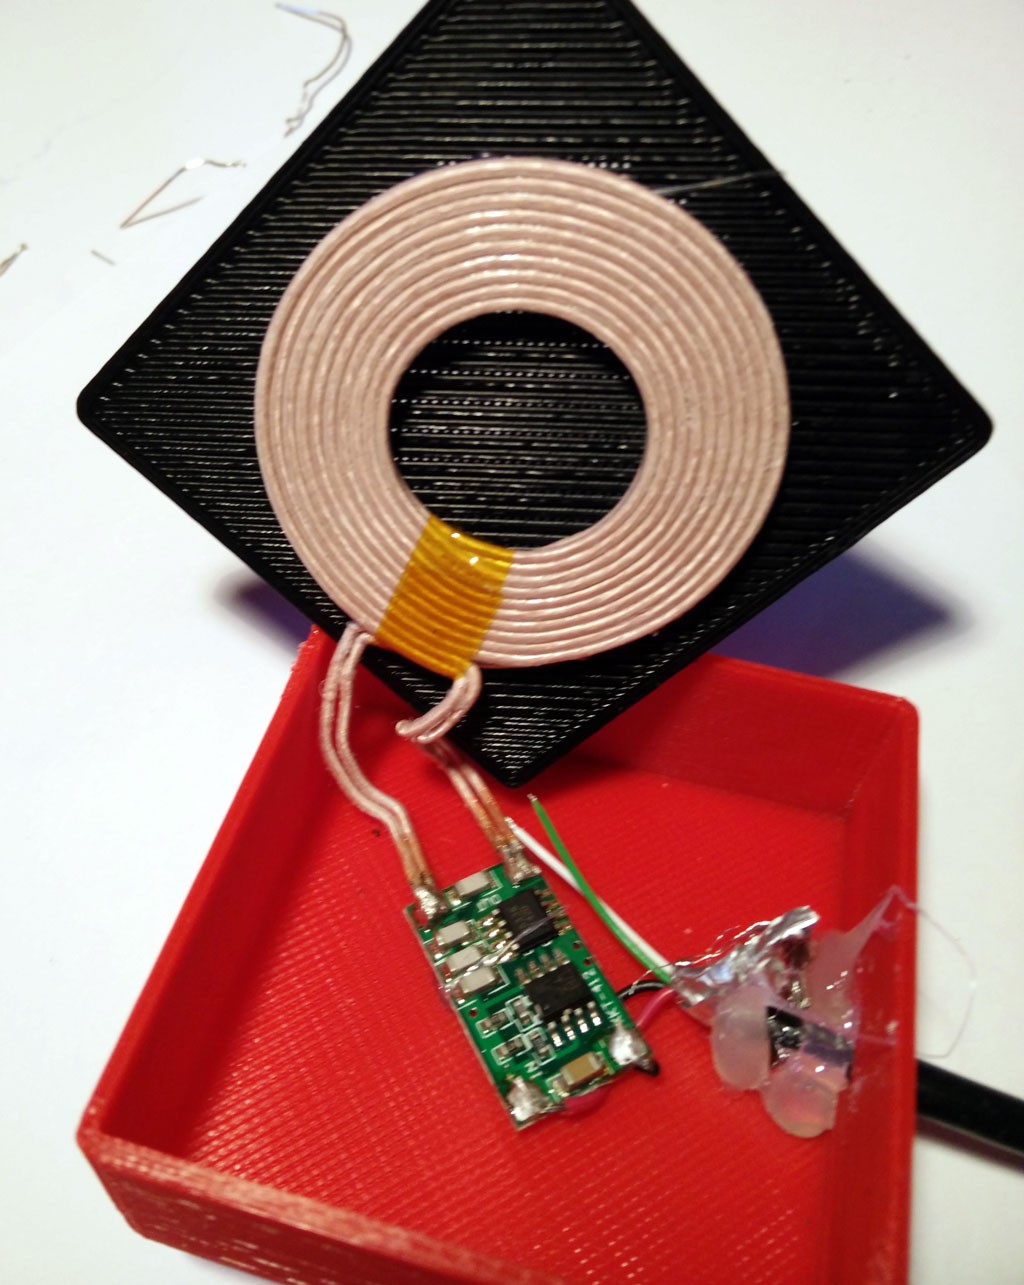
05/20/2016 at 13:26 • 0 commentsThis is a simple and easy add-on for the project. We make a 3d printed box for the wireless charging transmitter module and for the charging coil. In addition we need a USB cable which we will cut through and connect to the charging module.
![]()
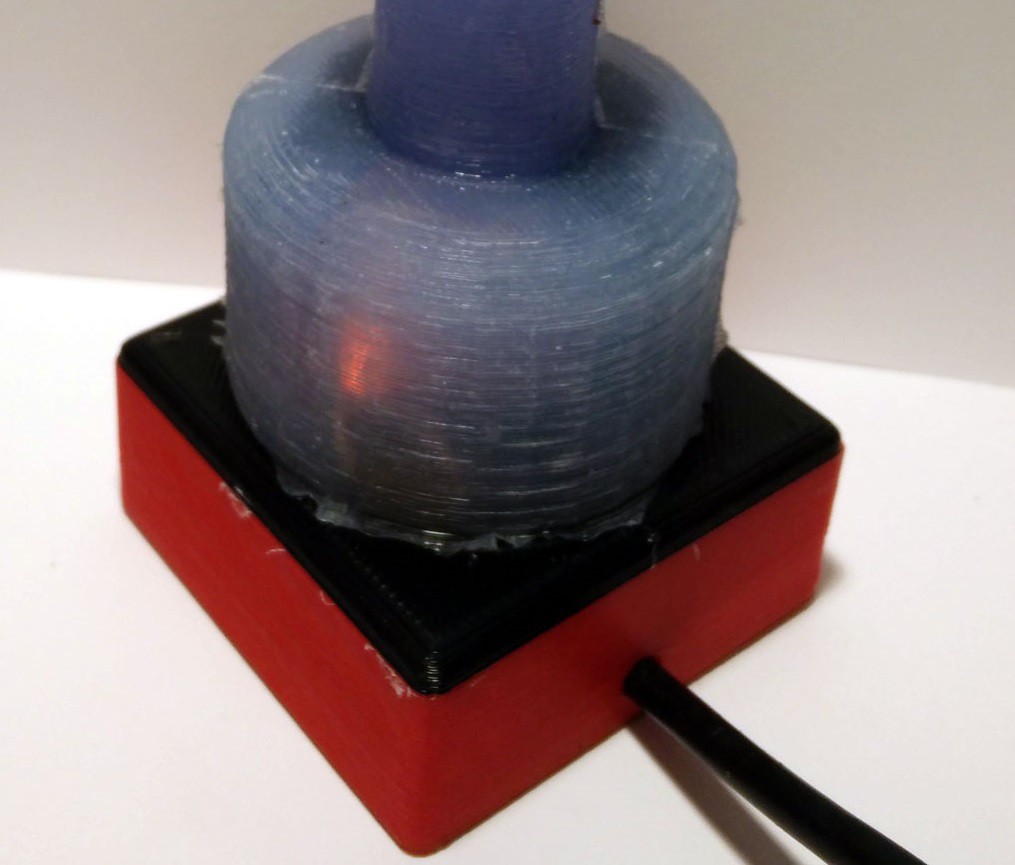
It is important to keep the distance between sender and receiver coil as small as possible. The larger the distance is the less power will be transmitted. Therefore the plate where you put the vibrator must be very thin. For most 3d printers this isn't a problem, even my daVinci printer managed to print out the thin plate.
![]()
Detailed instruction: https://bodyinteraction.com/2016/04/14/usb-powered-charging-station-for-the-silicone-molded-vibrator/
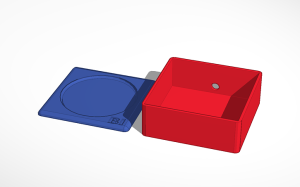
A. Print out part A and B. Download STL files (zip file)
![]()
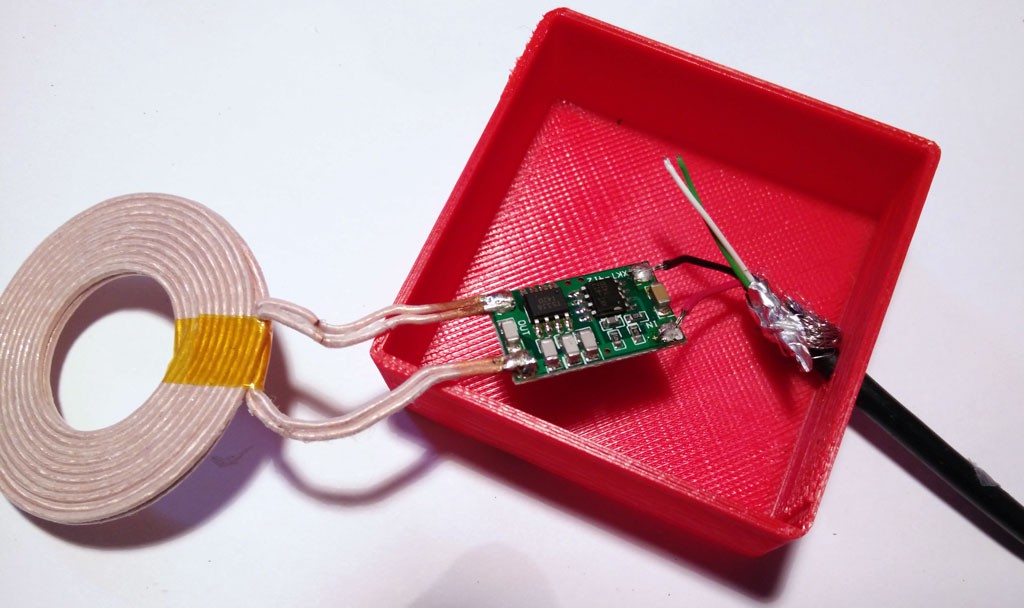
B. Cut a USB cable. Plug the cable through the hole of form B.
![]()
C. Now connect the USB wires with the sender module.
D. Glue the sender board on the bottom of the red form.
E. Now glue the black form and the sender coil together.
![]()
F. Now put together both parts.
-
Form and function influence each other
05/09/2016 at 14:36 • 0 commentsI am using for some month an unchanged Arduino scriped called "p5". You can download the script from codebender.
The script has the basic functions:
- slow motion = reduce viration motor speed,
- fast motion = speed up
- listen to other boards: adjust/sync vibration motor speed to other boards
- send out measured motion
- sleep modus
![]()
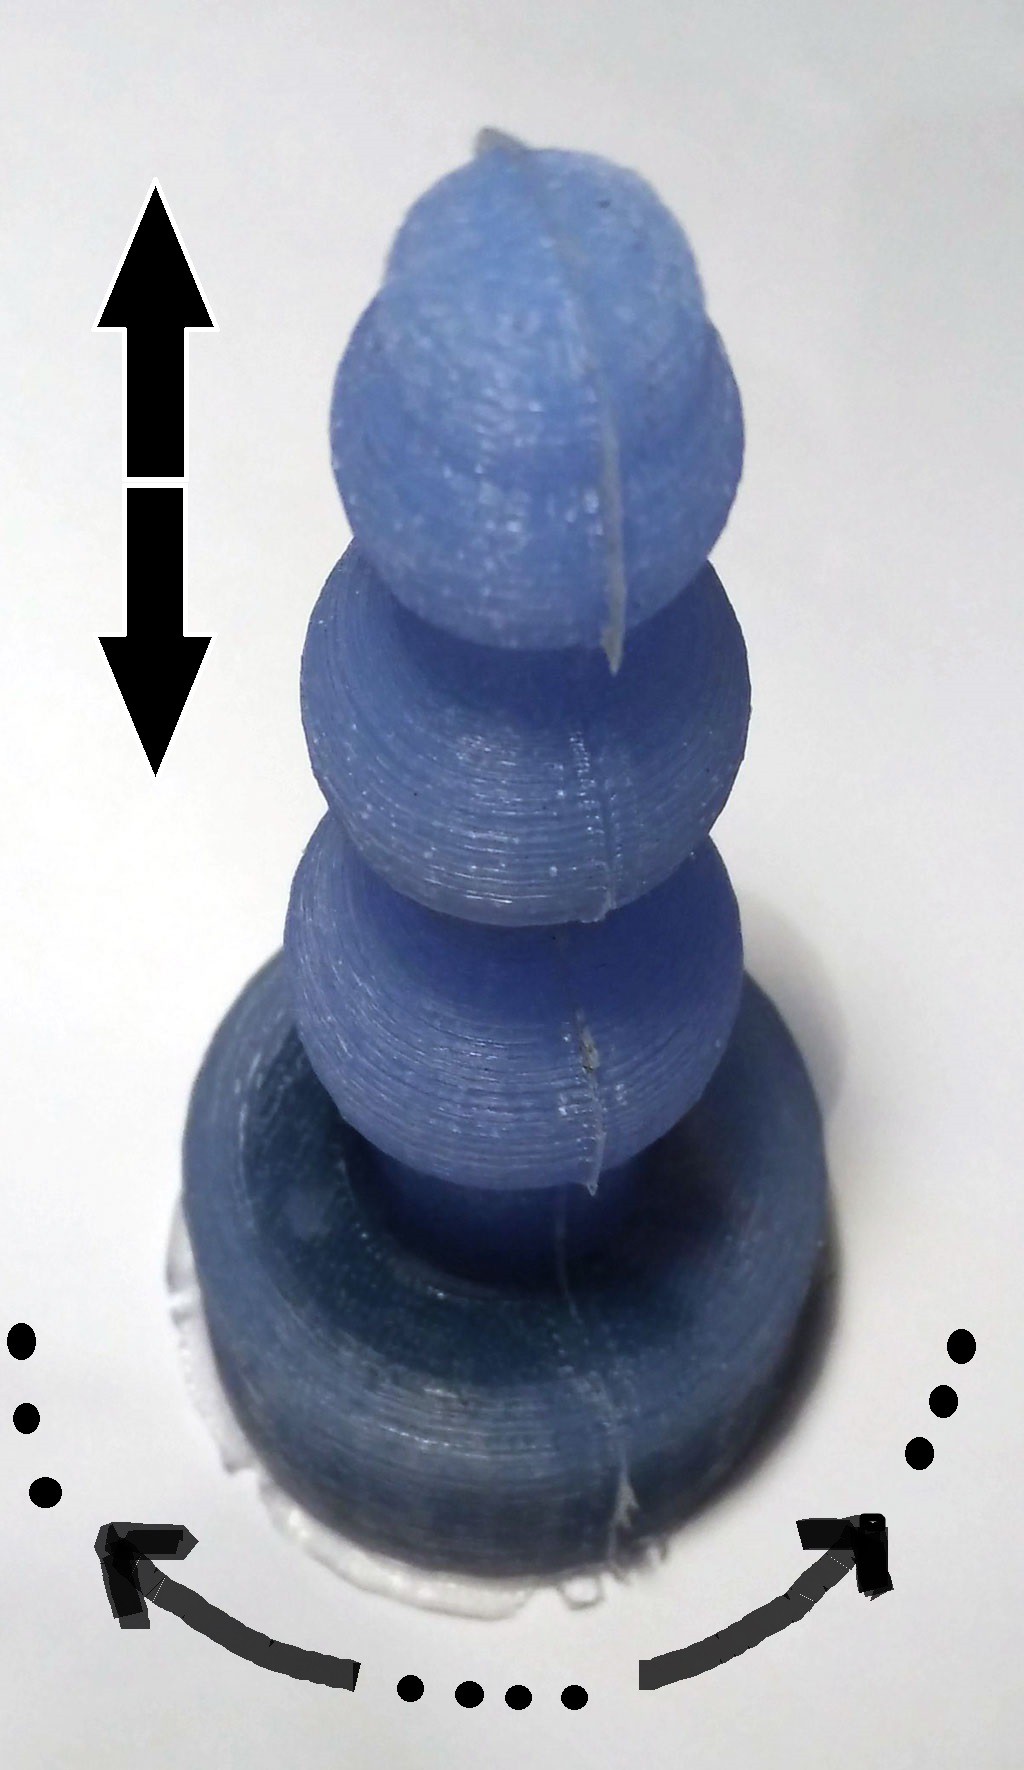
The form of the vibrator / dildo suggests that control of the motor will be done by horinzontal in - out - in - out motions (up and down arrows).
But by twisting the vibrator you get a great vibration motor boost! This wasn't intended as the form of older cases were not round. But it's a great feature.
This example show how form and function can influence each other (wanted or unwanted). For a maker it's not easy to understand the complex relationship between form and function.
-
Long way
04/26/2016 at 16:10 • 0 commentsI started developing a Arduino-based sex toys back in 2012. All hardware was just to big, had no possibilities for remote controls etc. Therefore I developed a small Arduino derivative "body interaction vibrator development board" based on the JeeNode boards. In 2012 I already experimented with silicone overmolding but the results were just ugly. Then 3d printing came into my life and I experimented with 3d printed cases for the body interaction board. Very impressive is the 2- way (or even n-way) communication between the vibrators which allow for syncronization as well as remote control. But 3d printed vibrators are know to be hard to clean, you need a very good printer to get usable results or you must use a professional printing service to get good results.
Wireless Arduino-powered Vibrator
Building your own silicone molded vibrator. Use a 3d printer for printing the form. Drive the vibration motor with a Arduino board.