Close
0%
0%

Zymeter

A device to monitor the progress of fermentation
(pH, specific gravity, alcohol, temperature)

Similar projects worth following
Zymeter is a device to monitor the progress of fermentation, in order to continuously monitor the alcohol content of your beer (as well as other parameters) and predict when fermentation will likely finish.

The design will be completely open source, with the goal of making it easier for people to monitor their beer.

I'm planning on making use of CC3000 Wifi chip - to enable your fermentation chamber to connect to your Wifi Access Point - in order to allow you to monitor your fermentation wherever you are.

The project schematic/software/design etc. will all be licensed under the Creative Commons CC0 licence - meaning you can do what you want with it!

You may wonder why you'd want to create a digital hydrometer rather than simply using a glass hydrometer. 

A glass hydrometer is a device which has a number of markings on, indicating the specific gravity and also is specially weighted.  It floats in your beer, you take a reading where the top marking is next to the beer line.  The problem with such a device is that you can't take readings continuously with it - unless you fancy sitting monitoring your beer all day long ;).

My idea to have have a digital hydrometer was that it would then be easily possible to create a graph to show the progress of your fermentation. This would then allow you to modify the progress of the fermentation using additional hardware (by varying the temperature).

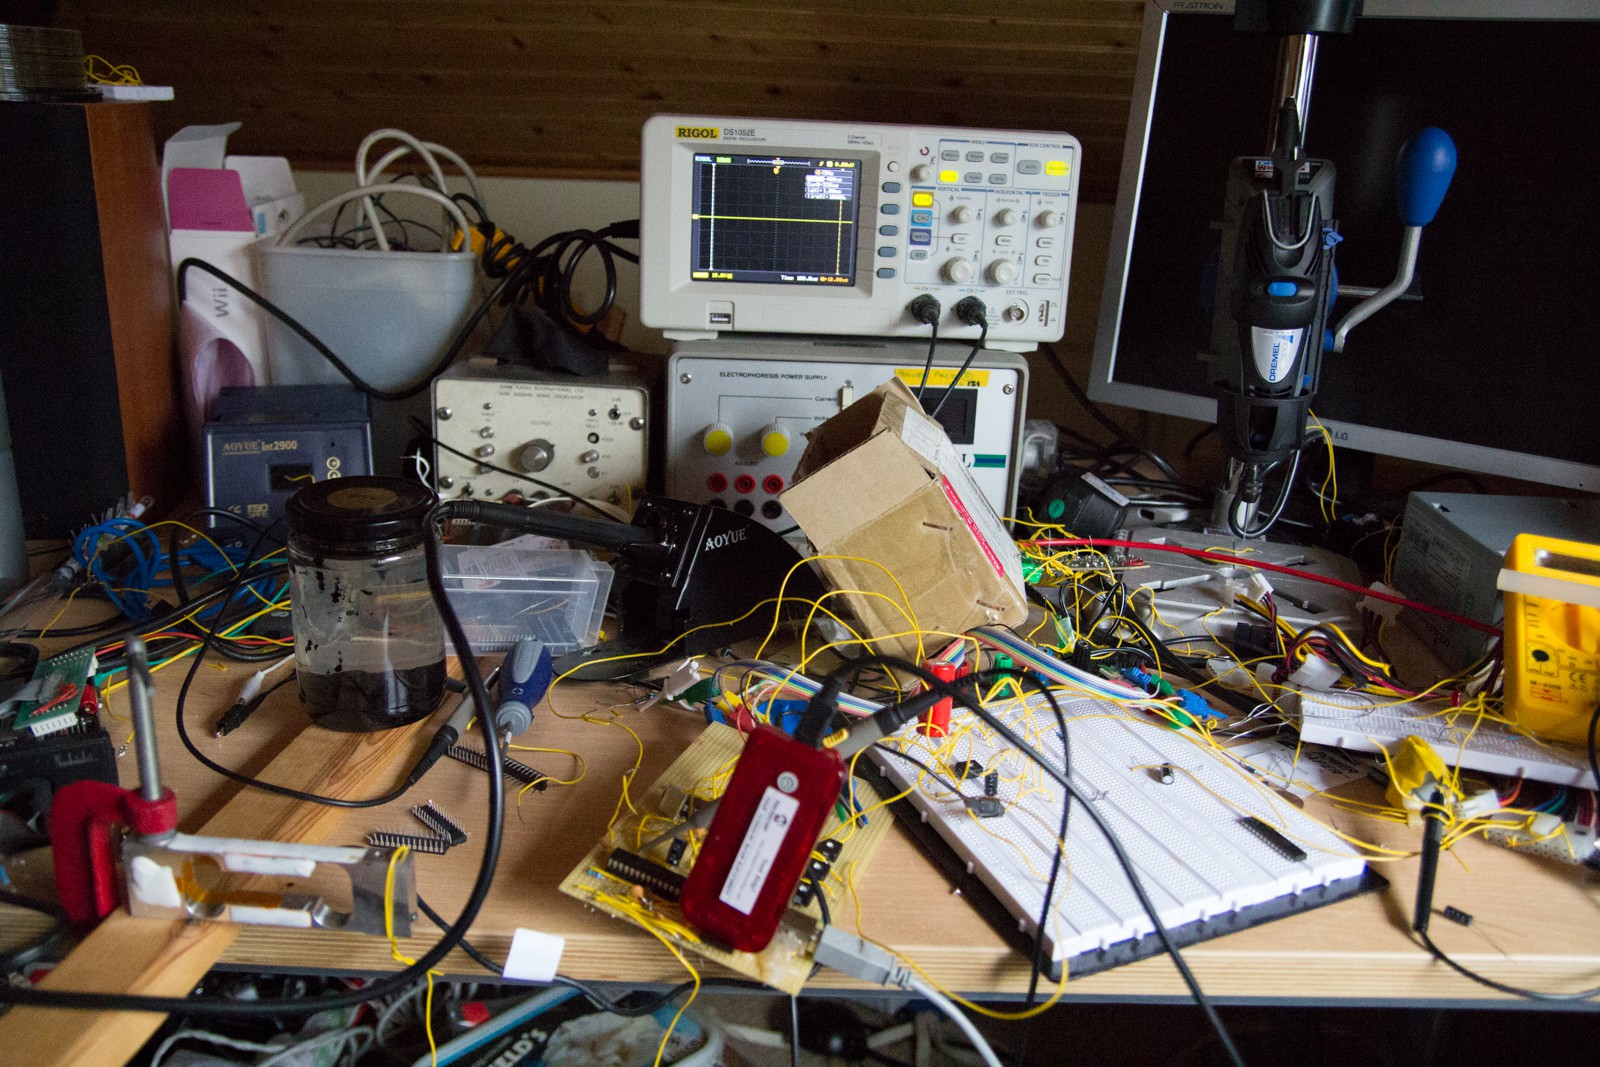
You can see in the photo (the one with the bucket and wooden frame) my original idea, using a load cell (which measures force).  I had numerous issues with this approach due to 'creep' from the load cell over time.

I'm now working on a vastly different approach using an ultrasonic transducer in order to measure the specific gravity - this is shown in the diagram below.
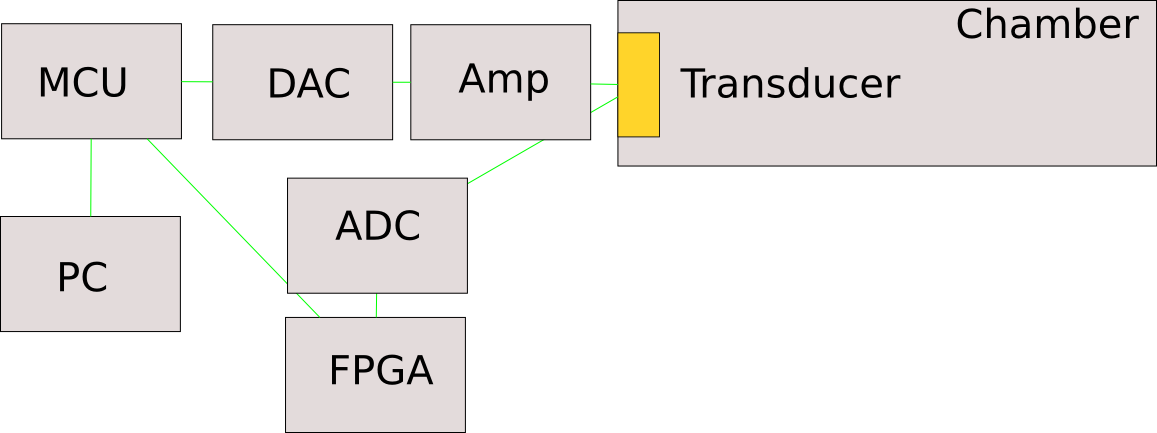
A single pulse of a sine wave will be generated and converted to analog.  This will then be fed through an amplifier to an ultrasound transducer.   The pulse will penetrate the beer and hit the opposite side of  the chamber.  The pulse will be reflected back towards the transducer, were it will be picked up by the ADC.

The ADC will be constantly running at 100MHz.  The FPGA will decode the output of the ADC, to find the difference in time, between the pulse being emitted and retrieved.  This will allow us to calculate the speed of sound in the beer along with the amplitude of the returned pulse.

By using a formula combining these values, it will be possible to determine the density and thus specific gravity of the beer (these formulae are listed in the science section below).  From this alcohol can then be deduced using a simple formulae.  

Alcohol = (Original specific gravity - current specific gravity)*131

Monitoring the temperature of the beer is important, as the hotter you ferment at, there will be more esters, the flavours the yeast produces.

I've been asked before why you'd want to monitor the pH during fermentation - there are a number of reasons for this. The pH of the wort changes during fermentation, especially with certain varieties of yeast/bacteria such as brett or lactobacillus. So by monitoring this you can keep a track of how acidic your beer will likely become (this is of particular importance for sour beers).

Ultimately we want to help people make their beers more consistent.

The Science:

We will use the following formulae obtained from  [1] in order to calculate the density of the beer.  R dennotes acoustic impedance, which is shown how to be calculated below.

Below is the formulae for acoustic impedance:

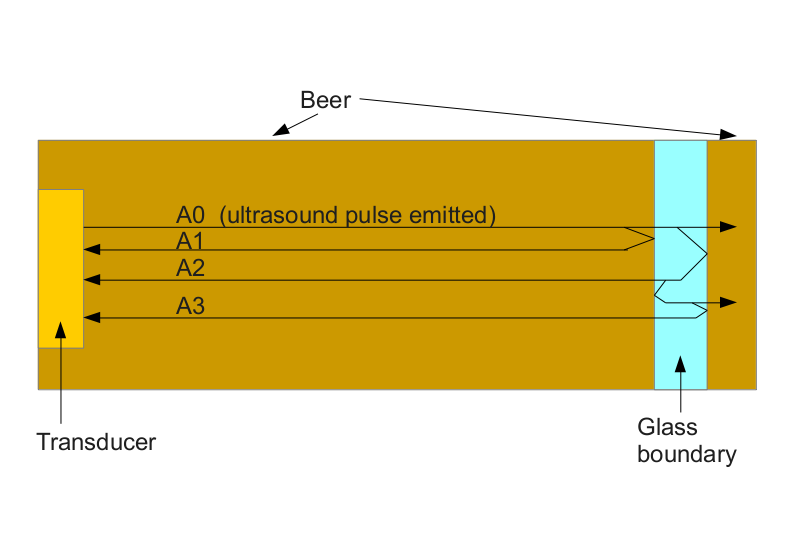
A1,A2,A3 denote the respective amplitudes of pulses.

The following diagram illustrates how pulses are recieved by the ultrasound transducer.  The transducer emits one pulse (A0) and waits for 3 more to be recieved.  The amplitudes of these three pulses is used by the above formulae to calculate acoustic impedance.  And then density can be calculated.

This technique of using 3 pulses to calculate density is known as the ABC-method.  Developed by Papadakis.
[1]  Acoustic measurement of liquid density with applications for mass measurement of oil - Erlend Bjørndal

  • 1 × 2MHz Ultrasound transducer
  • 1 × Cyclone II FPGA
  • 1 × ADS5482 105MSPS ADC
  • 1 × AD9764 14 bit DAC RF, RFID Hardware / Antennas
  • 1 × STM32F429 Microcontroller

View all 9 components

  • Website

    anfractuosity08/25/2014 at 22:11 0 comments

    Just created a website for the project :)

    http://www.zymeter.org/

  • Parts

    anfractuosity08/19/2014 at 21:19 0 comments

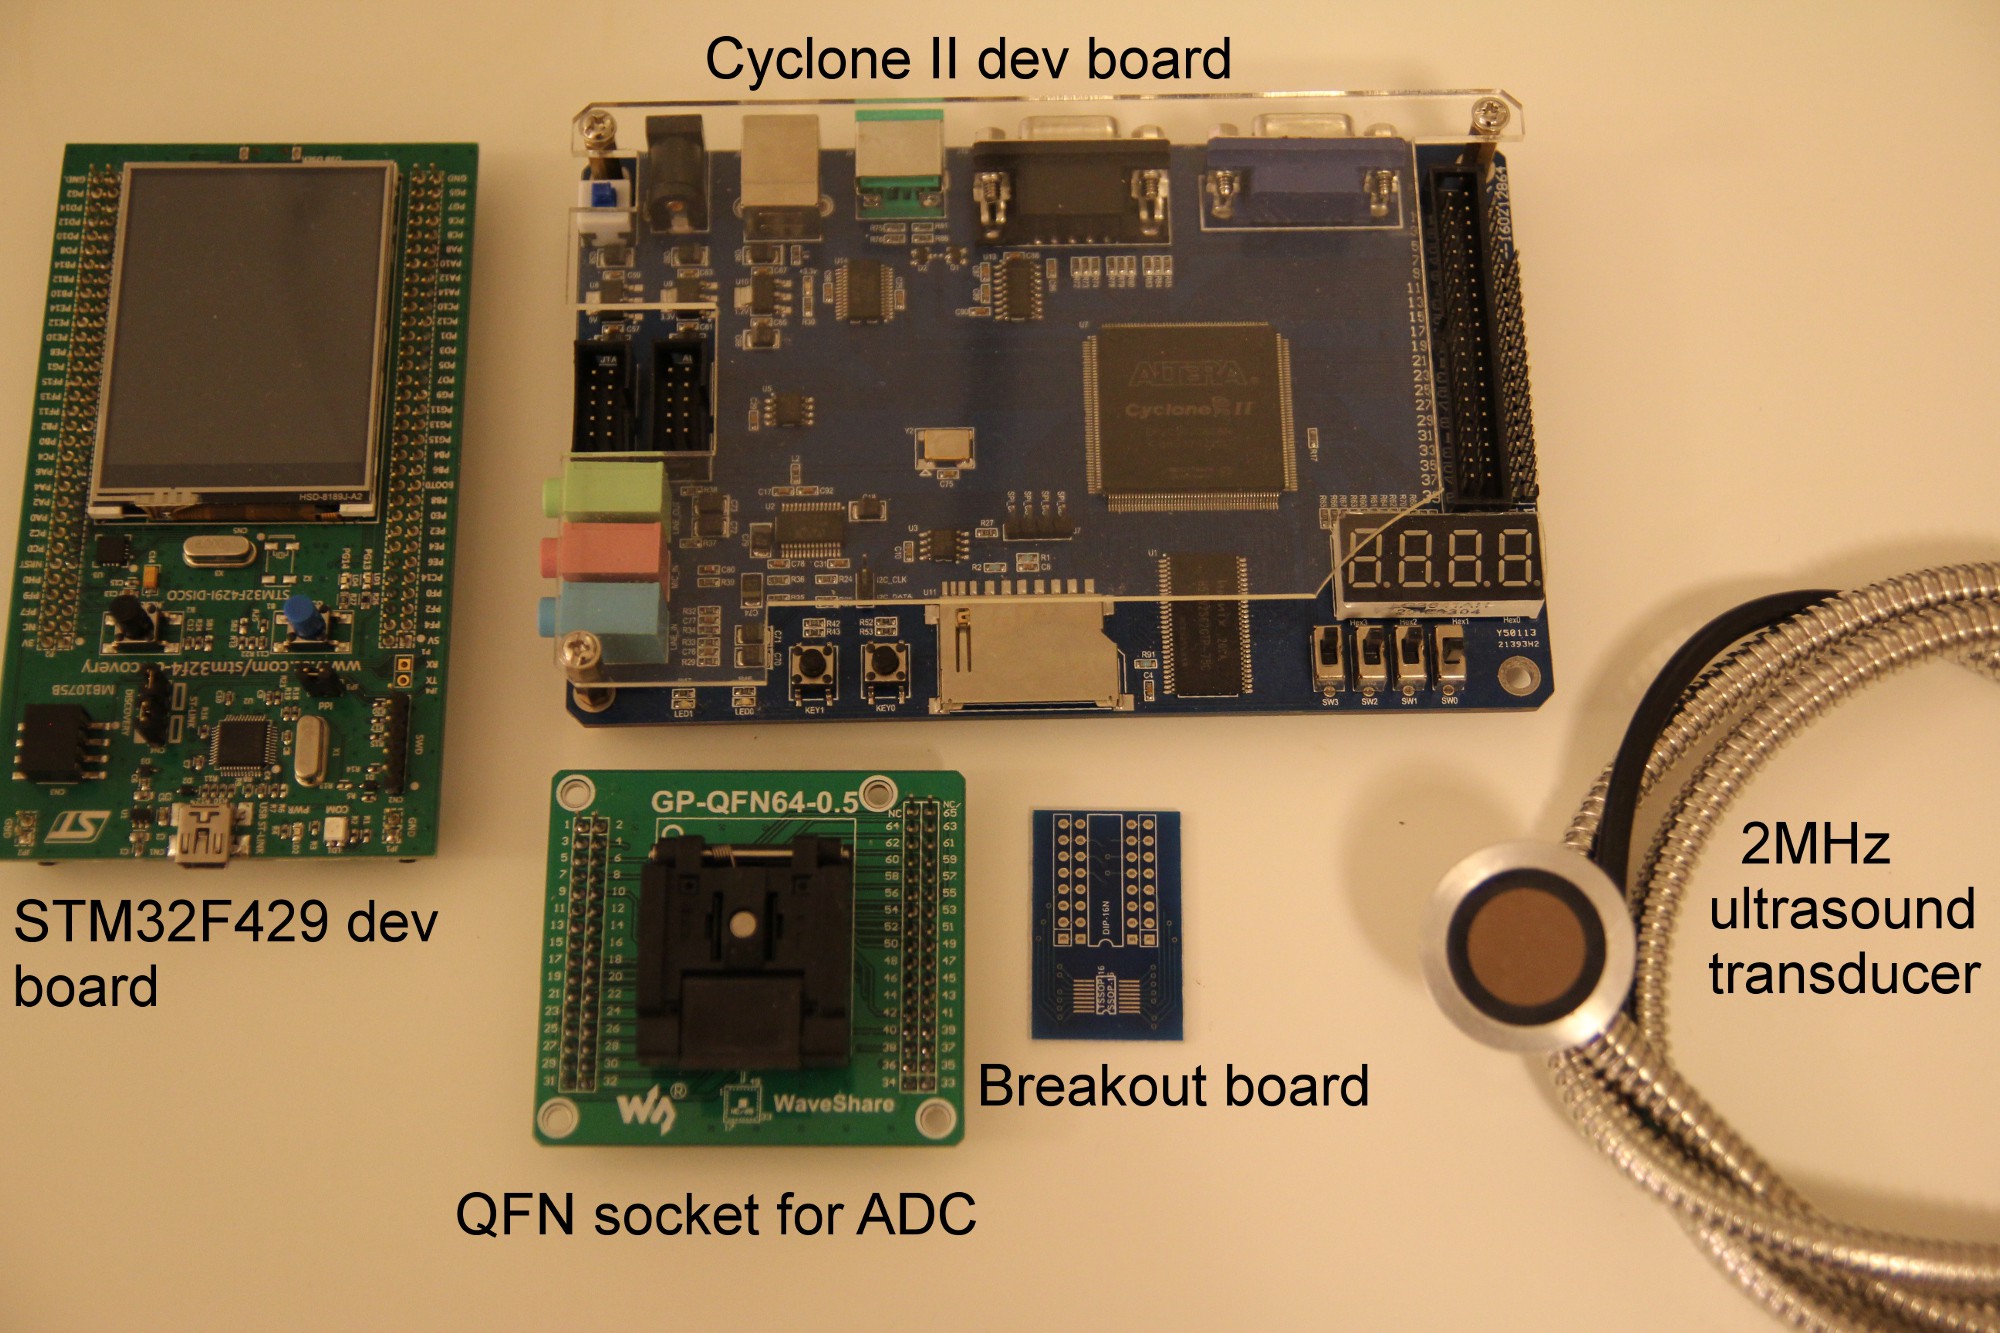
    Below is an annotated array of parts that I currently have:

    One of the main components I need to obtain now includes an amplifier chip.  I already have the ADC, DAC and pH chips.

    Next steps:

    * Assemble prototype using the above parts!

    * Test ultrasound pulses are being correctly generated using oscilloscope

    * Program FPGA using VHDL in order to monitor returned pulses

    * Build chamber (out of a drainpipe!)

    * Complete schematic design

    * Get PCB fabricated!

    * Assemble PCB

  • Github

    anfractuosity08/17/2014 at 19:53 0 comments

    I've just been working on adding datasheets for each of the main components which will be used, to a github repository for zymeter.

    Click here to find it!

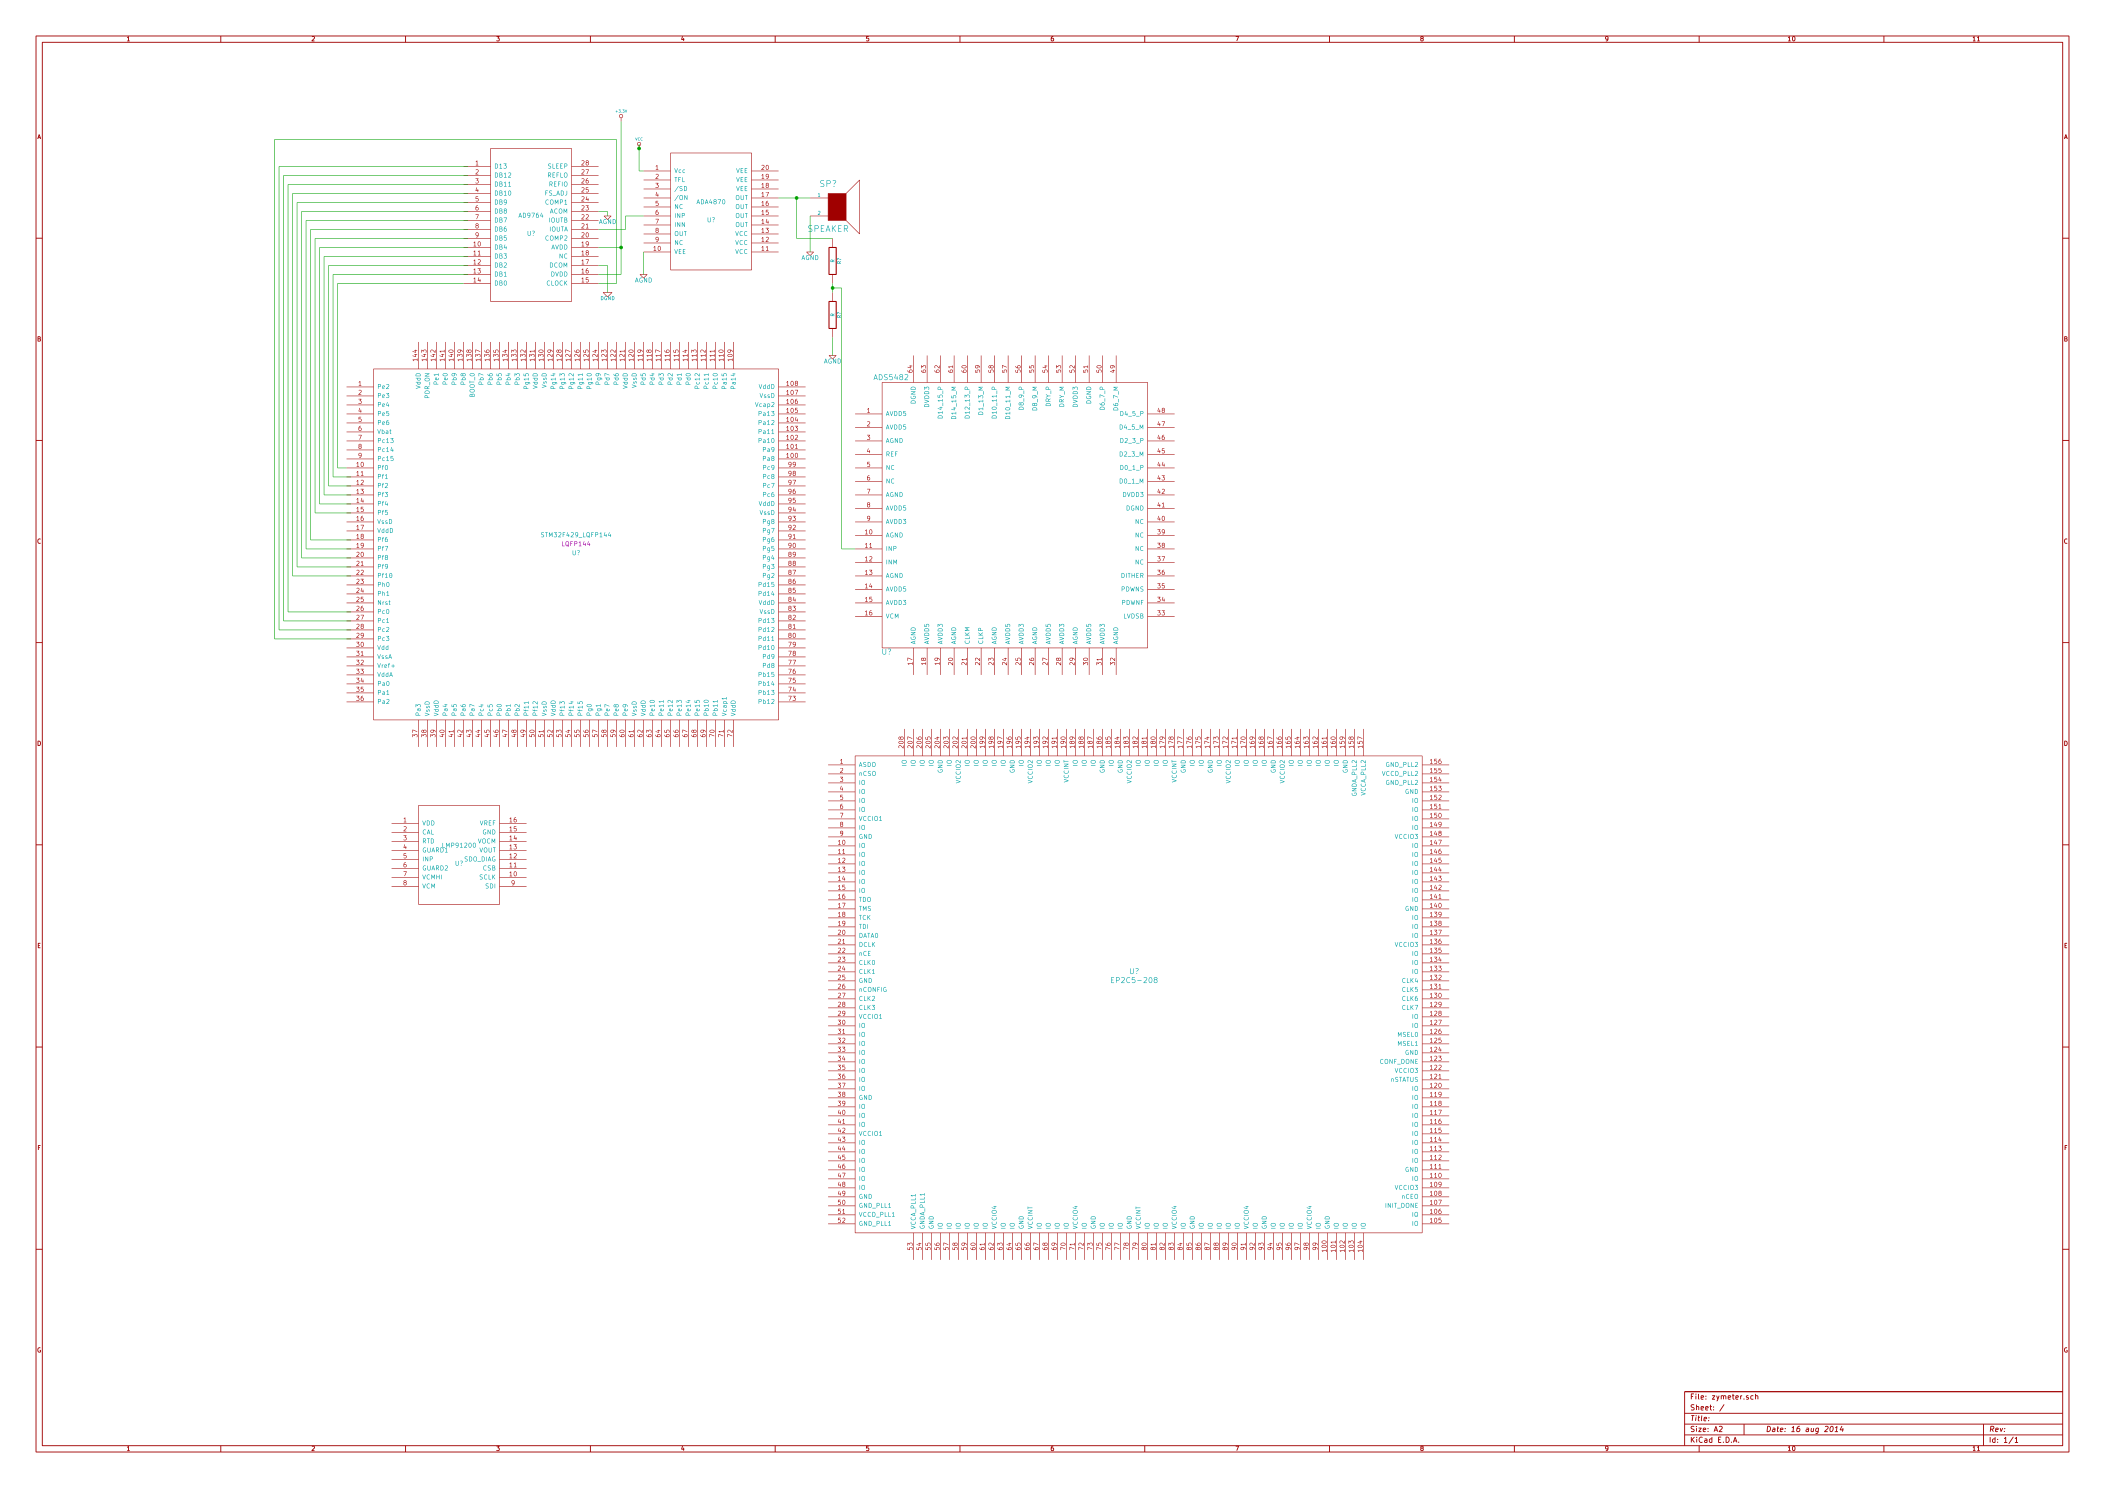
    Additionally I've also added the KiCad components and the schematic.  So you can quickly see as the schematic progresses.

  • Schematic design with KiCad

    anfractuosity08/16/2014 at 13:46 2 comments

    I haven't properly tried to use KiCad before.  I'm mainly used to using Eagle, but it seems like knowing KiCad would be a very useful skill to have, especially as it's Open Source.

    The schematic is currently in very early stages, I've added the main components though I believe.

    A number of these I had to design myself.  I found quite a useful webpage though, which makes designing the part a lot quicker: kicad quicklib

    I will also work on adding these files to my Github repository.

    I'm currently also looking more into how to use the ultrasound transducer to both emit and receive pulses.  I'm not sure how the voltage levels of the pulses emitted compare to those recieved, at the moment - if anyone has got any info on this or rough figures, I would be very interested to know!

  • Chamber

    anfractuosity06/15/2014 at 15:40 0 comments

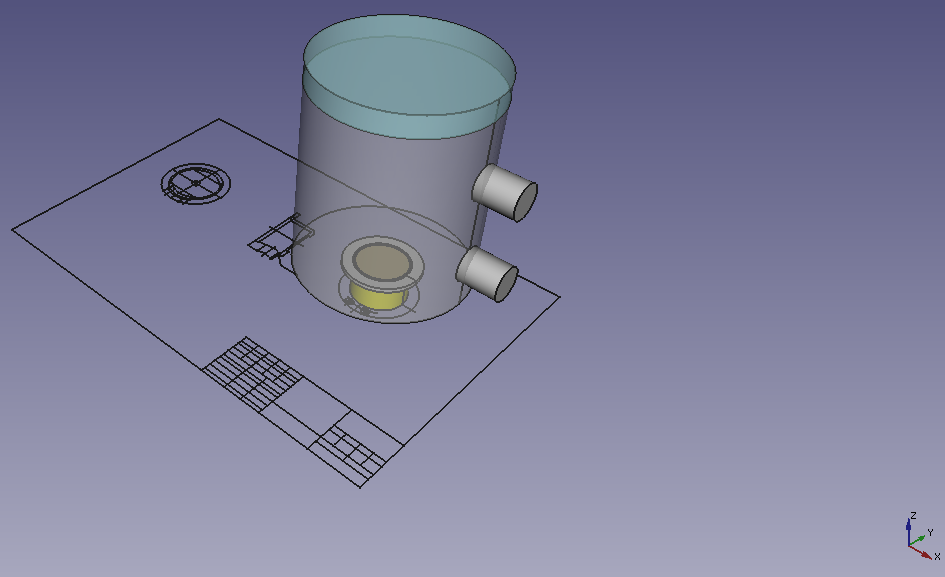
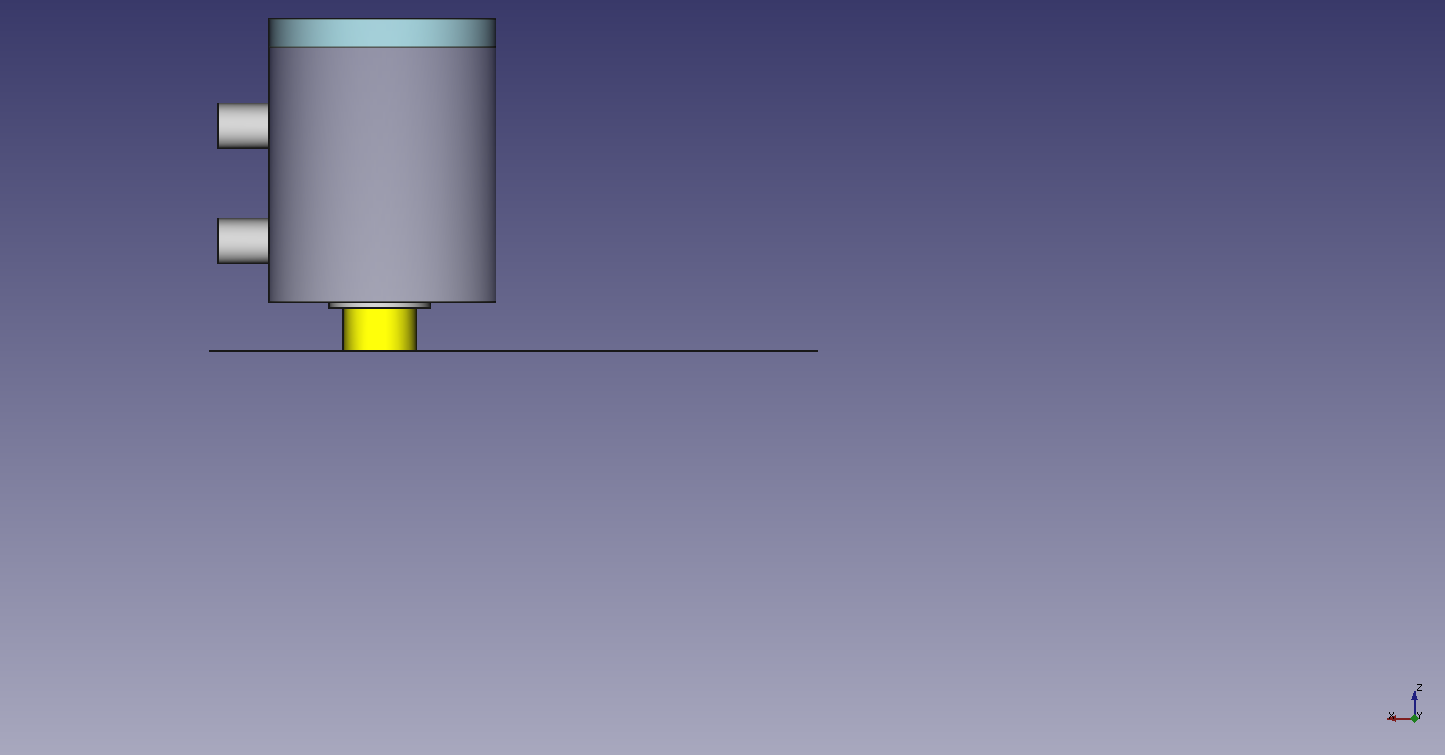
    The chamber will have two pipe connectors, in order to pump liquid through it.

    At the top of the chamber will be a piece of glass, which will be used in order to create a well defined reflection of the ultrasound pulses.

    In order to pump liquid through the chamber, I will likely make use of a peristaltic pump, as we don't need a high flow rate and also they help keep things sanitary.

  • Transducer CAD model

    anfractuosity06/15/2014 at 13:26 0 comments

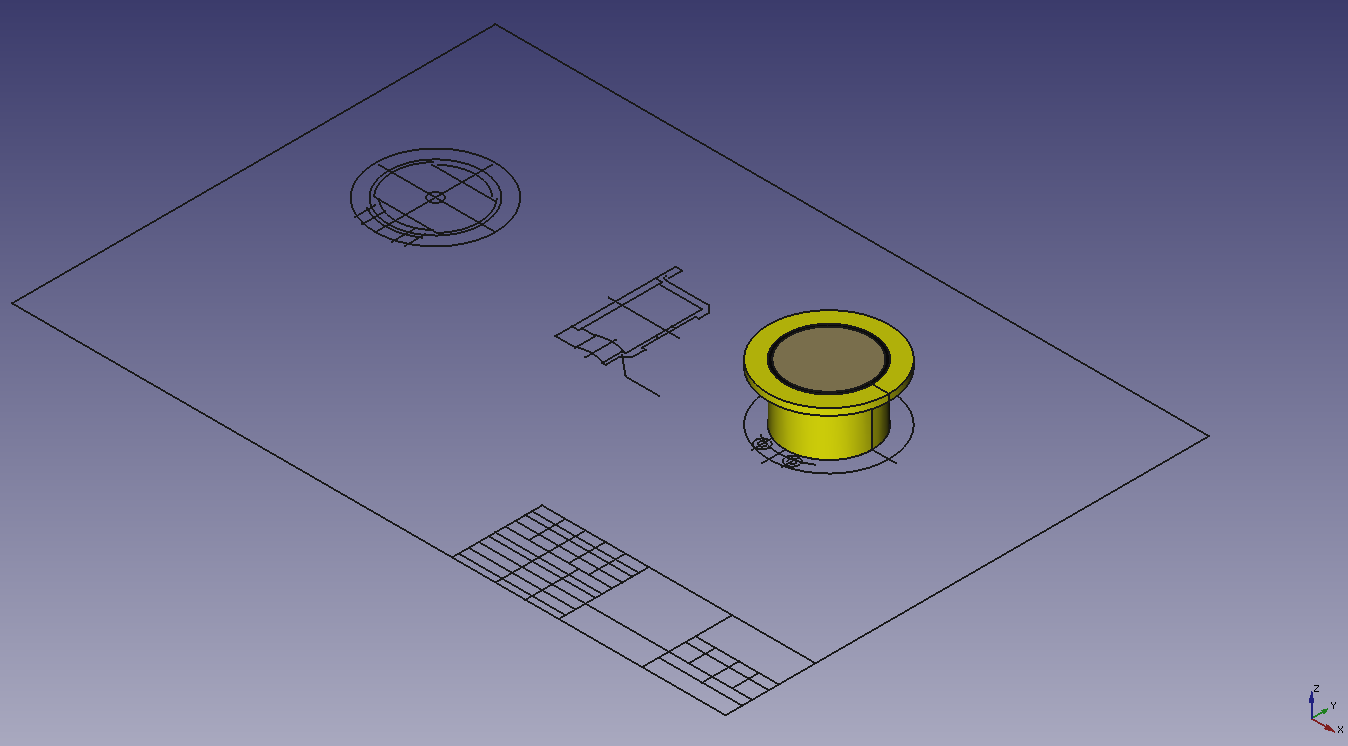
    I'm currently working on creating a 3D model of the transducer and chamber in FreeCAD, based on the transducer's 2D CAD drawing, I obtained from the manufacturer.

    The transducer has a 2mm thick flange, which I'm thinking of either clamping to the chamber, or making use of some form of adhesive.  Ideally clamping would be best, for long term usage I think.

  • The Original Idea

    anfractuosity06/06/2014 at 16:43 0 comments

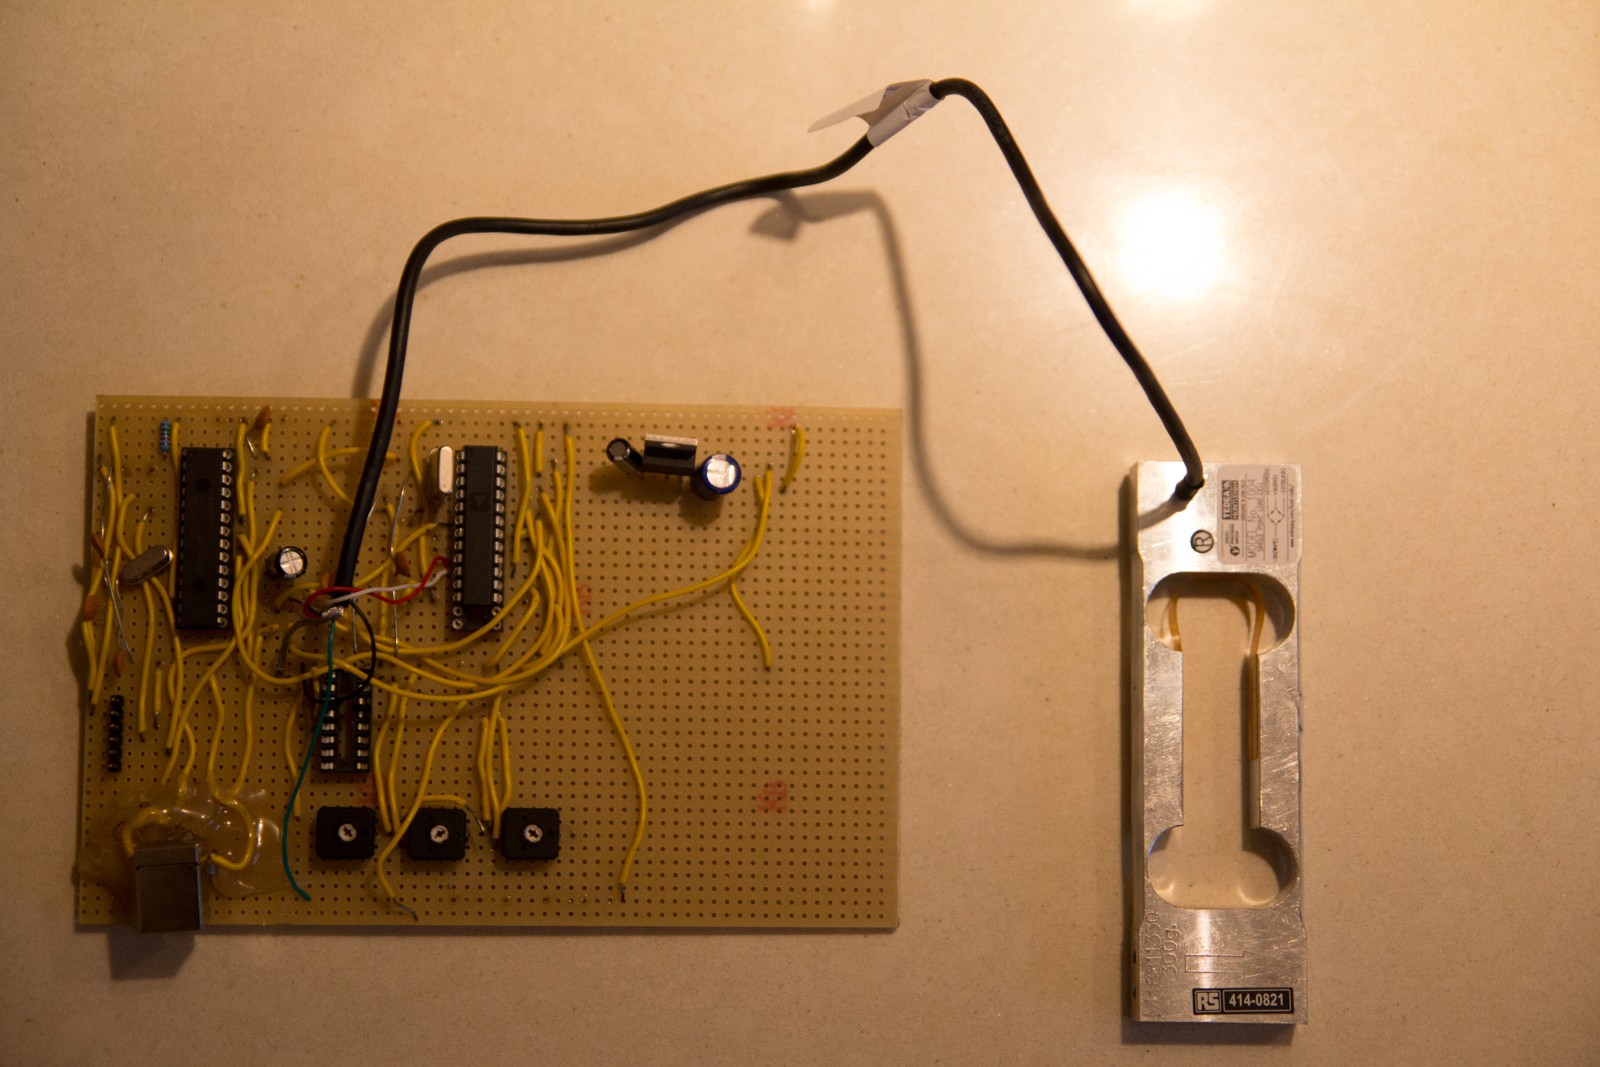
    I just thought I'd show what the original approach I took looked like, when I was using the load cell.  It makes use of a PIC32 microcontroller along with a differential ADC.  The output from the ADC was then fed to the PIC.  The PIC then output readings from the loadcell via USB.

    You can see the test phase below, with me programming the PIC chip.

  • Fancy hardware :)

    anfractuosity06/05/2014 at 19:25 0 comments

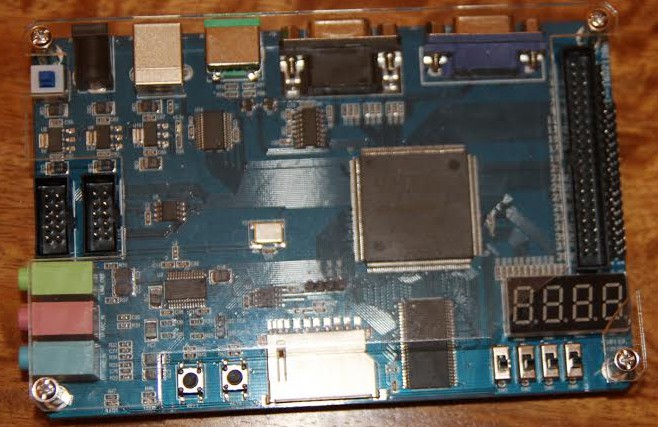
    Below is the FPGA board I will be building the prototype with (It uses a Cyclone II FPGA).  You can see it has a number of GPIO pins, which I can use for the ADC.

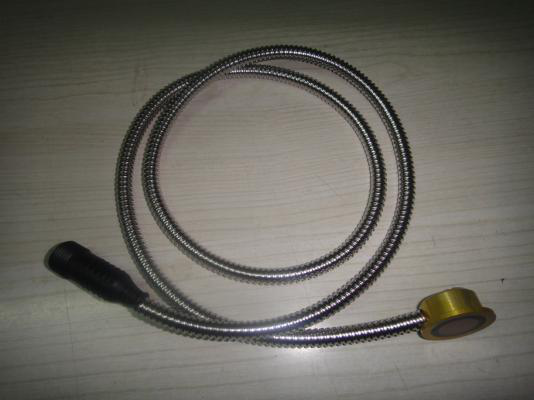
    Below is the 2MHz ultrasound transducer in all its glory

  • Acquiring components

    anfractuosity05/25/2014 at 23:14 0 comments

    I'm currently in the process of acquiring the components I need for the project.  I've added them to the list of components that I'll be using.

    I'm planning on using an FPGA to process the signal from an ADC.  The ADC will recieve the pulses from the ultrasound transducer.  From the pulses I aim to measure both the speed of sound in the beer along with the amplitude of the pulses.  By combining these two variables it should be possible to measure the specific gravity according to scientific literature.

View all 9 project logs

Enjoy this project?

Share

Discussions

Tihomir Nedev wrote 08/02/2017 at 10:22 point

Why are you using such high frequency transmission requiring FPGA?

  Are you sure? yes | no

mark wrote 06/28/2015 at 02:17 point

Have you made any more progress on this project?   how is it going?

  Are you sure? yes | no

Mike Szczys wrote 06/06/2014 at 22:54 point
Frothy goodness-- this hack is after my own heart! I've got an Australian sparkling ale in the secondary right now.

Thanks for entering this one in The Hackaday Prize. When people thing about all the connected devices in their homes, they forget about the fermenter!

  Are you sure? yes | no

anfractuosity wrote 06/06/2014 at 23:11 point
I had to google the sparkling ale, not one I've heard of before!

Exactly, I'd love to see a fermenter at the heart of every modern family home ;)

  Are you sure? yes | no

anfractuosity wrote 05/25/2014 at 22:29 point
Thanks, that'd be most appreciated!
I'm planning on using this chip http://www.ti.com/product/lmp91200 from Ti

  Are you sure? yes | no

zakqwy wrote 05/26/2014 at 17:40 point
Looks like a good chip for the job. In my experience, the main challenge in fermentation pH measurement deals with the electrode itself; you need something that can withstand sanitation without getting its reference system poisoned and a junction design that won't get clogged up with process debris. Ideally, you should try to get your hands on a temperature-compensated combination pH electrode that is designed for fermentation conditions (there are several manufacturers out there that specialize in these designs). Follow the storage recommendations (usually keeping the electrode immersed in 3M KCl when it's not in use) and calibrate regularly. pH probes are inherently a consumable, so don't be afraid to toss the probe once you can't get a good calibration.

Using sonic velocity of a liquid to ascertain density is certainly doable; I do a fair amount of work with clamp-on ultrasonic flow instrumentation that is capable of density determination for certain applications. Beyond the normal challenges related to ultrasonic echo processing (it's not easy to do this and get a reliable measurement), keep in mind that sonic velocity also varies dramatically based on temperature. In my experience, most folks looking for online density data accurate enough to convert over to alcohol content tend to use coriolis meters, but they certainly aren't cheap.

  Are you sure? yes | no

anfractuosity wrote 05/27/2014 at 18:47 point
Thanks for that information. At the moment I've only got a cheap eBay pH probe, that only cost around £10, but i'll look into the temperature compensated probes you mention.

Yes you're right about temp and ultrasonic speed variance. The transducers I've got have a built in temperature probe which will be handy.

  Are you sure? yes | no

zakqwy wrote 05/25/2014 at 22:25 point
Neat project! I've done a fair amount of online industrial pH measurement in various fermentation applications (mostly pharma stuff), so I'd love to help if you have questions.

  Are you sure? yes | no

Similar Projects

Does this project spark your interest?

Become a member to follow this project and never miss any updates