Tim Wilkinson
-
Testing the Inverse Kinematics
06/14/2018 at 18:32 • 0 comments -
Inverse Kinematics
06/12/2018 at 17:11 • 0 commentsOne of the pieces I tried to build for my first ROV was a manipulator arm. This was based around a kit I bought on eBay and adapted to use some Hitec underwater servos (which are *slightly* larger than their non-underwater equivalent for some reason). I still have the arm somewhere, but I never got it to work well because I never worked out its kinematics. At the time I imagined a little high-school euclidian geometry was all I needed. Apparently not. It turned out to be much more difficult.
Thankfully, people far clever than me have created algorithms and written code to solve these problems. One conceptually easy to understand algorithm can be found here (http://www.andreasaristidou.com/FABRIK.html) and is the basis for this javascript library (https://github.com/lo-th/fullik) which I've based my work on.
![]()
---------- more ----------
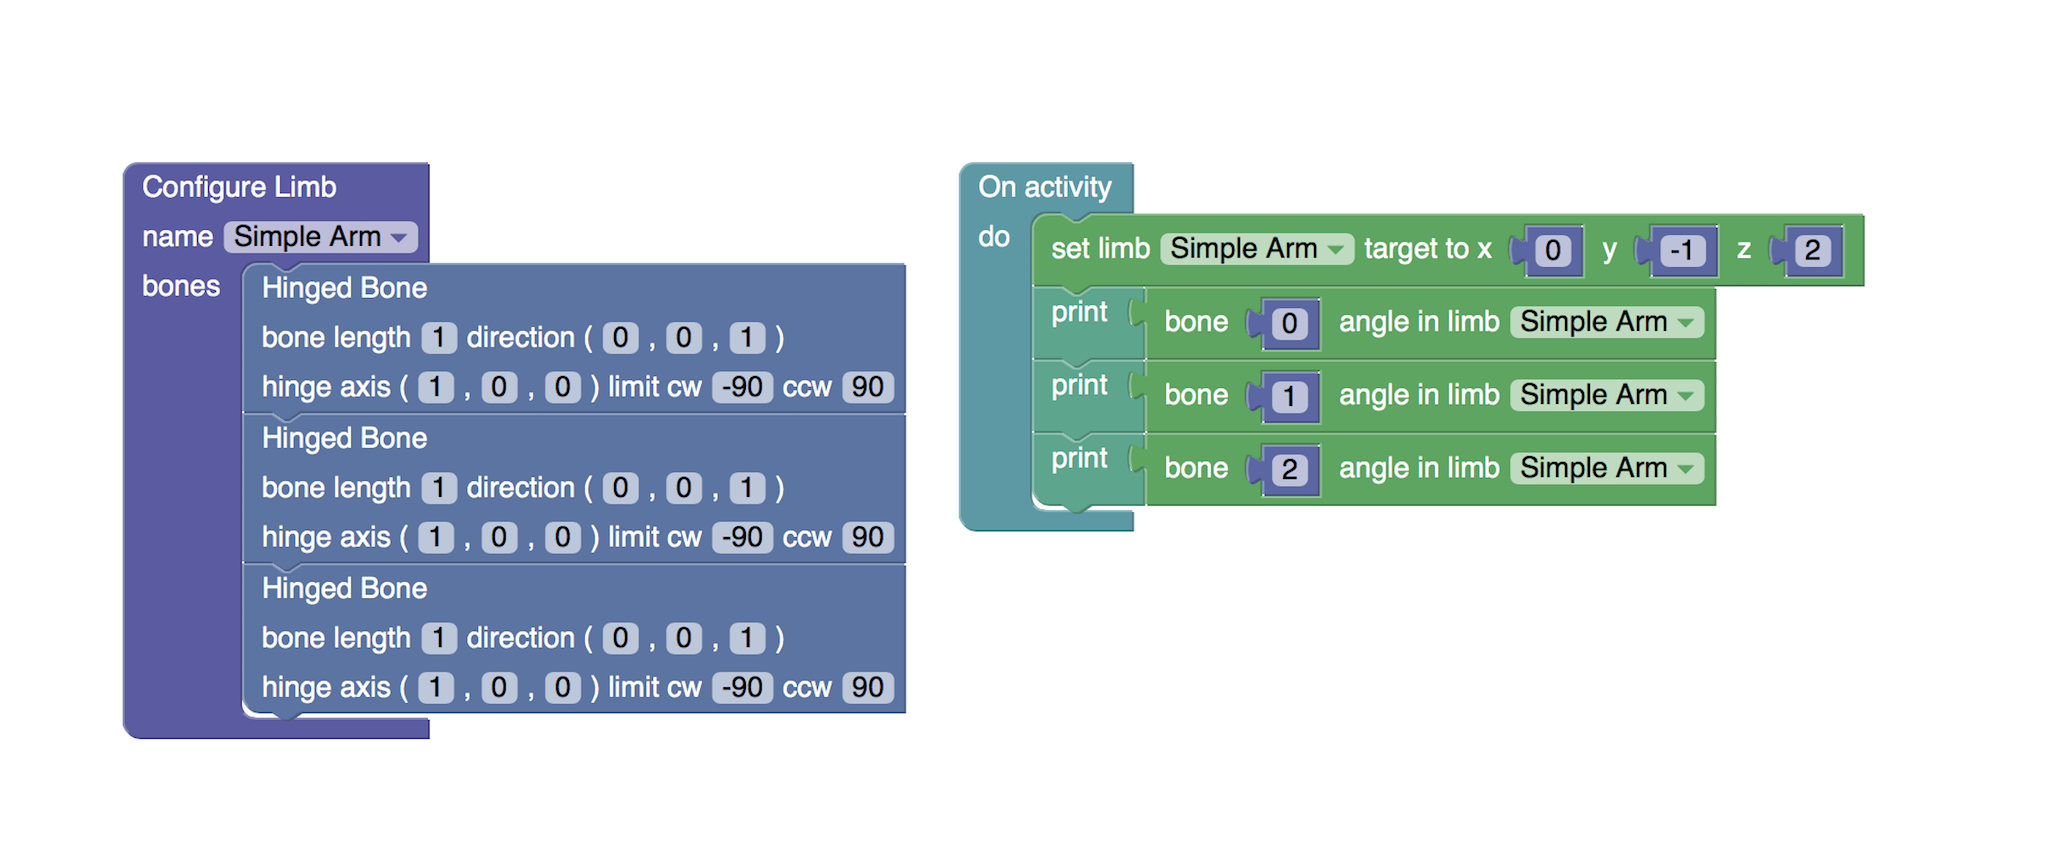
I've added a new category of components to my Blockly interface which allow the programmer to define the Inverse Kinematics of a system. In the above example, a simple robot limb consists of three bones, each hinged in a straight line. The bones are given length, initial direction (when the hinge angle is zero), and the hinges given an axis and limits. The application can then define the location of the end of the limb, and the system will solve the inverse kinetics and provide the angle of each hinge. For a real robot these angles would then be fed into the relevant servos with little, if any, more work.
All the heavy lifting is done by the FullIK library but hopefully this visual interface makes inverse kinematics more accessible. For the rolling robot this isn't terribly useful, but it'll come in handy for the robot arm (https://hackaday.io/project/158798-3d-printed-robot-arm-8bitrobots) and walking bot (https://hackaday.io/project/158800-nabi-a-sideways-walking-robot-8bitrobots).
-
First check
06/08/2018 at 00:11 • 0 commentsHad a little time to solder the through-hole stuff.
![]()
Popped a Pi Zero into the socket with the 8BitRobots software on an SD card, added power, and up comes the board! So happy. Detects and configures all the I2C devices (as you'd hope). Next step is to validate all the external I/O connectors.
-
MacroFab Delivery
06/07/2018 at 18:46 • 0 commentsDropped on my doorstep this morning. Testing later today ...
![]()
-
GitLab
06/05/2018 at 23:23 • 0 commentsI hadn't really intended to migrate away from GitHub when the Microsoft announcement came through. I don't think of Microsoft as being inherently bad (Visual Studio Code is my favorite editor). But it did make me look around at alternatives because I pay GitHub for private repositories ... and it turned out that GitLab would offer me that and more for free. So, migrate I did.
8BitRobots source code is now found at https://gitlab.com/8BitRobots
-
Blockly for the rolling ball robot
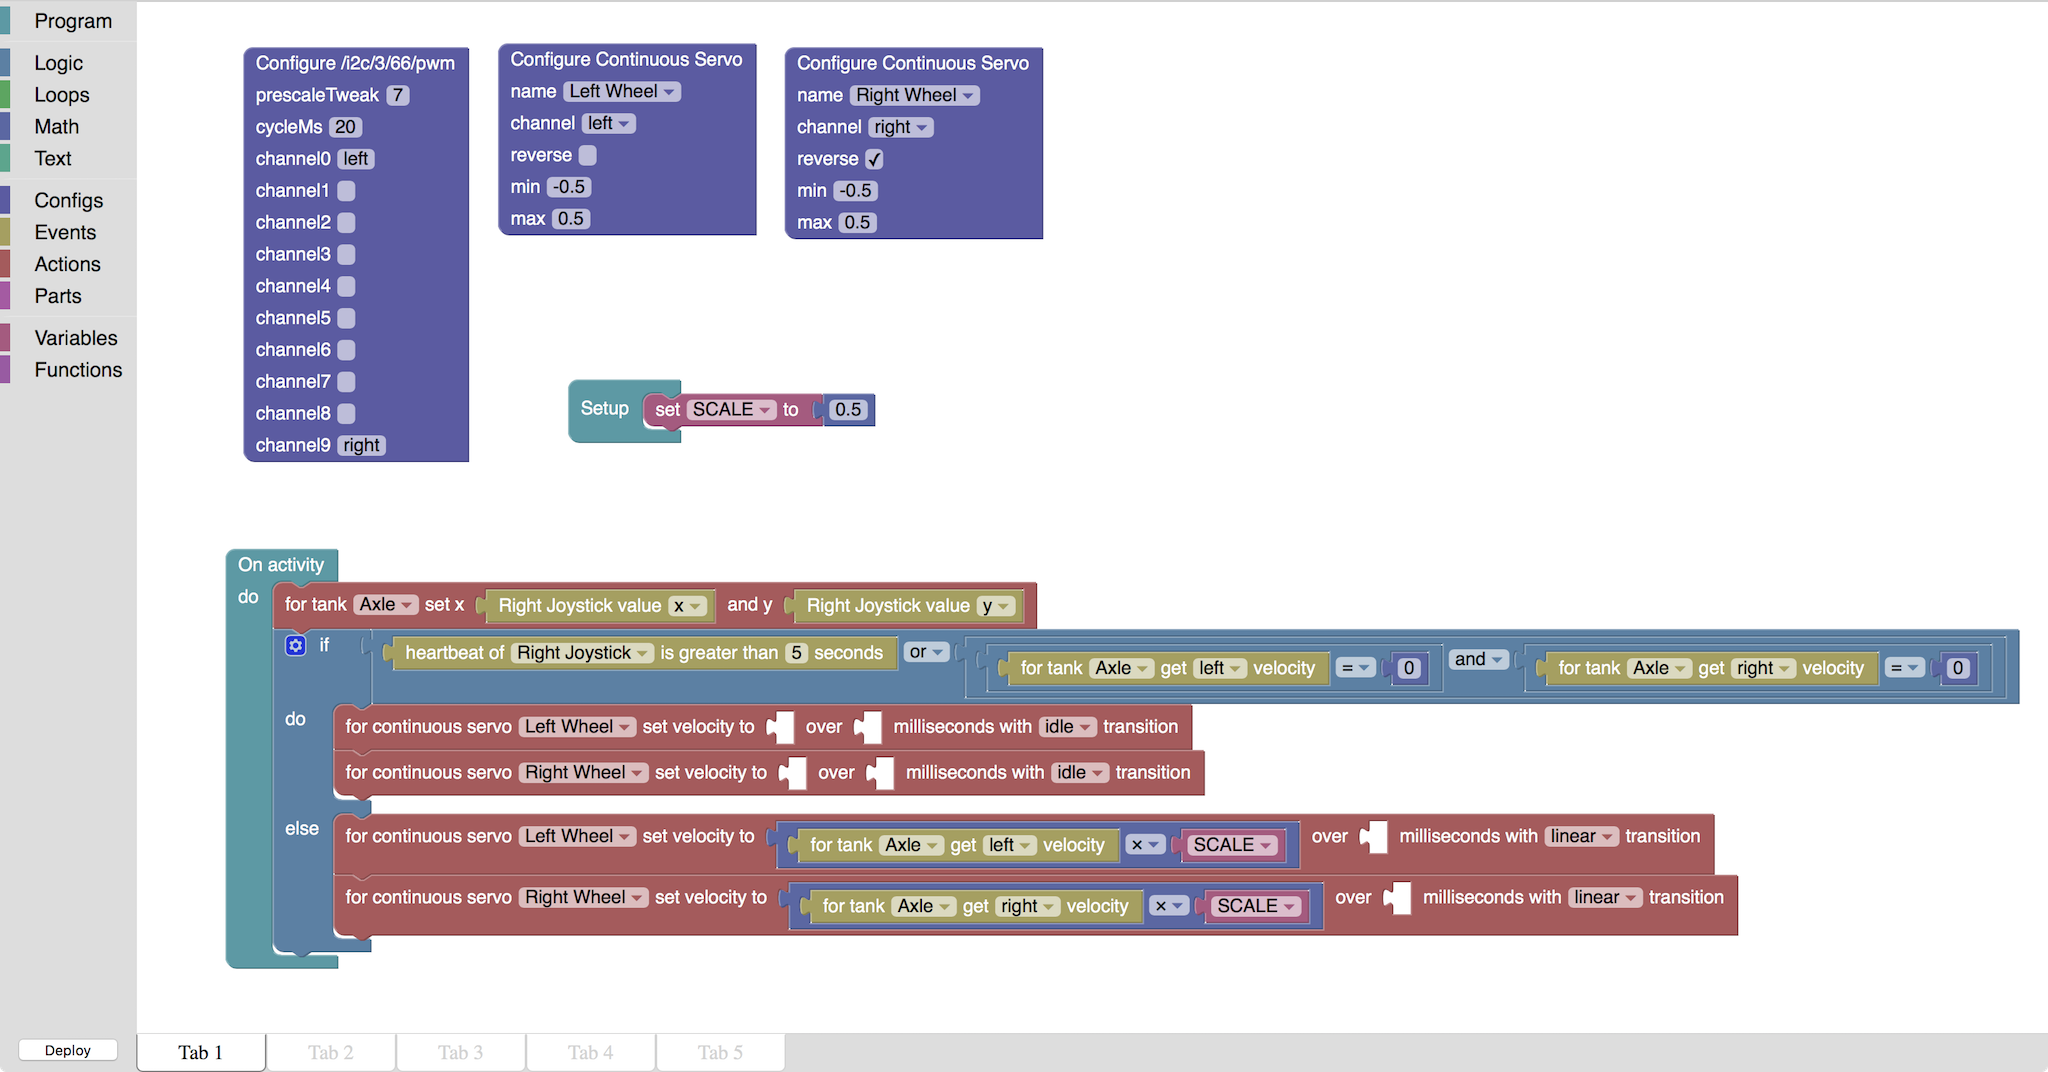
06/04/2018 at 16:39 • 0 commentsHere's the full Blockly code for the basic rolling ball robot:
![]()
The code consists of three sections:
- Configuration - Configuration sets up the hardware when the robot is first powered. In this example it configures the PWM outputs (naming each we want to use) and configuring a continuous servo attached to each of these PWM outputs.
- Setup - Setup is code run once after the configuration is complete. Here it defines a constant used to scale the motor velocities.
- Activities - Activities are the heart of the robot (there is one here, but you can have many). Each activity monitors changing inputs used within itself and when a change is detected, runs the code to process those changes. For the rolling ball robot, the activity is monitoring the input joystick and, when it changes, runs to code to change to velocity of each of the robot's wheels.
One of the major changes I've made to the Blockly setup since I started this project is the addition of Parts. Parts are stateful objects which can either be the software representation of additional hardware (such as a Continuous Servo) or an entirely virtual thing (such as a Tank axle).
-
All the robots
06/03/2018 at 17:53 • 0 commentsWith the delivery of the first assembled 8BitModules this week, it’s time to talk a little about the other robots I’m designing around the board.
Robot Arm
I still have a MeArm Classic I made on my laser cutter a while ago. This inspires me to build a 3D printed robot arm. To make it you need three servos, a hand full of skateboard bearings, a few M3 bolts, and an 8BitRobots module to control it all. I’ll document the project here https://hackaday.io/project/158798-3d-printed-robot-arm-8bitrobots
Sphere ROV
The Sphere ROV has been in development for some time, and this is the latest iteration of it. It’s been pretty difficult to build in a way I’m happy with, and I still have lots of problems to solve; but it merges my obsession with spherical robots and water. This iteration uses the 8BitRobots module (the others had custom hardware) and I’ll document it here https://hackaday.io/project/158799-sphere-rov-8bitrobots
NaBi the sideways walking robot
The NaBi design comes from UCLA and is a simple walking robot. Making robots walk is hard, but this design solves many of these problems by having the robot walk sideways. This version uses 3d prints, a few servos, some metal rods for the legs and the 8BitRobots module as the brain. For more information follow along here https://hackaday.io/project/158800-nabi-a-sideways-walking-robot-8bitrobots
-
PCB v1.0
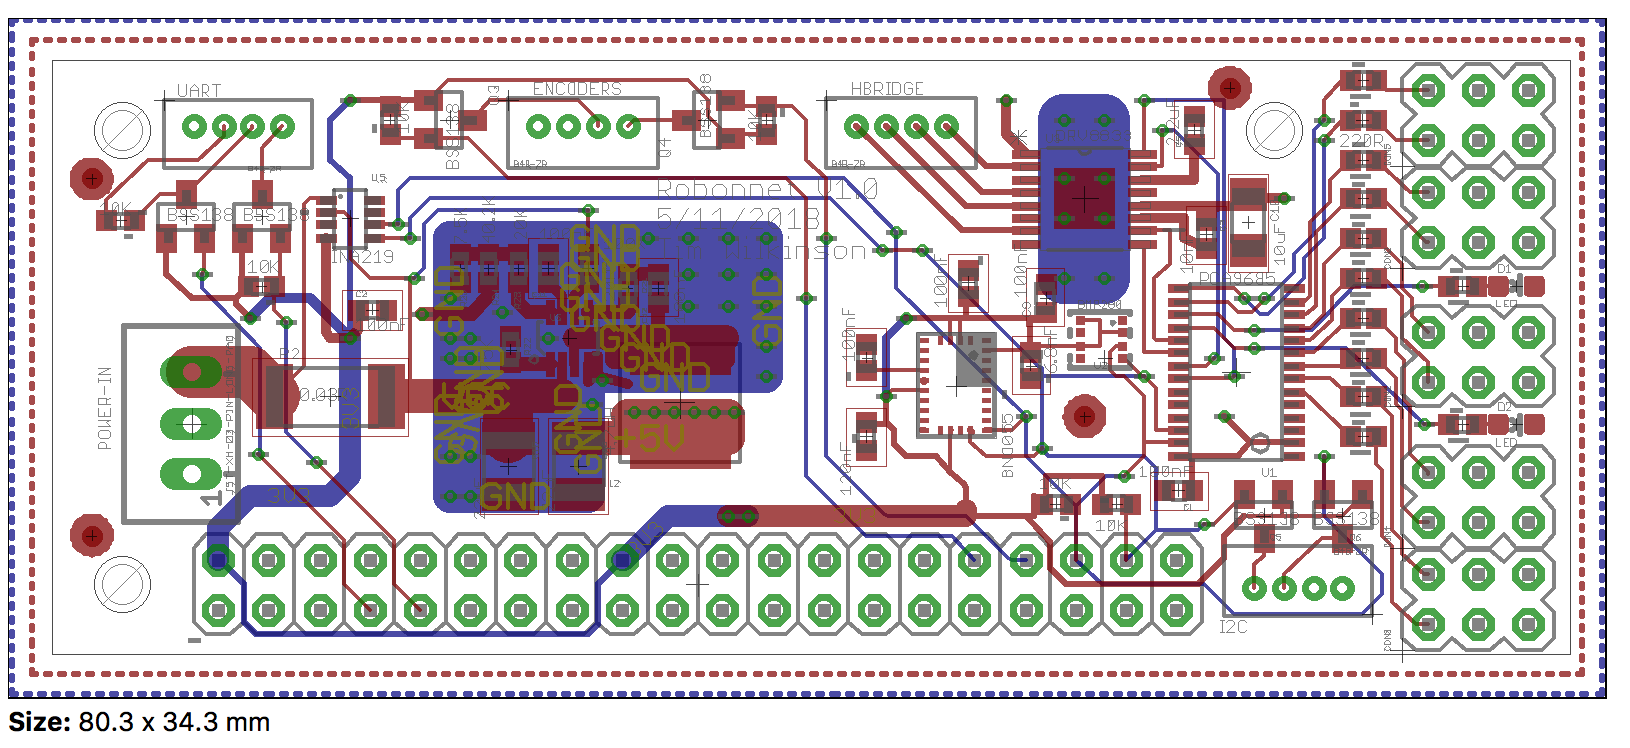
06/02/2018 at 20:30 • 0 commentsWith the newly assembled boards wending their way from Texas to me in California, time to publish the schematics and layouts (found in the Files section of this project). Here's an overview.
![]()
-
MacroFab experience
06/01/2018 at 23:35 • 0 commentsJust wanted to give a shout out to @MacroFab for their excellent service. It's the first time I've tried a PCBA supplier and I chose them for the super easy online tools and tight component sourcing integration. My experience of their support and customer facing people has also been excellent with super fast turnaround on questions.
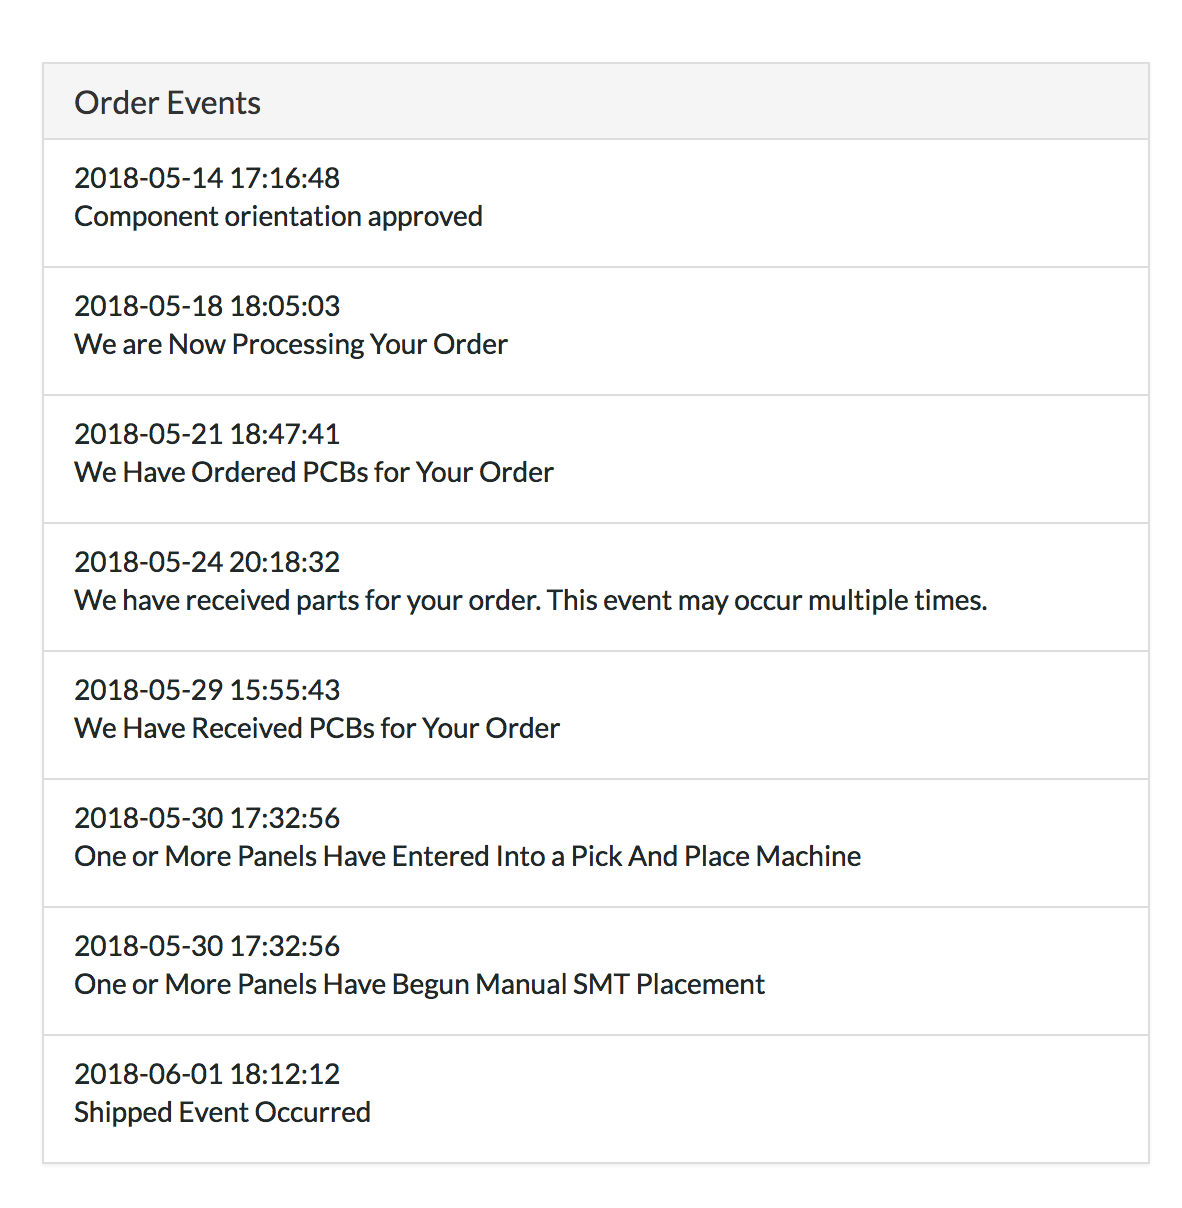
For those interested, this is a capture of the Order Events they generate during their process:
![]()
As you can see, the order-to-ship was only a couple of weeks which is just fantastic. Thanks people.
-
Where did all the 0.1uF capacitors go?
05/26/2018 at 06:50 • 0 commentsHad an email from my PCB builder yesterday asking me to pick another 0.1uF 0603 capacitor supplier because the one I'd originally specified wasn't available. A quick look around Mouser and I see there are basically no 0.1uF capacitors in the world anymore. I had some notion that this was an ongoing problem, but didn't fully appreciate just how bad it was until now! When is this shortage going to end? I know the bitcoin miners are buying all video cards, but if they're buying up all the capacitors then all is lost.
8BitRobots Module
A common hardware, software and 3D printed module to enable fun, educational robots anyone can print and program.