-
Mounting the screen/phone to the gimbal
06/01/2018 at 21:56 • 0 commentsMost gimbals are equipped to handle a gopro style camera, meaning the support 'tray' is oriented horizontally for the camera to sit on. Our phone or display will not be sitting on it. Reorienting the tray to act as a back plate-style mounting surface shoud be easy enough: just turn it...
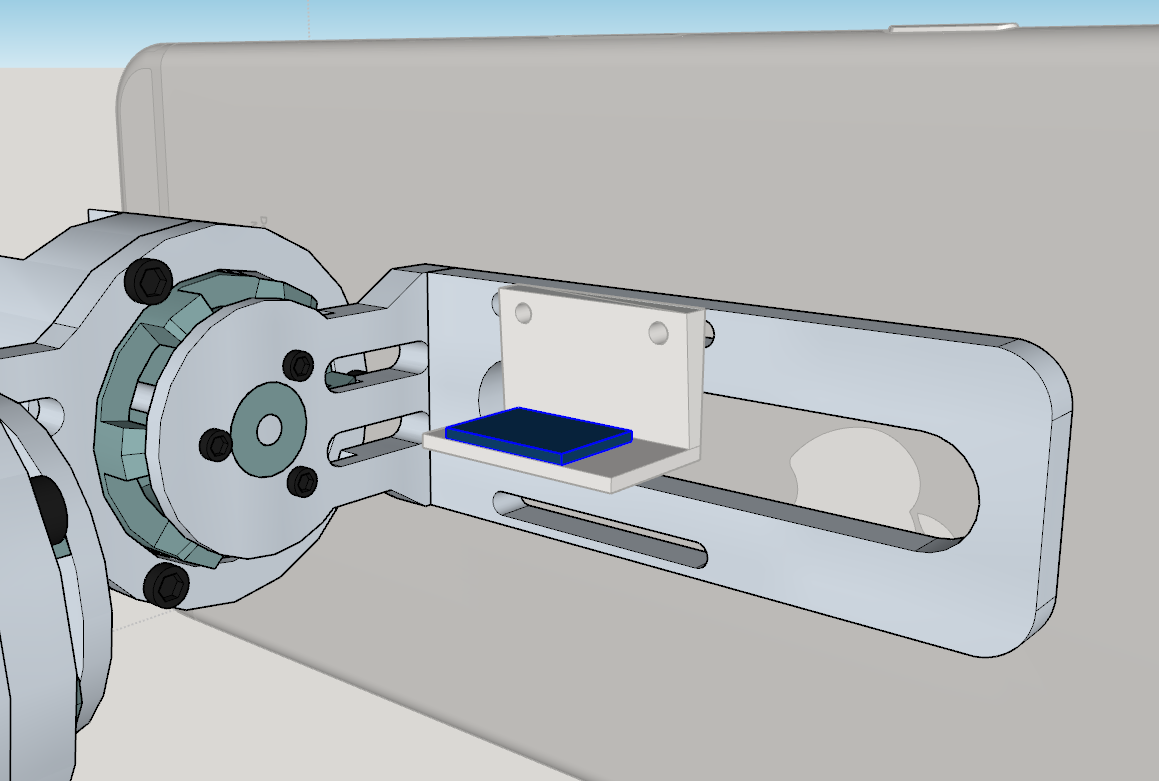
However, there is an MPU attached to this plate which sends the orientation to the processing board. To get this to register correct orientation, we will have to turn it 90 degrees so when the back plate is in the upright position, the MPU sits perpendicular to the display plane.
To attach the MPU, one could 3D print an appropriate bracket, but since I have committed myself to a 'no-3D-print' build on this one, a flattened and right-angled piece of PVC screwed to the back plate and some hot glue will do just fine!
![]()
There are a variety of kits for mounting almost any small screen to the back plate and this will have to mounted after a final screen is selected for this project. Mounting can be bolts, straps or my personal favorite, zip ties!
-
How to send control signals
05/18/2018 at 02:43 • 0 commentsSo the screen is steady while you are moving the control grips around; supercool, awesome, great, but how does this control your remote project?
My initial idea was to build an MPU into the grips and use that data to generate some sort of PWM signal (through an Arduino) that could be used by the remote project's onboard controller (in my case a CC3D Revolution flight controller) sent via an OPLink master. Then it dawned on me... The control signals sent from the gimbal board to the ESCs that control the gimbal motors are PWM, why not grab that signal and feed it into the OPLink? How the output from OPLink slave is interpreted by the flight controller may need some adjusting in the setup program (LibrePilot in my case) but it just might work...
That leaves only yaw control to worry about. A thumbslider joystick hooked up to an ATtiny for conversion to PWM and then sent along to the OPLink Tx should do the trick. This slider can be placed on one of the grips.
-
Gimbal
05/10/2018 at 19:04 • 1 commentHaving looked at hundreds of gimbals, I am going for cheap, light and simple. Essentially all versions of this are all very similar.
To attach it, I will flatten a section of PVC pipe ( the piece that goes between the grips) drill and bolt in place.
The gyro unit that resides on the camera base may need to be re-oriented so that the phone/tablet can be attached to the (former) bottom of the gimbal frame. Pics will follow...
-
Off the shelf
04/30/2018 at 22:39 • 0 commentsFor my proto, I am planning to go as 'off the shelf' as possible. A lot of my other designs have a lot of 3D printed parts, but this frame is going PVC...
PVC::
1 inch PVC pipe is awesome. Just, awesome. Things I have built with it include:
- hammock
- greenhouse
- fan stand
- hot-wire foam cutter
- and i have actually used it to carry water (weird, I know)
Gimbal::
Rather than try to build my own gimbal and gimbal controller, I am opting for a pre-made consumer gimbal (boo, hiss, DIY faux pas...) It comes with motors for under 60$CAD.
Battery::
Custom building lipos from separate cells is retarded. And zappy-smokey sometimes. Oops. OTS please. 3s 1300mah should be plenty for hours of entertainment.
Microcontroller::
Arduino Nano cause I have a pile of them. Proto will be hardwired to a Tx for control. Bluetooth/WiFi may be added later via Pi Zero W. Softwares will be fairly stock too.
Phone::
I know, I know... iPhone? Am I serious? Maybe. Mostly it is an easily found model... Not for me personally, but to each their own.
FoneTroll II: Gyro-mounted FPV/controller
Static-orientation screen holder with dynamic gyro-based controls for RC vehicles
 ken.do