 Curt White
-
113D Print Finger/Thumb Hard Cores and Mount in Silicone Rubber Skin
3D Print the finger and thumb cores. Avoid sanding the exterior unless there is obvious overhand: any inter-layer roughness will help keep the cores in the silicone skin through friction. Insert the 3D printed plastic cores into the appropriate area of the silicone rubber skin.
![]()
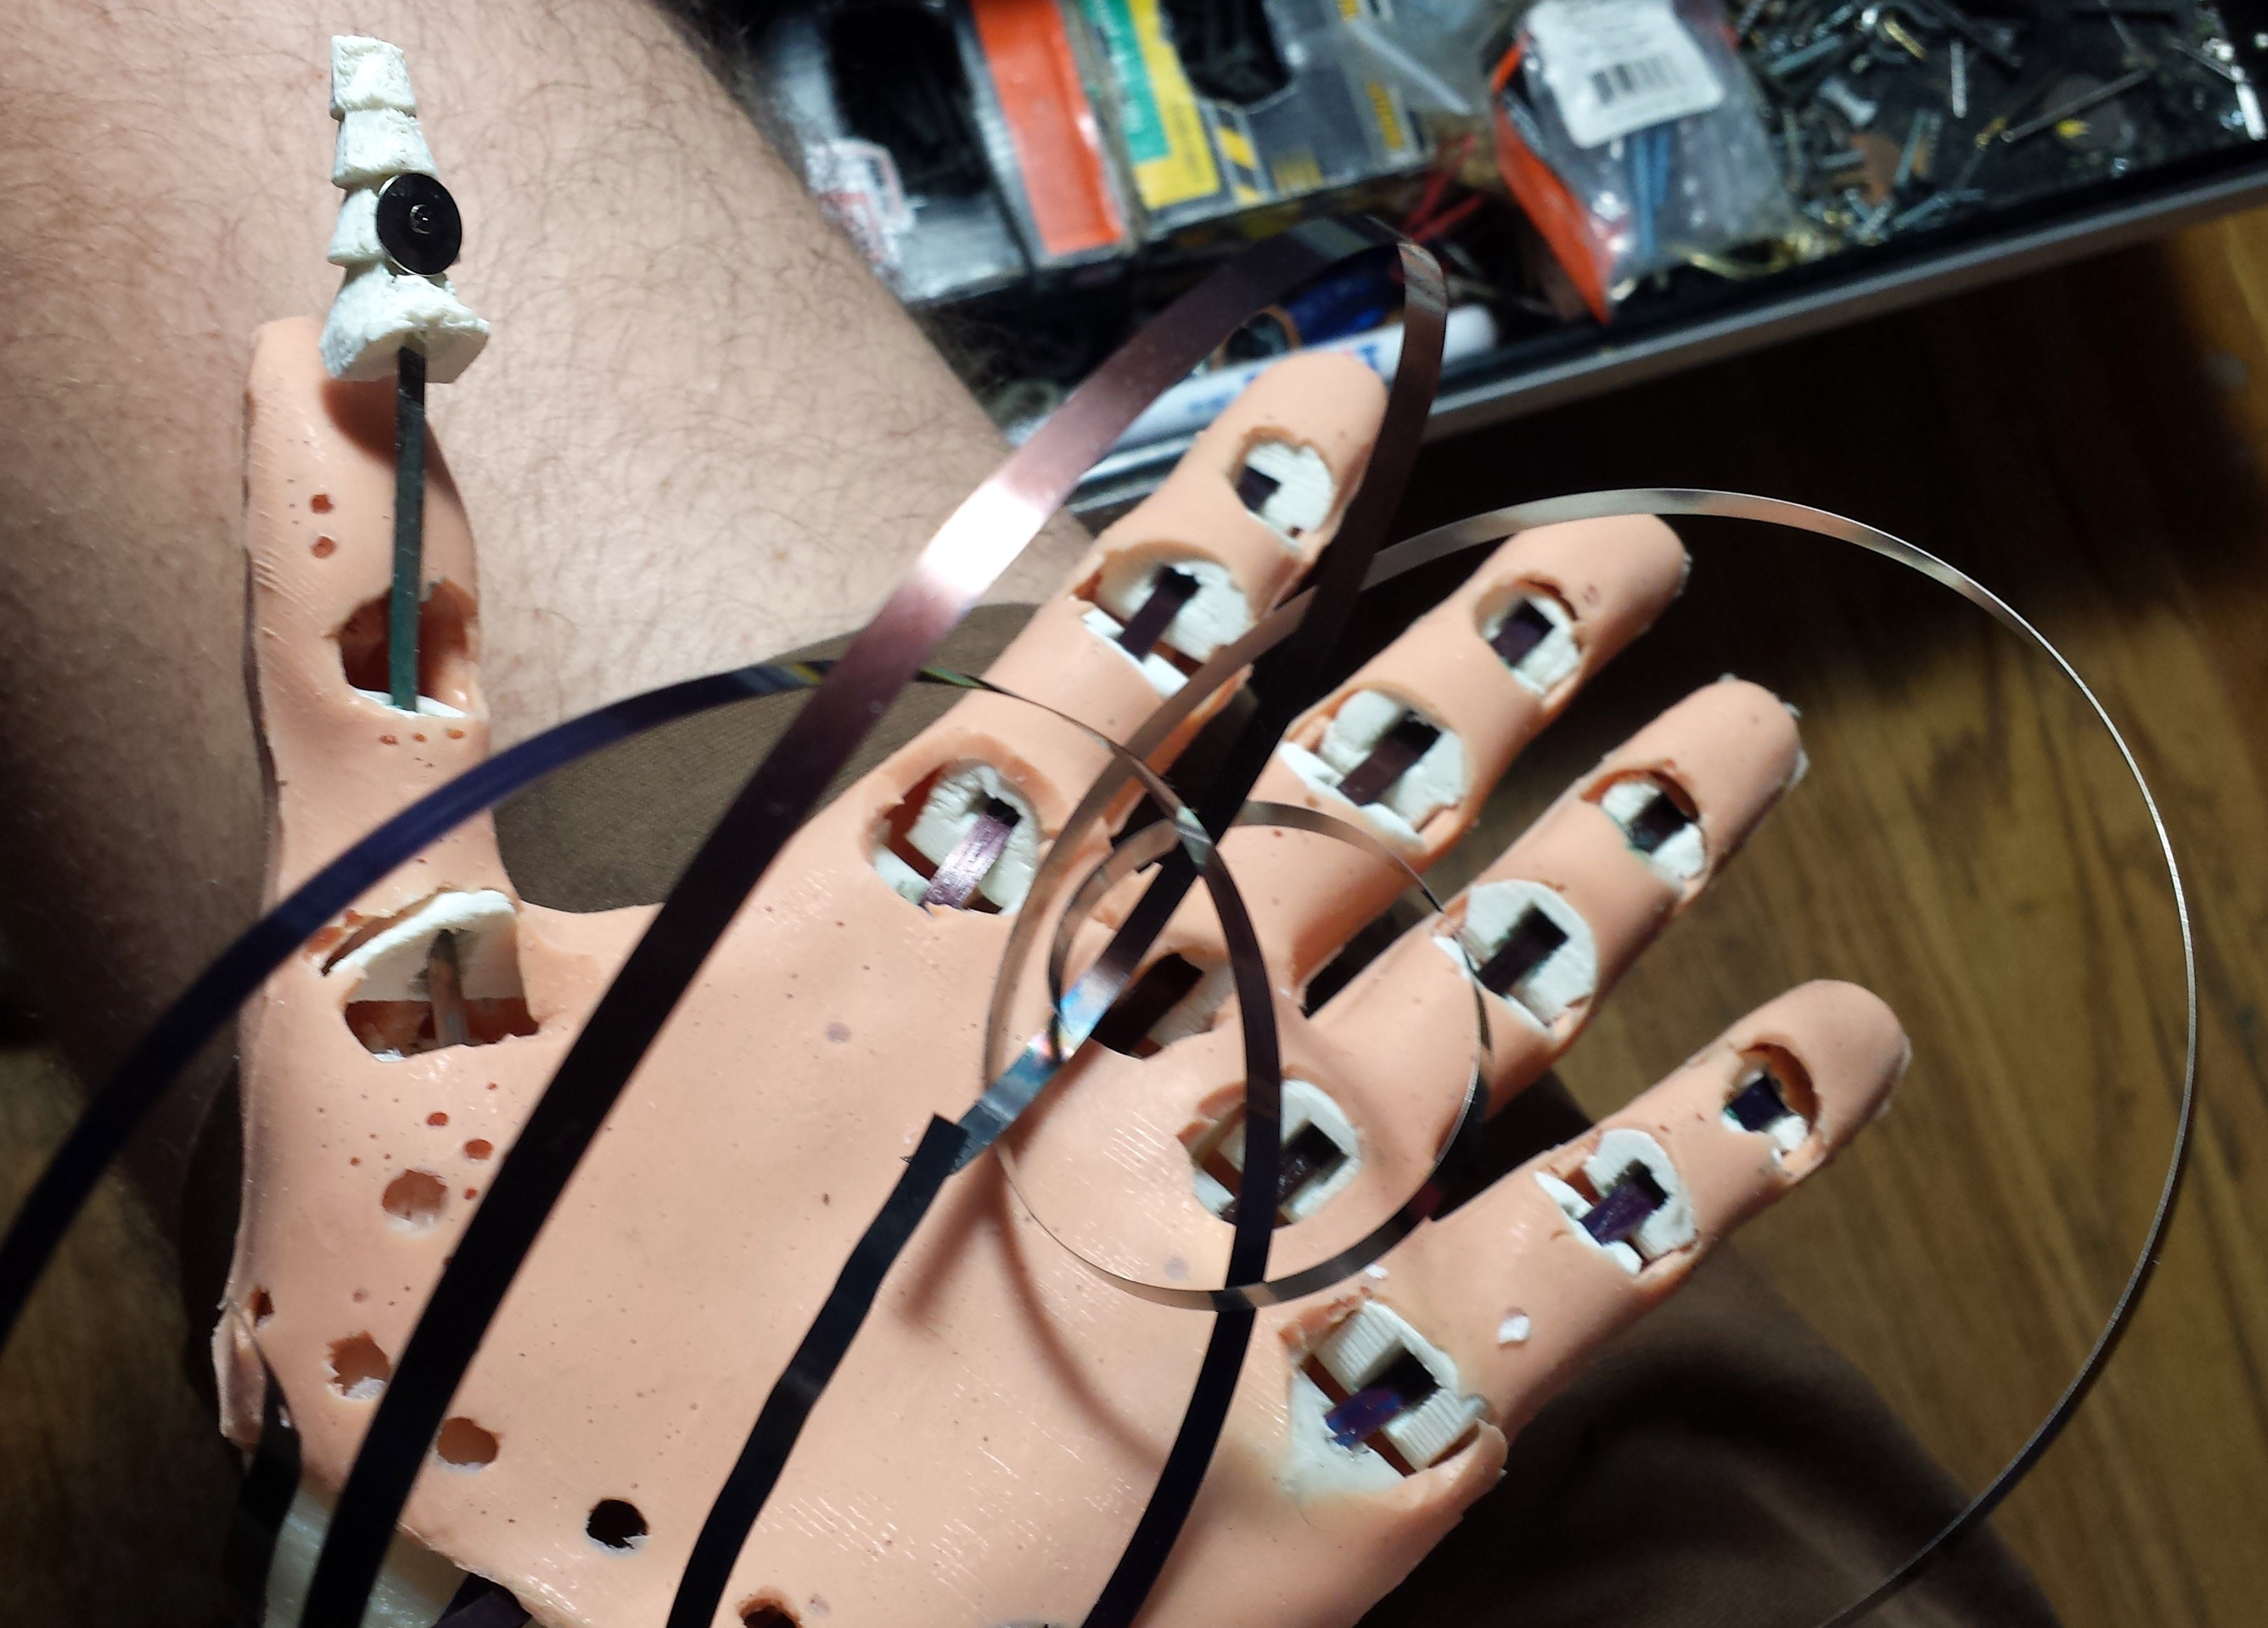
Remove spring steel ribbon from auto-retracting computer cable, egg timer or mini-measuring tape dispenser you acquired. It needs to be extremely thin and flexibly, otherwise it will produce too much resistance when closing the hand. Punch a hole in the end after making sure the ribbon is think enough to fit through the plastic finger/thumb cores. Attach the end of the spring steel ribbons to the bottom of the finger/thumb tip cores. I used thumb tacks for prototyping purposes but there are many possible ways to do this.
![]()
-
12Threading Cables for Hand Closing/Contraction
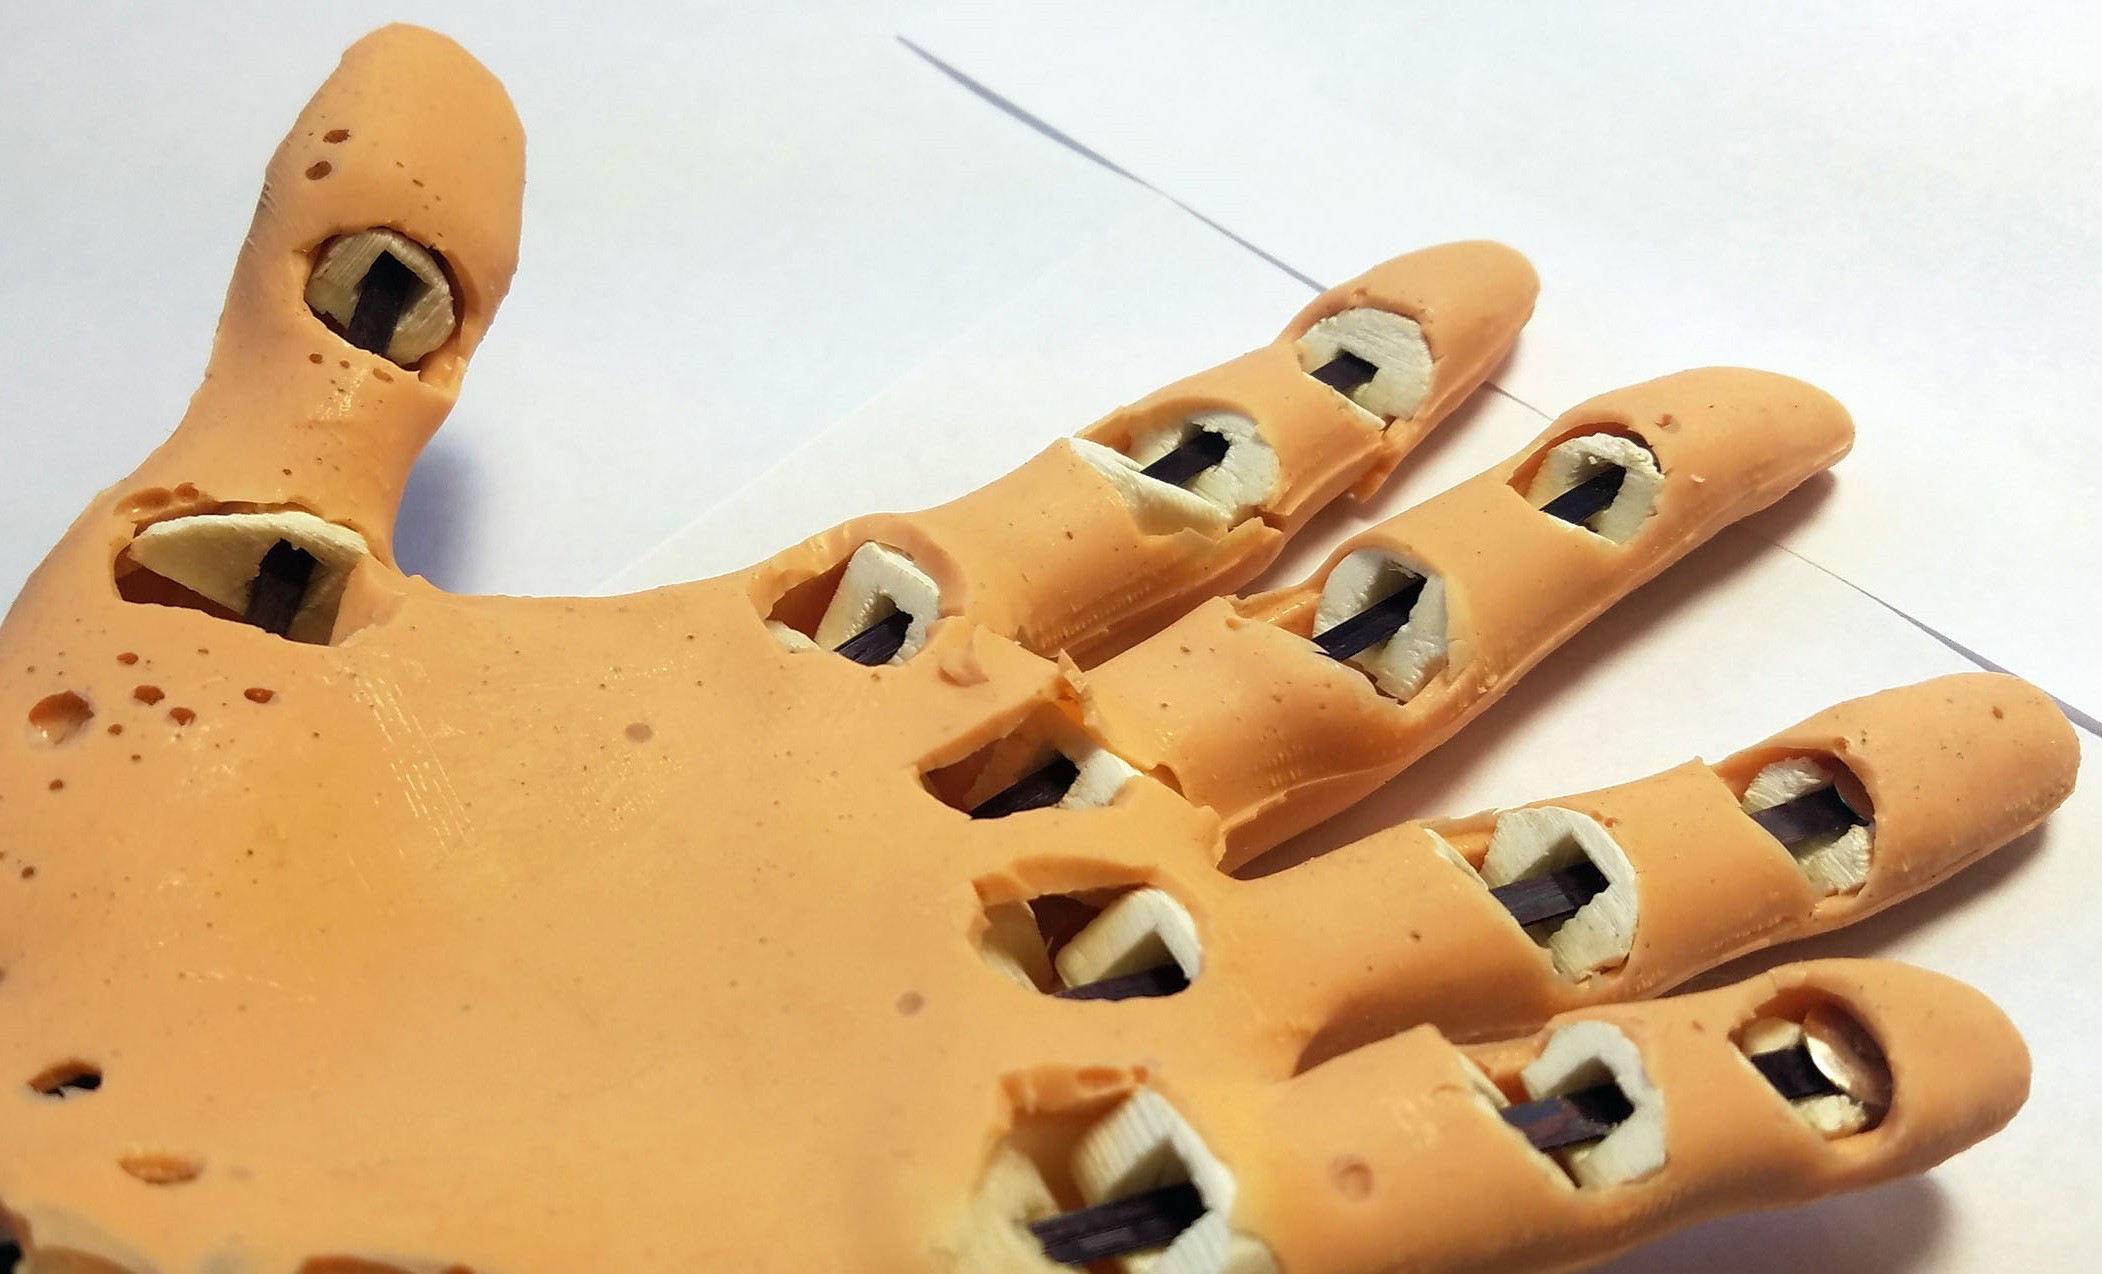
Once the middle 3D printed 'skeleton' digits are mounted inside the silicone rubber, thread the spring steel cables through the corresponding holes. Once the cables have been threaded through the 3D printed hand base, the finger/thumb tips can be inserted in the ends of the fingers/thumb.
![]()
The ridges in the tips match identical ridges inside the silicone rubber because the internal mold is based off the same 3D model. The friction this produces holds the hard plastic finger/thumb tips firmly inside the silicone rubber skin.
![]()
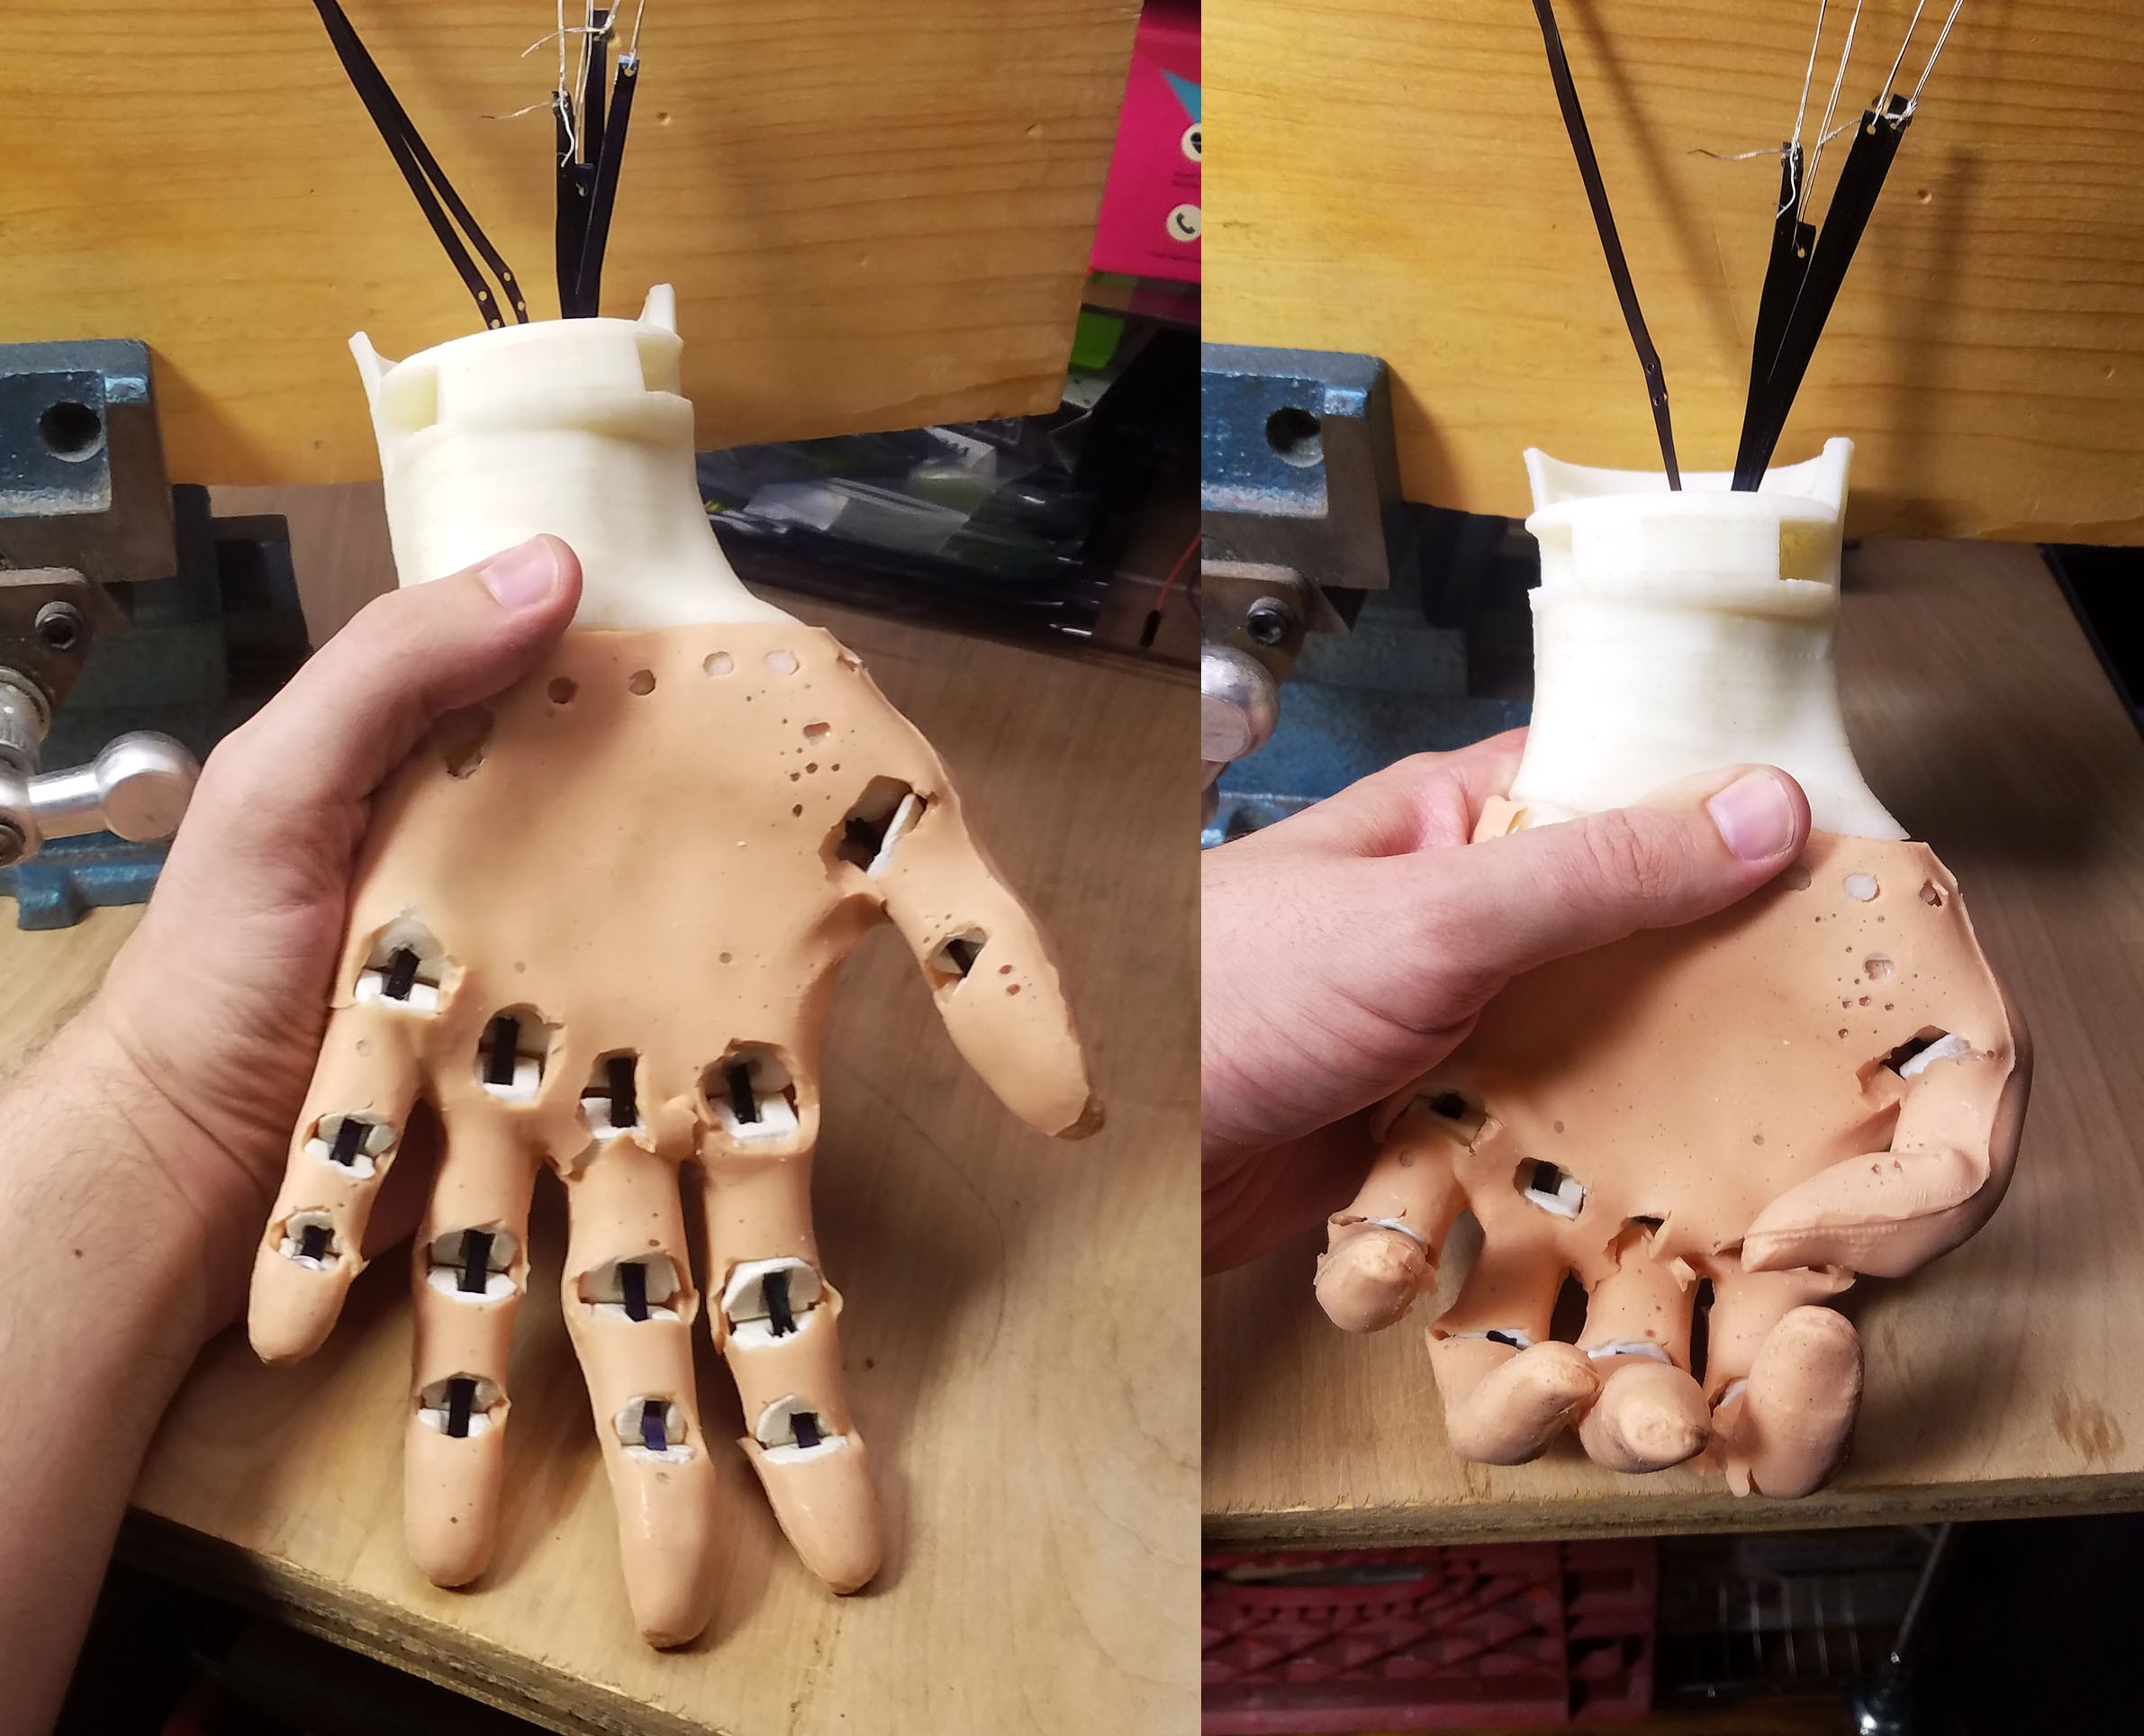
Hand with all steel cables installed.
-
13Testing the Completed Hand
Once all the steel cables have been threaded through the plastic hand base, attach them all to an object (I used a piece of wood) for testing. You will have to experiment with the tightness of each cable to get all the fingers and thumb closing and opening in sync.
![]()
3D Scan to Custom Soft Prosthetic Hand
Model and 3D print a mold to create a silicone rubber "skin" lattice for an easy to make custom prosthetic hand that matches your 3D scan


Discussions
Become a Hackaday.io Member
Create an account to leave a comment. Already have an account? Log In.