Links to the other tutorials in this series:
| ESP8266 SDK Tutorial (You are here!) | Learn how to use the ESP8266 SDK. This is what the pros use! |
| ESP8266 Lua/NodeMCU Tutorial | A look at the NodeMCU Lua interpreter for the ESP8266. Learn how to get to Blinky! |
| ESP8266 Arduino Tutorial | Use the Arduino IDE to simplify development and get up to speed very quickly! |
And here's the links to the other tutorials in Part 2:
| ESP8266 SDK Tutorial | Looking at using the linker to get PWM, and the included I2C libraries |
| ESP8266 Lua/NodeMCU Tutorial | Using PWM and I2C with Lua! |
| ESP8266 Arduino Tutorial | Using the Wire library for I2C, and AnalogWrite for fading! |
Links to Part 3:
| ESP8266 SDK Tutorial | Using MQTT to develop an IoT device |
| ESP8266 Lua/NodeMCU Tutorial | Using the NodeMCU MQTT module to communicate with a cloud data service |
| ESP8266 Arduino Tutorial | We use the simpler, more widely available HTTP protocol to log data to the cloud |
Getting Help
If you run into trouble while following these tutorials, you have a few different options:
- Ask in the discussion area below the article
- Join the ##esp8266 channel on Freenode IRC and ping me (MrAureliusR) or ask anyone who is in there
- Post on the ESP8266 Community Forums (note it can take a while to get a response!)
- Send me a private message here on Hackaday
The ESP8266 has been popular for quite a while now. The low cost of getting a module coupled with its power and reliability has made sales of the chip shoot through the roof. There's a lot of resources out there, but I wanted to combine all that information together into one place. So let's get started!
The ESP8266 was designed by a Chinese fabless semiconductor company called Espressif. Fabless means they just create the chip design, and they get another company to actually manufacture the silicon (Atmel was also a fabless semiconductor company). While having Wi-fi on-chip with a microcontroller was not a new idea, the concept having a simple serial link to control it out of the box was. Hobbyists all over the world started playing with the chip to see what it could do. Without having to program the ESP, complex IoT applications could be developed, using the ESP simply as an external Wi-fi chip. This is the easiest method for those who don't have interest in diving into the ESP itself. You can use AT commands over a serial link to control the chip. This is the only way to control the ESP modules which only have 8 pins. A full list of the AT command set can be found here. This is a perfectly acceptable solution for many hackers, and if that's all you need then great! I built a data-logging module which used the Sparkfun phant server as the backend using only AT commands. Getting it connected to my Wi-fi network and sending data was very easy.
However, many of you are here because you want to dive deep down into the power at the heart of the ESP8266. You want to program the module using Arduino or the SDK. You are interested in playing with Lua and discovering how it can be used in an embedded system like this. I generally recommend that people new to the ESP8266 buy a pre-fabricated module from a company like SparkFun or Adafruit.
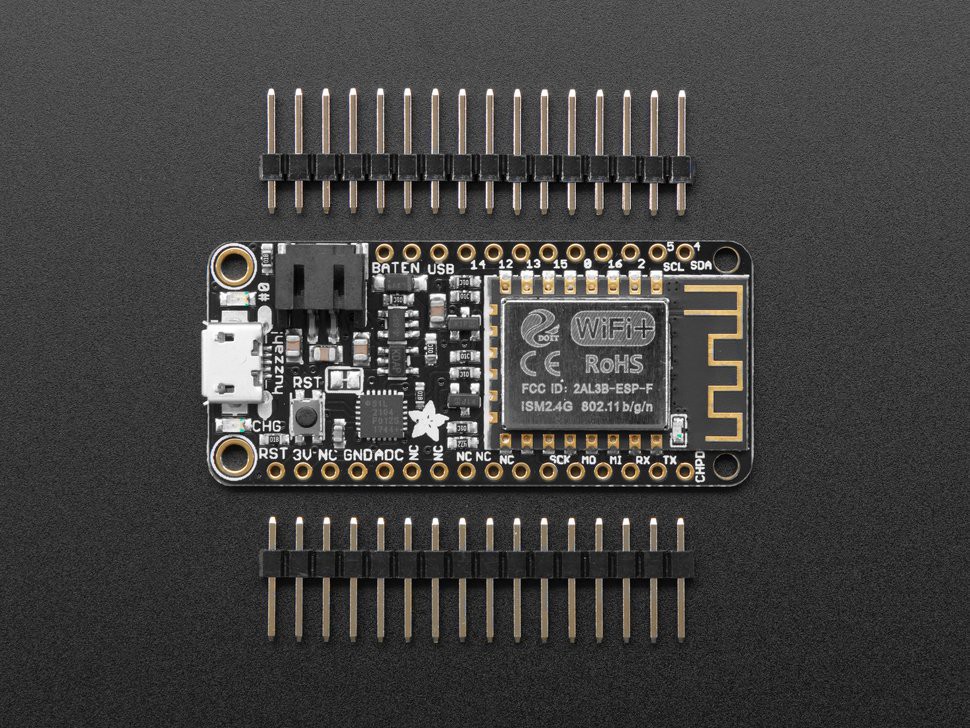
This takes a lot of the difficulty out of spinning your own board. But if you want to spin your own board using, say, an ESP-12F module, here are a few tips (skip to the tutorial section if you bought a HUZZAH Feather or a SparkFun Thing, or similar):
- Decide which module you want to use. The modules were originally designed by a company called AI Thinker, but now have been widely cloned. Some of these have on-board 3.3V regulators, others don't. Take some time to find a reliable source, and take a close look at the requirements for...
 Alexander


 Paul Andrews
 Cristian Dobre
please add fuzix or other system
lufa, RTOS etc