Each of the lamps created in this material research process is also completely portable with the help of easy to find 12v and 5v batteries that have been coupled with quick connecting parts.
All of the forms explored across this project have been propelled by seeking out mylar covered surfaces to use as as light reflectors in tandem with UV LEDs. Anchoring these properties to each iteration offered scalability of the lamp to various sizes, while also allowing the lamp to remain stow-able - key for working in small or remote spaces.
While the prompt for the Field Ready challenge specifically calls for the design of a wand, each of the resin curing lamps created for this project allowed for hands free exposure, and greater UV safety than other traditional UV curing wands.
The construction techniques demonstrated in this build would be accessible at any onramp for any maker - skills used in these projects ranged from hand-sewing to 3D-modeling. Also, since the project relies heavily on easy to find prefabricated parts, it feels more like assembling a kit than molding a product from scratch.
On obsessive material research...
The fun part of doing material research is finding out how the same materials get used across industries, so once you find a material with the desired properties - like a how this project relied on reflective mylar - one is able to conduct searches across applications to open up a world of ideas.
This project could keep iterating and be customized to the needs of any fabricator, while scaling to size and budget needs. I think there are more possibilities with this combo of materials - mylar being so wonderfully reflective it gets applied to so many different kinds of insulating materials and bags - there's a big shiny sandbox of easy to find materials to play with to use as light reflectors. I even had the idea of using spray adhesive to bond a sheet of mylar to a scrap of tyvek to see how that would create an even more thin flexible material - some day!
( I also can’t stress enough how important it is to talk to folks outside of your field about what you’re working on - I’ve gotten some of my best design solutions that way!)
Thinking about Power
Batteries are awesome! I'm grateful for them every time I'm scrolling Twitter waiting in line for something. The problem with batteries is that as they get used up, you start to get inconsistent voltage which could mean extended curing times - so if possible, if you're envisioning more than 2-3 hours of exposure time with your DIY resin oven, you'll need to buy a big battery that will deliver constant output, or use a wall DC adapter rated for the amount of LEDs you're using.
Final thoughts on repurposed grocery bag version:
Likely needs greater light density than what I fabricated for faster and more consistent cure times
Can fit some really large objects in there - probably perfect for curing parts coming right off of an SLA printer
It's made with really easy to find parts with simple to accomplish fabrication techniques
It stows away so small - smaller than the original design and smaller than the 3D printed version of the UV lamp. Mega points here.
Total Cost - ~$66
Final thoughts on 3D printed version:
Greater light density and more suited for smaller parts.
v2 needs a light gasket - similar to the way a sheet film triple box or dark room entrance works.
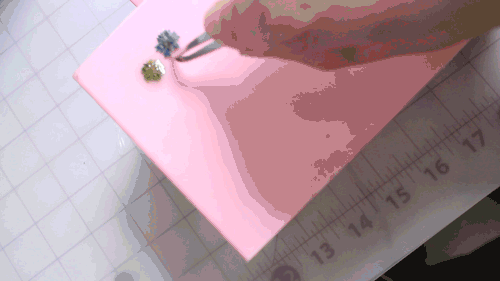
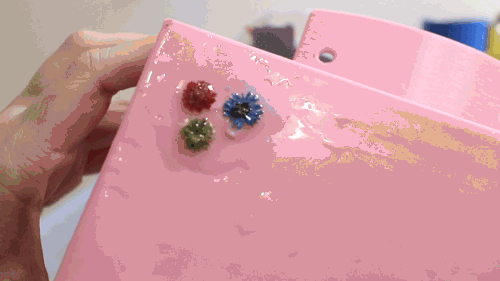
Really good for small jewelry projects (see below - made by curing the resin on diffraction grating)
Total Cost - ~$46 (not including tools 😬)
Parts research around making this collapsible UV lamp supercharged:
The distributor LEDlightsworld.com has a collection of UV LED strips of varying powers and light frequencies that could be implemented to work with specific resin compounds, or higher wattages for quicker exposure times/curing greater volumes of resin - they are a lot more expensive than the $15 UV led strip I worked with in my iterating, but are also much more customizable to your specific application if you’re working in a lab setting.
I mentioned it above, but I think taking thin pieces of mylar and bonding it to heavy duty fabrics has a lot of potential, couple this with tailored LED strips that are designed with the frequency for your specific resin, the size and shape of this UV lamp is boundless.
Thanks again for the finalist selection Hackaday! It was so fun to build this research out and I can't wait to see how other fabricators interpret this for their own use cases in the future!
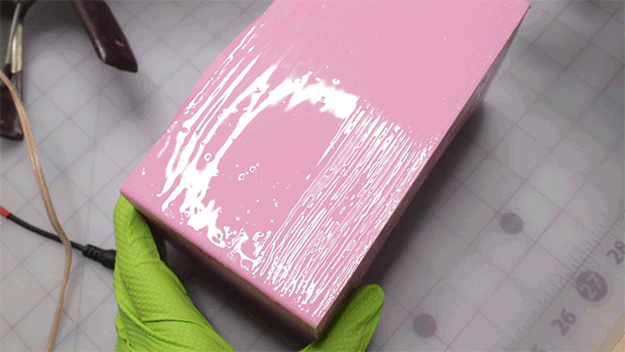
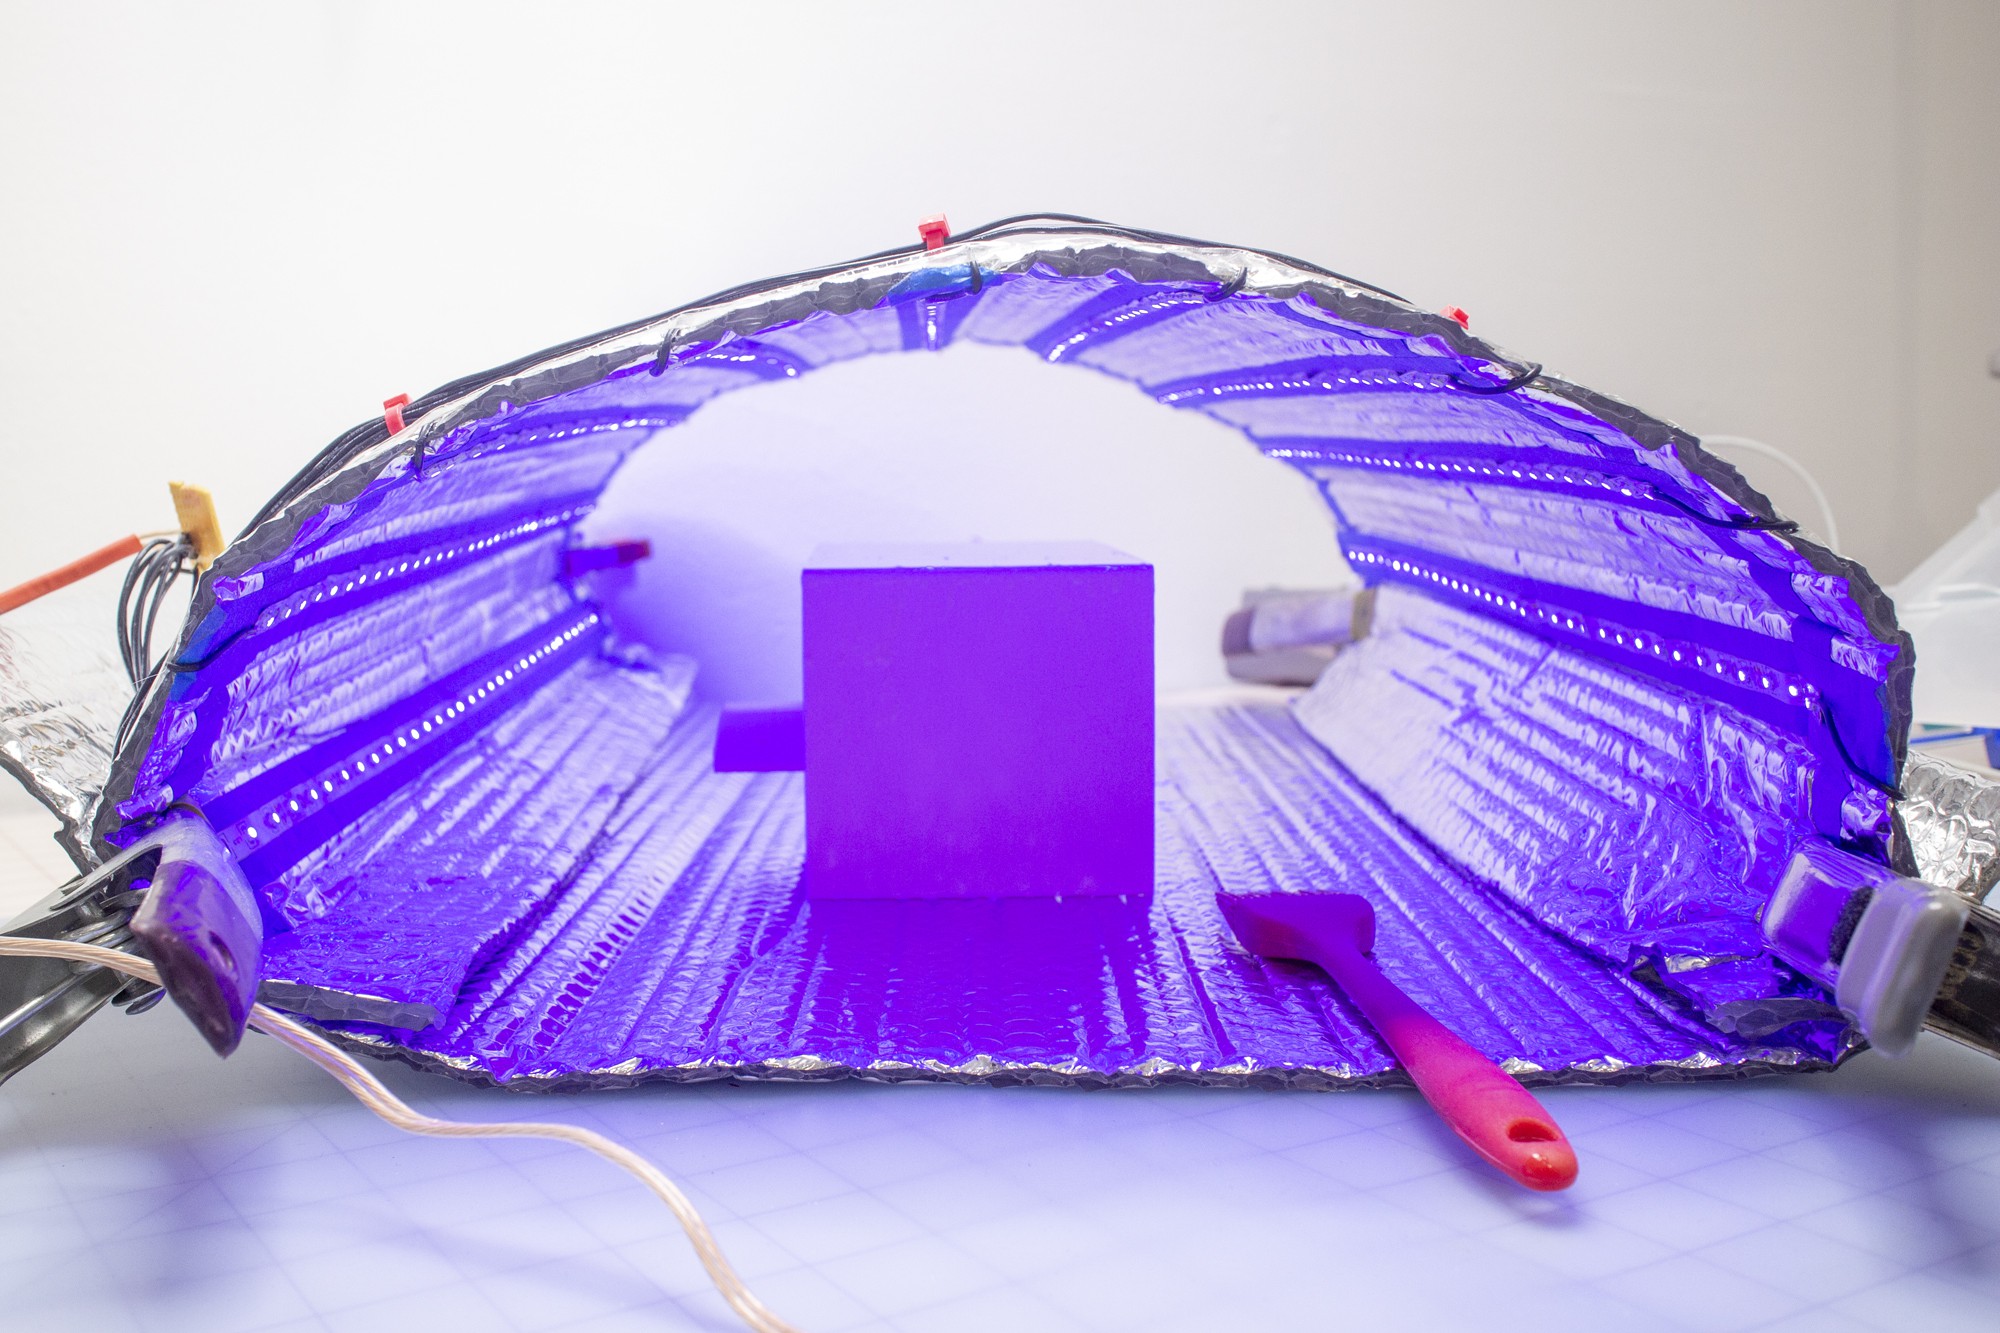
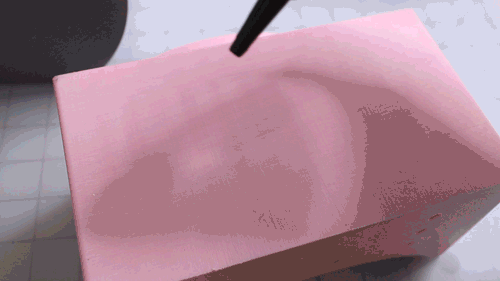
To test the 3D printed framed lamp unit, I 3D printed another little box form I've been producing for another project, that I was previously coating in polyester resin for durability, but have switched to coating with UV resin for the sake of testing the DIY lamp's capabilities.
Here's the part getting coated with UV activated resin with the help of a kitchen basting silicone brush:
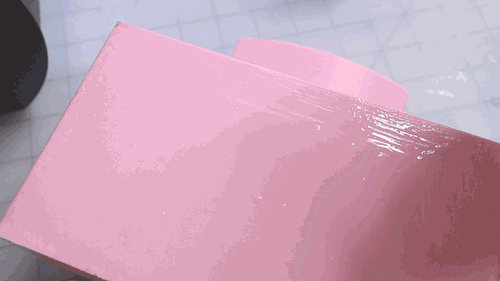
The coated part went into the oven for 10 minutes total, but I checked the curing progression at the 4 minute mark, 6 minute mark, and 10 minute mark.
Material properties observed:
If the bulb is too close to the surface of the uncured resin, it cures unevenly and extends exposure time.
The middle of the resin coated surface that had about 2-3" of space between the LED lens and the surface cured the fastest.
When embedding pieces (dried flowers pictured), layers thicker than 1/4" had uncured resin under the 'shadows' of the embedments and required longer time under the light.
Check out my last log post to see some conclusions around this style of lamp - thanks for checking out this iteration of the build!
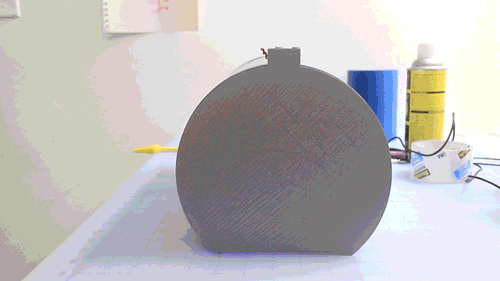
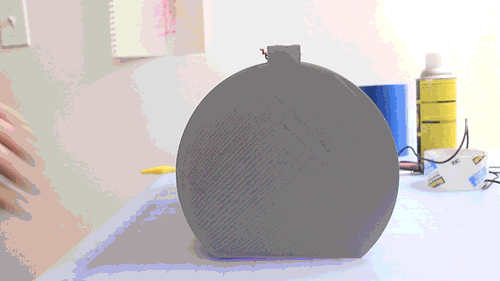
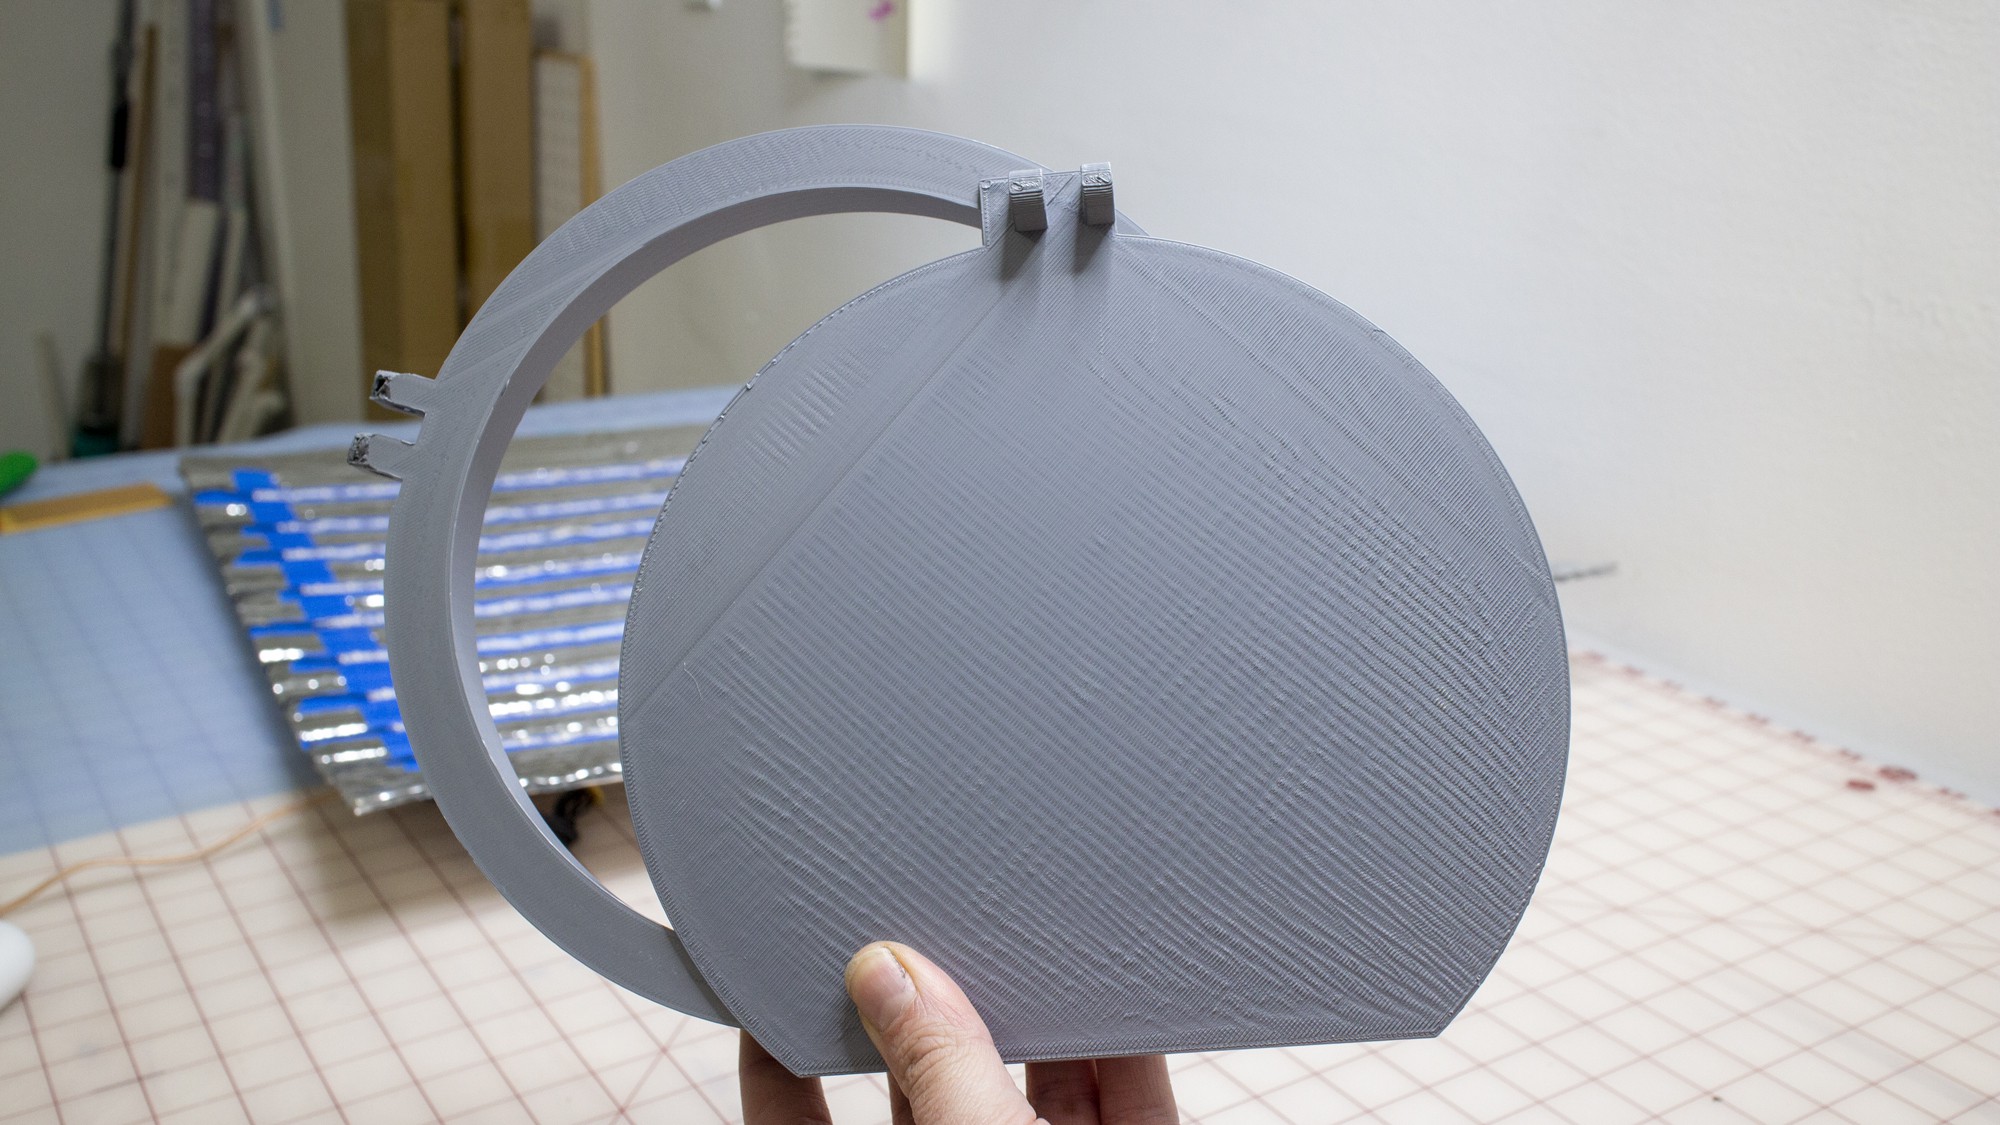
In a previous log post, I shared my idea for using the existing exposure unit I built (see original instructions for the PVC frame when I was still using the lamp primarily for cyanotype printing) with custom 3D printed end-caps.
Checking the Parts
Once the models came off the printer, I did a quick fitting to make sure the parts would fit.
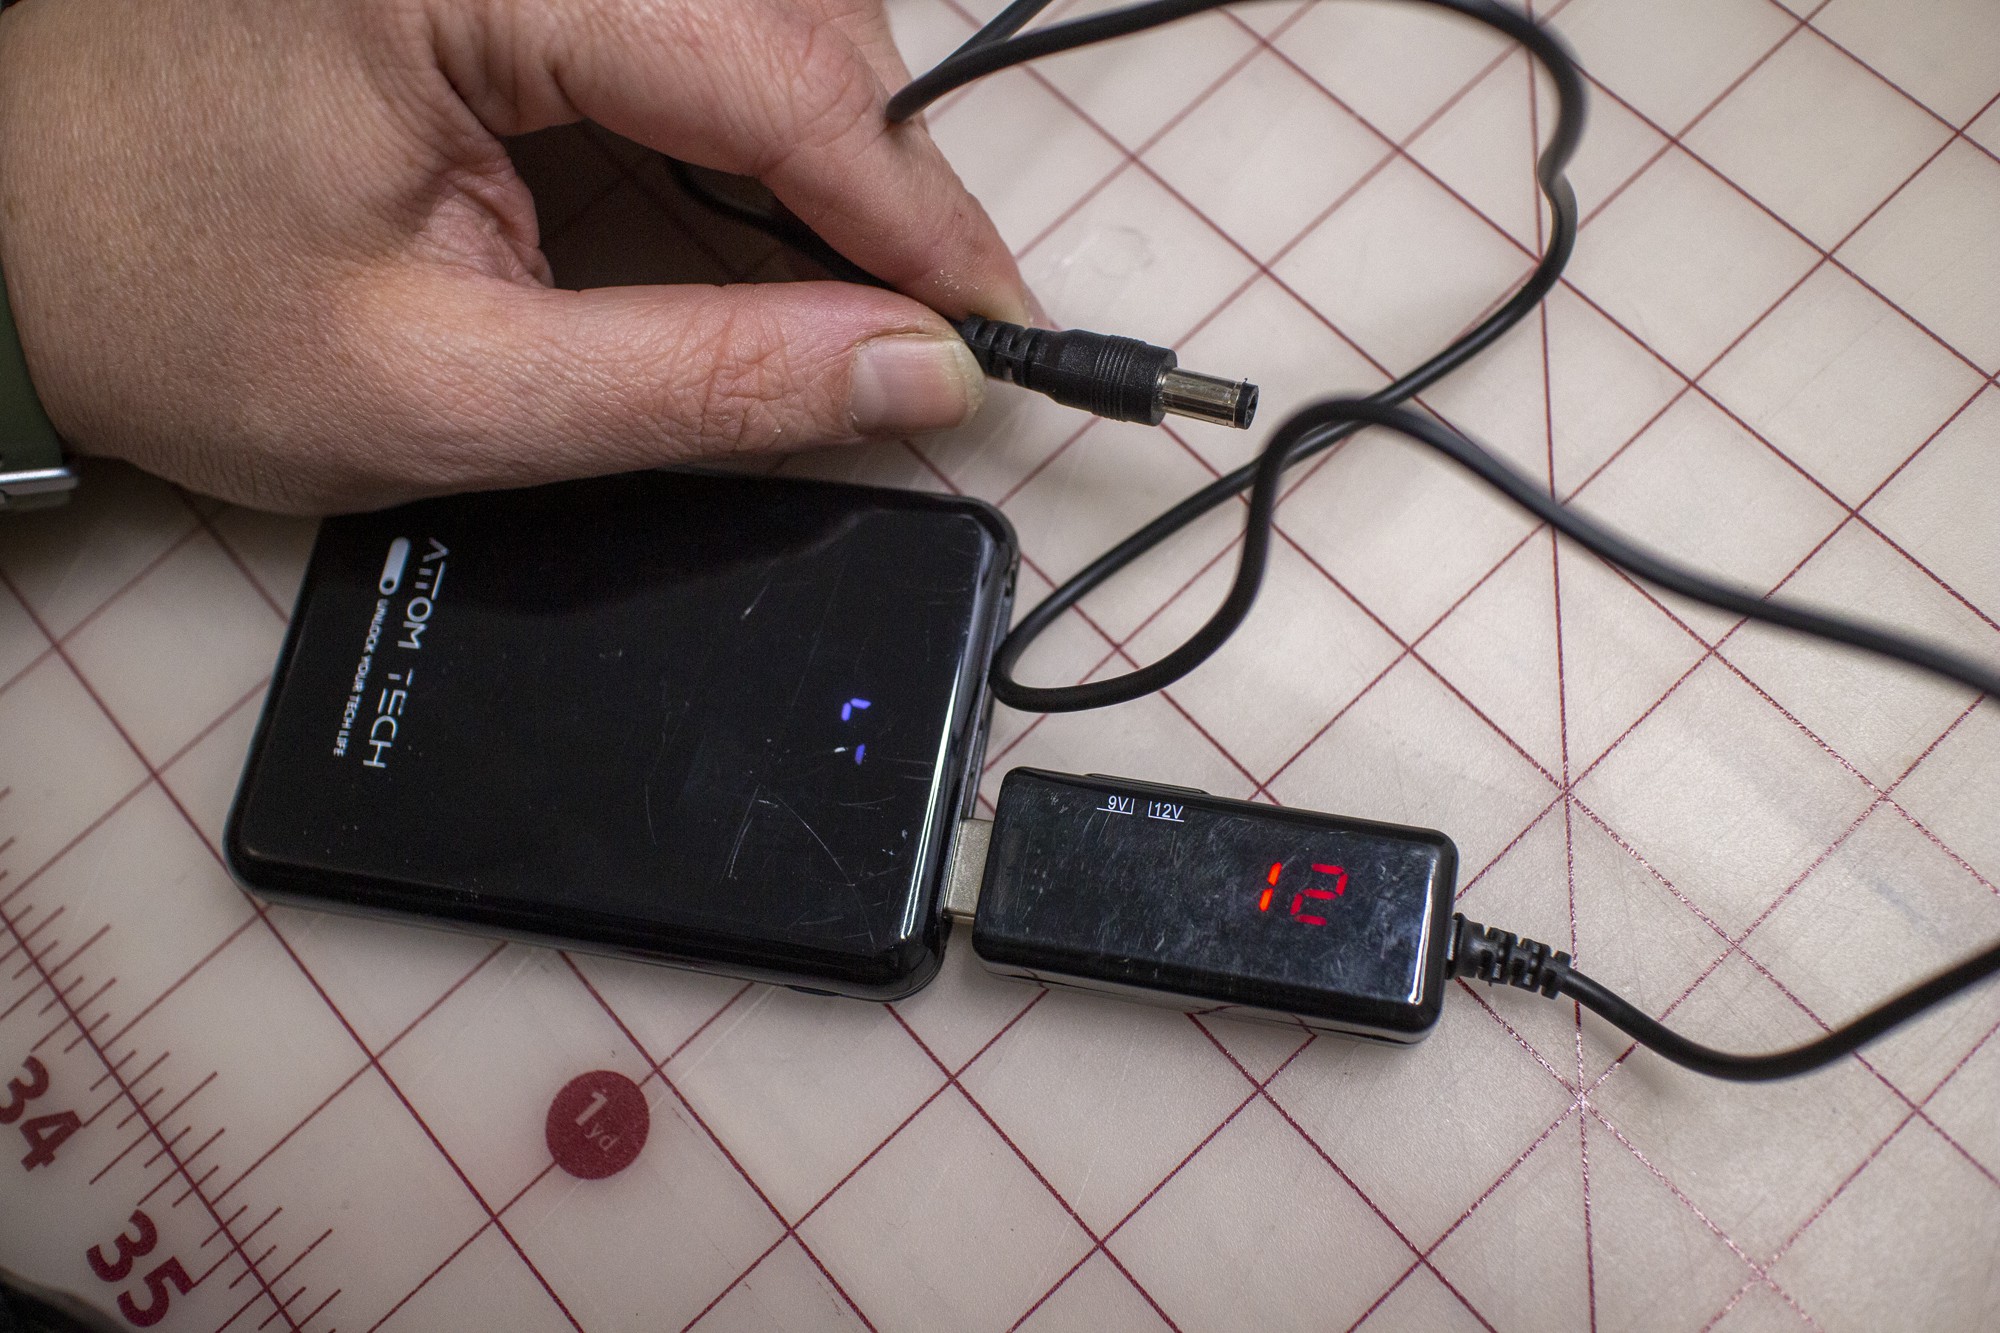
This 5v battery pack is super compact and has 2 USB outs - I found this 5V to 9V/12V step up USB cable to power the LED strip for this version of the collapsible UV lamp.
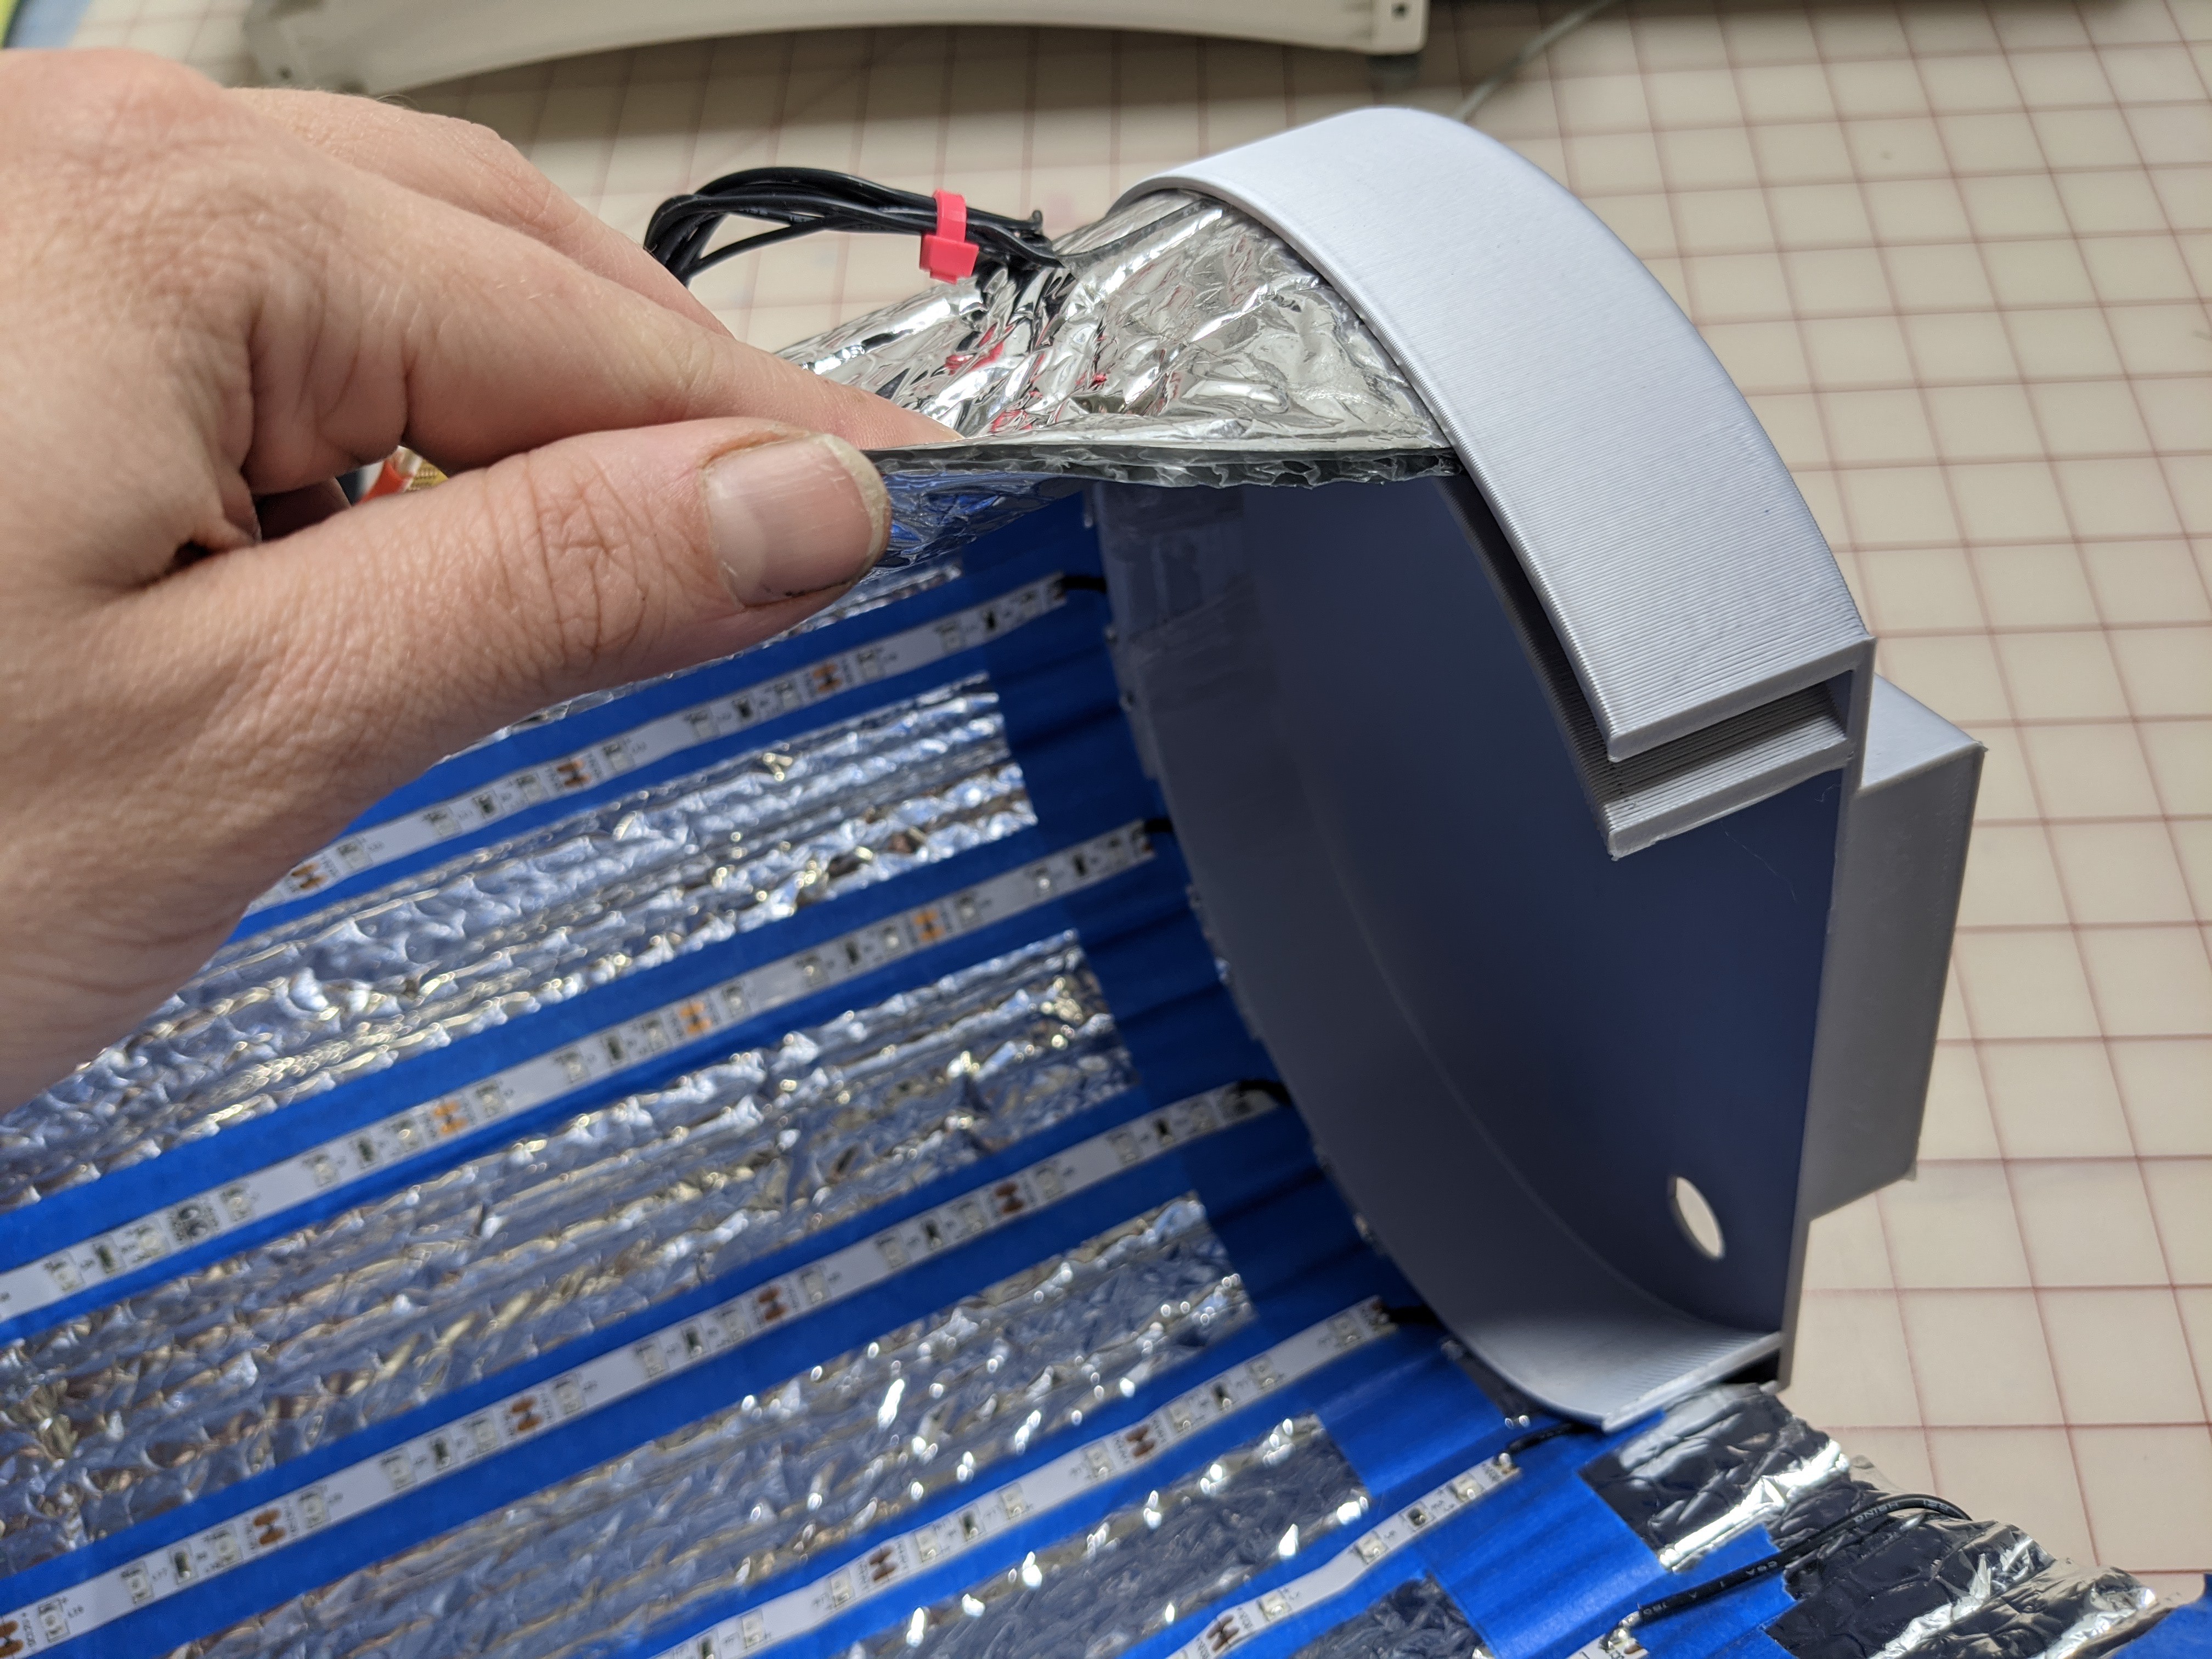
Assembling the tube
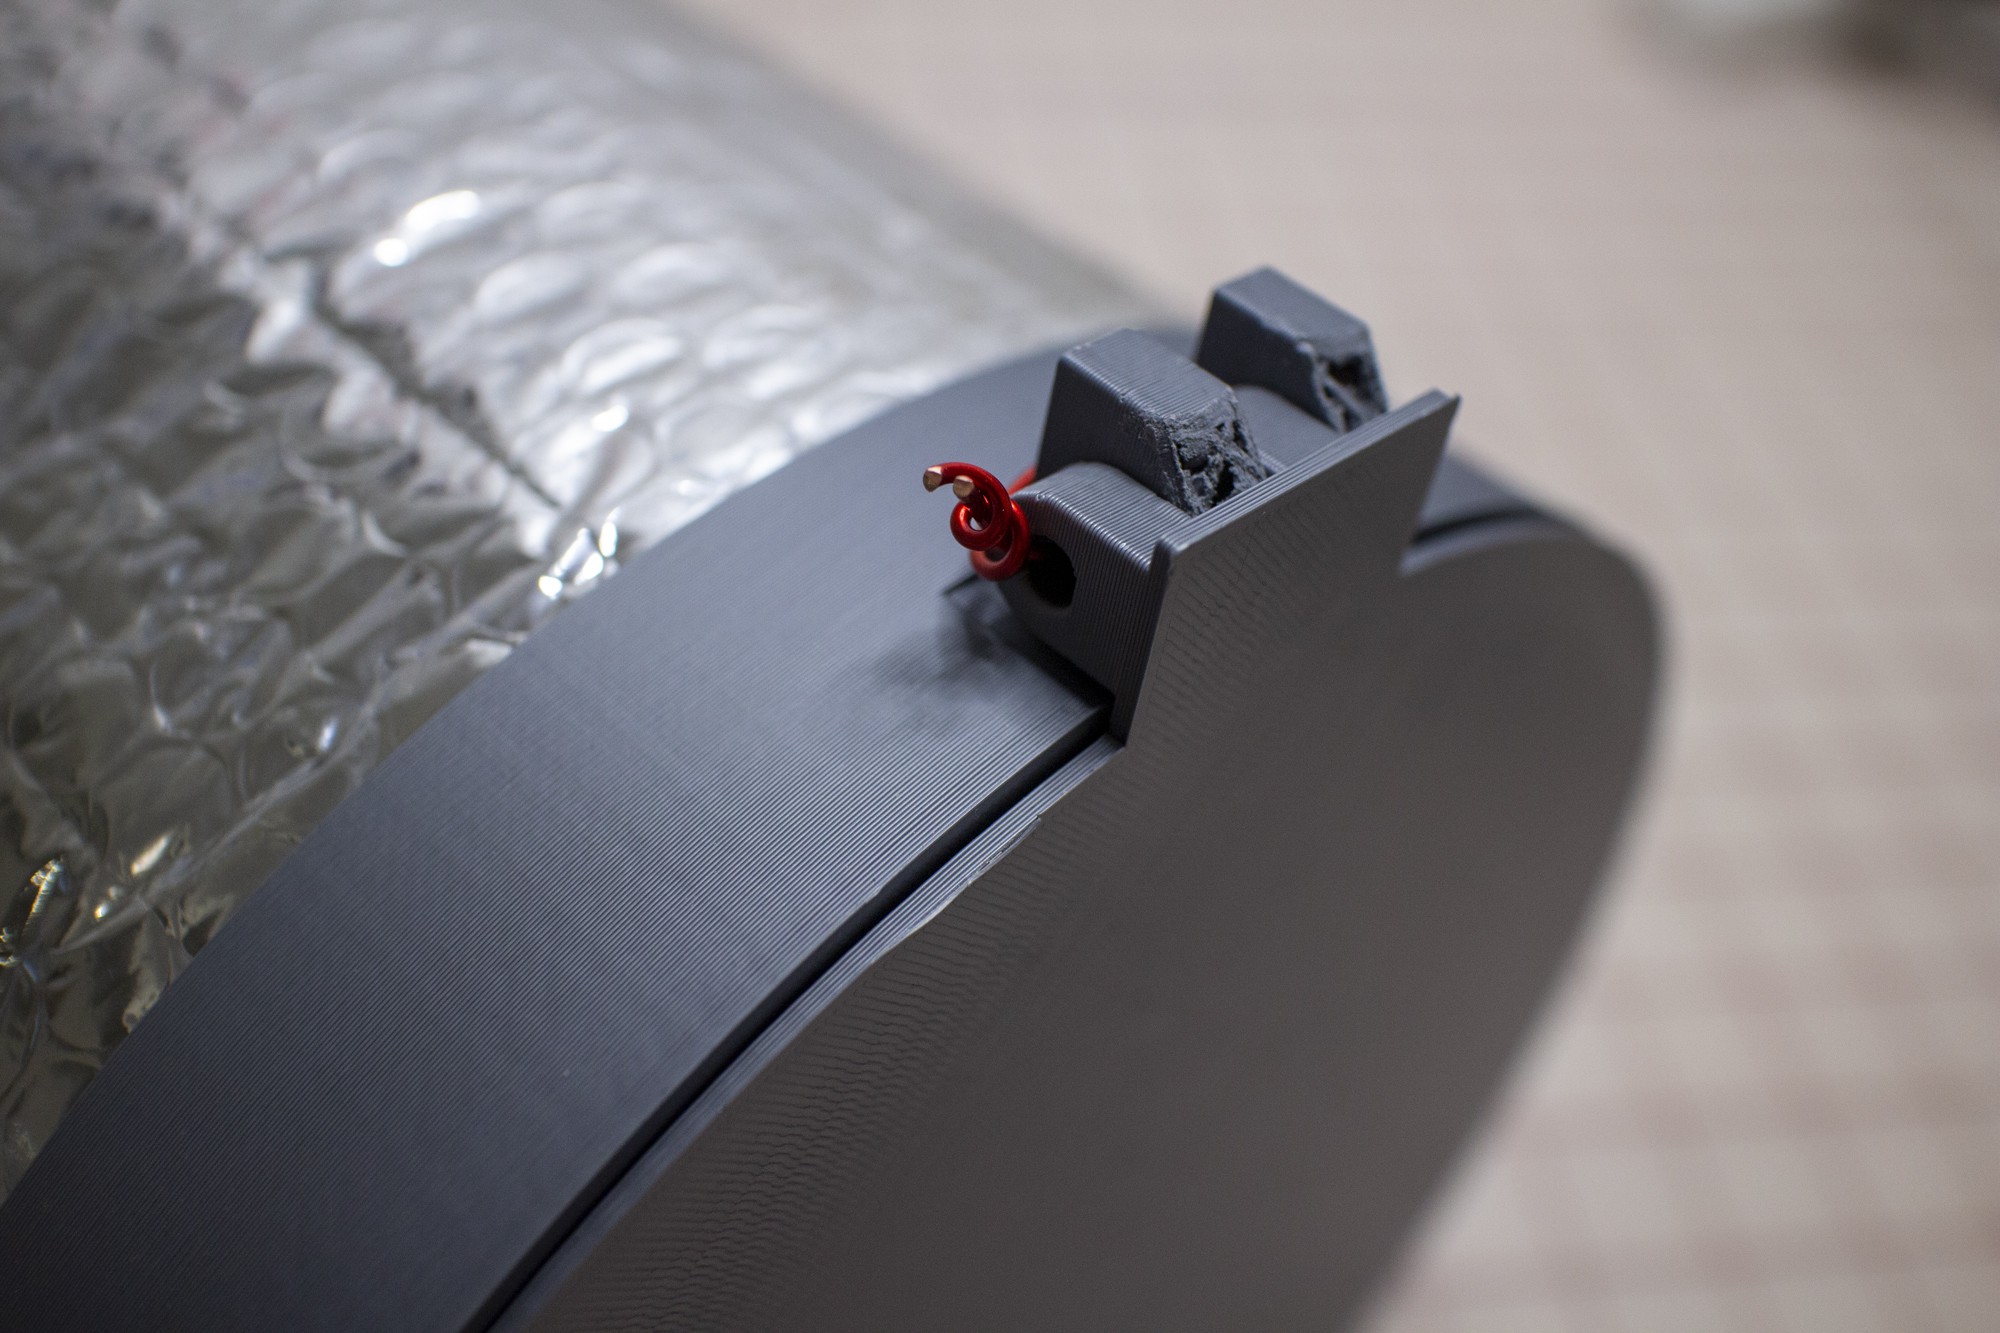
Each end cap served a different function - one end cap could support the power pack and LED plumbing, while the other end cap would function as a door for minimal fuss during resin exposure.
I used a piece of magnet wire to secure the hinge, but it could support a machine screw really easily. I had to grind down the hinge a little bit, but the revised models are attached to the main project page.
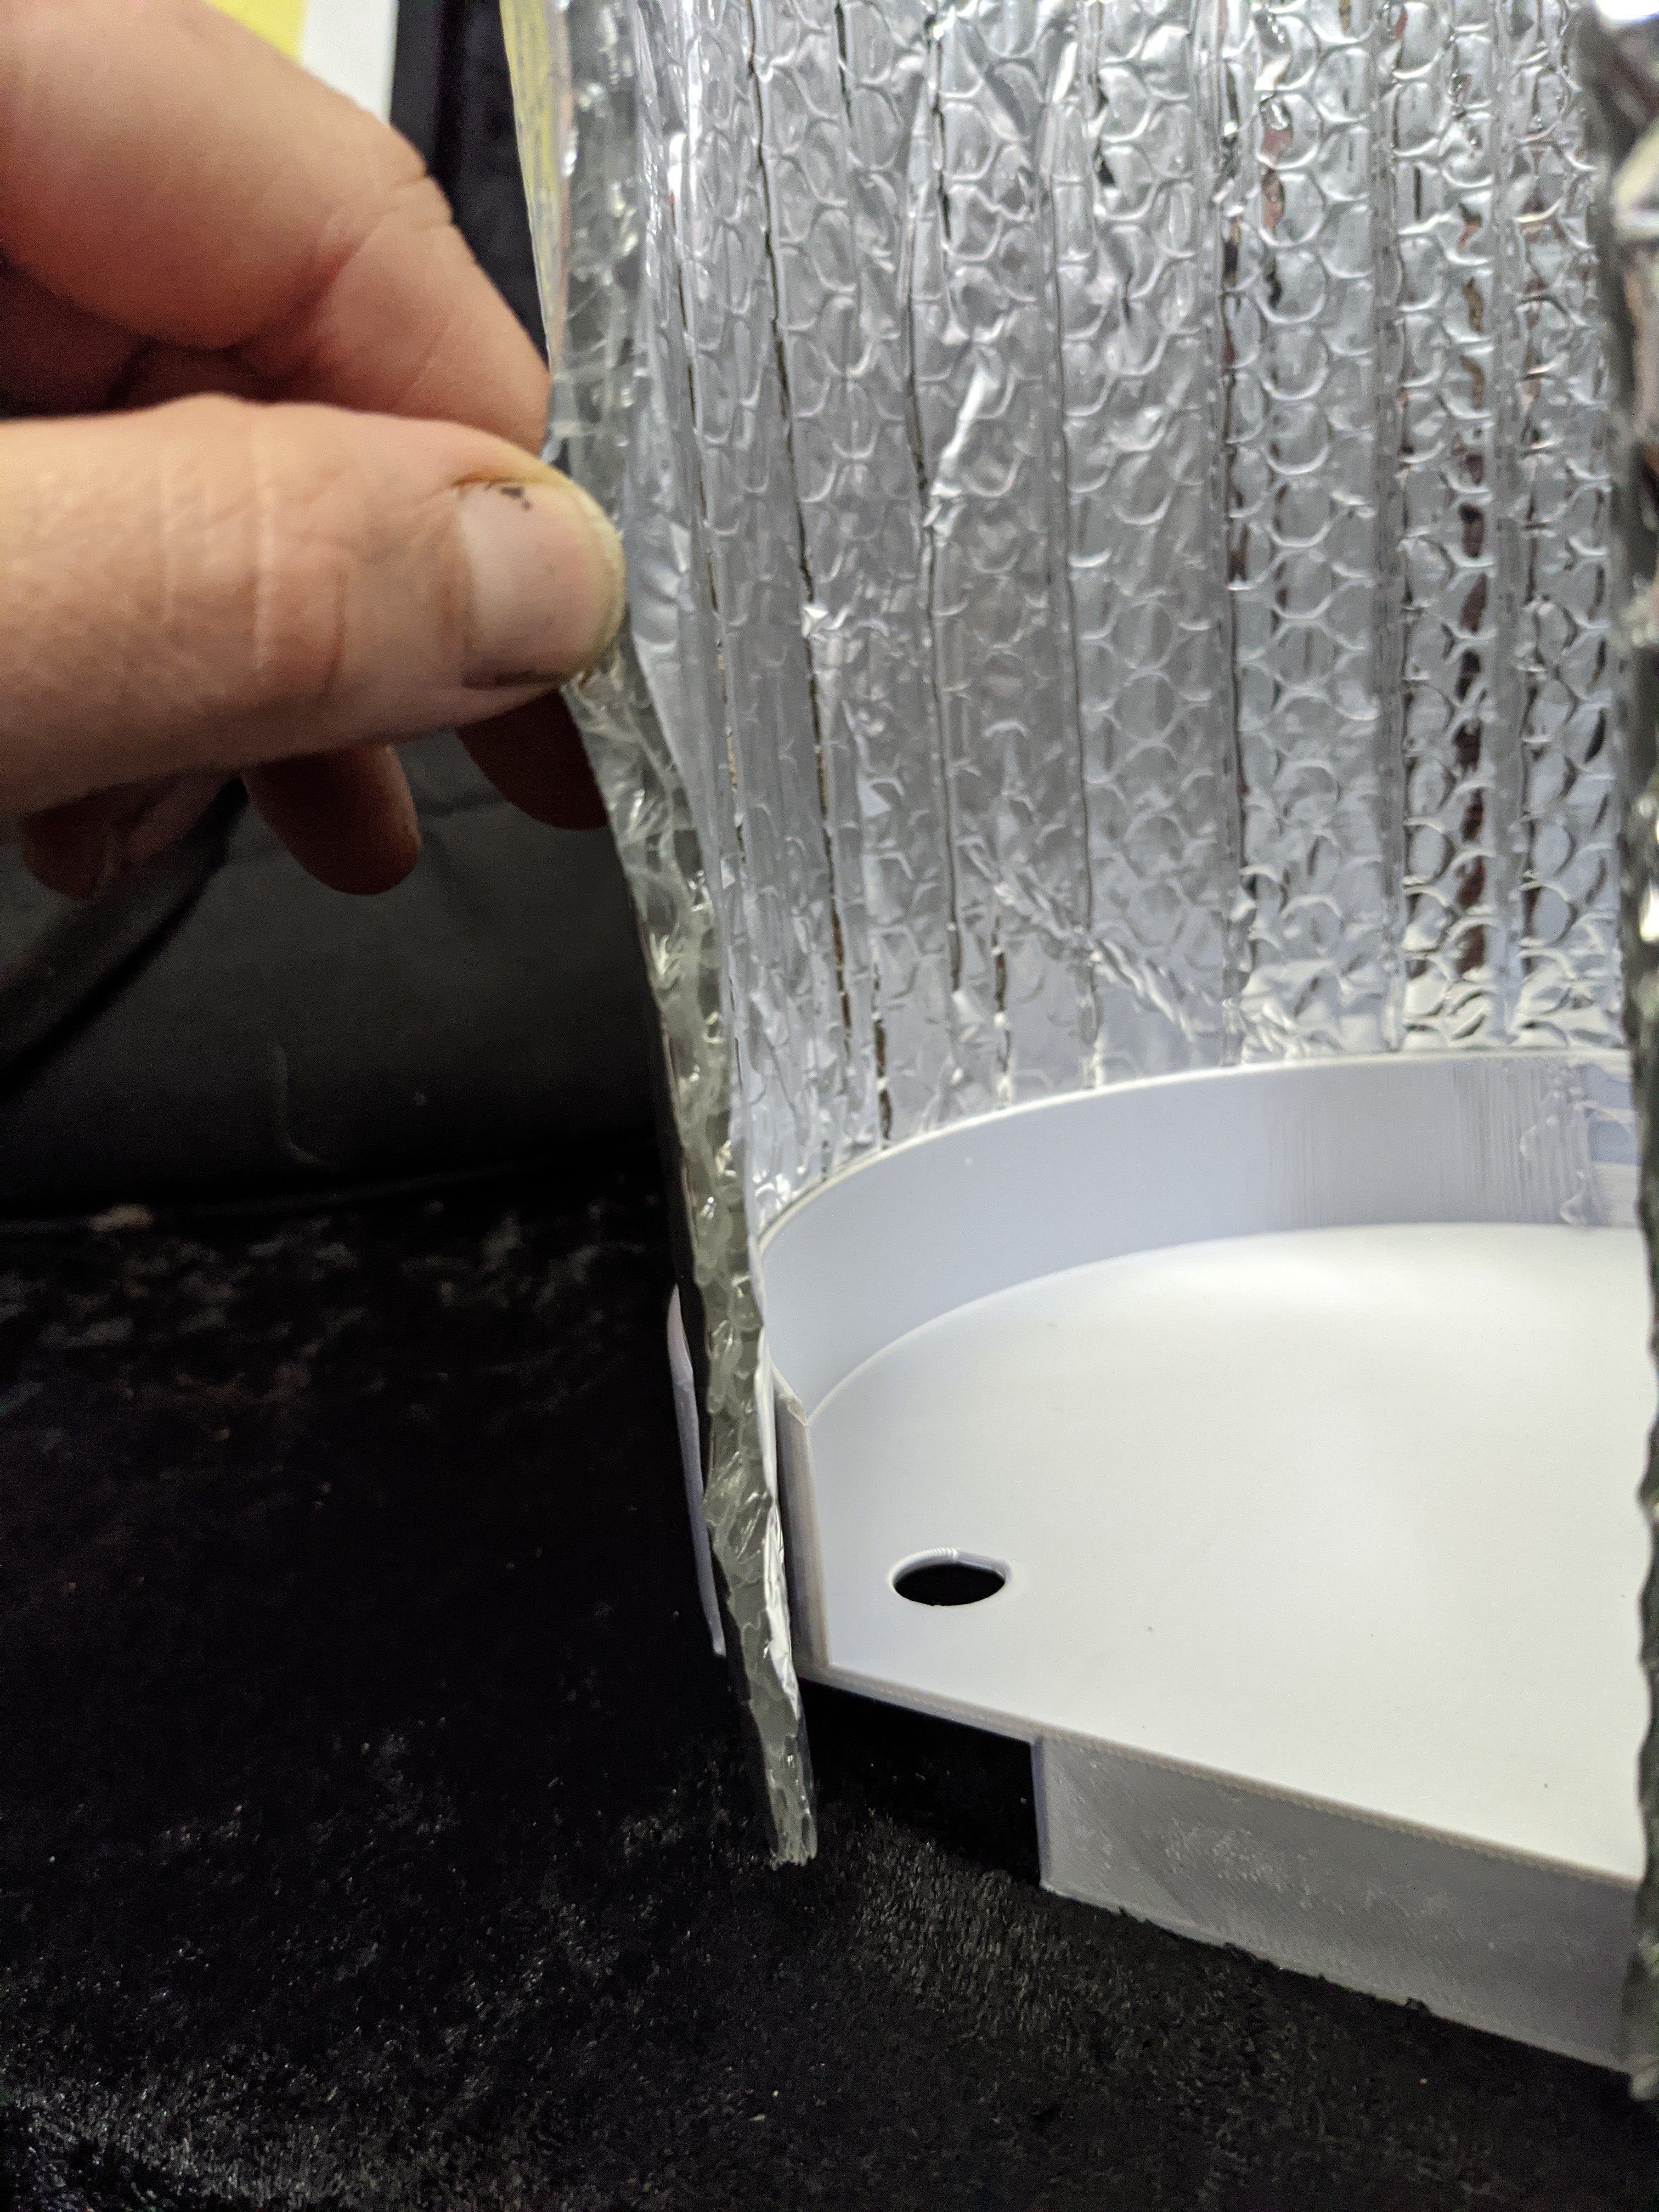
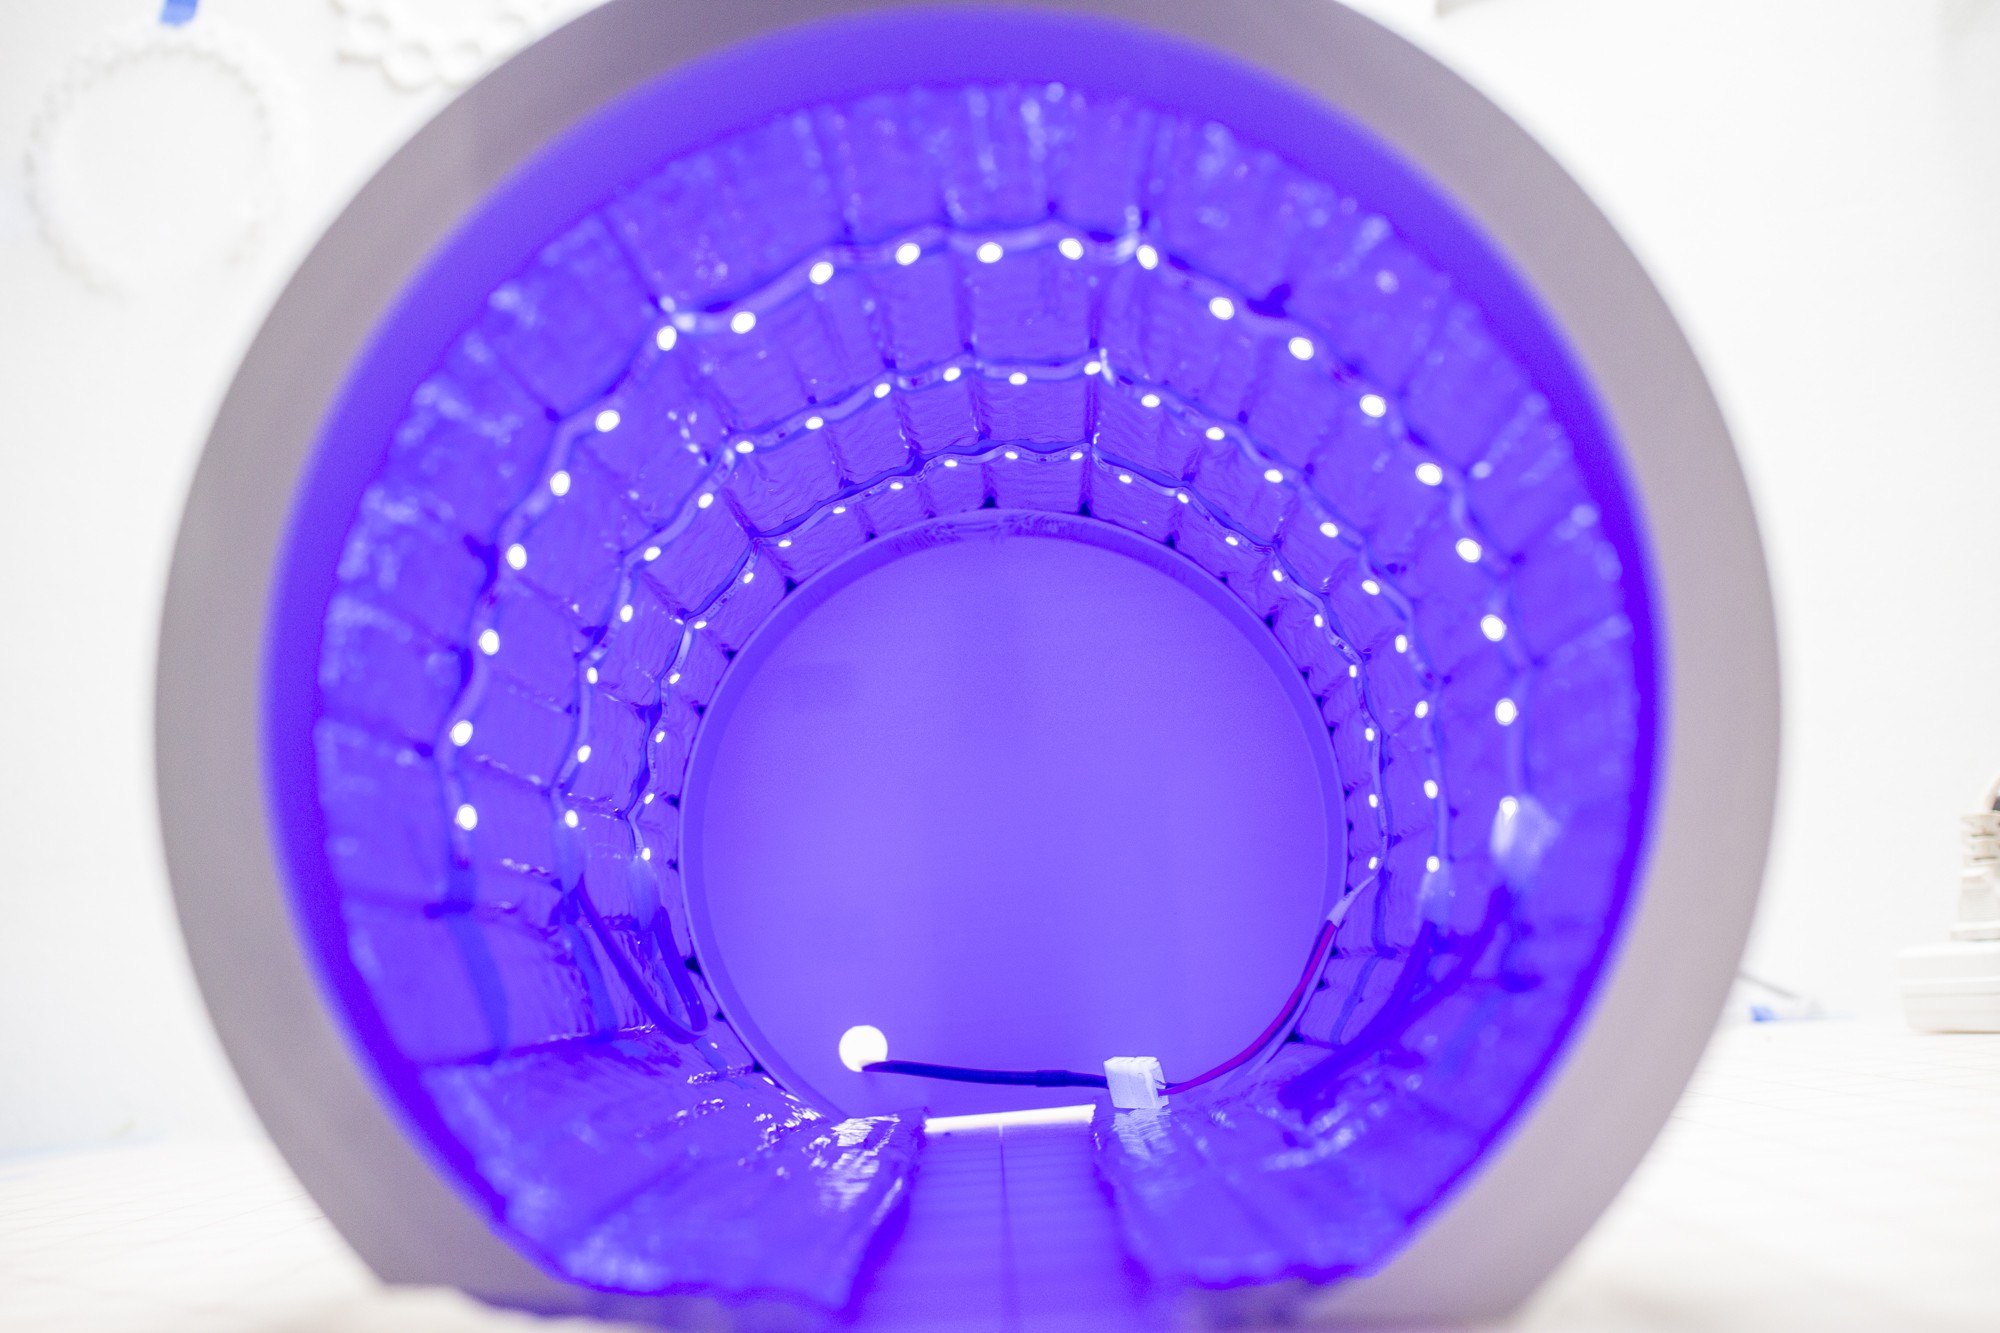
The design was created in Autodesk Fusion 360 and printed on a Prusa printer. Once the parts come off the machine, I measured how long of a piece of foil would be needed, and how many LEDs and would fit in a compact oven - this part is super customizable - have fun with it and scale it to the size that you need! (But you may need a bigger battery if you go big)
Collapsible construction and adding UV LED Strips
This video demonstrates the design and construction of the UV lamp, but not the wiring. For this version, the lights are wired in series, not parallel like the bag lamp. This might result in a voltage drop in a longer length of LED strip, but since this is so small, I didn't detect any dimming.
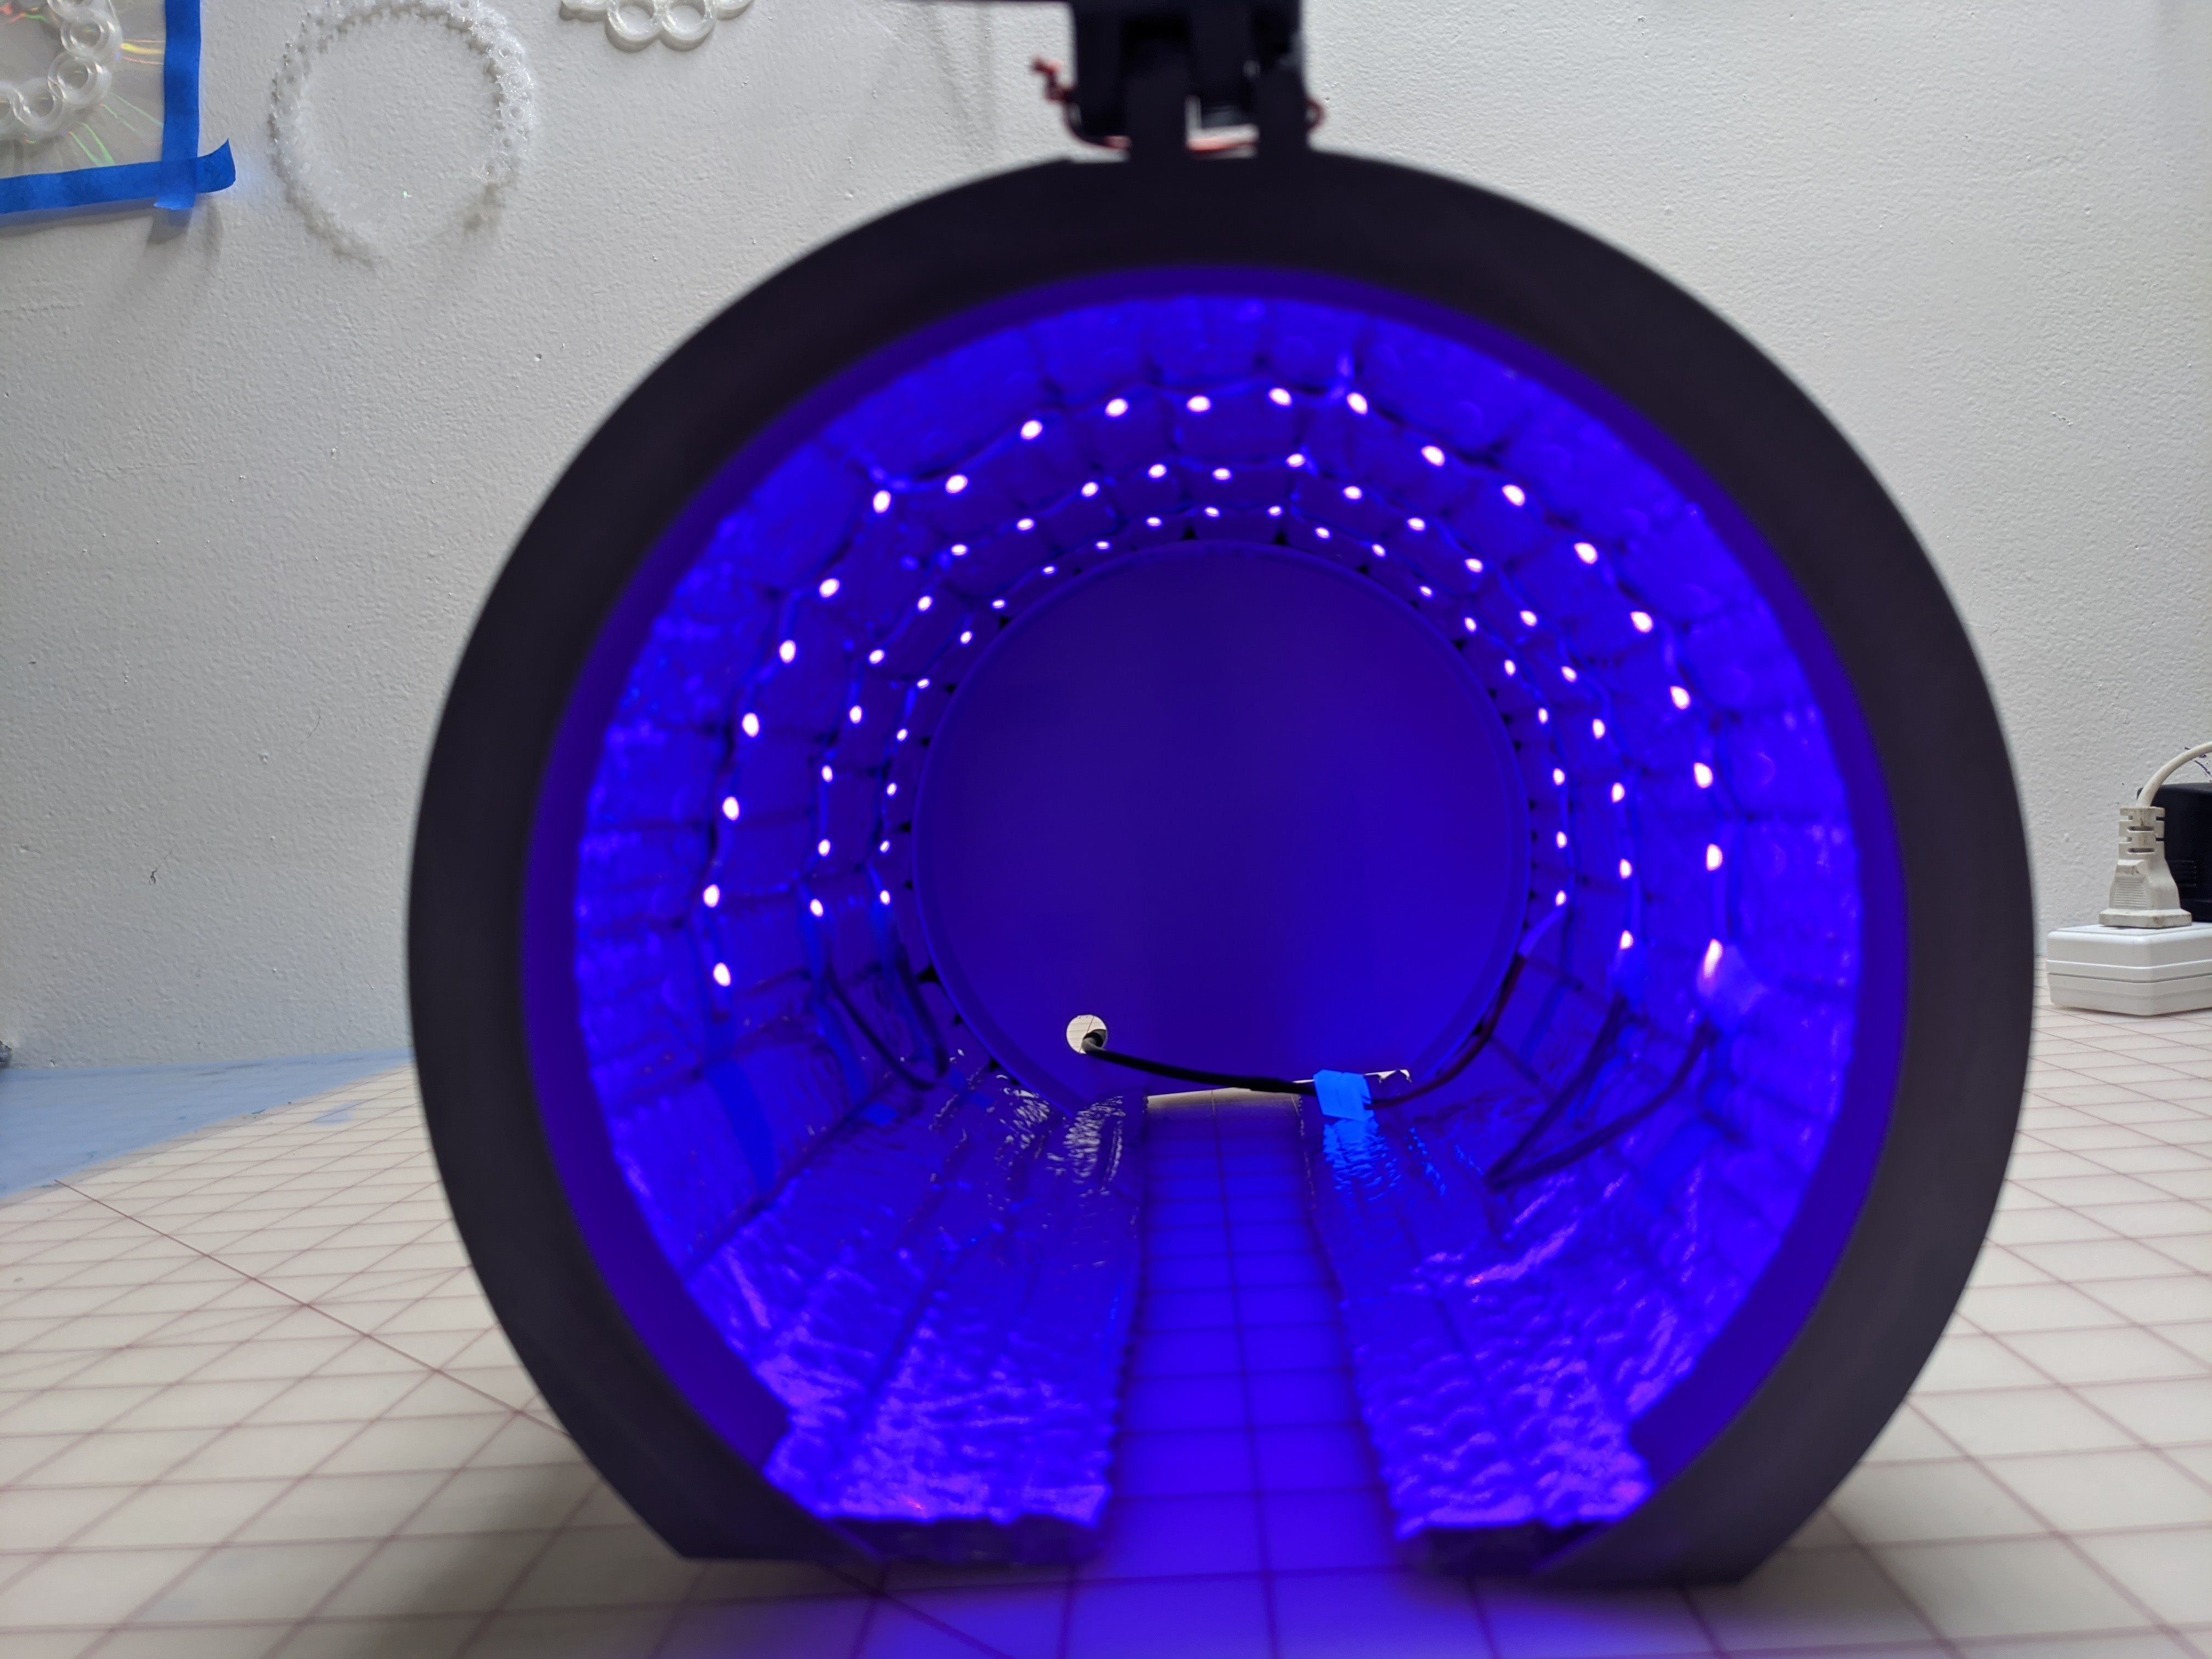
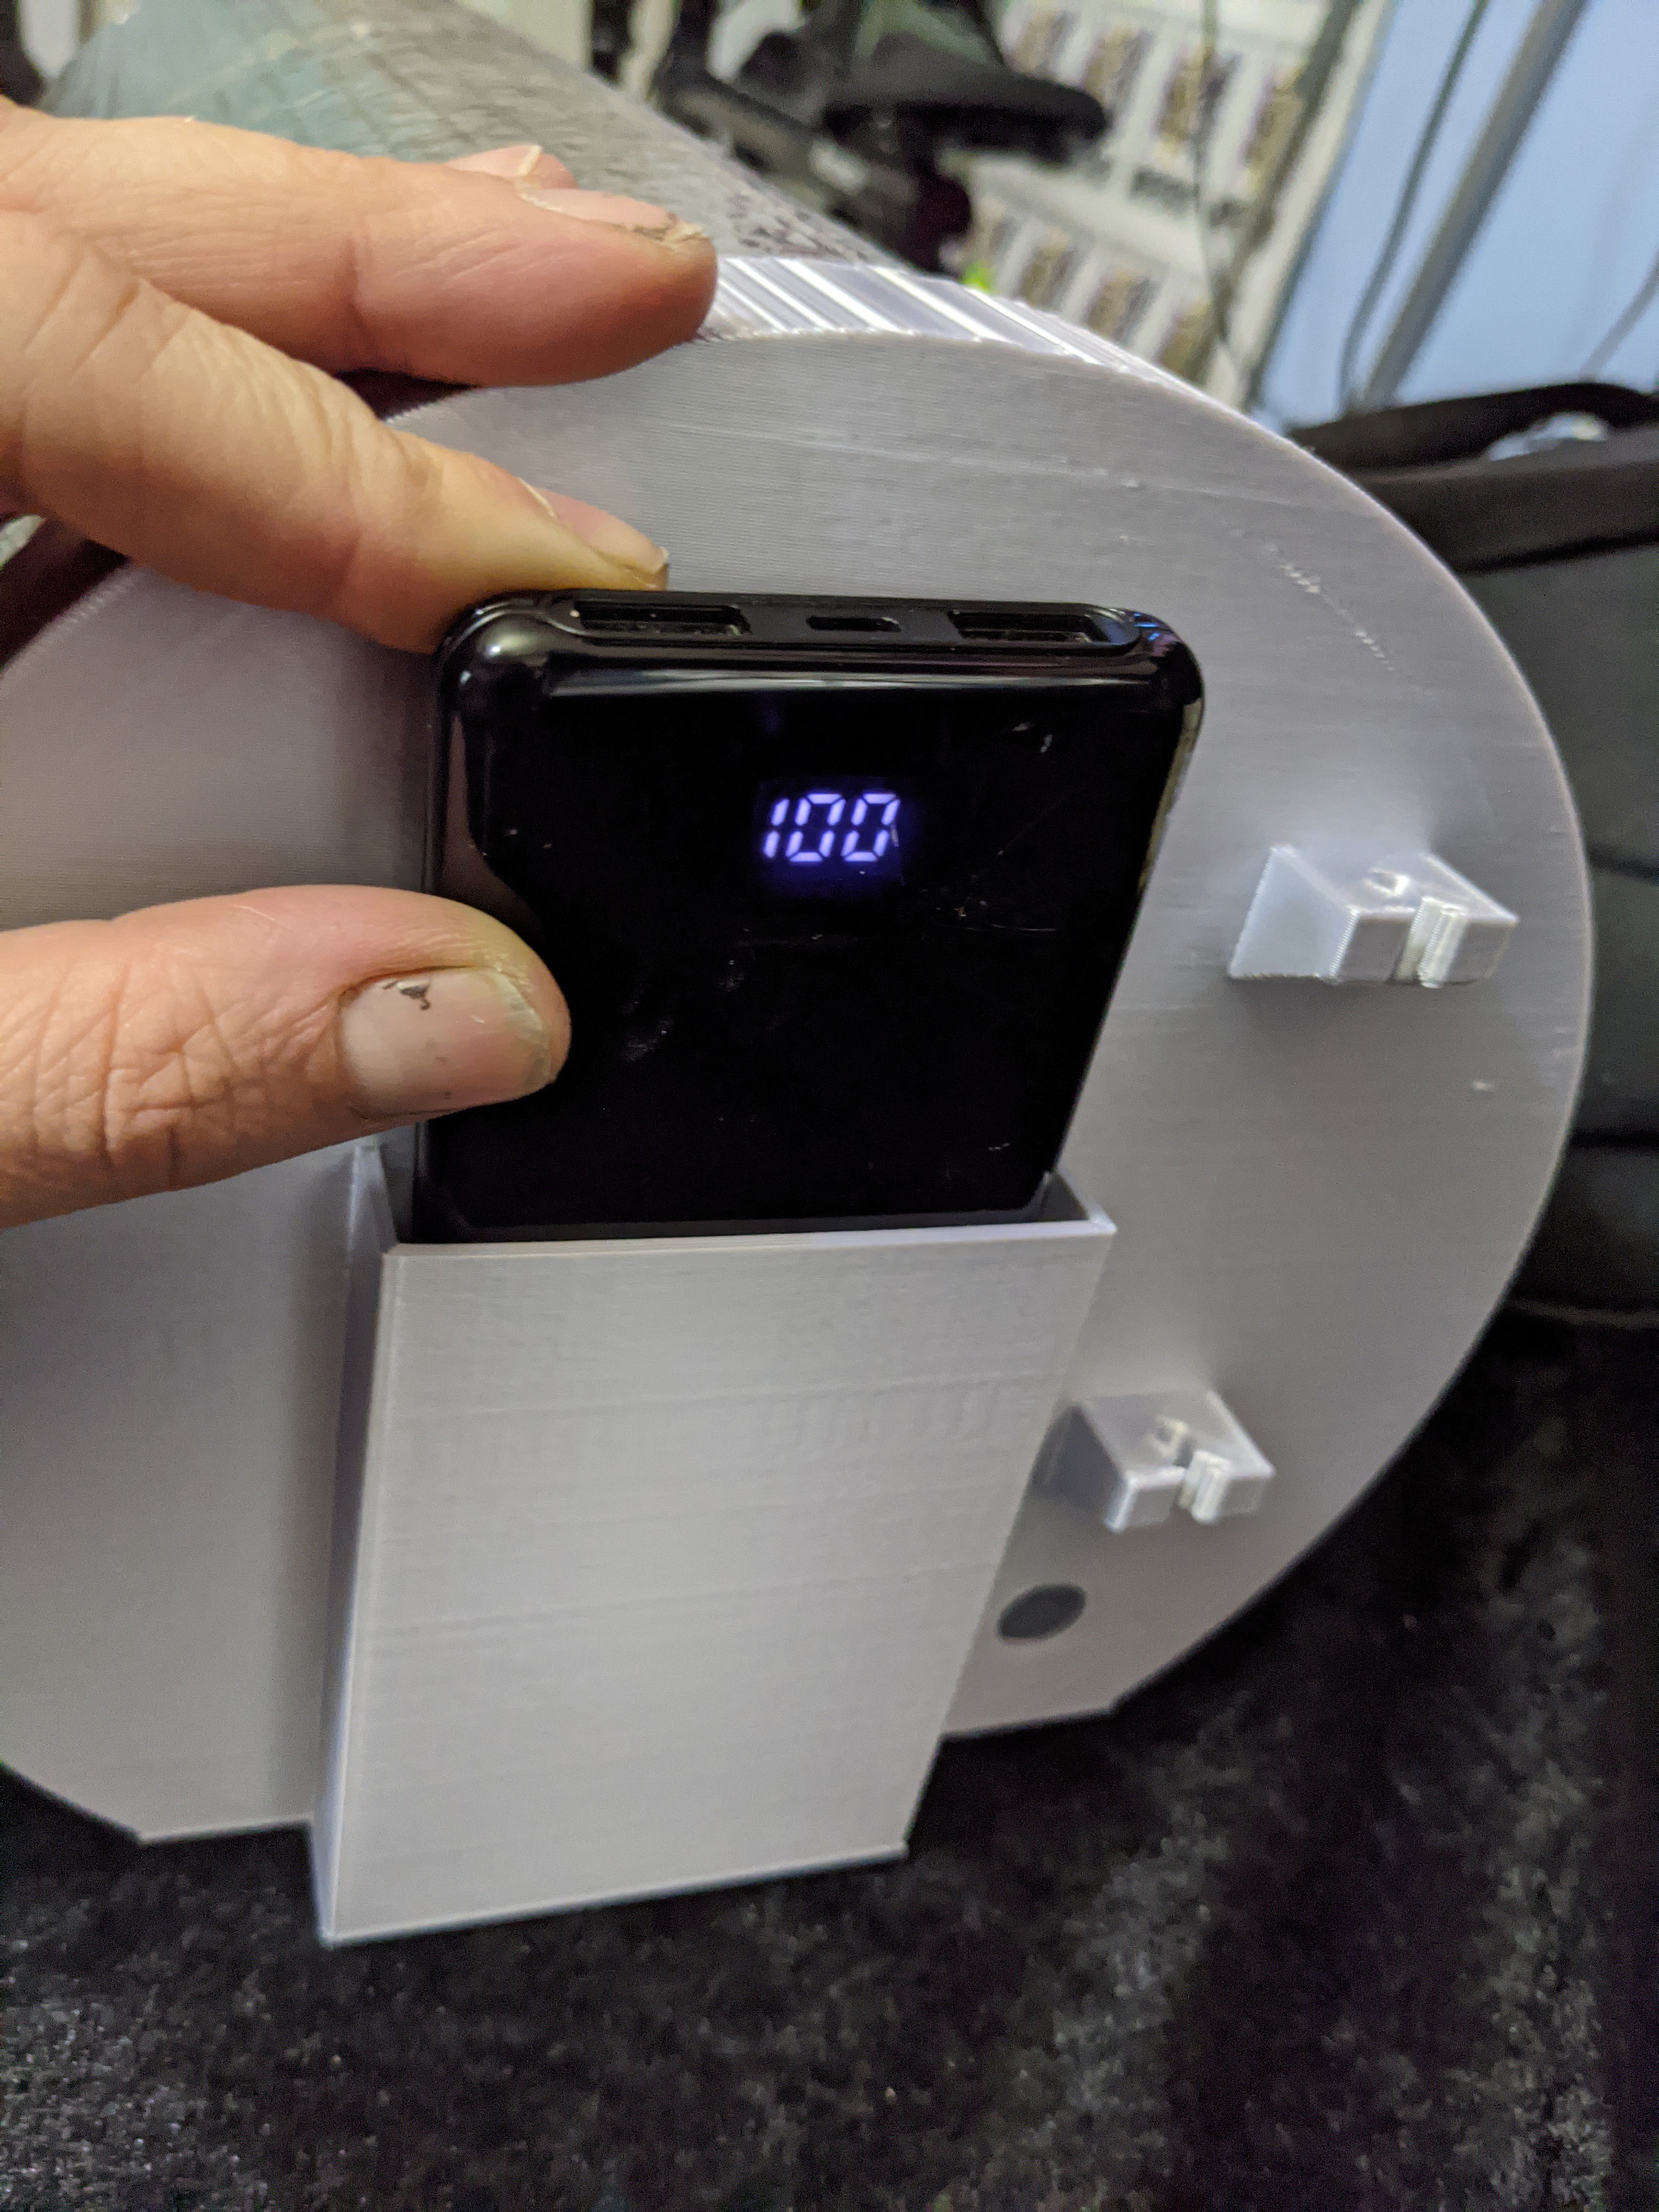
Testing run-time
Here'a a view of the lamp with the door open, I let it run for 30 minutes and the battery only dropped 15% of it's charge, and none of the components felt hot to the touch.
A future log post will include testing of this lamp with resin! Thanks for reading - please let me know in the comments if anything could be made clearer and I can make some revisions.
To test the soft grocery bag lamp unit, I 3D printed a box form I've been prototyping for another project that I had been coating with polyester resin in previous iterations..
Here's the part getting coated with UV activated resin with the help of a kitchen basting silicone brush, then going into the curing bag:
After 10 minutes under the lights, I removed the part from the bag.
Material properties observed:
For the first part coated, the resin cured really evenly over 10 minutes with out the bag being manipulated - this is longer than what the resin packaging indicated, but the layer could also have been too thin. (thin layers take longer to cure - depending on the shelf life of your resin)
For the second coated part, I squished the bag so that the top lights that were along the lid of the bag were closer to the resin surface and the resin cured in 4 minutes as indicated on the resin packaging.
This design may need a fan and a carbon filter to help with off-gassing when working with thicker layers of resin.
Check out my last log post to see some conclusions around this style of lamp - thanks for checking out this iteration of the build!
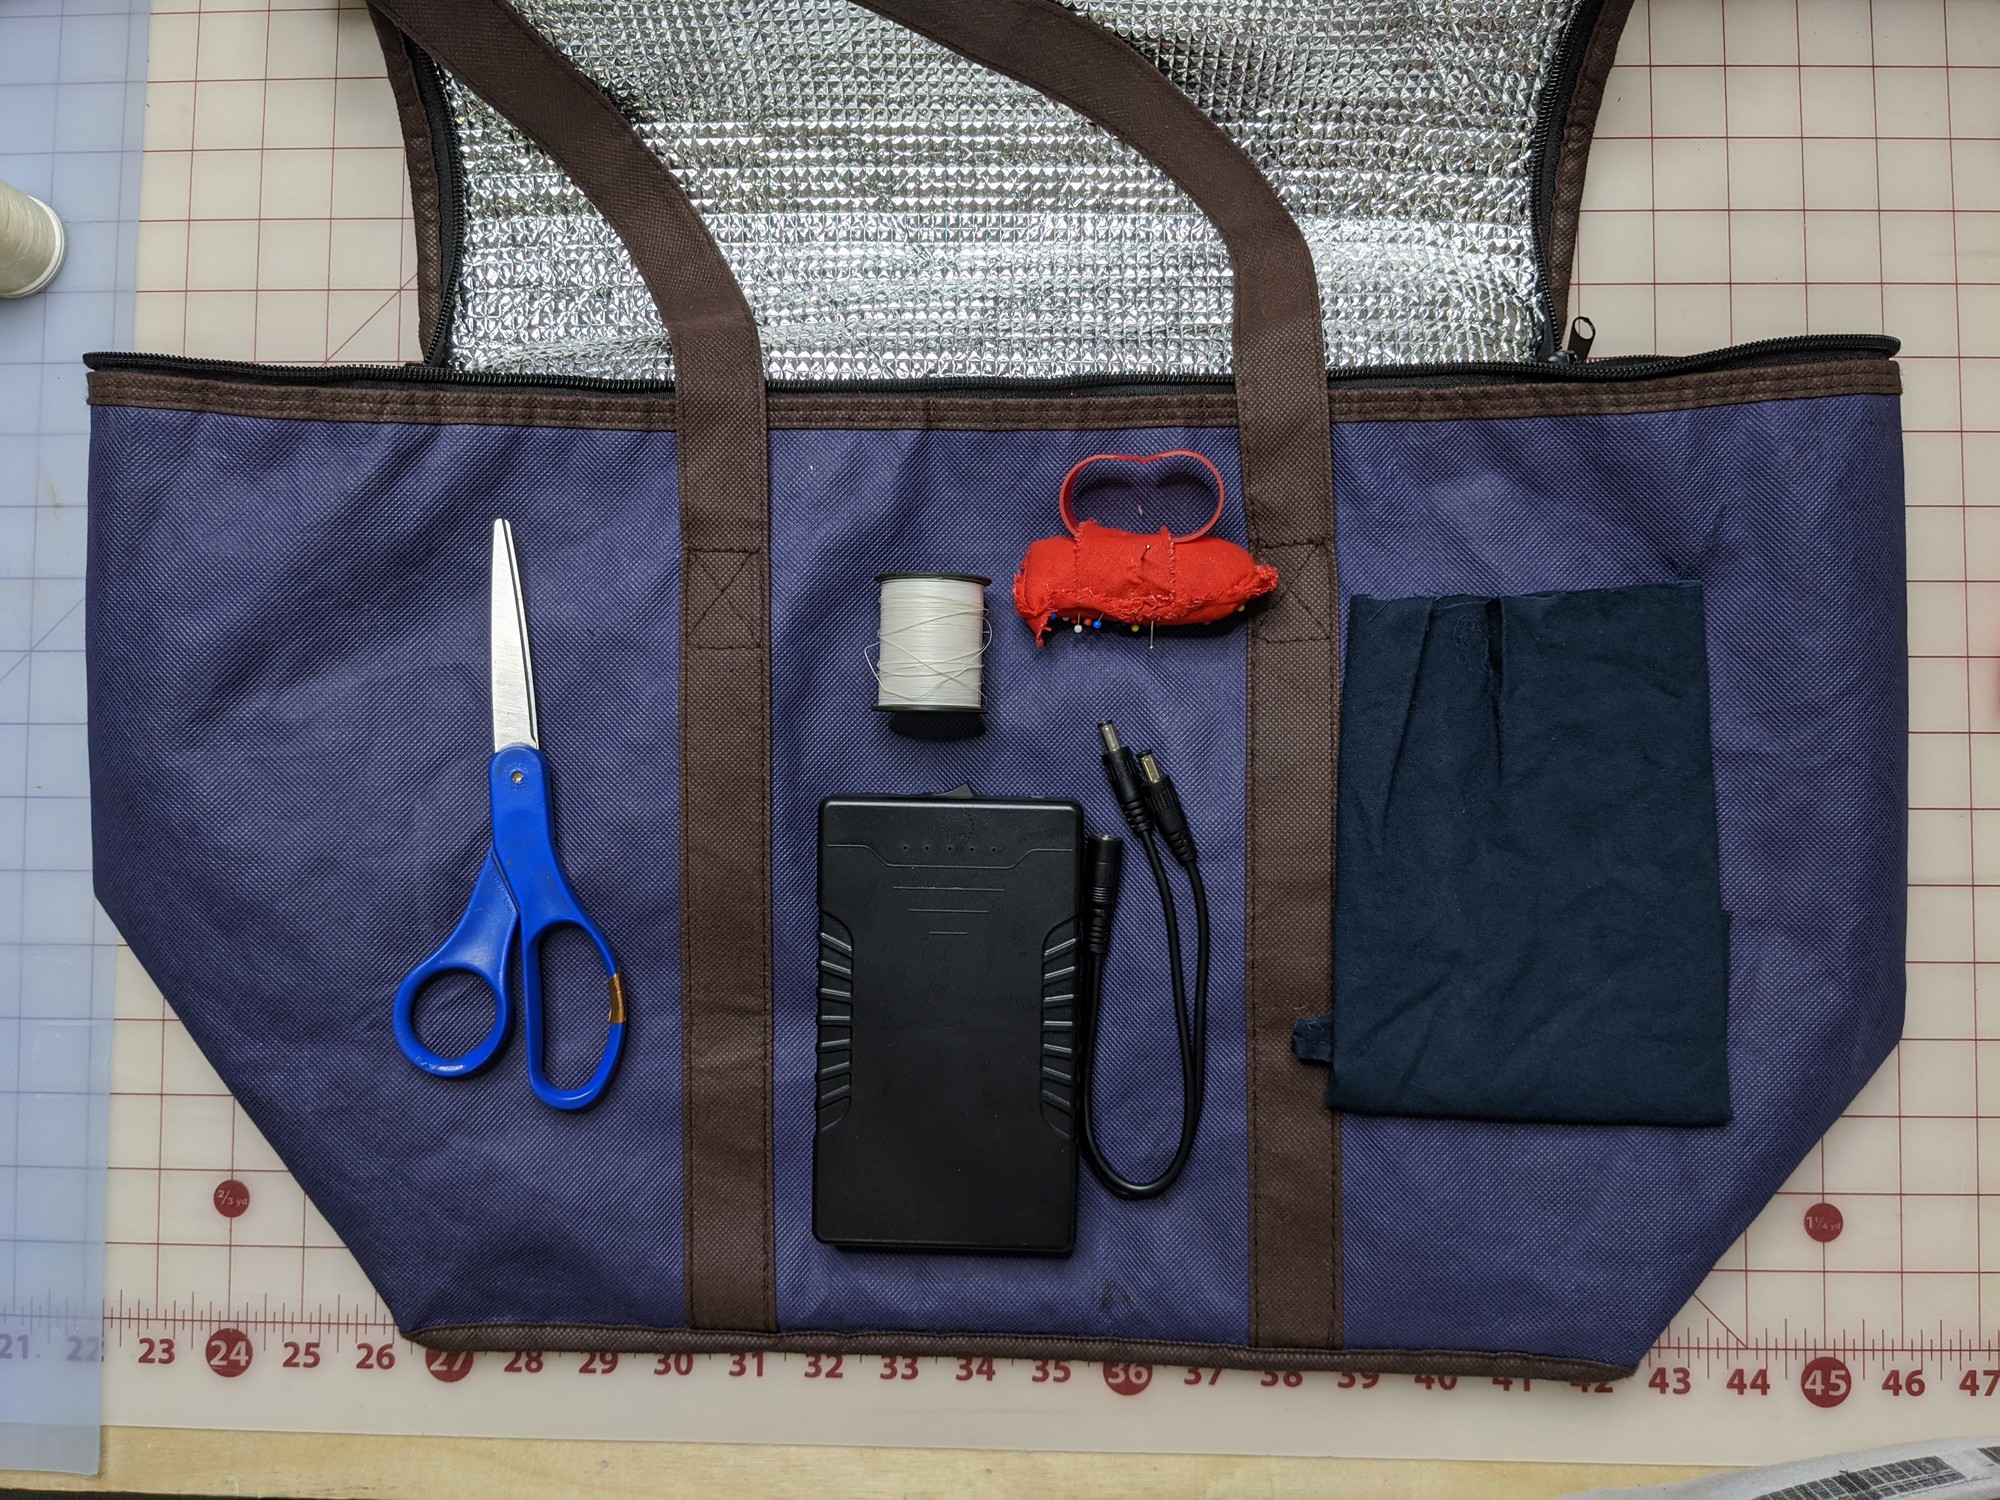
Tools and Materials for this version of a collapsible UV resin oven
Lined + insulated grocery bag
UV LED strips
Masking tape
12V Battery pack
Leather needle + heavy duty thread
Scrap fabric
Soldering iron + solder
Heat shrink
Jumper wires
PCB
Hot glue gun + glue sticks
Creating the power pack
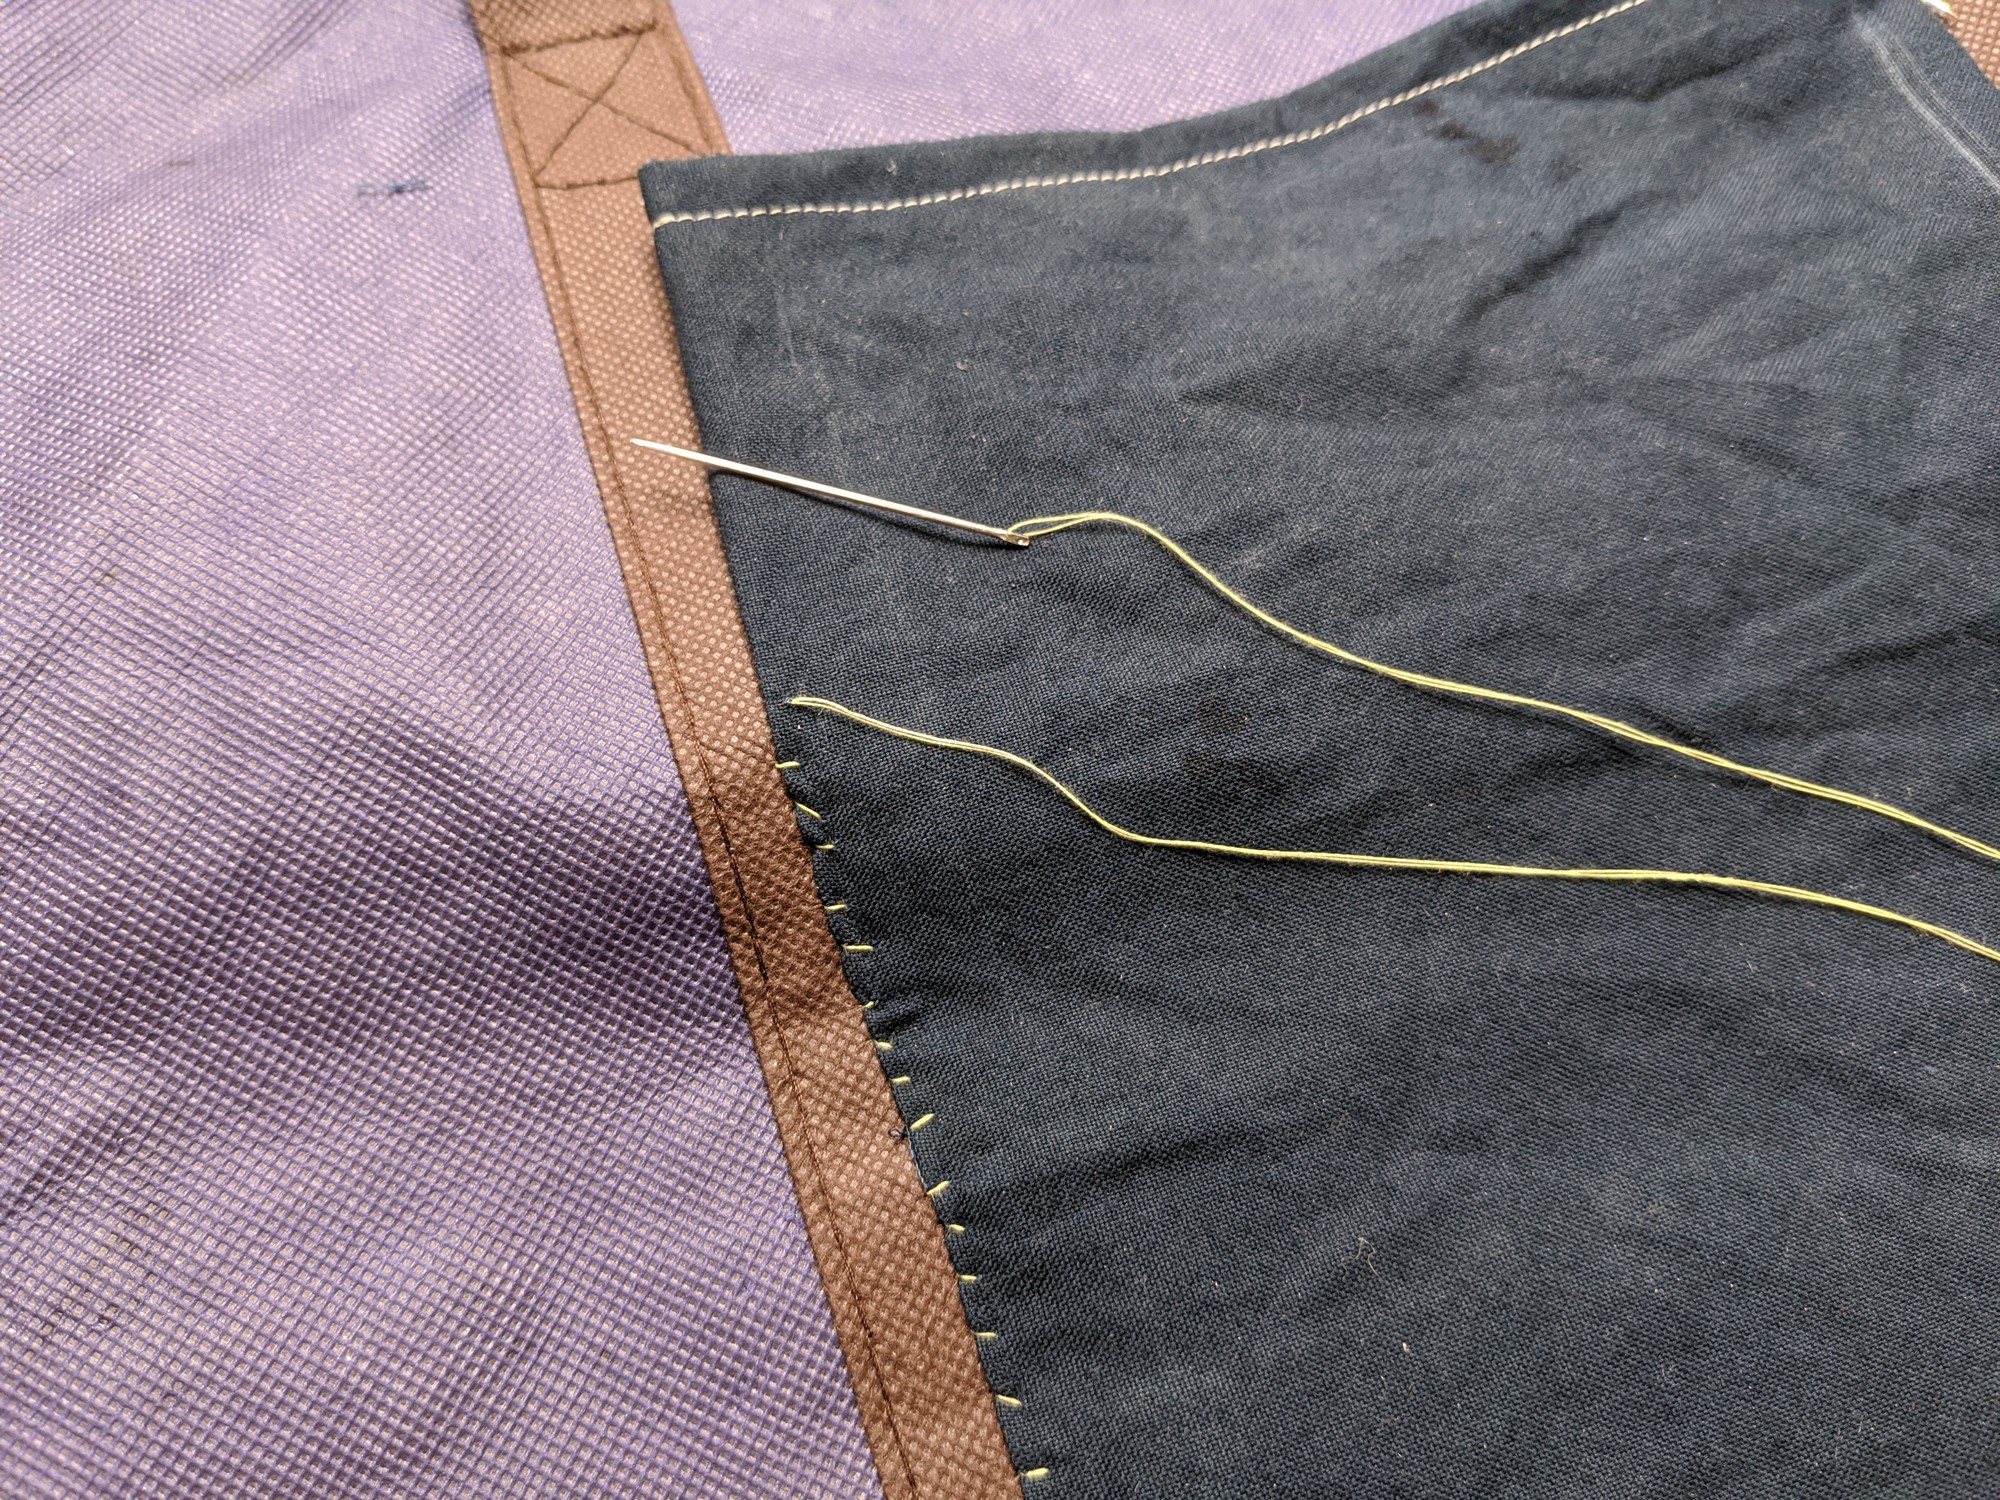
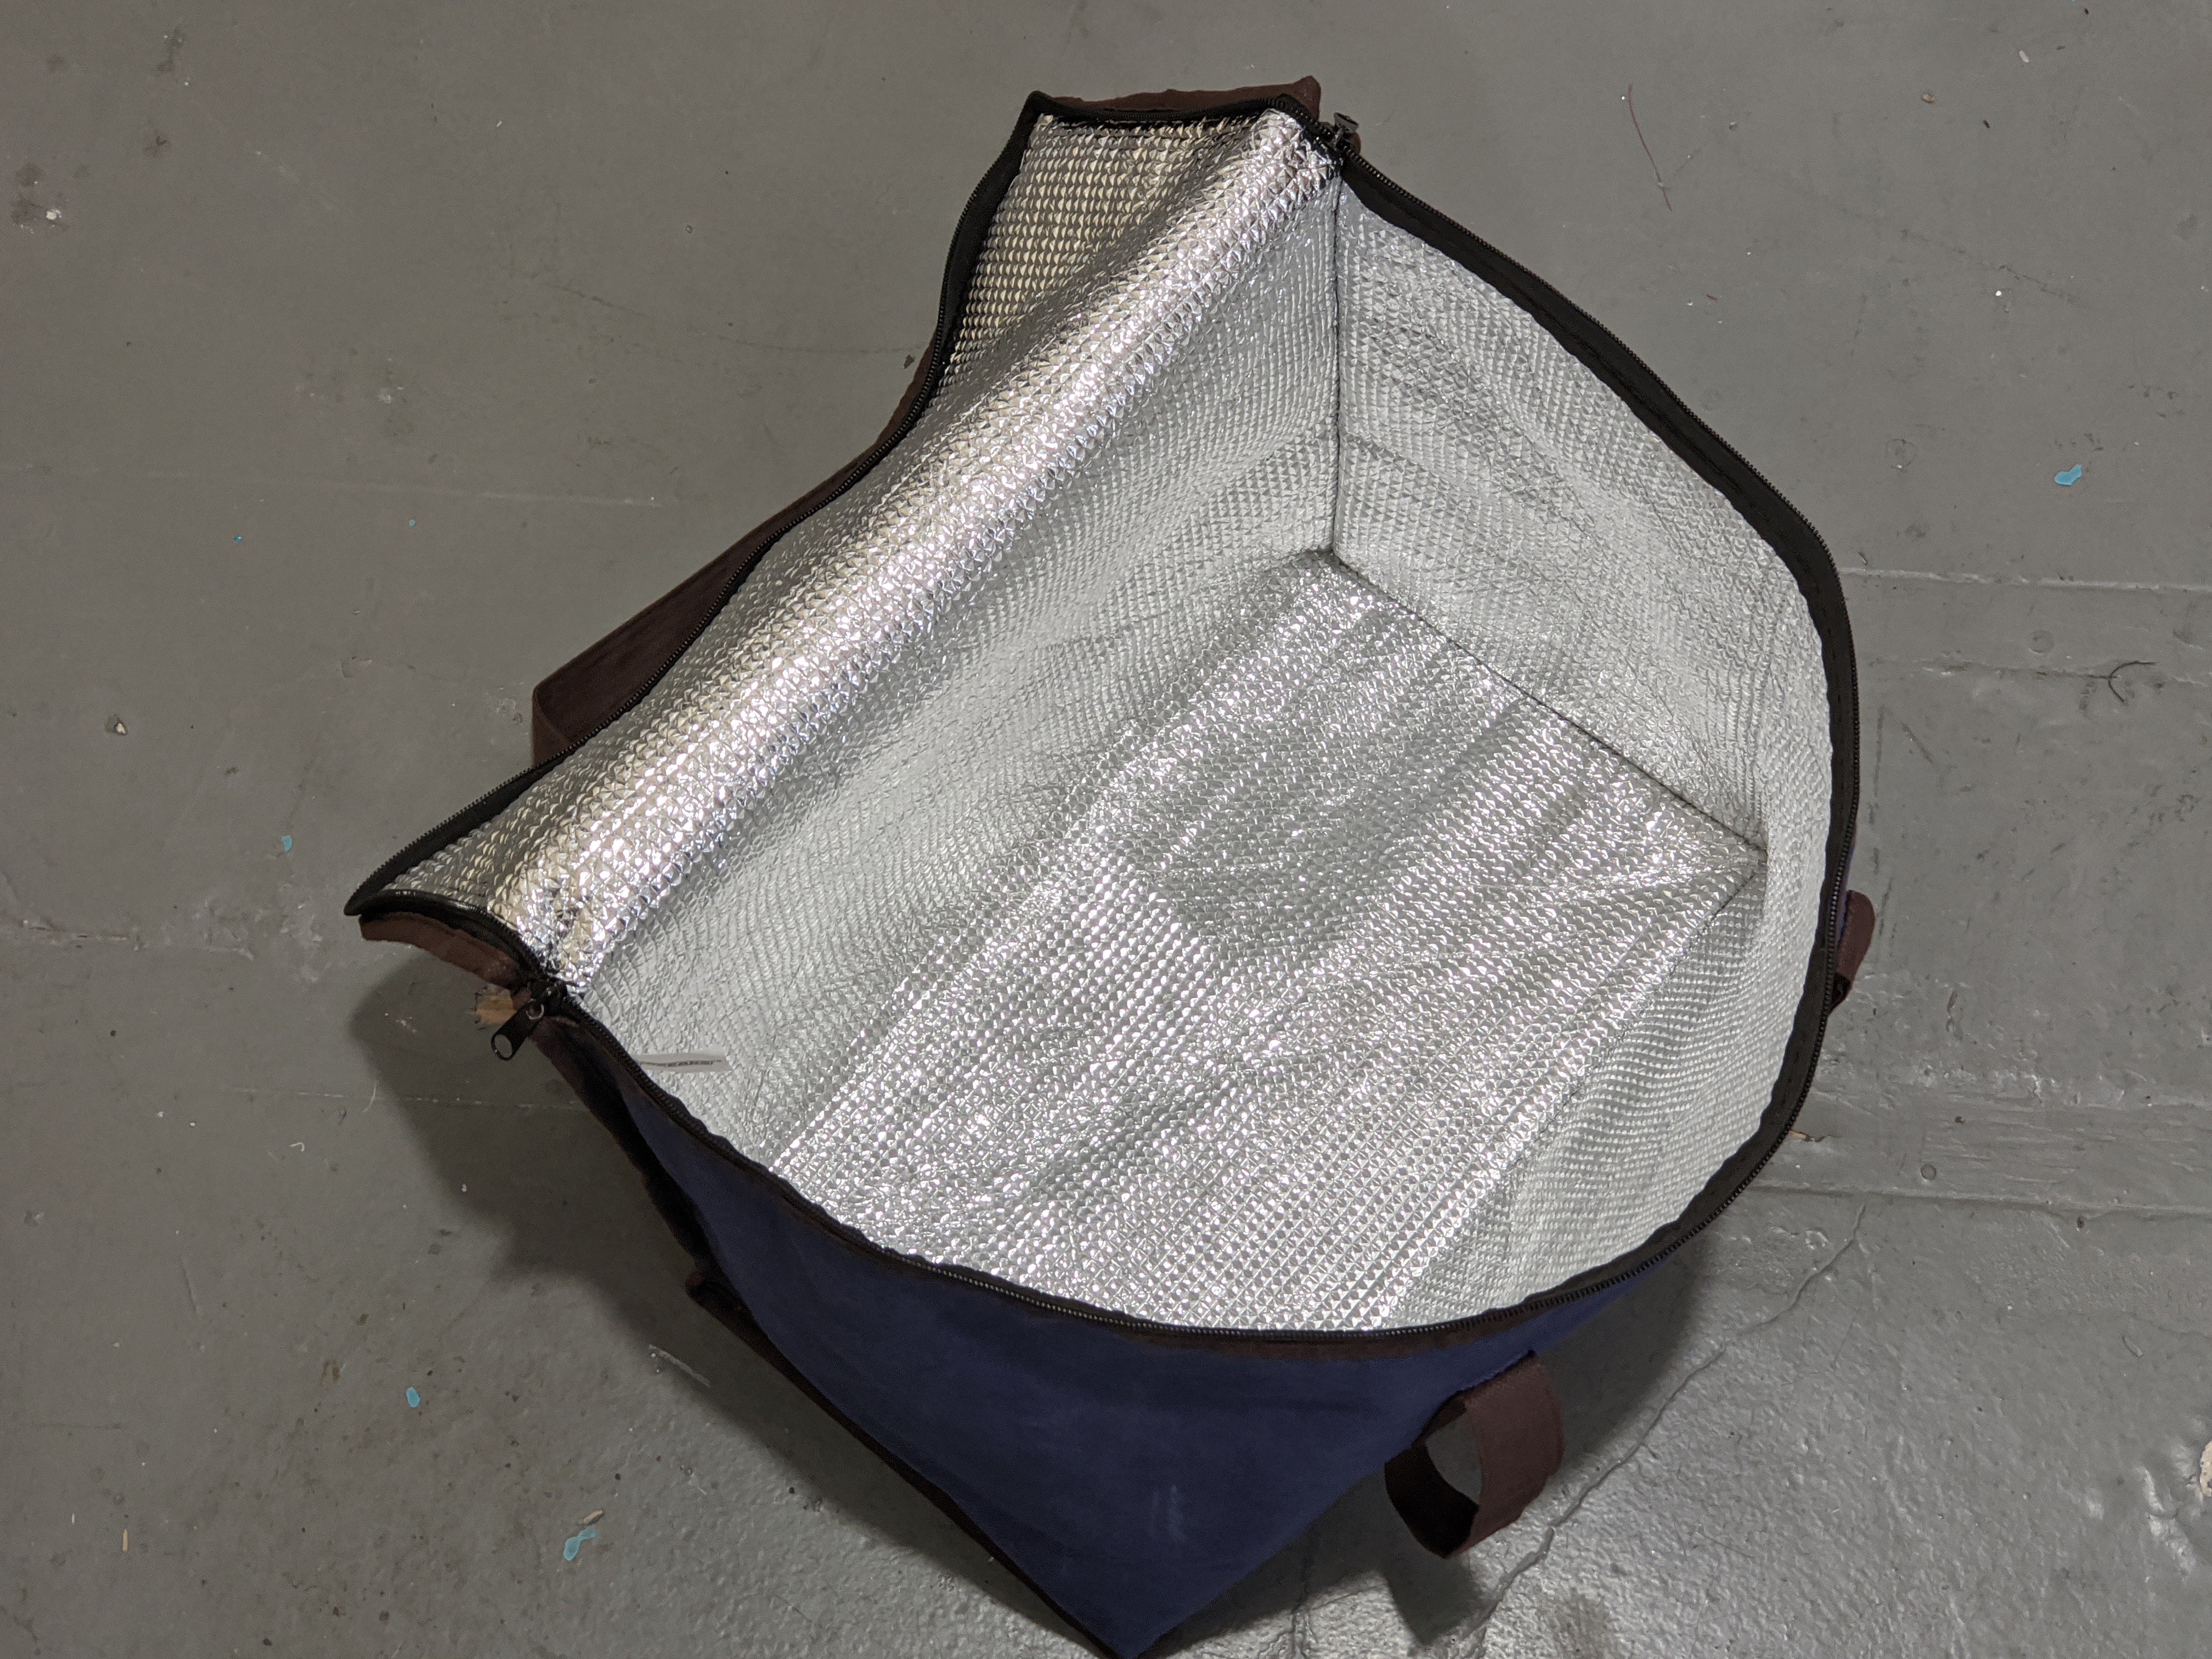
To modify this insulated grocery bag to be a portable resin oven, it needed a pocket to hold the battery pack and tools.
I had some heavy weight denim from an old pair of pants that got the chop and cut off a small piece, hand sewing a pocket between the two strap lines and along the base of the bag.
Using a leather needle helps punch through the weird textile and insulation material with it's razor edges.
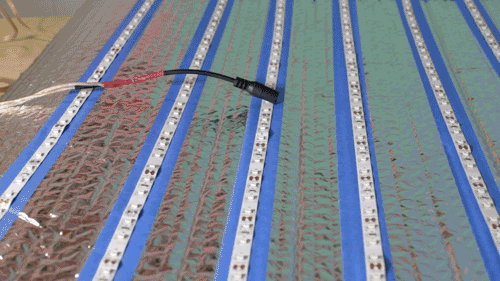
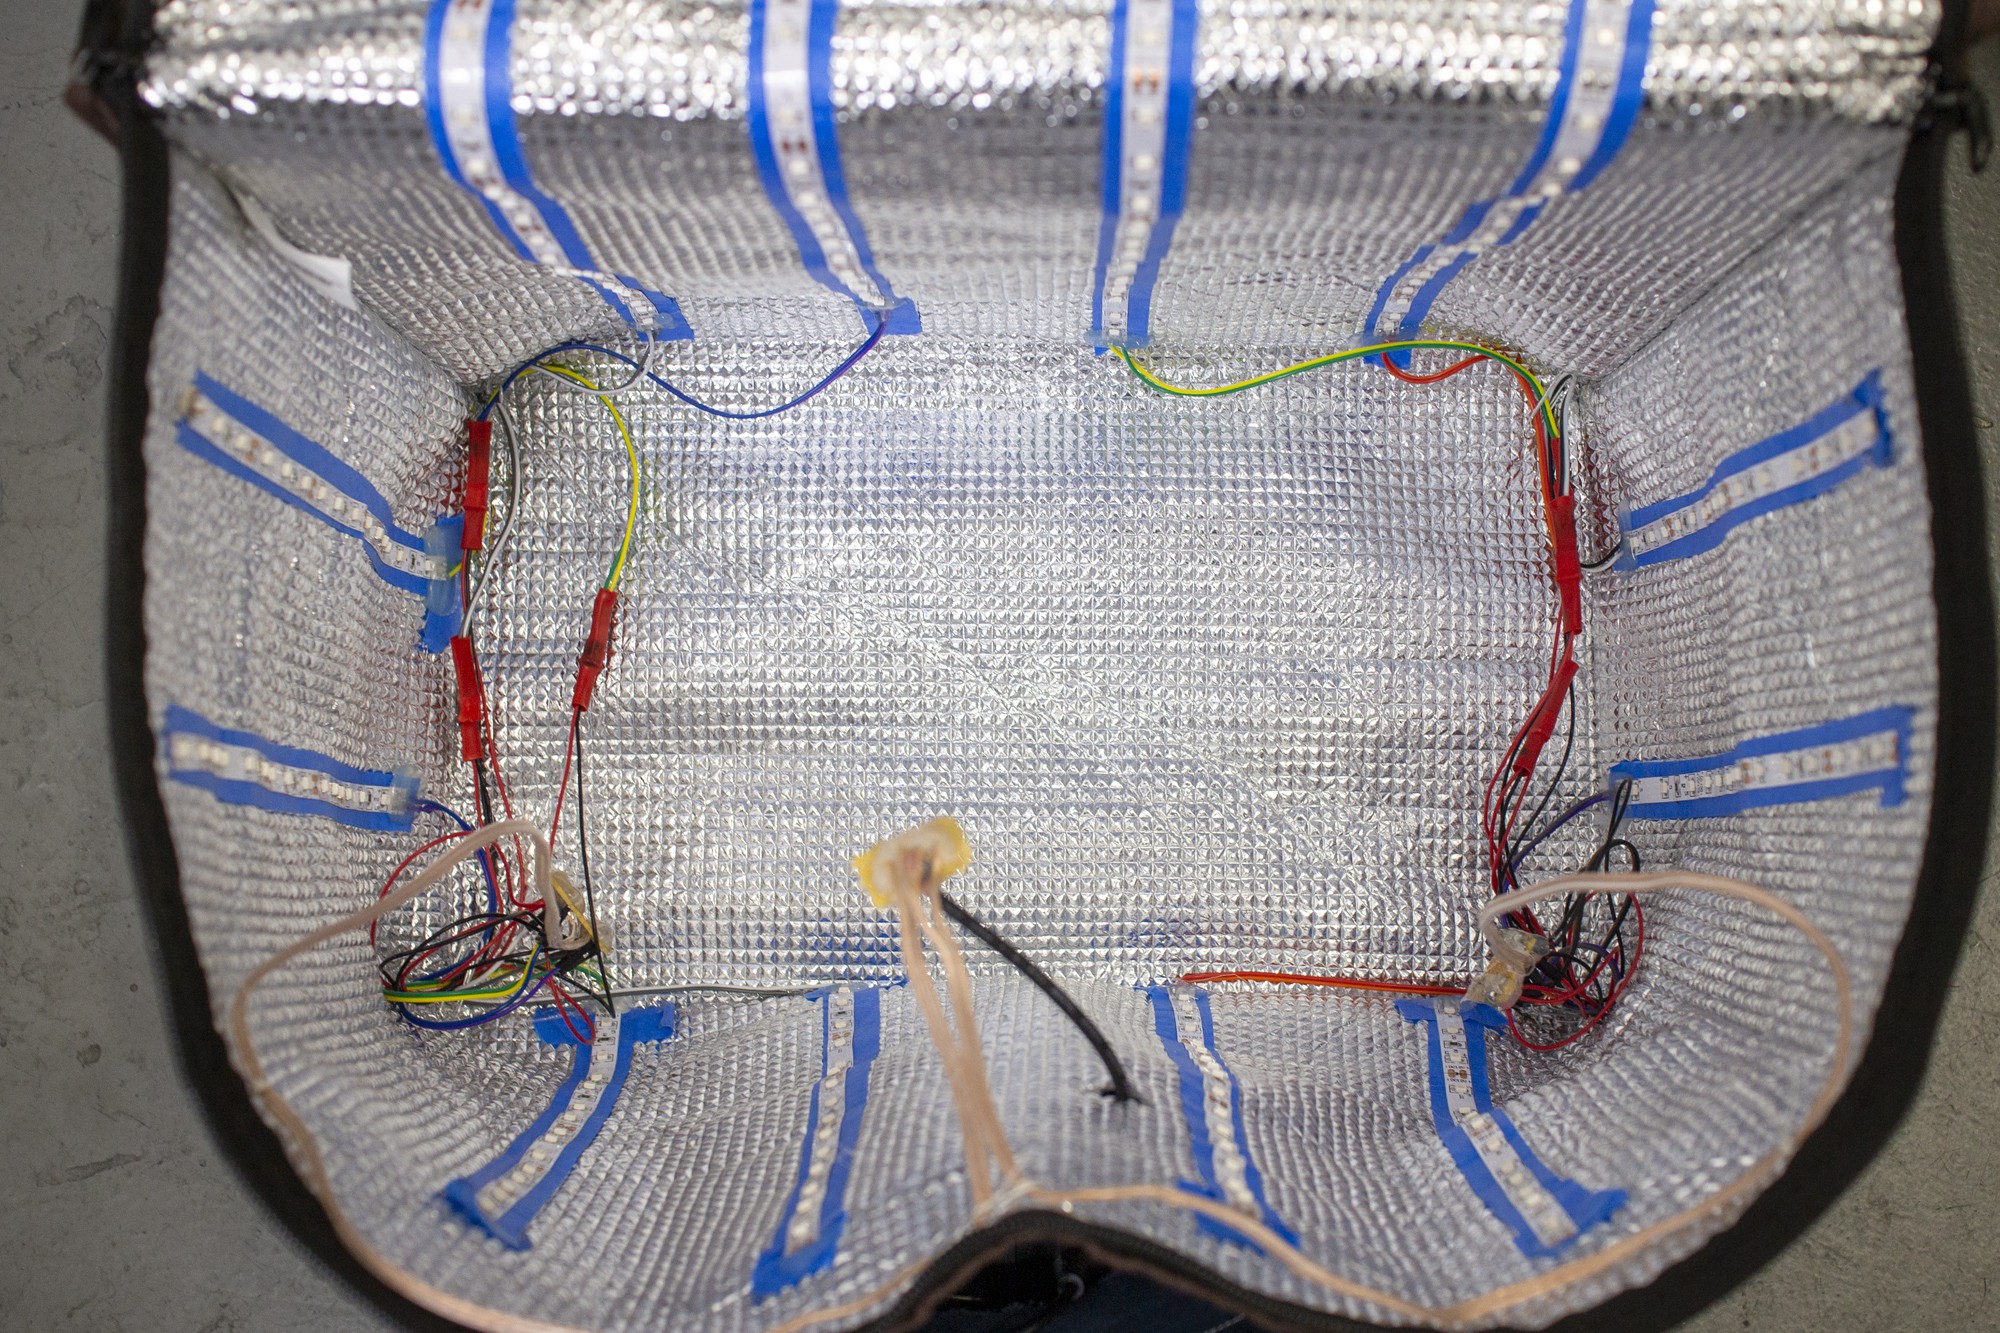
Plumbing the UV LED strips
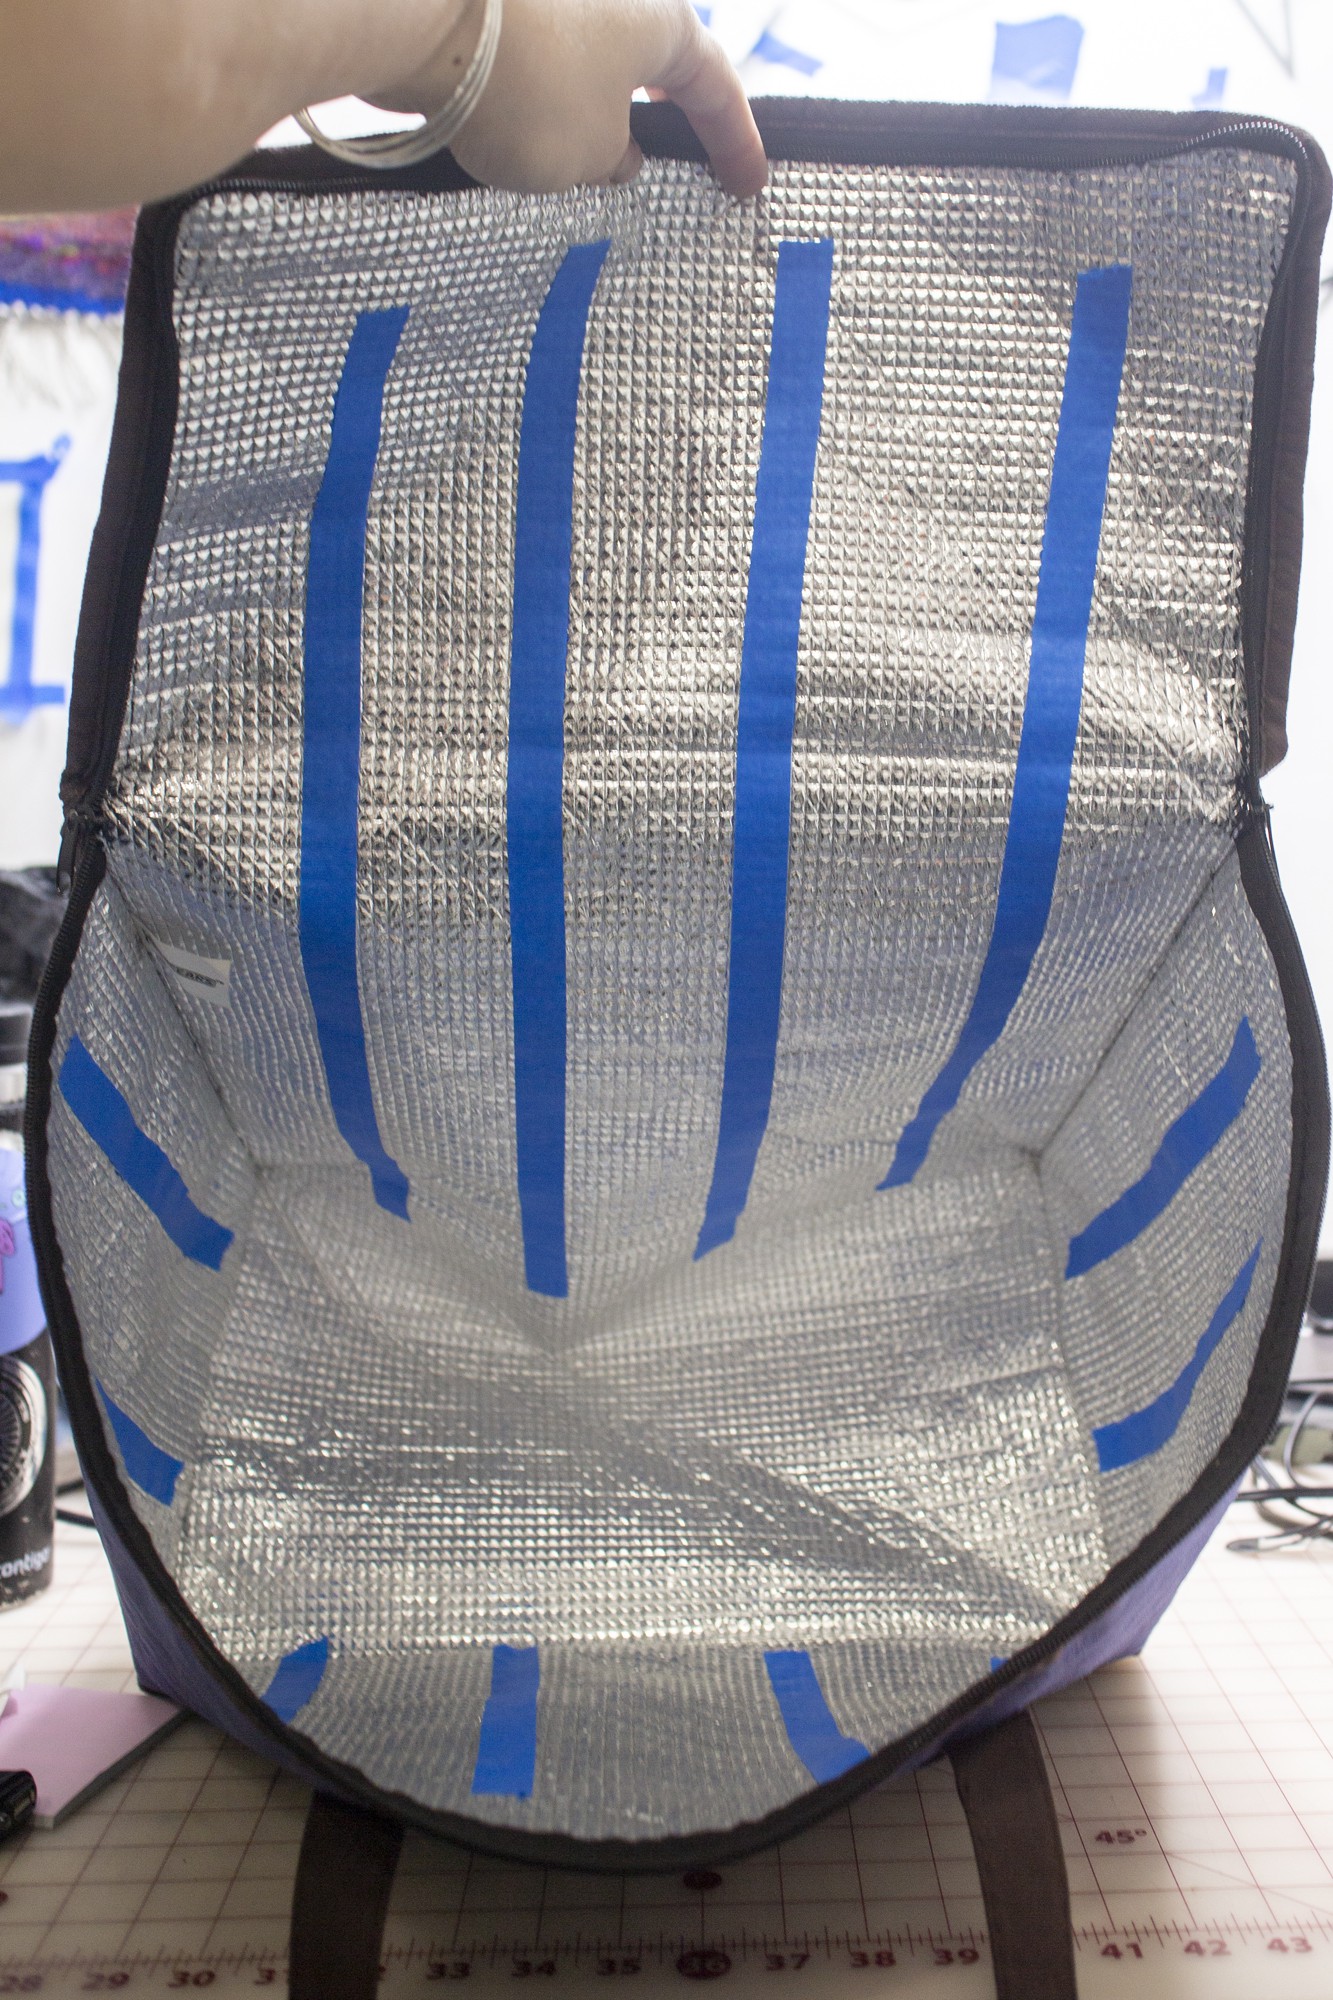
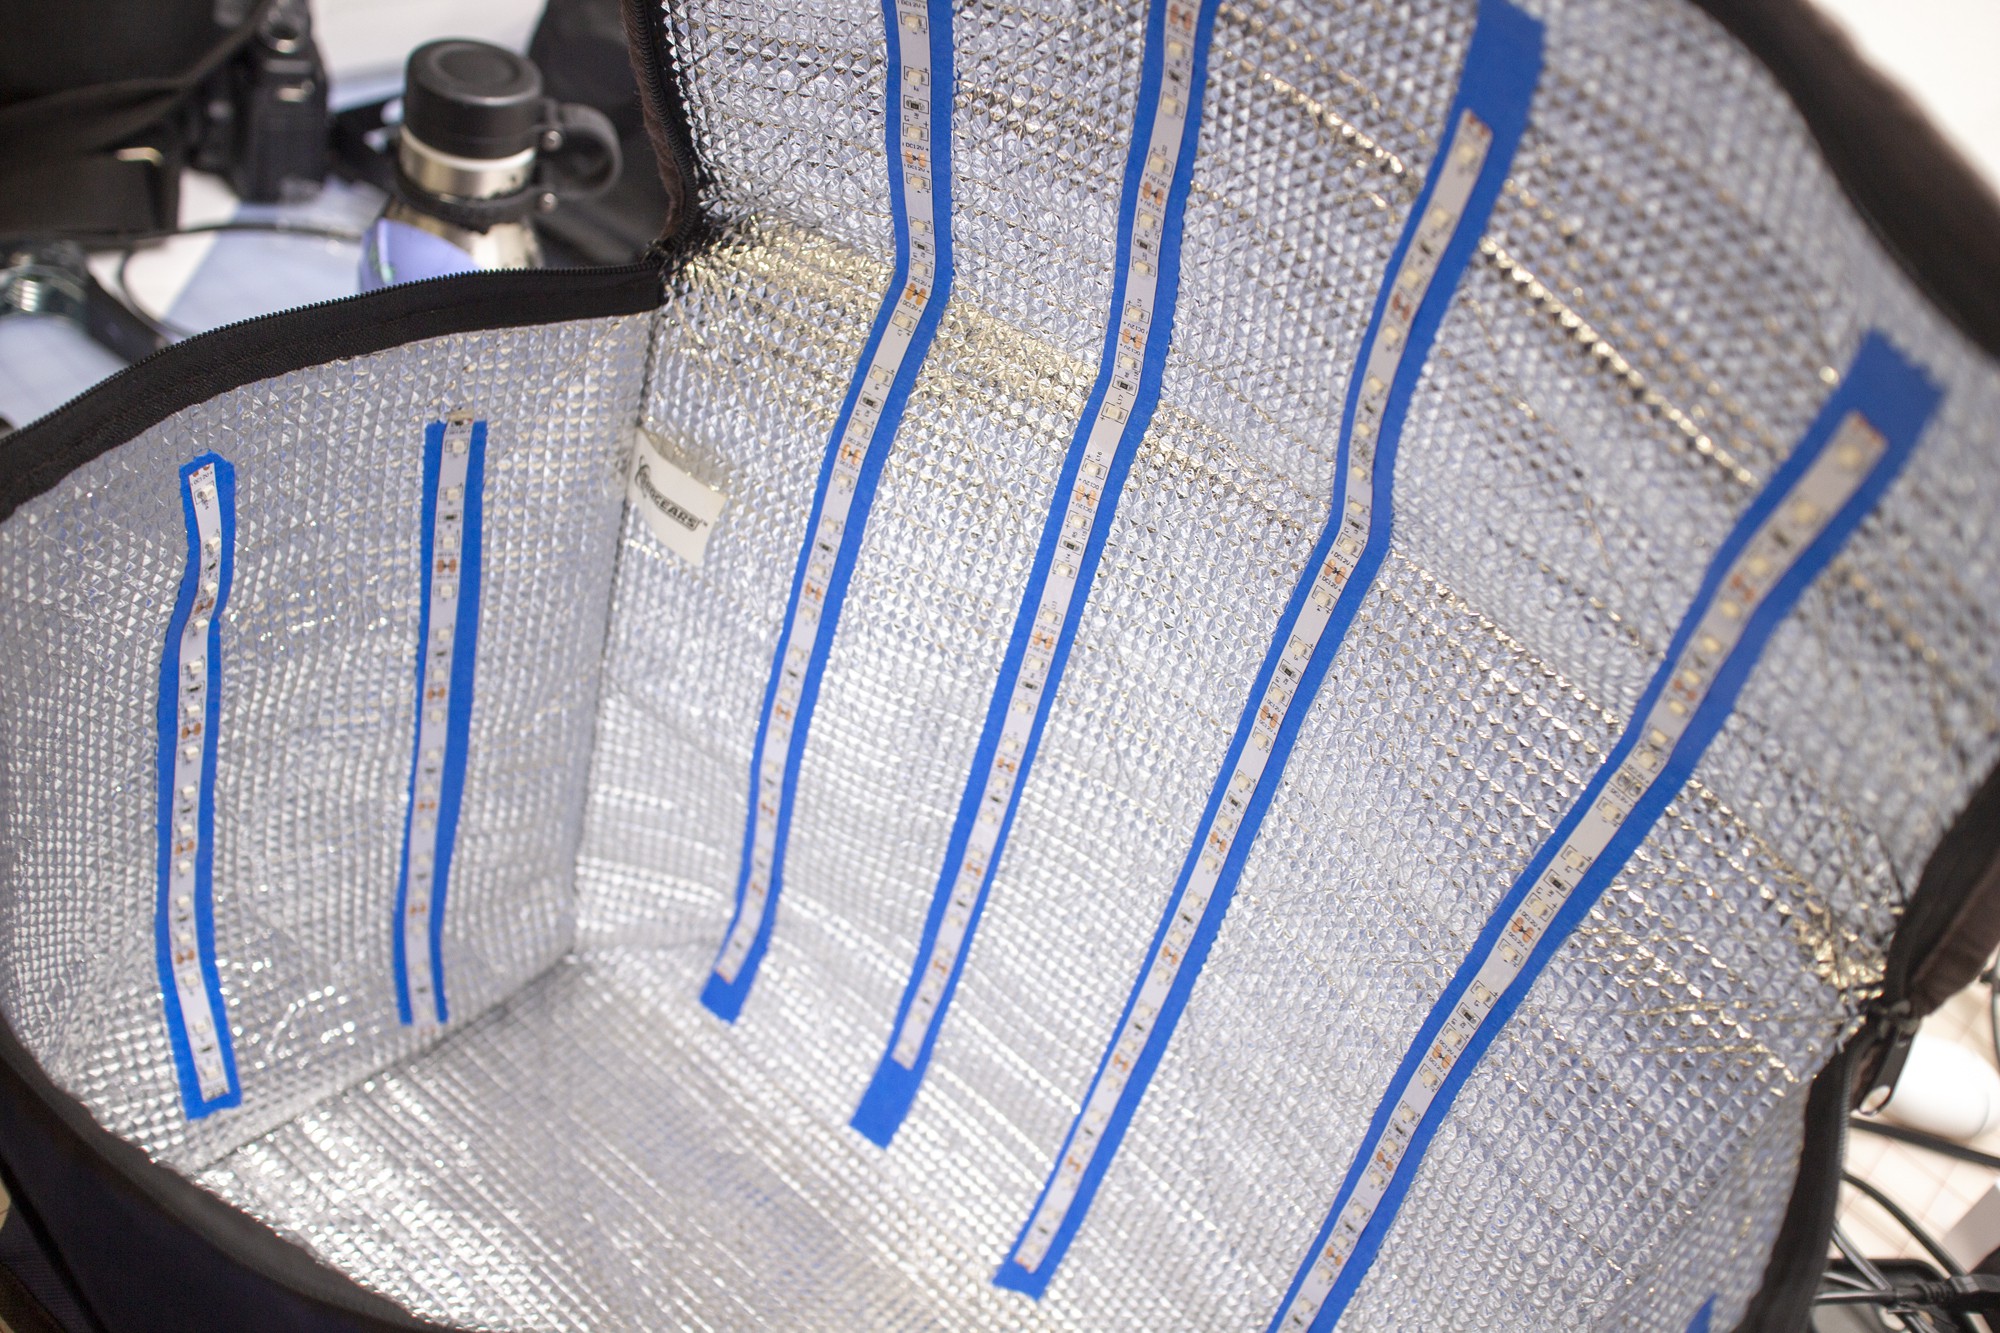
Once the power pocket was in place, I prepped the surface of the insulating mylar with a quick alcohol wipe and laid down blue masking tape along the areas that would hold LED strips.
I squished the LED strips into the tape deeply to make sure the backing adhesive was properly stuck in place.
I also made sure that once the LED strips were secured on the the tape with the adhesive backing that came on the LED strip that the bag would still be completely collapsible.
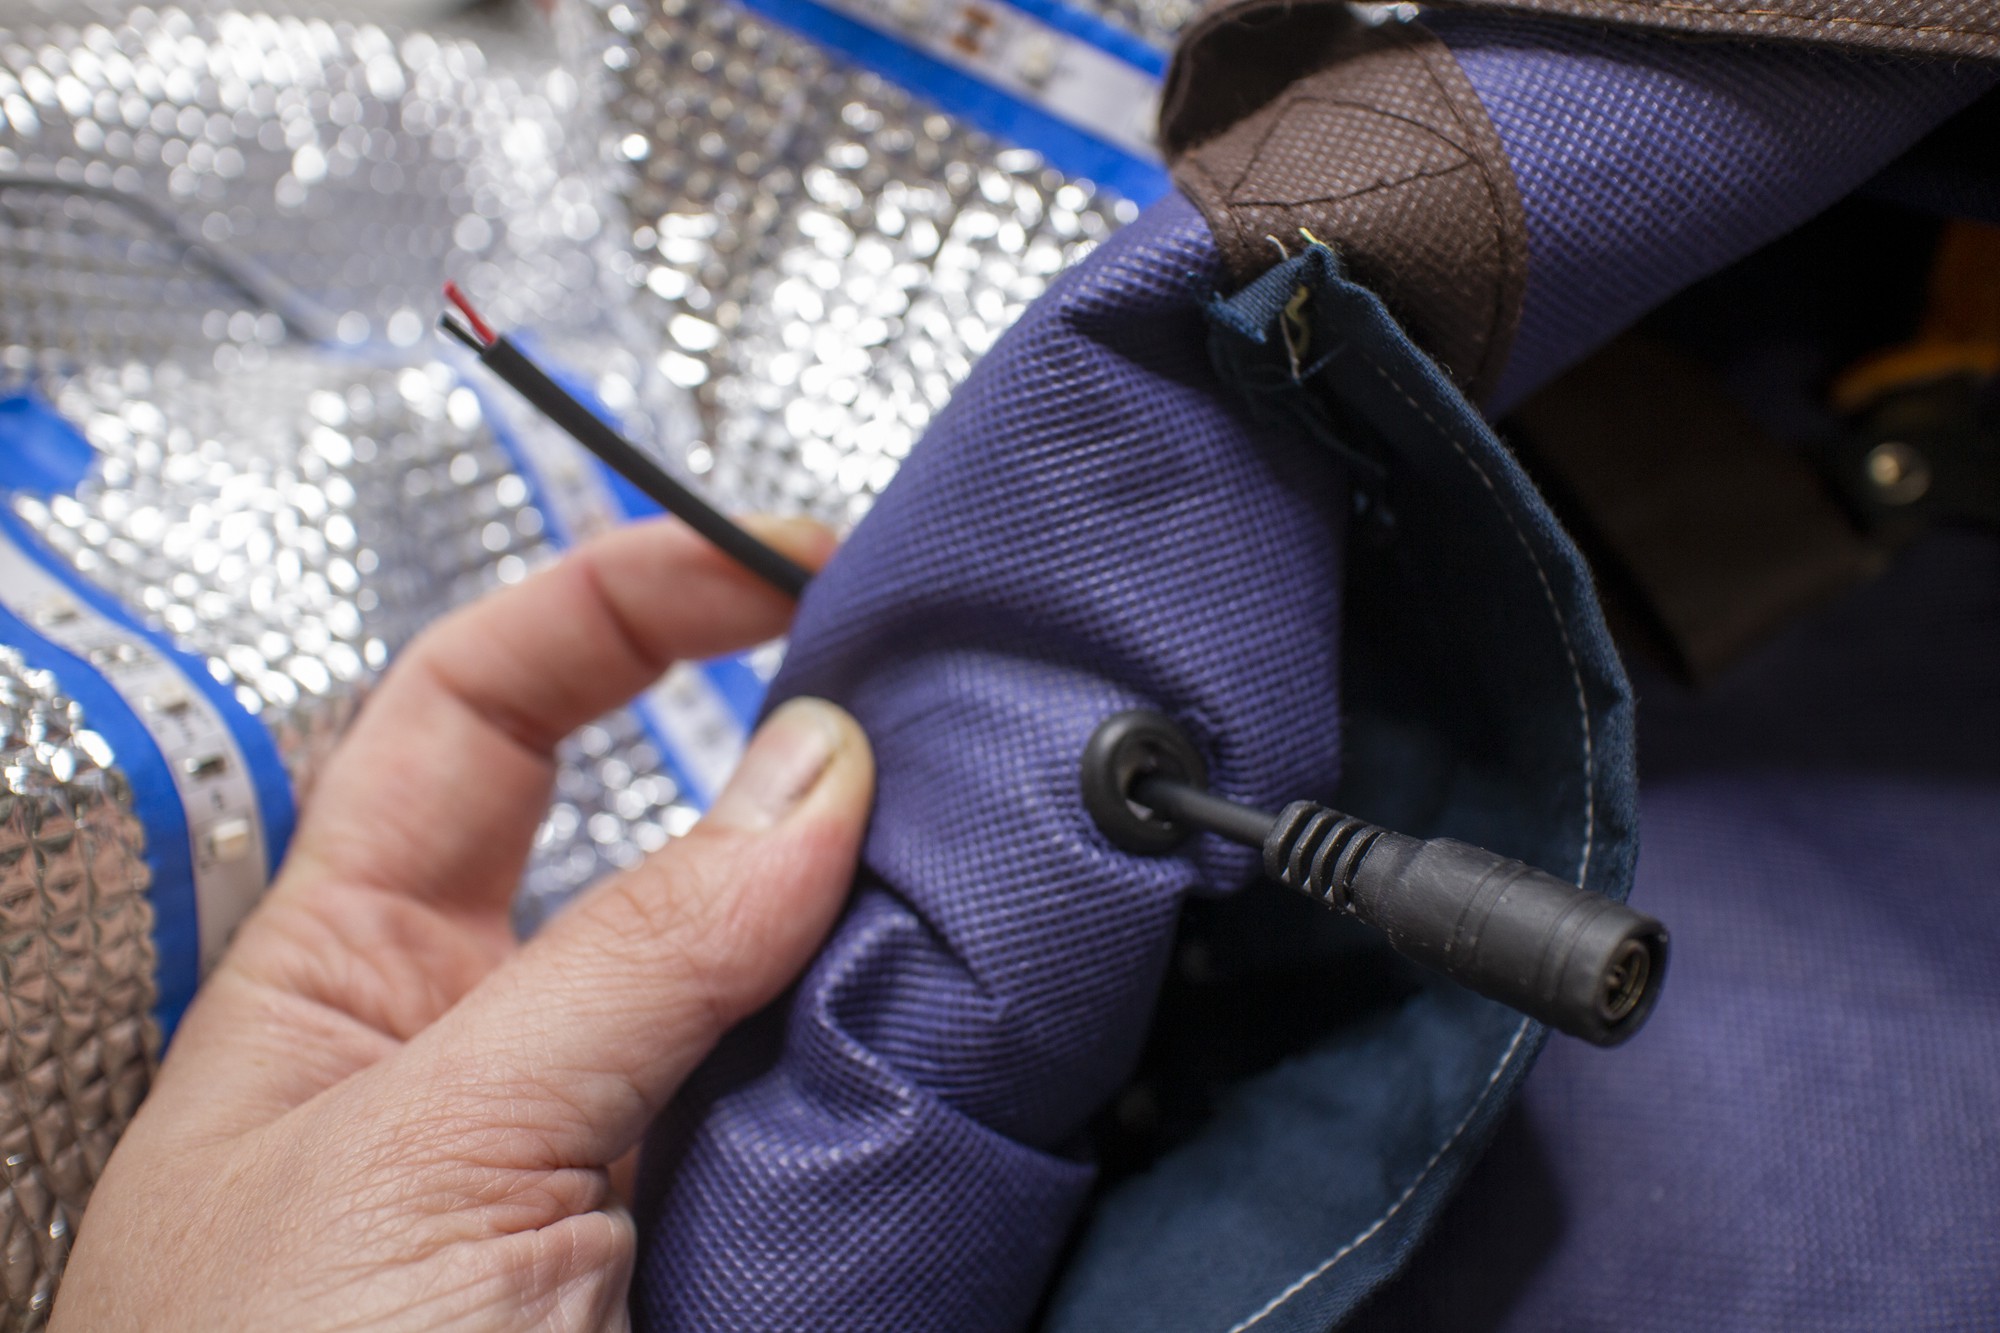
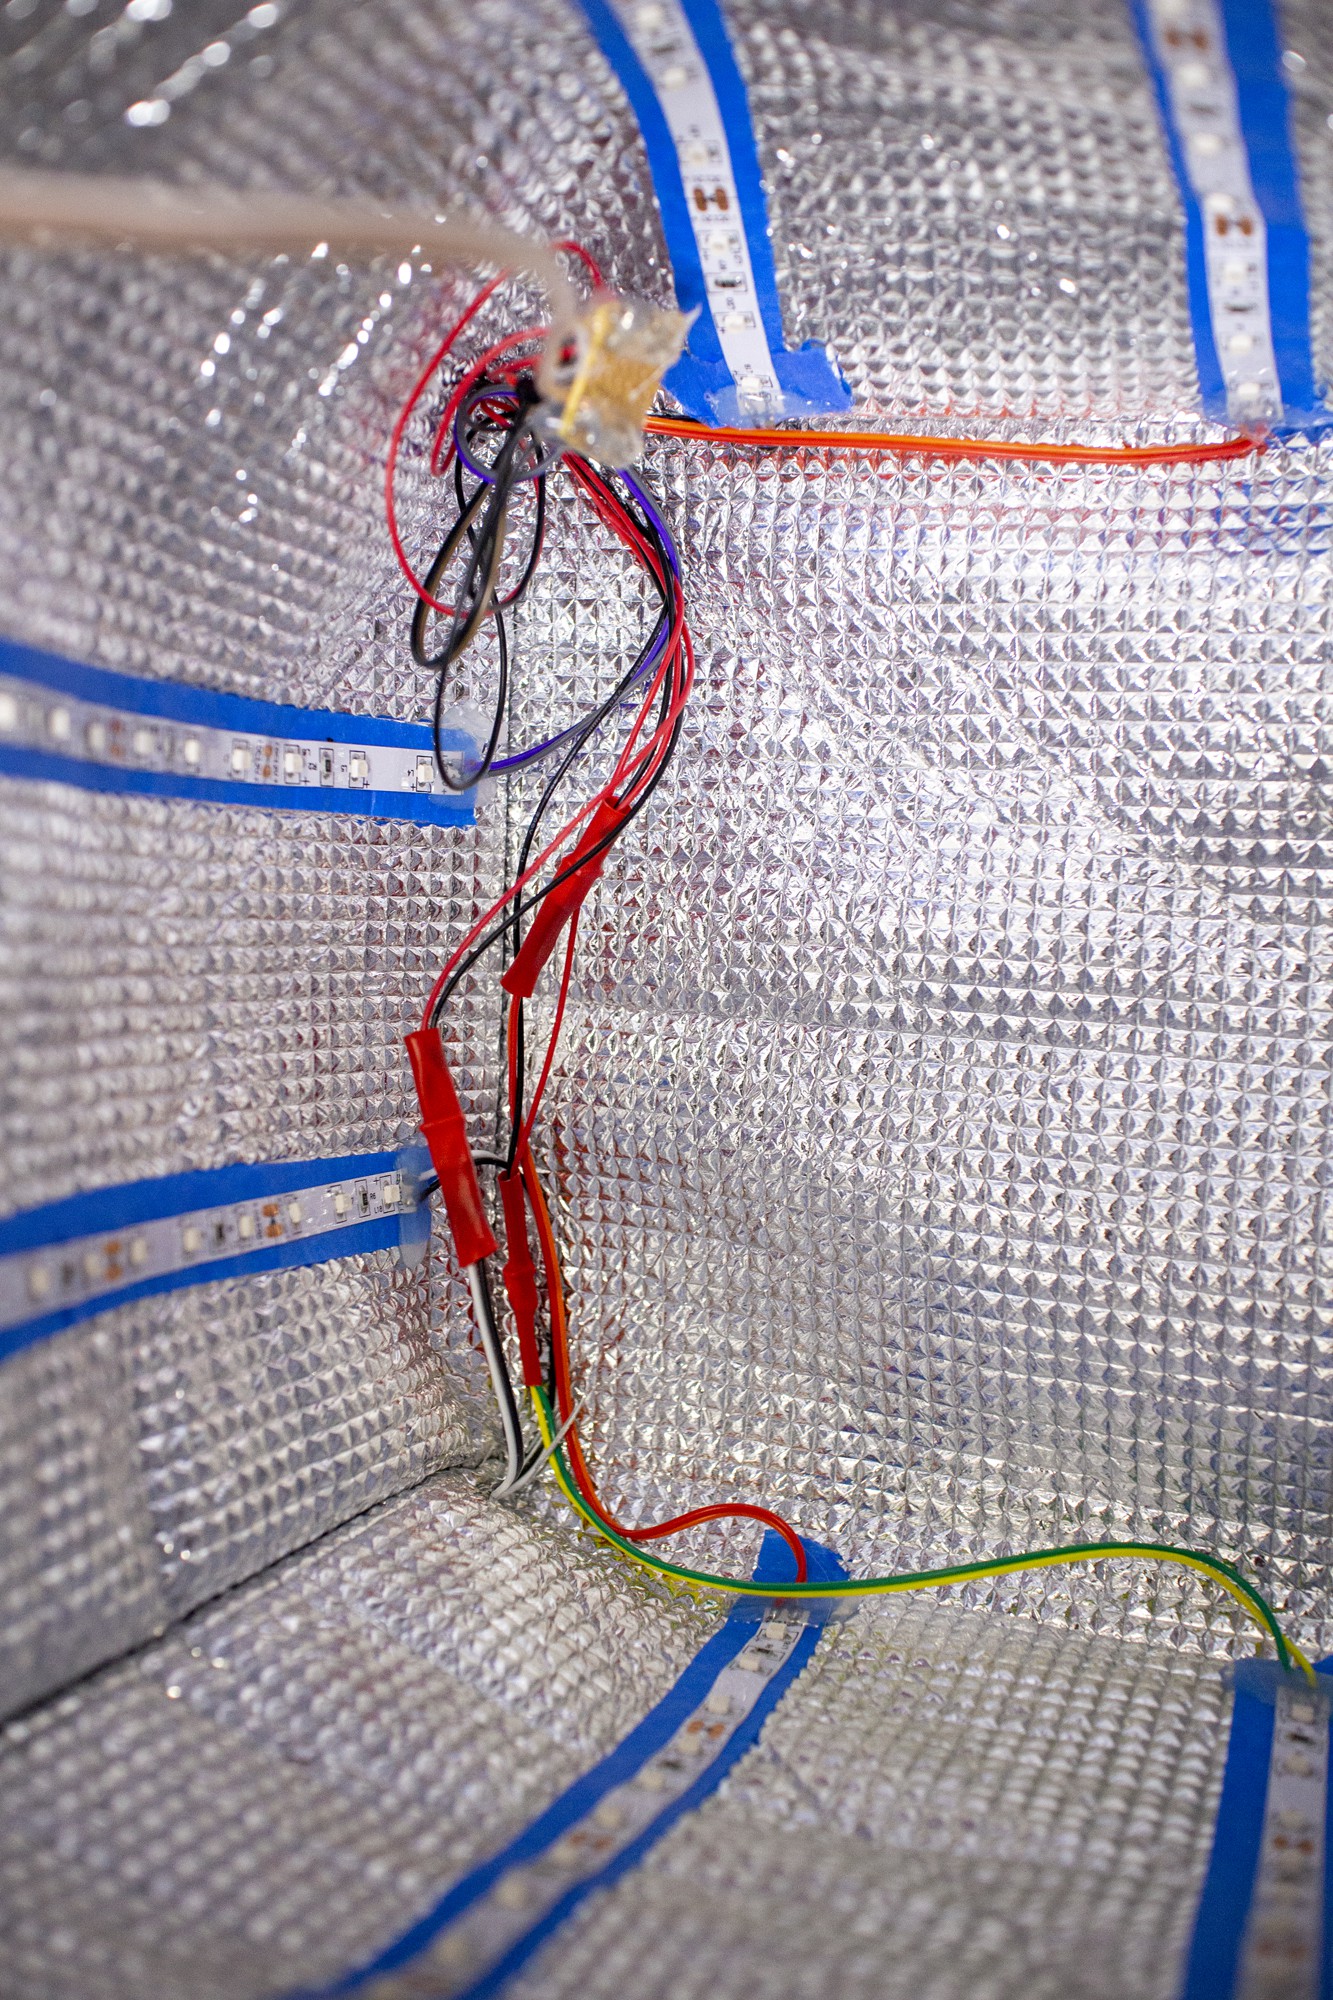
With the support of a rubber grommet, I made a small hole in the pocket part that had been sewn in to the bag, and threaded through an M-sized barrel power connector.
The LED UV light strips are wired in parallel. I cheated slightly and used quick-connecting wire junctions to route the wires to two PCB clusters in the front corners of the bag. Forthcoming video will have more examples of the wiring.
Each corner has a loop stitch to hold the wires in place to prevent them from getting bend or moved during handling or use.
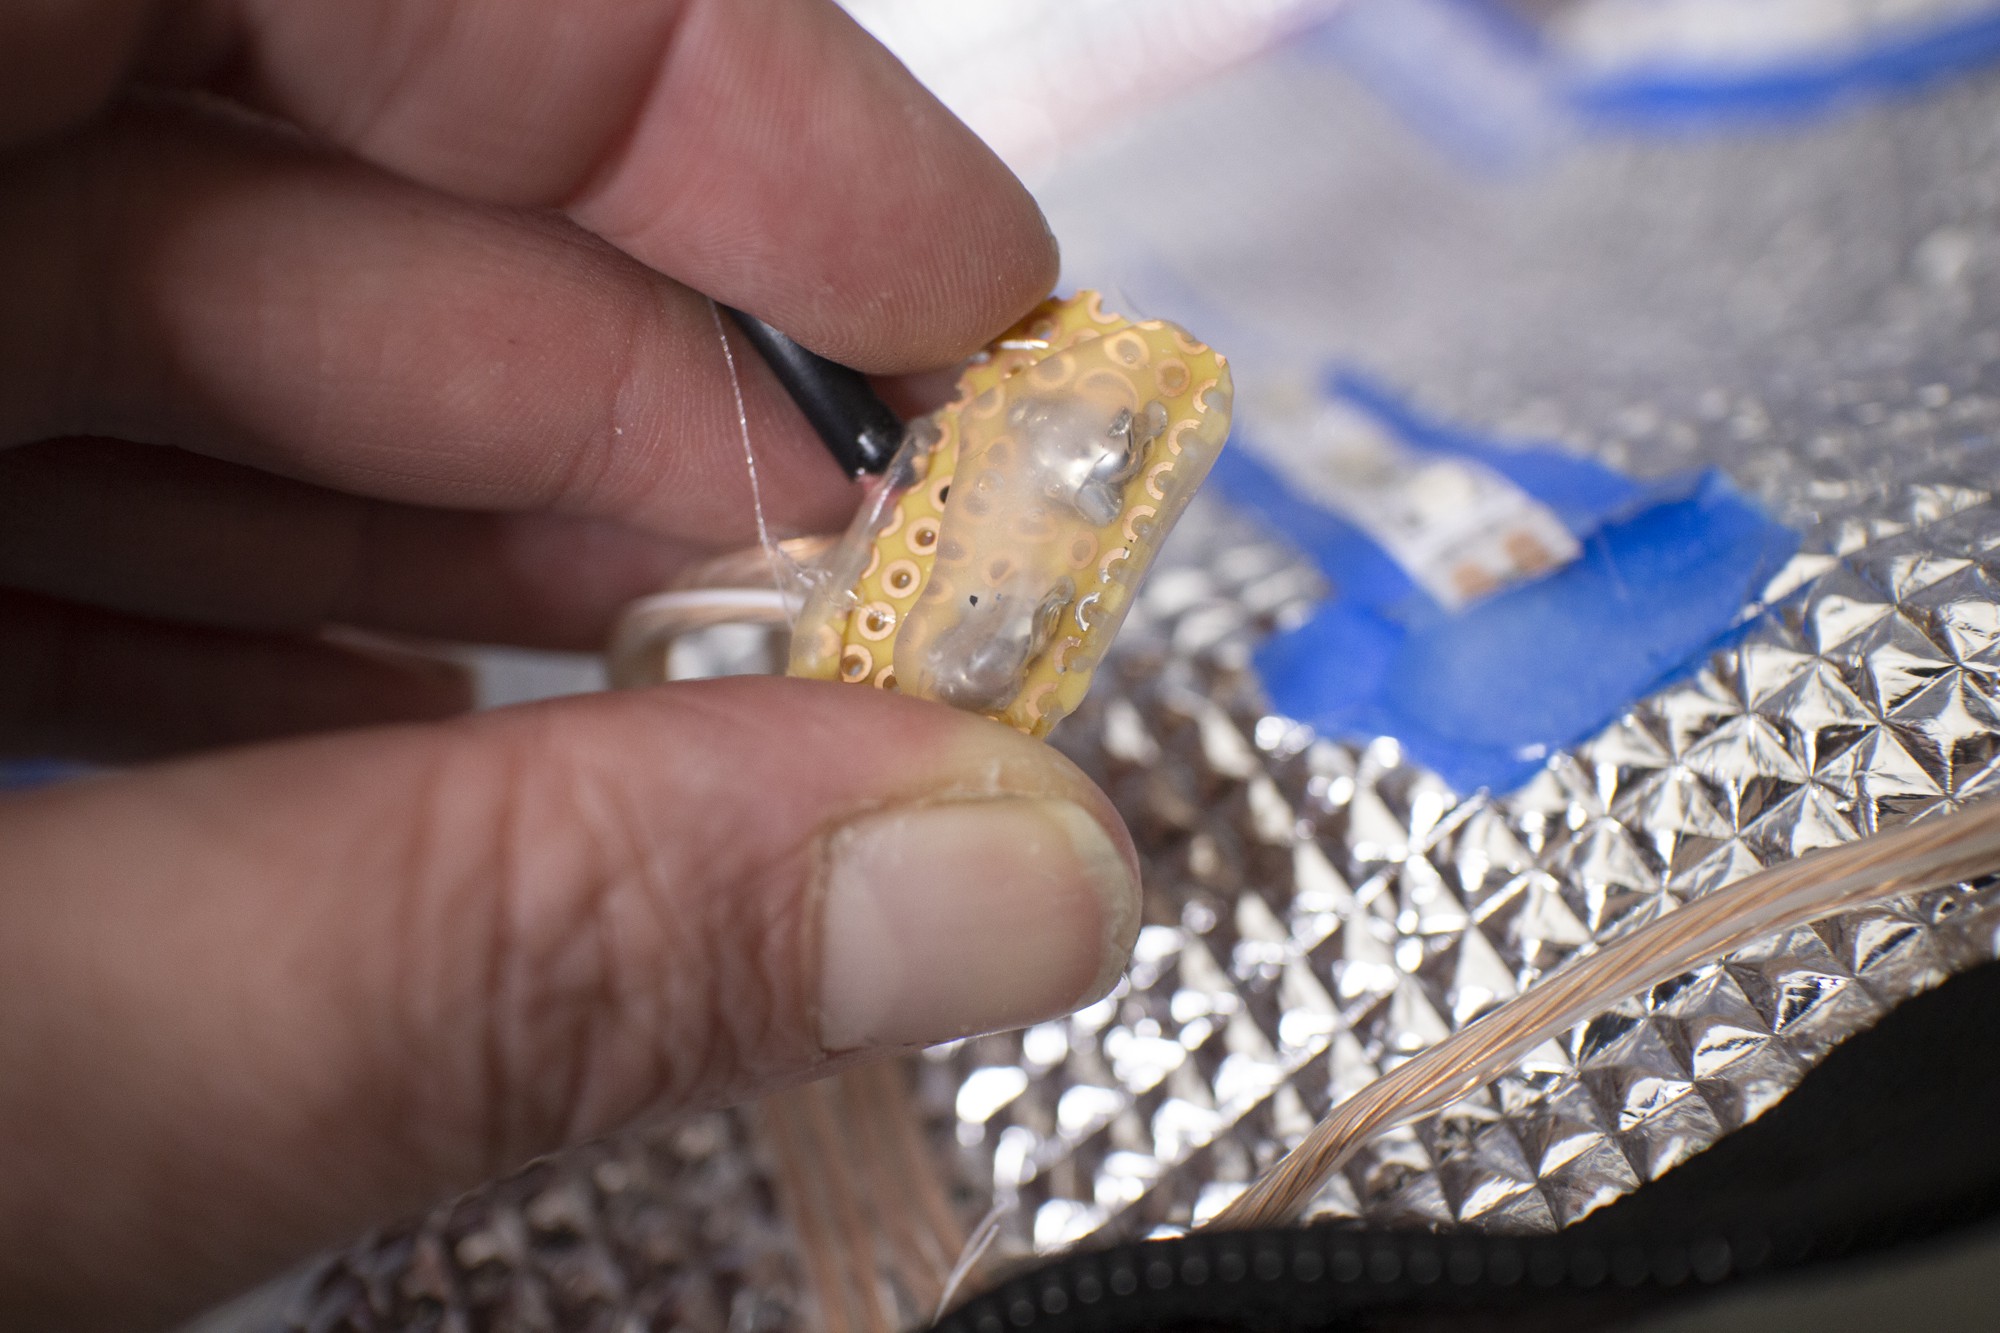
Sealing circuits
A long time ago, when I was working with Amanda Ghassaei at Instructables, I watched Amanda slather a circuit in hot glue to prevent it from shorting, but still be more accessible than say, epoxy, in case you need to diagnose a problem.
The top cluster is the ground line of power, and the bottom cluster is 12V+
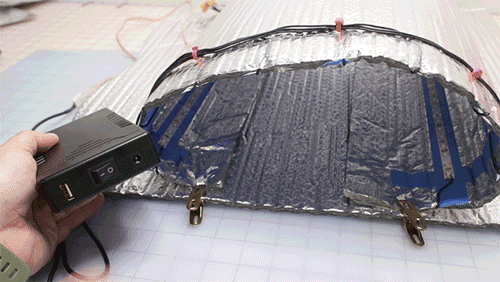
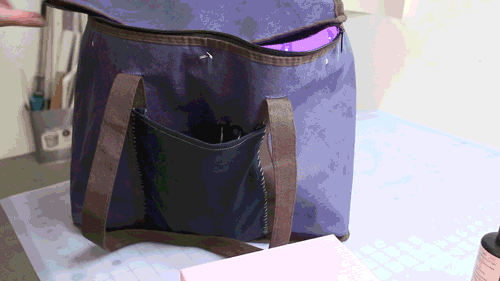
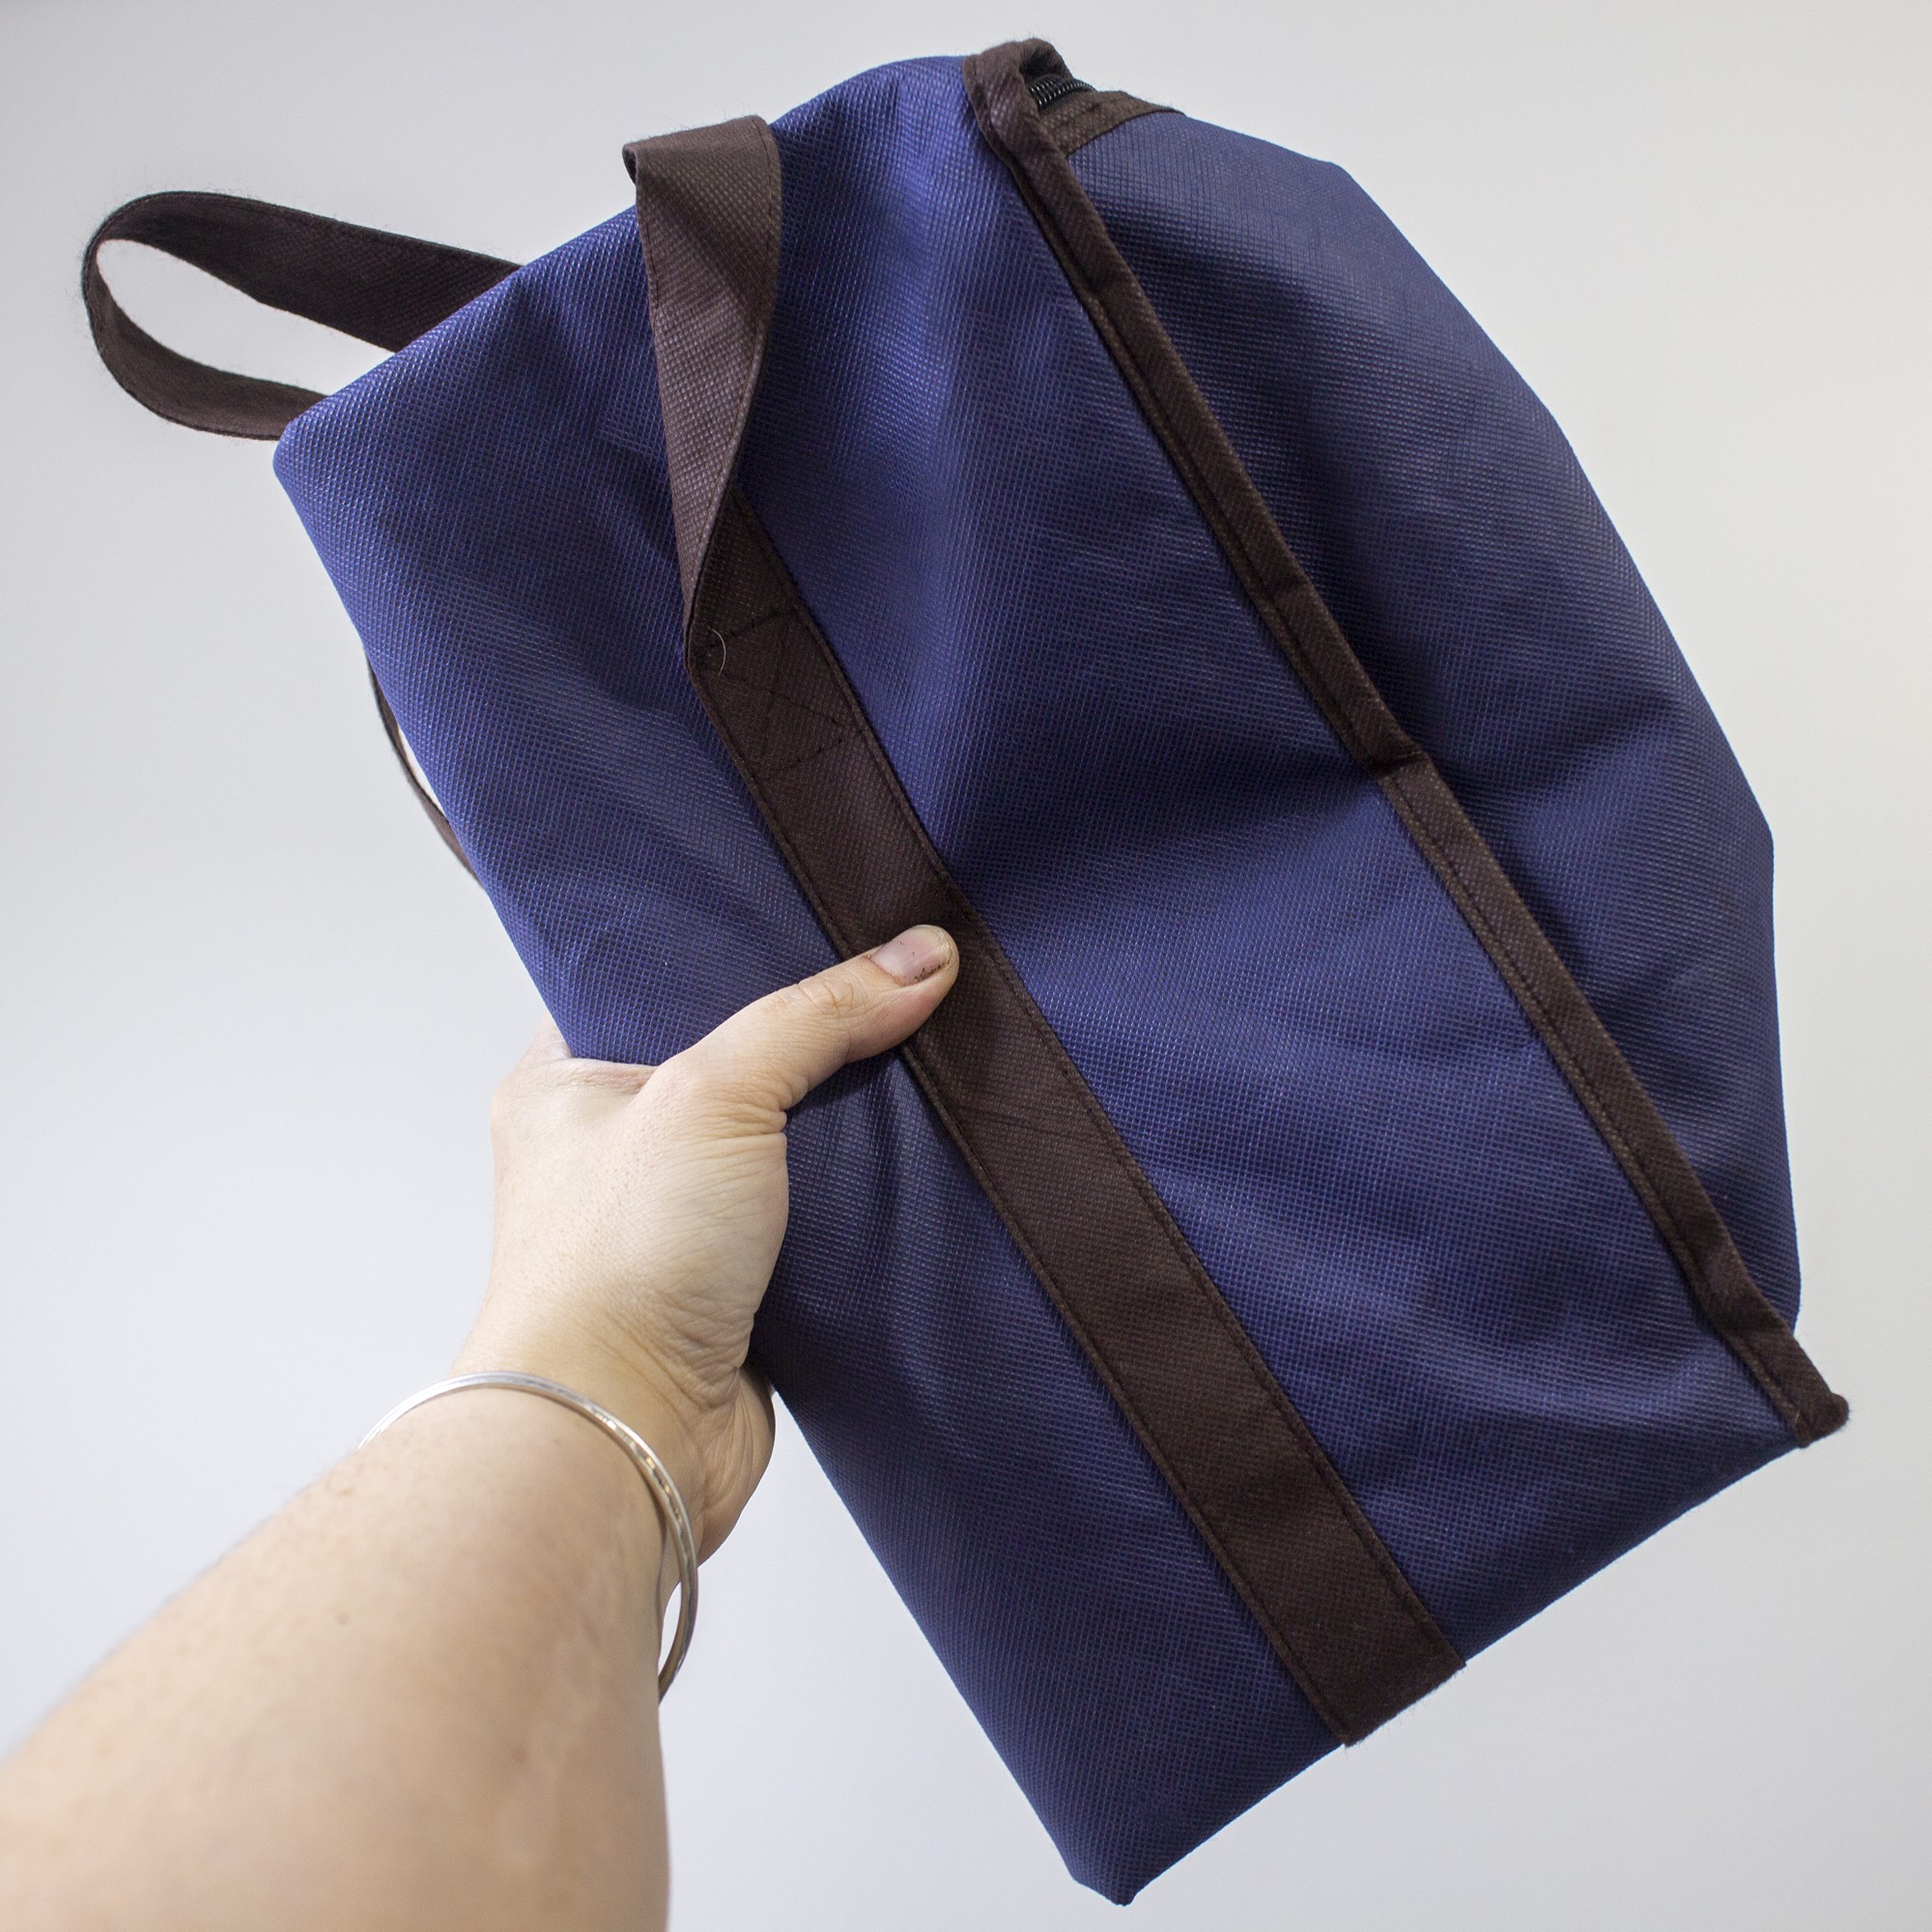
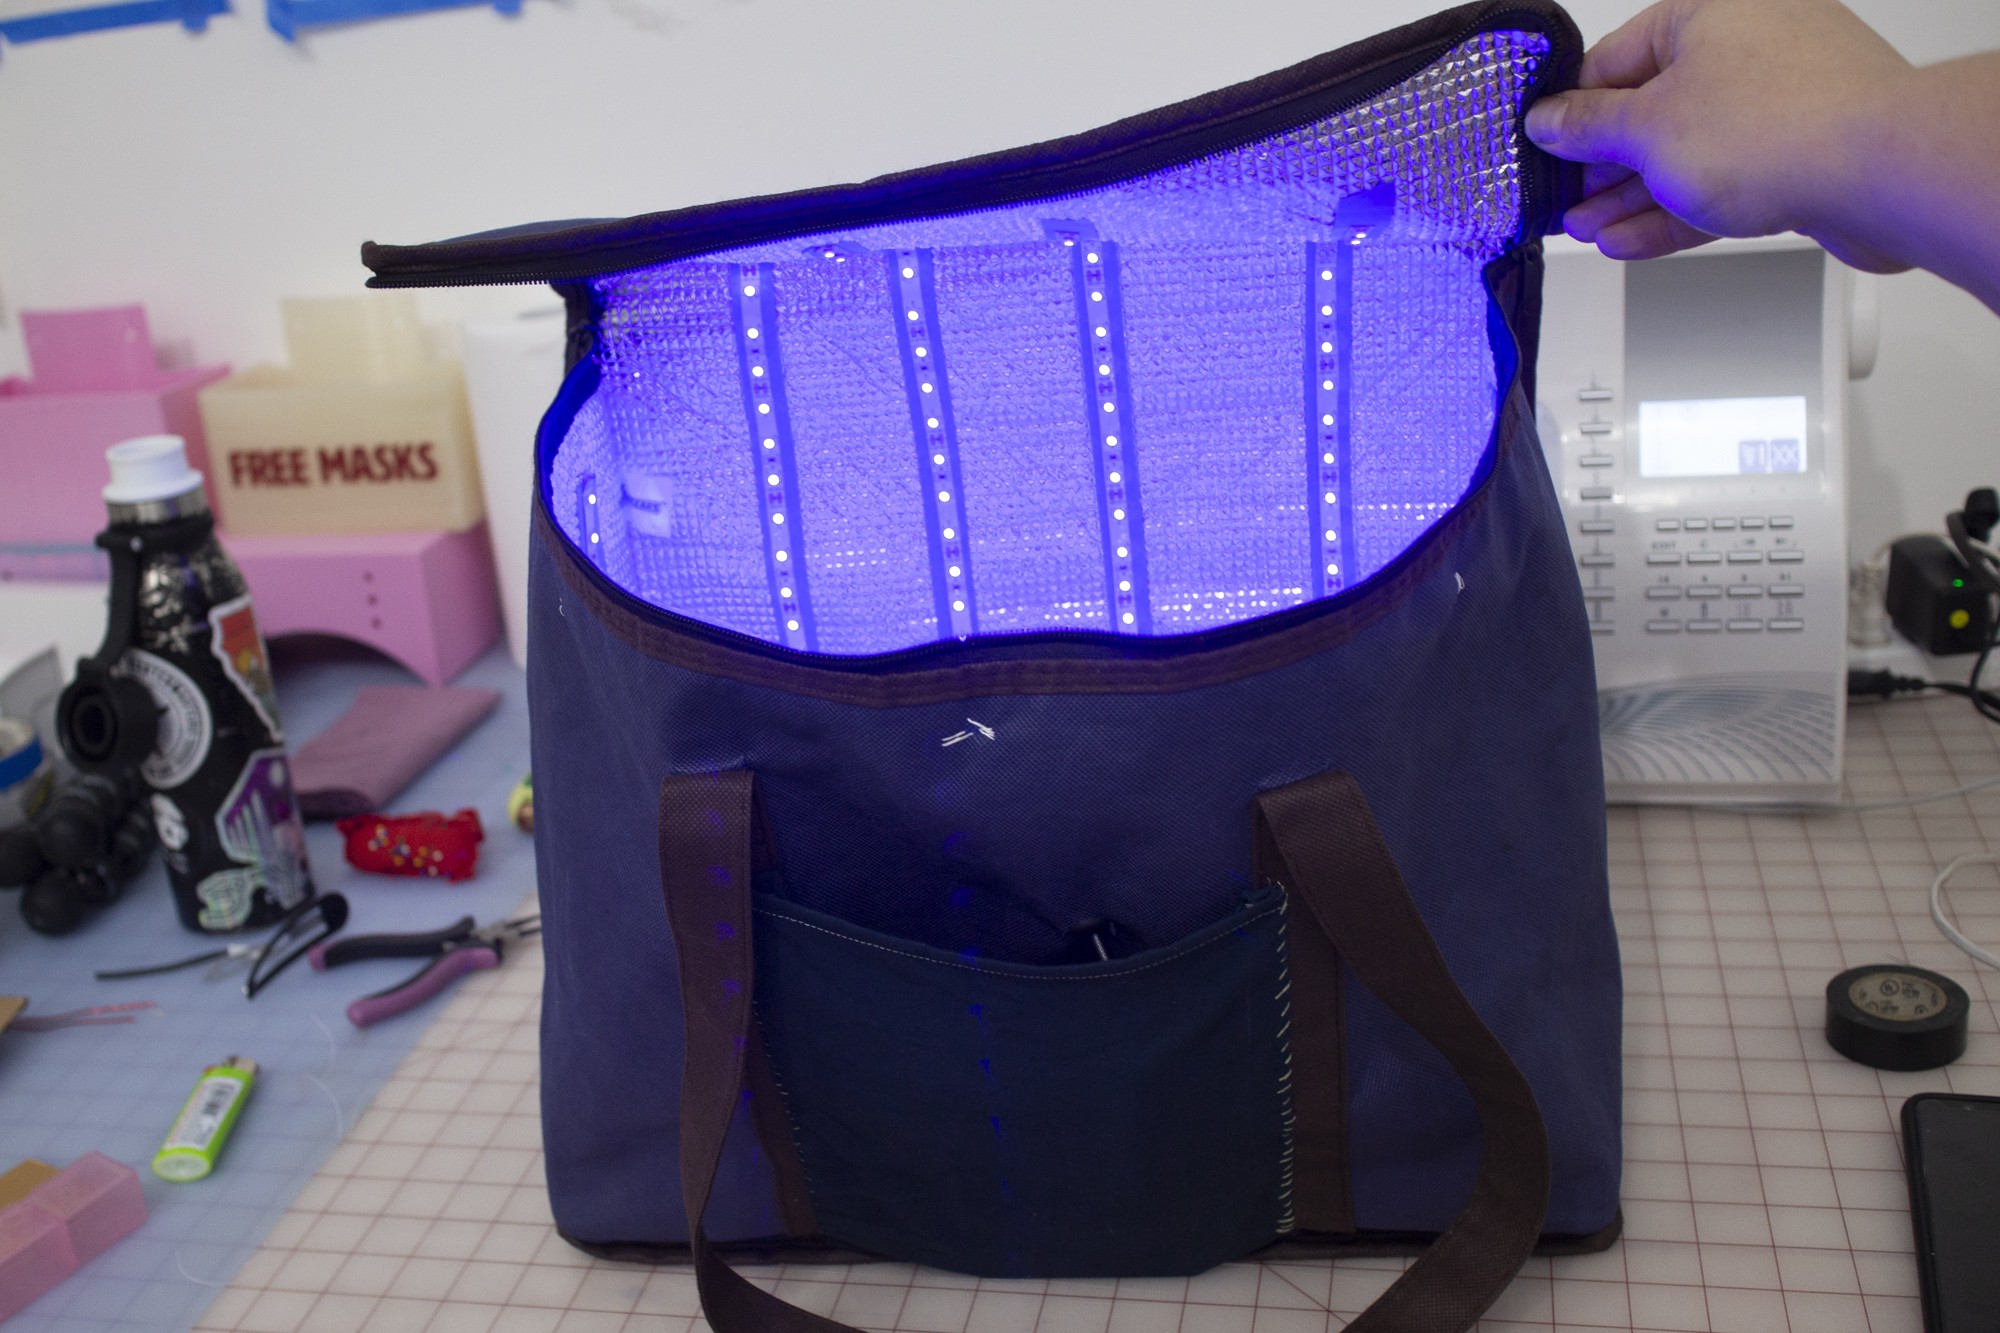
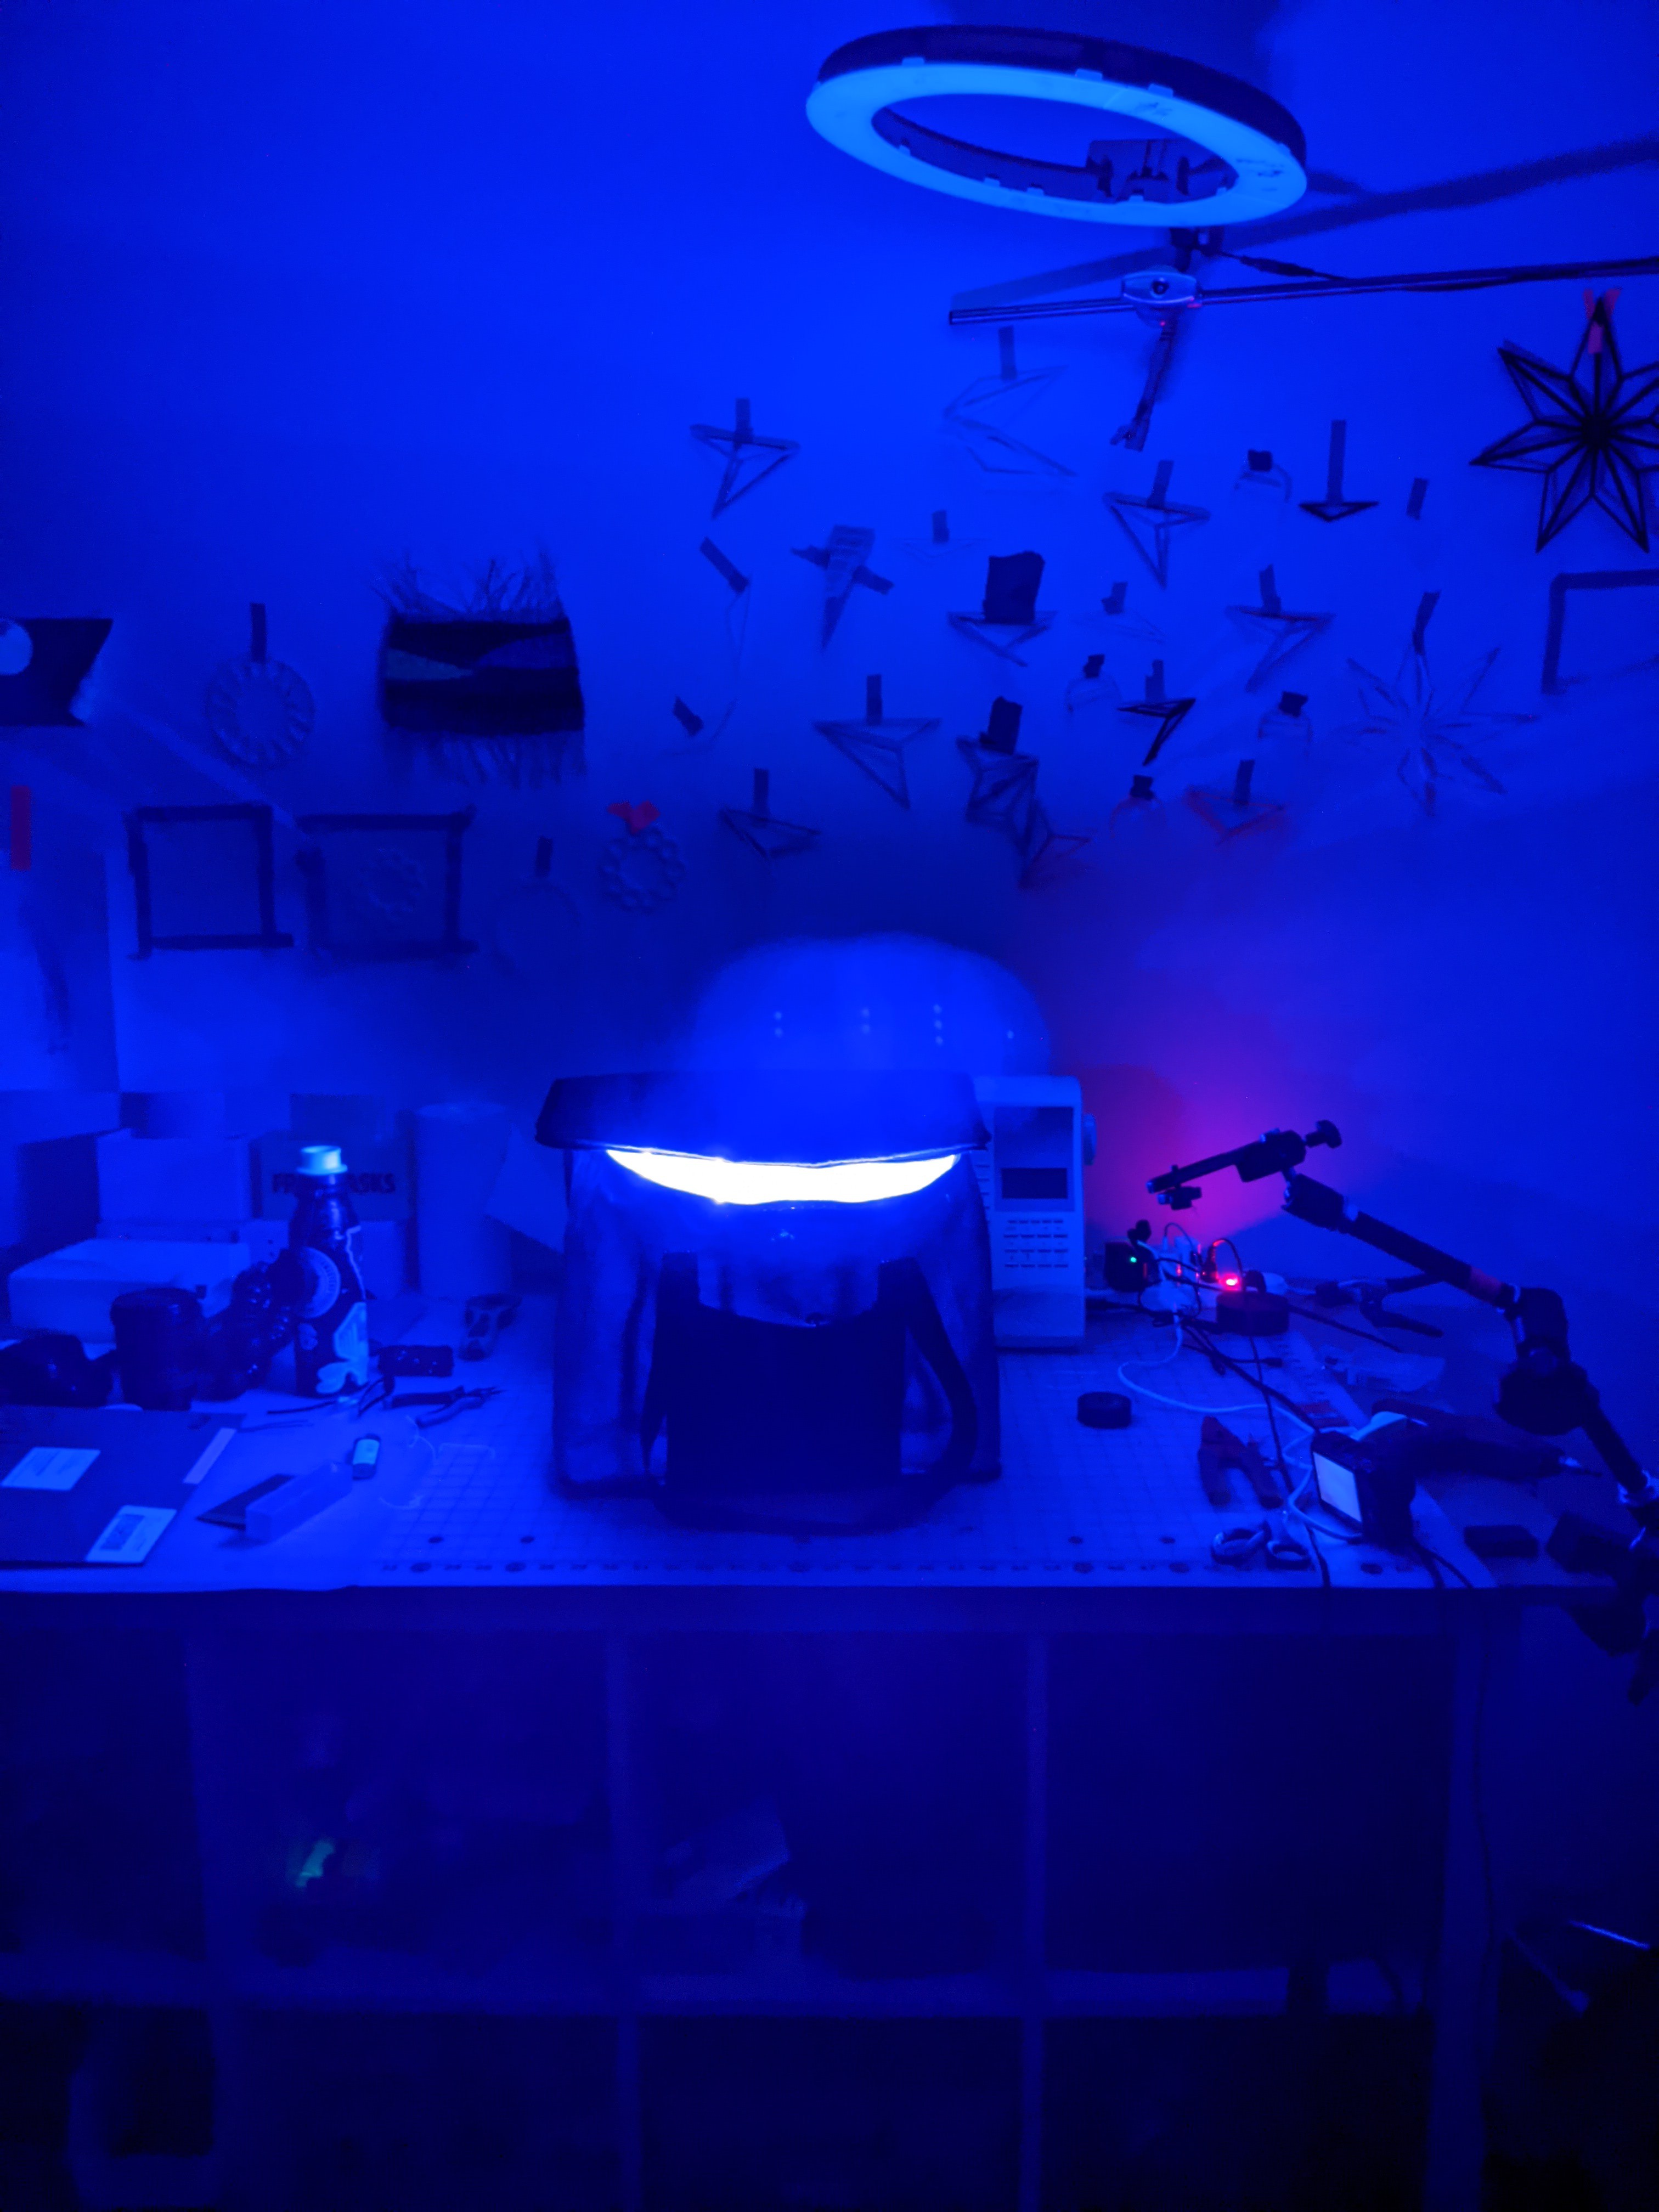
Finished Collapsible UV resin Oven from a Grocery Bag
Here's the finihsed grocery bag turned resin oven on my bench top!
The battery pack is in the front pocket, and it has almost zero light leaks, so excited for how well this came out, and how self-contained it is.
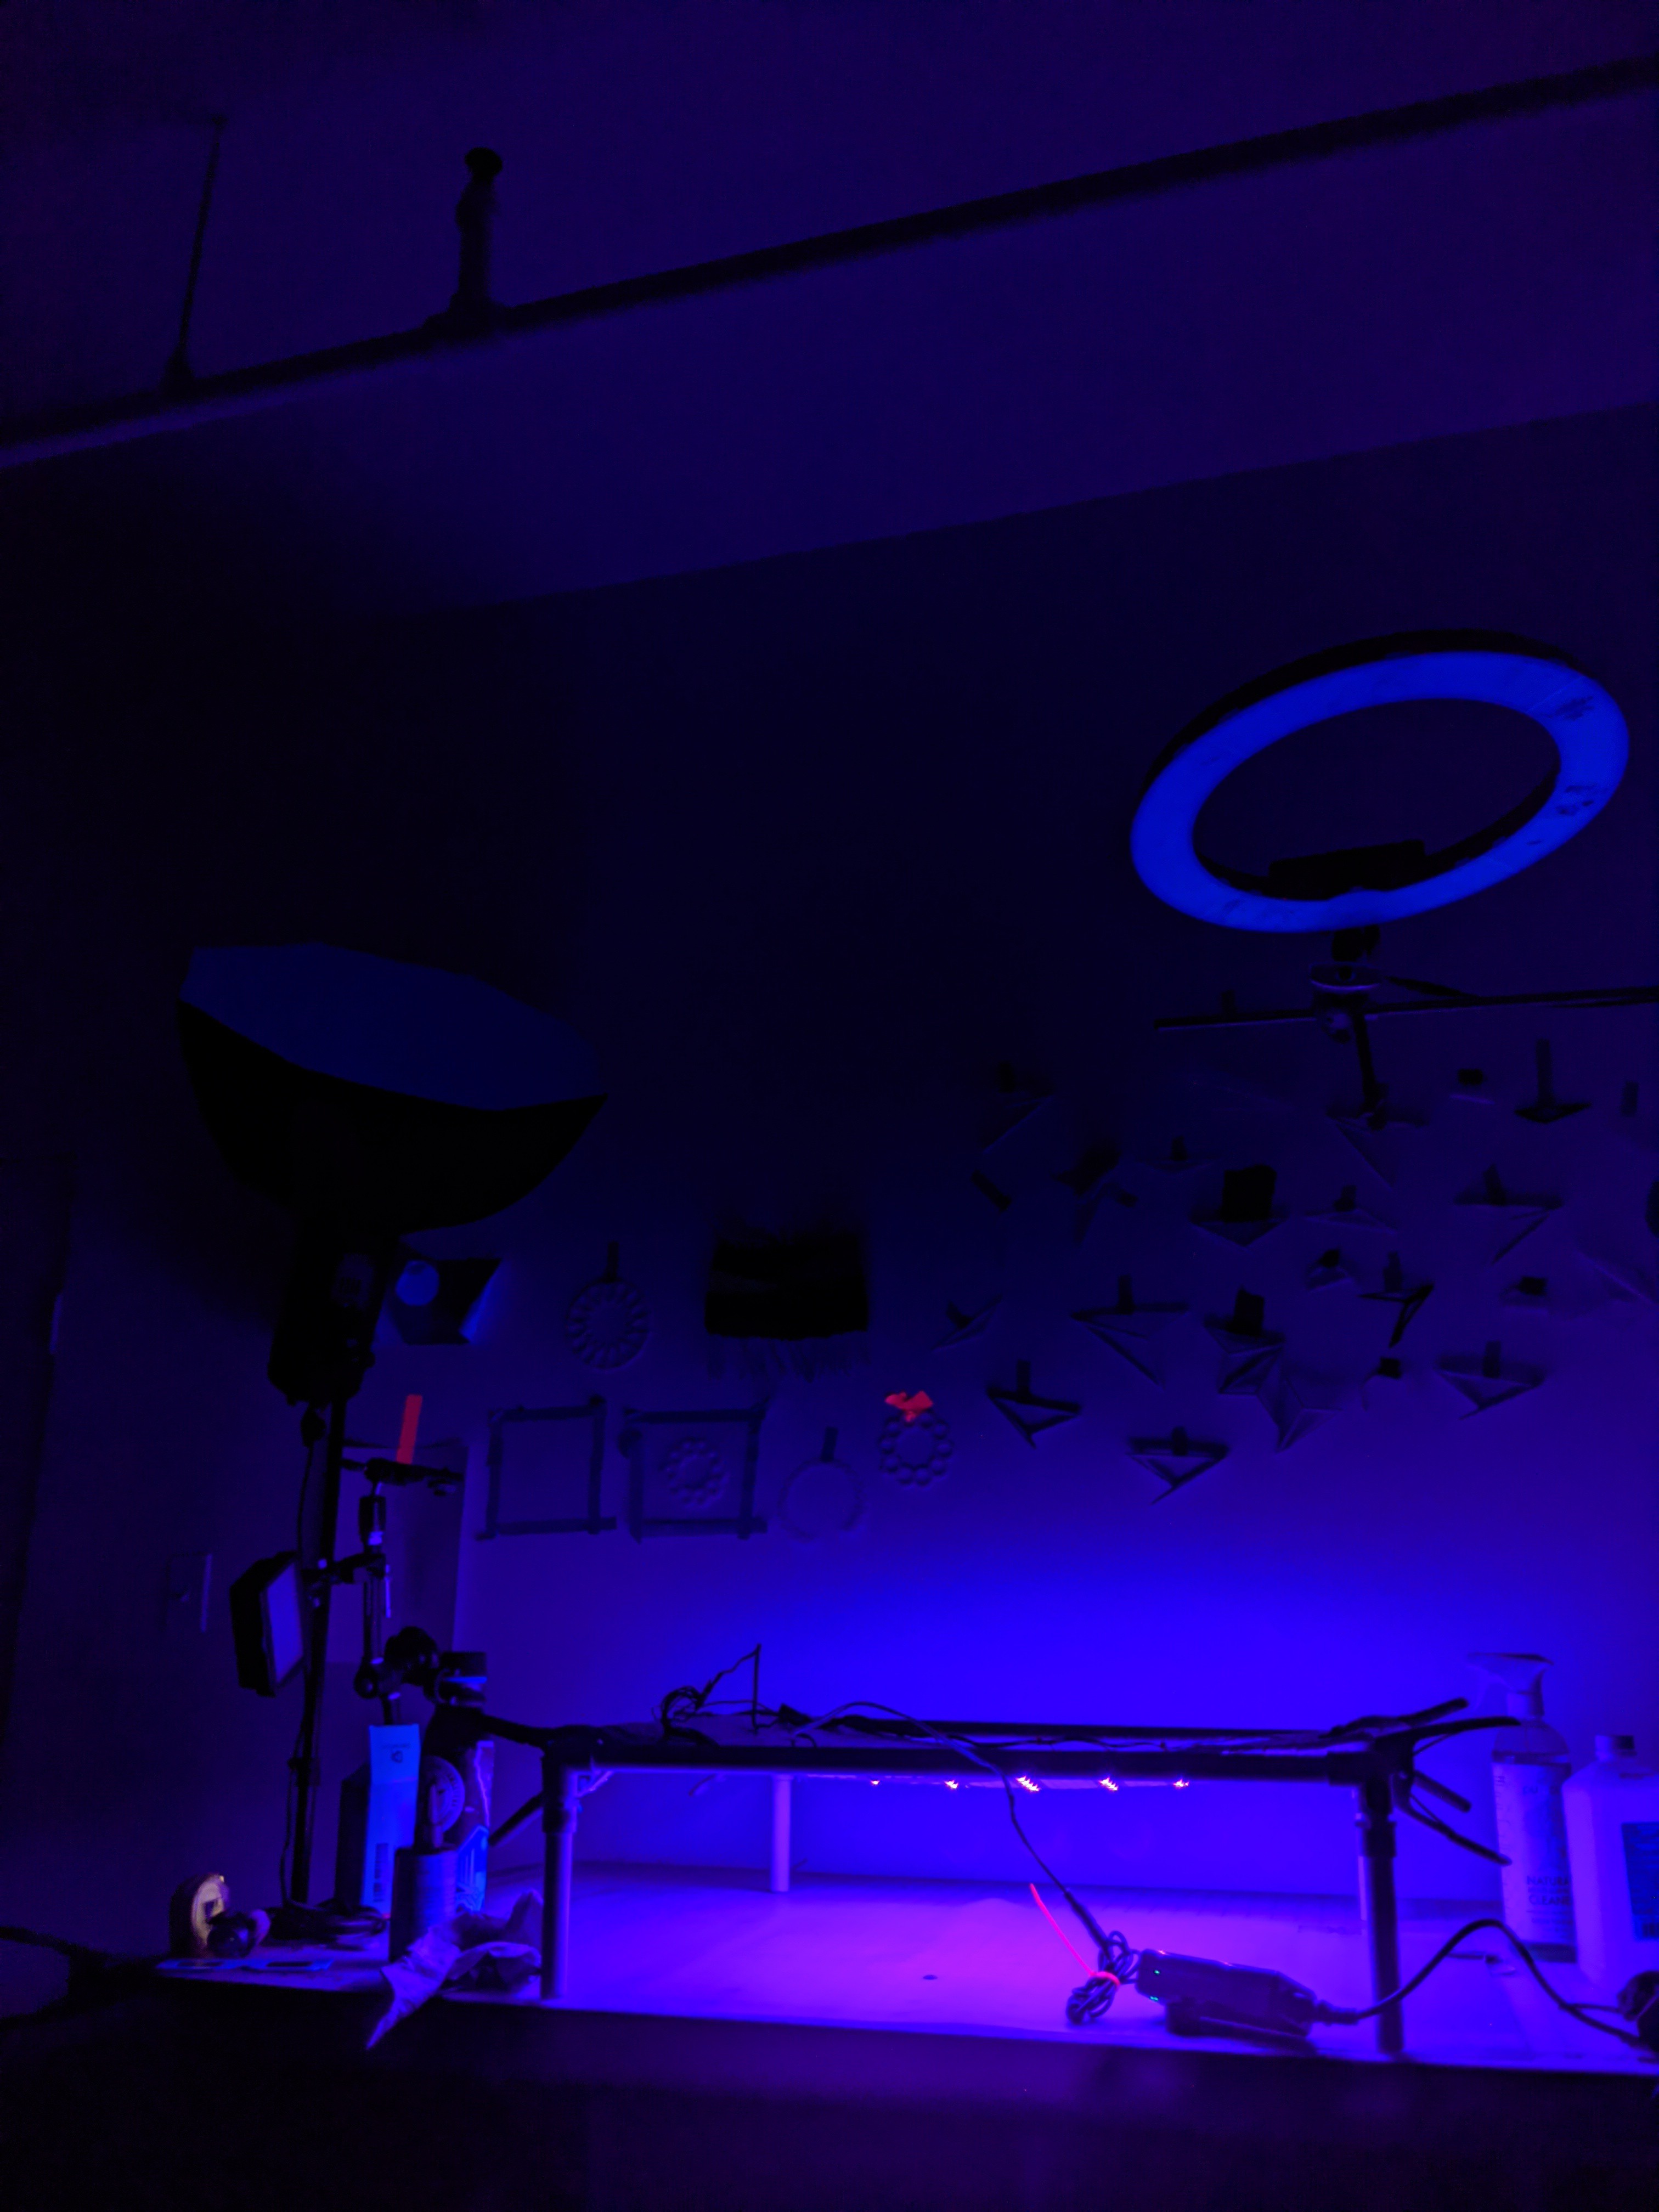
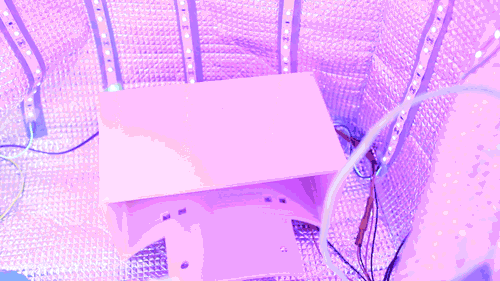
Here's some photos of the bag giving off sinister energy with the lights off in the workshop.
A future log post will include testing of this lamp with resin! Thanks for reading - please let me know in the comments if anything could be made clearer and I can make some revisions.
Looking for additional 'off-the-shelf' parts to modify
I took some time to share the Hackaday Prize design goals of portability and accessibility with some of my creative friends and showed them what I had already made, and one of them showed me a pre-manufactured grocery bag that already had reflective mylar lining. These bags are commonly used to deliver groceries and available in so many sizes, and are very cheap and durable.
Once I finally got my hands on one of these grocery bags I came up with a plan to plumb it with UV LED strip lights like the original lamp I had built and create a pocket for the battery pack and some pockets for commonly used resin working tools.
Exploring a 3D printed option
While the bag idea is successful because it uses so many readily available parts, I also wanted to create something that could be more scalable to the needs of smaller precision parts. In future log posts I'll be sharing a design for a smaller 3d printed USB powered UV curing lamp using the same mylar backed air foil material as the original design had to show the versatility of these components.
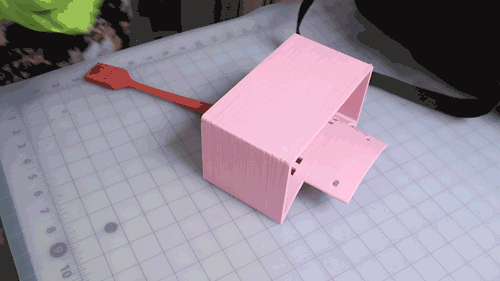
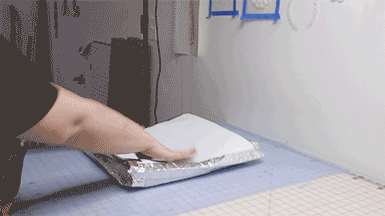
A few weeks after posting initial log posts on this project, as well as exploring more use cases for UV resin in my prototyping practice, I'm looking to origami and packaging design to potentially create more collapsible shapes for this UV LED lamp.
The above gif demonstrates turning 3 upcycled reused insulated grocery bags into a box like shape.
I belong to a CSA delivery in the summer, and the dairy and eggs get delivered in these bags, I keep them around and reuse them for packaging or for running other food to people, but they have all the same properties as the original bubble foil material I used in my first UV lamp
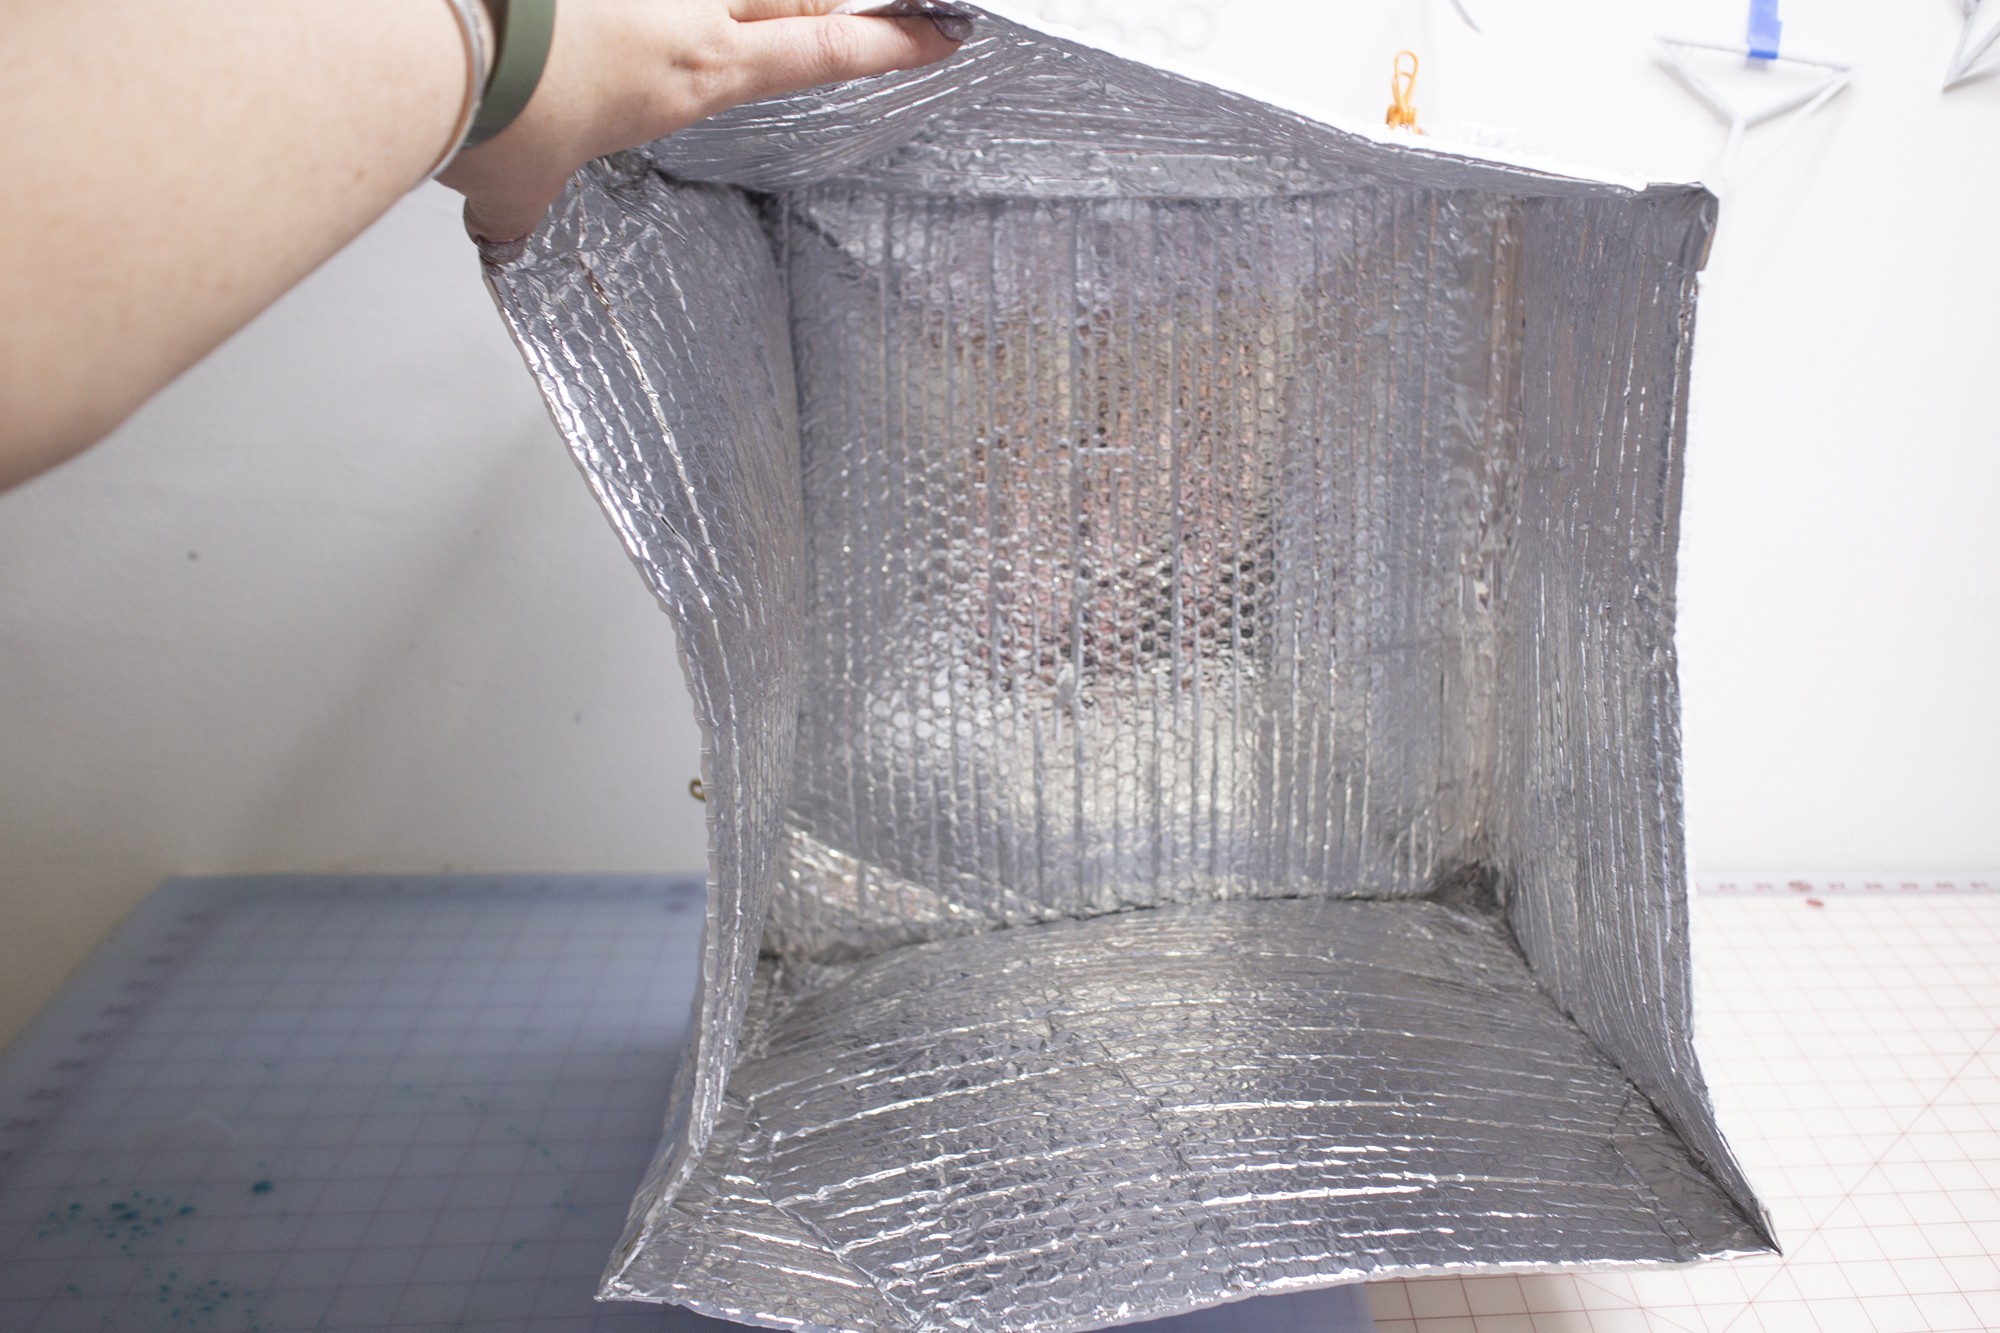
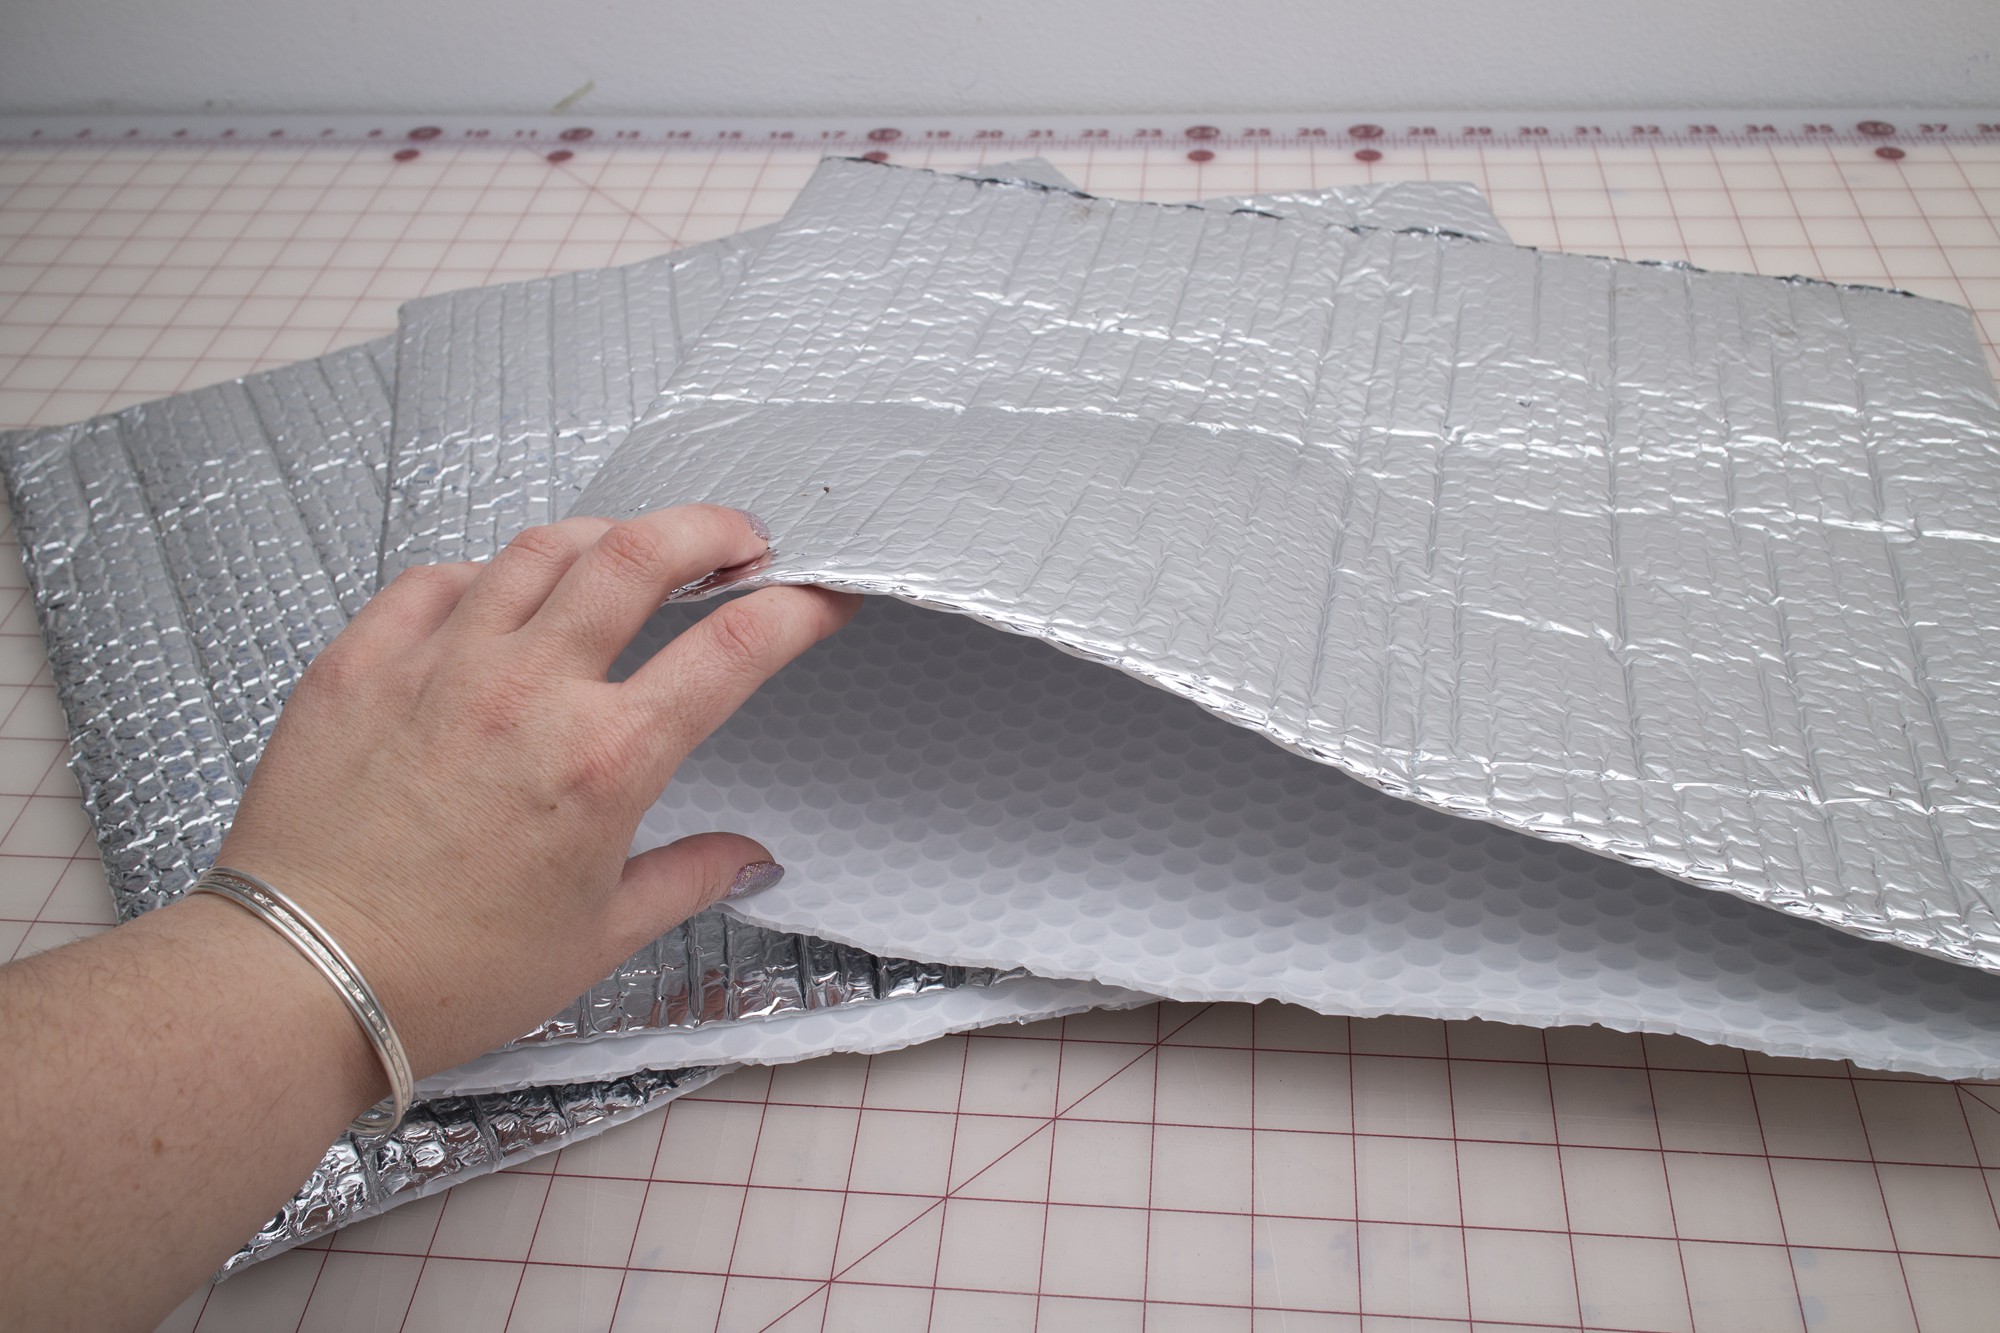
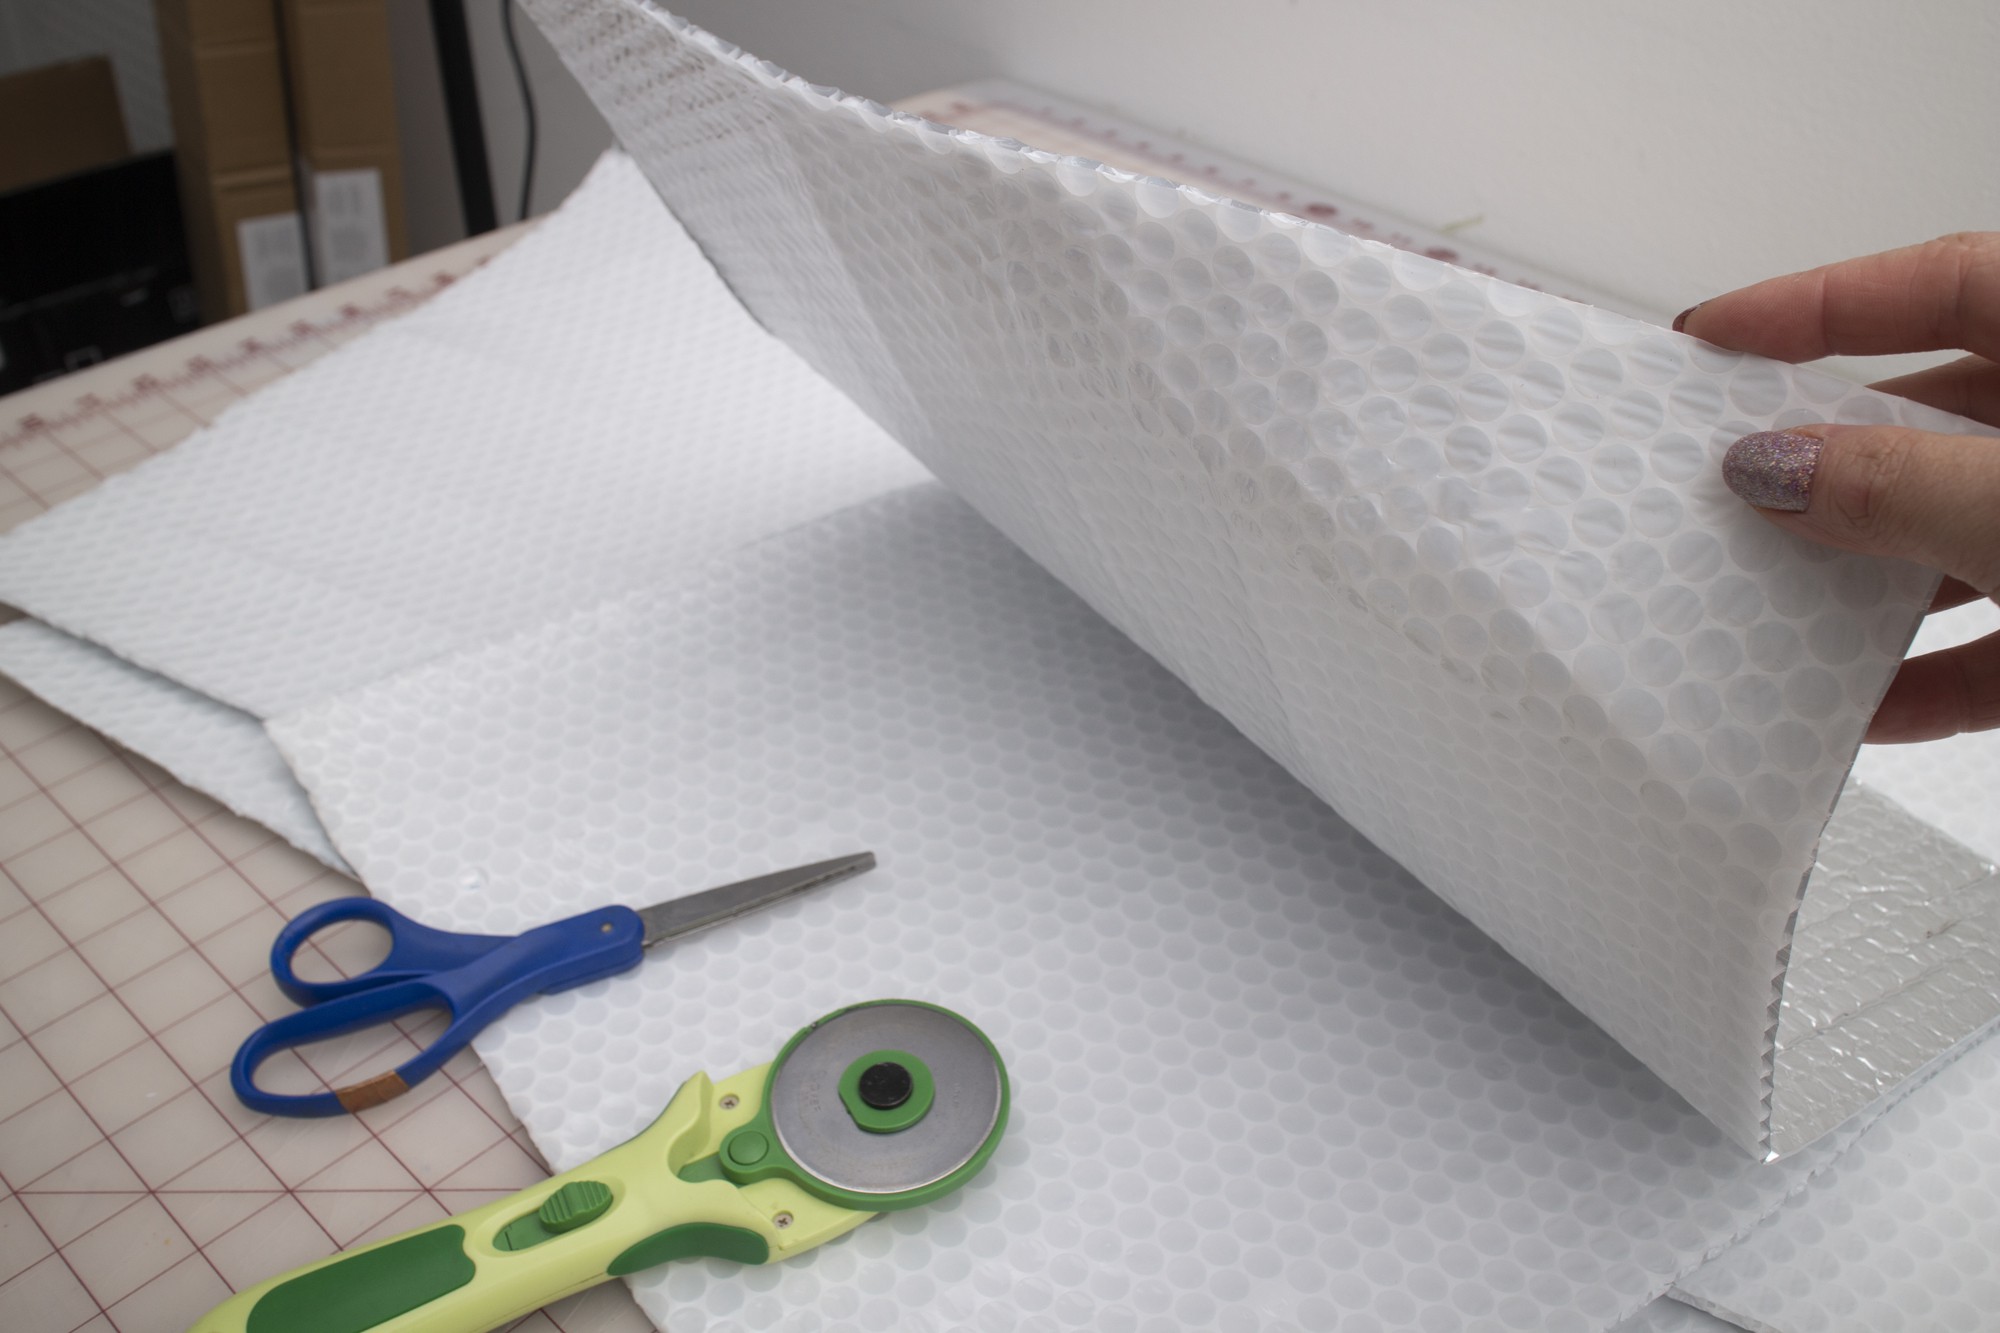
I began by cutting off the sides and turning the bubble foil into 16" squares
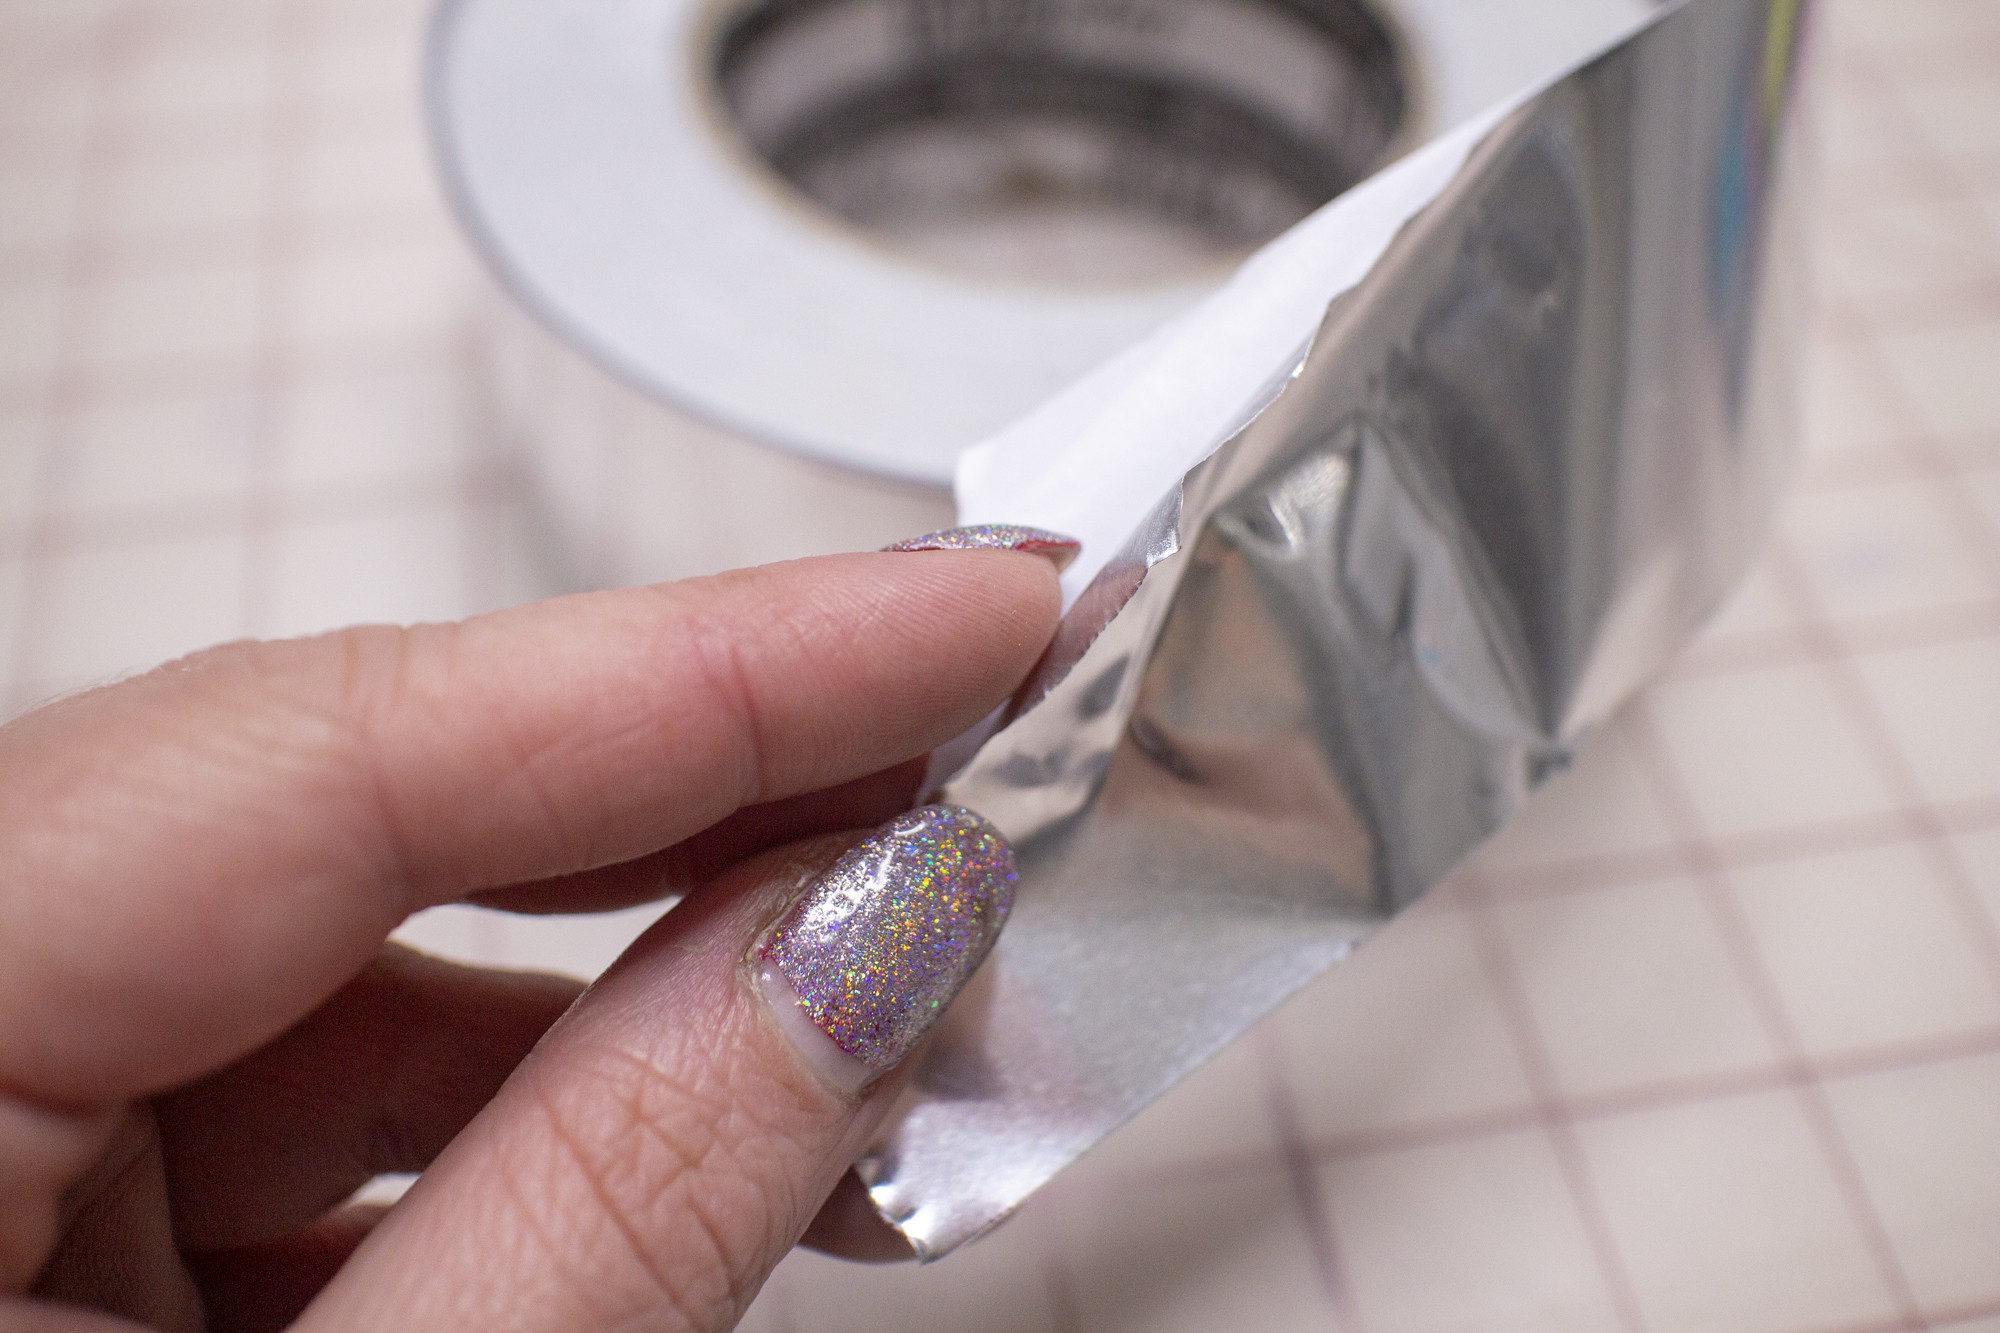
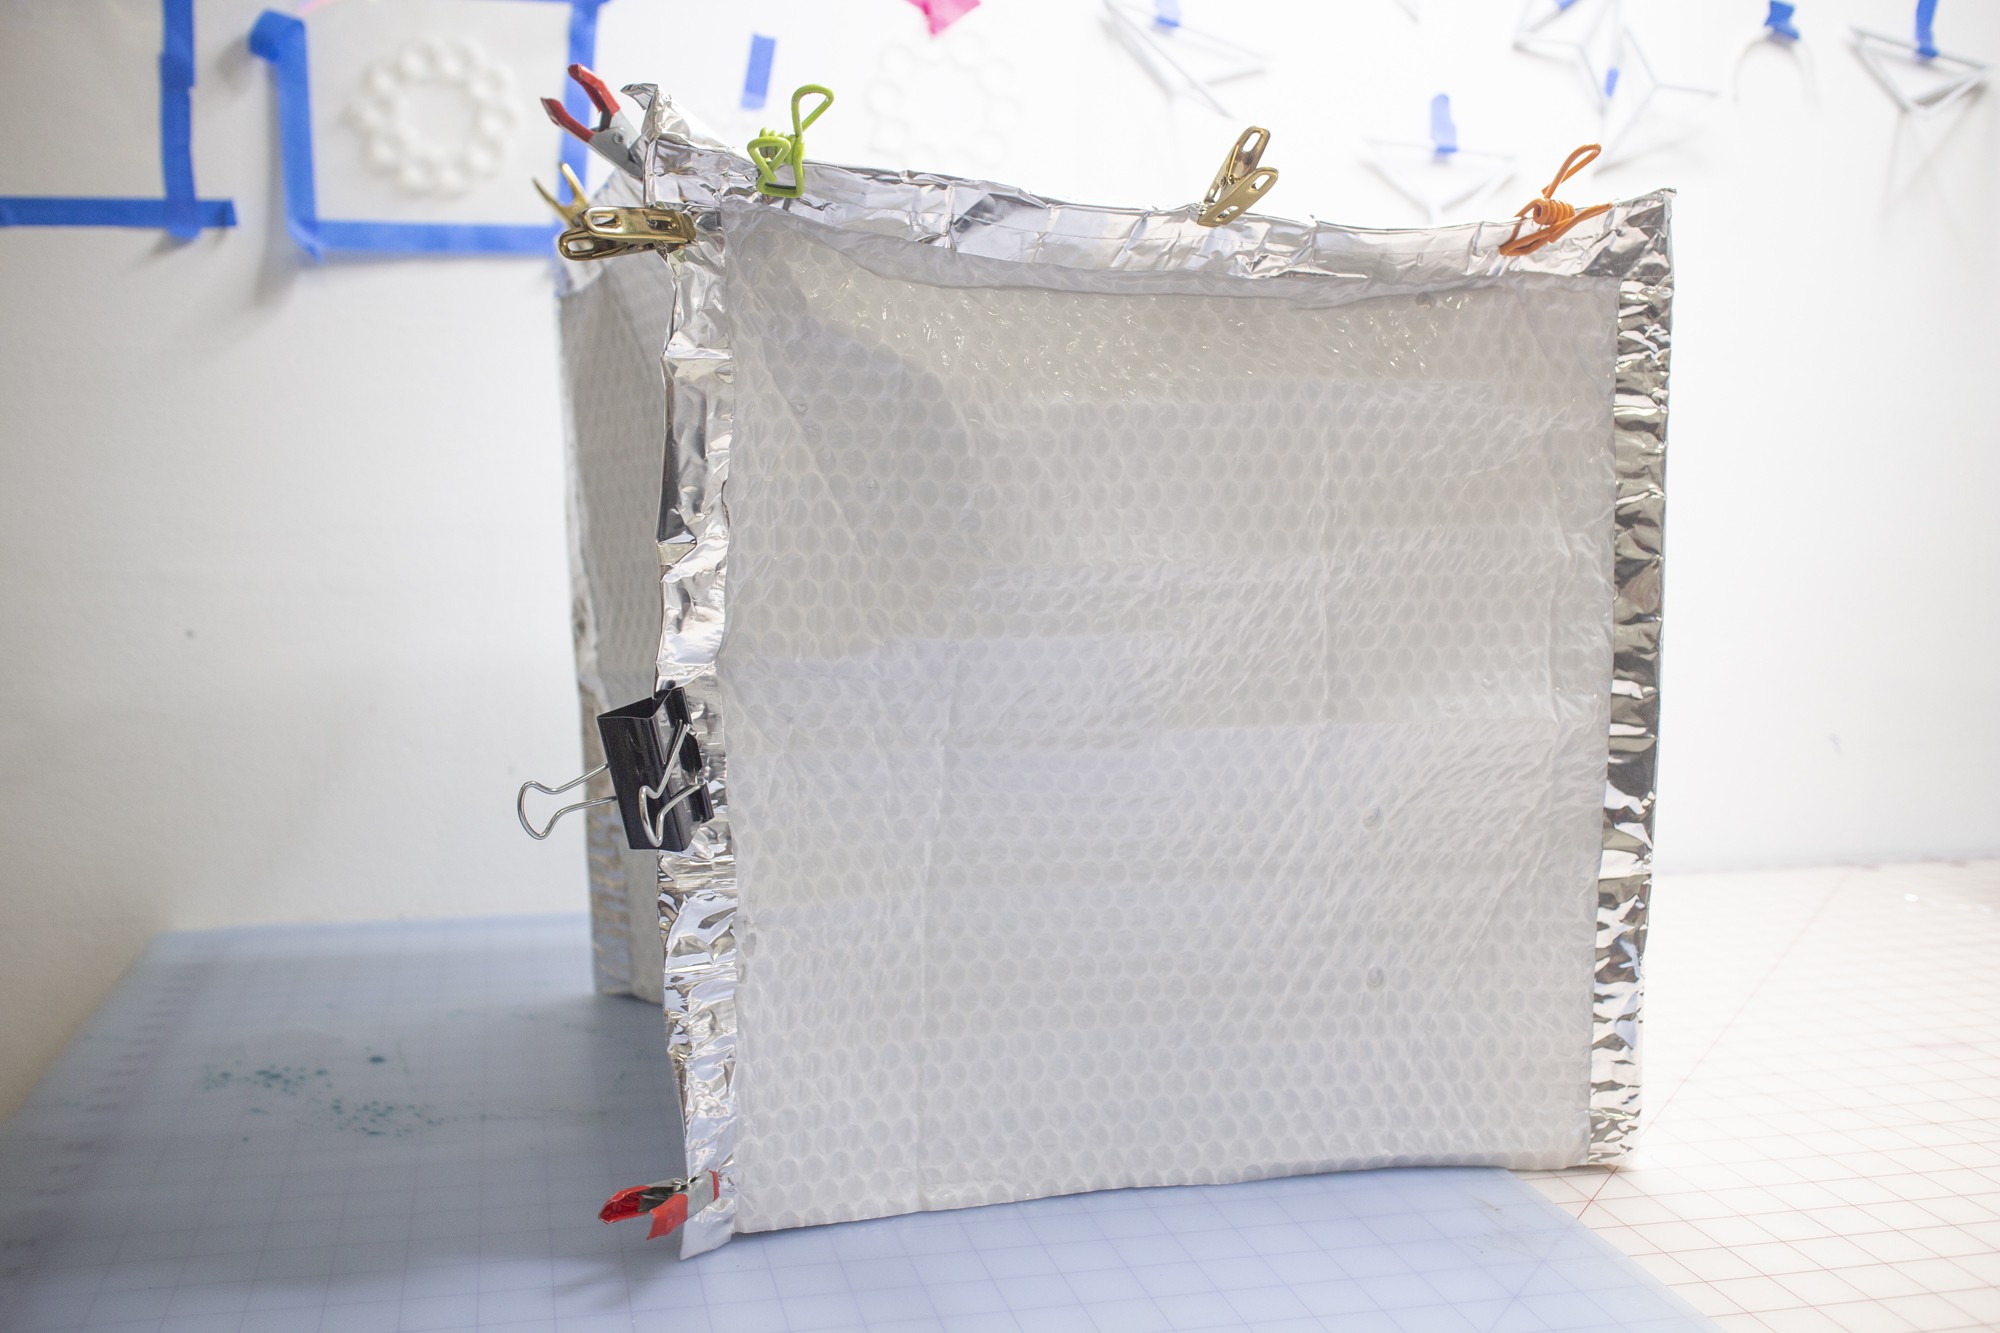
Using stainless steel foil tape, a strong, flexible, rigid tape, I bound all of the edges together to create a classic origami box shape. Each edge of the box shape had a foil tab that could be used to clamp the sides together with metal binder clips. Here's the box shape flat on the studio floor, it's hard to see but each edge is bound with stainless steel foil tape.
The foil tape tabs are folded over and clamped tight.
The internal volume of the shape after the edges are folded over and pinched is slightly more than a 14" cube.
I have been doing further product research to see how this UV curing lamp could become more portable and work with easy to find off-the-shelf components that require minimal tools or easy-to-execute fabrication.
Pricing for 24"x24" flexible, portable UV curing lamp
Bubble foil backing - $10.50 (this is enough for multiple UV curing ovens and reflecting surfaces)
Foam core boards/light barrier $6 (optional - even cardboard could work!)
Binder clips or A-clamps - $3
Total - $45.50
Portability
Optional portable battery pack to make this resin oven more field-ready brings the cost to ~$80
The portable battery pack linked above is ready to be paired with the flexible UV lamp design right out of the box. The battery pack is listed at supporting a 6000maH charge - which would equal 72wH. Since this UV lamp uses 24W, you could get 3 hours of UV exposures with this particular battery pack.
I don't have access to a resin 3D printer that uses UV to create models, but I do undersand that models made with this kind of technology to require some post-processing in a UV curing oven. This collapsible + flexible UV lamp emits a ~385nm wavelength that makes it ideal for curing UV resin and post-processing resin 3D prints.
The following details my experience in applying the resin and establishing a workflow for curing + cleaning.
Working with the resin
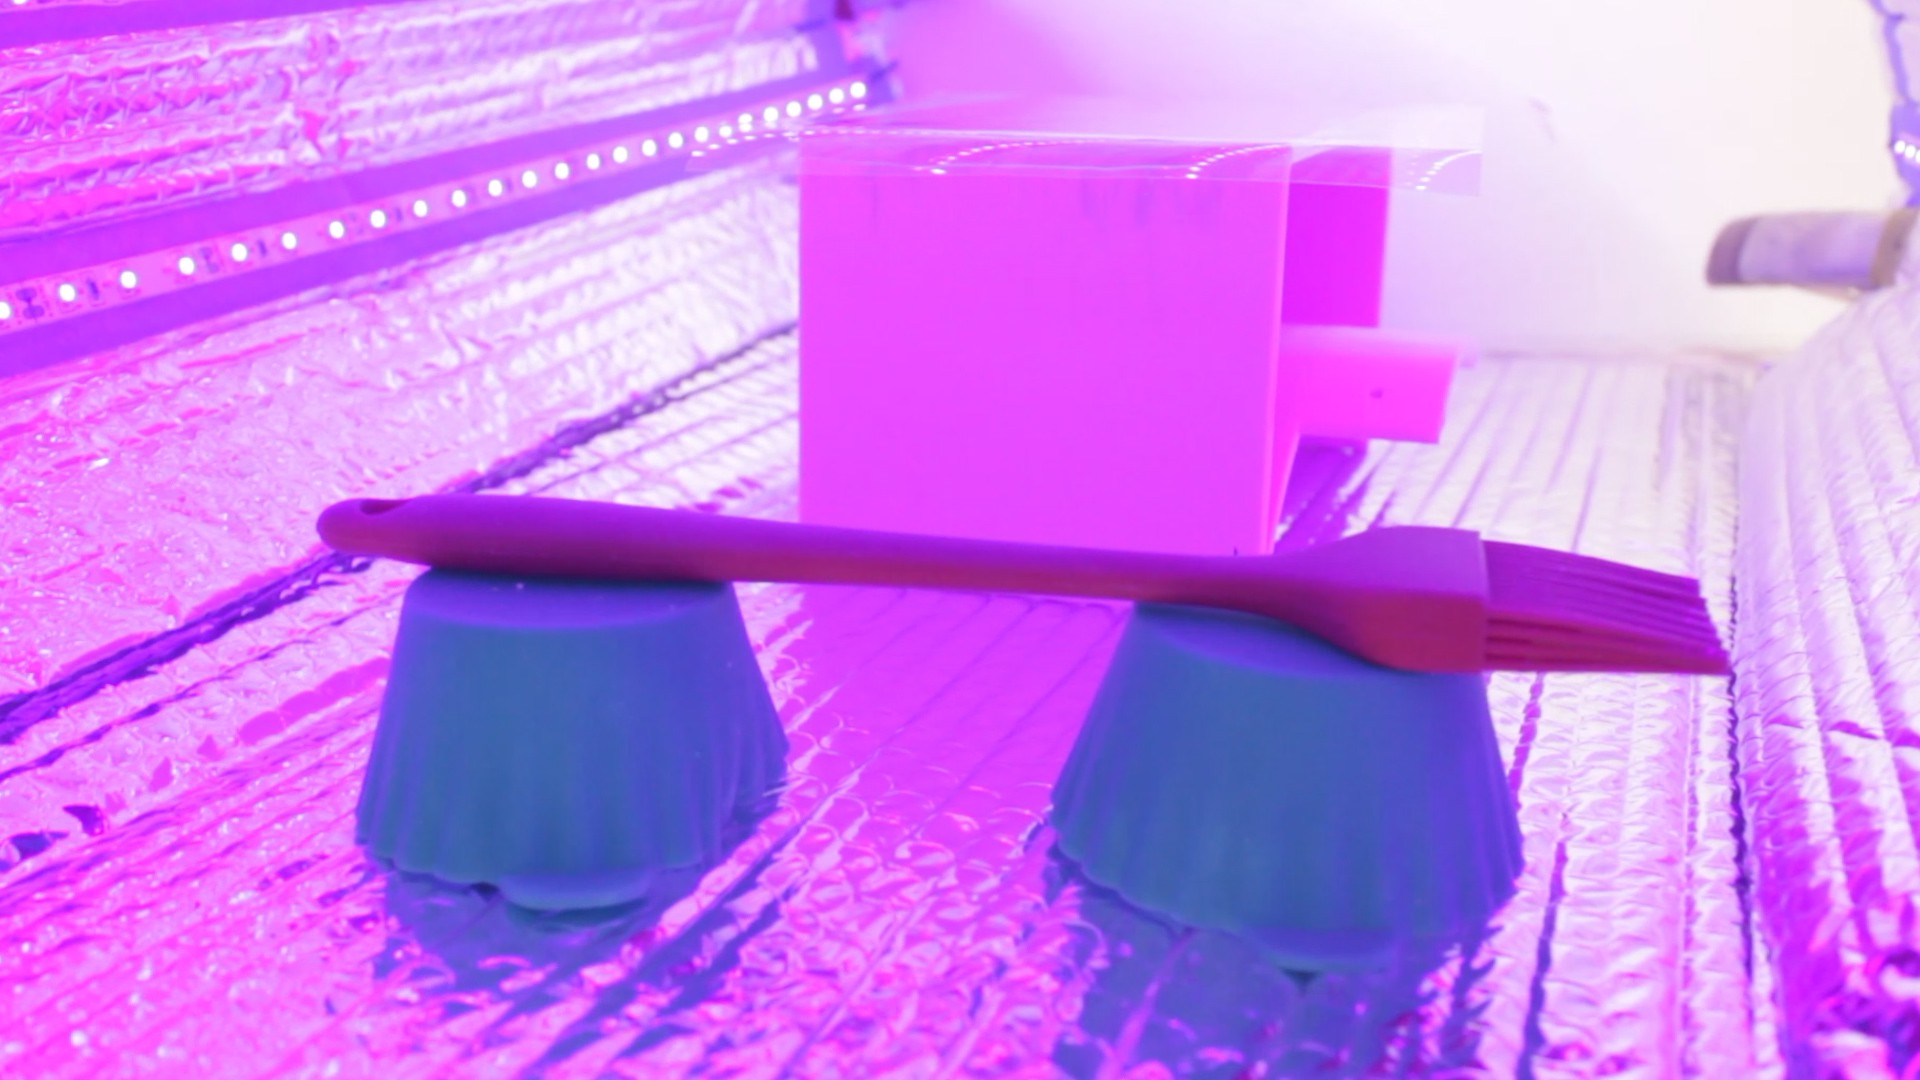
I have found that it is best to work the resin with silicone tools and place them under the curing lamp between uses. The resin hardens on the silicone tools and can be easily pulled off and quickly cleaned with isopropyl alcohol before using with liquid resin again. All of these tools can be found at a kitchen store, but if needed, you can find smaller silicone brushes at art supply stores.
Upside down silicone cup cake liners as bench dogs to support the tool under the lamp to harden the resin for cleanup.
I recently had some really excellent feedback on this project and was prompted to create some resin curing experiments.
Here's a short vid explaining how I tested this $50 DIY UV lamp for resin curing, and I hope to continue to share updates
Things that could effect exposure time:
Light density: how close the LEDs are arranged next to each-other and number of lights used.
Projection distance: see inverse square law for how light is exponentially darker as you move away from the source
The strip is this 12V 24W Black Light Strip that emits light at 395~400nm wavelength according to the product description. In looking through the reviews, an intrepid customer shared their results of what happened when they took a spectrometer to the LED strip: "The spectrogram shows this is truly a UV-A light with a maximum at 385 nm"
Direction of the light: I think if you flexed the light it could help diffuse the light in multiple directions, which could improve cure times and overall hardness throughout your pour.
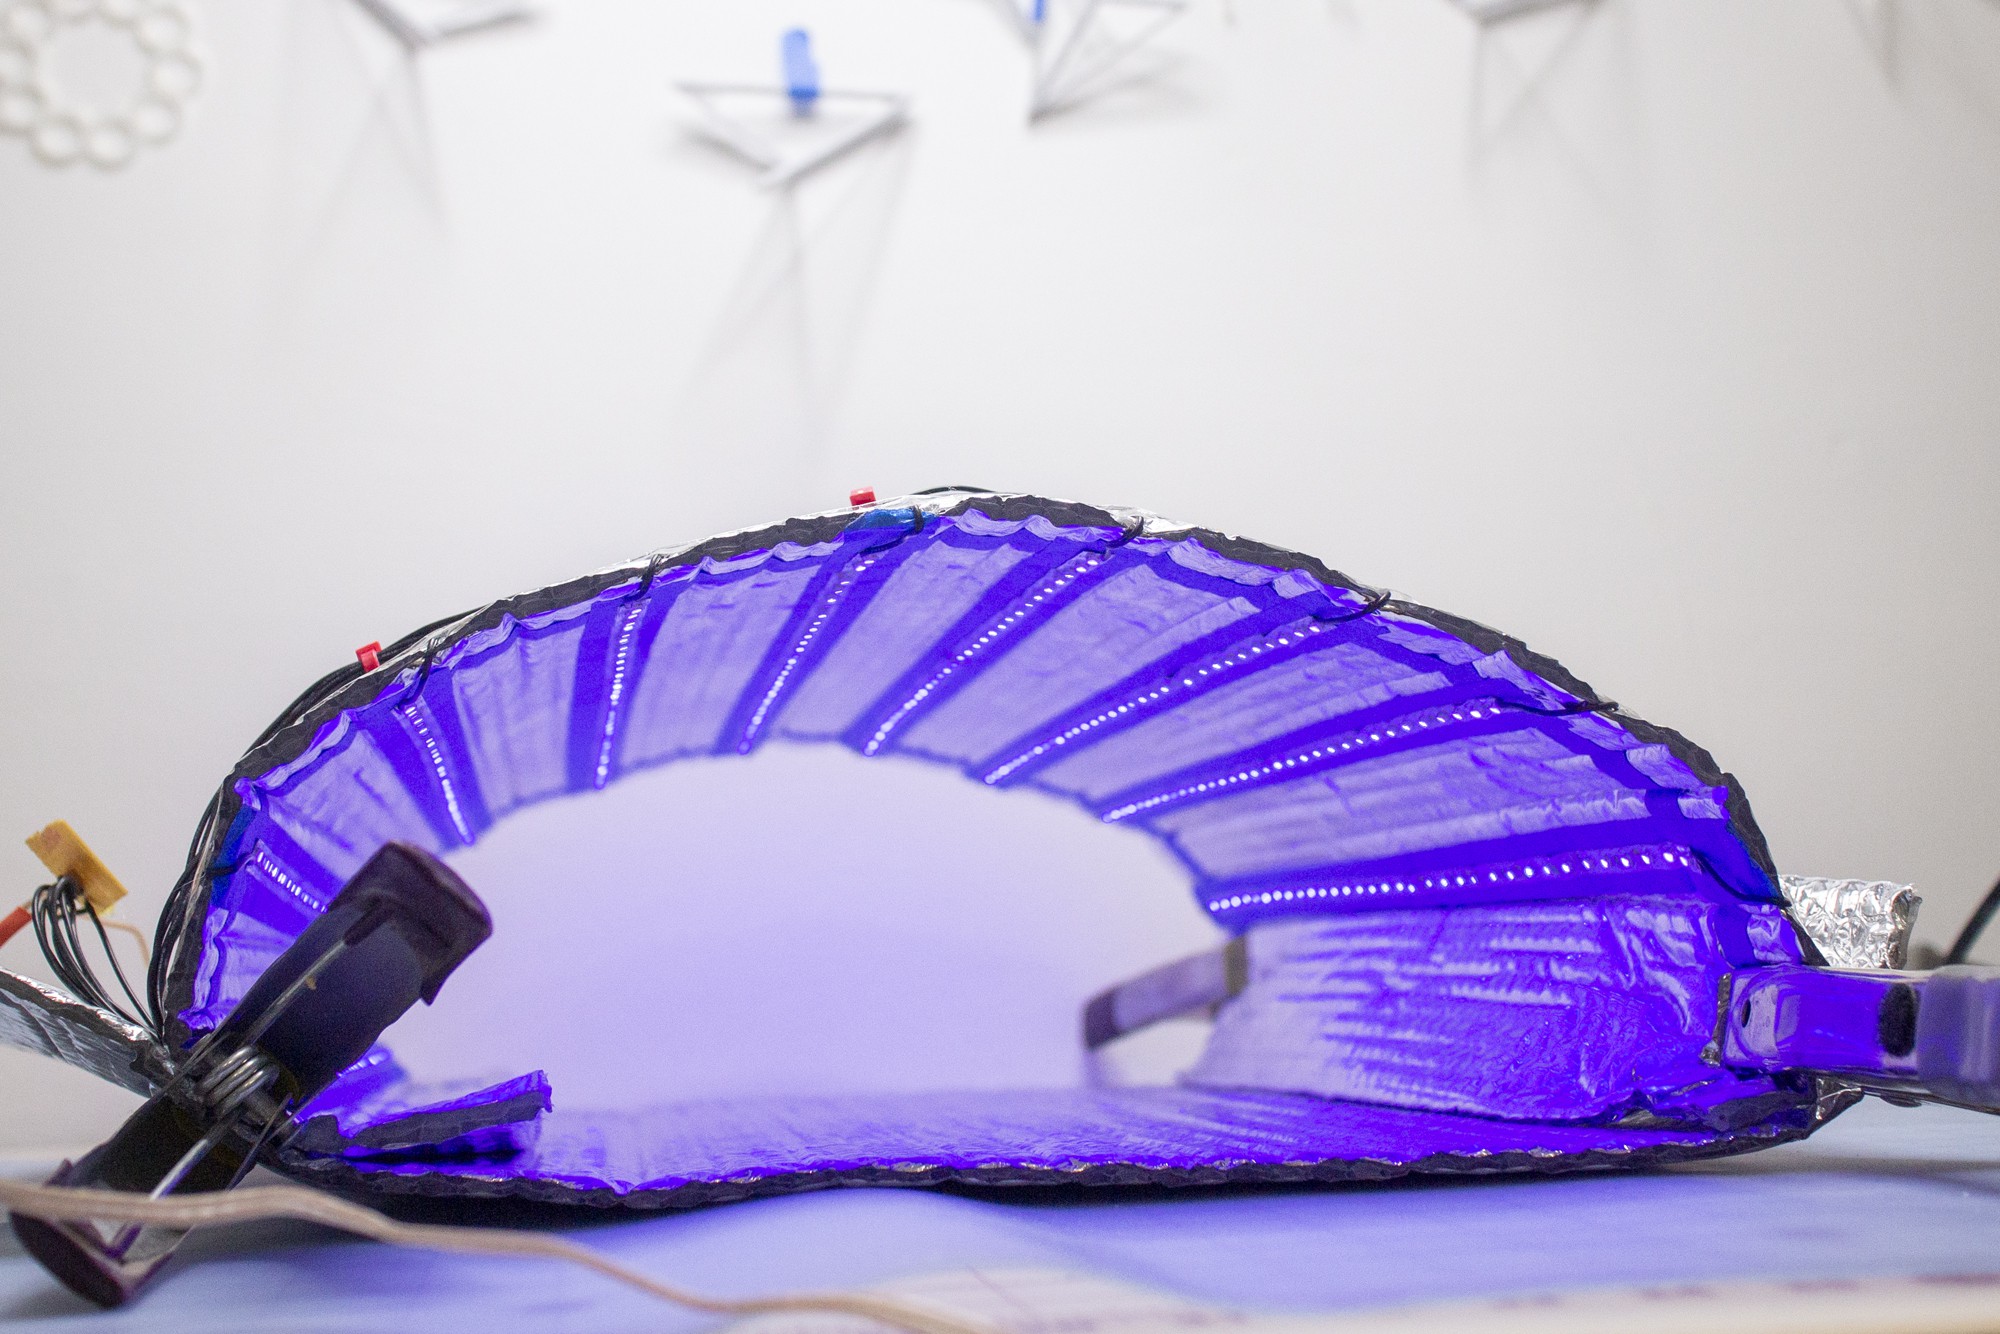
The second test completed replaces the rigid PVC frame with simple A-clamps and more bubble-foil material. I shaped the lamp into a loaf like shape, and secured it with clamps to an additional small piece of bubble foil.
Since the light was being emitted and reflected from multiple directions this time, I did notice that the resin was a bit stiffer and didn't require a wipe-down with IPA to chemically remove stickiness.
Here's a video demonstrating using the lamp in this flexed configuration with diffraction grating.
 audreyobscura
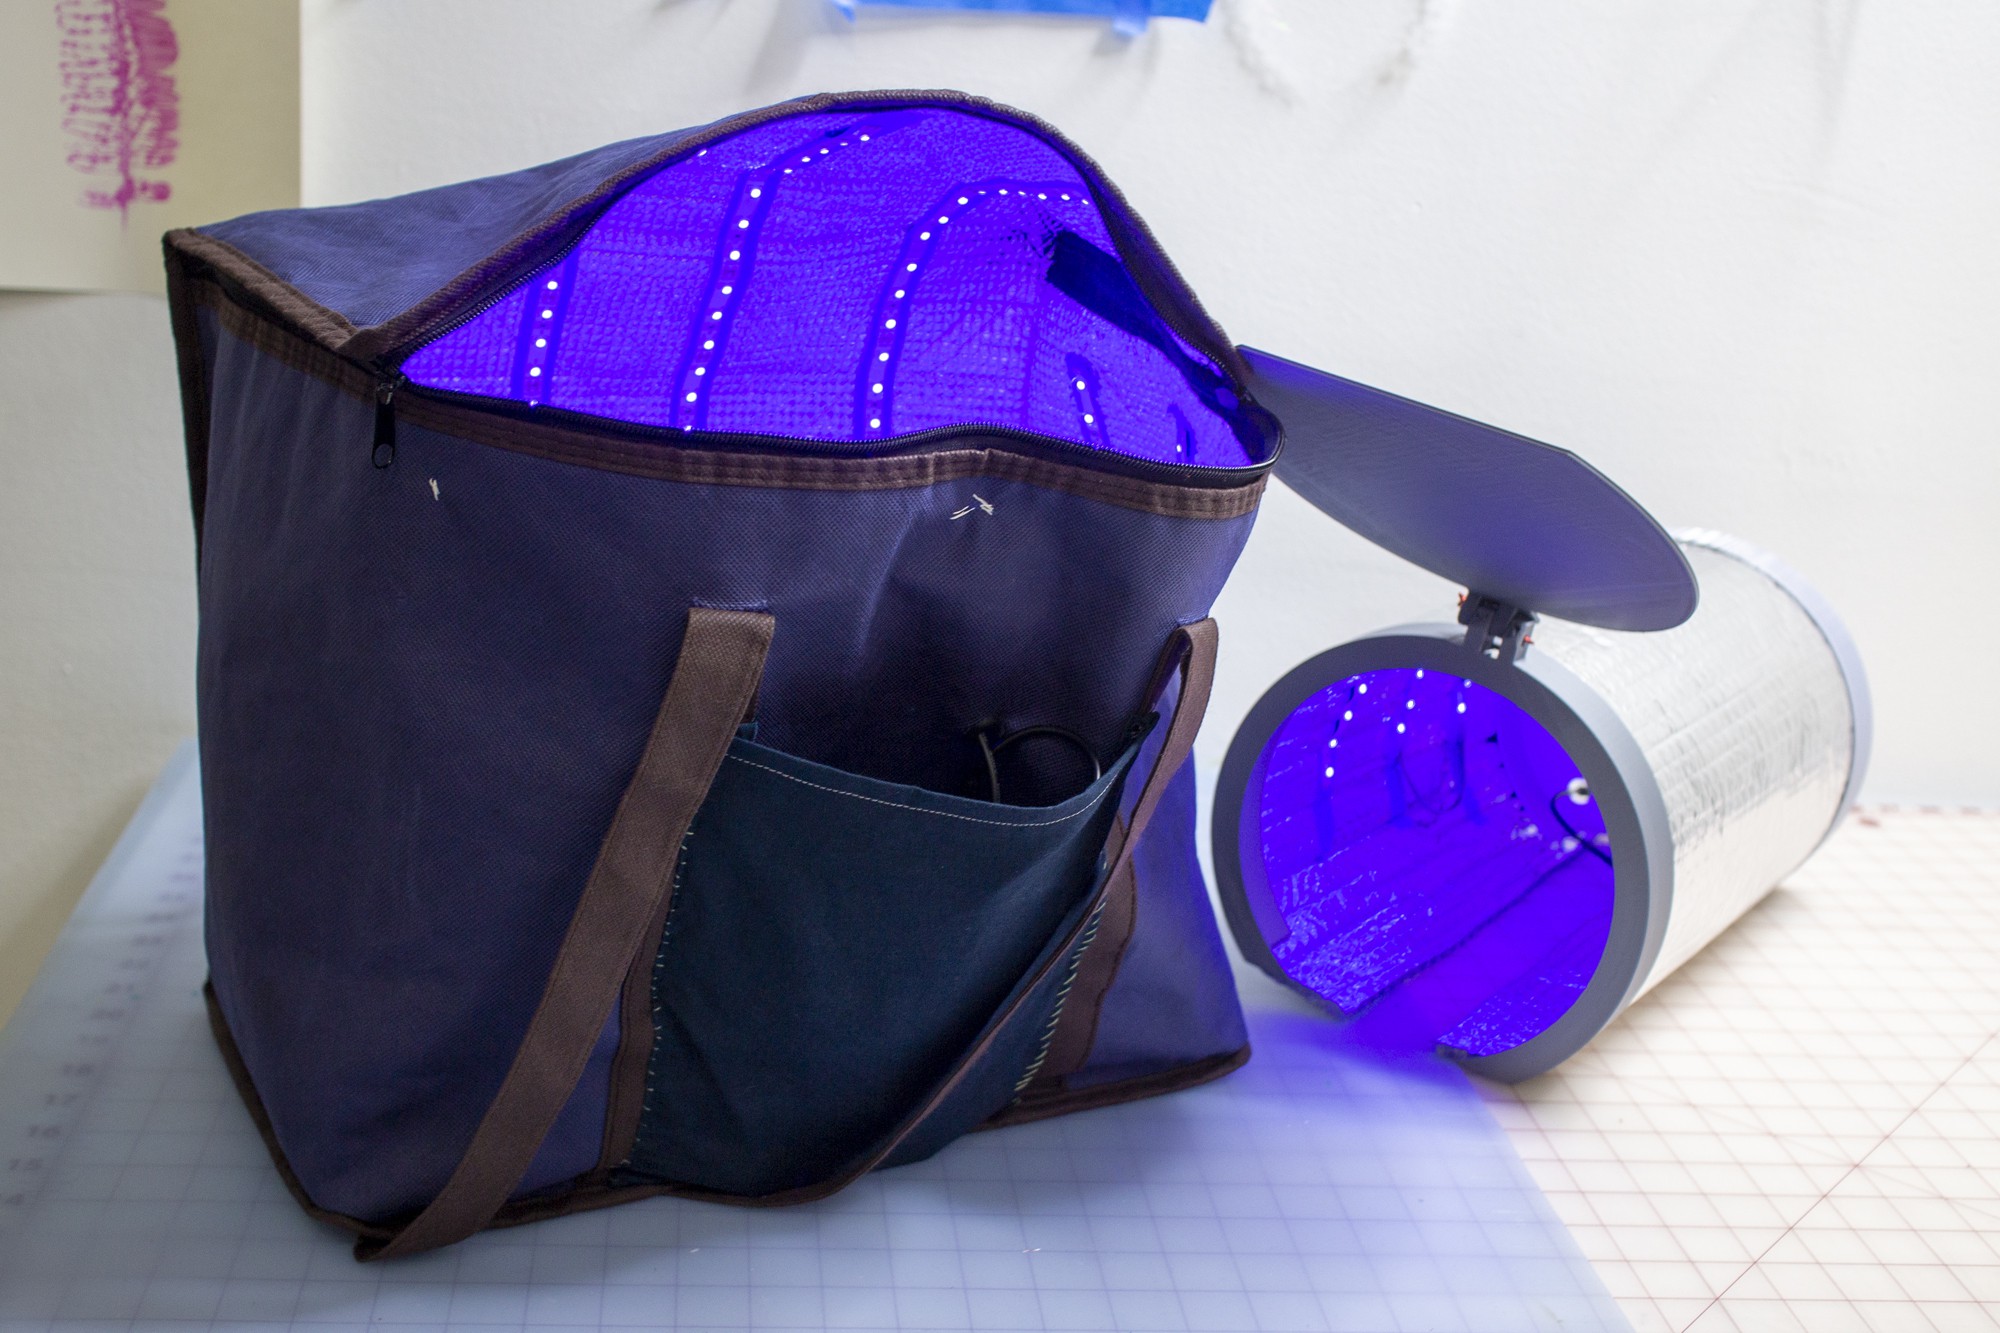


 I began by cutting off the sides and turning the bubble foil into 16" squares
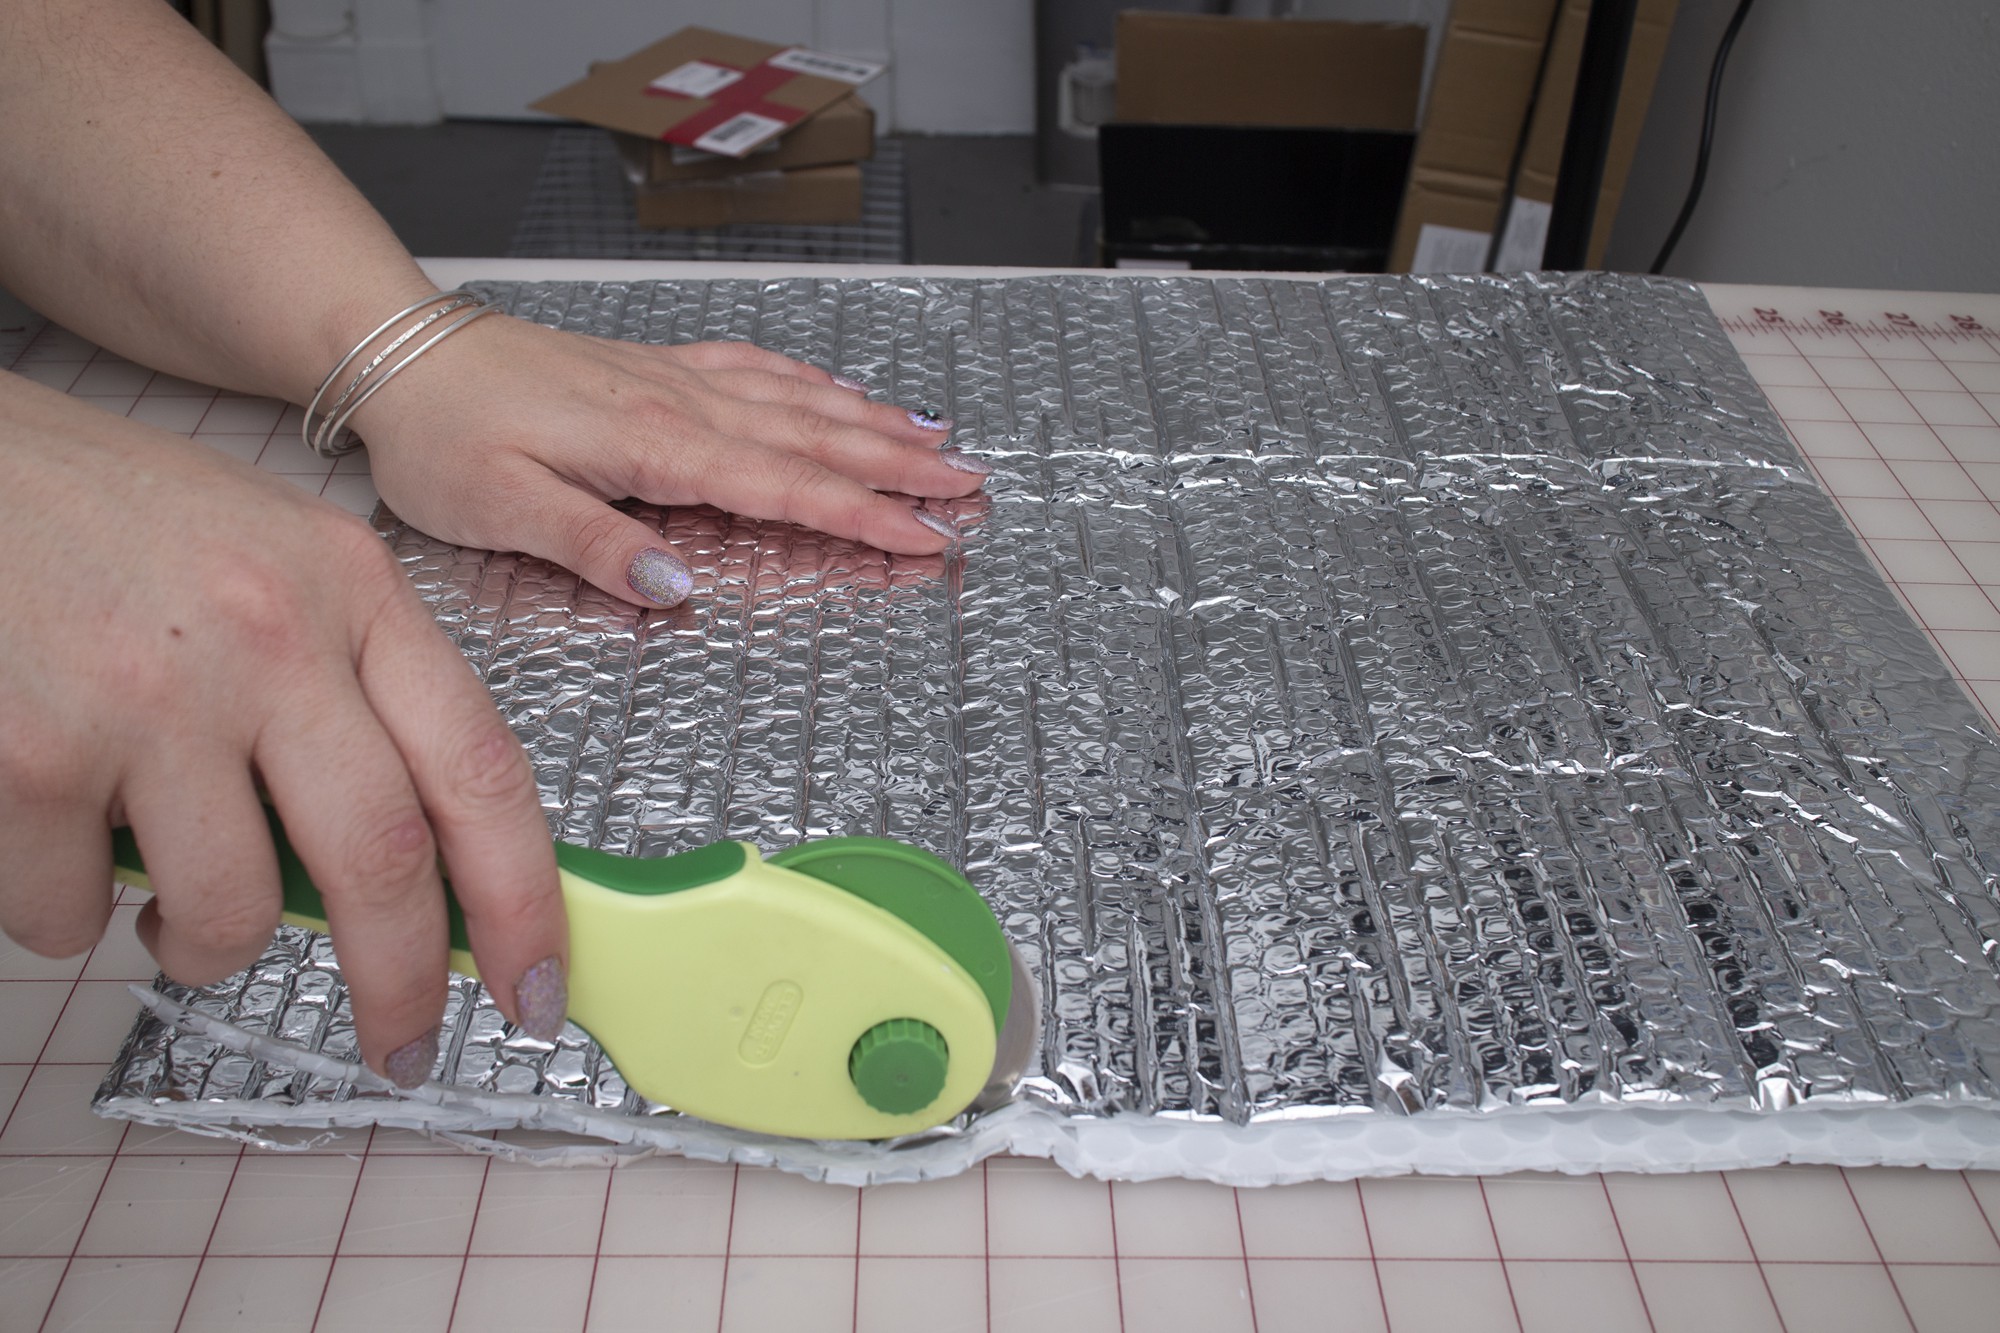
 Here's the box shape flat on the studio floor, it's hard to see but each edge is bound with stainless steel foil tape.
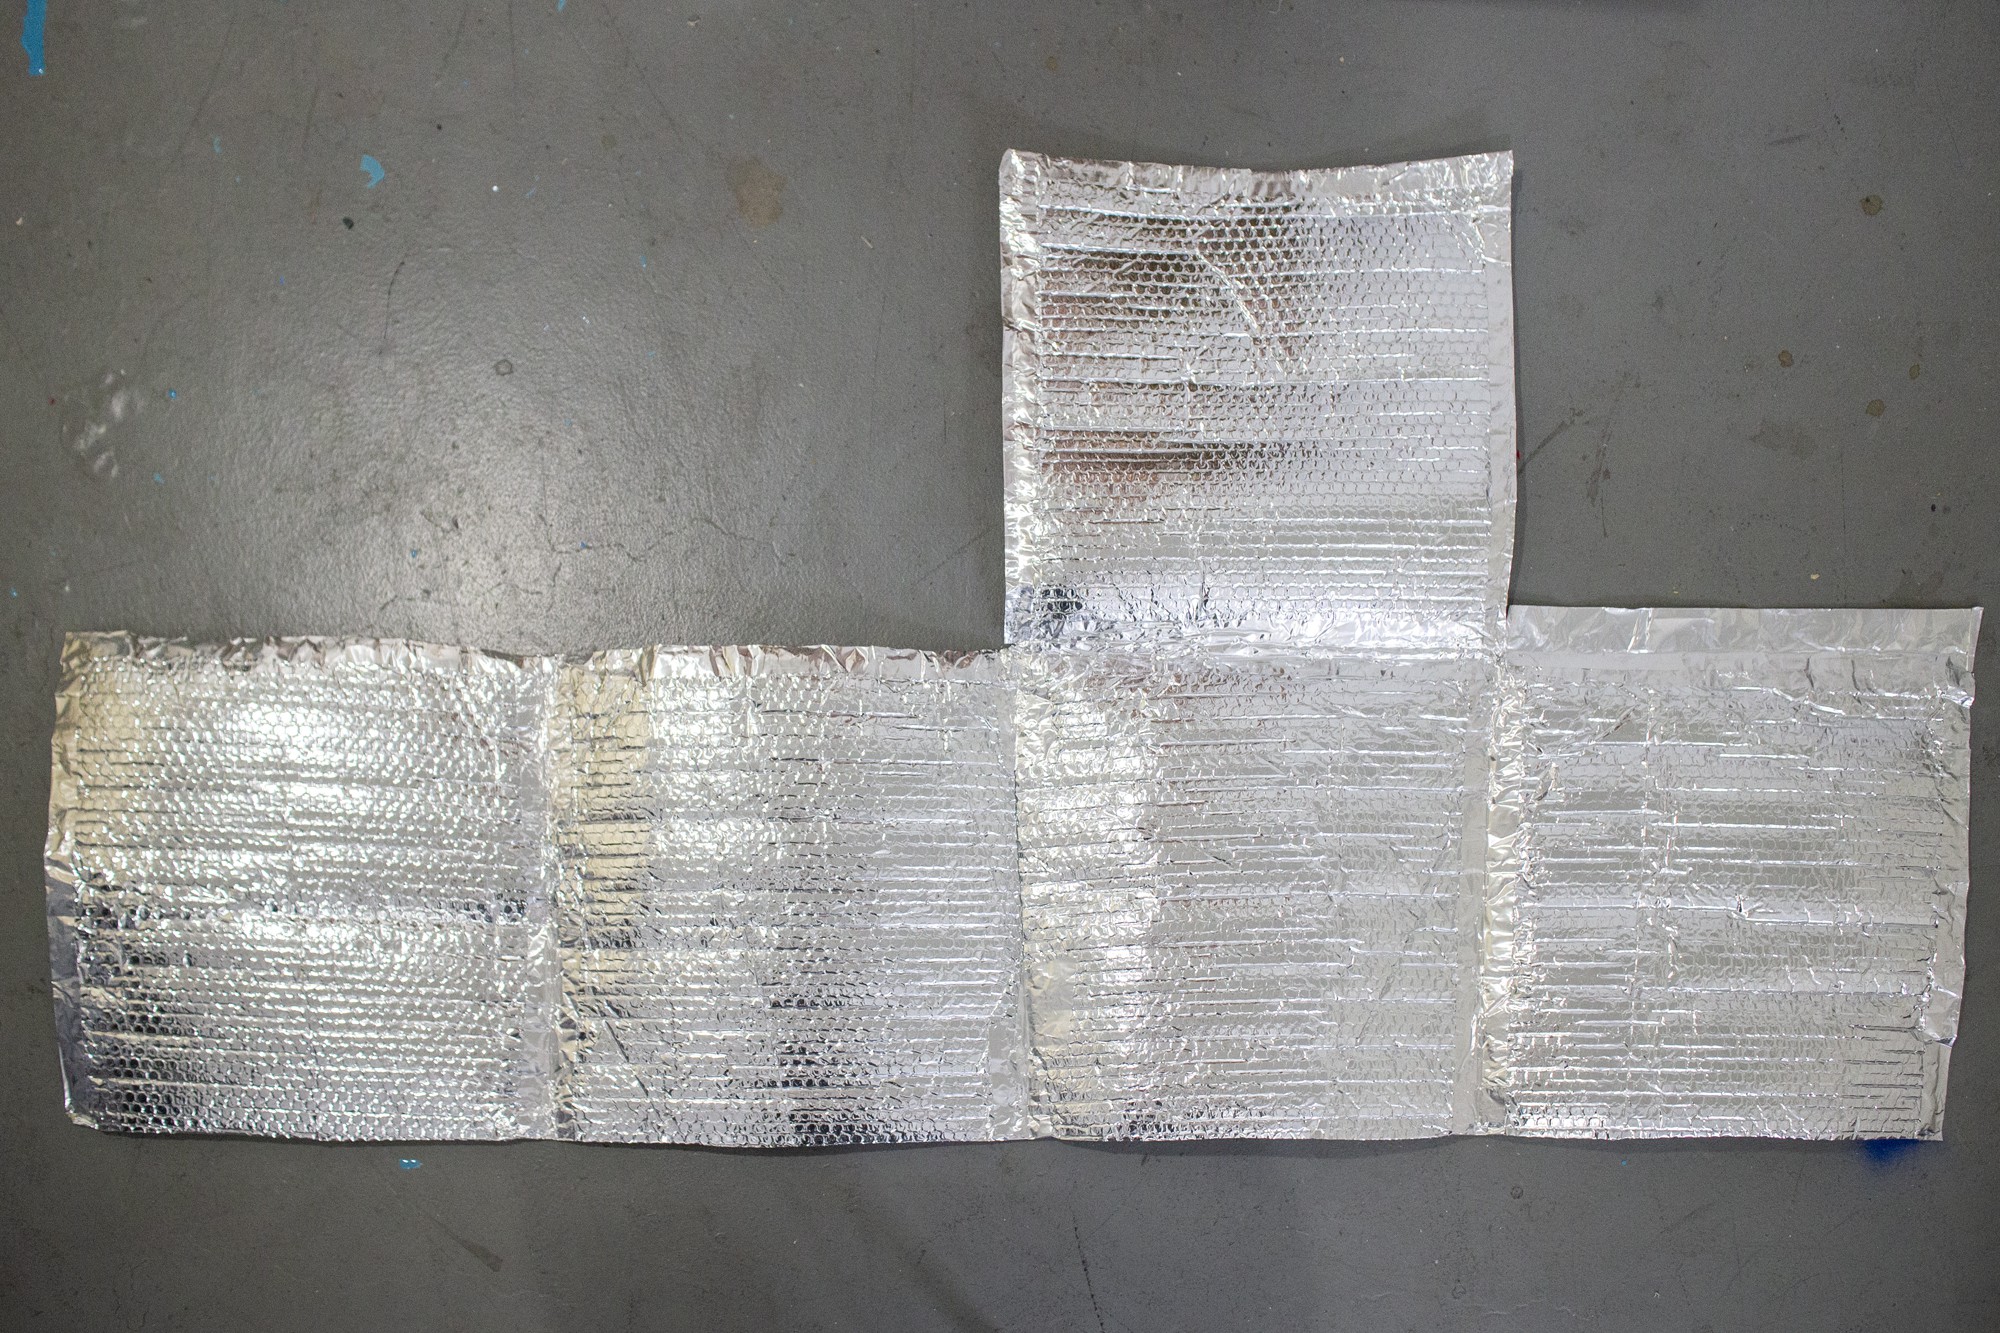
 The internal volume of the shape after the edges are folded over and pinched is slightly more than a 14" cube.