Close
0%
0%

Landbeest walking robot

Terrain-going quadruped. 3D printable. Two servo drive.

Similar projects worth following
I'm designing a 3D printable quadruped which only uses two servo motors. One servo for moving forward and the other one for steering.
Want it to be easy to build and control. Also maneuverable and able to clear minor obstacles and uneven terrain.

New project page

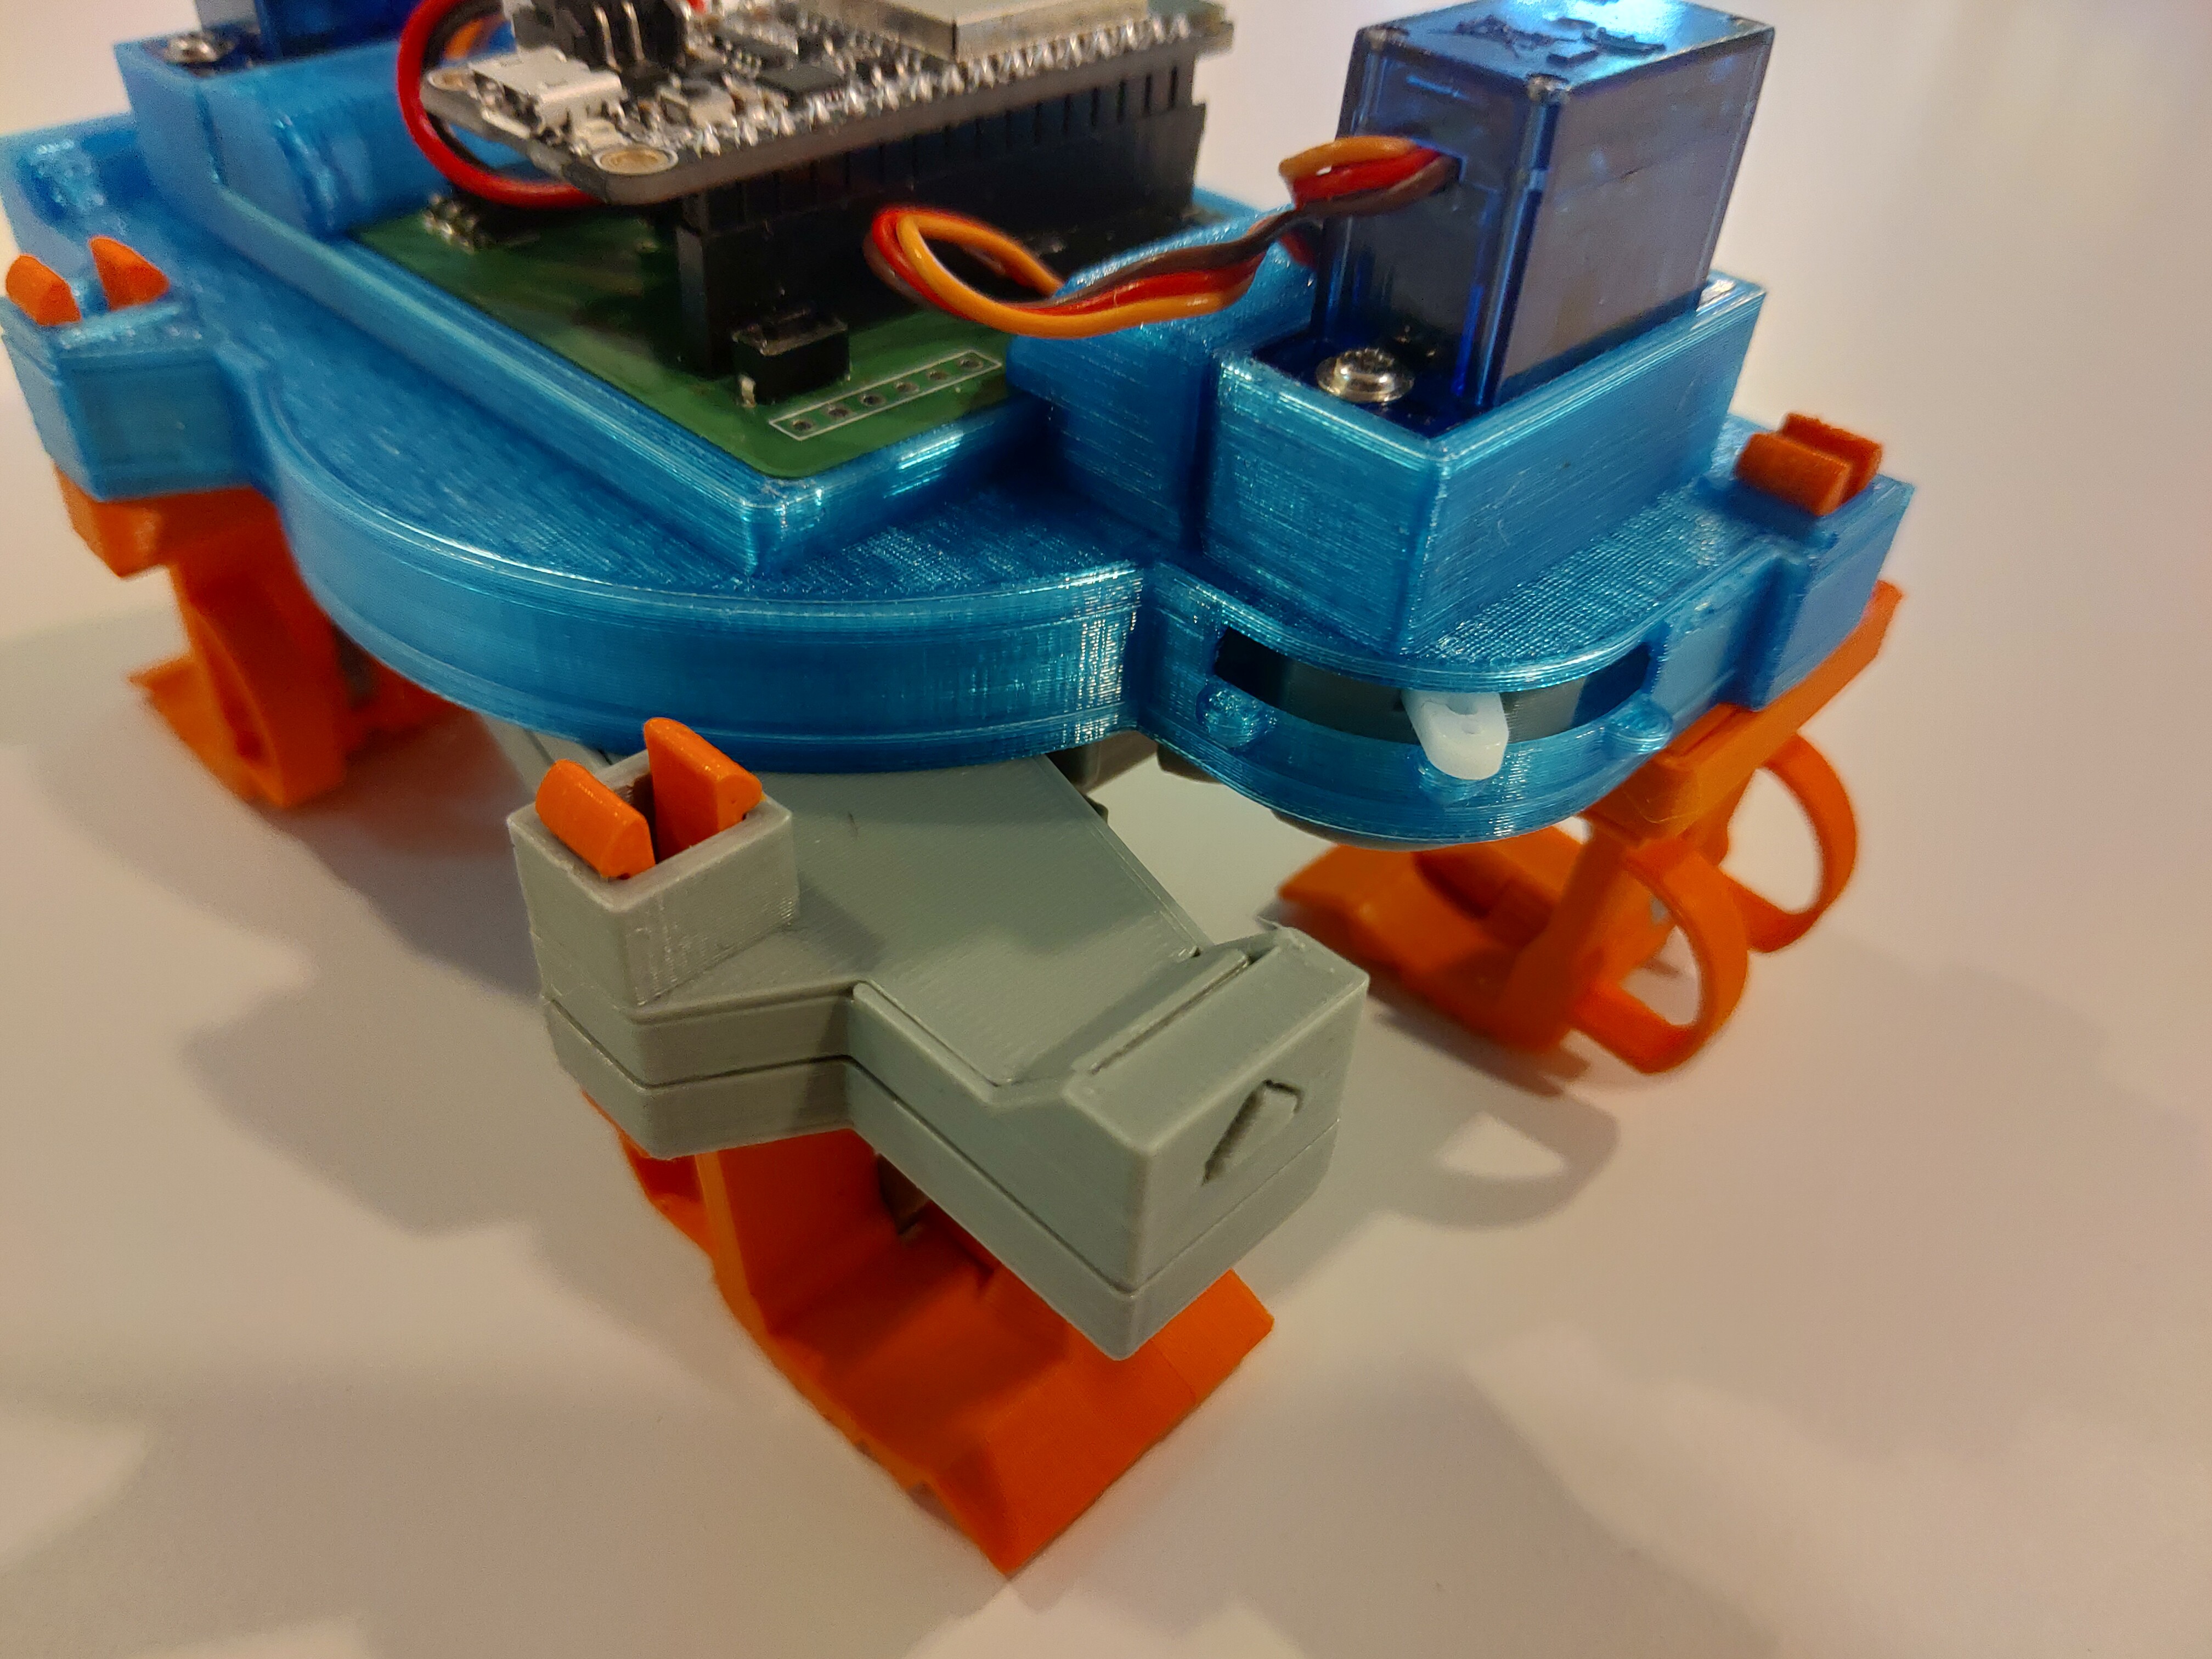
Landbeest has evolved into Tardygrade. Follow the link to see recent updates on this project. 
Motivation

I've previously tried building a couple of two-wheeled robots with the intent of having them drive around my apartment unattended. However that hasn't usually worked out as well as I'd hoped. What tend to happen is that the robot gets stuck on something after a minute or two, and I'll have to go rescue it. Usually the stumbling blocks are obstacles that aren't easily detected by sensors: carpet edges, door thresholds or wires.

Goal

I want to design a quad walker robot platform that is really simple to build and is suitable for negotiating living room floor terrain. 

Once I've arrived at a design I'm satisfied with I will publish stl files for 3D printing, buid instructions and code examples.

Latest prototype

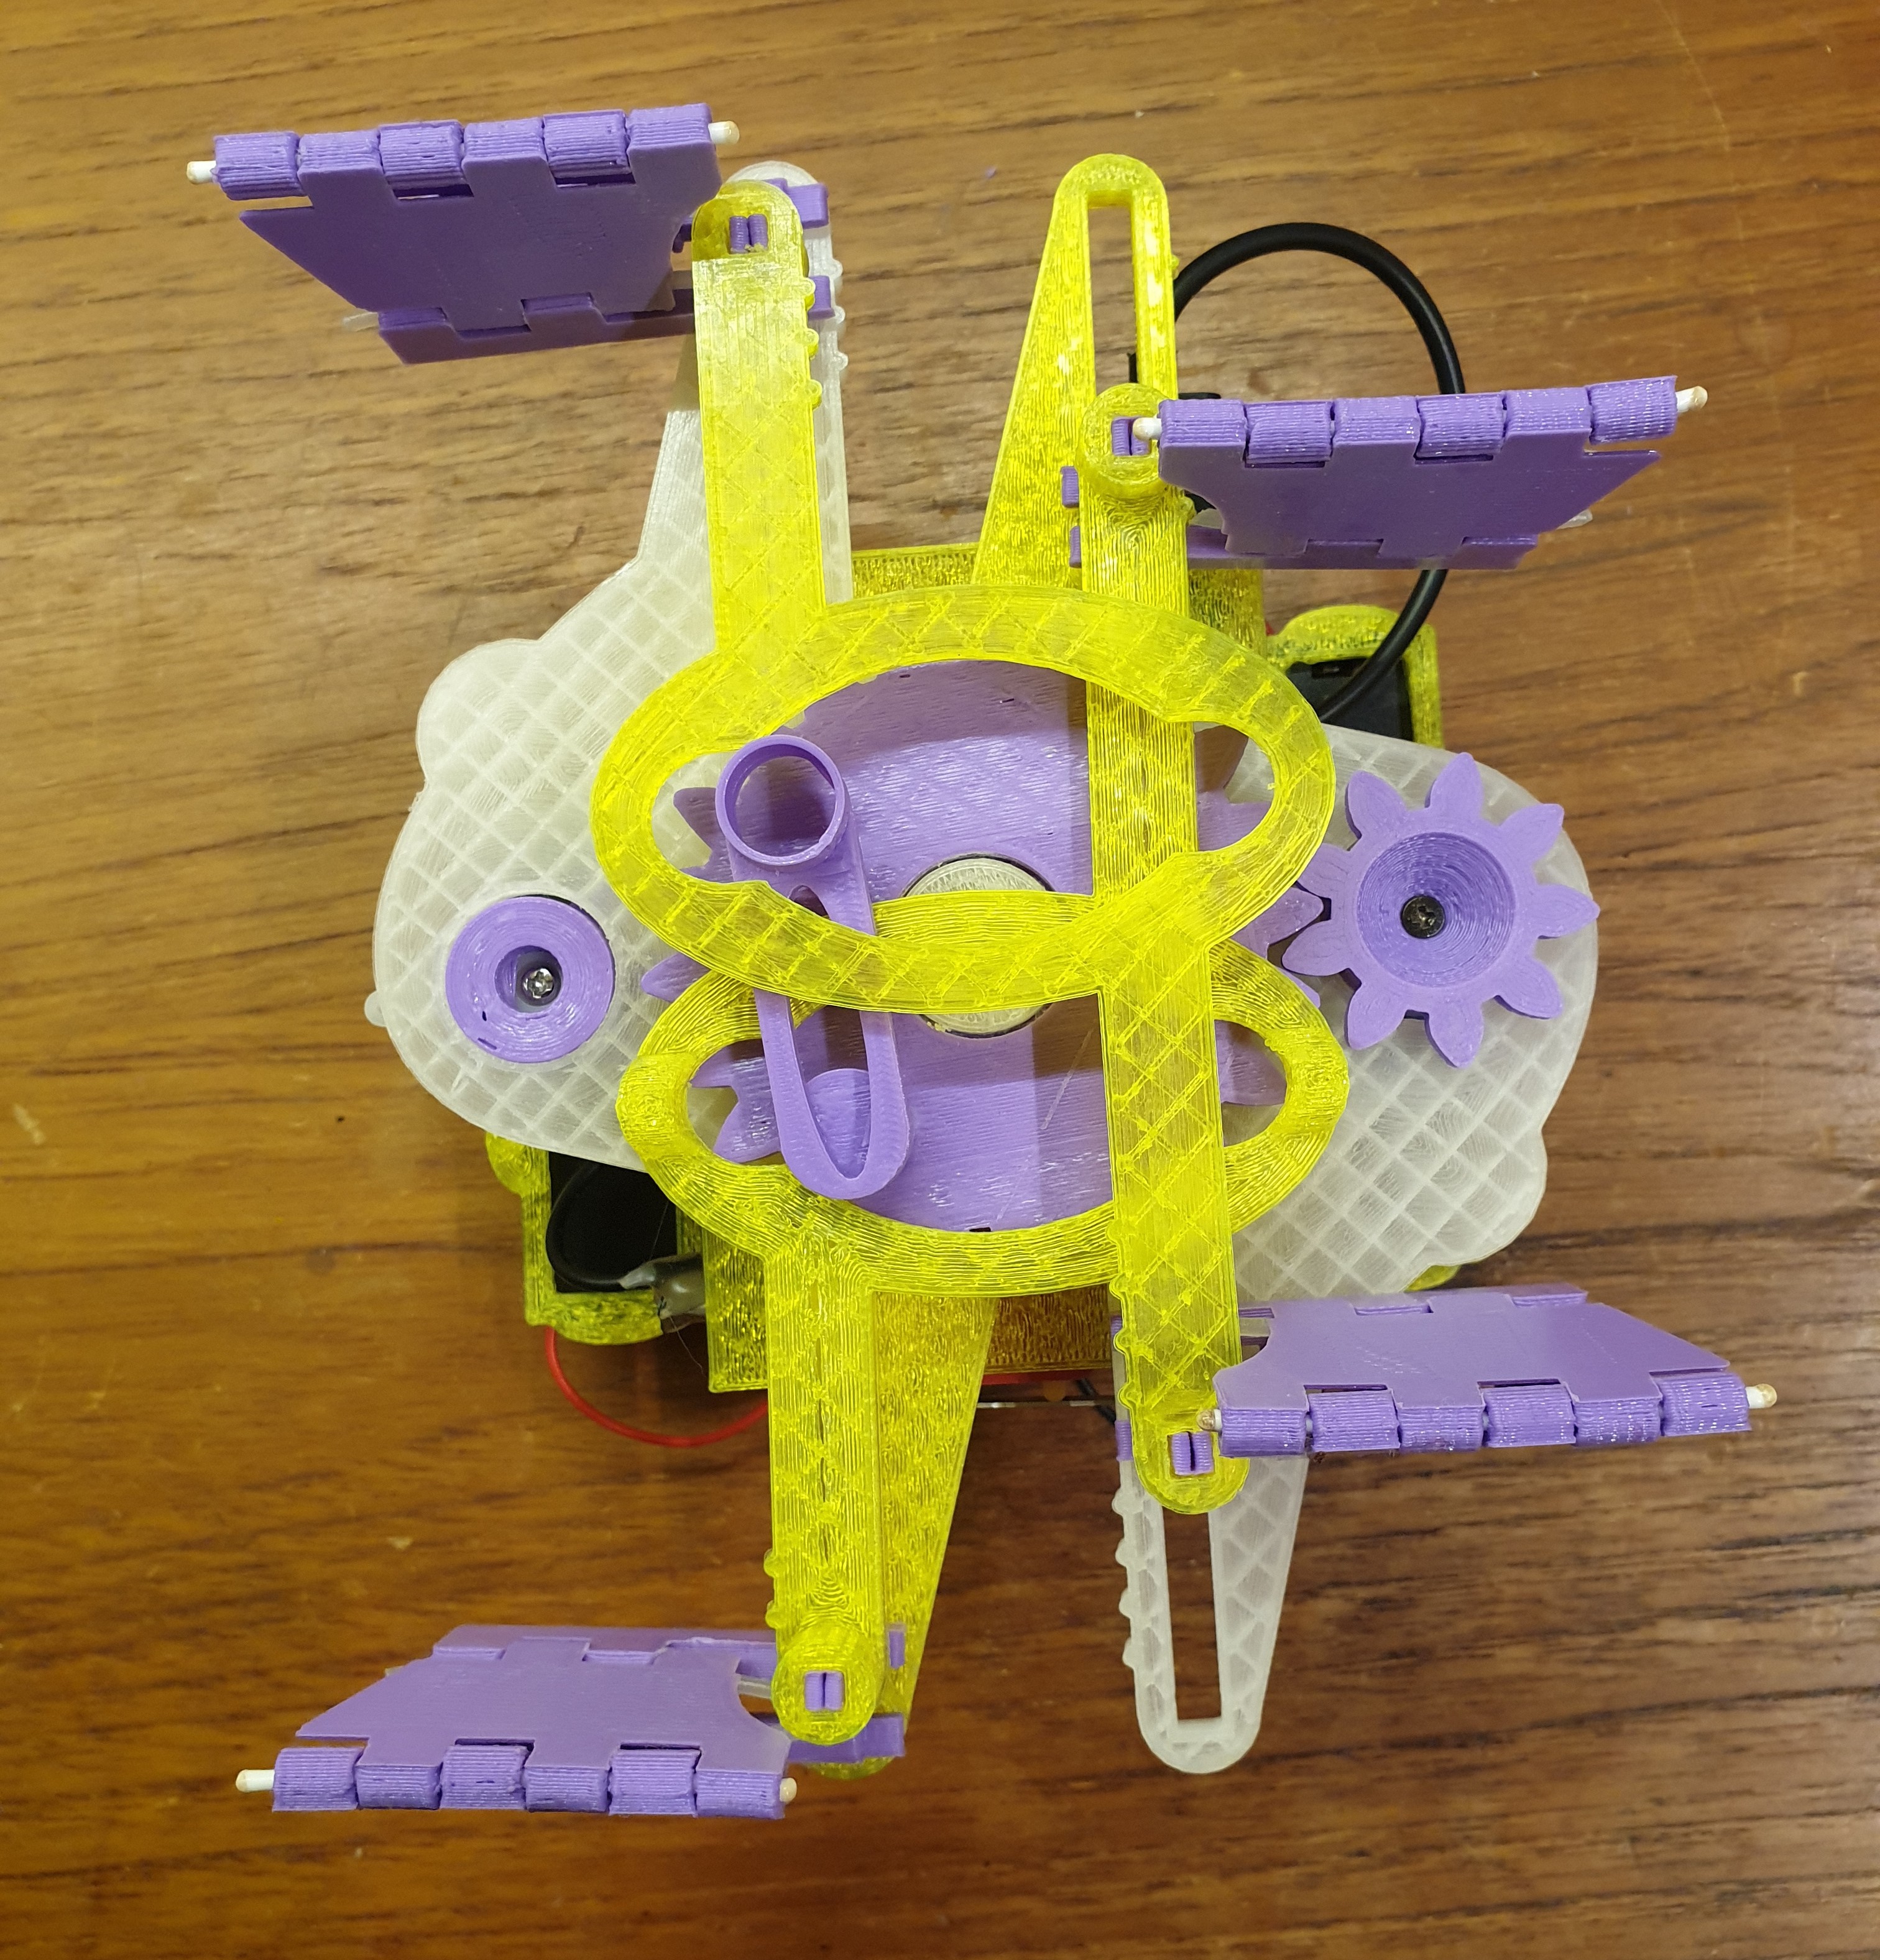
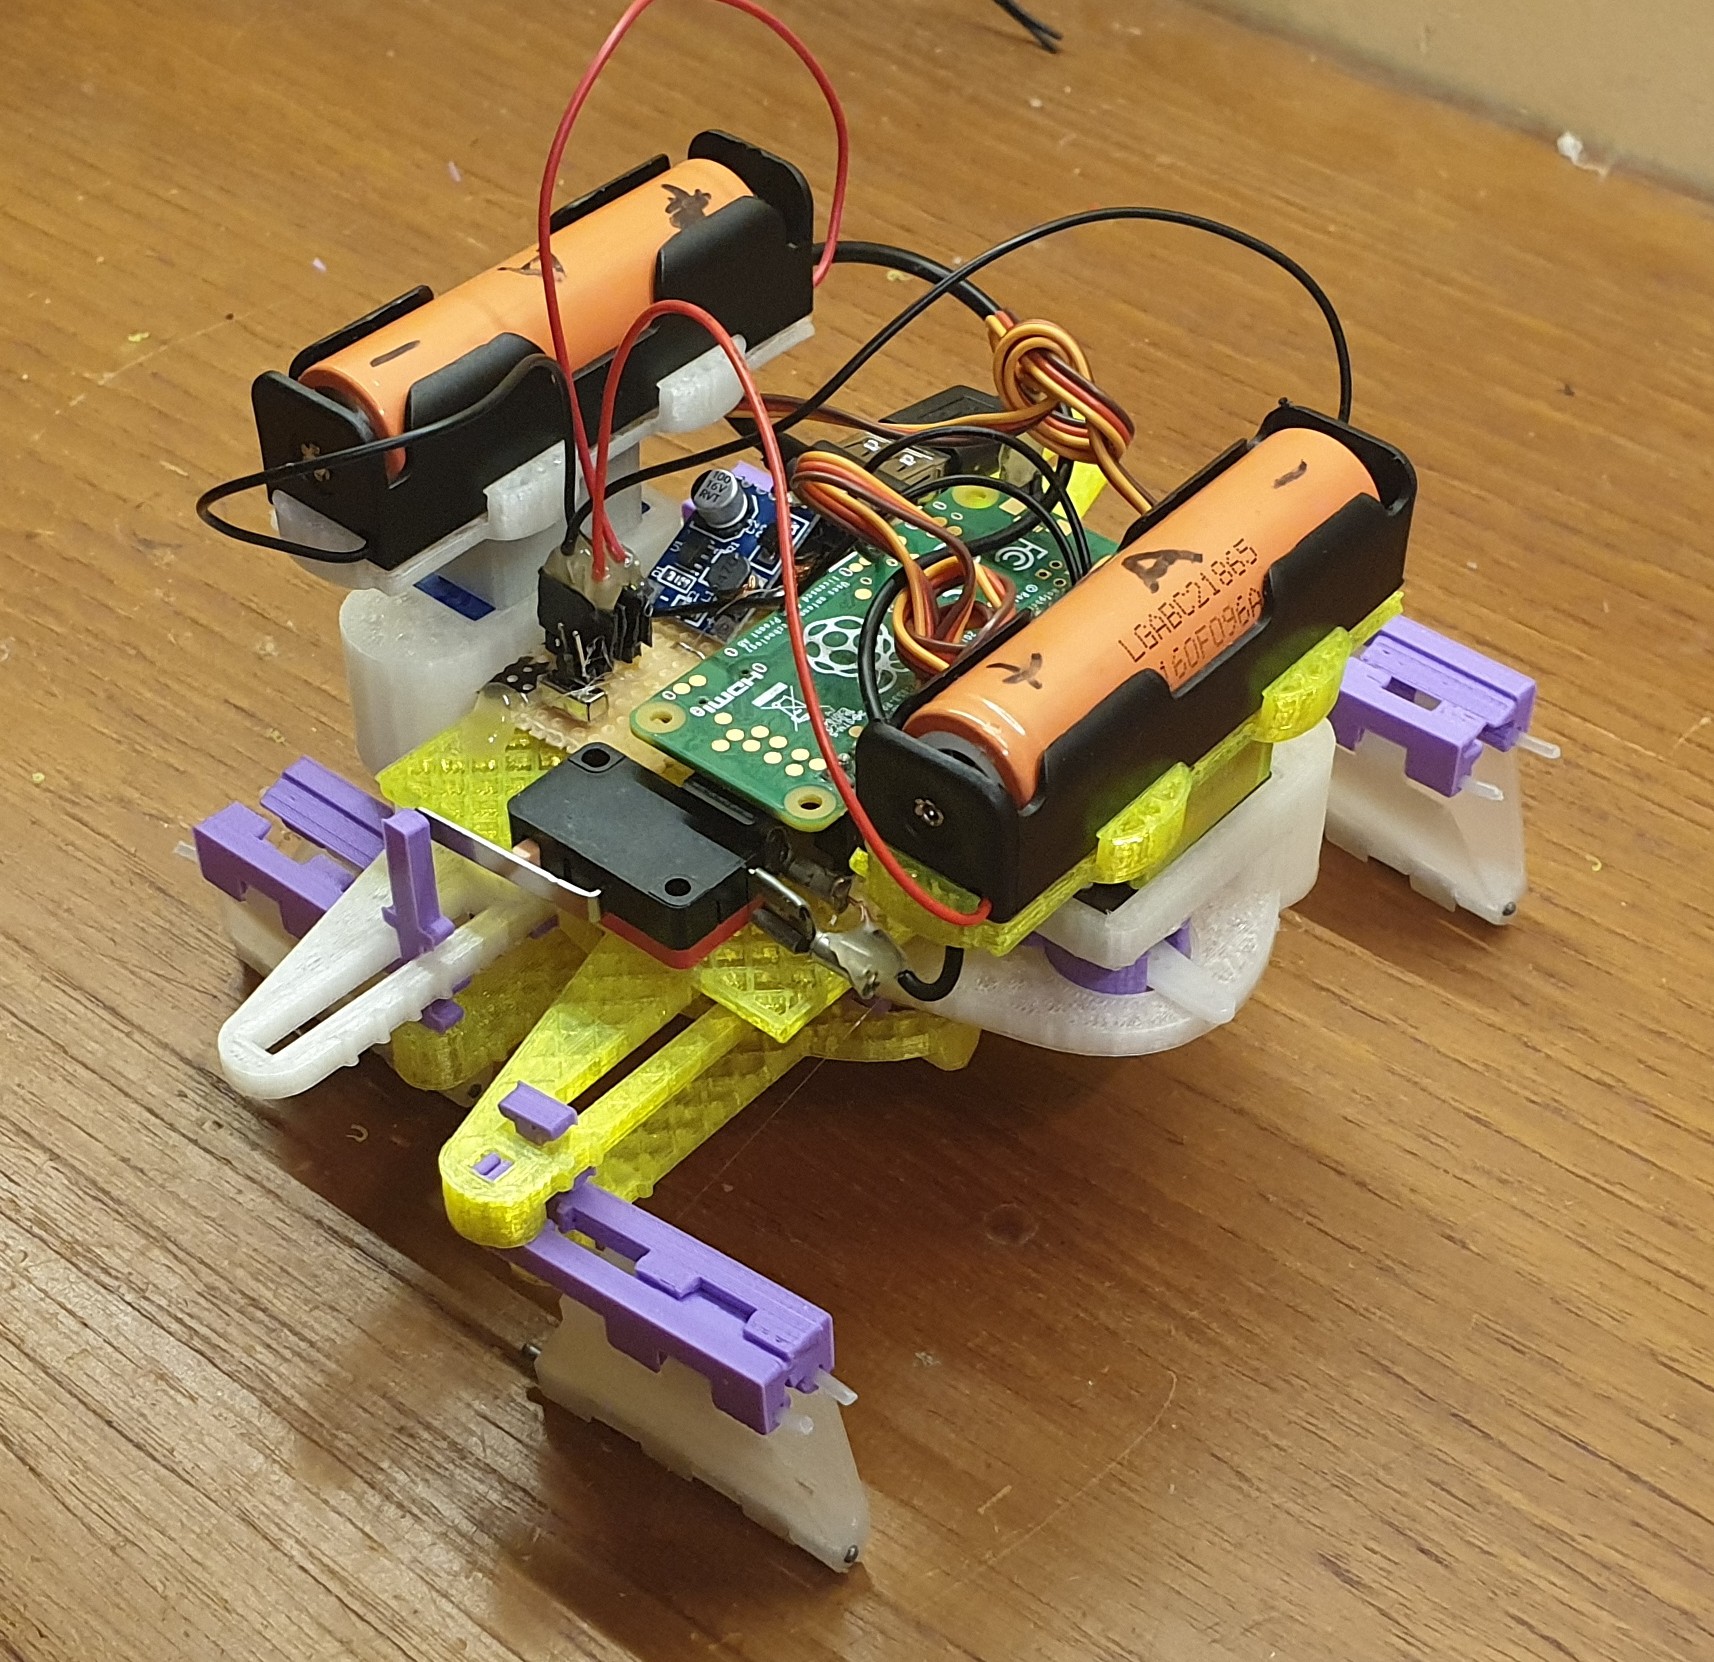
LB-322: Project close to completion. 

Previous prototypes

Naming convention

To distinguish between different prototypes I'm using the naming convention "LB-XYZ", where X, Y, Z are digits 0-9.

  • X++ if the drive train has been improved since the last prototype.
  • Z++ if steering has been improved.
  • Y++ if improvements not related to X and Z have been made. 
  • Extra! Extra! Landbeest is now Tardygrade. Read all about it!

    Dejan Ristic07/07/2021 at 10:55 0 comments

    All future updates on this project will be posted on the new Tardygrade project page.

    The Landbeest page has been tumbleweed central for a few years now. But during 2021 I've had time to work on the robot again and have made some major progress.

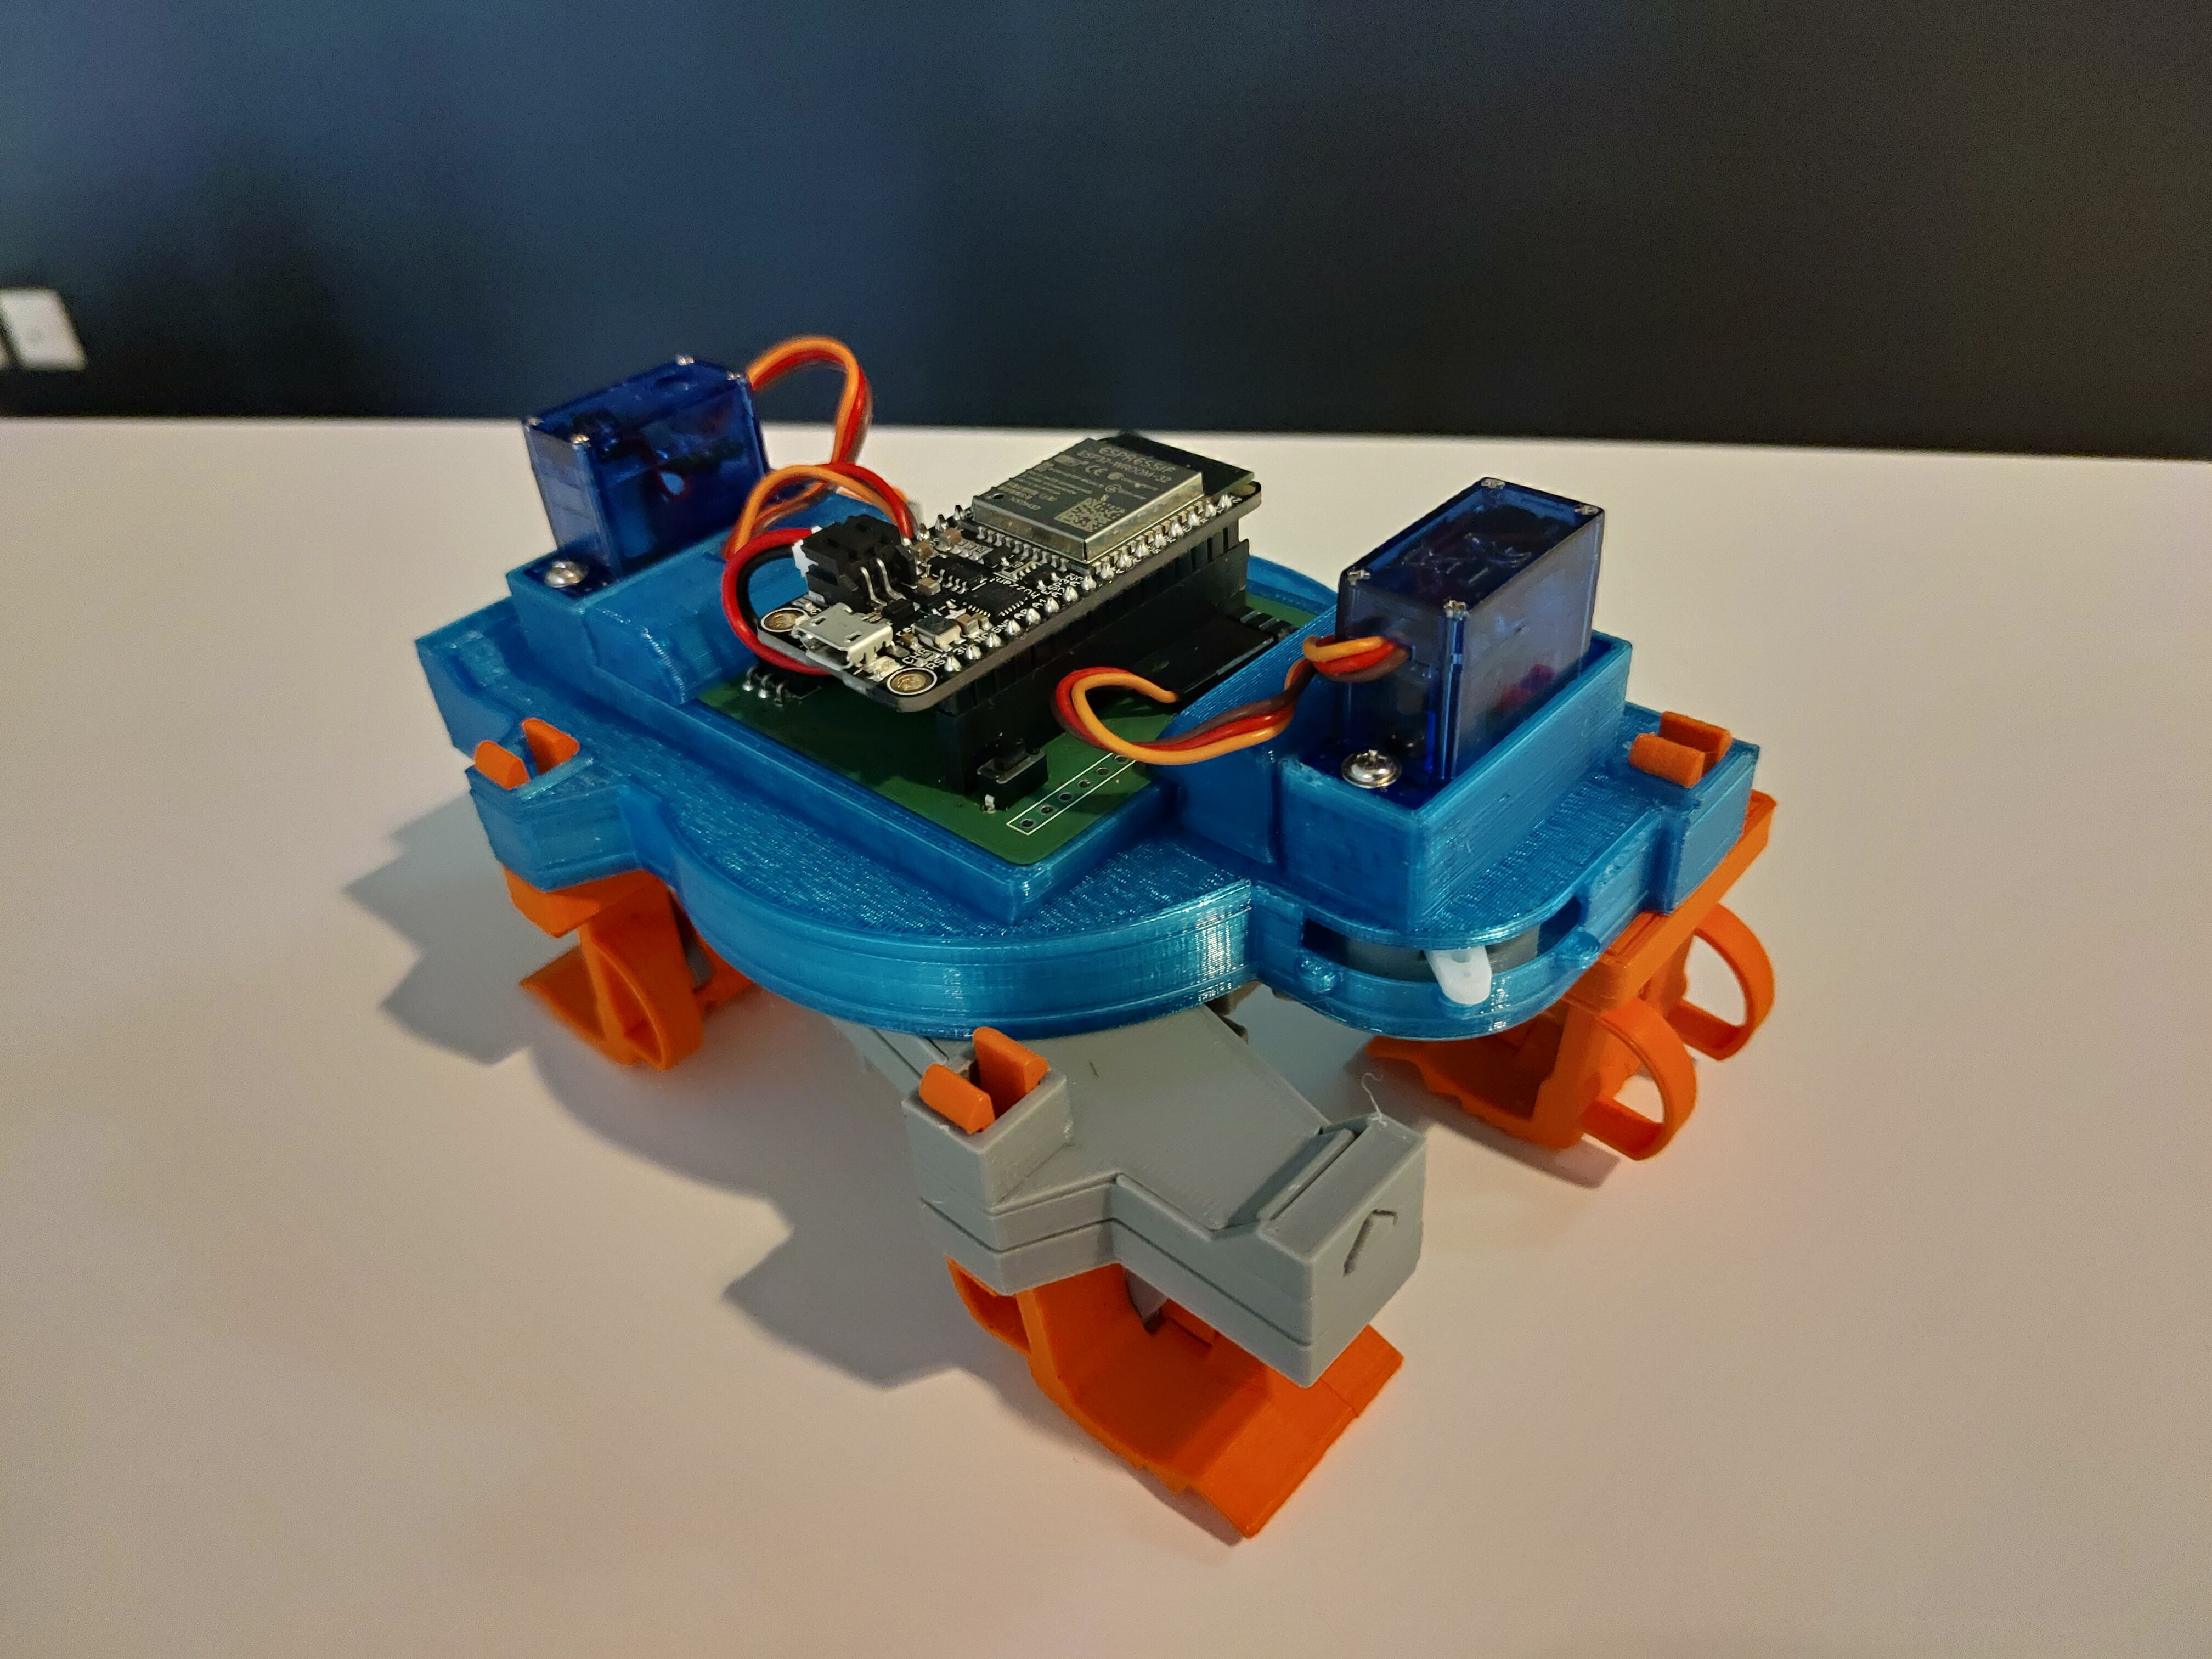
    I finally gave up on the old Tinkercad model and have now reworked the whole frame and mechanism in FreeCad. 

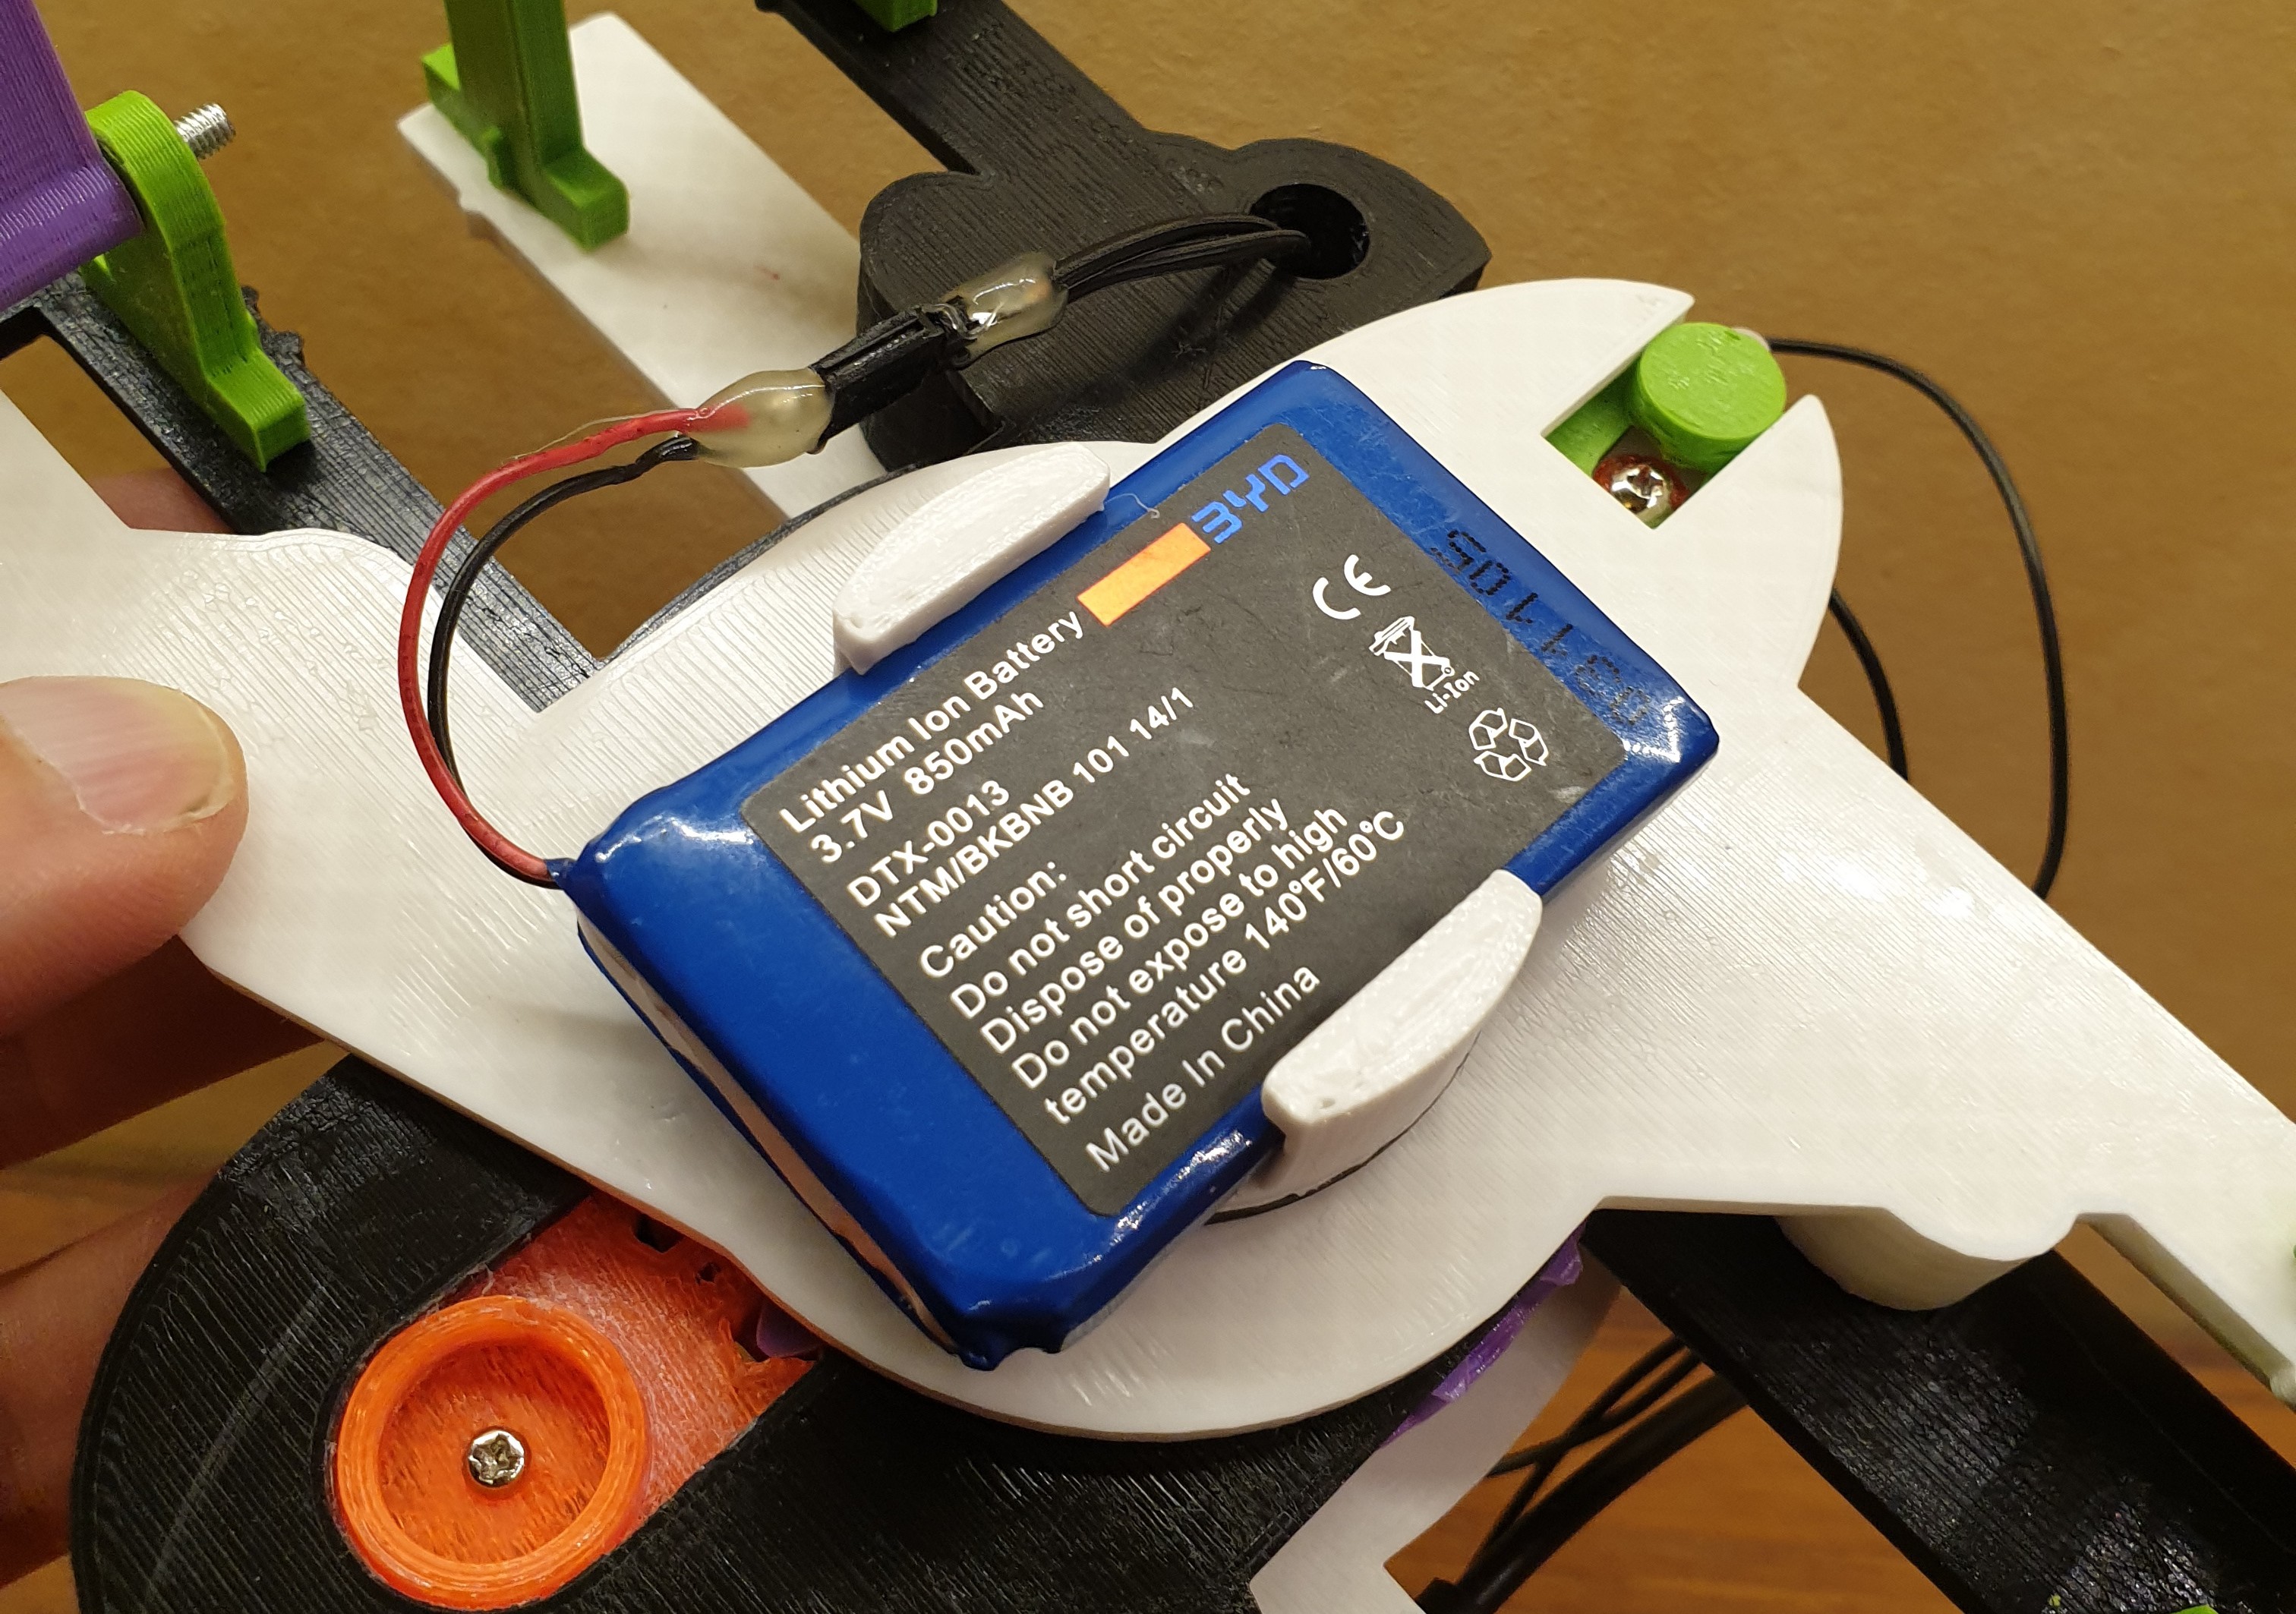
    The frame now acts as housing for the mechanism, so no more exposed gears. The battery is also concealed within the body.

    All M3 screws are gone. The robot body is now fully 3D printable.

    I'm working on a little PCB that uses hall switches for position control instead of the old mechanical switch.

    The brains are now ESP32 instead of RPi Zero.

    This will be my last update of this page. Check out Tardygrade for future developments.

  • Another LB-322 demo + progress report

    Dejan Ristic01/25/2020 at 18:29 0 comments

    Made another build of LB-322 with some minor improvements. Demo video below:

    Compared to LB-312, the legs are now spaced apart at different lengths on left and right side. This is a bit of a compromise to make the frame more robust and easier to print. But it also introduces some balancing issues. An unbalanced load can lead to tilting to one side while the robot walks. 

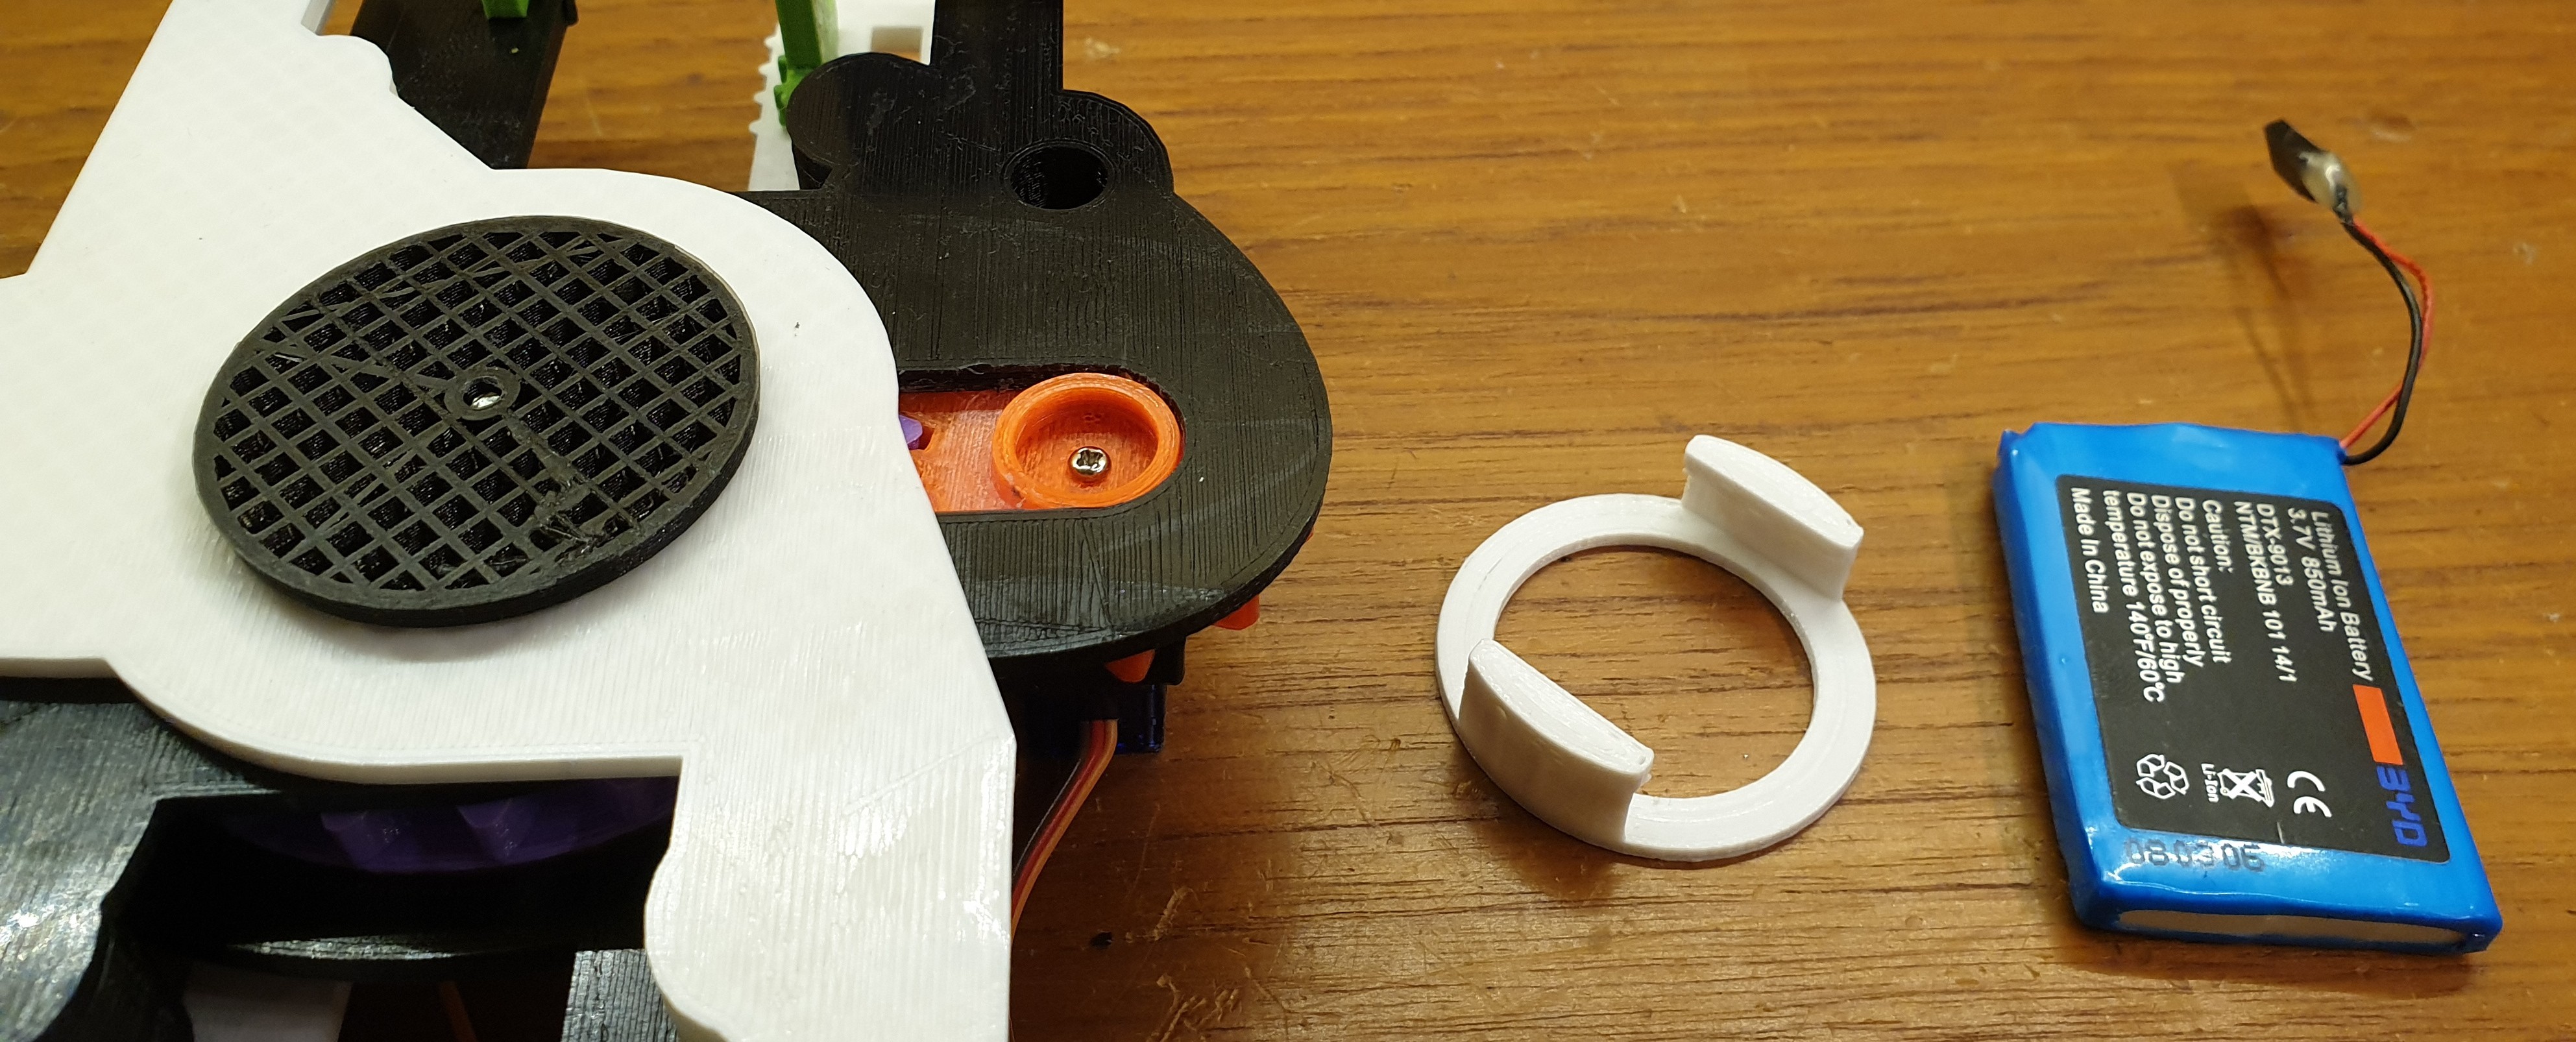
    I decided the best spot for putting batteries are directly on top of each servo. I made a little 18650 holder that fits over each servo. The holders are designed so that the weight of the batteries gets evenly distributed across the frame.

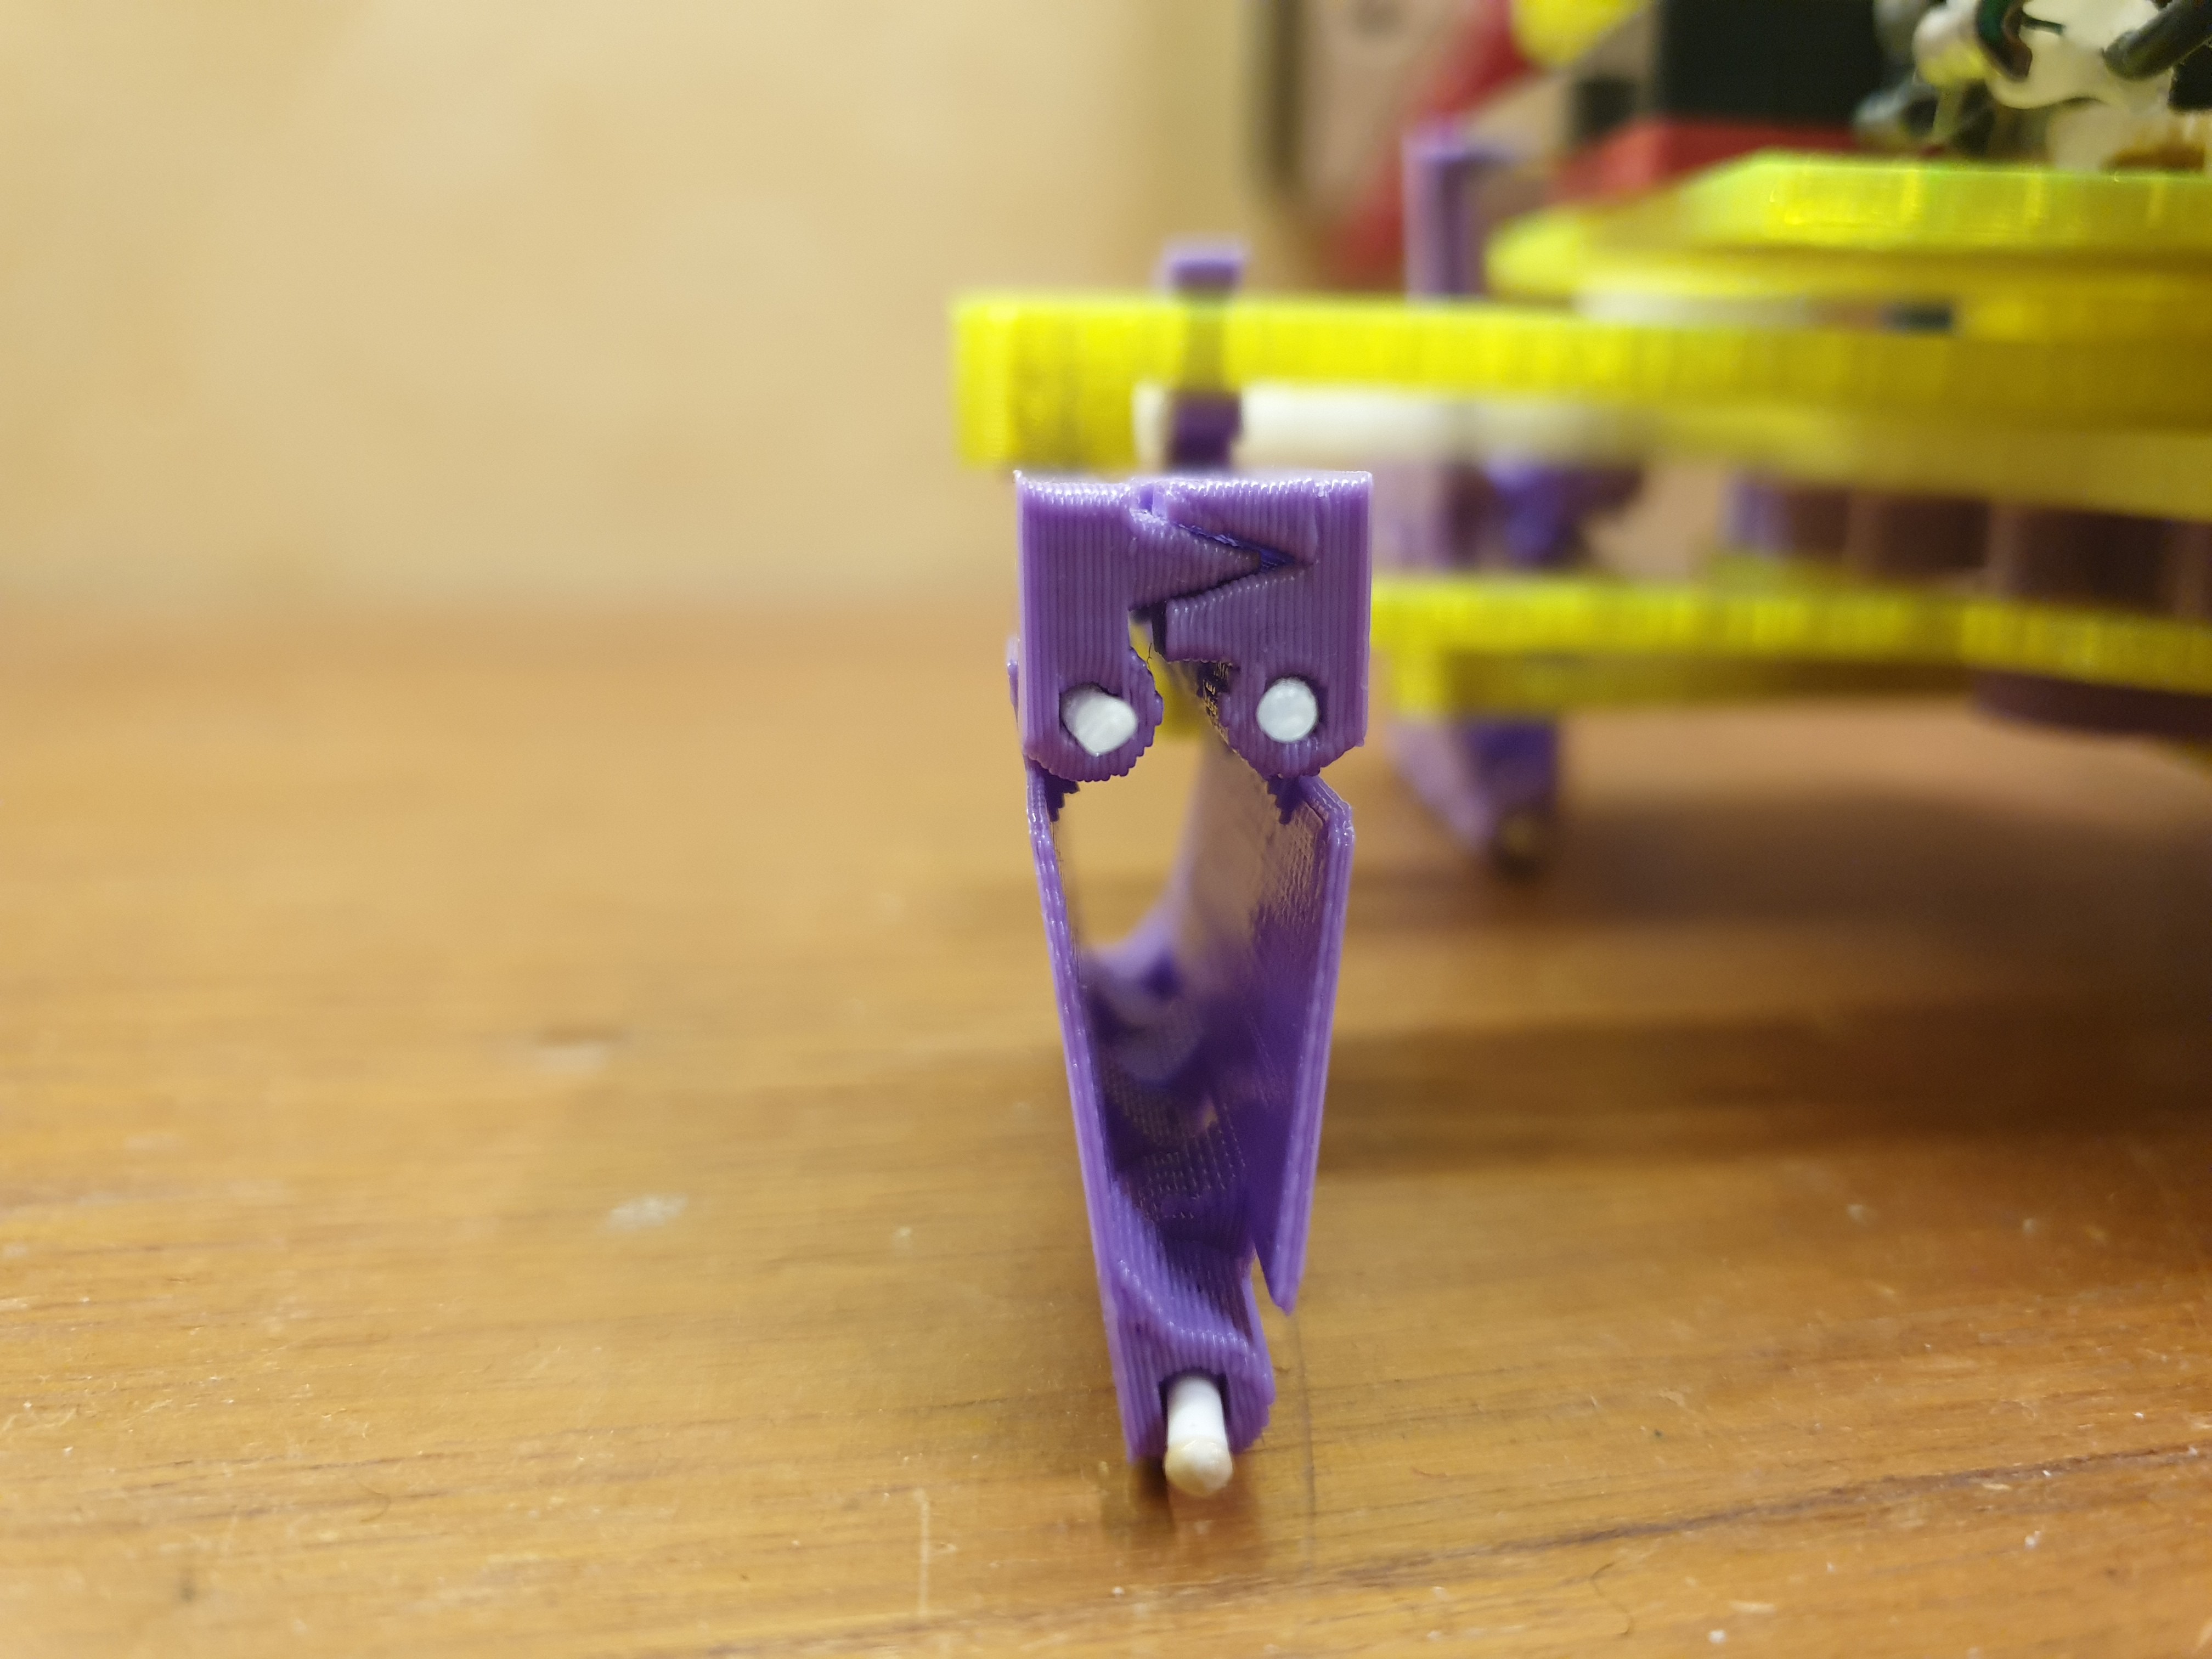
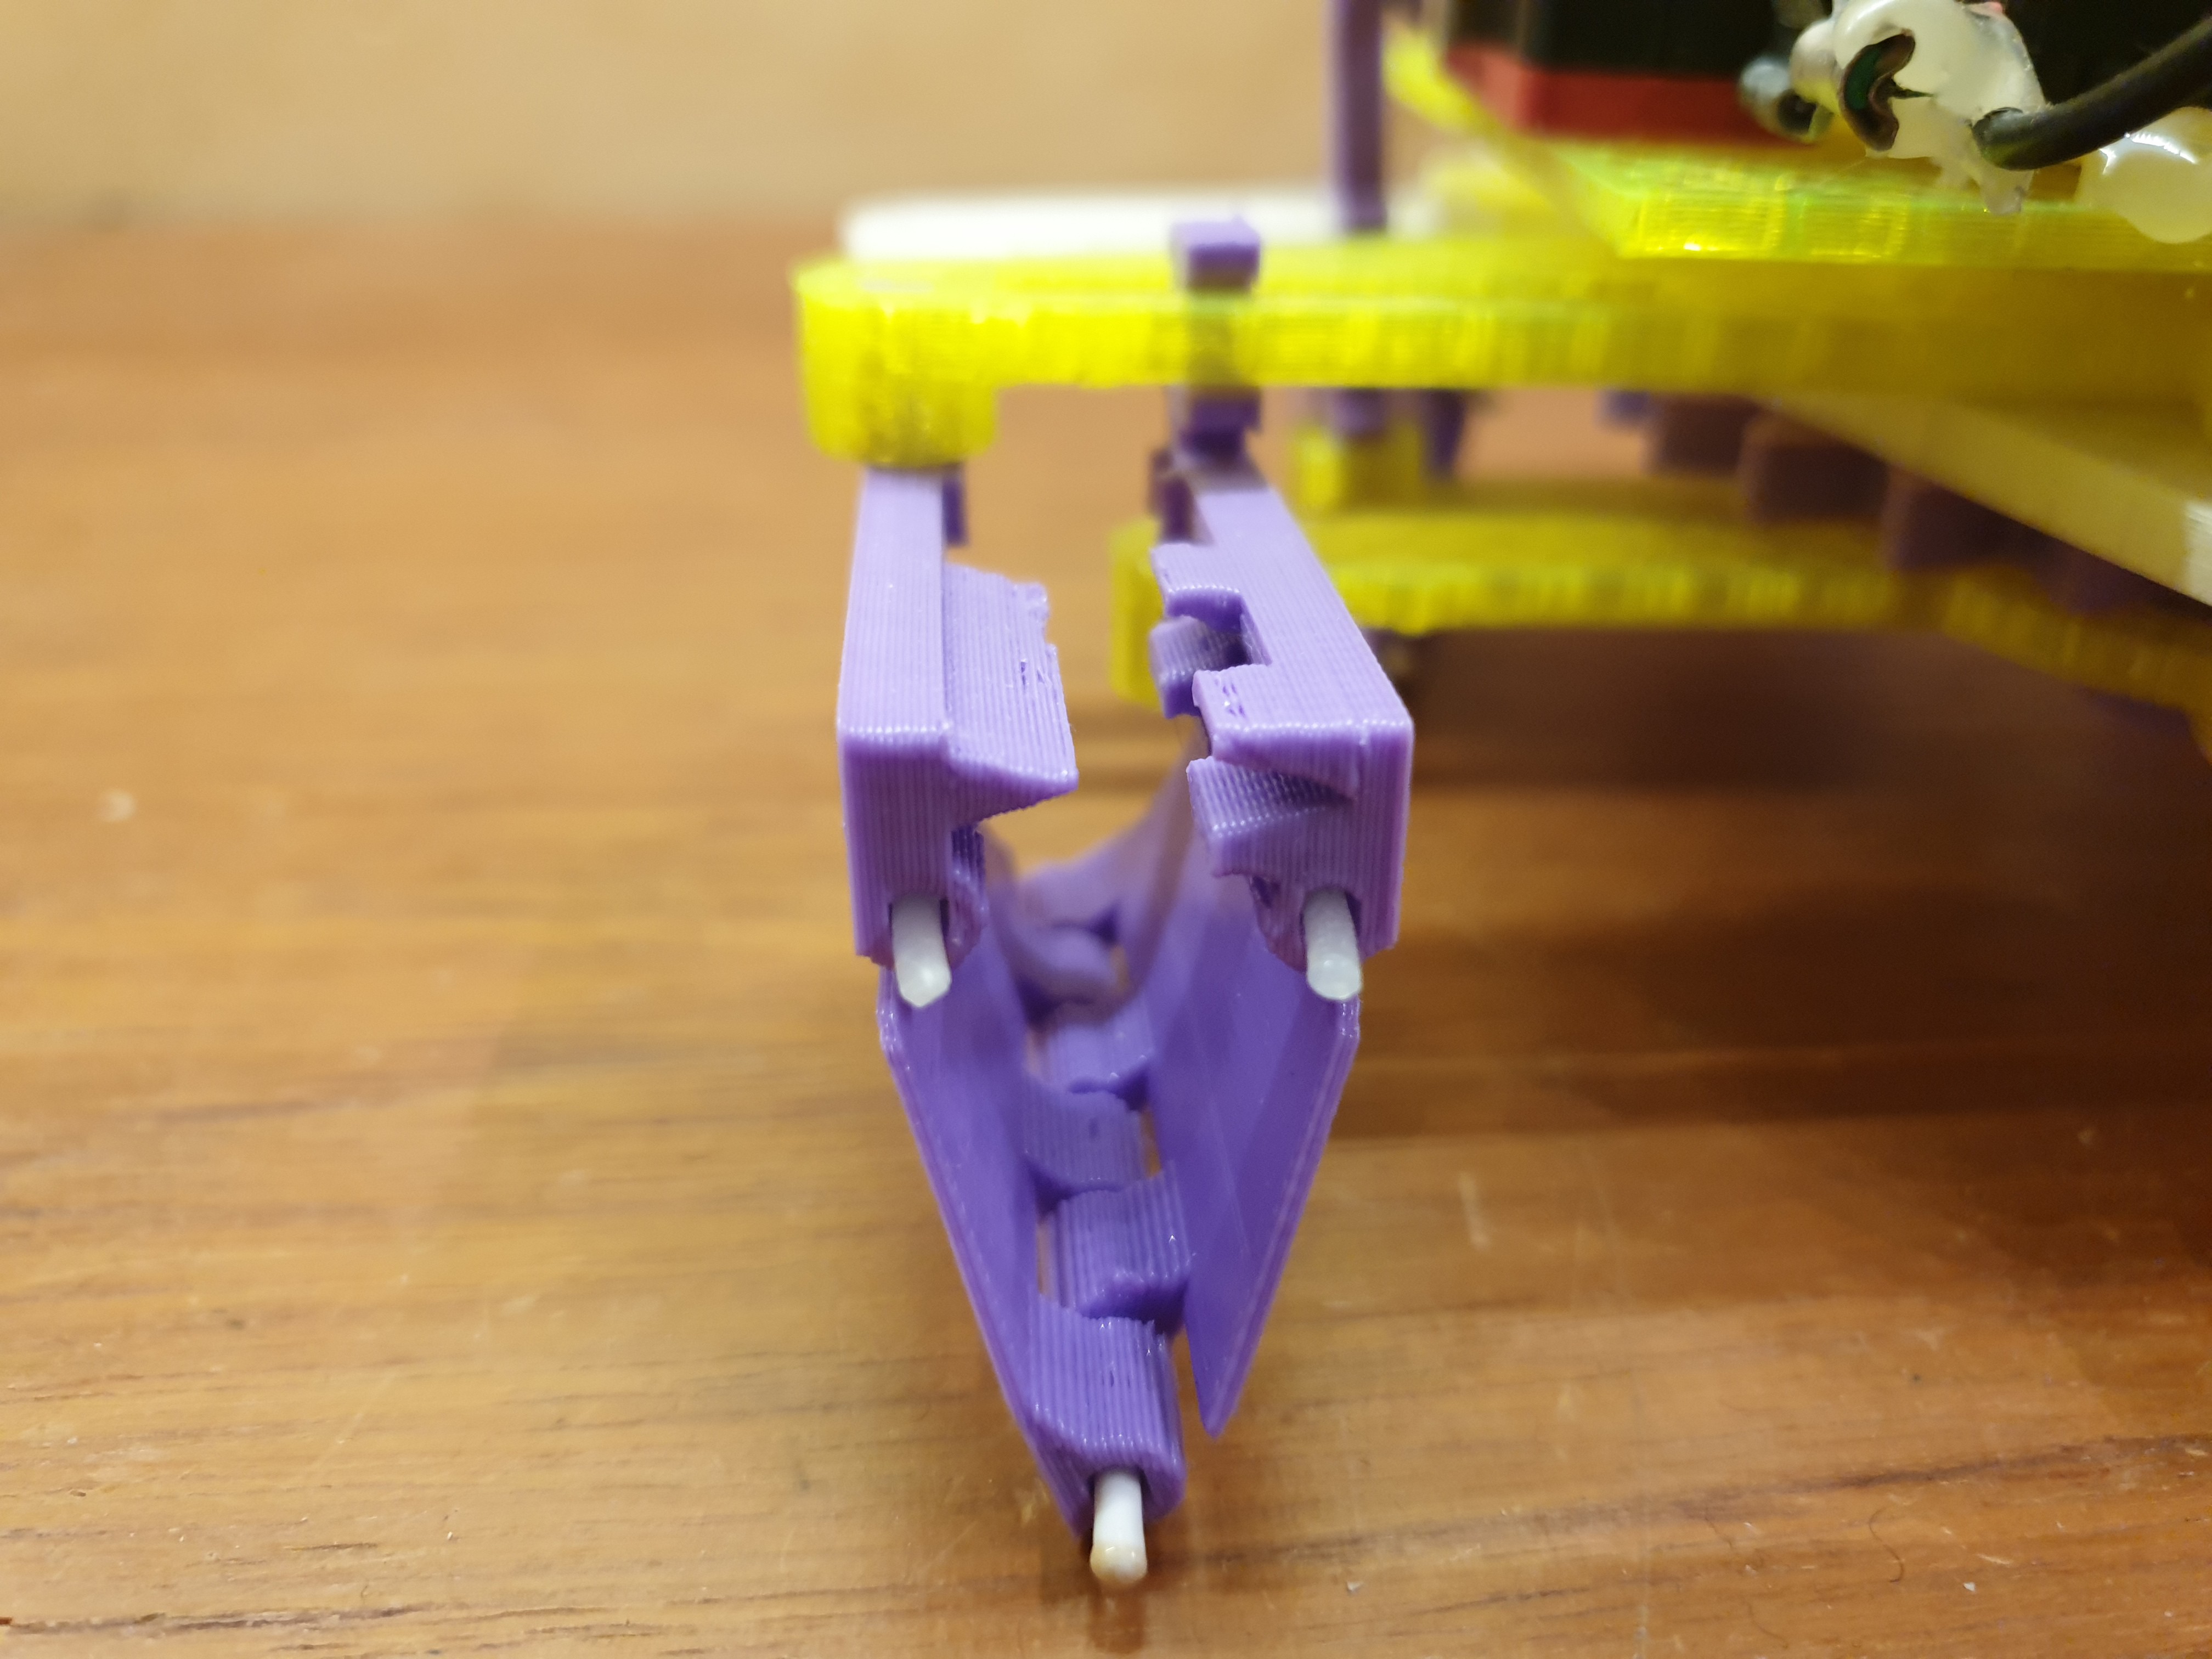
    One issue with the LB-312 was that the legs could be quite wobbly in the upright position. With LB-322 I've solved this by having an interlock that holds the leg hinge stable while upright.


    There are still a few minor kinks left to with the design:

    • There is an audible squeak when the robot walks. Sounds like the cam and follower tolerances are a bit to tight.
    • The leg hinge pins made from pla filament tends to wiggle out after prolonged walking action. This can be prevented by melting the filament slightly on each end after insertion. Not sure if there's any better solution.

  • LB-322 close to completion

    Dejan Ristic01/11/2020 at 06:44 0 comments

    Finally had some time to work on the project again over the Christmas holiday. I'm pretty happy with the result, but still needs some minor tweaking.

    The main improvement is that the cam mechanism has been relocated to the bottom side of the chassis. This makes for easier placement of batteries and electronics on top of the robot.

    I've also modified the design to bring size and weight down, and to make assembly a bit easier. 

    Leg hinges now uses 1.75 mm filament as pins instead of M3 screws.

    I've abandoned my plans to migrate the design to OpenSCAD for now. Ever since I began programming professionally I've mostly lost interest in coding on my free time. Funny how that works. 

  • Project still alive

    Dejan Ristic11/30/2019 at 18:54 0 comments

    Very little progress with the project for the last few months. Have some ideas on how to improve on the last prototype, but been too busy with work to finalize a new design.

    I've kept on noodling around in Tinkecad. But as the model has gotten more complex I've concluded that Tinkercad isn't the right tool for the job anymore. When I want to change one aspect of the model, several other parts are affected and it cascades into hours of labour.

    Since I'm planning to make a major overhaul of the design anyway, I've decided to remake the model from scratch, this time using OpenSCAD. 

    There will be an initial time investment in doing so. But ultimately it will be easier to try out different design ideas using parametric CAD modeling. The idea is to only need adjusting som key parameters, and all the dependent measurements will get adjusted automatically. Well that's the plan anyway.

    Just a short post for now. Project is still alive. Expecting to get the OpenSCAD model done some time in January.

  • LB-312 software update

    Dejan Ristic07/08/2019 at 20:34 0 comments

    In my last post I pointed to the RPi as the reason why I couldn't get the same smooth servo action as with the previous prototype. 

    It's a poor carpenter who blames his tools.

    Today I went back and looked at the code and it turns out the real culprit was my shoddy middle-of-the-night programming. I've fixed the Python script and now the stutter is gone and everything runs much smoother. I also fixed a bug in the turning sequence which made the turning radius much wider than it needed to be.  

    This time around LB-312 struggles a bit when walking in reverse. That seems to be a mechanical problem. I tried to add some lithium grease to the gears but that didn't seem to improve things. A possible cause is that the load is unbalanced. 

    Or maybe I need to take another look at the code.

  • LB-312

    Dejan Ristic07/07/2019 at 17:21 0 comments

    The project has pretty much been on hold since March, but last week I finally found some time to finalize this new prototype. This time around Landbeest is going IoT with an onboard Raspberry Pi Zero. I can ssh into it and call Python functions for different movement sequences. Here's the video: 

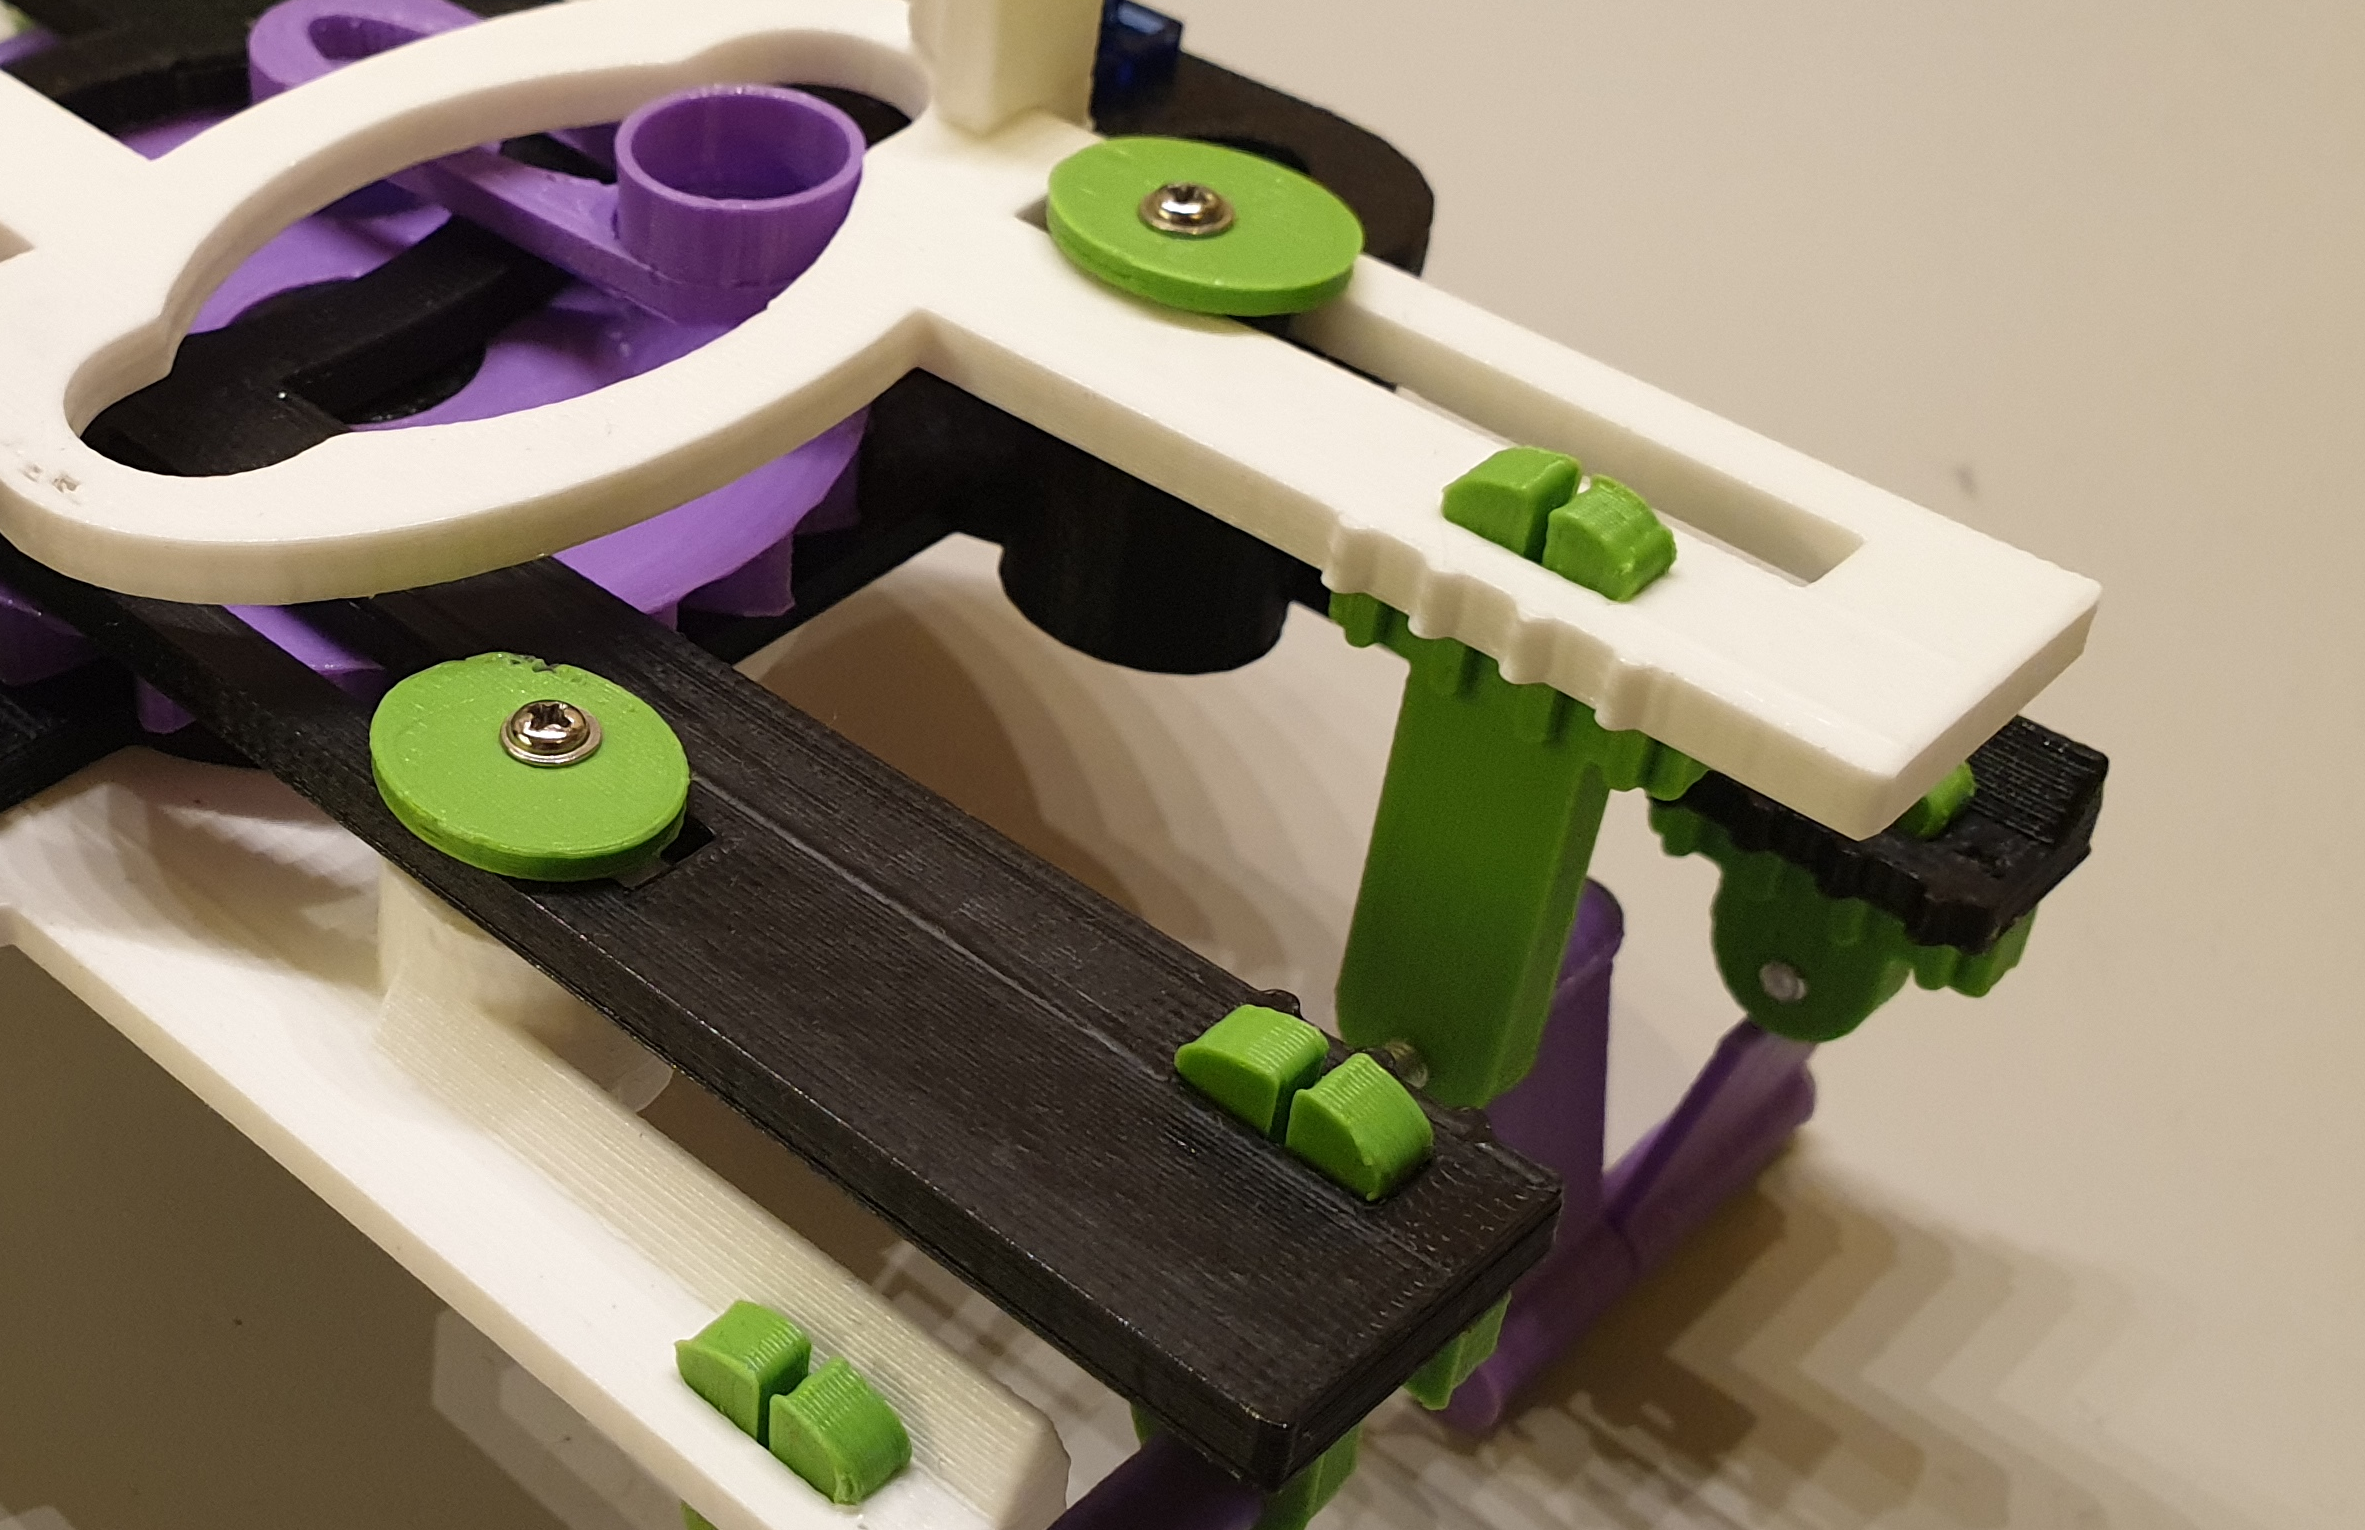
    The plan is to eventually put the 3d model up on Thingiverse. To that end I've mainly focused on making the model sturdier and easier to print and assemble. There's no longer any need for gluing parts together—all pieces are now either snap-fit or uses screws. I've also put little notches on the sides of snap-fit parts that indicates what they should attach to. (I tend to forget that myself.)

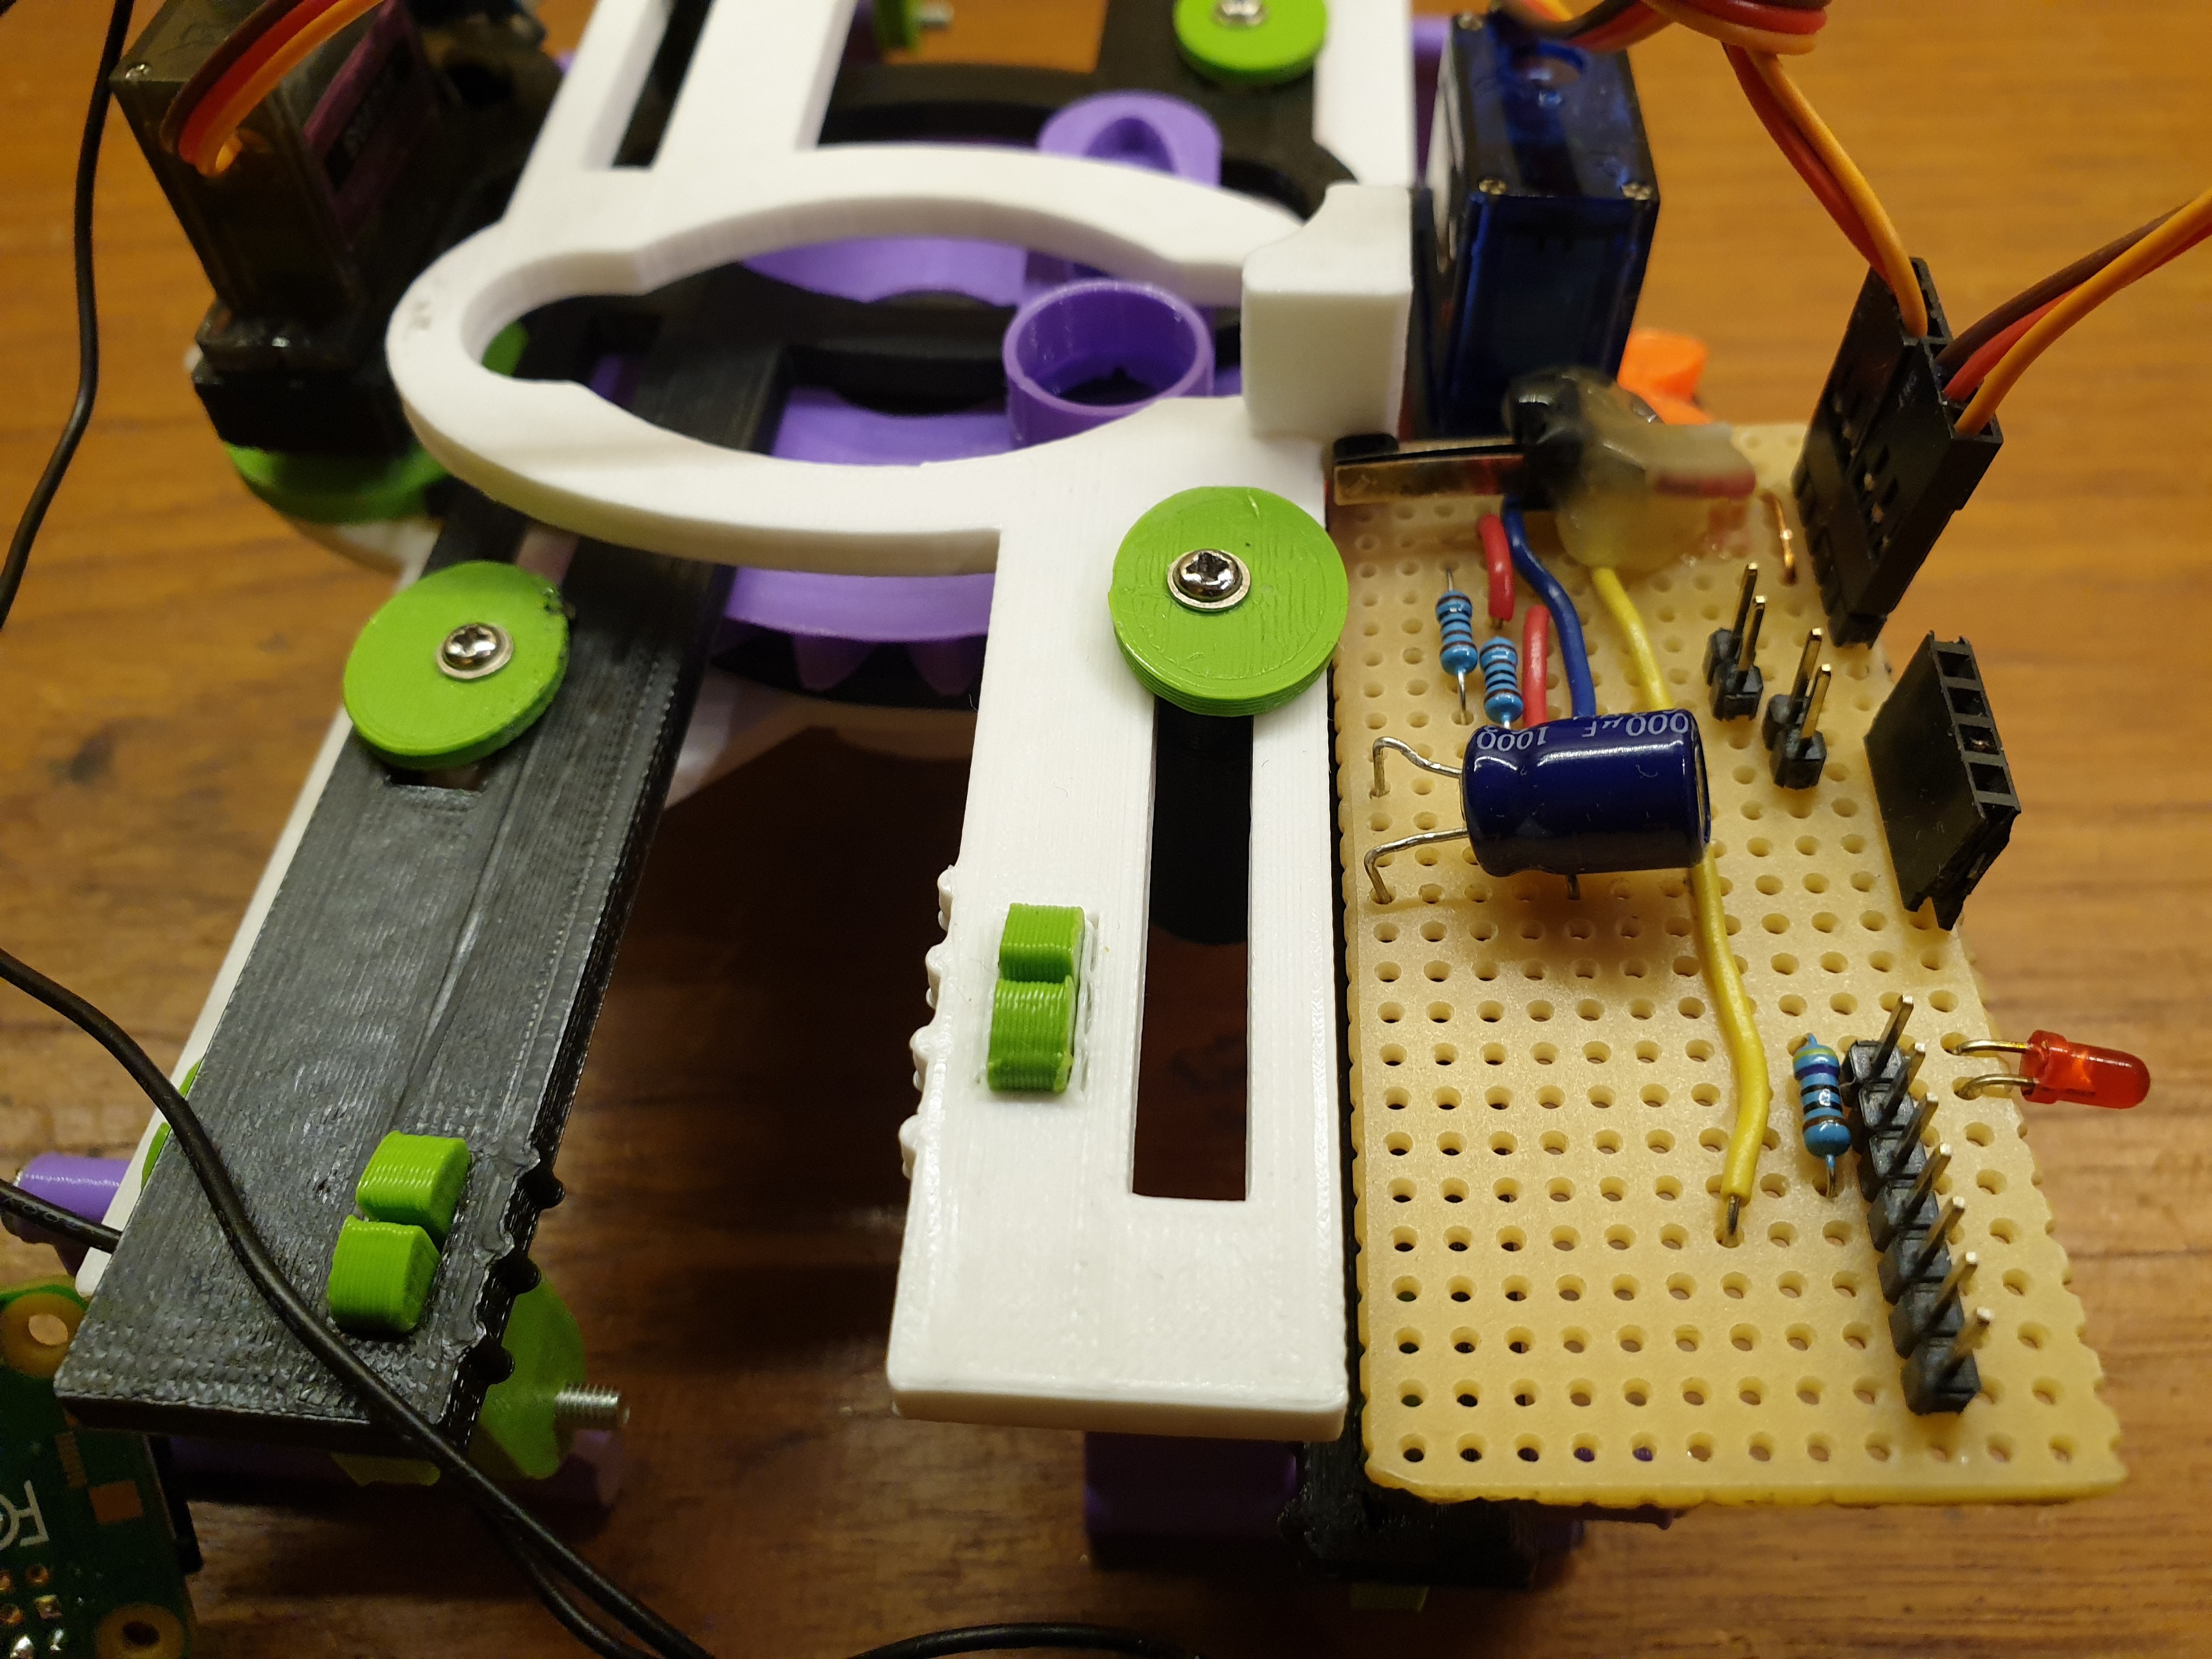
    .On earlier prototypes I hadn't attempted to make the robot selfcontained with onboard battery and electronics. I just used a wire harness with an Arduino Uno for controlling it. Making this prototype teatherless was pretty much an afterthought. I just hotglued a PCB with the RPi and servo drive components to one side. The PCB holds a little leaf switch (top right in next image) that lets the RPi know when the drive gear has completed a revolution.

    I found running Python on RPi to be a bit less responsive than an Arduino when trying to stop the servo in response to the switch closing. So with each revolution the mechanism stutters a bit in order to find its proper position. 

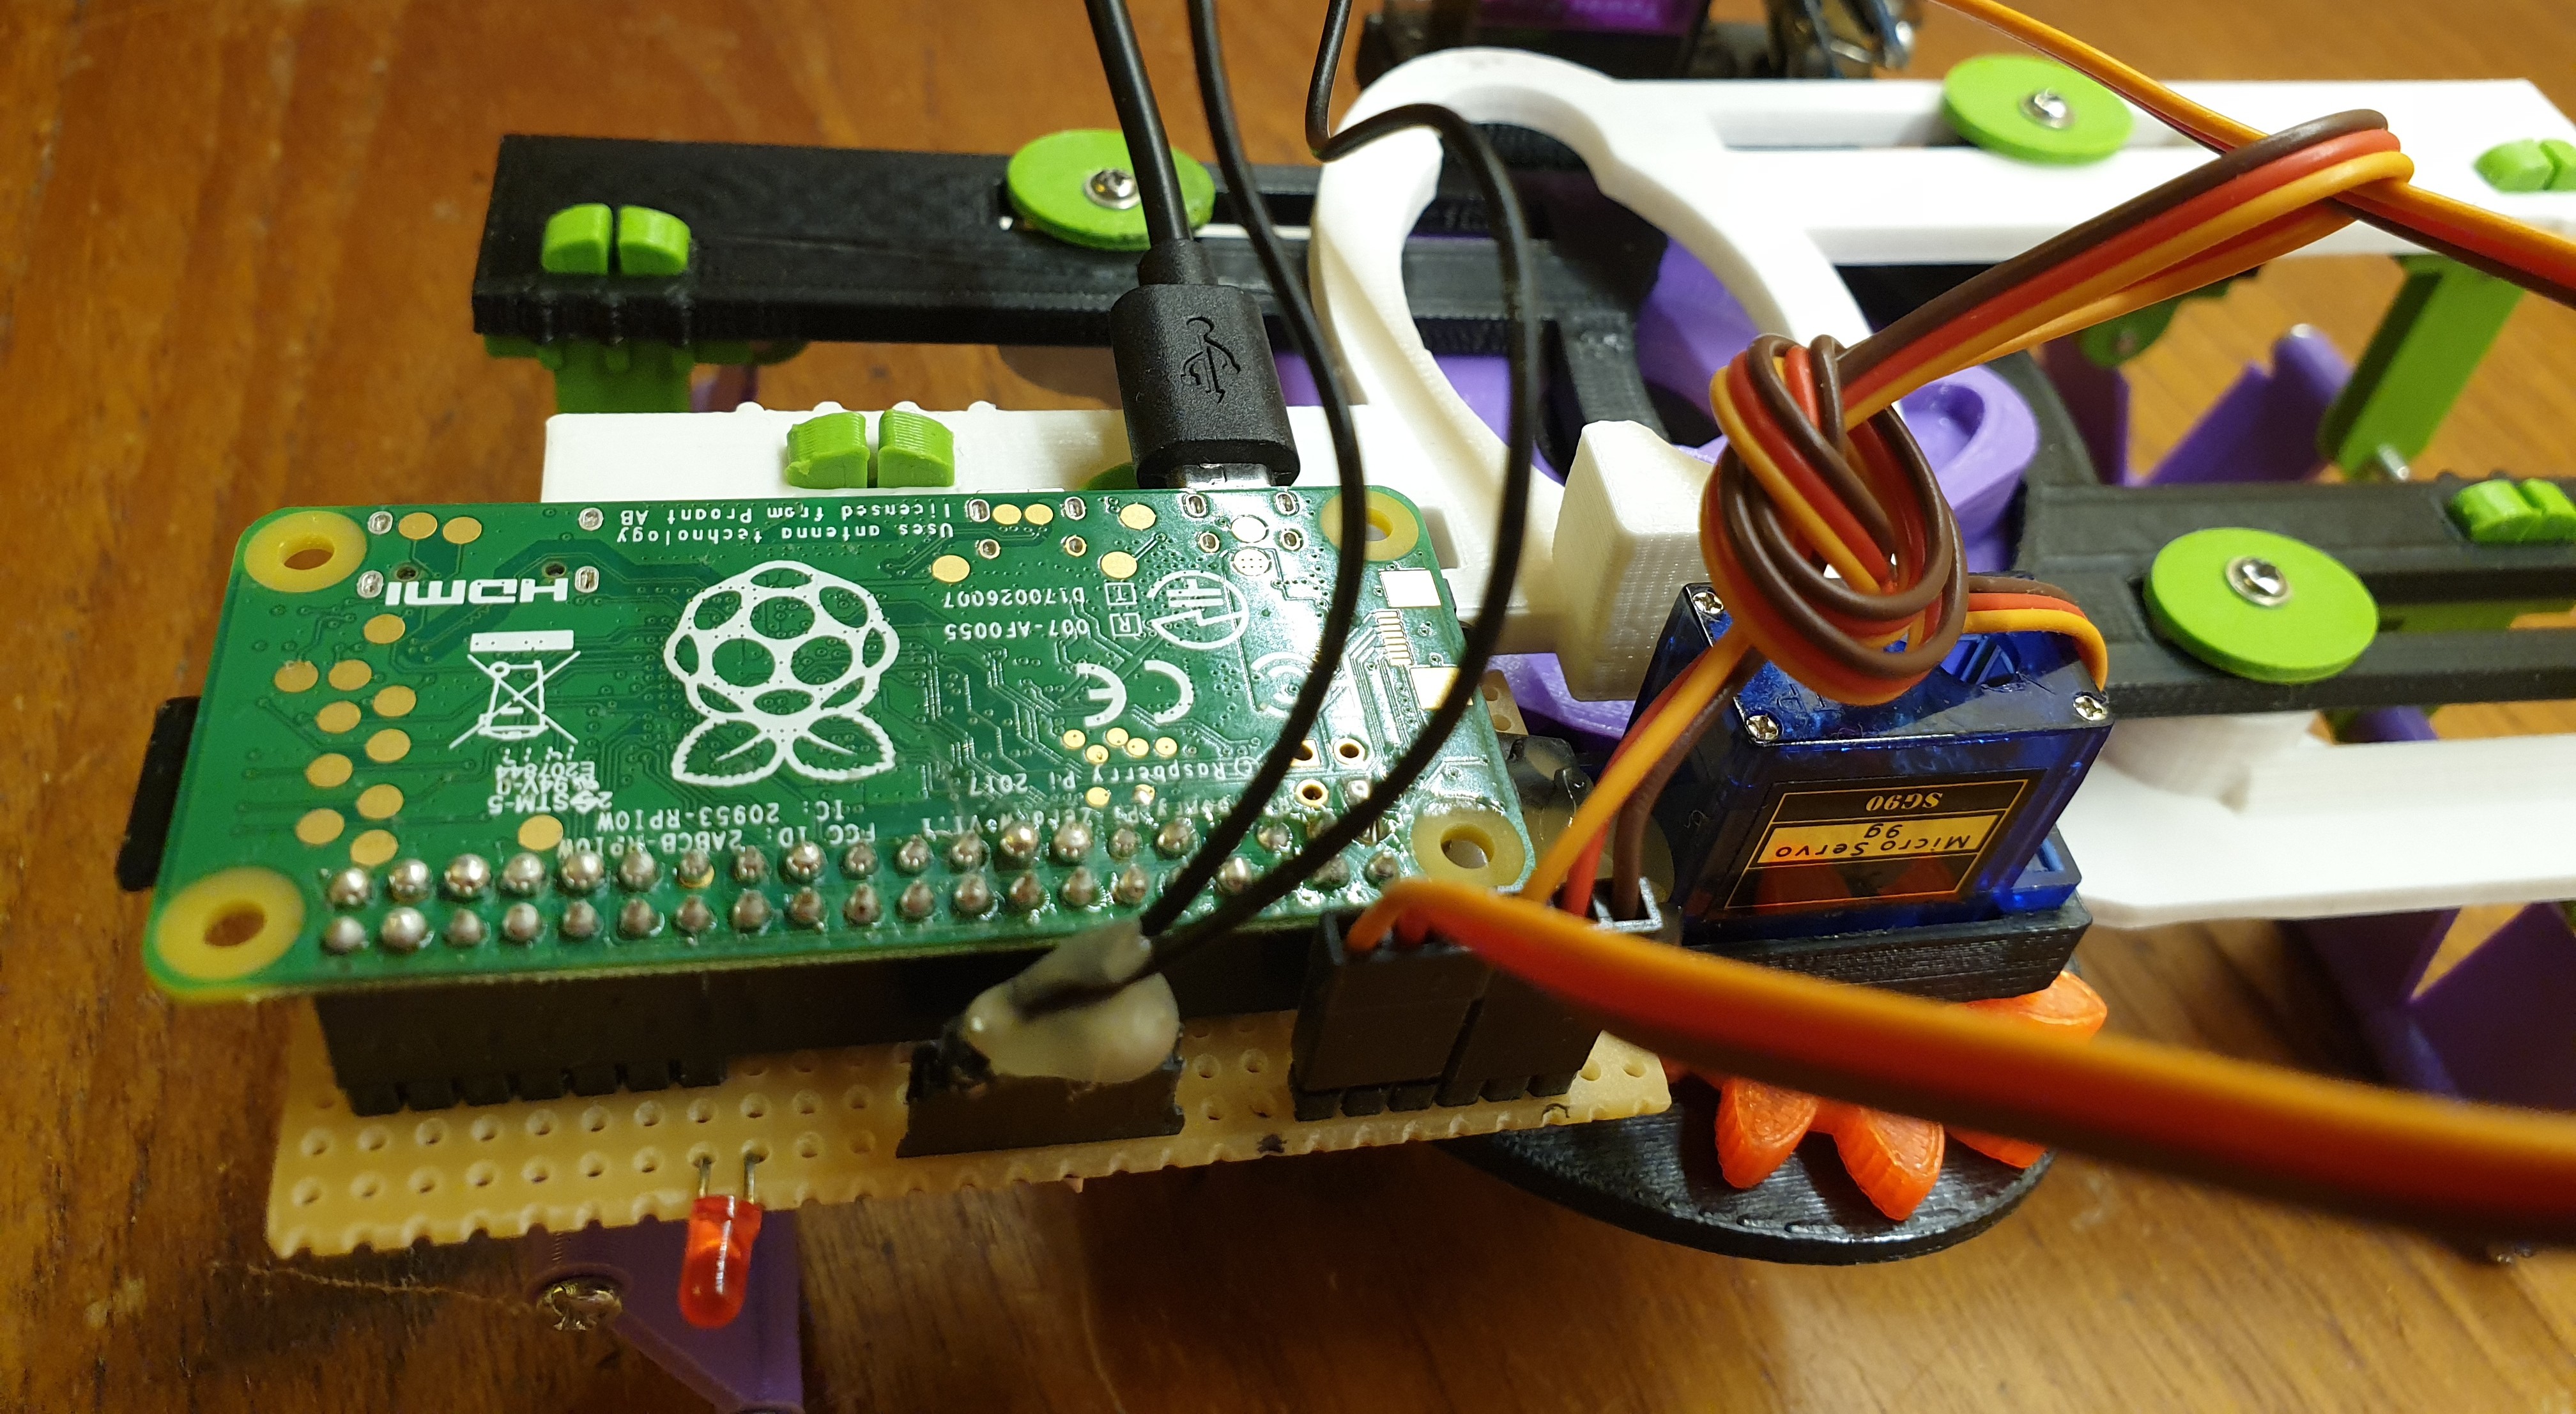
    Below the PCB has been connected with the RPi and power supply cable for the servos.

    I should really start thinking about modifying the design to have a proper platform for fitting electronics onto. There's basically two options:

    1. The battery currently attaches to the pivot on the bots undercarriage. If the legs where a bit taller I could fit a larger container on that spot for housing all of the electronics. Sort of like the gondola on an airship.  
    2. The other option is to have a detachable platform hovering on top of the robot.

    I like the gondola option best, except the legs would interfere with any distance sensor you might want to fit there. I'll need to think it through before deciding which way to go.

  • Scissor steering prototype done

    Dejan Ristic02/28/2019 at 01:23 2 comments

    I've now built the LB-302 prototype, which implements the scissor steering method I described in my last log. It was actually only supposed to be a throw-away draft—I basically had no expectation for it to work on first try. But it turned out to work great. Go figure!

    This won't be a long post. Mainly I want to show this video of LB-302 in action:

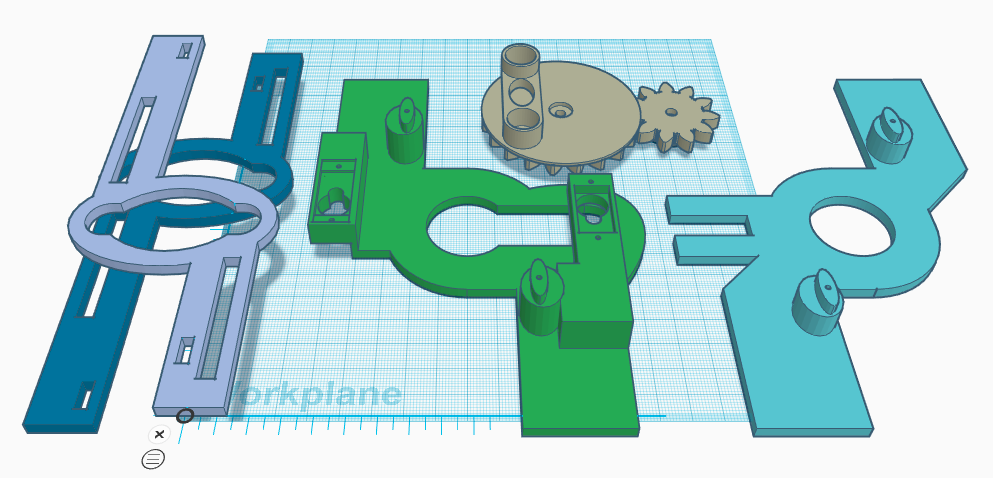
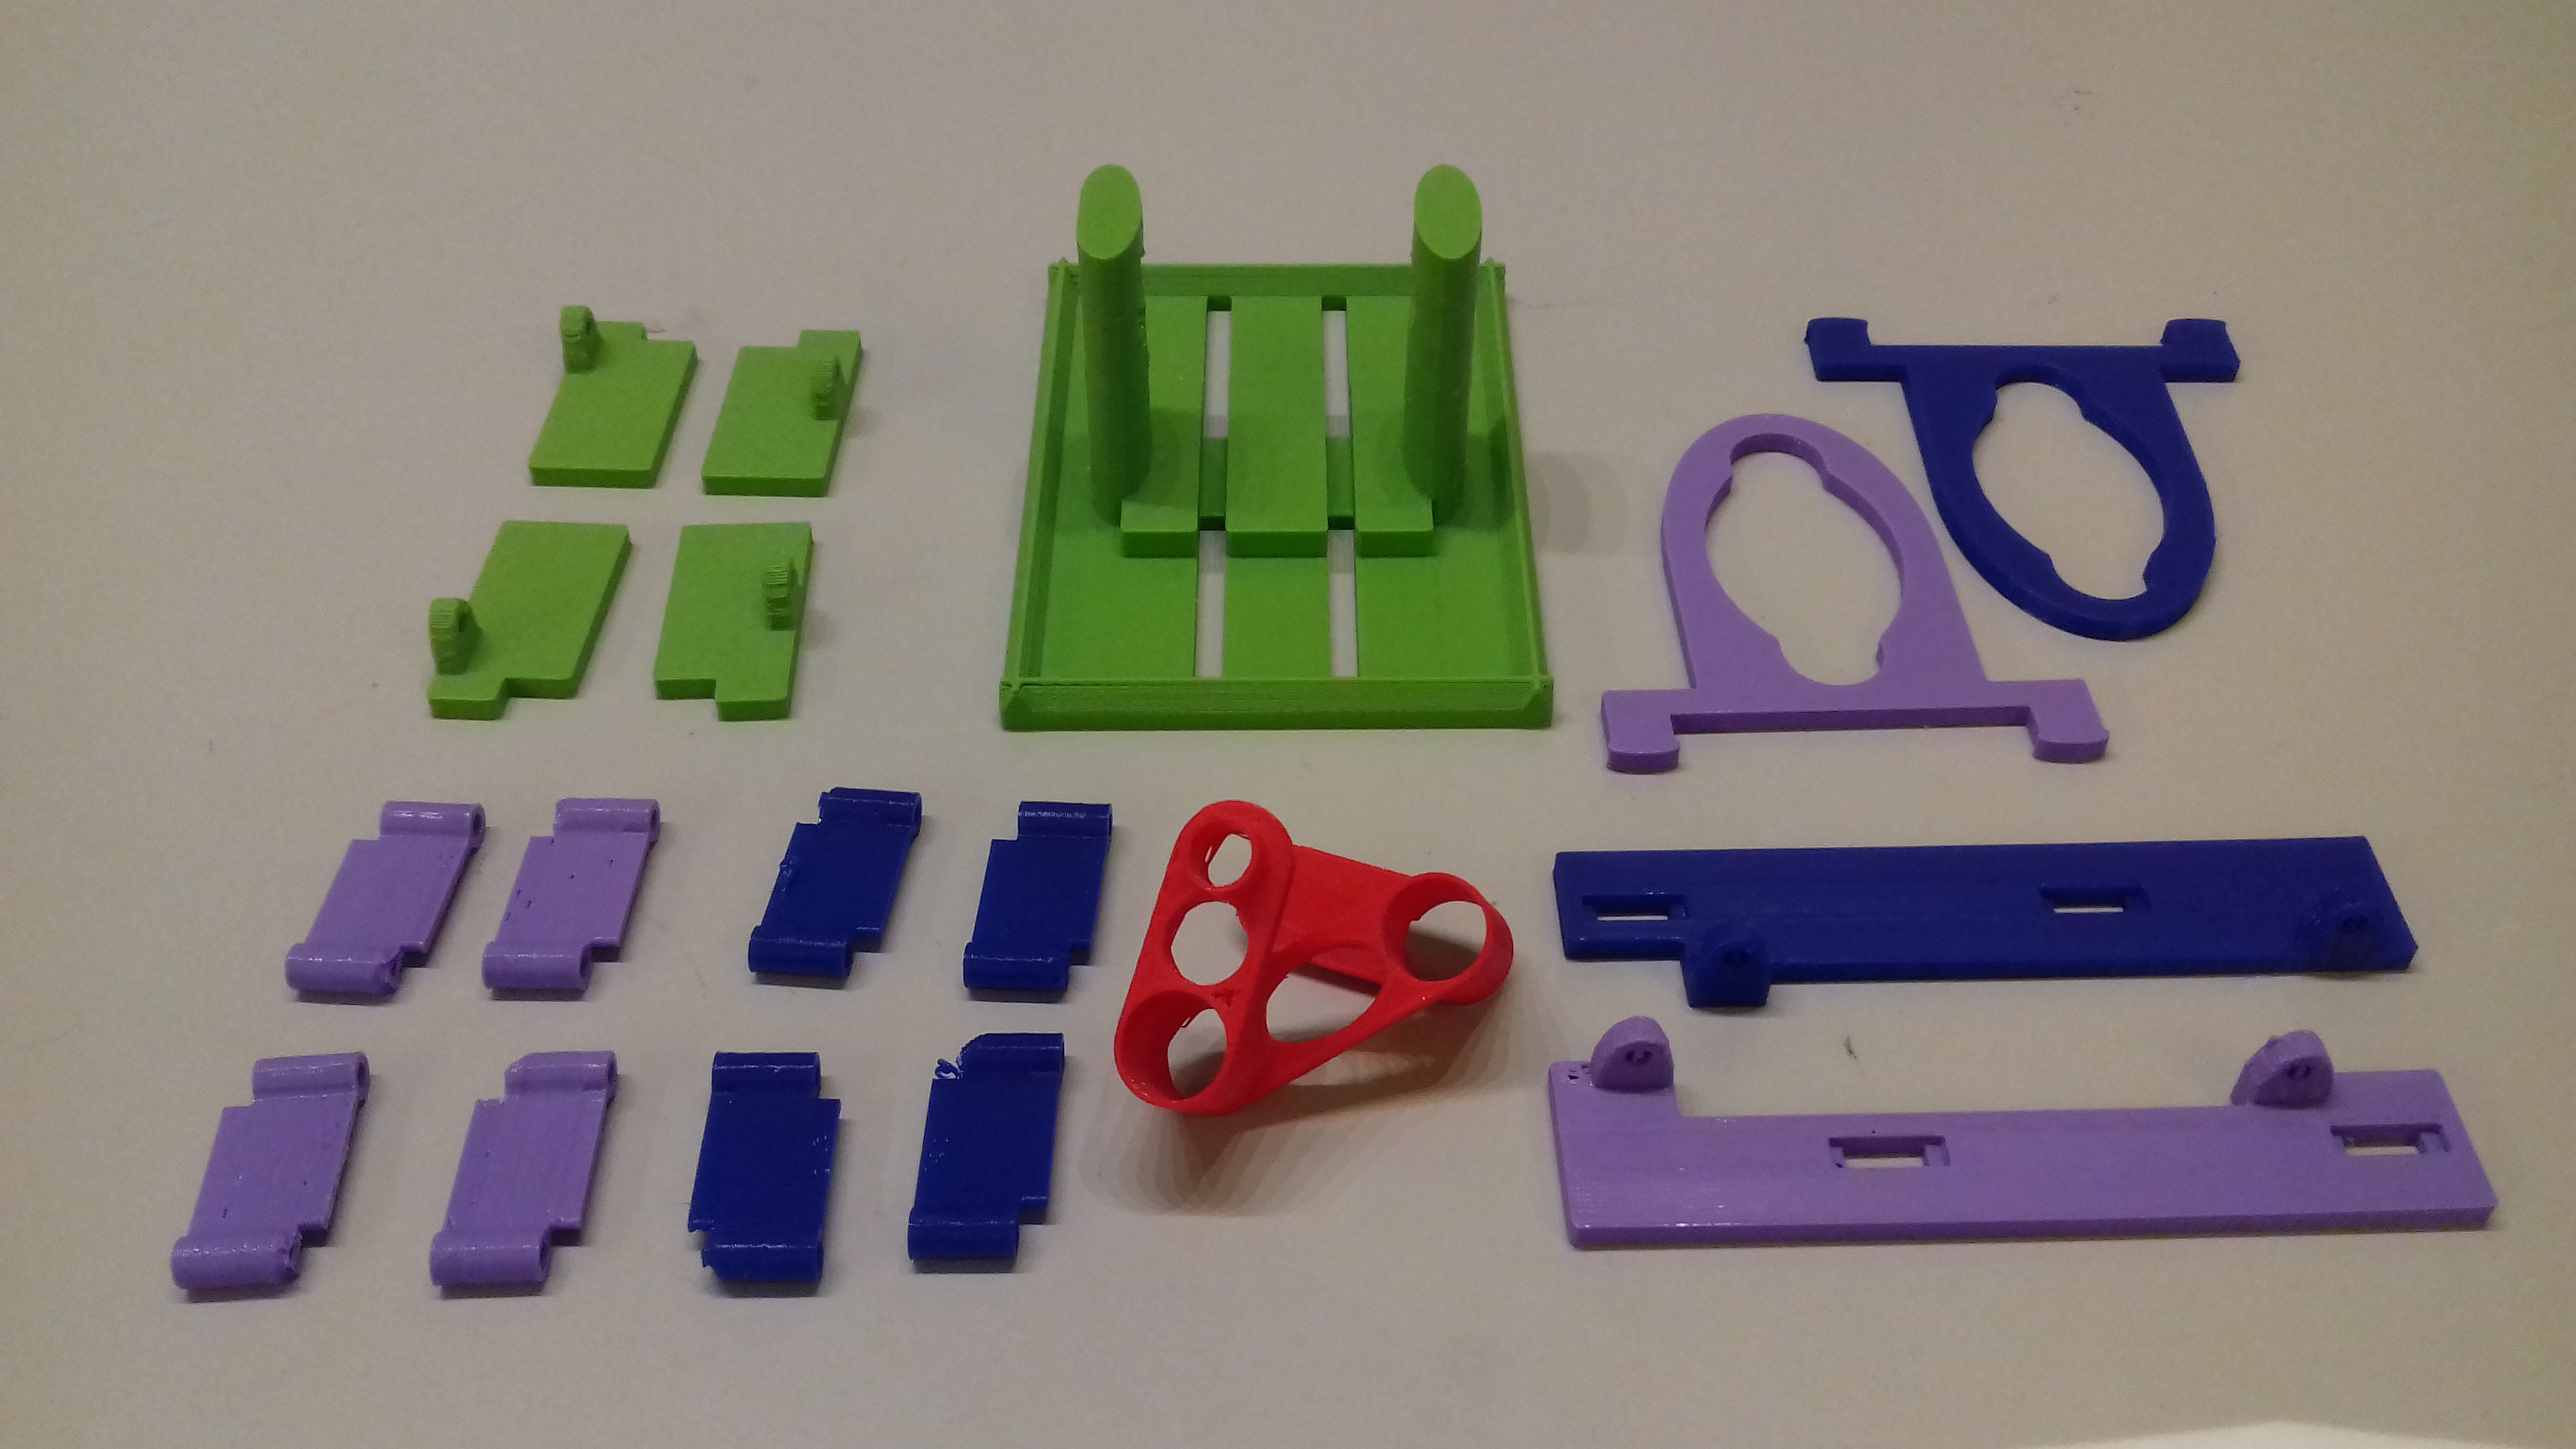
    This shade of blue looks pretty awful on camera. I had planned to print the actual demo version parts with contrasting colors in order to showcase the mechanism better. Here's an image of the main components for some more clarity:

    The reduction gear is based on these parameterized gears made by Leemon Baird.

    I was happy to discover that LB-302 can achieve a tight turning radius with no problem. And it also has the ability to pivot 360° on the spot.

    LB-302 only uses two servos. But I did have to cheat and add a cherry switch to the component list. It's necessary in order to monitor the legs position, since they're driven by a continuous 360° servo which lacks position control. The requirement to keep track of feedback from the switch also makes the Arduino code a bit more complex than I'd like it to be.

    Overall though I'm quite pleased with how this prototype turned out. Obviously it's not polished and not very practically useful. For one thing there's not much room for fitting a pcb and batteries onto the chassis. But I finally have a practical solution for steering, so I still feel I've made some real progress with this one.

    I'll probably do a more elaborate writeup on this later, along with a better looking prototype.


    On a final note I'd just like to mention that my project placed as one of seven "runners-up" in the Hackaday 3D printed gears challenge. Sweet! Thank you judges! Now I'll head over to Tindie and try to decide what to spend my $100 voucher on.

  • Scissor steering method

    Dejan Ristic02/17/2019 at 04:24 0 comments

    I'm quite happy with how the 1-servo drive train turned out on the LB-201 prototype. I think it has potential and is the right way to go, even if it needs some more work. Then the main design issue remaining is deciding on what method should be used for steering.

    I've previously tried out articulated steering with the LB-101 prototype. As expected, that prototype barely worked at all. As I see it, effective articulated steering using only 3D printed parts will be difficult to achieve even with a more carefully worked out design.

    In this log I'll present an idea for a different steering method. I'm calling it "scissor steering" for lack of a better term.


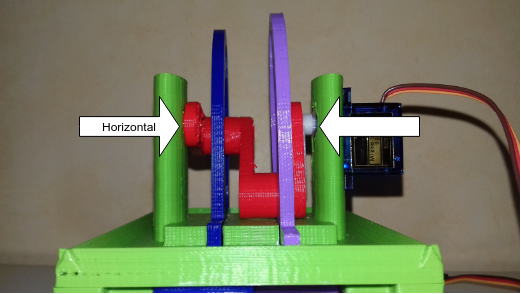
    On the LB-201 prototype the cam axle is mounted horizontally between two pillars. 

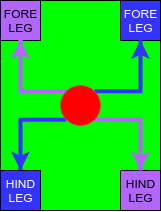
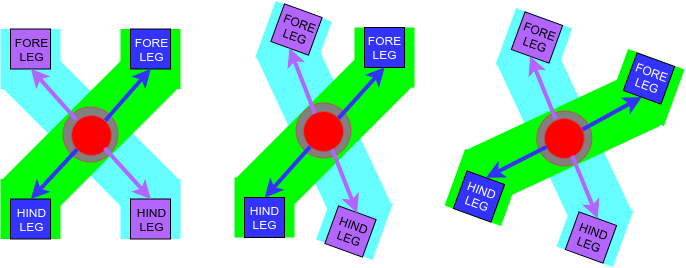
    But when using this steering method, the cam axle needs to be mounted vertically instead. In the image below the vertical cam axle is represented by the red circle. The bottom end of the cam axle is mounted through a hole in the chassis, and its top end is connected to a 360° servo. It drives two yokes, represented by purple and blue arrows, each of which moves a diagonal pair of legs. Of course the yokes must now be horizontally oriented, not vertical like on LB-201.

    Now let's forget about the cam and yokes for a second. 

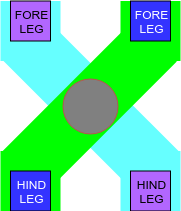
    In the next image I've divided the chassis into two parts: green and cyan. They are connected by a pivot (the gray circle) which allows them to move like scissors. Let's also imagine that there are some gears around the pivot on the green part of the chassis, which is turned by a geared servo mounted to the cyan part. 

    Now let's put the cam axle and yokes back into the picture. 

    In the figure series below the bottom end of the cam axle is mounted through a hole in the center of the pivot. Each yoke drives the two diagonal legs of its respective chassis part. 

    A right turn is executed through repetition of the following two steps:

    1. In the center figure, only the blue legs are touching ground. The cyan chassis part pivots clockwise.
    2. In the right figure, only the purple legs are touching ground. Now the green chassis part pivots clockwise by the same degree. 

    I believe this method should work both for rotating Landbeest while at a standstill, as well as for making a turn while walking.

    The purple and blue yokes are basically only connected to their respective two legs. Consequently, as the cyan chassis part pivots clockwise (center figure) the purple yoke will pivot with it. This is allowed, since the cam axle rotates on a vertical axis. However the synchronization between the yokes will get somewhat messed up until the green part has executed its pivot (right figure). But I don't think that will be a big deal as long as the pivot angle doesn't get too large.

    It will probably be a while until I can fully put this idea to practice. The last prototypes I've made has incrementally improved on previous stuff, but this one will be more of a reboot. I'll probably make at least one intermediary prototype before I attempt a fully realized one. 

    I think this is a pretty neat idea, but implementing it is a whole other story. There will be bunch of practical issues cropping up once I start dealing with the reality of this thing. 

  • LB-201 prototype completed

    Dejan Ristic02/12/2019 at 13:55 0 comments

    I've now built and tested the LB-201 prototype, which uses the 1-servo drive mechanism I worked on last week. There's no steering on this one. I'll deal with that issue that later.

    Here's LB-201 trying to climb over a few different obstacles:

    Too fast

    The servo, when at full speed, is really giving the robot a full body workout. That doesn't necessarily translate to better performance though, since the legs tends to loose grip at that speed. I'll probably want to add a reduction gear to future prototypes. 

    Cam axle orientation

    The cam axle is mounted horizontally, which definitely gives this robot something of a steampunk aesthetic. That wasn't something I was striving for though. It just happens to be the simplest arrangement I could think of for coupling the yoke movement to the legs. The obvious flaw with this design is that since the load is off-center it's hard to avoid mechanical friction as the cams moves through the upper range of the yokes.

    The perhaps more sensible design choice would be to have the whole assembly turned by 90° so that the side of the yokes are on the same plane as the chassis. In addition to lower risk of friction this would also make the robot less top heavy. 

    I didn't want to dismiss the horizontal cam axle arrangement without giving it a shot first, since it has the advantage of requiring less intricate 3D printing. But unsurprisingly it proved to have problems with friction which I'm not sure can be remedied merely by refining the design.

    Other thoughts

    The terrain-going capabilities of LB-201 have been somewhat improved compared to previous prototypes. The linear actuators previously had a travel of 2 cm, which allowed the legs to lift about 1 cm above ground. The cams on LB-201 turns along a 3 cm radius, which also gives the actuators a travel of 3 cm. This means LB-201 can clear obstacles of about 1.5 cm. It's a start, but 2 cm or more would be even better. That's a challenge for another day though.

    I'm still using Tinkercad exclusively for this design. But now that the number of moving parts has increased I'm definitely getting to the point where it's a real chore to get all the measurements right. I should probably start thinking about migrating the project to OpenSCAD at some point.

    What's next?

    I originally planned to have another go at articulated steering as my next project endeavor. But I've recently figured out another method of steering which I think it might have more potential. If I don't find any holes in it I'll lay it all out in my next log post. 

    Build

    Finally, here are some pictures of the printed parts and how they were assembled:

    Read more »

  • 1-servo drive tested successfully

    Dejan Ristic02/09/2019 at 22:47 2 comments

    This is a quick update on my progress with the 1-servo drive train.

    Earlier this week I finally managed to get a grasp on how to to construct an elegant mechanism for driving all four legs with just one servo. I've since realized that while I had the basic idea right, I was a bit off on the details. 

    I've now thought it through and modified my solution. To convince myself that it actually works I printed this mechanical model:

    The jig transfers rotary motion to the linear actuators in order to cycle through the four leg poses discussed in previous logs. The actuators takes turns moving while the other one is stationary. Turning the wheel in the opposite direction will cycle the poses in reverse which will be used for walking the robot backwards.

    The whole thing looks pretty simple once it's there in front of you. But I'm not ashamed to say that I find this mechanical stuff a bit challenging to visualize and as a result I've had a few "what was I thinking"-moments before I got this to work.

    Another thing that had me stumped initially was how wide to make each dwell of the yoke, in order to have the actuator pause exactly half of the time. Turns out that's not rocket science either—I believe the right answer is one third of the wheel diameter minus half the cam diameter. EDIT: I think that should read "one fourth of the wheel diameter minus half the cam diameter". But don't take my word for that either.

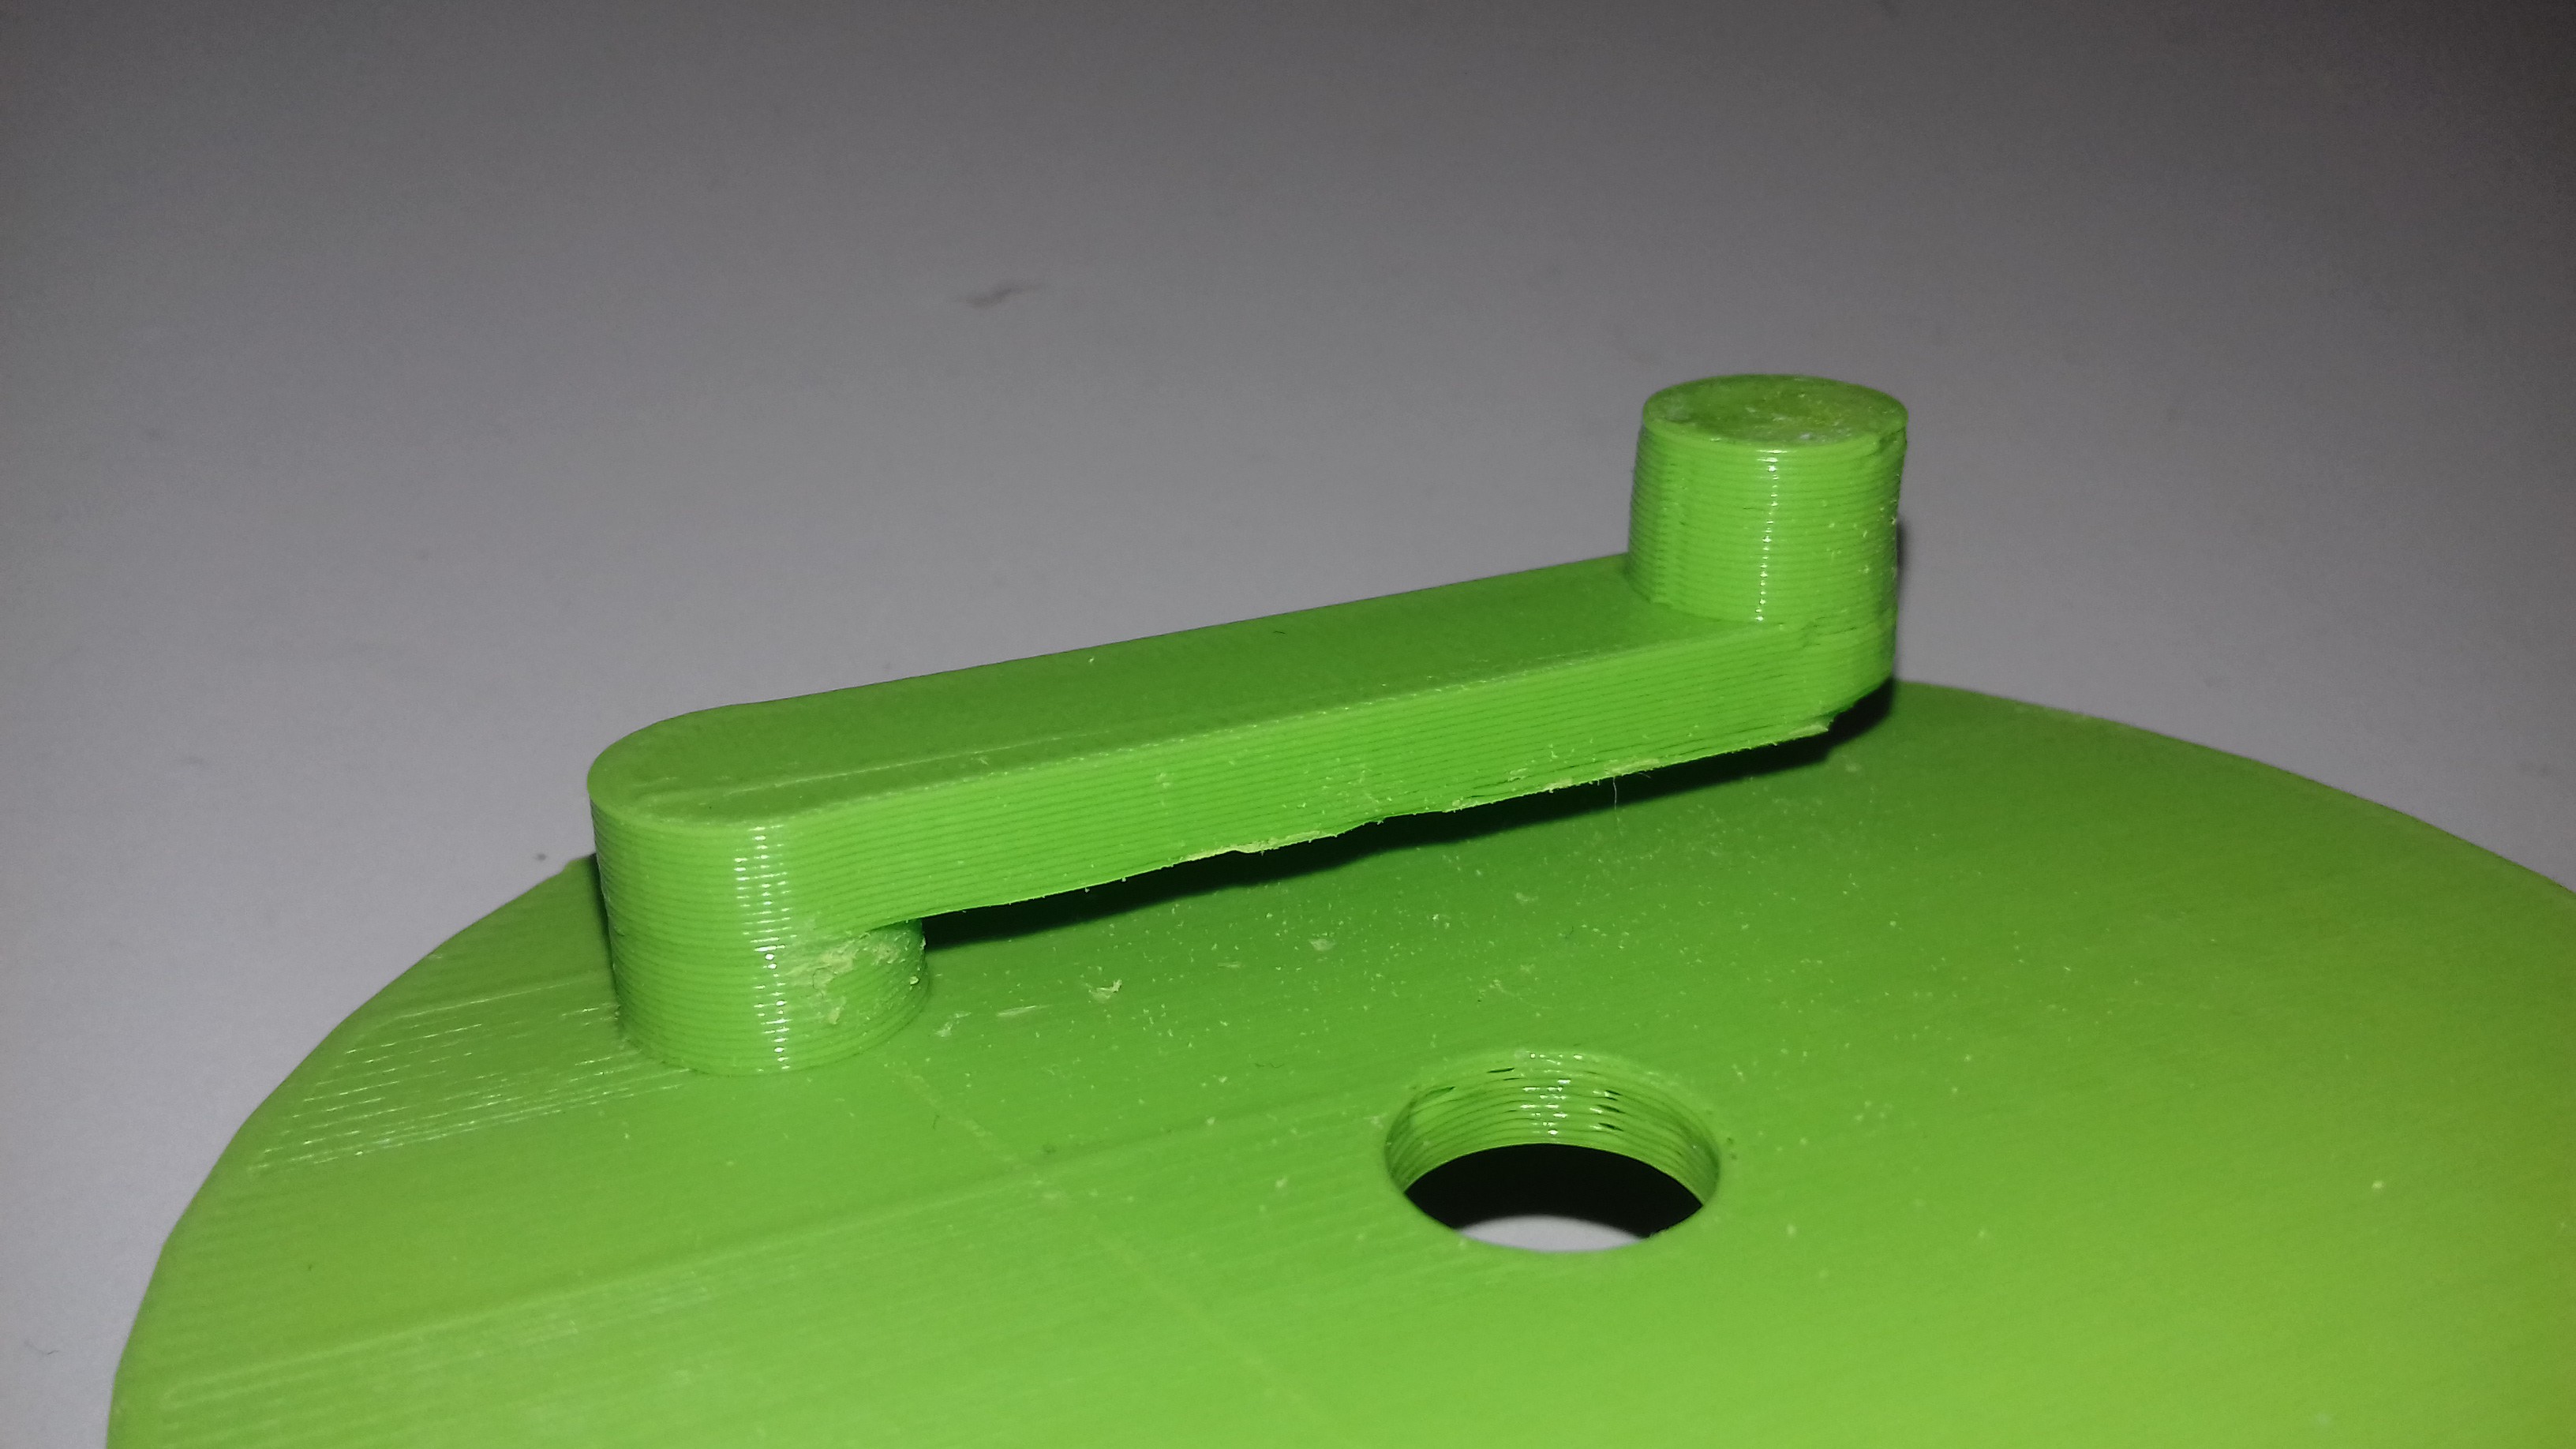
    The main thing that might need improvement is how the cam that moves the top actuator is tacked onto the bottom actuators cam:

    That looks a bit fragile doesn't it? I think a better solution would be to have one cam on each side of the wheel. But with the current design the yoke isn't wide enough and would bump up against the wheel axle. However if I were to use substantially wider cams I might be able to use that solution (since that would also make the yoke wider). Such a design would be more compact and also less prone to break. EDIT: The yoke will hit the axle regardless of cam diameter. But it's still a good idea to make the cam thicker for added strength.

    Now it's time to leverage this amazing new tech with the next Landbeest prototype (LB-201). I hope to have it up and running within the next few days.

View all 16 project logs

Enjoy this project?

Share

Discussions

meatqueen wrote 04/22/2021 at 01:22 point

Wow! Haven't seen anything like this kind of locomotion yet! 

  Are you sure? yes | no

Selina Zawacki wrote 02/01/2019 at 22:51 point

Love how much movement there is with a simple/clean design like this - interested in seeing future iterations

  Are you sure? yes | no

Dejan Ristic wrote 02/01/2019 at 23:30 point

Hey, glad you like it! That's very encouraging. Next version should be out in one or two weeks provided I don't hit any major snags.

  Are you sure? yes | no

Mike Szczys wrote 01/30/2019 at 19:16 point

So simple but very effective. Well done! I'm not great with mechanical design, but looking at this I think there must be an easy trick to make it a 1-servo design.

  Are you sure? yes | no

Dejan Ristic wrote 01/30/2019 at 20:26 point

Thanks! Yeah, this first prototype is just a quick proof of concept for the leg movement. I imagine I've worked out how to do the one-servo thing in principle, but of course the real challenge will be in the practical stuff.

  Are you sure? yes | no

Mike Szczys wrote 02/22/2019 at 23:17 point

I love the new motion with a single servo. Fantastic!

  Are you sure? yes | no

shane.snipe wrote 01/30/2019 at 04:40 point

I like the minimalism. Check out my walker that also uses 2 motors.

  Are you sure? yes | no

Dejan Ristic wrote 01/30/2019 at 05:37 point

Thanks! Love your project, very cool. Great to get inspiration from other walker designs.

  Are you sure? yes | no

Similar Projects

Does this project spark your interest?

Become a member to follow this project and never miss any updates