MasterOfNull
-
Success, and possibilities..
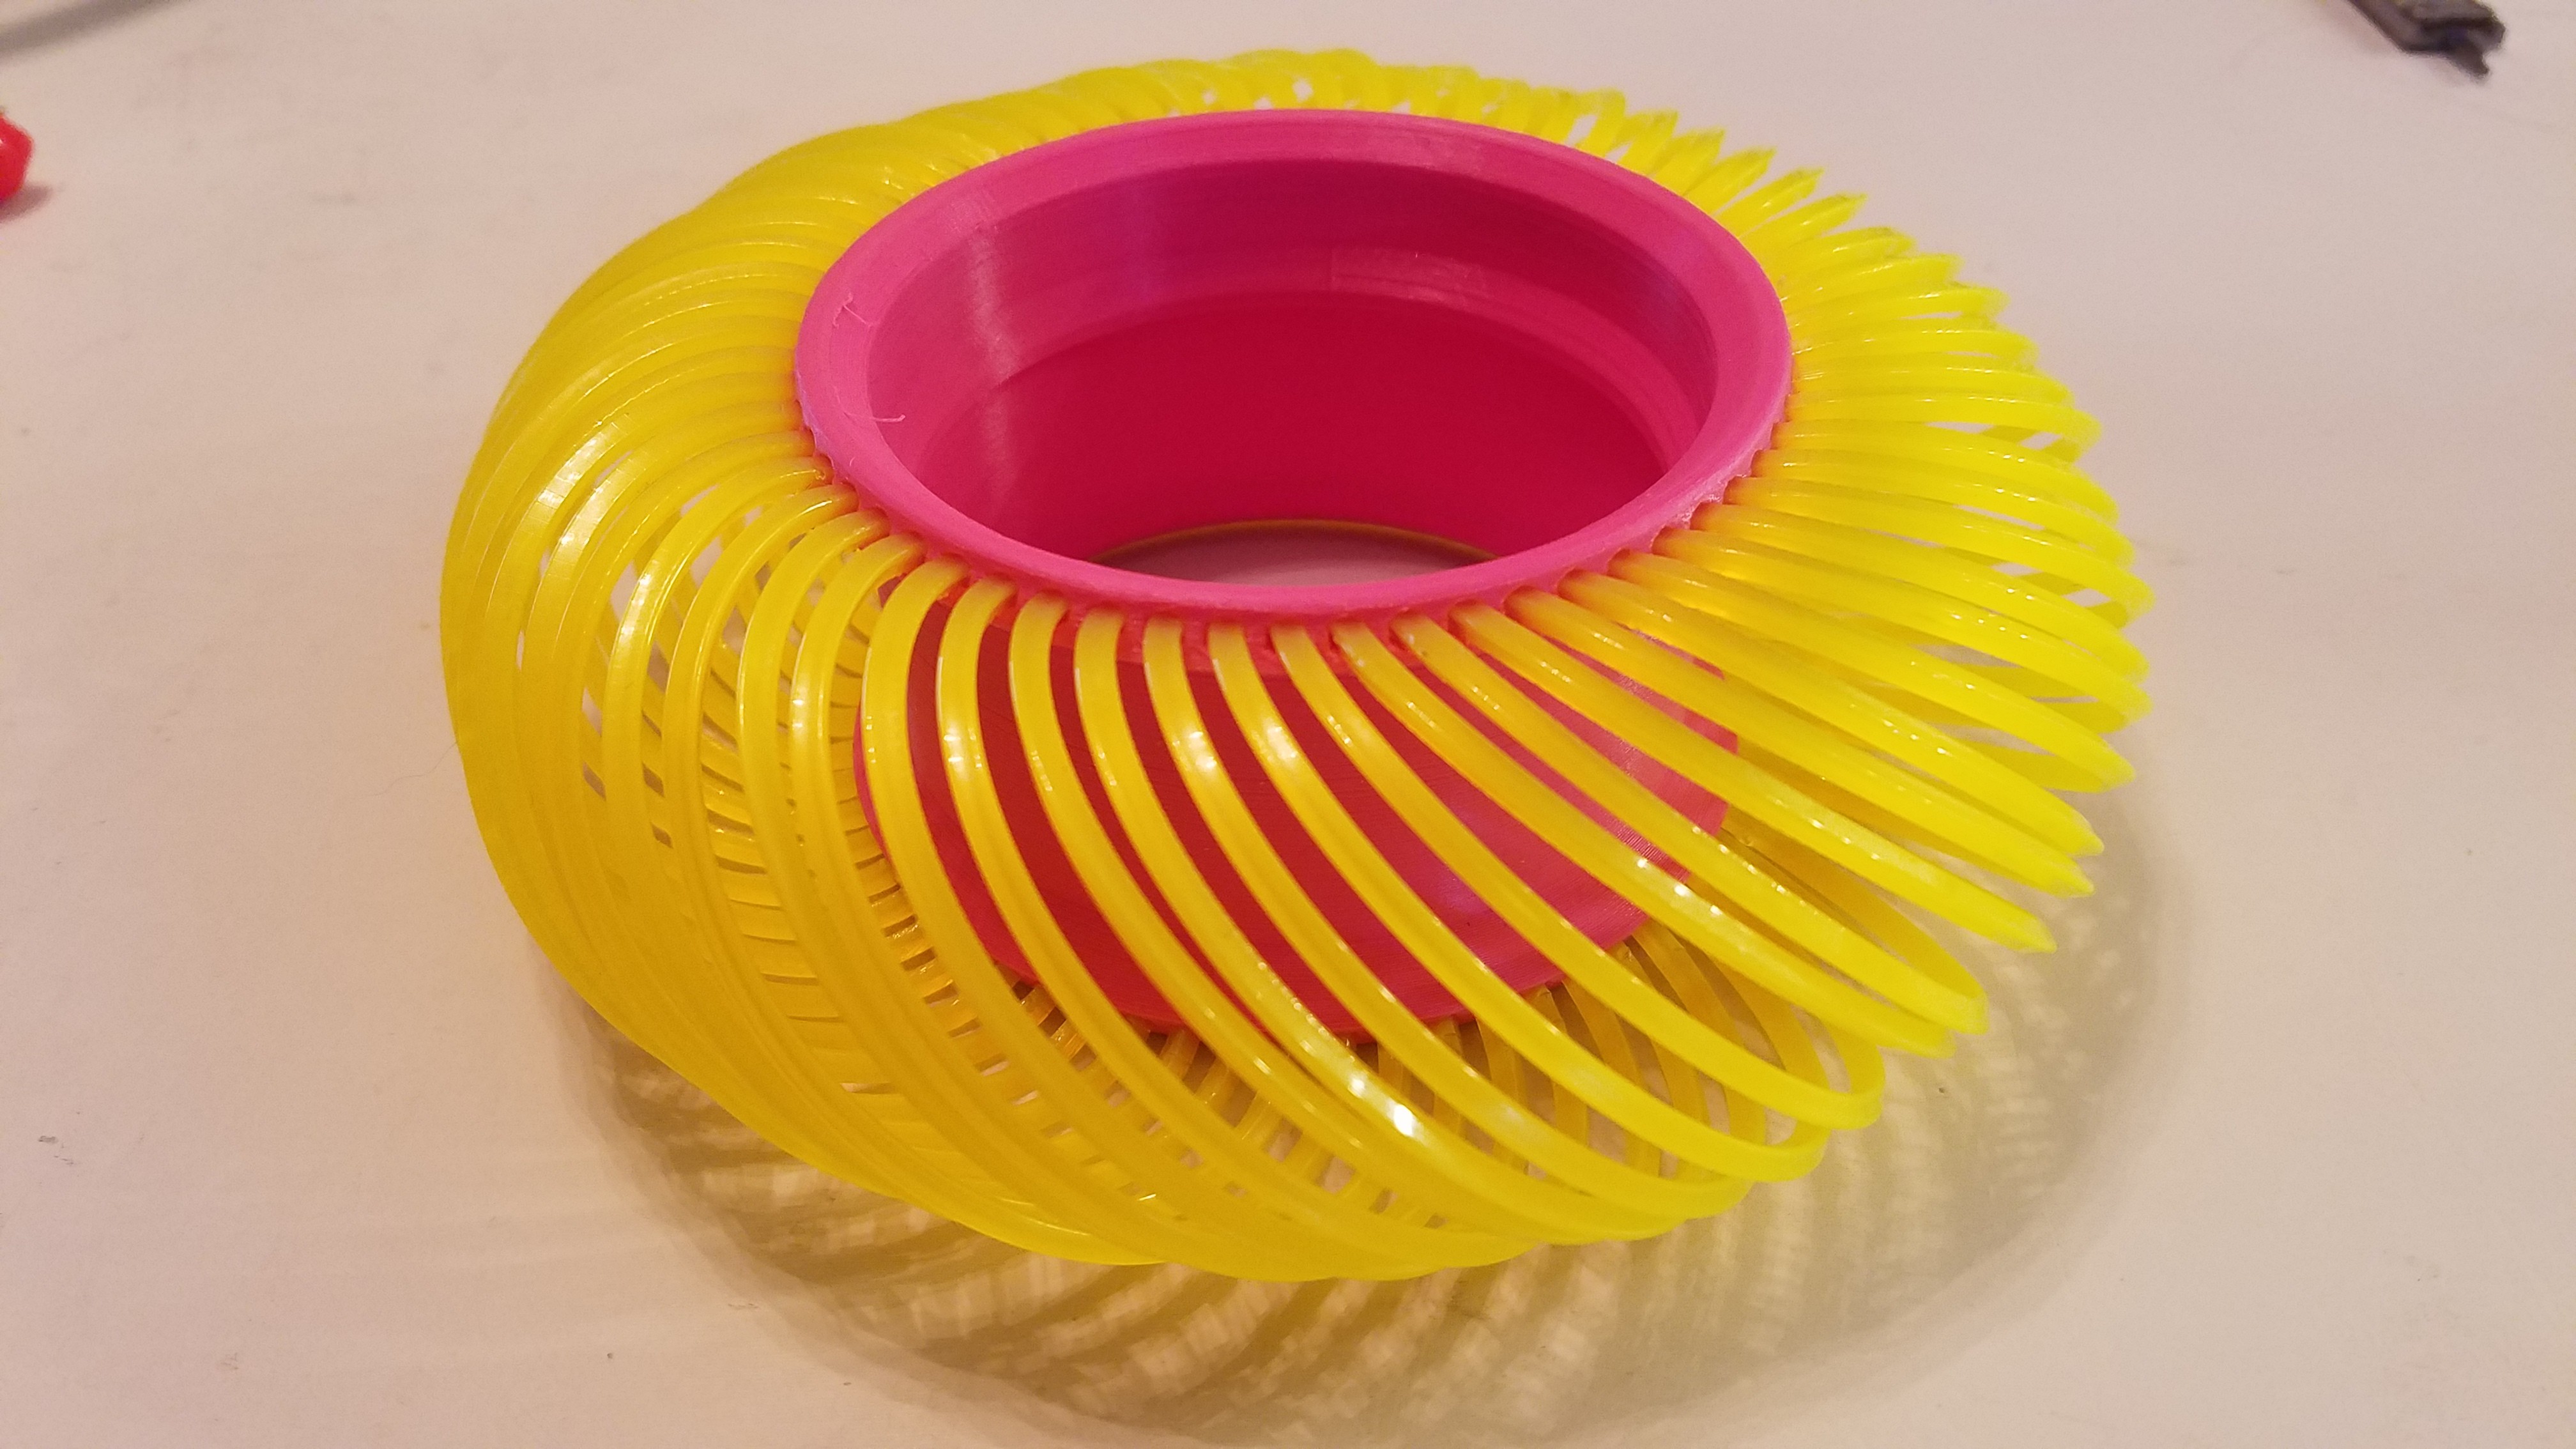
05/10/2019 at 19:49 • 0 commentsThe narrower aspect ratio worked, and I got the hole size for press fitting the filaments just about perfect.
![]()
The filaments definitely had a left or right twist to them depending on which end I inserted first. I tried to balance that out later on, but the first 20 or so were just randomly oriented.
<EDIT> My son and I played catch with these by bouncing them off the ground and they survived with no consequences. They are pretty bouncy! I believe this means I have sufficient depth at the insertion point of the filaments to keep them there with just the press-fit.</EDIT>
Now to model the transmission for it again.
However, I just thought of an alternative to string trimmer filament which might actually work better..
Zip-ties!
Bend them into a loop and they don't deflect very much from the cylinder shape side to side, but they still flex nicely along the circumference of the cylinder for better performance as a tire as well.
They won't have quite as much grip as the triangular trimmer line, but I honestly think the flexing off axis is going to be more of an issue. I already had to make one design compromise based on that.
The flat shape also lends itself much better to being woven into a cross hatch pattern for a Mars rover style tire, which was the original intention of this project before the Mecanum prospect took over.
I'm going to have to try them later.
-
Printing parametric polygon perfection project (log)
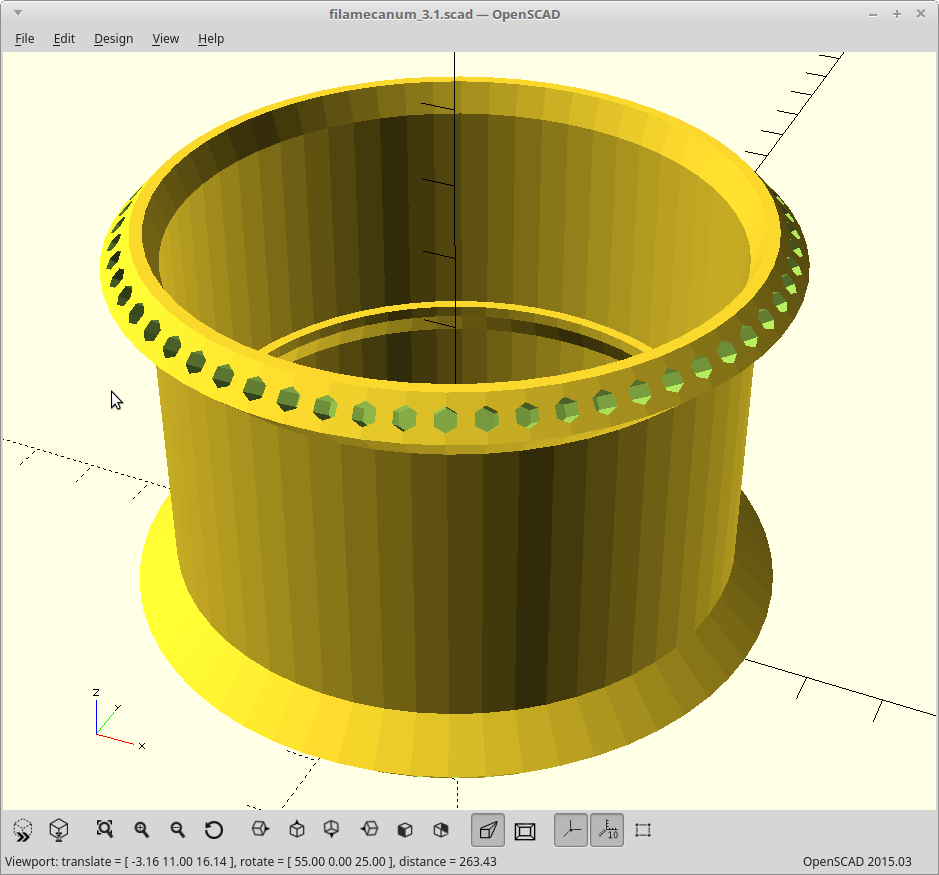
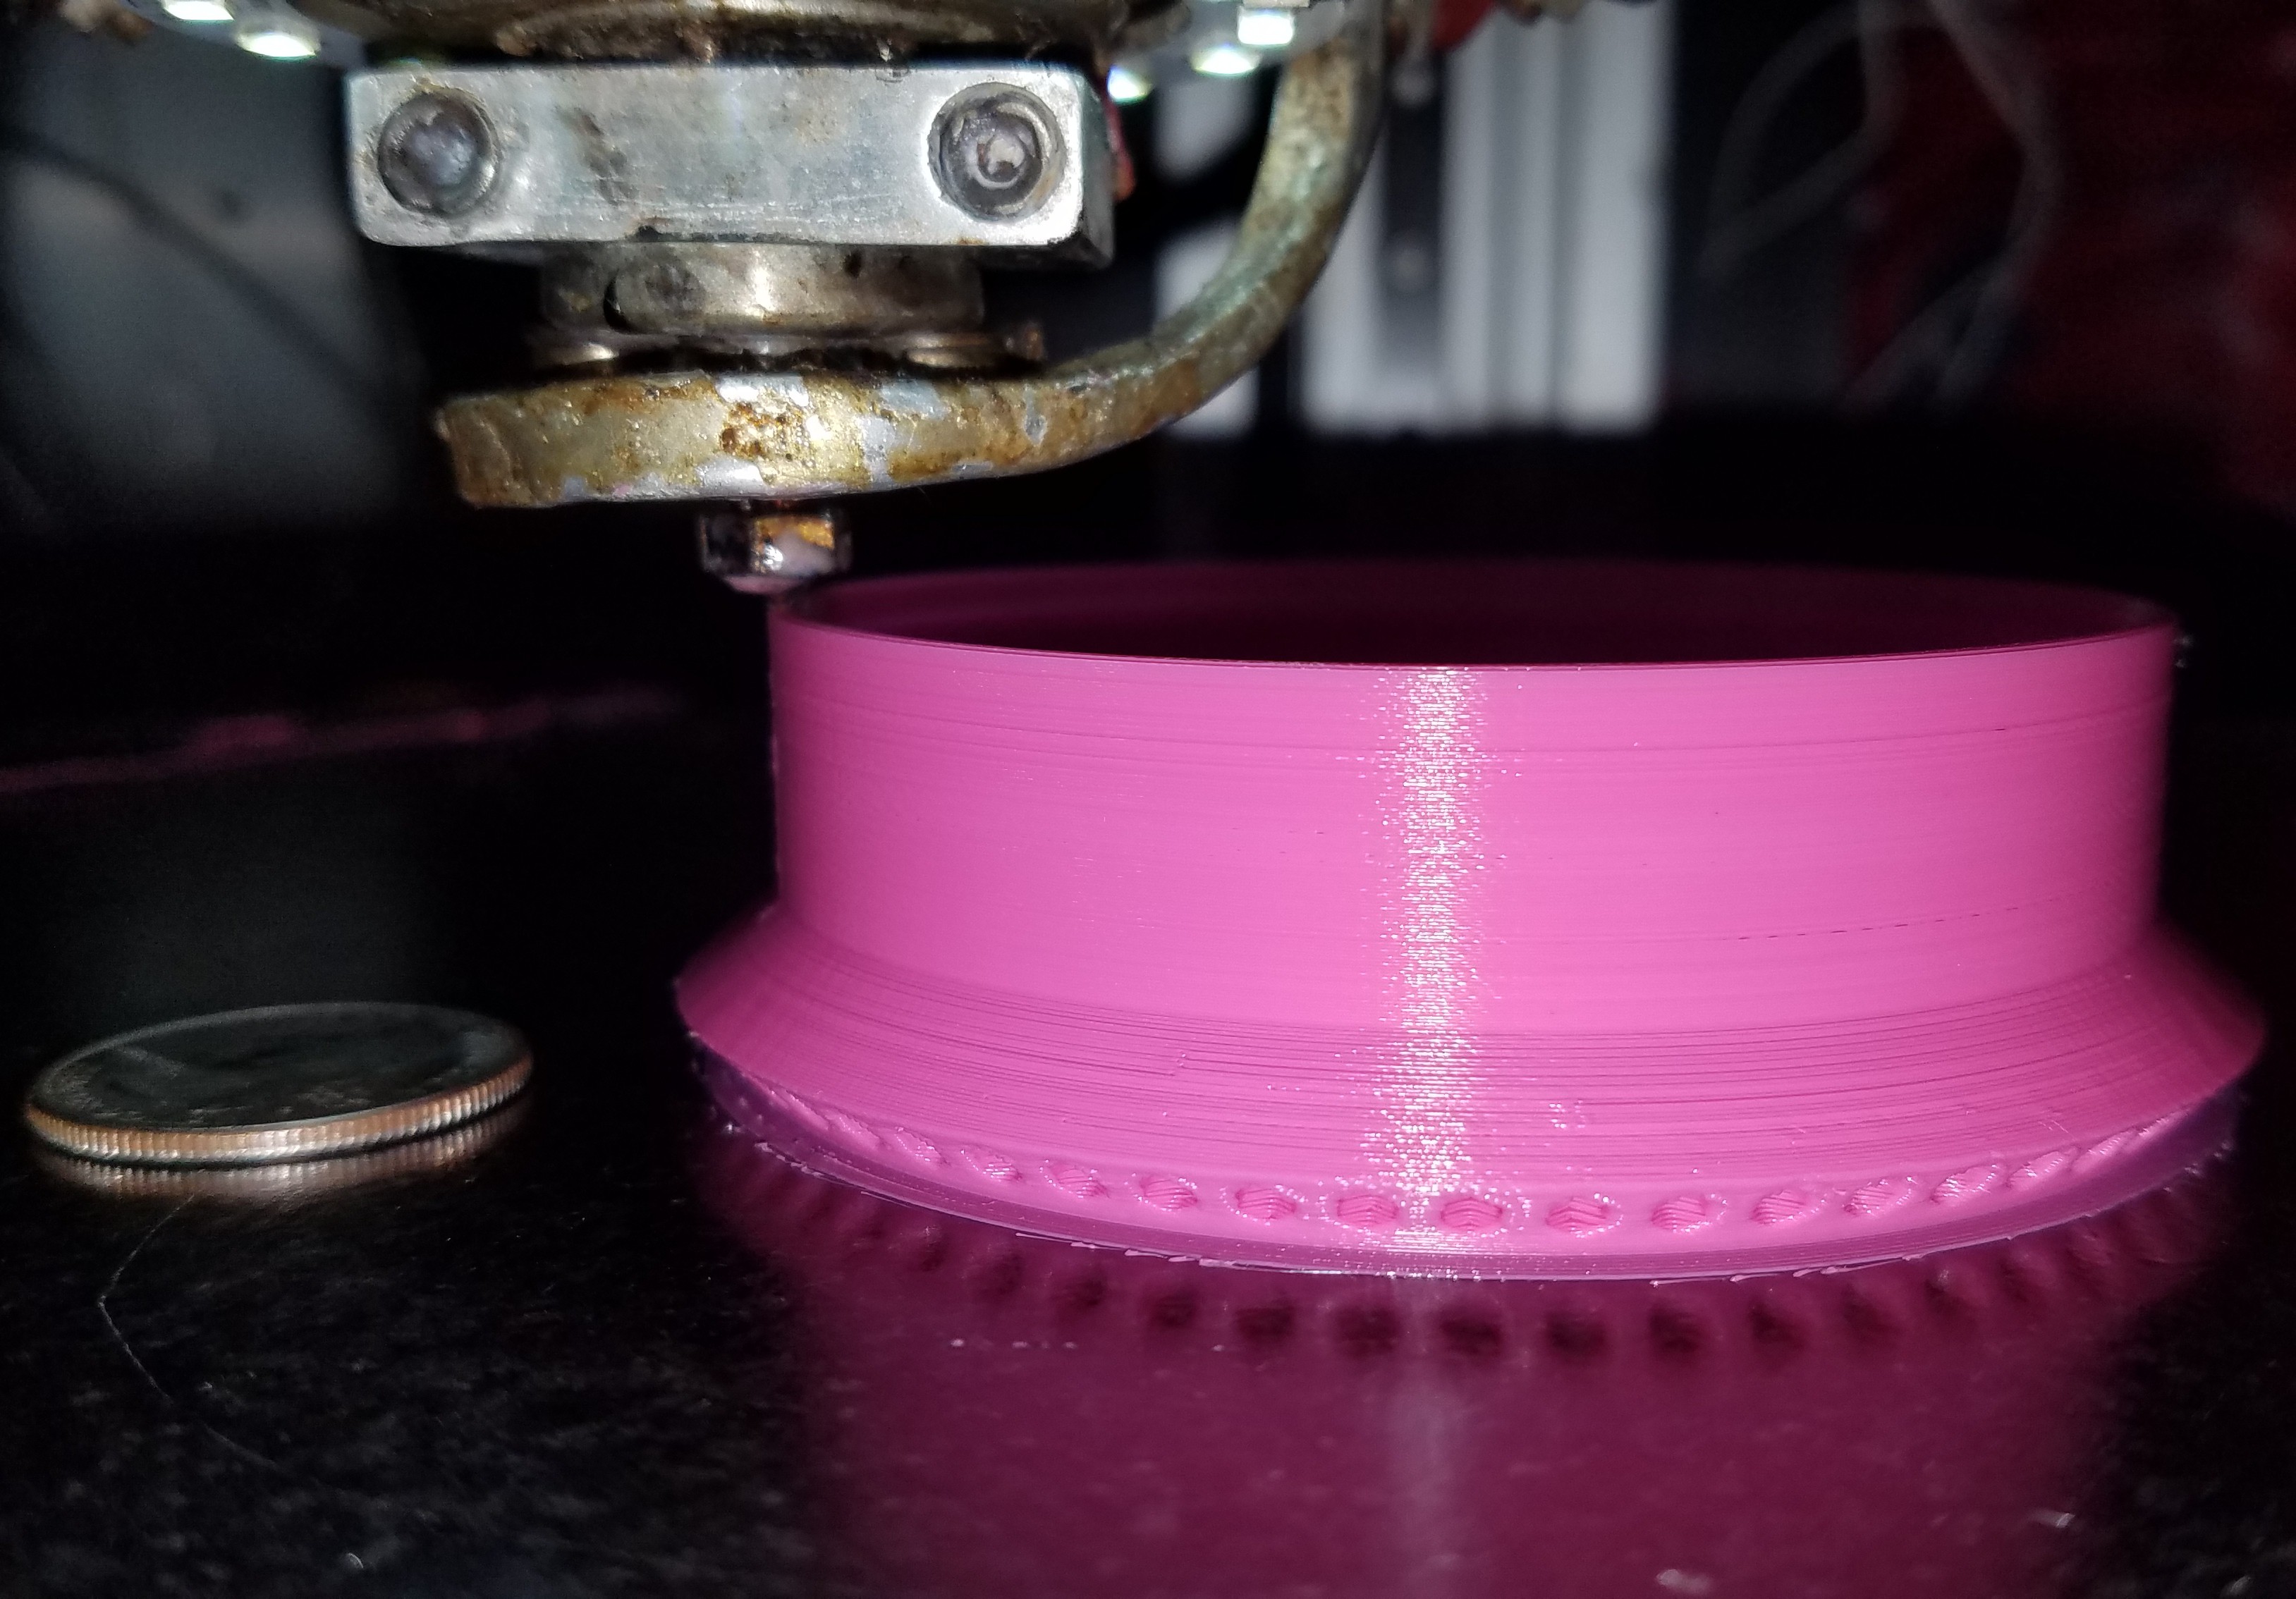
05/09/2019 at 17:22 • 0 commentsI'm done with the new parametric simplified model of the rim.
![]()
Printing it.
New code is up.
<EDIT> Ooof, that was going to take a long time to print. 8 hours per rim.
I scaled back some of my excessive thickness and such, and got it down to 4 hours.
Printing.
Looking at this in real life as it prints, this is a pretty big wheel now!
![]()
It should pose a suitable challenge for the #MPRT - Modified planetary robotics transmission to spin, and is probably large enough for a good test in grass and such.
I hope I didn't make it too thin, and that my guess for the press fit dimensions for the new trimmer line is right. This one has a 1.6mm wall thickness.
Uploaded the new code again.
</EDIT>
<EDIT2>
The filament holes were too small. Drilled them all out to size though and corrected the model.
Then I put a few filaments in.
They flexed far too much. The rim and the tire aspect ratio are going to have to be narrower.
</EDIT2>
-
OpenSCAD polygons
05/09/2019 at 15:50 • 0 commentsPrimitives in OpenSCAD are a really great for adding and subtracting your way to what you want. Add a cylinder here, subtract another there, you got a rim.
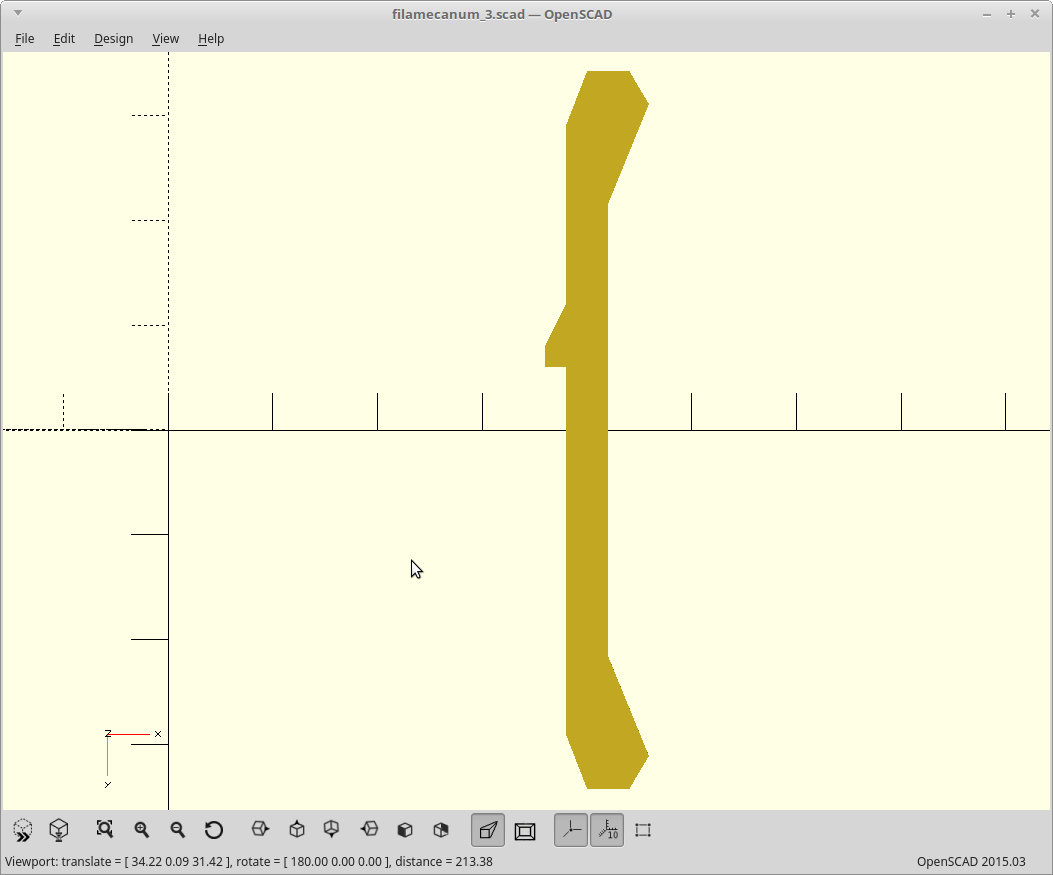
However if you have a complex shape that can be extruded, a polygon will be much more efficient. A little harder to visualize though for sure.
You define your profile as a set of points which define a 2D object. Be prepared to do some math.. :)
polygon(points=[
    [rim_ir,rim_h/2-rim_edge_z-wall_thickness],
    [rim_ir+wall_thickness,rim_h/2],
    [rim_or+wall_thickness,rim_h/2],
    [rim_or+rim_edge_x,rim_h/2-rim_edge_z],
    [rim_or,rim_h/2-rim_edge_z*4],
    [rim_or,-rim_h/2+rim_edge_z*4],
    [rim_or+rim_edge_x,-rim_h/2+rim_edge_z],
    [rim_or+wall_thickness,-rim_h/2],
    [rim_ir+wall_thickness,-rim_h/2],
    [rim_ir,-rim_h/2+rim_edge_z+wall_thickness],
    [rim_ir,-hub_offset-wall_thickness*3],
    [rim_ir-wall_thickness,-hub_offset-wall_thickness],
    [rim_ir-wall_thickness,-hub_offset],
    [rim_ir,-hub_offset],
]);
Which gives you your 2D object.
![]()
Then you do your extrusion on that by adding a rotate_extrude(), and you got your 3D shape.
![]()
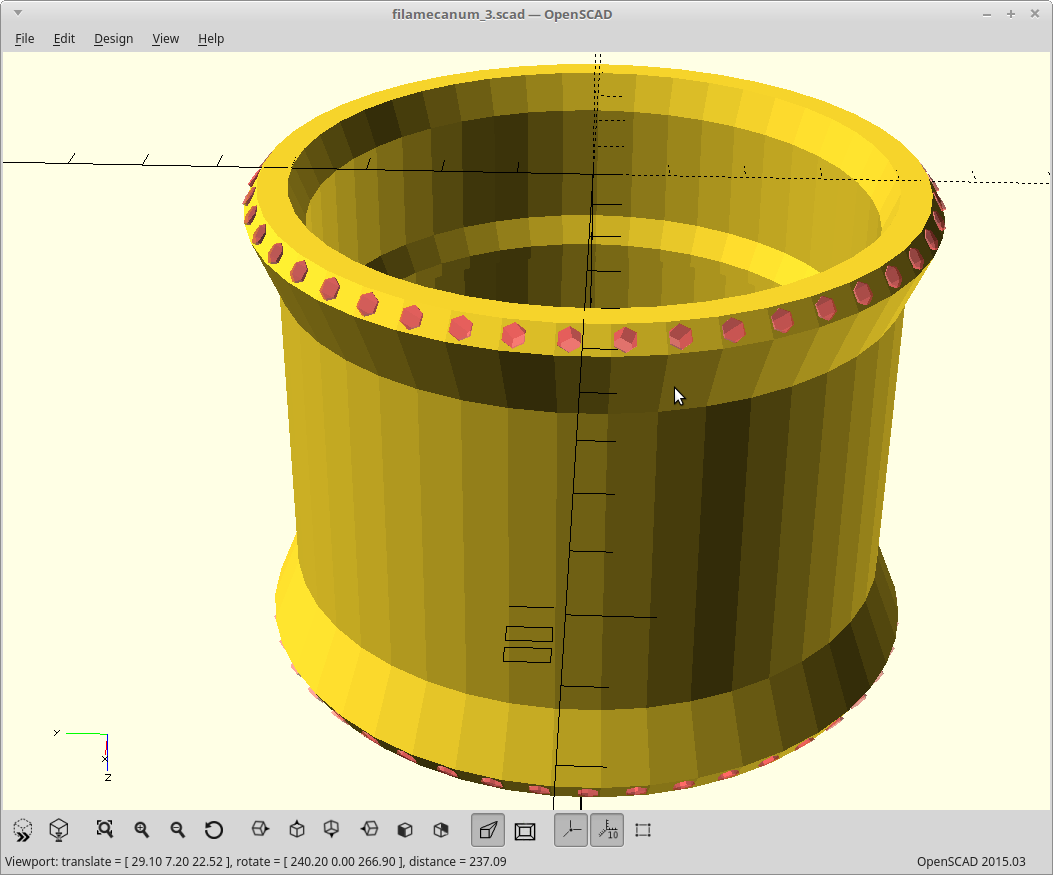
Add some holes, and you got a rim. Well actually, the position of the holes defined the position of the rim above, but now I get to add them back in. :)
![]()
The code which generates that is 20 lines long, and most of those are just for readability of the polygon array.
-
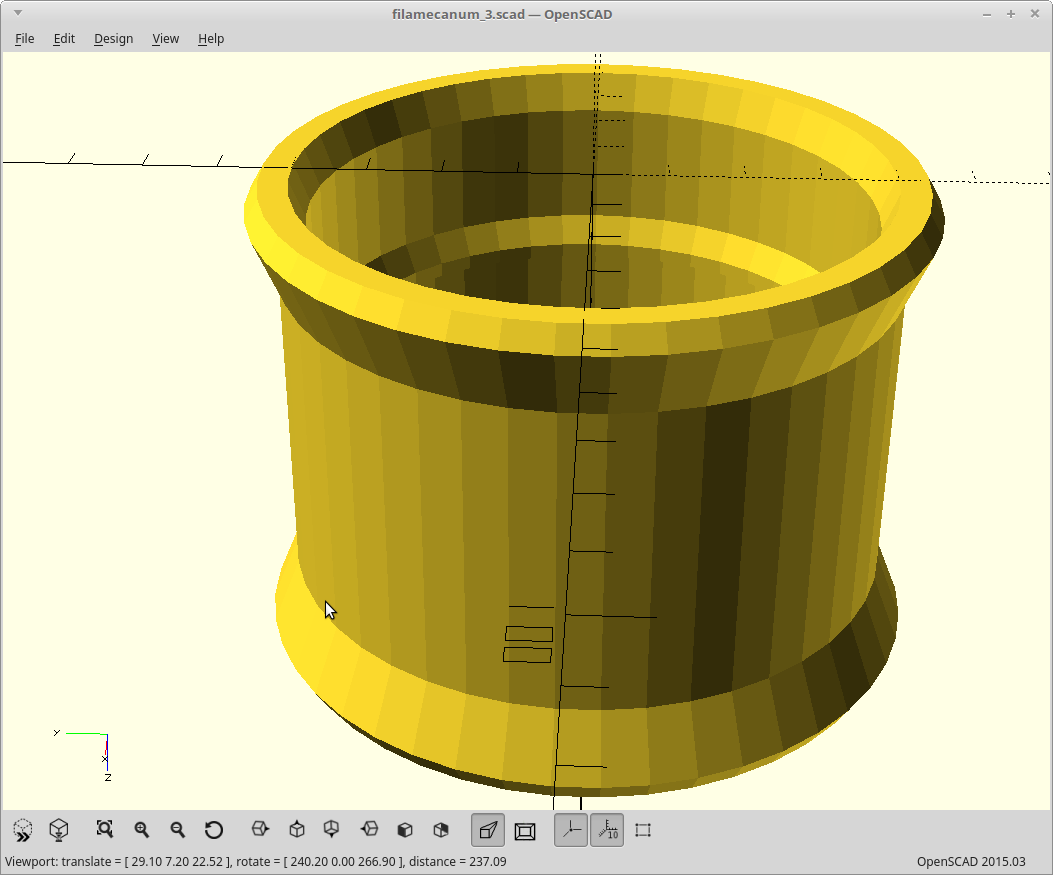
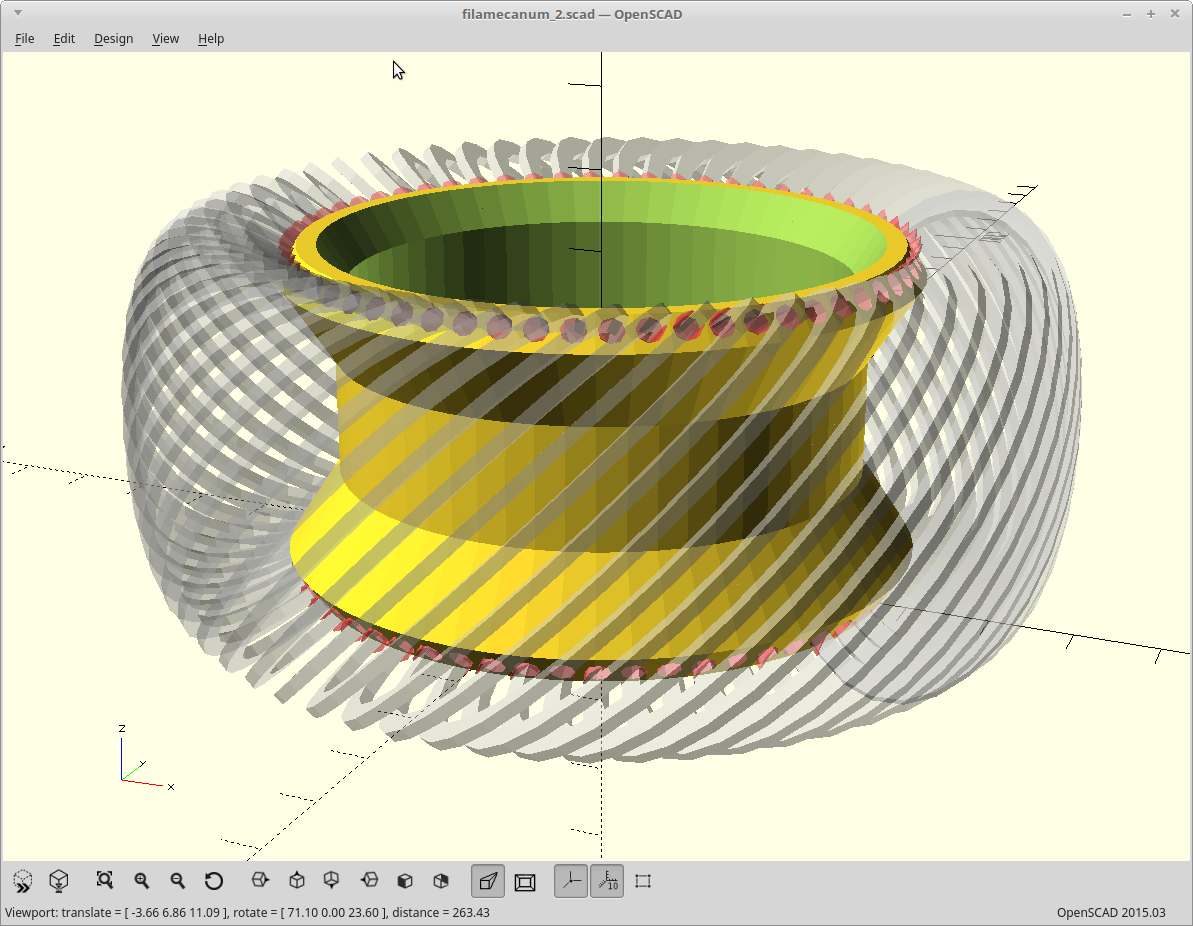
Simpler
05/08/2019 at 16:52 • 0 commentsI went through a range of tire aspect ratios and rim widths and watched the resulting angle which is required for the filament holes. All the ones that make sense are between 2-7 degrees of being 90 degrees from the tangent to the rim around the circumference. That means I could eliminate needing a CW and a CCW version and just have one.
![]()
The filament holes still need to be outwardly angled to generate a tire width wider than the rim, but the lower tire aspect ratios also usually correspond to the use of a wider rim. This means for the vast majority, that angle ends up just pointing at the centerline for the rotational axis of the rim.
Those two points mean I can simplify the modeling of the filament holes significantly here and generate a single parametric model. I'm starting over with a fresh model, and doing that.
I'm going to split the rim and hub back up as well. It will consume less material to print this as two parts as then I don't need the conical underside to keep the overhangs manageable. Using a narrow rim aspect ratio would not have worked before as the overhang required for the cone became too severe. Now both parts can be optimized for what they need to do, and be parametric. It also means the transmission can go back to being laser cut. The only sticking point here is then I should really put the surface for the motor end seal in the transmission model, which means the output ring will end up needing a small rim as well.
-
The perfect trimmer line for this..
05/07/2019 at 04:05 • 0 commentsI had four variations on trimmer line here of the larger (2.2mm+) diameter to test for this.
- The regular round stuff. I can't imaging that would work too well. It will slide in both directions.
- Star shaped, with raised edges and recesses along the length. Better. The issue here is that the star shape was never extruded perfectly. Both the stuff I had, and the same stuff I found brand new in the store, had some ridges along the length. It will not slide well in the long dimension as such.
- Octagonal shaped line I used for the proof of concept. It was pretty good.. smooth along the length for the most part, but still had some defined edges which would grip the ground when driven off the long axis.
- Square line. This seemed like a good idea, until I tried to bend it. The square shape meant it was impossible to keep a corner facing down. It always wanted to align so one of the flat surfaces was the one which would be hitting the ground.
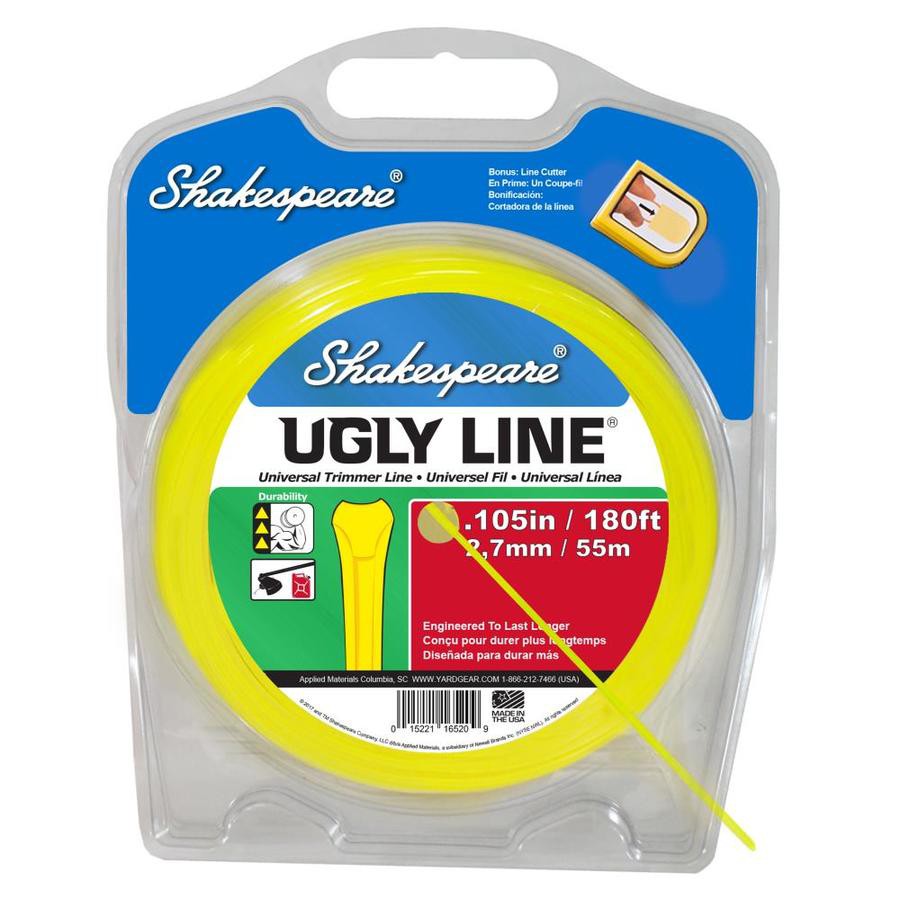
So I went looking, and I found this.
![]()
It has an overall triangular shape, which means that when you bend it into a circle, one point of the triangle is always facing the outside of the bend. That was something I didn't really expect, but it kinda makes sense in hindsight. The line resists the bending more where it is thicker, and so aligns with a thin edge out. It's also perfectly smooth along the length.
They even have a massive 4mm diameter version of this same line in stores locally, so my upper limit for the filament diameter just went away. About 10 of those, spreading the weight over 4 wheels, could probably support a human being with the spring tension of the line itself.
I'll be using this going forward.
-
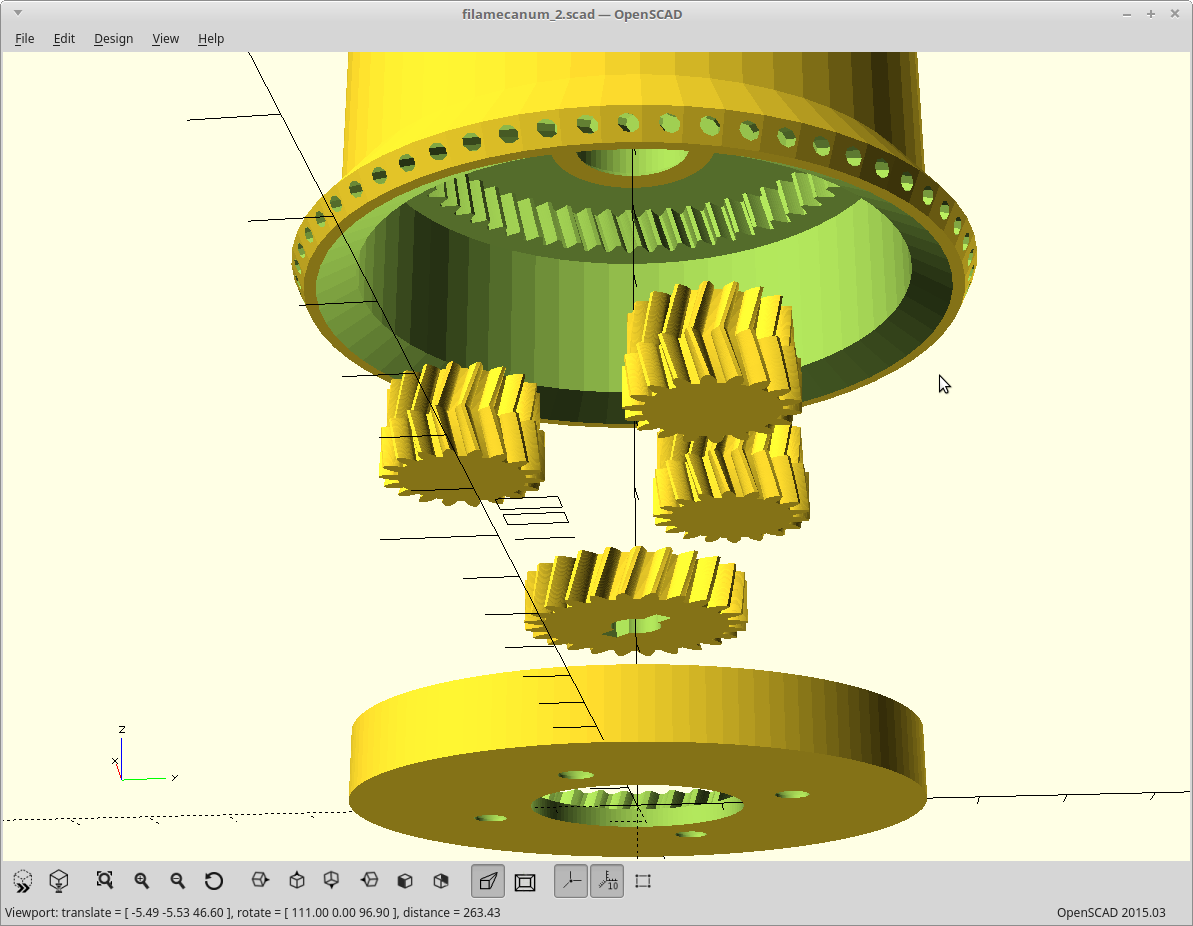
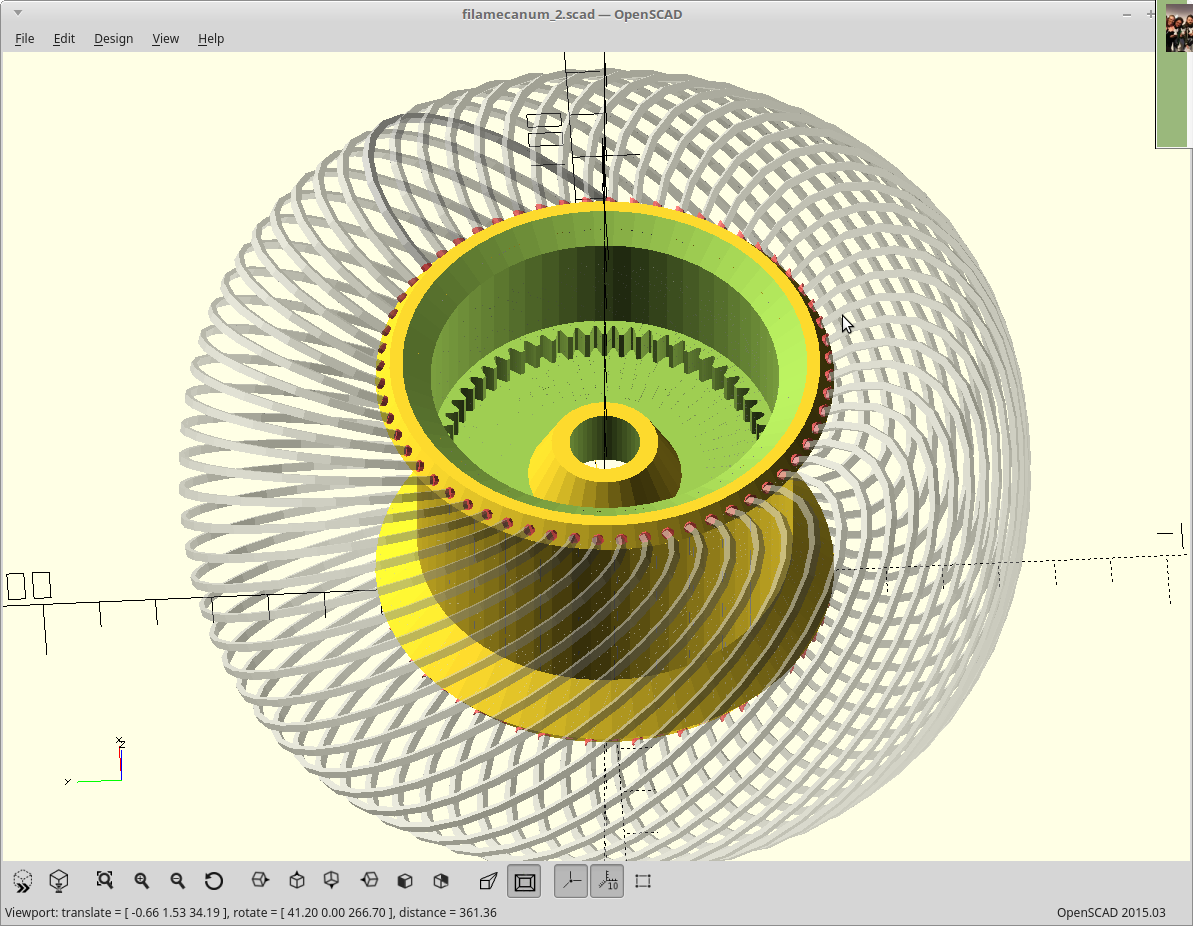
MPRT added
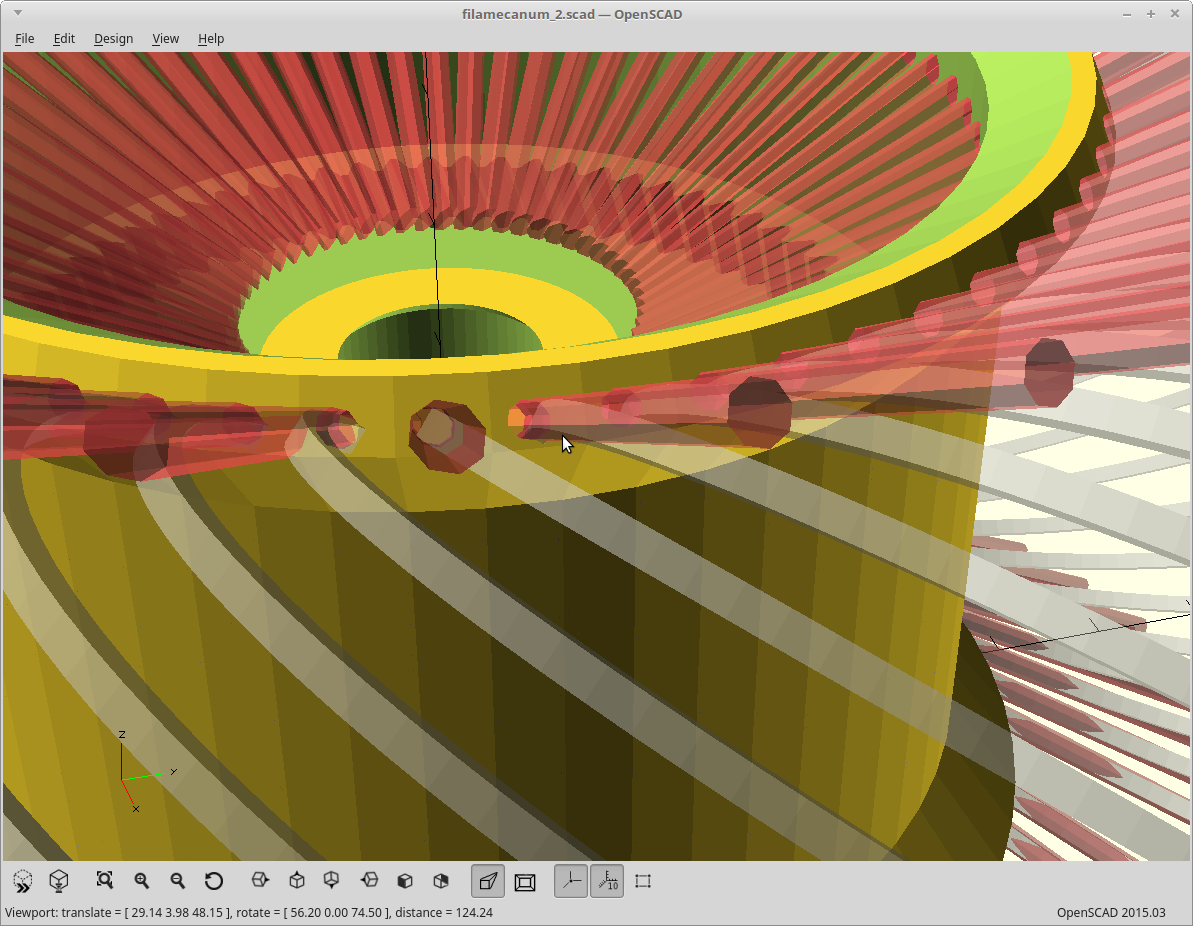
05/06/2019 at 11:08 • 3 commentsSorted out the pitch changes needed to make #MPRT - Modified planetary robotics transmission mesh without interference. Two layers, two different gear pitches.
Added it.
![]()
I think I may still add a carrier for the planets as I actually do have room above them here to do so.
Here is what a pseudo cross section looks like.
![]()
The rim is printed with what is the up here, down. I actually needed that big conical shape to print this without needing supports. As a bonus, this puts the bearings right in the center as well.
I'm still debating if I want to add an o-ring to that gap between the motor ring gear and the rim. If I did, then I would actually have a sealed transmission here. That is a huge o-ring though and would definitely need to be lubricated if it was rubber, which may actually attract dirt more than just running it dry or using graphite lubricant. Then again, I could spring for some Teflon o-rings, or perhaps wrap the regular o-ring with Teflon tape? Actual sealed ring bearings of that diameter start at about 80 McDonalds cheeseburgers, so I won't be doing that.
I think I'll add the slot for the o-ring anyway, just so I have that as an option later. Sealed sounds pretty nice.
-
Parametric is hard y'all
05/05/2019 at 21:43 • 0 commentsI blew most of the day today trying to make this parametric. (aka.. change any variable and every part of the model adjusts properly).
I have failed thus far.
The intersection of the cylinder sections and therefore the filament holes generated from them, aligned to always hit the center of the rim area, relies on a lot of different variables. I've accounted for most of them, but I'm still missing something.
Right now you can change the hub radius, hub height, rim radius, rim height, bearing radius, bearing height, depth of the hub inset, tire aspect ratio, and the tire overhang and have the resulting model be within half of the thickness of the rim for the filament holes. But it's not perfect.
![]()
I'm going to stop right here and move on to adding the #MPRT - Modified planetary robotics transmission to this now.
I've posted the current code for this. if you can think in 3 dimensions and geometry is your thing, and you care enough to figure out what I'm missing... feel free to comment. :)
-
Fusion
05/05/2019 at 14:35 • 0 commentsThe result thus far:
![]()
-
Hotrod
05/03/2019 at 21:39 • 0 commentsI modeled a new version for the purpose of actually building something!
This one is big enough to wrap the motor I have, is lower profile for less off-axis deflection but wider to allow more vertical flexing, has 60 filaments instead of 30, and now prints as one piece.
![]()
Now to add the #MPRT - Modified planetary robotics transmission drive to the inside.
That part still needs a little work. I'm on it. In the meantime, the source I'm starting with to produce what you see above...is up.
-
Convergence
05/03/2019 at 19:02 • 0 commentsI believe the universe is trying to get me to build a robot. Perhaps I should listen.
First up, my booth neighbor at the Milwaukee Maker Faire last year handed me a box full of seven brand new 100W DC motors with a manufacturing defect (pin location in driveshaft was too close to the motor). Nice brushes, good bearings, and built in encoders. They are built for the long haul though, and so are heavy. They also run at 3k rpm which was too high to be directly usable, and so they got put aside as I didn't have an immediate use for them.
Next up the #MPRT - Modified planetary robotics transmission idea happened. I didn't have an immediate use for it so I just put it out there for others. @agp.cooper was kind enough to join that project and help it along with his desire to adapt it to use as a joint in his SCARA arm project.
The #P2 - Pick and Place for 3D Printers project was the one I had pegged as something I could take to completion and be the most useful thing I could produce in the free cycles available. That project is based on a Jetson Nano and a Pi camera which means I'm going to have a powerful, portable, machine vision platform sitting on my desk whenever it decides to come off backorder and show up.
And now this project happened. Again, I don't have an immediate use for it, so I just put it out there for others.
That is a lot of now usable robot related convergence happening.
I think I might have to build a robot.