Close
0%
0%

Resto-Mod 8 bit microcomputer

Retro-Futuristic 8-bit AVR based computer with 5" TTL CRT, PS-2 Keyboard, Serial Thermal Printer, PCM sound, and flash file system

Public Chat
Similar projects worth following
What's a "Resto-Mod microcomputer" you ask? Resto-Mod is a car guy/hotrodder term for taking a classic old car and installing a modern drivetrain, suspension, and brakes to build a better car that looks like period original (until you pop the hood). So a "Resto-Mod microcomputer" is a modern microcontroller based board driving a set of classic peripherals that recreates the experience of using 70's-80's era computers without the hassle of learning and maintaining commercially useless development environments for antiquated processors.

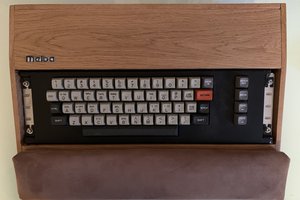
This Resto-Mod 8 bit Microcomputer is based on a ATMEGA1284P microcontroller with a 1978 5" Ball Brothers TTL CRT, PS/2 keyboard interface, PCM audio output driven by a homemade LM386 based amp, serial thermal printer, USB serial debug interface, period friendly switches and buttons, and a case that looks just as classic as the CRT. All the software is coded from scratch.

This project is currently shelved while I complete a couple iterations of the "1978 Heathkit Digital D&D Dice Tower" I wish I had as a kid playing AD&D. But, don't fear it will get resurrected in a number of future projects including the  Digital D&D Player's Sheet, The Ultimate Hotwheels Timing Computer, and the Heathkit Delux Digital D&D Dice Tower.

Here's a quick description of the project as it exists today.

Hardware: The case was purchased from Amazon.com. It's new but certainly looks period. It was modified to contain the CRT in the top portion of the case for heat dissipation. The front faceplate was cutout for the CRT display and contains the thermal printer and a handful of buttons, a 3-way switch, and the pot for volume control. The rear faceplate has the PS/2 keyboard port, a USB type  B female port, and a standard three prong AC power cord jack with integrated power switch. A cheap 12v power supply in an open frame is screwed to the inside of the rear faceplate. This 12v supply drives the CRT, controller board, and serial printer. The USB type B port is a panel mount conncetor that has a small 3 port USB hub connected inside the case. This hub has a cheap USB FTDI RS-232 interface card plugged into one port. The kind of card you can buy off Amazon for $9. It provides a TTL serial interface to the controller board that is used for serial console to the development PC for debugging. An Atmel-ICE is plugged into the other port of the USB hub. It's connected to the AVR processor on the controller board via it's ISP port. A single USB connection provides both ICE and serial console interface to the device. It's a tight fit but it's workable and comes apart for updates relatively easy. I'm impressed everything fit as well as it did.

The CRT is a 1978 Ball TV-50 5" Data Display Monitor. It was pulled from an old CNC machine (I don't know which type) and I bought it on E-bay surprisingly cheap. It's in very good condition with no burn in or any other sign of prior use.

The hand built controller board was built on a Adafruit full-sized protoboard. It sports a ATMEGA1284P processor with 20 mHz crystal, 7805 voltage regulator, connector for PS/2 port on the back of the case, and a plugin daughter card. The daughter card was built on a Adafruit half-sized protoboard and contains the LM386 audio amp and the inverting transistors for the TTL CRT interface. The inverting transistors are required because the data signal to the CRT is driven by USART0 in SPI mode on the microcontroller. When the USART is idle, it drives the output high. This caused a problem with the horizontal refresh creating some ghosting and a vertical bar on the left side of the screen. To fix this, the signal from the SPI is inverted and the character bitmap was inverted as well. The horizontal sync is generated by timer/counter 1 and the vertical sync is generated on a generic output pin. There is no dedicated video controller.

Software: The software is all written in C from scratch using the Atmel Studio 7.0 IDE and associated GNU toolchain. It's architect-ed to create a dedicated application devices. So, it doesn't provide a loader like a user OS. However, it's organized into drivers (CRT, serial, sound, ps/2 keyboard, etc.), services (text windowing manager, UI objects such as text box/radio button/check box/menu, file system, etc.), a simple task/screen manager, and application tasks that are organized into "screens". The user application is written as a series of files that represent each screen of the application. Each file has at least a minimal set of global data structures and a couple function handlers that implement the screen. The data structures describe the UI objects that comprise the screen and the function handlers provide the functionality for these objects. The task/screen manager parses the data structure to dynamically load each screen's data into RAM when that screen has the focus. If a subsequent screen is navigated...

Read more »

  • The case is starting to come together...

    John Anderson04/24/2020 at 07:50 0 comments

    I got a little more work done on the case this evening.

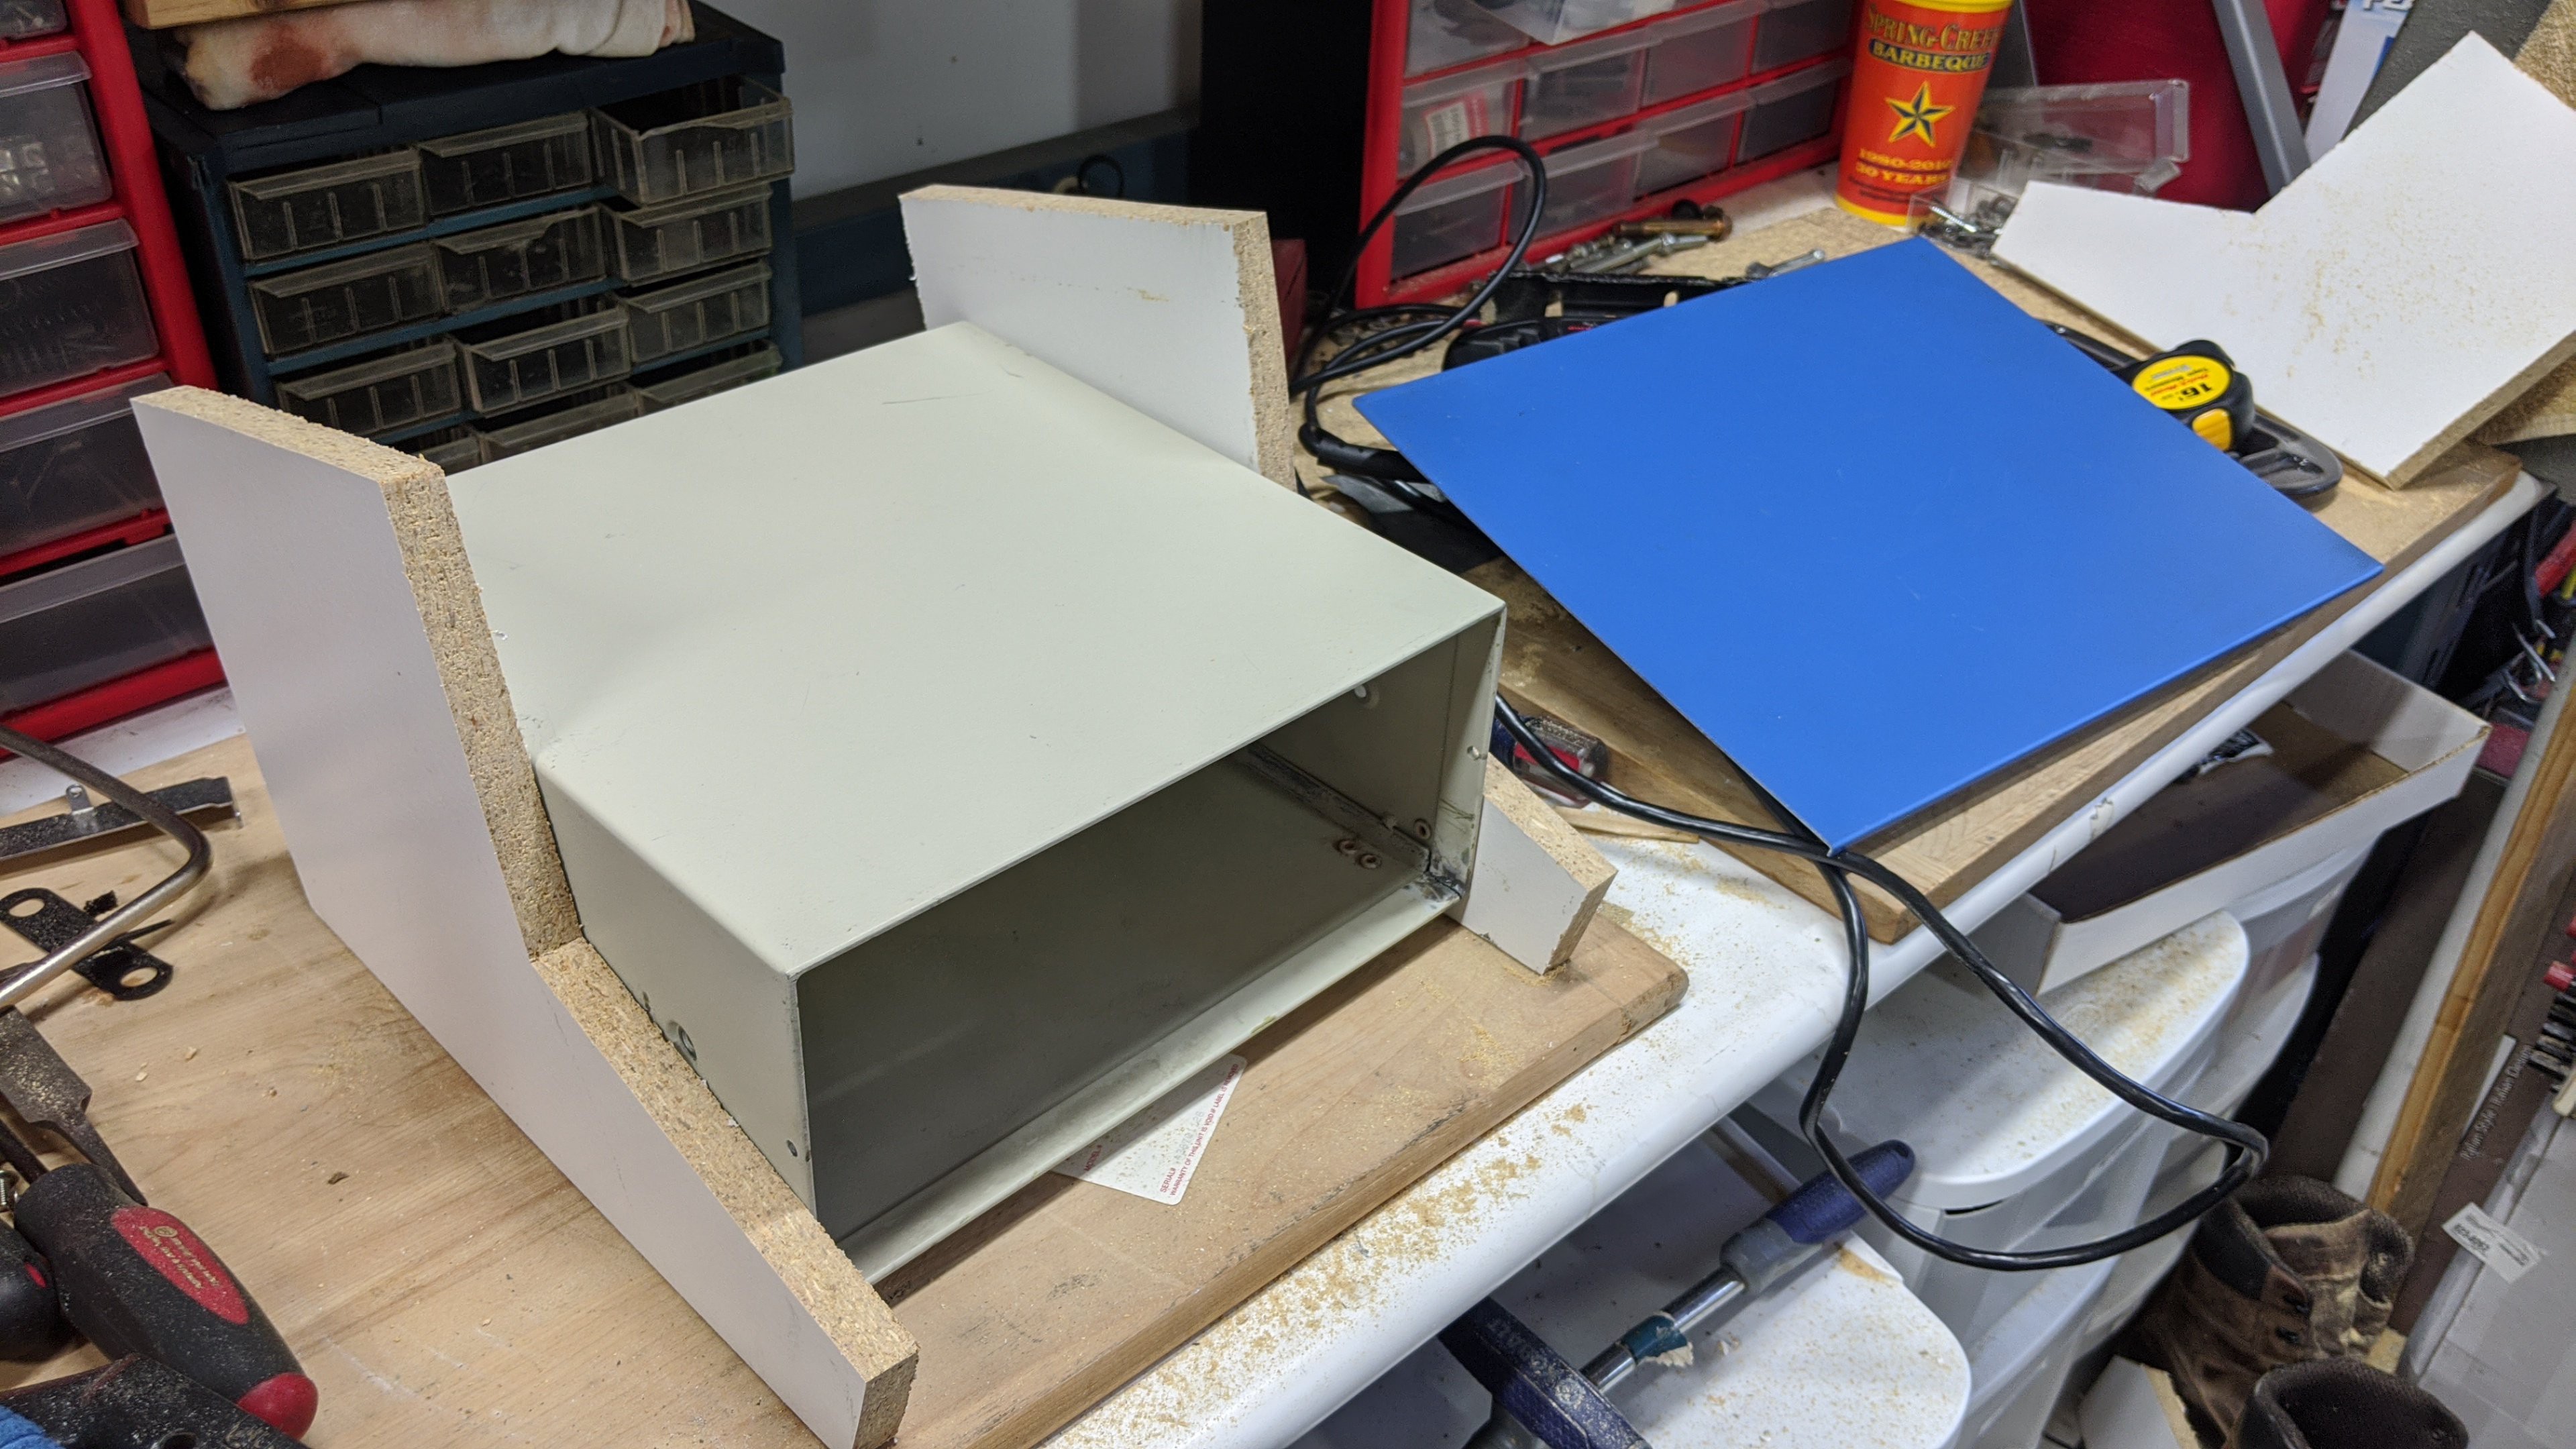
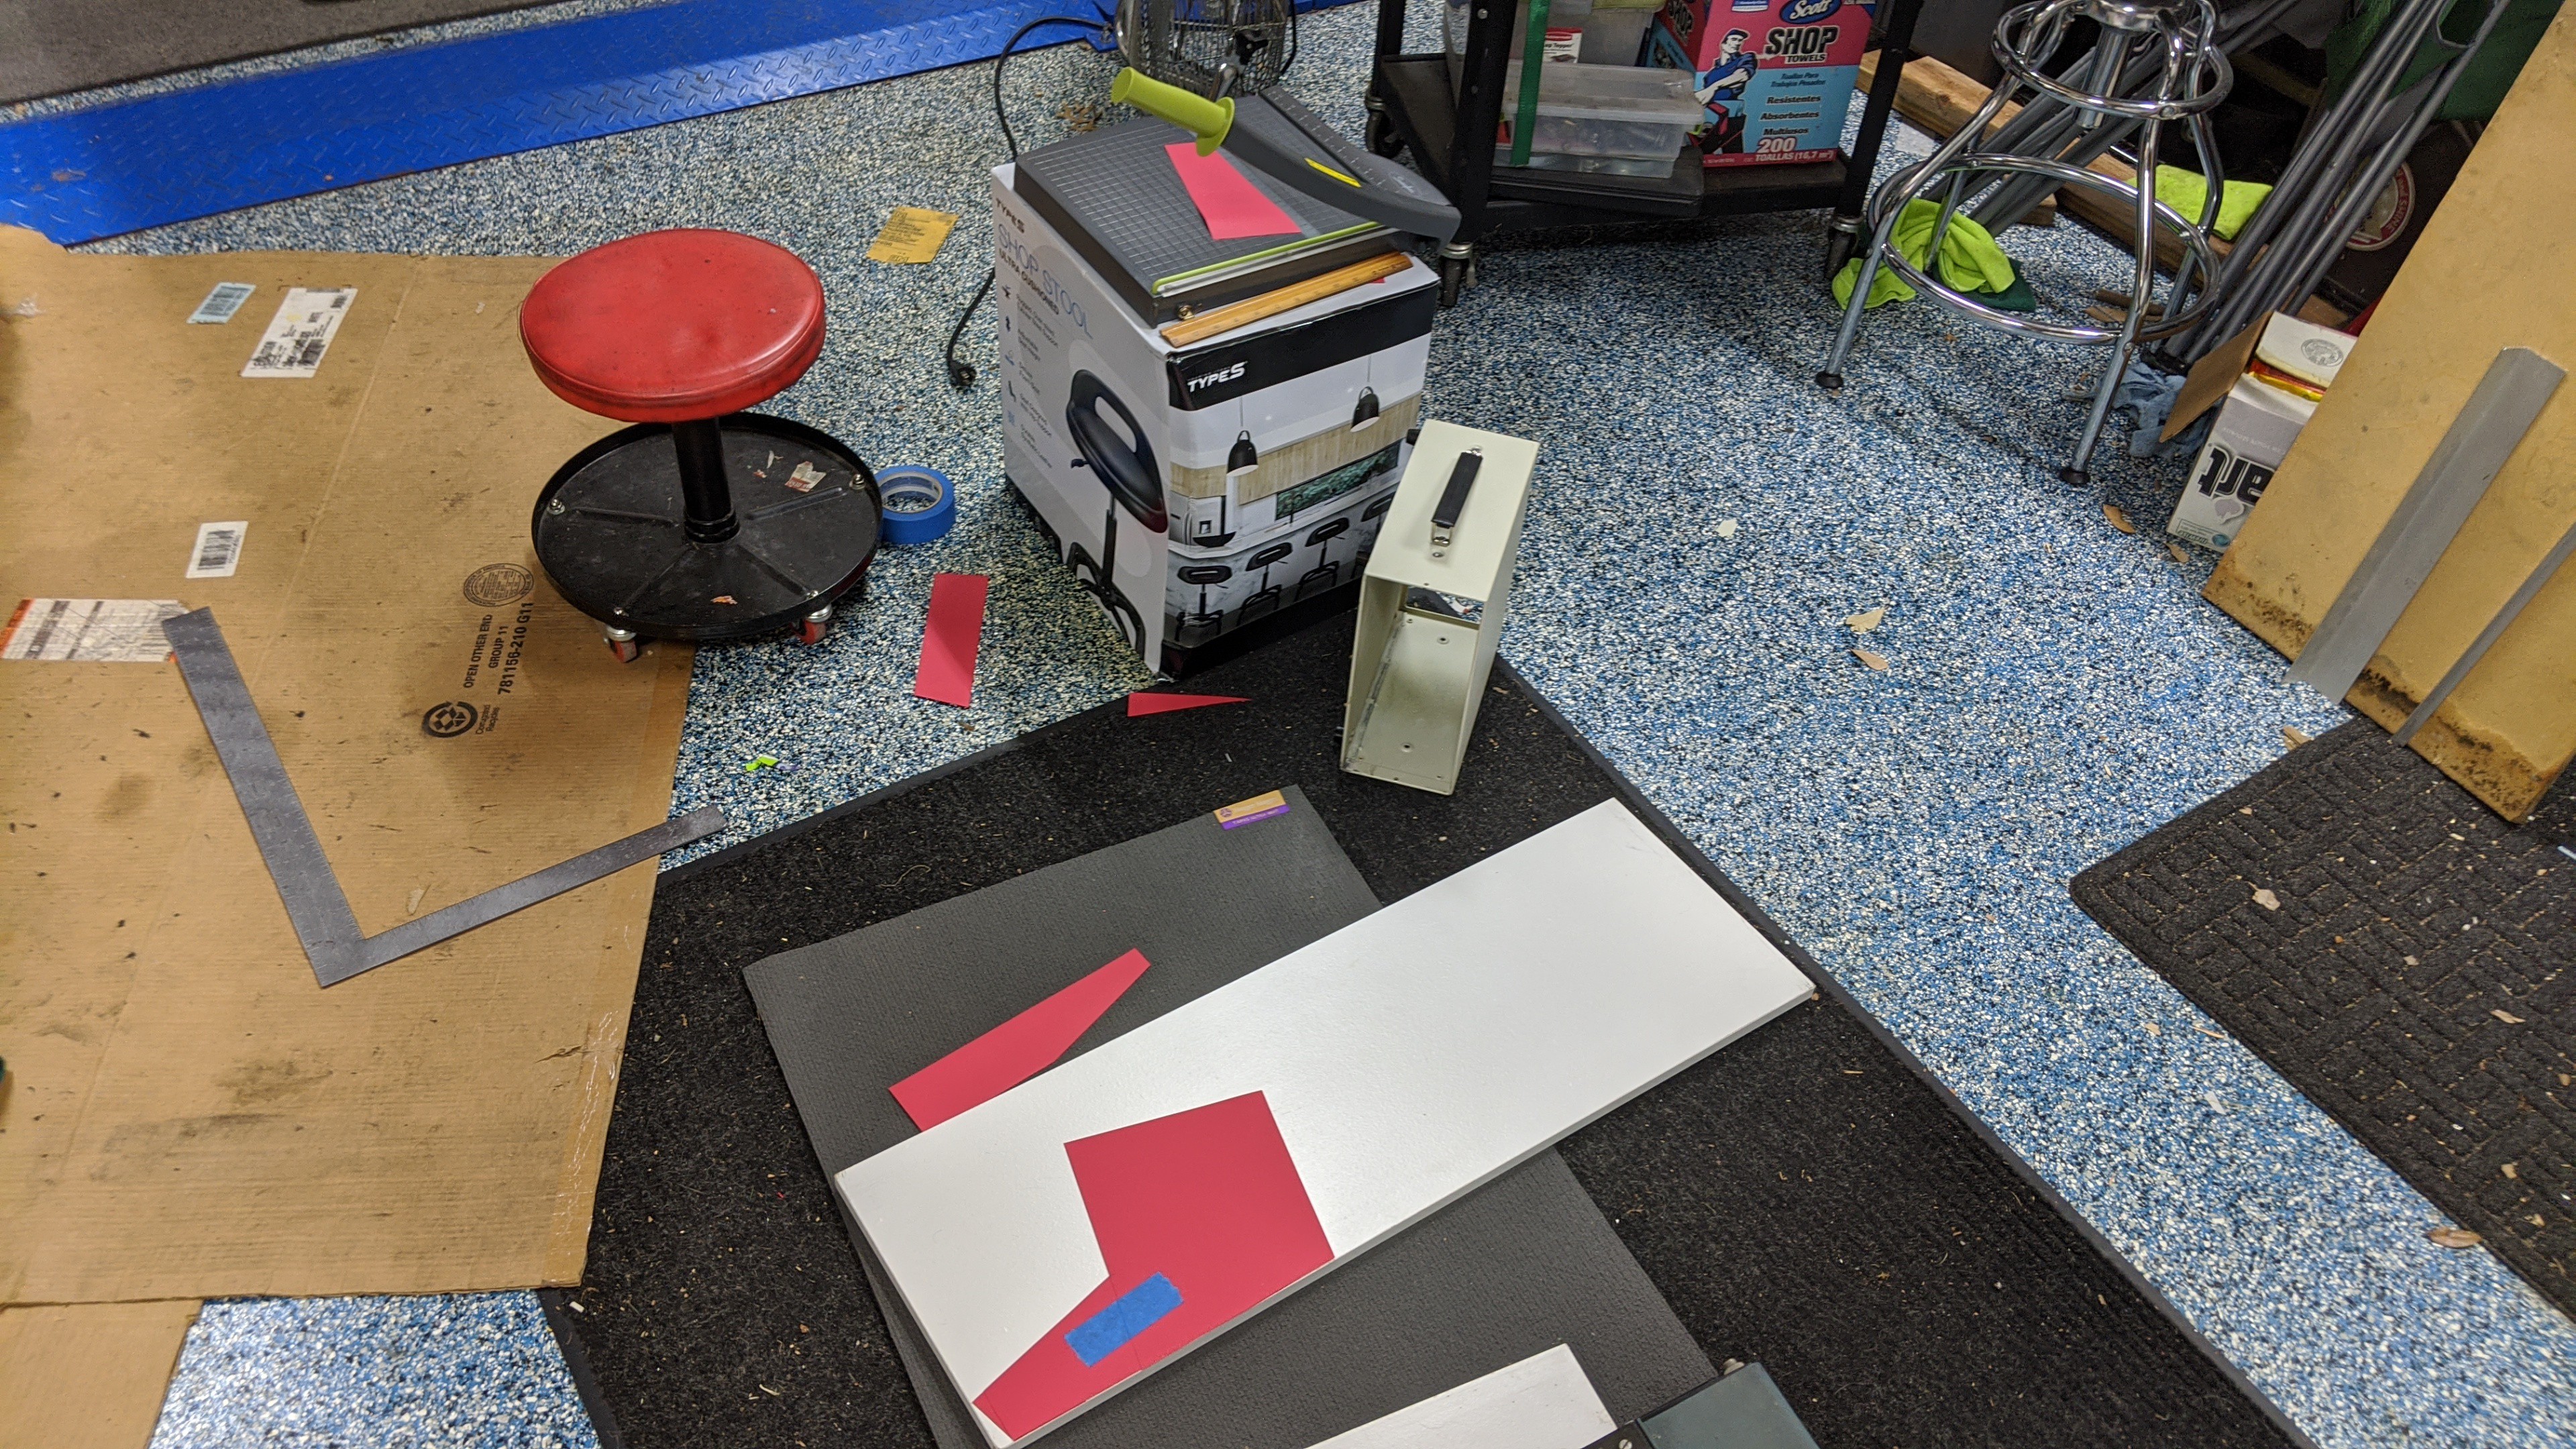
    I cut out some pieces to mock-up the case layout. I used a scrap piece of 12x1 shelf board to cut out the sides of the case. I'll use some solid wood shelf board for the final version of the case. These test cuts proved my template is good and helped me determine where to cut the data analyzer case.

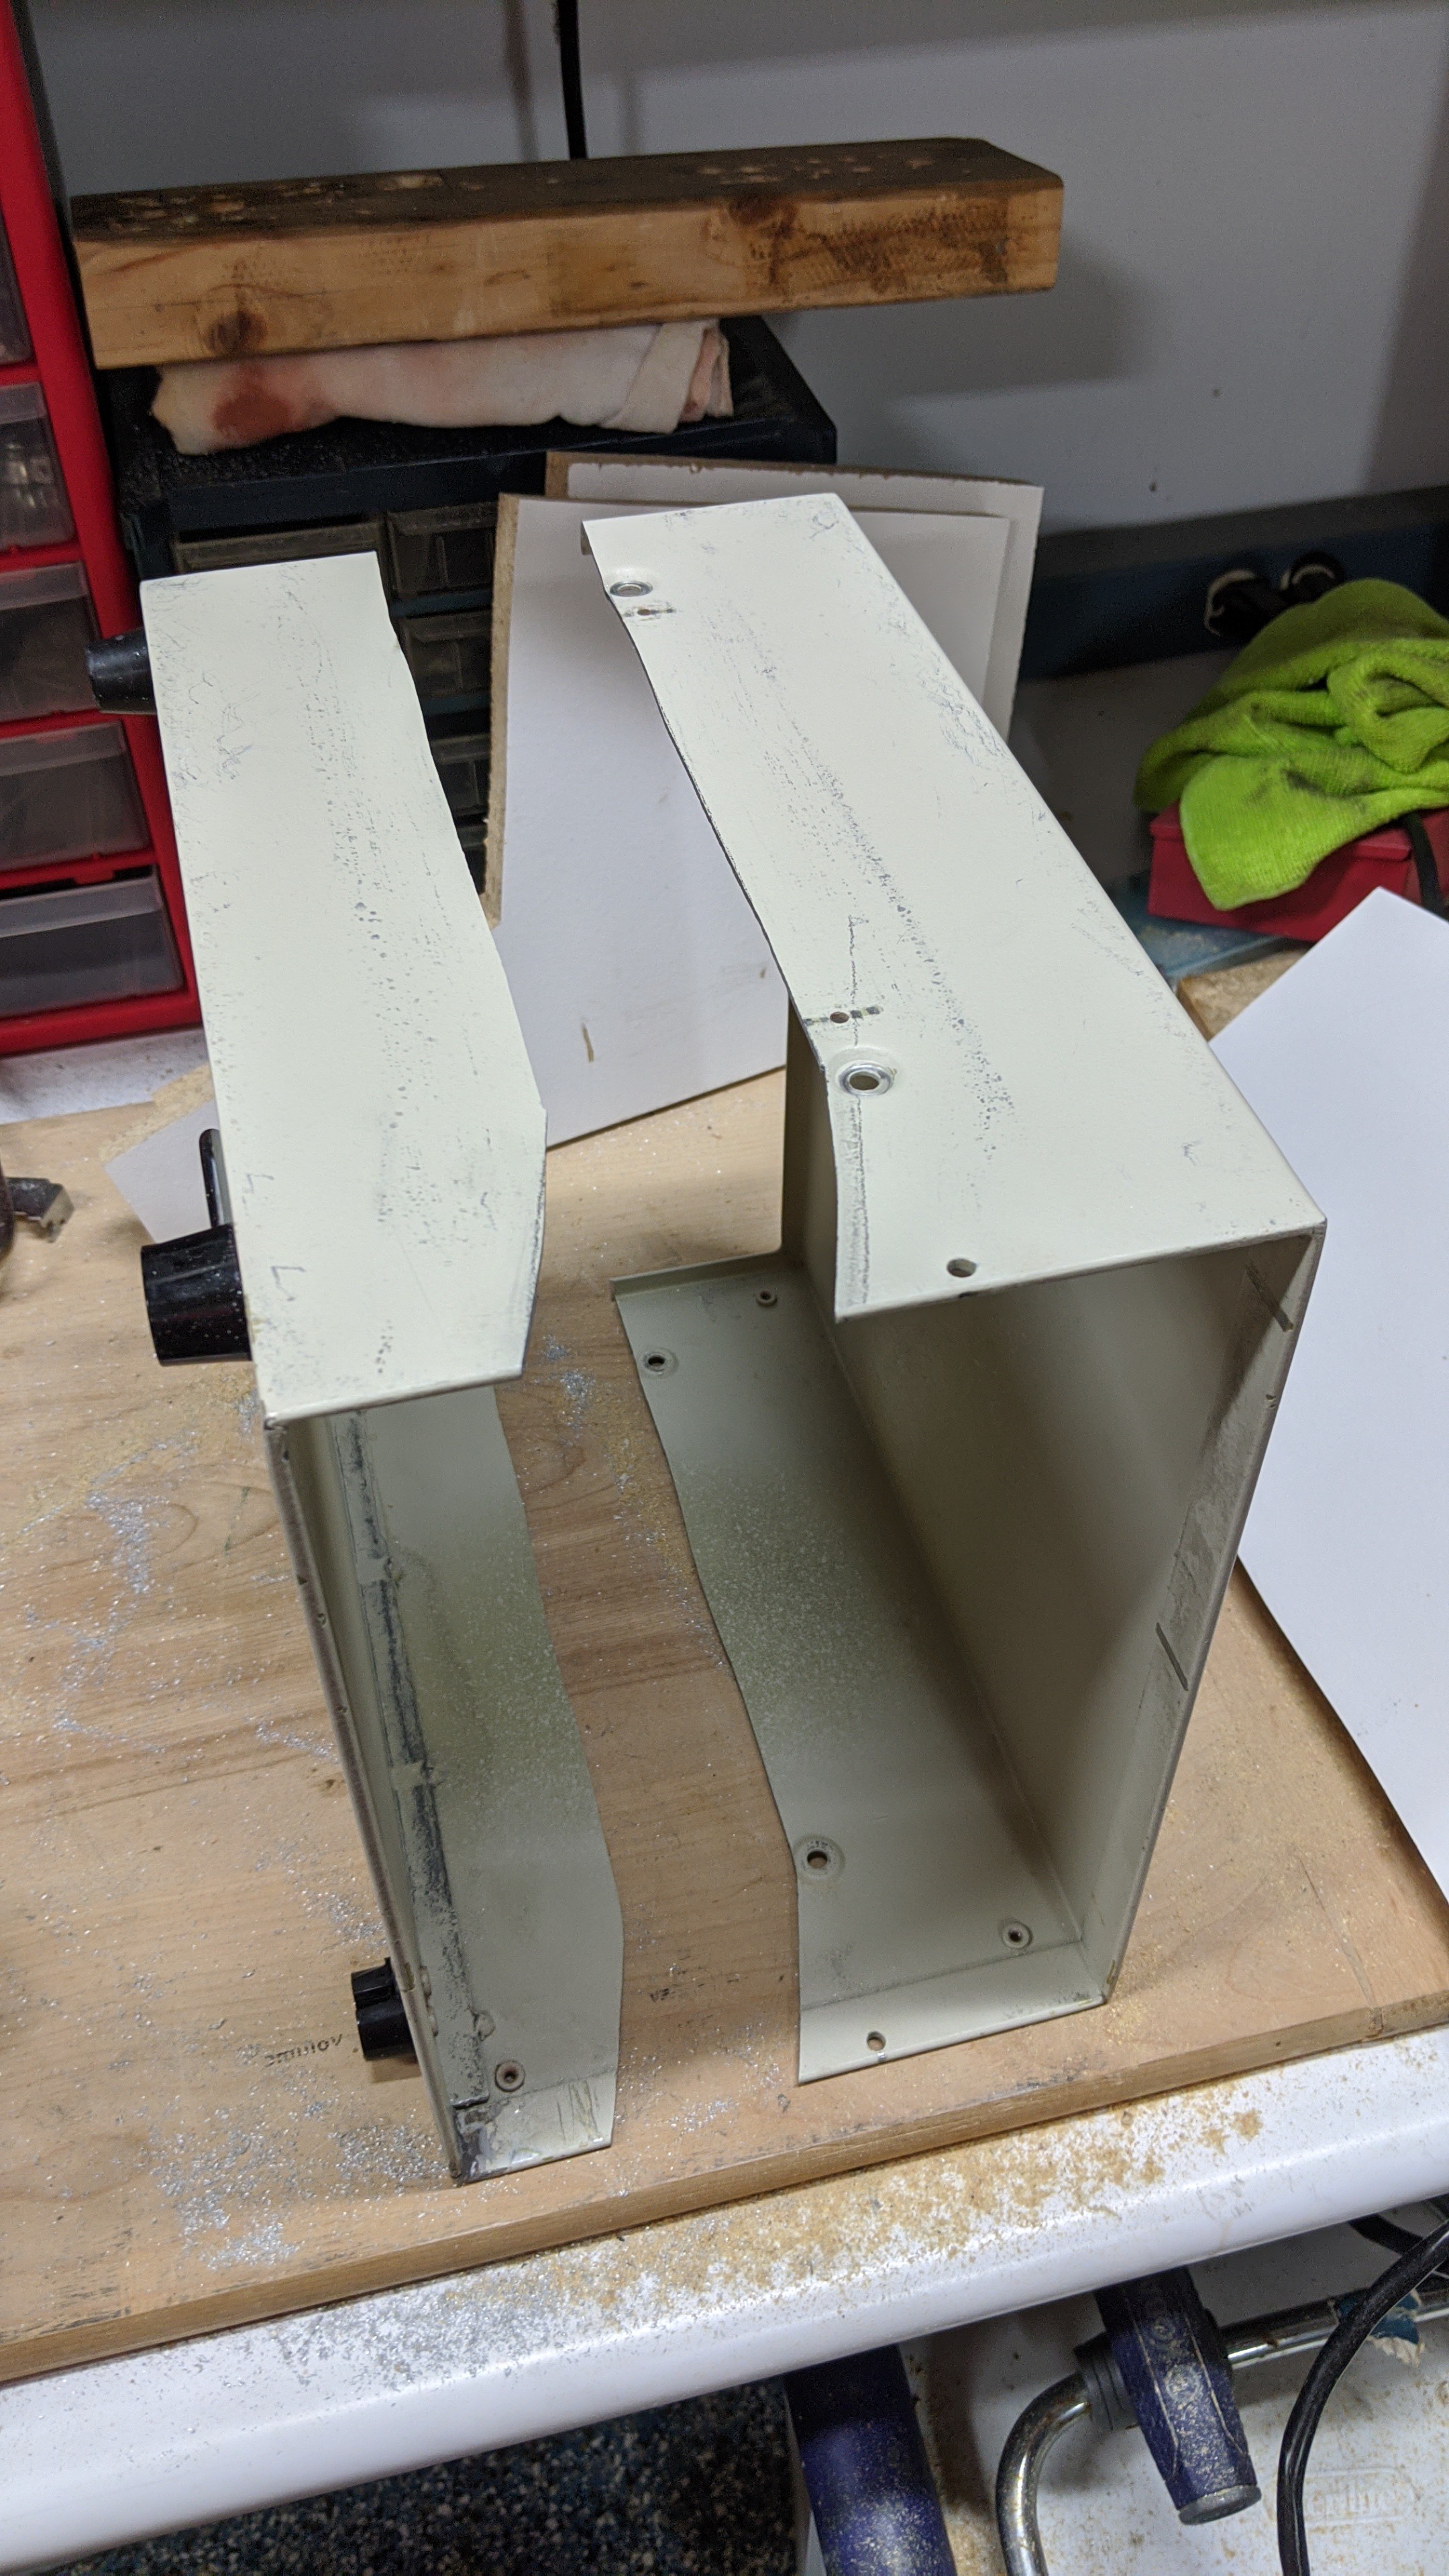
    Next, I cut the analyzer case in half.

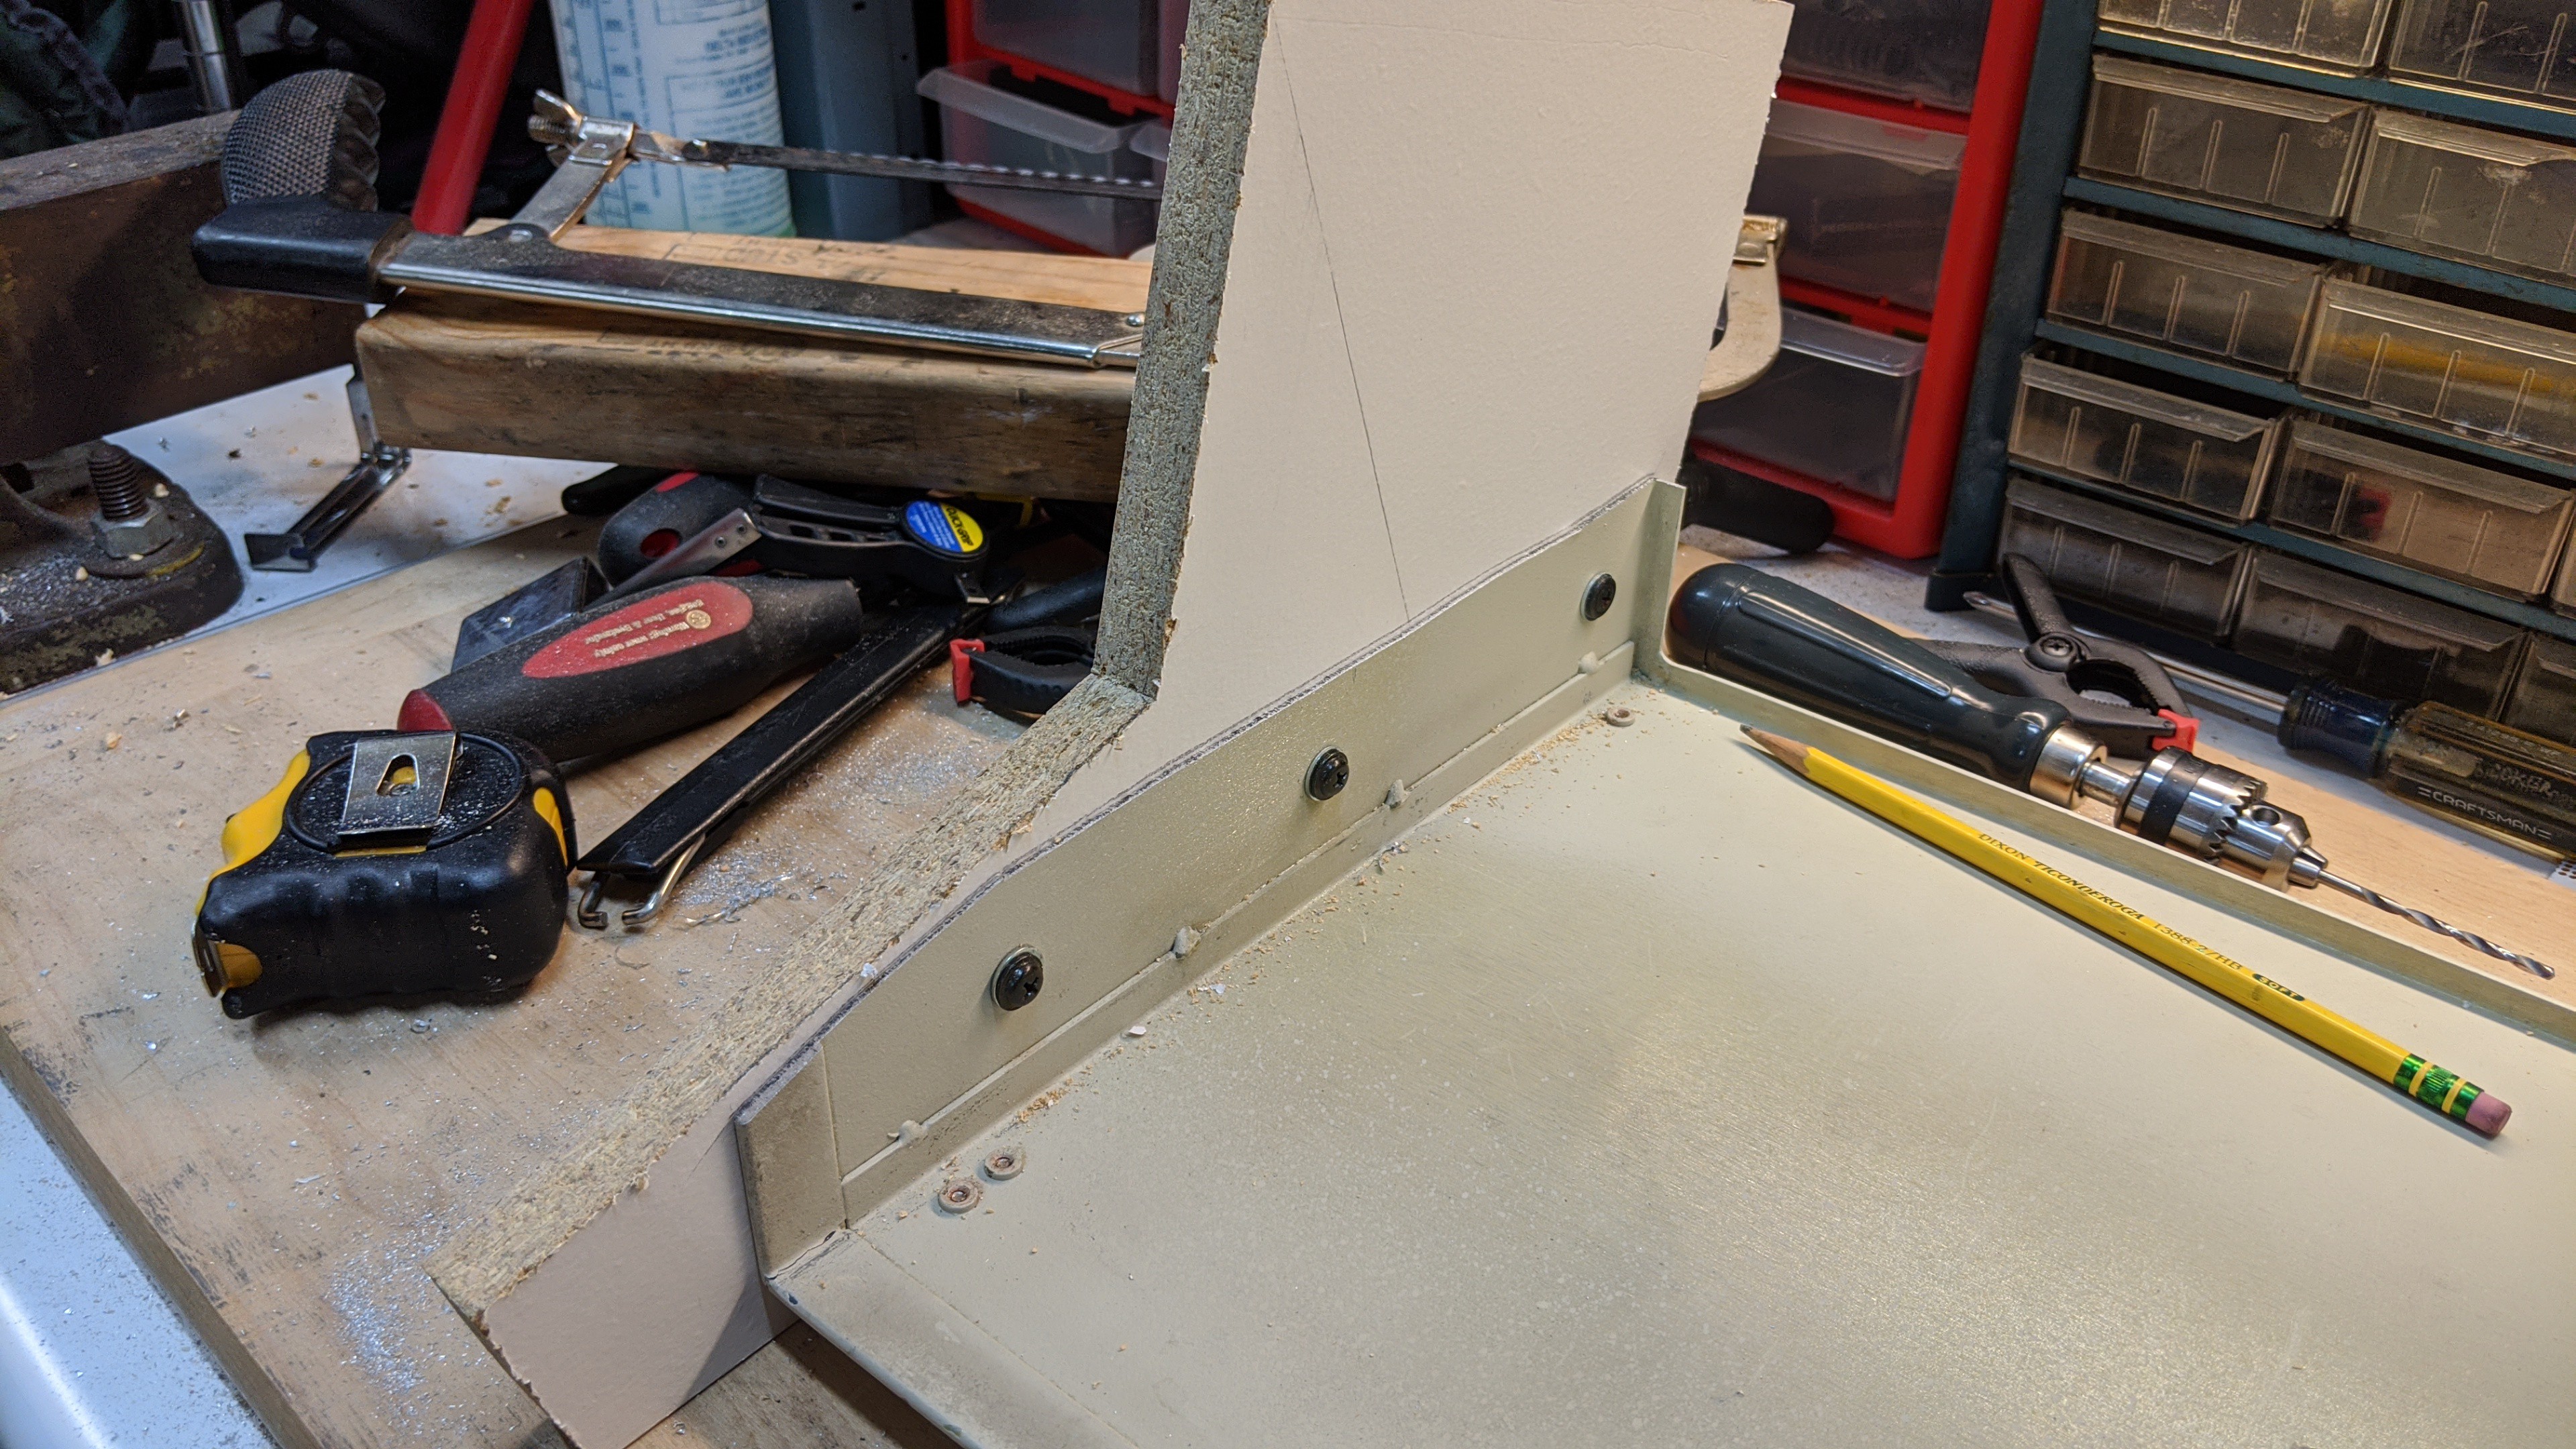
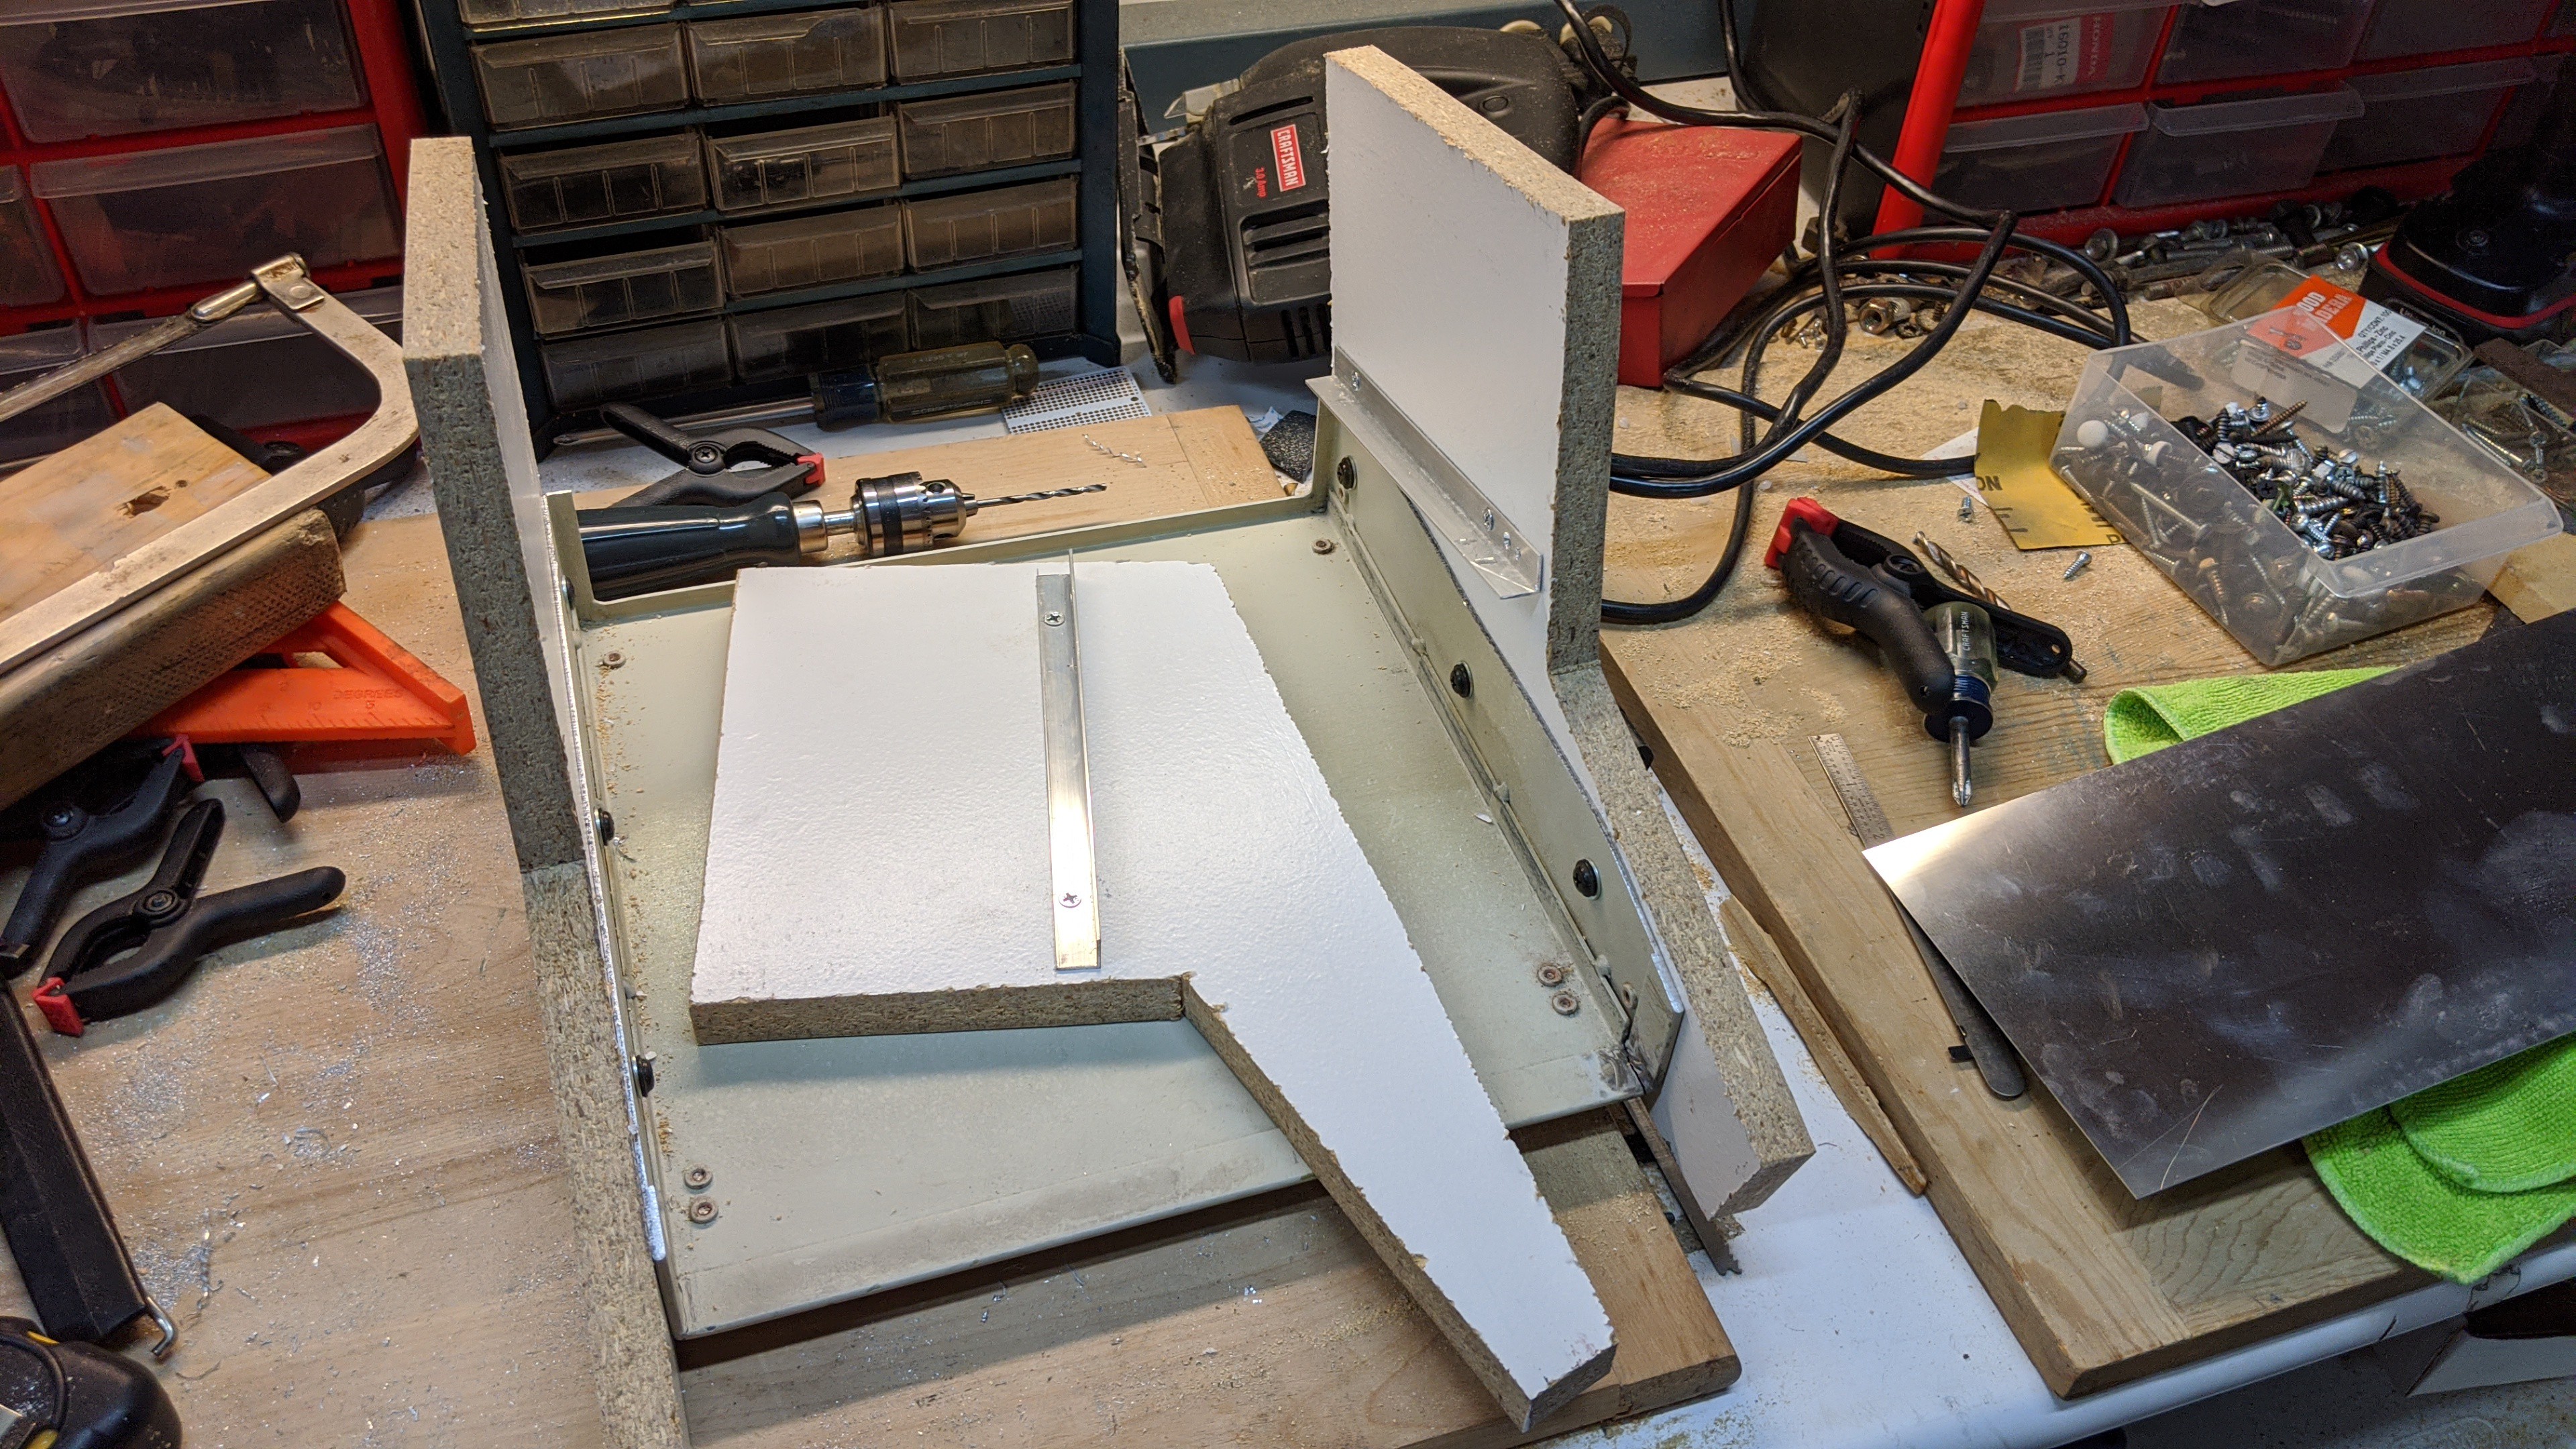
    Then I drilled out and screwed the side pieces to the bottom of the case.

    Here I mocked up how the other half of the case will be used for the top of the case. The top of the new case is a few inches shorter than the original analyzer case. I'll wait until I cut my final side pieces before I measure and cut it.

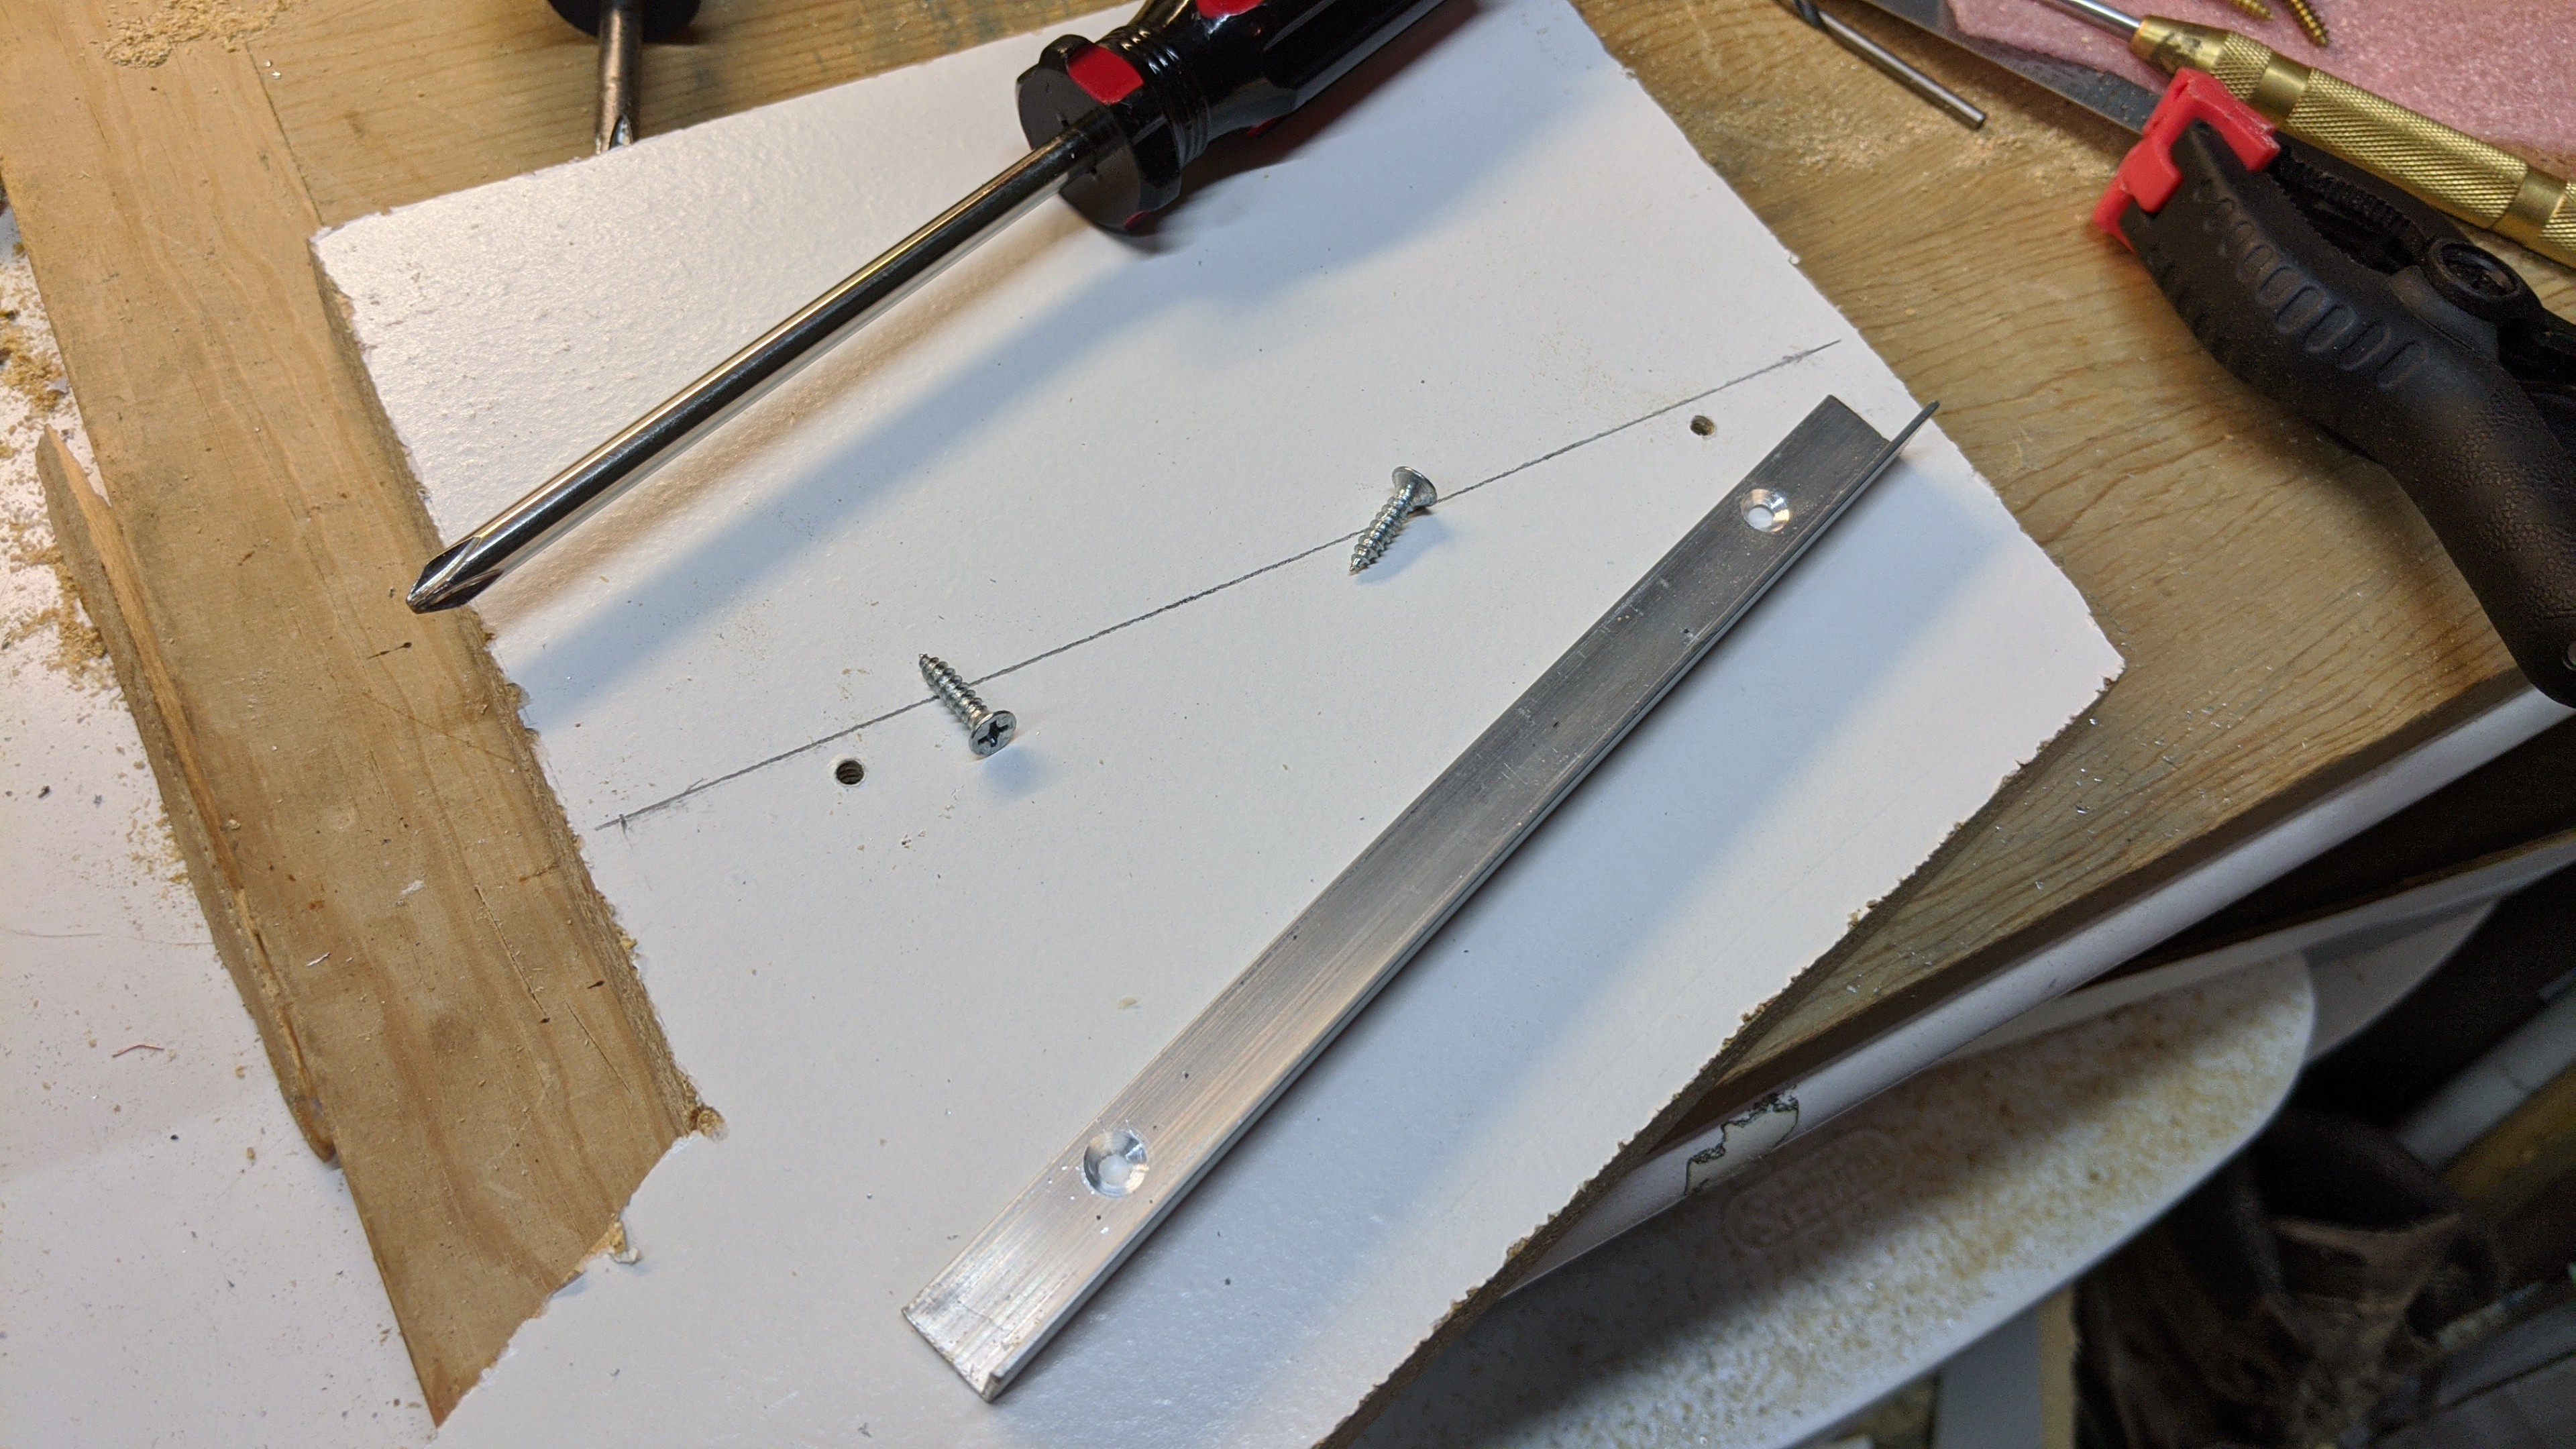
    Next, I measured and marked one of the side pieces and the center piece. Then, I cut, drilled, and counter sunk a couple pieces of aluminum angle. I had this laying around from some previous project.

    The angle aluminum was screwed to the two upright pieces.

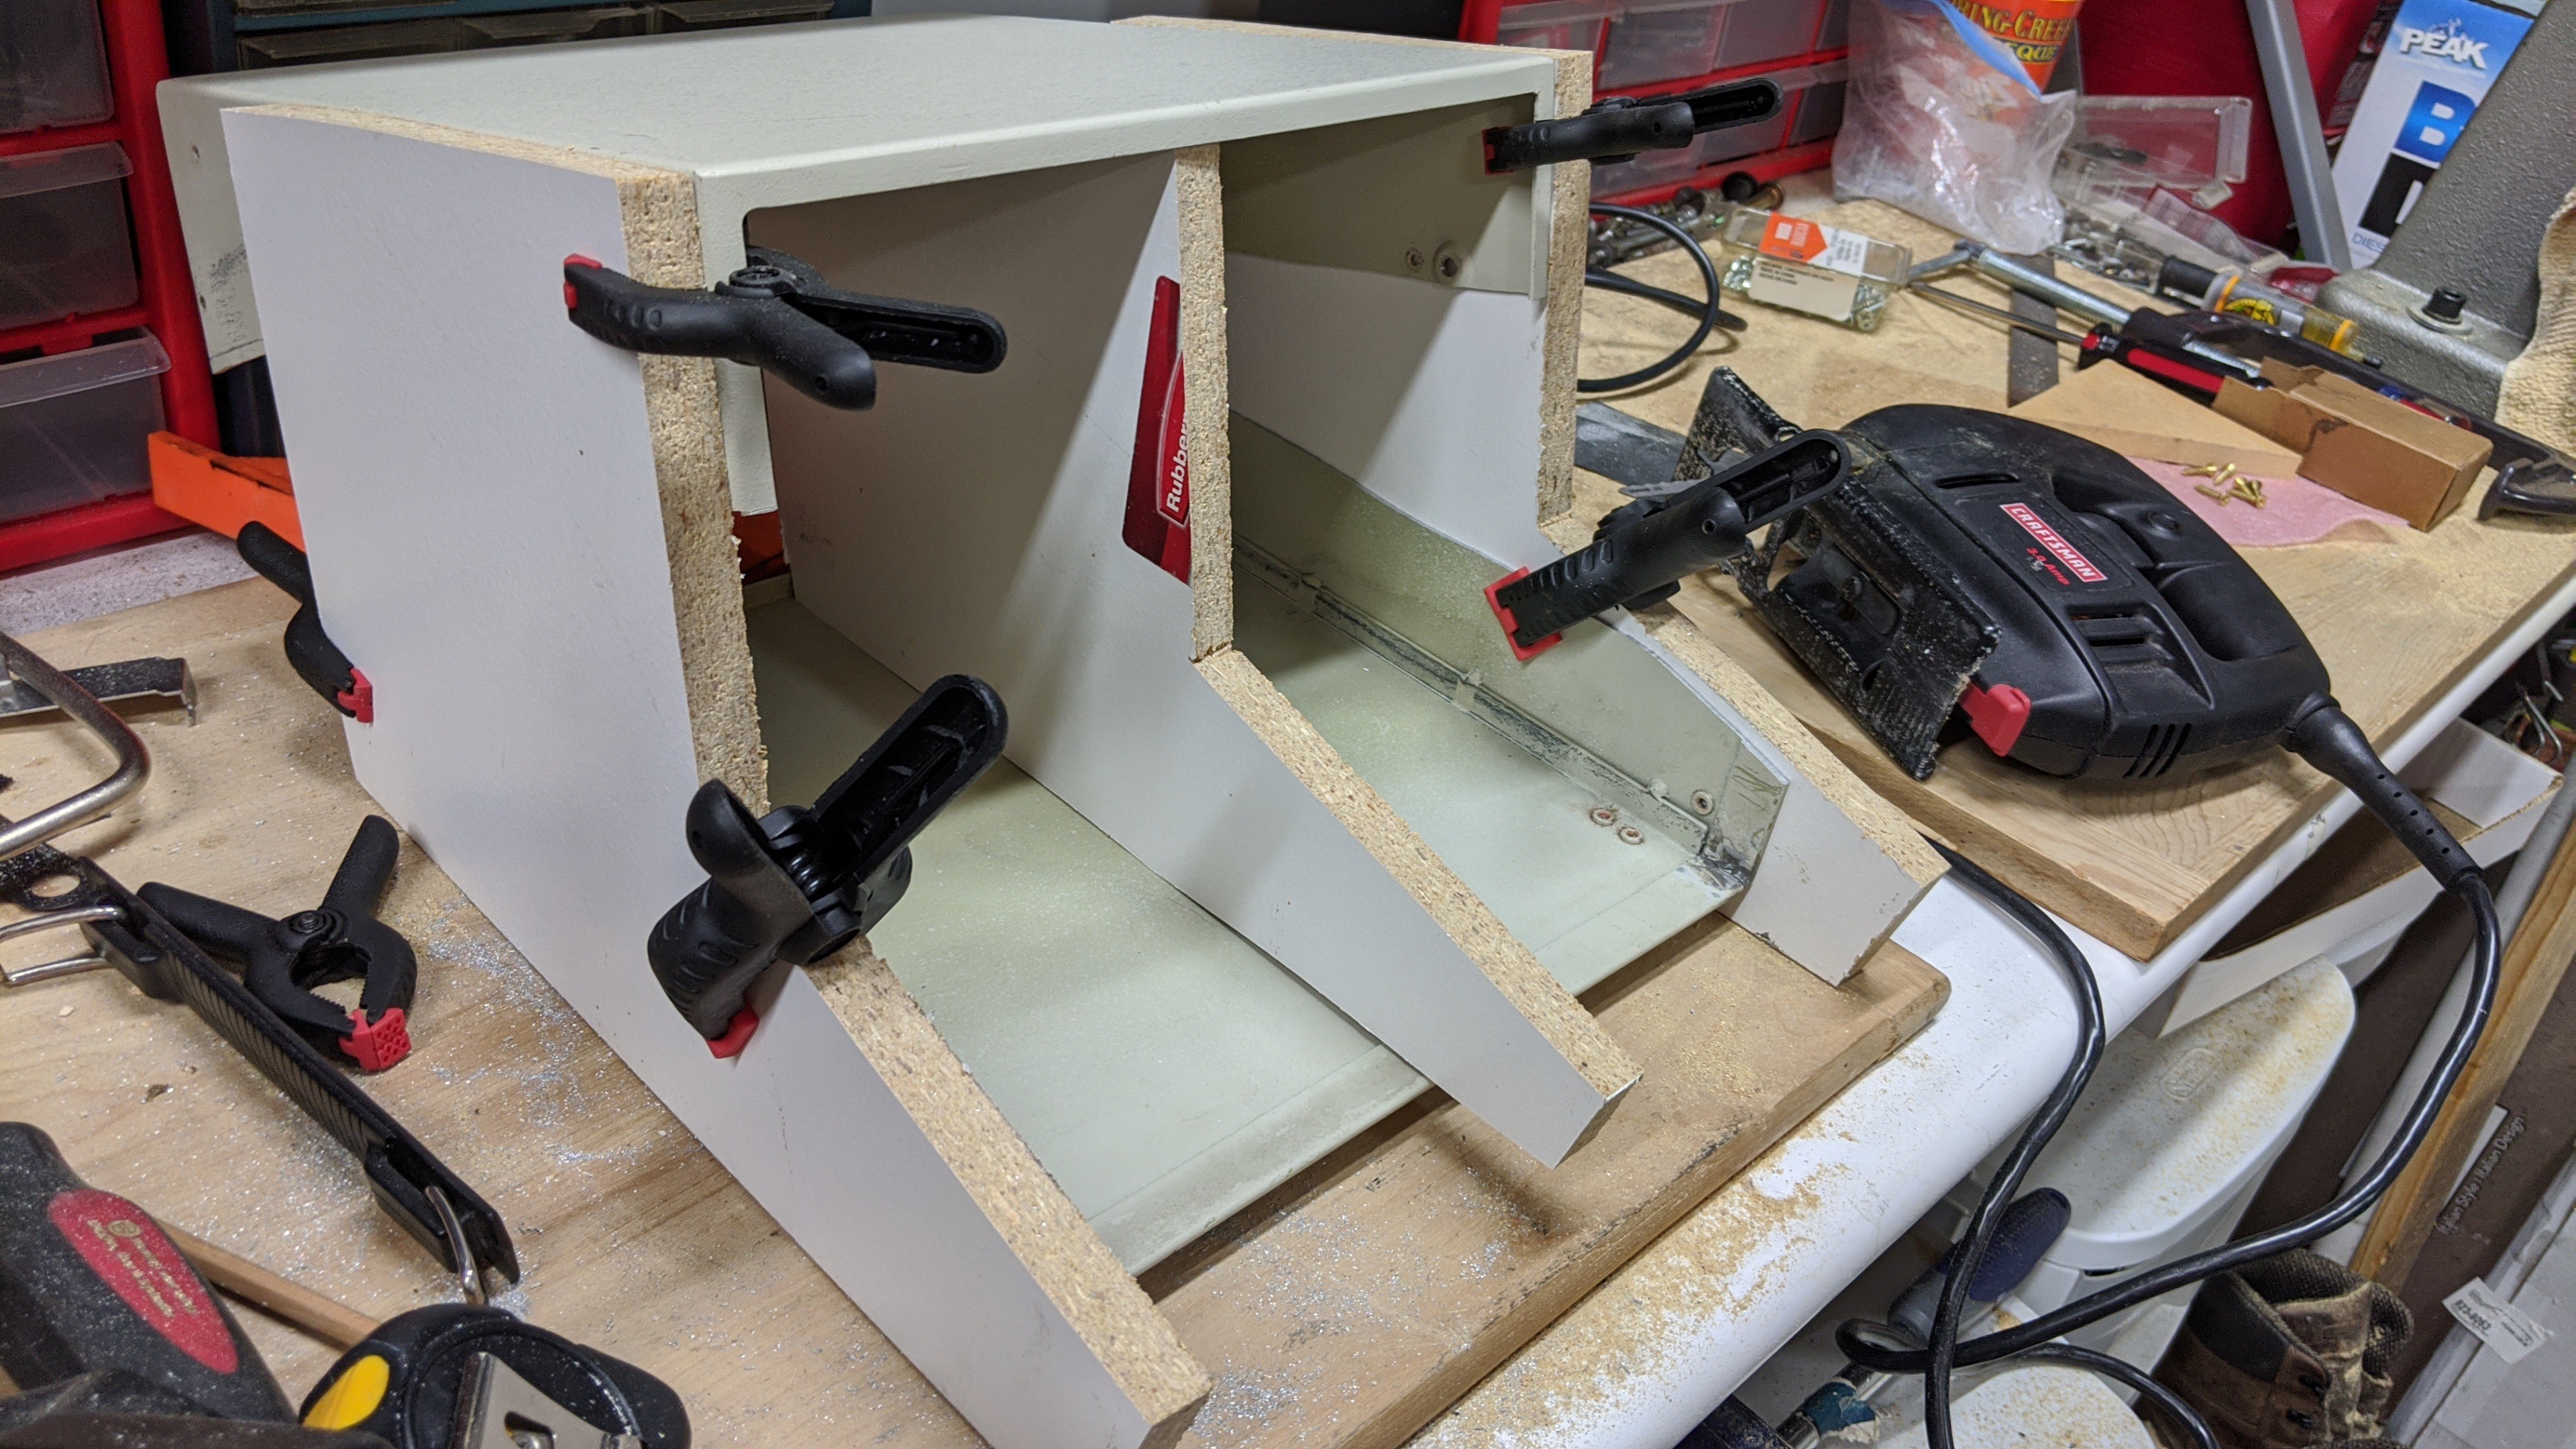
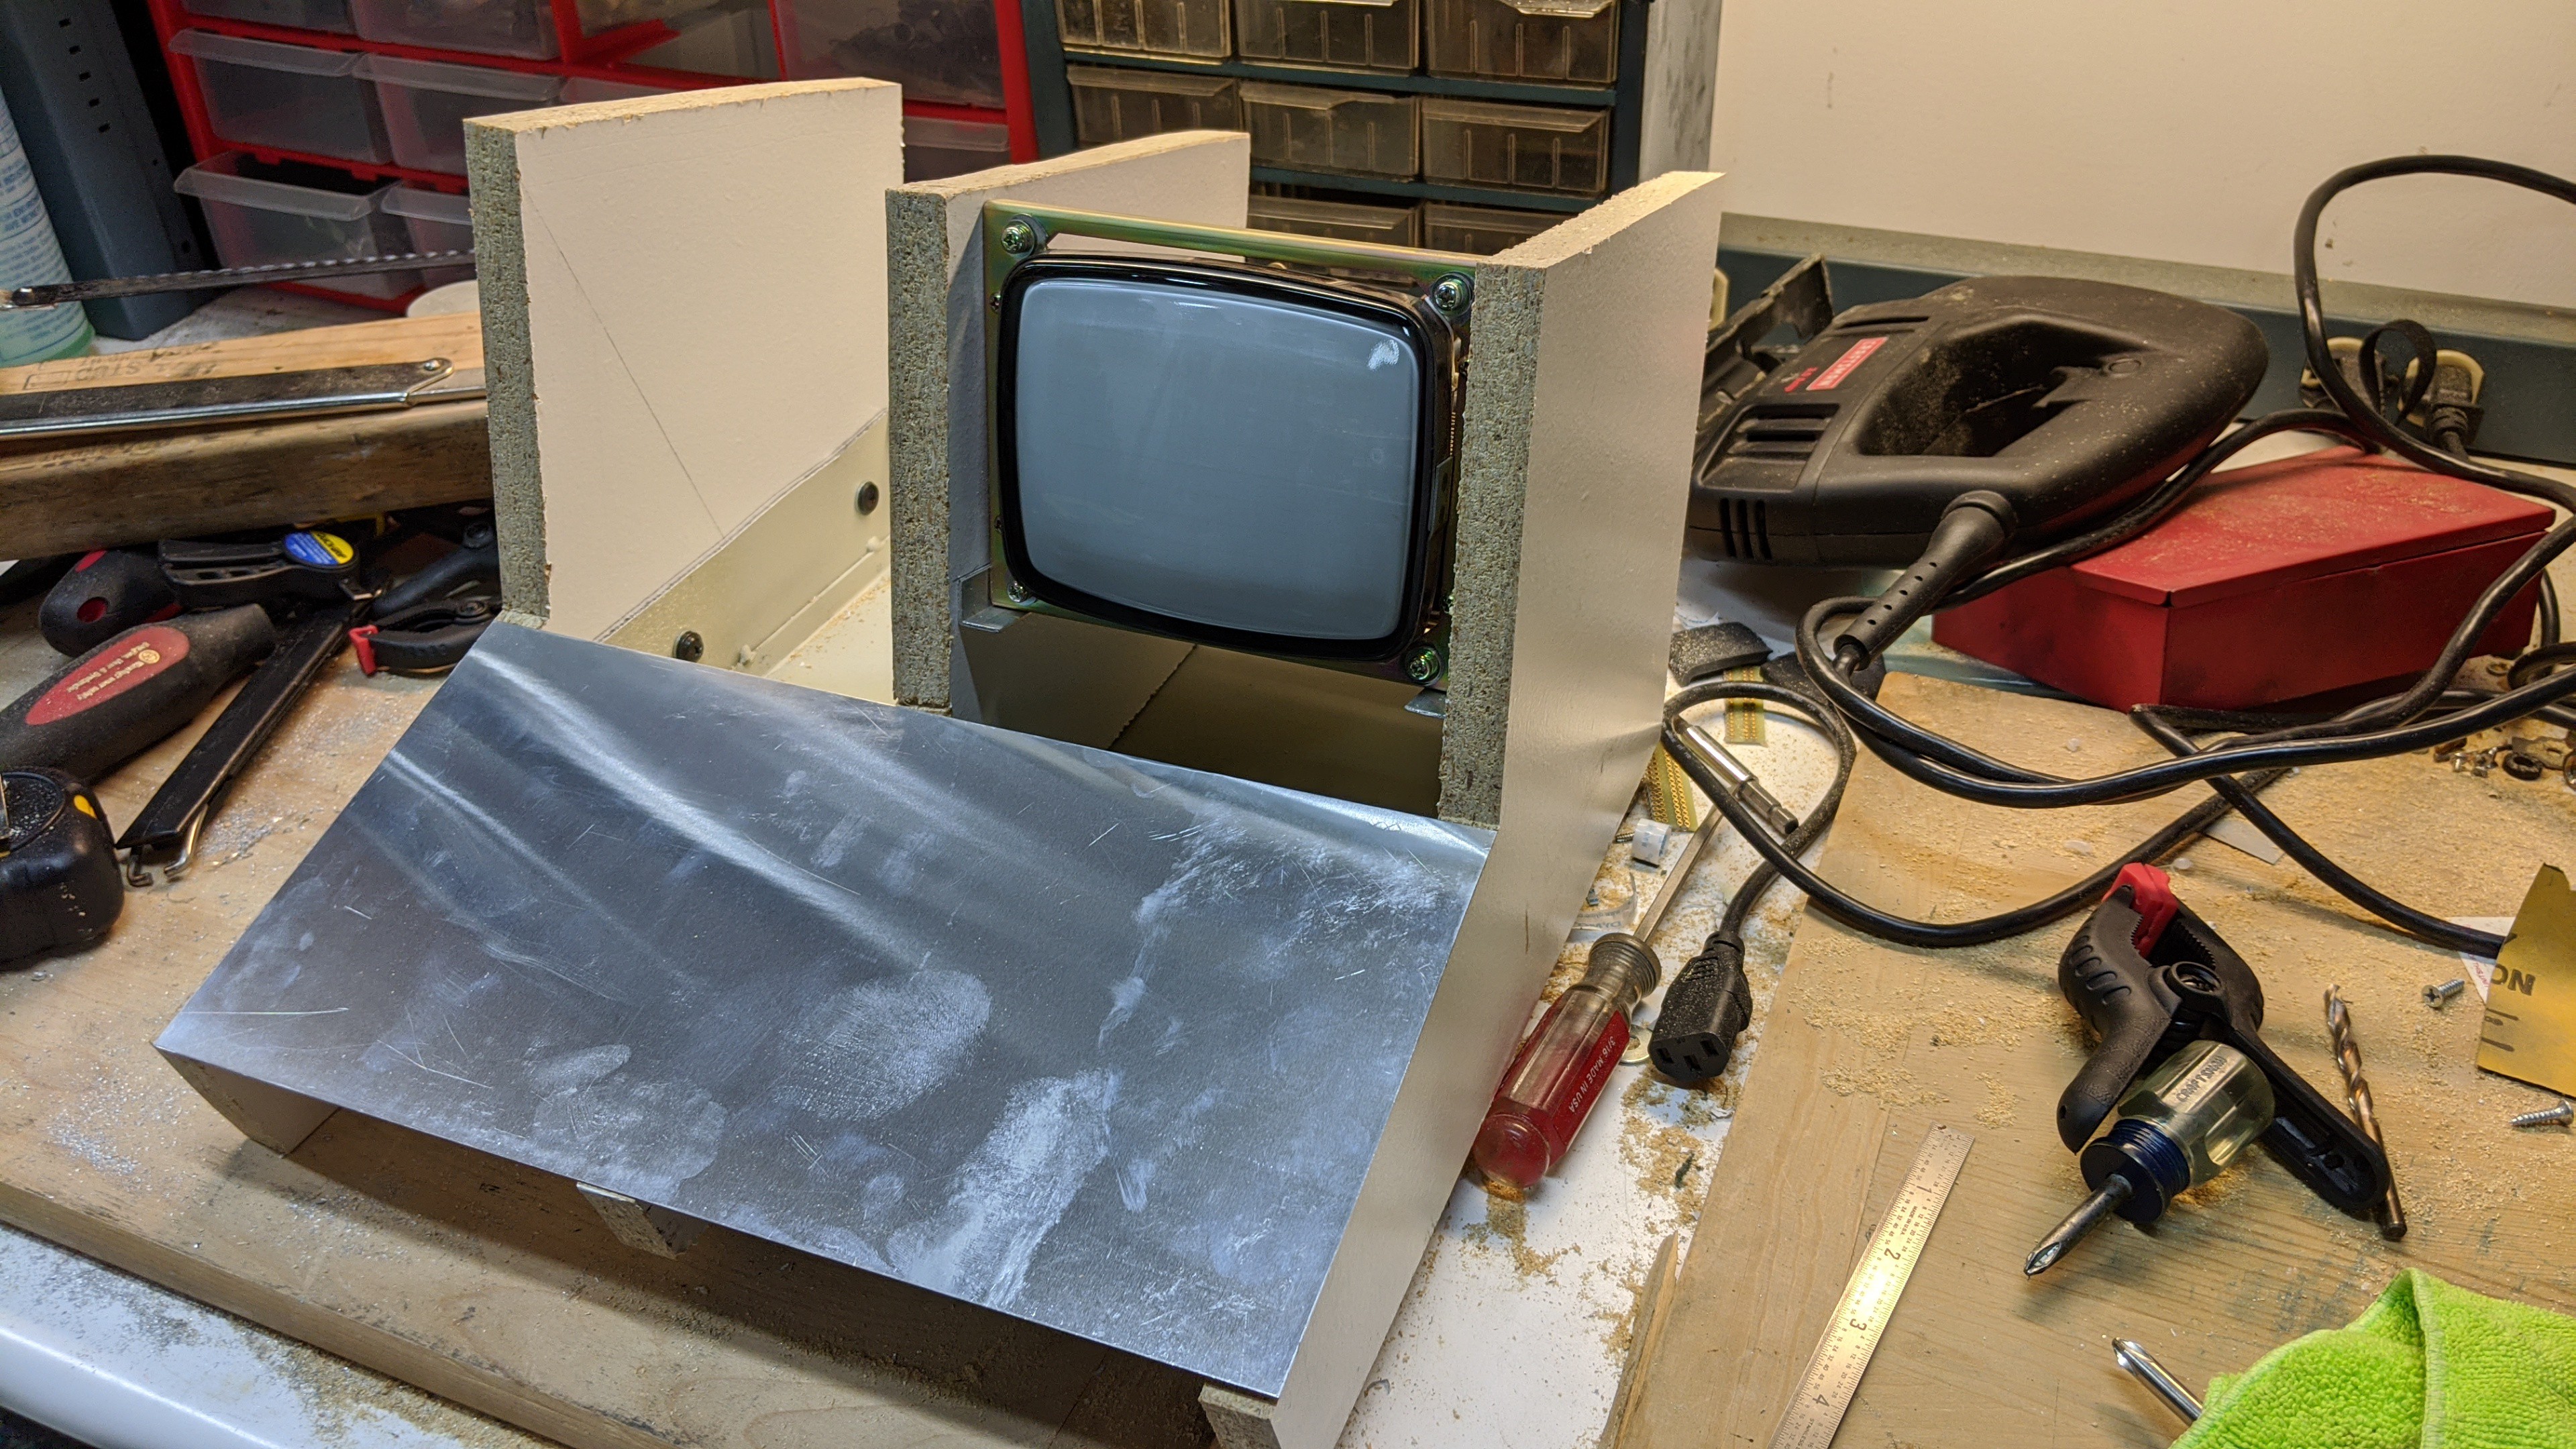
    And this is how it will fit together with the CRT and the faceplate where the keyboard will be mounted. I'm glad I did this mock up. The CRT ended up being little high in the case. The bezel that will mount on the front faceplate around the CRT screen will likely end up flush with the top edge. I'll need to move the angle aluminum rails down around 1/2" or so when I cut my final upright pieces.

    When I cut the final version of the middle upright, I'll drill several large holes in it with a hole saw to promote cooling air movement and allow routing wires between both sides of the case. Also, the front section of the middle upright will have to be cut off to make room for the keyboard.

  • New processors...

    John Anderson04/23/2020 at 01:05 0 comments

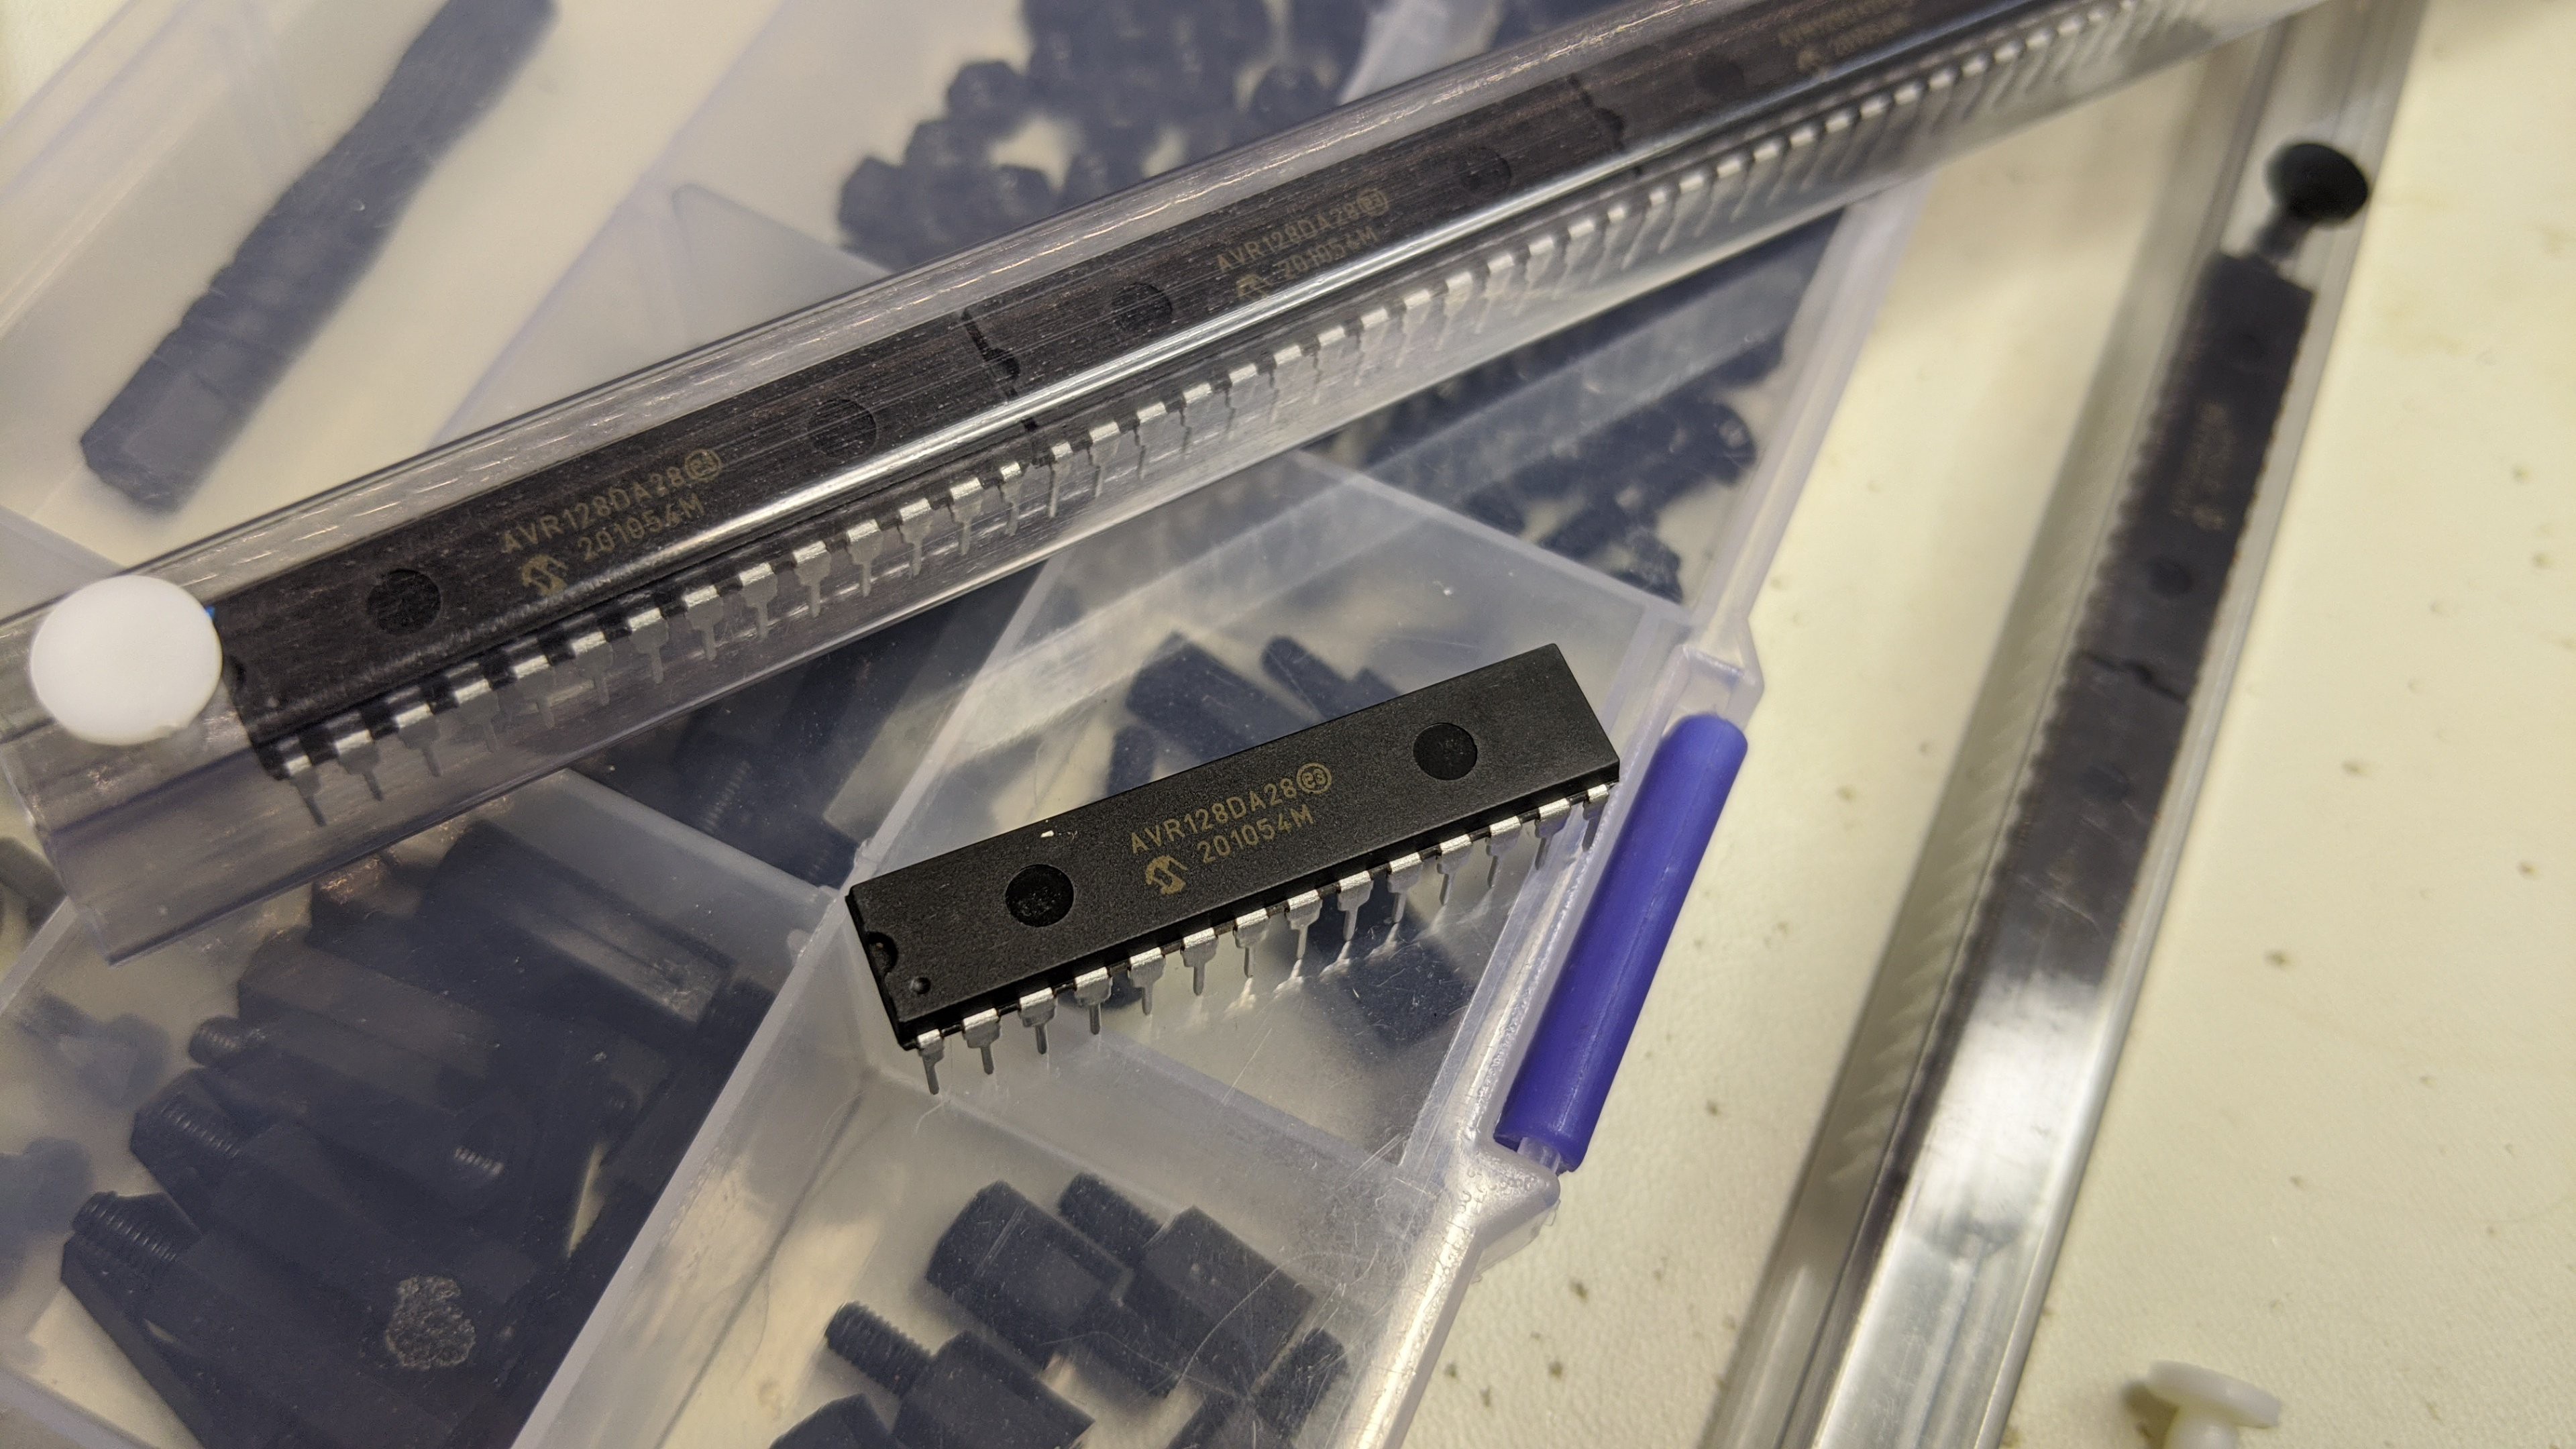
    I forgot to add this teaser a couple days ago.

    I received the new AVR processors from Microchip. I am eager to play with these.

  • Designing the new case...

    John Anderson04/22/2020 at 06:52 0 comments

    Spent a couple hours in the shop this evening digging up materials and playing with layouts for the new case.

    I think I have it roughly figured out. You can see the profile template I created laying on the cheap laminated shelving board in the pic above. I cut that out to see how it will look and fit together. I also figured out how to hack up the Data Analyzer case that is donating the CRT, power supply, cooling fan, and power switch/relay. It will also provide the base and top cover over the CRT. 

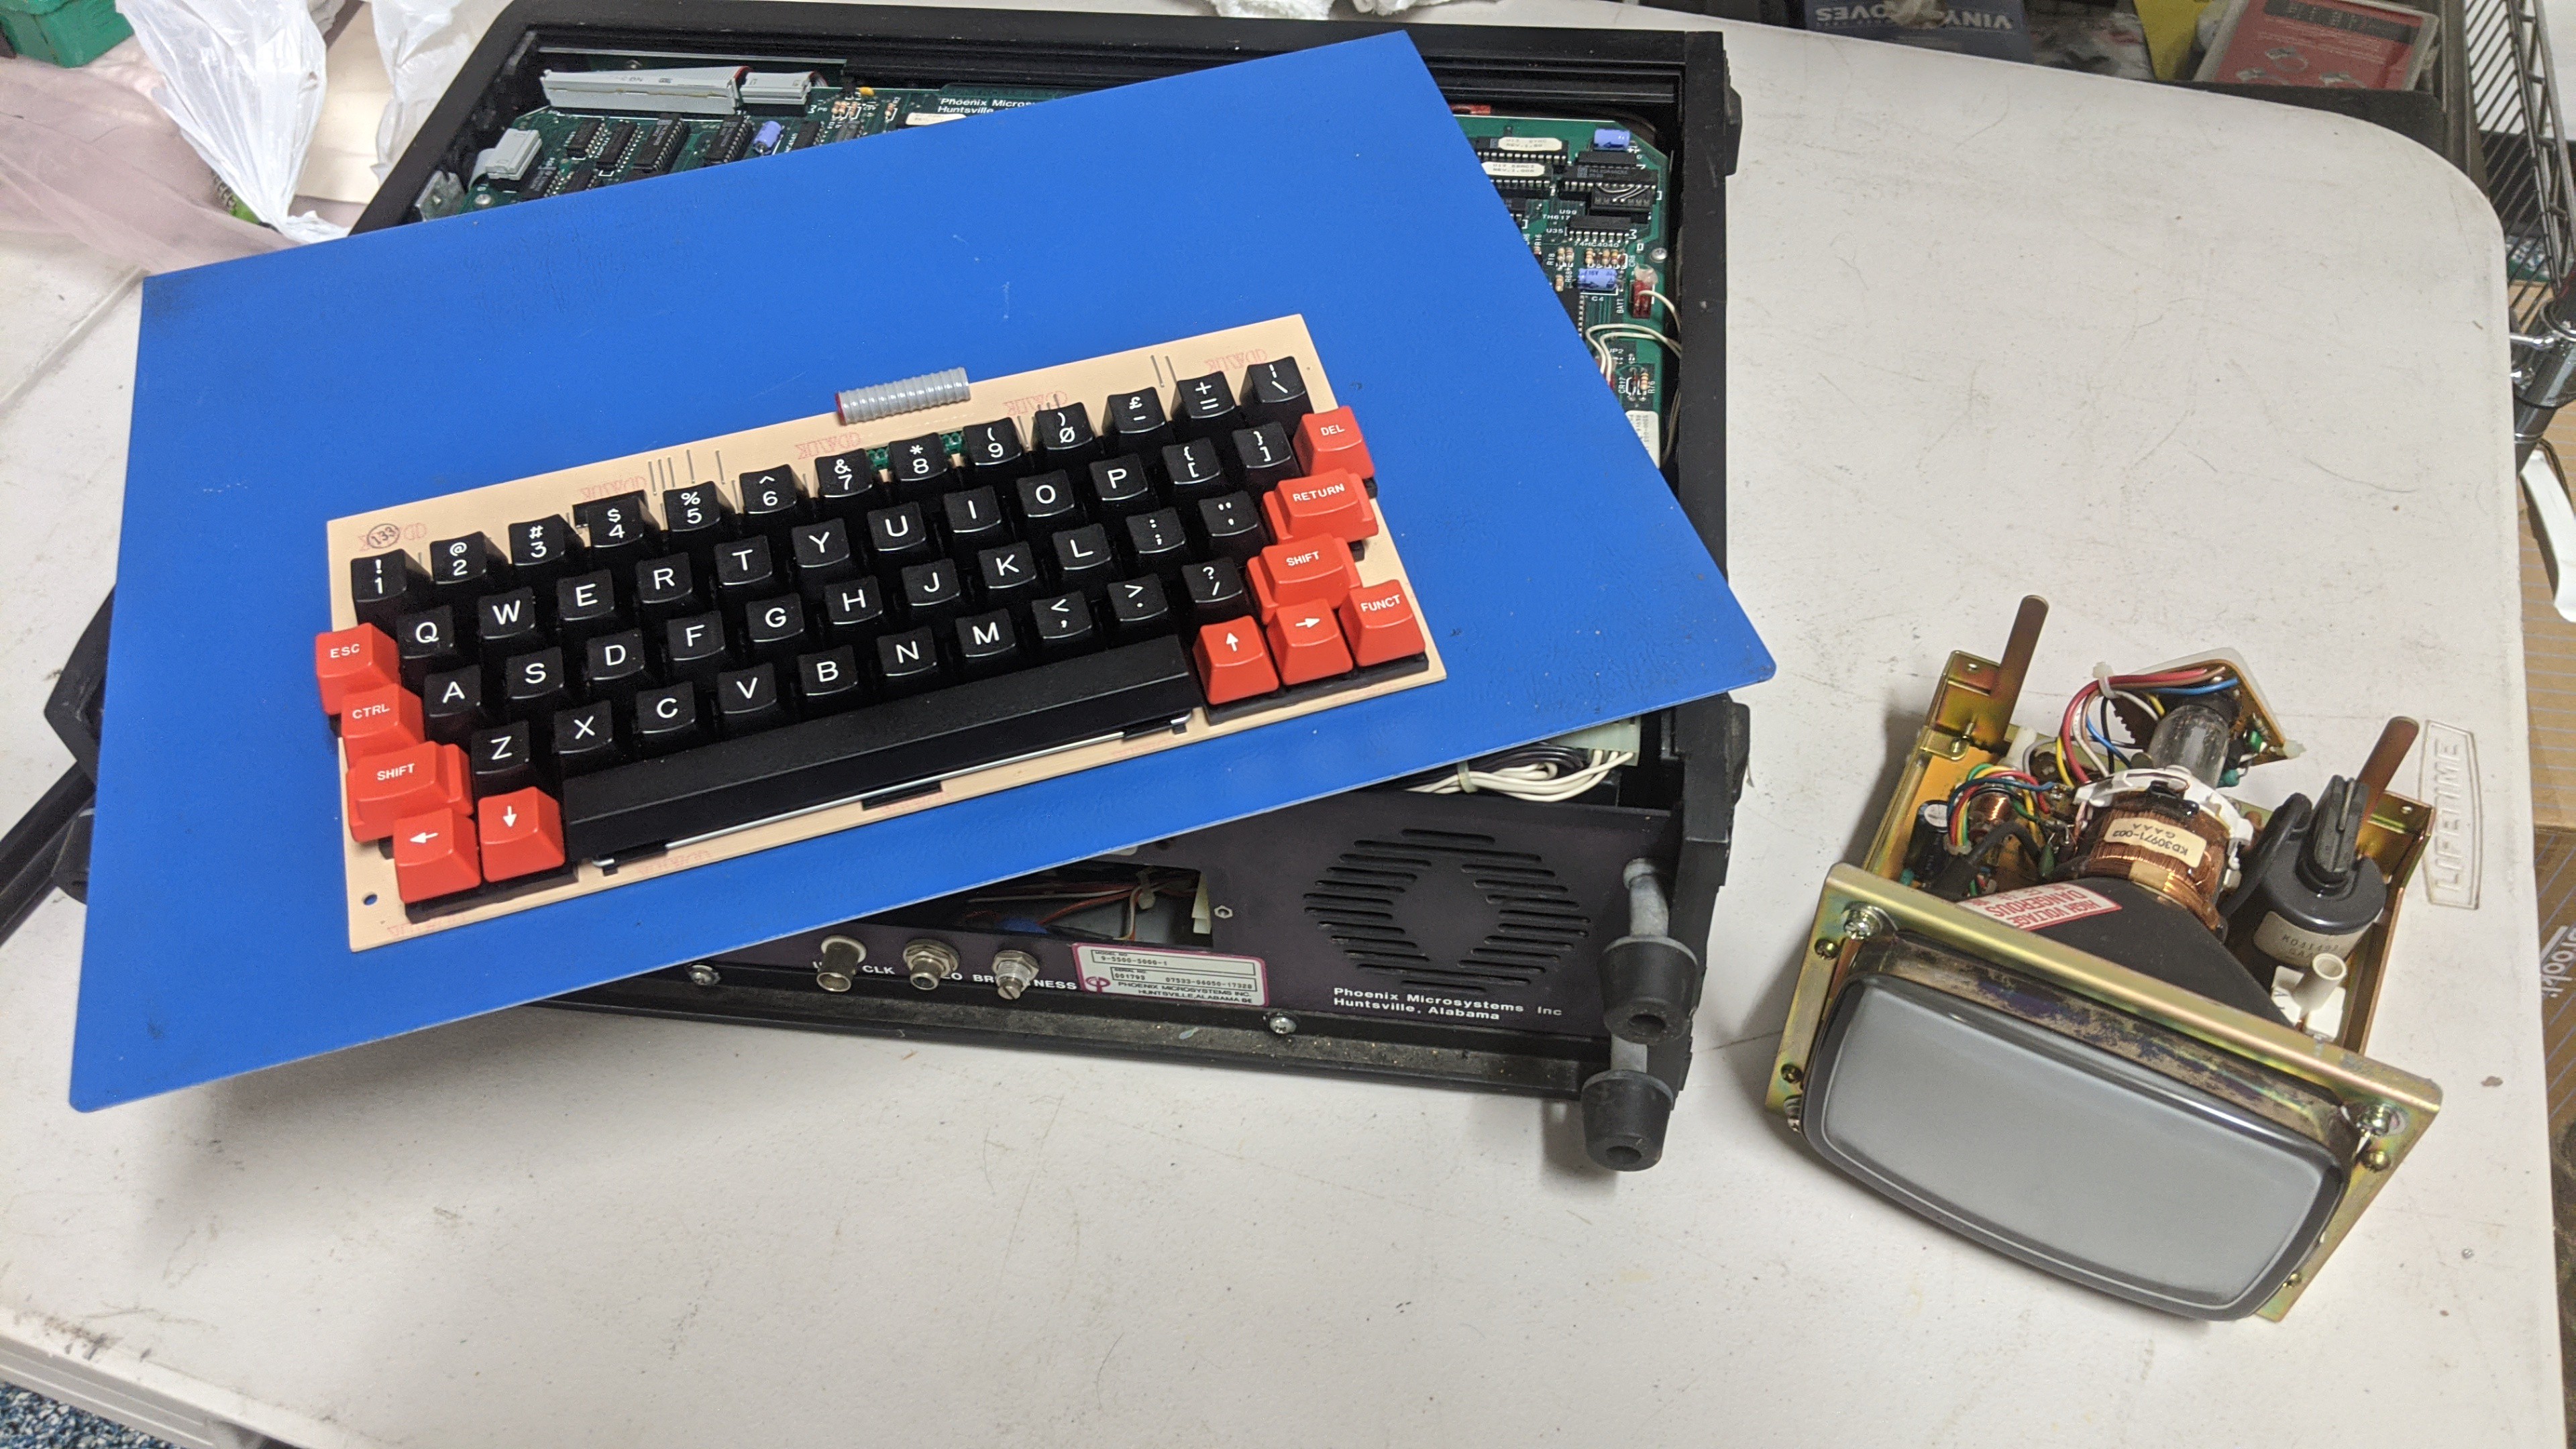
    Some painted sheet aluminum from a different parted out analyzer will be used for the keyboard and front face plates.

    Now I just need to dig up some 12" x 1" solid wood self boards or something similar. These cheap laminated boards aren't going to hack it. I'd like to use solid wood that will take a stain reasonably to maintain a proper retro home-built look. I think I can find some pine shelving board without doing anything too drastic.

  • Coming out of hibernation...

    John Anderson04/18/2020 at 06:27 0 comments

    I'm excited about the new AVR128DA28 processors Microchip recently released. I have several on pre-order and expect to receive them next week. These little 28 pin AVR processors are available in an easy to prototype through-hole SDIP package (same form factor as the ATMEGA328 SDIP). They have 128K of FLASH (application space), 16K of RAM, a wealth of peripherals, and the I/O pins are highly configurable. So, I've decided to do re-spin of the original Resto-Mod 8 bit Microcomputer to show off just how much you can do with one of these little controllers and a minimal amount of support logic/circuits.

    The new Resto-Mod 8 bit Microcomputer will be similar to the original with some new features and a truly "home-built" case. The case will integrate the CRT display, audio, thermal printer, switches, knobs, keyboard, serial port connector, SD Card slot, and power supply in one case. The CRT will be a 5" green phosphor CRT salvaged from an old serial protocol analyzer. The keyboard will be an NOS unit from an Oric Atmos home computer. Back in the 80's Radio Shack purchased unused stock from defunct PC models and resold the parts under their Archer brand. You can still find some of these components at vintage computer/equipment shows and online auction sites. 

    A full list of peripherals and functions for this spin of the Resto-Mod Micro Computer include:

    • Front panel toggle switch and LED indicator for power
    • 5" geen phosphor monocrome CRT
    • 32x16 character display with normal and inverted character display
    • Front panel brightness control for CRT
    • 58 position keyboard
    • Rotary encoder with press button function for application navigation
    • PCM sampled sound playback and speech synthesis
    • Front panel volume control for audio
    • DB-9 connector for serial port
    • Terminal and data-logging applications
    • SD Card with DOS FAT32 support
    • Front panel access to the SD Card slot
    • Built-in thermal printer
    • Case cooling fan

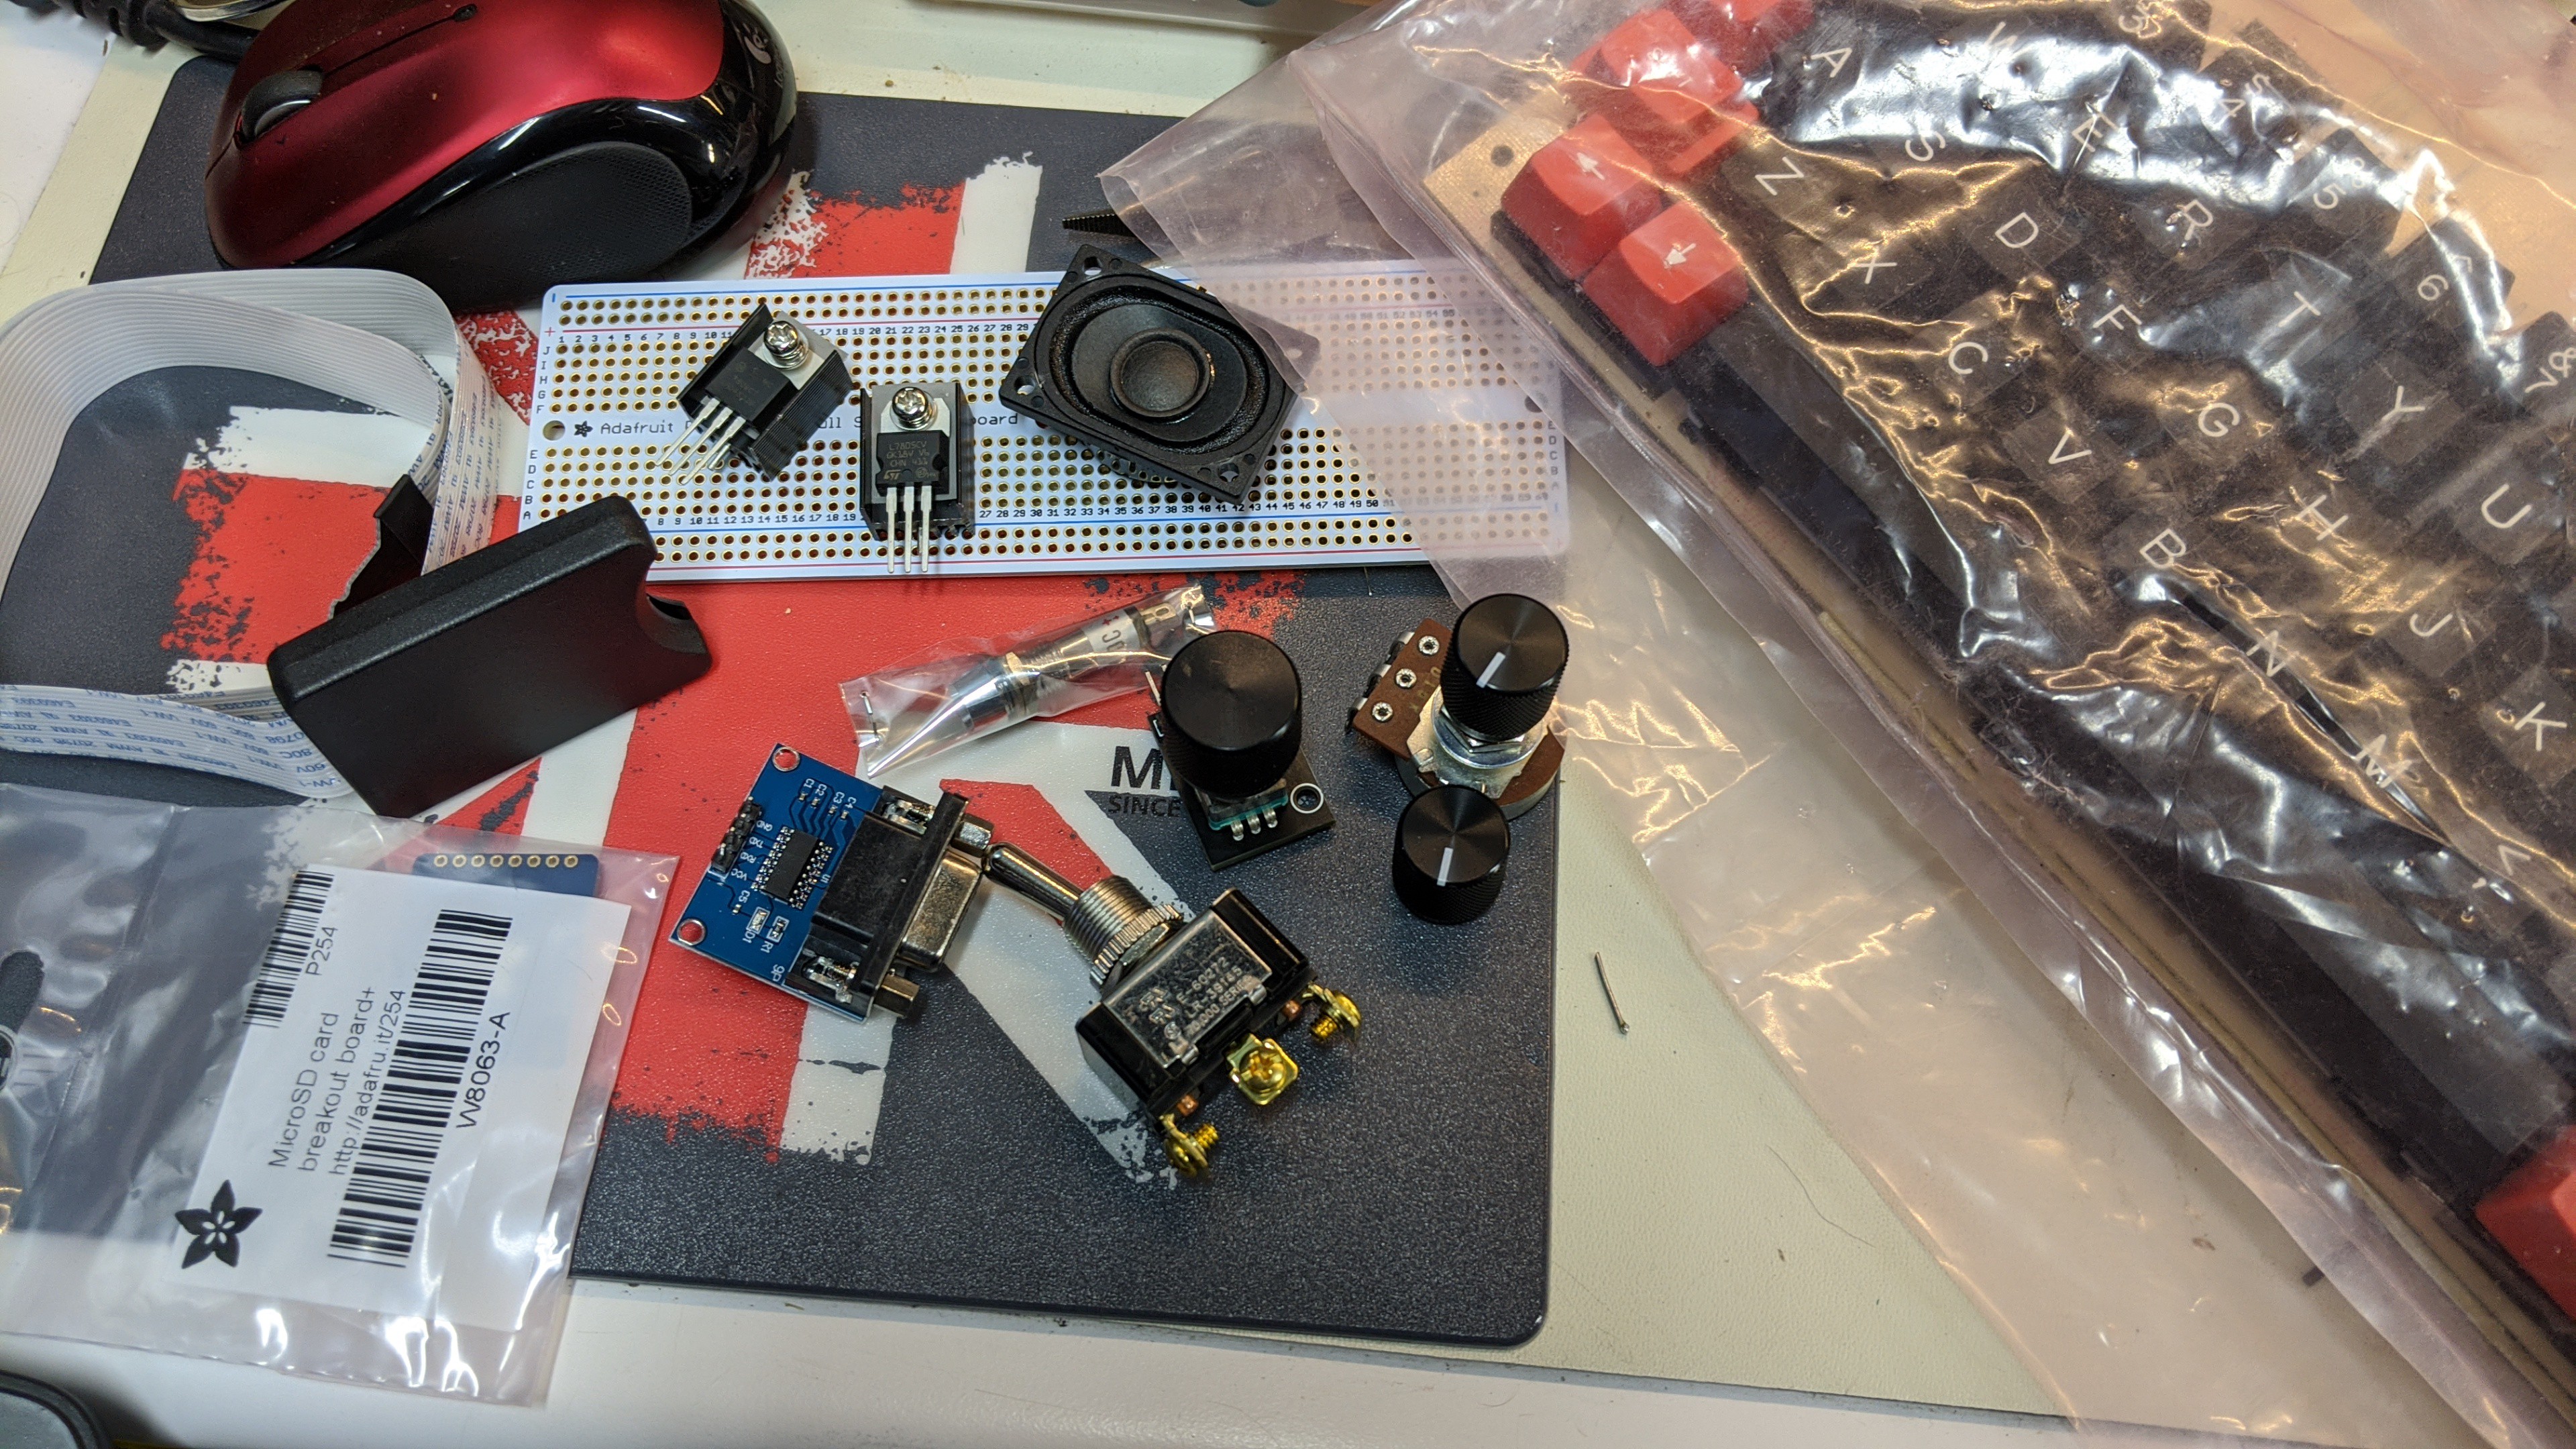
     I've already collected most of the parts required for this build.

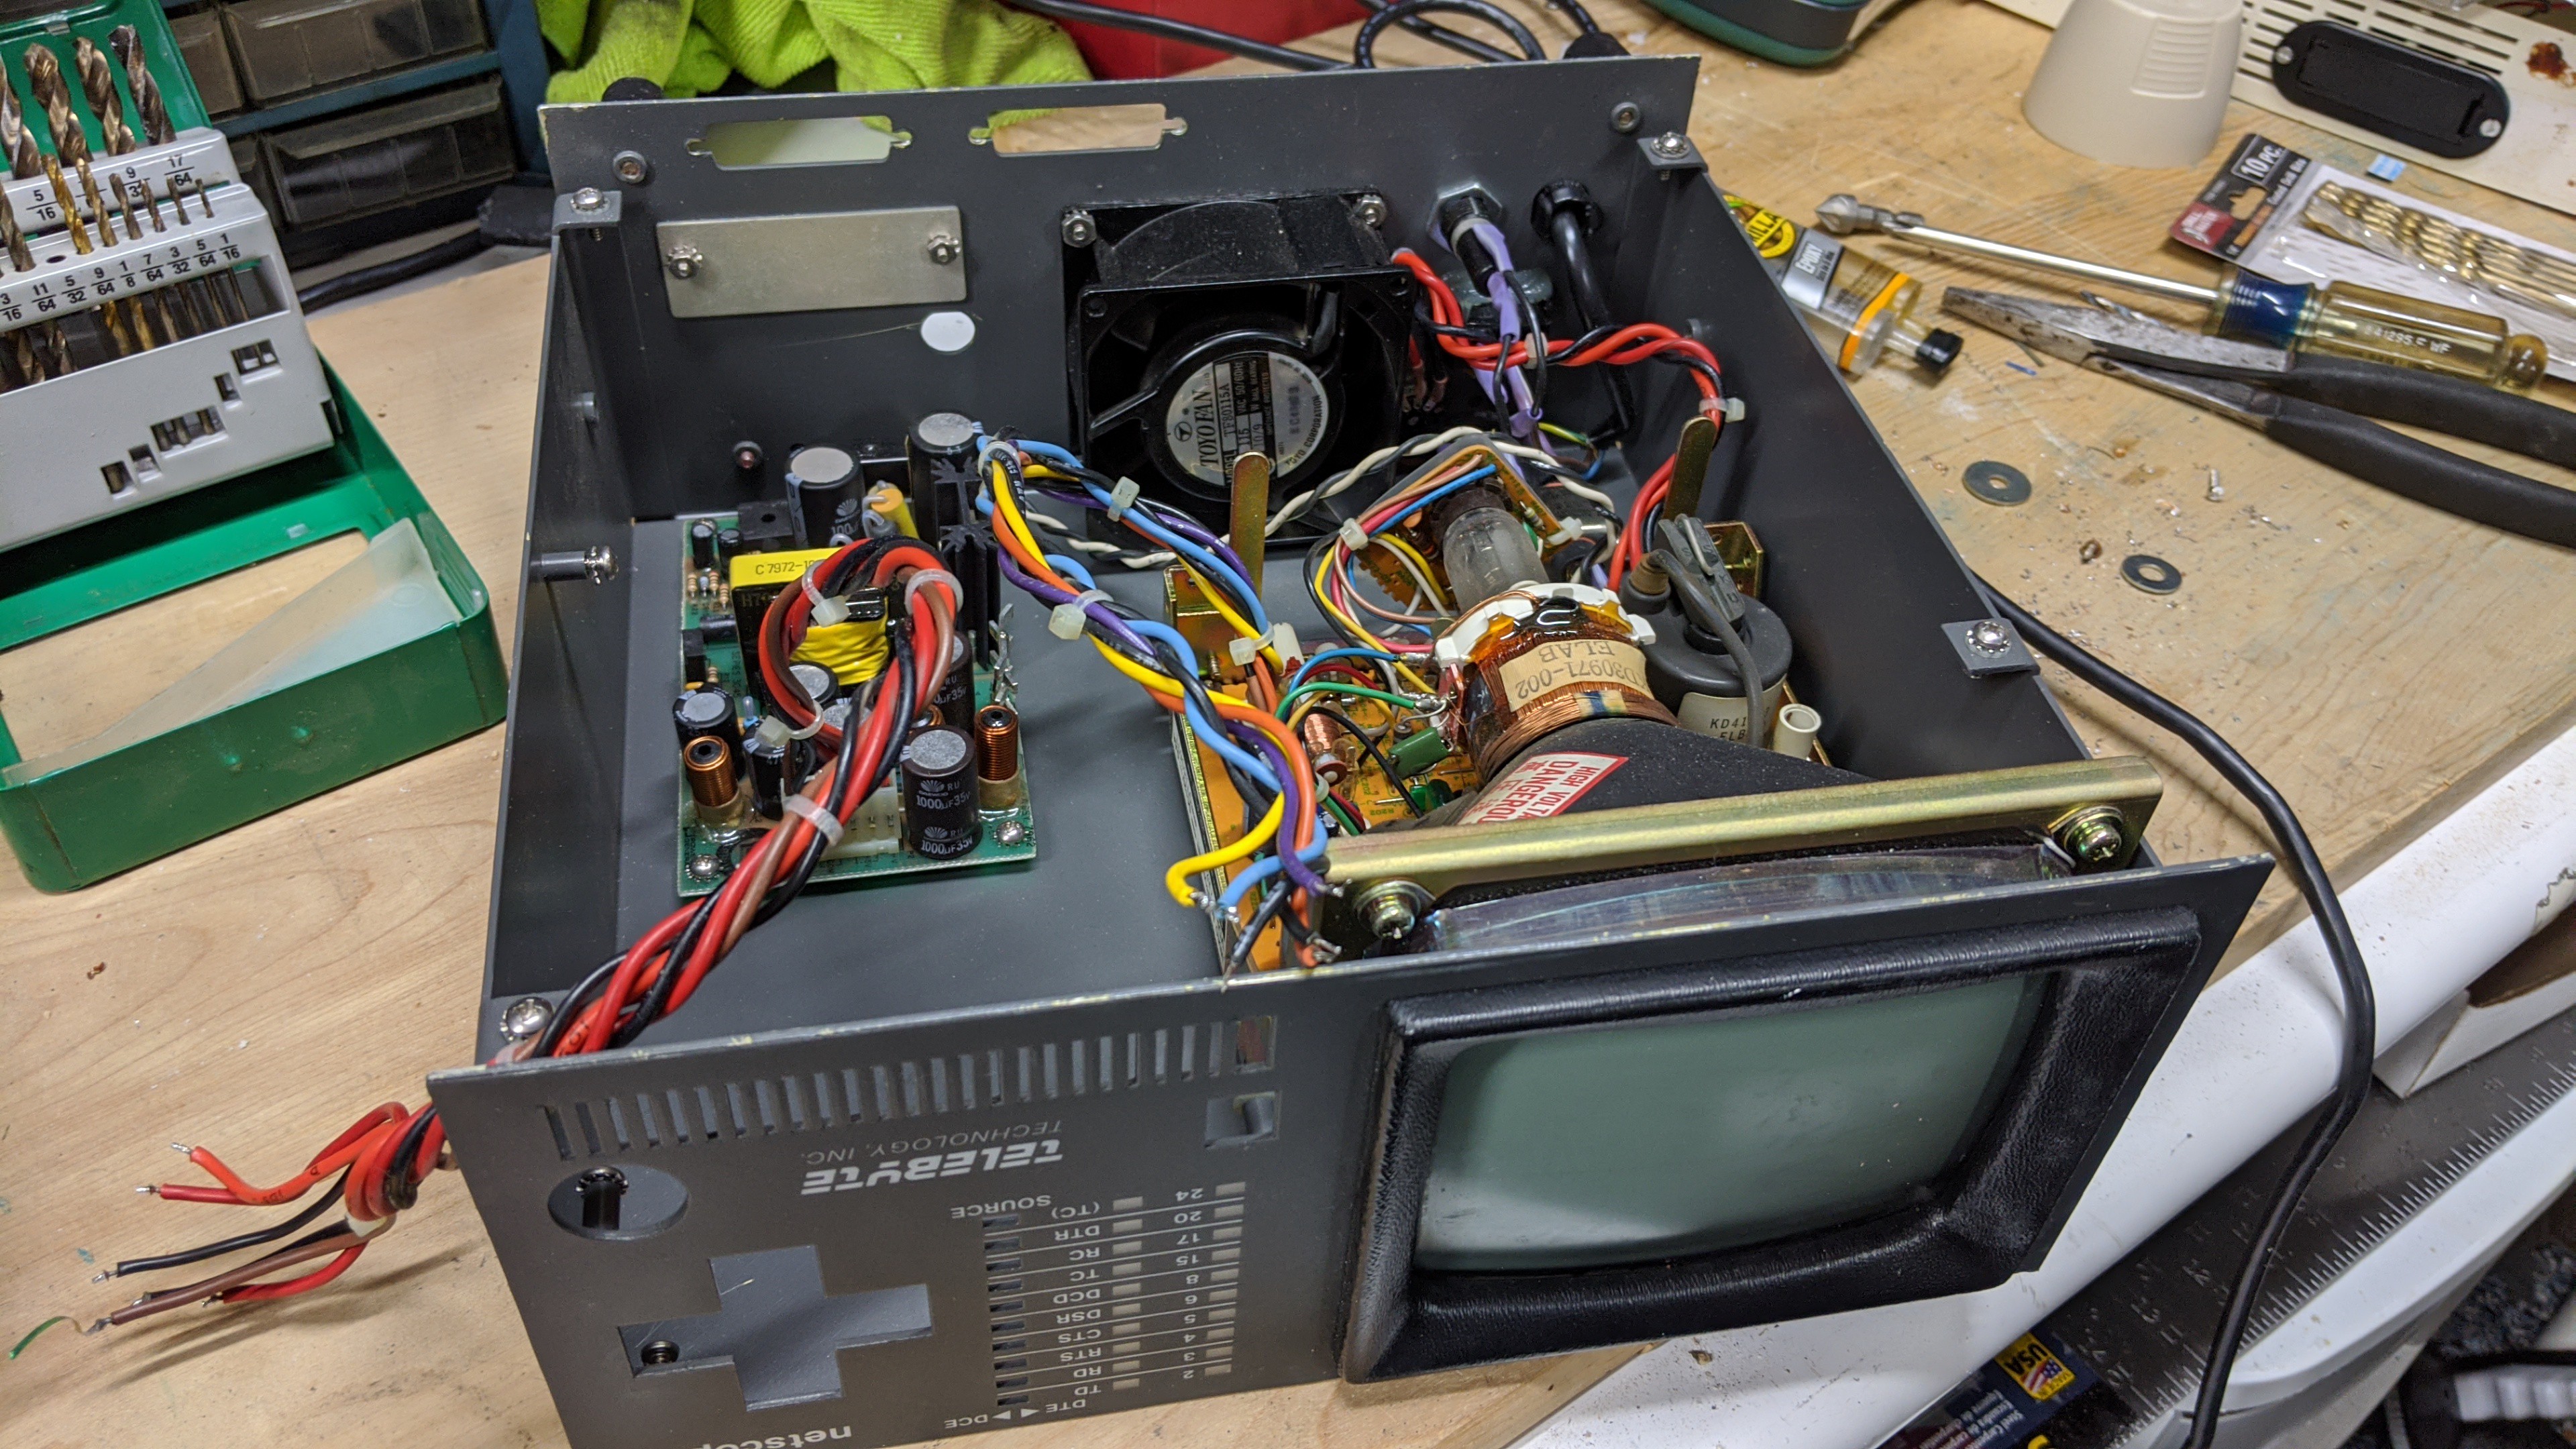
    An old Telebyte Netscope serial protocol analyzer will provide the 5" CRT, CRT bezel, power supply, power cord, power relay and fuse, case cooling fan, case feet, and case handle. I might even use some of the sheet metal from the Netscope case to build the "home-built" case for the final system.

View all 4 project logs

Enjoy this project?

Share

Discussions

adam.klotblixt wrote 04/18/2023 at 14:35 point

The crt is really nice looking and fits the time period well. Not as easy as an lcd, but that was not the point here.

  Are you sure? yes | no

Andy Preston wrote 05/09/2020 at 11:44 point

I'm trying to find options for a CRT monitor... I've been wondering about modifying old black and white TVs. If you've got any info kicking around on using CRTs with digital equipment, I'd love to see it... It seems to be such a minority interest there's very little info online. (I'm currently reading a couple of 1980s academic textbooks on TV which "could be more helpful".) The internet seems to be full of "commenters" saying "why don't you just use an LCD / TFT / your PC in terminal mode?"

  Are you sure? yes | no

John Anderson wrote 05/09/2020 at 20:37 point

The easiest TV's to use for projects here in the US are the ones with a composite input, yellow RCA jack on the front or back. Some (but not all) of 90's cheap portable B&W TV's had them. I don't think those were as common in Europe.

In the absence of a composite input, it's pretty easy to modify a 90's TV to add it. I love this video describing how to do it.

https://www.youtube.com/watch?v=7LfRfeyuF0c

Then look up "Arduino TV Out" for a description and some circuit examples hooking up a microcontroller to composite input on a TV.

  Are you sure? yes | no

Andy Preston wrote 05/11/2020 at 11:44 point

RCA yellow jacks are available but not common "over here". But we do have SCART/Peritel inputs and it's enough to find the composite input on them.

Yeah! That's what I was planning on trying on my old TV (I assume this is what that video is about - haven't watched it yet) ..... Probing into the board and finding where the R.F. stuff "ends" and patching into the composite lines there.

What I'd really like to do, just for "the adventure", would be to find the sync and luminosity signals and "talk" to them. But it's probably wiser to just stick with composite for now.

Edit: watched the video now.... woah! someone sure likes their old 80s video game sound effects ;)

  Are you sure? yes | no

John Anderson wrote 05/11/2020 at 20:30 point

BTW, the bandwidth and CRT image quality of the average TV is less than one of the dedicated CRT displays/monitors. Displaying 80x25 text is virtually unreadable on a TV. But 32x16 text, like I am clocking out in the original project, should be OK. You might even like the look. It'll add to the homebuilt look and feel.

If your search "CRT Display" on ebay, you should be able to find several CRT display modules intended for industrial machine tools and test equipment. Most posted are stupid expensive. But if you keep looking, you can find them reasonable money. I just found a NOS 5" Panasonic CRT for $39. I couldn't resist and bought it. Now I'm gonna have to explain to my wife wife why I bought yet another CRT ;-)

The other option is to search for old test equipment and data analyzers with raster CRT displays. Again, many will be posted for stupid amounts of money. But, eventually you'll find one for reasonable money (for a case, display bezel, power supply, and display). The condition on these can vary significantly. So, look for postings with images of the screen functioning. The HP analyzers integrate the CRT drivers with the main CPU board. So, reusing the CRT's from those is a little more involved.

  Are you sure? yes | no

Andy Preston wrote 05/11/2020 at 20:47 point

Yeah... that old E. Bay waiting game! ;)

My TV only has a 5 inch screen.... so I can't see 80x25 working even if it did have the bandwidth. ;)

Thanks for all the advice... I shall watch for more updates. :)

  Are you sure? yes | no

Andy Preston wrote 04/22/2020 at 21:01 point

I love the Oric Atmos keyboard.... All of my plans for resto-mod are "spoiled" by having to use a PC keyboard.... I've been looking for dumb-terminals on E. Bay but they cost loads of money... I hadn't thought of looking for a "for spares or repair" old 80s computer.... I wonder if I can find something in a really bad way but with good keyboard for a decent price?????

  Are you sure? yes | no

Andy Preston wrote 05/09/2020 at 11:40 point

That Oric Atmos Kbd is a good choice because you've got "full ASCII" on the keys with backslash and tilde, etc... which a lot of old keyboards don't seem to have.... I've had a look at old Commodore stuff, because there's so much around, and they're a bit lacking.... The best ones I've found so far are the BBC Micro and MSX machines.... both of which have all those ASCII characters but still don't look like they've come off a PC.

  Are you sure? yes | no

John Anderson wrote 05/10/2020 at 22:26 point

I've found lot's of NOS keyboards for 80's obsolete hardware on ebay. You just have to be patient and willing to spend a little. I just got 5 NOS Hi-Tek keyboards with series 725 mechanical switches for $30. The key caps are a little weird. I guess they were made for some sort of word processor or something. A donor Hi-Tek PC keyboard or some cheap keyboard stickers could fix that. They'll just add to the homebuilt/cyberpunk retro futuristic look.

  Are you sure? yes | no

Andy Preston wrote 05/11/2020 at 11:35 point

Wow! 30 bucks for 5 sounds like a very very good price.... So far I've found 1 used BBC micro keyboard for £25.... I'll keep looking. :)

  Are you sure? yes | no

John Anderson wrote 05/22/2020 at 20:38 point

BTW, looking for a keyboard with some character? Search ebay for "vintage soviet ELEKTRONIKA MC computer IBM keyboard MS7007 NOS NIB sealed new". I bought one of these from a seller on Ebay out of the Ukraine. The seller still has more available at this time. Shipping was pricey for me. But the price of the keyboard was very reasonable for NOS stock. Shipping might be cheaper for you.

  Are you sure? yes | no

Andy Preston wrote 05/23/2020 at 08:51 point

That does look VERY nice... I wanted something "a bit different"... it doesn't get much more "different" than that!

  Are you sure? yes | no

Dave's Dev Lab wrote 02/22/2020 at 21:19 point

  Are you sure? yes | no

John Anderson wrote 02/23/2020 at 07:26 point

Yes, that looks like the one. It's a 1978 Ball Brothers 5" CRT as well. You can find them occasionally on Ebay. It fits perfectly into that case.

  Are you sure? yes | no

ostropest wrote 02/04/2020 at 18:14 point

AVR don have MMU

  Are you sure? yes | no

Ahron Wayne wrote 01/09/2020 at 03:52 point

I learned about PCM last week, and now it seems I'm seeing it everywhere. Nice setup, very well packed together!

  Are you sure? yes | no

John Anderson wrote 01/09/2020 at 13:24 point

I'll be adding PCM sound to my next rev of the digital dice tower. I'll be using a ATMEGA328 processor directly driving a tiny speaker. Sound volume is kinda low but workable for this application. I'll also post a simple Linux command line utility I wrote that can convert various sound and video file formats into raw PCM data and outputs it to a text file in C code format that can them be included in your project. So, if your interested in PCM sound look for that project from me in the coming weeks.

  Are you sure? yes | no

John Anderson wrote 01/07/2020 at 07:31 point

Let me know if you are interested in source code and I'll post it.  I won't bother until requested. I'll likely post most of that source code in the context of upcoming projects. I have so many projects and so little time :-)

  Are you sure? yes | no

Daemon informatica wrote 04/23/2020 at 06:26 point

Actually, I was poking around the page looking for a github / gitlab link of sorts. I'd like to see it. :)

  Are you sure? yes | no

John Anderson wrote 04/23/2020 at 19:49 point

Since I am starting this new build, I was already planning to create a new code base. I'll plan to create some sort of repository (likely Git) and link it here. Look for it in the coming weeks. 

The previous project got mothballed in a less than fully functional state. I was adding an SD card file system and I was optimizing the interrupt handler for the video data write to see how far I could push the resolution. None of that was tested. I don't plan to test and fix that code. The original system is going to get reconfigured and all new software. I'll probably create a new project for that one when I get to it. So many projects, so little time :-)

  Are you sure? yes | no

Similar Projects

Does this project spark your interest?

Become a member to follow this project and never miss any updates