-
31Electronics/Finishing - Step 7
Mount the propellers to their respective motors. For initial flight testing, it is recommended to use the same propeller for all three motors, a 5030 to 5040 three-blade prop is recommended. Later on, the rear propeller may be swapped with a 5535 or 6030 three-blade, and the front two may be swapped with a 5050 or similar.
-
32Electronics/Finishing - Step 8
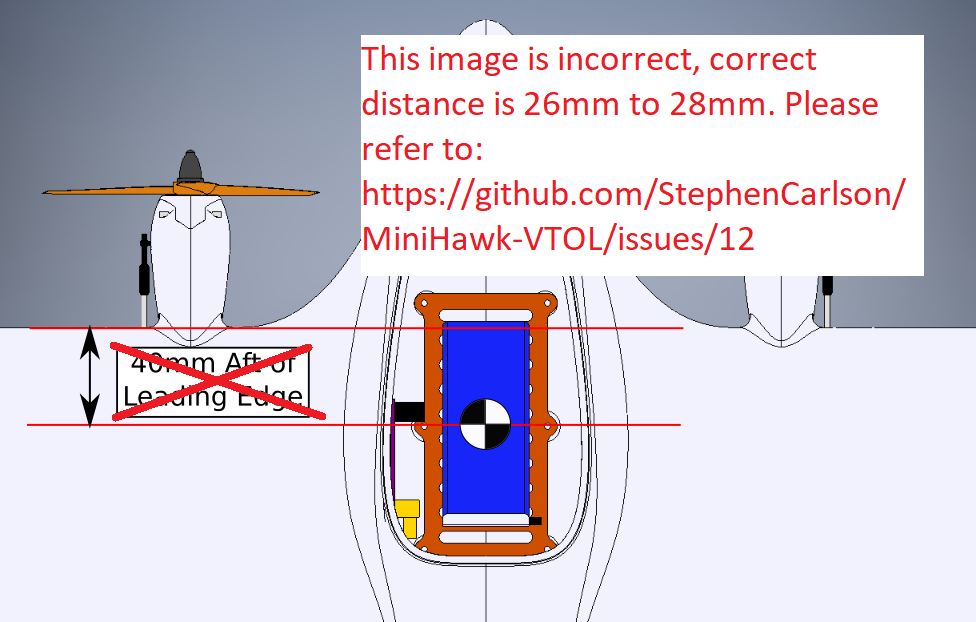
The Center-of-Mass for the aircraft is intended to be
at 165mm back from the tip of the nose, or 40mm back from the leading edge of the wing. This is exactly along the middle pair of mounting holes for the Battery Tray. This is an initial value, and the Center-of-Mass may be shifted back by around 8mm to 10mm from this point, but with increasing risk to stability.Update: This was completely wrong; the neutral point is actually around 36mm from the leading edge, and the mass should center well ahead of this. As this vehicle is both a fixed-wing and multicopter, the Center-of-Mass stated here is for the fixed-wing condition, and any measurement of Center-of-Mass should be performed with the motors tilted into the forward-flight condition, propellers attached, and the lid secured. Shift the battery fore or aft to achieve proper balance, or add ballast if merited.![]()
-
33Electronics/Finishing - Step 9
Perform any other measures necessary to get the vehicle ready for flight. Decals, paint, or heat-activated covering are possibilities. Vehicle mass should come to an All-Up-Weight around 700 grams to 800 grams, with the 3D-printed airframe alone measuring around 300 grams.
MiniHawk VTOL
A fully 3D-Printable VTOL aircraft, designed as a hybrid fixed-wing plank + tricopter planform. For FPV and UAV experimentation.
 Steve Carlson
Discussions
Become a Hackaday.io Member
Create an account to leave a comment. Already have an account? Log In.