Close
0%
0%

Teti [gd0022]

A 3-in-1 desktop because I can't build a 2-in-1 laptop.

Similar projects worth following
I didn't want to design a (desktop) PC; I'm a laptop person.

After hours of (re)researching, I couldn't find a laptop that had the features I was looking for, and I don't have the expertise to DIY one, so I turned towards a relatively portable custom desktop solution that holds 3 USBC touchscreens and will be transported in a custom backpack, Tetinventory [gd0039].

The T in Teti is for "Tethered Tablet".

Navigation

The title tag system is explained here, and the table is updated when a change occurs. Notable logs have bold L# text.

L1
[A] Initial Project Status
L2
[M] Feature Naming and Branding
L3
[M] Screen Holders and Dual Screen Laptop Mode
L4
[R] OLED Screens
L5
[M] Small tweaks
L6
[M] Small file updates
L7
[M] Tetent Concept3
L8
[T] Moving on to a test bench

Preface

[2022 - August 30]

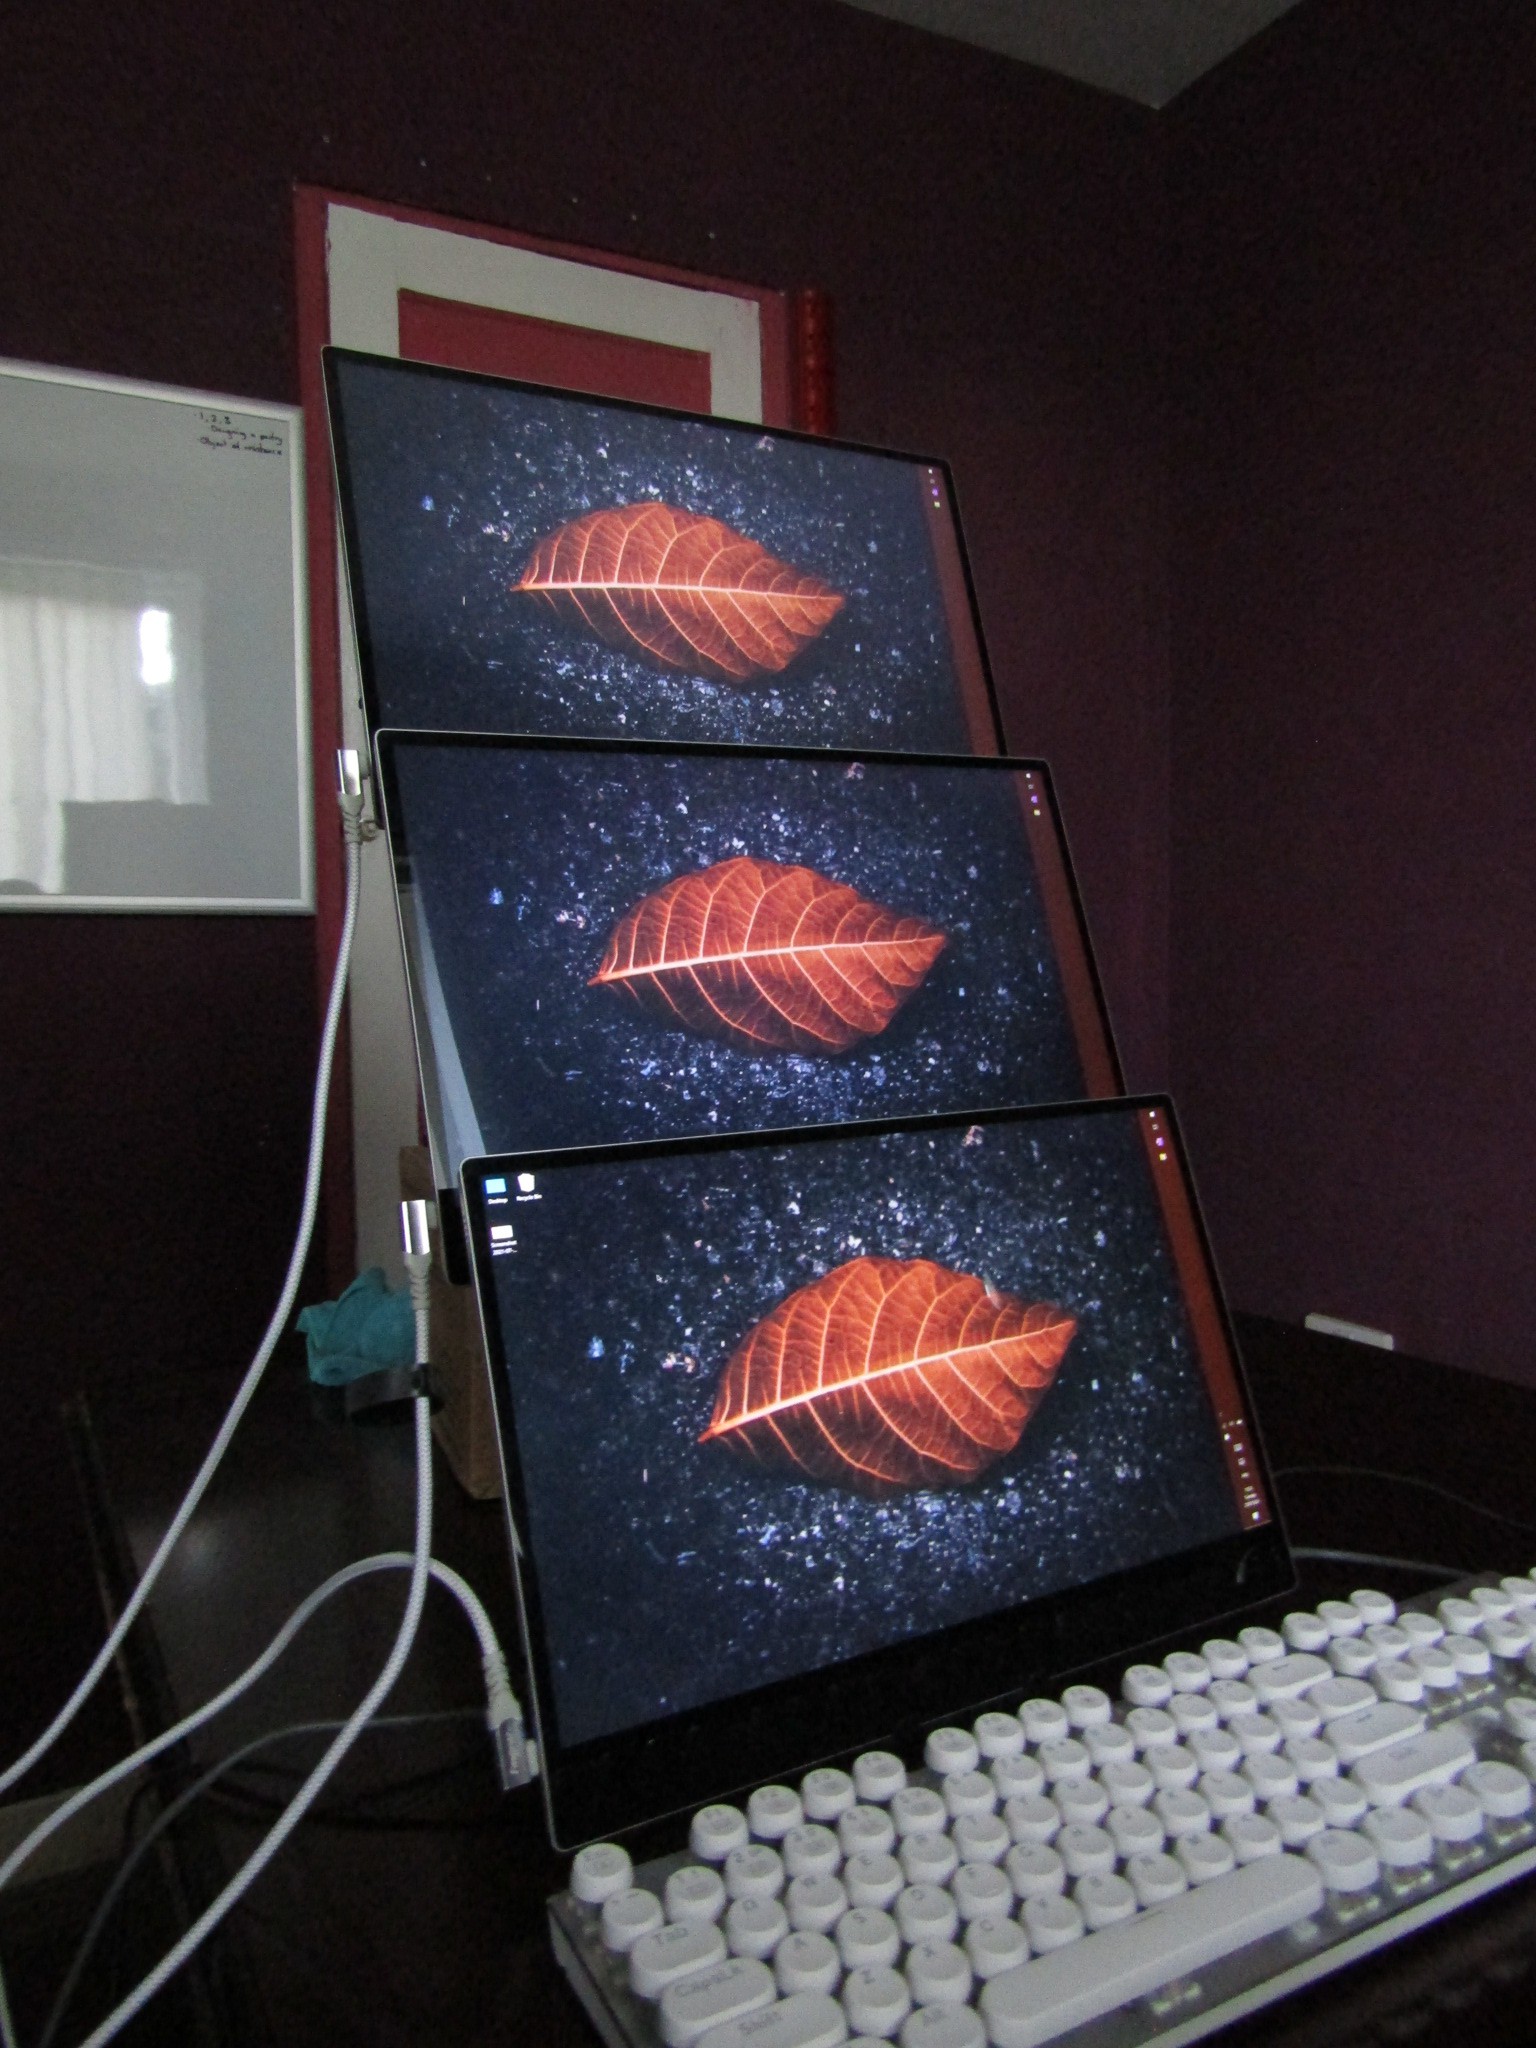
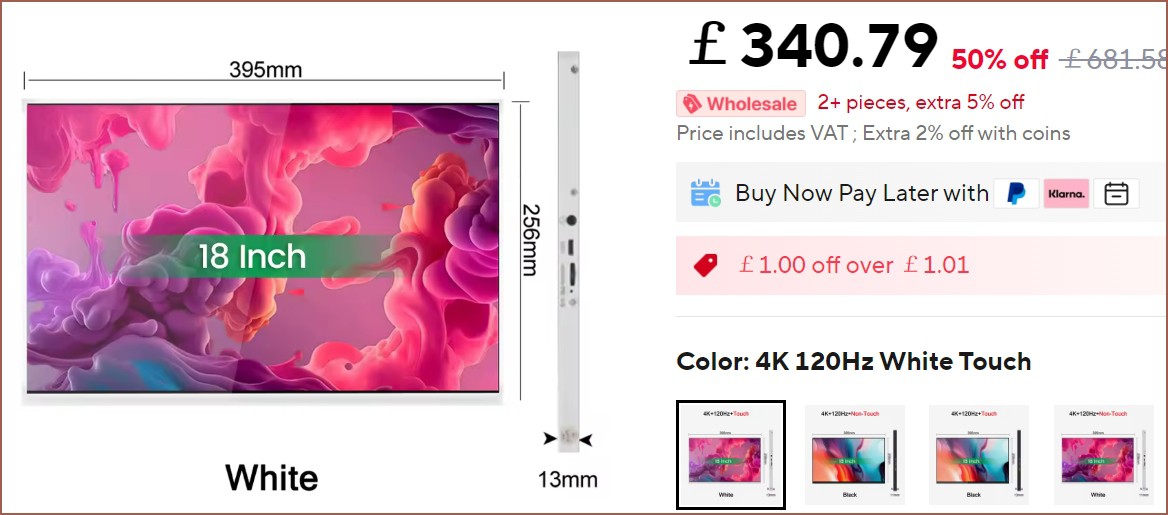
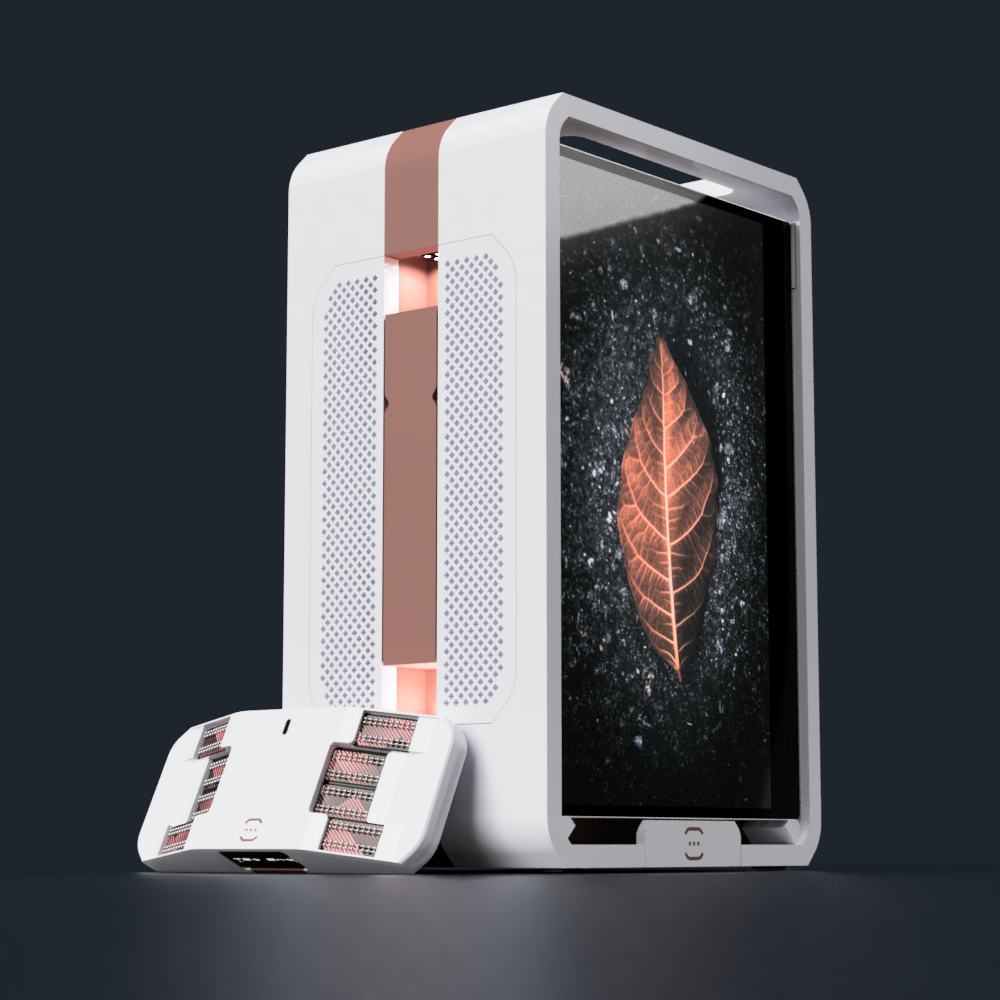
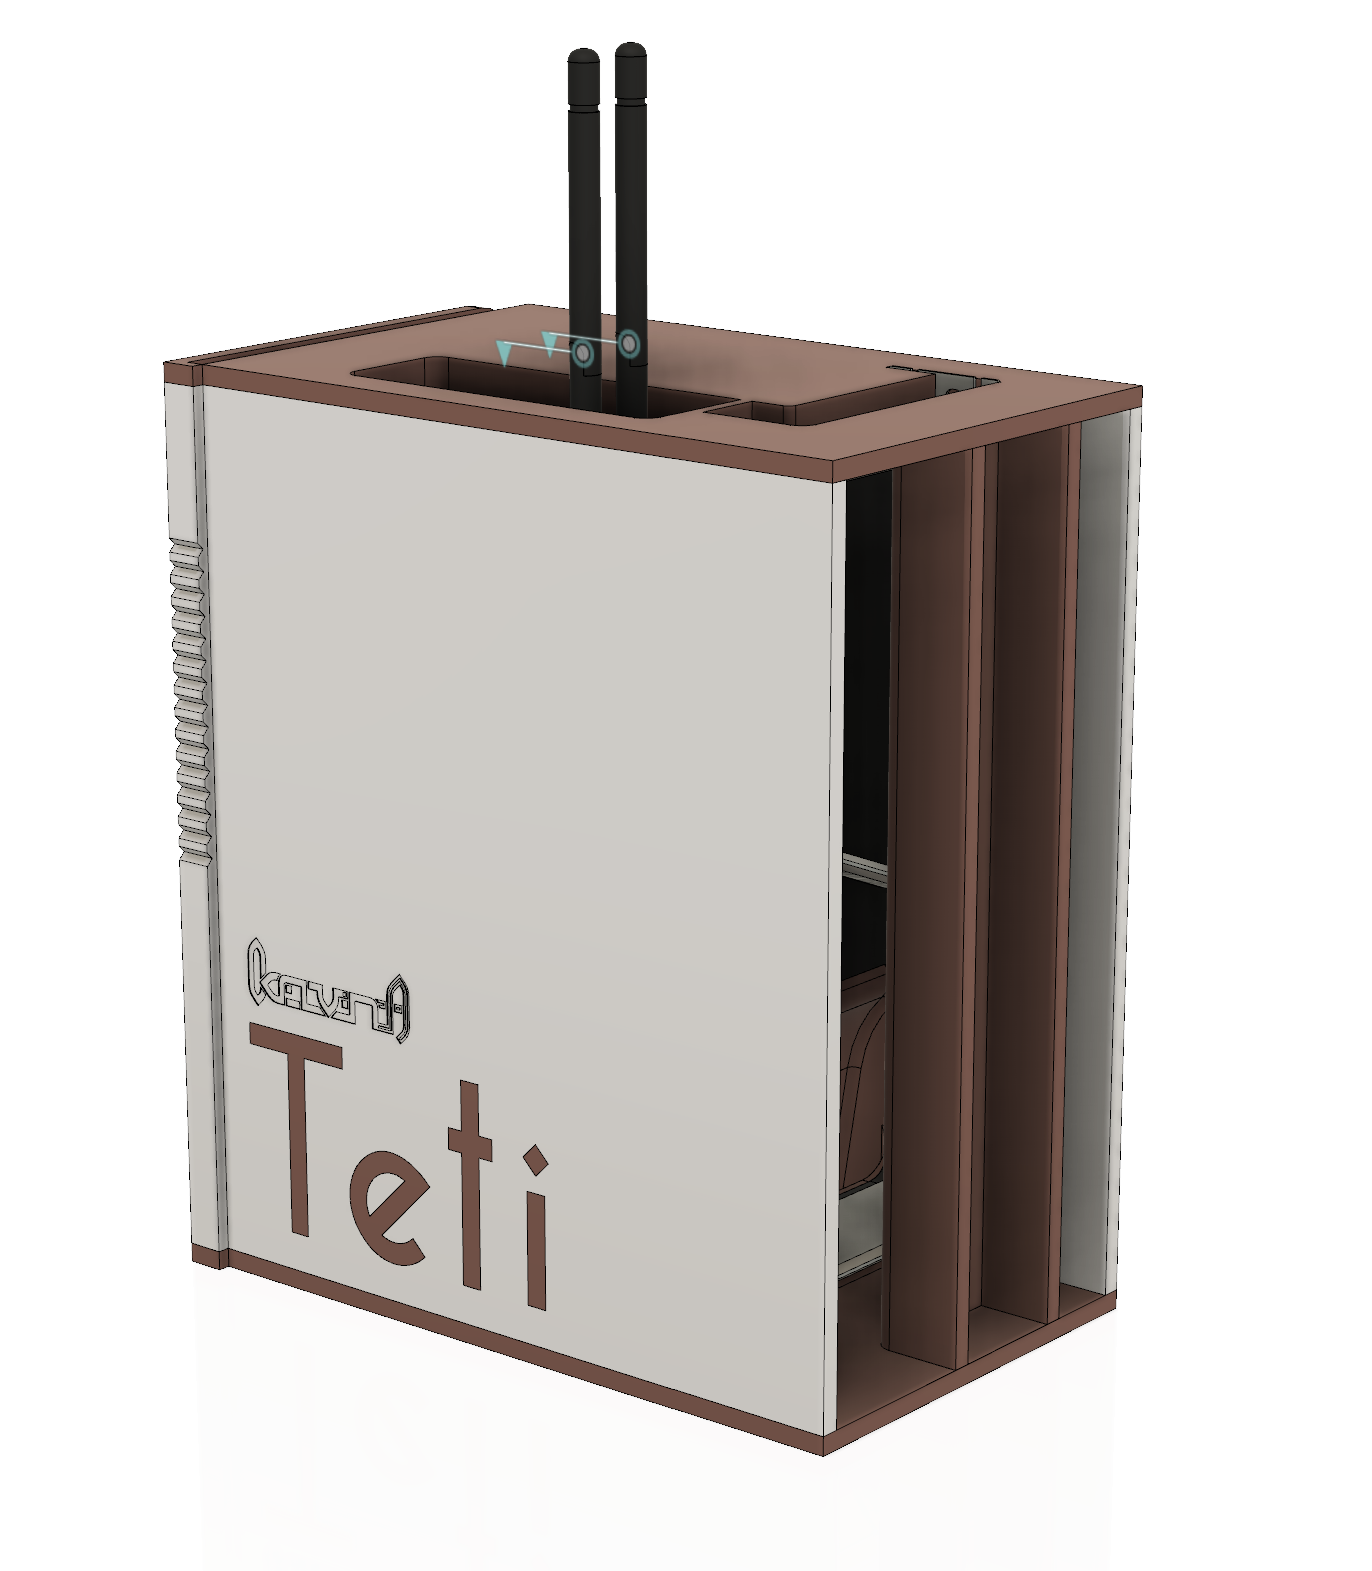
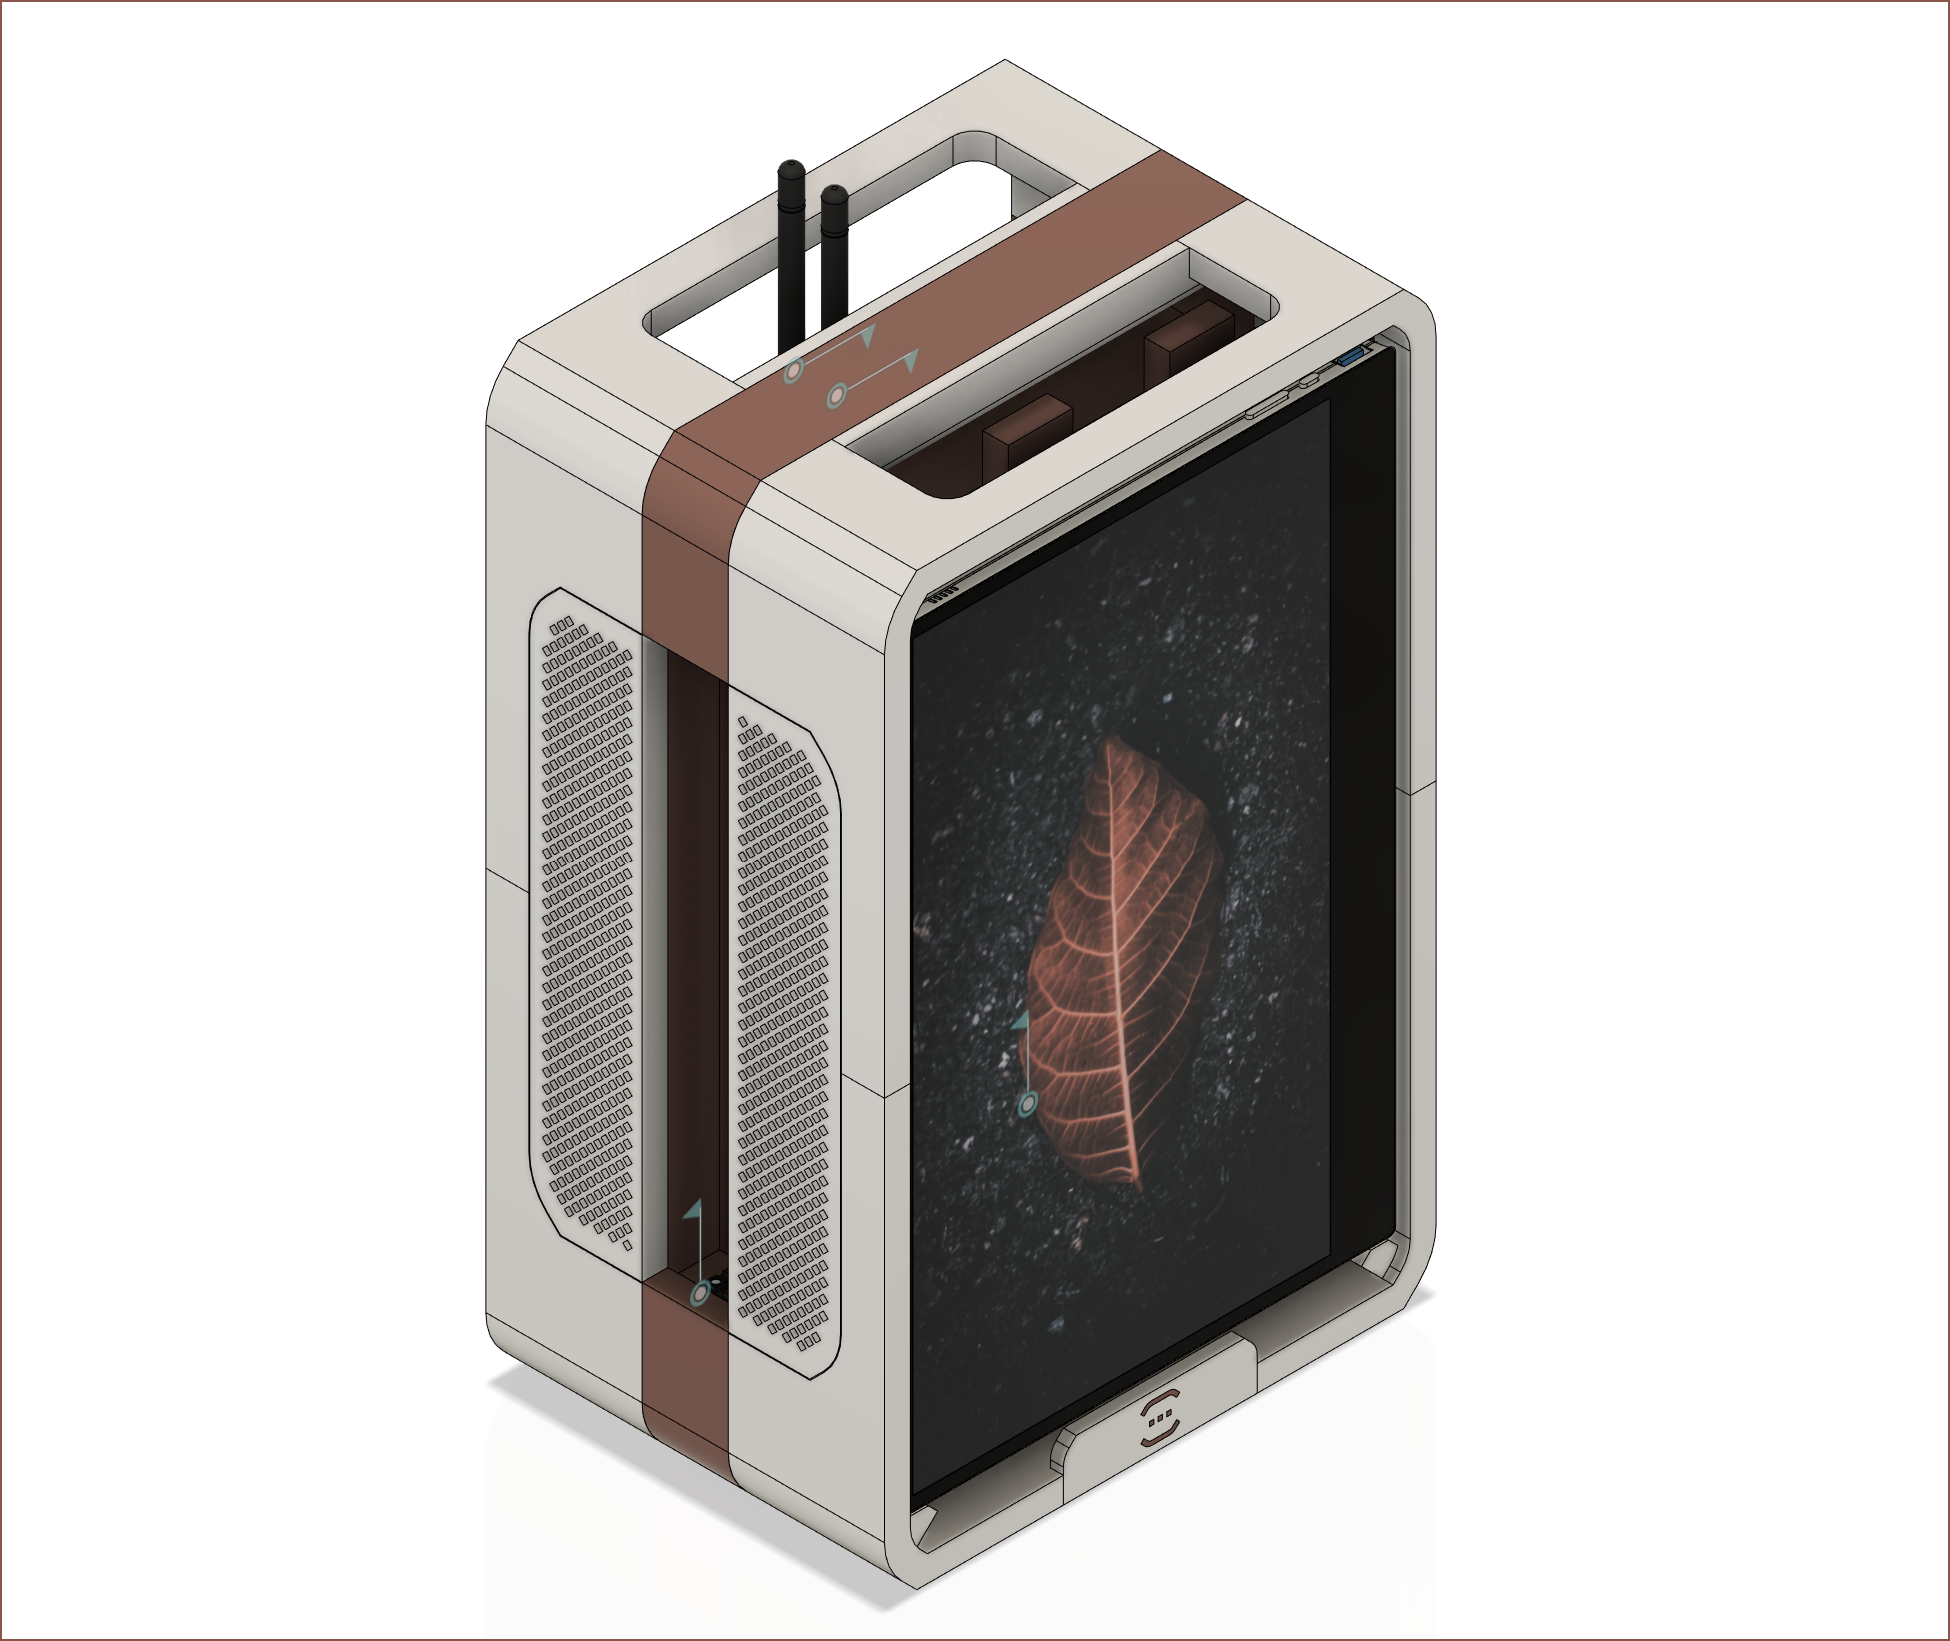
What you see is the 3rd design attempt of this case. The main component is a set of 3, 4K USBC touchscreens that are 15.6" in size. I would've gone with 120Hz 17.3" 1440p if I had the option. Each screen uses around 7W on average (20% brightness).

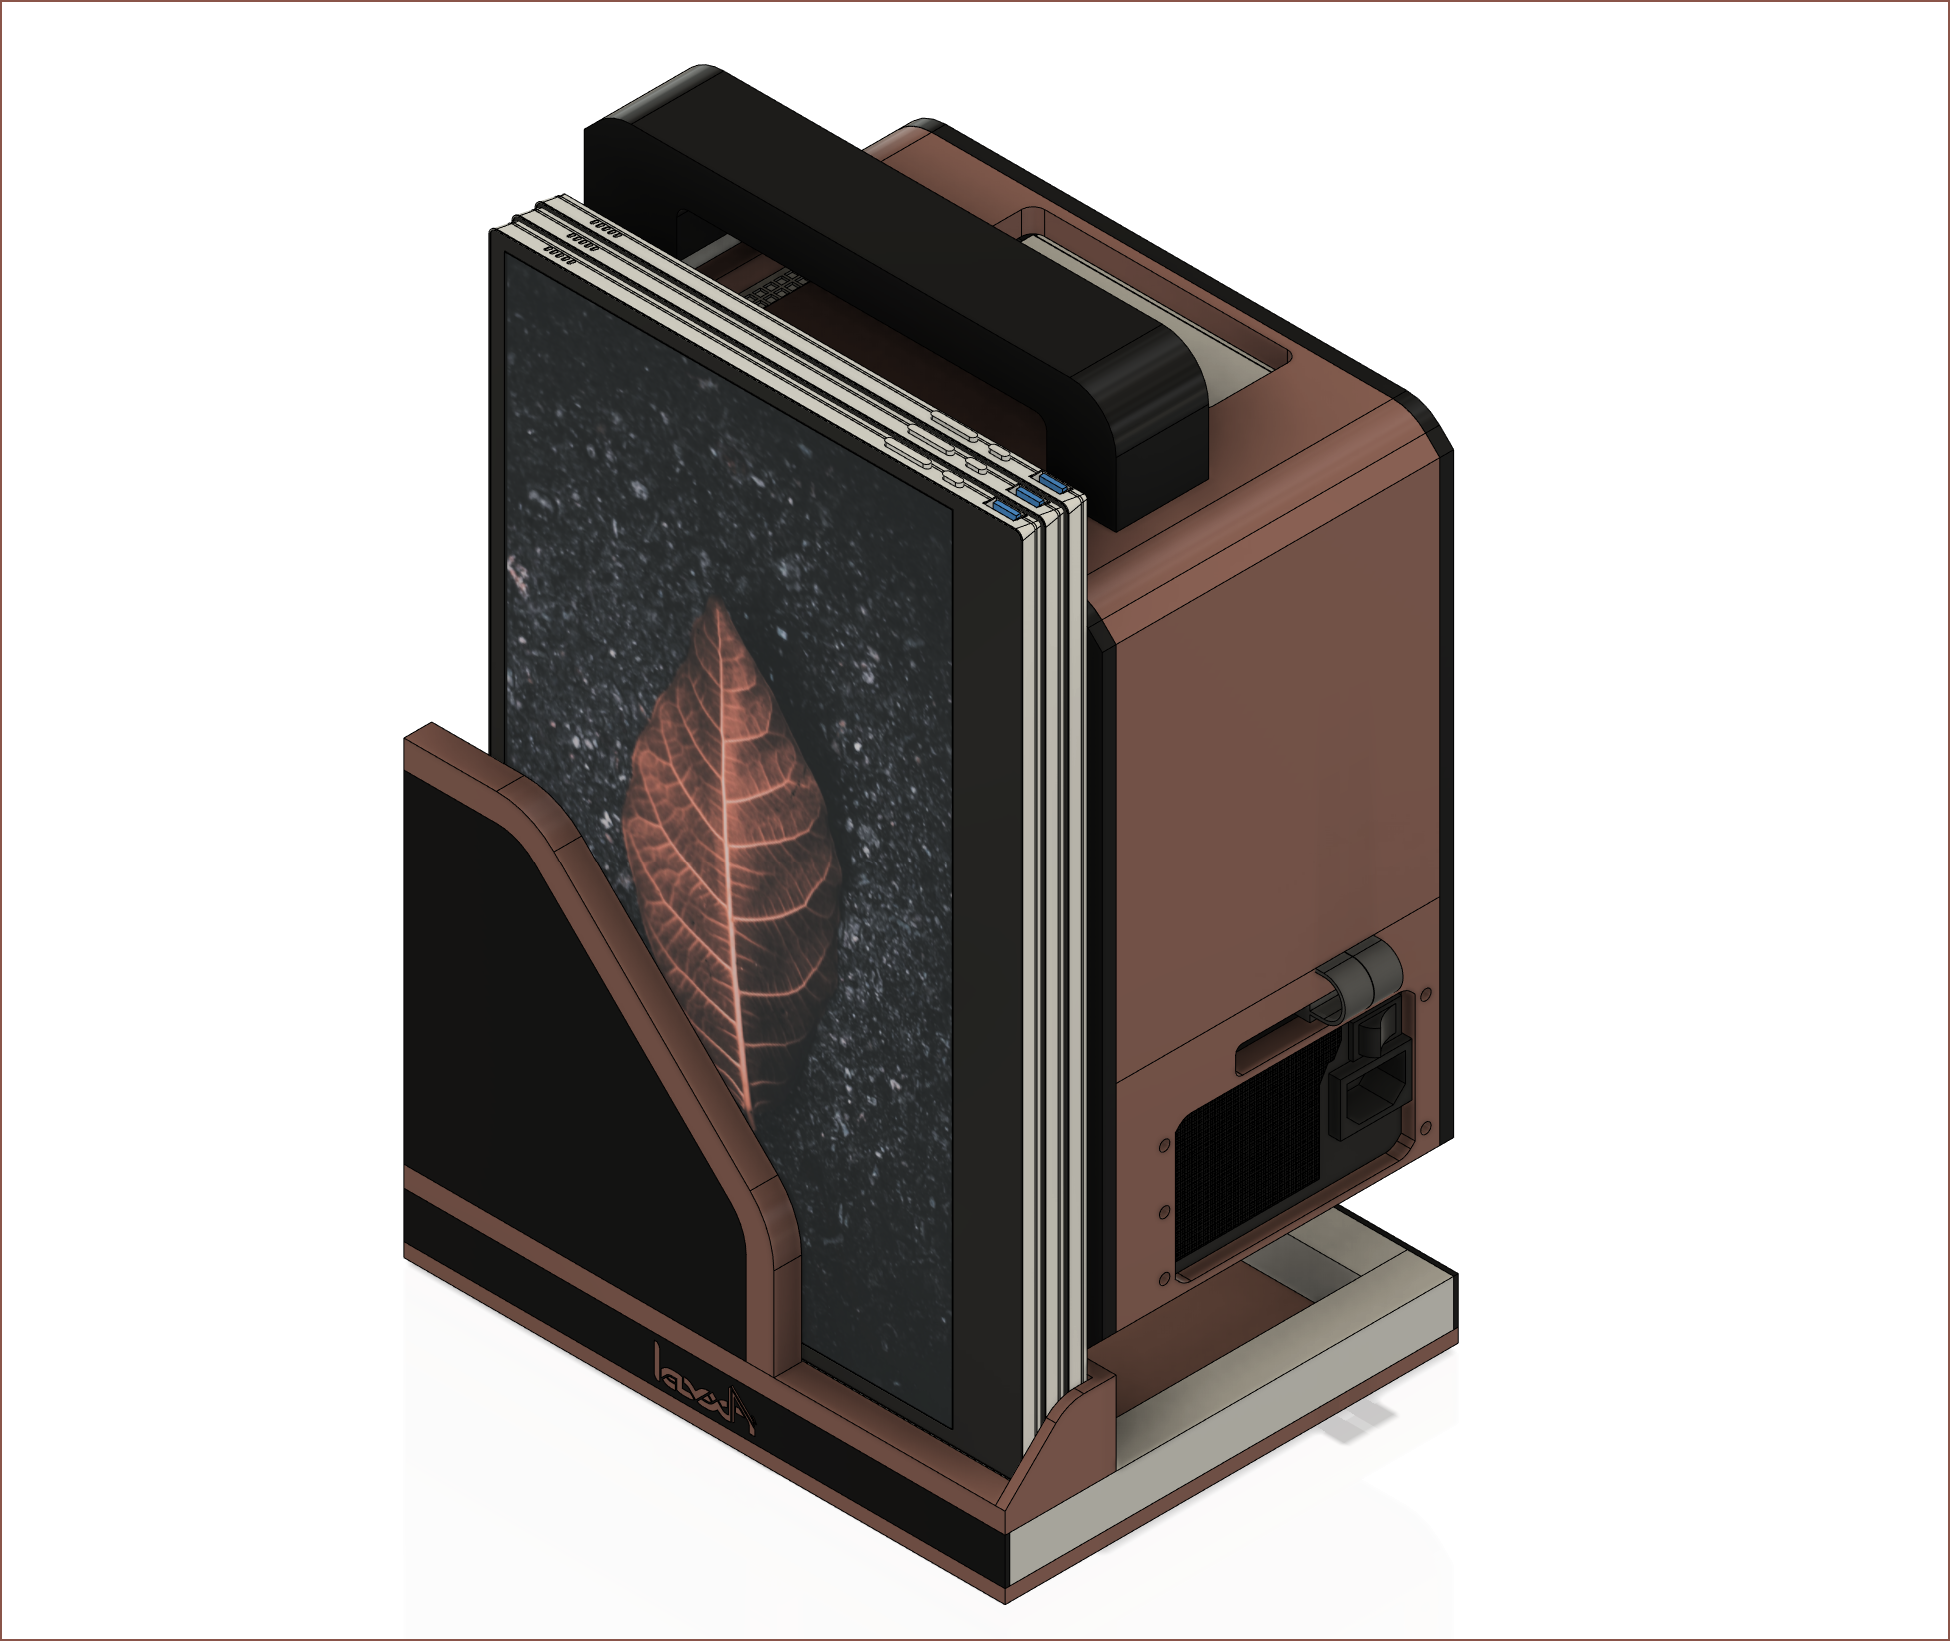
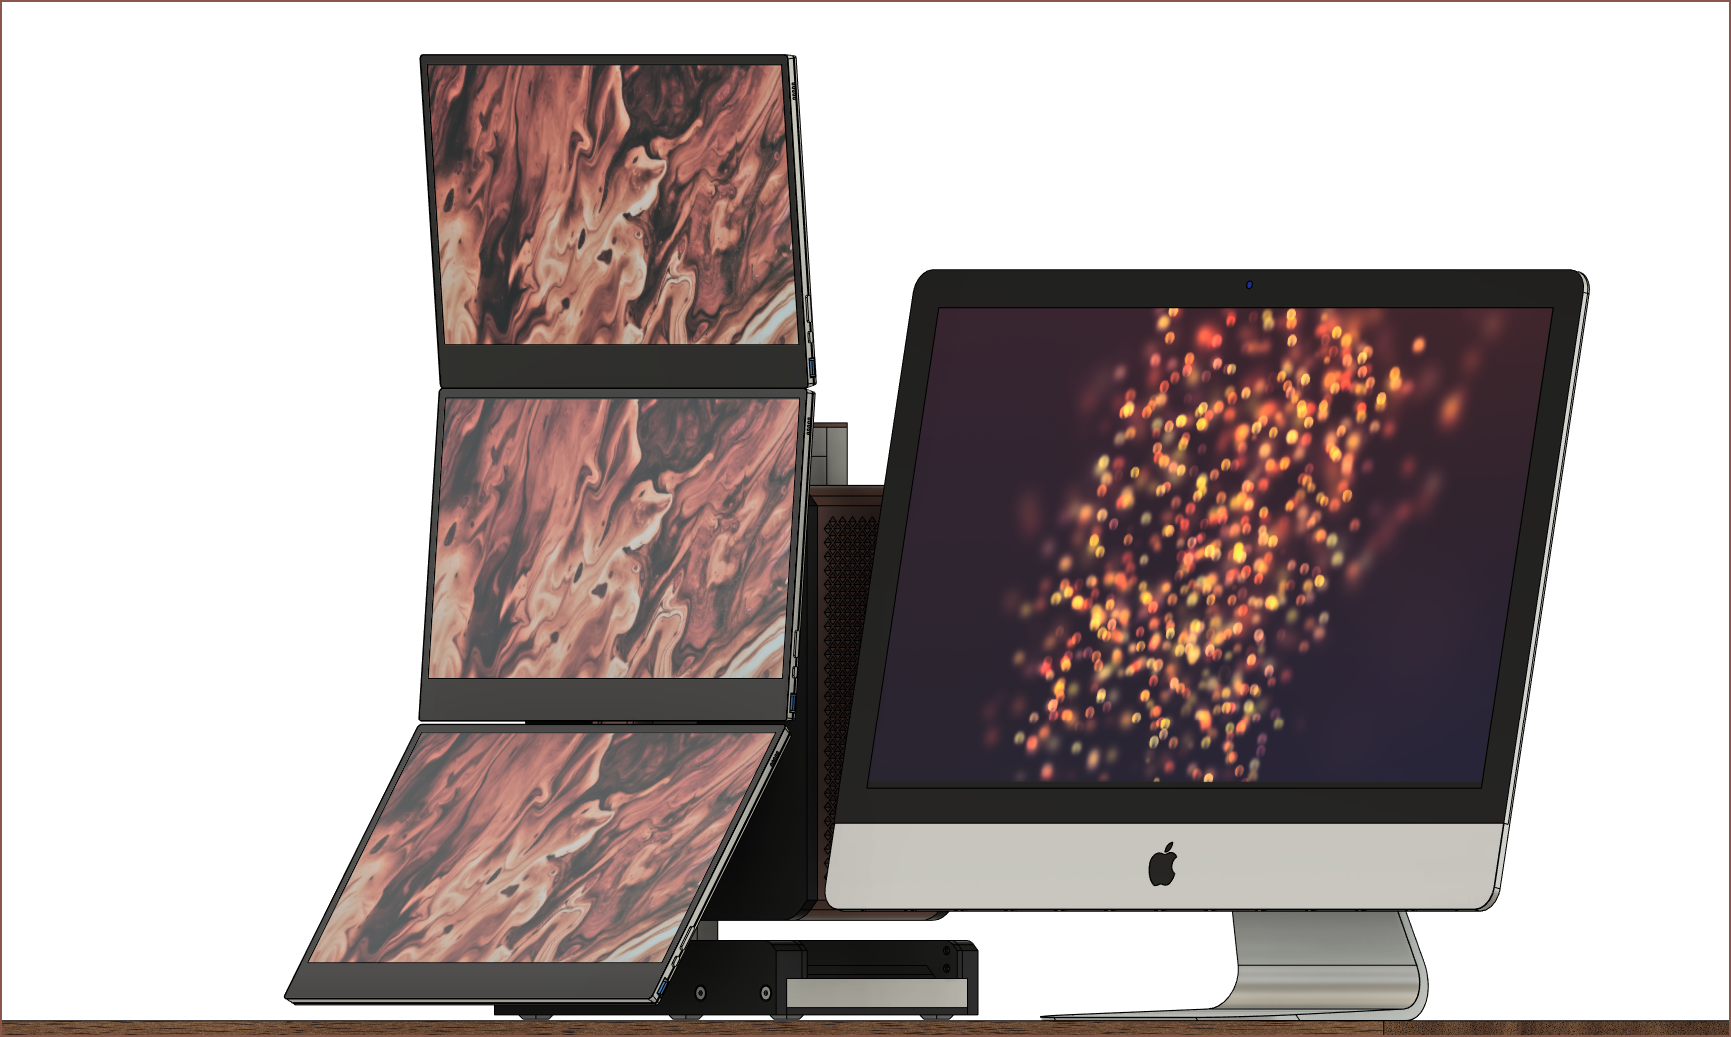
  • Using 1 connected to a 3 metre cable allows an always-charging-tablet-like experience (I've always wanted to own a Victorious/iCarly XL Pear Pad). 
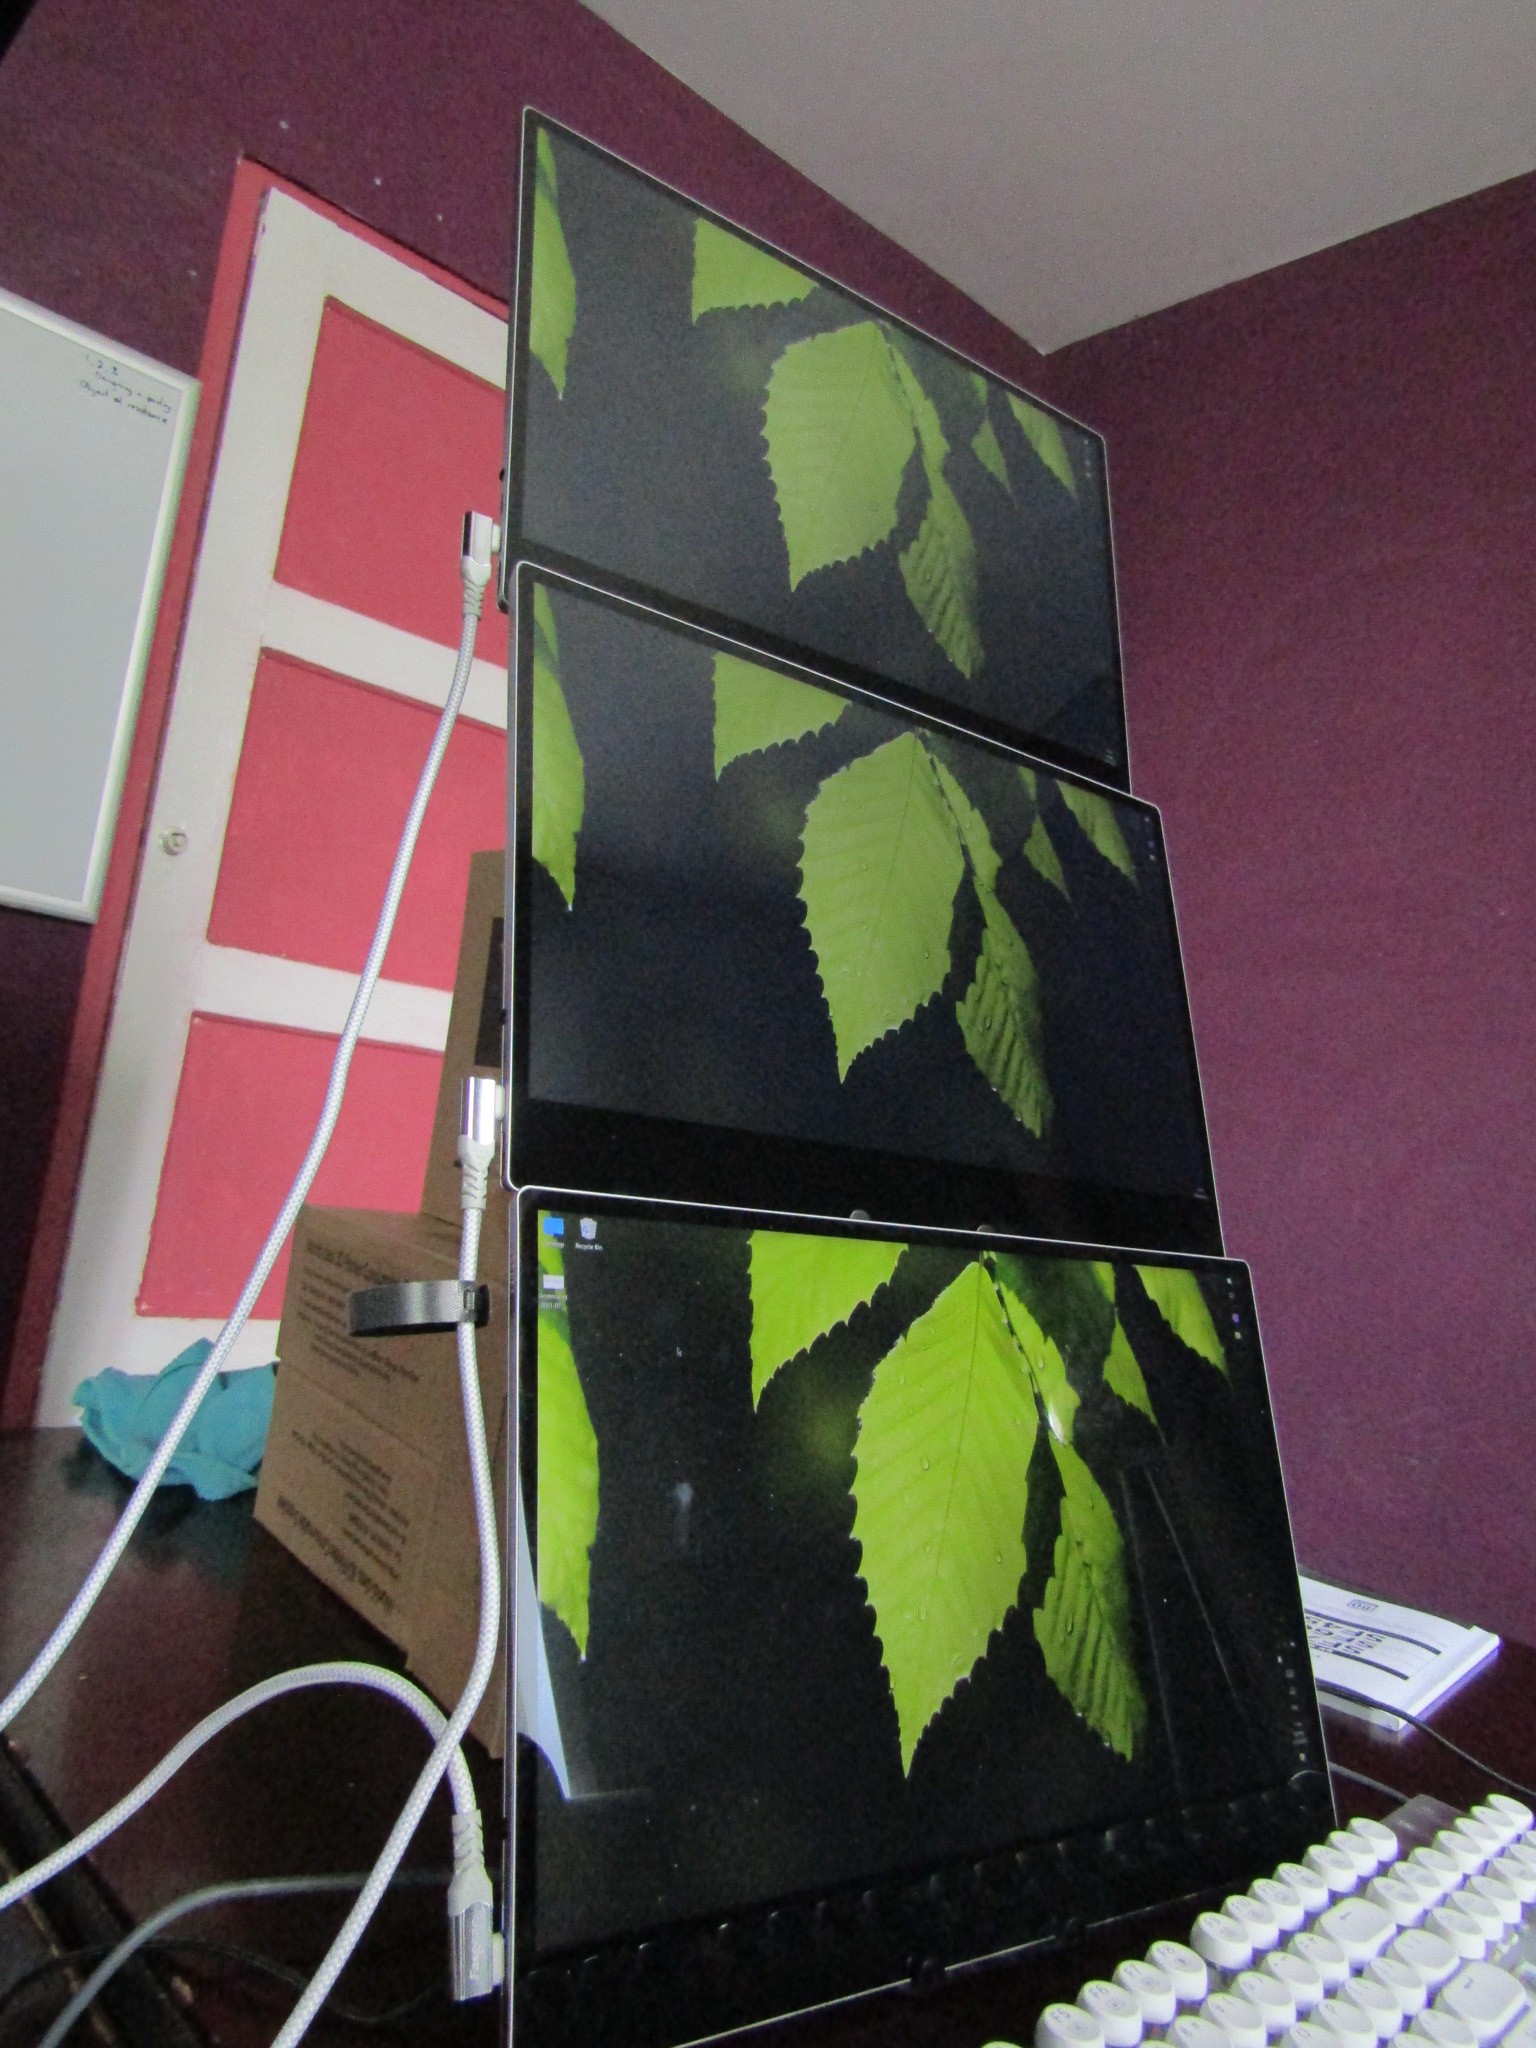
  • Using 2 connected to 3m cables allows for a dual screen laptop experience (inspired by the concept laptops that never reach the market)
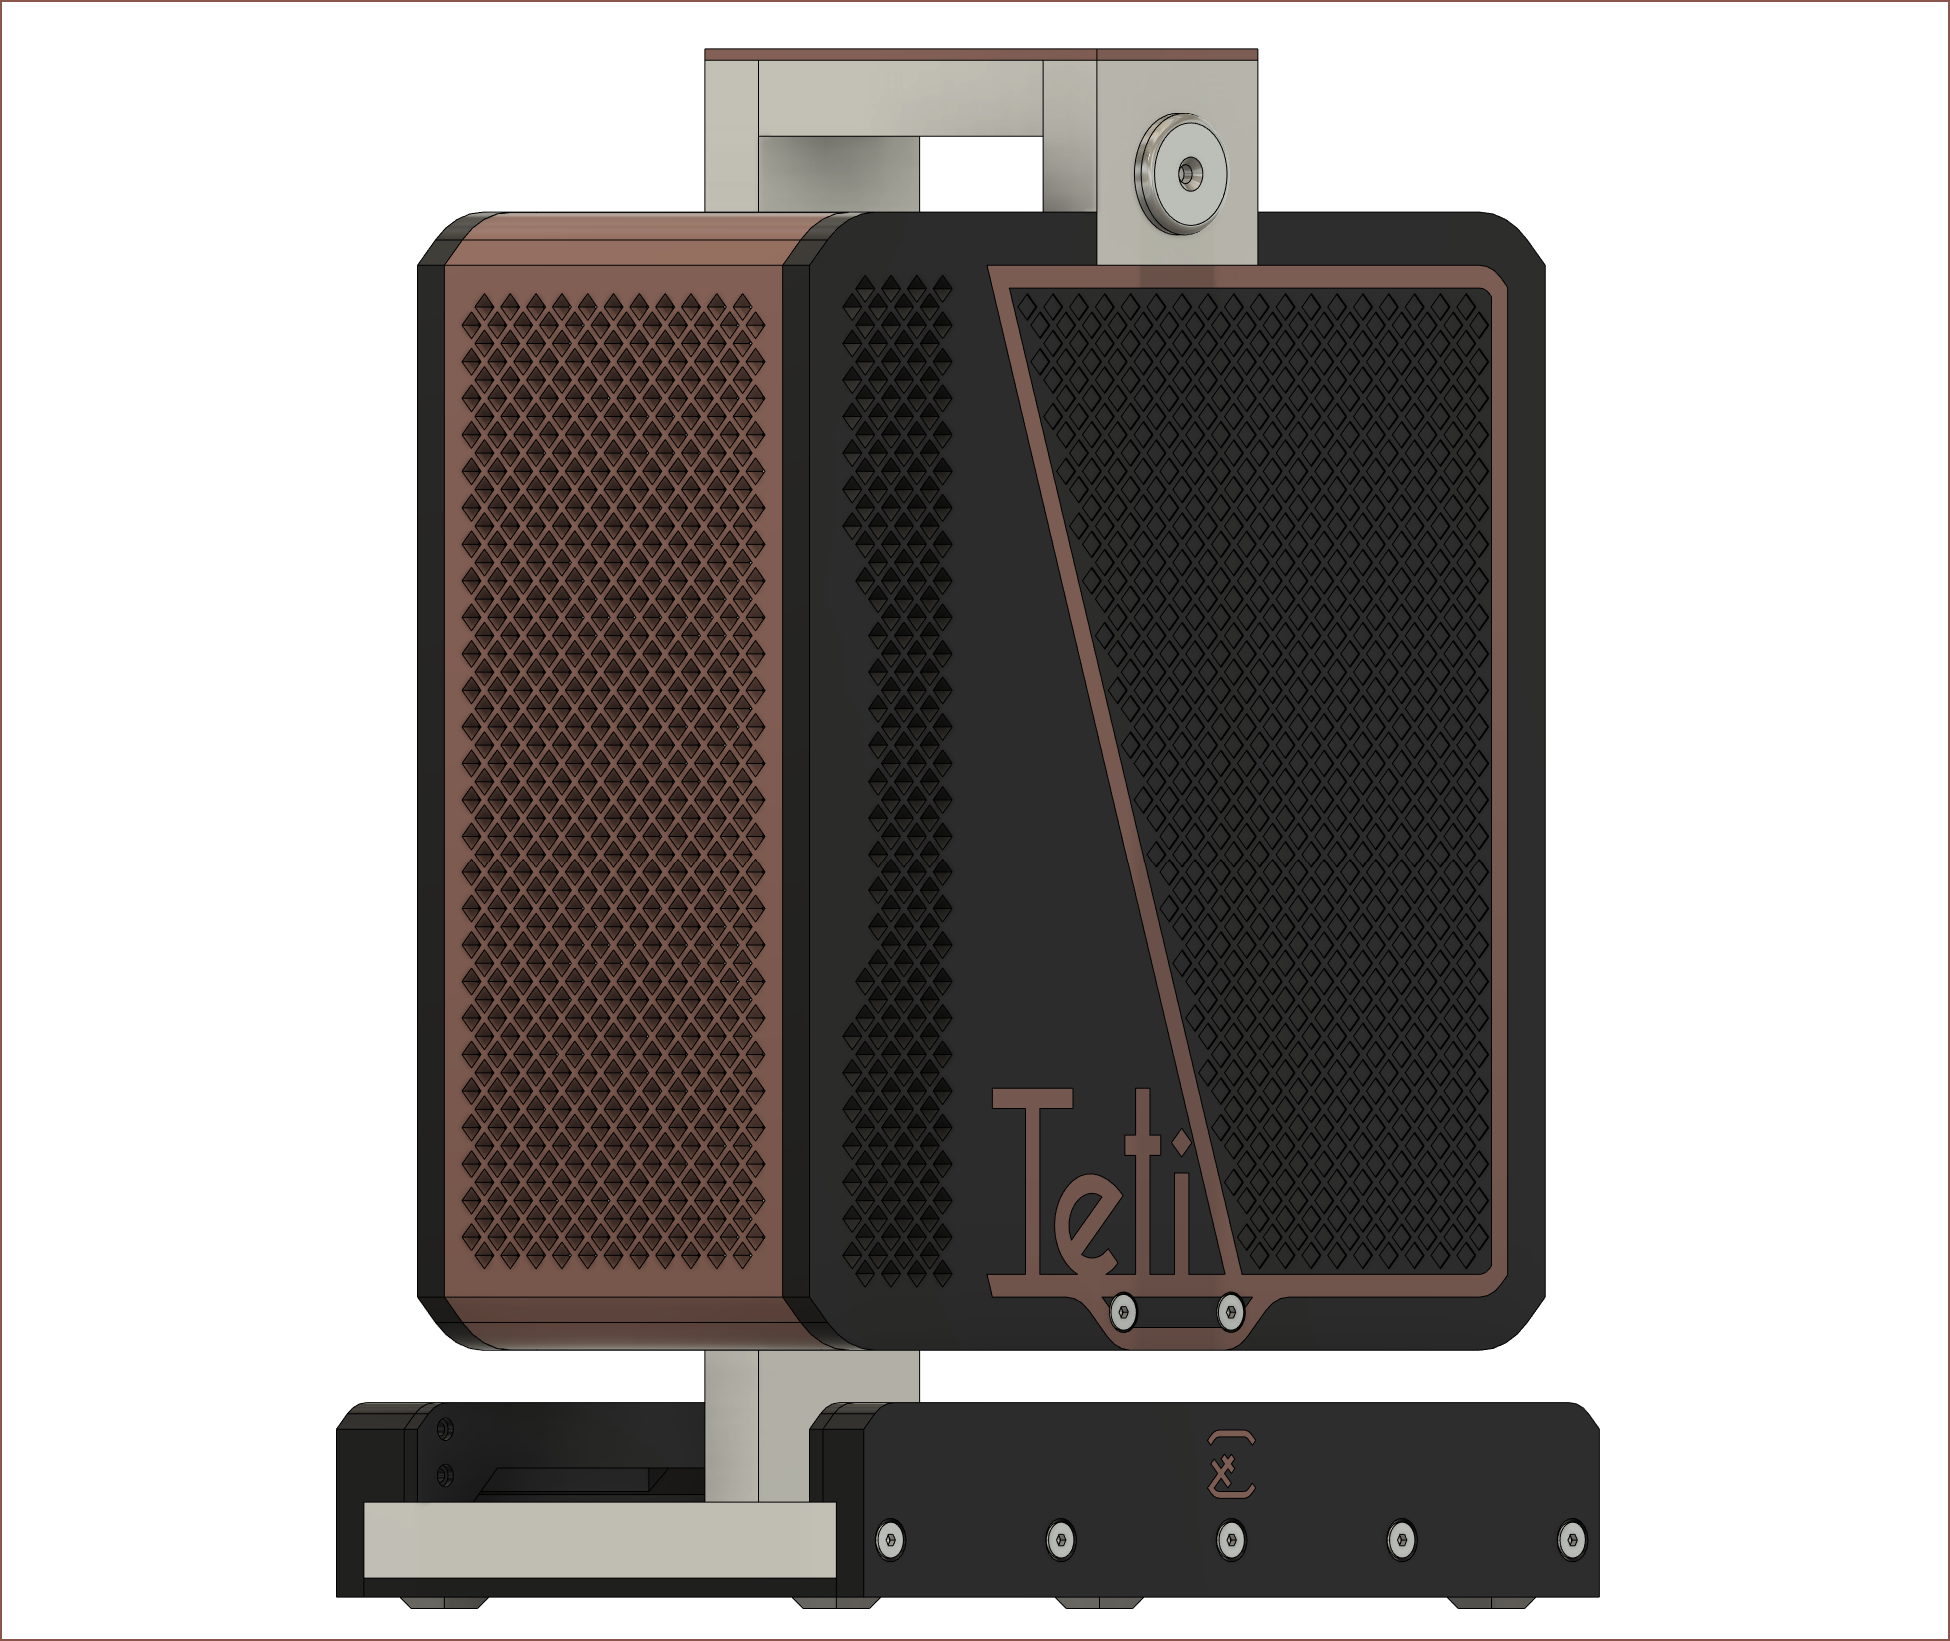
  • Using 3 connected with 1m cables and mounted onto Teti is for the desktop experience. I don't think I'd need 3, but I can say that having 3 boost "hacker vibes" to make using the bottom two screens feel more productive.

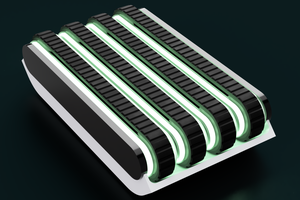
I dislike ultrawide setups due to the horizontal space and neck-turning needed, as well as monitor light coming in from the sides of my vision, so I'm mounting the 3 screens verticaly (which has around the same surface area as a curved 27" monitor in portrait orientation). This was partially inspired by the #T^2 Tiles [gd0095].

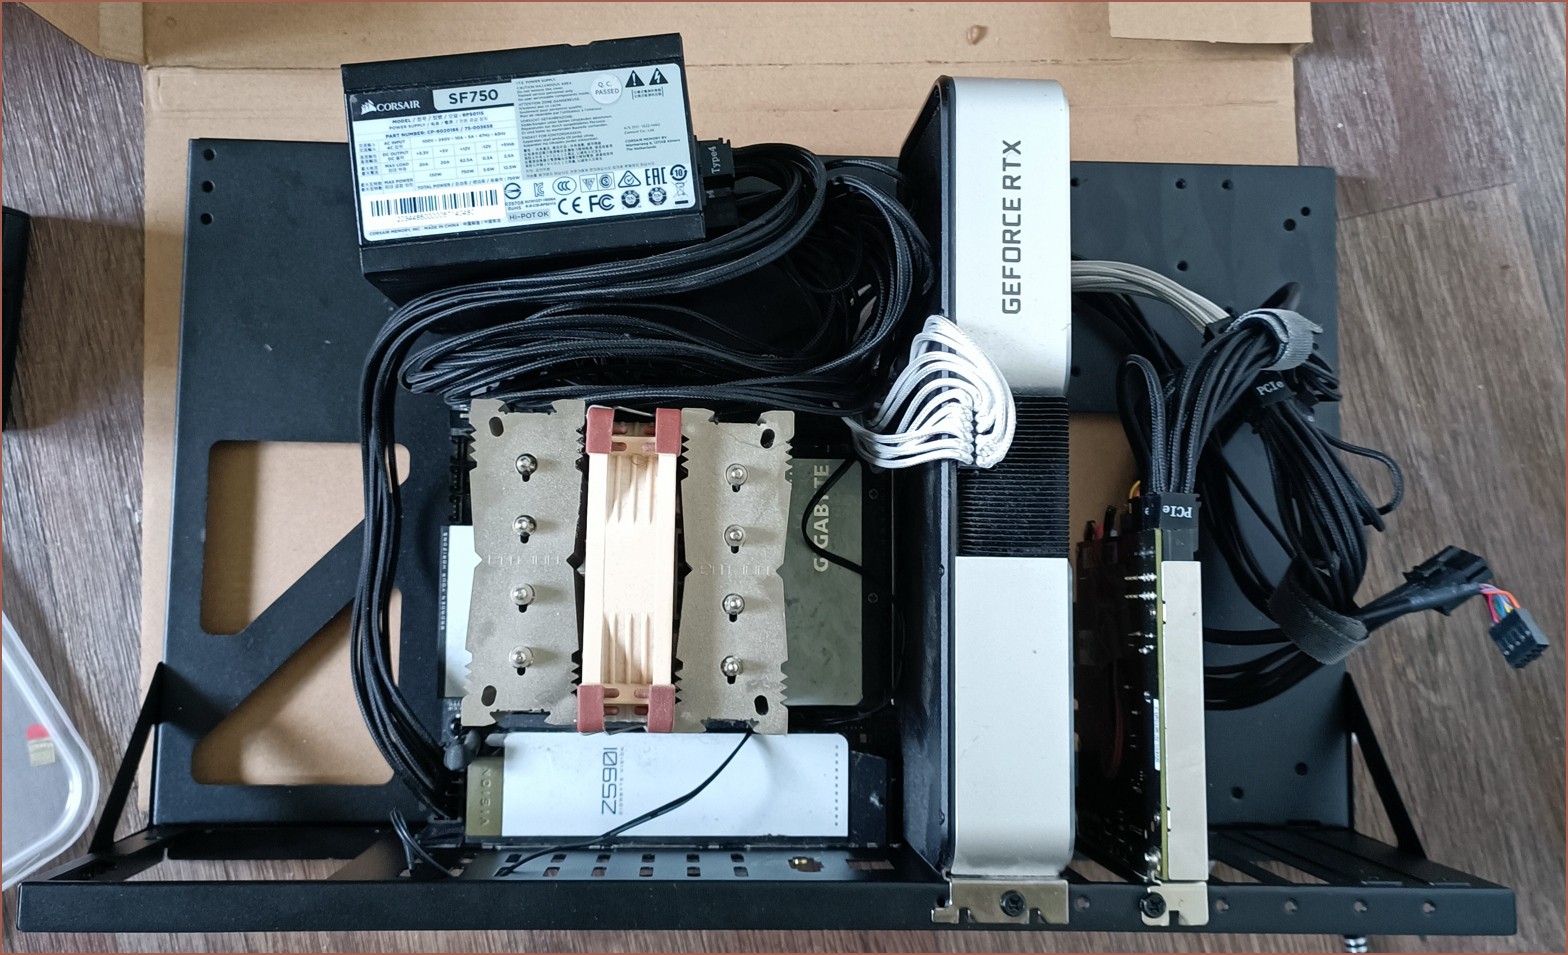
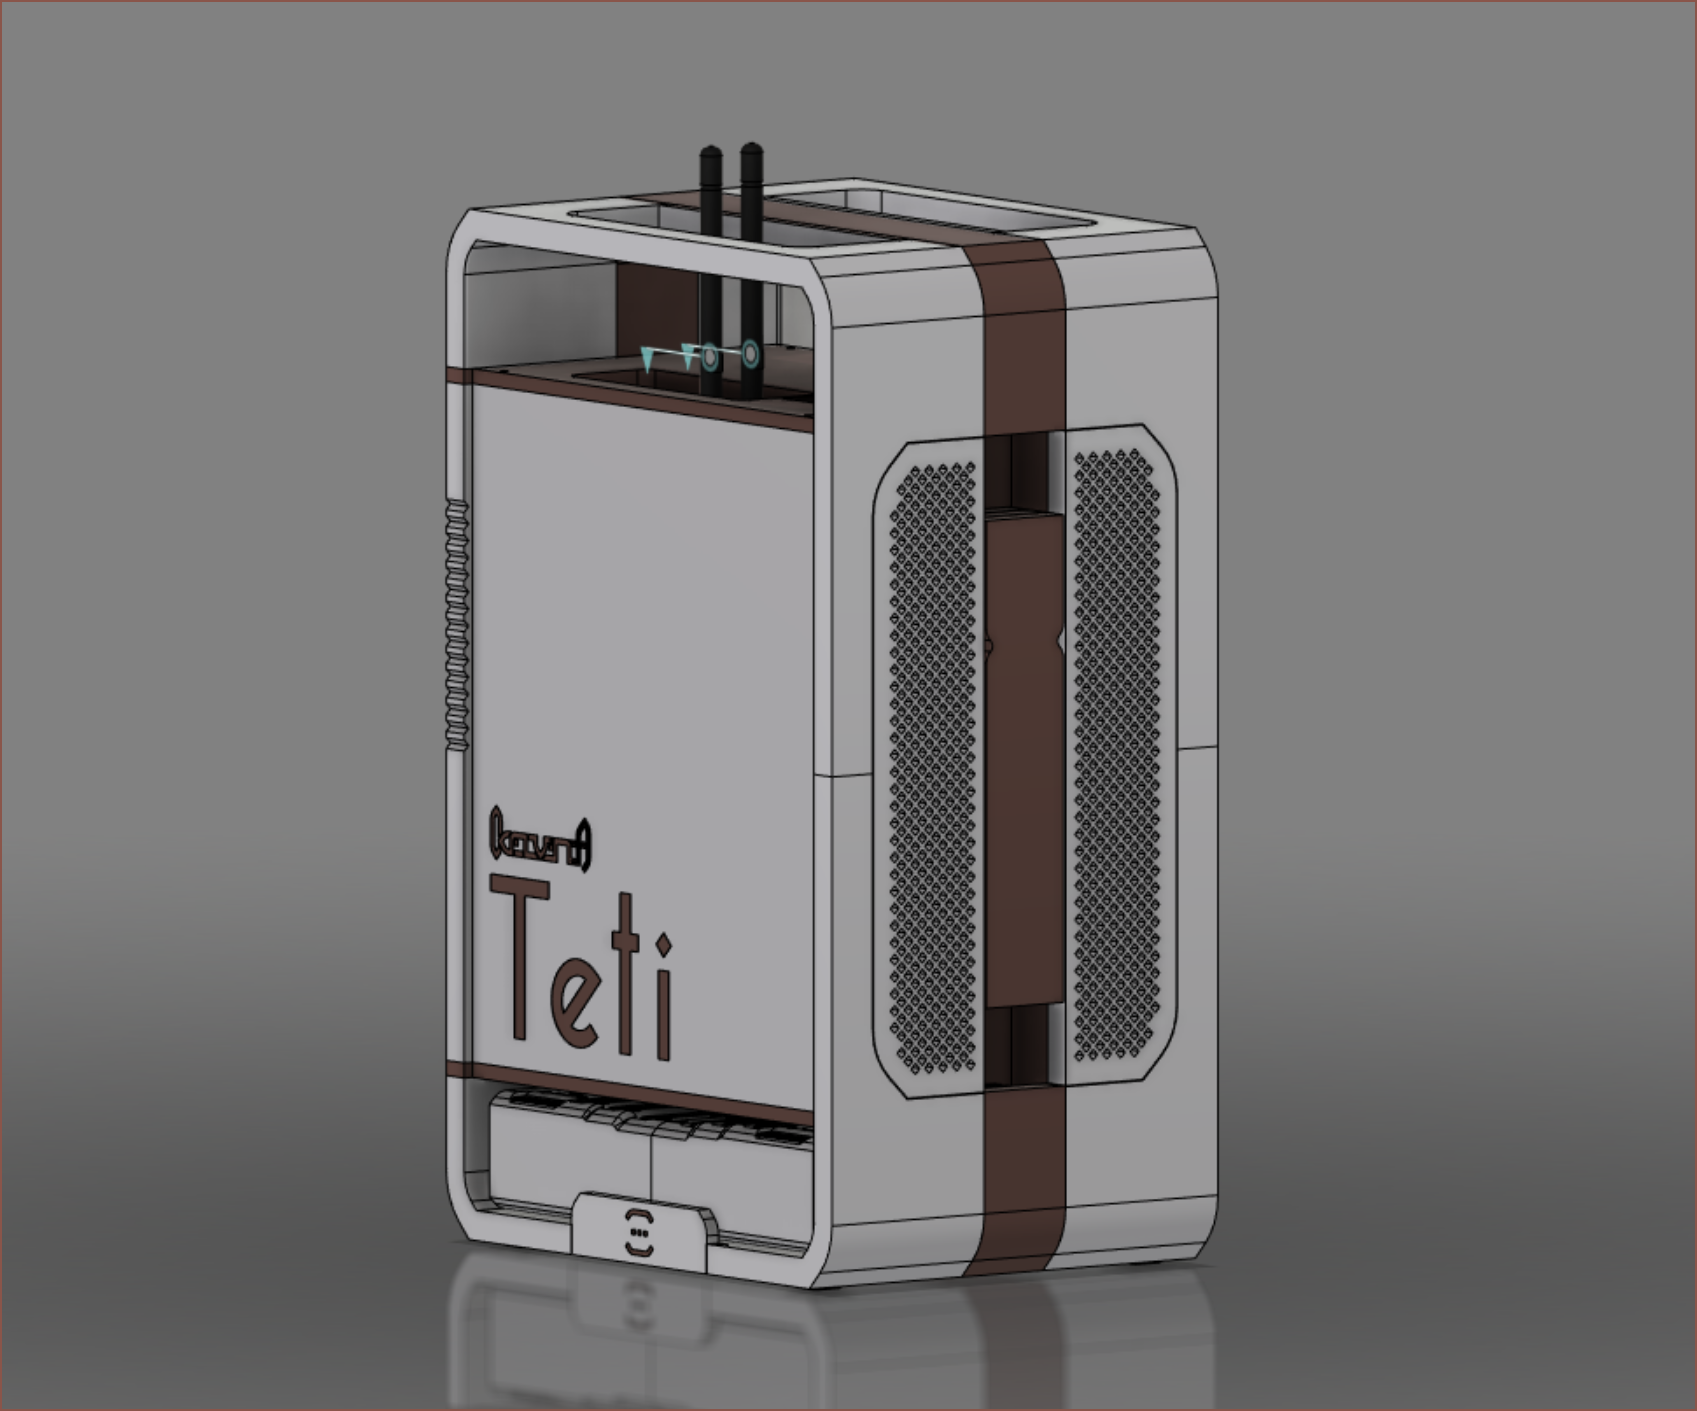
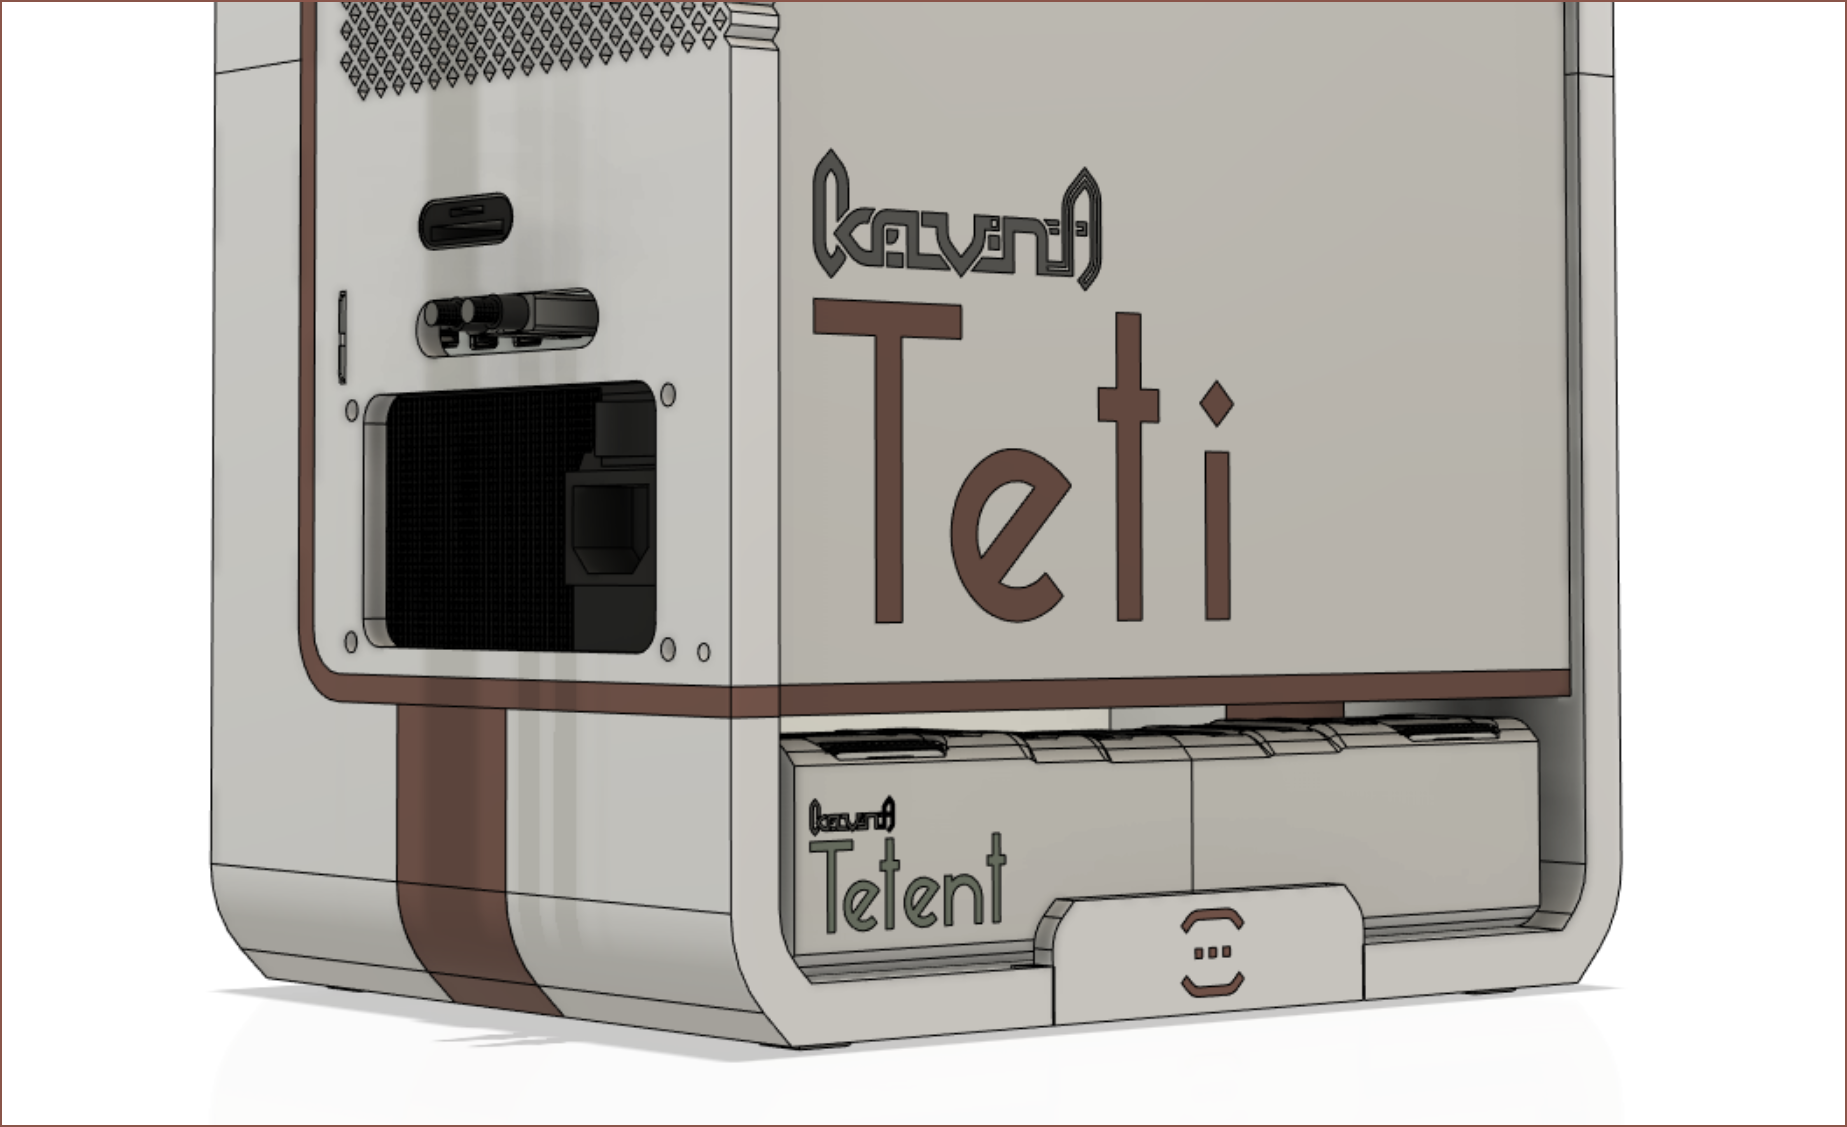
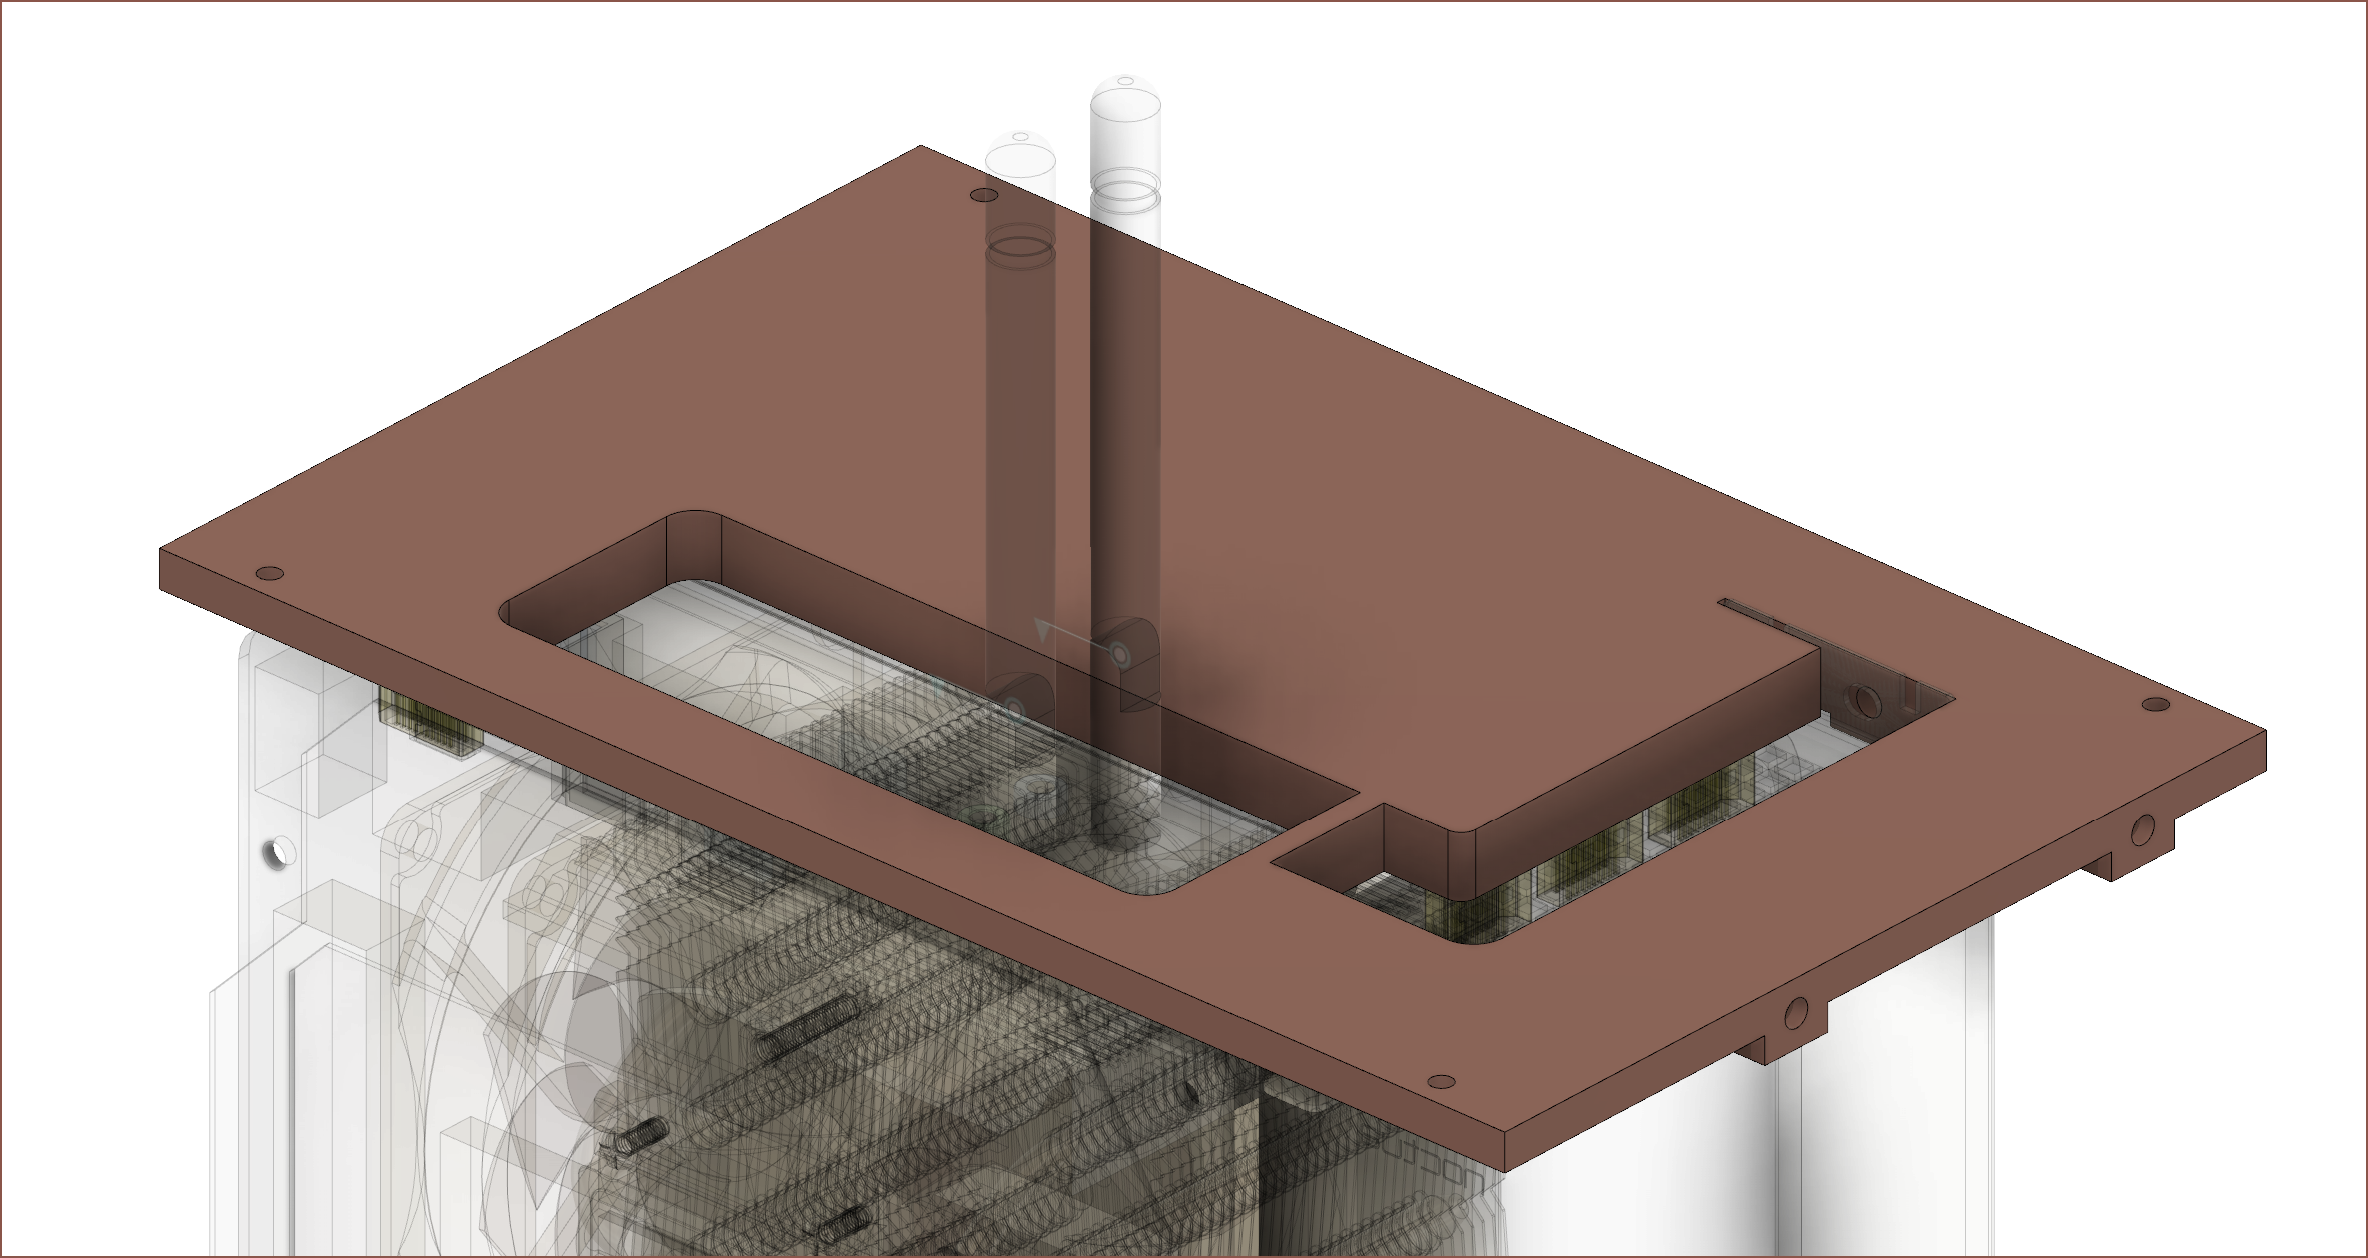
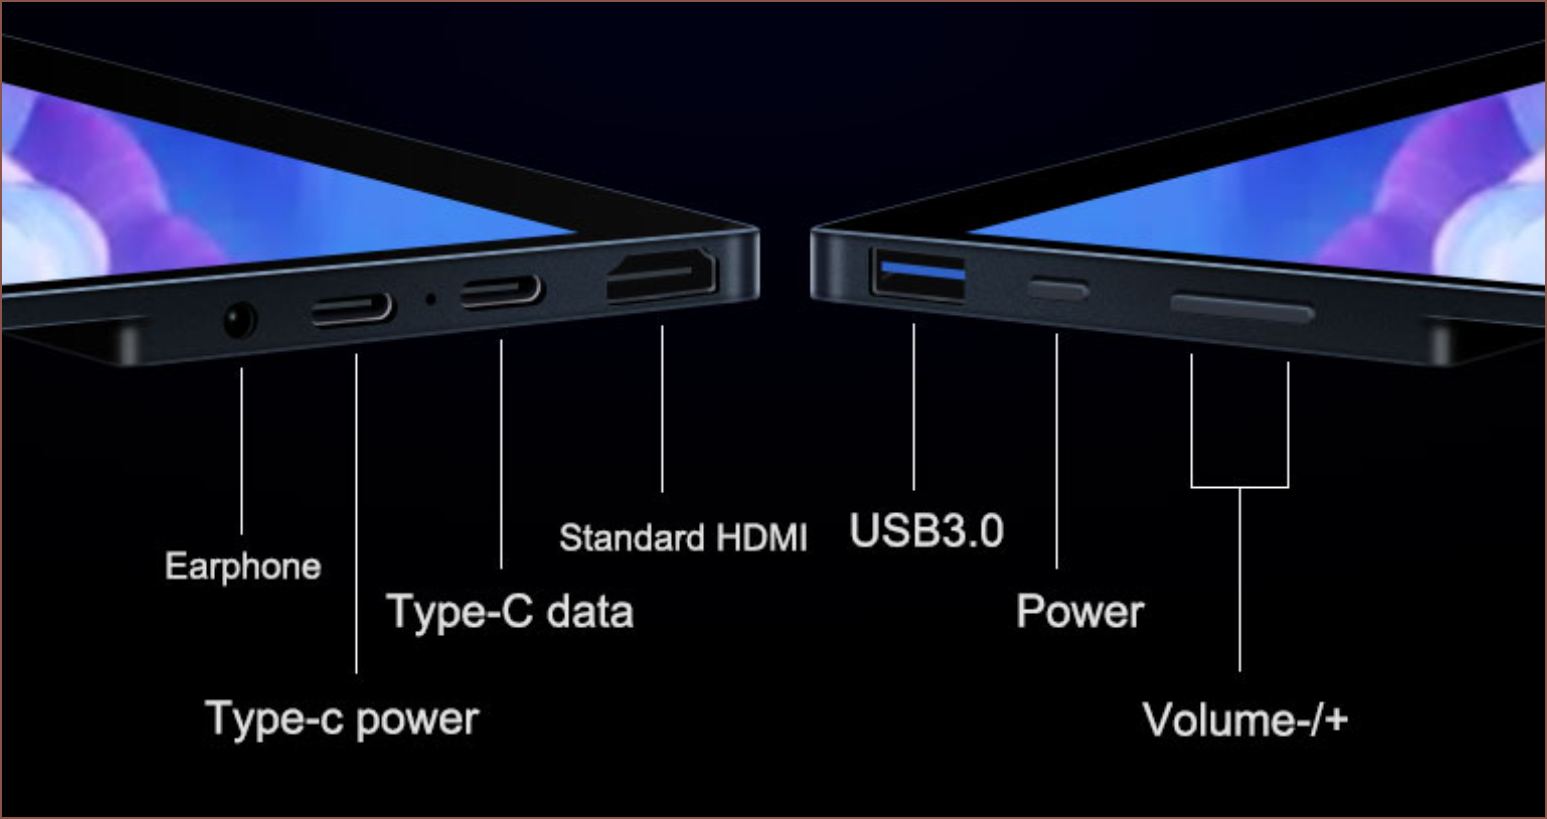
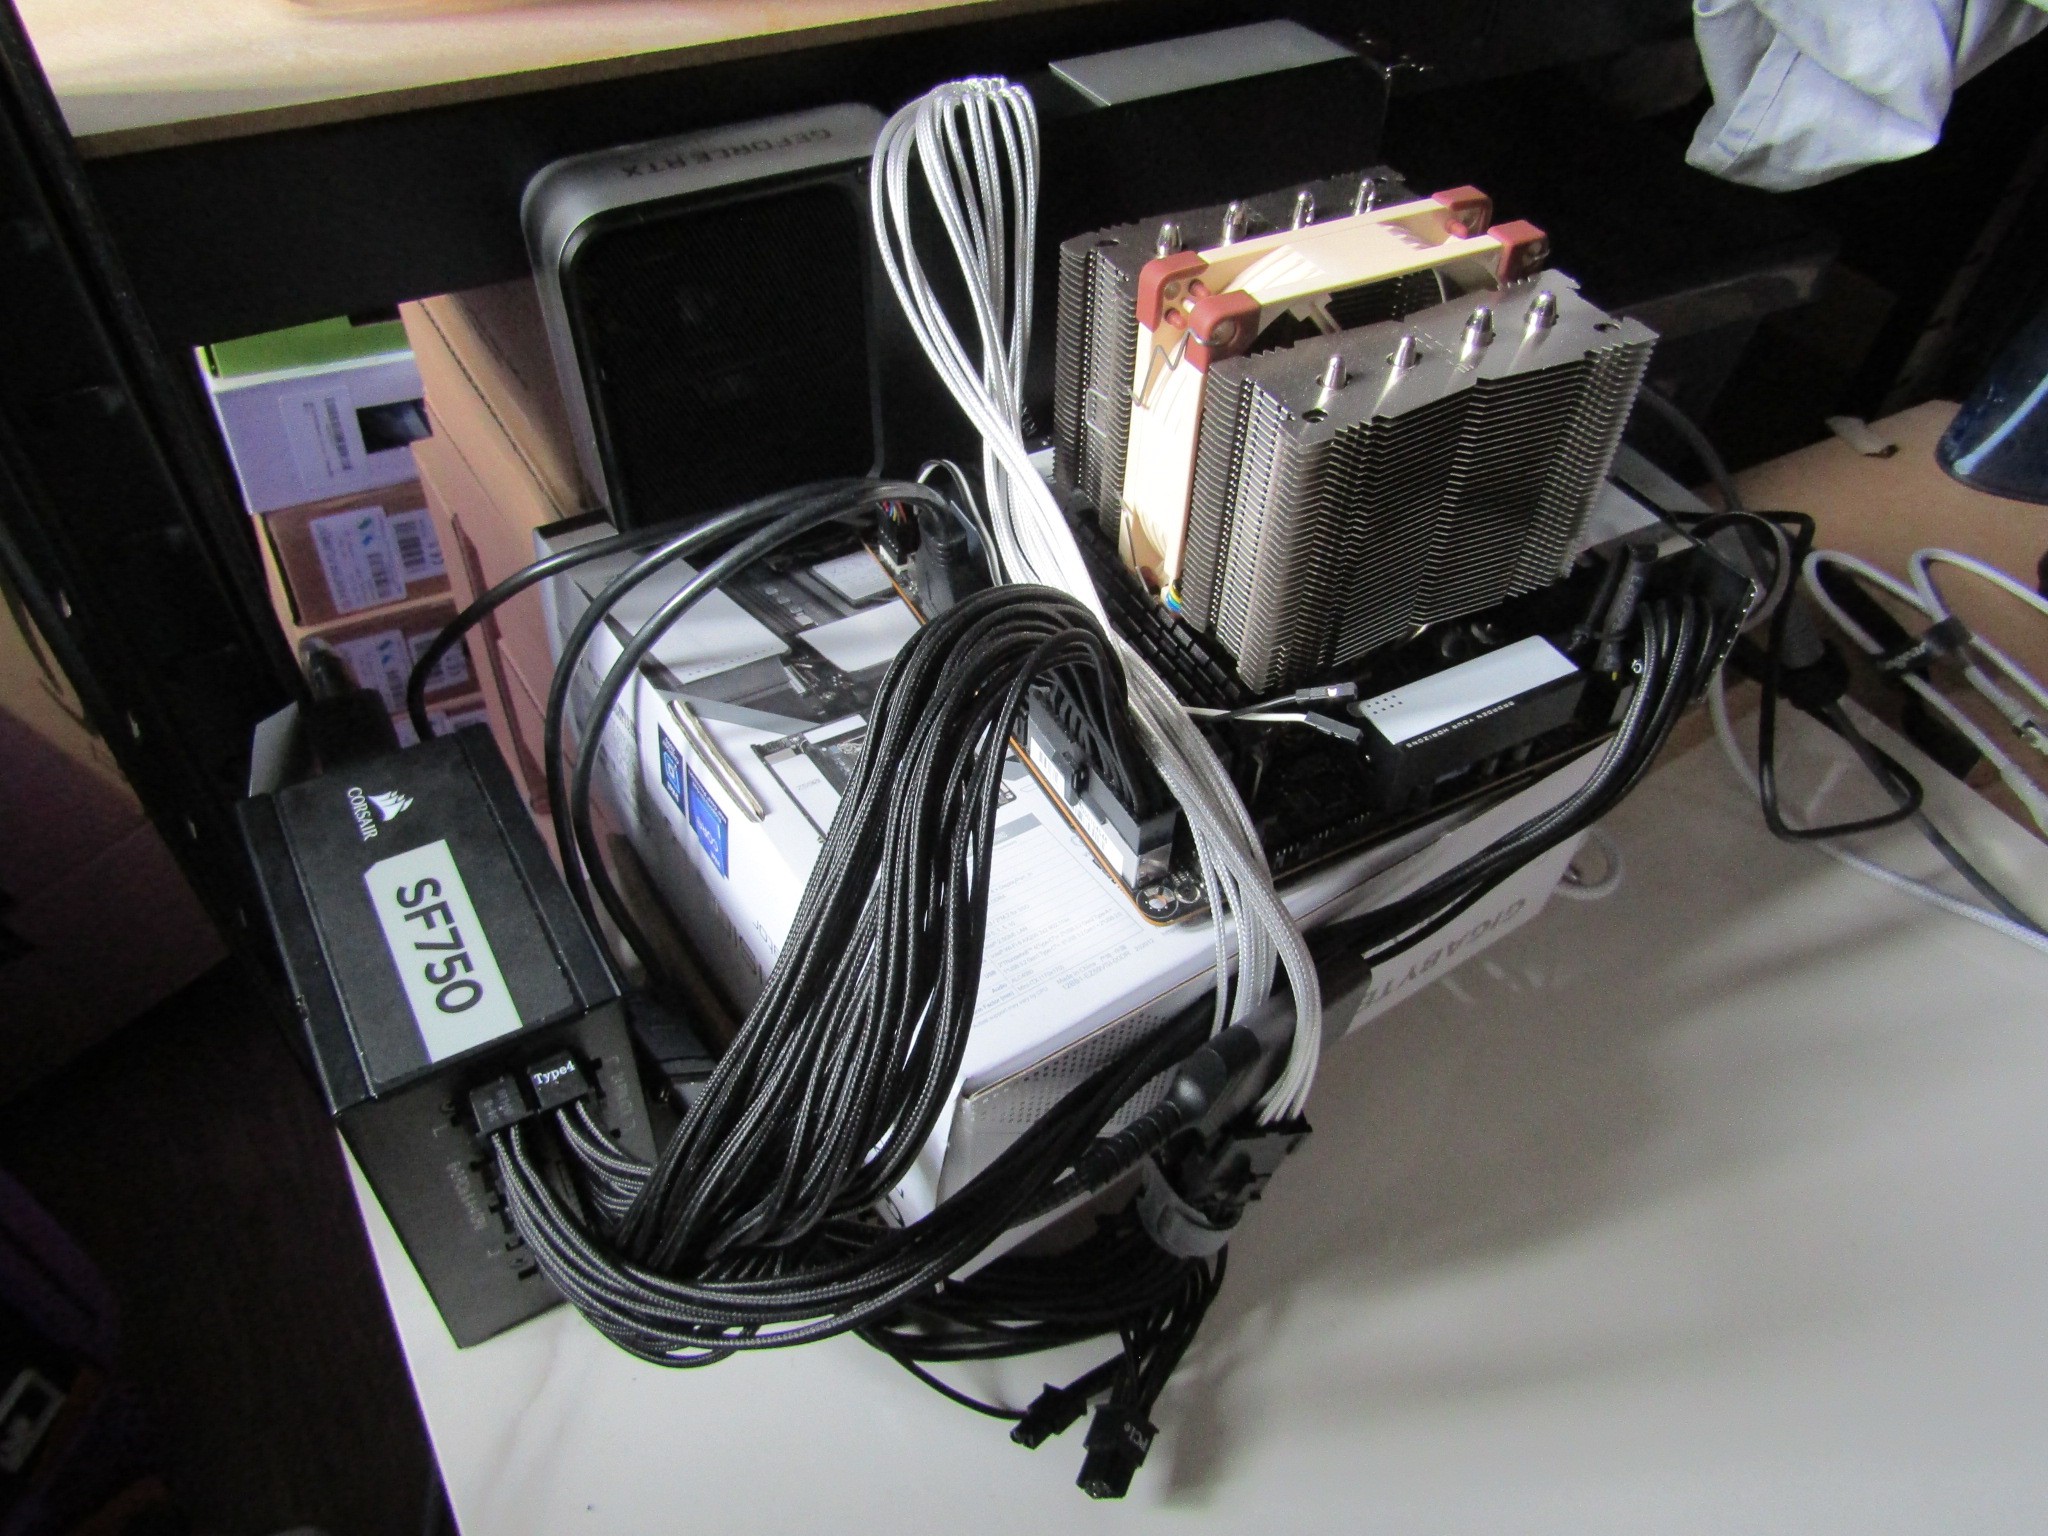
The system uses a Z590I Vision D ITX, which happened because AMD was out of stock of their 5900x for months after release and this ITX board came out with my wishlist IO panel, unlike the AMD options. I went with an 11600K I got for £219. I was also able to get an FE 3060TI in June 2021. A Gigabyte Titan Ridge is used for the other 2 USBC output ports for the screens. Other parts include:

  • 64GB 3200Mhz Blackout DDR4 RAM (that I got for £193.49)
  • Corsair SF750 PSU
  • Adata SX8200 2TB SSD

The keyboard and mouse project is #Tetent [gd0090] (though I'd also like to use #Tetent Timespy [gd0136]) and the backpack to carry it is called #TetInventory [gd0039]. For now, I intend to print it on the CR600S (see #Revolving Hotend [gd0012] and #Printer Repair [gd0137]).

Tetent and #Tetrinsic [gd0041] are the 2 projects mainly holding this project up.

  • [T] Moving on to a test bench

    kelvinA06/25/2026 at 19:12 0 comments

    It's been almost 6 years since I started conceptualising and modelling this PC and almost 5 years since being able to use it while it was perched on the box the motherboard came in. Due to starting my #Hexagon Bed for a 220 cm Mattress project, I thought it was good to do some 5-year maintenance.

    Since it's been 5 years, I can only come to the conclusion that I didn't need the portability I designed Teti for. Instead of 3 screens stacked ontop of each other, I've instead just used a single one of them in portrait mode for the past year. 

    Since I hadn't used it for some time, I also disabled the Gigabyte Titan Ridge in Device Manager because I was getting a stream of Error 17 in Event Viewer where "A corrected hardware error has occurred." with it about 30 times a second. It obviously isn't advisable to route a PCIe wire right under the CPU of all things, and then flatten the weight of the motherboard on it:

    The above was taken while I finally moved the components to an £11 test bench, which I got so that I could properly mount the PCIe expansion cards, not have the motherboard slide when plugging in/out ports and even get a power button! Yes, I've been having to close the circuit with jumper-wire and something conductive, such as wire snippers, to turn on the PC for 5 years.

    The space on the left is in part because there is only an ATX PSU mount, not SFX, and because said SFX PSU plugs into a stiff 4 metre cable I bought for that portability I mentioned. The 3060 Ti is merely a few millimetres shorter than the test bench, so I think it's a nice fit.

    For the aforementioned #Hexagon Bed for a 220 cm Mattress, I've been looking in a slightly larger, high refresh rate monitor with a small "chin" bezel. The only one that does all that without giving up touch is a Realza 18" 3840 x 2400 120Hz monitor:

    I plan to go down from 150% on the 15.6" the UHD screen I use now to 125%, increasing my portrait logical resolution from 1440 x 2560 to 1920 x 3072. 

    I looked in the documentation of the Titan Ridge and it supports full DisplayPort 1.4, not allegedly capping the framerate at 4K60 like the Vision D Z590I motherboard documentation claims. Using a bandwidth calculator, a little over 100Hz is possible without display stream compression; I've heard some NVidia features turn off when its in use, though I don't think I've ever used them. I believe monitors over 16 inches need a little more power than 15W, the minimum spec for USB-C ports. Since I already own the Titan Ridge, which has a 27W port that can inject DP into USB-C, the most seamless and lowest cost solution is to simply replace the old NVMe to PCIe riser cable with a new one for £8 (which is half I paid for half the speed 5 years ago):

    I believe the power terminals are only for cards that need more than NVMe yet do not feature their own 12V sockets, which the Titan RIdge has.

    This test bench has an oh-so-convenient set of cutouts to port it right on over:

    This, and the lack of small cases that would support this, is one of the reasons why I got this test bench.

    As for #Tetent [gd0090], it means there are no longer any sizing limits.

  • [M] Tetent Concept3

    kelvinA03/26/2023 at 17:57 0 comments

    Wow it looks like it's all coming together. I've composited the render similar to how it's been done for the PS5 below:

    Sony PlayStation 5 (PS5) Standard Edition 825GB Console – Mulbison ...

    Just like the inspirations.

    I will write a more detailed log in the #Tetent [gd0090] project, but I was seeing if adding a copper line would tie the look together with Teti and I think it does and I had to write about it ASAP. 

    The stripe doesn't go all the way around the back (similar to Teti) and I think that preserves the pure white look from the 3rd person perspective:

    I also like the larger diamond squares as it looks more modern than if I had a speaker grille with squares the same size as Teti. It also looks like a brand image decision and not a generic grille. I also think that, from the first person perspective, there's enough copper to break up the otherwise bland looking white shape.

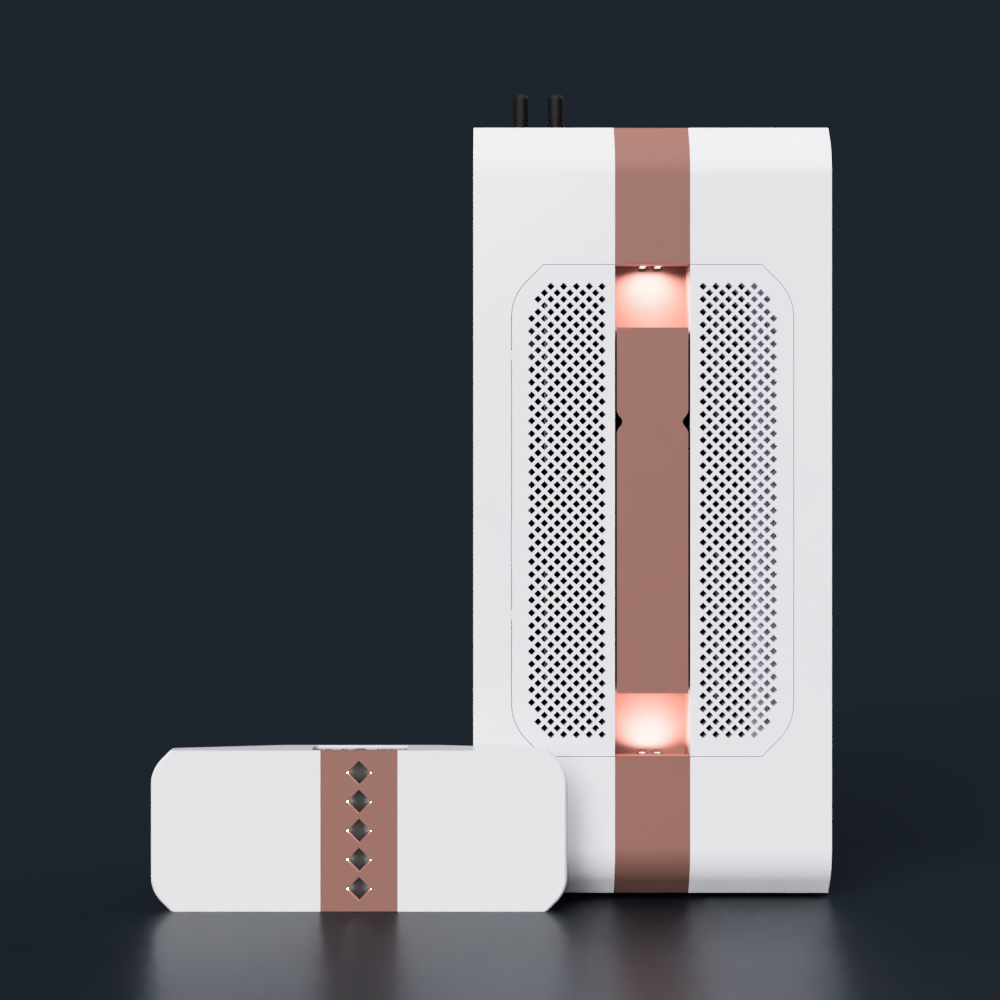
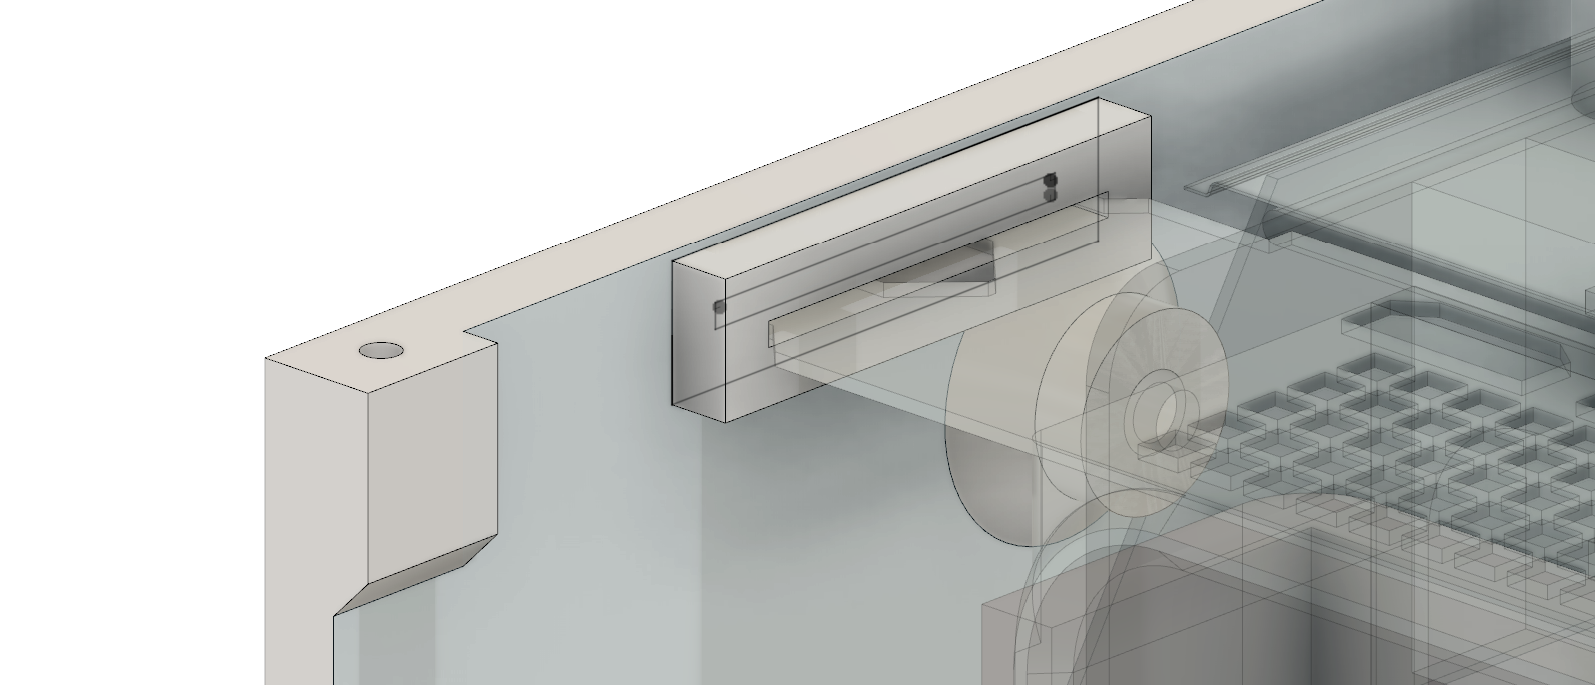
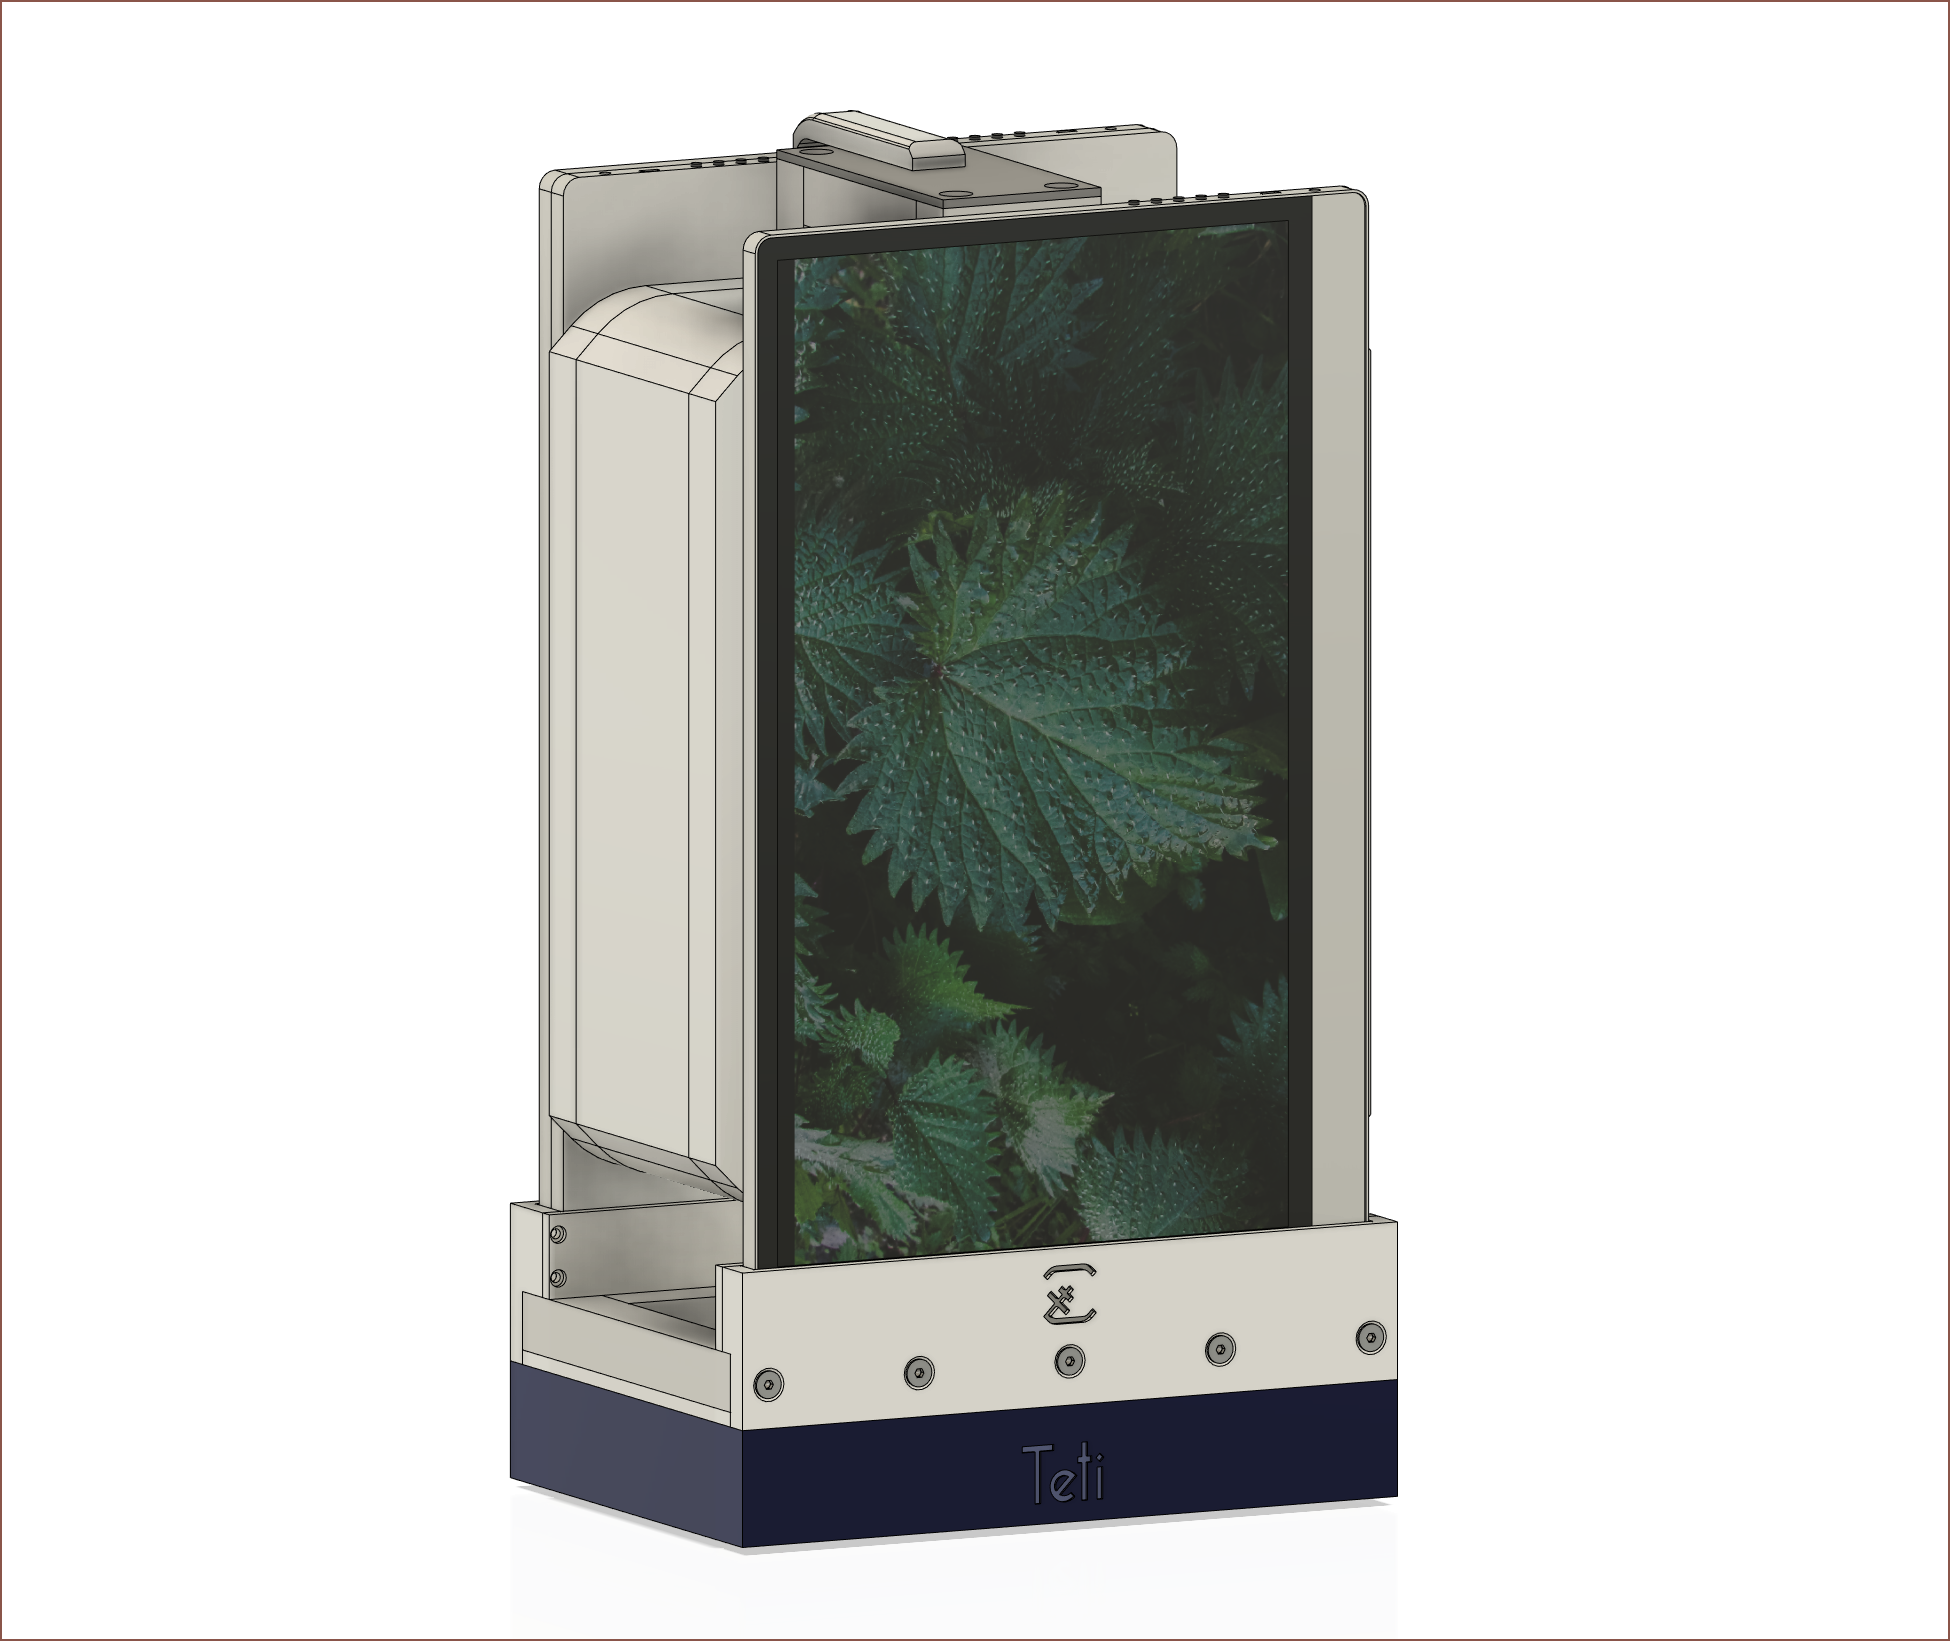
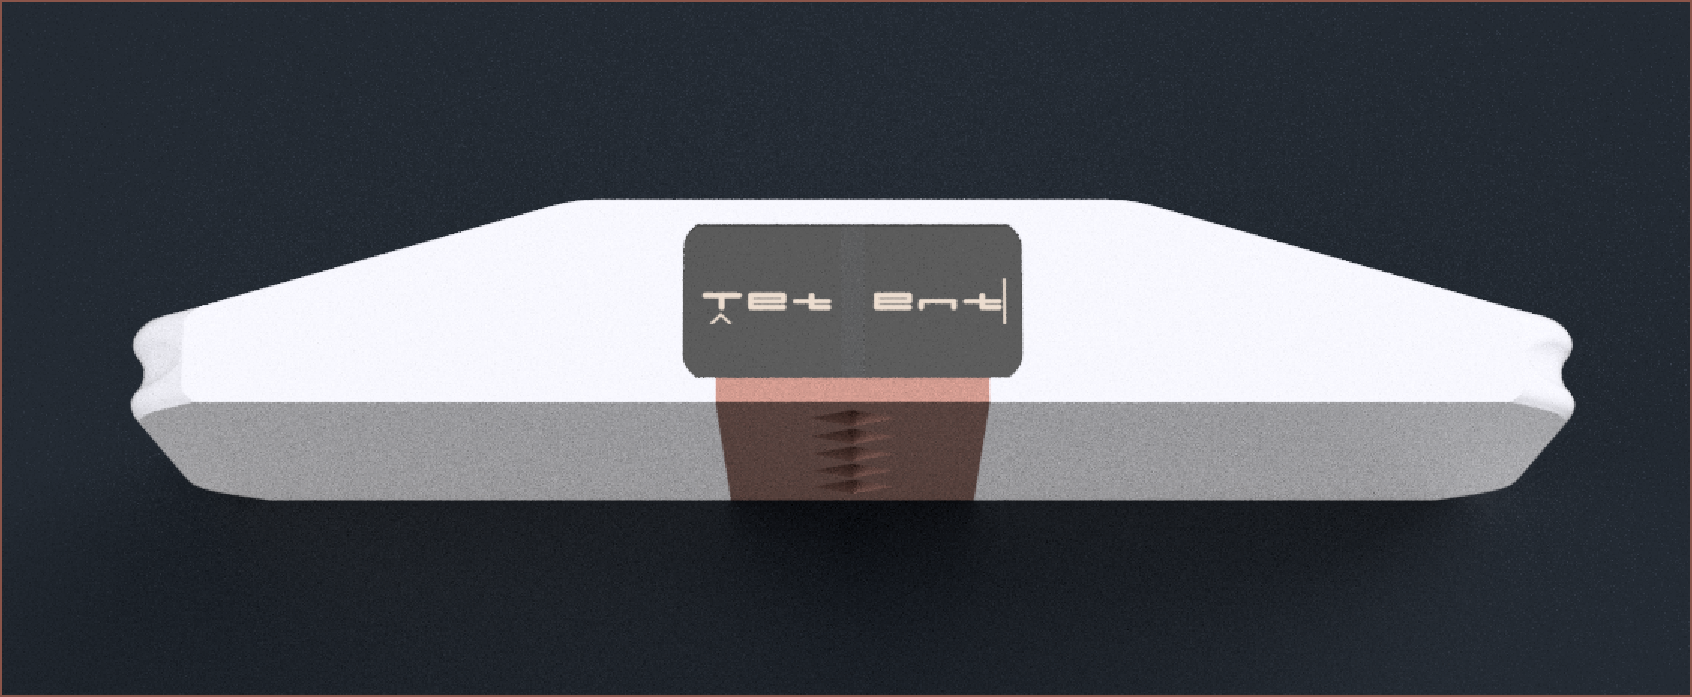
    Lastly, I've added the same reflective LCDs on the bottom. The BOM of this "controller" is over £200, so I don't think it's too bad to add 10% for the satisfying convinience of not having to worry about device orientation, especially when Tetent is in a pocket. Just grab, calibrate and type.

    New main project render

  • [M] Small file updates

    kelvinA09/19/2022 at 10:21 0 comments

    Tetent as modelled in https://hackaday.io/project/184181/log/211077

    Width increased from 185 to 190mm.

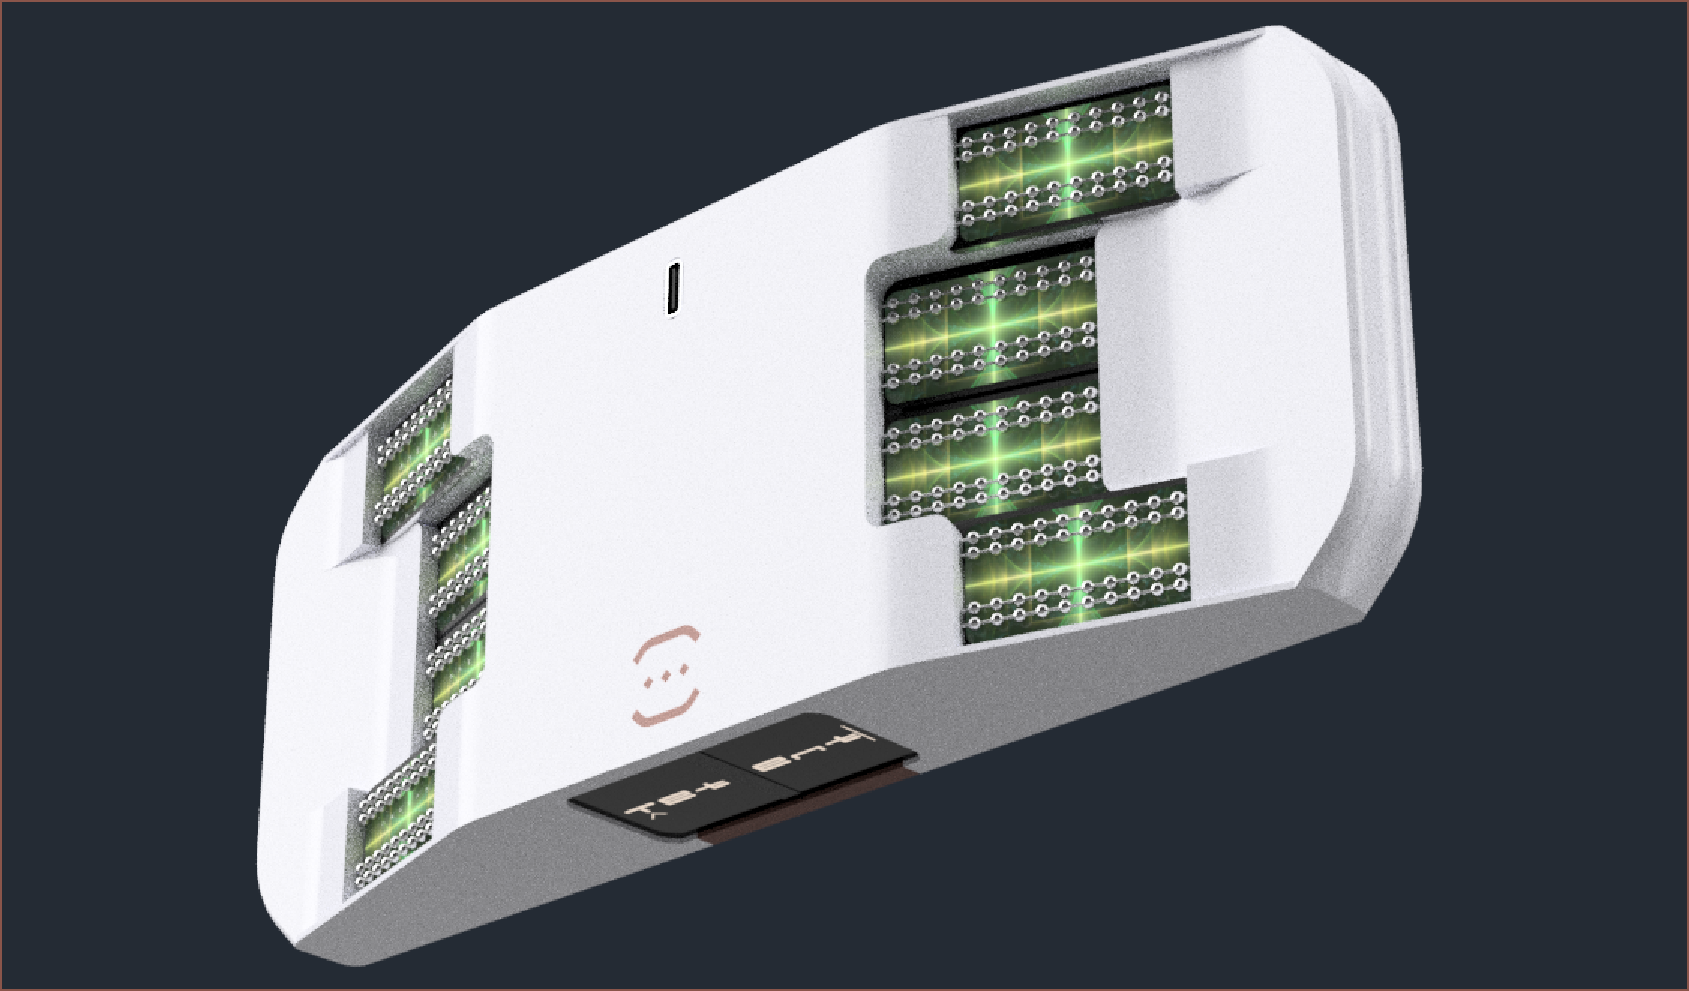
    The screen holders have been increased to the same length as the two Tetent's, which is currently 214mm. The print thickness has decreased slightly from 12 to 11mm so that they'd fit. This decreases the pressure exerted on the screens, and should make the tablet stand and laptop mode more stable.

    Wed 21st Sep

    Following the PCB design of #Tetrinsic [gd0041], I've updated the branding of #Tetent [gd0090] and Teti.

  • [M] Small tweaks

    kelvinA07/13/2022 at 16:21 0 comments

    First was adding some faces to the mini logos so that they can be lifted up and slotted back in. This is to allow storage of the Tetents.
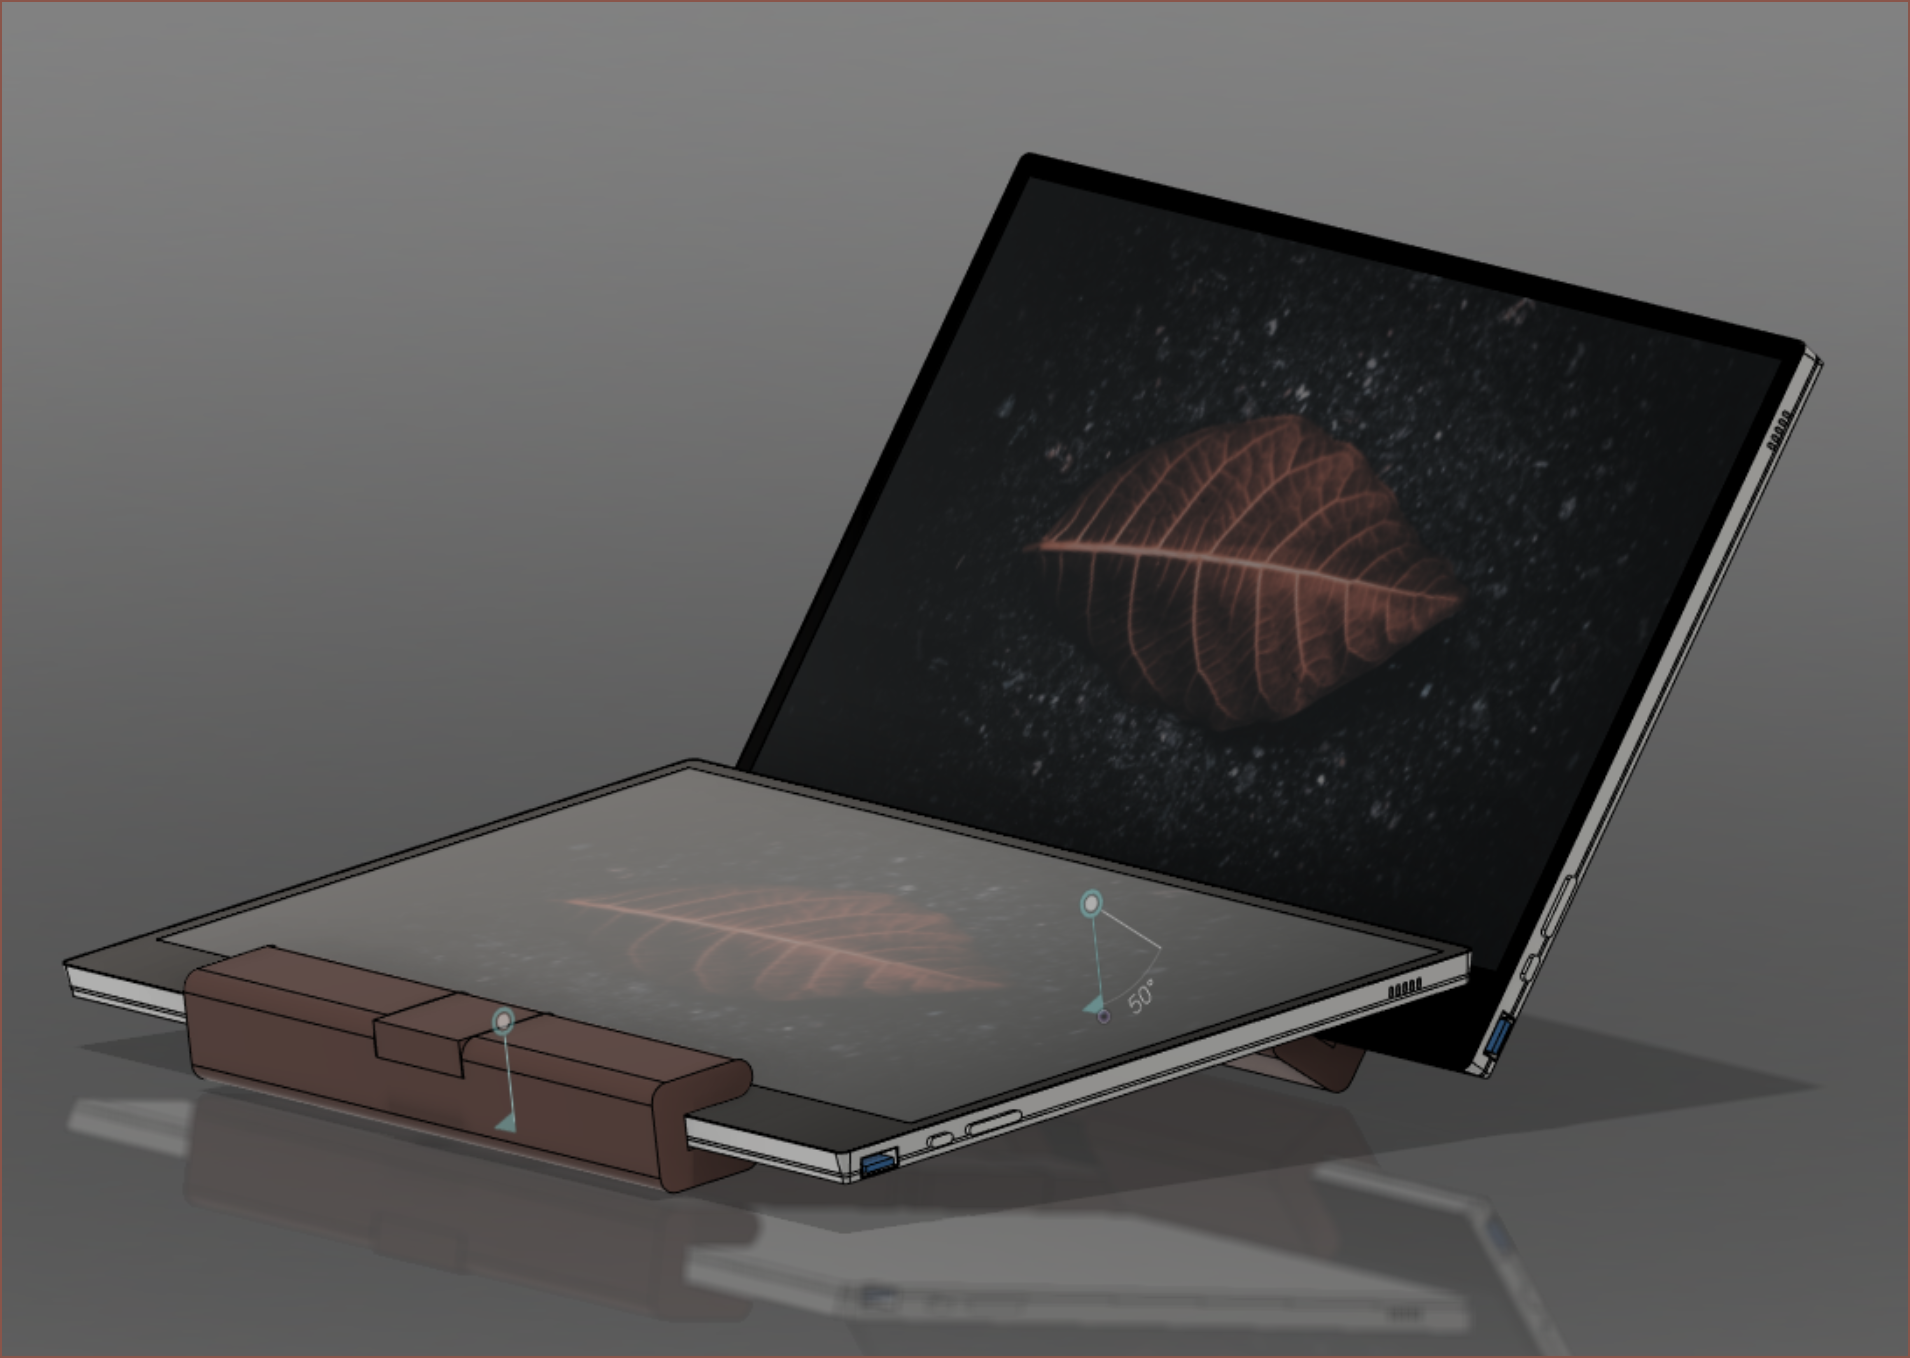
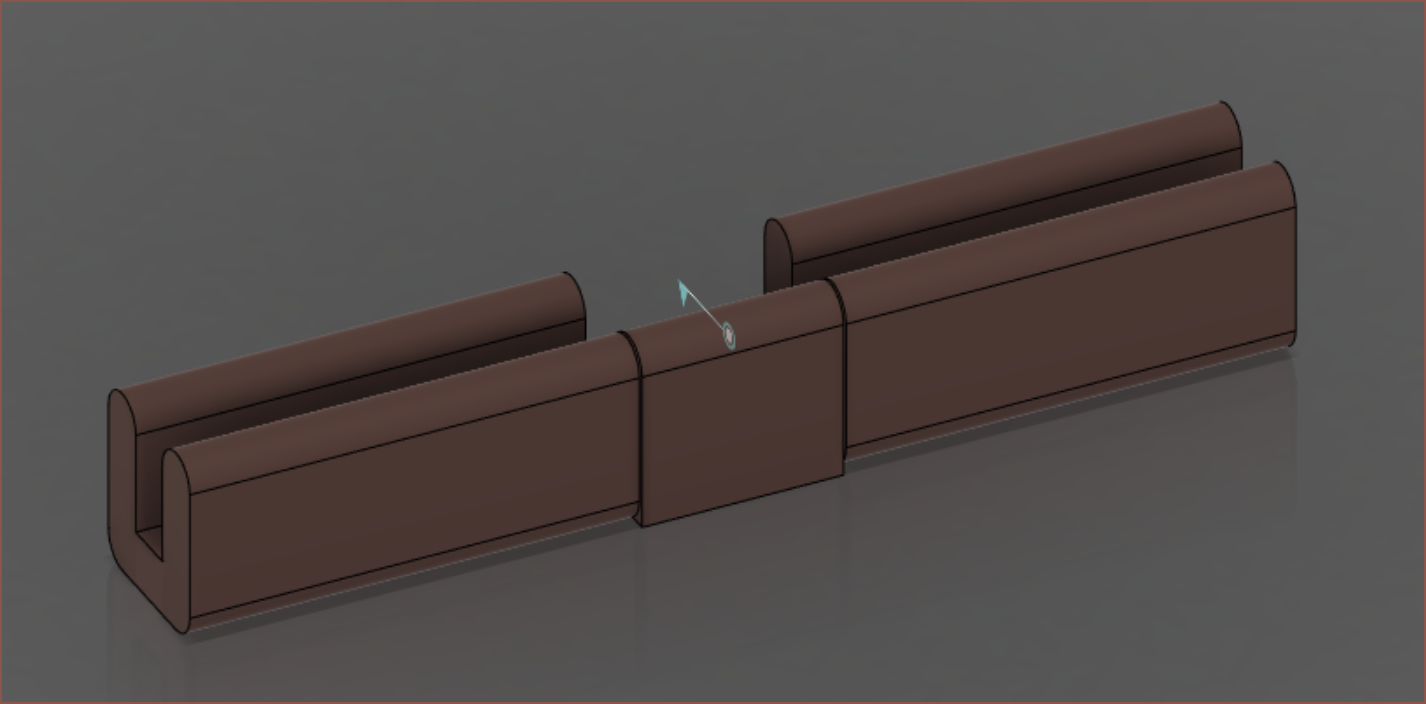
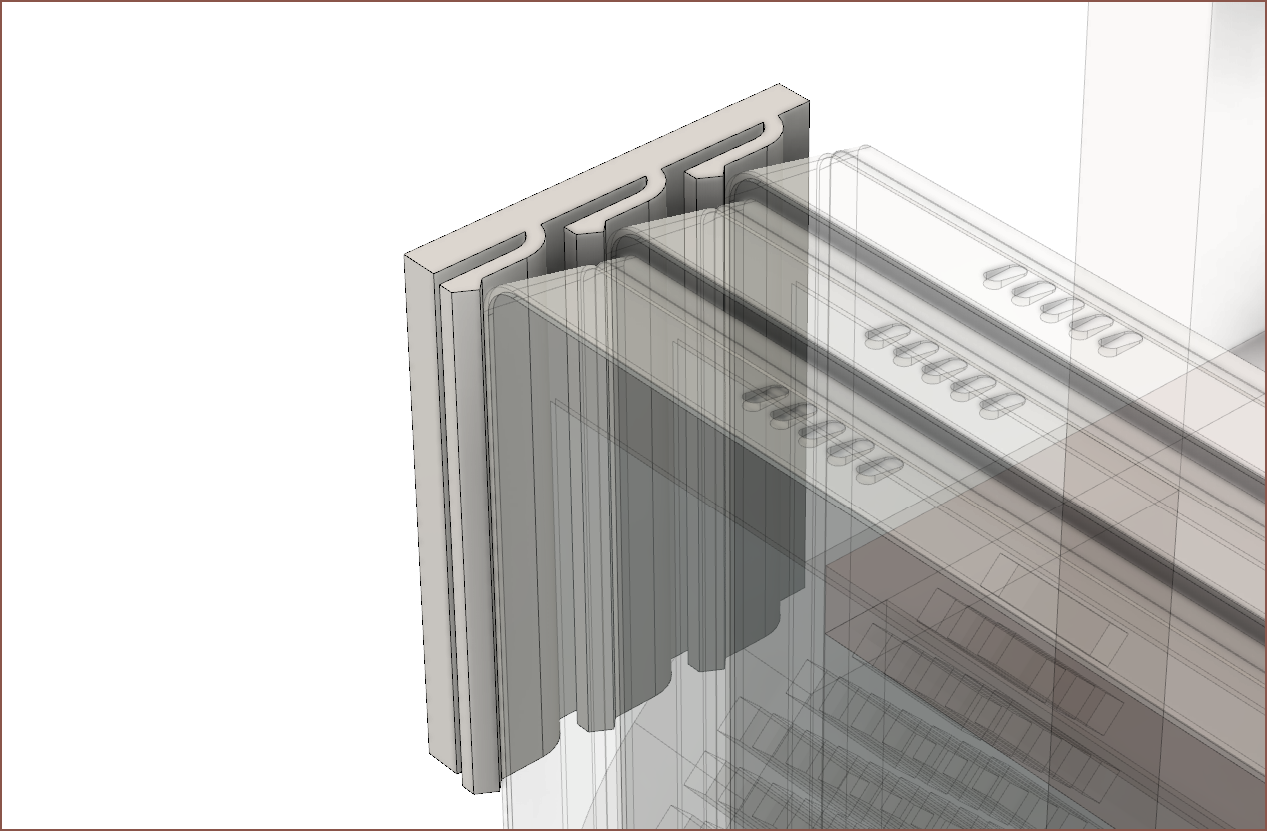
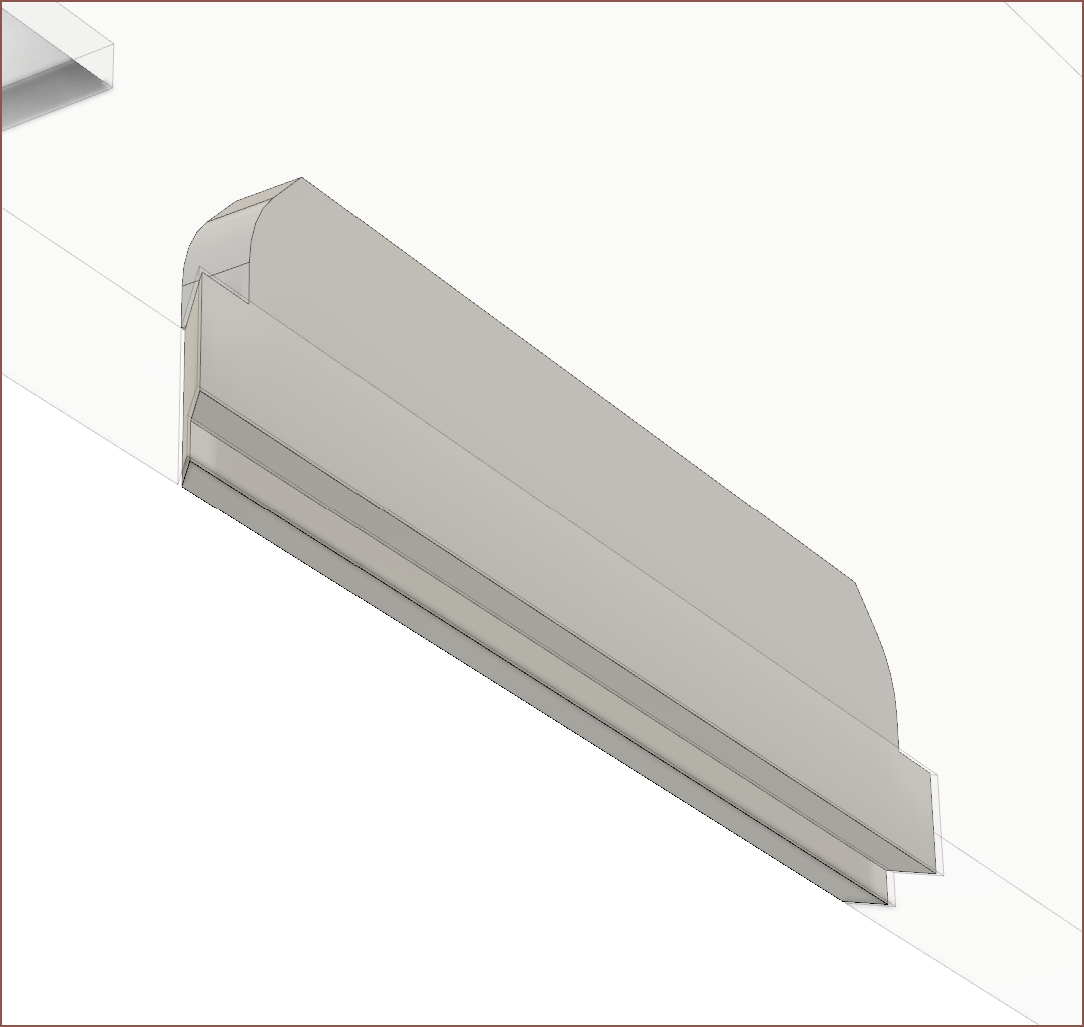
Then I modelled the clips that will hopefully keep the screens in place.

    Currently, I'm adding mounting holes and slots everywhere, in hopes of being able to print a minimum viable box.

    I don't know why I didn't think about it until I woke up today, but I could've designed and printed these sections of the case and have my PC in some resemblance to a box instead of living ontop of the motherboard's packaging box.

    It also allows me to make sure all the wires fit in here before I start printing the rest of the case.

  • [R] OLED Screens

    kelvinA07/11/2022 at 01:06 0 comments

    I just found out that 4K touch portable OLED screens now exist, and at a price that is actually affordable: https://www.aliexpress.com/item/1005004110616192.html

    If these were around in Dec 2020 when I bought my screens, I most likely would've jumped on these instead. Thinner, deeper blacks, more colours, built in stand and has a full sized USB? Yes please.

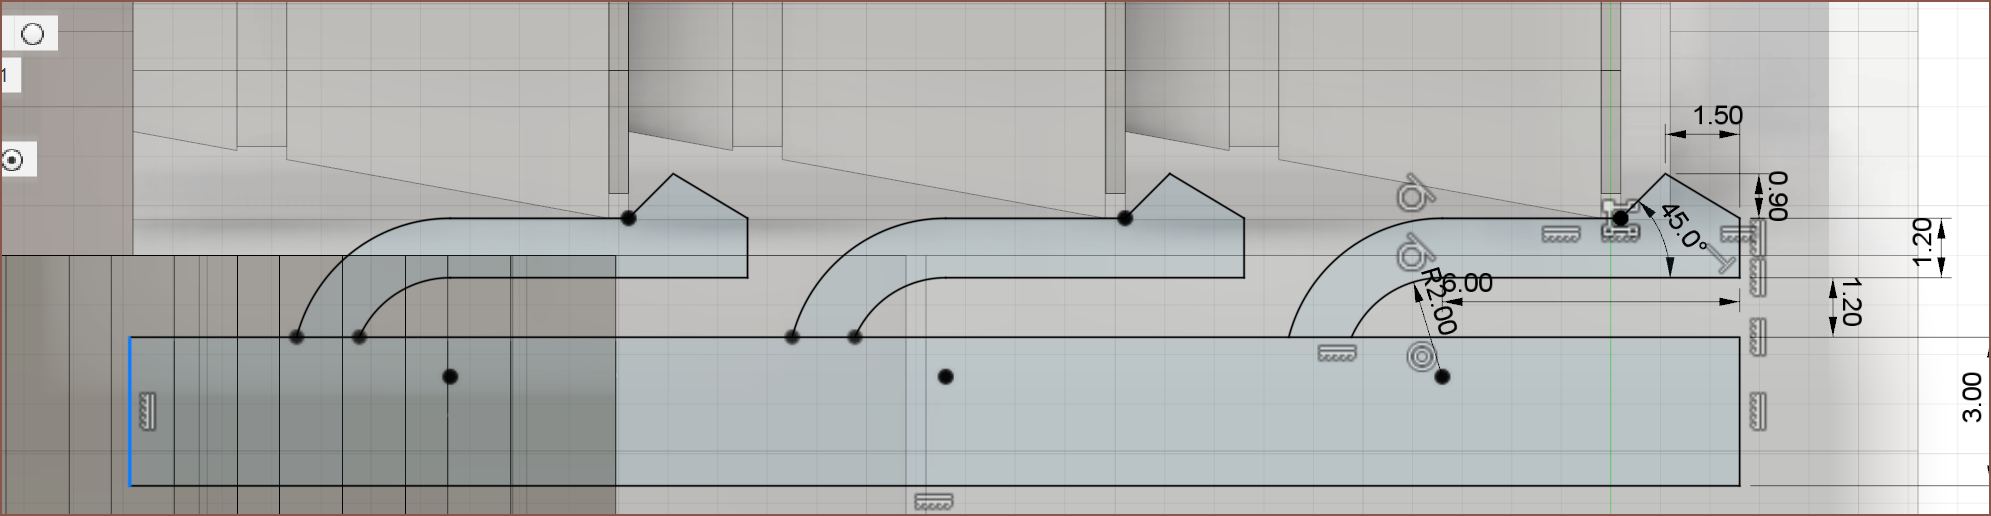
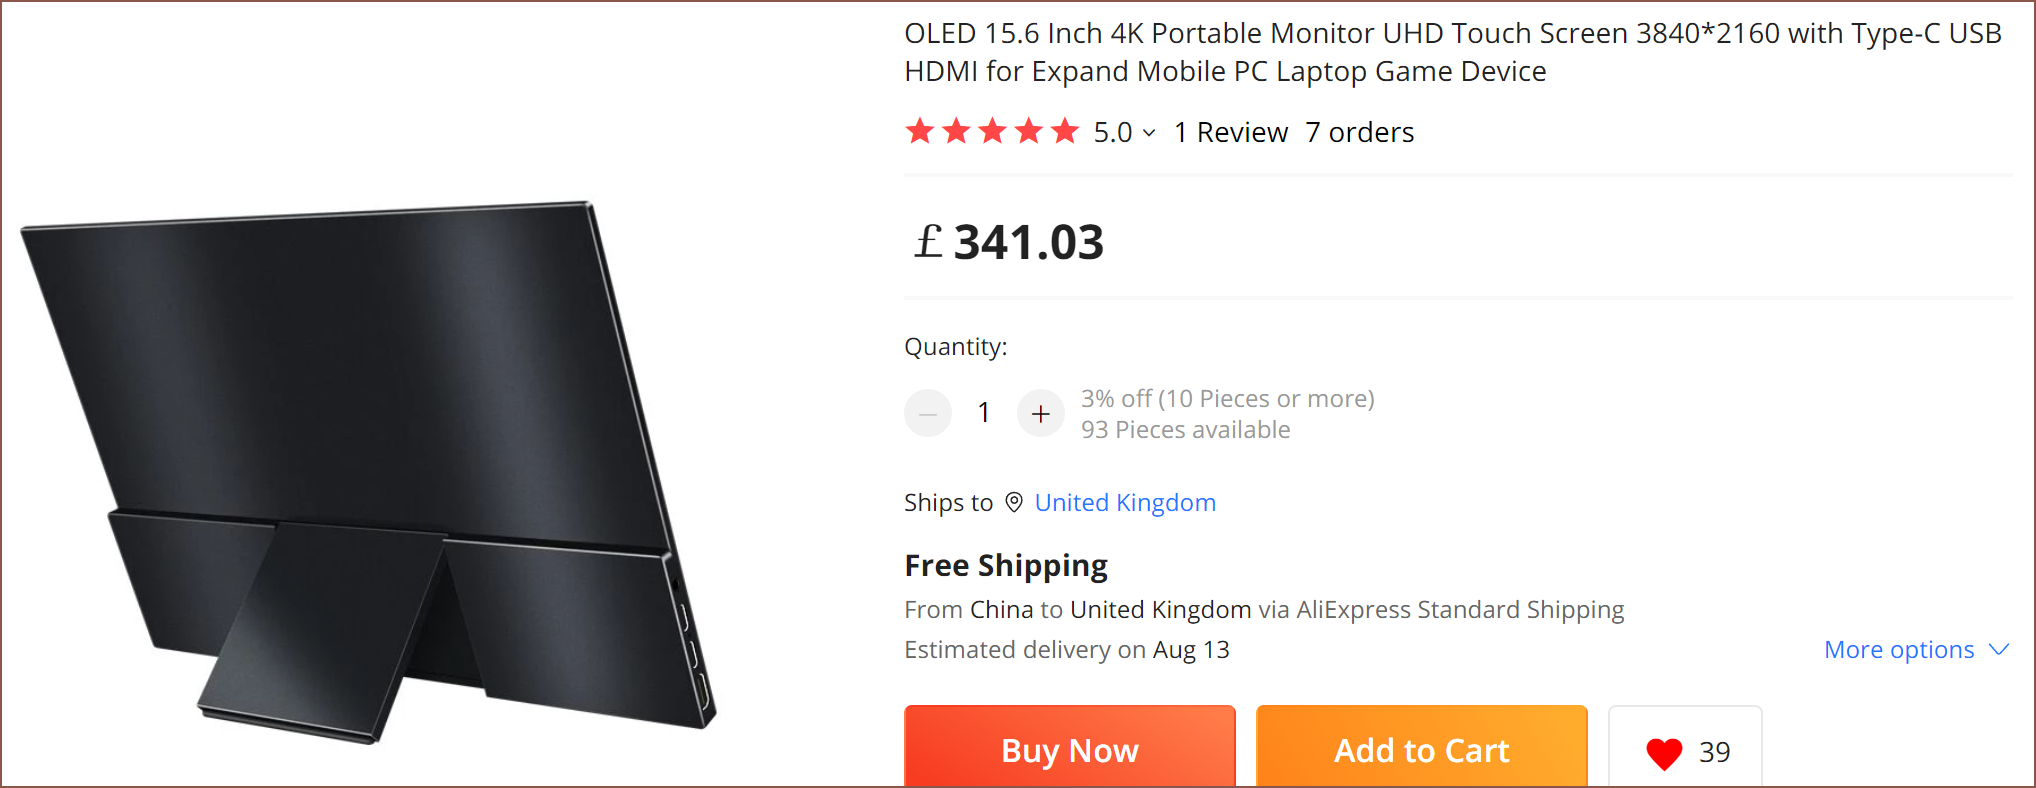
    Especially nowadays since the screens I bought late 2020 have gone up £70 each.
    It also looks to have less chin.

    Oh there's also an IPS one in the same body.

    Then it would've been an even easier sell to me. Buy 1 OLED main and 2 IPS additionals.

  • [M] Screen Holders and Dual Screen Laptop Mode

    kelvinA06/17/2022 at 15:40 0 comments

    [17:30] Sigh... Now that I'm back into designing Teti, I think I can see the reason why my progress has stalled for months: all the "low hanging fruit" tasks mostly dried up and it was now predominantly the complex tasks left. One such task is designing the screen holder.

    Read more »

  • [M] Feature Naming and Branding

    kelvinA06/17/2022 at 08:18 0 comments

    Last night, I was renaming Fusion 360 features to bring the standard of the CAD file more inline to the best practices I thought up a while ago. I also added a temporary stack of screen holders in the area that has been vacant for quite some time (see below).

    Eventually, I got to the part of the model that puts branding on the left panel, and I wanted to change it in a way that would be consistent with other projects.

    Read more »

  • [E1][A] Initial Project Status

    kelvinA04/08/2022 at 01:19 1 comment

    This is what the first 2 designs of Teti looked like before I thought of the current one:

    The idea was to use 2020 and 2060 extrusions for the frame. The first one was going to use magnets to hold the screens at the top. I was also planning to use the RX6800XT but my human eye could only see out of stock. The image below is what I expect it to look like when all 3 screens are out, with a 27" iMac for scale:

    Anyway, the 5900X was also out of stock and the Z590I Vision D ITX just came out with the cleanest and most ideal IO I could've ever hoped for, so I switched to an 11600K + 3060Ti system and embraced the all-white I originally planned for:

    I went for black because it looked a bit cooler during the design stage. Anyway, this third design drastically simplified things, as I no longer needed an AIO or GPU riser cable and could just use the PCIe port the ITX came with along with a Noctua NH-D9L CPU cooler whilst still staying under 200mm width. This was the first concept, planned for an RTX 3070 in October 2020:

    That blue block at the bottom was magnetically attached and would've been the base for the monitor stand before I thought of making the PC case itself the monitor stand. This concept also used some older screens that never worked out. They arrived from AliExpress bent, the main 4K monitor's touch didn't work and the dual 1080p's confirmed my suspicions that I needed a resolution of 1440p+ if I wanted to work without distractions.

    Currently, the PC is sitting on the box the motherboard came in:

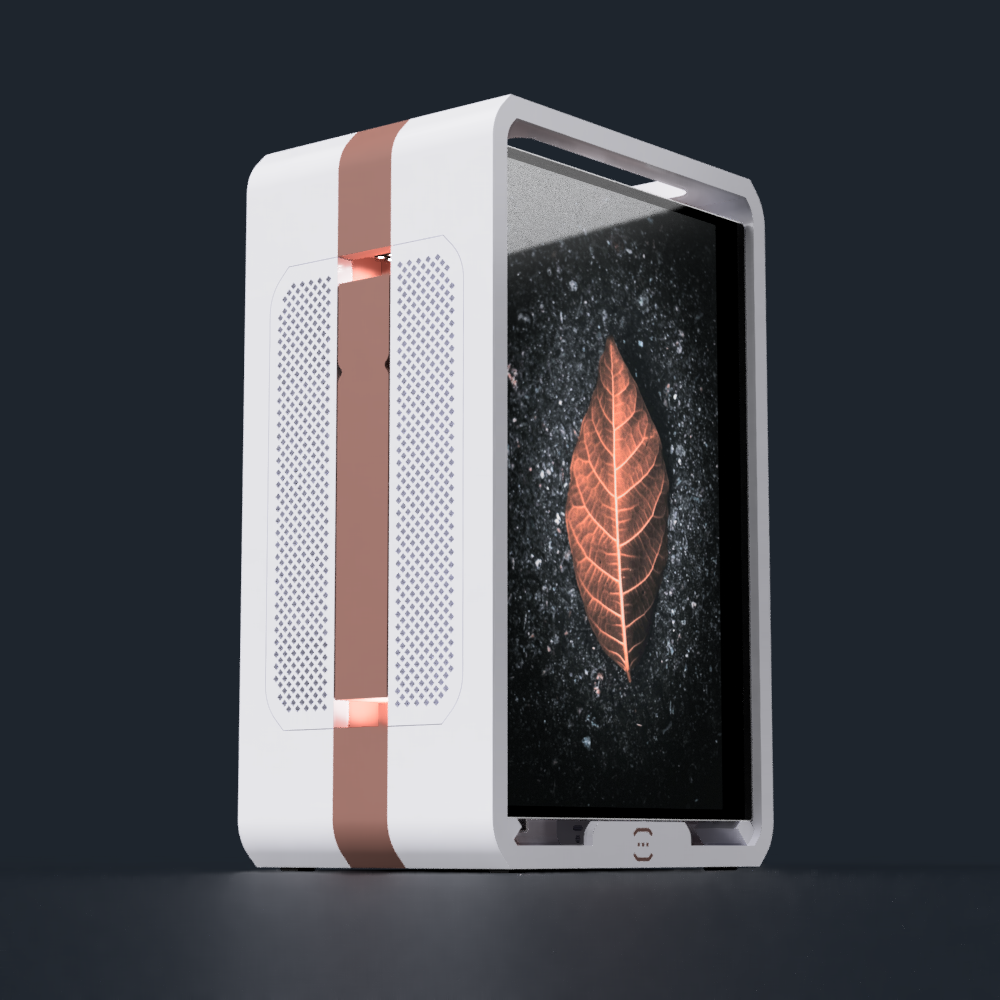
    I also tried the 3 screens with some filament spool boxes:

    Right now, my task list is:

    • Go through the model and add mounting screws
    • Design the screen stands / holders
      • These holders need to be able to hold them in the 3 screen setup as well as individually like a tablet stand
    • Design a kind of locking mechanism to keep the screens in place in the case
    • Add the hinges for the 3 monitor setup stands
    • Add the holders for the screen stands

View all 8 project logs

Enjoy this project?

Share

Discussions

Similar Projects

Does this project spark your interest?

Become a member to follow this project and never miss any updates