RubenFixit
-
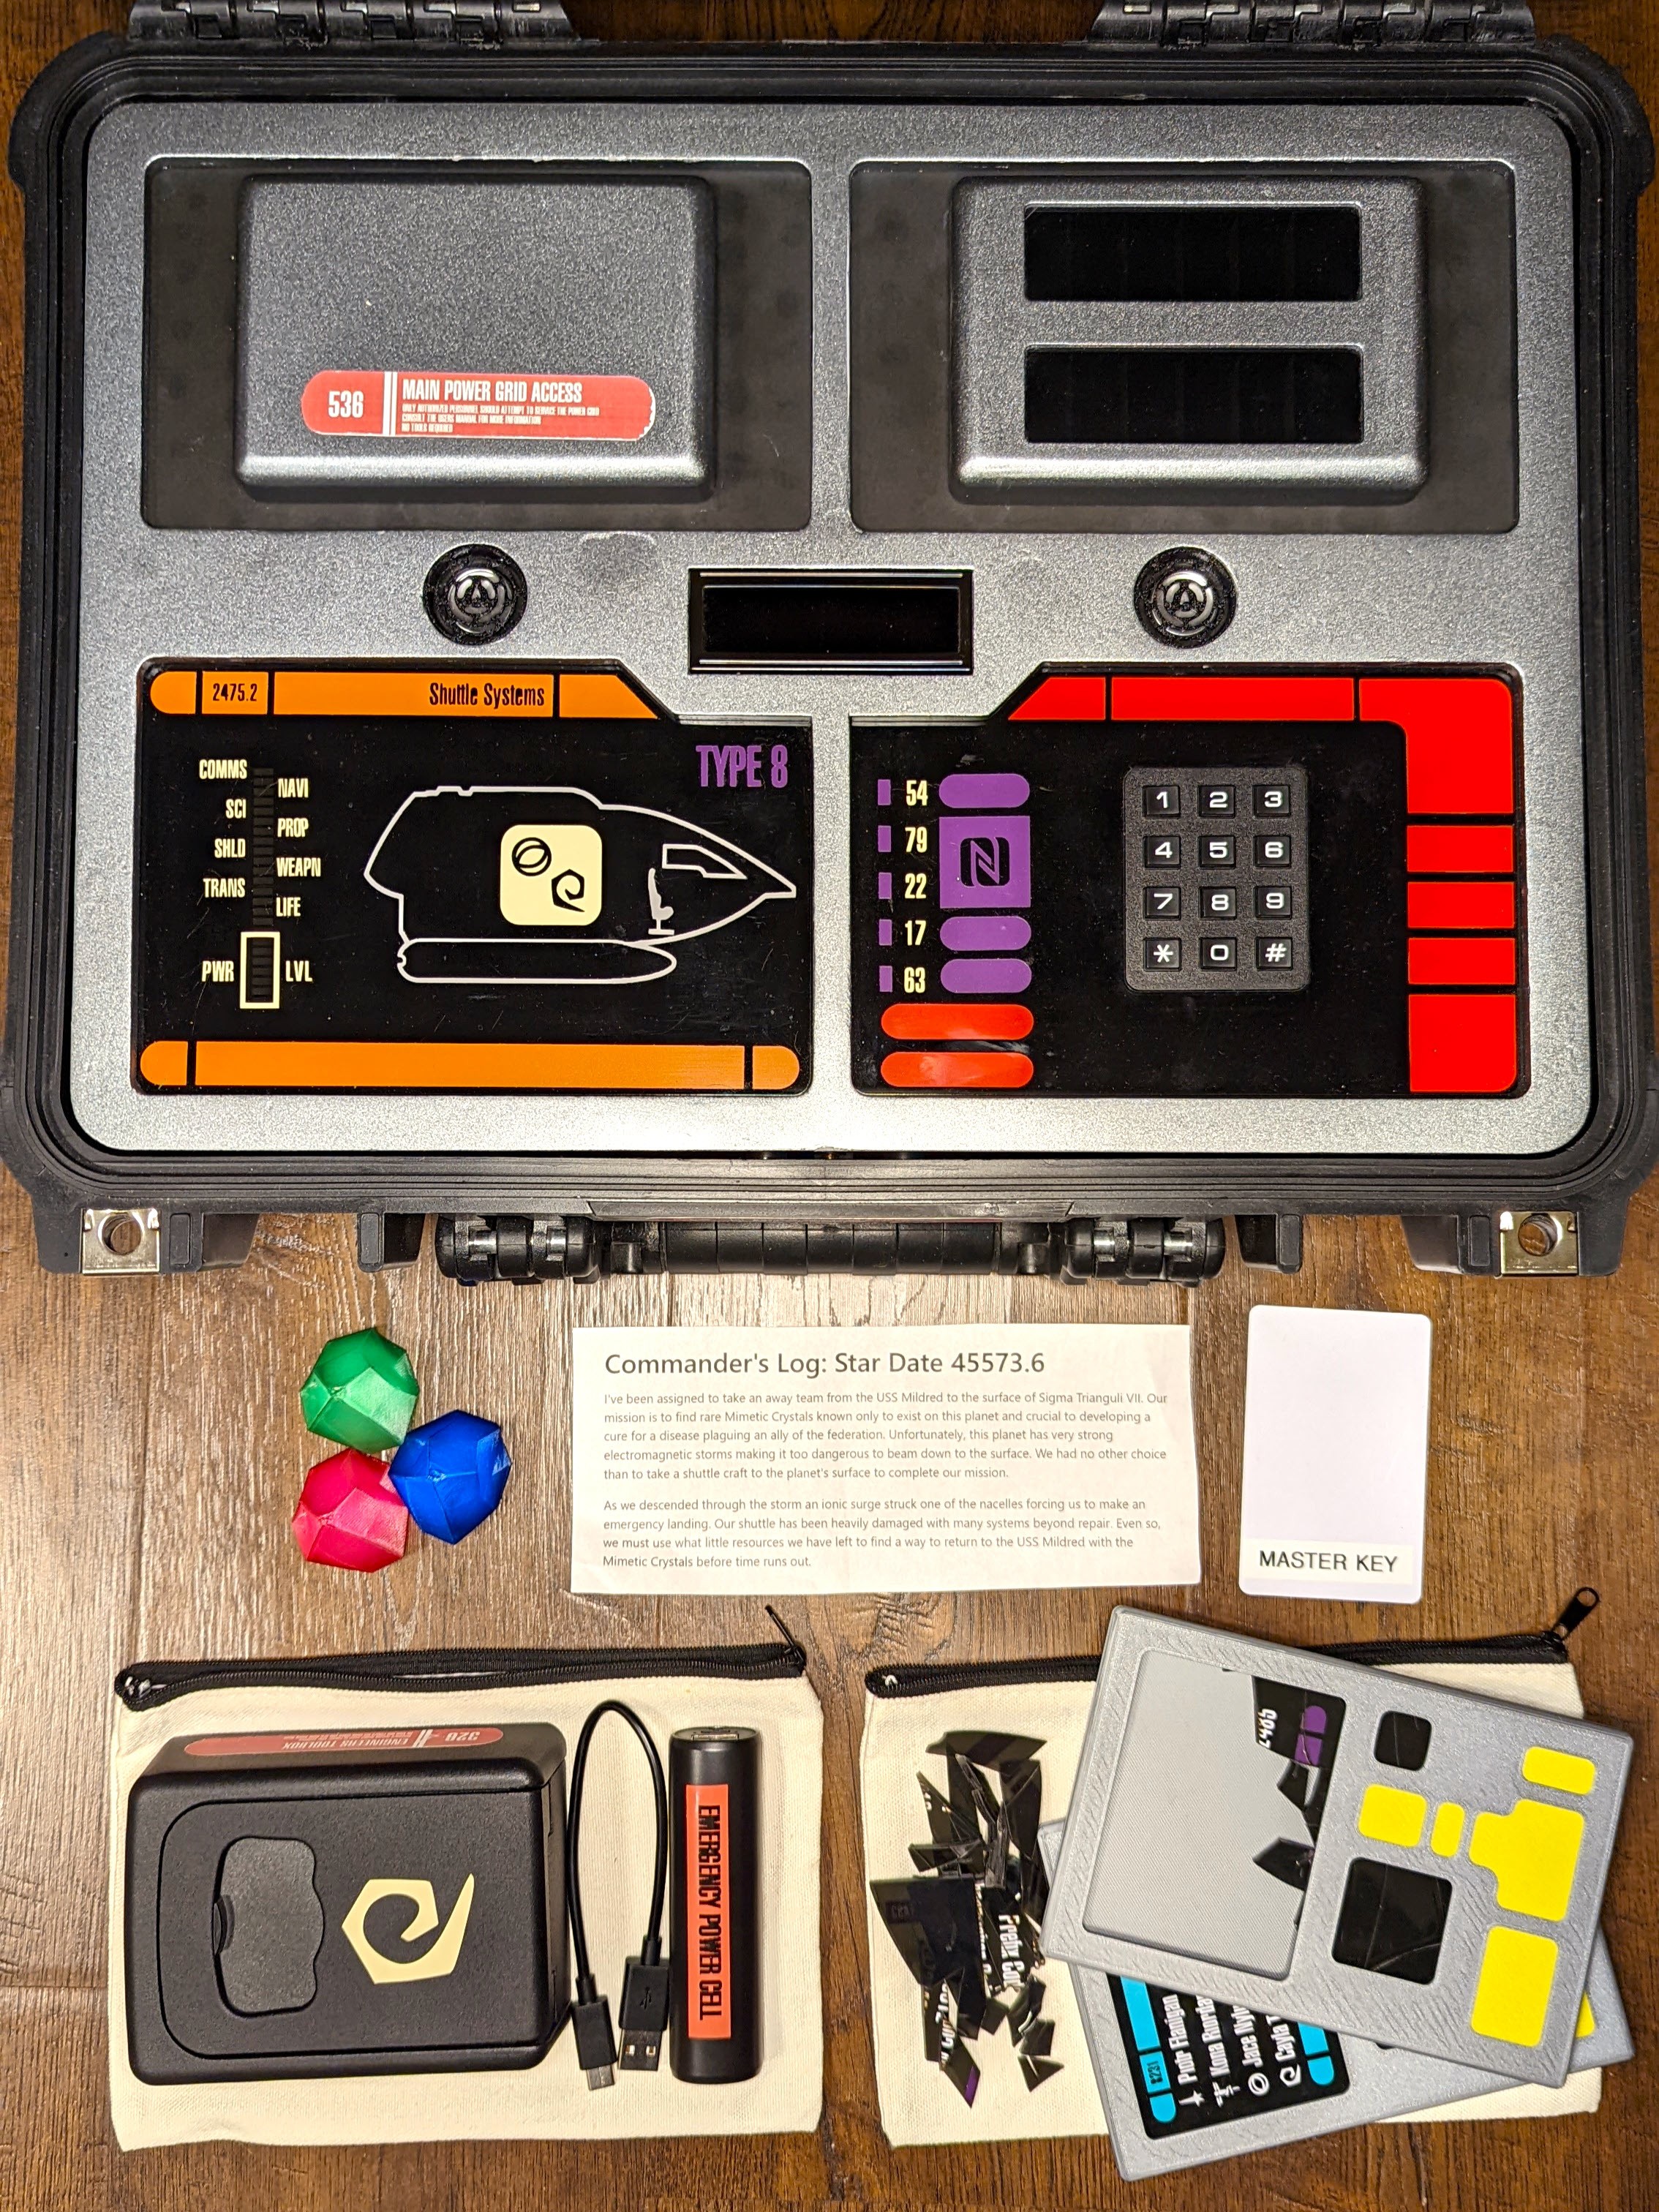
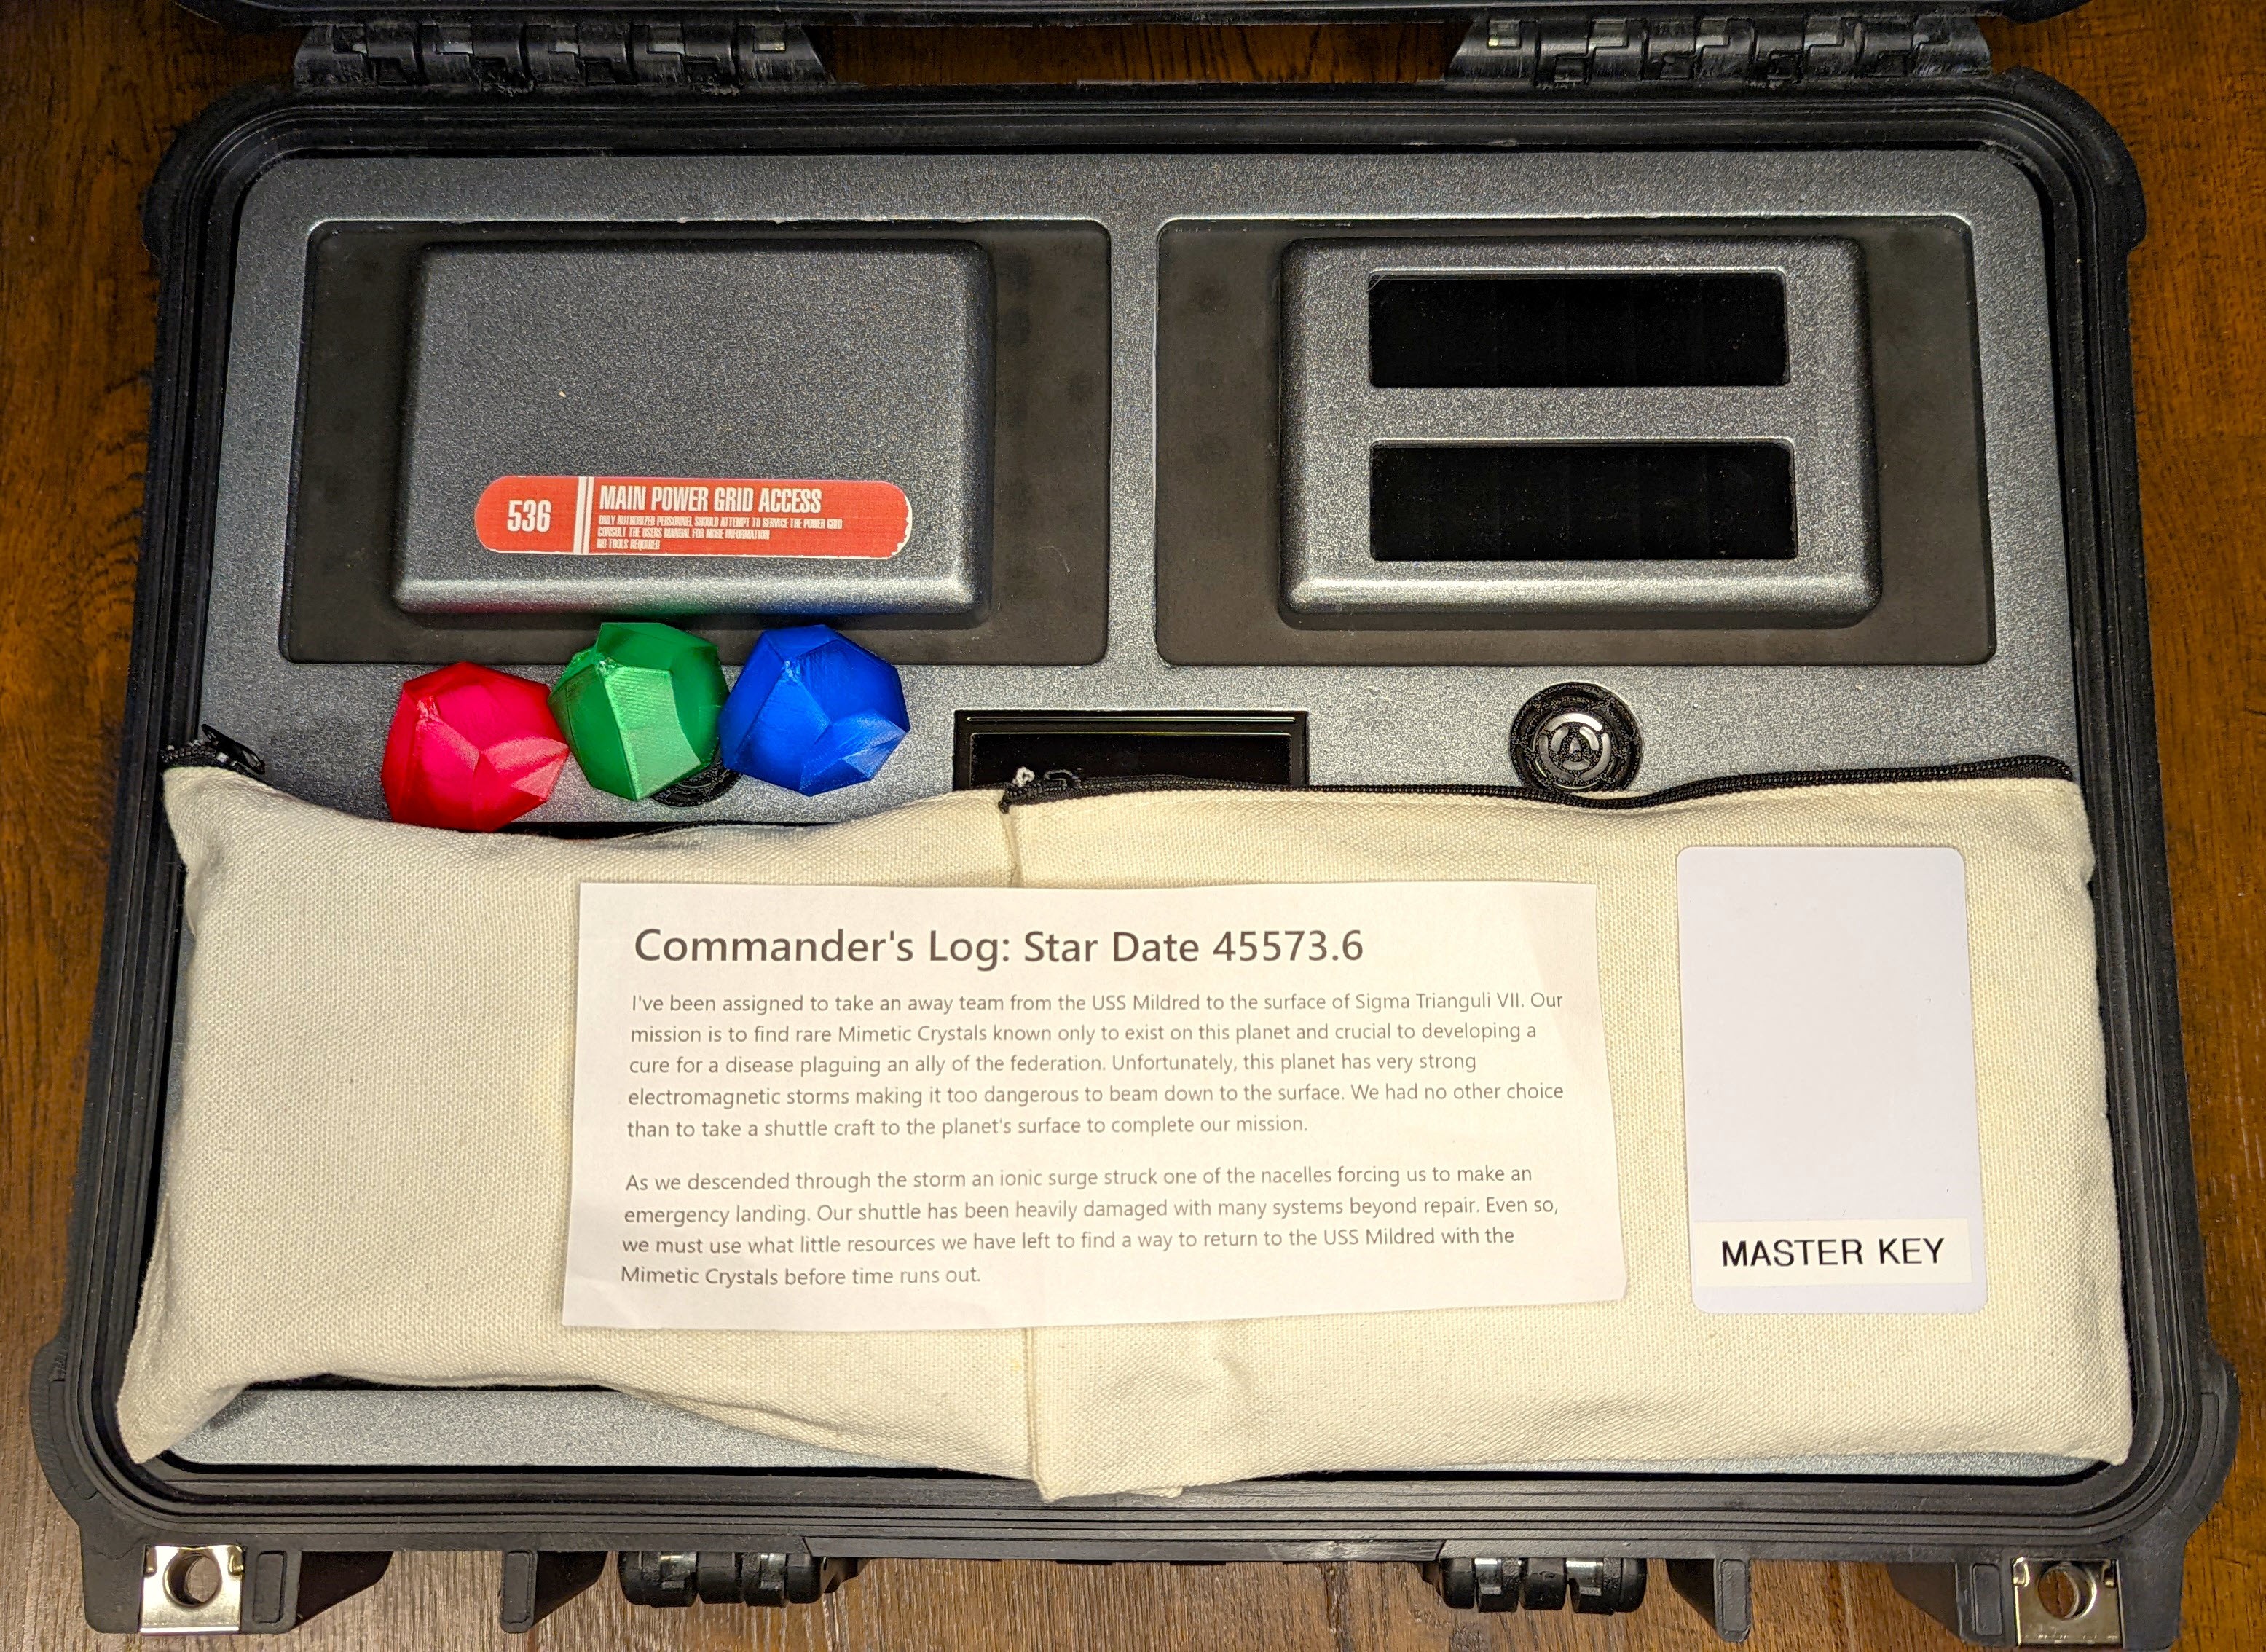
Setting Up the Box
04/25/2022 at 02:14 • 0 commentsClean Up
- Charge Emergency Power Cell & Battery in the box
- Remove all 12 Isolinear Chips and shuffle them
- Return 10 Isolinear Chips to the Isolinear Chip Bay and hide 2 in the PADDs
- Attach the Isolinear Chip Cover
- Reattach all Power Grid wires
- Attach the Power Grid Panel
- Place Each PADD in it's own zipper bag
- Shuffle and return all tools to the toolbox
- Lock the toolbox by scrambling the number dial
- Place the following in another zipper bag:
- Emergency Power Cell
- USB A to USB C cable
- Engineers Toolbox
- Carefully place all items on top of the panel, with the Commander's log Card on last.
![]()
![]()
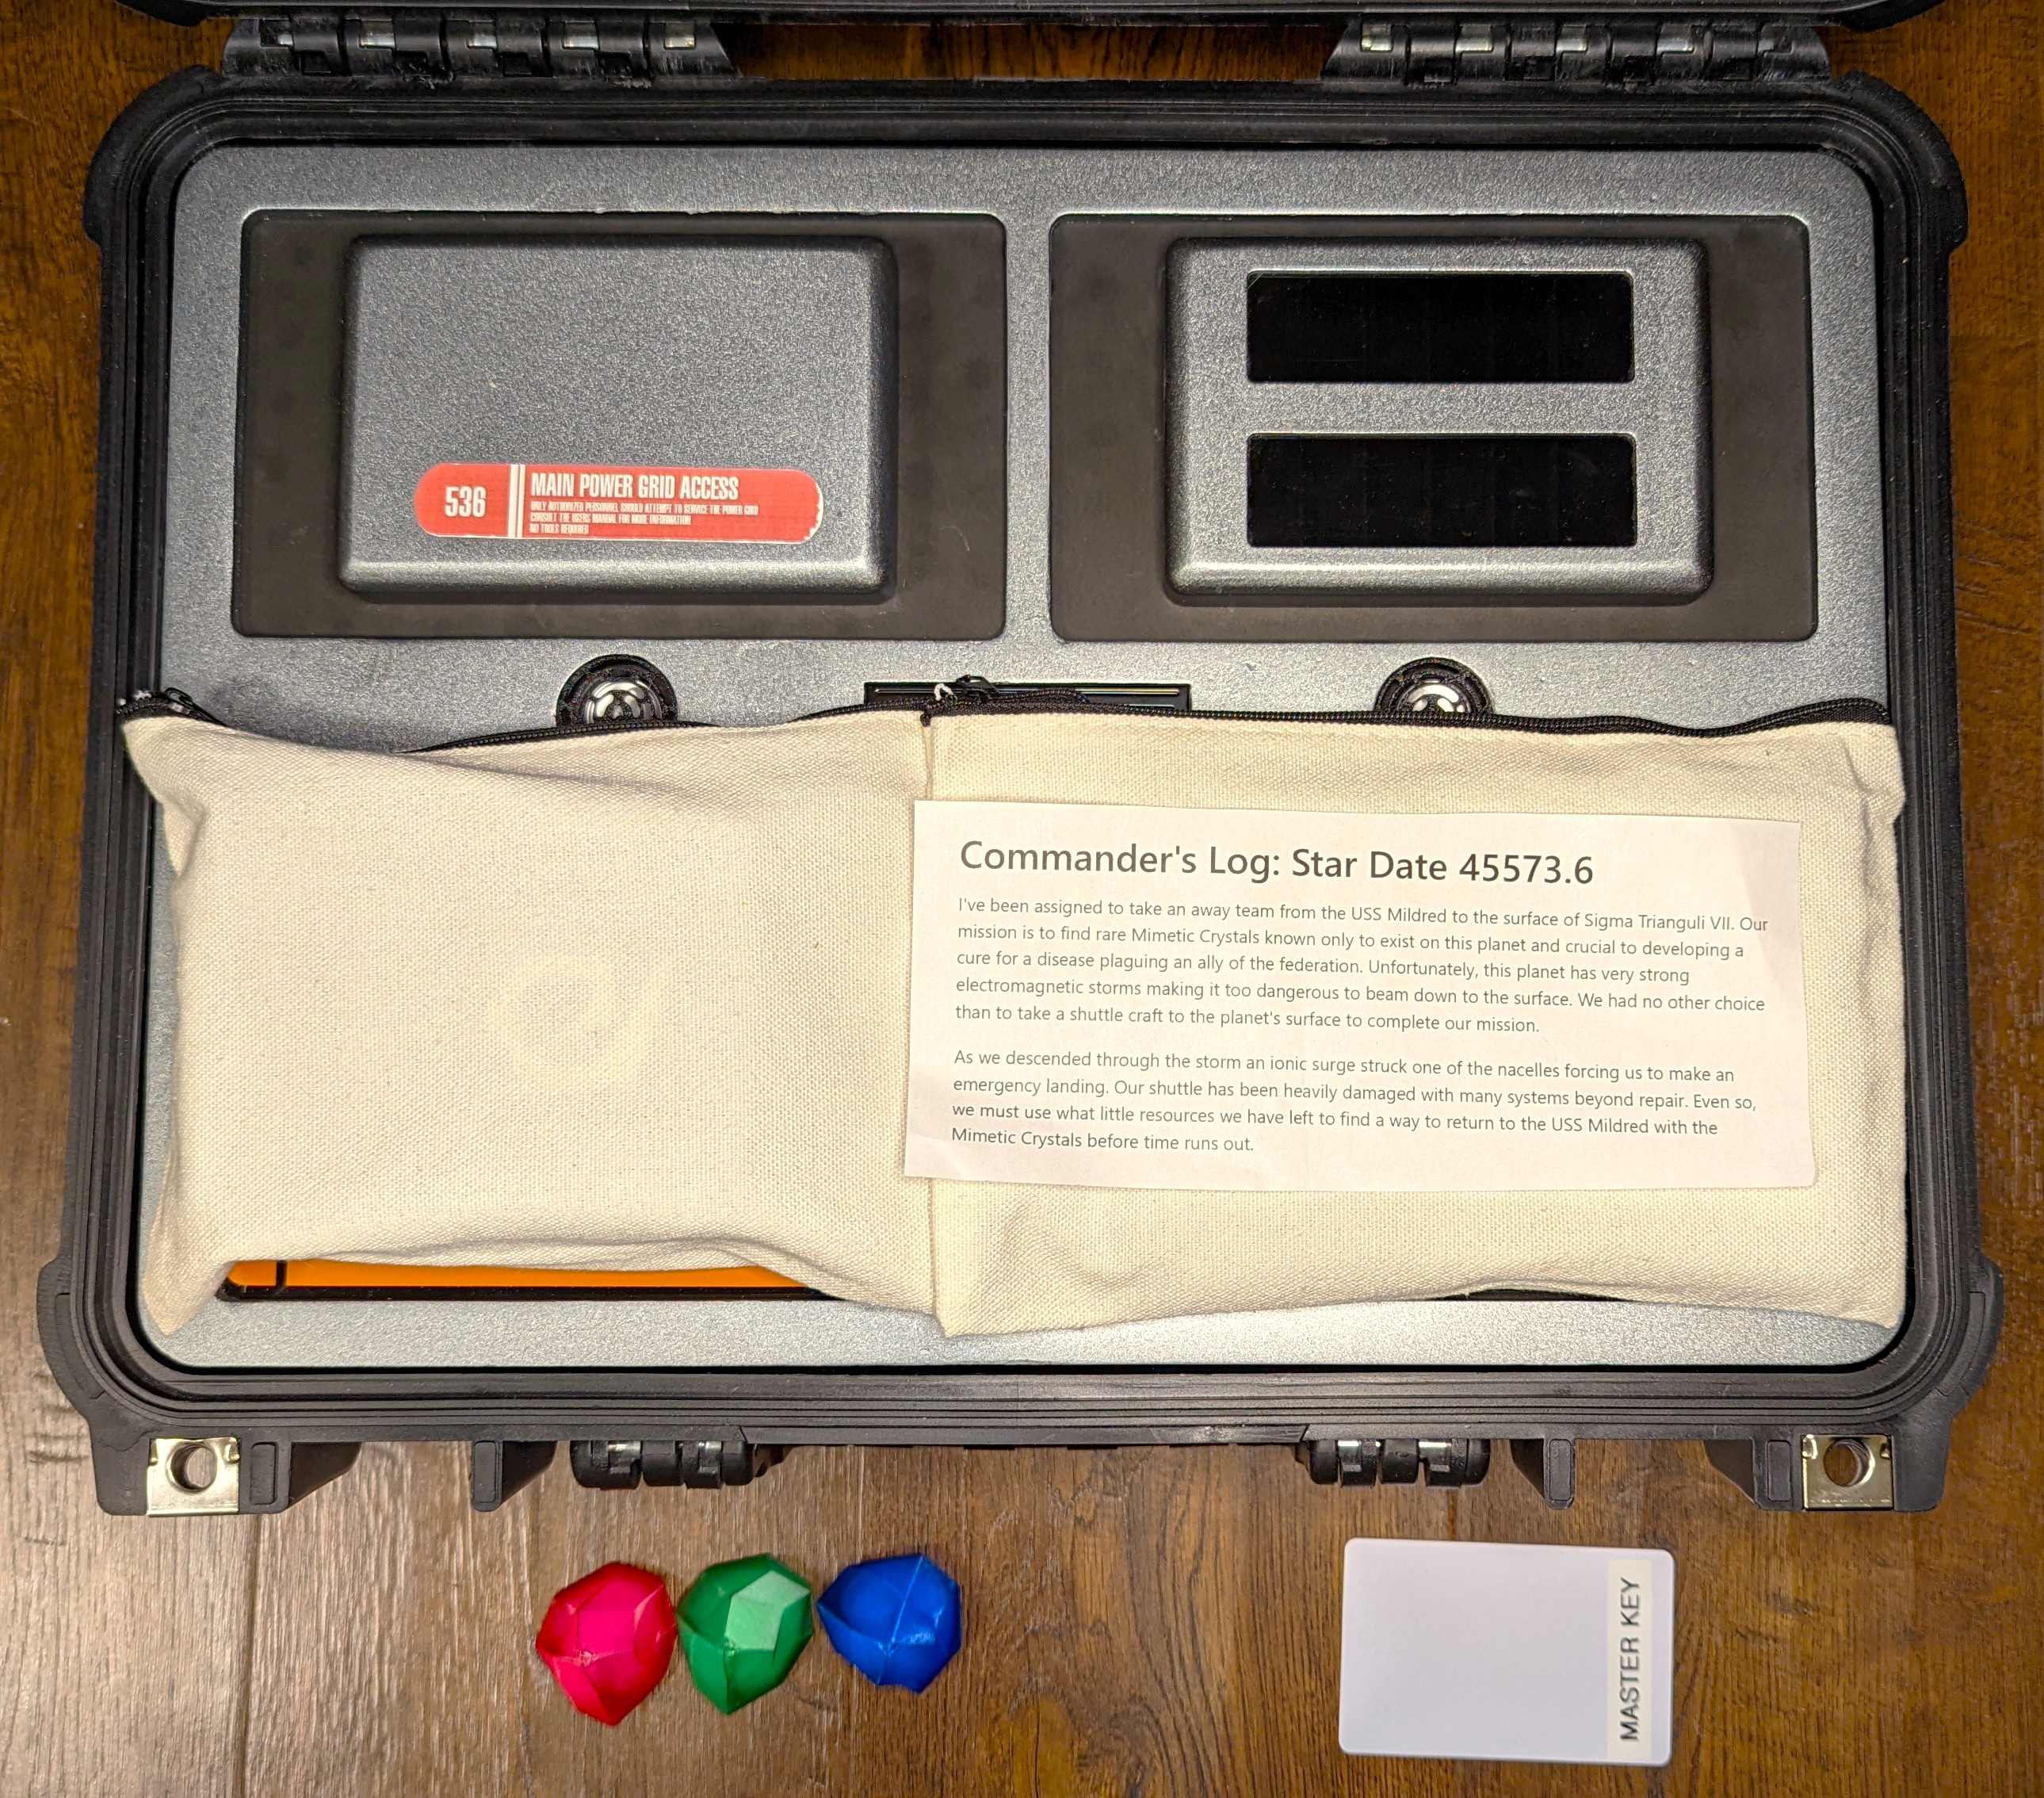
Setup
- Ensure everything is where it should be (see Clean Up above)
- Remove the Mimetic Crystal and Masterkey
- Hide each Mimetic Crystal somewhere nearby, and update the Scan Results (website or printout) with clues or GPS coordinates of their location.
![]()
-
Etching the cricuit boards
04/21/2022 at 05:01 • 0 comments
PCB Laser Test There are several ways to etch your own circuit boards, but the method that I tried this time around worked very well especially for larger boards.
In this method I painted a copper PCB board with an even coat of black acrylic spray paint. After letting it dry I used my diode laser cutter to remove the paint in the areas that I wanted etched away.
One problem I ran in to was that the diode laser would produce very wavy lines if it was run too quickly. This is easily fixed by simply running the job at a slower speed. Unfortunately this increases the overall time required to complete the job.
I found that for my laser engraver a speed of 400 mm/m was a good compromise between speed and line quality.
After etching the paint I used a Copper Chloride Enchant to finish etching the board.
Once the etching is complete, you can remove the paint with acetone.
The final result was great!

Power Grid (left), Isolienar Chip Grid (right
Star Trek Shuttle Console
A Star Trek away mission themed escape room in a box.