Close
0%
0%

$5 DNA Replicator

The one of the most revolutionary inventions of the 20th Century, designed for DIY gene replication.

Similar projects worth following
I have plans to add real-time analysis of dsDNA concentration, allowing for infectious disease diagnosis without extra equipment. This will be done with through-the-tubing fluorescent measurements. It's now in a new Project!

The PCR machine allows us to copy, alter and join DNA in many ways, and has brought about the Biotech revolution. Until now, commercial PCR machines have cost thousands of dollars. OpenPCR has brought the price down to a few hundred, but that's still too high for classrooms, DIY'ers and HackerSpaces.

This project describes a remarkably simple but fully functional DNA replicator, based around the Arduino platform, and utilising just a handful of components. The trick is to use multiple physical process driven by just heat, dirving the conversion of DNA between its single and double stranded states; altering the activity of the polymerase in copying DNA; and circulating the reaction mixture though several temperature zones via convection.

What's all this for then?

The Biotechnology Age is well under way. But like the Silicon Age, I think it will only really explode in growth once the entry price reaches a point where a few college dropouts can afford to build a biotech lab in their parent's basement, and with their inventions, put a dent in the universe.

The biotech laboratory is getting more and more streamlined, and experiments that would once have taken weeks or months can be performed in days, with much improved Recombinant DNA techniques, next-day-delivery of DNA primers, and cheap Gene synthesis. Although we can now forget about many old fashioned (but still widely used) techniques like Plasmid Cloning by Restriction Enzyme Digest, which require boxes full of expensive enzymes, the one technique that kickstarted the Biotech Revolution is still an absolute necessity.

PCR, or the Polymerase Chain Reaction, is one of the greatest inventions of the 20th Century. With it we can take a single stand of DNA and make trillions of identical copies. With these copies, we can identify a murderer from a speck of skin, DNA barcode living creatures to study entire ecological systems or identify the cause of a disease for personalised medicine. And because at the fundamental level all life on Earth operates on the same basis, we can even swap the "code" of life between species, rewriting the schematics of living organisms.

The grass roots interest in DIY biotechnology is growing, with projects like Biobricks and the Glowing Plant Project making headlines around the world. But the fact is, it's still too expensive for most people to get involved. With a target price of $5 for the parts to build a working PCR machine, and a secondary goal of $50 to build a really great machine, I hope to change that. At that price level, everything changes. Suddenly schools can afford to do recombinant DNA experiments in science class, just as the Apple IIe changed my school experience. Poorer countries can use the same equipment for medical diagnosis, and BioMaker's can start working on those inventions that will make the world a better place.

Download the designs, build the Polymerase Chain Reactor, and Viva la Revolucion Biotec!

System Design Documents

Here is the overview for the cheap, and ridiculously cheap PCR machines.

The $5 PCR machine

  • minimal parts
  • V-USB interface to calibrate temperatures, and log raw data

The $50 full featured PCR Machine

  • Bluetooth interface
  • Cloud-storage of optimal Annealing temperatures and DNA/Primer trading-portal for DIYBIO
  • GUI control of PCR machine, Primer annealing temperature calculator, Cloud access for sharing data
  • Realtime plotting of temperature data
  • I2C temperature sensors for ±0.4 Celcius accuracy, with no calibration required
  • Temperature fuses for safety
  • RGB LED for temperature status/bluetooth connectivity
  • Touchdown PCR and controlled annealing temperatures 

How PCR works:

In detail, the Polymerase Chain Reaction Machines operates by cycling a mixture of Template DNA (this contains the stuff we want to copy), Primers (short and cheap bits of DNA the match the front and back of the sequence we are copying), a Polymerase (the bio-nanobot that does the copying), and raw chemical nucleotides that will make up the sequence of the copies.

As an analogy, think of the template as a book, the primers as a set of bookmarks for certain pages, and the polymerase as a photocopier. The raw nucleotides are then something like the blank paper.  

PCR exploits the fact that some polymerases in Extremophiles from volcanic vents or hot springs can operate at very high temperatures, at which most organisms would be well and truly cooked.

Continuing with the (now very bad) analogy, imagine heating up the template as opening the book. Cooling the book inserts bookmarks at the correct location and closes it, and now you can hand it to the guy on the photocopier, who will photocopy everything between the bookmarks....

Read more »

  • 1 × $5 Polymerase Chain Reactor:
  • 1 × perf board 10cm X 8cm
  • 1 × ATMEGA168P Electronic Components / Misc. Electronic Components
  • 1 × Paperclip Use to hold PCR reaction loop in place
  • 1 × 12MHZ crystal Oscillator for the Atmega

View all 23 components

  • 2015 HAD Prize

    David07/29/2015 at 14:06 0 comments

    Please, don't forget to follow my new project, found here: https://hackaday.io/project/6180-realtime-pcr-diagnostic-device

    Thanks!

    PS some skulls would be nice :)

  • New Project time!

    David06/08/2015 at 18:56 0 comments

    Hi DIY-Bio fans!

    I just want to announce my new entry to the 2015 prize, the Realtime PCR Diagnostic device https://hackaday.io/project/6180-realtime-pcr-diagnostic-device

    This thing is a massive upgrade to the PCR machine I build last year, and to be honest, I'm not sure if it will even work. But start following the project to find out what happens!

    Thanks,

    David

    PS, anyone want to collaborate?

  • And I'm out...

    David10/14/2014 at 08:06 4 comments

    ...Thanks Hackaday, it was fun!

    Not 100% sure what to do next with the project now.

    Does anyone actually want to build a PCR machine (besides me :) ?

    Do people out there want them as a kit? A finished product? Or just well documented and left on Github?

    It would be pretty easy to get some PCB's made up and put up on Tindie or somewhere. Let me know if you would be interested!

  • Hybrid Human-Coral-Jellyfish Nanobots Biosensors

    David10/11/2014 at 20:16 0 comments

    You know how I promised you something really cool a few updates ago? Well, here is the project I will be undertaking next, using the $5 Polymerase Chain reactor!

    What happens when you cross the DNA of a Jellyfish found off the coast of California, a Human, and a species of Japanese Coral?

    ...and then you go and add the combined DNA to an intestinal-inhabiting Bacteria? A whole lot of awesome is what I hope, as we try and create a nanobot that can optically display Calcium concentrations! Welcome to biohacking!

    Here's the rough outline of the Hack: We use the DNA sequence from the jellyfish Aequorea victoria that encodes its Green Fluorescent Protein, and the Orange fluorescent Protein from the kusabira-ish coral, both from available plasmids. Muscles contract when nerves impulses lead to Calcium concentration increases in muscle cells. The interwoven fibers are pulled together by trillions of bio-nano-bots, after Calcium unlocks the blocking-bot. By using PCR to read out the spaced DNA sequence of Human DNA and the fluorescent proteins, and using some Phage proteins to join the DNA strands into a circular plasmid, we can fool Bacteria into reading the fused instructions, and build our bio-nanobot-sensors for us. The sensor works by the shape-changing effects of Calcium on the sensor, and translating this to a change in color! So, this bio-nanobot-sensor should change from glowing green to orange (or vice versa?), as the amount of Calcium in a solution increases.

    $5 Polymerase Reactor Update:

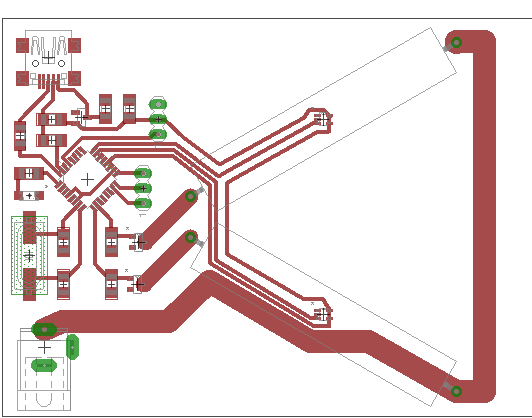
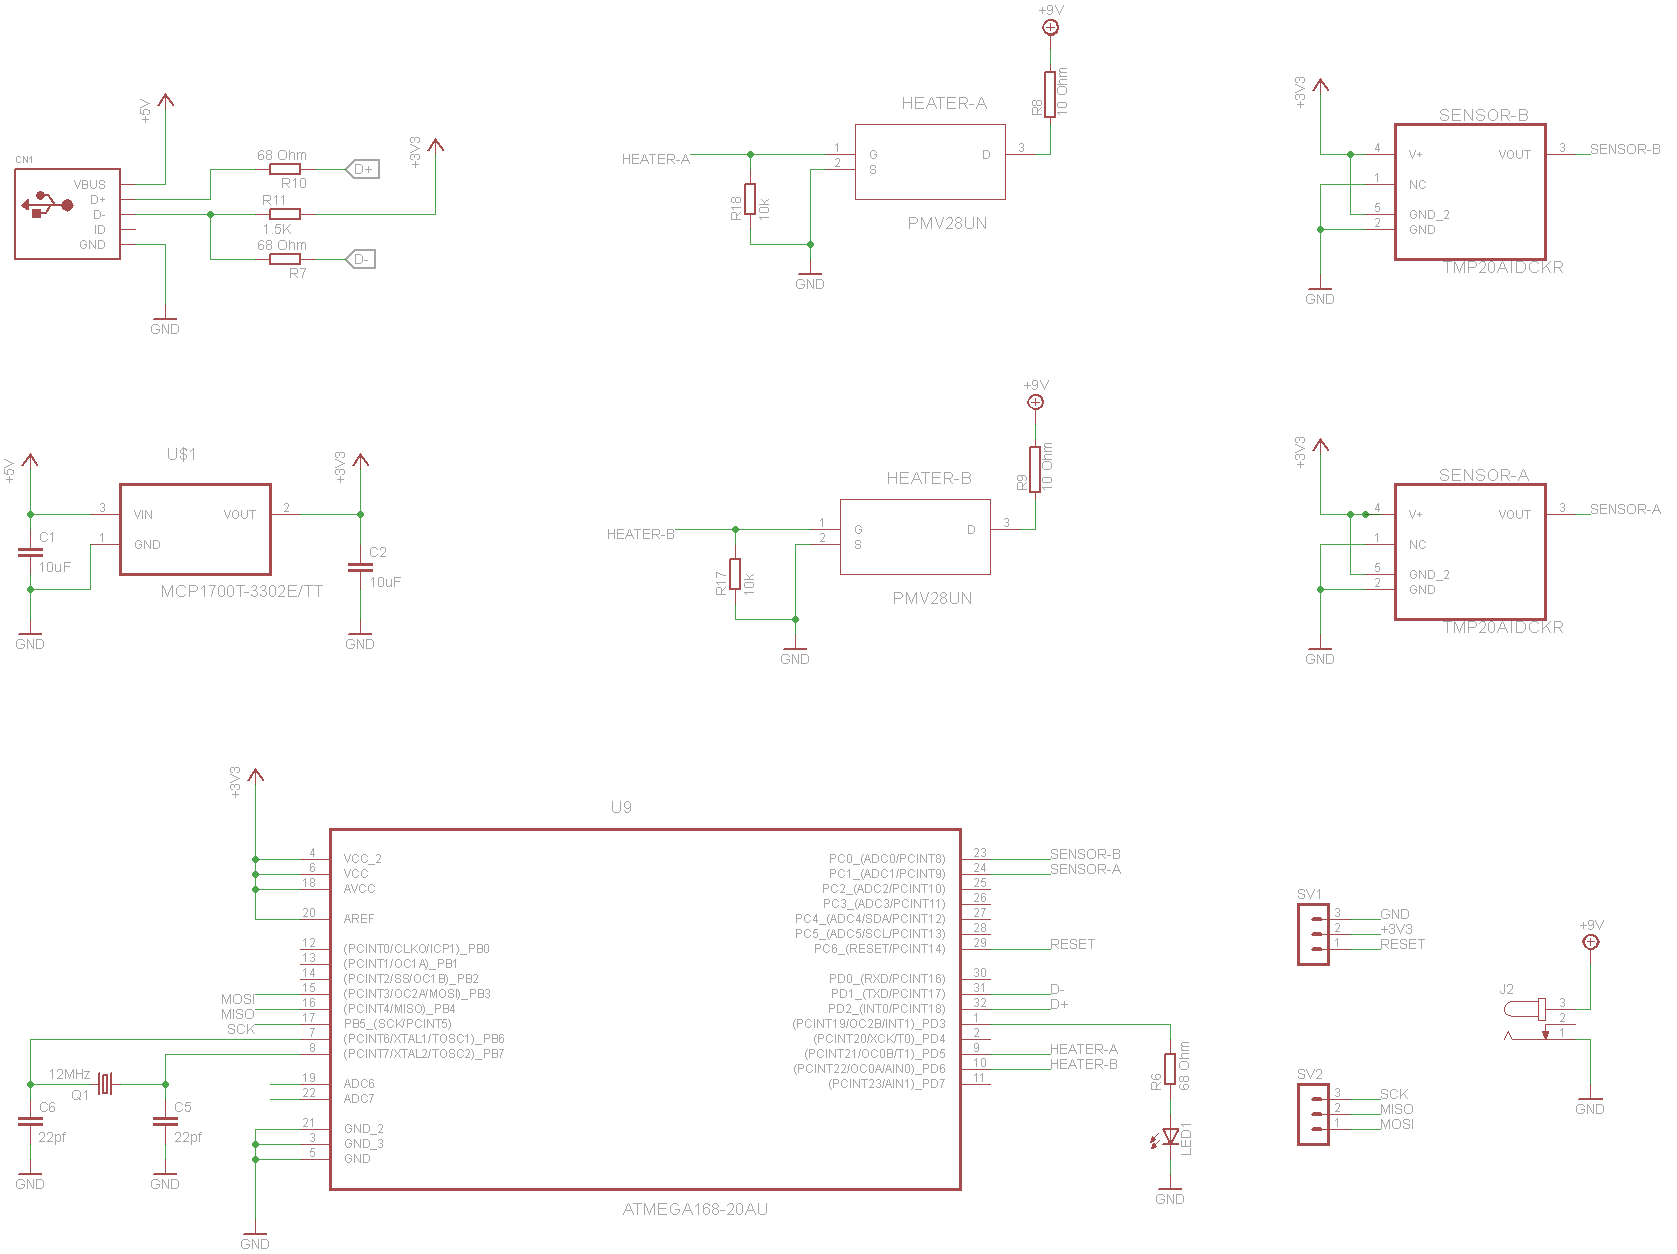
    I've also update the PCB and Schematics, so now it uses surface mount components on a single-layer board! That should save a few more cents!

  • CSI: Hackaday

    David09/27/2014 at 21:51 0 comments

    I've just uploaded my 5 minute video, hopefully completing the last entry requirement for this stage of the competition! I've got my fingers crossed, and I'm really hoping I haven't skipped a vital competition rule.

    Biotech in Action

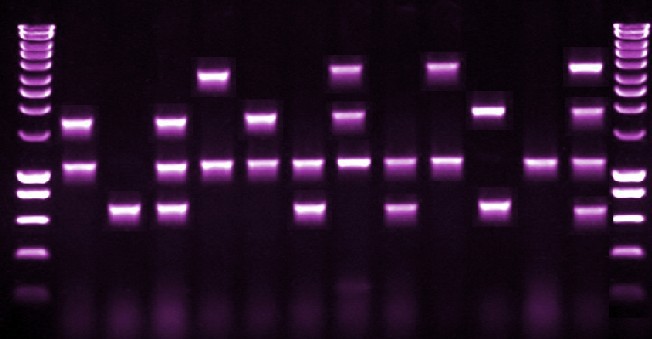
    In the video, I've show how my Polymerase Chain Reactor works, how it compares to what's out there, and hopefully shown its innovation and connectedness. What I've also shown is the power of molecular biology.  In the demo, I've demonstrated how DNA profiling can identify a person from the DNA evidence that everyone leaves behind wherever they go.

    DNA profiling can be used to identify people by their DNA, and I've used a method based on some STR's, which are segments of DNA that vary in length between individuals. By taking samples from many people, and comparing the results of a sample of unknown identity, we can match that sample to our database.

    Of course, to be relatively certain, you need to measure many different STR regions, as the variance of any one particular STR is not-so-high. Usually, about a dozen or so are used by the FBI or Interpol.

    I just used one, called TH01, which is used by both of those agencies. That's nowhere near enough to identify a person usually, but I cheated :)

    I asked for DNA sample from a bunch of friends, and did a TH01 STR analysis on all the samples. Many samples looked identical, but some were identifiable. So, I just used the 4 there were the most clearly different, and used them in the demonstration.

    Besides the PCR machine, the only lab equipment needed for such an experiment is a centrifuge and a gel electrophoresis system. Both can be made at home, and make a fun and cheap weekend construction project.

    It's a great proof-of-principal, but I have something really great planned next, for the next round of the competition. Are you ready for some Gene Hacking?

  • Race to the Finish II

    David09/26/2014 at 11:48 0 comments

    The Polymerase Reactor 2.0 is finished!

    Here are some pictures:

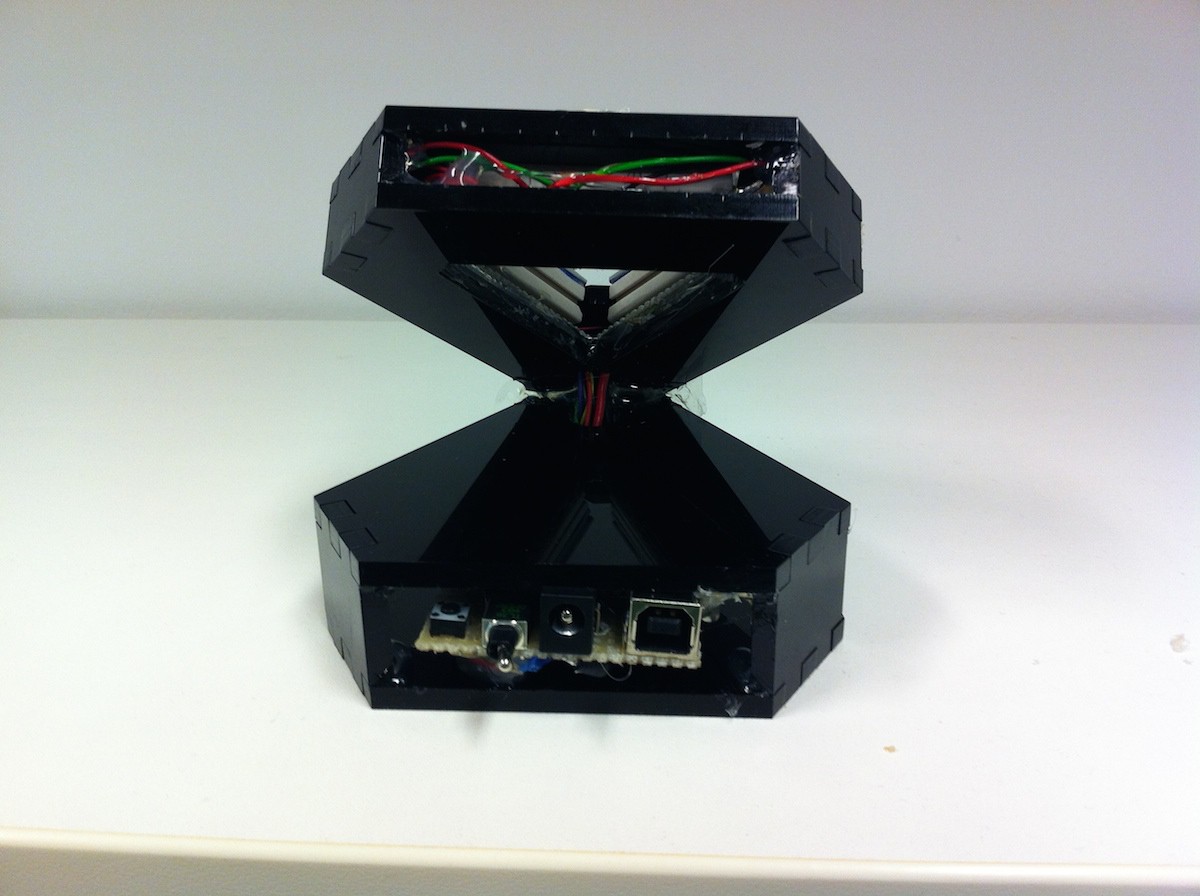
    The rear port contains a USB connector for reprogramming and debugging, a 9V input connector, and a toggle switch to select the power supply used to power the microcontroller. The switch doubles as on on-off switch when only one power source is connected.

    The device connects to a Windows/Linux/Mac machine via Bluetooth, using the cheap HC-05 module.

    Any serial terminal can control the device; I used the Arduino software Serial Monitor to interface with it.

    There are several commands for reading and writing data to the PCR machine, here is some examples:

    You can connect and start controlling the PCR machine with just a few lines of Python code:

    import serial
    
    pcr = serial.Serial('/dev/tty.HC-05-DevB', 38400, timeout=1)
    

    I hope to build a simple python server to control the PCR machine next, and then design a nice interactive web interface for the machine, so its easy to control over the internet.

    EDIT:

    Actually, an Intel Edison would be great from this kind of project. The built in WiFi saves lots of effort for the hardware, and its got enough power to handle the server side stuff for the web interface etc. 

  • Race to the Finish

    David09/26/2014 at 08:25 0 comments

    I hope to have a REALLY cool update late today, or early tomorrow, but for now, here's the current state of the PCR machine.

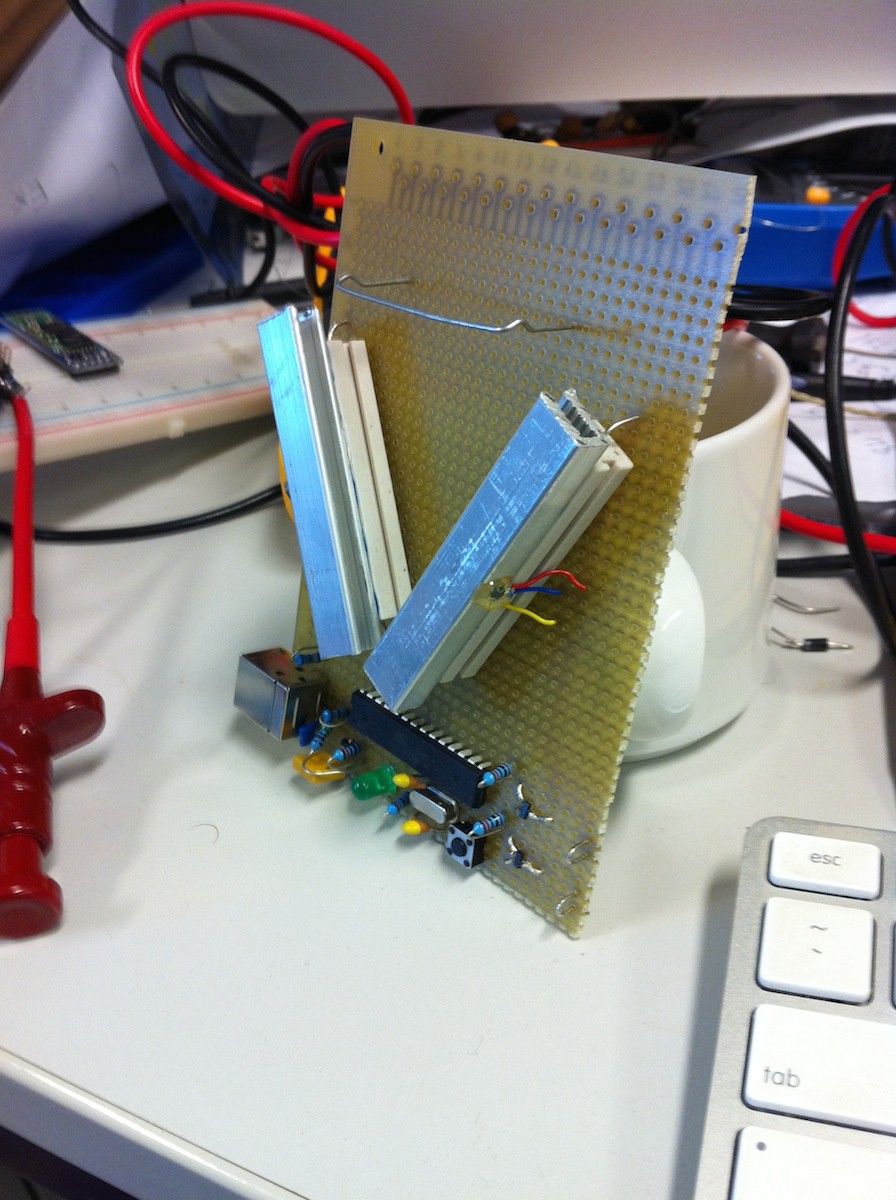
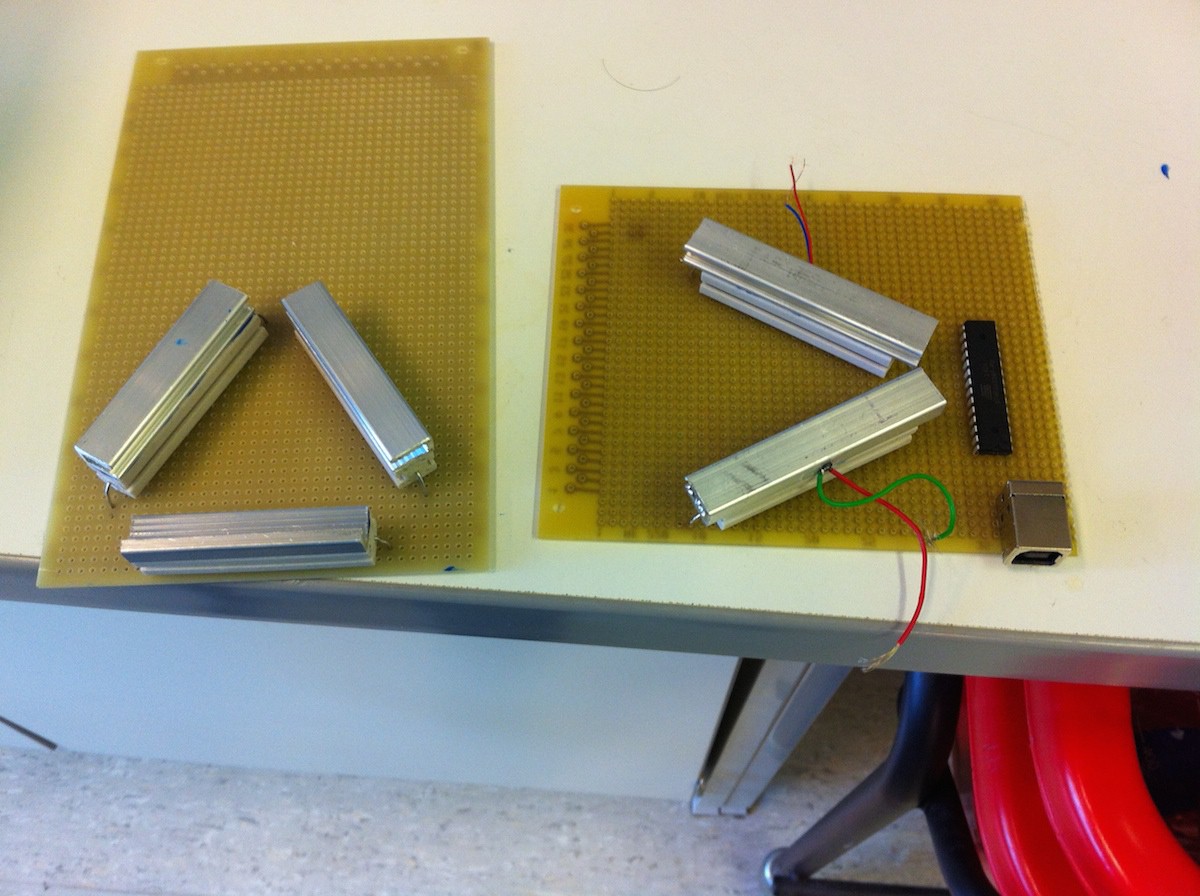
    The $5 Polymerase Chain Reactor is finished, using perfboard and a combination of through-hole and surface mount parts. I've used V-USB for temperature logging, and it works great!

    I have a cool demo planned for this machine very soon...

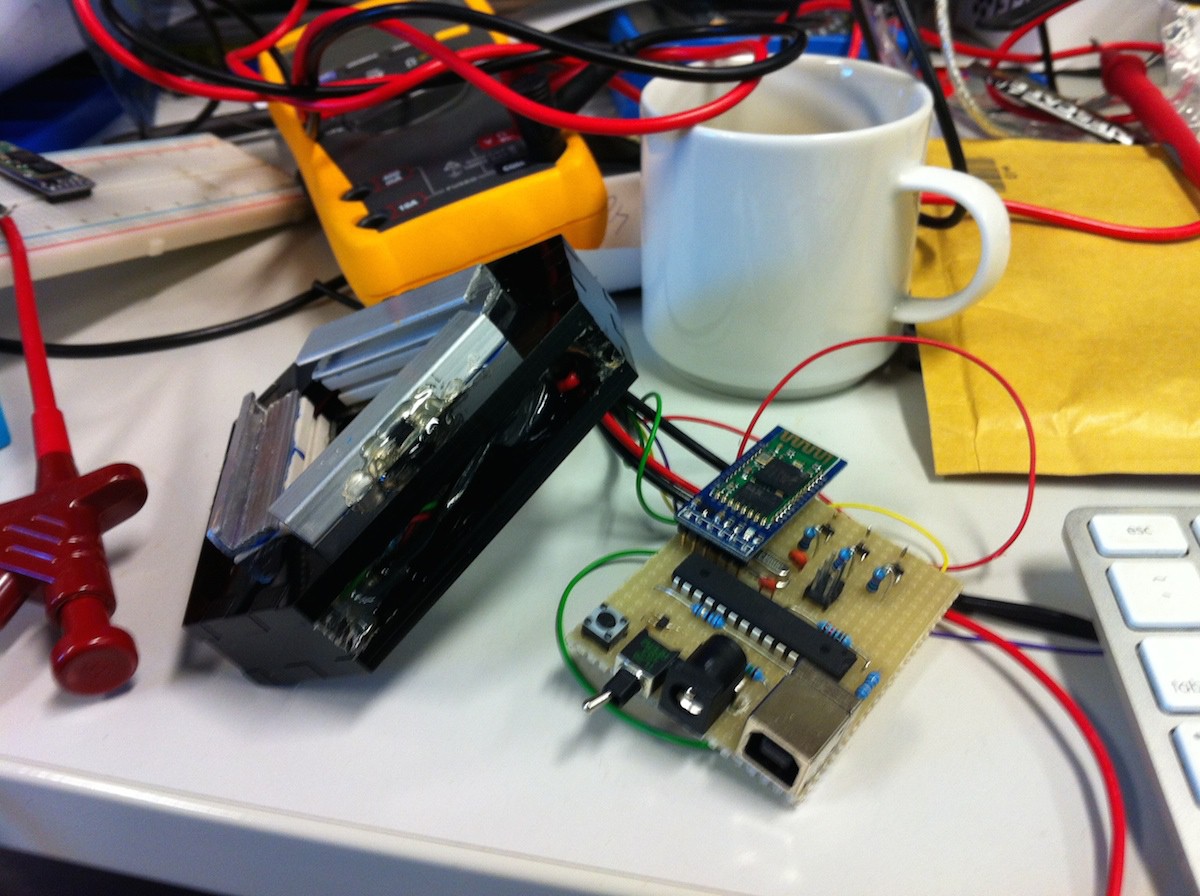
    The full-featured machine prototype machine is also almost finished. I wrote a ton of arduino code into the small hours of the night, and now I have a nice API to control the device via bluetooth.

    You can access via Bluetooth:

    • Current temperatures of the heating blocks
    • Current PID parameters
    • Turn on/off temperature-streaming for real-time plotting
    • Alter the target temperatures of the heating elements
    • Alter PID parameters
    • Shut down the heating elements

    I really wanted to have a GUI prepared by now, but TBH, a month is a very short space of time to design and construct an entire new product, AND do all the coding necessary for a nice user interface. But with the hardware finished, and a bit of luck with making it to the top 5, I can focus on that next month.

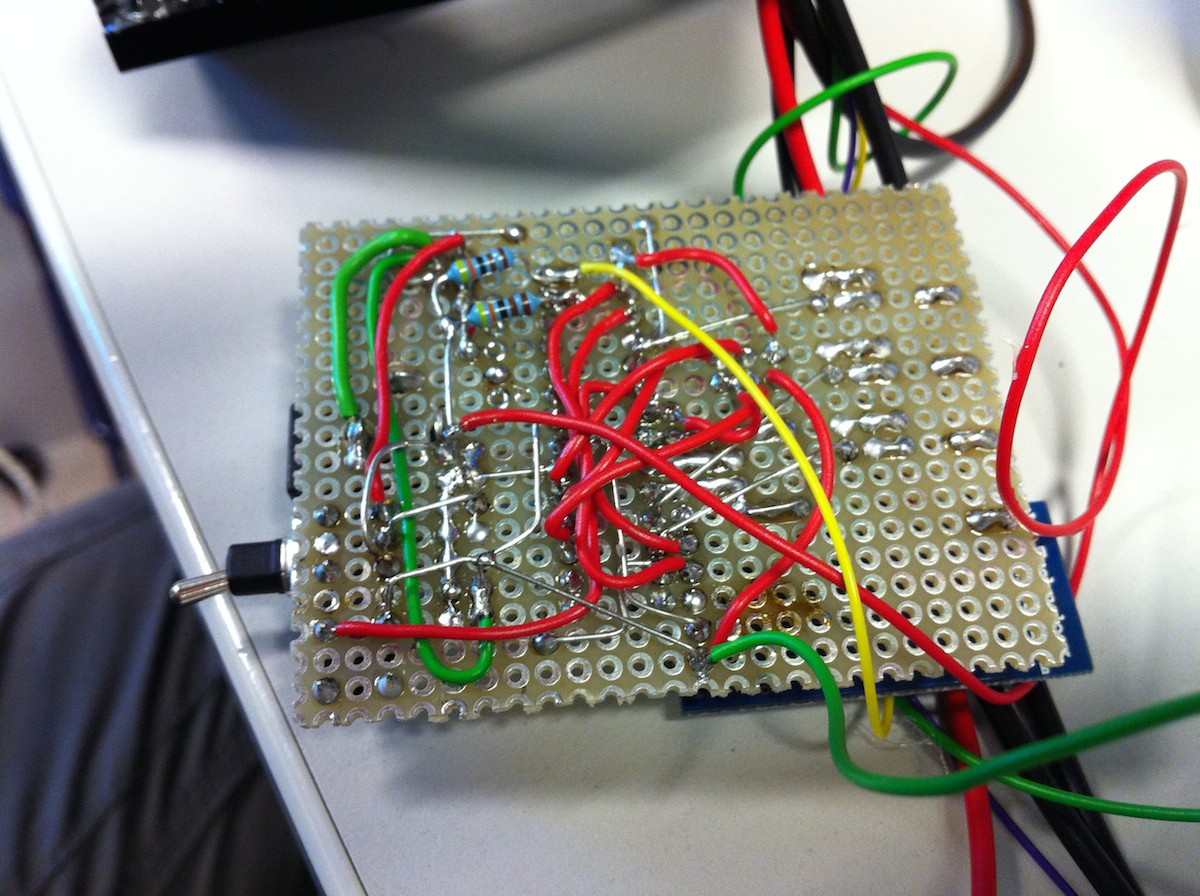
    It's a real rat's nest on the back of the board though!

    I hope I make the next round, so I can get some PCBs made up. I think building a 3D structure directly from the PCB will make construction much easier as well.

    More Soon!

  • Case Design and Laser Cut Parts

    David09/21/2014 at 17:27 0 comments

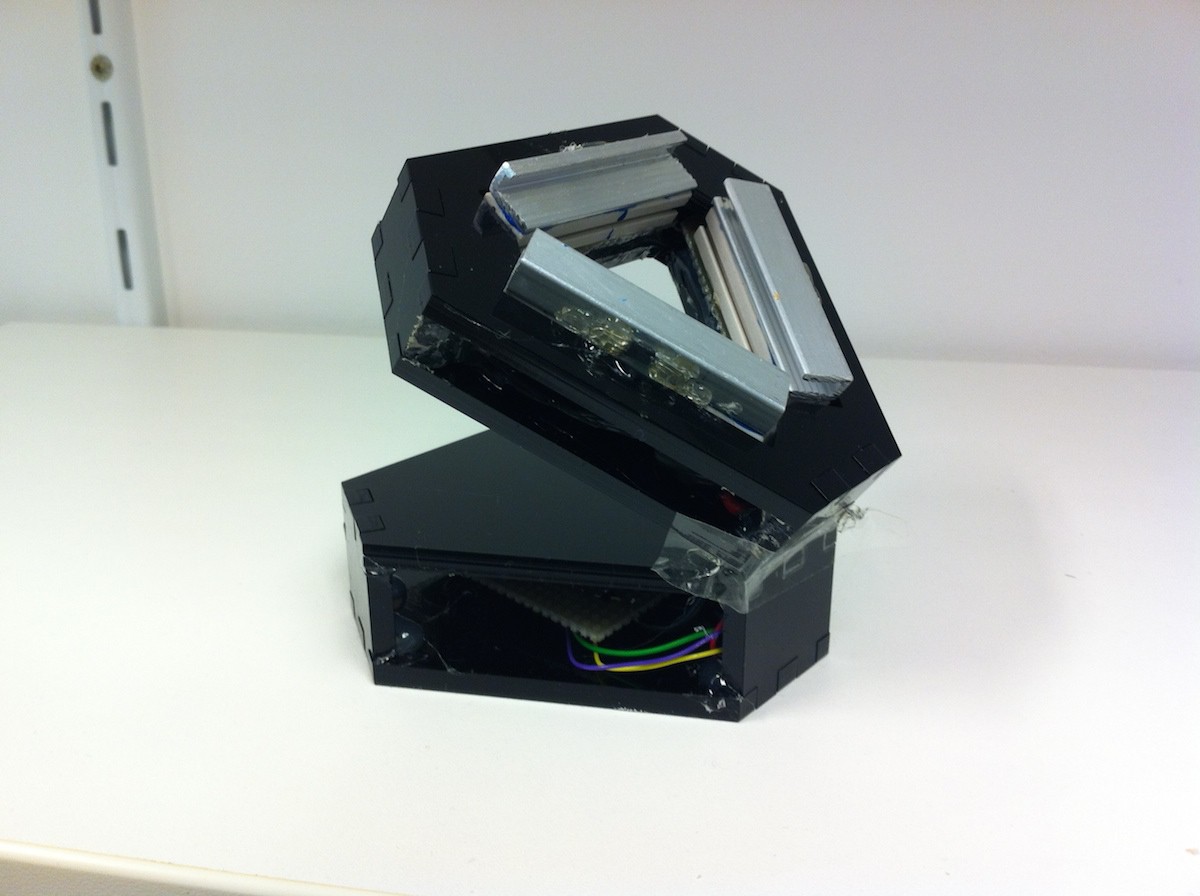
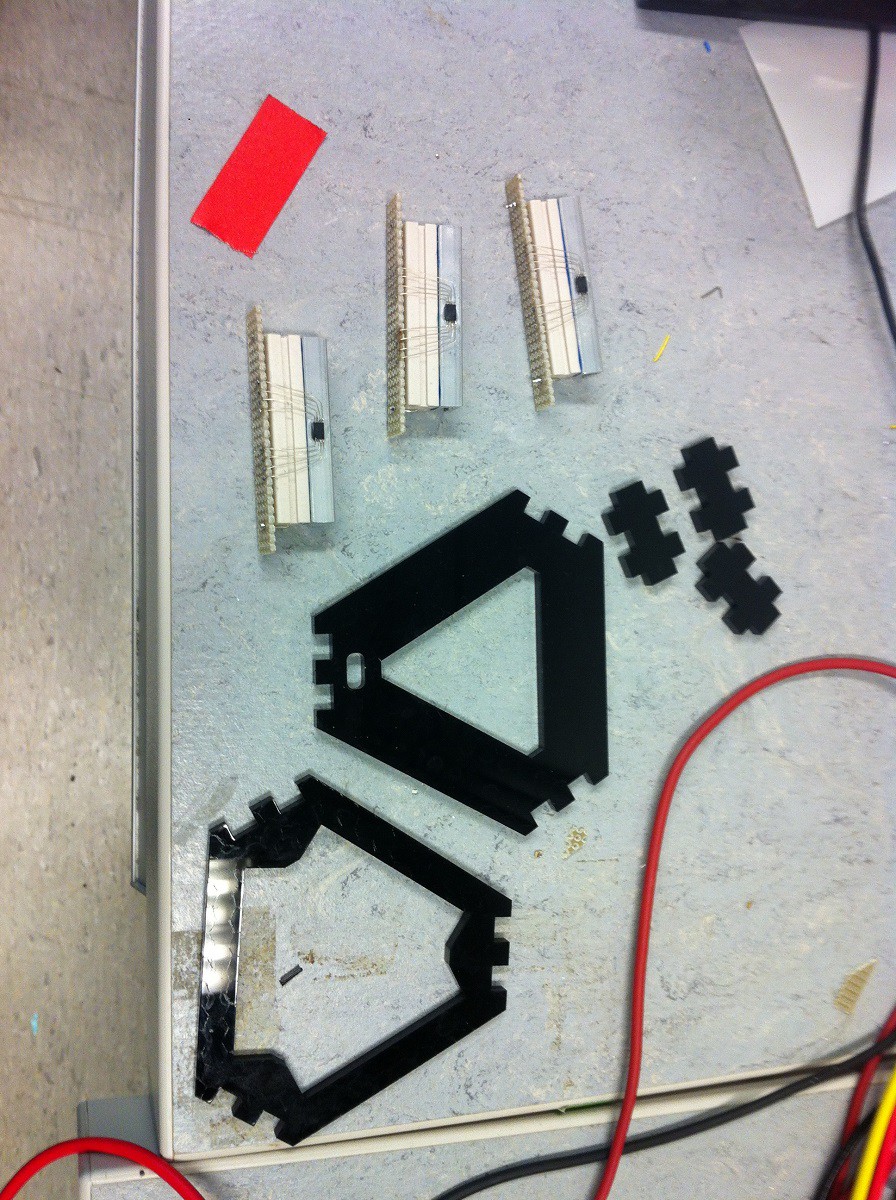
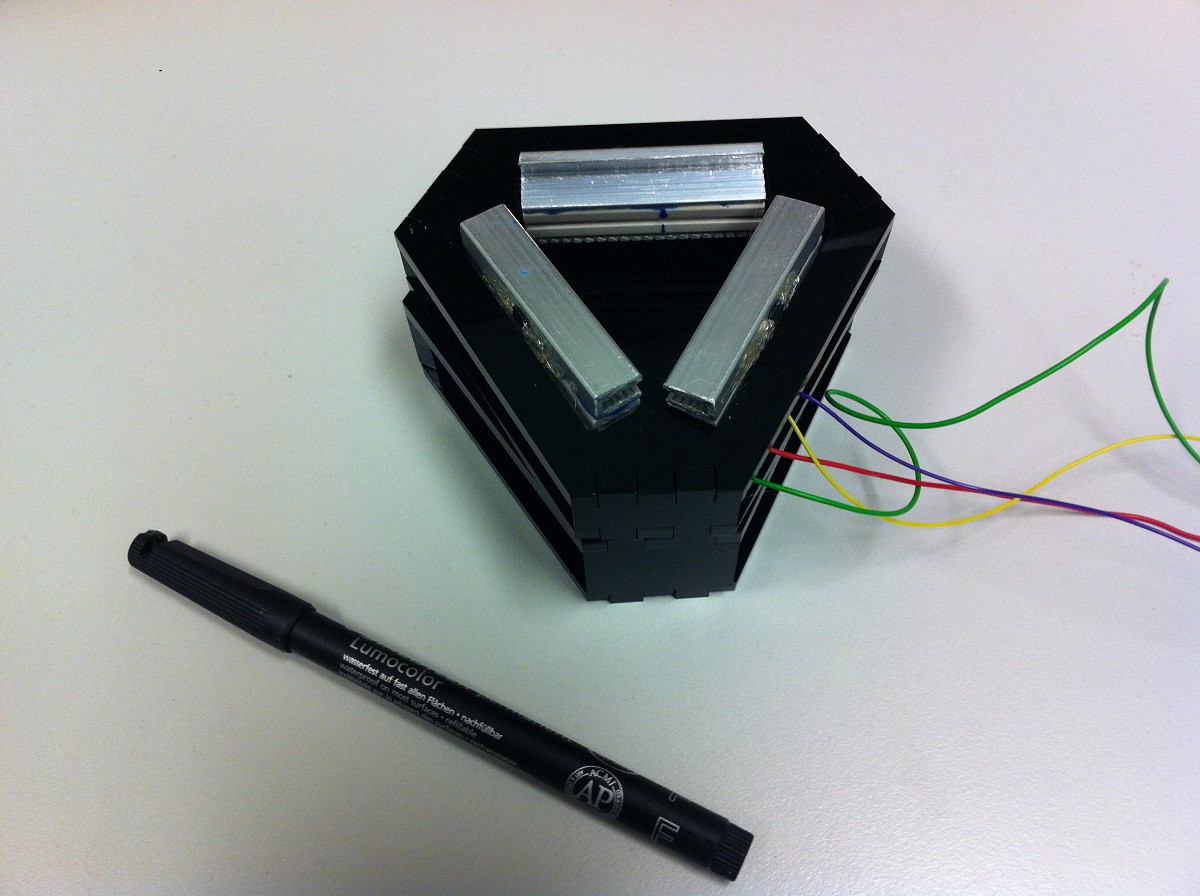
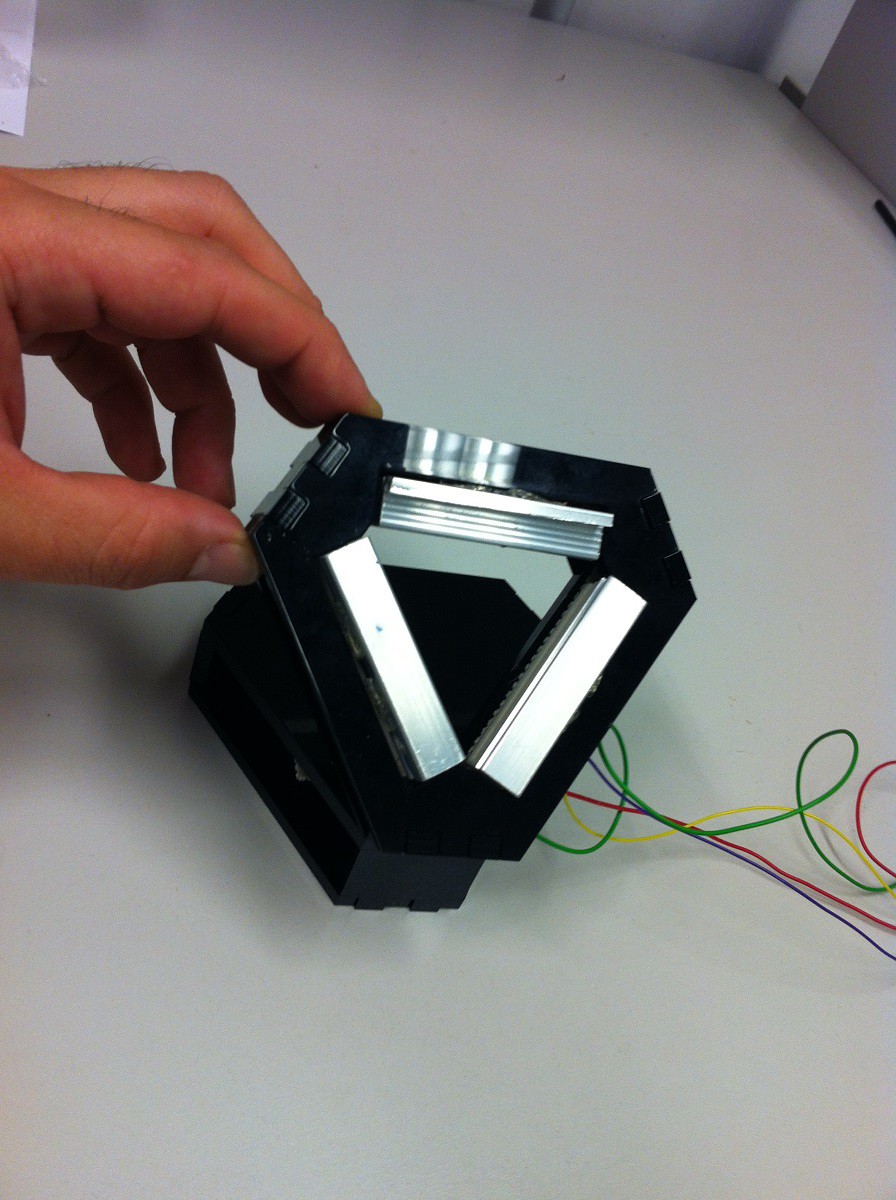
    I have spent the weekend watching the Oculus Rift keynotes on TwitchTV, and putting together the Polymerase Chain Reactor. The design for the case was created in Illustrator, and laser cut from black 5mm acrylic plastic. I would have preferred to use my 3D printer, but it's out of action, and there's no chance I can get this project finished in time AND rebuild my DIY printer with this deadline. It uses interlocking tabs to hold together, but it's still missing a nice hinge mechanism between the top and bottom compartments. Does anyone have an elegant solution for me?

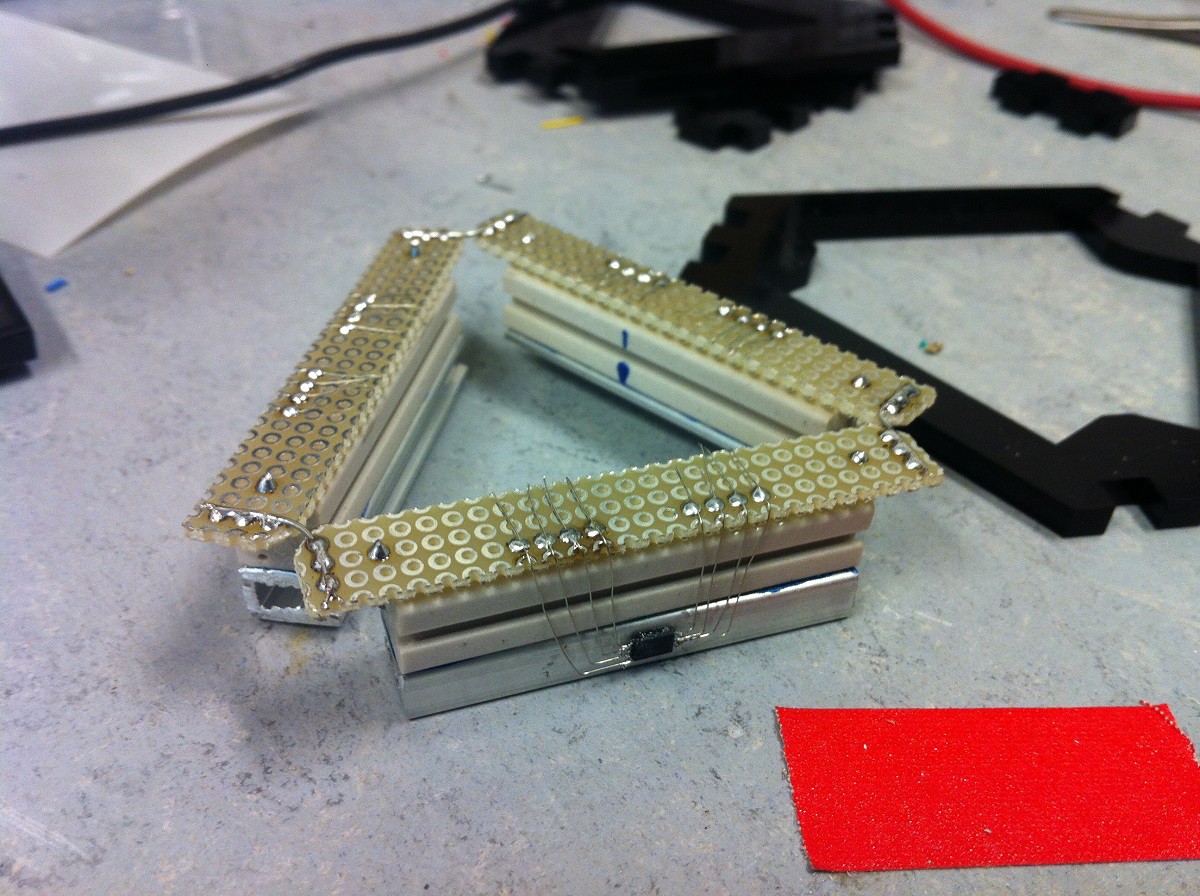
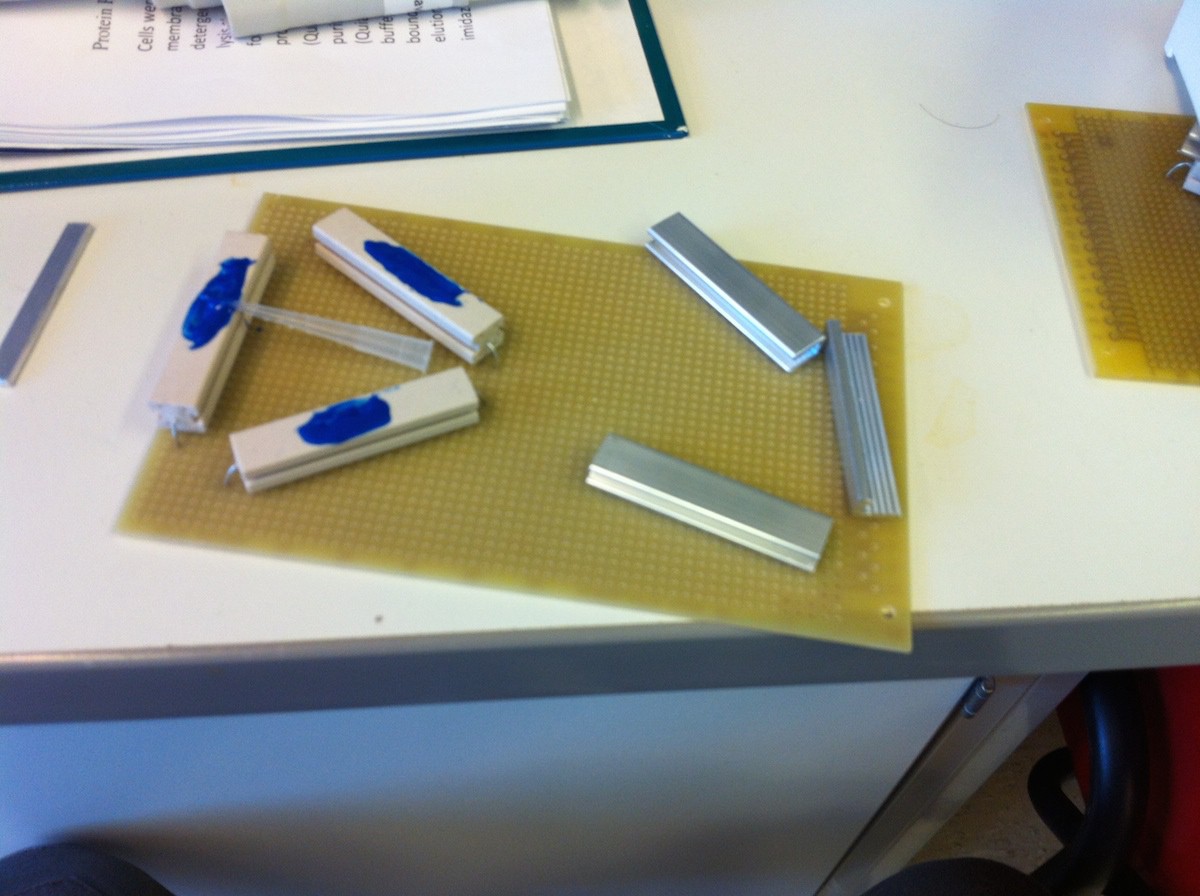
    Each heating element uses a 10 Ohm, 11 watt ceramic resistor, and an Microchip MCP9805 temperature sensor on I2C to the Atmega328. They are wired up, and the separate boards held together by a short piece of wire. Of course the final design will use custom PCB's, but there's not much time left in the competition, so I have had to hand-solder the surface mount parts...

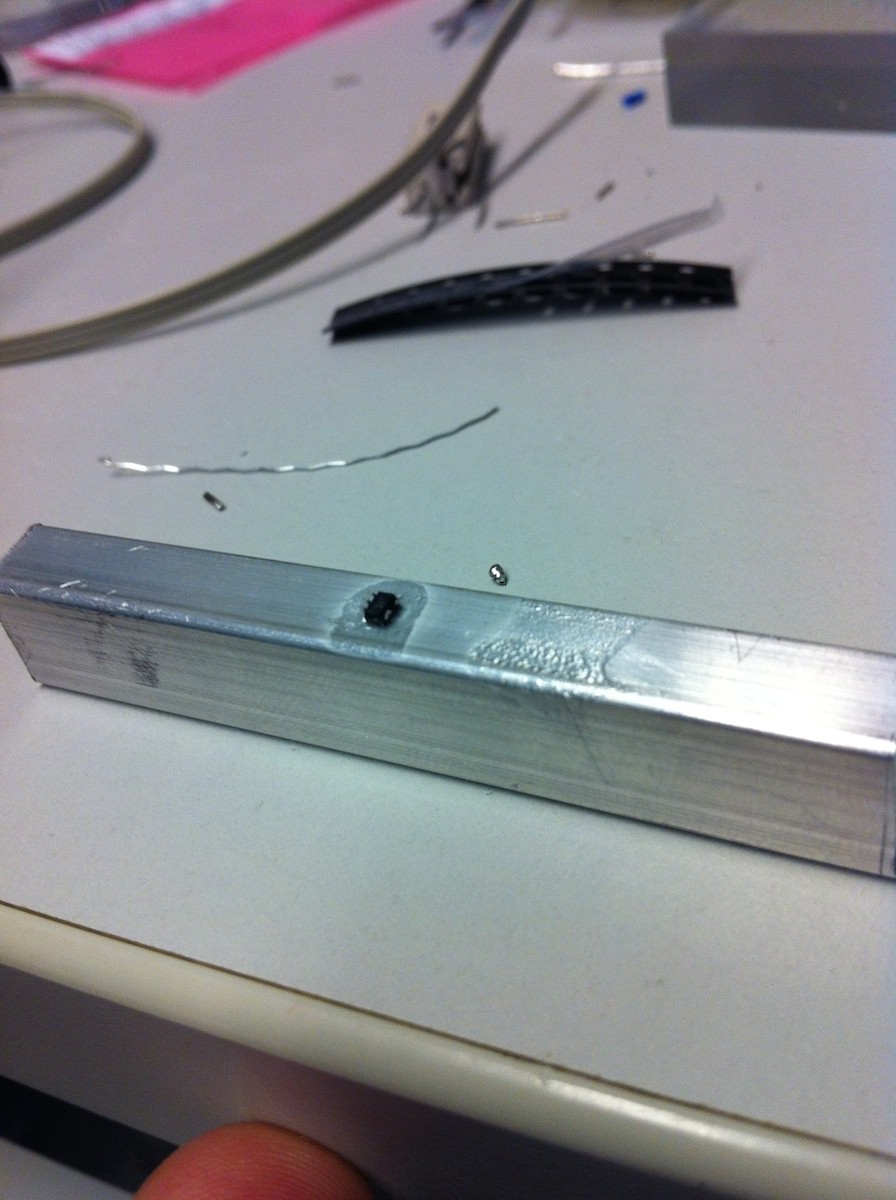
    The wires to the surface mount chip are VERY delicate, so I used a blob of hot-glue to give them some support. Then the case was snapped together around the completed heating/sensing system.

    The main-board is not yet complete. It will use the Atmega328P, with an Arduino-compatibleUSnooBie bootloader, so it doesn't need an FTDI chip for USB programming, and can act also as a HID device. It will use a cheap HC-05 bluetooth module for serial communication to the controlling computer. I hope to have a great-looking Processing based GUI for the PCR machine control and access online databases, but with time running out, I might have to make an alpha App with python and TraitsUI.

    More to come soon!

  • New Parts List

    David09/16/2014 at 17:02 0 comments

    I have the cheap version PCR machine completed, so here is the new parts list:

    MicrocontrollerAtmega328p$2.30
    3.3V RegulatorMCP1700T-3302E/MB$0.37
    2x 0.4C Temp sensorsLMT86QDCKTQ1$0.60
    2x 11W 10ohm heating resistorsSBCHE1110RJ$0.78
    2x 4A N-MosfetsTSM2310CX$0.80
    Capacitors and Resistorsvarious$0.50
    aluminium extrusionas described$0.50
    12MHZ crystalXTAL003210- HC49/4HSMX$0.27
    Paperclip$0.05
    USB mini connector$0.45
    Custom 2-layer PCB

    purchased in bulk

    $0.70

    The parts are commonly available and prices are good estimates for buying at single quantities You will just need a 9V 3A power supply to complete the project. That's a sum total of just $7.32, if you are buying single parts. 

    Moving to an ATTINY design would save about a dollar, and hand soldering on a 5x7cm perfboard a further 40 cents, lowering the cost to about $5.92, which I'll hope you will allow me to round down to the target price of $5 :) However, sticking with a custom PCB and buying a batch to make 100+ PCR machines, the price starts approaching $4.

  • Building the Prototypes

    David09/06/2014 at 15:31 0 comments

    Well, its been awhile since my last update, but that's not because of the huge amount of works I've been doing. I've been on holiday, but now I'm back working of the project

    Yay! I'm in the Top 50!

    Wow, I wasn't sure I would get this far, but it seems like I've passed the first barrier! I understand that the top fifty receive $1000 worth of electronic parts. Well, I hope they arrive soon and I can use them in this project, because I'm seriously low on cash to buy parts. I also hope they are sent from within Europe, because custom and duty fees are a killer!

    Anyway, I'm working hard on finishing working prototypes of the $5 board and the no-hold-barred super PCR machine. They are both really really really hard work, because at this stage, I don't have the time or funds to get PCB's made up. So, I am soldering all the parts by hand. And SC-70 surface mount parts are TINY!

    The only way I can manage it to to super glue the tiny temperature sensor to the aluminium heat spreaders upside-down, and then try and solder fine wire onto the legs, dead-bug style. Yes, I have destroyed many sensors so far....

    The heat spreaders are then held in place on the heating resistors with heating glue. 

    More to come soon!

View all 20 project logs

Enjoy this project?

Share

Discussions

Dr. Michael A Morgan wrote 02/09/2017 at 15:02 point

What's the current state of the project? Have you thought about commercialization?

  Are you sure? yes | no

David wrote 02/10/2017 at 08:06 point

The project is paused at the moment. I have a few projects that I would like to sell, maybe on Tindie, so I have to get the business side of things set up first. Then I'll start selling all the projects at the same time. Hopefully by the end of the year!

  Are you sure? yes | no

bijtaj wrote 06/08/2015 at 23:03 point

Where do you get your primers from and how expensive are they?

  Are you sure? yes | no

David wrote 06/09/2015 at 04:55 point

From a company here in Germany. Each primer costs about 5-10 euro, depending on length. It gives you enough for about 2500 PCR reactions, but if you buy larger quantities the price per reaction falls

  Are you sure? yes | no

Mixon wrote 04/04/2015 at 19:11 point

Great stuff man!. Big A and star to you!.

If you make a nice kit of then I'm game. I buy a kit!.

Happy easter.

// Mixon

  Are you sure? yes | no

gomisan wrote 03/20/2015 at 00:28 point

Just arrived at your project after discussing biohacking with my girl friend last night. She's a molecular microbiologist, and I'm a geek and occasional builder so I bravely stated that 'surely' it wouldn't be too hard to build a PCR machine with some heaters, an arduino to control it etc etc.

Then to back up my assertion I came looking here today and found your project. You last log entry states that 'you're out' ... does that mean there's nothing more to be done here, or you have moved on to different things? I would like to try and build something like this.

  Are you sure? yes | no

David wrote 03/20/2015 at 12:00 point

Well, it meant I'm I was out of the competition. I only made it to the semifinals of the 2014 Hackaday Prize. 

The prototype seems to work OK. I had two ideas on moving forward:

a) Get a bunch of boards made in China, and offer them on Tindie (where you could buy one).

b) keep working on better implementations and ideas. I was thinking of adding a blue LED, a green filter and a photodiode mounted perpendicularly, and doing Real-time PCR through the semi opaque teflon tubing with a fluorescent DNA binding dye. Ask your girlfriend what she thinks of that :)

But yeah, I'm not really sure what to do next.

  Are you sure? yes | no

davedarko wrote 09/29/2014 at 17:57 point
That acrylic case looks awesome! Have you thought about using a smaller/cheaper atmega? Or even an attiny2313?

  Are you sure? yes | no

David wrote 09/30/2014 at 07:26 point
The $5 PCR machine could benefit from switching to an ATtiny, saving about 50 cents, but I could only use an ATtiny1634. That's because the code is already over 8K, and I need two PWM's to control the heating elements, and only the ATtiny1634 hits both of those requirements.

Because I need 3 PWM's for the better PCR machine, I can only use an ATMEGA. The ATMEGA168 is only a tiny bit cheaper than the 328 version, and as I'm already at 14K of code, so if probably safer to stay with the ATMEGA328P as I will be adding more features in the code as the project evolves.

  Are you sure? yes | no

davedarko wrote 09/30/2014 at 10:20 point
Wow, 8K? When V-USB is 2k, what is the rest? I'm just interested in your design decisions, hope you don't mind me asking - I don't want to sound like an average HaD blog commenter ;) It's surprising how big code can be, especially when your idea sounds so simple (that's what I like about it, it's brilliant). Serving two or three PWM signals by hardware or software and reading out two or three analog inputs does not sound that heavy. There is a softPWM library if you need more PINs with PWM. But anyways, great work, great concept - good luck for the prize!

  Are you sure? yes | no

David wrote 09/30/2014 at 11:03 point
I can't reply to your new comment directly, theres no threading in the comments it seems...

Anyway, the code is up on the Github site for you to examine, but what I use is the PID library (https://github.com/br3ttb/Arduino-PID-Library/), and the HID-serial library (https://github.com/rayshobby/hid-serial). Using those two prewritten libraries means my entire code is under 100 lines :)

I do have a dozen or so ATtiny841's ready to go, and the code is only a *tiny* bit over the 8K limit. If I optimised the code and removed the bootloader, and programmed the chips with my AVR ISP Mk2, I could probably get it done. If I make the next round, I will try!

However, I am not familiar with direct AVR programming, and going that route would mean leaving my nice safe Arduino environment, as there is no Arduino core for the ATtiny841 available yet.

  Are you sure? yes | no

davedarko wrote 09/30/2014 at 23:00 point
everything seems to be in order :) I got used to it, no threading needed in a linear conversation anyway...

okay, I never noticed that you are still using the arduino basis, I've played with V-USB once and always had to program my avr's with an usbasp programmer so I never thought of that. I've checked your code and was even more surprised about the size but never noticed the file ending with pde.

Beautiful case, can't take my eyes of it :)

  Are you sure? yes | no

Jasmine Brackett wrote 08/15/2014 at 23:48 point
Hello David, your project info is looking good, but please review your documentation to ensure it has everything we require for it to be considered for the next round of The Hackaday Prize.

By August 20th you must have the following info on your project page:
- A video. It should be less than 2 minutes long describing your project. Put it on YouTube (or Youku), and add a link to it on your project page. This is done by editing your project (edit link is at the top of your project page) and adding it as an "External Link"
- At least 4 Project Logs
- A system design document. Please highlight it in the project details so we can find it easily.
- Links to code repositories, and remember to mention any licenses or permissions needed for your project. For example, if you are using software libraries you need to document that information in the details.

You should also try to highlight how your project is 'Connected' and 'Open' in the details and video.

There are a couple of tutorial video's with more info here: http://hackaday.com/2014/07/26/4-minutes-to-entry/

Good luck!

  Are you sure? yes | no

daveatfernie wrote 08/13/2014 at 16:02 point
Progress certainly has moved on but now resembles the LavaAmp PCR machine :)

http://lavaamp.wordpress.com/

  Are you sure? yes | no

David wrote 08/13/2014 at 17:04 point
Interesting! The principle seems very similar, but that's not surprising. Once you start thinking about convection for PCR, the idea for a closed loop system becomes obvious :) Phil Howard came up with a similar idea, outlined in his comment below.

After a quick look though, a few points jump out:
- The circular design of the heaters is much harder to fabricate for DIY'ers.
- Attaching the tube to the outside of the heating element means the tube has to be a precise length to be in good contact (with my design, the tube presses outwards onto the heaters, and slack is used up in the corners, i.e. 5mm here or there isn't an issue.)
- The straight sides means I can use very cheap power resistors as heating elements. I guess by using wider aluminium heat spreaders, I could also PCR multiple samples like the LavaAmp, but thats not my goal.
- The heating element is fixed in a horizontal position. I think (and am currently testing the theory), that you can alter the cycling velocity of the fluid by changing the angle of the plane of the heaters. i.e. when they are aligned vertically, you get the fastest speeds, and near horizontal the slowest. That way you can alter the extension time, and thus PCR longer targets.
- LavaAmp seems to be vapourware, as http://lava-amp.com is down, and the blog hasn't been update since 2010
- Lastly, its not Open Source hardware and software. You can download my schematics and code right now, and build your own Polymerase Chain Reactor :)

  Are you sure? yes | no

davedarko wrote 08/11/2014 at 12:21 point
something went wrong with the formatting, I guess there is a break within the table.

And congrats to your working setup!

  Are you sure? yes | no

David wrote 08/11/2014 at 13:28 point
OK! all fixed now I hope.

Sometime today or tomorrow, I will upload the schematics and source code, so that other people can build the v0.2 prototype. That should be enough to verify that it works, and help identify any potential flaws or improvements in the design.

I have already moved on to using a single ATMEGA328P using V-USB to save the cost of a FTDI chip, but another option is to build a DNA Replication shield for the Arduino. The Arduino Uno already has the microcontroller, 3.3V converter for a reference voltage, and the USB interface I need. Any opinions? Would this be better than a more expensive standalone system?

Hopefully this is the kick the DIY BioHacking need to go mainstream. If I win the Hackaday prize, or make it to the top 3, I will next design a super cheap Gel Electrophoresis and Incubator system. That should be enough hardware to bring Recombinant DNA technology to the classroom and Hackerspace.

  Are you sure? yes | no

Phil Howard wrote 07/17/2014 at 15:34 point
Could you use a convection tube to control how the fluid flows? Maybe even a double helix heat exchanger, where the fluid flows up one helix, round a U and down the other.

Creating a more complex shape might permit a series of changing temperatures, largely by winding around warmer or colder water. A simple version would run back and forth between hot and cold sides in the right ratio to set the temperature.

Again it's all driven by convection so only the shape is necessary.

  Are you sure? yes | no

David wrote 07/20/2014 at 17:40 point
Yep, that's what I have in mind, but somewhat more straight forward.

  Are you sure? yes | no

daveatfernie wrote 07/16/2014 at 07:30 point
I'm also interested to see the viability of the project. I have built PCR instruments for the last ten years and usually the effort is put in to have homogeneity in the tube to ensure that the product has amplified properly. I could see the tube containing a lot of primer dimers. How are you intending to test the DNA once it has been amplified?

  Are you sure? yes | no

David wrote 07/16/2014 at 08:23 point
I'll PCR test fragments of various lengths and with various primer Tm's to test see if the principle is sound, and check by seeing if I get good gel bands. Then I'll clone some the fragments into vectors for sequencing, to make sure I'm getting real results. The idea isn't to have a general purpose lab PCR machine, it's to get a cheap machine for schools and hobbyists to try PCR, without having to spend hours slaving away in front of water baths.

  Are you sure? yes | no

davedarko wrote 07/12/2014 at 19:07 point
How long should the temperature transition times be? I don't think water will cool off that fast so you have to pull it out some how? Is it a crane which dips a cocktail of DNA and polymerase into hot water and different heights above the boiling pod? I'm just letting my mind spin here... interesting project anyways!

  Are you sure? yes | no

David wrote 08/14/2014 at 08:08 point
Sorry for not replying sooner! The times used in a standard PCR thermocycler are all most about the heating and cooling times. Standard 'fast' protocols use 20 seconds denaturing, 20 seconds annealing, and about 30 seconds for each thousand base pairs of target you want to copy. But, lab-on-chip devices that can heat or cool tiny specks of fluid seem to run nearly 10 times the speed. I guess a few seconds each for the first two steps, then 30 seconds per kbp is the best you can do?

  Are you sure? yes | no

Insapio Limited Company wrote 07/11/2014 at 12:20 point
Interested in seeing where you're going with this! Kary Mullis is my hero. Plus, hard to beat $1.

  Are you sure? yes | no

David wrote 07/11/2014 at 21:47 point
Sorry, but I have had to raise the price to comply with the competition rules. However, now there will be temperature and time tracking. It things get really complicated, it may even reach $10, but I'm trying my best!

  Are you sure? yes | no

Similar Projects

Does this project spark your interest?

Become a member to follow this project and never miss any updates