-
Making a physical version of this project.
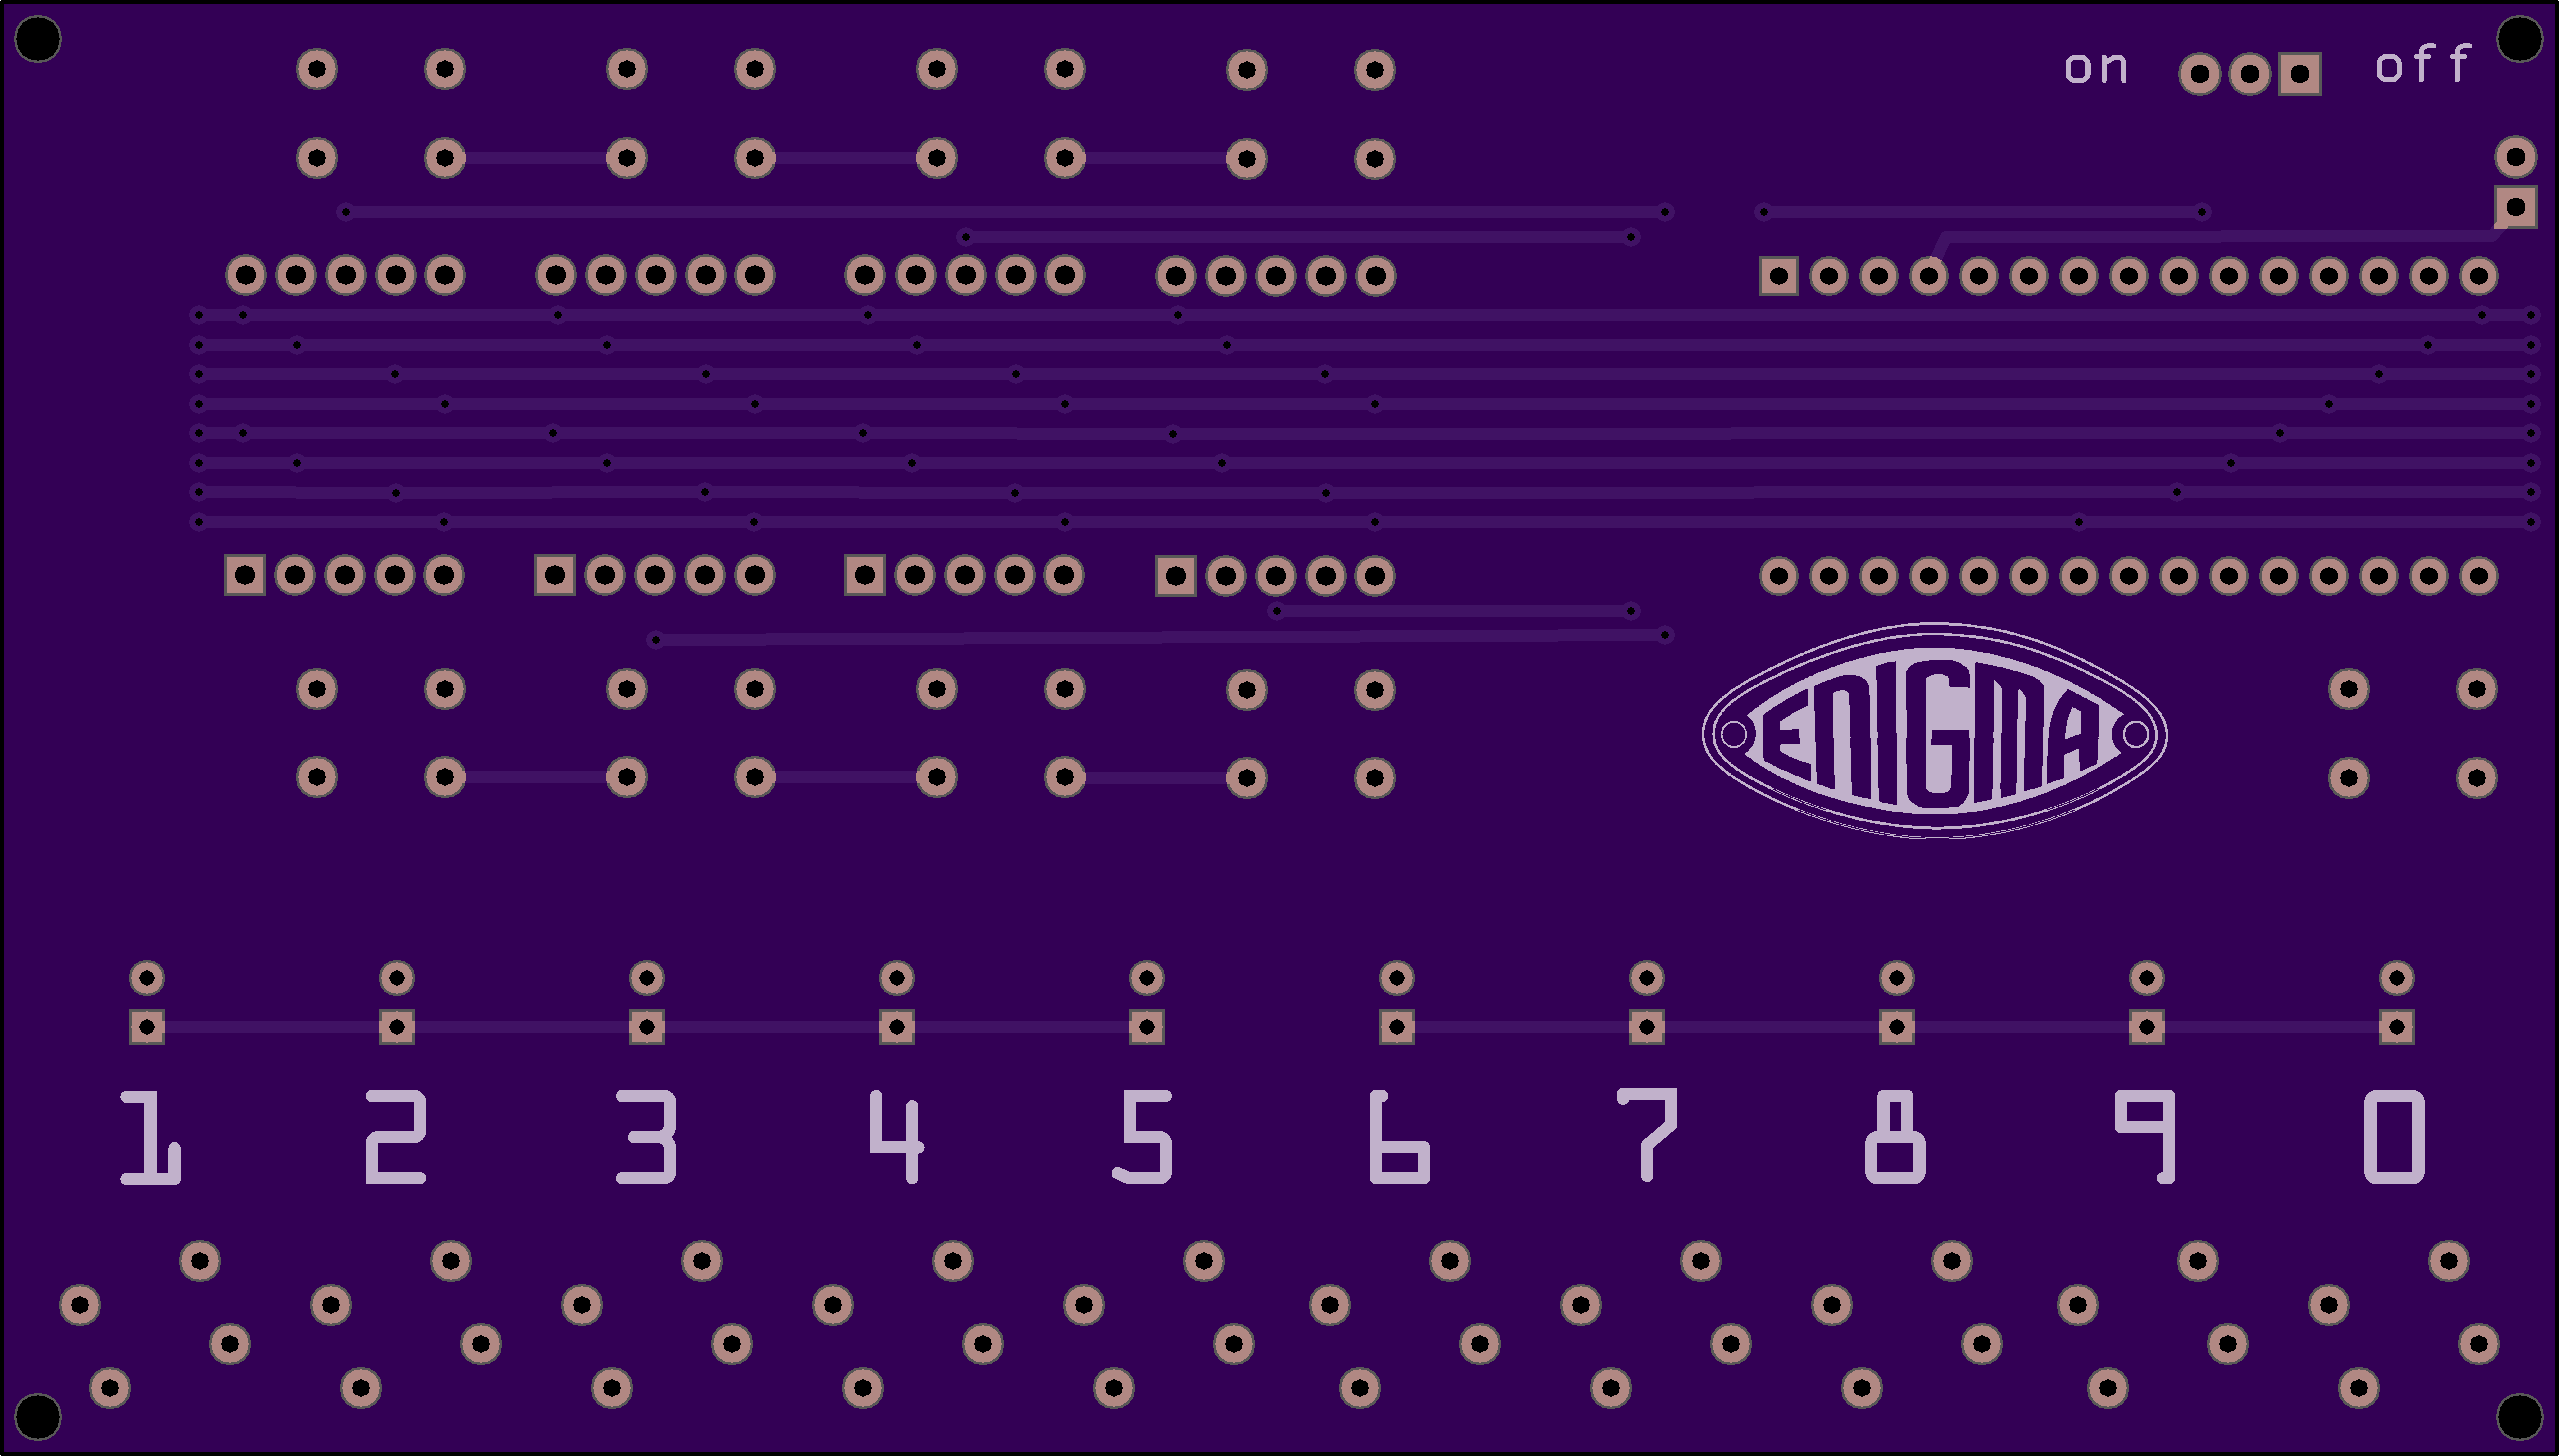
05/23/2019 at 05:24 • 0 commentsThis project is getting its own PCB, its about time we have a physical Enigma Z30 Simulator
https://hackaday.io/project/165684-nano-z30-a-numbers-only-enigma-machine-simulator
-
New Project: A full featured Enigma Machine Simulator
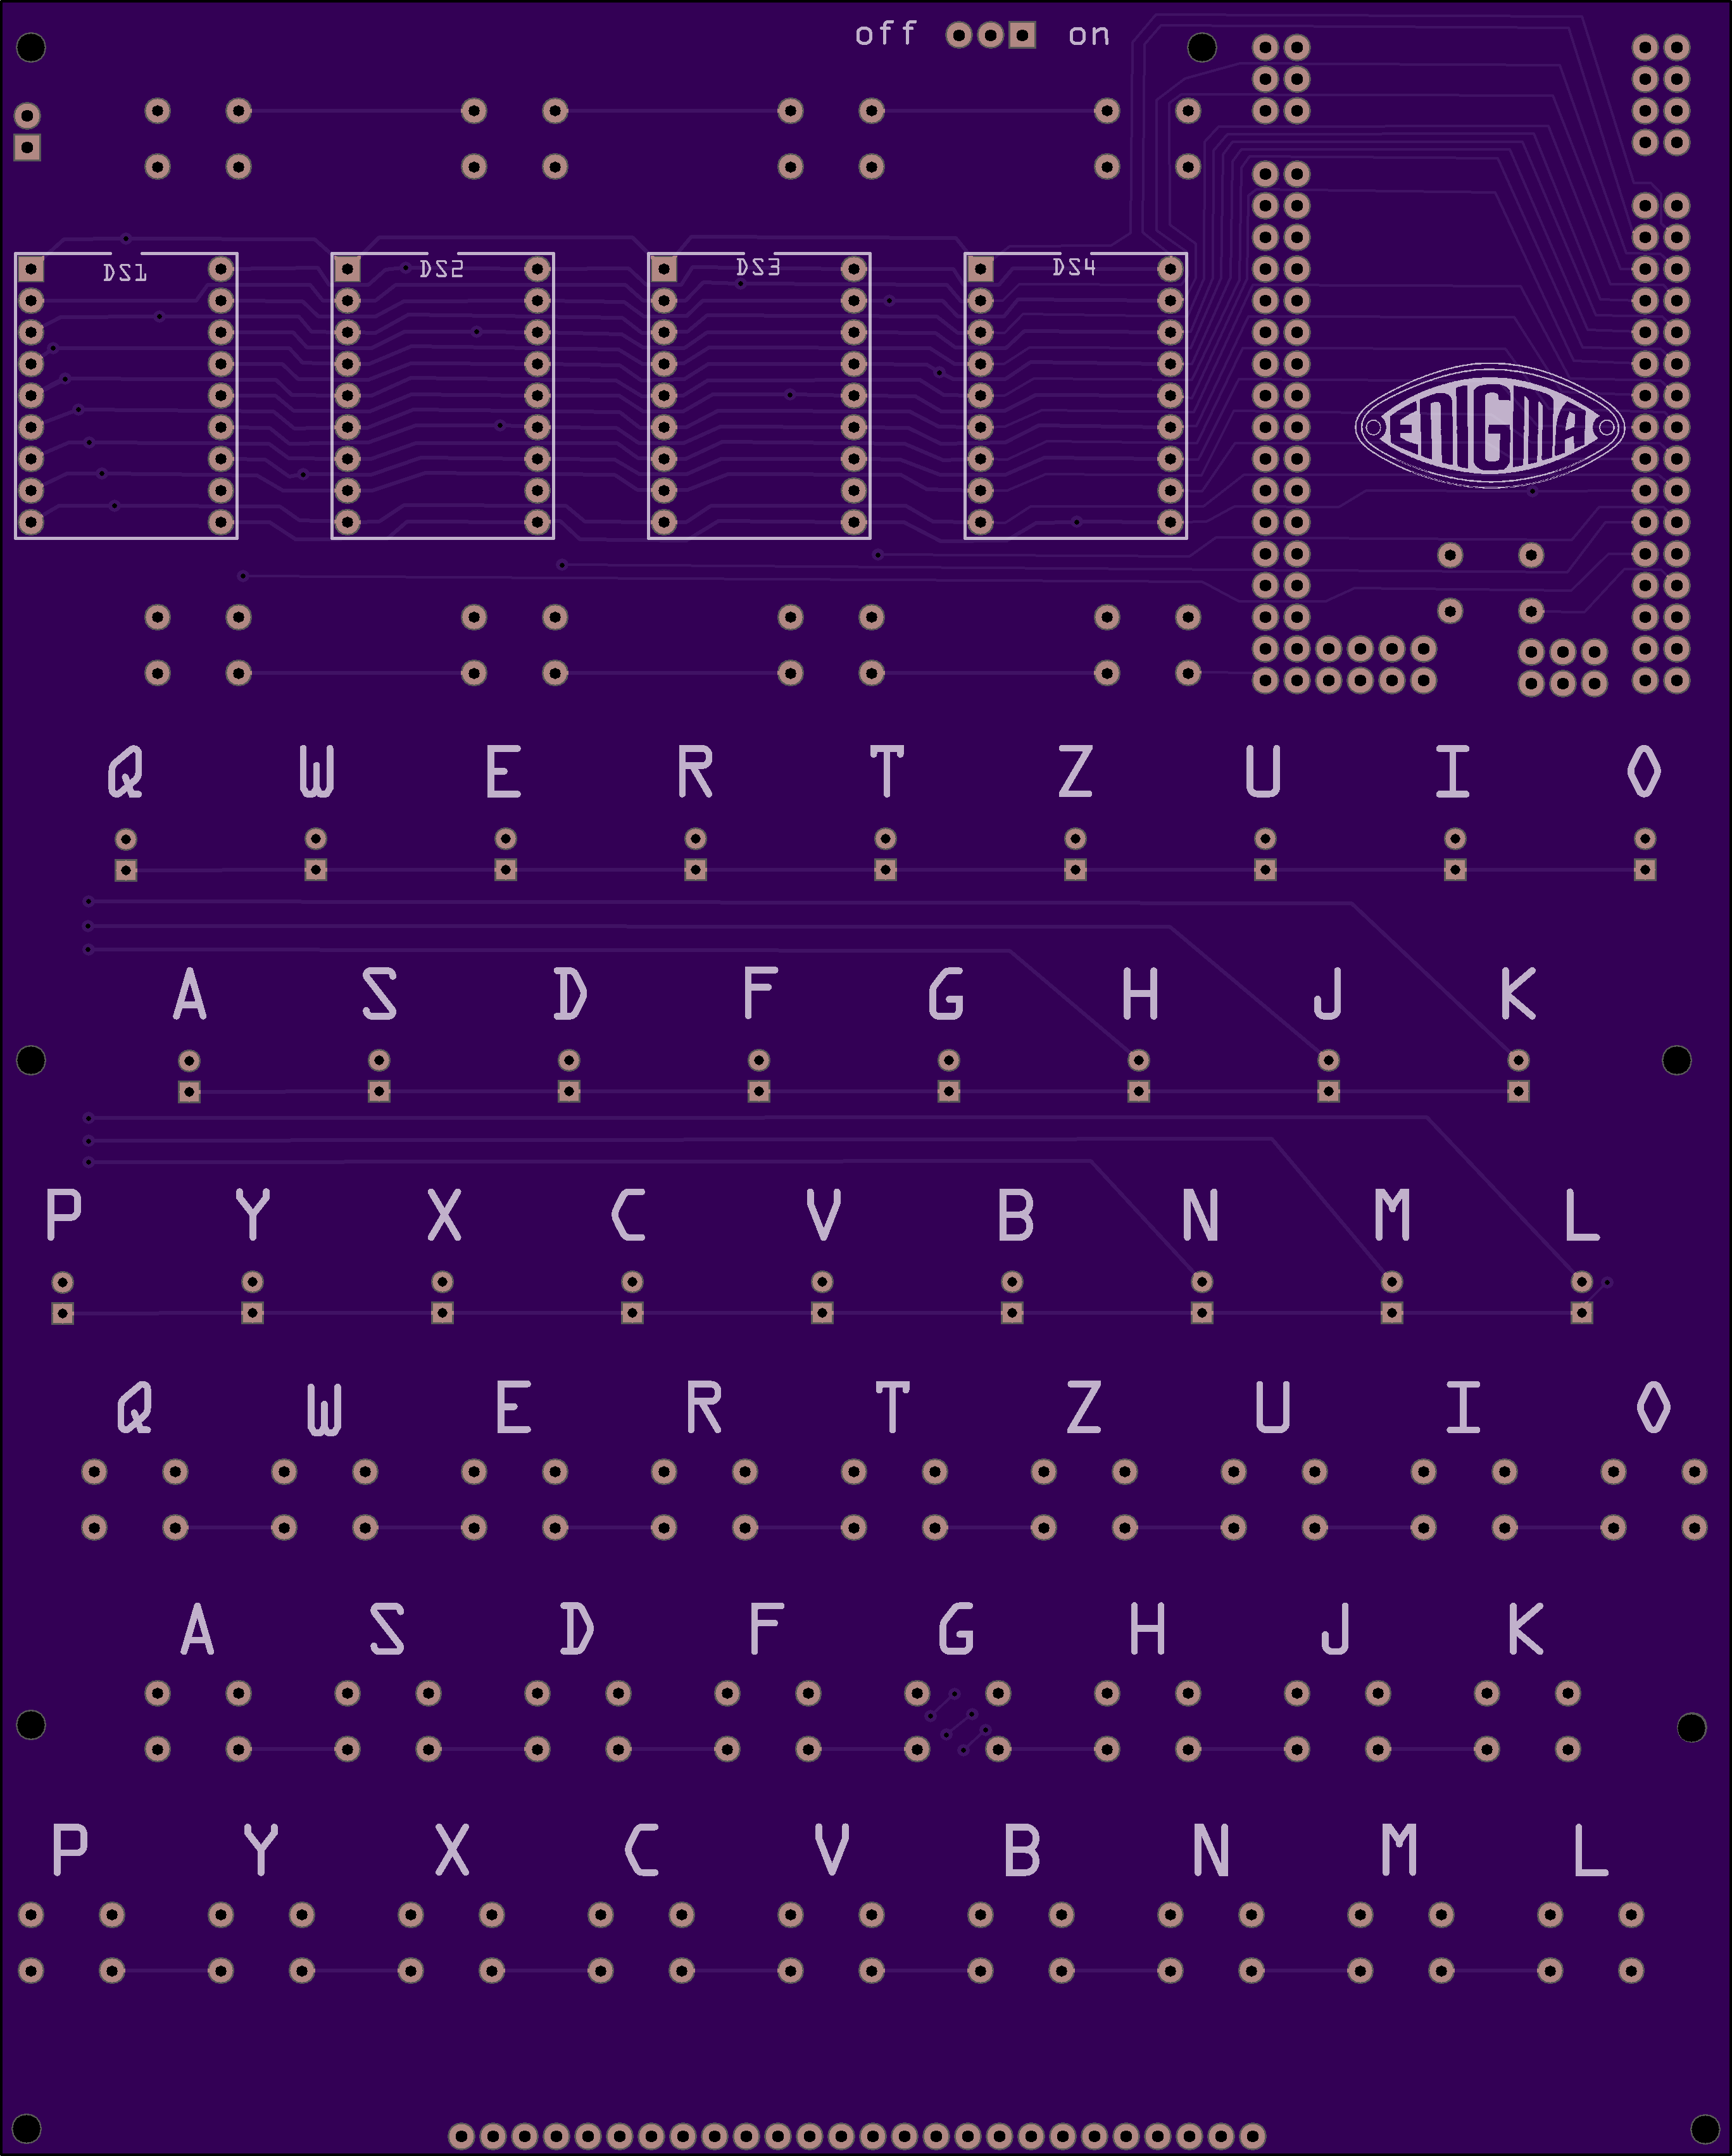
05/15/2019 at 23:05 • 0 commentsI have been wanting to make an Enigma Simulator with 16 segment displays, leds and buttons, but the Arduino Nano/Uno do not have sufficient I/O pins to do that. The Mega2560 R3 Pro Mini changes all that. It has enough IO pins to drive all the LEDs, read all the keys and have a full 26 letter plugboard without resorting to crazy multiplexing tricks. Below is an image of the board.
To read more, follow this hackaday io project here:
https://hackaday.io/project/165559-at-mega-enigma-a-2560-pro-mini-enigma-simulator
![]()
-
Optimized program is now 679 bytes
07/12/2017 at 03:33 • 0 commentsAs part of the 2017/04 Retrochallenge, went thru the code and optimized it further. It has gone from 703 bytes in the initial release to 714 bytes for gear and lever stepping and the same functionality now occupies 679 bytes. By changing the jumps to a conditional jump that is always taken, 7 extra bytes can be eliminated for a new smaller size of 672.
http://arduinoenigma.blogspot.com/2017/05/retrochallenge-2017-rc201704.html
-
v2.0 Released. Has lever and gear stepping.
03/26/2017 at 16:44 • 0 commentsAfter realizing two different types of machines were created, the code was modified to implement both. The original machine had a lever stepping mechanism. This is a simpler mechanism to implement, but it has a double stepping anomaly, Any wheel showing 9 will step that wheel and the wheel to its left. Later machines were created with geared stepping. This behaves like a car odometer and no numbers are skipped. The settings menu was changed to allow the stepping setting to be changed as well. The program was aggressively optimized. The enigma machine code with the added features shrank when compared to v1. When the settings menu is added, the code only grew by 11 bytes.
Read more and get the latest program at:
-
Going all in...
01/04/2017 at 12:00 • 0 commentsSome new code was added to be able to change the machine settings without exiting to the KIM-1 monitor. From within the main screen (00 on the right two digits), push the [B] button and the screen will show 0123 F1. The numbers on the left are the rotor types. There is only one reflector type, so a 0 is shown in its place. The up/down buttons used to change the rotors in the normal view can be used to change the rotor types. To accept the new rotor types, push [B] again. If an invalid rotor combination is selected, EE is shown on the two right digit.
Once any combination of 1,2,3 is entered, pushing [B] again will take us to the ring setting screen. The screen will initially show 1111 F2. The numbers on the left are the ring settings for the reflector and the 3 rotors. Again, the up/down buttons can be used to change the settings to any value between 0000 and 9999. Pushing [B] again returns to the main screen (00) and the machine is now ready to encrypt numbers with the current settings.
While on the F1 or F2 screens, the machine will not accept a numeric input to encrypt. Pushing [GO] in any of the 3 screens will zeroise the encryption key to its default value of 1,2,3,1,1,1,1,4,3,2,1 This use of the [GO] button can be disabled in either screen independently by changing the location of a jump in the code.
The new program size is 703 bytes. Counting the bytes for the Kim-1 ROM keyboard and display routines adds 150 bytes for a total of 853 bytes. We can now fully configure the machine from within the program. The only time the KIM-1 monitor is needed is to launch the program by typing [AD] 0500 [GO]
-
Arduino UNO Implementation
12/26/2016 at 14:38 • 0 commentsNow that the Excel Paper Model and the KIM Uno version are working and producing the same results, here is a third implementation to make experimenting with this machine more accessible to everybody,
https://github.com/arduinoenigma/Mystery6502Machine/blob/master/EnigmaZ30.ino
This program is not part of the #1kBChallenge.
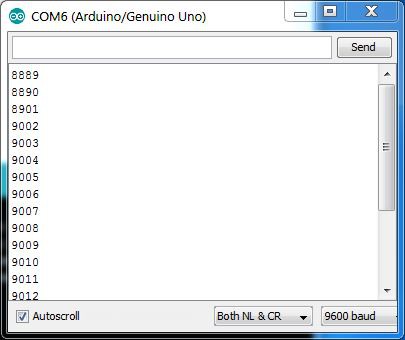
To use it, open a Serial Monitor.
Send ! and and any combination of 1,2,3 to set the wheel type and their position.
Send @ and four numbers to set the ring settings
Send # and four numbers to set the visible wheel position.
The set commands can be concatenated to set the whole key at once.
After !,@ or # receive the required digits, the current key will be shown.
Send a number and it will be encrypted with the current machine settings.
For example:
1111 encrypts it with the current machine settings
!312 sets the wheels to 3,1,2
@1111 sets the ring settings to 1111
#6789 sets the wheel positions to 6789
!312@1111#6789 sets the whole key.
1111 encrypts it with the key set on the step before.
$ prints the current key, will print 03+01+02+01+01+01+01+06+07+08+09 the sequence to enter in the KIM Uno at address 0050 to configure the machine
-
The Next Implementation...
12/25/2016 at 05:16 • 0 comments -
Using the Excel Paper Model to encrypt a message
12/18/2016 at 15:52 • 0 commentsFirst, get the Excel Paper Model of the Enigma Z30 here:
Once the file is opened, find the following section on the left panel of the Enigma tab.
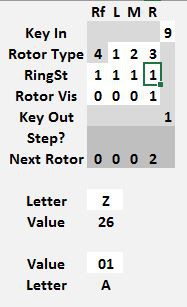
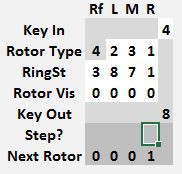
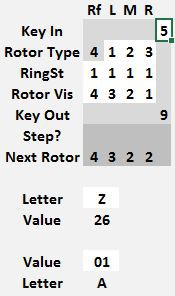
This is the control panel where the Enigma Z30 model is operated.
Data can only be entered on the white squares.
On the Key In row, the number to encode can be entered
On the Rotor Types row, the left, middle and right rotors can be set, use the 1, 2 an 3 rotors only once. The reflector is fixed to type 4 and cannot be altered.
Below, on the Ring Setting row, each rotor can have its stepping point and relative position of the contacts altered. When the ring setting is 1, the rotor steps at the 9 -> 0 transition. If the ring setting is 0, the rotor steps at the 8 -> 9 transition, if set to 2, it steps at 0 -> 1. Each rotor, including the reflector can have its own different ring setting.
The Rotor Vis row sets each rotor position. Every time a new key is encoded, first the rotors advance to the next position, and then the key is encoded. The next rotor position is shown a few lines below in the Next Rotor row. In the example shown, the rotors were originally set to 4 3 2 0 and when the key 5 was pressed, the machine changed the rotors to 4 3 2 1 and then encoded 5 into a 9.
The encrypted value for the entry key is shown in the Key Out row. In this example, 5 encrypts to 9.
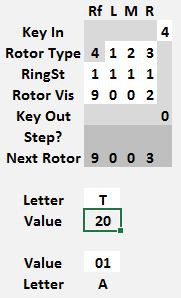
As an aid to encrypting text, two conversion fields are shown at the bottom, one converts letters A..Z to numerical values 01..26 and the other field converts a number in the range 01..26 to a letter A..Z
---
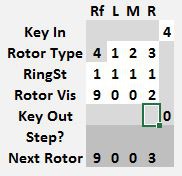
To encode some values with a starting rotor position of 0 0 0 0, set the machine as shown below. The 9 encrypting to 5 is for a starting position of 9 9 9 9, which advances the rotors to 0 0 0 0. Don't use that value. At this point, just set the Rotor Visible position.
Note the Next Rotor position is 0 0 0 1. Before starting to encrypt anything, copy that rotor position values from the Next Rotor row to the Rotor Vis row.
Notice that 9 now encrypts to 1. That is the correct encrypted value for a starting position of 0 0 0 0. If the key to encrypt was a 9, note the Key Out value of 1. If the value to encrypt was not a 9, simply change it and the Key Out will show the correct output value. Afterwards, advance the rotors to 0 0 0 2 by copying the Next Rotor values to Rotor Vis.
Once a stepping point is reached, the Paper Model will automatically step the appropriate rotor and show the Next Rotor value.
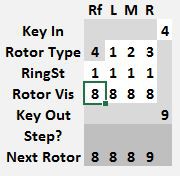
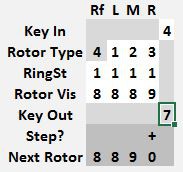
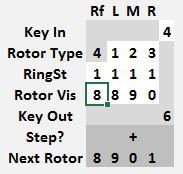
Different enigma machines models use either a lever or gear stepping mechanism. The gear driven ones behave like a car odometer and advance the numbers correctly. The ones with lever driven stepping mechanism behave a little differently, any rotor at its stepping point, on the next key press will increment itself and the rotor to its left. This is known as the double stepping anomaly. An example is shown below.
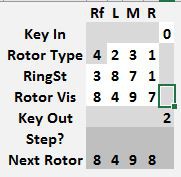
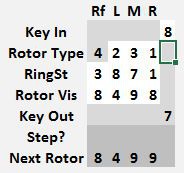
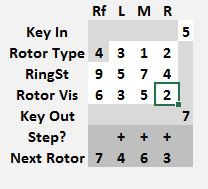
The sequence above shows a starting position of 8 8 8 8 and the number 4 being encrypted 4 times, the output value on the first frame is disregarded, as this frame only sets the starting position of 8 8 8 8 to determine the next position of 8 8 8 9 once the key 4 is pushed. Thus 4444 encrypts to 7600
---
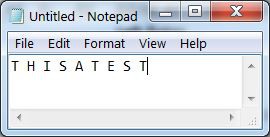
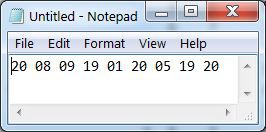
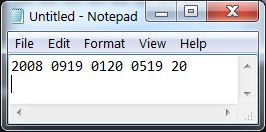
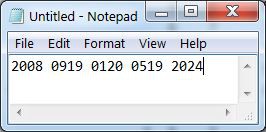
To encrypt text. Type something in the text editor of your choice.
Enter the first letter in the Paper Model to obtain its numeric code of 20.
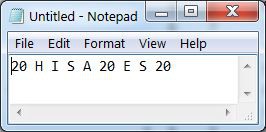
Replace all T with 20
Repeat until all characters have been converted
then arrange in groups of 4 numbers
an X (24) can be inserted to pad an incomplete group
then encrypt as usual.
----
To create an actual encrypted message, start by reading the key table for today.
 ---------------------------------------------------------
 |Tag |  Walzenlage  |   Ringstellung  |   Kenngruppen   |
 ---------------------------------------------------------
 | 18 | 2    3    1  |  3   8   7   1  | 537 183 547 654 |
The first column is the day of the month. The second column sets the rotor types and order. The next column is the ring setting values. Finally on the last column there are some indicator values to embed in the message to indicate the key used.
To set the machine with this values. Type [AD] 0050 [DA] 02+03+01+03+08+07+01
The paper model can be set as follows:
Then execute the enigma program by typing [AD] 0500 [GO]
Select a random message starting position 8497 and select a random message key 8351.
Set the wheels to 8497 and encrypt 8351
If using the paper model, remember to set the Rotor Visible value, then step the rotors by copying the Next Rotor value to Rotor Vis and entering the Key In value. This yields 7, the first value of the encrypted message key.
The random message key of 8351 encrypts to 7800. Set the Rotor Visible wheels to 7800. The use of a random starting position and random message key ensures messages with the same clear text encrypt to different cyphertexts.
Encrypt the rest of the message
Now we put everything together. The random message starting position and the random message key are listed on the first line. The next line starts with a message indicator of 5475. The first three numbers must match any of the groups listed on the last column. This assures the recipient that the correct key is used. A random number was added to 547 to pad it to a group of 4 characters. Then, include the rest of the message.8497 8351 5475 9451 6340 5542 2888 4592
Before this sequence of numbers is given to the radio operator to send over the air, you may want to add a header indicating how many groups of 4 characters are in this message and a message sequence number.To decrypt a received message. Confirm the correct key by matching the first group of numbers in the second row to one of the possible message indicators for the day. Set the machine rotor wheel types and ring settings. Move the rotors to the first group of numbers. Type the second group of numbers to get the message key. Move the rotors to the message key and start decrypting from the second group of numbers in the second row.
Now that you have the theory behind encrypting messages with the Enigma Z30 machine, head over to
http://enigmaworldcodegroup.freeforums.net/thread/102/ewcg-codebook-2017
and give this message a go.
-
Paper Model now Steps. Stepping algorithm optimized. 11 bytes saved.
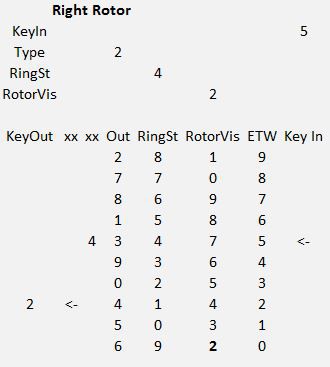
12/18/2016 at 04:01 • 0 commentsI was looking for a way to make the Excel Paper Model for the Z30 calculate the stepping points so it would be a complete model of the machine. The example shown below is for a rotor with a Ring Setting of 4, the 1 mark on the ring is set to the 4 position on the rotor. When this rotor is showing a 2, it is at its stepping point. The 9 is aligned with the 2 and at position 0 of the Entry Rotor.
This made me realize that I can ask what is the Ring Setting value at position 0 and if it is a 9, then step the next rotor to the right.
This is the old algorithm, it uses an interesting logic to determine the stepping point.
0623 STEPRT
0623        LDX #$00        A2 00
0625        LDY #$03        A0 03
0627 STEPSC
0627        LDA *LRRING,X   B5 54
0629        CLC             18
062A        ADC #$08        69 08
062C        CMP #$0A        C9 0A
062E        BCC STEPS1      90 02
0630        SBC #$0A        E9 0A
0632 STEPS1
0632        CMP *LROTOR,X   D5 58
0634        BNE STEPS2      D0 05
0636        LDA #$01        A9 01
0638        JMP STEPDN      4C 3D 06
063B STEPS2
063B        LDA #$00        A9 00
063D STEPDN
063D        STA *TMP02,X    95 5F
063F        INX             E8
0640        DEY             88
0641        BNE STEPSC      D0 E4
0643        STY *TMP01      84 5E
This is the new algorithm. It calls the ENRING routine with A=0 and Values of X of 1,2 and 3 to see if the three rotors on the right are at the stepping position, indicated by the value of 9.
To get the shorter algorithm to align with 0643, the beginning of the unchanged part, 11 NOP are used.
0623 STEPRT
0623        LDX #$01        A2 01
0625        LDY #$03        A0 03

0627 STEPSC
0627        LDA #$00        A9 00
0629        JSR ENRING      20 67 06
062C        CMP #$09        C9 09
062E        BEQ STEPDN      F0 02
0630        LDA #$00        A9 00
0632 STEPDN
0632        STA *TMP01,X    95 5E
0634        INX             E8
0635        DEY             88
0636        BNE STEPSC      D0 EF

0638        NOP             EA
0639        NOP             EA
063A        NOP             EA
063B        NOP             EA
063C        NOP             EA
063D        NOP             EA
063E        NOP             EA
063F        NOP             EA
0640        NOP             EA
0641        NOP             EA
0642        NOP             EA

0643        STY *TMP01      84 5E
In the next release of the program, those 11 NOP will be eliminated.
-
Adding functionality without adding bytes...
12/18/2016 at 01:01 • 0 commentsThere are three keys in the KIM Uno that are not used in the Enigma Z30 program. Those keys are [GO], [A] and [B]. The program has a built in expansion capability. If those keys are pressed, control branches to three vectors, KPUSHA, KPUSHB and KPUSHG. Those addresses contain a jump back to start, but it can be replaced with a jump anywhere. Eventually, control must be restored to the main loop for program execution to continue.
This is the relevand portion of the original code.
CMP #$0A
BEQ KPUSHA

CMP #$0B
BEQ KPUSHB

CMP #$13
BEQ KPUSHG

JSR MOVROT
JMP START

...

KPUSHA
JMP START
KPUSHB
JMP START
KPUSHG
JMP START
We are going to add the functionality to zeroise the encryption keys by resetting them to the default values at the push of a key. This functionality is useful in case an adversary barges into the encryption room, at the push of a key, the current encryption key is destroyed.
When the Z30 program initially starts executing, it checks memory address 0050 for the value 0. If it finds this memory is not initialized, it copies the default encryption key from address DEFVAL in program memory to this RAM address. If we skip the check for 0 and jump to the part of the routine that does the copy, we have effectively implemented a zeroise function. Best of all, we are only changing existing bytes, no code has been added.
And this is the changed code. A couple of lines were changed to use variable TMP01 to allow the timeout routine to clear the last encoded key automatically after [GO] is pushed. The added label adds no code.
INIT

CLD
LDA #$0
CMP *ENIGVA
BNE INITOK

ZEROIZ      ;REM_ADD_THIS_LABEL
LDA #$0B
STA *TMP01  ;REM_CHANGE_TO_TMP01
LDX #$0

CPYINI
LDA DEFVAL,X
STA *ENIGVA,X
INX
DEC *TMP01  ;REM_CHANGE_TO_TMP01
BNE CPYINI

INITOK

START

...

CMP #$0A
BEQ KPUSHA

CMP #$0B
BEQ KPUSHB

CMP #$13
BEQ KPUSHG

JSR MOVROT
JMP START

...

KPUSHA
JMP START
KPUSHB
JMP START
KPUSHG
JMP ZEROIZ  ;REM_CHANGE_TO_ZEROIZ
Test your new functionality by executing the program and changing the rotors with the up/down keys. Then press the [GO] button. The display will return to 4321. Change the rotors again and press a key to encrypt it. While the input and output key are still shown on the right and before they are cleared back to 00, press the [GO] button. They rotors will return to 4321, the last input and output key are still shown, but will be cleared soon by the TIMEOUT routine.
Mystery 6502 program for the Kim Uno #1kBChallenge
The #1kBChallenge inspired me to dust off the Kim-Uno and write an Enigma Z30 simulator. This is a very rare numbers only Enigma Machine.
 Arduino Enigma
 Note the Next Rotor position is 0 0 0 1. Before starting to encrypt anything, copy that rotor position values from the Next Rotor row to the Rotor Vis row.