MakerM0
-
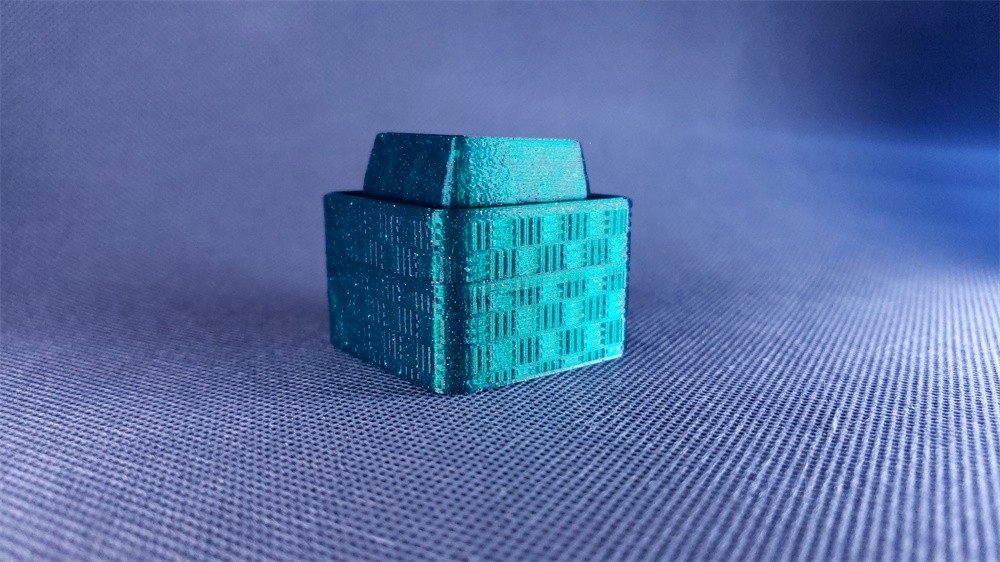
Gift Box
01/24/2025 at 12:28 • 0 commentsIf you are considering gifting a finished product, you may use this gift box, provided that you already possess a 3D printer.
-----> 3D Prnting files <----
![]()
![]()
-
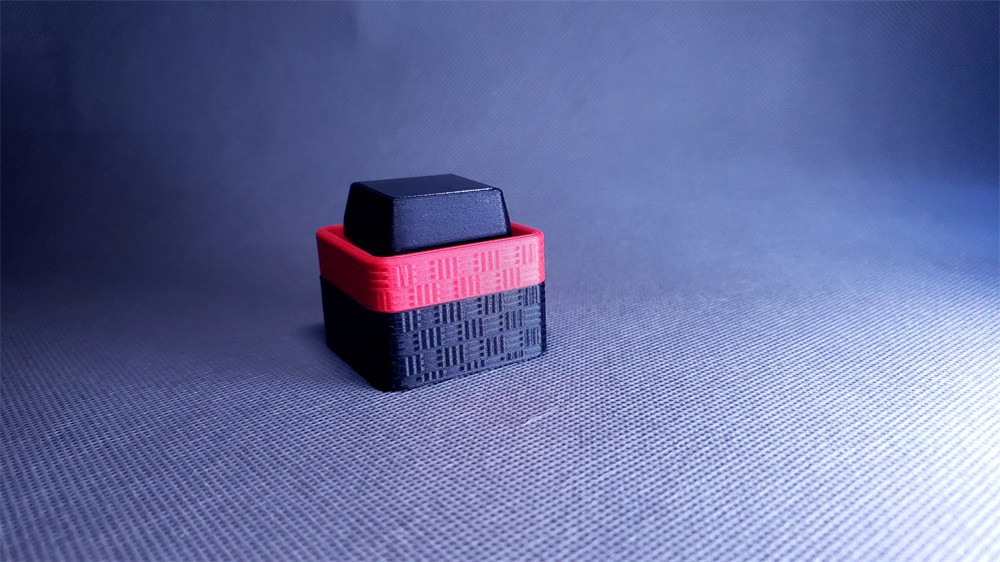
new look
11/28/2024 at 10:27 • 0 commentsRecently, I've added a new look, with the surface wrapped in texture, offering a new visual experience.
3D printed packaging boxes are also quite interesting.
-----> 3D Prnting files <----
![]()
![]()
![]()
-
update
10/01/2024 at 05:57 • 0 commentsThanks to the updates of the CircuitPython library Adafruit_CircuitPython_ImageLoad, it is now possible to use PNG images with transparency and add background images.
![]()
I'm using resin 3D printing and spraying paint to see how it turns out.
![]()
-
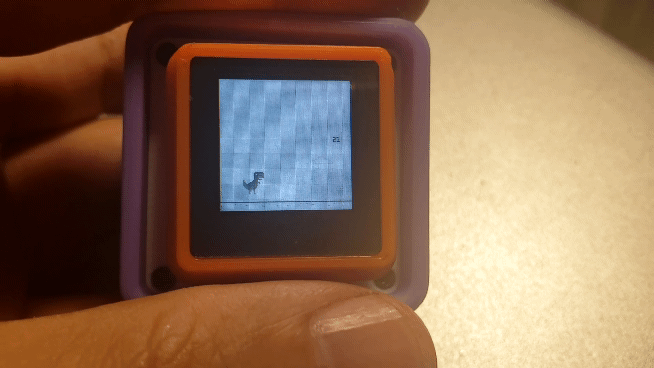
Dino
09/15/2024 at 15:21 • 0 commentsI've just discovered an interesting project, and I also want to try porting it over. It's very easy, so let's see how we can play the dino game on this project.
In this Arduino project, an interpreter that was new to me was used. Hopefully, there will be opportunities to use it to implement some fun ideas in the future.
A fast WebAssembly interpreter and the most universal WASM runtime.
The source code only needs the following modifications.
![]()
#include <Arduino_GFX_Library.h> #define GFX_BL 37 // default backlight pin, you may replace DF_GFX_BL to actual backlight pin /* More data bus class: https://github.com/moononournation/Arduino_GFX/wiki/Data-Bus-Class */ Arduino_DataBus *bus = new Arduino_ESP32SPI(38 /* DC */, 9 /* CS */, 5 /* SCK */, 4 /* MOSI */, GFX_NOT_DEFINED /* MISO */ ); /* More display class: https://github.com/moononournation/Arduino_GFX/wiki/Display-Class */ // for HardWare v2.3 Arduino_GFX *gfx = new Arduino_NV3023( bus, 10 /* RST */, 0 /* rotation */, false /* IPS */, 128 /* width */, 128 /* height */ ); // for HardWare v2.0 // Arduino_GFX *gfx = new Arduino_GC9107( // bus, 10 /* RST */, 0 /* rotation */, true /* IPS */, // 128 /* width */, 128 /* height */ // ); #include <wasm3.h> #define NATIVE_STACK_SIZE (32*1024) #define BUTTON_UP 11 #defineBUTTON_DOWN 0 #define BUTTON_ROTATION 39 -
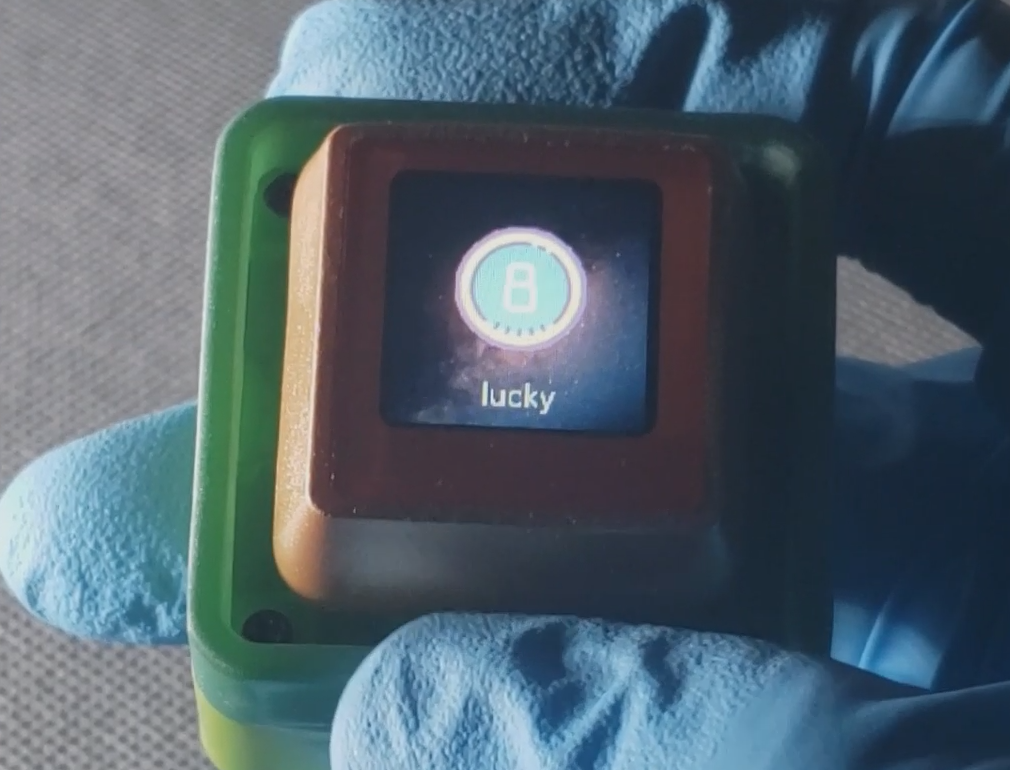
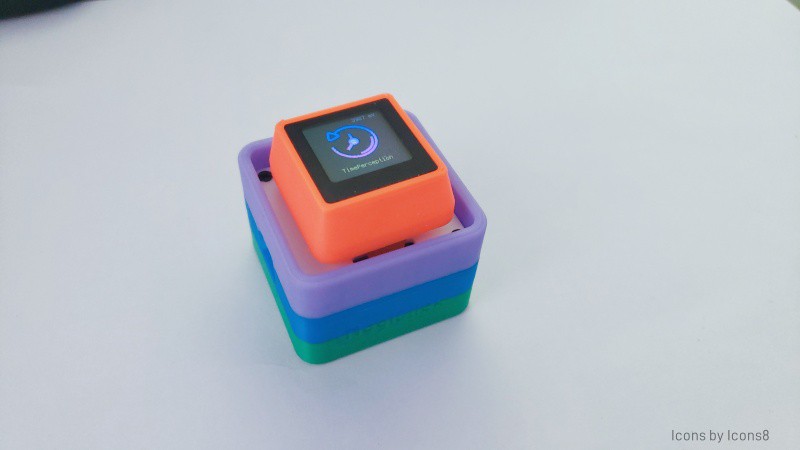
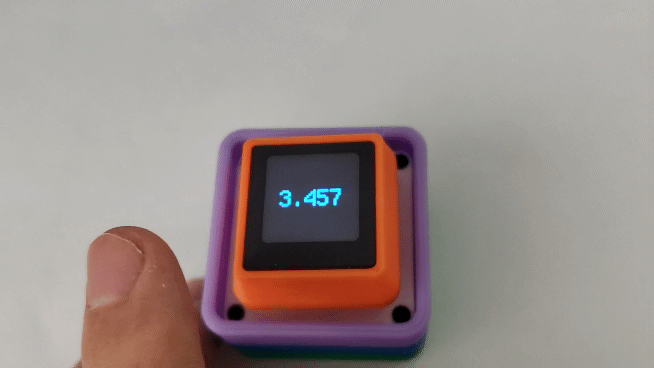
Time perception
08/10/2024 at 07:58 • 0 comments![]()
I've developed a small game designed to assess an individual's temporal perception skills, specifically focusing on the precision of second estimations and their awareness of the passage of time. The programming required for this game is quite straightforward. Upon pressing a key, a timer begins. The objective is to release the key when you believe the pre-determined time interval has passed. By analyzing the outcomes, we can evaluate a person's aptitude in perceiving time accurately.
The primary programming used for development is CircuitPython.
CircuitPython is an open-source firmware for microcontrollers that makes it easy to program hardware with Python. It's particularly popular for educational purposes and hobbyist projects because of its simplicity and the large community supporting it.
The image demonstrates an attempt at gauging 4 seconds of time passage. Ha!
![]()
from magiclick import MagiClick import os,displayio,supervisor,gc,terminalio import rtc import time from adafruit_display_text import label import board,microcontroller mc = MagiClick() from adafruit_bitmap_font import bitmap_font font_file = "fonts/LeagueSpartan-Bold-16.bdf" font = bitmap_font.load_font(font_file) # font = terminalio.FONT main_group = displayio.Group() mc.display.root_group=main_group t_label = label.Label(terminalio.FONT, color=0x2f88ff, scale=3) t_label.anchor_point = (0.5, 0.5) t_label.anchored_position = (mc.display.width//2, mc.display.height//2) t_label.text = "Press" main_group.append(t_label) mc.display.auto_refresh=False mc.display.refresh() microcontroller.cpu.frequency=160000000 mc.display.brightness = 1.0 now = 0 while True: time.sleep(0.001) key_event = mc.keys.events.get() if key_event: if key_event.pressed: key = key_event.key_number elif key_event.released: key = key_event.key_number+10 else: key=-1 if key==0: now = time.monotonic() t_label.text="Timing" print("Timing") mc.display.refresh() elif key == 10: t = time.monotonic()-now t_label.text= f'{t:.3f}' print("end") print(t) mc.display.refresh() elif key==2: print('exit') microcontroller.cpu.frequency=240000000 mc.exit() -
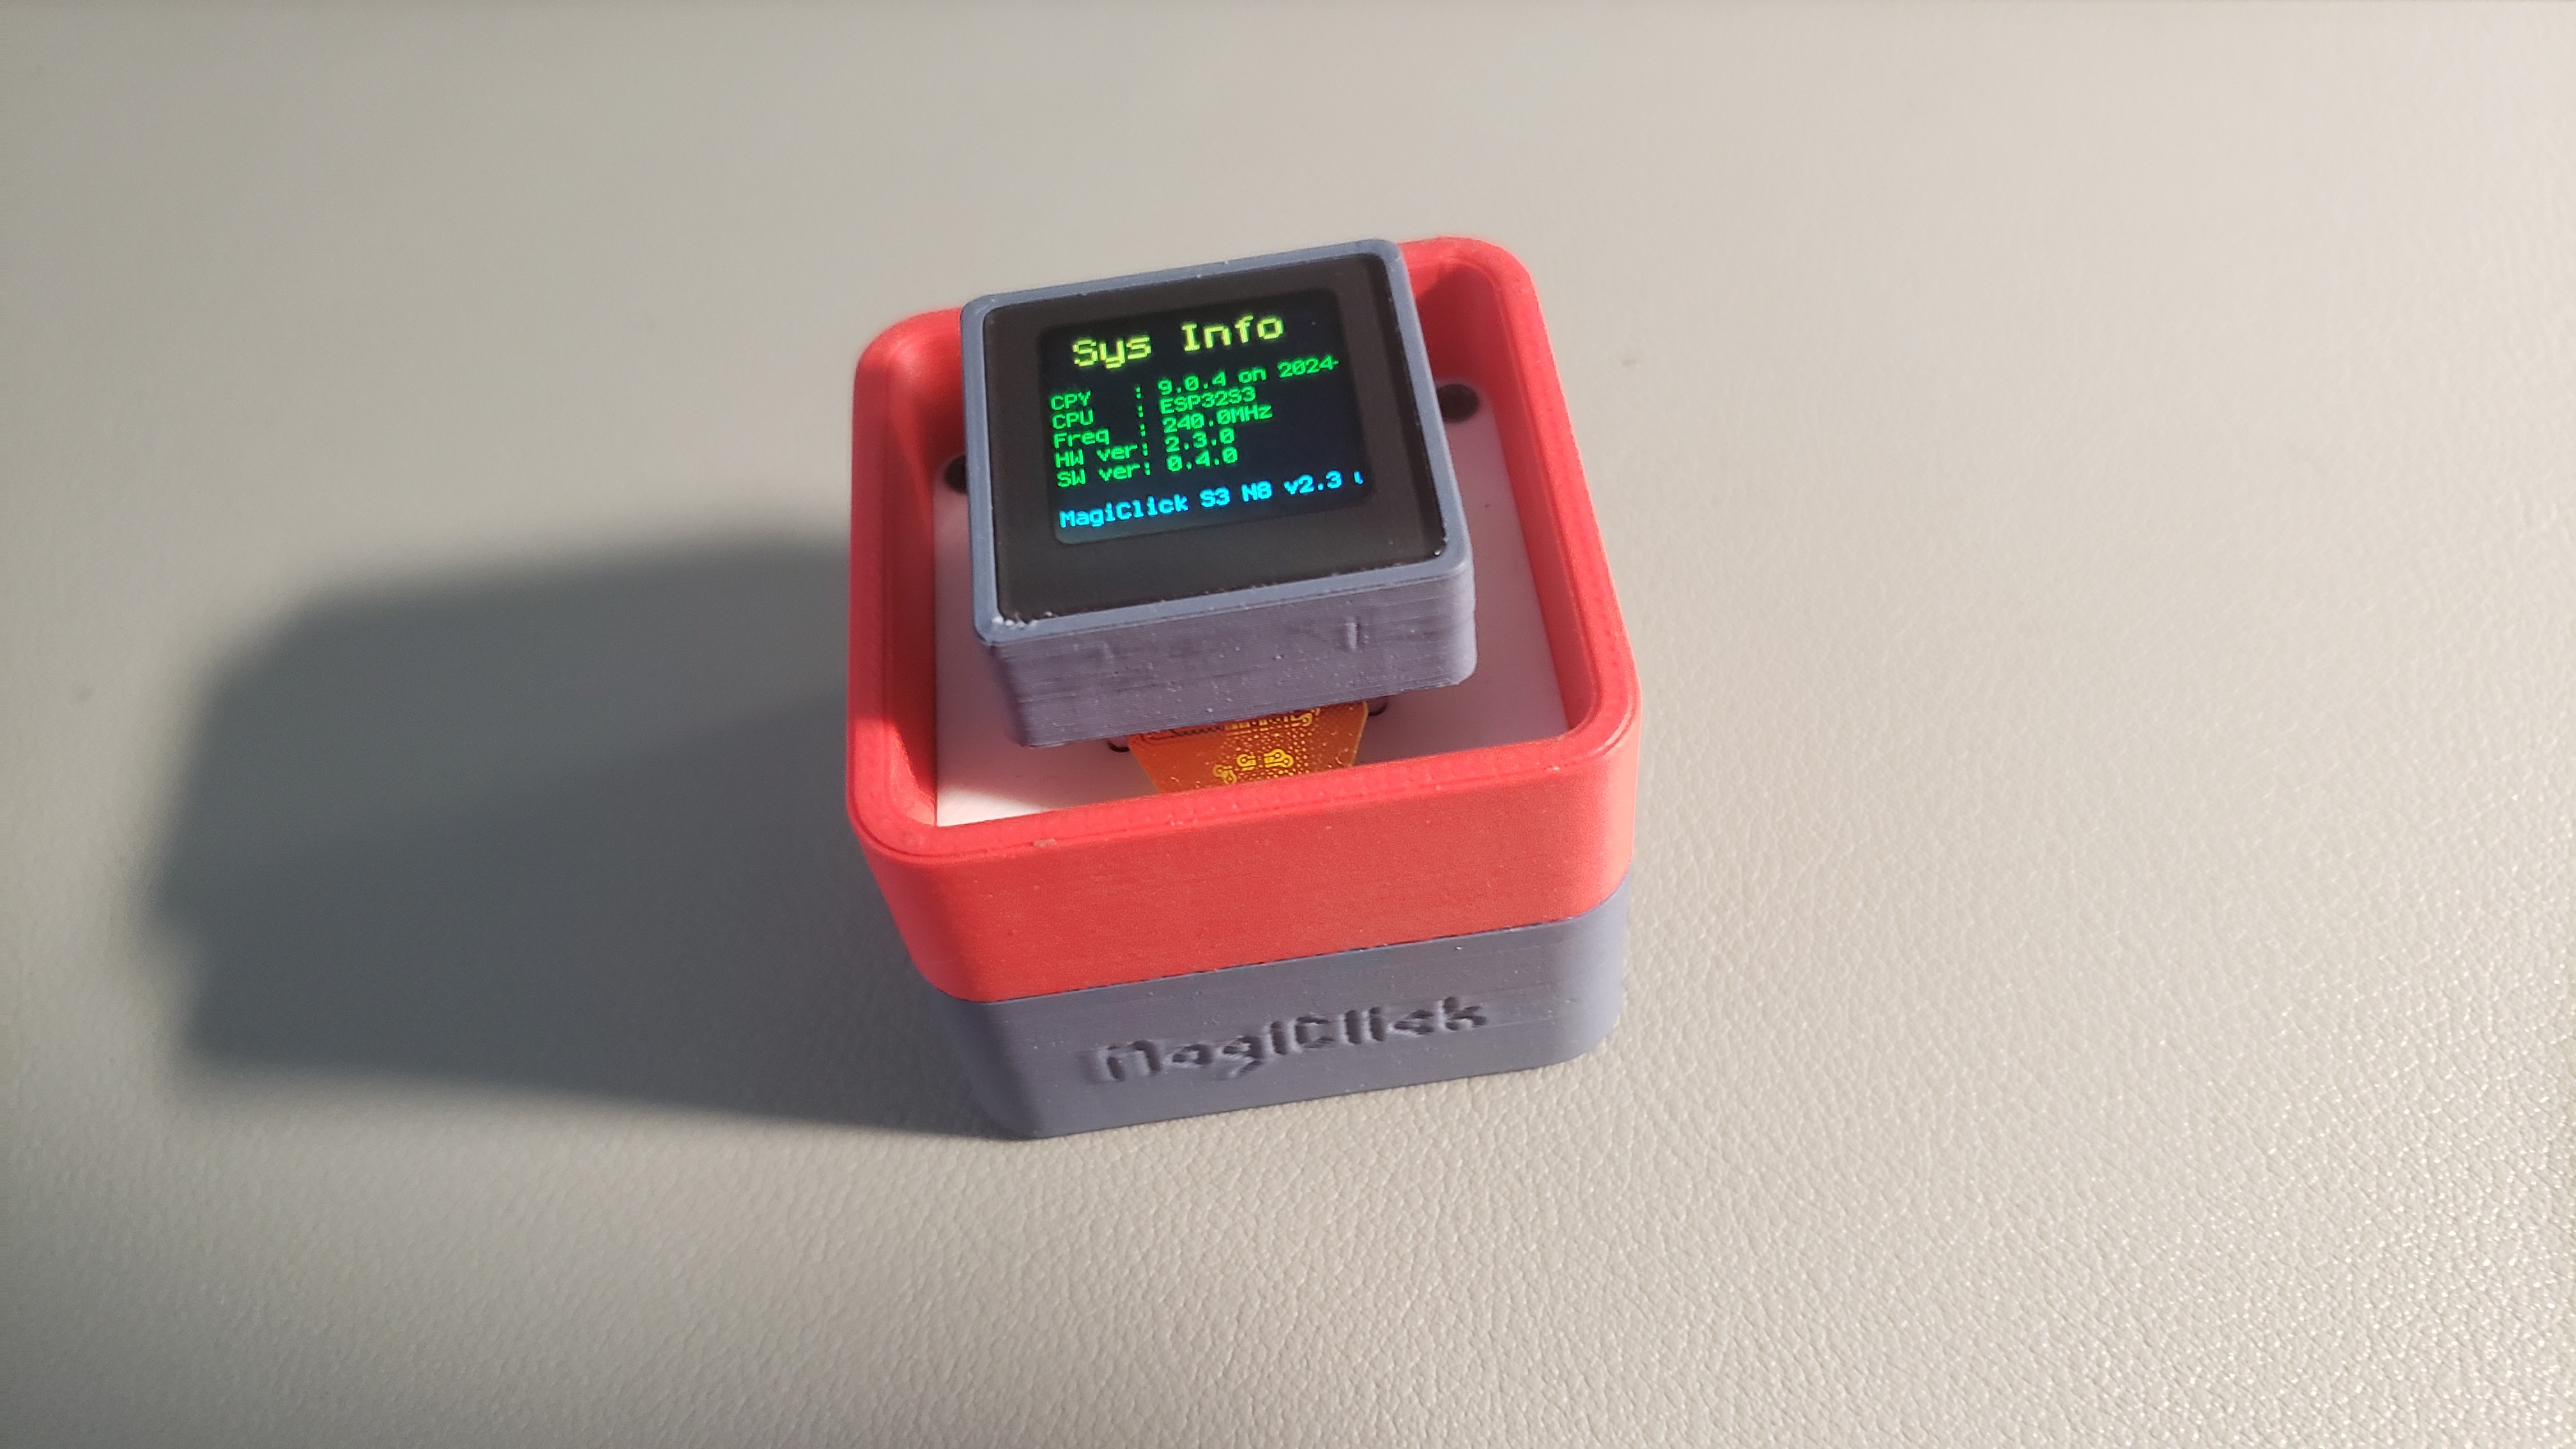
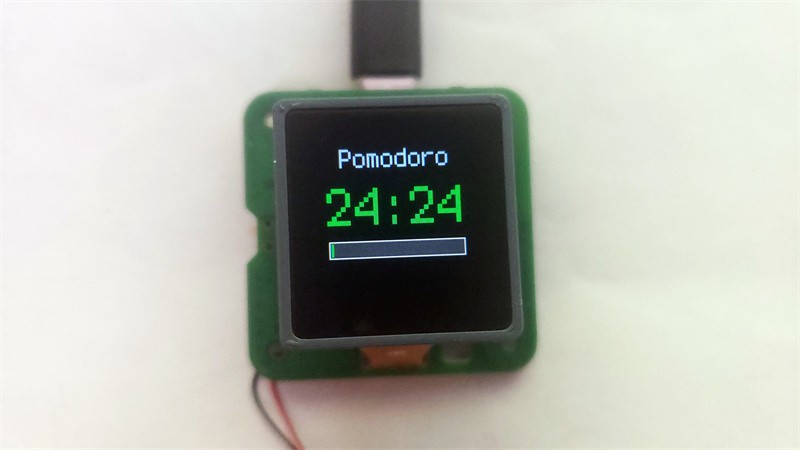
cpy 9.0.4
06/13/2024 at 10:26 • 0 commentsAfter some time of hard work, I installed cpy 9.0.4 to the latest version of button.
Meanwhile, the code was updated to include a storage function and some new features.
Some issues have been fixed.
![]()
-
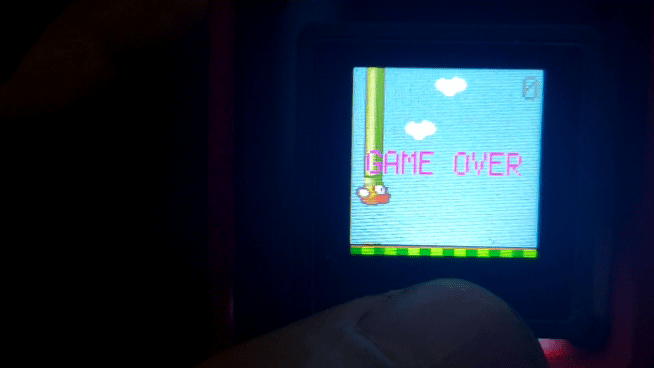
circuitpython and game
04/26/2024 at 05:11 • 0 comments![]()
Drawing inspiration from the C language implementation of tinyflap, I successfully developed a Flappy Bird game utilizing CircuitPython. The debugging phase proved to be unexpectedly seamless, enabling me to swiftly create an initial prototype of the game.
The ground and clouds were drawn using the adafruit_display_shapes lib, whereas the bird and pipes were implemented directly using images.
![]()
-
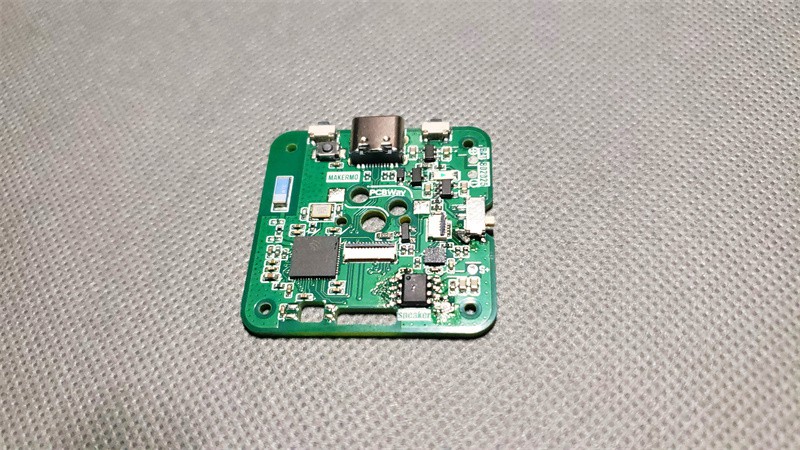
first test
04/19/2024 at 07:49 • 0 commentsPrimarily, I wish to sincerely thank PCBWay, a leading entity in the industry, for its perceptive vision in identifying the potential of my project and extending substantial backing. Your sponsorship has transcended material provision by equipping me with superior-grade, precision-crafted PCB products that have been instrumental in facilitating seamless advancement during the R&D process.
Throughout our cooperative engagement, the dedicated technical team at PCBWay has upheld a stringent attitude and provided efficient services, guaranteeing faultless precision at each juncture, thereby significantly boosting my operational efficiency. The outstanding product quality and considerate customer service you deliver have undoubtedly been crucial factors contributing to achieving key developmental milestones in the project.
![]()
![]()
![]()
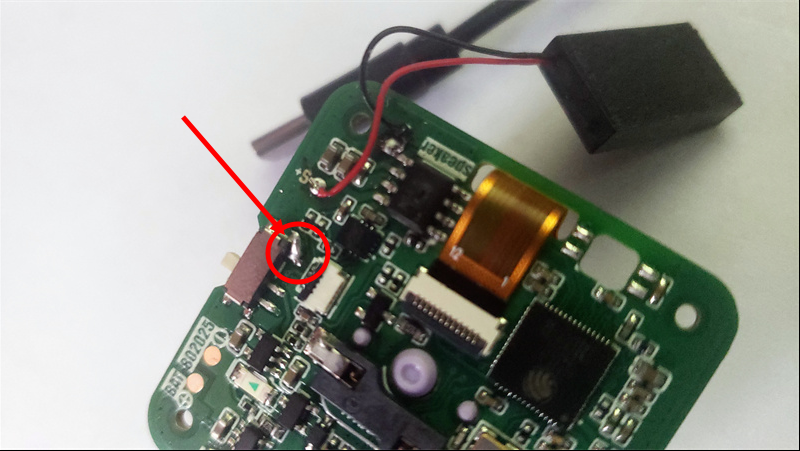
The testing process has been largely smooth, during which we did identify a minor design oversight where the LDO (Low Drop-Out) section was not provided with a stable control signal, leading to an inability to completely shut down the system. However, this issue is relatively easy to rectify; it can be resolved by shorting two pins as indicated in the diagram. Currently, we are using CircuitPython version 8.x and have confirmed its successful operation. In the coming days, I will commence work on porting to version 9.x.
![]()
![]()
![]()
A charging indicator LED has been integrated onboard, facilitating the observation of the charging status.
-
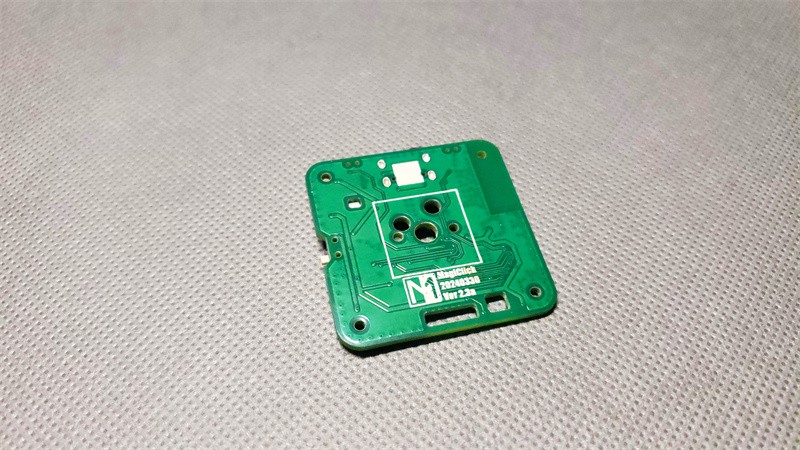
first version
04/01/2024 at 03:03 • 0 commentsBased on previous experience, after the schematic diagram was ready, the first version has finally been updated.
The pcb has been checked and found to be without issues, so it's ready for sampling.
The components with small packages have been chosen as much as possible on the PCB, therefore, only one side needs to be soldered.
![]()
![]()
MagiClick S3 - Mechanical Macro Keyboard with Disp
A single-button keyboard, based on circuitpython