 decurus
-
1Tape
Making the Tape is pretty simple.
1) You can download the TapeOrgan_Tape.zip, it includes two stl. This is a very small version of a normal cassette, you can 3D print both of them or just use your own.
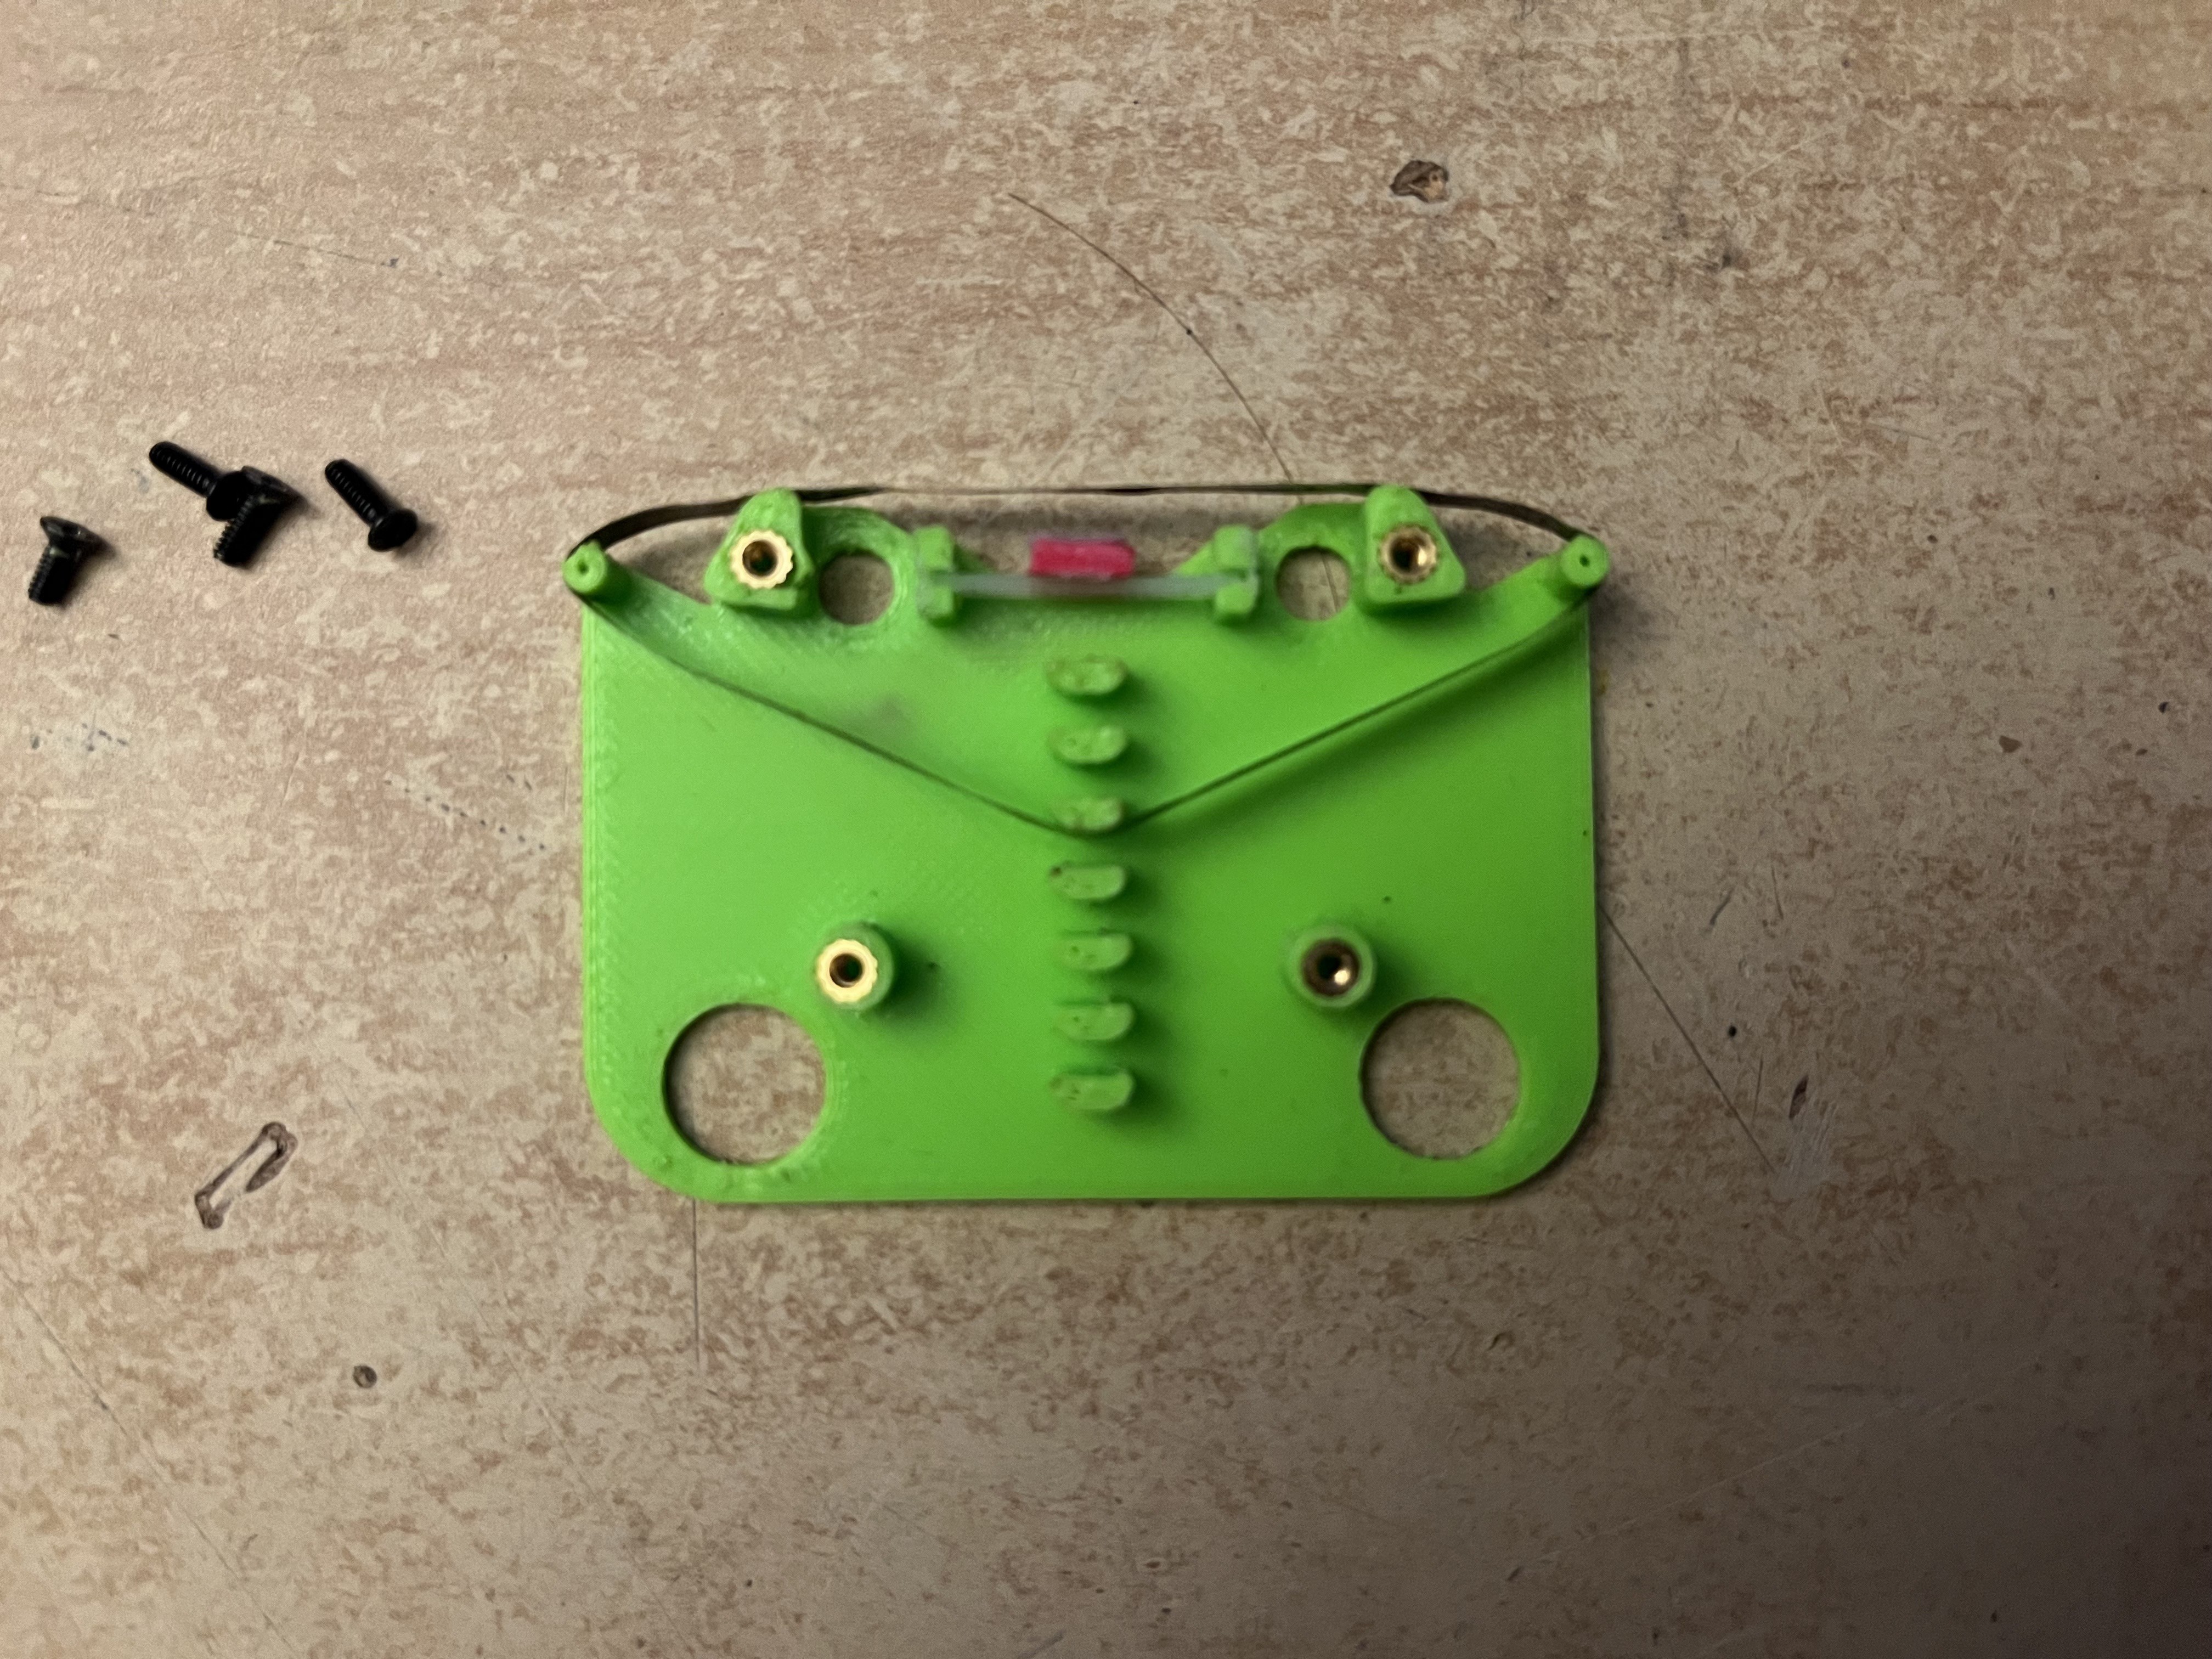
2) On the underside of the tape you need to insert a mechanism that pushes the tape against the reader. What I did was cut a slid into both of the pools to the left and right of the reader, insert a piece of zip tie across and put a small piece of foam rubber on it. this firmly presses the tape against the reader. in order to not create to much friction I then put a small piece of paper on top of it. You can see the assembly in the image below.
3) From a still intact cassette cut out the part of tape you want to loop. Don't make it too short, because it may not fit in the 3D printed cassette, it needs to be long enough to go under the tape reader and to at least one of the rubber wheels that drive the tape. But other than that, all is up to you
4) Tape the ends of the piece of tape you cut together. I recommend using only a small piece of flexible tape. Normal tape one might use for paper should be fine.
5) put the looped tape in the underside of the cassette. There are some poles on the underside you can use to wrap your tape around. (See image below) Make sure, its not to tight, the reader and wheels of the cassette player will press down on the tape and therefore deform it a bit, so give it enough slack.
6) now put the upper side of the tape on the underside. You can either use threaded inserts (like I did as seen on the image below) or instead just glue both sides together.
![]()
-
2Electronics
Currently I only tested the firmware on an rp2040 zero, they are super affordable and easy to come by where I live.
1) Download the firmware
2) Put the firmware on the RP2040 by first connecting the board while holding down the boot button and then drag and dropping the firmware onto the newly discovered storage device
The RP2040 should now be recognized as a MIDI device called "TapeOrgan". Just open your DAW and make sure you see it.
3) Open up the cassette player and
a) ... unwire ... the motor from the circuit board. But leave as much wire attached to the motor as possible. it's best to desolder it directly from the pcb inside the player.
b) solder some wires to the positive and negative terminal where you would usually put the batteries. These will be used to connect to the rp2040 power supply.
c) Put all 4 wires (two from the motor and two from the batteries) so that you can reach them from the outside, then close the cassette player again
4) solder everything like so:
![]()
-
3Usage
1) Insert the cassette
2) Hook up the rp2040 via USB to your computer
3) Push down the play button as you normally would to start the tape. Its not supposed to start now, but you should hear the *generic tape player noises*
4) Open a DAW of your choice and set up a track such that it outputs midi to the Tape organ. Then connect the audio output of the cassette player to your audio input and set up your DAW such that you can hear it.
Now when playing a MIDI note, the tape starts to play. Currently, only channel 0 is supported.
Tuning: While playing a note, you can use CC1 to increase or decrease the speed of the tape. This change ONY applies to the note that is currently being played. If you play a different note it uses the speed set for this note (full speed per default). The Tuning will be saved when the RP2040 is powered down. If you want to delete the entire Tuning at once, you have to send a value (any value) on channel CC2 4 times. As soon as the RP2040 receives 4 consecutive messages on CC2, it will delete the tuning. The counter gets reset as soon as the RP2040 receives any note or a message on CC1
KNOWN ISSUES: Currently there is a constant Pulse wave playing compared to the original signal without the rp2040 circuit. This is (most likely) because the TB6612 uses pwm to adjust motor speed (as h-bridges usually do) but unfortunately I can't find out how to change the frequency of the pwm to an inaudible frequency or filter it out so it does not spill in to the tape player circuit. I will work on that

Discussions
Become a Hackaday.io Member
Create an account to leave a comment. Already have an account? Log In.