Tape Organ
A drone instrument built from an old cassette player.
A drone instrument built from an old cassette player.
To make the experience fit your profile, pick a username and tell us what interests you.
We found and based on your interests.
tape_organ_firmware_v0.4version 0.4: increased PWM speed to get rid of the unpleasant noises, also implemented auto play mode4 - 64.00 kB - 06/28/2025 at 00:13 |
|
|
tape_organ_firmware_v0.3version v0.3: the tape organ can now be controlled via cv. connect cv according to schematics. set pin 8 to high to enable cv. set pin 7 to have the rp2040 interpret the cv signal from 0-5 volts or to low for 0-10 volts, depending on your hardware. If you use the resistors as shown in the schematics, the rp2040 should be save to use up to 10 volts. (plus some overhead). if you intend to use other CV voltages, you should check the resistors.3 - 63.00 kB - 04/06/2025 at 17:20 |
|
|
tape_organ_firmware_v0.2version v0.2: tuning gets saved. so if you loose power (or accidentally pull the cable out. of course I never did that 2 minutes before I wanted to start my life stream) the tuning gets recalled automatically. in order to delete the entire tuning you have to send something on channel 13 4 times. if the tape organ receives something on any other channel, the counter gets reset.2 - 62.50 kB - 04/04/2025 at 21:42 |
|
|
TapeOrgan_Tape.zipZip Archive - 81.84 kB - 02/26/2025 at 17:49 |
|
|
tape_organ_firmware.uf2Firmware to be put on the rp2040uf2 - 60.00 kB - 02/26/2025 at 17:44 |
|
After what feels like an eternity of trying to figure out how to fix this unpleasant noise that happened during slowing down the motor I finally saw the most obvious thing, which was just changing the PWM speed of the RP2040 to an inaudible range. Now of course that was already on my mind but I was not so well versed in using the pico SDK when I started working on this project and I never got it to work. I finally figured it out and implemented the fix. Now everything is working super nicely.
Furthermore I implemented some extra additions:
There is now an autoplay mode, where the tape plays the entire time and you can adjust the speed manually using a built in potentiometer.
Also I implemented CV because why not. It can be used with 5 Volts or 10 Volts depending on what you need.
How do you use these modes? Well, Midi still works as normal.
To use autoplay connect pin 7 to high, to use 5V CV connect pin 8 to high and to use 10V CV connect pin 7 and 8 to high. That's it.
The next step is to built a small PCB and maybe finally call it done.
I have been working on the TapeOrgan over the weekend and managed to cross off some tasks off my list.
The most important one: The tuning you can do with MIDI now always gets saved on the RP2040. So if you loose power or accidentally pull the plug 2 minutes before you start your stream (totally never happened to me) you can just power it pack up and the tuning is right there. If you want to delete the entire tuning to start fresh, send 4 messages on CC2 (does not matter what the messages are). The LED will get brighter and brighter with every message and upon receiving the forth message, the tuning will be deleted.
The second one is something experimental. I added an audio jack in to the board and now I can send CV signals from other synthesizers. For now, the CV signal is mapped straight to the speed of the tape. That means: higher voltage, higher speed. I also put in an option to switch between 5 Volts and 10 Volts CV. (but no worries, the RP2040 should always be protected, even if you send 10 cv by accident. It should not get much higher thou.)
I put out every thing you need to rebuild this project. There is still a couple of things I want to do, but for now, Im gonna set it aside and test it out.
Further Work:
- Make a PCB that is small enough to fit into the cassette player
- Have the RP2040 save the tuning
- Implement more midi commands (pitch bend, reverse direction...)
- Get rid of the PWM square wave
- Use other channels
- Release source code
After a lot of back and forth I finally decided on a software structure. At first I wanted a micro controller to fully take care of adjusting the tape speed on receiving midi commands. But that would have ment a lot of fine tuning and less flexibility when it comes to the tonal range. So I decided to use potentiometers that can be used to fine tune pitch and the microcontroller just switches between them to deliver power to the motor. While that means that there is only a limited amount of notes to be played that also means that these can be fine tuned way more precise…. I think. That being said… the entire weekend was spent trying to compile the pico sdk and tinyusb in order to have an rp2040 be detected as a midi device. Never done that before, it was a long journey but I got there in the end.
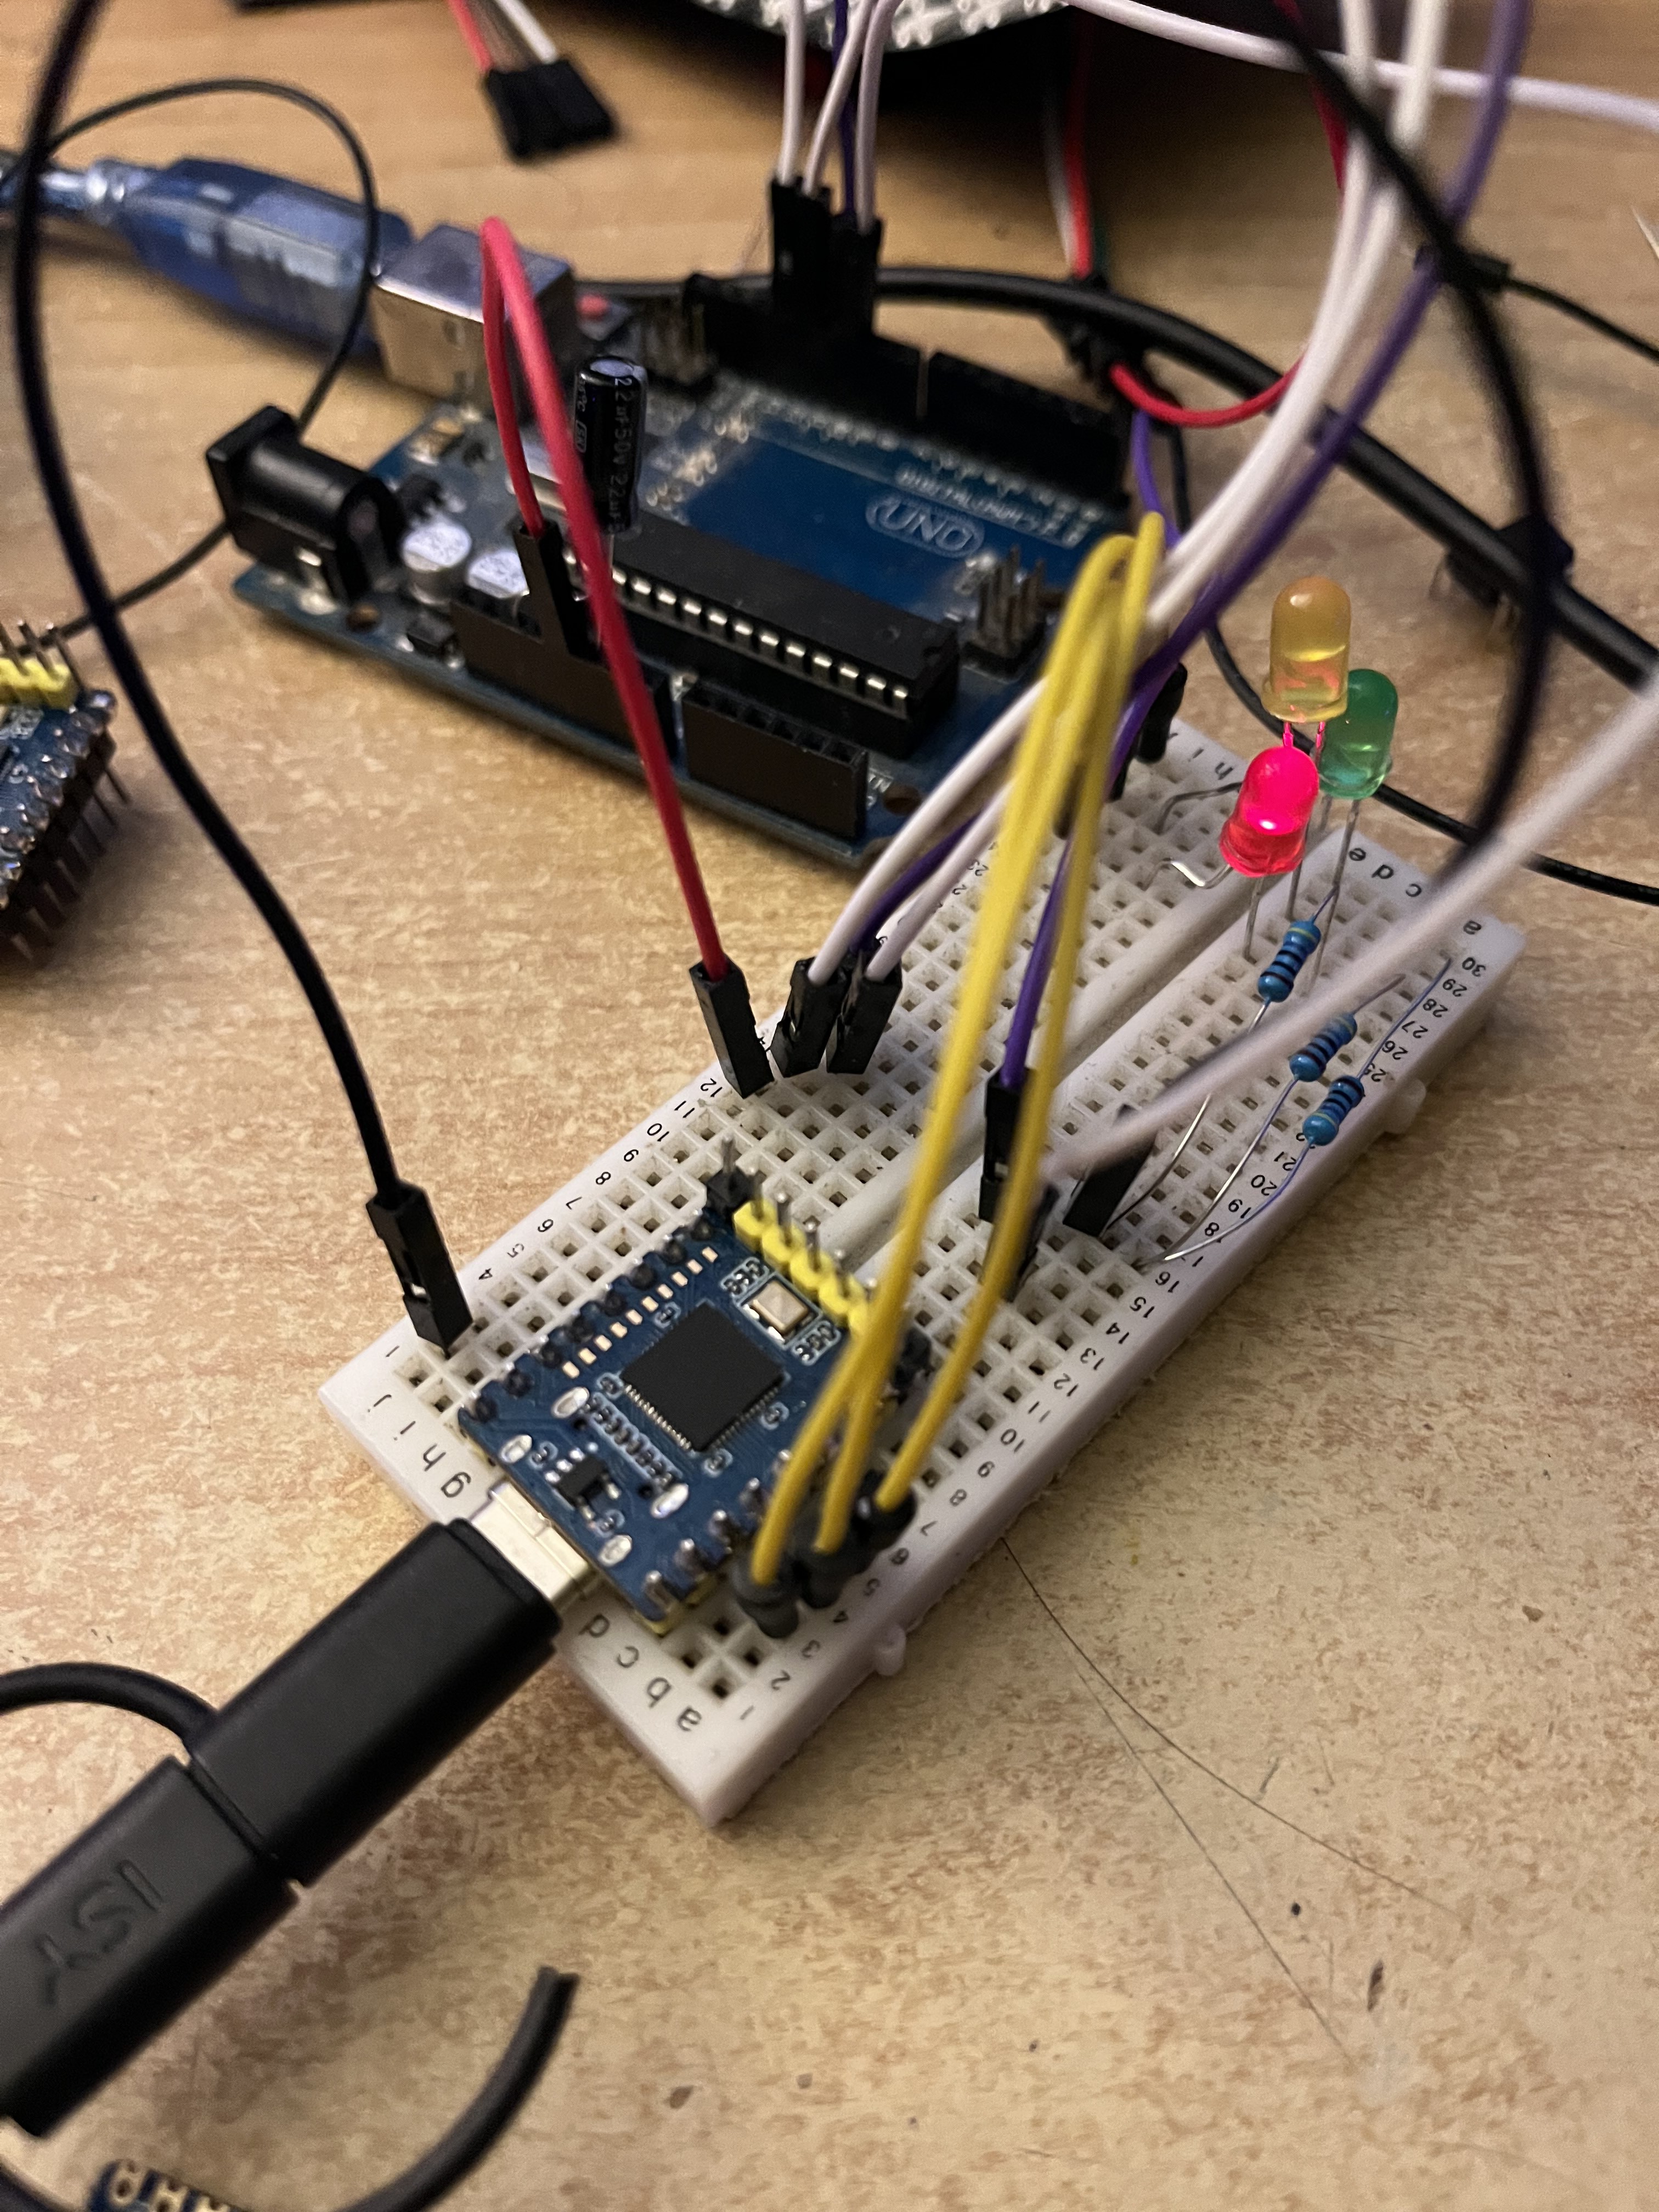
Sigh…. Sometimes you are just blinded by yourself. Of course this approach would not work. The idea was easy enough to implement and everything worked on the breadboard. But for some reason the motor would not do anything. Of course not. The rp2040 goop current is like 8 mA and the motor needs something like 500 mA. The poor gpio pins where completely out of their league. So… next step…. Do it with an h-bridge. This of course means that I do have to implement speed control via pmw, but st least I have an idea of how to adjust the speed without re coding the entire thing every time .
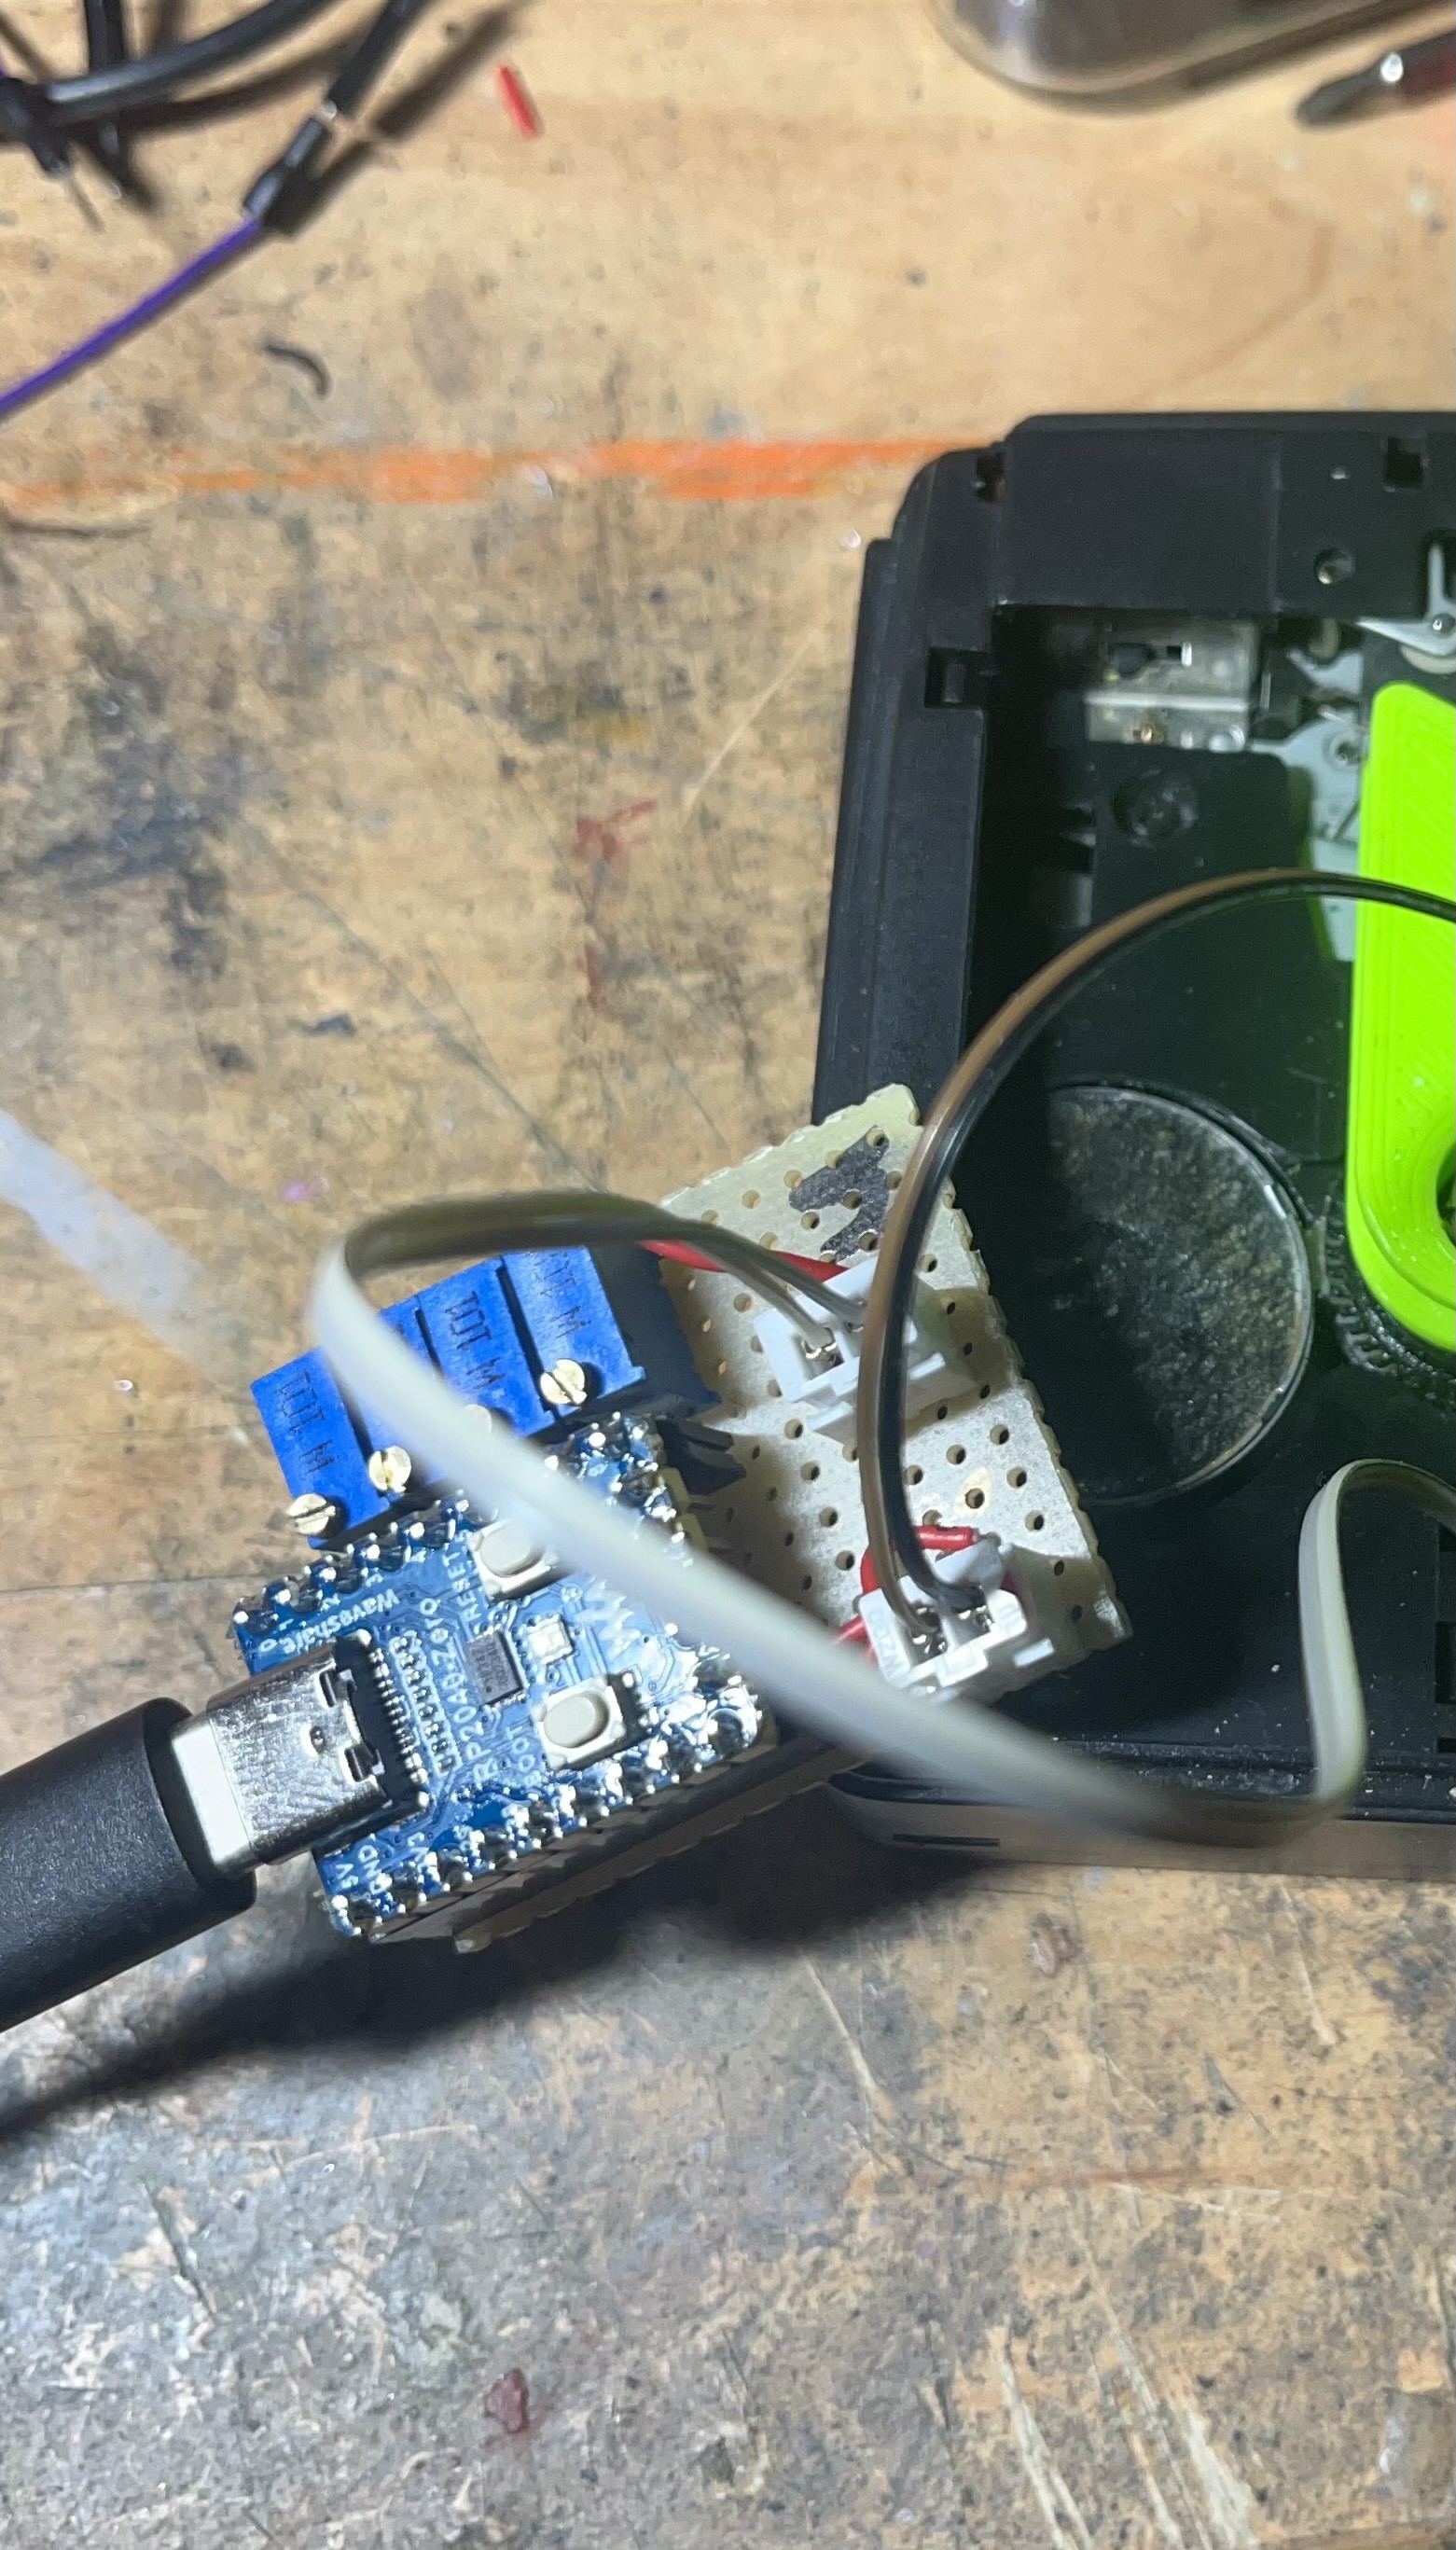
It worked. After a bit of tinkering and coding I finally have everything complete. The rp2040 receives a midi note and starts spinning the motor. While the note is playing, one can use the cc 1 to slow down or speed up the motor. The changes speed will be remembered for the entire time the rp2040 is turned on. Other notes are not effected and can be adjusted individually.
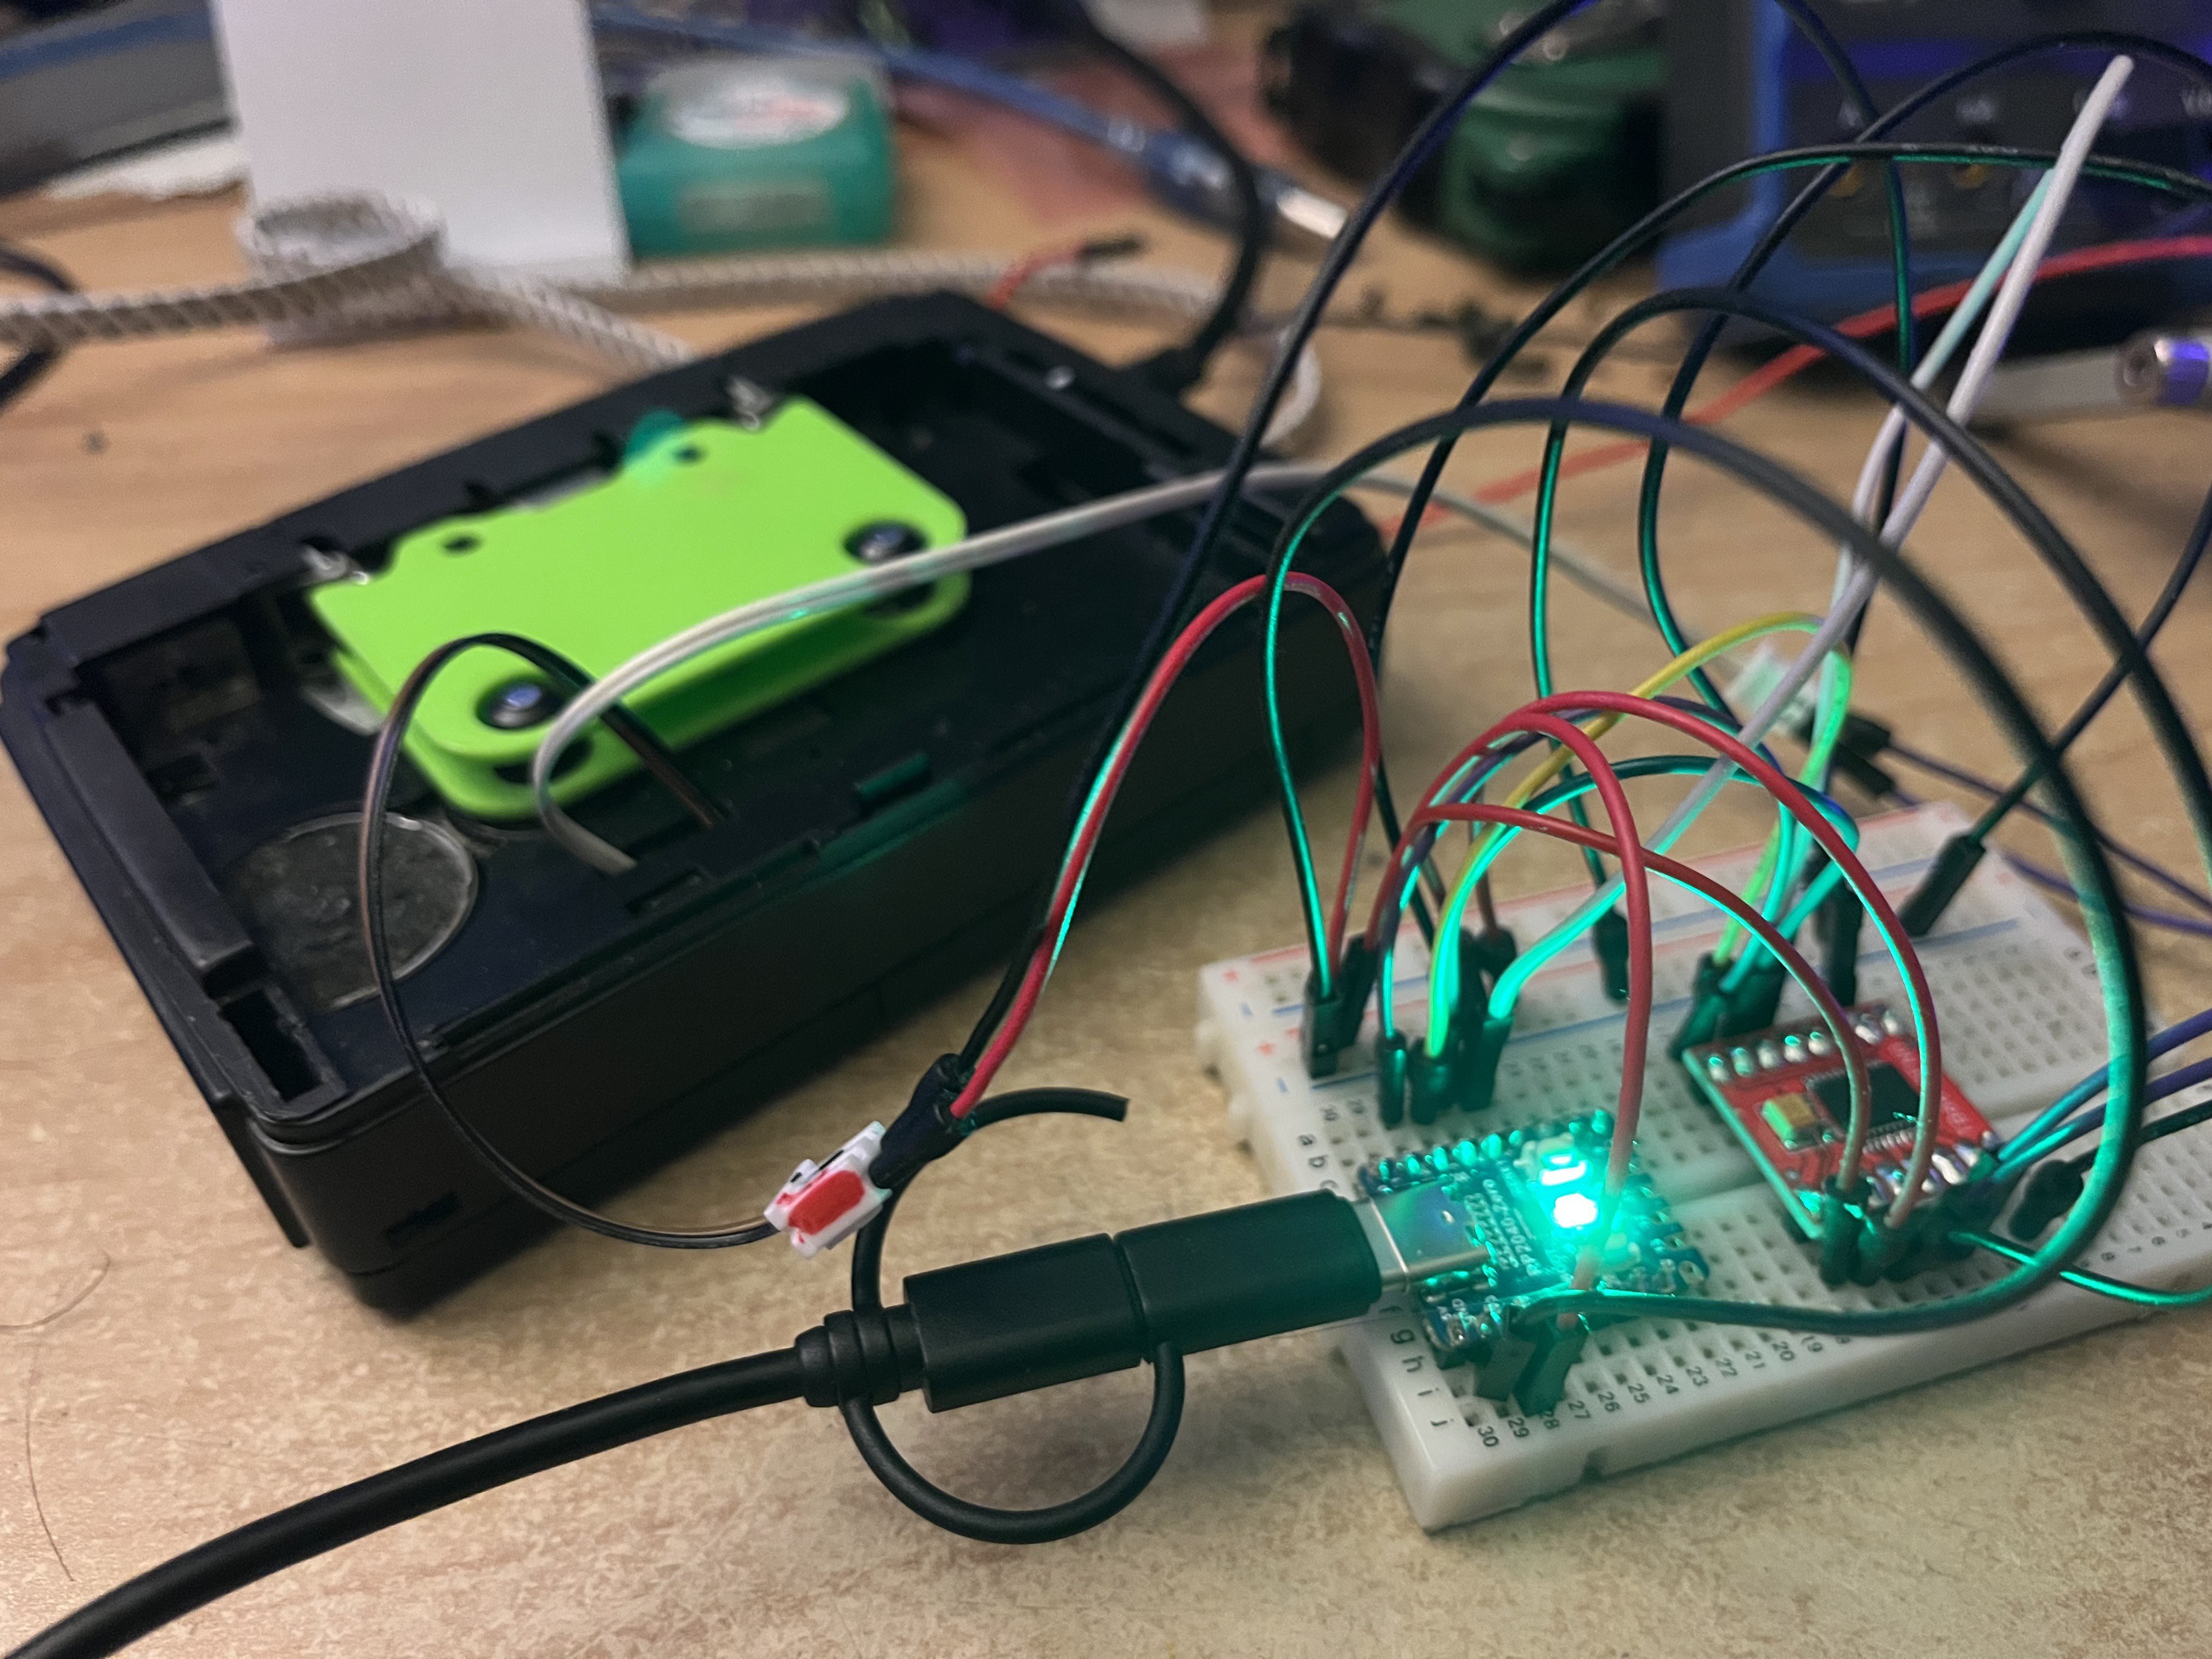
Well what do you know, sometimes overthinking is not the solution. After The struggles with my previous approach, I decided to rethink what I was doing. Taking apart the cassette player and basically rebuilding it did not make a lot of sense. So I figured out a way to instead mount the tape inside the cassette player. And what do you know, that was probably the easiest solution I could have done in the first place. I modeled some tiny cassettes that can hold a very short strip of tape.
I put some bits and bops in place so you can have a variable length of tape. The only downside with this approach is that you have to have a somewhat long initial length in order to get it working which was not the case in my previous approach. However. having it working is better than...not having it working. So. The next step is to hook up some micro controller and change the speed of the motor.
This project has turned into a question of "How much stuff can you do wrong" and "at what point do you stop and reevaluate, if you are still on the right track. So after deciding to build the entire mechanics such that the tape rolls free instead of being glued to a wheel I then quickly realized that the problem was not the tape on the wheel but the motor being way to fast. I then thought about a gear box (with rubber bands instead of cog wheels) to slow down the speed. The mechanics got more and more complex (I am a software developer, not a ... mechanics...builder....). I had to put the electronics on a separate layer, was printing gear wheels over gear wheels. Eventually I got it working but the entire construct was so wobbly and unreliable, the rubber bands where slipping and nothing run smooth.
I was facing the question...does any of this still make any sense. The first option that came to mind was if I should ditch the motor and buy a separate one. But for some reason that did not feel right. I was moving further and further from the original cassette player.
That was until I realized...I could just print a new cassette and slap the small piece of tape I needed in that. I .... could just use the original cassette player instead of recreating the entire thing. After that the rest should be easy.
Soooooooooo...Back to the drawing board it is.
So the first thing I did was ... well of course order a cassette player.
I received one that also came with a cassette in it, lucky me.
I started dissembling the cassette player and reduce it to the bare minimum I needed to have the reading head still in working condition.
That was the easy part. Turns out, there is basically no electronics in a cassette player, but the mechanics are just beyond genius. Back in the day there was so much ingenuity behind a lot of hardware to make up for the lack of advanced electronics.
My brain already started over engineering the Tape Organ but when I started reverse engineering the PCB I stopped myself and instead try to use what I already had. So I screwed everything to a piece of plastic, so it would not slip around.
I then listened to the cassette. It was some kids music and ... most of it was pretty awful. I can fully understand why the previous owner didn't want to have it anymore. But one of the songs had some nice background drone in the intro. I cut out one single note of this drone and glued it to a 3D printed wheel.
I then arranged everything such that the reader touches the wheel and could ... well... do its job.
Before I started coding the micro controller I wanted to make sure everything worked and I am glad I did because... no it didn't. When I spun everything up what I got did not even remotely sound like what was supposed to come out of the tape.
I am not yet sure if my guess is correct, but I think having the tape glued to a wheel and have this wheel press against the reader does not produce the right sound. So I will now have to built something that uses loose tape without a wheel as it normally does in a cassette player anyways.
So, back to the drawing board.
I like making live music and lately I have been experiemnting a bit more with samples. (I am more of a "natural instrument" guy, so I have never really done any sample stuff). I also like to build hardware instruments and some day I got the idea of using a cassette player as a sample player. (Of course this is not a new idea, but to me it was XD) The general concept is to cut out a pice of tape from a cassette and use this sound as a base. then spin it up and get the sound using the cassette players electronics. The faster it spins, the higher pitched it sounds. Then, using a micro controller, I can convert the midi messages from a DAW or some keyboard to the rotation speed of the motor to change its pitch. Then I just use like 5 of these and have myself a nice drone synthesizer that also dabbles as polyrhythm generator.
Of course I also would have to add some knobs and maybe a small 8 segment display to properly tune the sound to a specific pitch, but that should be about it.
Making the Tape is pretty simple.
1) You can download the TapeOrgan_Tape.zip, it includes two stl. This is a very small version of a normal cassette, you can 3D print both of them or just use your own.
2) On the underside of the tape you need to insert a mechanism that pushes the tape against the reader. What I did was cut a slid into both of the pools to the left and right of the reader, insert a piece of zip tie across and put a small piece of foam rubber on it. this firmly presses the tape against the reader. in order to not create to much friction I then put a small piece of paper on top of it. You can see the assembly in the image below.
3) From a still intact cassette cut out the part of tape you want to loop. Don't make it too short, because it may not fit in the 3D printed cassette, it needs to be long enough to go under the tape reader and to at least one of the rubber wheels that drive the tape. But other than that, all is up to you
4) Tape the ends of the piece of tape you cut together. I recommend using only a small piece of flexible tape. Normal tape one might use for paper should be fine.
5) put the looped tape in the underside of the cassette. There are some poles on the underside you can use to wrap your tape around. (See image below) Make sure, its not to tight, the reader and wheels of the cassette player will press down on the tape and therefore deform it a bit, so give it enough slack.
6) now put the upper side of the tape on the underside. You can either use threaded inserts (like I did as seen on the image below) or instead just glue both sides together.
Currently I only tested the firmware on an rp2040 zero, they are super affordable and easy to come by where I live.
1) Download the firmware
2) Put the firmware on the RP2040 by first connecting the board while holding down the boot button and then drag and dropping the firmware onto the newly discovered storage device
The RP2040 should now be recognized as a MIDI device called "TapeOrgan". Just open your DAW and make sure you see it.
3) Open up the cassette player and
a) ... unwire ... the motor from the circuit board. But leave as much wire attached to the motor as possible. it's best to desolder it directly from the pcb inside the player.
b) solder some wires to the positive and negative terminal where you would usually put the batteries. These will be used to connect to the rp2040 power supply.
c) Put all 4 wires (two from the motor and two from the batteries) so that you can reach them from the outside, then close the cassette player again
4) solder everything like so:
1) Insert the cassette
2) Hook up the rp2040 via USB to your computer
3) Push down the play button as you normally would to start the tape. Its not supposed to start now, but you should hear the *generic tape player noises*
4) Open a DAW of your choice and set up a track such that it outputs midi to the Tape organ. Then connect the audio output of the cassette player to your audio input and set up your DAW such that you can hear it.
Now when playing a MIDI note, the tape starts to play. Currently, only channel 0 is supported.
Tuning: While playing a note, you can use CC1 to increase or decrease the speed of the tape. This change ONY applies to the note that is currently being played. If you play a different note it uses the speed set for this note (full speed per default). The Tuning will be saved when the RP2040 is powered down. If you want to delete the entire Tuning at once, you have to send a value (any value) on channel CC2 4 times. As soon as the RP2040 receives 4 consecutive messages on CC2, it will delete the tuning. The counter gets reset as soon as the RP2040 receives any note or a message on CC1
KNOWN ISSUES: Currently there is a constant Pulse wave playing compared to the original signal without the rp2040 circuit. This is (most likely) because the TB6612 uses pwm to adjust motor speed (as h-bridges usually do) but unfortunately I can't find out how to change the frequency of the pwm to an inaudible frequency or filter it out so it does not spill in to the tape player circuit. I will work on that
Create an account to leave a comment. Already have an account? Log In.
Become a member to follow this project and never miss any updates
By using our website and services, you expressly agree to the placement of our performance, functionality, and advertising cookies. Learn More

 I_void(warranties)
 Quinn
Quinn
 PixJuan