decurus
-
Electronics
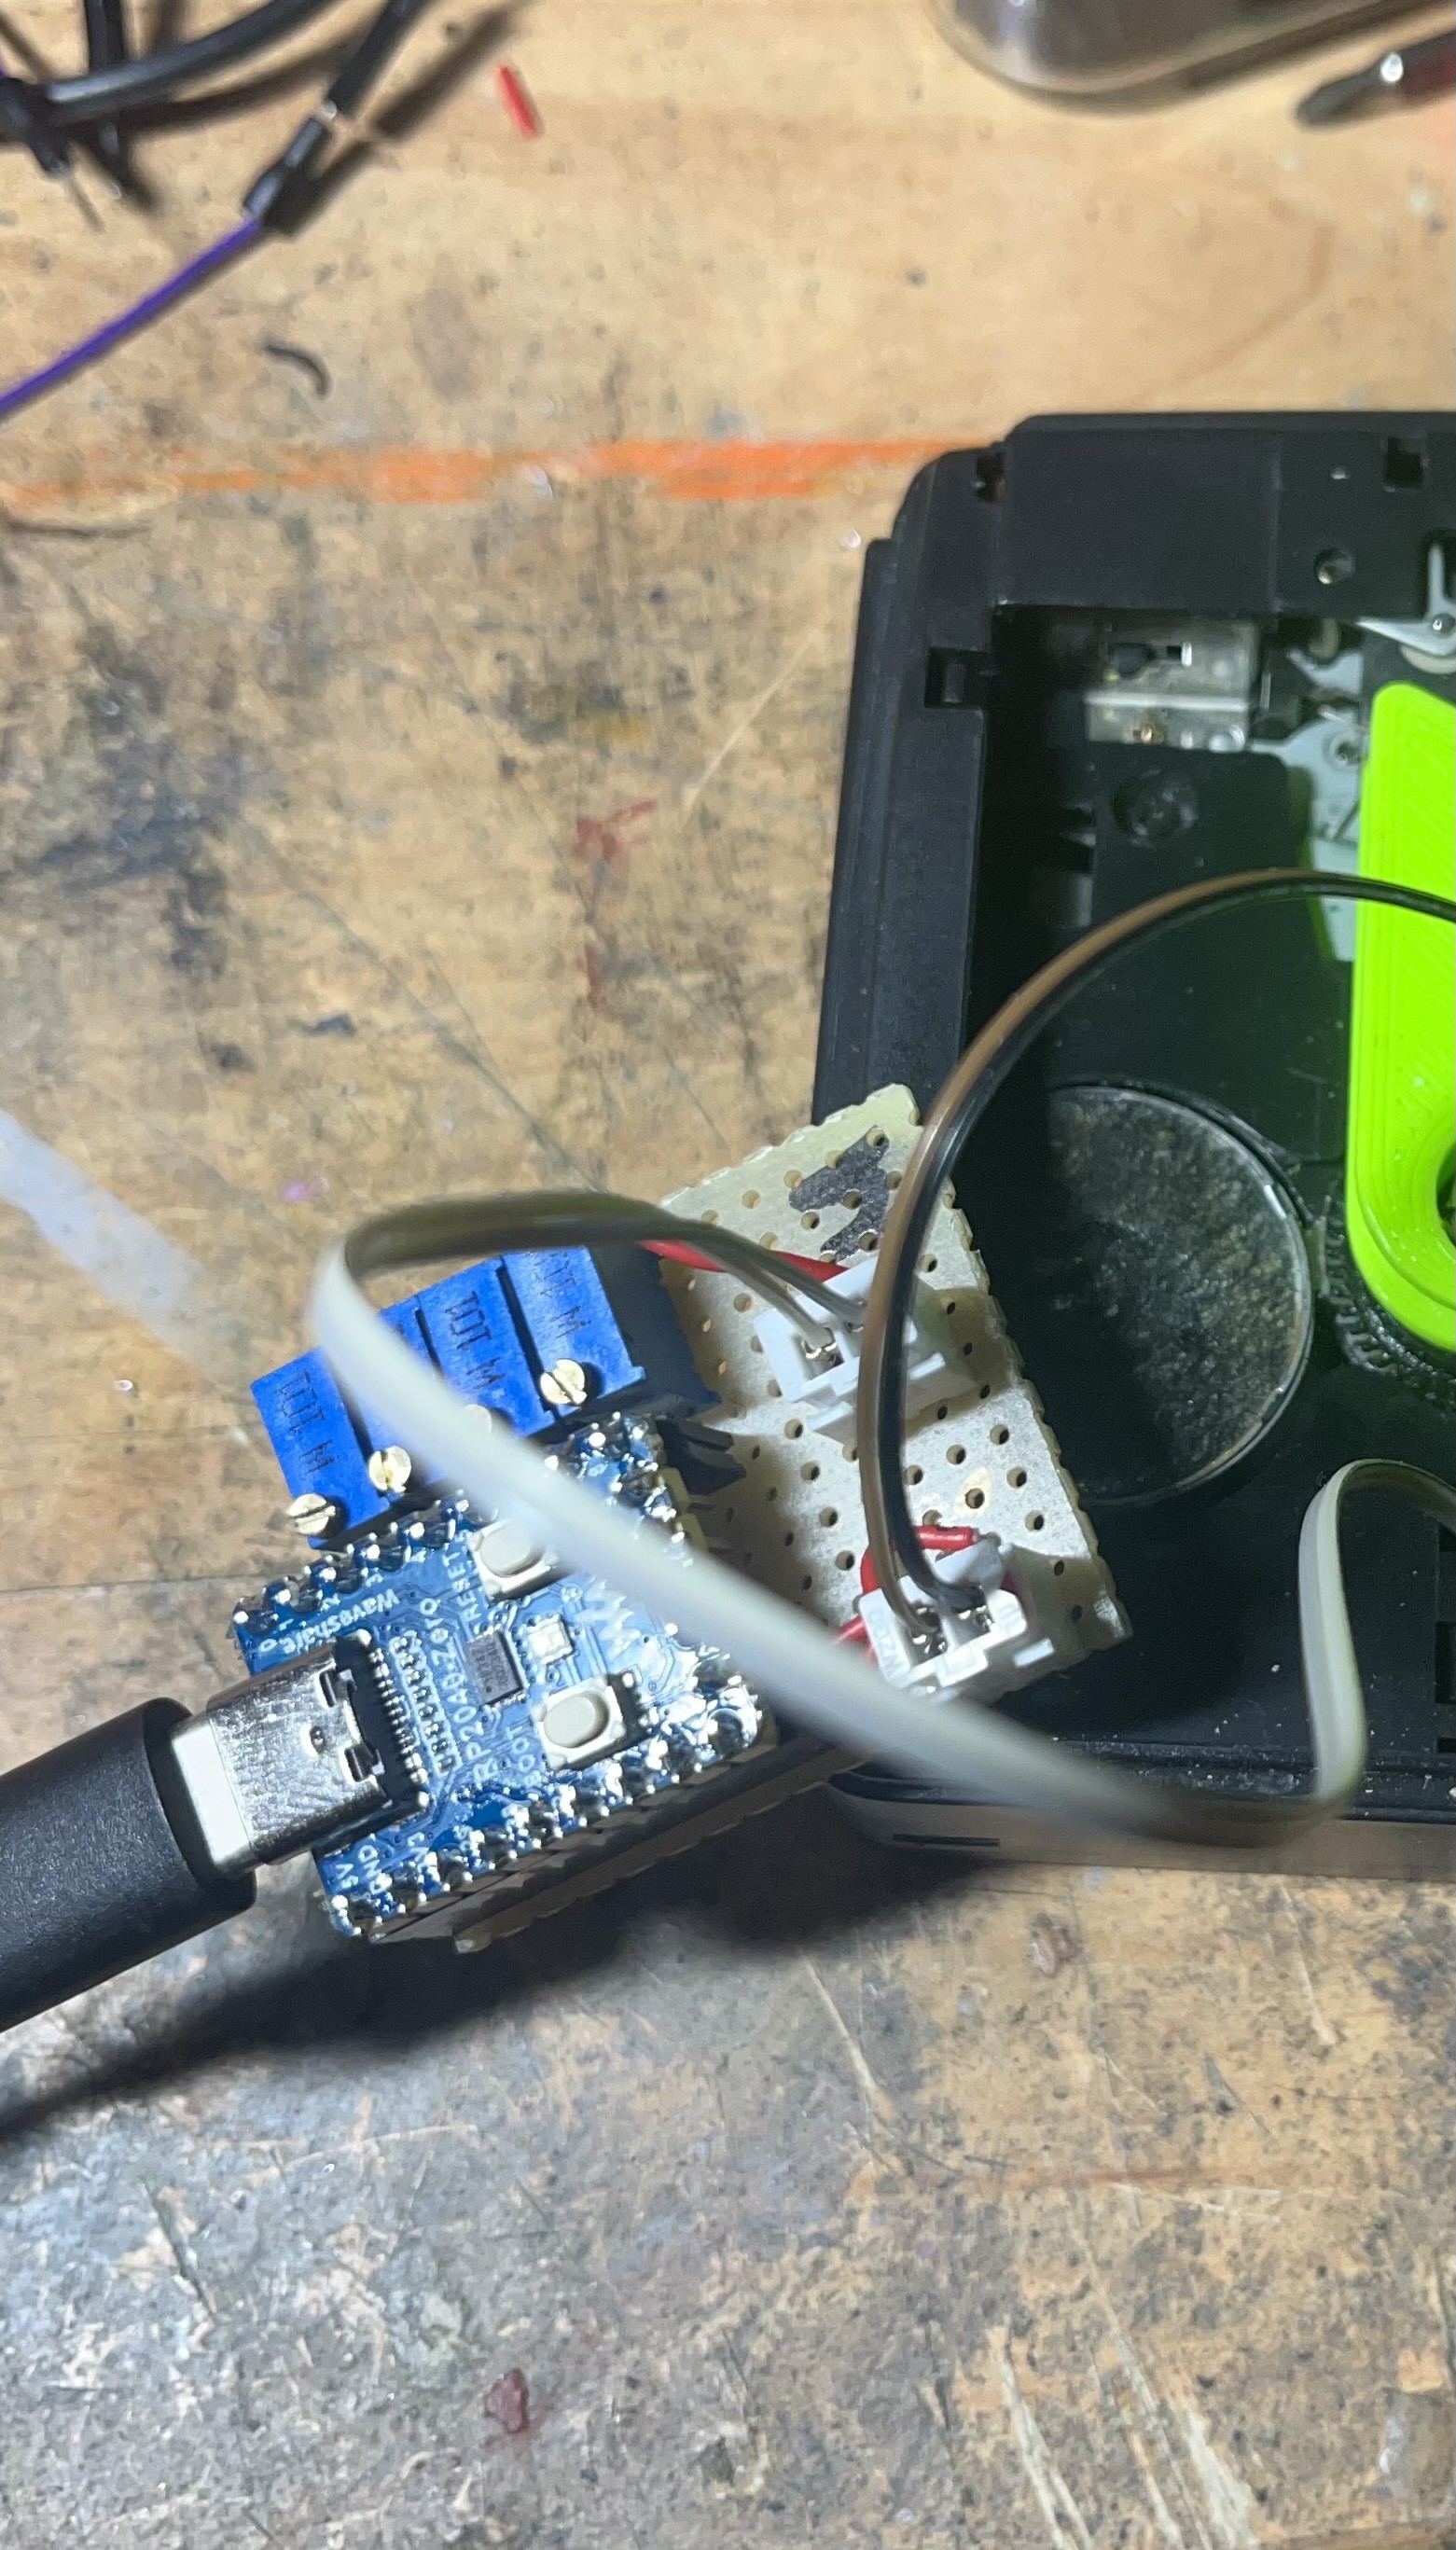
02/16/2025 at 18:19 • 0 commentsAfter a lot of back and forth I finally decided on a software structure. At first I wanted a micro controller to fully take care of adjusting the tape speed on receiving midi commands. But that would have ment a lot of fine tuning and less flexibility when it comes to the tonal range. So I decided to use potentiometers that can be used to fine tune pitch and the microcontroller just switches between them to deliver power to the motor. While that means that there is only a limited amount of notes to be played that also means that these can be fine tuned way more precise…. I think. That being said… the entire weekend was spent trying to compile the pico sdk and tinyusb in order to have an rp2040 be detected as a midi device. Never done that before, it was a long journey but I got there in the end.
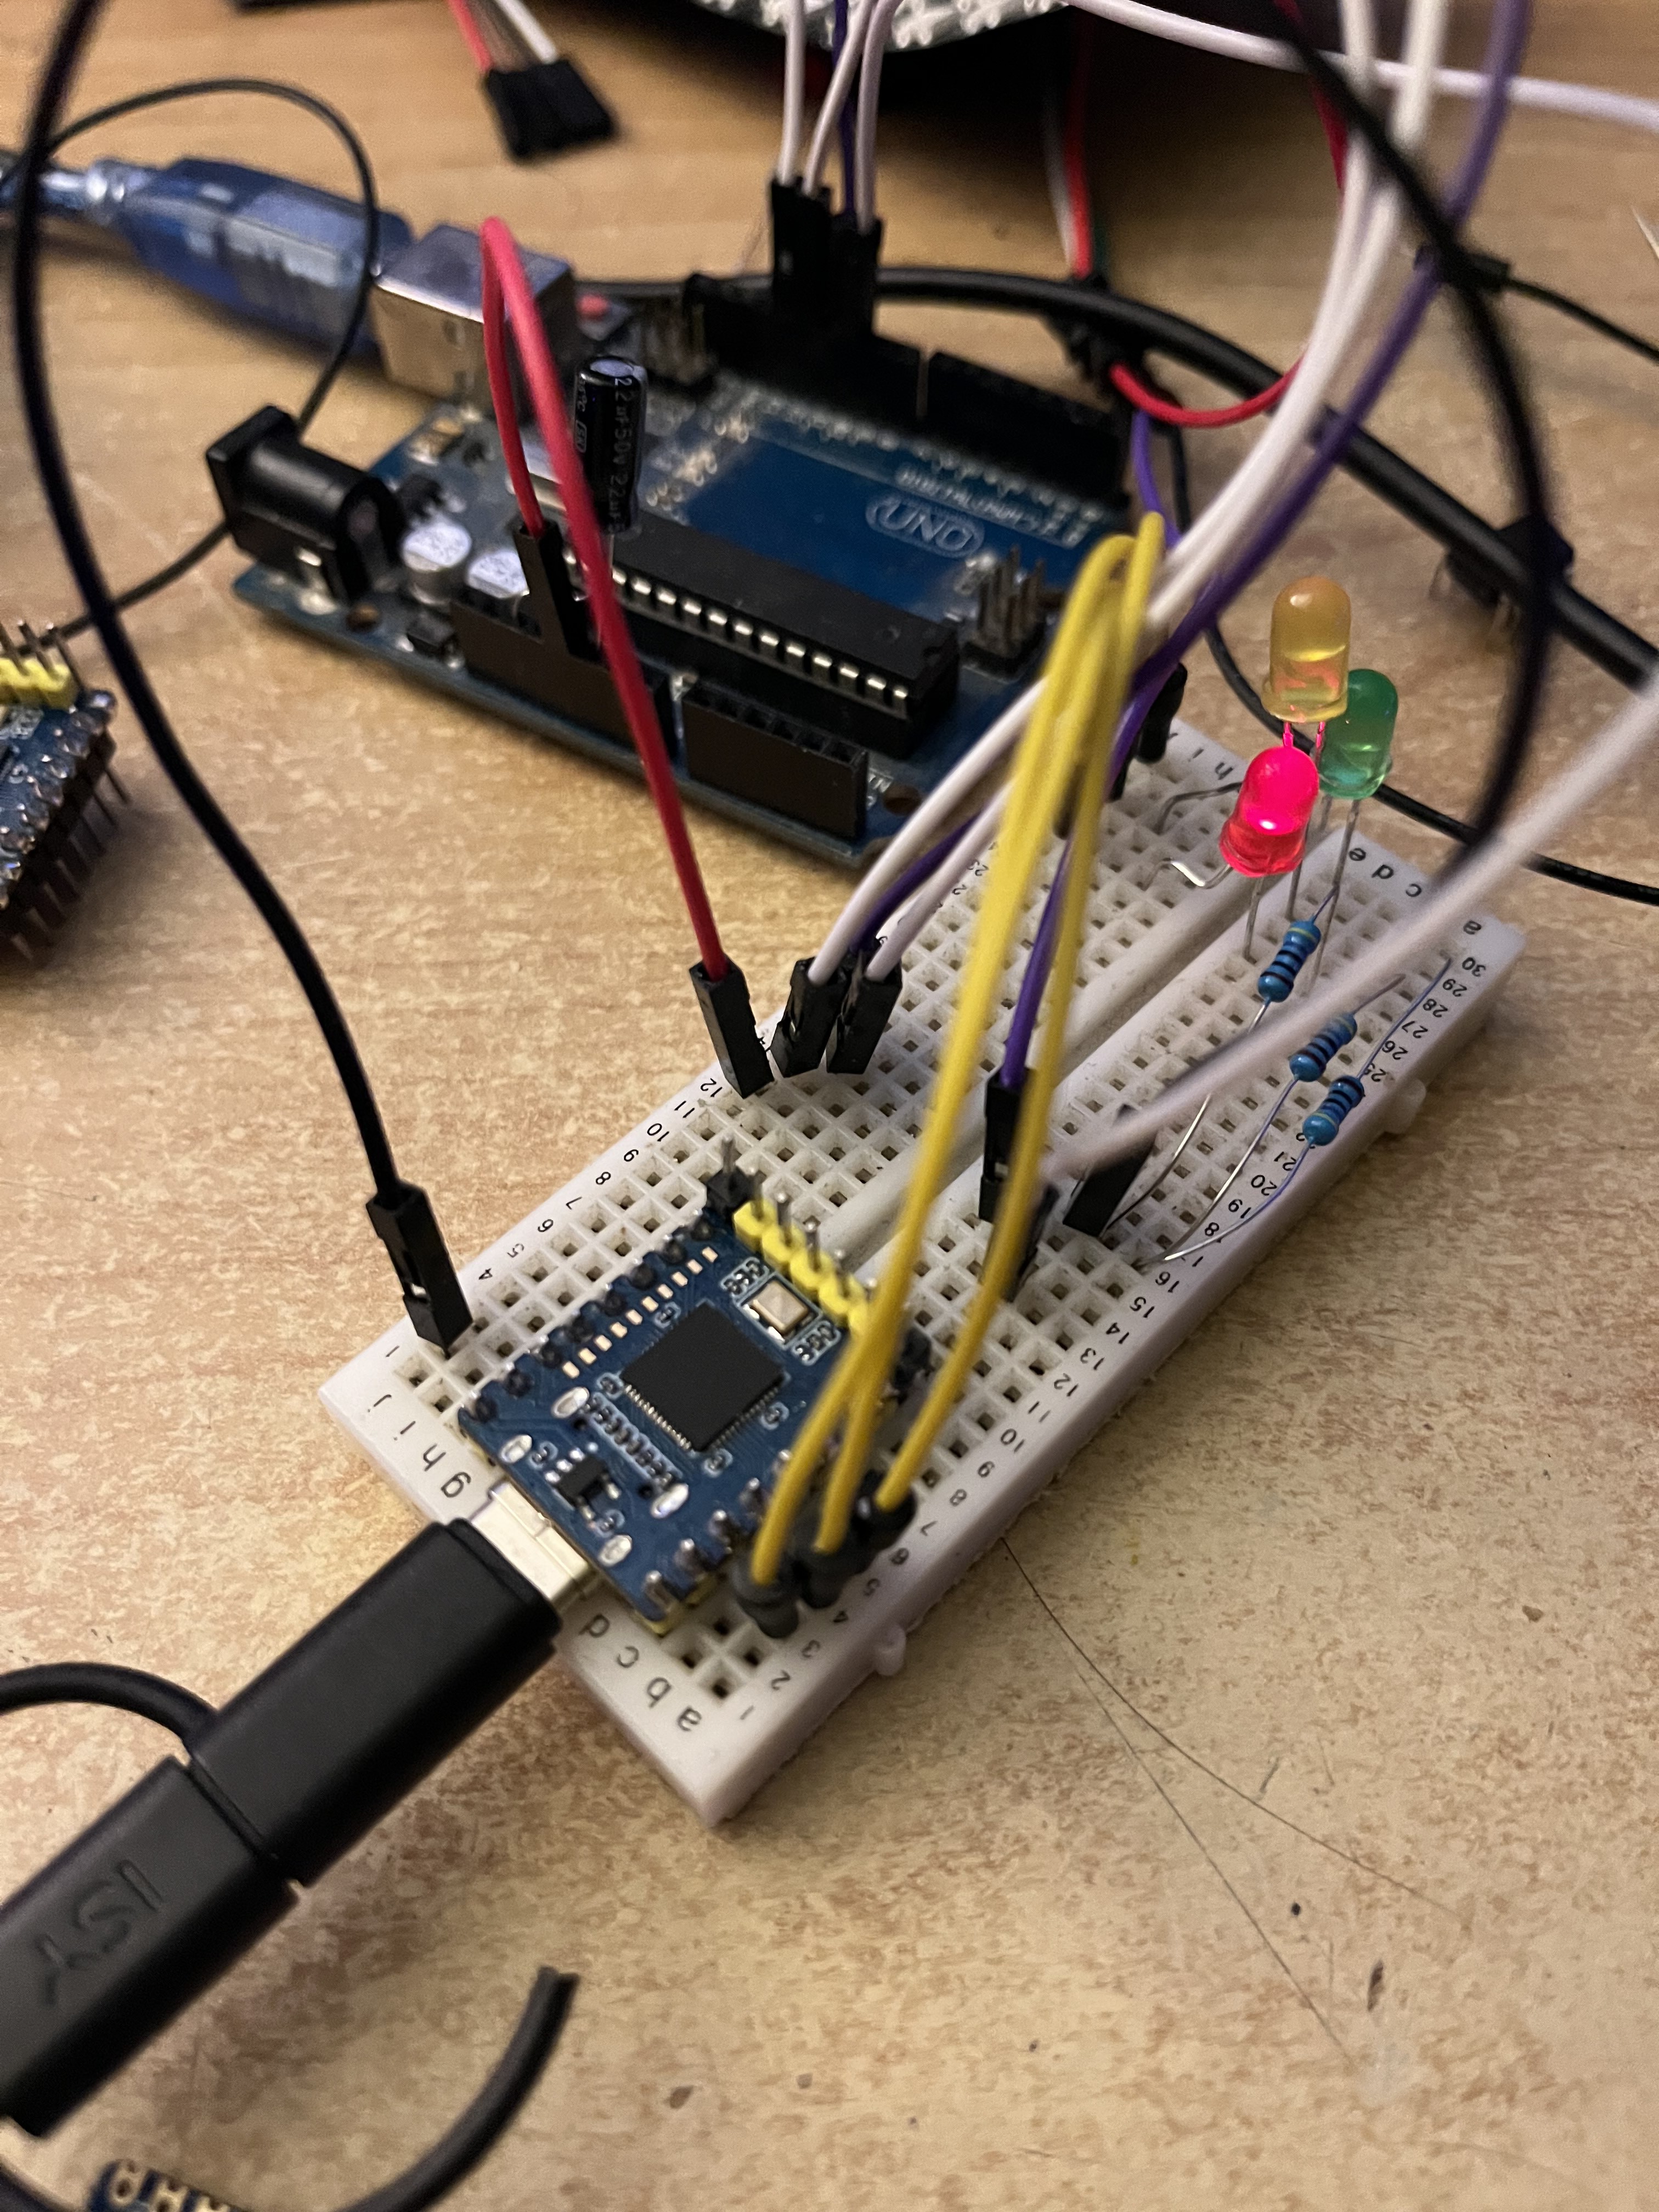
Sigh…. Sometimes you are just blinded by yourself. Of course this approach would not work. The idea was easy enough to implement and everything worked on the breadboard. But for some reason the motor would not do anything. Of course not. The rp2040 goop current is like 8 mA and the motor needs something like 500 mA. The poor gpio pins where completely out of their league. So… next step…. Do it with an h-bridge. This of course means that I do have to implement speed control via pmw, but st least I have an idea of how to adjust the speed without re coding the entire thing every time .
-
New Approach
10/04/2024 at 11:00 • 0 commentsWell what do you know, sometimes overthinking is not the solution. After The struggles with my previous approach, I decided to rethink what I was doing. Taking apart the cassette player and basically rebuilding it did not make a lot of sense. So I figured out a way to instead mount the tape inside the cassette player. And what do you know, that was probably the easiest solution I could have done in the first place. I modeled some tiny cassettes that can hold a very short strip of tape.
![]()
I put some bits and bops in place so you can have a variable length of tape. The only downside with this approach is that you have to have a somewhat long initial length in order to get it working which was not the case in my previous approach. However. having it working is better than...not having it working. So. The next step is to hook up some micro controller and change the speed of the motor.
-
Wrong Decisions
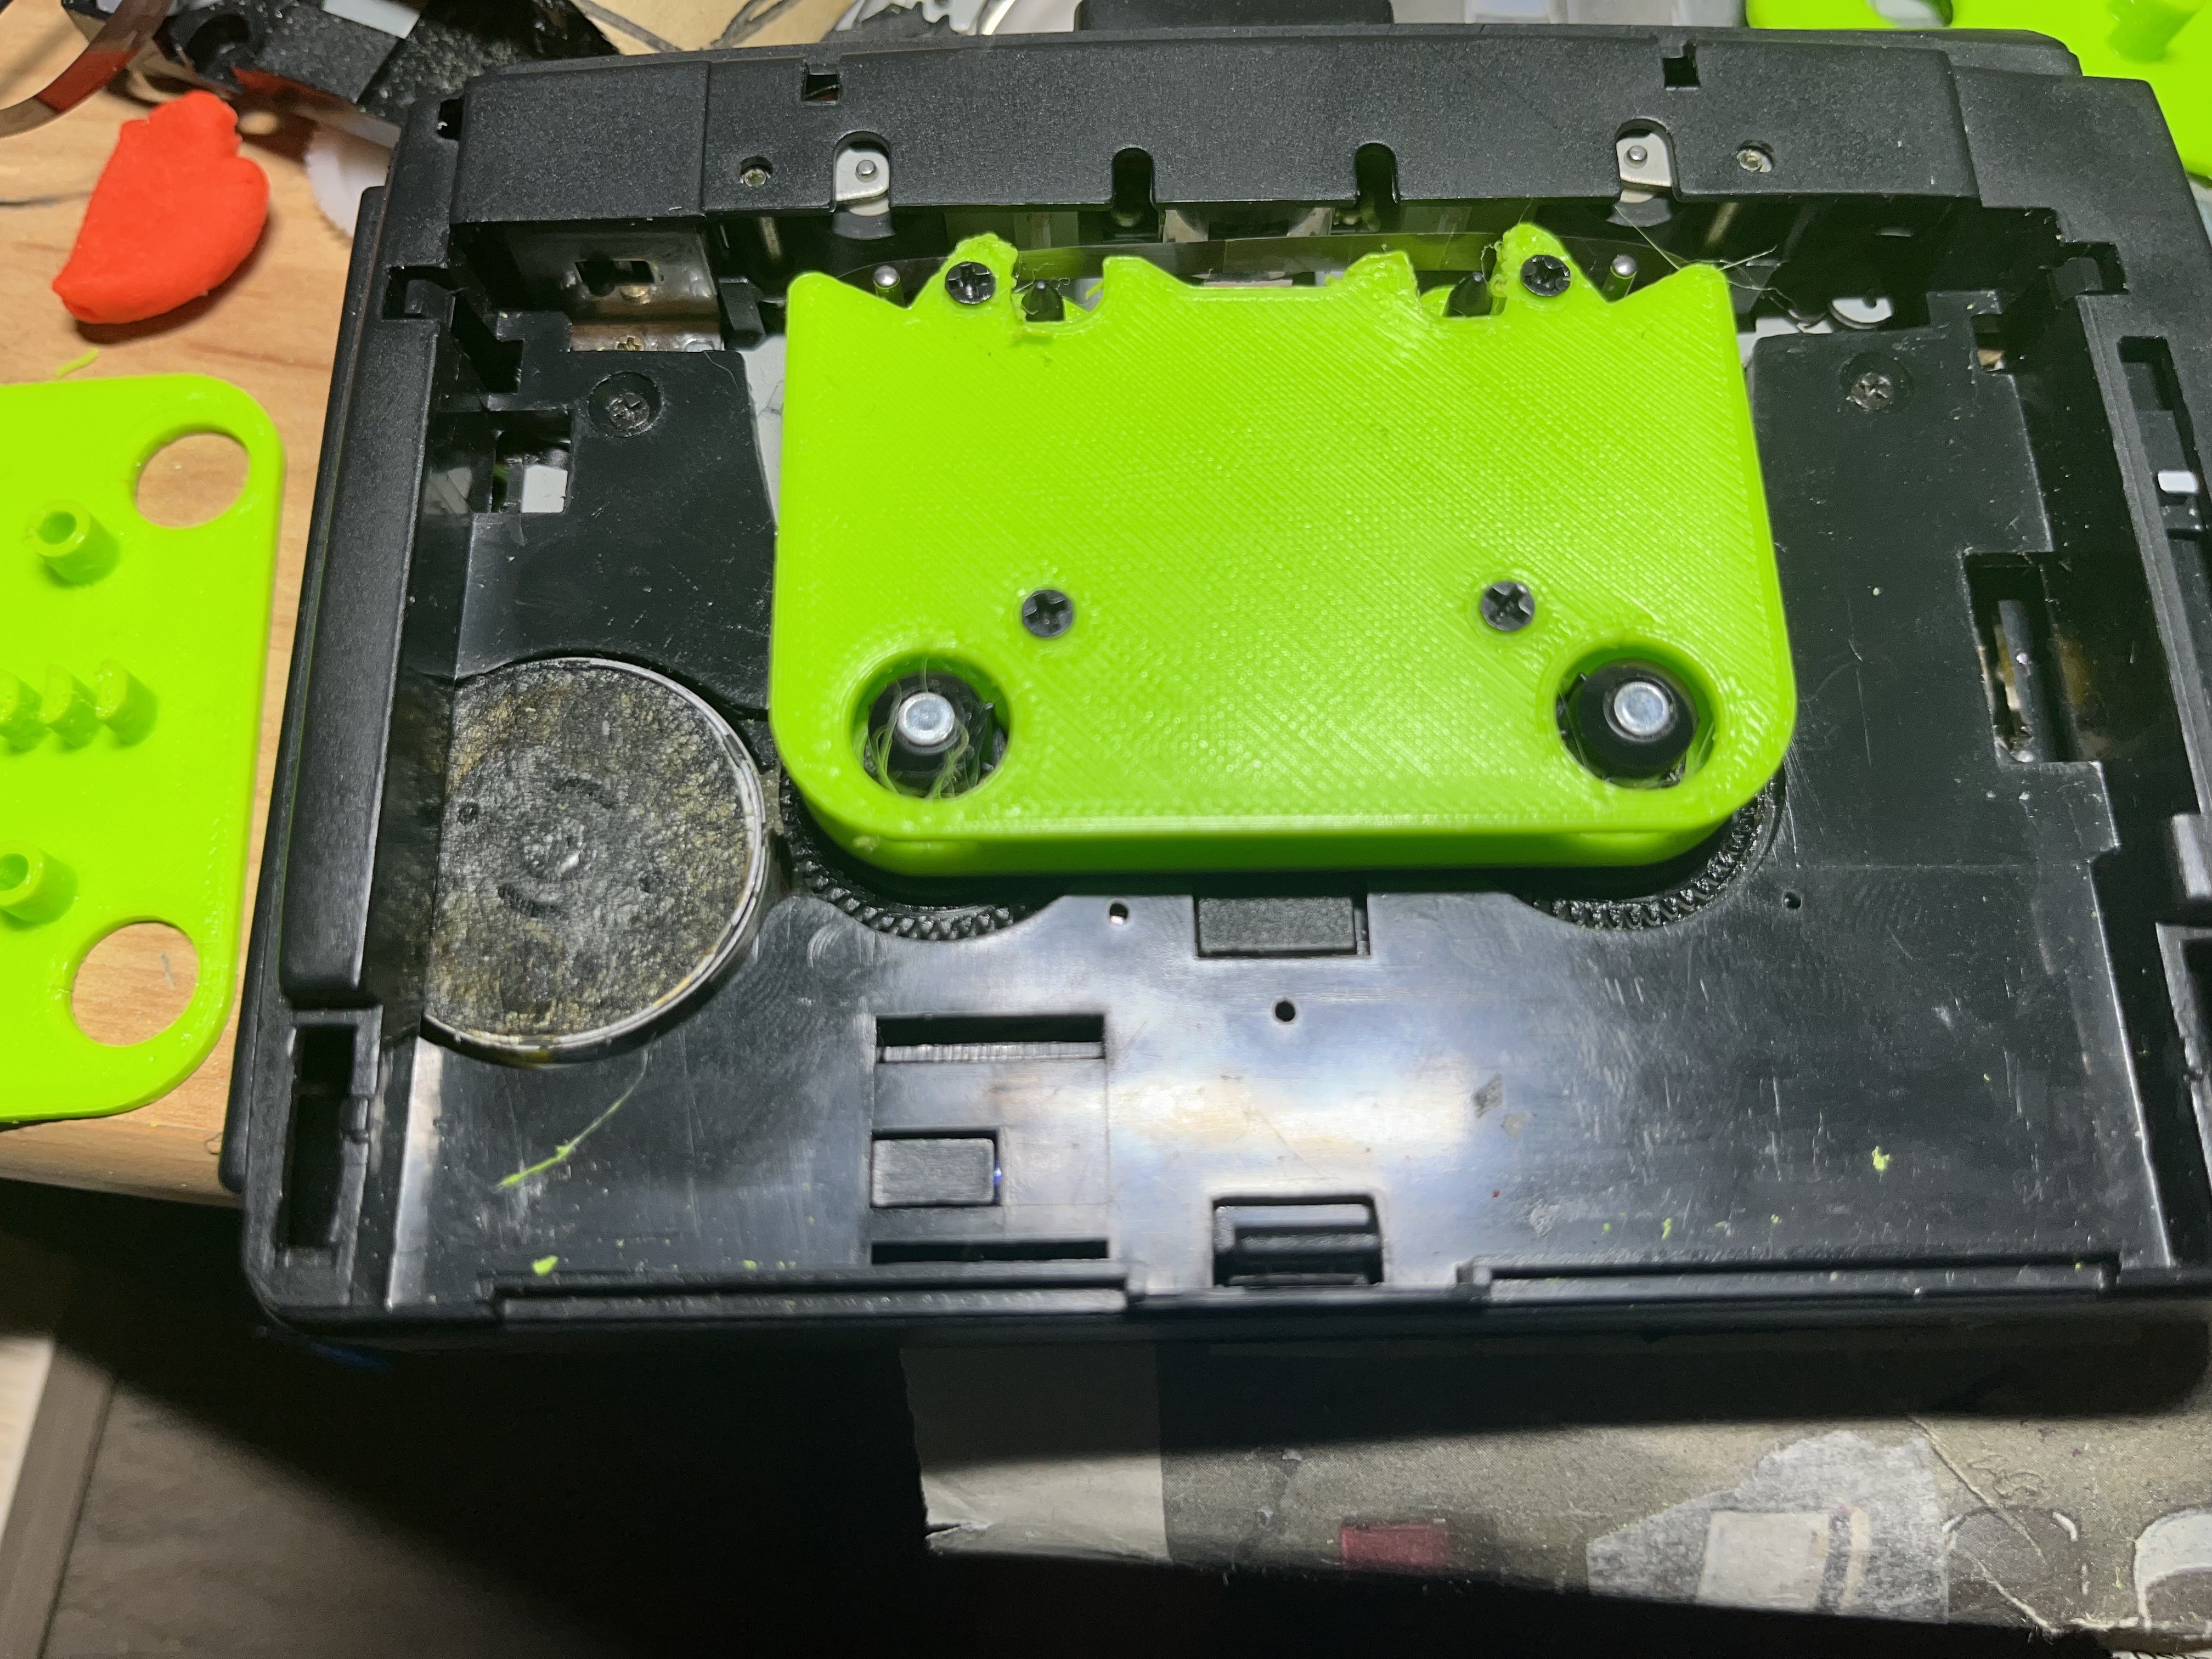
10/02/2024 at 20:01 • 0 commentsThis project has turned into a question of "How much stuff can you do wrong" and "at what point do you stop and reevaluate, if you are still on the right track. So after deciding to build the entire mechanics such that the tape rolls free instead of being glued to a wheel I then quickly realized that the problem was not the tape on the wheel but the motor being way to fast. I then thought about a gear box (with rubber bands instead of cog wheels) to slow down the speed. The mechanics got more and more complex (I am a software developer, not a ... mechanics...builder....). I had to put the electronics on a separate layer, was printing gear wheels over gear wheels. Eventually I got it working but the entire construct was so wobbly and unreliable, the rubber bands where slipping and nothing run smooth.
![]()
I was facing the question...does any of this still make any sense. The first option that came to mind was if I should ditch the motor and buy a separate one. But for some reason that did not feel right. I was moving further and further from the original cassette player.
That was until I realized...I could just print a new cassette and slap the small piece of tape I needed in that. I .... could just use the original cassette player instead of recreating the entire thing. After that the rest should be easy.
Soooooooooo...Back to the drawing board it is.
-
First steps
09/16/2024 at 19:41 • 0 commentsSo the first thing I did was ... well of course order a cassette player.
I received one that also came with a cassette in it, lucky me.
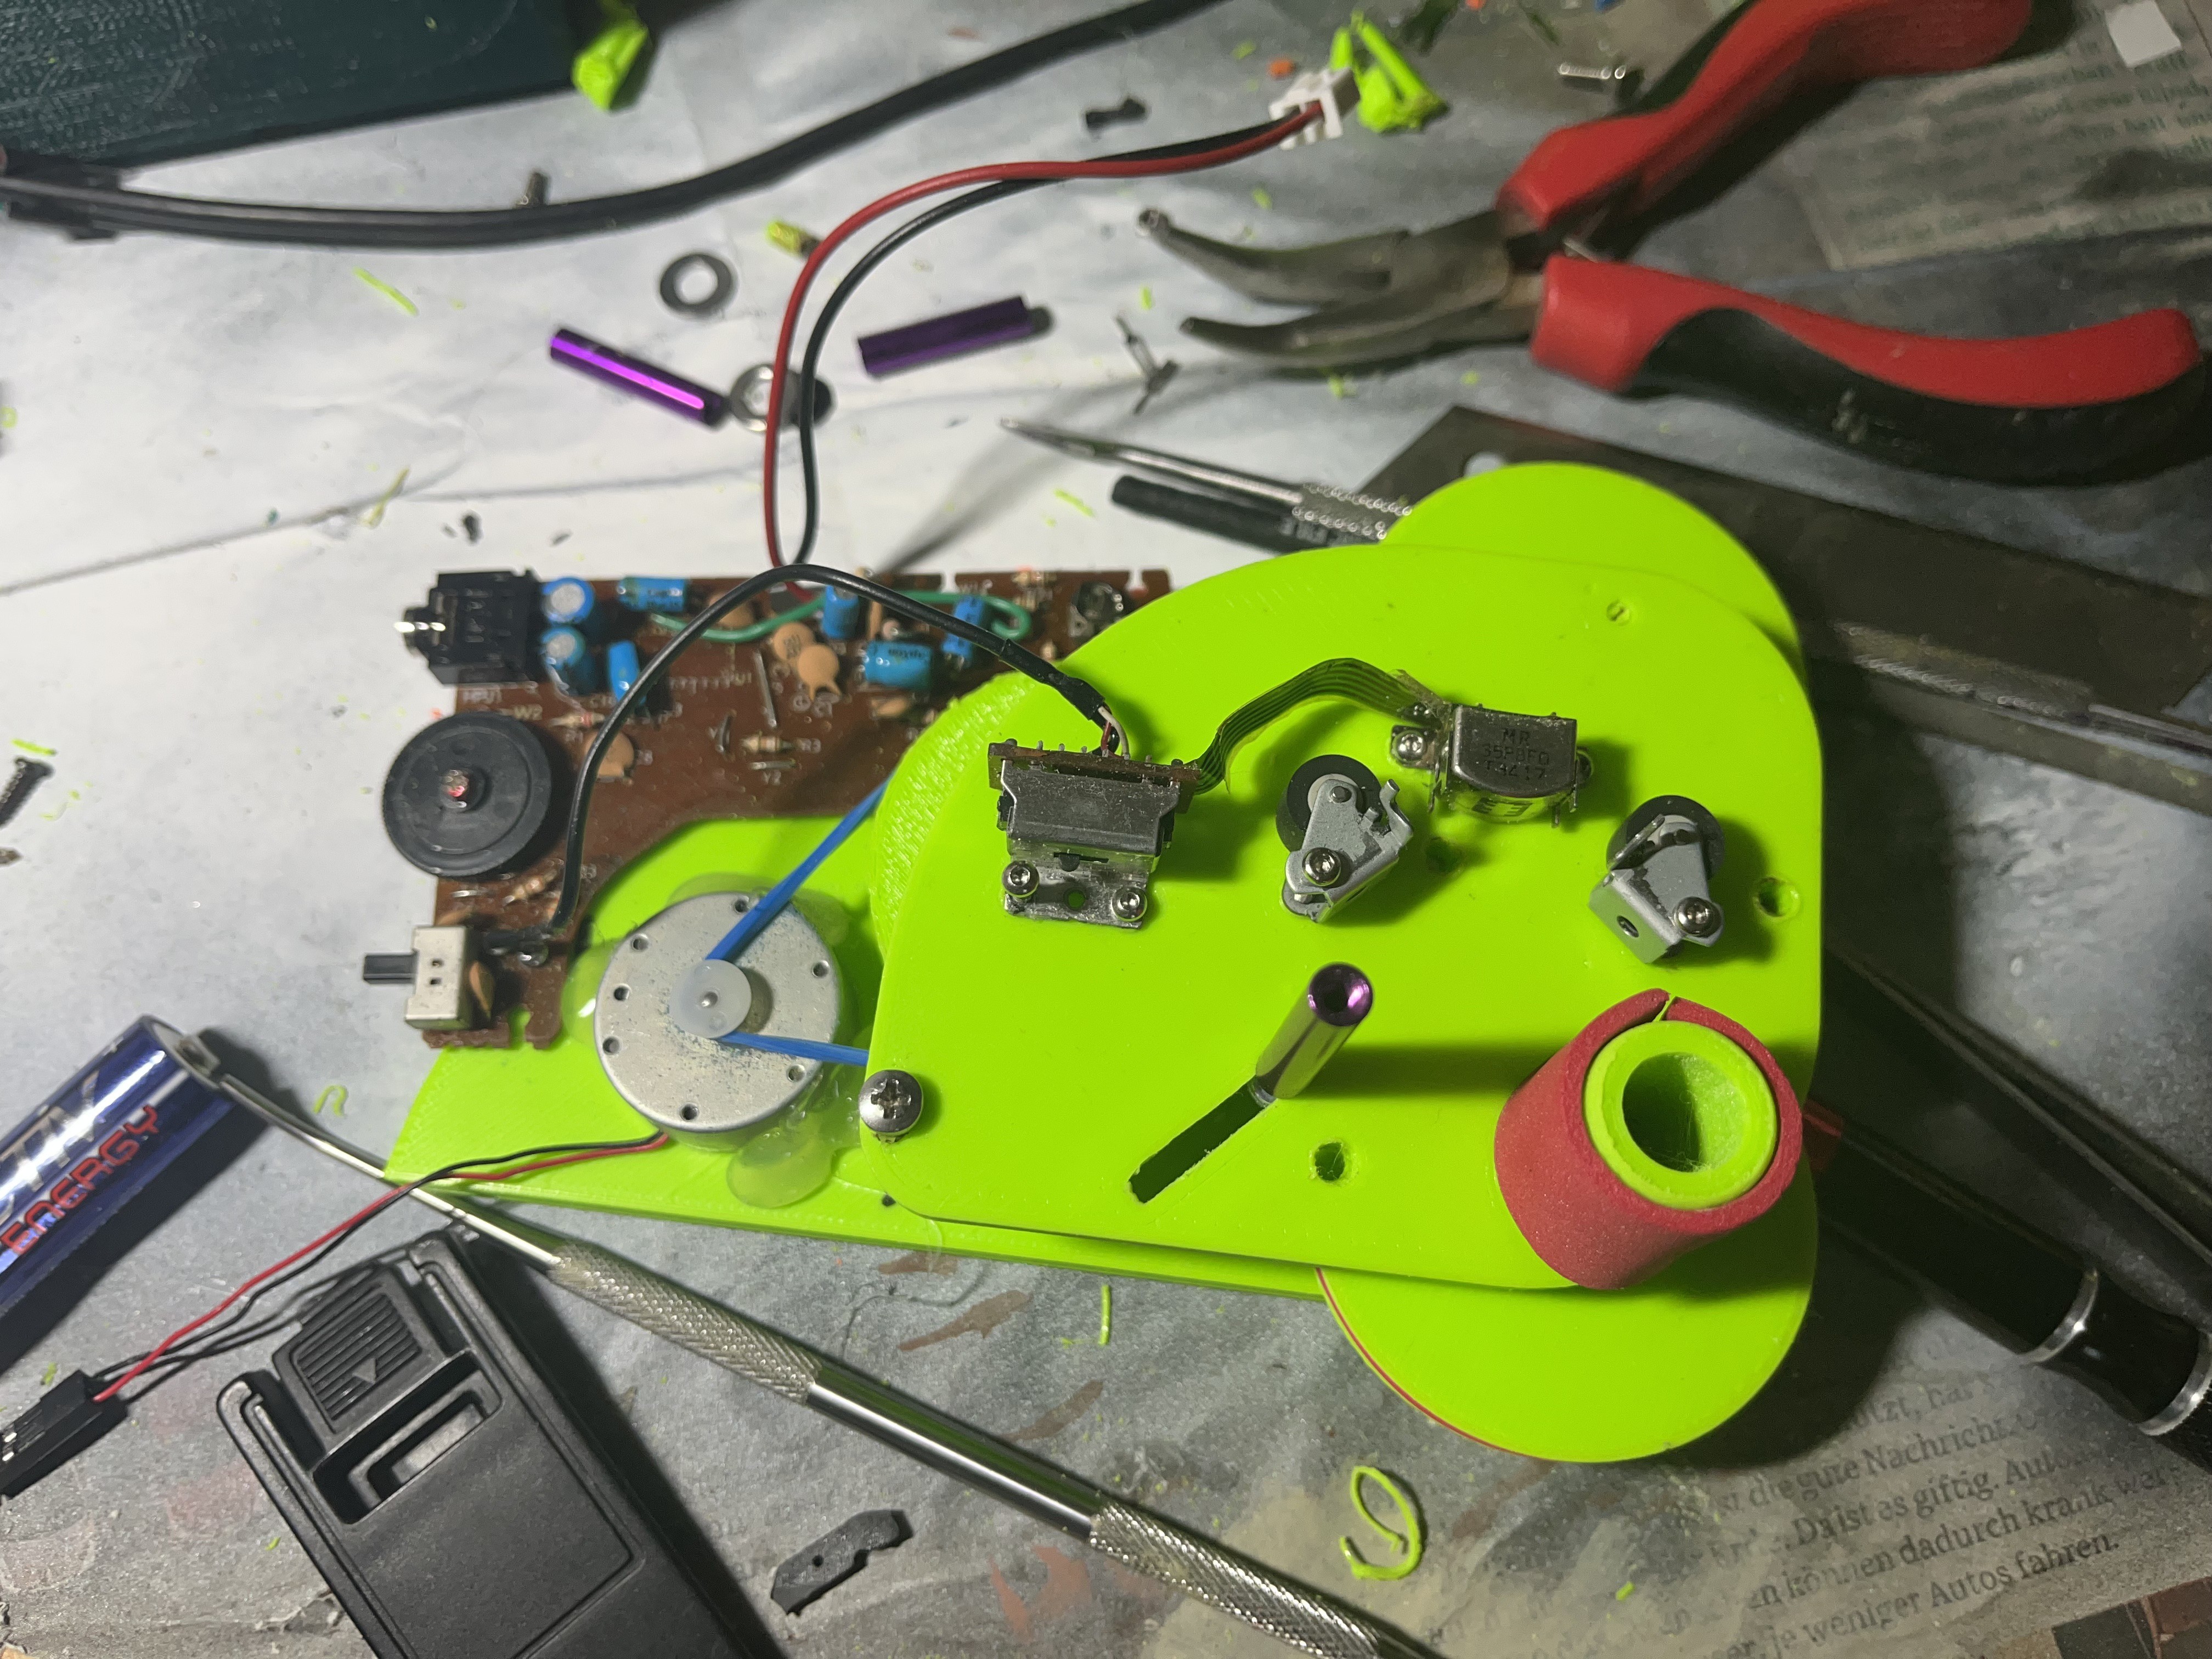
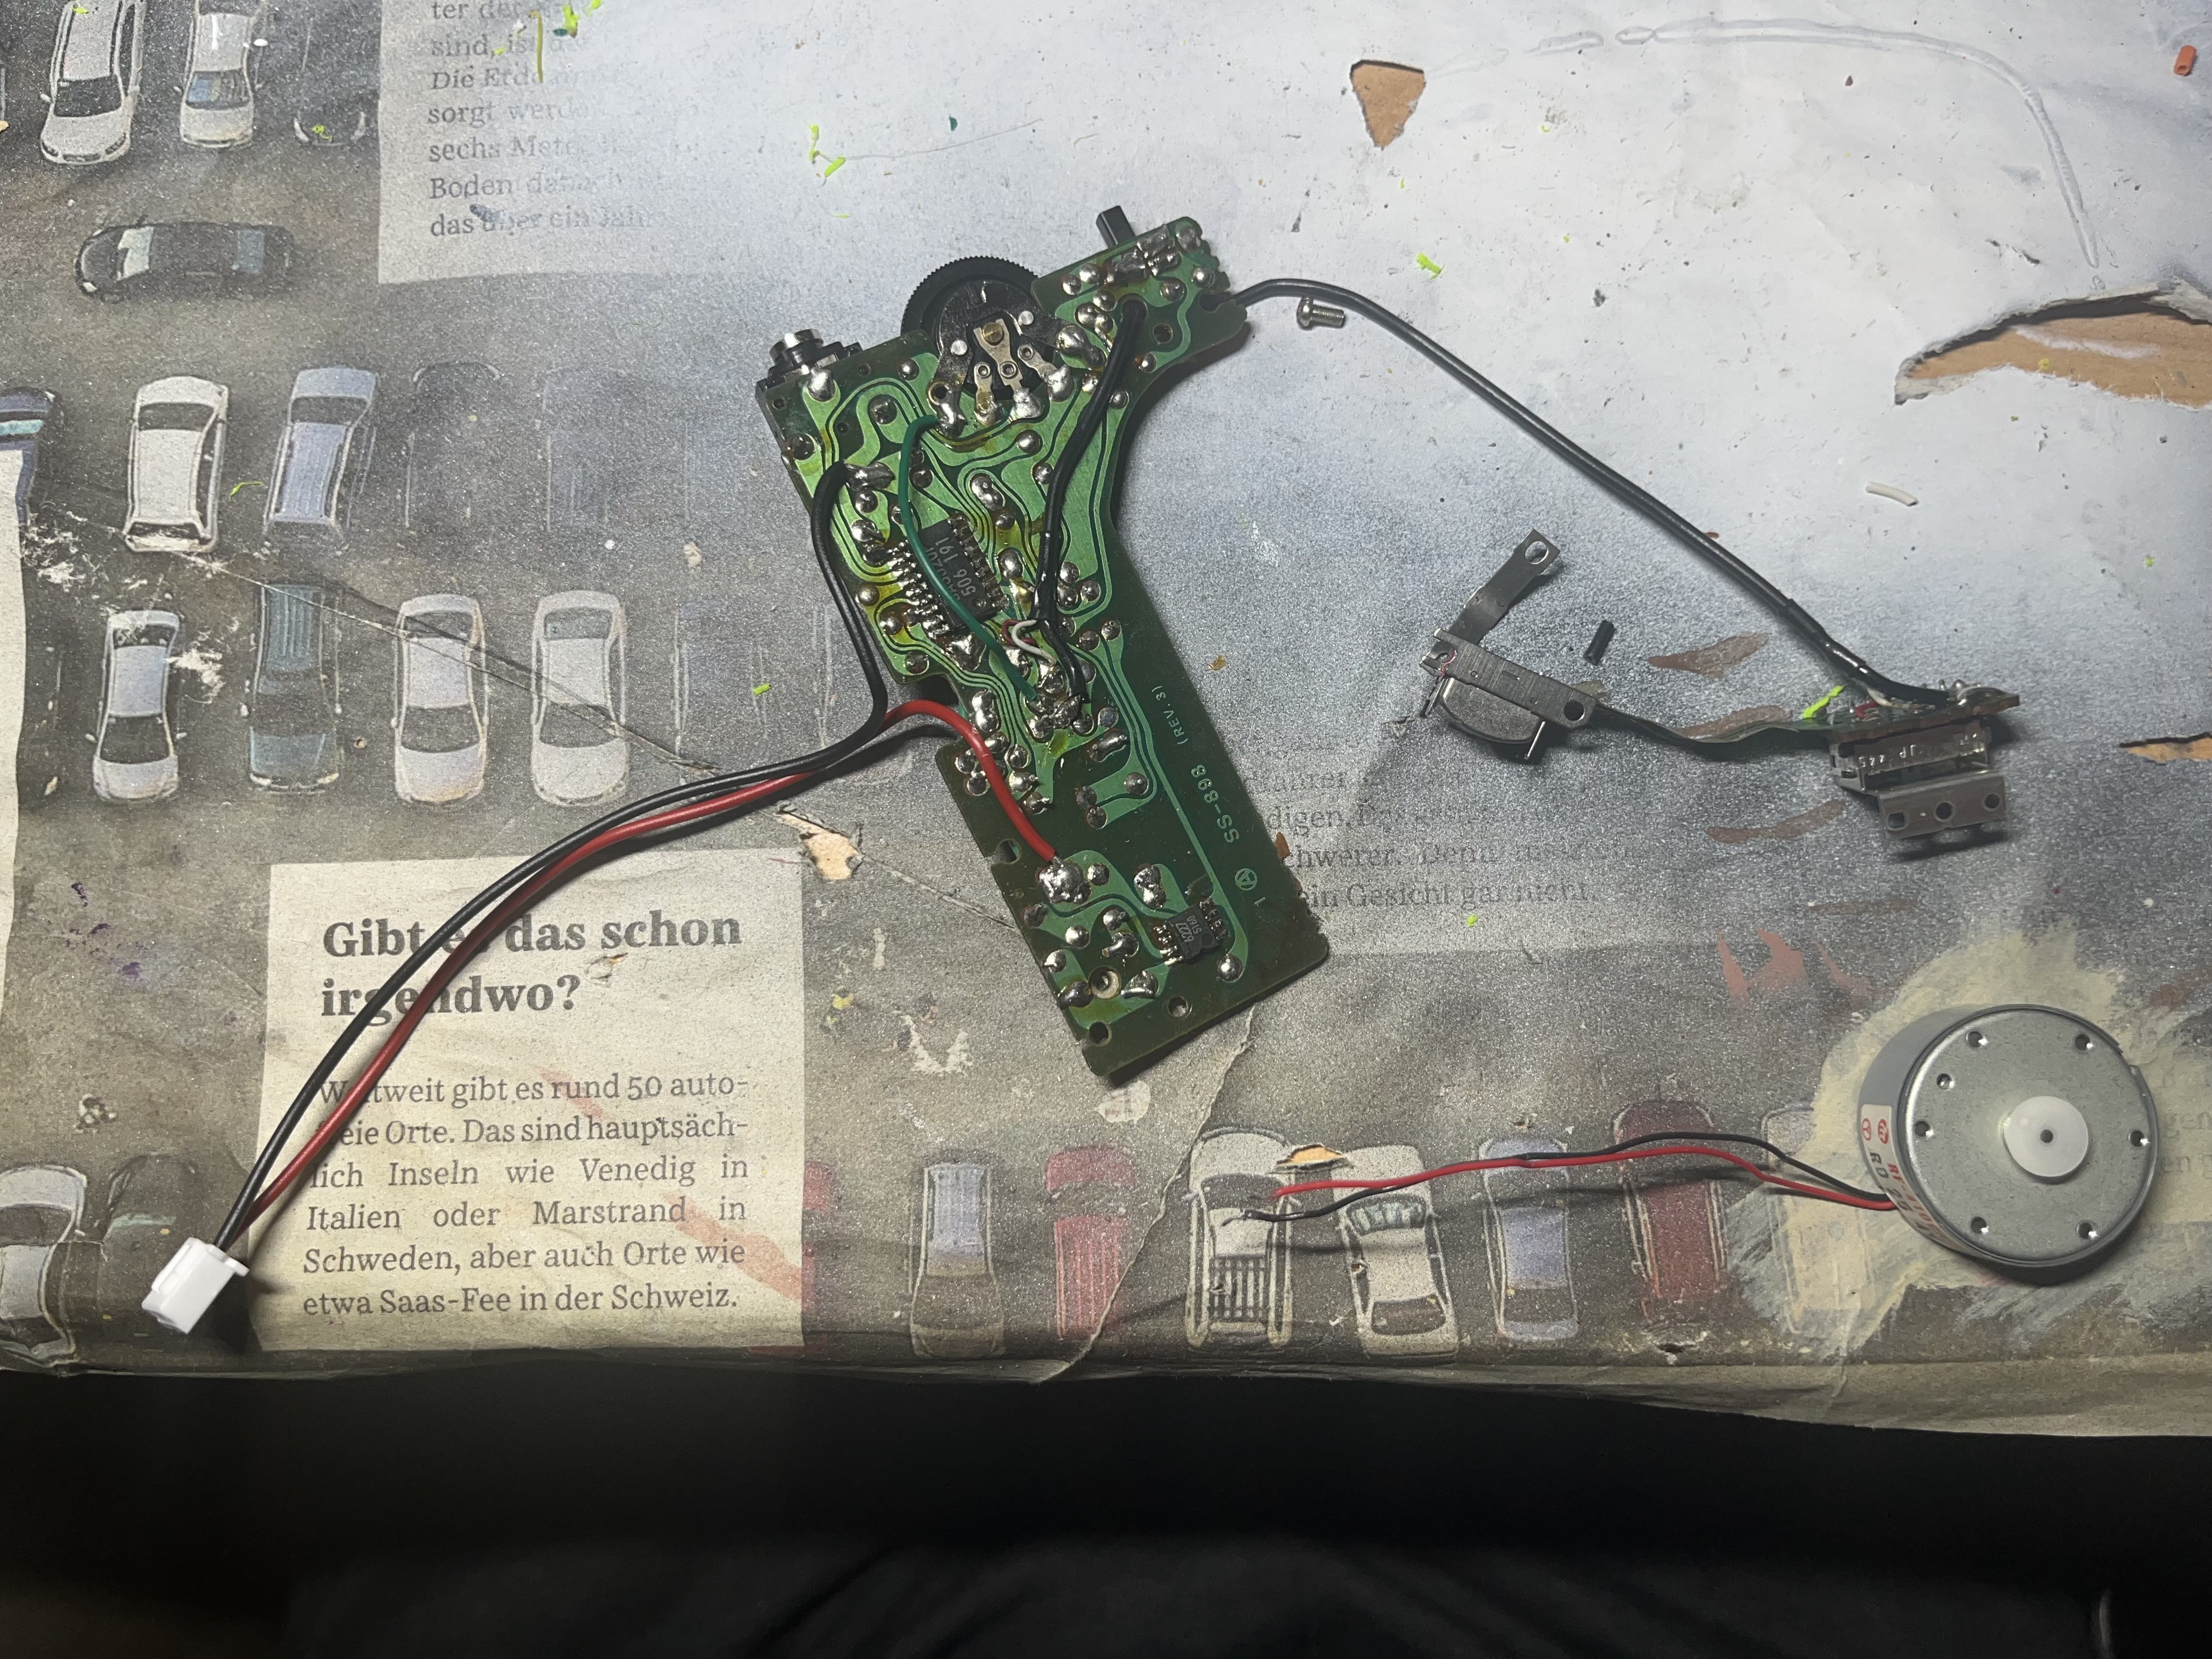
I started dissembling the cassette player and reduce it to the bare minimum I needed to have the reading head still in working condition.
![]()
That was the easy part. Turns out, there is basically no electronics in a cassette player, but the mechanics are just beyond genius. Back in the day there was so much ingenuity behind a lot of hardware to make up for the lack of advanced electronics.
My brain already started over engineering the Tape Organ but when I started reverse engineering the PCB I stopped myself and instead try to use what I already had. So I screwed everything to a piece of plastic, so it would not slip around.
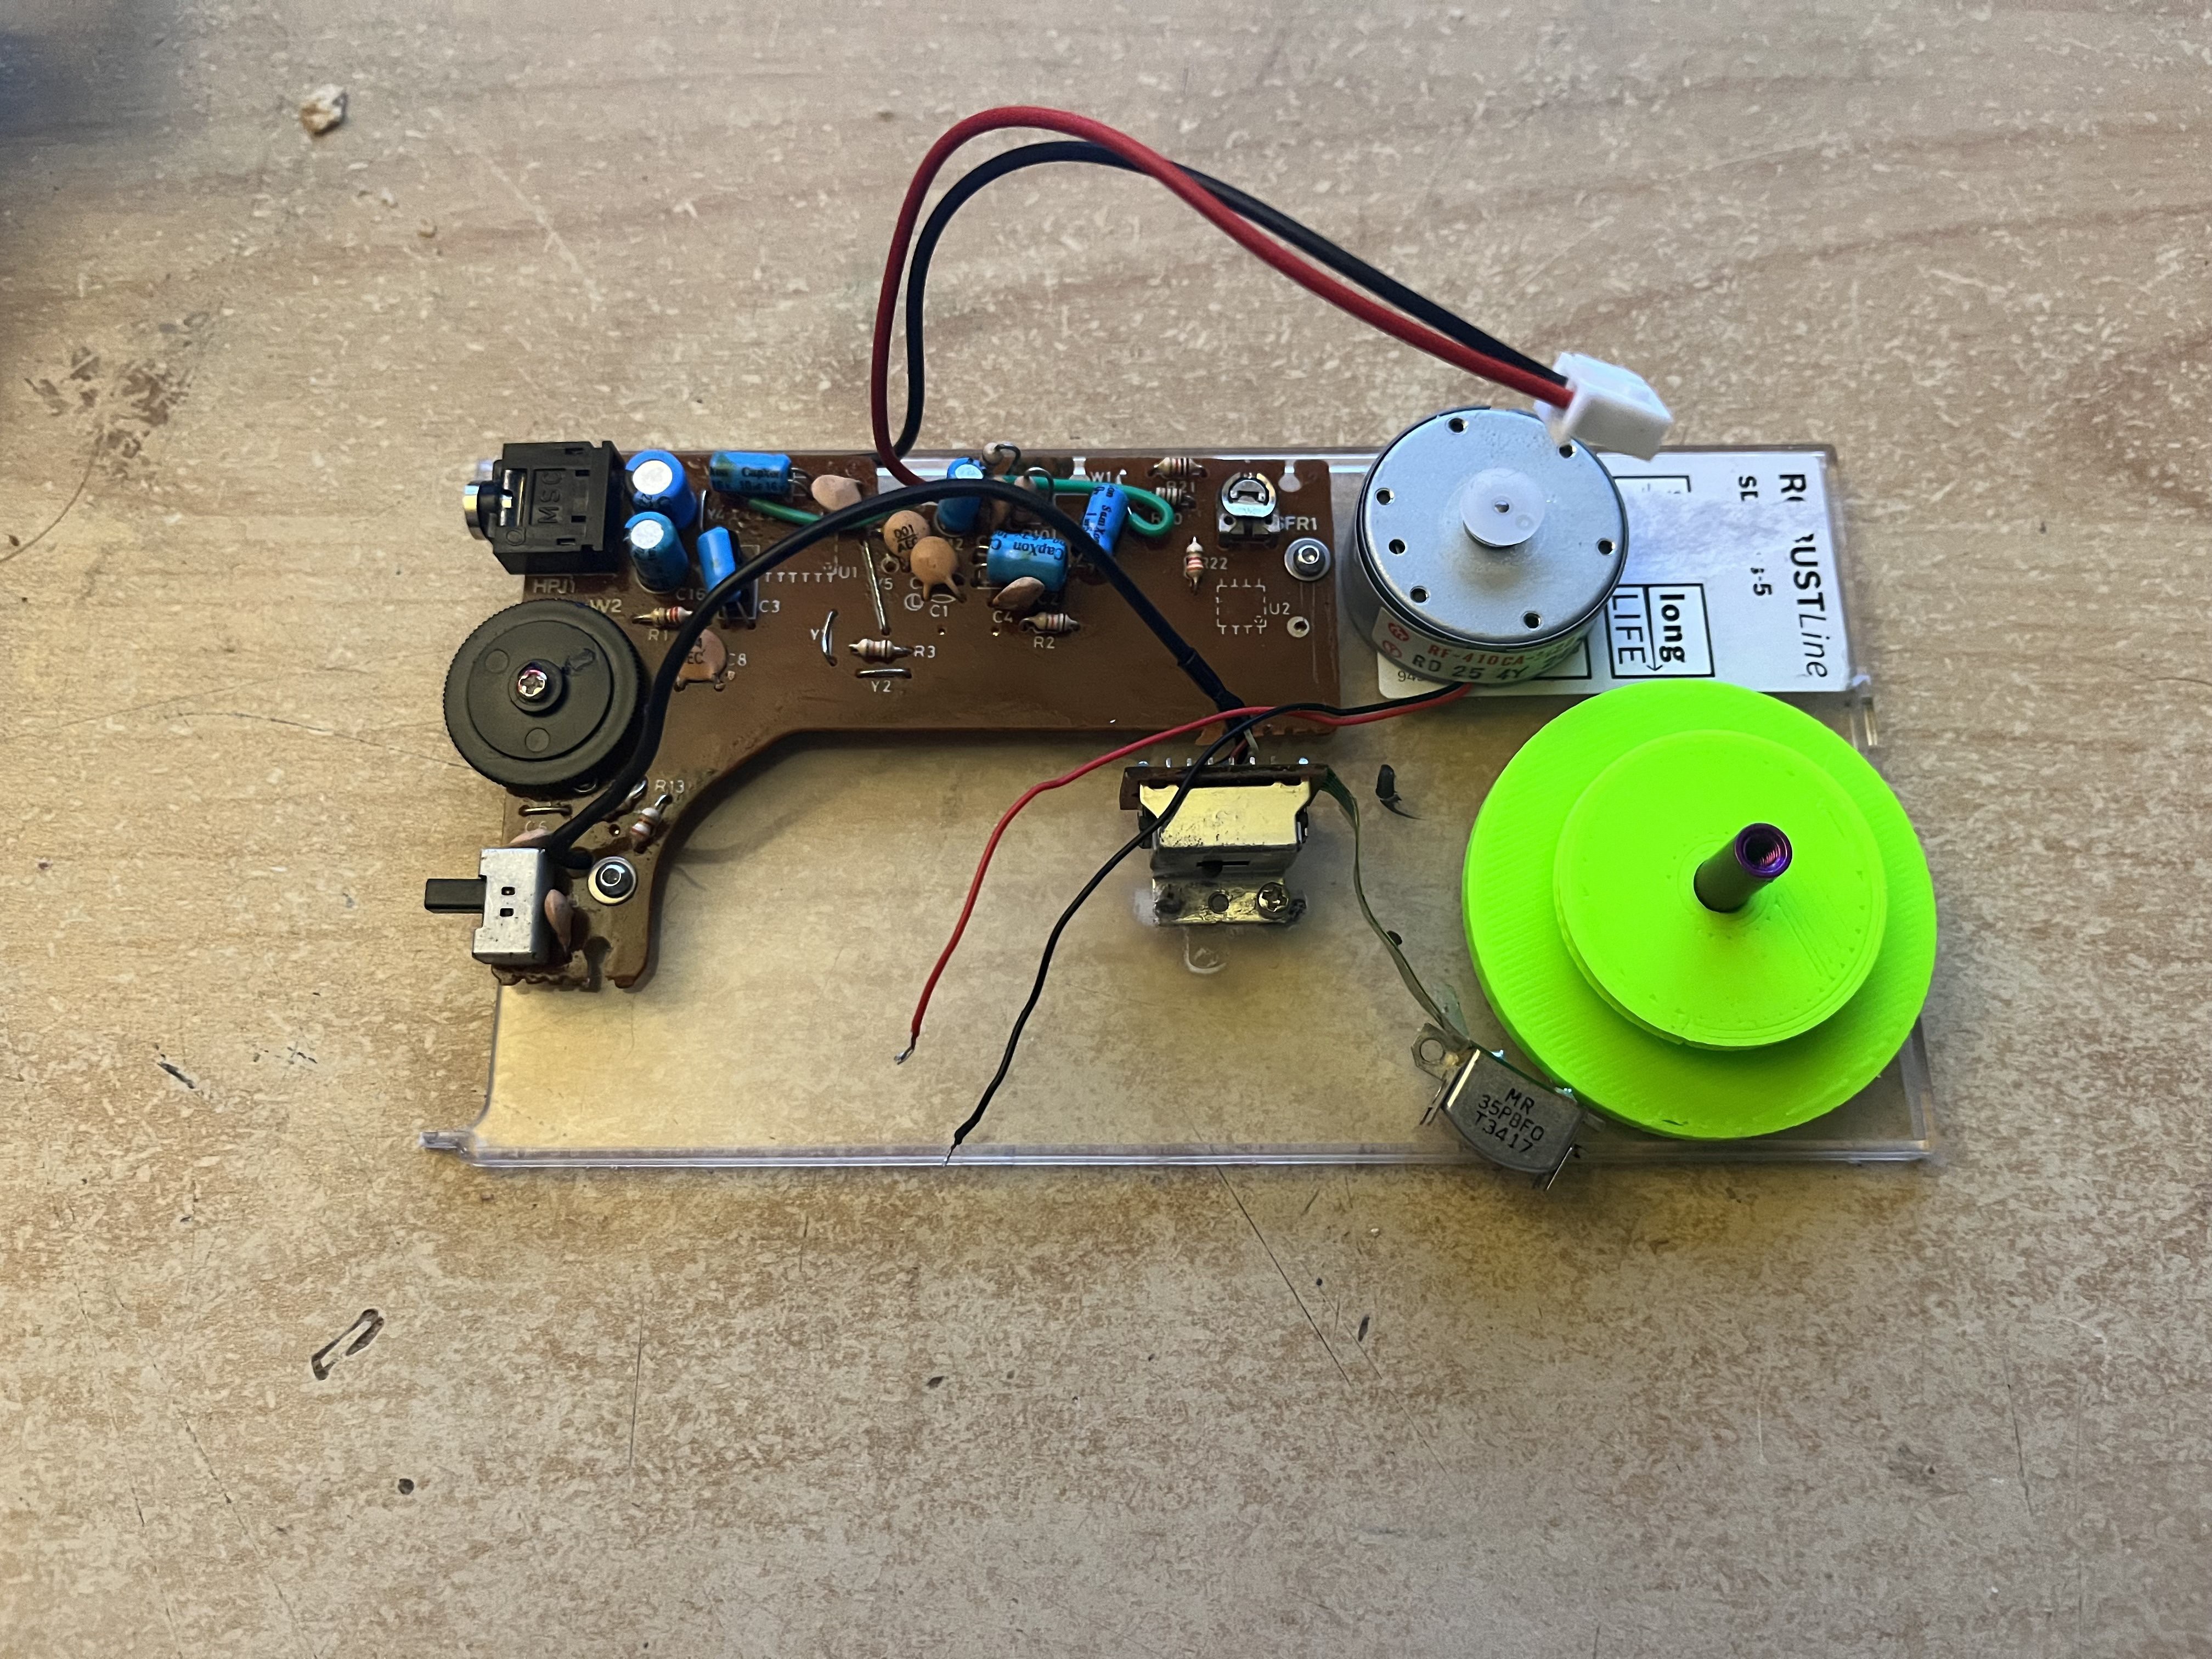
I then listened to the cassette. It was some kids music and ... most of it was pretty awful. I can fully understand why the previous owner didn't want to have it anymore. But one of the songs had some nice background drone in the intro. I cut out one single note of this drone and glued it to a 3D printed wheel.
I then arranged everything such that the reader touches the wheel and could ... well... do its job.
![]()
Before I started coding the micro controller I wanted to make sure everything worked and I am glad I did because... no it didn't. When I spun everything up what I got did not even remotely sound like what was supposed to come out of the tape.
I am not yet sure if my guess is correct, but I think having the tape glued to a wheel and have this wheel press against the reader does not produce the right sound. So I will now have to built something that uses loose tape without a wheel as it normally does in a cassette player anyways.
So, back to the drawing board.
-
The Idea
09/16/2024 at 19:30 • 0 commentsI like making live music and lately I have been experiemnting a bit more with samples. (I am more of a "natural instrument" guy, so I have never really done any sample stuff). I also like to build hardware instruments and some day I got the idea of using a cassette player as a sample player. (Of course this is not a new idea, but to me it was XD) The general concept is to cut out a pice of tape from a cassette and use this sound as a base. then spin it up and get the sound using the cassette players electronics. The faster it spins, the higher pitched it sounds. Then, using a micro controller, I can convert the midi messages from a DAW or some keyboard to the rotation speed of the motor to change its pitch. Then I just use like 5 of these and have myself a nice drone synthesizer that also dabbles as polyrhythm generator.
Of course I also would have to add some knobs and maybe a small 8 segment display to properly tune the sound to a specific pitch, but that should be about it.