Emily
Emily-
L(a)unch Menu: BREAD!
03/08/2025 at 20:09 • 0 commentsOur prototype of the Breadapult is complete! After an intense final push, we successfully integrated 3 servos into our frame and generated a functioning catapult that launches bread upon user command.
Our next steps are to redesign the entire structure in Fusion, reassemble it using the printed PLA parts, and integrate a 4th servo to the pivot point of the "goal post" arms so that the launch angle is adjustable via potentiometer control, which we have working as a separate component currently.
![]()
-
03/06/2025 at 07:08 • 0 commentsThe most important thing? CONSTRUCTION. And guess what? We’re almost DONE. 🎉
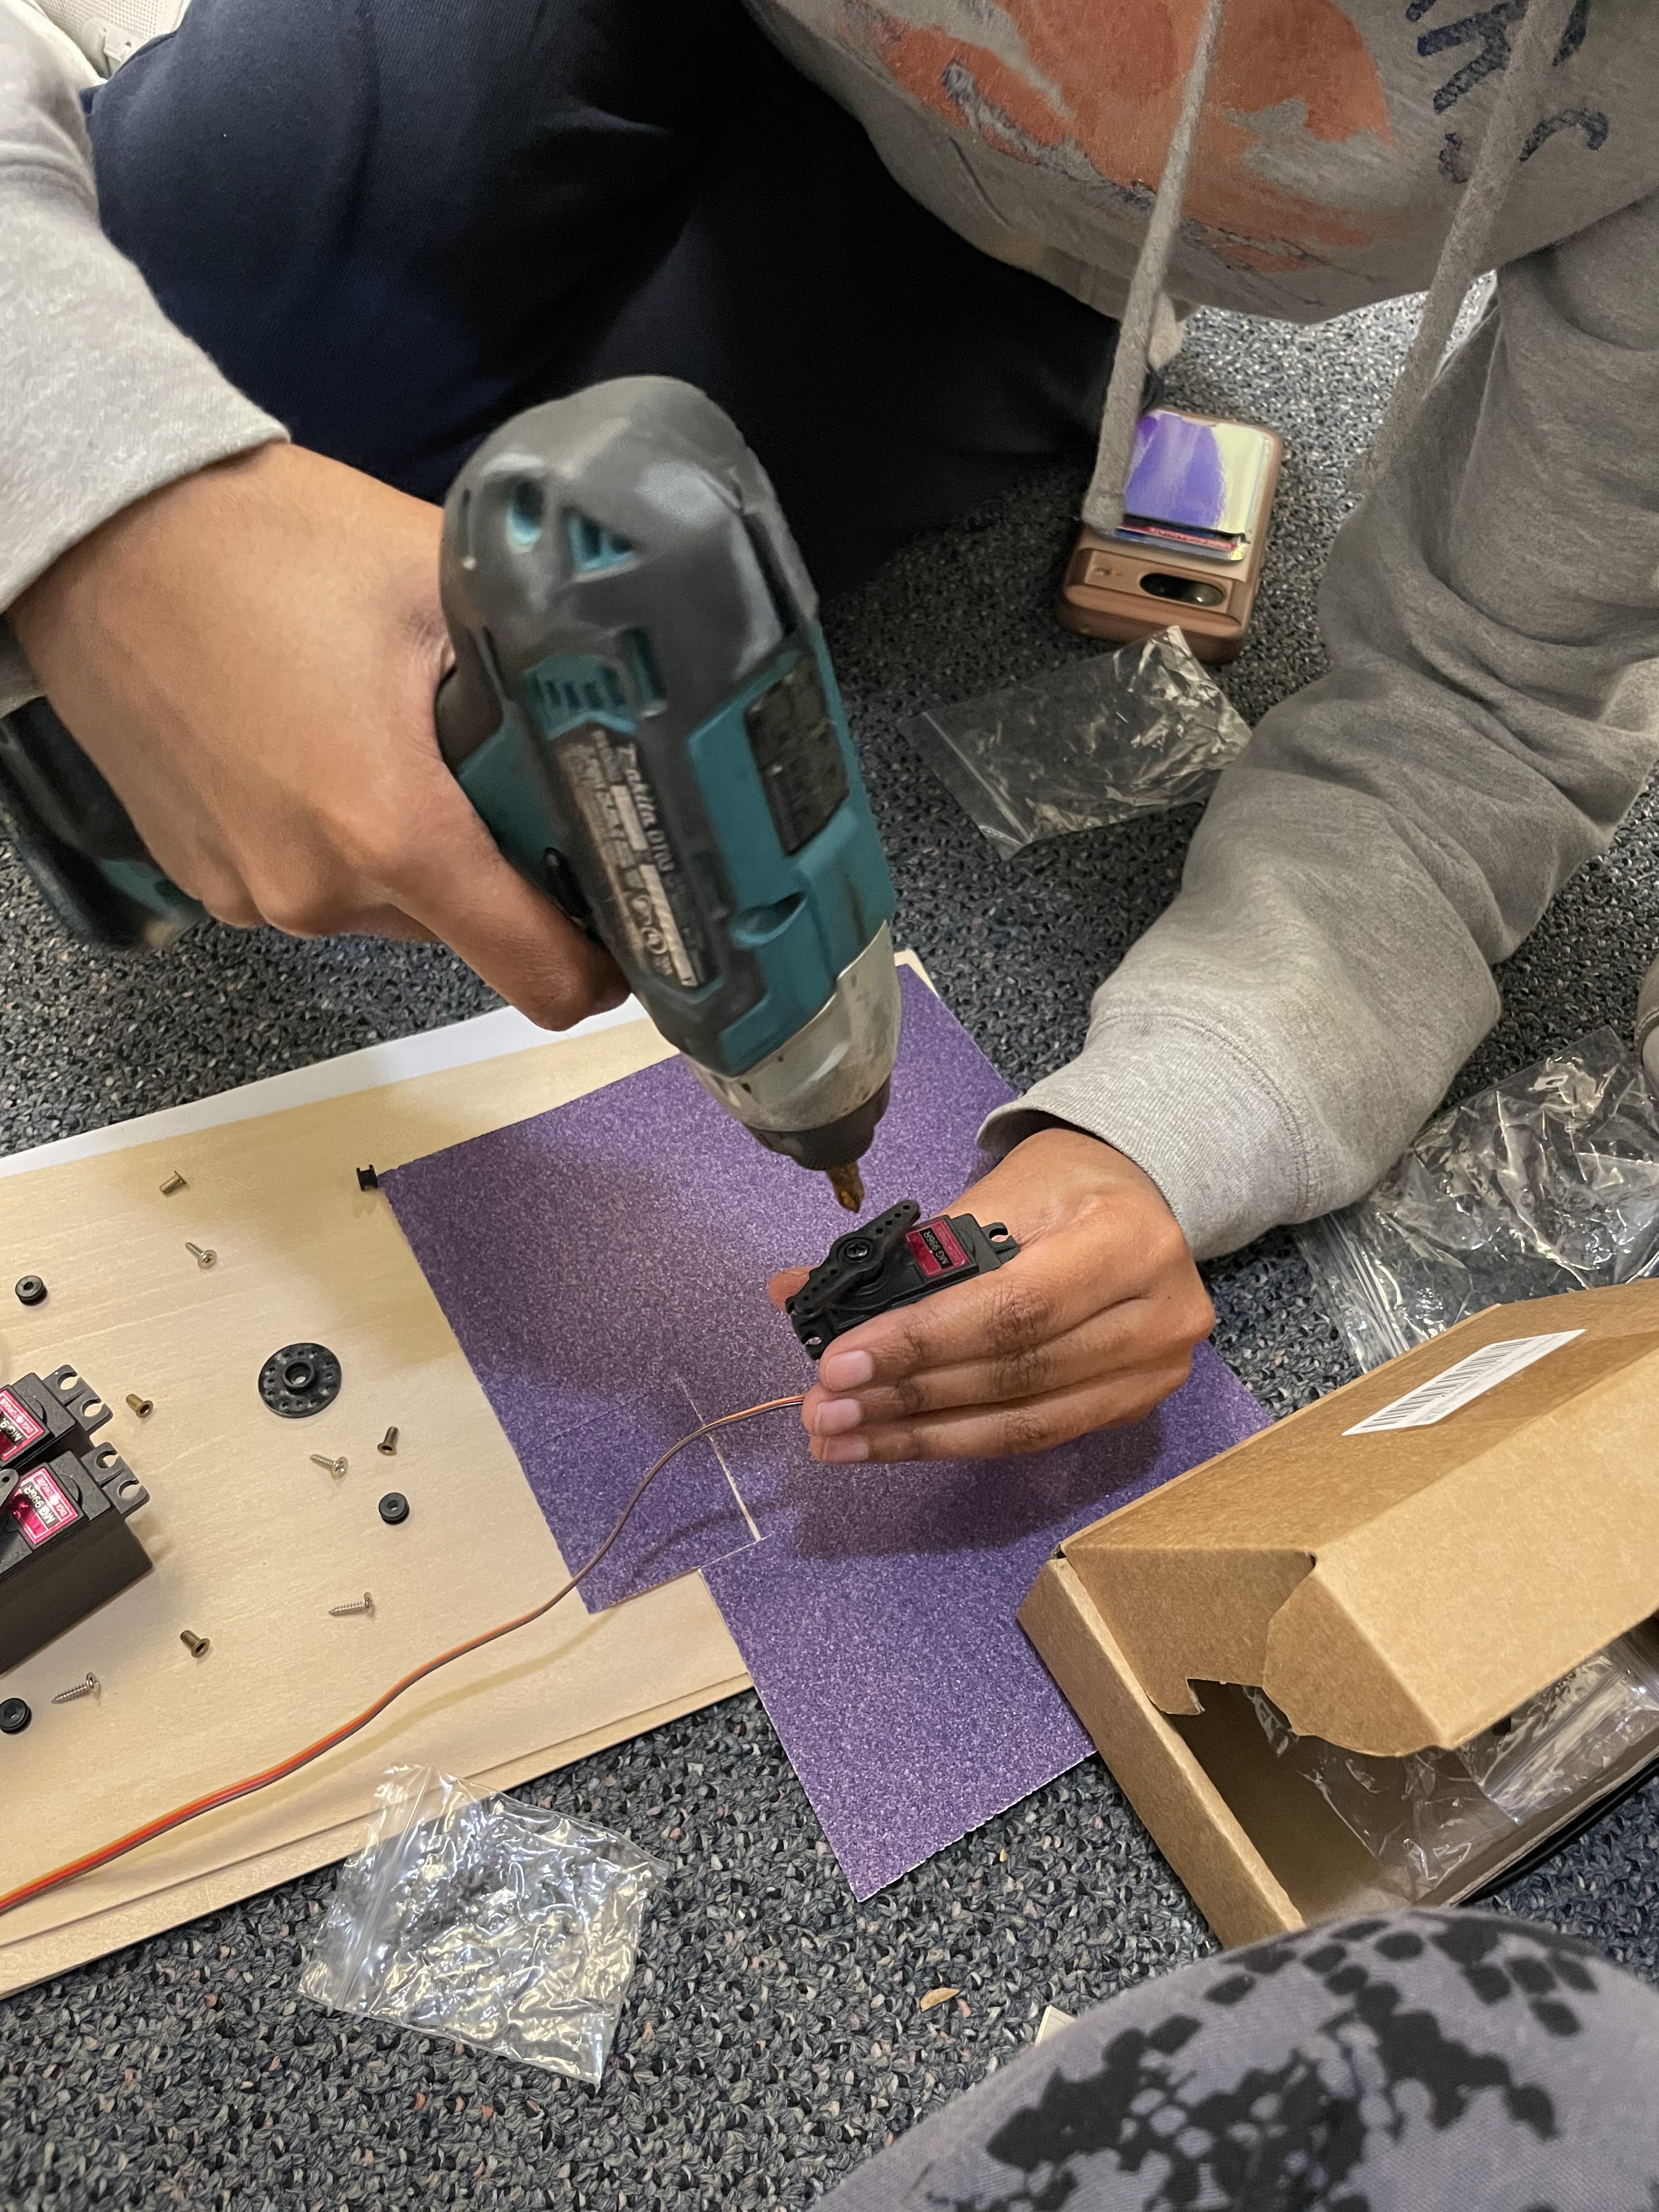
🪵 We glued the wooden and 3D printed parts together like a DIY dream.
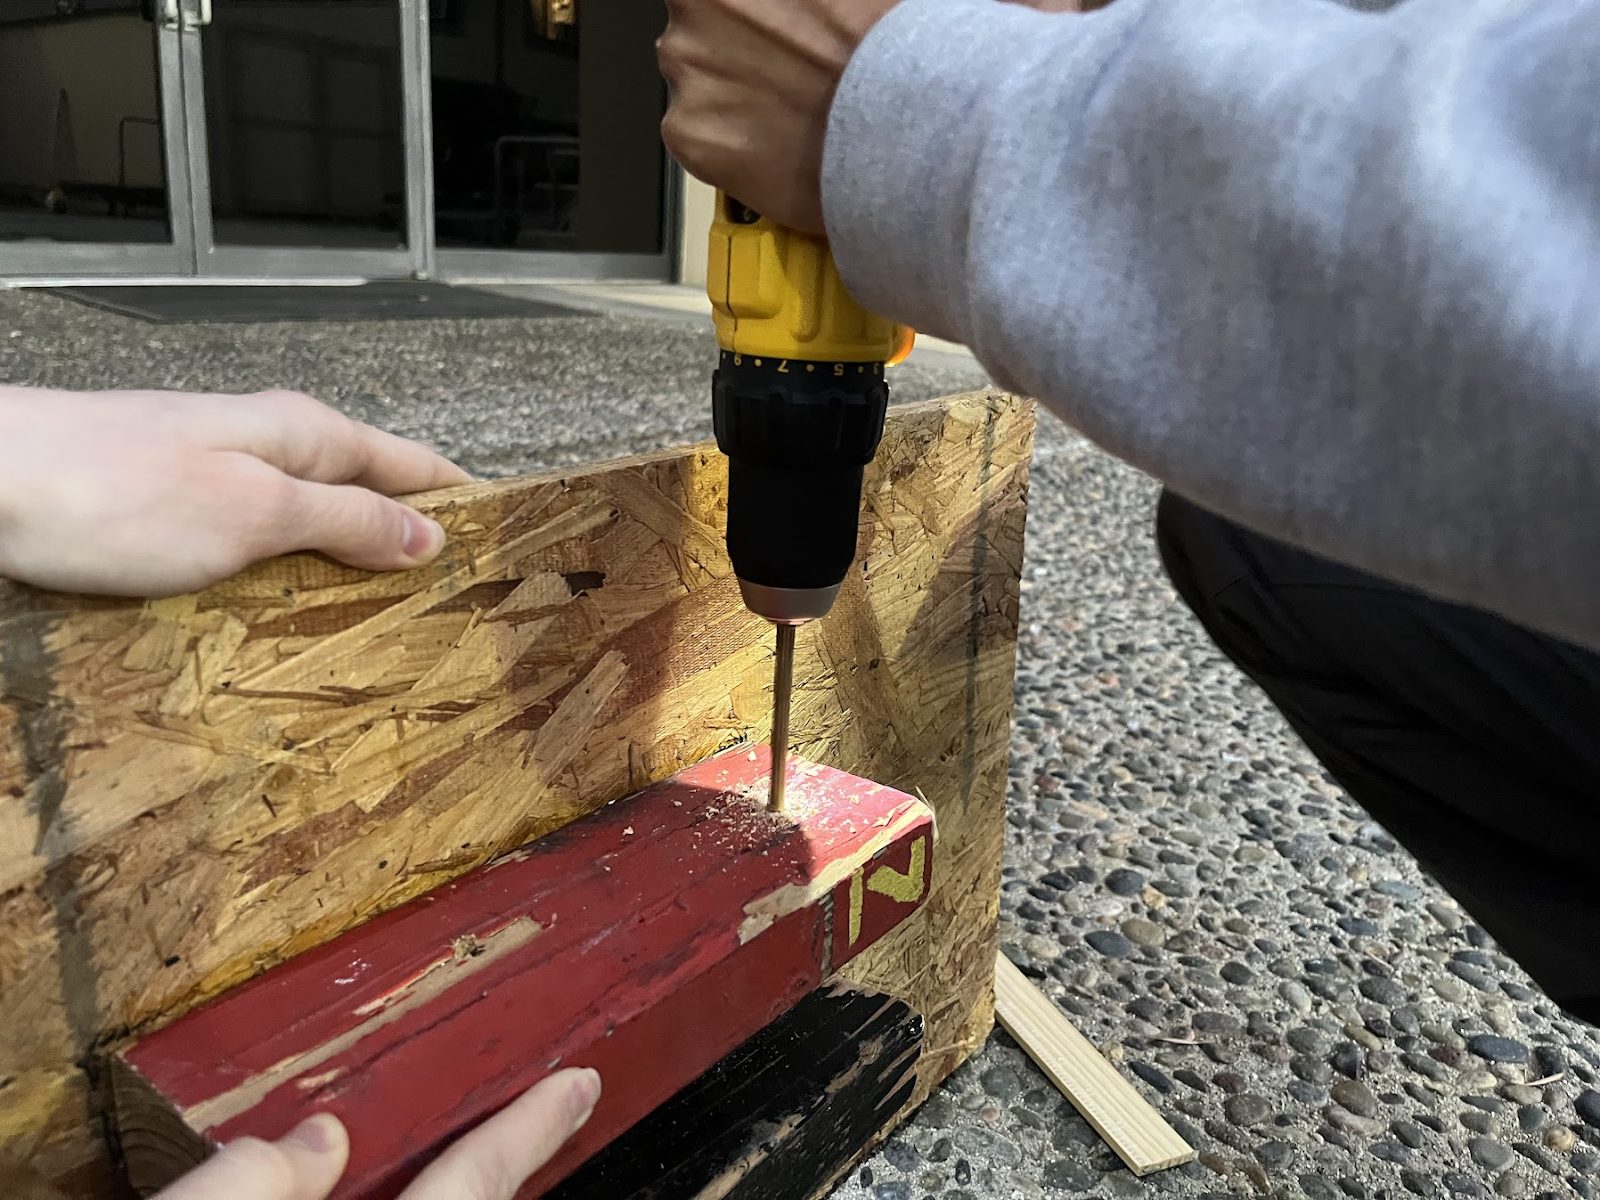
🛠️ We drilled holes and locked the arm between two support blocks.
🤖 We attached TWO servos for rotation and launch power—because what’s a catapult arm without some motion?![]()
Now, just one final touch—connecting the second servo with a spring—and then… TESTING TIME. Get ready for action!
![]()
![]()
K’glue’ate, Nik’bolt’hita, Em’torque’ily. Lock it in and send it!
-
Continue to toast this up!
03/06/2025 at 06:52 • 0 comments🔥 We’re Toasting! 🔥
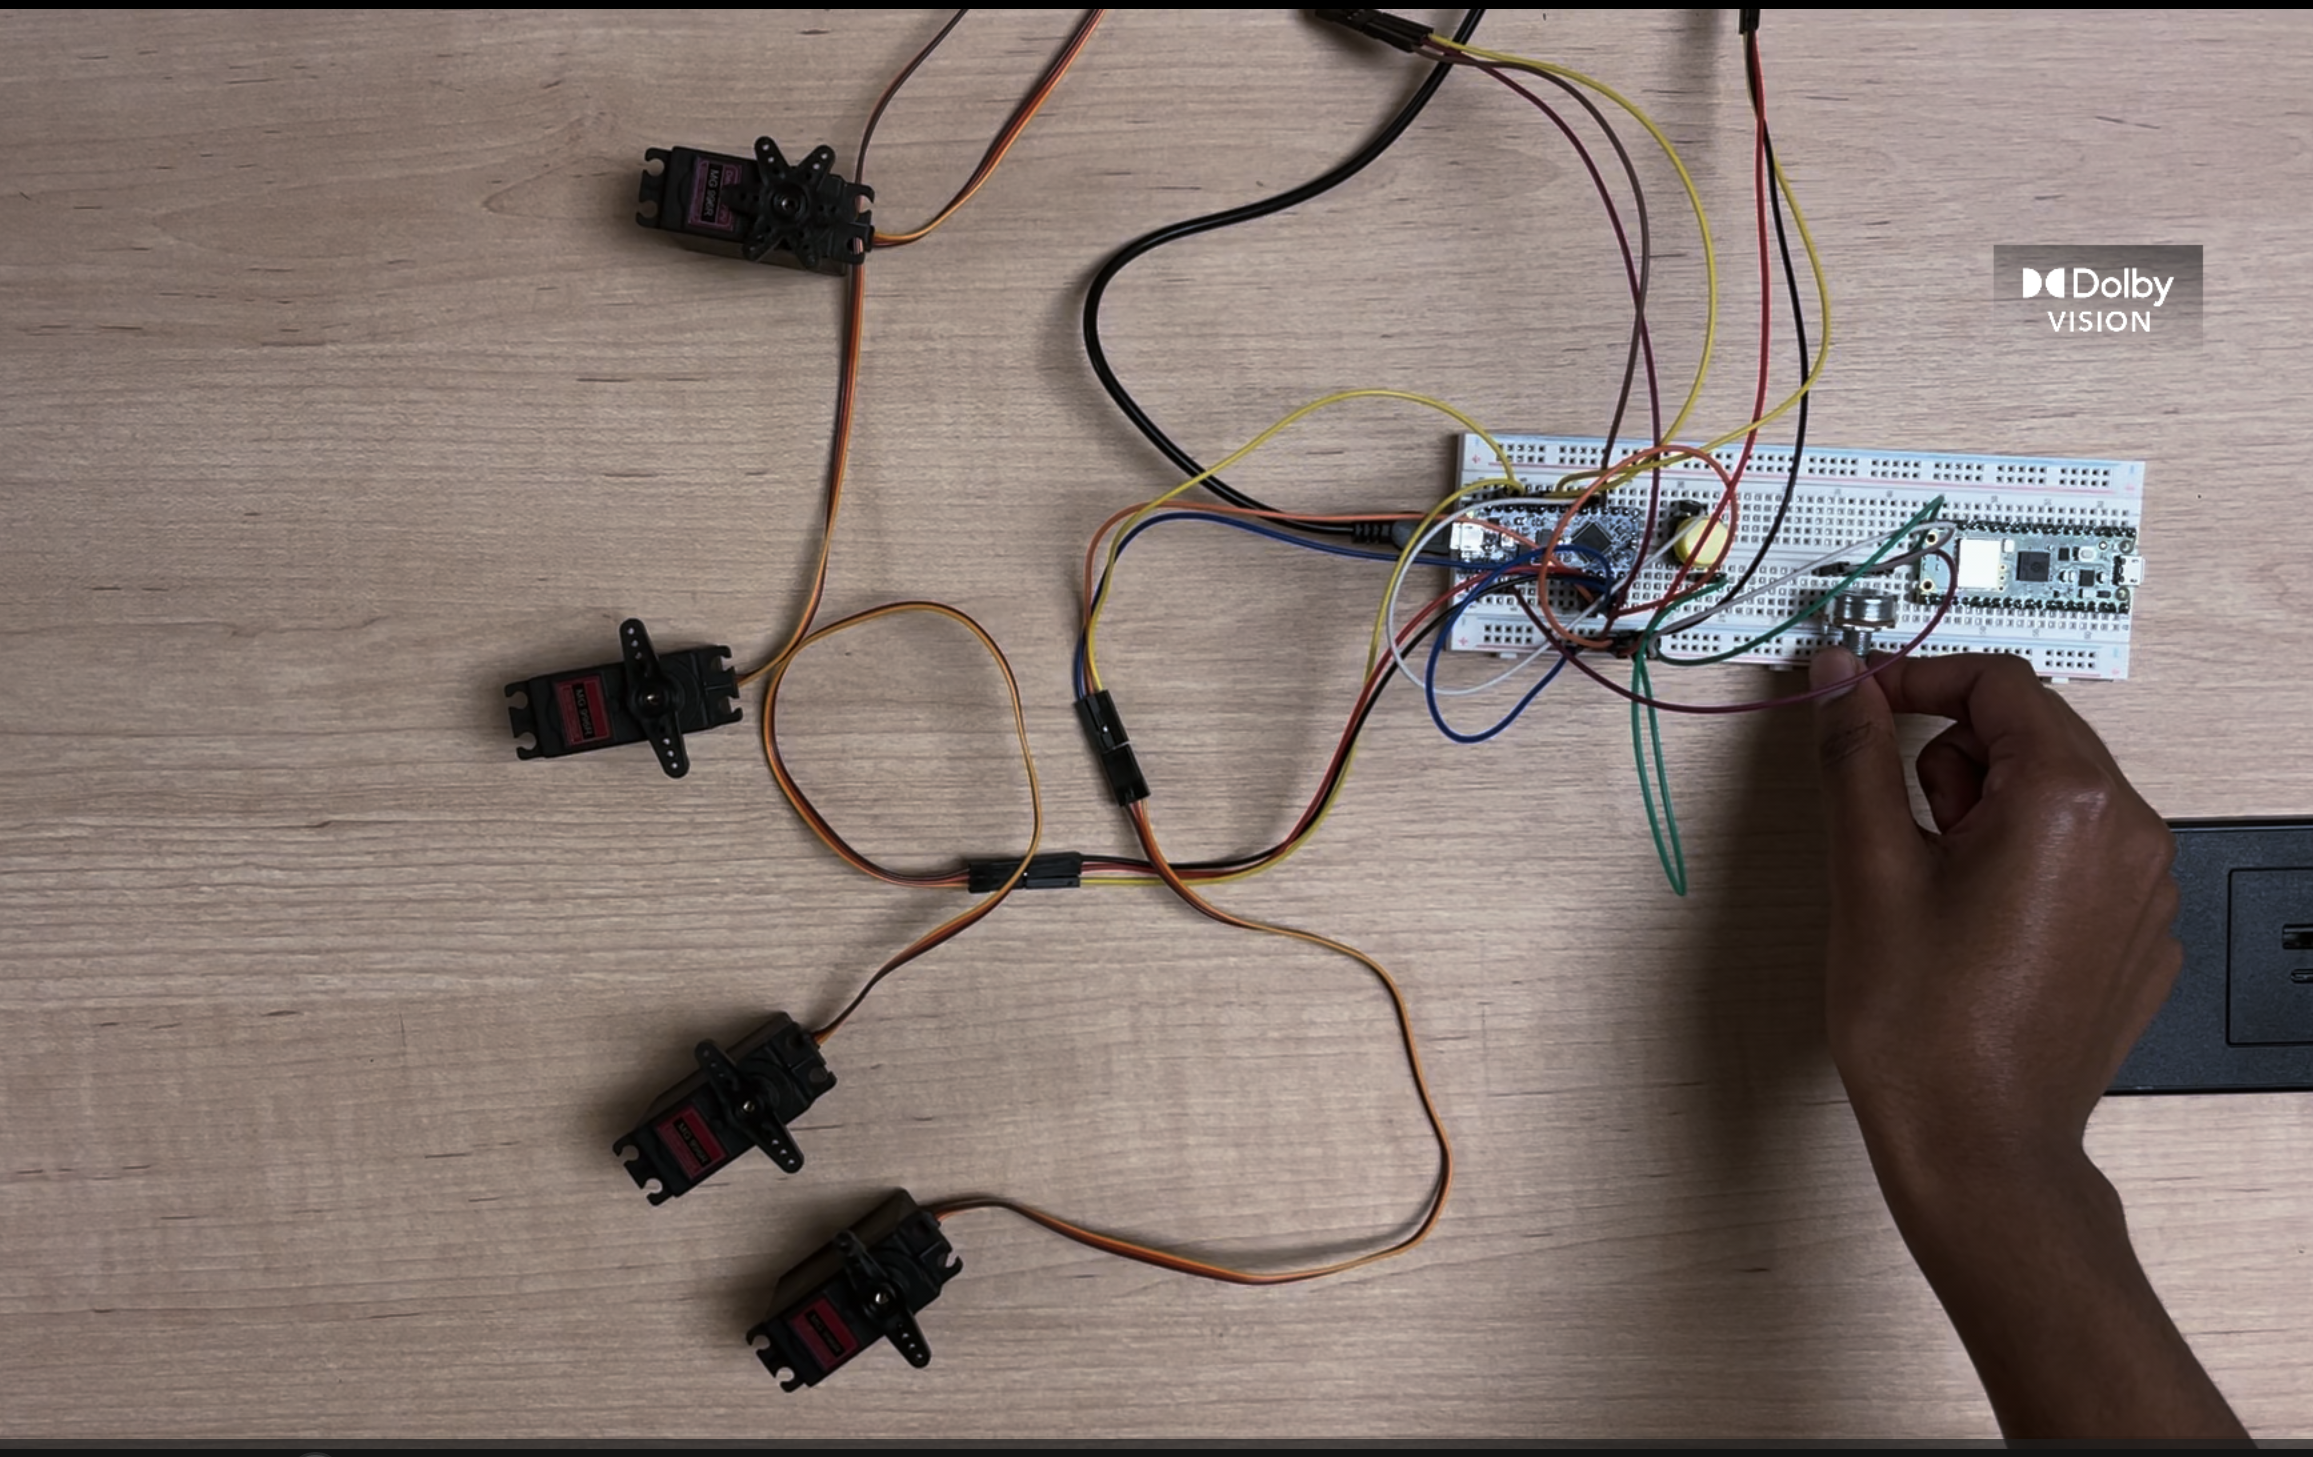
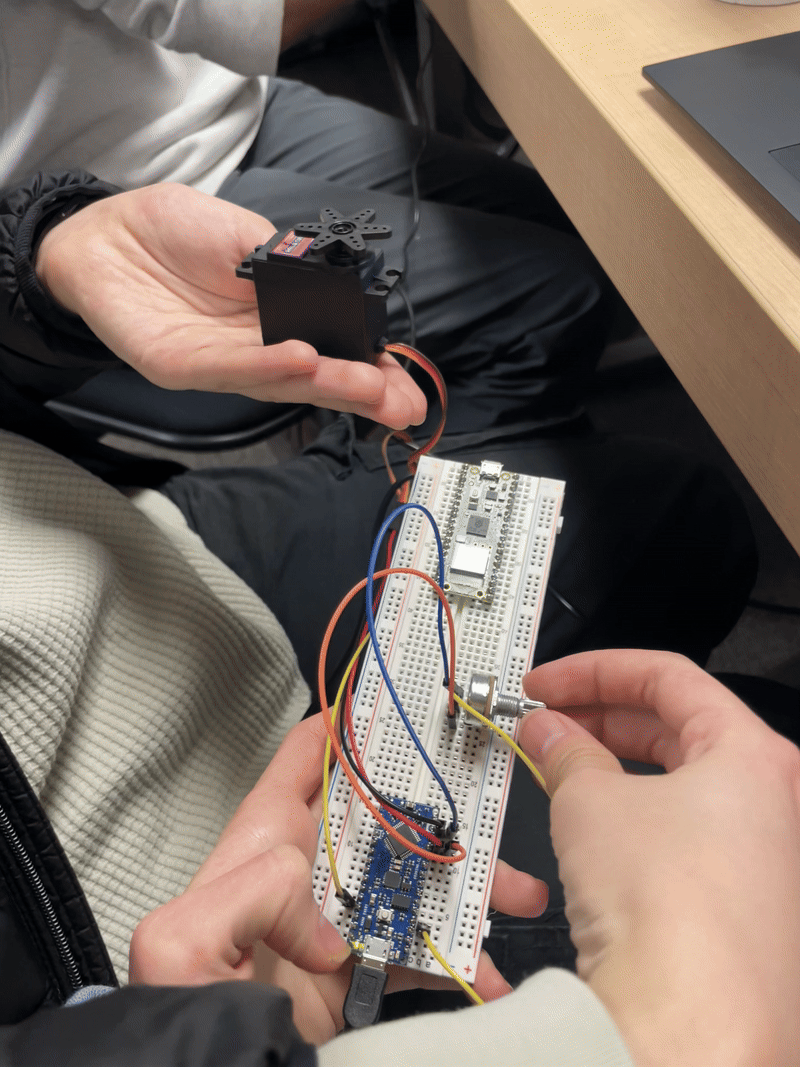
This week was all about making the electronics work! ⚡ We made sure our code was solid for the four servos, and guess what? They’re up and running! 🎛️💨 Press a button, and boom—they respond! Don’t believe us? Check out our fire picture. 🔥🎥
![]()
Are we cooking? Oh, absolutely. Next update? It’s BUILDING time! 🛠️ Stay tuned for the magic.
🚀 K"ready"ate, Nik’steady’hita, Em’launch’ily. We're GO for ignition! 🚀
-
PLAYING WITH FIRE
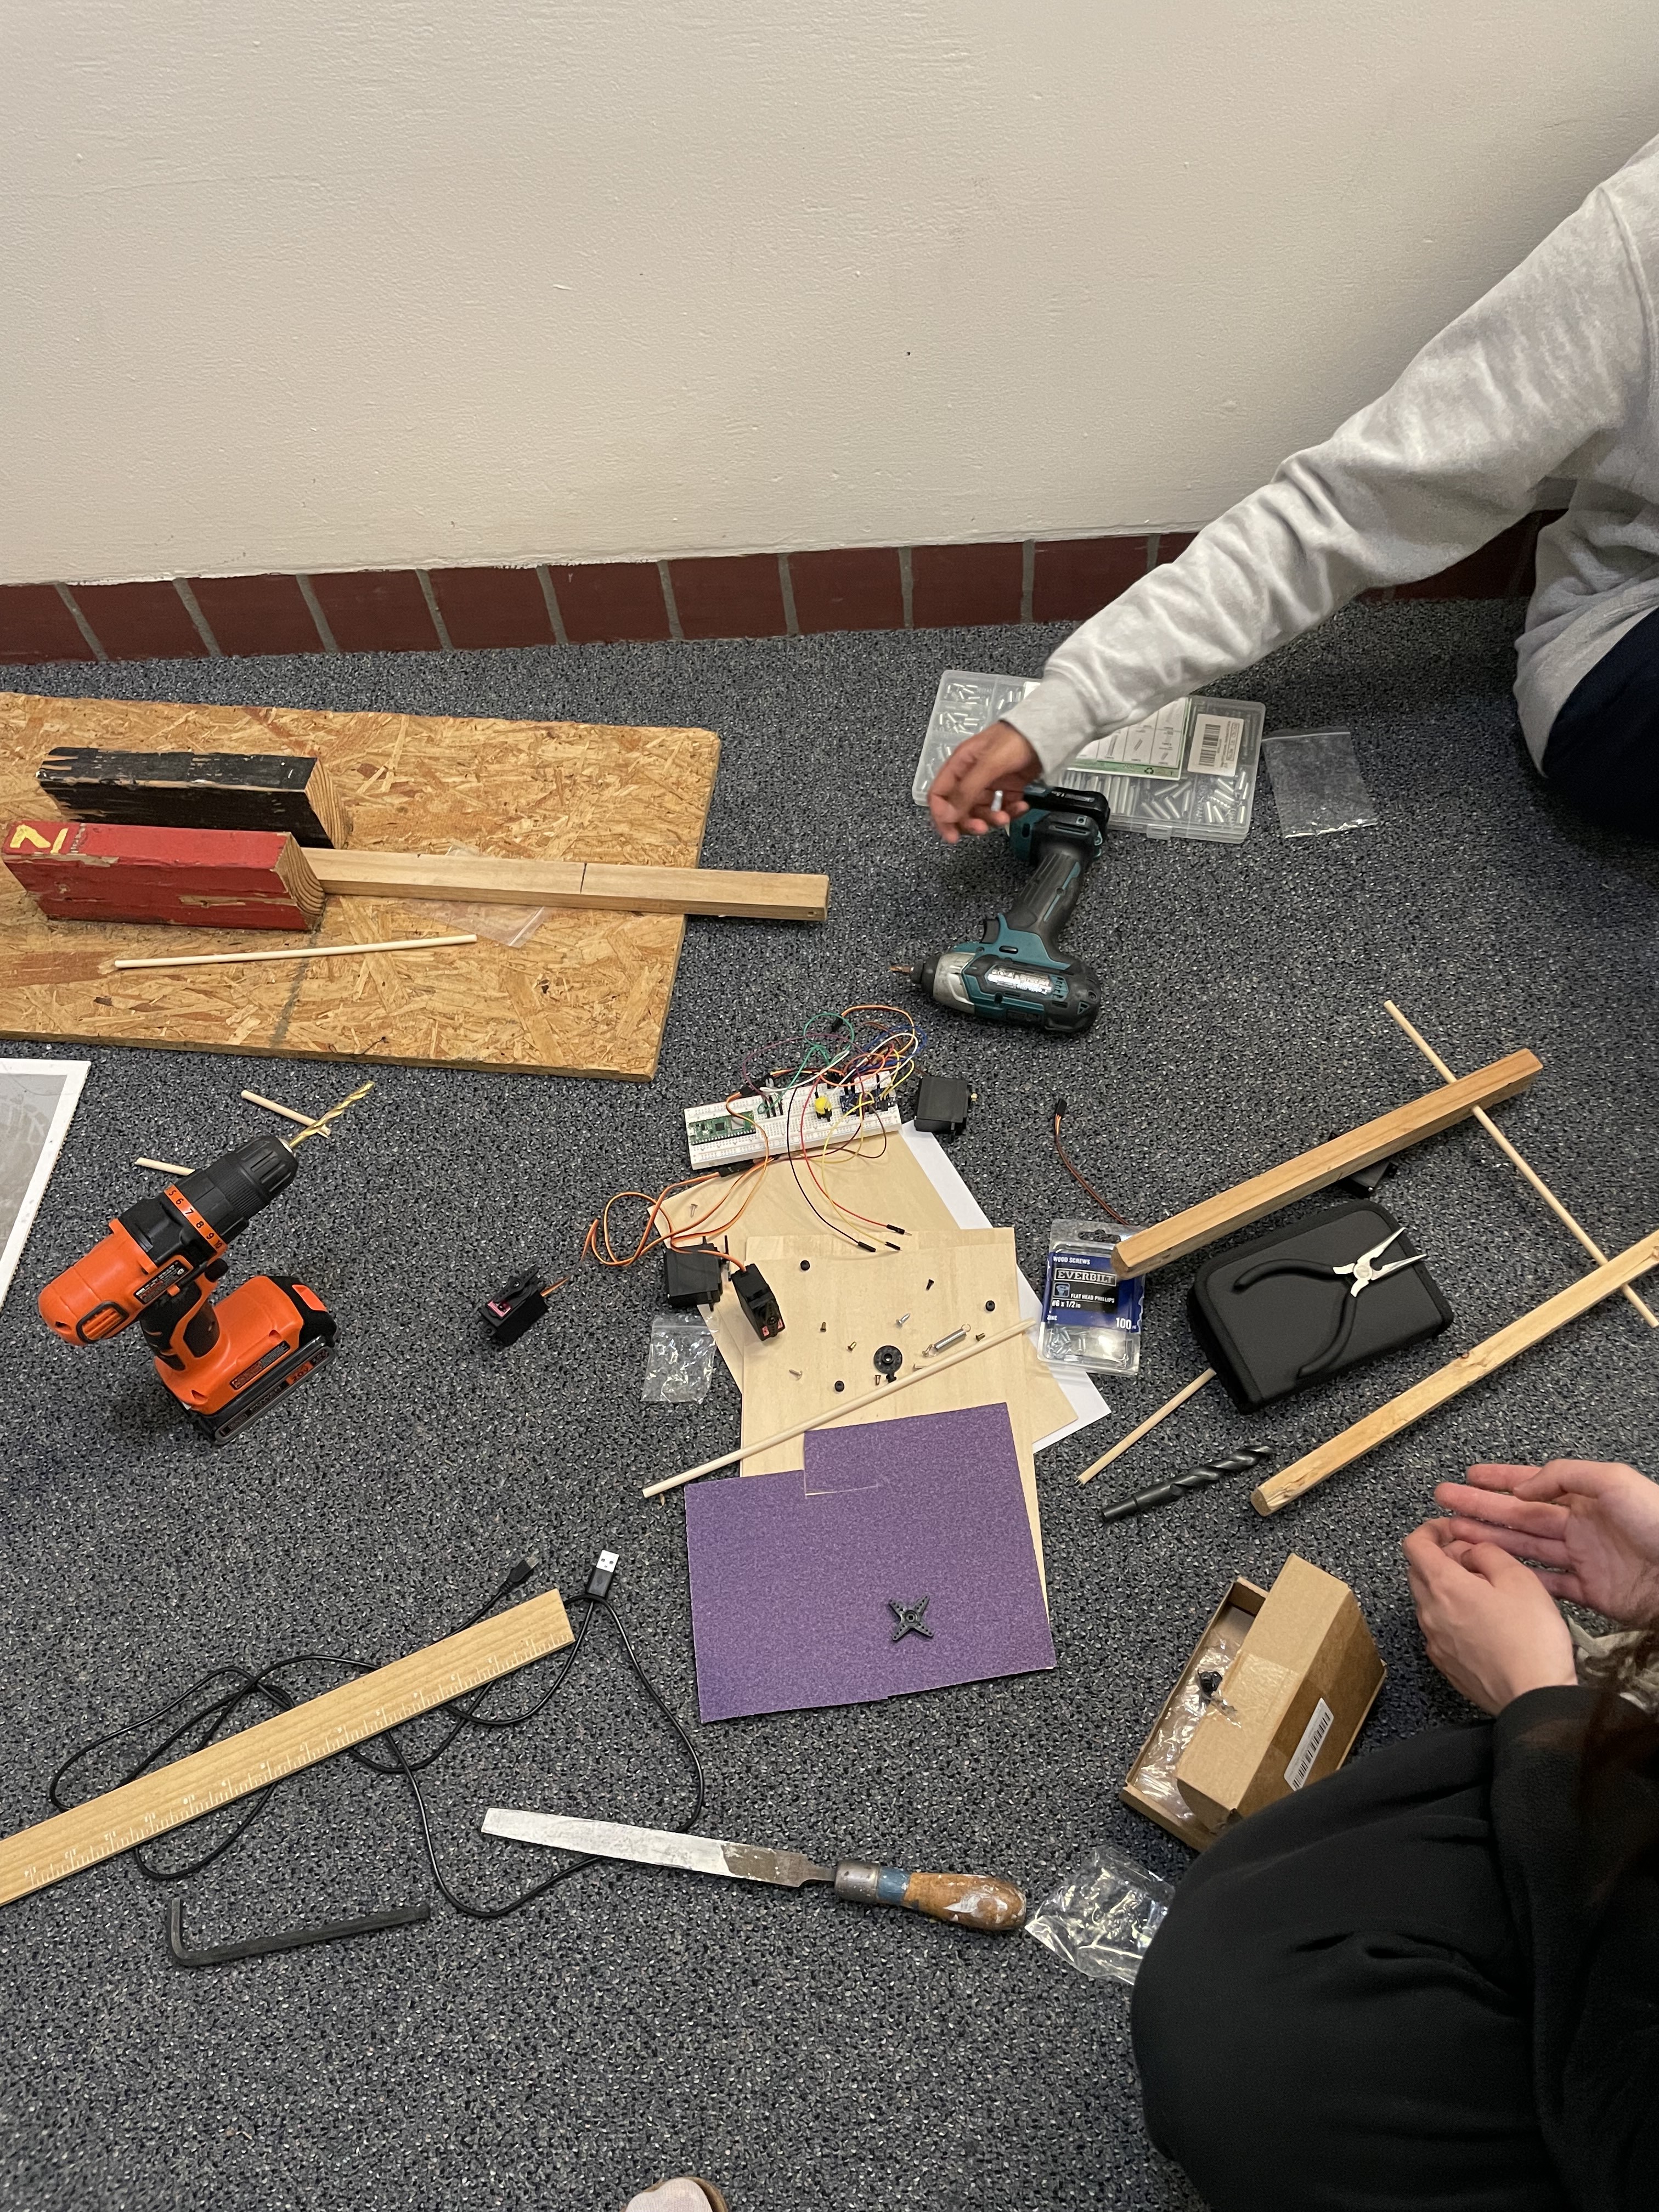
02/13/2025 at 05:08 • 0 commentsWhat’s toasting?! This week, we focused on our initial construction and electronics setup.
We obtained wood for construction and began gluing and drilling components together. We assembled the base beams, vertical beams, and both axles.
We also decided upon the following additional design considerations:
- Place the base beams as close as possible (increase the flexural stiffness of the 2 axles—shorter beams are less prone to buckling and deformation)
- Place spring to the arm as far away from the pivot point as possible (maximize torque)
- Place axle 1 as low as possible to decrease force experienced upon impact with arm
- Place solenoid as far away from pivot point as possible (maximize torque)
- Make the arm as long as possible (maximize angular acceleration of bread!)
- Use a 6-pointed servo (maximum area of contact on flat peice)
- Make the hole for axle 2 larger than holes in vertical beams (so arm freely rotates & beams are locked by servo motion)
- Cyborg arm (“Bucky”/”Winter soldier”) with bottom half (hitting axle) comprised of wood 12in, and top half 3D printed (reduce weight, increase angular acceleration, easy replaceability)
- Balsawood cuts for servo 1
- Have the piece attached asymmetrically to servo 1 (maximize torque)
- Springs that we’re considering
On the electronics side of things, we were able to pick up our servo motors, potentiometers, buttons, and other various components. We began coding, and after a few minor setbacks (rip to the smoking potentiometer), we were able to complete the code for Servo 3 (which controls the vertical beams) and begin working on implementing Servos 2 and 4, which hold down the arm as the spring extends.
Em“chk”ily, Ka“chk”te, Nik“boom!”hita
-
Initial Plans
02/02/2025 at 02:26 • 0 commentsProject Breadapult has launched! Pun intended.
We decided on these overarching goals:
- Build a working catapult that is able to launch bread across the dining hall
- Be able to control the distance the bread travels to accurately hit our targets
And these design requirements to achieve those goals:
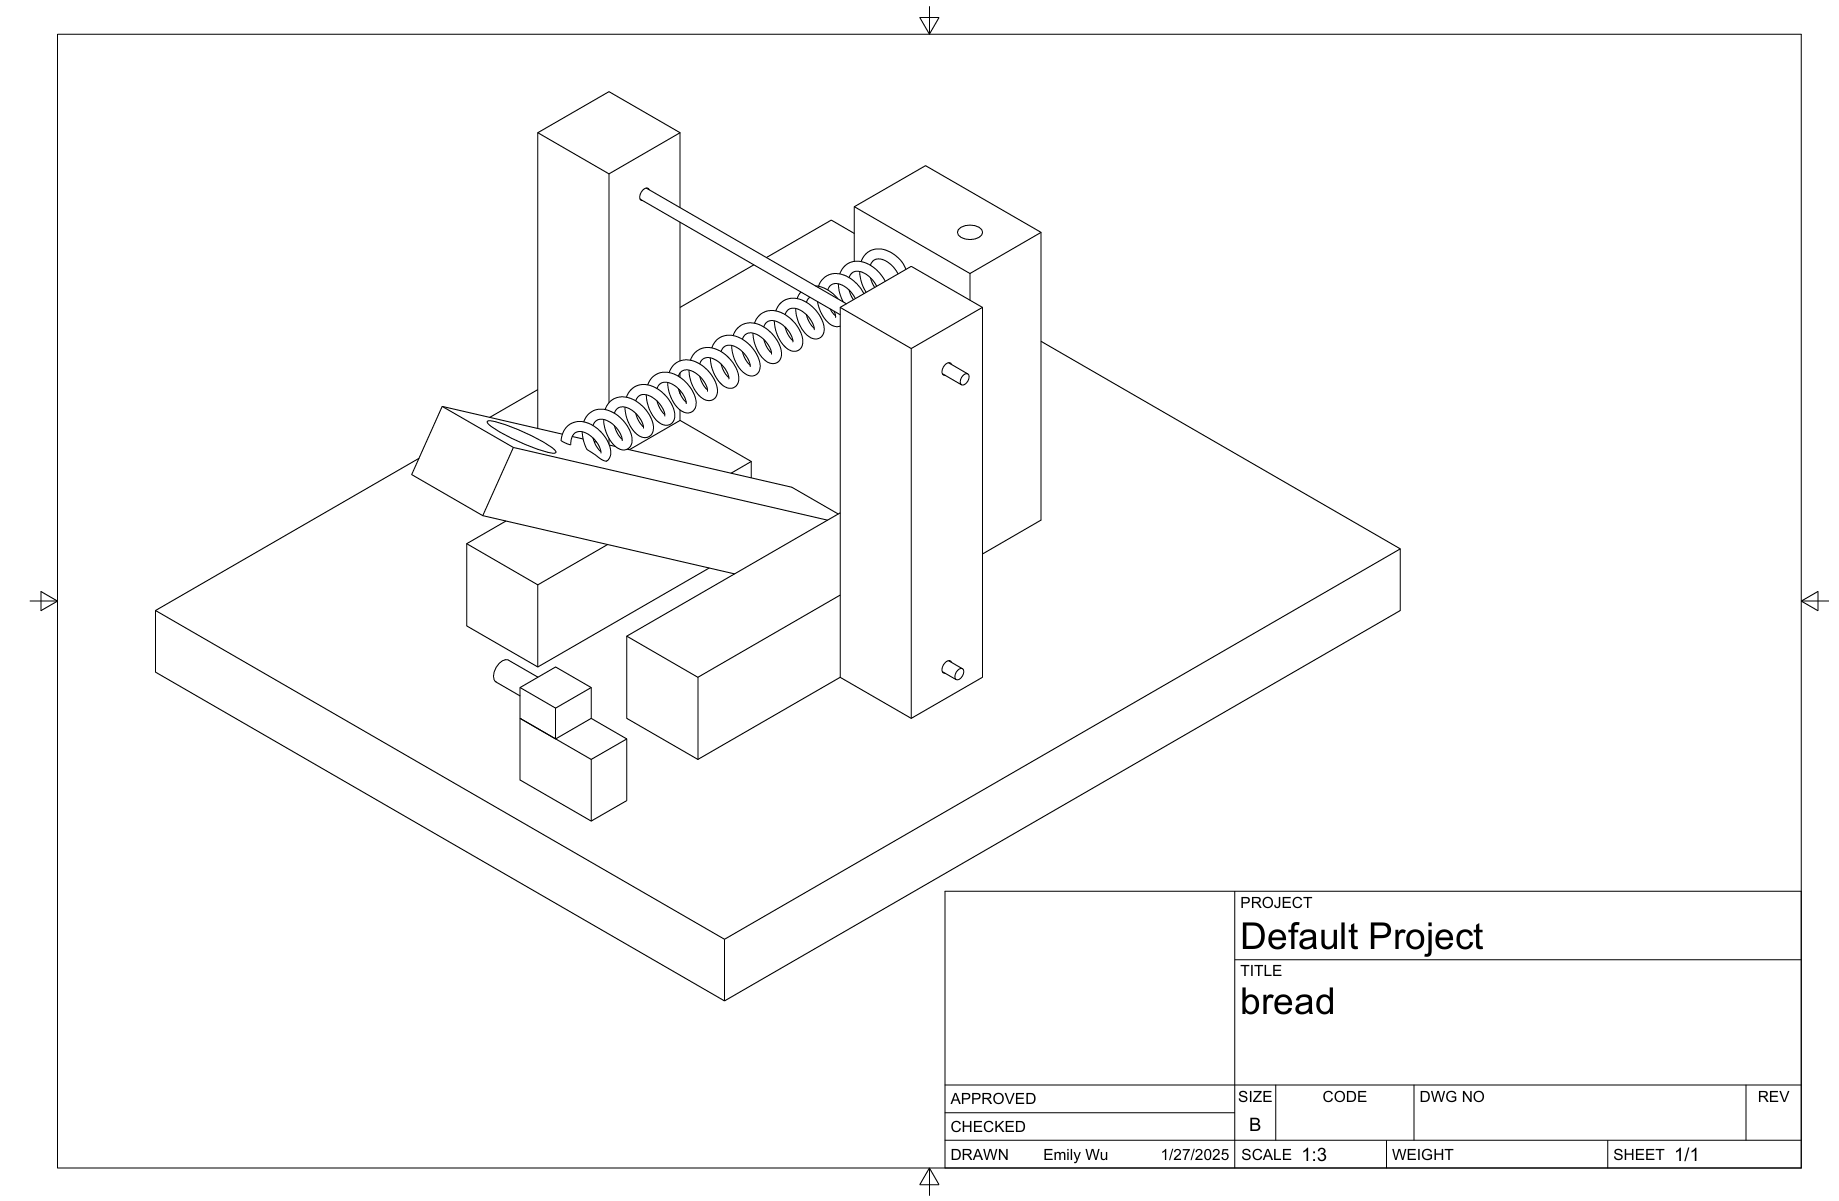
Feature Description Implementation Launch Mechanism An automated way to torque the arm and launch bread Servo motor, Spring Securing Arm To secure the arm in place while the spring loads Solenoid Launch Angle To change the angle of release, impacting distance of travel Servo Motor, Potentiometer Bonus: Bread Supply Wheel device to continuously supply bread Stepper Motor Bonus: Panning Rotate entire catapult to acheive 360° of attack Servo motor, potentiometer We've also started developing the physical design for the frame, pictured below! Next steps are to obtain wood and begin construction of the physical frame.
![]()


 Em“chk”ily, Ka“chk”te, Nik“boom!”hita