Ai-Thinker
PCB Design in LCSC EDA
The PCB was designed entirely in LCSC EDA using pre-selected components. After schematic capture and PCB layout, I ran a DRC check and exported the files for ordering from JLCPCB (they even offer colored silkscreen! ).
PCB Soldering
After a long wait, the PCBs finally arrived. They looked great, so I started soldering (trust me, this module isn’t easy to handle).
- Few components made assembly fast.
- Since the module’s IO8 pin was required (pins are limited), I first soldered the module using a “hotplate” method, then hand-soldered the remaining components.
- Always check for short circuits before powering up. If everything’s fine, you can flash a test program to verify functionality.
- Button detection: Cycle between standard RGB, WS2812, and WS2811 strips via button press. (Optional: long press to toggle BLE if you don’t want Bluetooth always on.)
- Infrared reception: Receive NEC codes via IR receiver to trigger specific actions.
- Bluetooth control: Connect WB2 BLE with a WeChat Mini Program. The WB2 parses received data to control the LED strips.
Core Code
Features implemented:
Implementation is straightforward. After a few days of testing, all functions work smoothly. My code isn’t perfect—feedback is welcome!
Fusion 360 Enclosure Design
Designed a simple enclosure in Fusion 360. Nothing fancy—just a small case with a snap-fit structure to avoid screws.
- Using plug-in connectors increases thickness slightly.
- If using wires instead of plugs (like commercial controllers), the thickness could be reduced by 50%.
Final Assembly
· Fix the buttons with hot glue.
· Prepare components (not much to prep).
· Place the PCB in the enclosure and secure it.
· Snap on the cover—and it’s done!
Function Testing
Connect the LED strips in advance.
Warning: No foolproof design yet, so don’t insert RGB or WS2812/WS2811 backwards. All use 4-pin connectors.
Button functions: All working.
IR control: Works perfectly.
BLE control via WeChat Mini Program: Automatically discovers the preset Bluetooth name, eliminating manual selection. Opens the app → connects automatically.
LED strip type switching: Top-right corner allows switching strip types; different strips show different effects.
Conclusion
This DIY project supports 5–30V input. Output voltage depends on input, making it compatible with most LED strips on the market, as long as the appropriate power supply is used.
If you’re interested, give it a try and build your own universal LED controller!

 Olek
Olek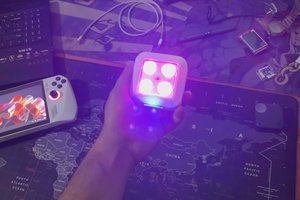
 Arnov Sharma
 Christoph Tack