Close
0%
0%

Zeno Robot

Zeno is a hybrid robot--could be AI controlled, could be local--that is large enough to bring a drink or remove trash.

Similar projects worth following
This robot was first intended to be a large version of an AI robot, MARS (by Innate.bot), but it is morphing into a hybrid that will be able to do some household tasks.

March 18, 2026. Zeno comes to me and takes my trash to a bin.

February 19, 2026. Zeno finds the trashcan, then turns around to find me.  The goal--Zeno to come to me on command, grasp trash in its gripper then deposit the trash in a can--is coming along. I just added a second Huskylens camera that detects the color of the trashcan and goes to it. Now (Feb. 28), Zeno can grab and hold a piece of trash.

My wife thinks that all good robots need a name, so we discussed things, came up with a list and narrowed it down to either Lars or Zeno. This robot is based on MARS by Innate.bot. MARS is an interesting AI robot that is available now. The video below is a snippet of what the robot can do.

Lars (large MARS) was a high contender for the name. I'll tell you my thoughts on Zeno and why that won out. I've dealt with many robots. I own two Aibo's (1999 and 2024 versions). I have an Astro robot (available from Amazon by invitation). I always wanted, but never acquired a Heathkit Hero robot. I currently have a pre-order in place for the humanoid, Neo (due to arrive sometime during 2026). I've applied to be a beta tester for Memo robot. Notice that these robots, Aibo, Astro, Hero, Neo and Memo all end in the letter "o."  Obviously, Zeno sounds like it belongs.

MARS has an arm that can be "trained," it comes with an arm that can be used to teleoperate and train the system. The arm uses Dynamixel servos, so I thought it wouldn't be too hard to scale this up using larger Dynamixel servos while using the MARS training system.  I have the parts and may try this, but I've done some thinking on household robotic applications and I want to try something else. I've played with grippers (see my hackaday project) and I like the idea of a gripper that "just needs to be near an object to close and hold it." 

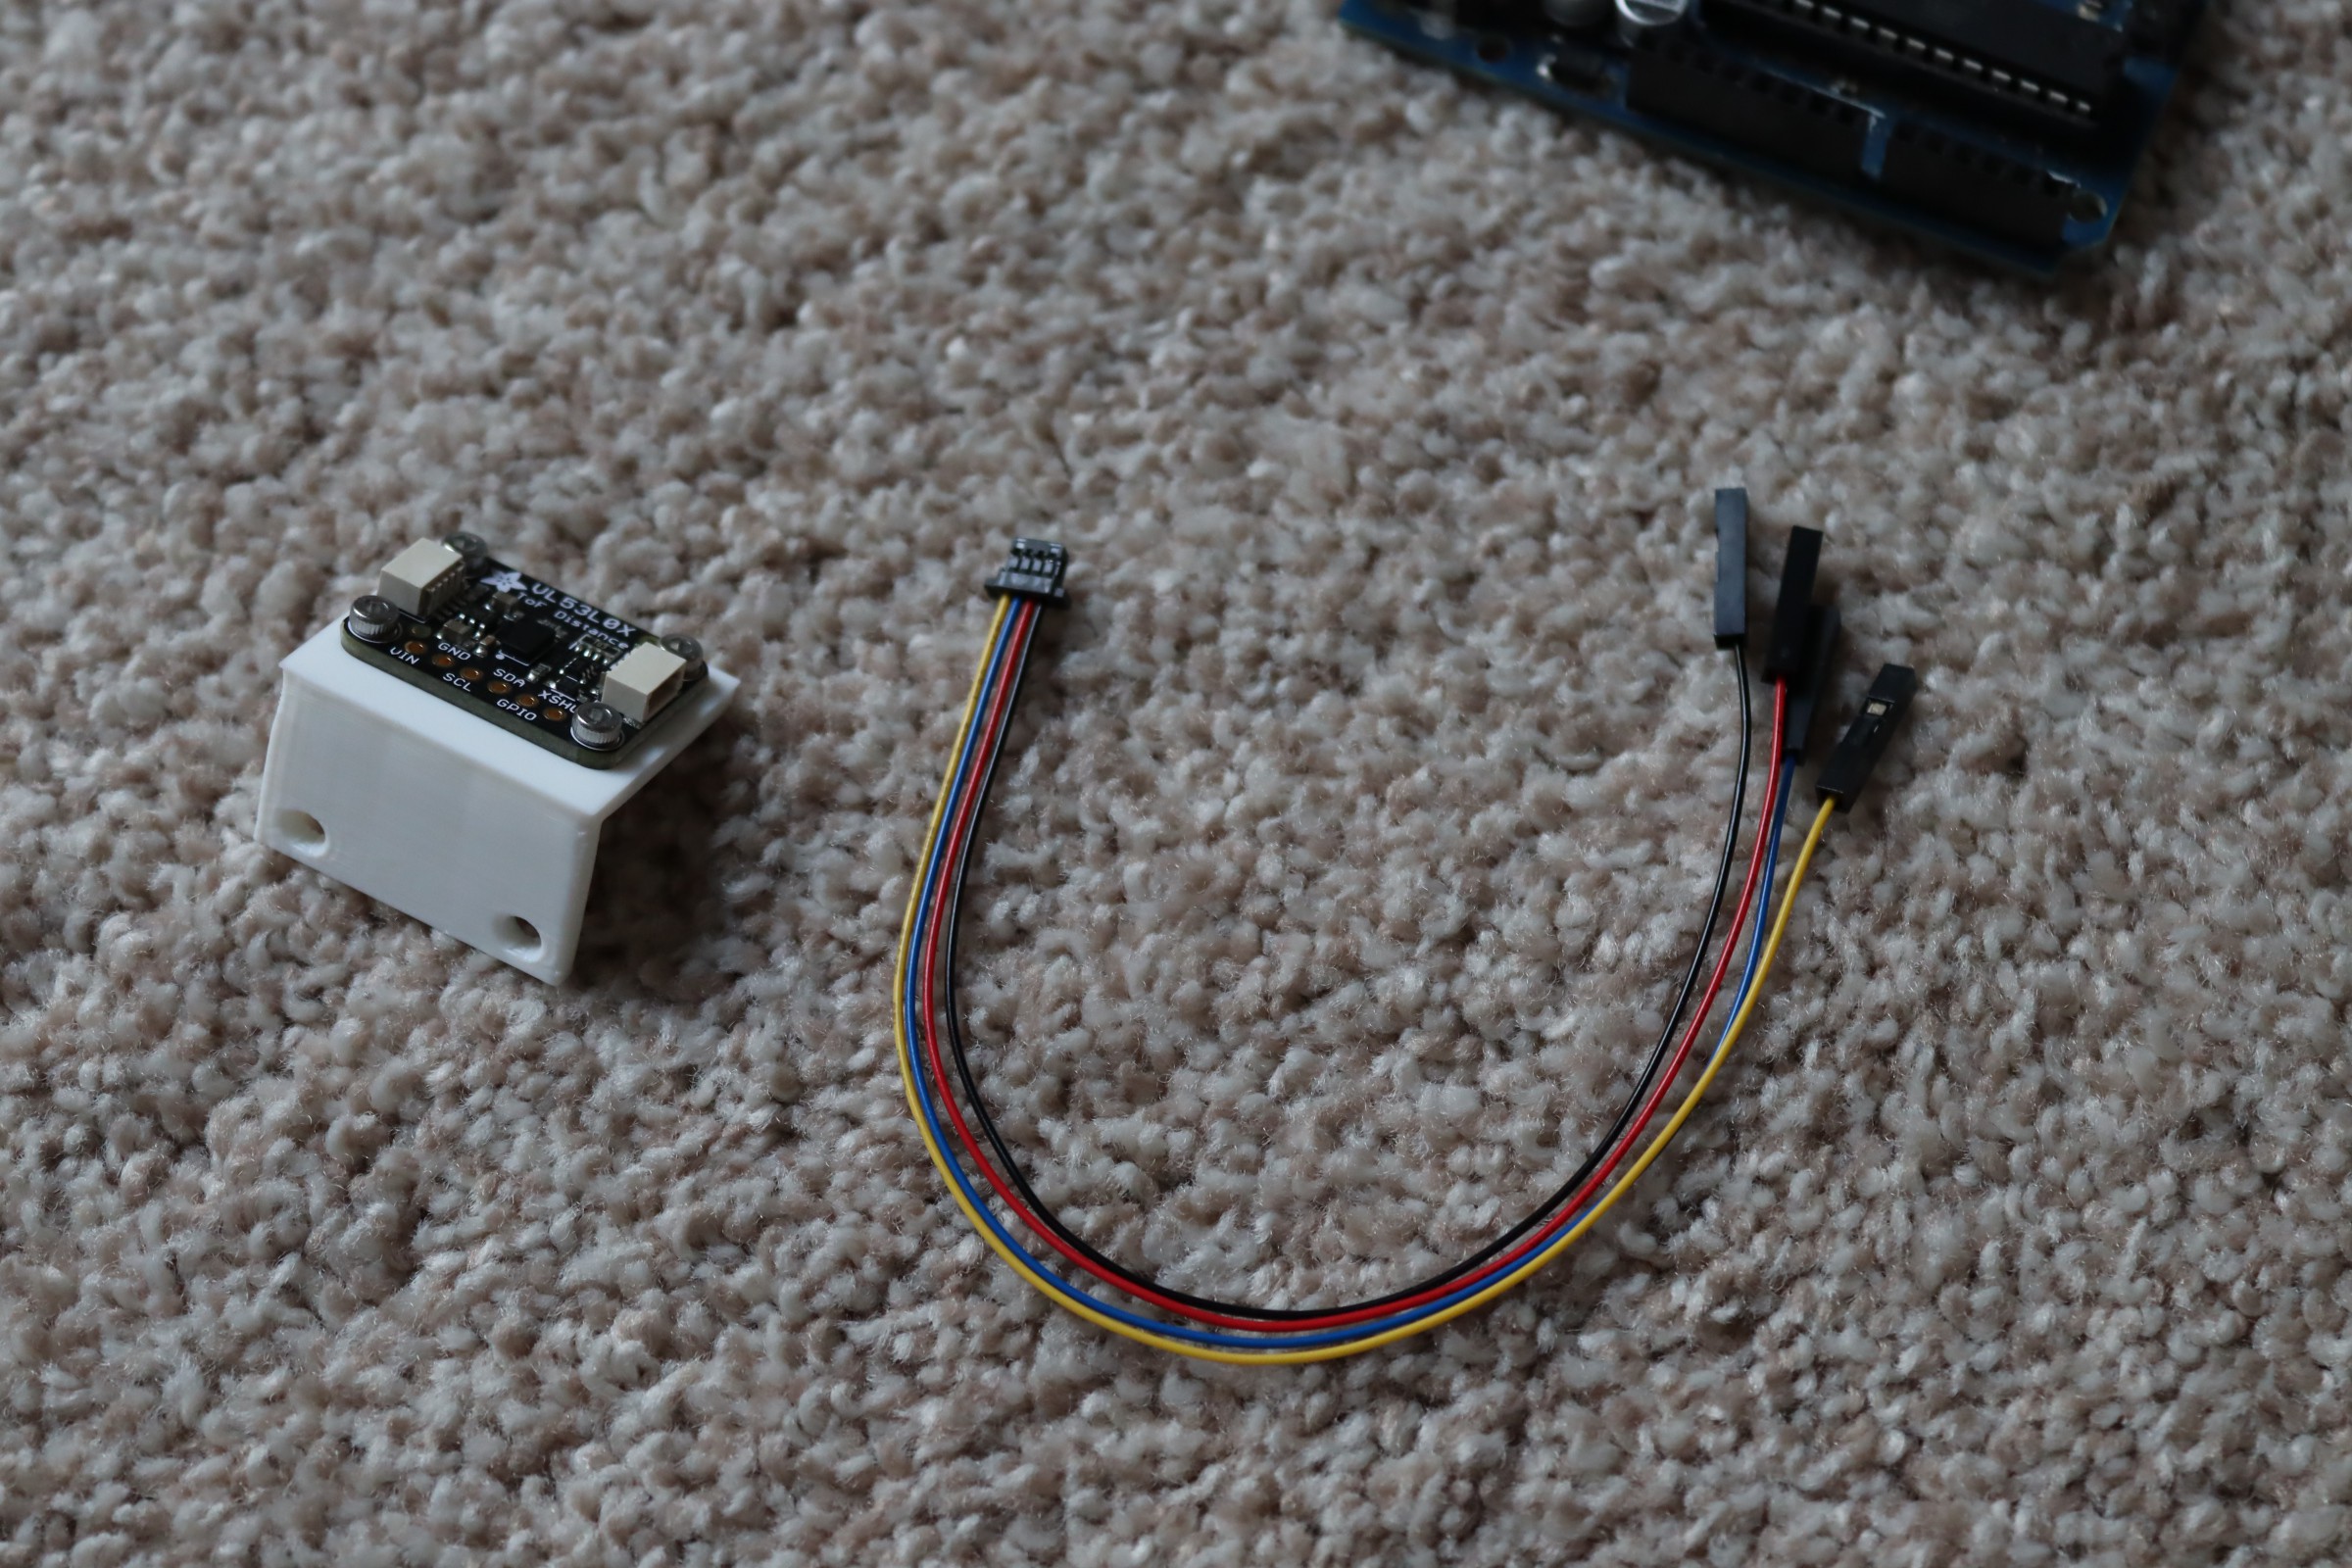
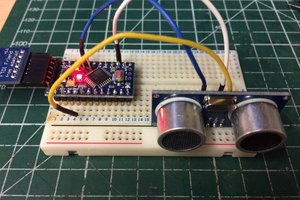
In principle, another thing that bothers me is that so many systems seem to use cameras only (x, y data) without using distance (z data). If I can identify a bottle of water and move to it (x, y data), then I only need distance (z data--obtainable by laser detector) to place the bottle in the center of my gripper. A close command will grasp the bottle. 

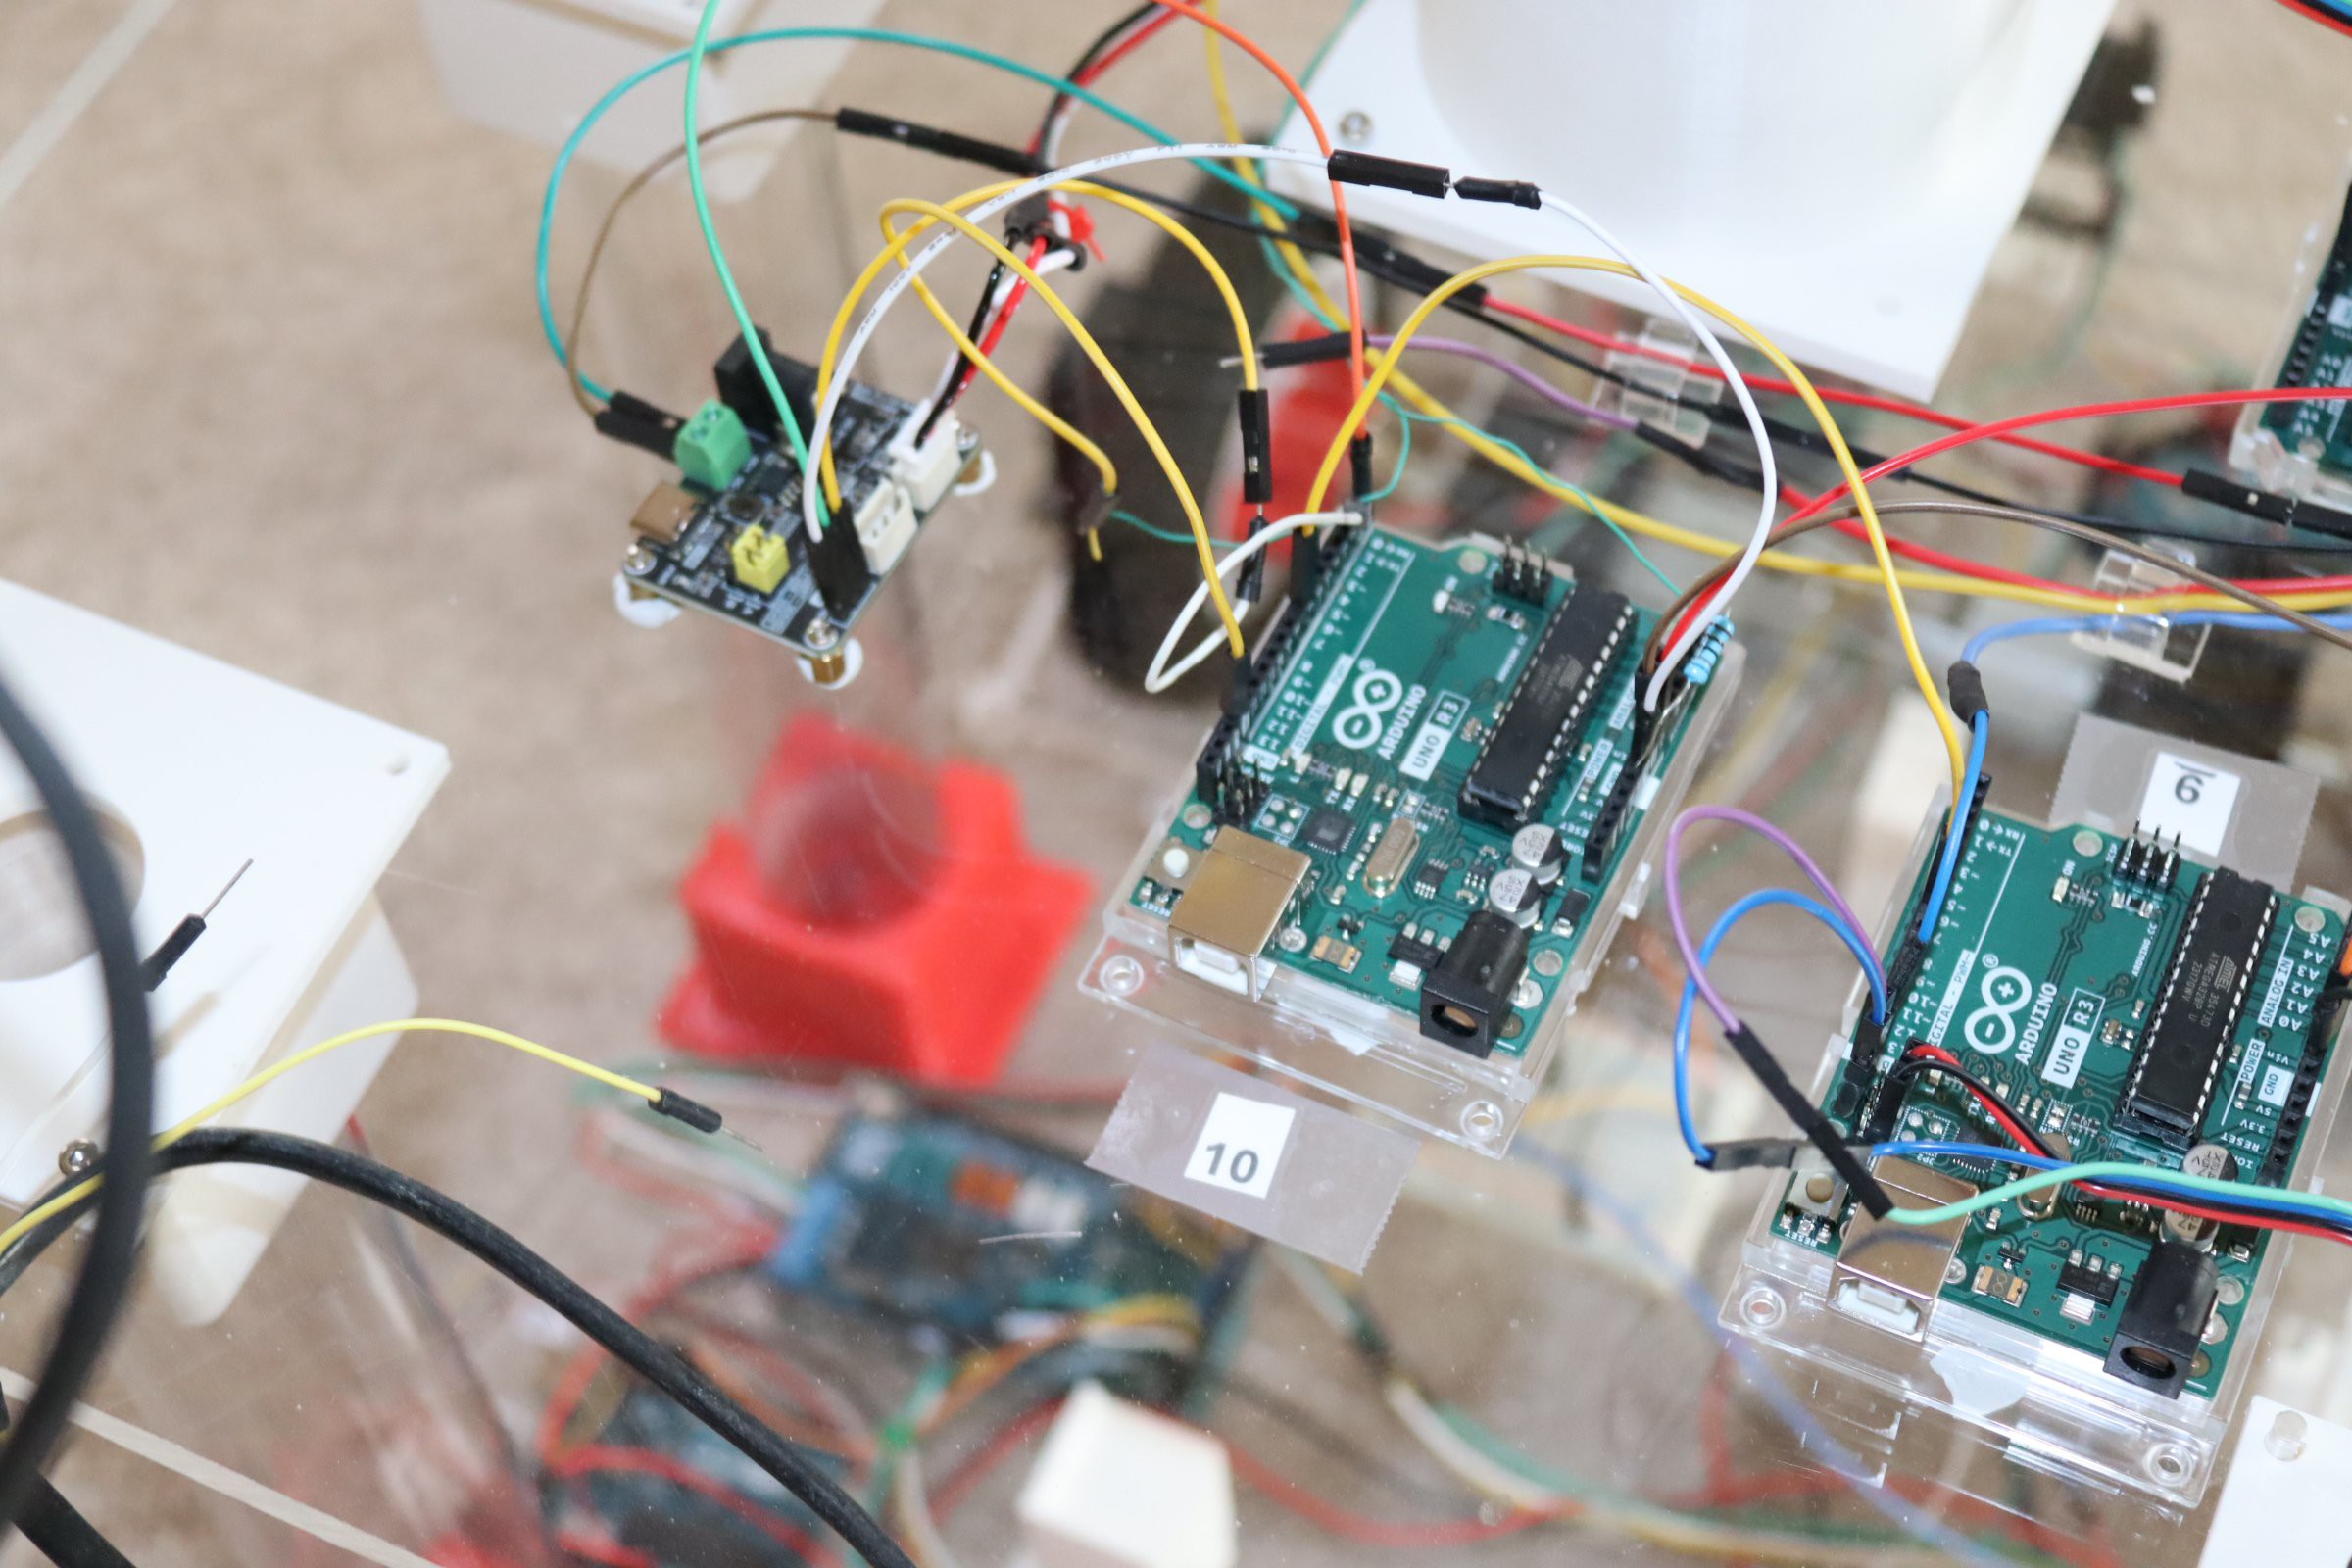
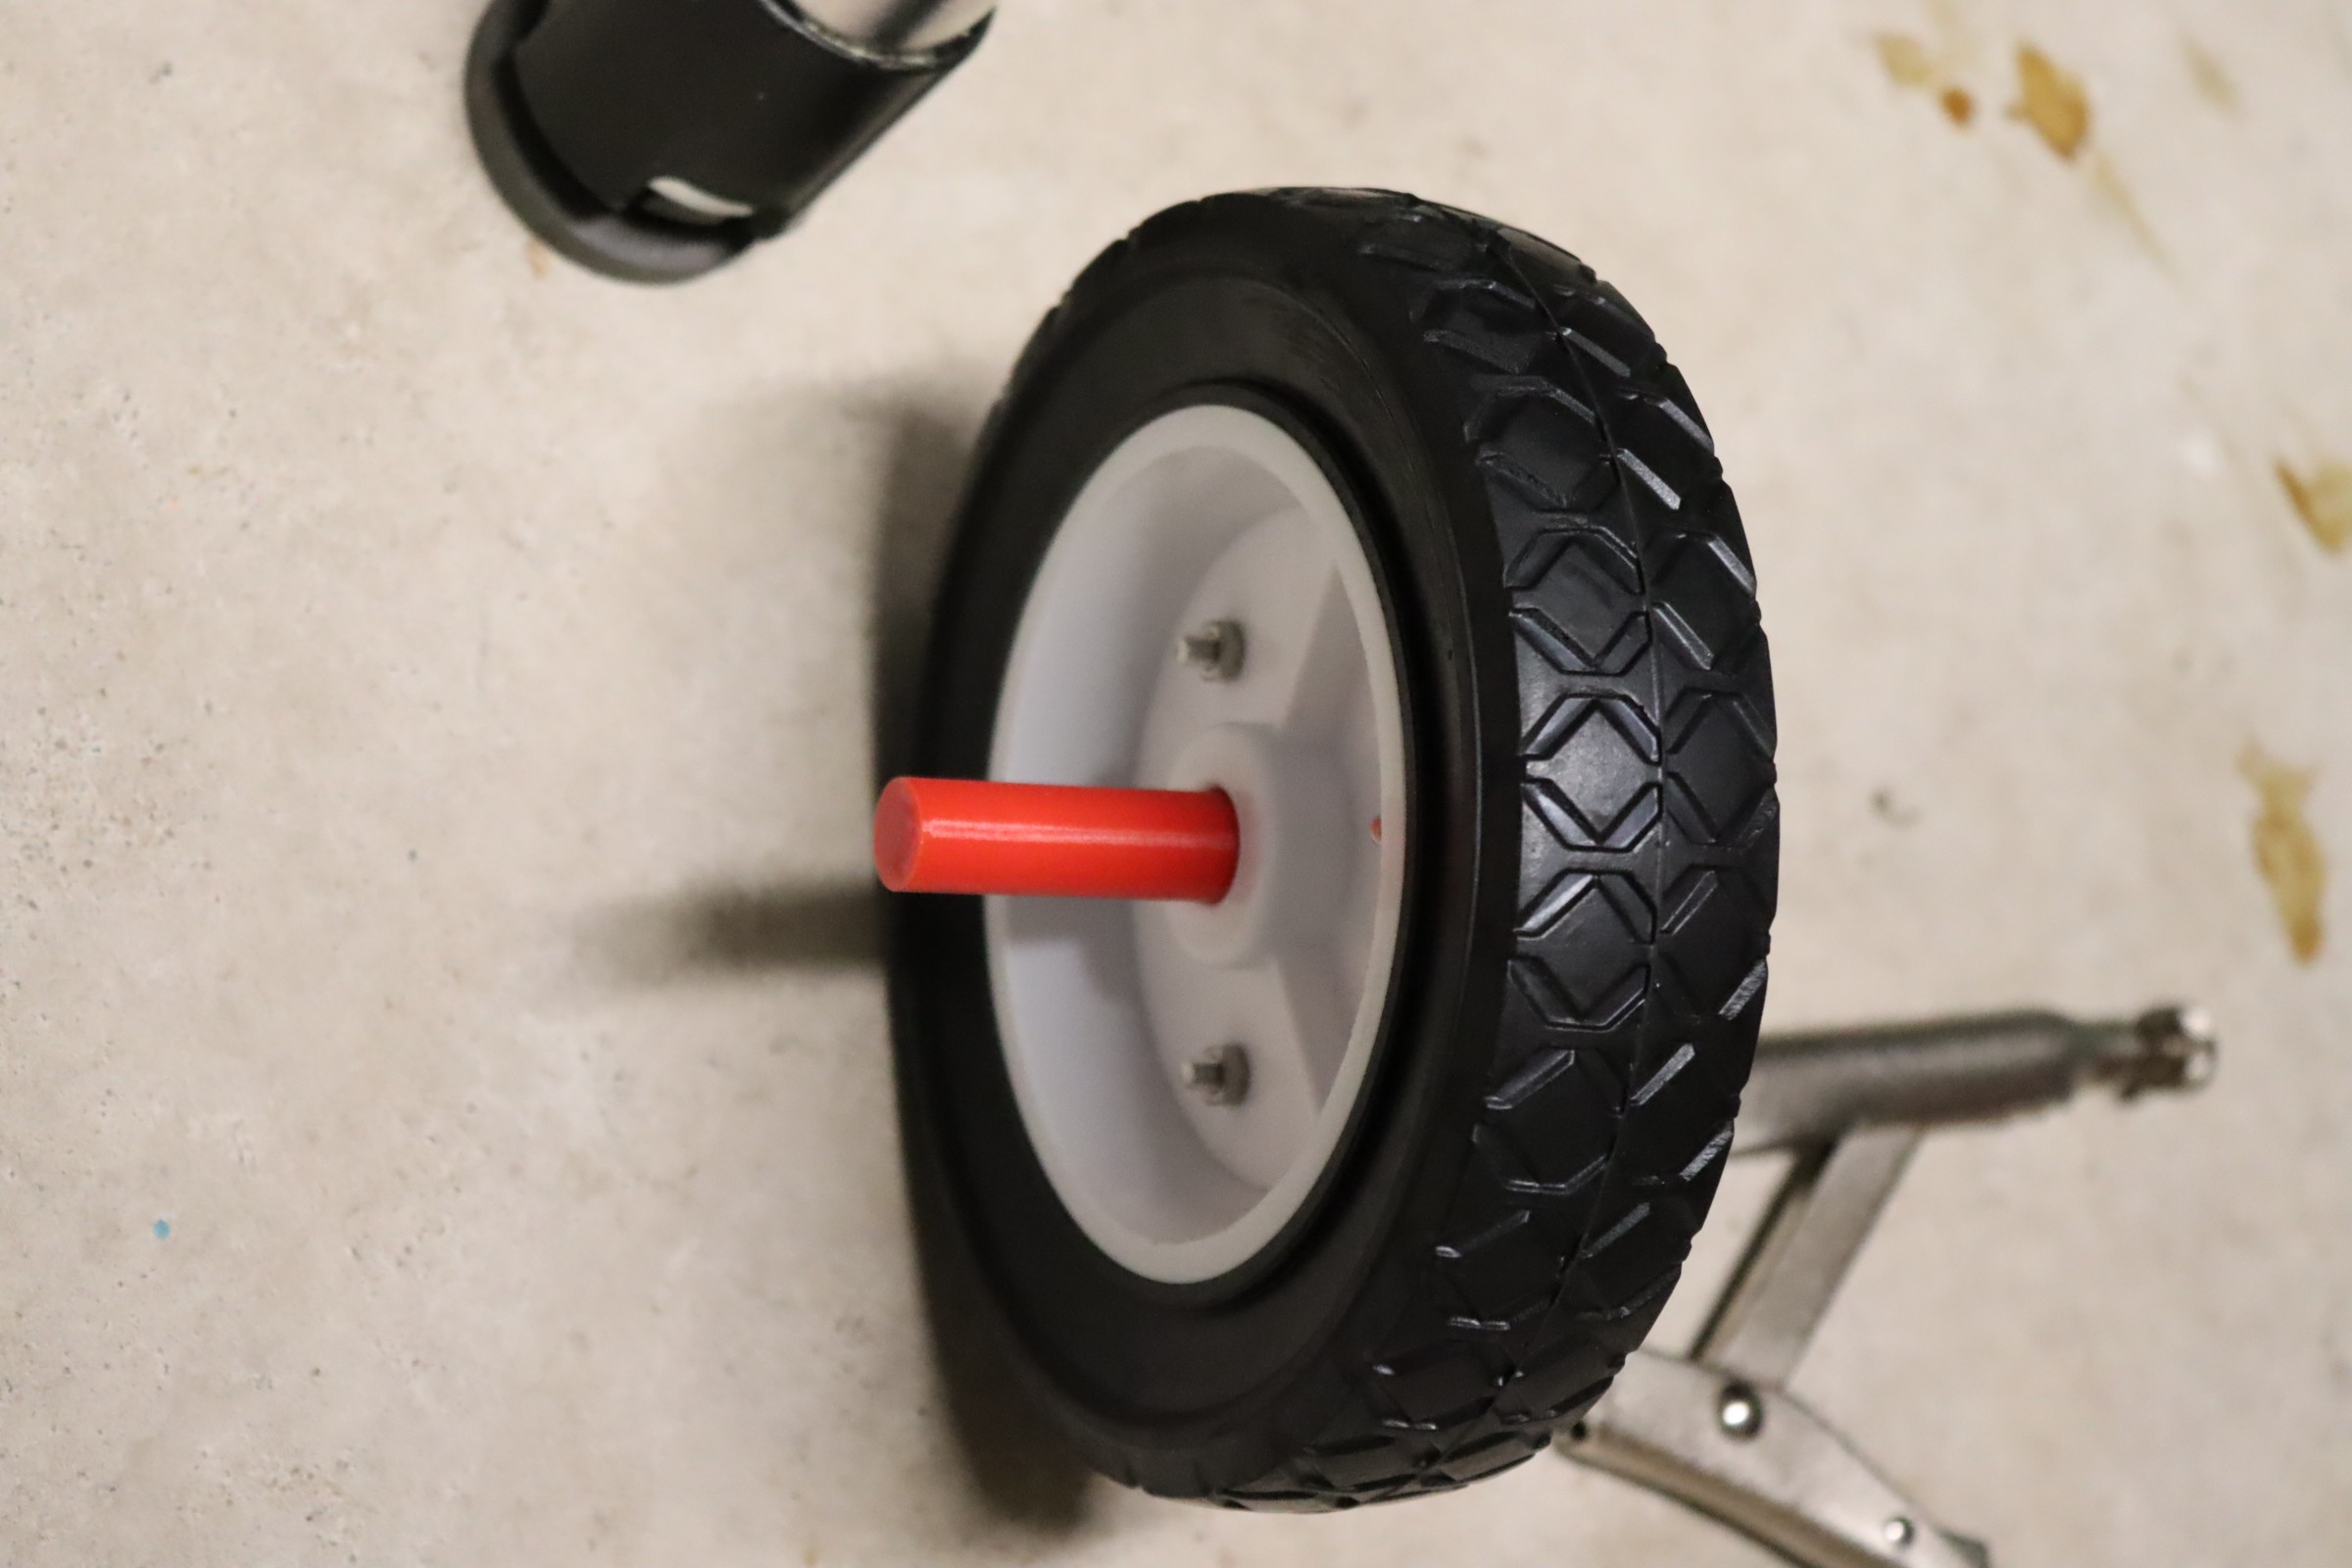
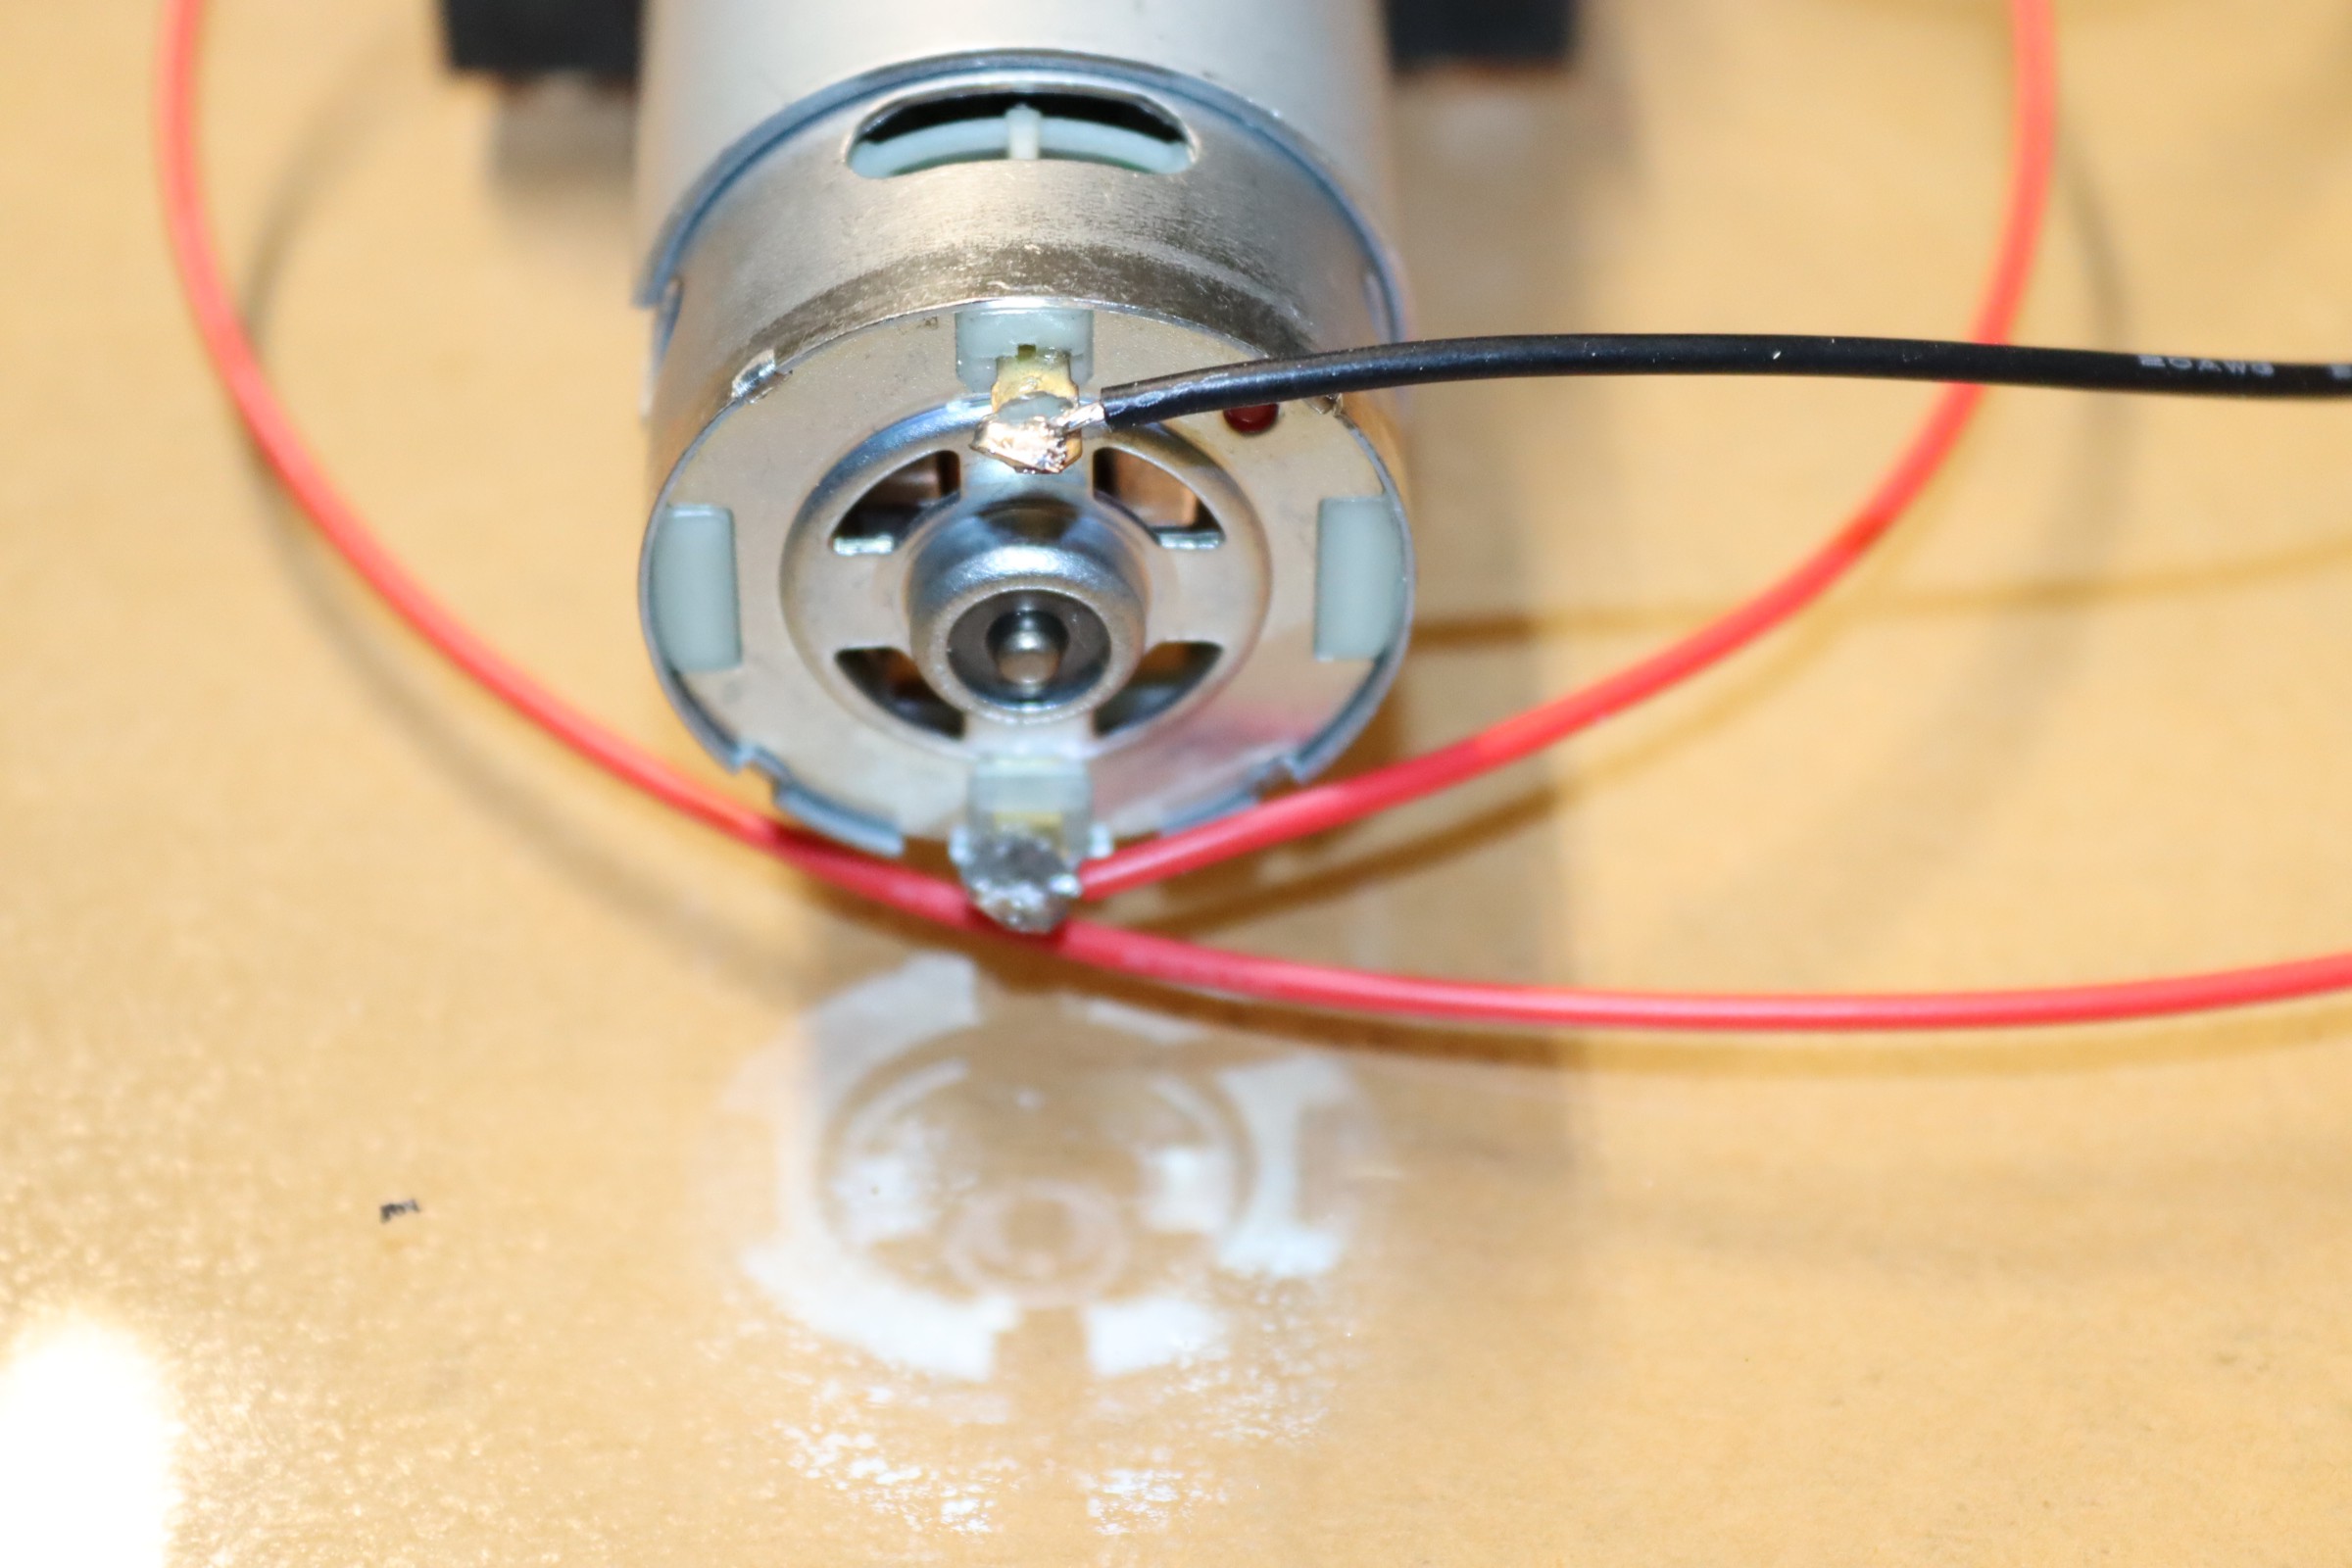
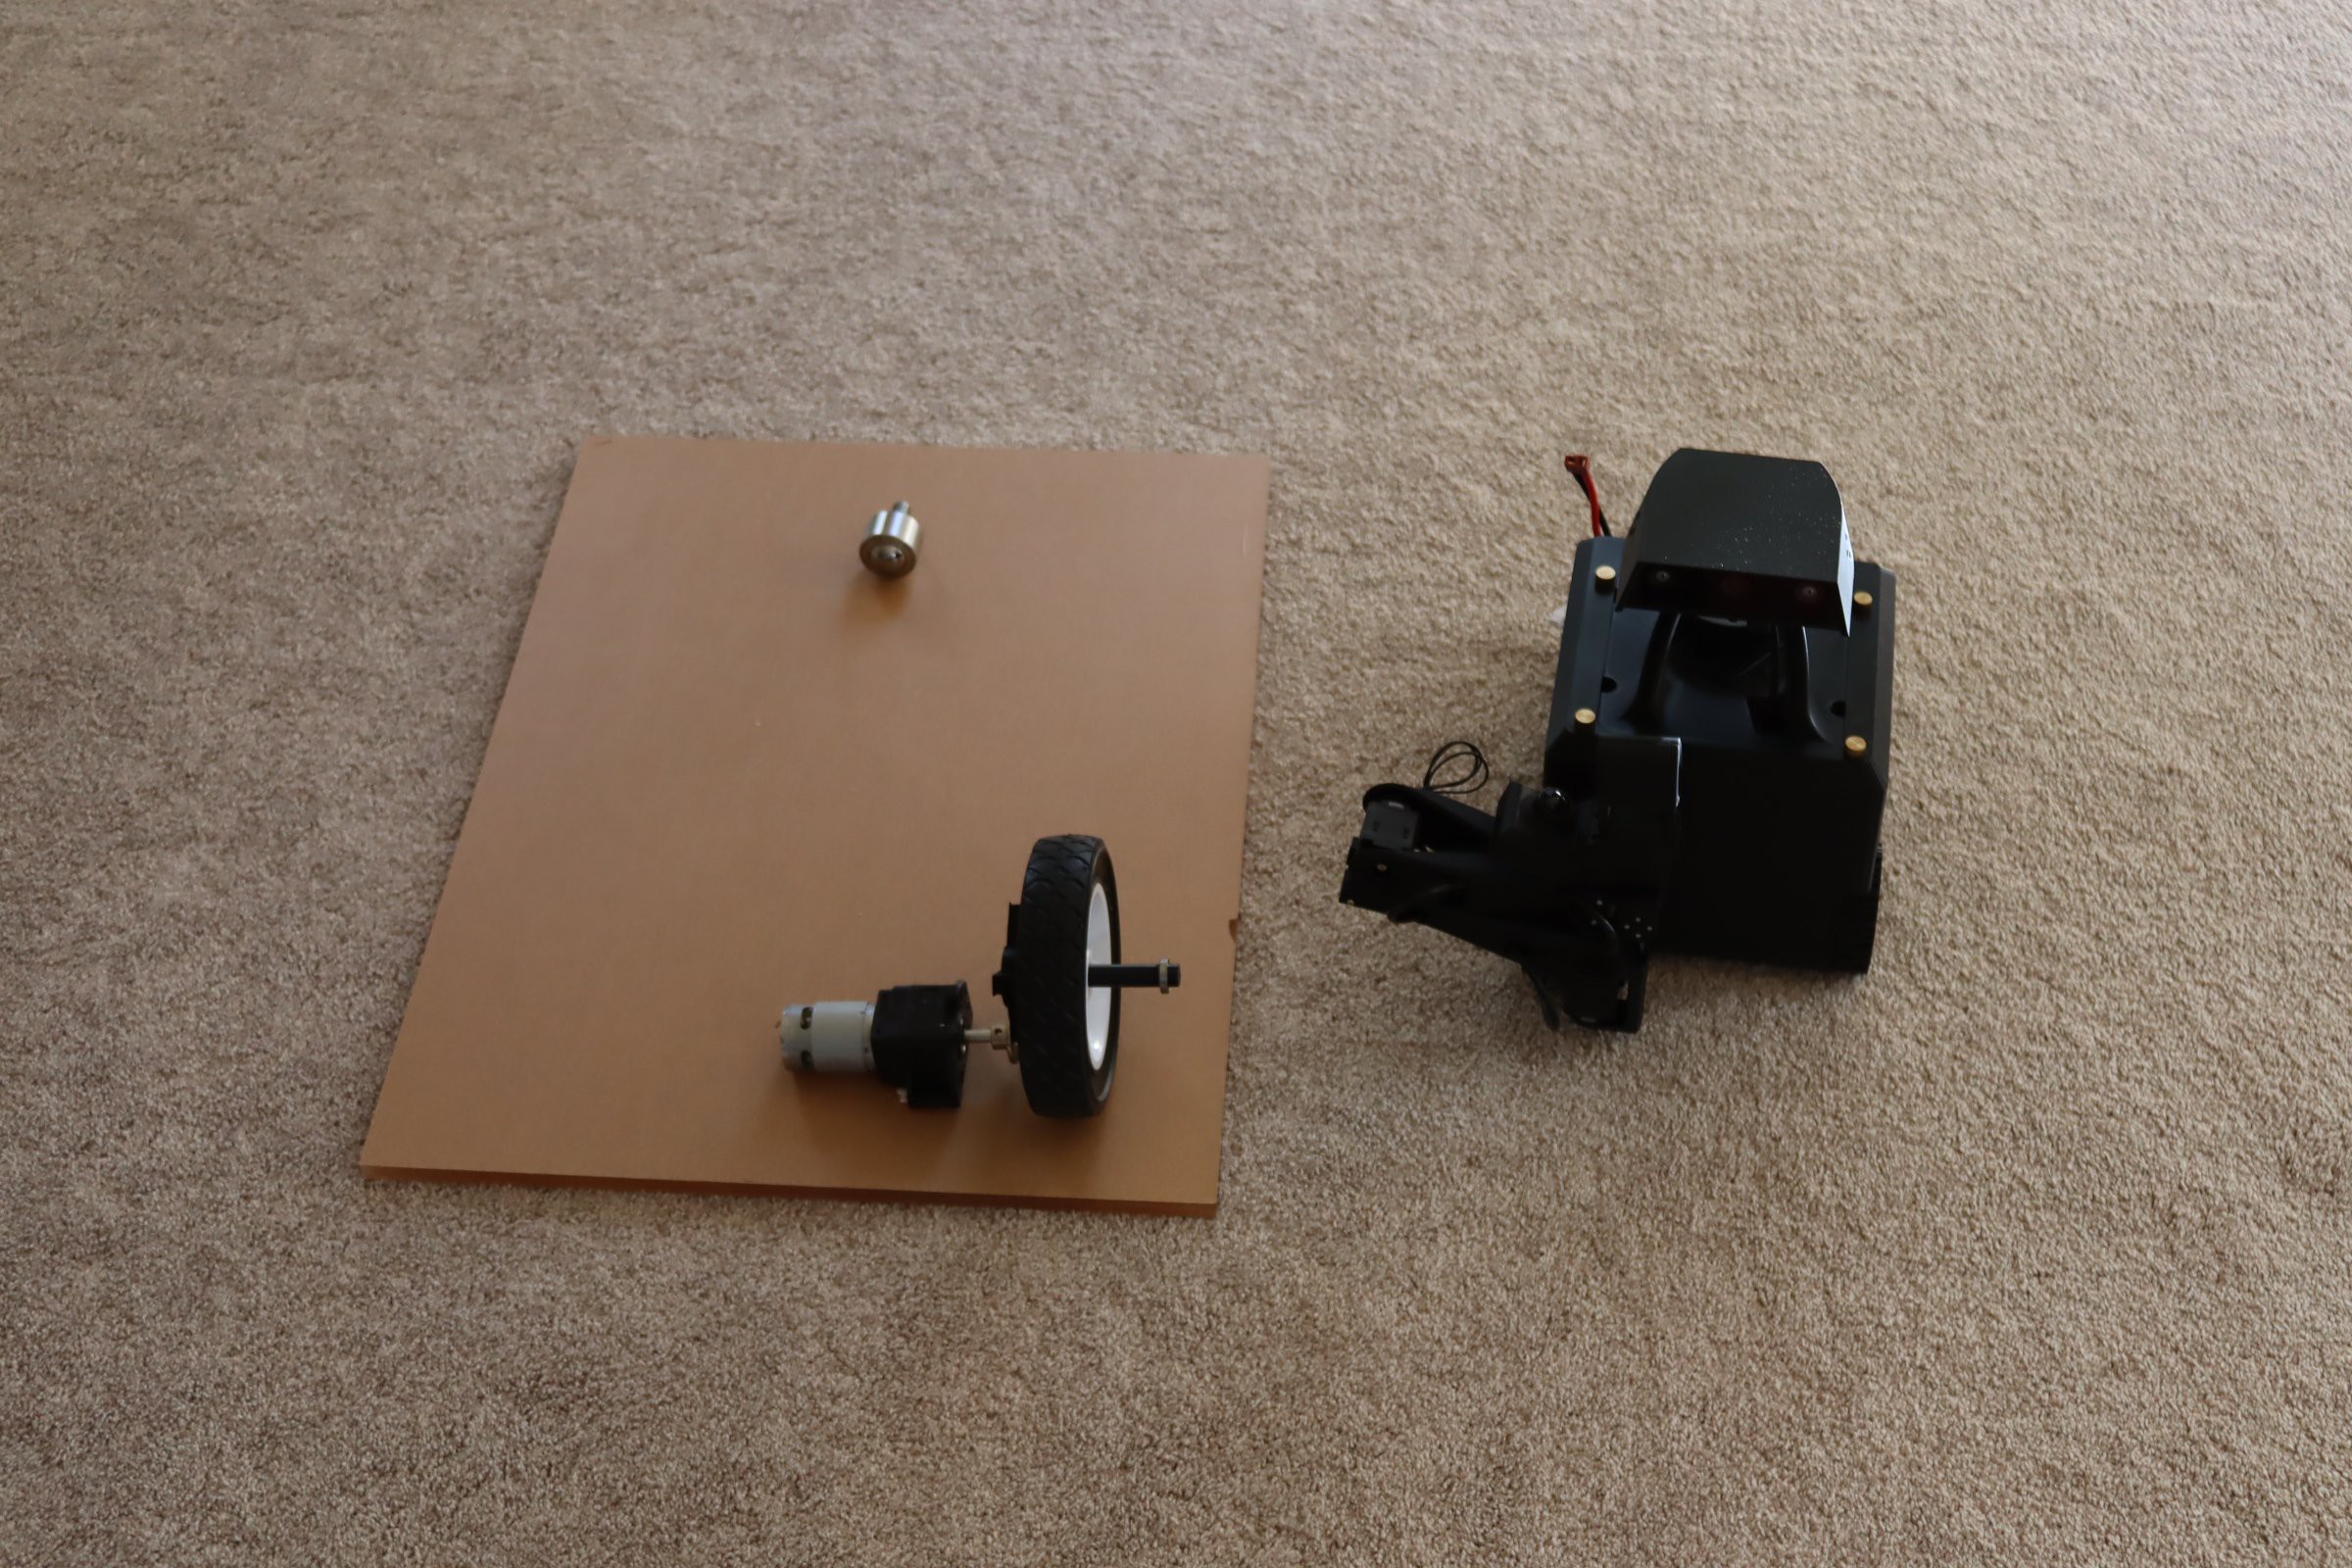
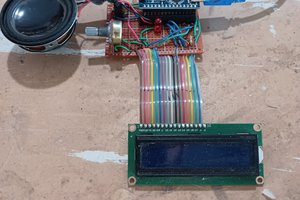
Zeno is my first attempt at a robot strong enough to actually do things. I've taken a "one Arduino per function" approach and I currently have six Arduinos in use (a mega with a motor shield for the drive motors, four Unos (one for each distance sensor) and one Uno to connect the Huskylens (vision) to the motor control.  I'll need one for the gripper, one for the gripper camera/arm, one for the gripper distance detector and one for the voice recognition module. That will put me at ten Arduinos. This makes it easy to troubleshoot, but it does require the larger robot body and power supply.

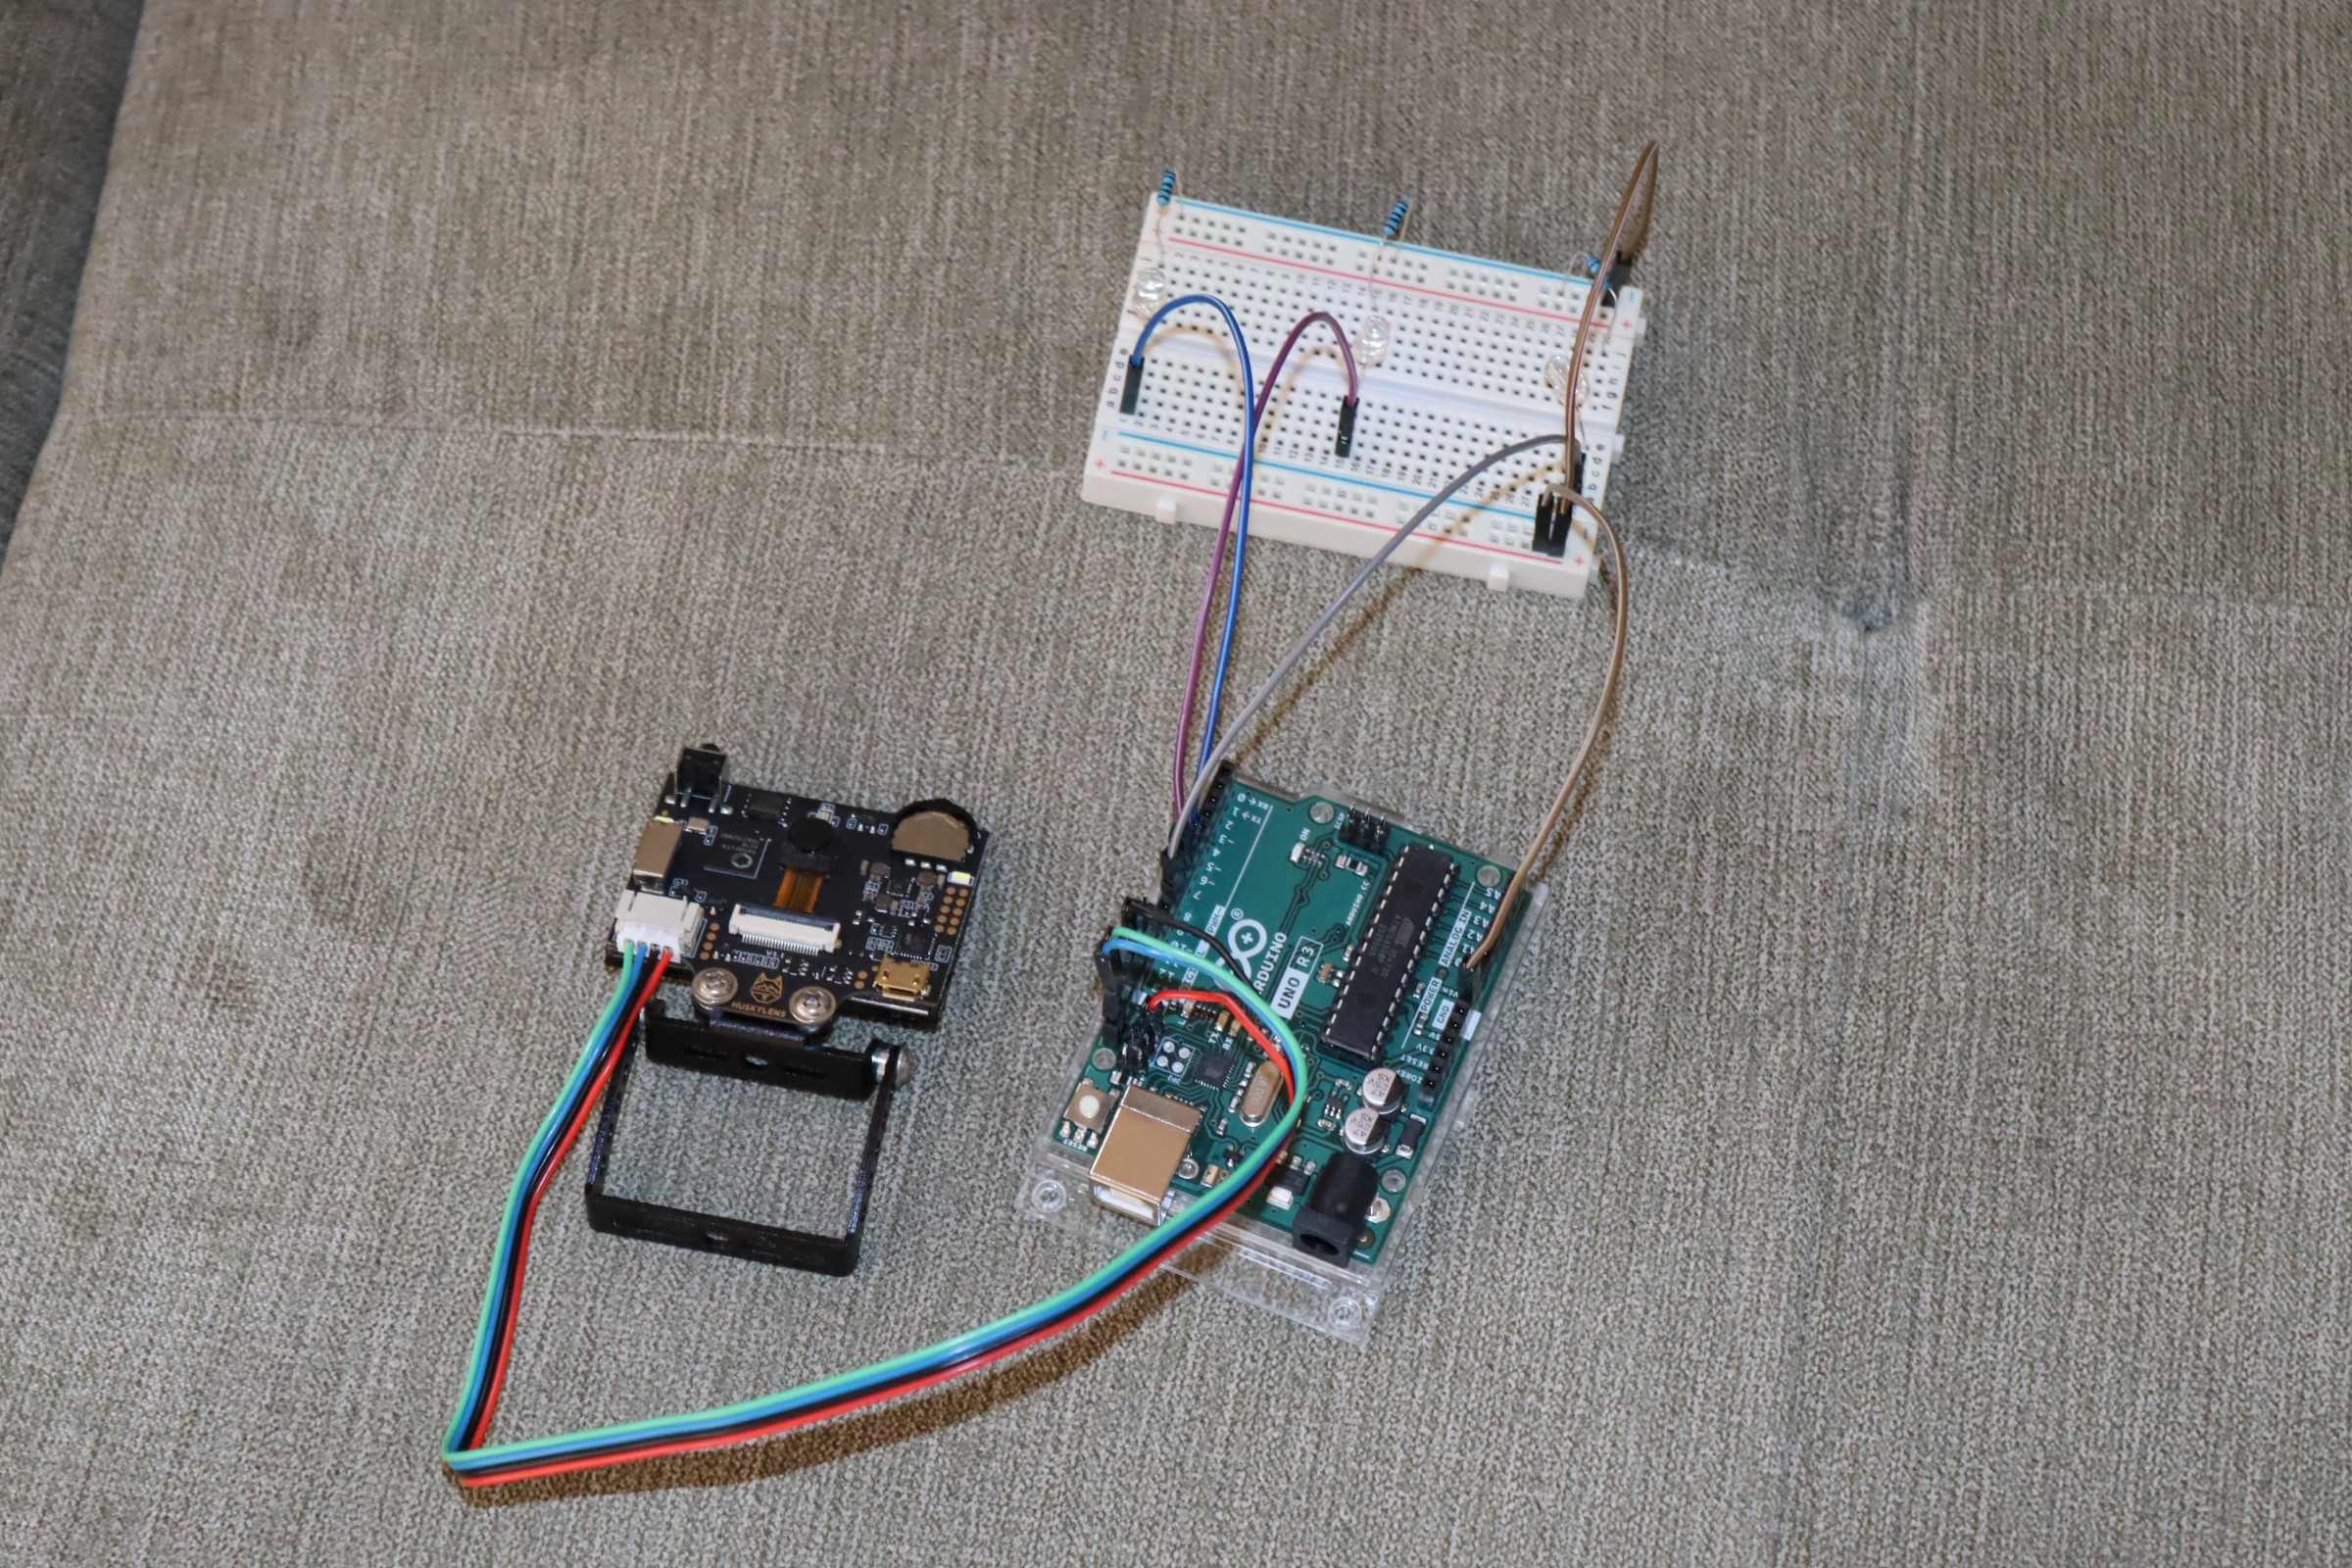
AI, which uses a lot of computing power--often in the cloud, provides great speech recognition/voice interaction and visual perception. A Huskylens and a speech recognition module provides limited voice control and limited visual recognition--but that's less than fifty dollars and it's local. 

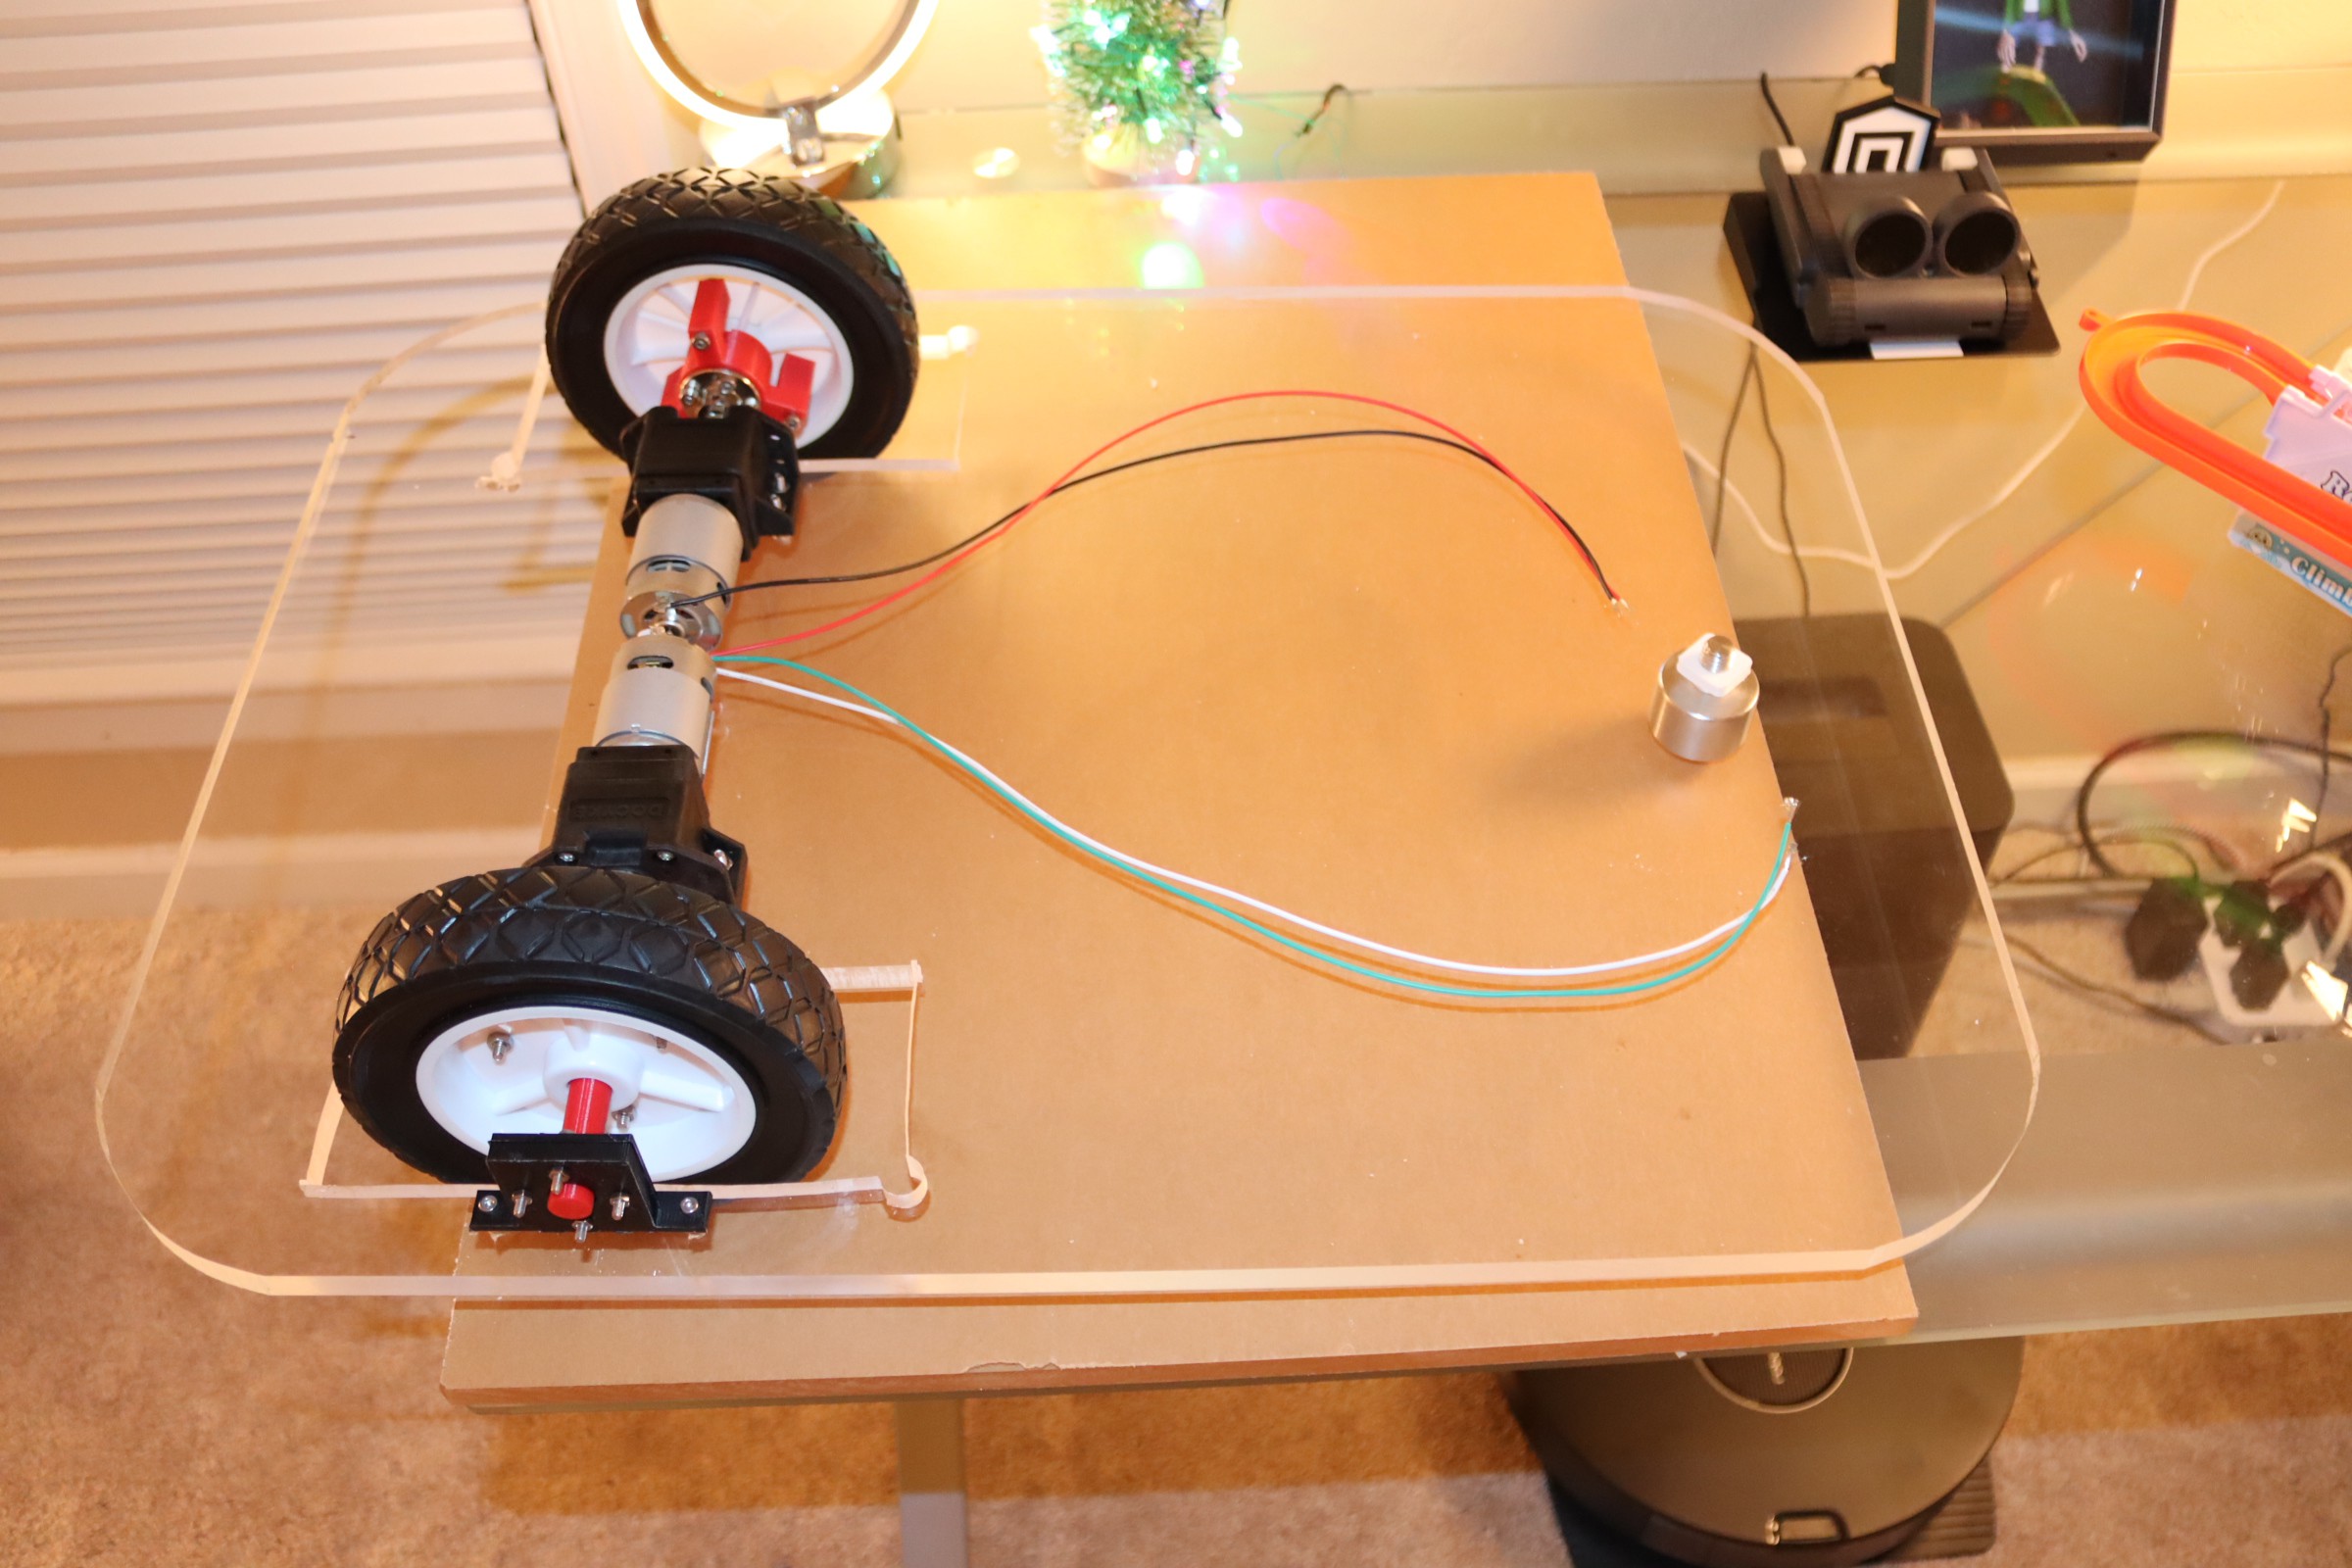
Zeno, right now, can follow me around or find me in a room (of course; id1--trained to me, will recognize almost anyone who wanders by).

My short term goal is to have Zeno find a bottle of water and bring it to me (where ever I am in the room) on voice command. After that, I will "train" Zeno to come and retrieve the empty and take it to the trash. I suspect that many simple tasks will not require great machine intelligence and complex arm systems. 

We'll see.

arduino11.ino

ino - 1.46 kB - 03/18/2026 at 20:58

Download

arduino10.ino

ino - 2.75 kB - 03/18/2026 at 20:58

Download

arduino9.ino

ino - 1.48 kB - 03/18/2026 at 20:57

Download

arduino8.ino

ino - 2.59 kB - 03/18/2026 at 20:57

Download

arduino5.ino

ino - 2.89 kB - 03/18/2026 at 20:57

Download

View all 13 files

  • Lidar Anomolies

    Mike Rigsby03/18/2026 at 21:07 0 comments

    For the moment, I am ignoring input from the two front and rear/side lidar units (Arduino 1, 2, 6 and 7).

    These units sometimes "detect" something I can't see. Actually, Max (my Aibo robot dog) barks at unknown things (and displays little "x's" on his map) while Astro (Amazon robot) will circle around "nothing visible" in the middle of the large open floor. 

    Curious, but something for another day.

  • Data I supplied to Google AI to write code for Arduino #5 (motors)

    Mike Rigsby03/18/2026 at 21:01 0 comments

    Given an Arduino Mega with a genuine Arduino motor shield

    Motors will be powered at 80 percent voltage

    Input pins are 48, 49, 30, 26, 24, 22, 46, 47, 27, 25, 23, 45, 43

    Output pins are 4

    Motors are initially off

    There are three stages:

    Stage one starts when pin 45 goes high. Remain in stage one until exit condition is met:

    Stage one:

    If pin 25 is high, both motors on forward

    If pin 27 is high, right motor forward and left motor reverse

    If pin 23 is high, left motor forward and right motor reverse

    If pin 43 goes high, exit stage one and start stage two

    Remain in stage two until exit condition is met

    Stage two:

    Both motors off for 5 seconds

    Both motors reverse for 5 seconds

    Right motor forward and left motor reverse for 3 seconds

    Stop both motors

    If pin 24 is high, both motors on forward

    If pin 26 is high, right motor forward and left motor reverse

    If pin 22 is high, left motor forward and right motor reverse

    If pin 30 goes high, exit stage two and start stage three

    Stage three:

    Stop motors

    Make pin 41 high for one second, then low

    Delay 23 seconds

    Both motors reverse for 5 seconds

    Right motor forward and left motor reverse for 5 seconds

    Both motors off

    Return to original condition, waiting for pin 45 to go high

  • Connections

    Mike Rigsby03/18/2026 at 21:00 0 comments

    Here's the connection setup.

    Arduino Pin Connection Reference

    Source Arduino

    Source Pin

    Destination Arduino

    Destination Pin

    Arduino #1 – Right Front LiDAR

    Pin 13

    Arduino #5 (Mega)

    Pin 48

    Arduino #2 – Left LiDAR

    Pin 13

    Arduino #5 (Mega)

    Pin 49

    Arduino #3 – Front Camera LiDAR

    Pin 13

    Arduino #5 (Mega)

    Pin 30

    Arduino #4 – Lower Front Camera

    Pin 6

    Arduino #5 (Mega)

    Pin 26

    Arduino #4 – Lower Front Camera

    Pin 7

    Arduino #5 (Mega)

    Pin 24

    Arduino #4 – Lower Front Camera

    Pin 8

    Arduino #5 (Mega)

    Pin 22

    Arduino #6 – Left Rear LiDAR

    Pin 13

    Arduino #5 (Mega)

    Pin 46

    Arduino #7 – Right Rear LiDAR

    Pin 13

    Arduino #5 (Mega)

    Pin 47

    Arduino #8 – Upper Camera

    Pin 6

    Arduino #5 (Mega)

    Pin 27

    Arduino #8 – Upper Camera

    Pin 7

    Arduino #5 (Mega)

    Pin 25

    Arduino #8 – Upper Camera

    Pin 8

    Arduino #5 (Mega)

    Pin 23

    Arduino #9 – Voice (Come)

    Pin 13

    Arduino #5 (Mega)

    Pin 45

    Arduino #9 -- Voice  (Trash)                  Pin 7                    Arduino #10                   Pin 7

    Arduino #9 – Voice (Trash)                    Pin 8                    Arduino #5 (Mega)      Pin 43

    Arduino #10 –Gripper                             (inputs only)

    Arduino #11 –Extender                           Pin 13                 Arduino #10                   Pin 9

    Arduino #5 (Mega)                                    Pin 41                 Arduino #11                   Pin 4

  • Arduino #10, Gripper

    Mike Rigsby02/28/2026 at 22:33 0 comments

    Now, I'm adding the gripper. This is controlled by Arduino #9 (voice recognition). When the word "trash" is recognized, Pin 7 of Arduino 9 goes high and this goes to pin 7 of Arduino 10. This causes the gripper to close until it senses feedback on the pressure sensor. Then it holds for five seconds and releases (just a test situation for now).

    I roughly described the gripper here. 

    Here's what Arduino #10 and the control module for the servo motors looks like.

  • Misc. Construction

    Mike Rigsby02/25/2026 at 15:06 0 comments

    I'm trying to catch up a bit on the construction.  Here, I have mounted the motors and the supports for the MARS robot (which I'm probably not going to use in this project--but they are there if I want to put in another platform). 

    I used two of these gear motors from Amazon.  The wheels did not have enough traction, just slipped all the time. I added 3M gripping tape to the wheels and they work fine. This tape is quite costly, but works very well when you need more traction. Below is a lidar assembly, fastened to a 3d printed mount using 2mm screws.

    This is a Huskylens and Arduino assembly--used for video detection. I added a breadboard and leds so that I could tell when something is detected and whether it is "left, right, or center."

  • Voice Recognition

    Mike Rigsby02/25/2026 at 00:41 0 comments

    Using a Gravity speech module (about $15.) and an Arduino Uno, I added speech recognition to Zeno.  With the Gravity, a wake word and about 15 custom commands can be trained. Roughly 100 preset commands are recognized. When I say, "Zeno . . . come" command id5 (first trained word) is activated. I use that to turn on pin 13 of an Arduino Uno, which is then read by the Arduino Mega--activating the "follow me" sequence (a Huskylens camera has been trained to me and it provides left, center, right lines to the Arduino Mega).

    Here's the current list of Arduino processors and how they are interconnected.

    Arduino Pin Connection Reference

    Source Arduino

    Source Pin

    Destination Arduino

    Destination Pin

    Arduino #1 – Right Front LiDAR

    Pin 13

    Arduino #5 (Mega)

    Pin 48

    Arduino #2 – Left LiDAR

    Pin 13

    Arduino #5 (Mega)

    Pin 49

    Arduino #3 – Front Camera LiDAR

    Pin 13

    Arduino #5 (Mega)

    Pin 30

    Arduino #4 – Lower Front Camera

    Pin 6

    Arduino #5 (Mega)

    Pin 26

    Arduino #4 – Lower Front Camera

    Pin 7

    Arduino #5 (Mega)

    Pin 24

    Arduino #4 – Lower Front Camera

    Pin 8

    Arduino #5 (Mega)

    Pin 22

    Arduino #6 – Left Rear LiDAR

    Pin 13

    Arduino #5 (Mega)

    Pin 46

    Arduino #7 – Right Rear LiDAR

    Pin 13

    Arduino #5 (Mega)

    Pin 47

    Arduino #8 – Upper Camera

    Pin 6

    Arduino #5 (Mega)

    Pin 27

    Arduino #8 – Upper Camera

    Pin 7

    Arduino #5 (Mega)

    Pin 25

    Arduino #8 – Upper Camera

    Pin 8

    Arduino #5 (Mega)

    Pin 23

    Arduino #9 – Voice Recognition

    Pin 13

    Arduino #5 (Mega)

    Pin 45

    Yes, there are nine Arduinos and there will be at least two more.

  • Software

    Mike Rigsby02/19/2026 at 22:01 0 comments

    I've found that Arduino code can be written using AI. As a test case, I created the following in a Word document:

    Given an Arduino mega and Arduino motor shield

    Pins 23, 25, 27, 46, 47, 48 and 49 are inputs

    If pin 25 is high, both motors are on

    If pin 23 is high, the left motor is on forward and right motor is on reverse

    If pin 27 is high the right motor is on forward and left motor is on reverse

    If pin 46 or 47 or 48 or 49 is high, both motors are off

    What is the Arduino code

    I did a query using Google and received workable Arduino code--just had to copy it and paste it into the Arduino space. 

    Beware that this is not perfect. When I did the same thing for the "find the trashcan, back up, then find the human," I received six pages of code. The code didn't work. For some reason, the second attempt assumed PWMA to use pin 10 instead of pin 3. 

  • Wheels

    Mike Rigsby01/20/2026 at 22:16 0 comments

    I printed a couple of bearing holders.

    Next, I printed an axle/wheel attachment. This also connects to the motor.

    I drilled 3 holes through the plastic wheel and attached the axle to the wheel.

    Next, I soldered  wires to the motor.

    This was followed by attaching the gear shaft to the axle assembly.

    The motors/wheels were mounted to the plexiglass with 3mm screws.

  • The Beginning

    Mike Rigsby01/18/2026 at 14:07 0 comments

    I started by using 1/2 inch thick acrylic.

    This 18 inch by 24 inch sheet has sharp corners, so I wanted to soften it a bit. I started by using a one gallon paint can as a template and marked the corners for rounding.

    I cut these corners using a sabre saw, moving slowly.

    This was followed by cutting out slots for the wheels. I drilled starter holes, then used the sabre saw to cut out the rectangles where the wheels would fit.

View all 9 project logs

Enjoy this project?

Share

Discussions

Mike Rigsby wrote 02/25/2026 at 14:46 point

As you may have noticed, I am more in the "barely works camp" rather than the "highly sophisticated group." Zeno actually stops just before crashing into me--only because the camera loses sight of my upper half and quits sending signals.

  Are you sure? yes | no

Ken Yap wrote 02/25/2026 at 02:48 point

Looks fun and cool. 👍 Will Zeno cover half the remaining distance to you in successive binary divisions of time, thus asymtotically approaching but never quite reaching you? 😉

  Are you sure? yes | no

Similar Projects

Does this project spark your interest?

Become a member to follow this project and never miss any updates