 ElectroScope Archive
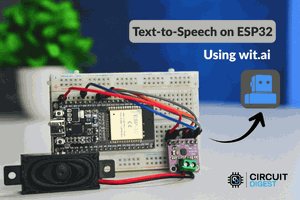
This project shows how to make an AI-powered text-to-speech (TTS) system using an ESP32-C3 microcontroller and an online TTS service (Wit.ai). Instead of trying to generate speech on the ESP32 itself (which has limited memory and processing), this design sends text to an AI service that returns audio, which the ESP32 plays through a speaker. (“Text-to-Speech” converts typed text into spoken words.)
🧠 Why Use Cloud-Based TTS
The ESP32-C3 is a tiny embedded processor with limited RAM and flash. High-quality speech synthesis requires large models and audio processing that can’t realistically run locally. To solve this:
-
ESP32-C3 connects to Wi-Fi.
-
It sends text over HTTPS to a cloud TTS API.
-
The AI service (Wit.ai) generates natural speech and streams audio back.
-
The ESP32 plays it through an I2S amplifier and speaker.
Advantages
-
Natural sounding AI voices
-
Small memory footprint on the ESP32
-
Scalable to many languages and voices
-
No heavy local processing
🧩 What You Need
The components needed for ESP32 C3 Text to Speech using AI
| Component | Purpose |
|---|---|
| ESP32-C3 Dev Board | Main controller (Wi-Fi + GPIOs) |
| MAX98357A I2S Amplifier | Digital audio driver |
| Speaker (4Ω or 8Ω) | Plays the audio |
| Breadboard + jumper wires | Prototyping |
| USB Cable | Power & programming |
This setup uses the I2S digital audio interface, which lets the ESP32 transmit streamed audio directly to the amplifier.

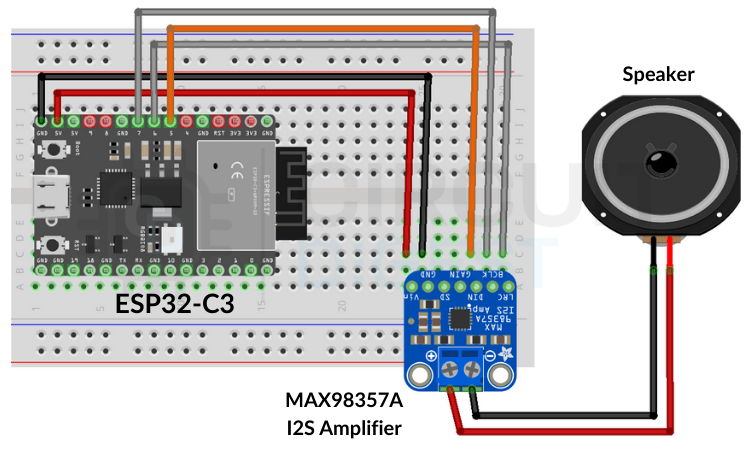
🔌 Wiring
Connect the ESP32-C3 to the MAX98357A amplifier:
| ESP32-C3 Pin | MAX98357A Pin | Signal |
|---|---|---|
| GPIO07 | BCLK | Bit clock |
| GPIO06 | LRC | Left/Right clock |
| GPIO05 | DIN | Audio data |
| 5 V | VIN | Power |
| GND | GND | Ground |
Double-check wiring to avoid shorts before powering up.
🛠️ Set Up Wit.ai
-
Create a free account at Wit.ai.
-
Create a new app for your project and choose a language.
-
Go to Settings → HTTP API to get your API Bearer Token.
-
Save the token securely — don’t hardcode it in public repos.
💻 Install the TTS Library
In the Arduino IDE:
-
Open Library Manager
-
Search for WitAITTS
-
Install the library
This library handles HTTPS communication, buffering, and audio streaming.
⚙️ Upload and Test the Code
Use this example sketch — replace your Wi-Fi SSID, password, and the Wit.ai token:
#include <WitAITTS.h>

const char* WIFI_SSID     = "YourWiFiSSID";
const char* WIFI_PASSWORD = "YourWiFiPassword";
const char* WIT_TOKEN     = "YOUR_WIT_AI_TOKEN_HERE";

WitAITTS tts;

void setup() {  Serial.begin(115200);  delay(1000);    Serial.println("\n--- ESP32-C3 TTS Online Demo ---\n");
  if (tts.begin(WIFI_SSID, WIFI_PASSWORD, WIT_TOKEN)) {    Serial.println("TTS Ready! Type text below:");  } else {    Serial.println("TTS init failed — check credentials.");  }
}

void loop() {  tts.loop();  if (Serial.available()) {    String text = Serial.readStringUntil('\n');    text.trim();    if (text.length() > 0) {      Serial.println("Speaking: " + text);      tts.speak(text);    }  }
}
-
Upload the sketch.
-
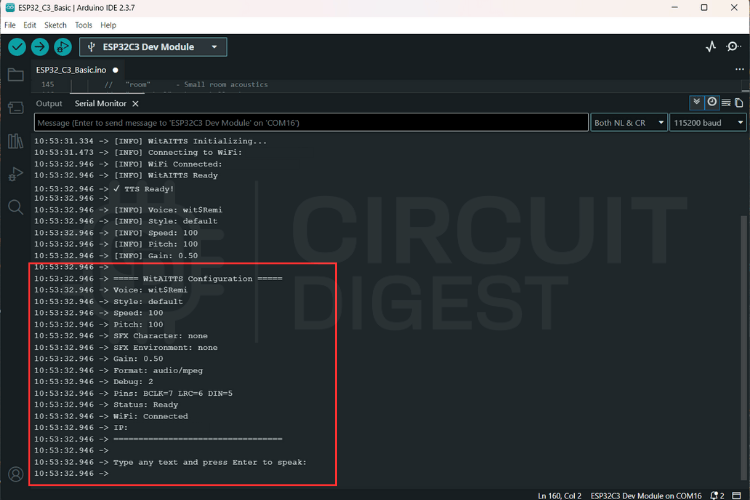
Open Serial Monitor (115200 baud).
-
Type a sentence and press Enter.
-
Your ESP32 starts streaming and playing the AI voice audio.
📡 Streaming & Playback Tips
-
Strong Wi-Fi (≥ −60 dBm) improves response.
-
Stable Power reduces distortion.
-
Quality Speaker gives clearer voice.
-
Network reliability impacts how smooth the audio plays.
🛠️ Debugging
| Issue | Likely Cause |
|---|---|
| No audio | Wrong wiring or amplifier power |
| HTTP errors | Bad token or Wi-Fi problems |
| Distortion | Weak power or a poor speaker |
Check serial logs to trace issues.
🚀 Expand and Integrate
Once you have basic TTS working, you can apply this setup to:
-
Voice feedback in IoT devices
-
Talking notifications/alarms
-
Chatbots or assistants
-
Accessibility tools
This flexible approach lets your ESP32-C3 speak any text delivered by sensors or user input.
Want more ESP32 Projects? Explore nodes like sensors, speech-to-text, or AI assistants to make your projects listen and speak!
Explore a curated collection...
Read more »
 electronicsworkshops
 Mansour Moufid