-
A place to work
11/09/2016 at 01:18 • 0 commentsI now have a workspace I can build and tinker in. While I spend the next few weeks setting it all up, I'll eventually be able to have a space where I can work on my projects. As such I'll hopefully work on this project again, and while it likely may change what it's going to do, at least I will be starting work on it again.
-
No progress :(
01/21/2015 at 23:13 • 0 commentsSo I stopped working on this once I didn't make it through to the next round of the Hackaday Prize. Bad form I know, but I guess I just lost the motivation to keep working on this project when I didn't really need it anymore at home. Some background, previously I had a yard that I hated mowing etc. but now that I've moved from there (early in the project) and have a yard that I can comfortably mow using the ride-on, there's just no urgency around this project anymore. At least until I get my garden going again for some of the other features (egg collecting, fruit collection).
So where does this leave RoboWillie? I'm wanting to finish it, but there are also heaps of other started projects that I've got going in progress, and many more that I want to start. So while I will eventually pick up the tools for this one, I'm going to finish off a few others first until I get my workshop built again and have the tools available to finish it off.
I think that the next project I'm going to complete is my automated vertical garden project. Alternatively might go with the robotic arm I have been designing (which could eventually end up with a brother being mounted on RoboWillie). I might also end up putting a few more of the projects that I'm working on up to hackaday.io so I and others can track progress etc. as a build log.
-
Mini Maker Faire Wrap-Up
08/20/2014 at 02:02 • 0 commentsSo this weekend past was the Sydney Mini Maker Faire, boy am I exhausted!
![]()
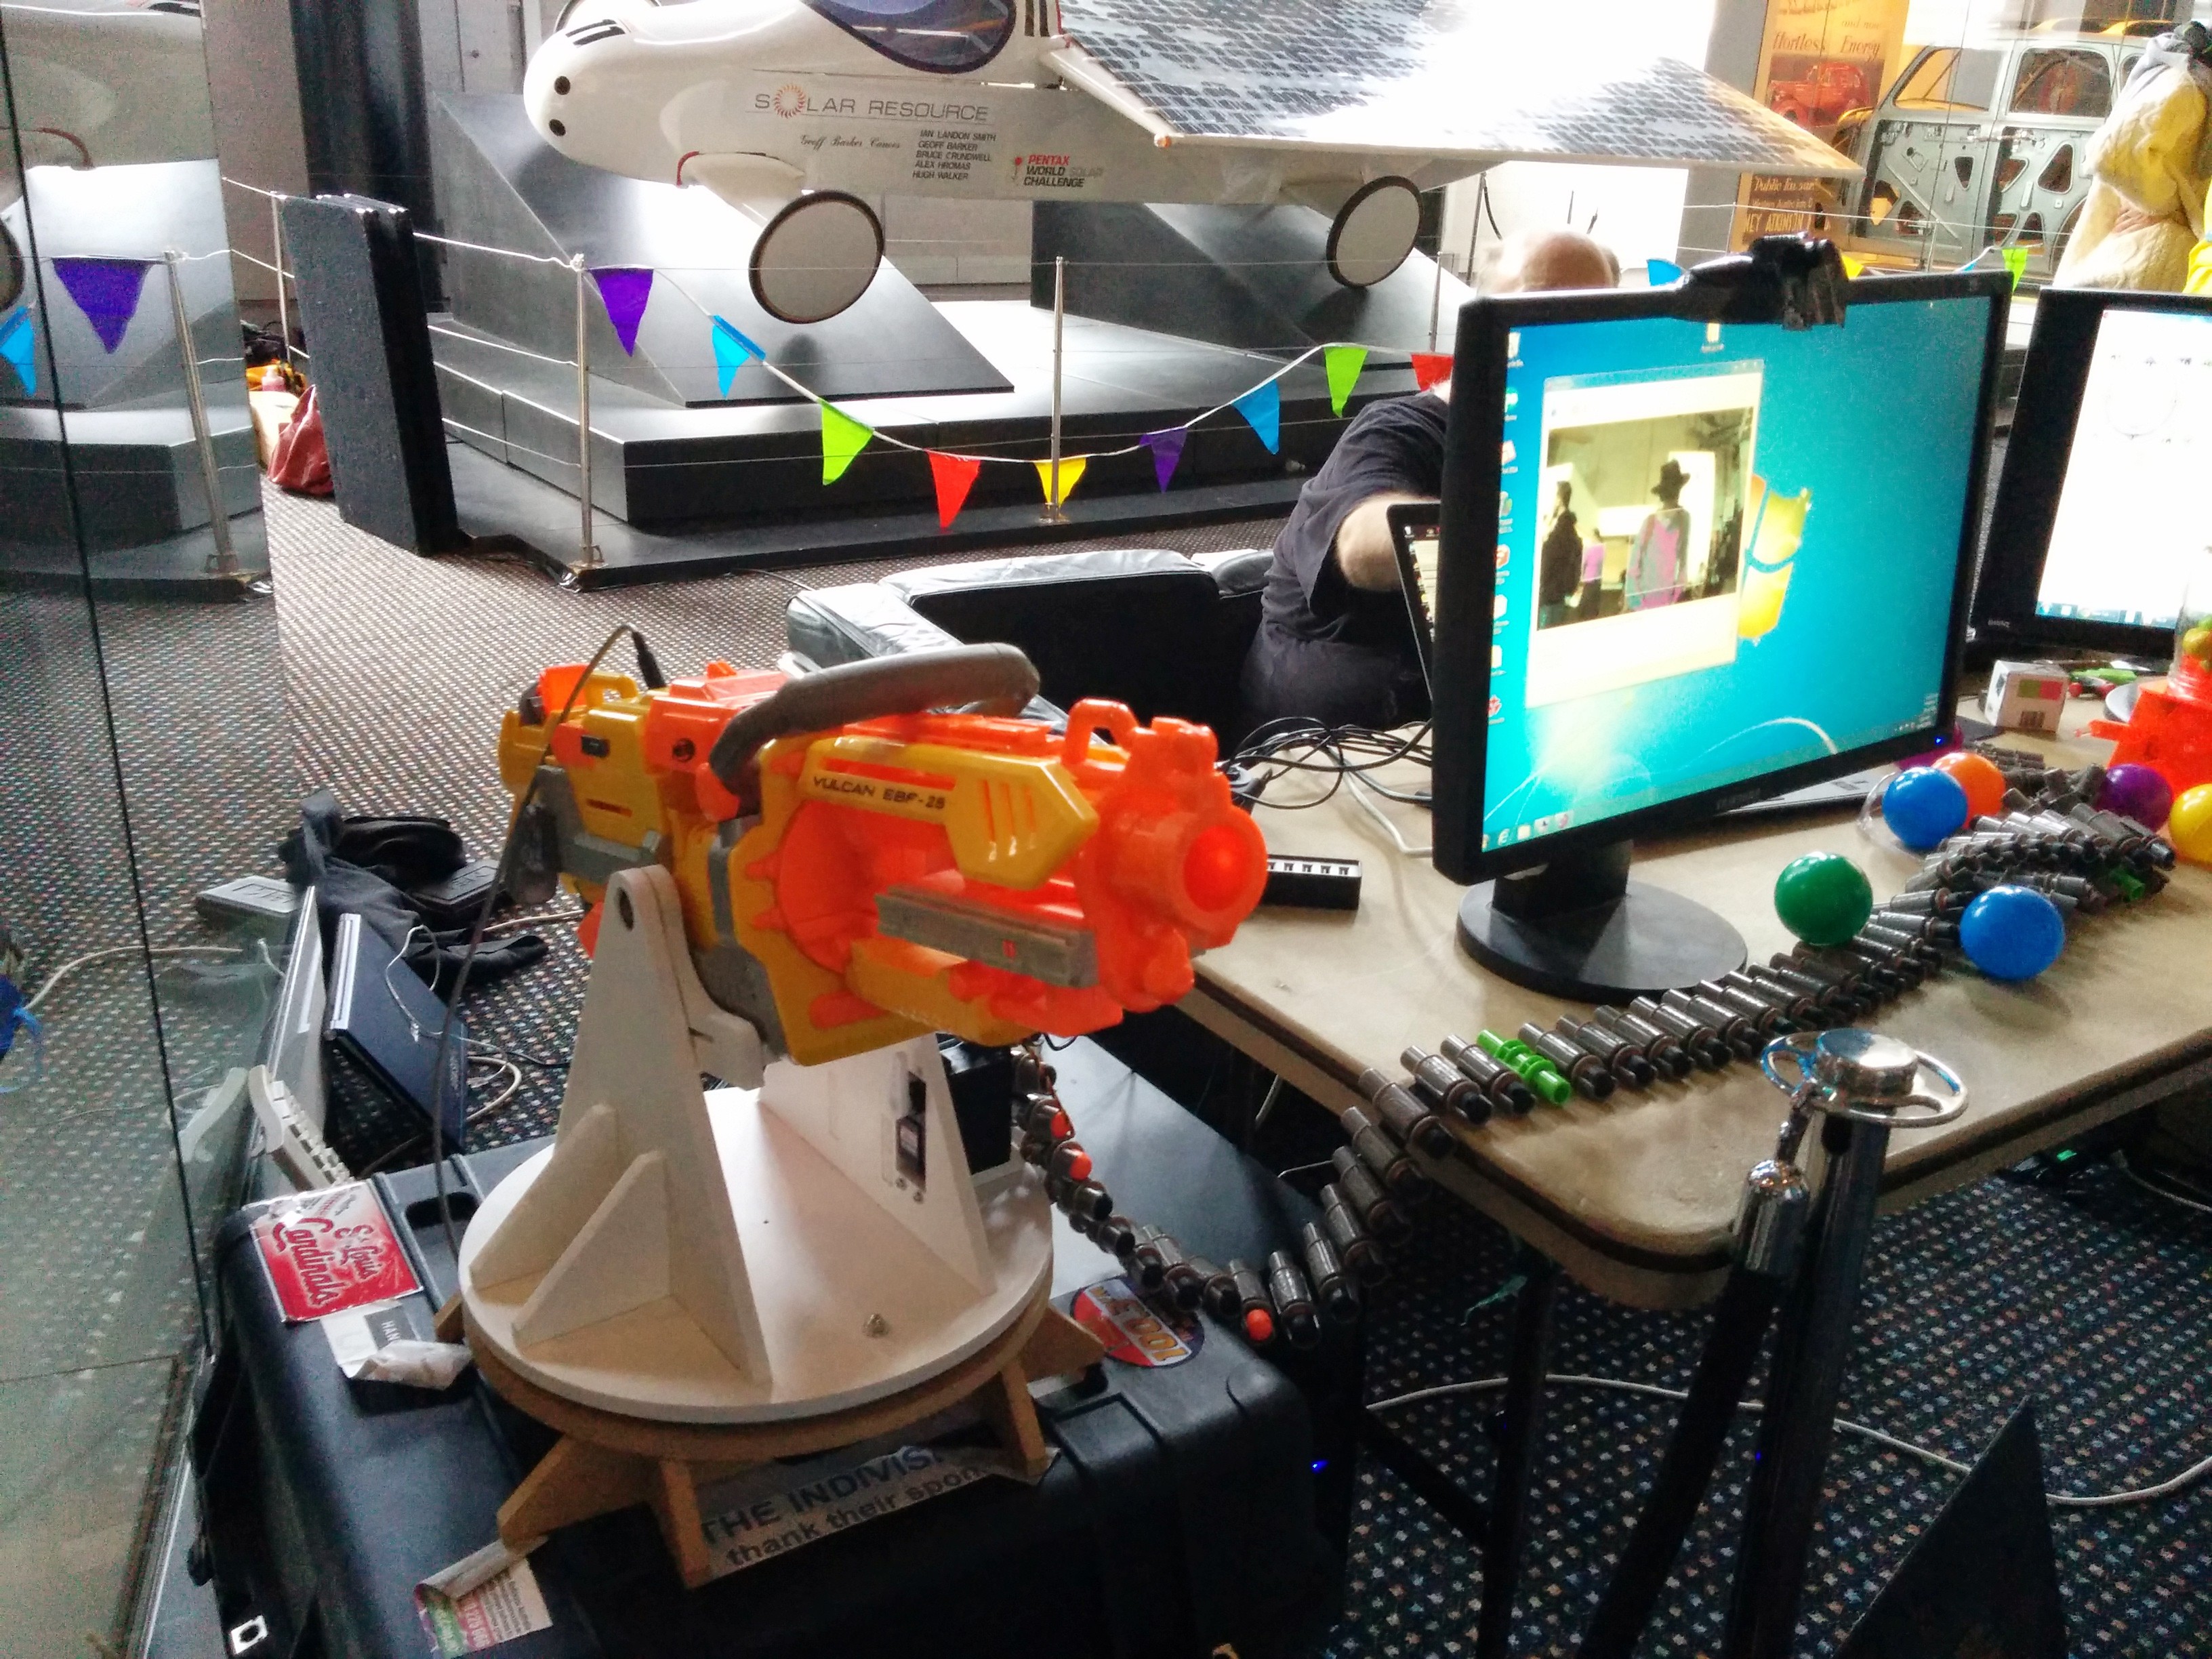
We had approximately 5,500 visitors come through the Powerhouse Museum over the two days and going by my voice you would guess I spoke with a good portion of them! I also did several interviews and panel discussions so I'm thoroughly stuffed! That being said, my Nerf sentry turret was quite a popular attraction and considering the rush job performed rather well (started on Monday night, finished up around 1am Saturday morning, 5am start to get to the Faire!). Here's a couple of pics/youtube vids of the turret set up at MMFSYD.
Now that the Maker Faire is over, I need to get on with the video requirement for the RoboWillie project. Have to complete tonight after work!!! -
Sentry Gun
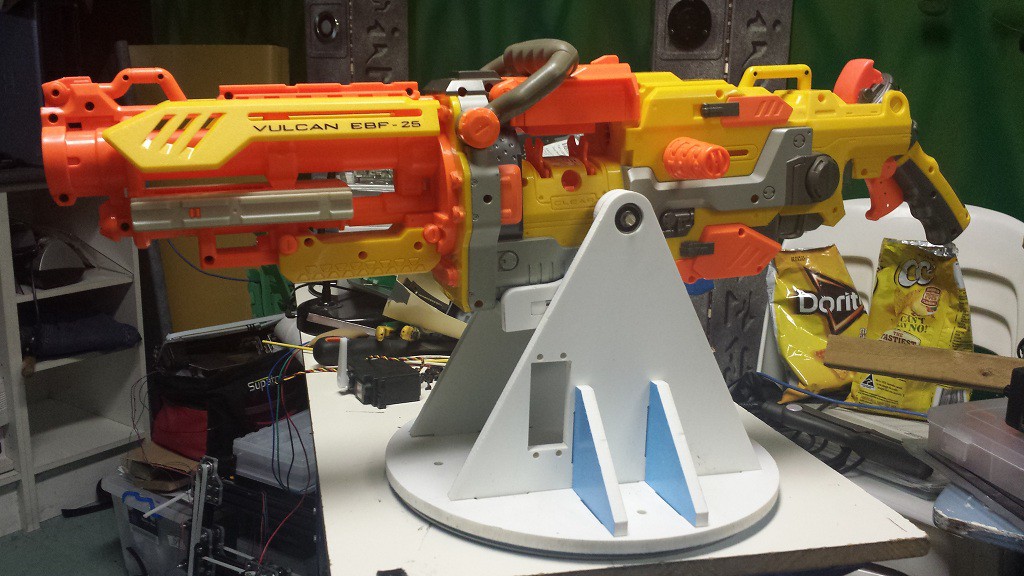
08/12/2014 at 23:01 • 0 commentsSo I still haven't had the chance to take my video but it will happen soon! In the meantime I thought I'd just share on the progress of the sentry gun that I've been working on in preparation for the Maker Faire this weekend. Up to the stage now where I need to add the electronics etc, which I'm planning on getting done tonight. I'm really pleased with how it's turned out so far. The center of gravity is nearly spot on (a teensy bit top-heavy but certainly good enough) and the movement of the sentry is extremely smooth thanks to a 500KG bearing and some nifty design work. All panels were cut out of 10mm PVC foam which is super strong for it's weight.
![]()
Video of it in action here.
-
Delays...
08/07/2014 at 23:26 • 0 commentsRain predicted for this weekend where I live and I only have a ute (pickup for you Yanks out there), so doesn't look like I'll get the chance to move much this weekend including the parts for the groundskeeper chassis.
Also next week we have the Sydney Mini Maker Faire on which the hackerspace I belong to (RoboDojo Makerspace) is attending so I'll be busy that weekend also, meaning that unfortunately I won't have any decent photos up in time for the close of this round of voting for the Hackaday Prize.
One of the projects I'm completing for the SMMF is an automated Nerf sentry gun. Another of the Sydney hackerspaces likes to wear T-shirts with their logo on it to these events, so I'm going to make my sentry target that logo on the day, mwuhahaha. No bad blood between us, it's all just in the spirit of fun. The sentry could eventually become part of the groundskeeper to target unwanted pest in the yard (unlikely, but I figured keep this post relevant to my RoboWillie project).
Actually it's pretty funny, whenever I say the name of my project I have a little giggle. Willy here in Australia is a slang term for a certain male organ, so having a robotic one... well I digress!
Anyway... until I get the chance to get the parts over and start taking photos etc. I'll have plenty of time to keep planning and get back to working on the ROS installation for the onboard PC. It's fairly standard installation but I just need to make sure I install the correct libraries for the 3D camera and the LIDAR scanner. Also I'll use this time to make an introduction video for the entry requirements, talking on film is a little out of my comfort zone, but hey, it needs to be done!
That's all for today, next update should hopefully include the video.
-
System Design
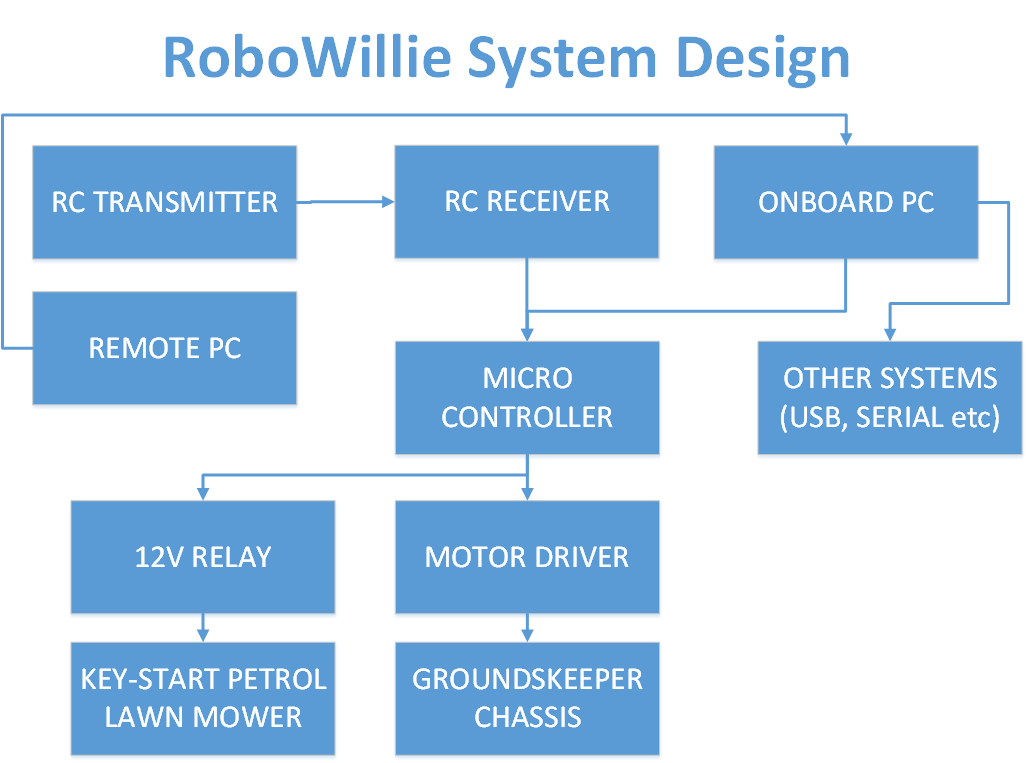
08/07/2014 at 00:38 • 0 commentsSo while I won't get the chance to actually work on RoboWillie until the weekend at the very earliest, I can at least begin to explain a little more about how he will work. It's good that one of the requirements for the next stage of TheHackadayPrize is to have these documents as it gives me another incentive to document the project in more detail.
![]()
Hopefully you'll be able to follow along. Obviously this is a very high level design view and the actual processes are a little more complicated than just plugging everything together, however I'll do my best to explain.
This is a dual control system, with the RC always being able to take control over the automated functions. This is important for several reasons. Firstly, it's a safety control. Should the robot decide to do something it shouldn't, the operator can take control of the situation. Secondly, it's handy for times where you just want to do it yourself or haven't programmed in a behaviour yet (one off tasks etc). Finally, I'm hoping that it can be used to teach the robot behaviours, similar to a macro recording.
The RC interfaces directly with the microcontroller to output signals to the motor driver and a variety of subsystems. One of these subsystems is a simple relay that will be connected to the key-start circuit of the mower so that remote start is a button press away on the transmitter! The other major function of the micro is to talk with the motor driver and provide a method of steering the chassis. I have two 500W motors that will be used to steer using tank steering.
There is also the option for the remote PC to teleop the robot over WiFi either directly steering it, or by issuing commands to perform a certain task. ROS allows bidirectional commands/feedback so some of the processing could also be performed on the remote PC reducing the need for a powerful onboard computer. This reduces weight and size considerably.
The onboard PC is then responsible for interfacing both with the microcontroller and other systems which can be run over USB or serial. An example is the Hokuyo LIDAR that I will most likely be using for obstacle avoidance/guidance. One of the future addons, a robot arm, will also interface over USB to the onboard PC for more intricate tasks such as egg collecting.
Well that's all for now; I'll try to get a video up over the next couple of days with more of an introduction to the robot.
-
The Beginning
08/06/2014 at 03:24 • 0 commentsSo I figured I'll start by saying where I'm at so far. I've been planning this project for several years, making a few adjustments in both what it's eventually going to achieve, and how I'm going to do it.
I now have a fairly concrete understanding of what I will achieve in Phase 1 and how I'm going to do it. I have the mower, I have the electronics, I have the metal needed to weld together a chassis. Now I need to put it together!
Time is the biggest killer for me as it really only leaves weekends to work on it. I've also recently moved house so am also in the process of settling in. But I figured putting it up here on HaD projects is the best way to keep me motivated as it allows everyone to see my progress (or lack of ) giving me a kick in the butt if needed to get working on it again.
 praetorian

