Close
0%
0%

Tool Switching - Multi Extrusion

A scaleable approach to multi extrusion, easy to adopt in most CoreXY/H-Bot printer designs.

Similar projects worth following
Single and dual extruder FDM printers are commonly available these days but machines with support for 3 or more hotends are still hard to find. The current approach to dual/multi extrusion is either a XY carriage moving multiple hotends or a single hotend with several filaments feeding into it (eg. E3D Cyclops, Diamond Hotend, Prusa i3 MK2 Multi Material), Both designs have their own limitations with regard to scaleability. For the first it is size and weight of the carriage, the second requires all materials to be within a similar temperature range.This design overcomes some of these limitations and requires only off the shelf components (pins, bushings, magnets), 3D printed parts and most importantly no additional motors, servos or other electrical components. Modification of most CoreXY/H-Bot style printers should be possible.See https://youtu.be/eOKCvtaMa08 for a demo

Motivation

In the last years the filament market was flooded with a lot of innovative materials, like metal or wood filled, soft touche and similar to get a specific surface finish onto parts or fiber reinforced, magnetic, electrical conductive, temperature or wear resistance, low friction filaments for engineering requirements. All these filaments come with their unique set of downsides they might be brittle, hard to get to stick to the build plate, slow to print, warp or are simply expensive.

Being able to combine several materials in one part opens up a whole new universe of design possibilities. Mechanical parts that combine ridged and flexible elements in one object for eg. hinges that don't require assembly. Cases for PCB's with flexible and translucent elements to expose switches and board mounted LED's, covered in a layer of copper or brass fill plastic for the desired steampunk look. 

Even single material prints can benefit for multiple hotends, as it allows to keep several filaments loaded and ready to use (setup time) or have different nozzle sizes available without screwing around (sorry for the pun).

From my opinion, a printer that is easy to work with and almost always ready to just start with the next part should support

  • two 0.4 mm hotends with standard filaments, eg. PLA and either PET-G or ABS
  • one 0.4 mm hotend with dissolvable support material, eg. PVA, HIPS or E3D Scaffold
  • one 0.4 mm for an additional engineering or aesthetic filament
  • one hotend with a smaller nozzle for finer detail prints
  • one hotend with a larger nozzle for faster prints

Goal

The intention of this project is to spread the idea and start people thinking about further possibilities and better implementations. Providing a ready made product is a very specific Non-Goal. Instead I want stick to the true spirit of hacking and provide building blocks to help other people to integrate this as a feature into existing CoreXY printer designs and toolchains. My tools of choice are OpenSCAD for CAD and Cura for slicing.


Implementation

The main design criteria for the proposed solution are

  • should be easy to build, without access to a special tools or a machine shop
  • should work without changes to existing printer firmware
  • should not require additional motors, servos etc
  • should only require electronic components directly related to additional hotends


Current state

  • The design is verified to the point that it is actually possible to print usable parts (not just tug boats)
  • STL's and OpenSCAD files are available here for download
  • A plugin for Cura to add the required G-Code commands to load and unload tools is available


Ongoing Tasks


Future tasks

  • Support for other slicers. Until that a generic post processing script would be nice
  • Better support for nozzle offset calibration, maybe as plugin for the slicer or as a standalone tool.
  • Provide carriage and tool rest designs for off-the-shelf printers
  • Airtight filament spool container, with permanently attached stepper and hotend, for moisture sensitive materials. 

inspection_camera-case.stl

sla - 816.69 kB - 09/24/2017 at 17:45

Download

inspection_camera-diffuser.stl

sla - 80.95 kB - 09/24/2017 at 17:45

Download

inspection_camera.scad

x-openscad - 2.15 kB - 09/24/2017 at 17:45

Download

Hotend-v2.scad

Main CAD file

x-openscad - 14.79 kB - 08/23/2017 at 17:11

Download

bushing.scad

x-openscad - 4.91 kB - 08/23/2017 at 17:11

Download

View all 14 files

  • About repeatablity of tool switches

    rolmie10/20/2017 at 21:03 1 comment

    The calibration tool is feature complete, but requires one more round of code refactoring.

    I recently added a feature to test the whole design for repeatablity. The basic idea is to to take a reference picture of each nozzle and compare it to a picture take after unload and load.

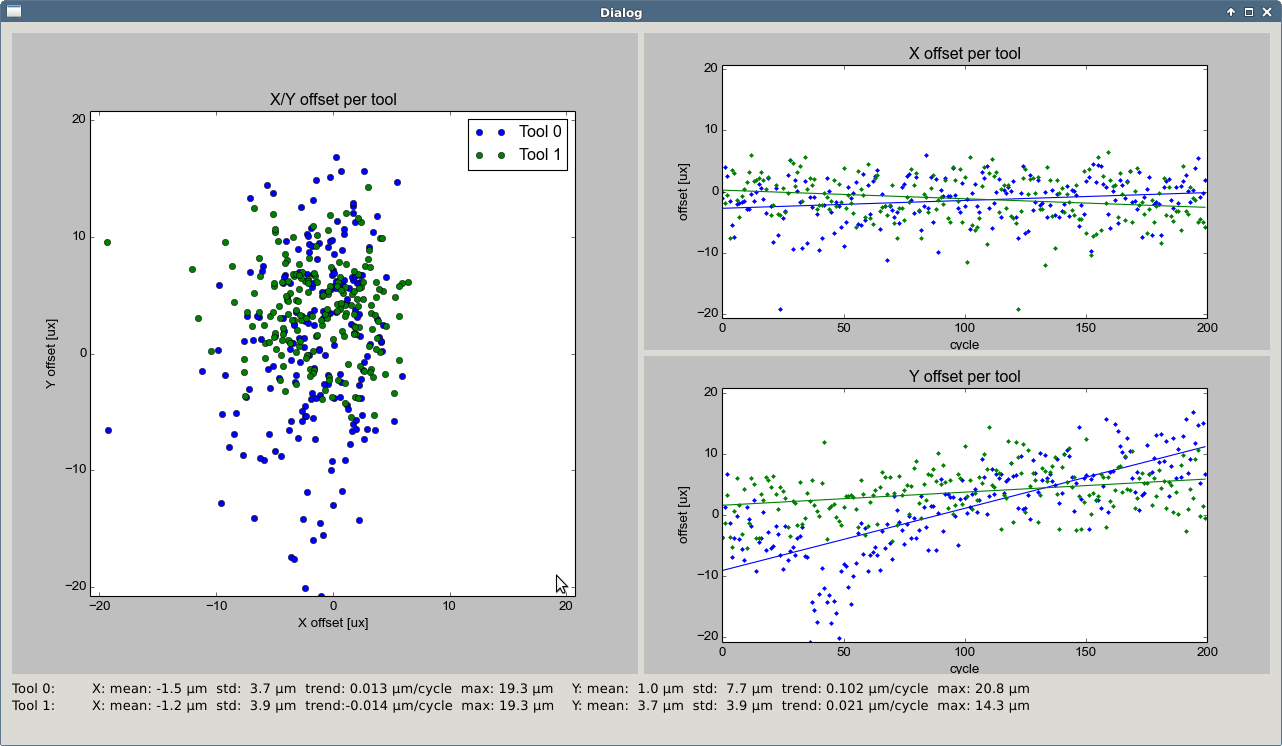
    OpenCV provides a function called phaseCorrelate which estimates the shift between to pictures in (sub)pixel. The process is calibrated by moving the hotend a known distance in the beginning. The camera I'm using has about 4.2µm/pixel resolution.

     Below are the results of 200 load/unload cycles with two tools in the sequence T0 -> T1 -> T0 -> T1 -> ... . The plot on the left shows all nozzle positions, while the right part is X and Y separated over time. 

    In short, the repeatability is in the ballpark of 20µm over 200 load/unload cycles which is identical to a 200 or 400 layer print (depending on the slicer). The Y axis seems to have a steady trend. The reason is yet unclear to me. It can't be step loss, because this would affect both tools. Thermal drift (the test lasts about 40 Minutes) maybe? Overall I'm not concerned about it, it is good enough for the purpose.

  • Update: Cameras and Calibration Tool

    rolmie09/24/2017 at 20:30 0 comments

    Only a brief update, as it is late already, but I'm eager to get a few news out.

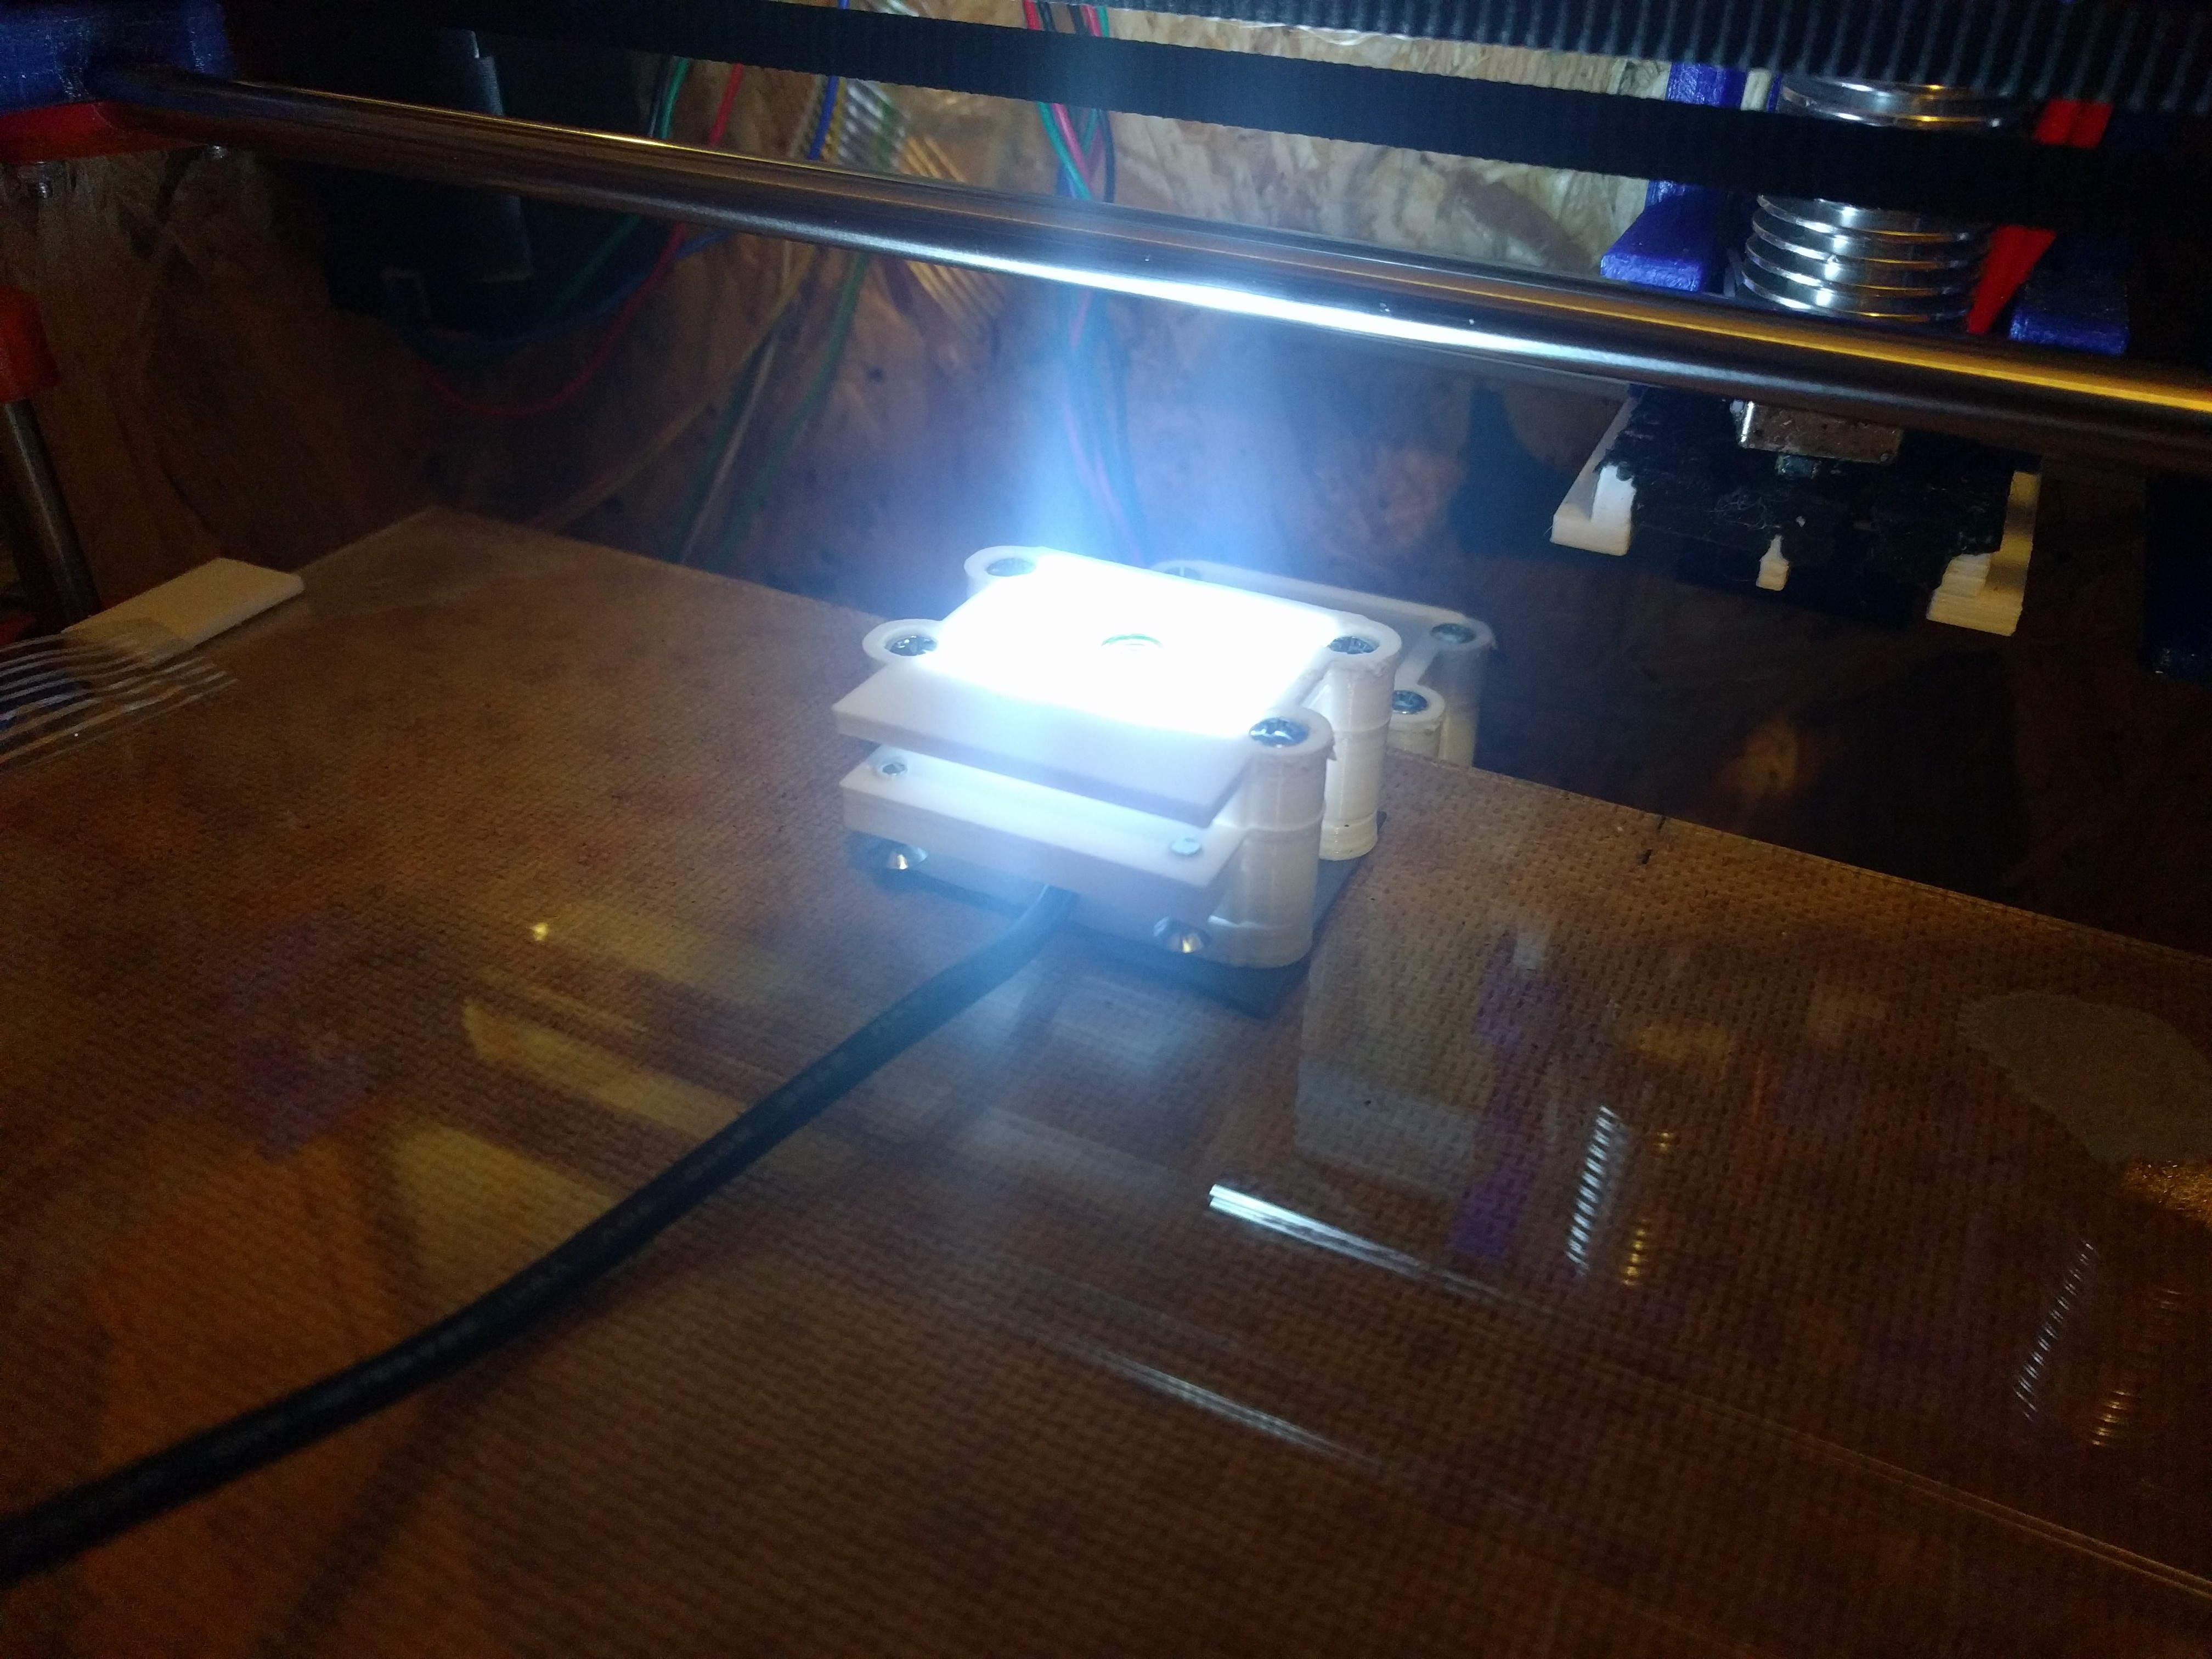
    I just uploaded CAD and STL (case, diffuser) files for the inspection camera. The cover is a dual extrusion print with transparent PLA used as light diffuser. I'll add detailed instructions in the next days.

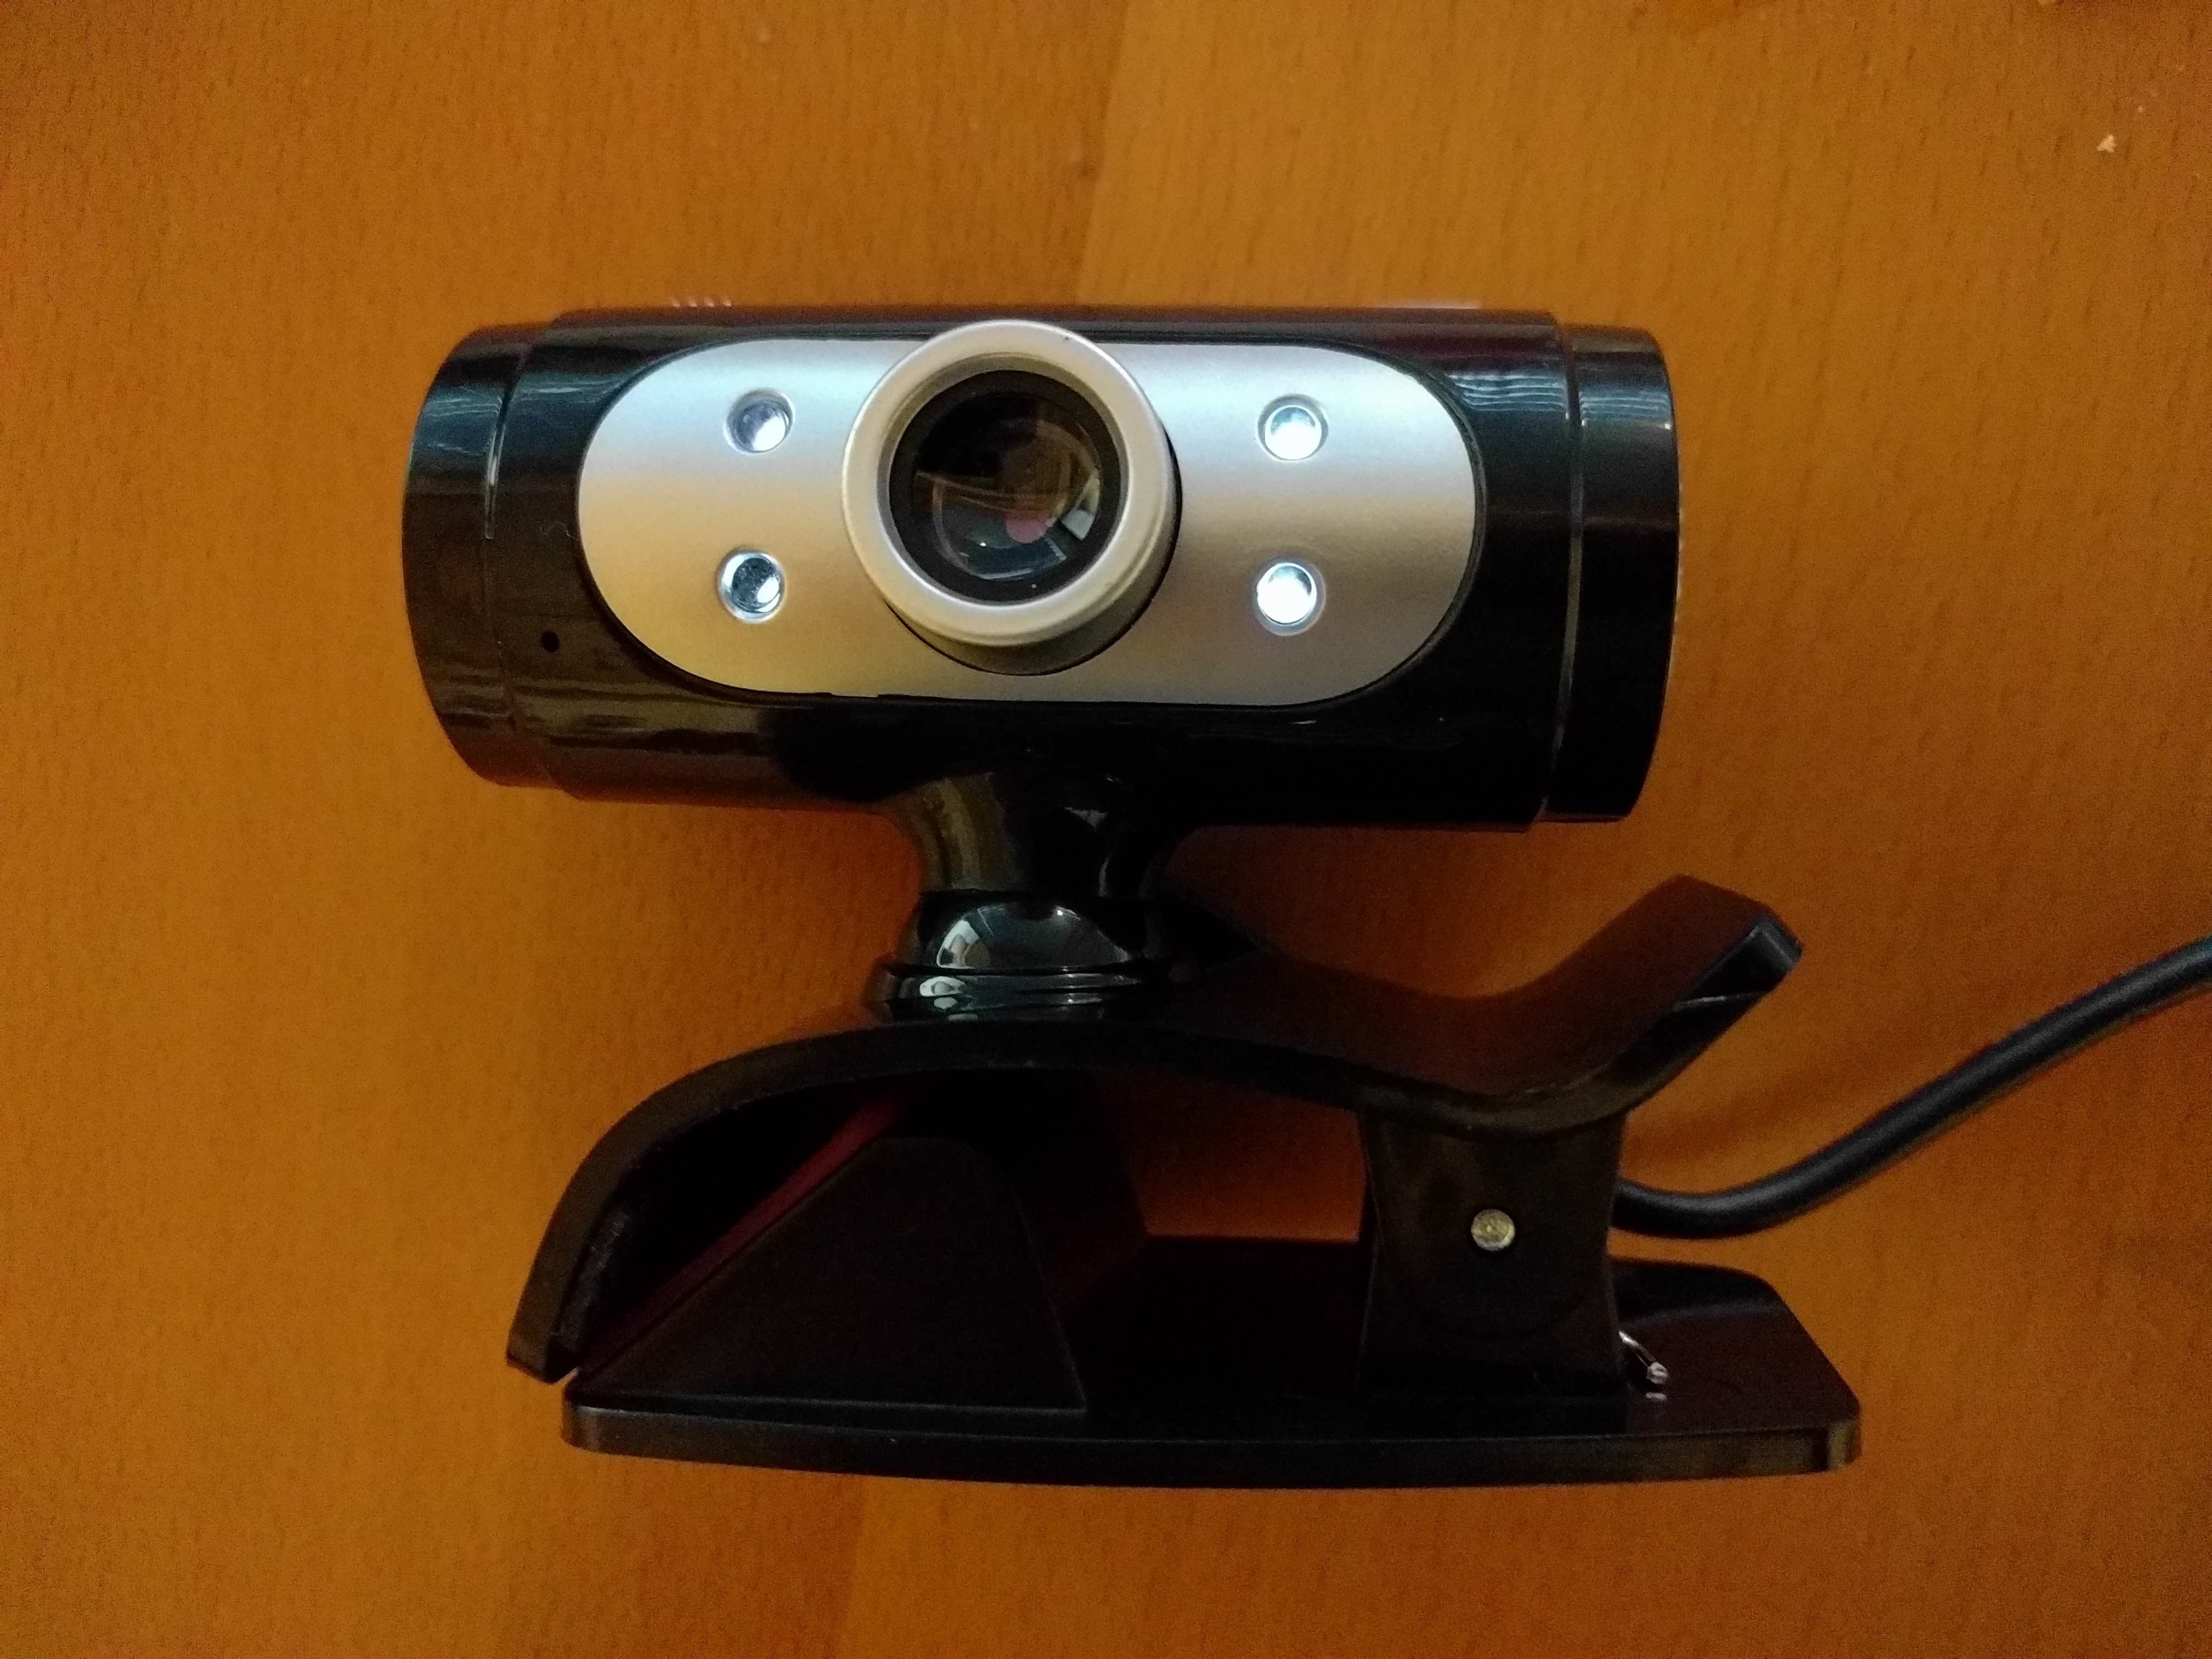
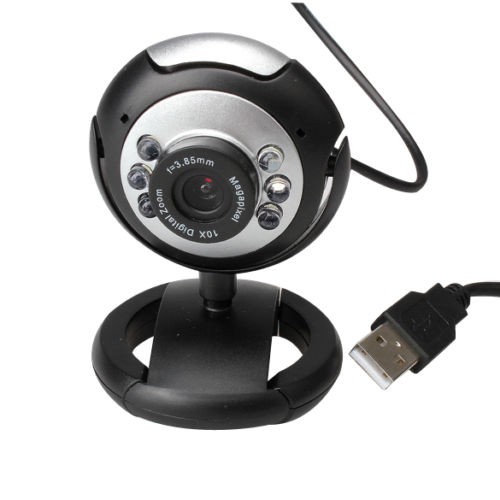
    The case is compatible with these two cameras (amazingly PCB dimensions, mount hole distances etc are the same). The first one is available for about $12. It features an 720P chip with support for MJEPG compression, which allows for 30fps in all situations.

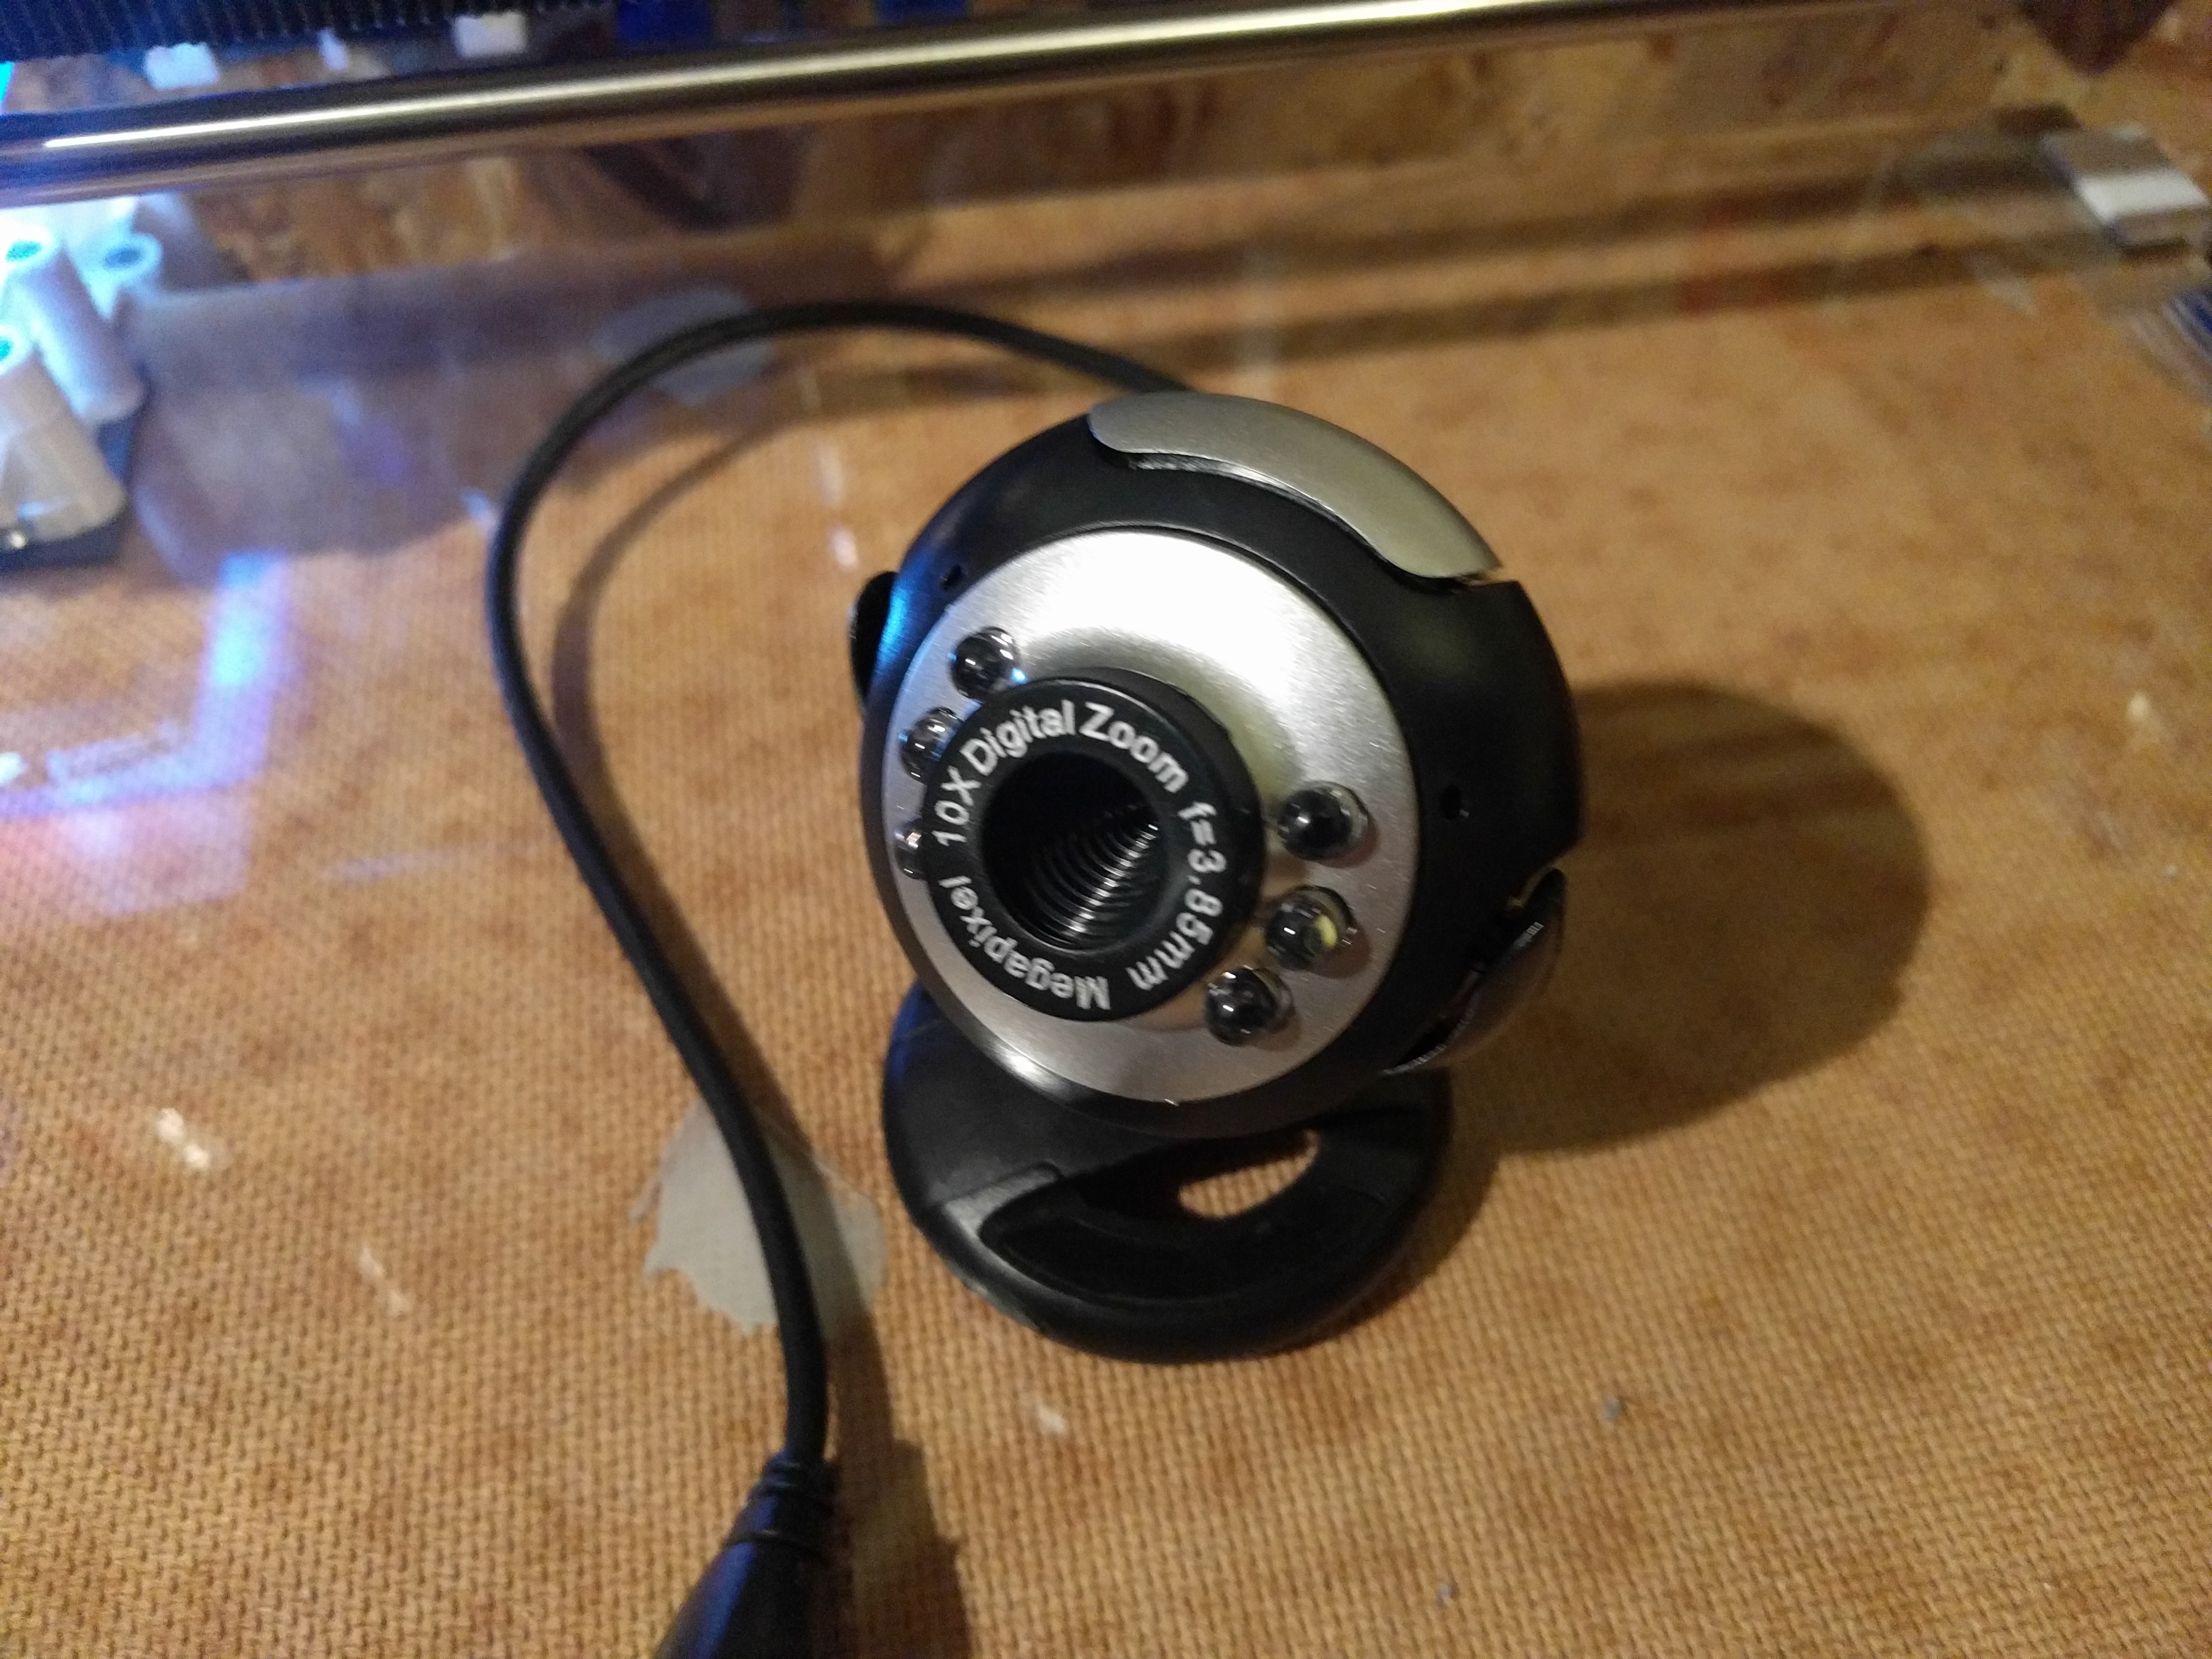
    This one is available for about $6, but only supports 640x480. The frame rate sometimes drops down to about 5 fps and the overall image quality is blurry. It is good enough for the job, but not convenient to work with.

    The calibration tool is also slowly progressing towards being feature complete. The UI is now much cleaner an easier to work with. It keeps a reference image of each nozzle after registration which is later used to estimate the offset after a reload and to estimate the resolution of the camera (µm/pixel).

    A few TODO's are left, eg. nozzle types are still hard coded, significant offsets in are Z difficult to work with, offset measurements are given in pixel instead of µm ... 

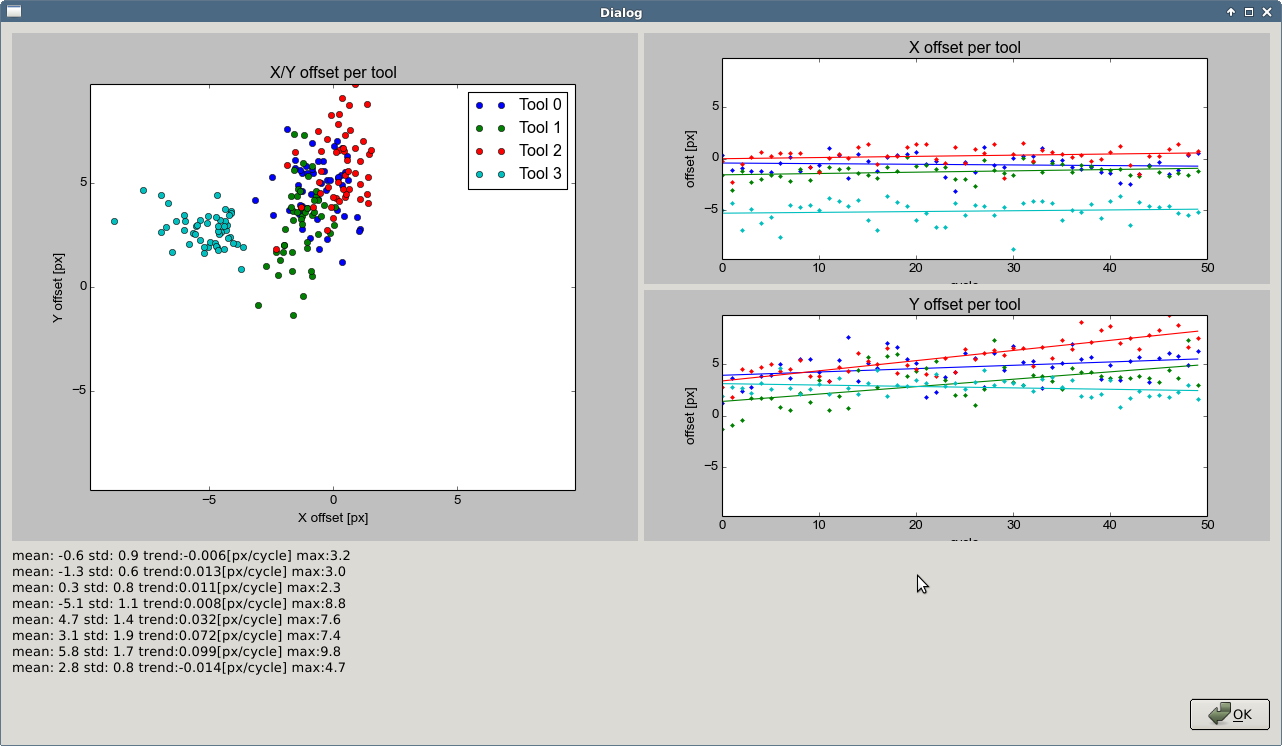
    My favorite feature is the repeatability measurement job. All tools are loaded repeatedly and the reference image is used to estimate the XY offset. The plots below are in pixel, the camera resolution is about 4.5µm per pixel, each tool was loaded 50 times. "Tool 3" is a reference point on the carriage, unaffected by tool changes.

    It is very useful while tuning, eg. I figured that my printer was loosing steps in Y because I pushed the carriage to hard. I'm a still a bit concerned about the trend in the Y offset of tool 0 and tool 2, investigation is ongoing.

  • WIP - Offset Calibration Tool

    rolmie09/07/2017 at 12:52 1 comment

    The new camera works great and is now permanently attached to my prototyping printer. The camera comes with 6 white LED's, which are still used, but now covered by a thin layer of transparent PLA to spread the light. 

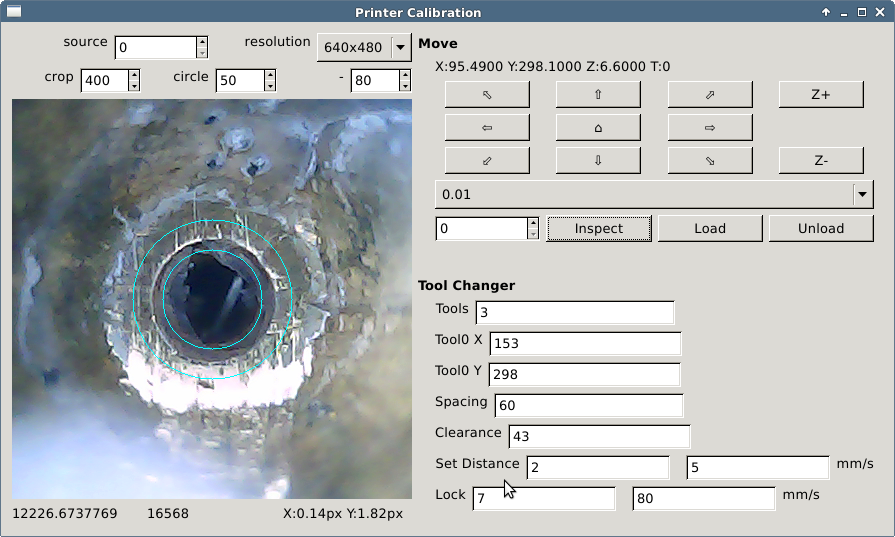
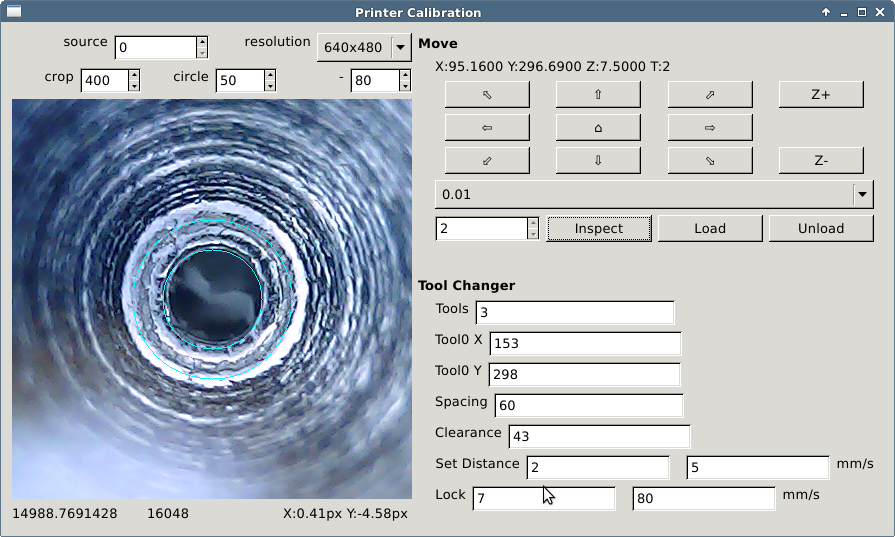
    Better software for calibration is on the way, too. The GUI is pretty horrible mainly because I suck at UI/UX (any UI/UX people around to help out) and I have no experience with Qt.

    Nevertheless, once configured, it is easy to work with. No more accidental crashes, no more attempts of unloading a tool in the wrong position. no more collisions with the camera. Some of the planed features are:

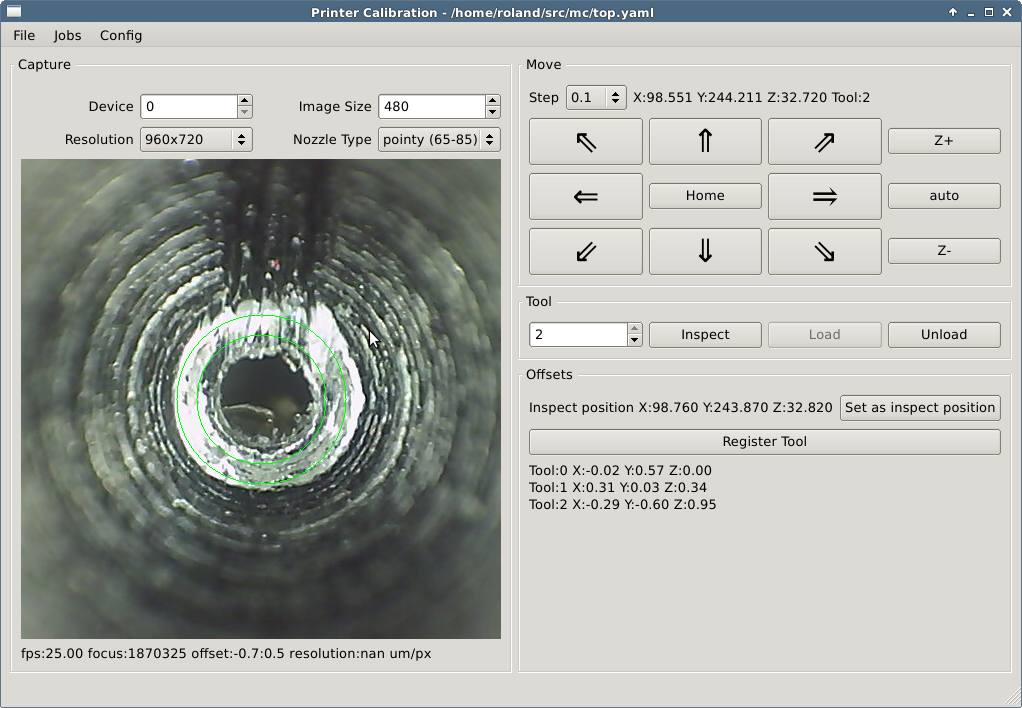
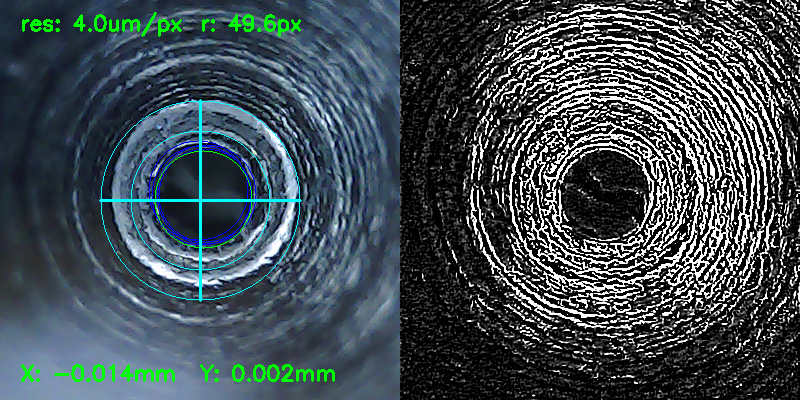
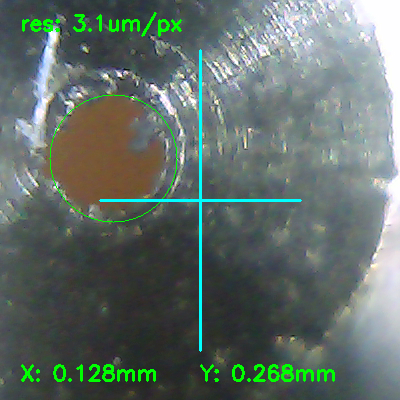
    • XY Calibration: Circle detection works great on new and used nozzle after careful parameter tuning, but so far, the results are very unsatisfying for used nozzles, with eg. blobs of filament in the center. Manual calibration requires less than a minute per hotend.
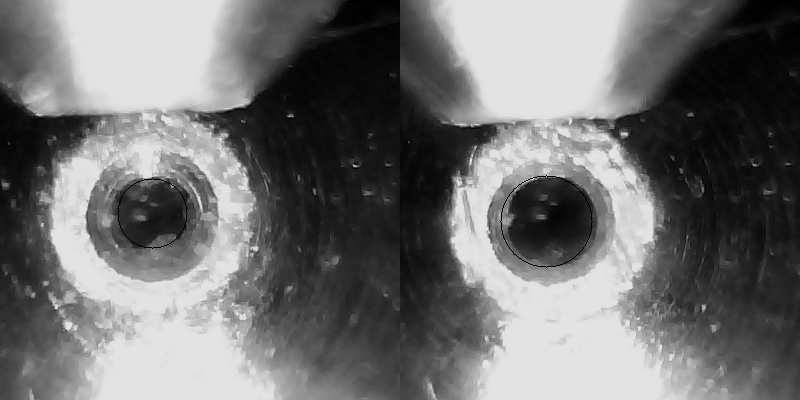
    • 'Auto Focus' Z calibration: I found a good paper about blur blur detection which boils down to compute the variance of the laplacian of an image. The tool restricts the computation to the area enclosed between the two circles. As of now, the result is only shown (bottom left), but it should be possible to automate in a very similar way to 'Auto Focus' in cameras.
    • Testing Repeatability: A reference image of each nozzle is kept and used to estimate the X and Y offset after unloading and loading, by calculating the phase correlation of the laplacian of both, the reference and the current image. I have plans to run some endurance tests, to eg. see if the design is stable enough for 1000 load/unload operations per tool.
    • At least support for Smoothieware and Repetier firmware, but I try to stick generic G-Codes as much as possible.
    • Support for USB and network (untethered) connections to the printers, but no plans for WiFi cameras so far.
    Tool 0, used brass nozzle

    Tool 2, unused stainless steel noozle

    In case you wonder, Laplacian is the second order derivative of a gray scale image. This is commonly used for eg. edge detection etc

  • WIP - Offset calibration camera

    rolmie08/31/2017 at 18:24 0 comments

    UPDATE 2017-09-07: The camera works great even without additional lens, just by shortening the lens holder by about 8mm. Otherwise to much light is blocked of the nozzle at the focal point. I ordered a few more budget USB cameras to see if this is reproducible with others. Stay tuned.


    At the moment I'm using a USB microscope, temporarily fixed to the build plate for nozzle offset calibration (more details). It works, but what I really want is a camera permanently attached to the printer to make it easier to check and verify the current offsets and collect data about the long term stability and repeatability of the tool switching system.  

    The microscope is pretty difficult to integrate, so far I found now way without major downside. First issue is the form factor, it is cylinder about 120mm long and 12mm diameter. Attaching it upright to the build plate would significantly reduce the usable space in Z. Second, the short focal length makes it easy to run the nozzle into the microscope if used horizontally with a mirror (what I'm doing now), as the tip of the nozzle needs to moved below the top of the microscope case. Third the price, it is pretty expensive compared to a simple USB camera and maybe hard to procure as well.

    Thankfully, the internet is full of "USB camera to microscope conversion" guides. And what looks promising is using a simple webcam (640x480) and a lens with a short focal distance, harvested from a green laser pointer.


    The estimated resolution of 3.1 µm/pixel is slightly better than what I got with the USB microscope (about 5µm/pixel). The estimation is based on the diameter of the circle (pixel) and that it is a 0.4mm nozzle.


    The focal distance is about 6-7 mm, enough to keep 2-3 mm safety distance between the camera and the nozzle.

    The plan is to keep the camera module in a upwards looking direction permanently attached to the build plate.  X and Y offsets are still optically calibrated and Z could be done by eg. touching a micro switch with the nozzle once x and y offsets are known (to ensure the nozzle will hit the switch). 

    The only downside is the harvested lens, the specs are unknown to me. I ordered a set of smartphone camera lenses (zoom, fish eye, macro and wide field), maybe one of these is usable as well.

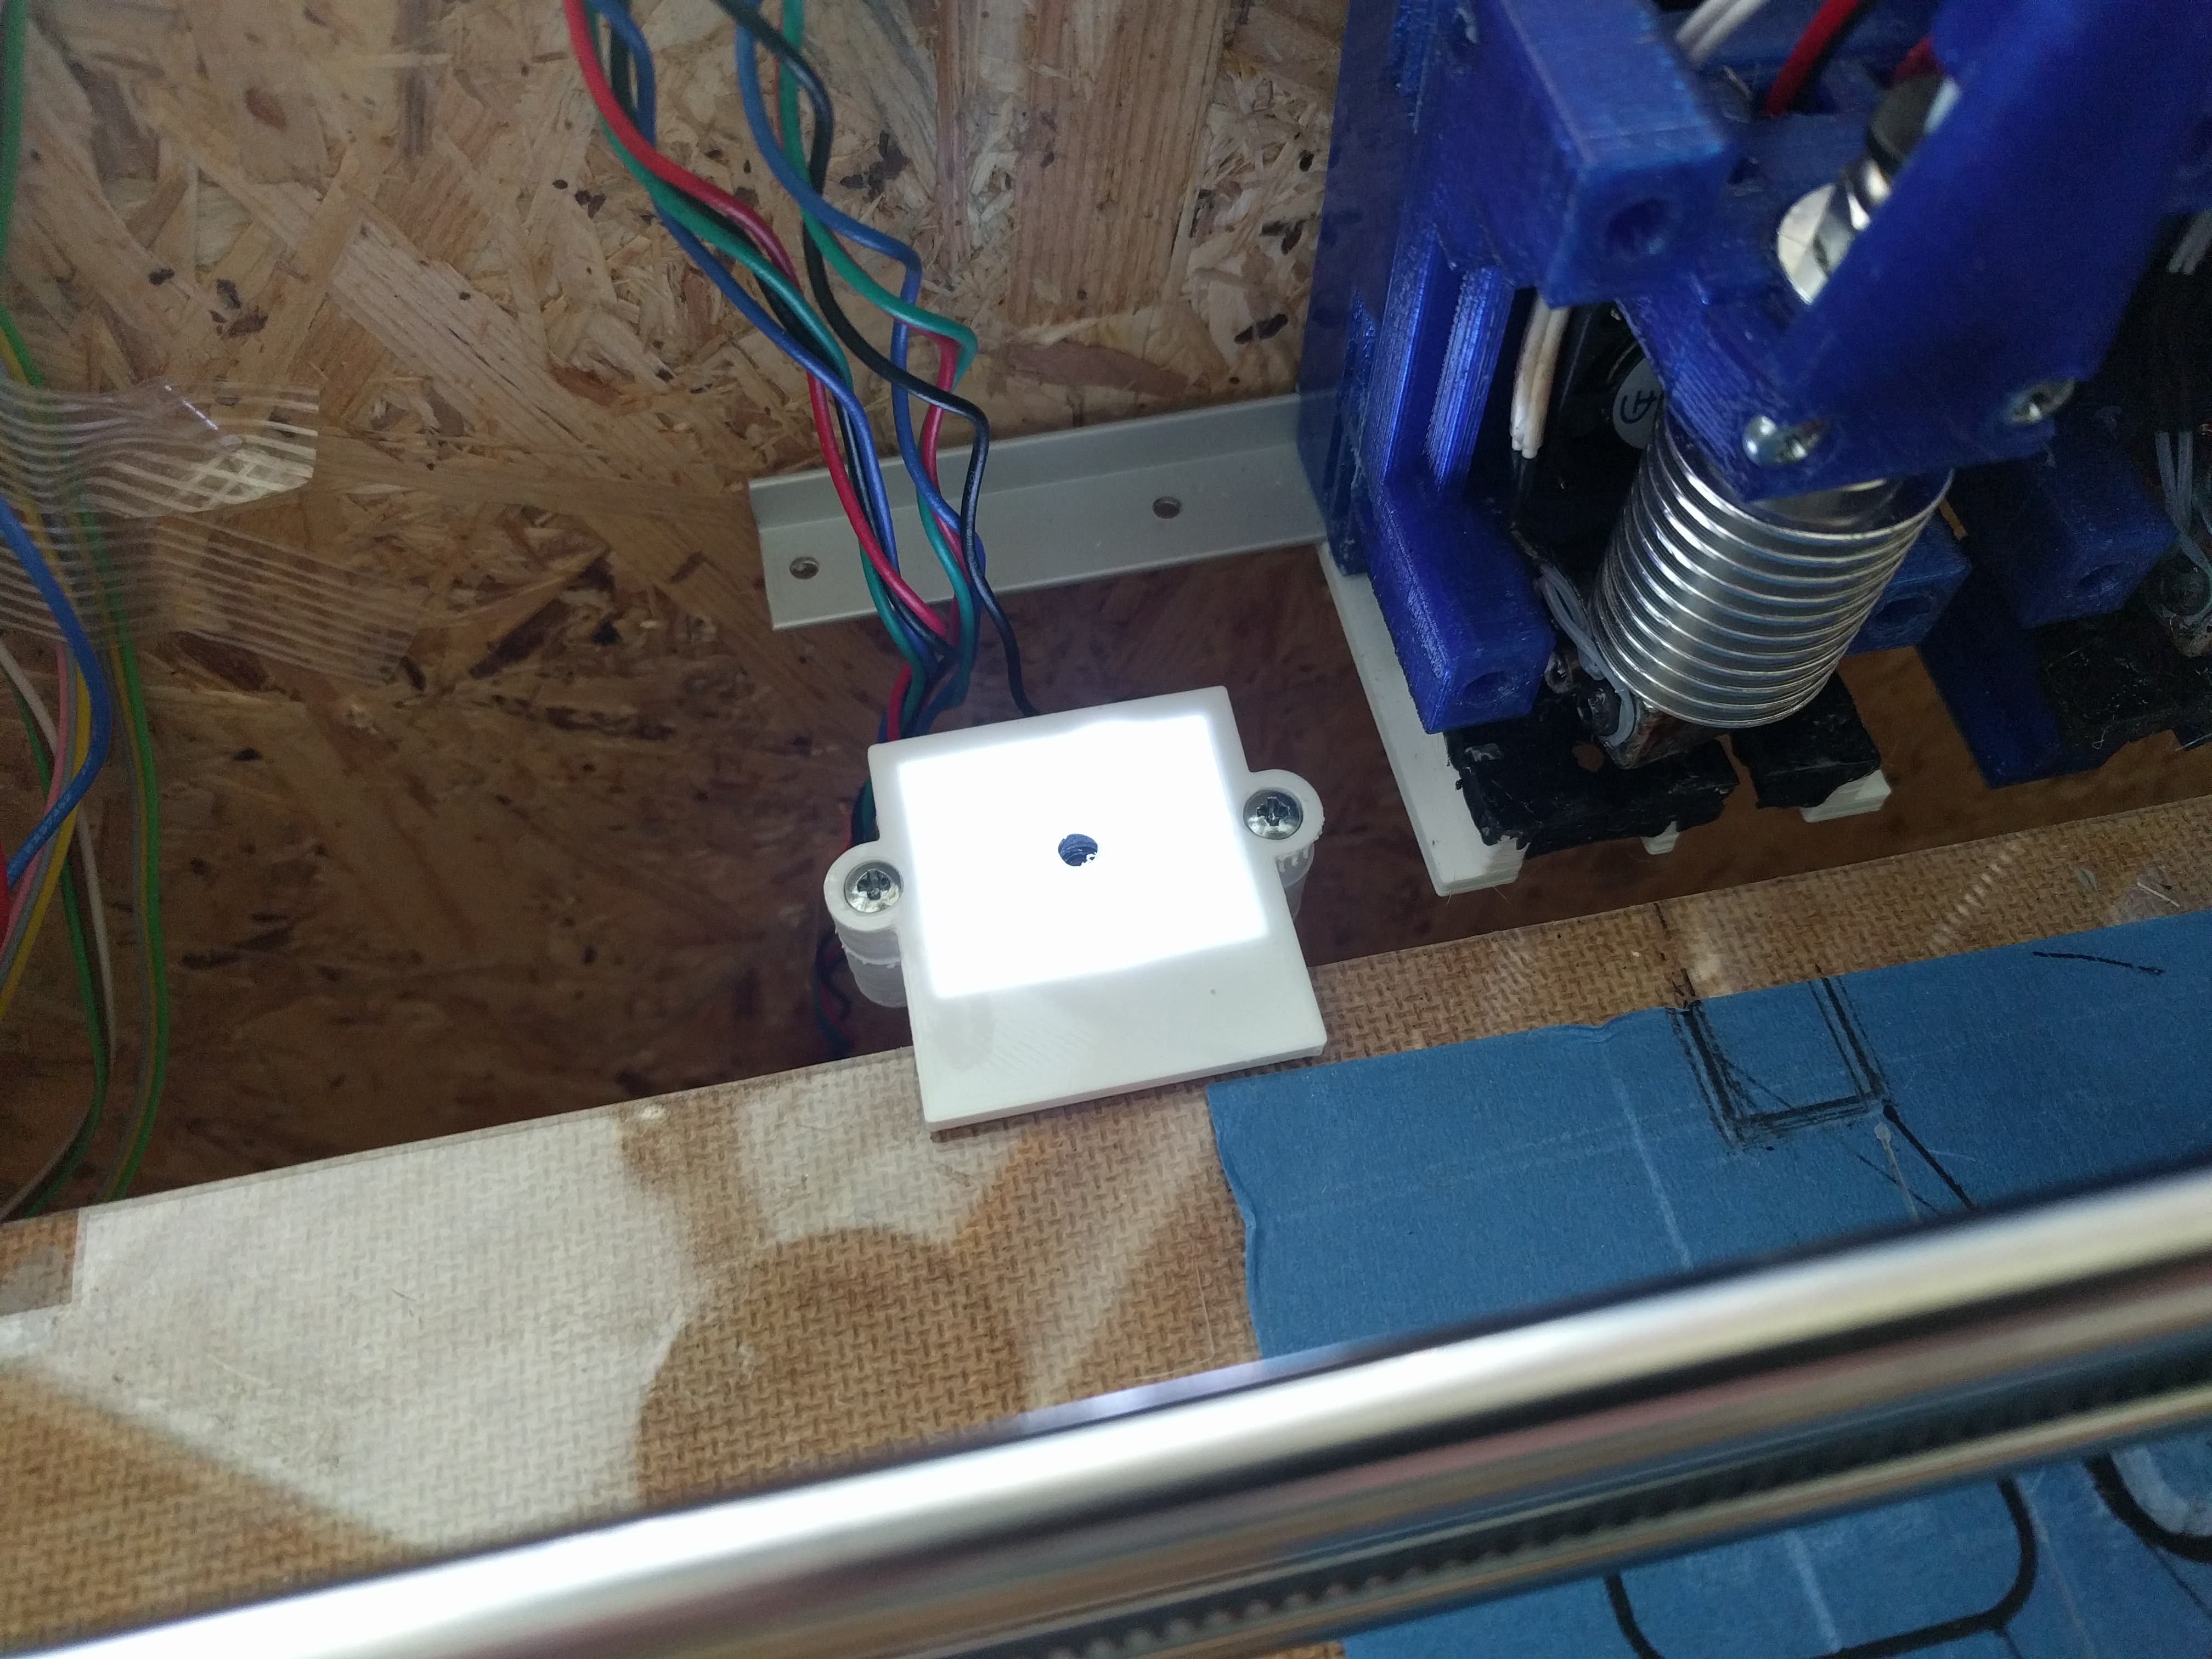
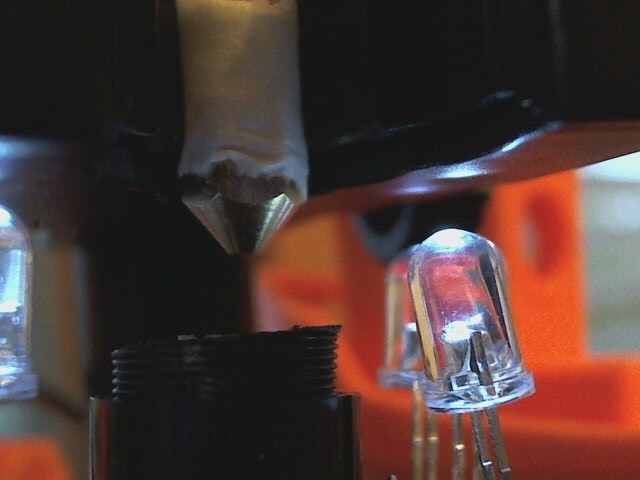
    For reference, a picture of the camera.

  • At Work

    rolmie08/24/2017 at 07:19 0 comments

    Still using only two hotends, but that is only limited by the board I'm using.

  • Redesign - First Print and Parts

    rolmie08/18/2017 at 16:56 0 comments

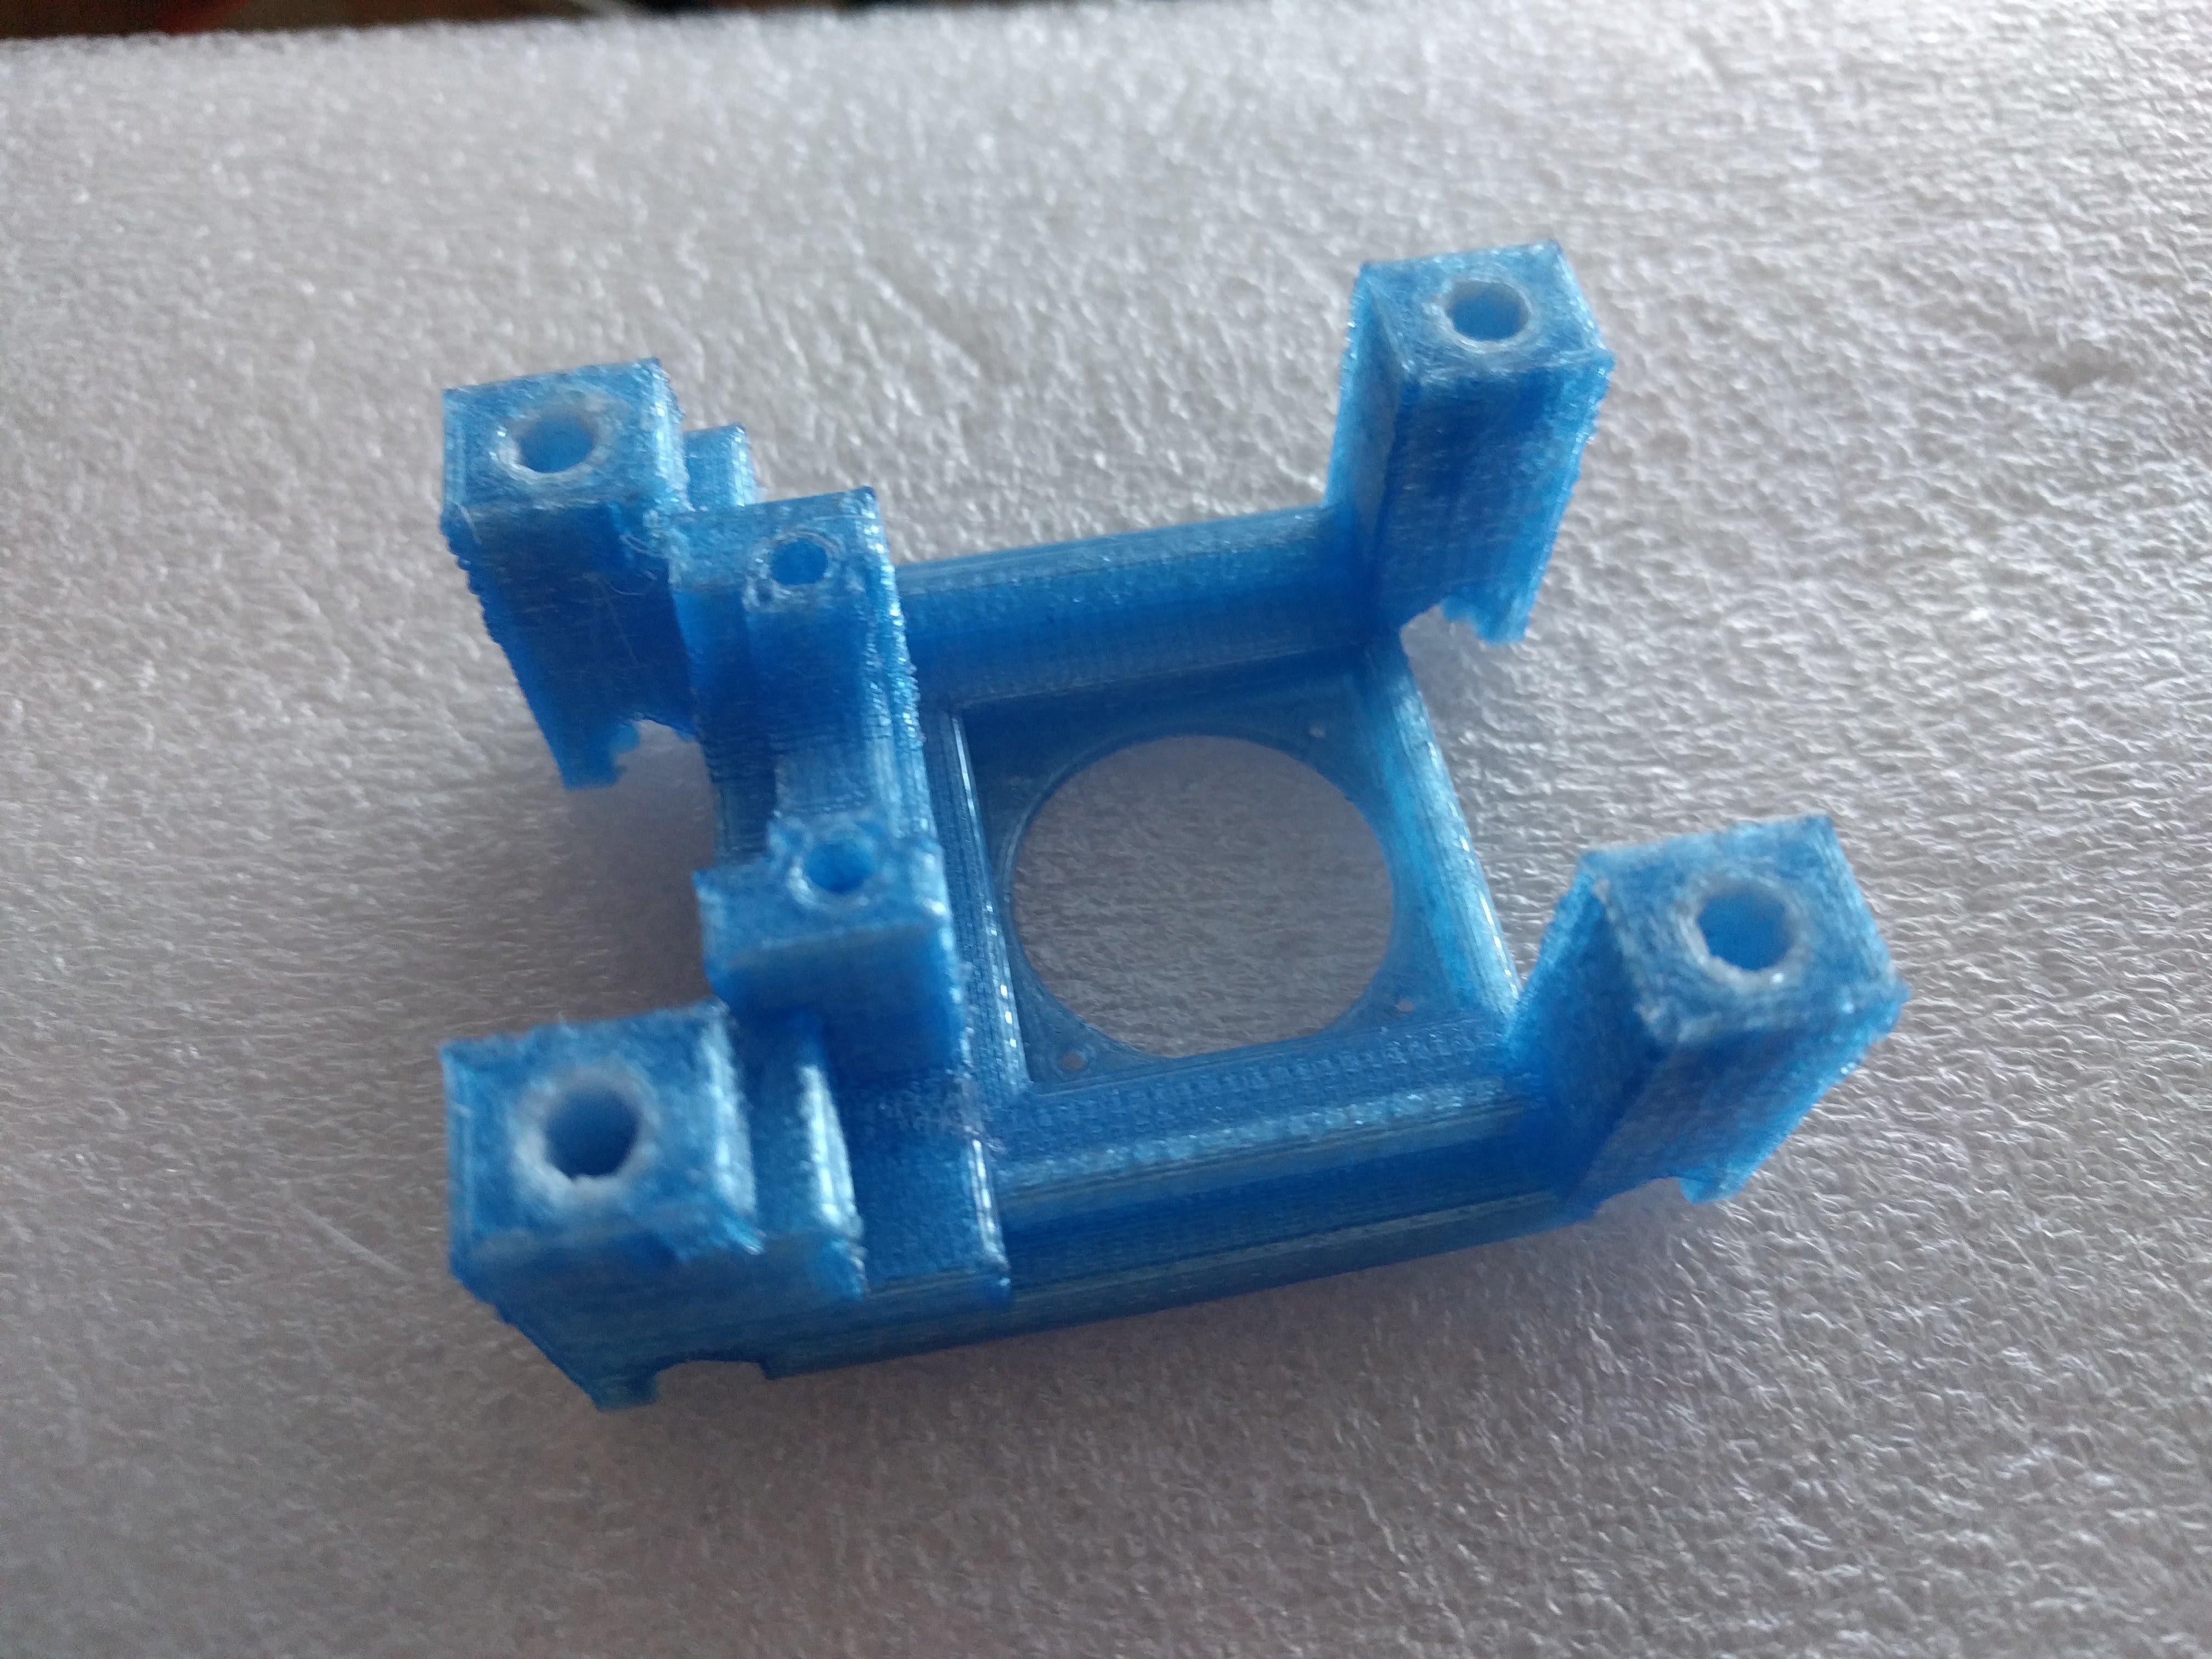
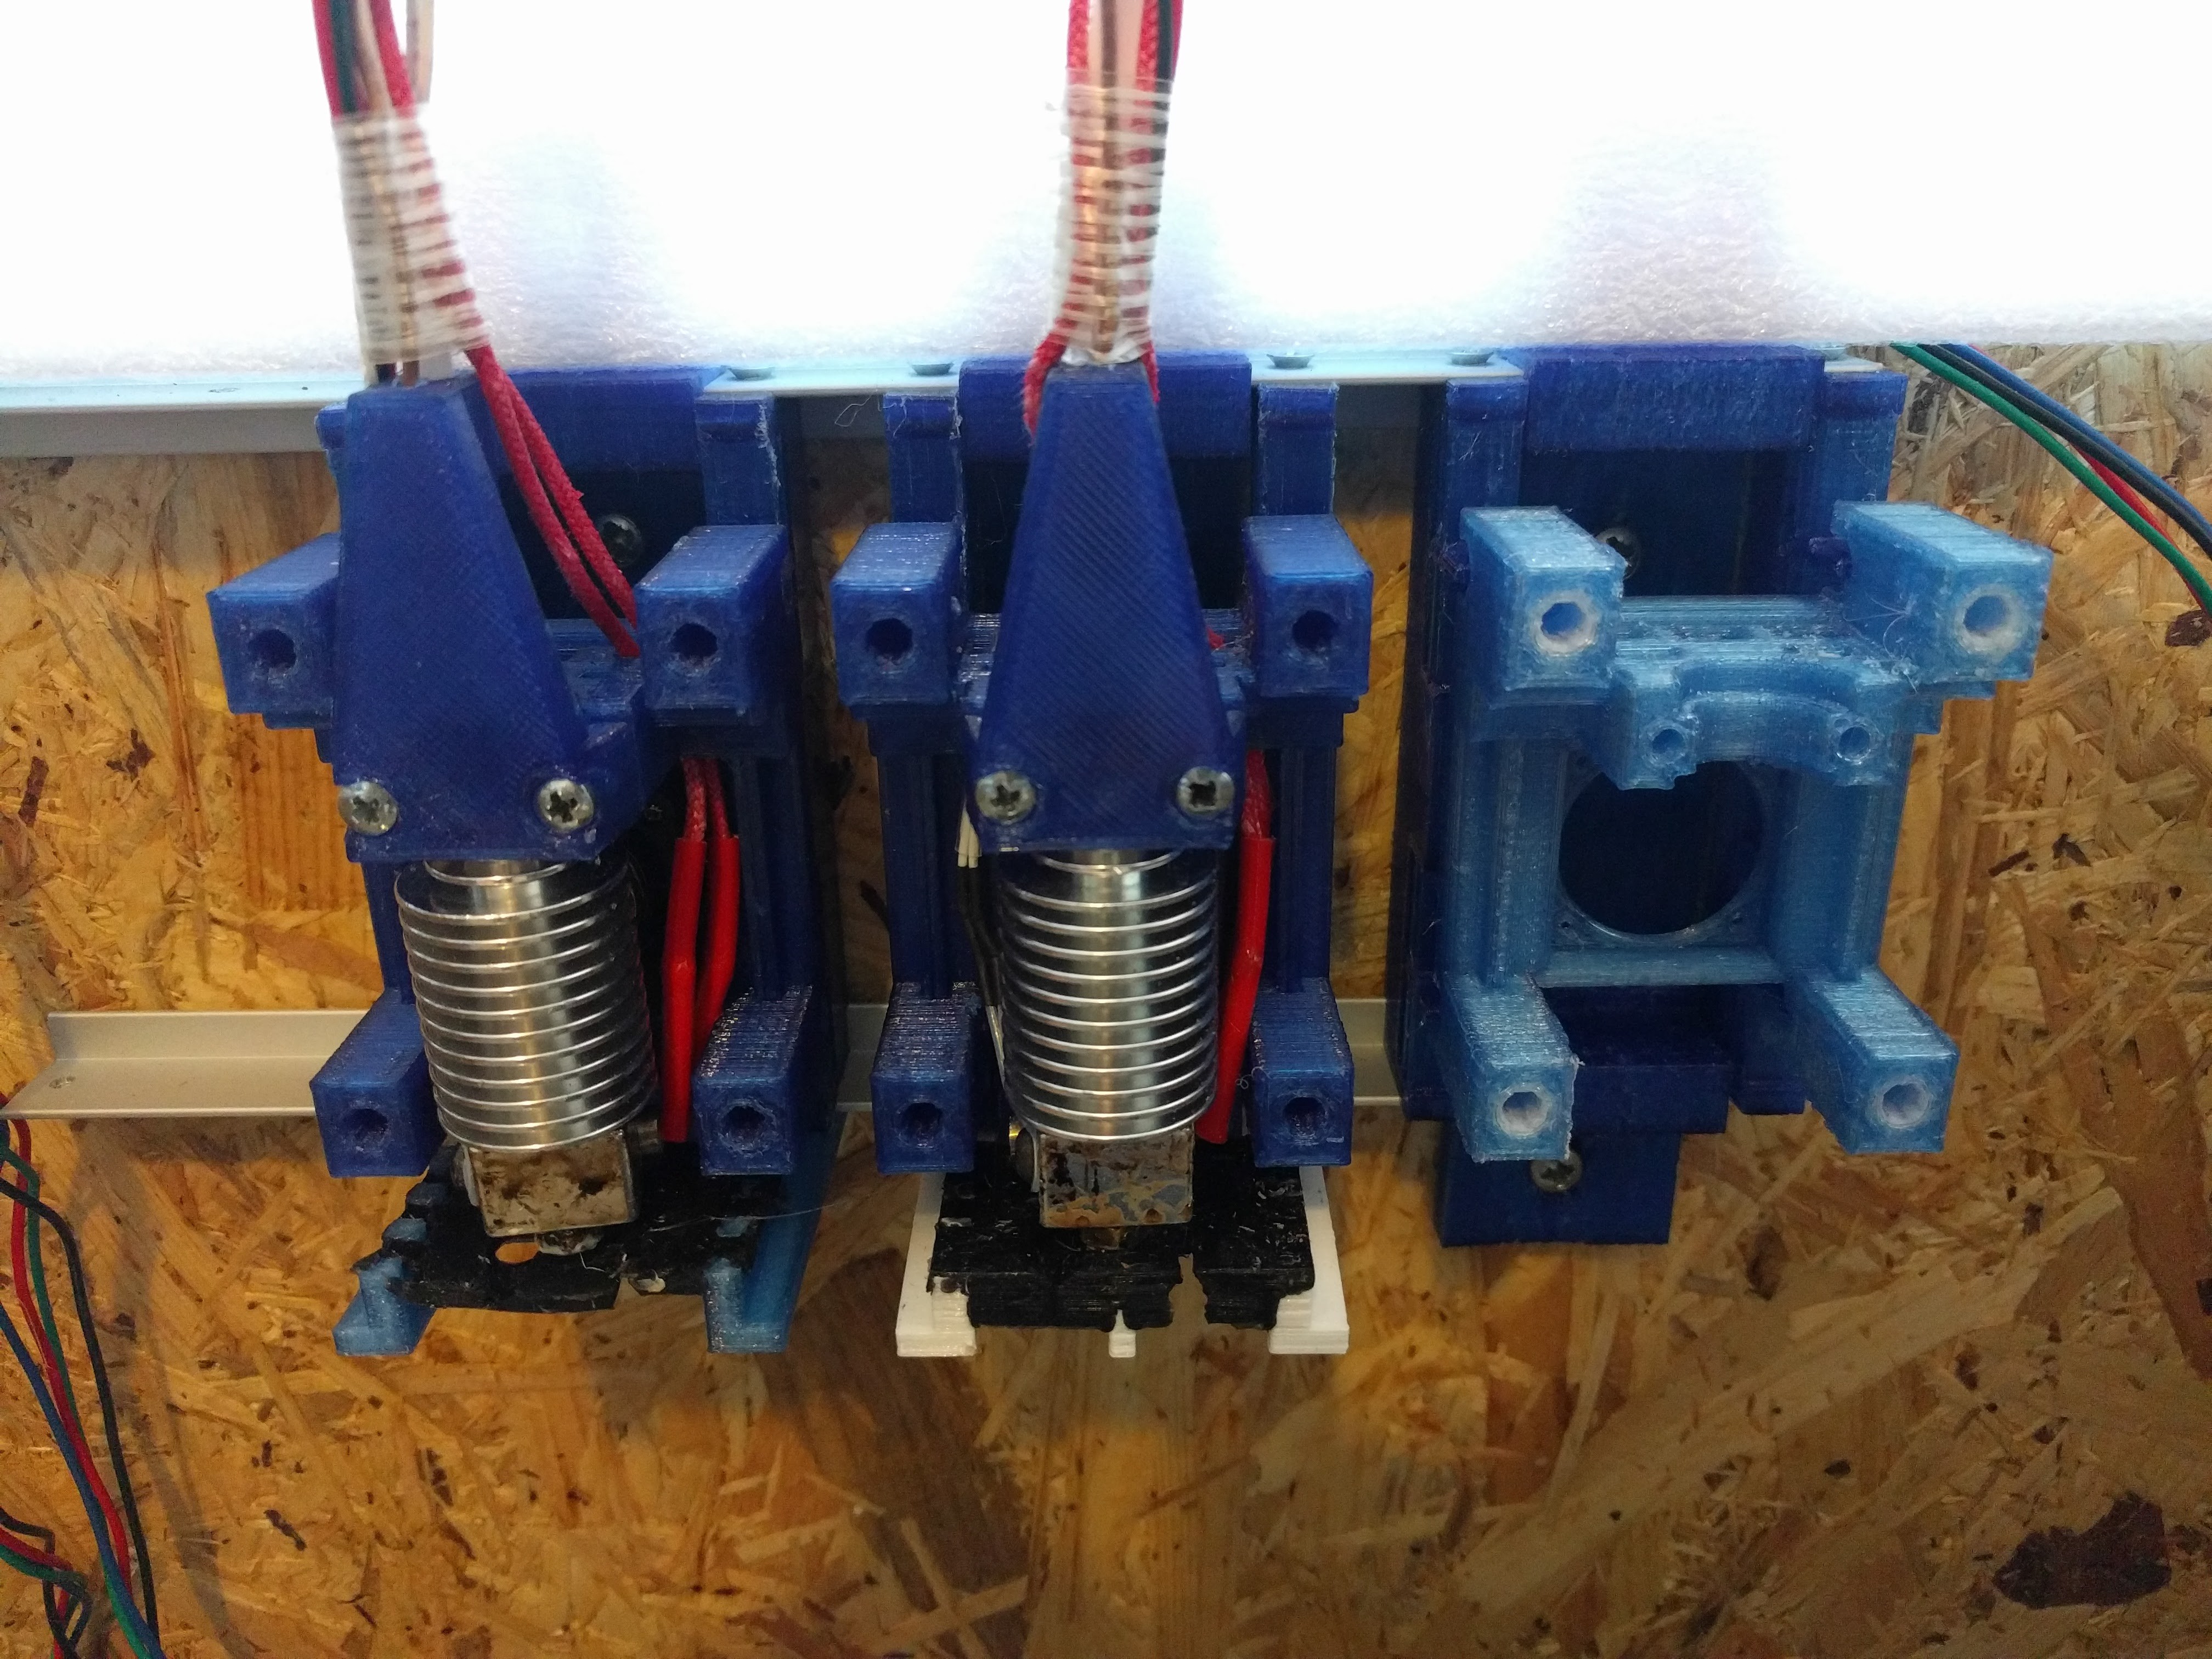
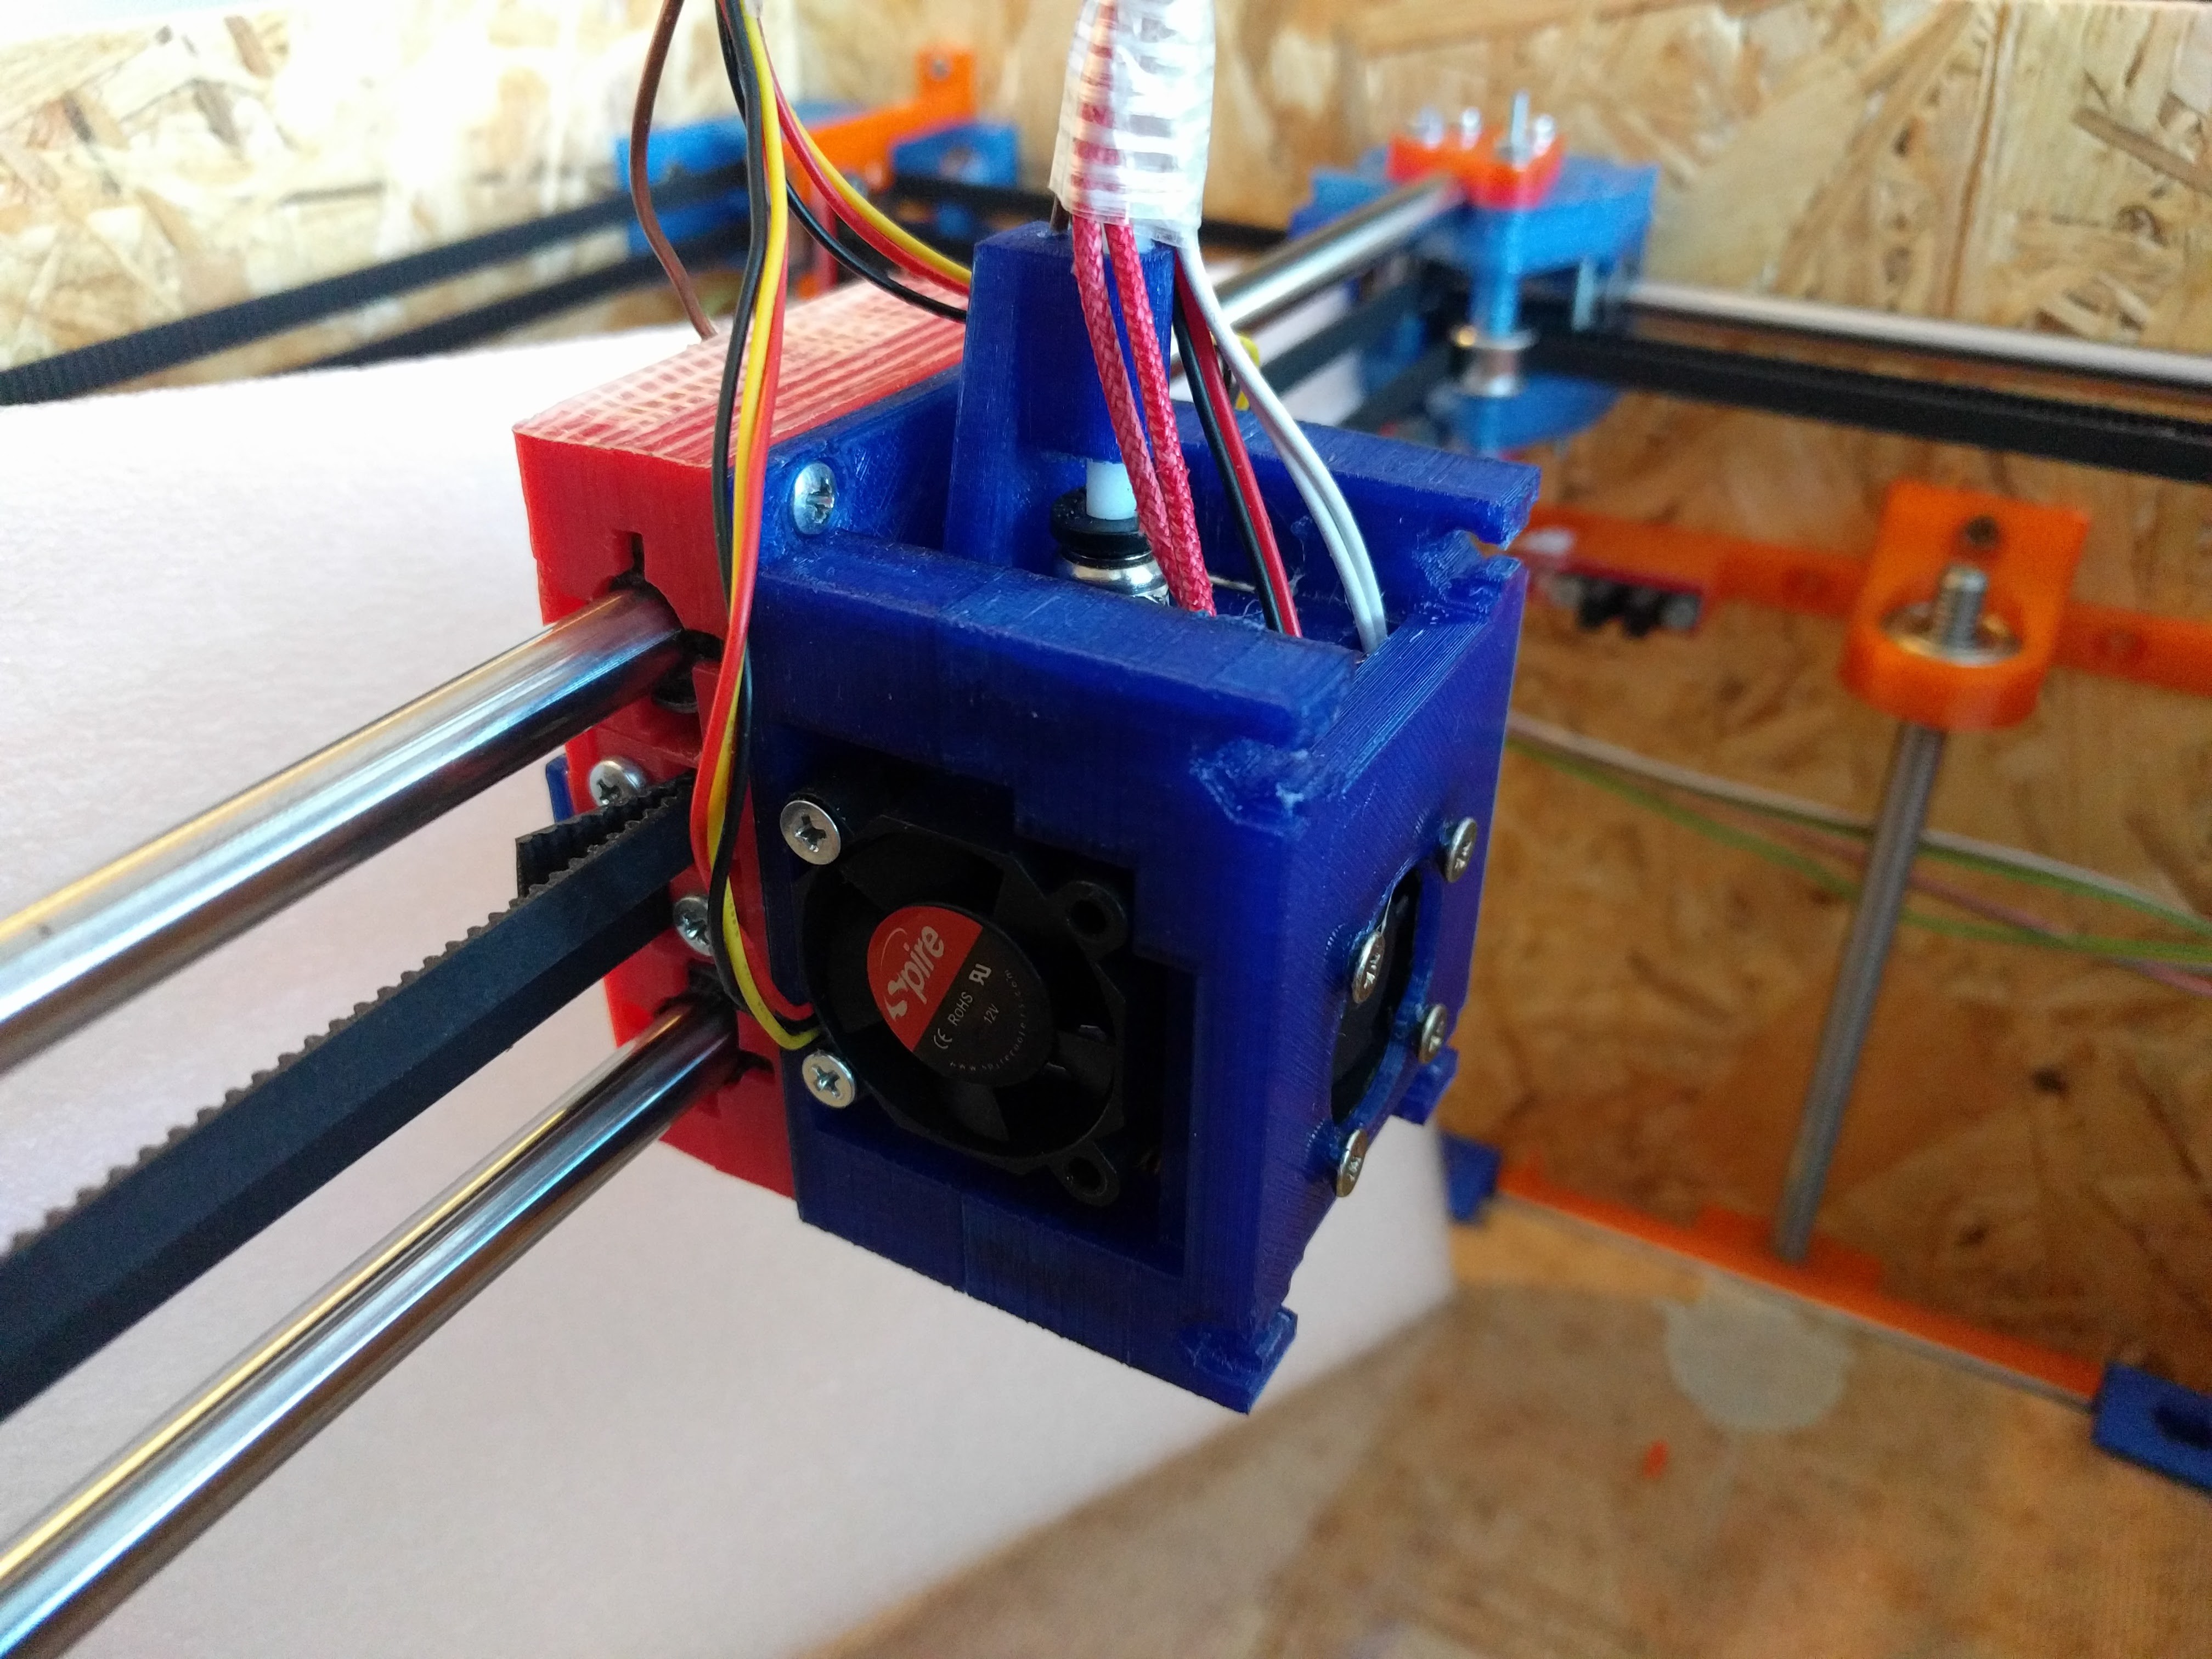
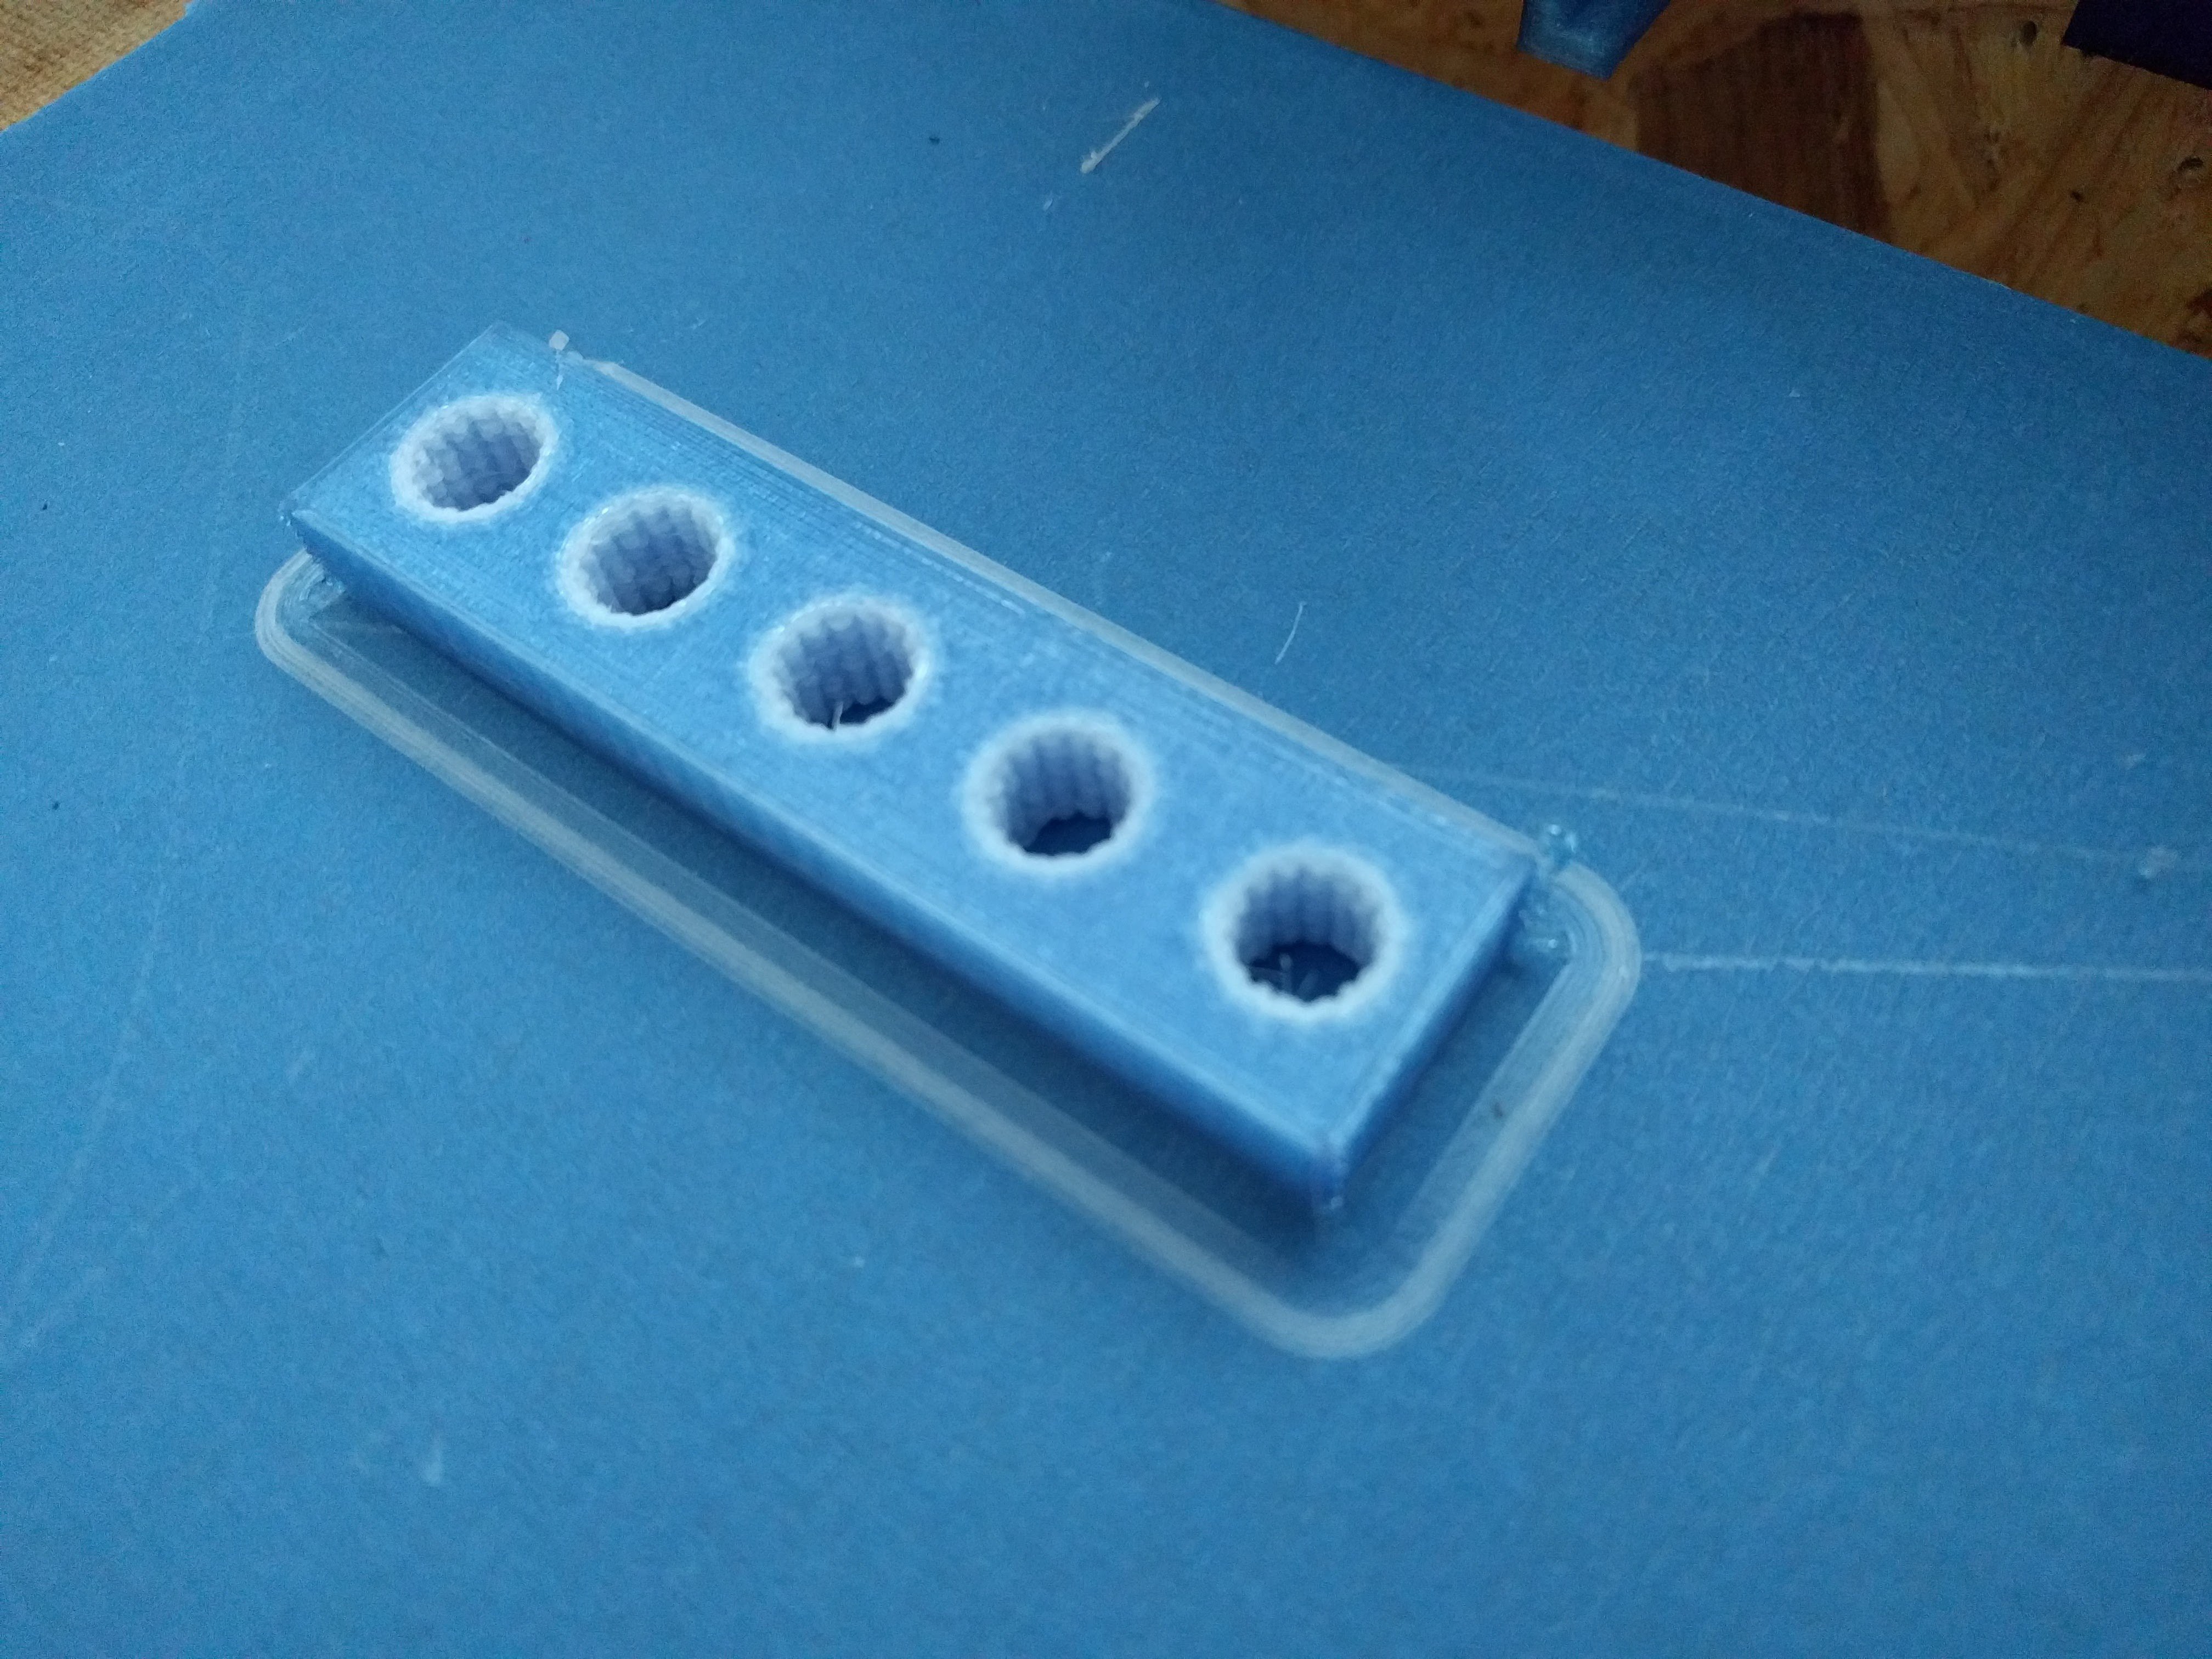
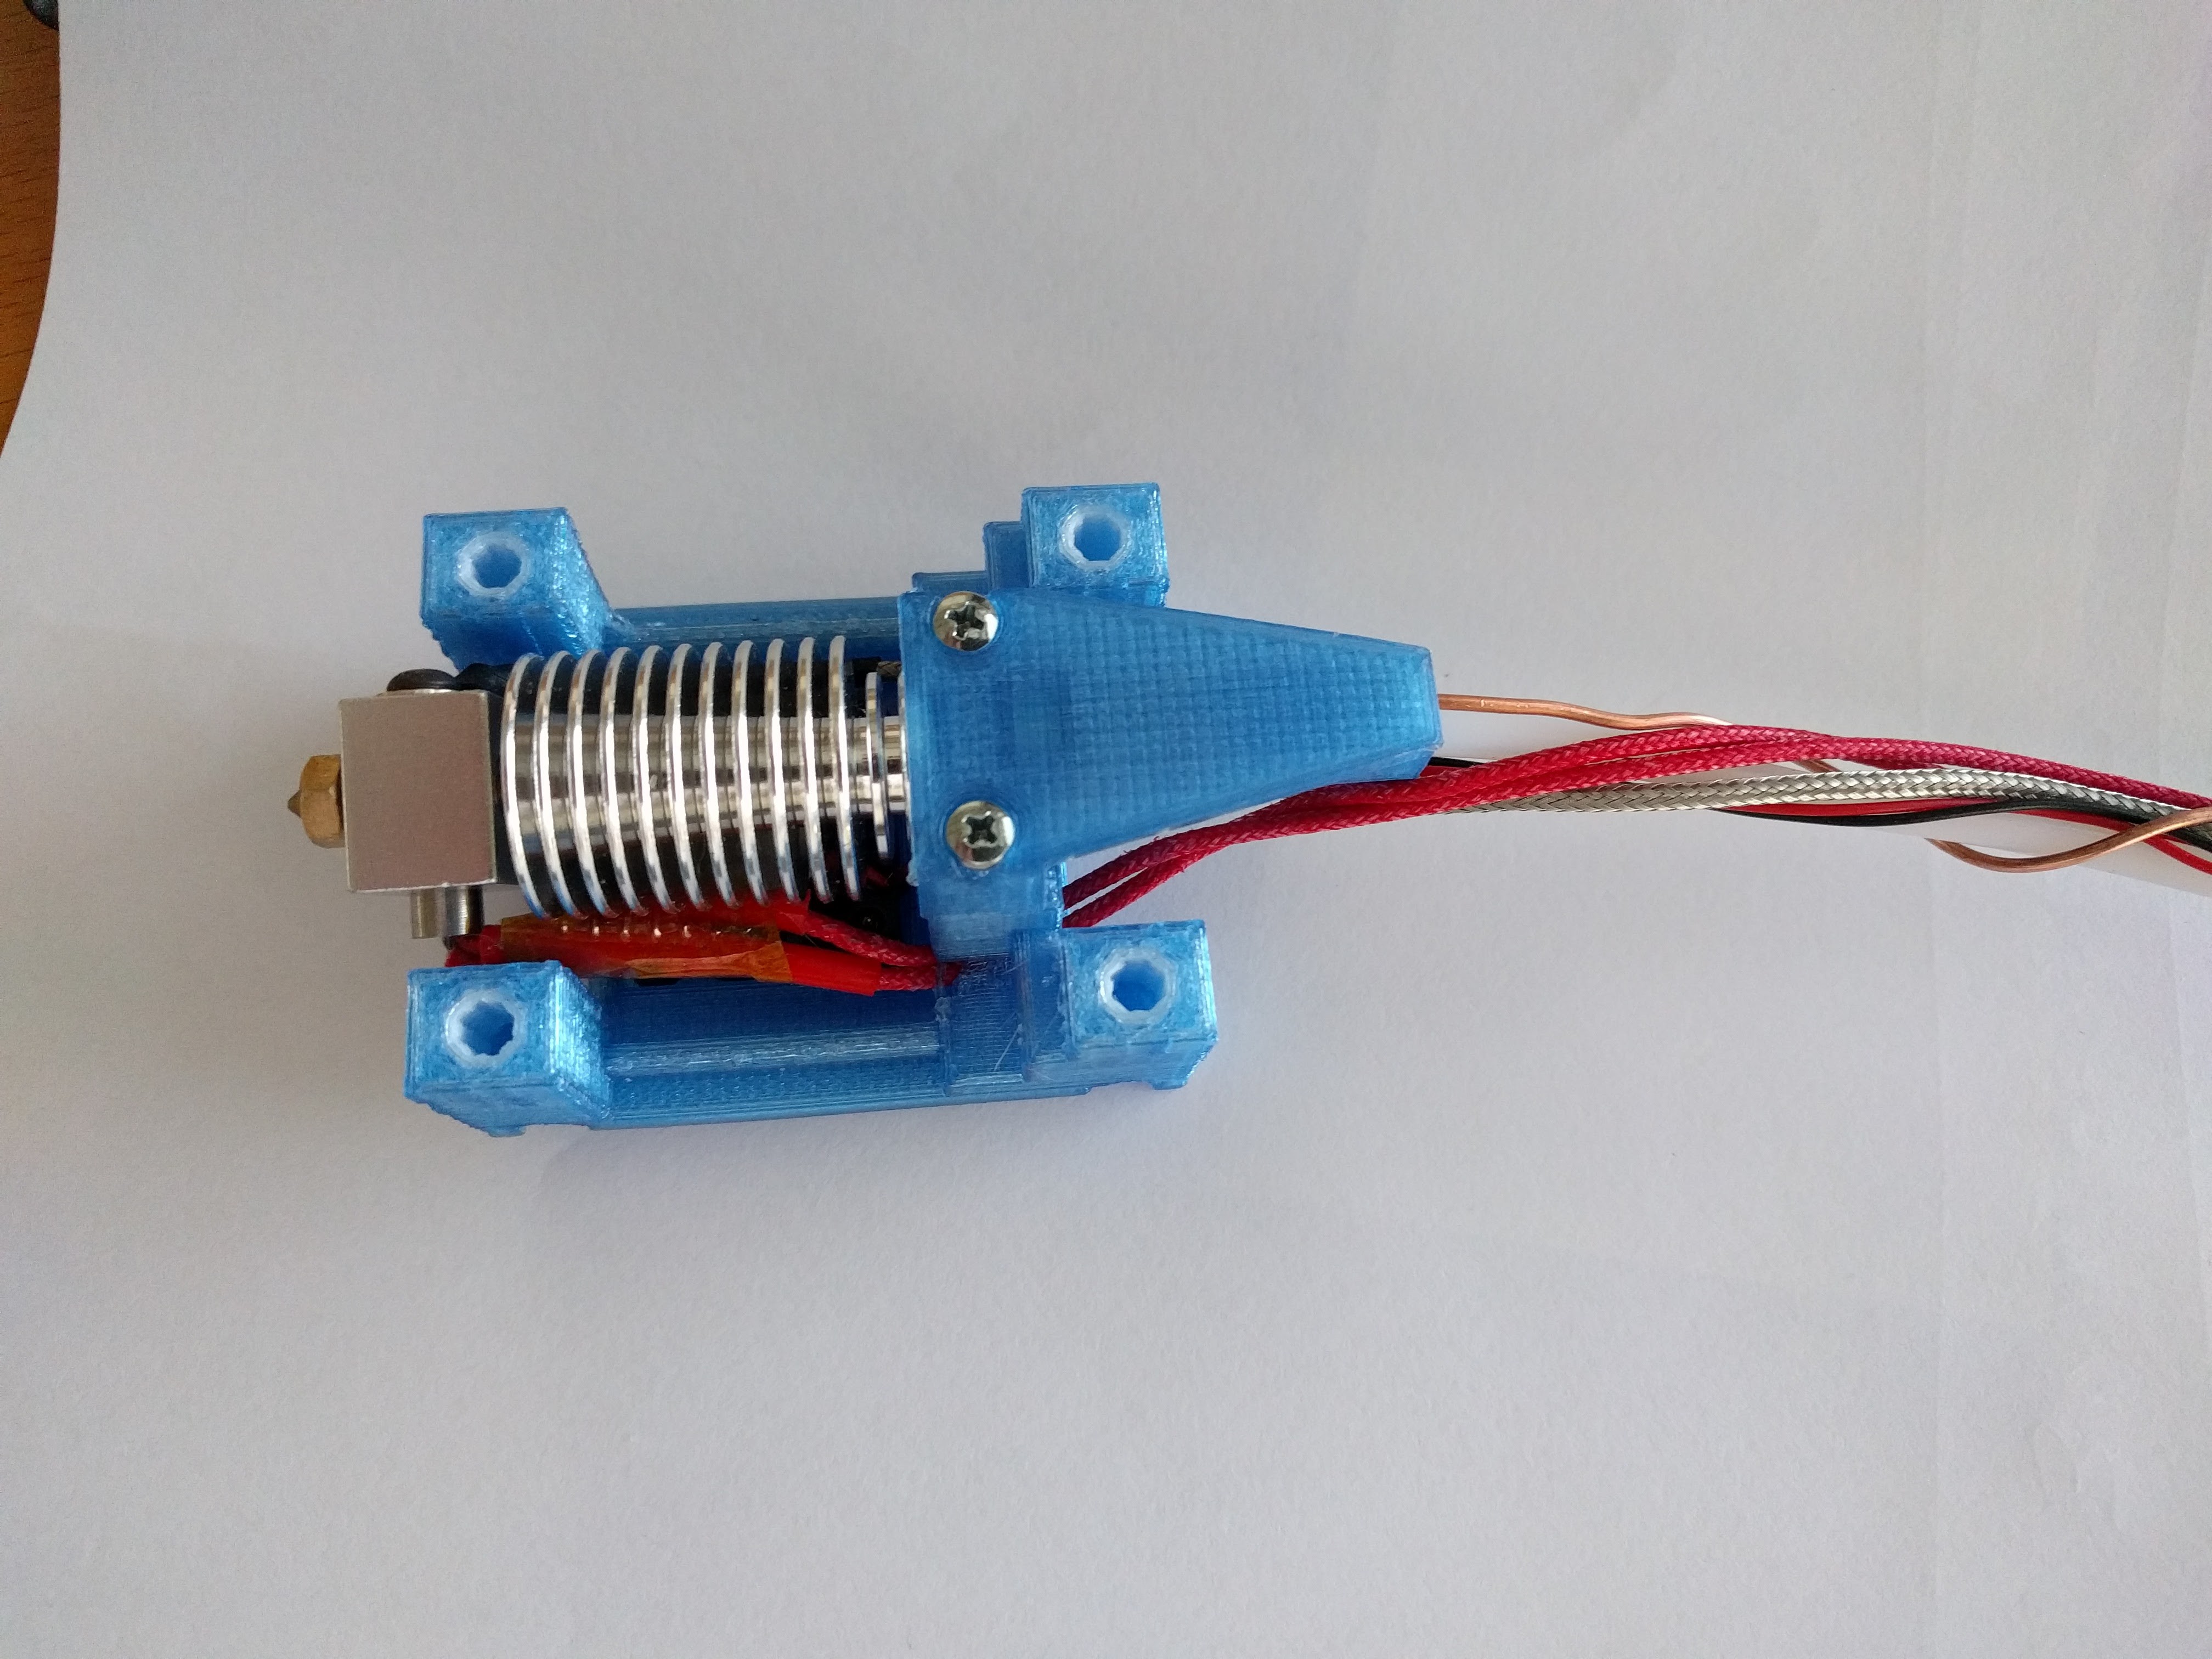
    The project entered a new stage, the prototype is good enough to bootstrap itself to print better parts. Below is an image of the hotend fixture that is printed in PET-G (light blue) and POM (white, low friction wear resistant) to replace the previously used brass bushings.


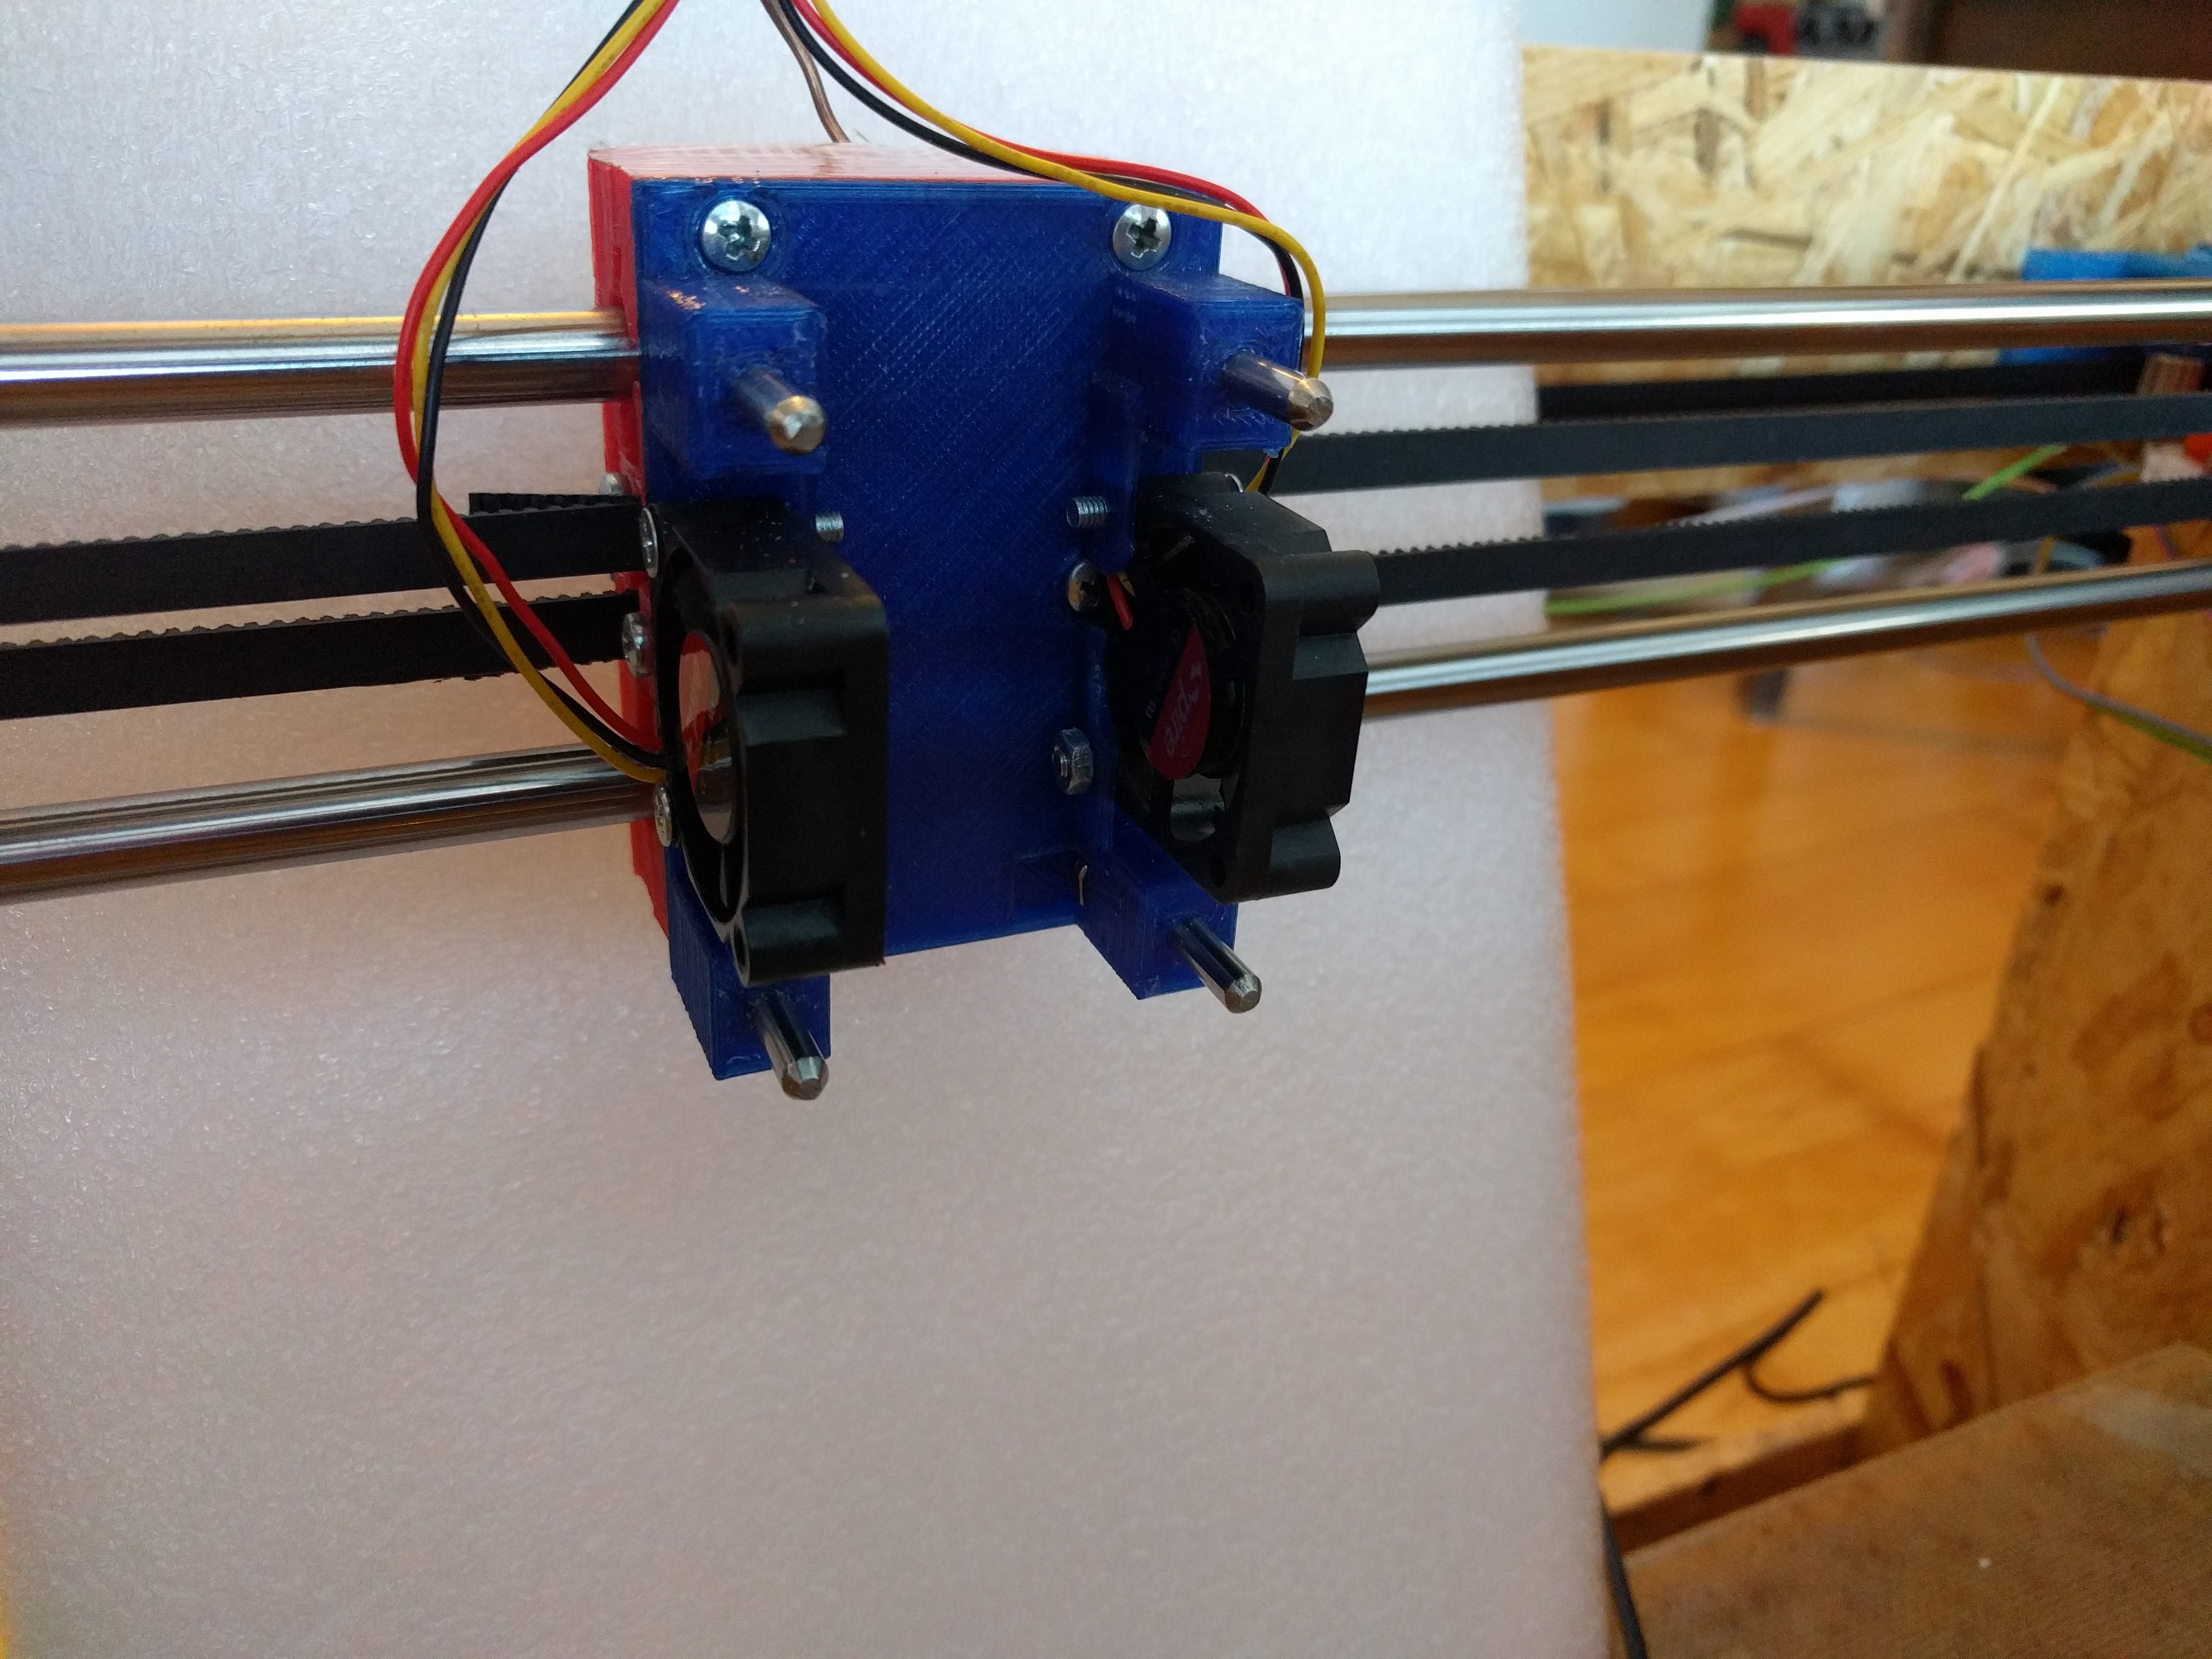
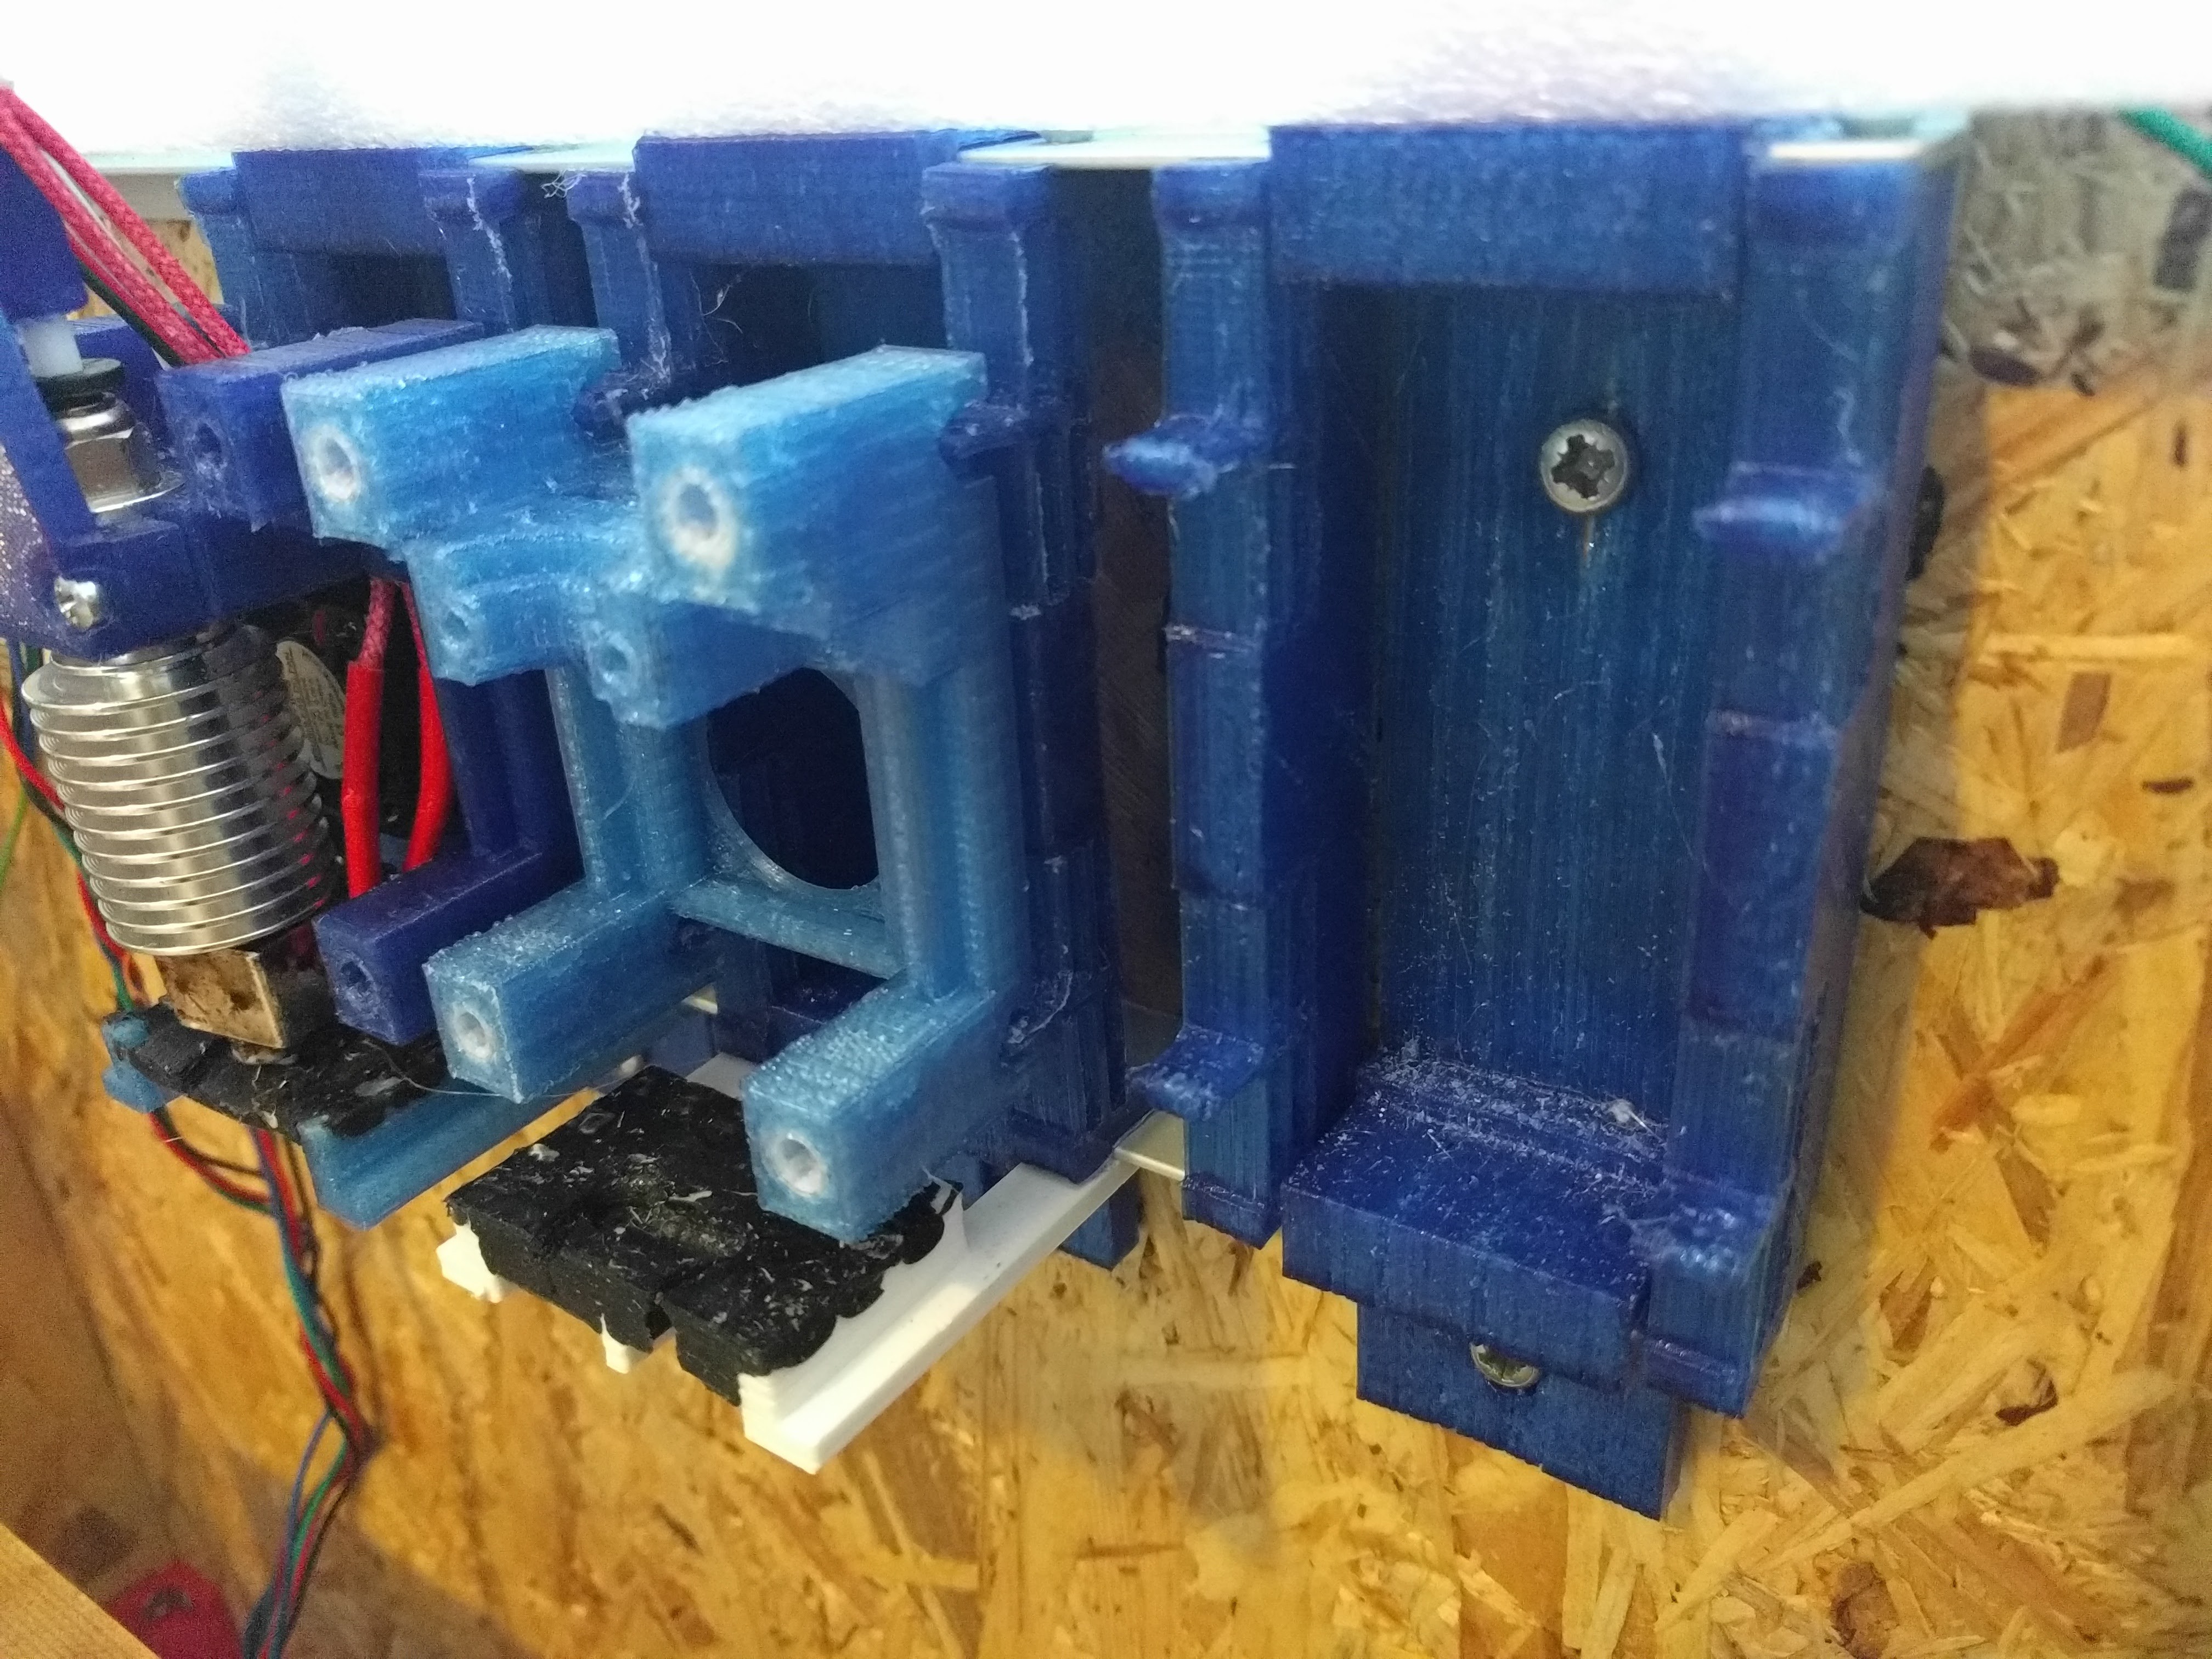
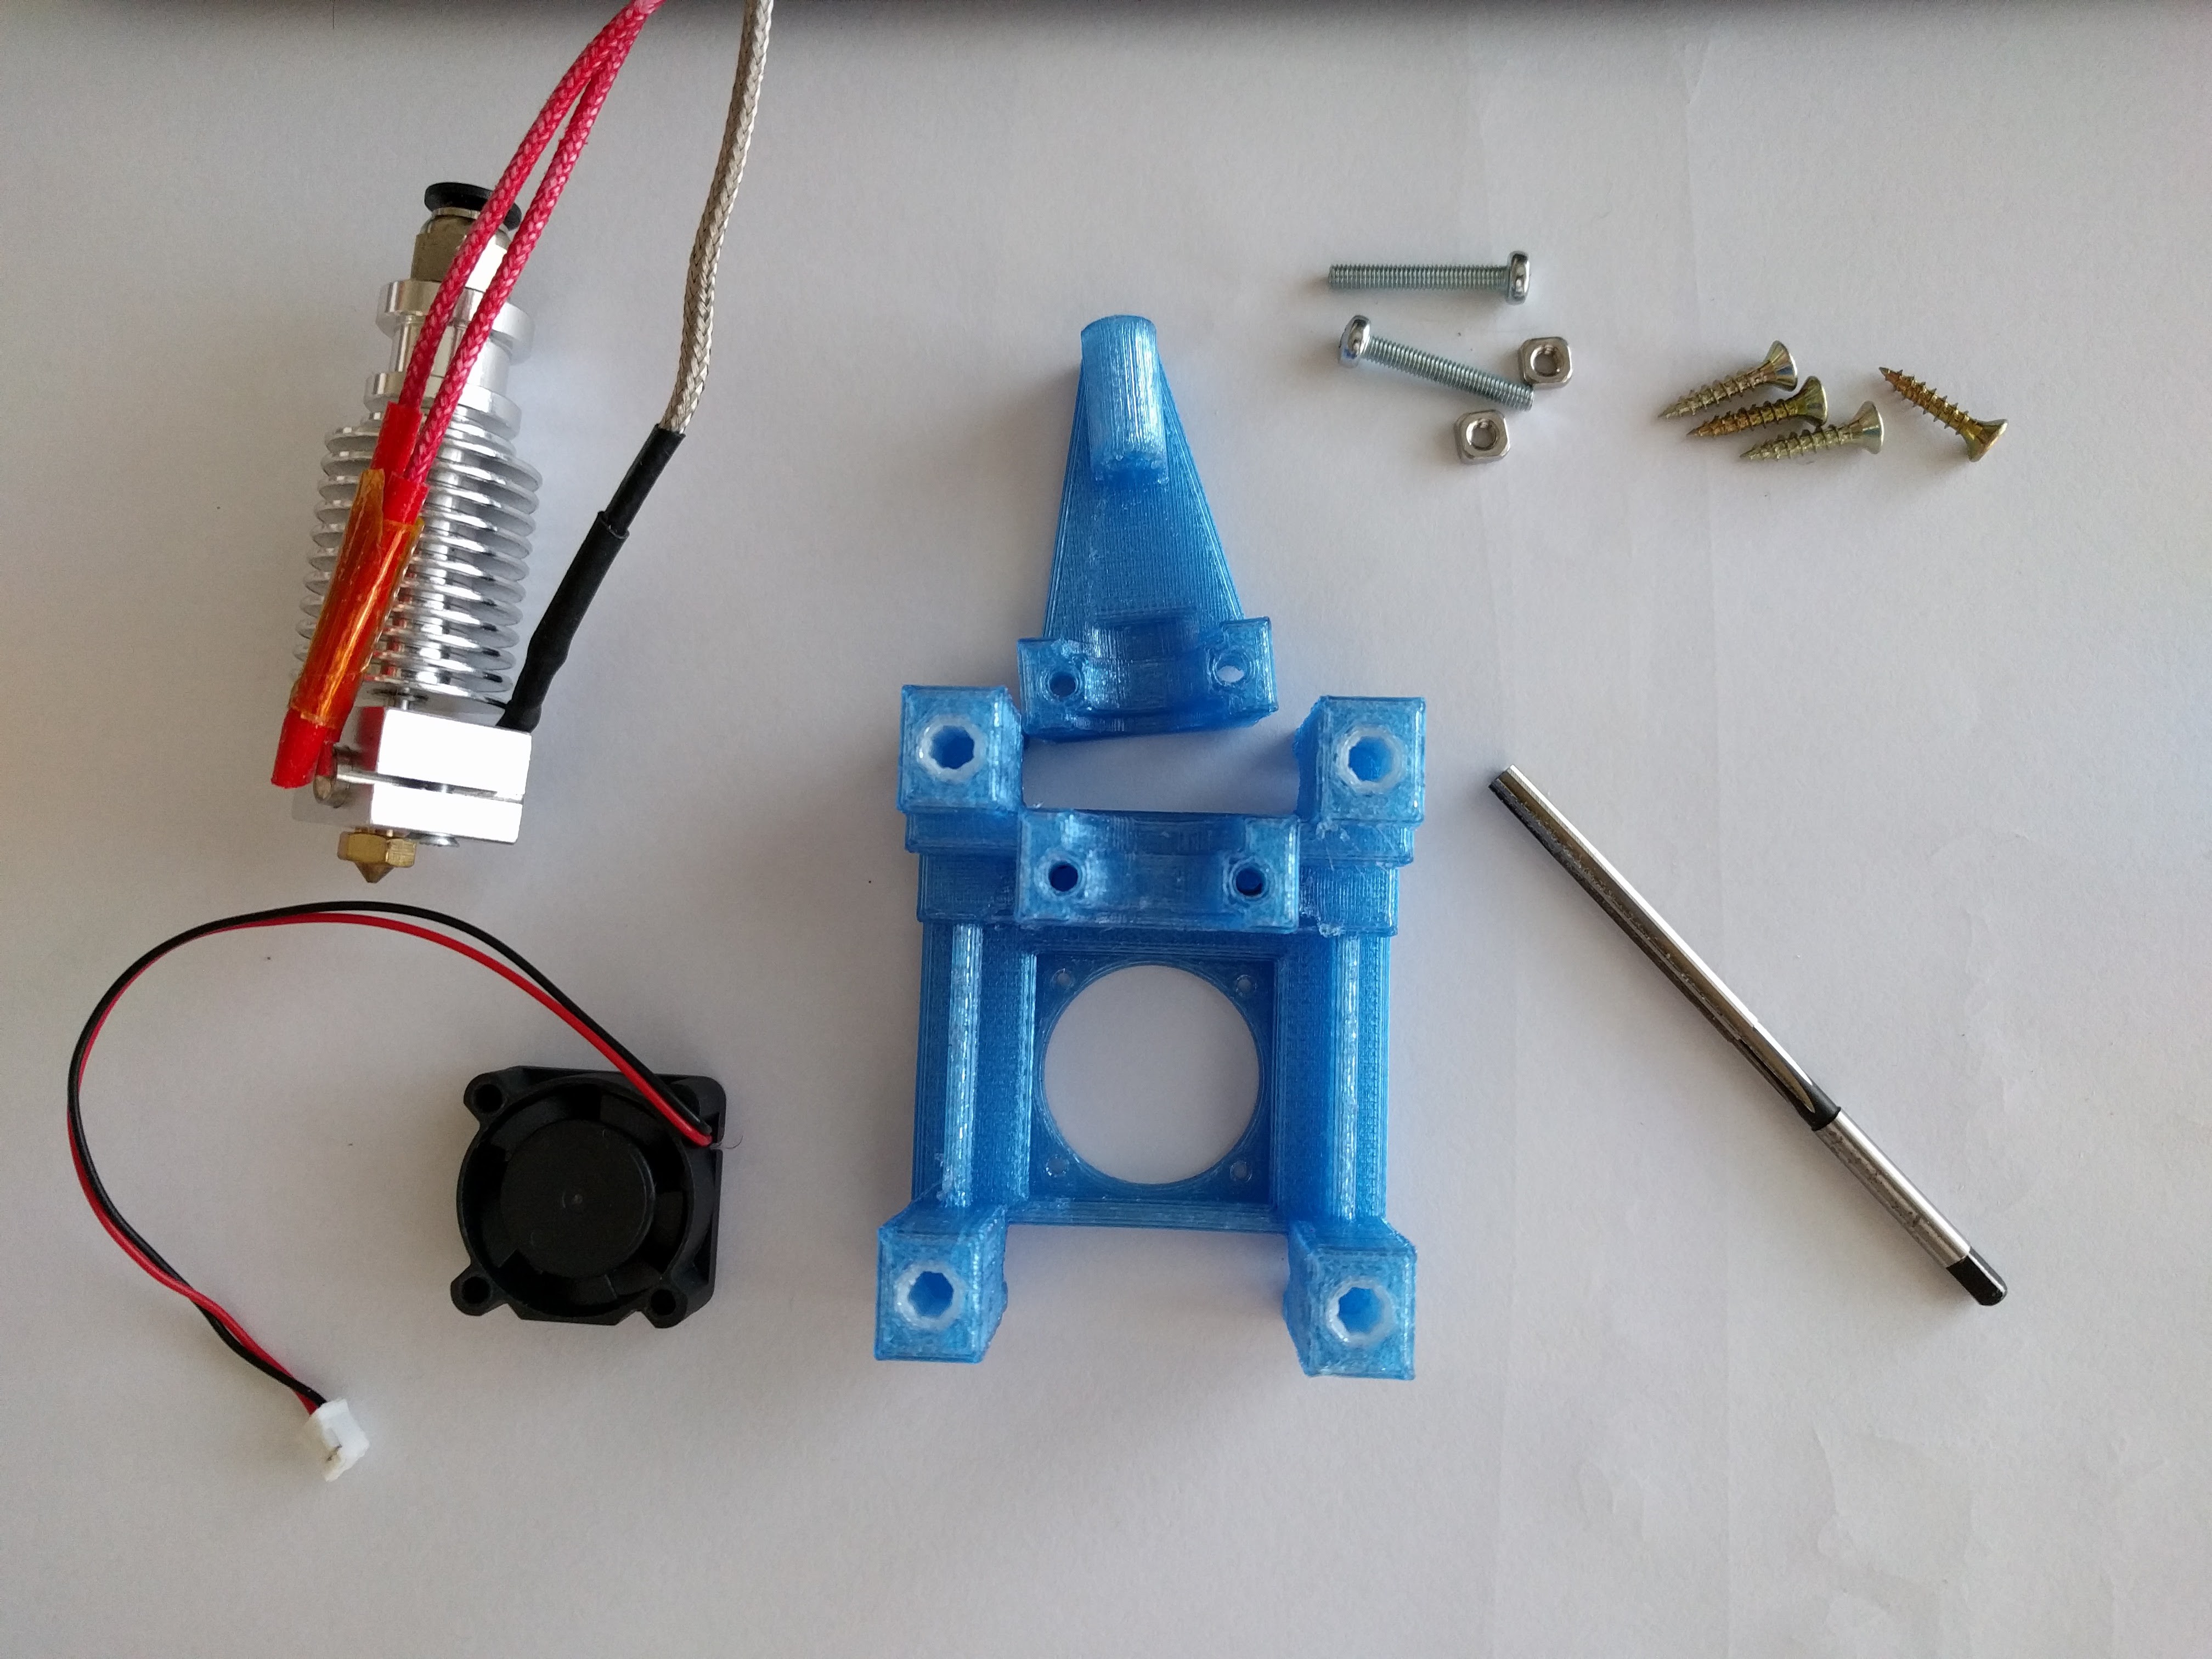
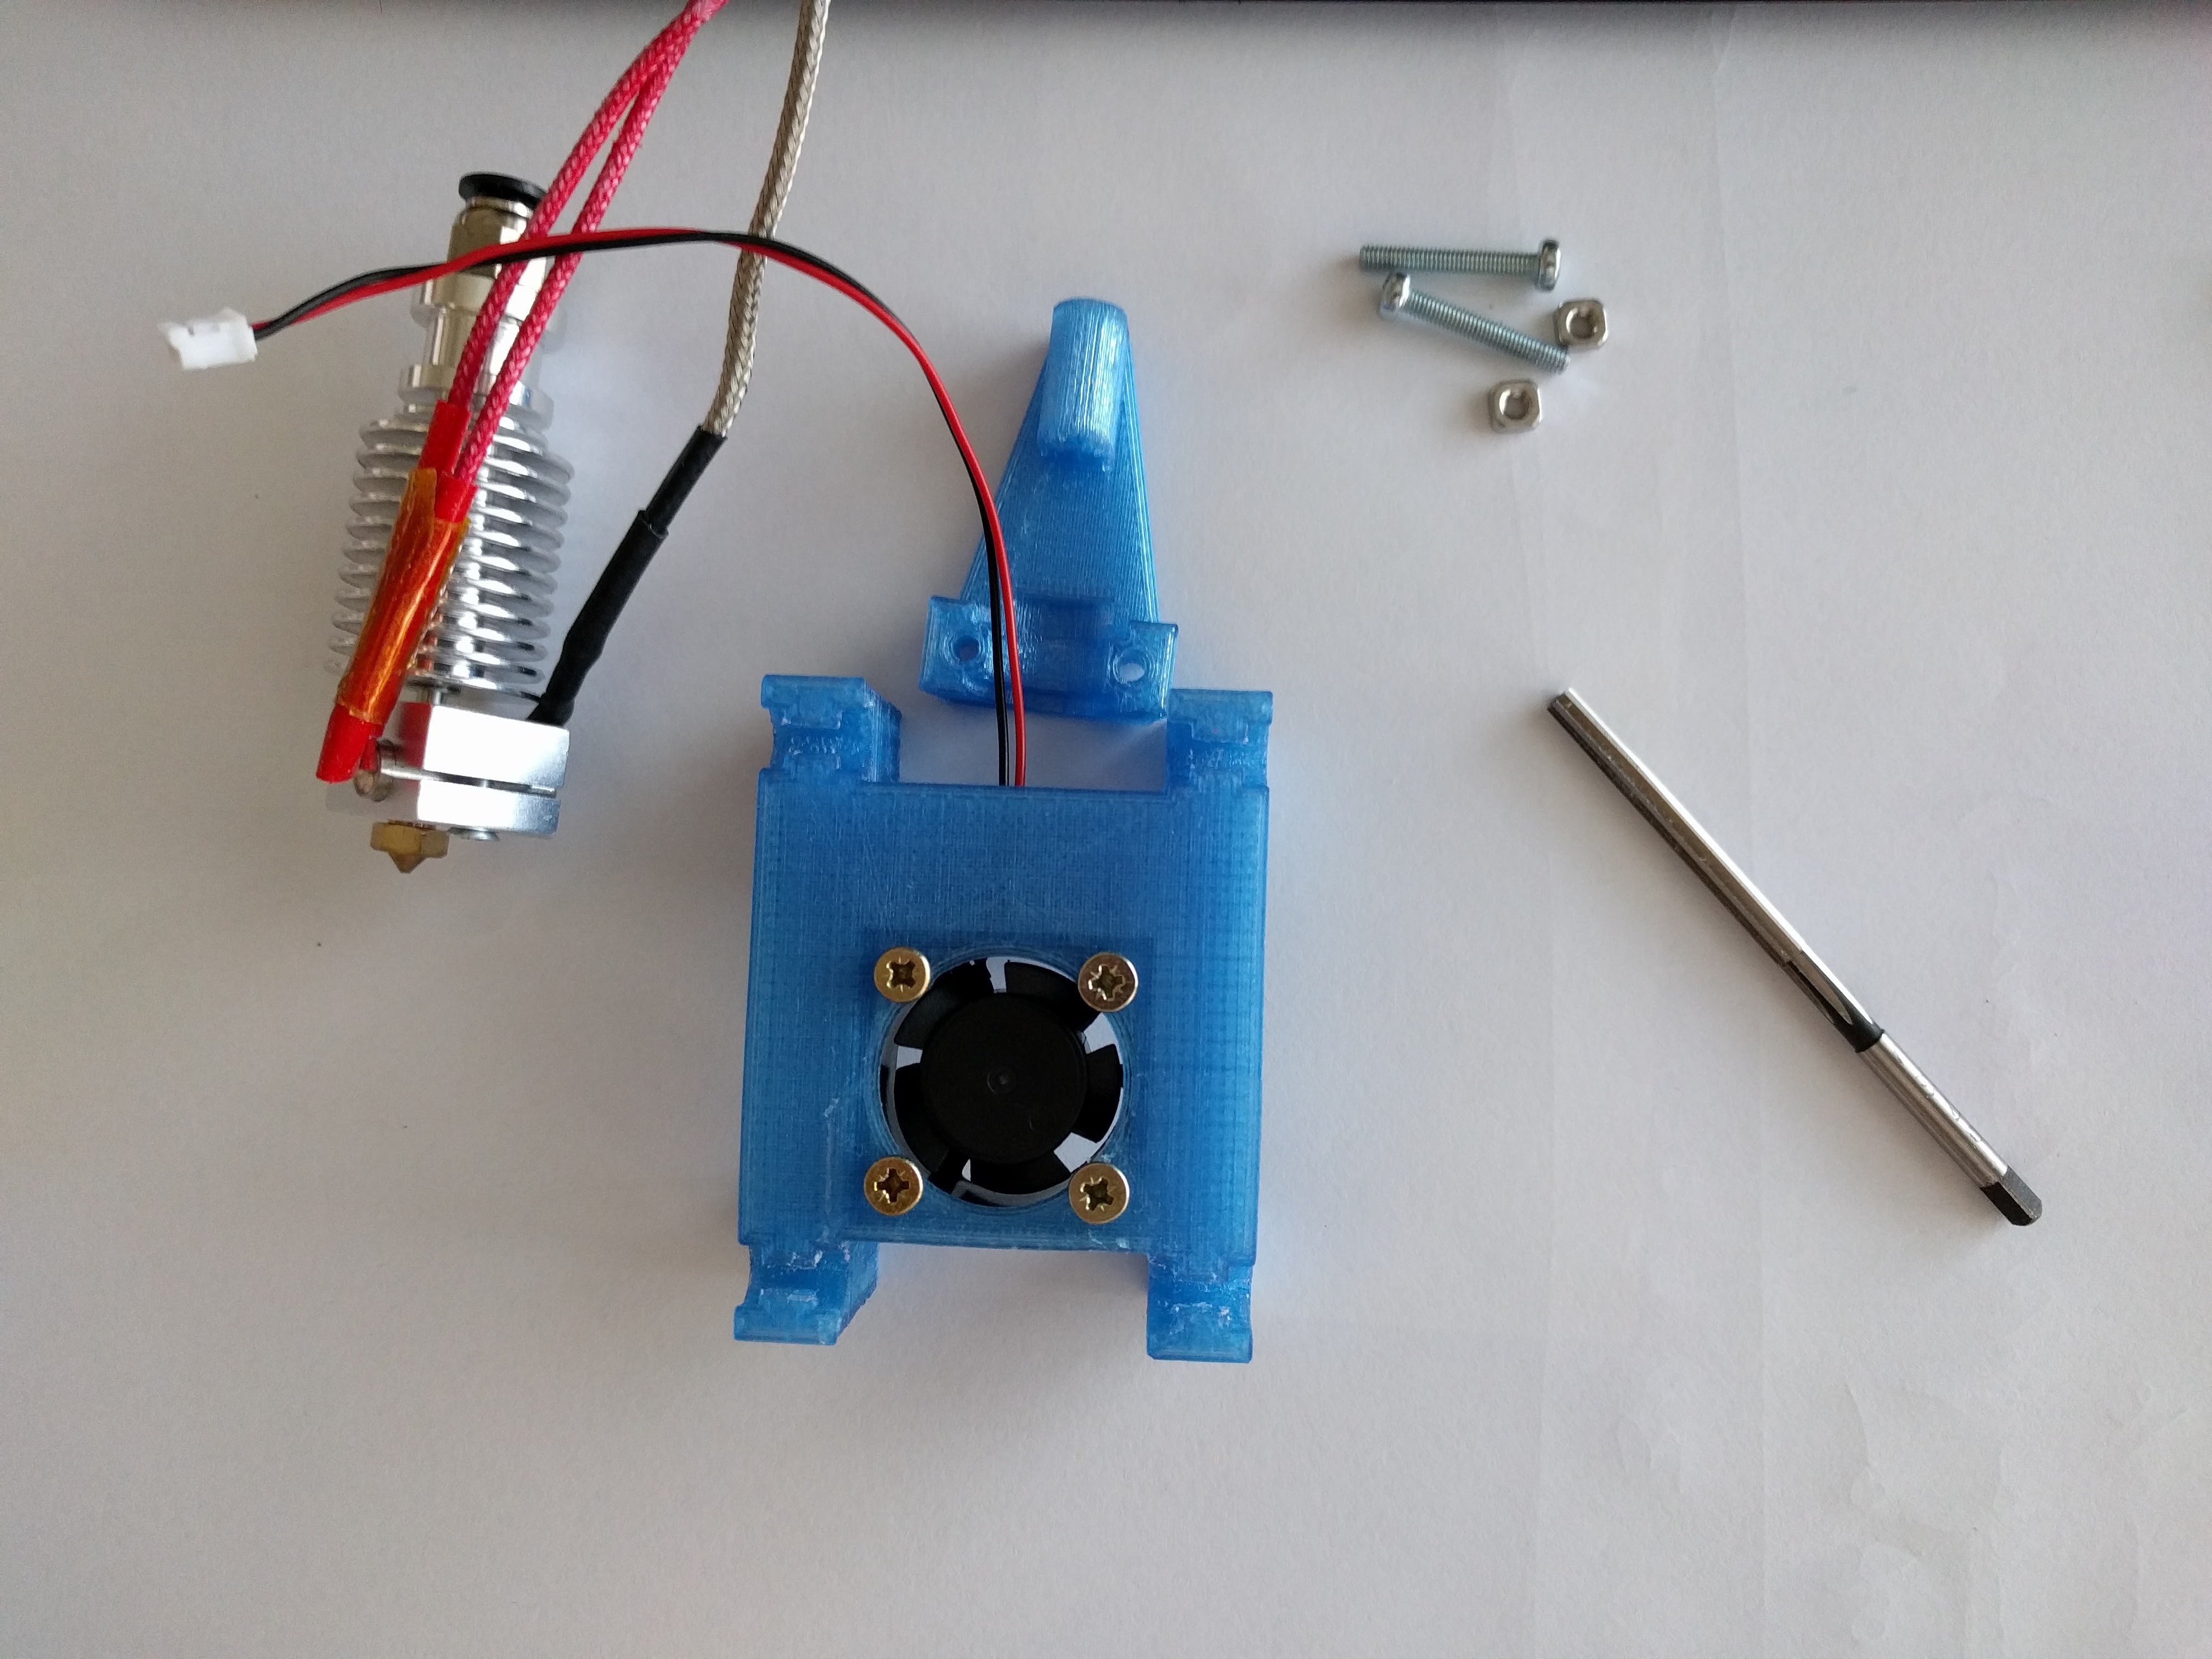
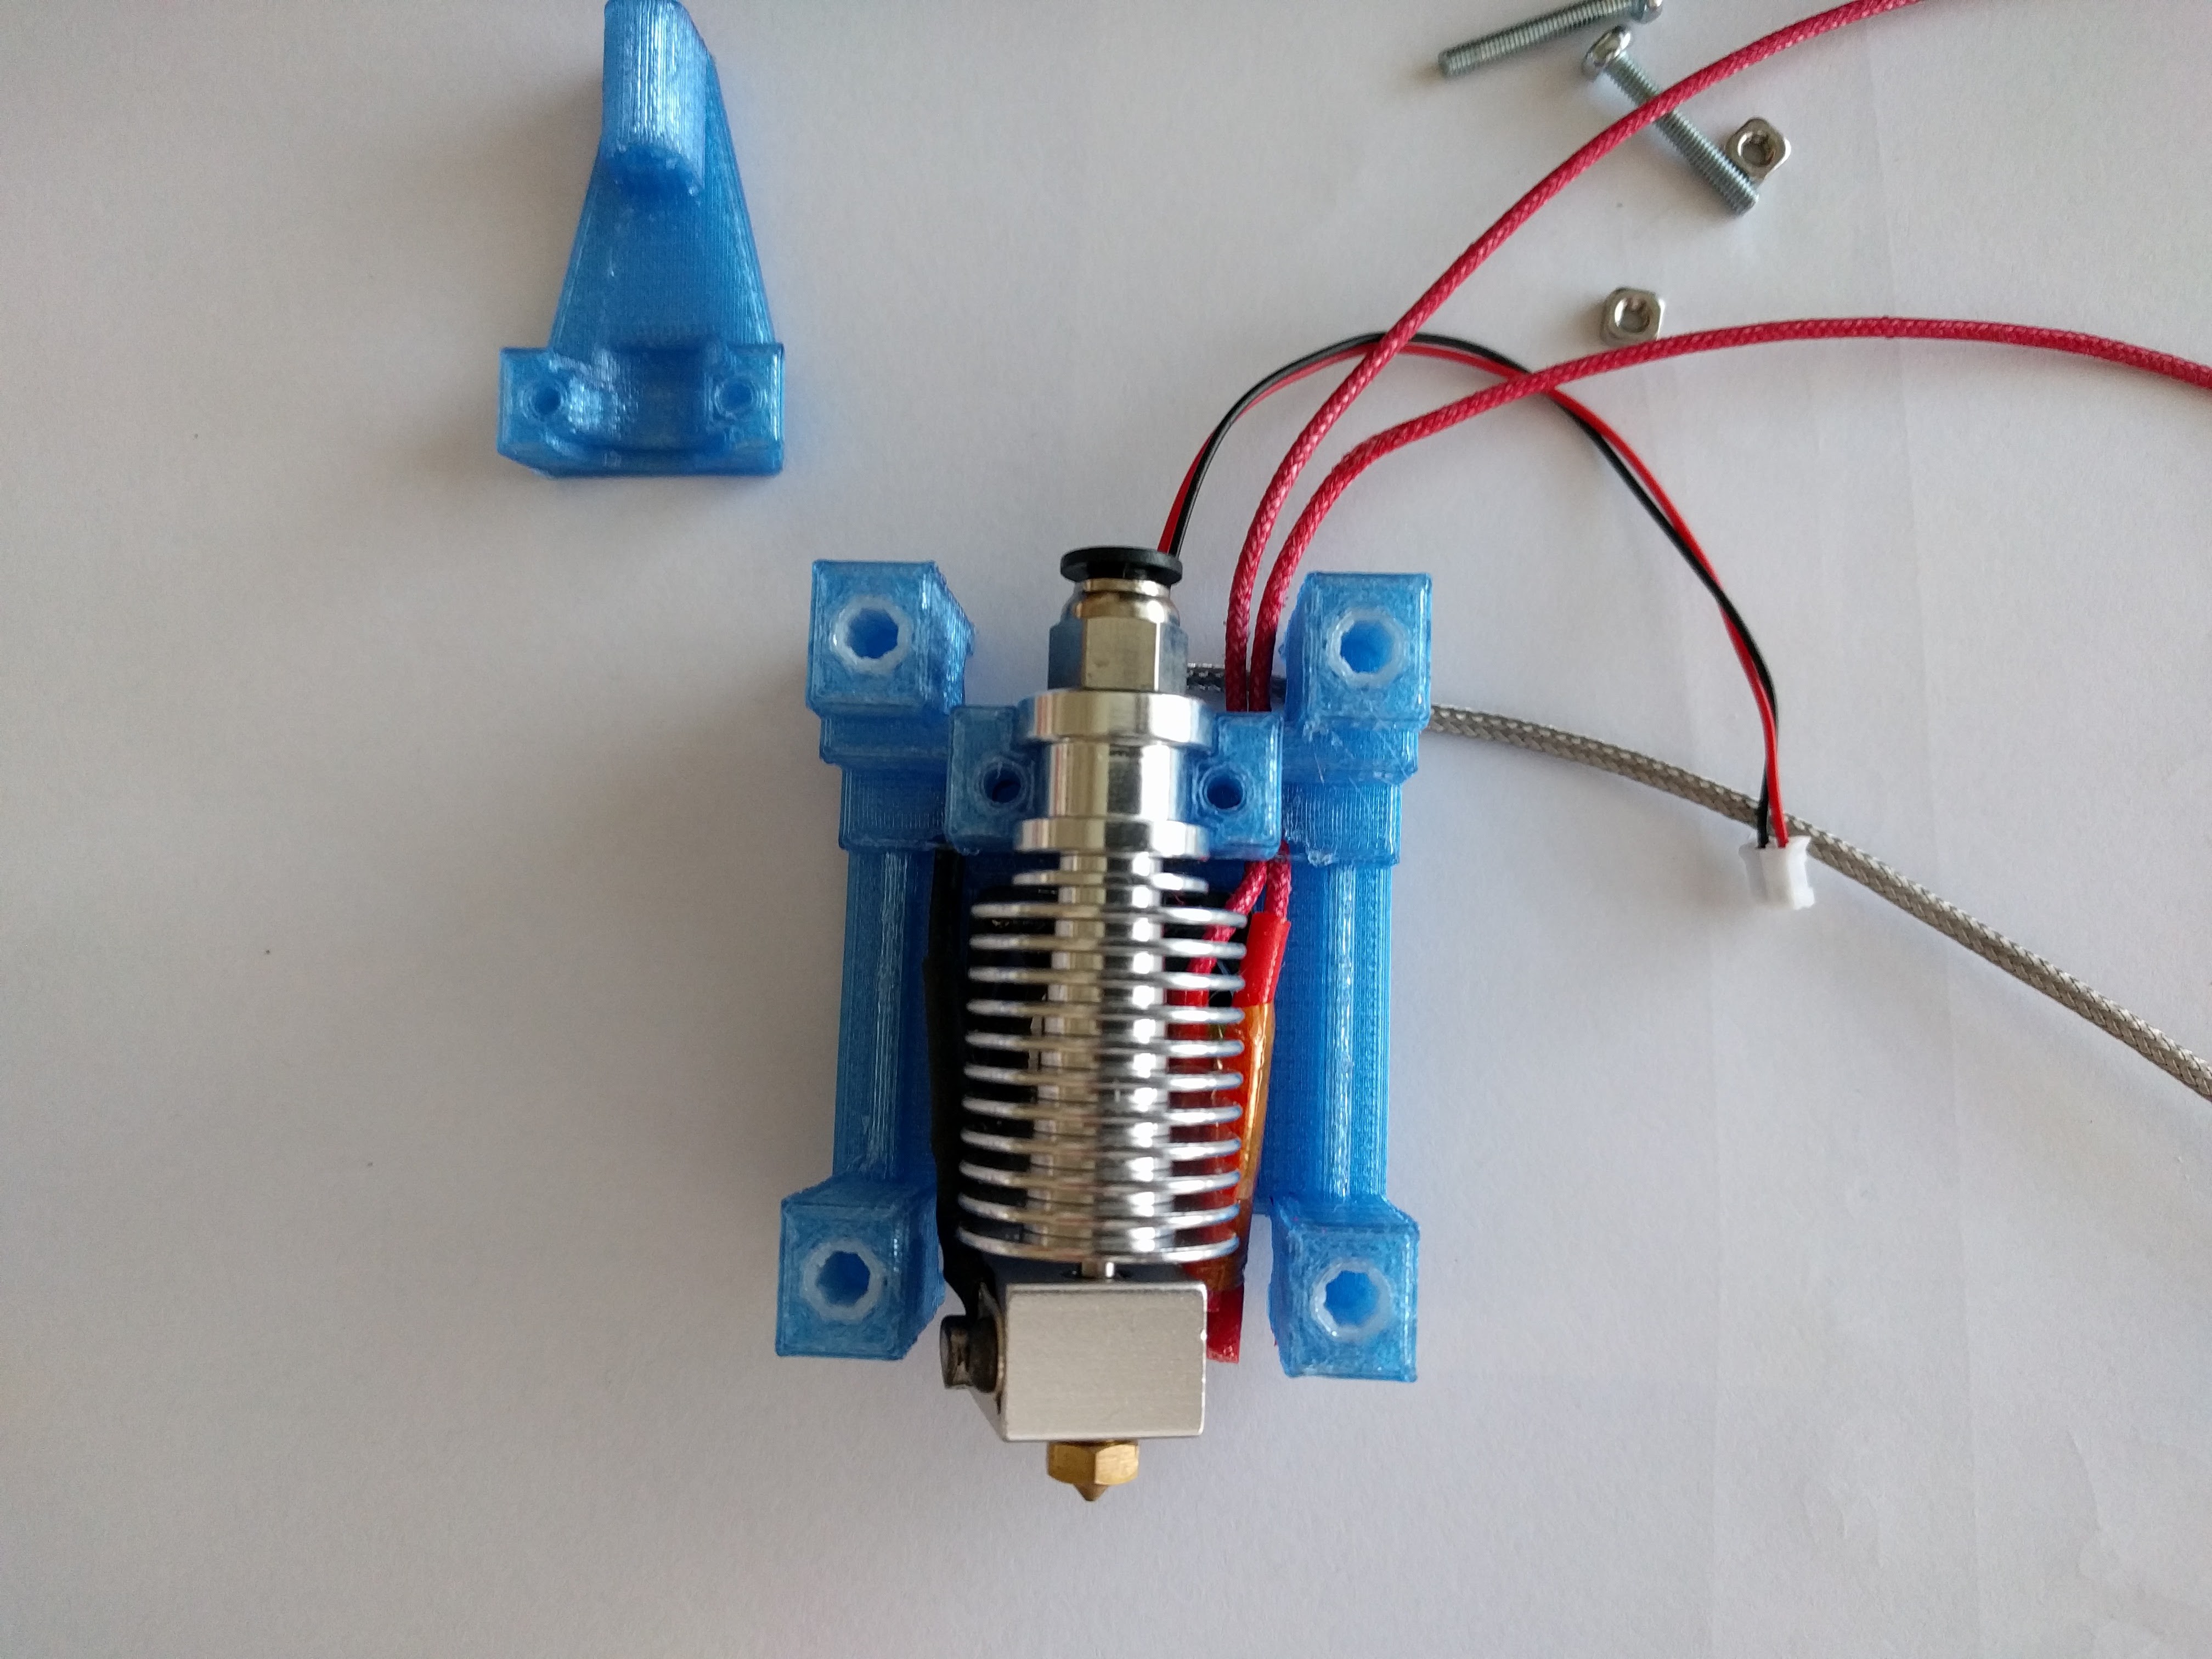
    The joint between the carriage and the hotend is now made out of four printed 4mm bushings (instead of two brass) and four 4mm shafts. Loading and unloading is now faster and smoother. The overall design is very compact and forms an air duct to guide cooling air down to the printed part.


    carriage without hotend

    carriage with hotend 
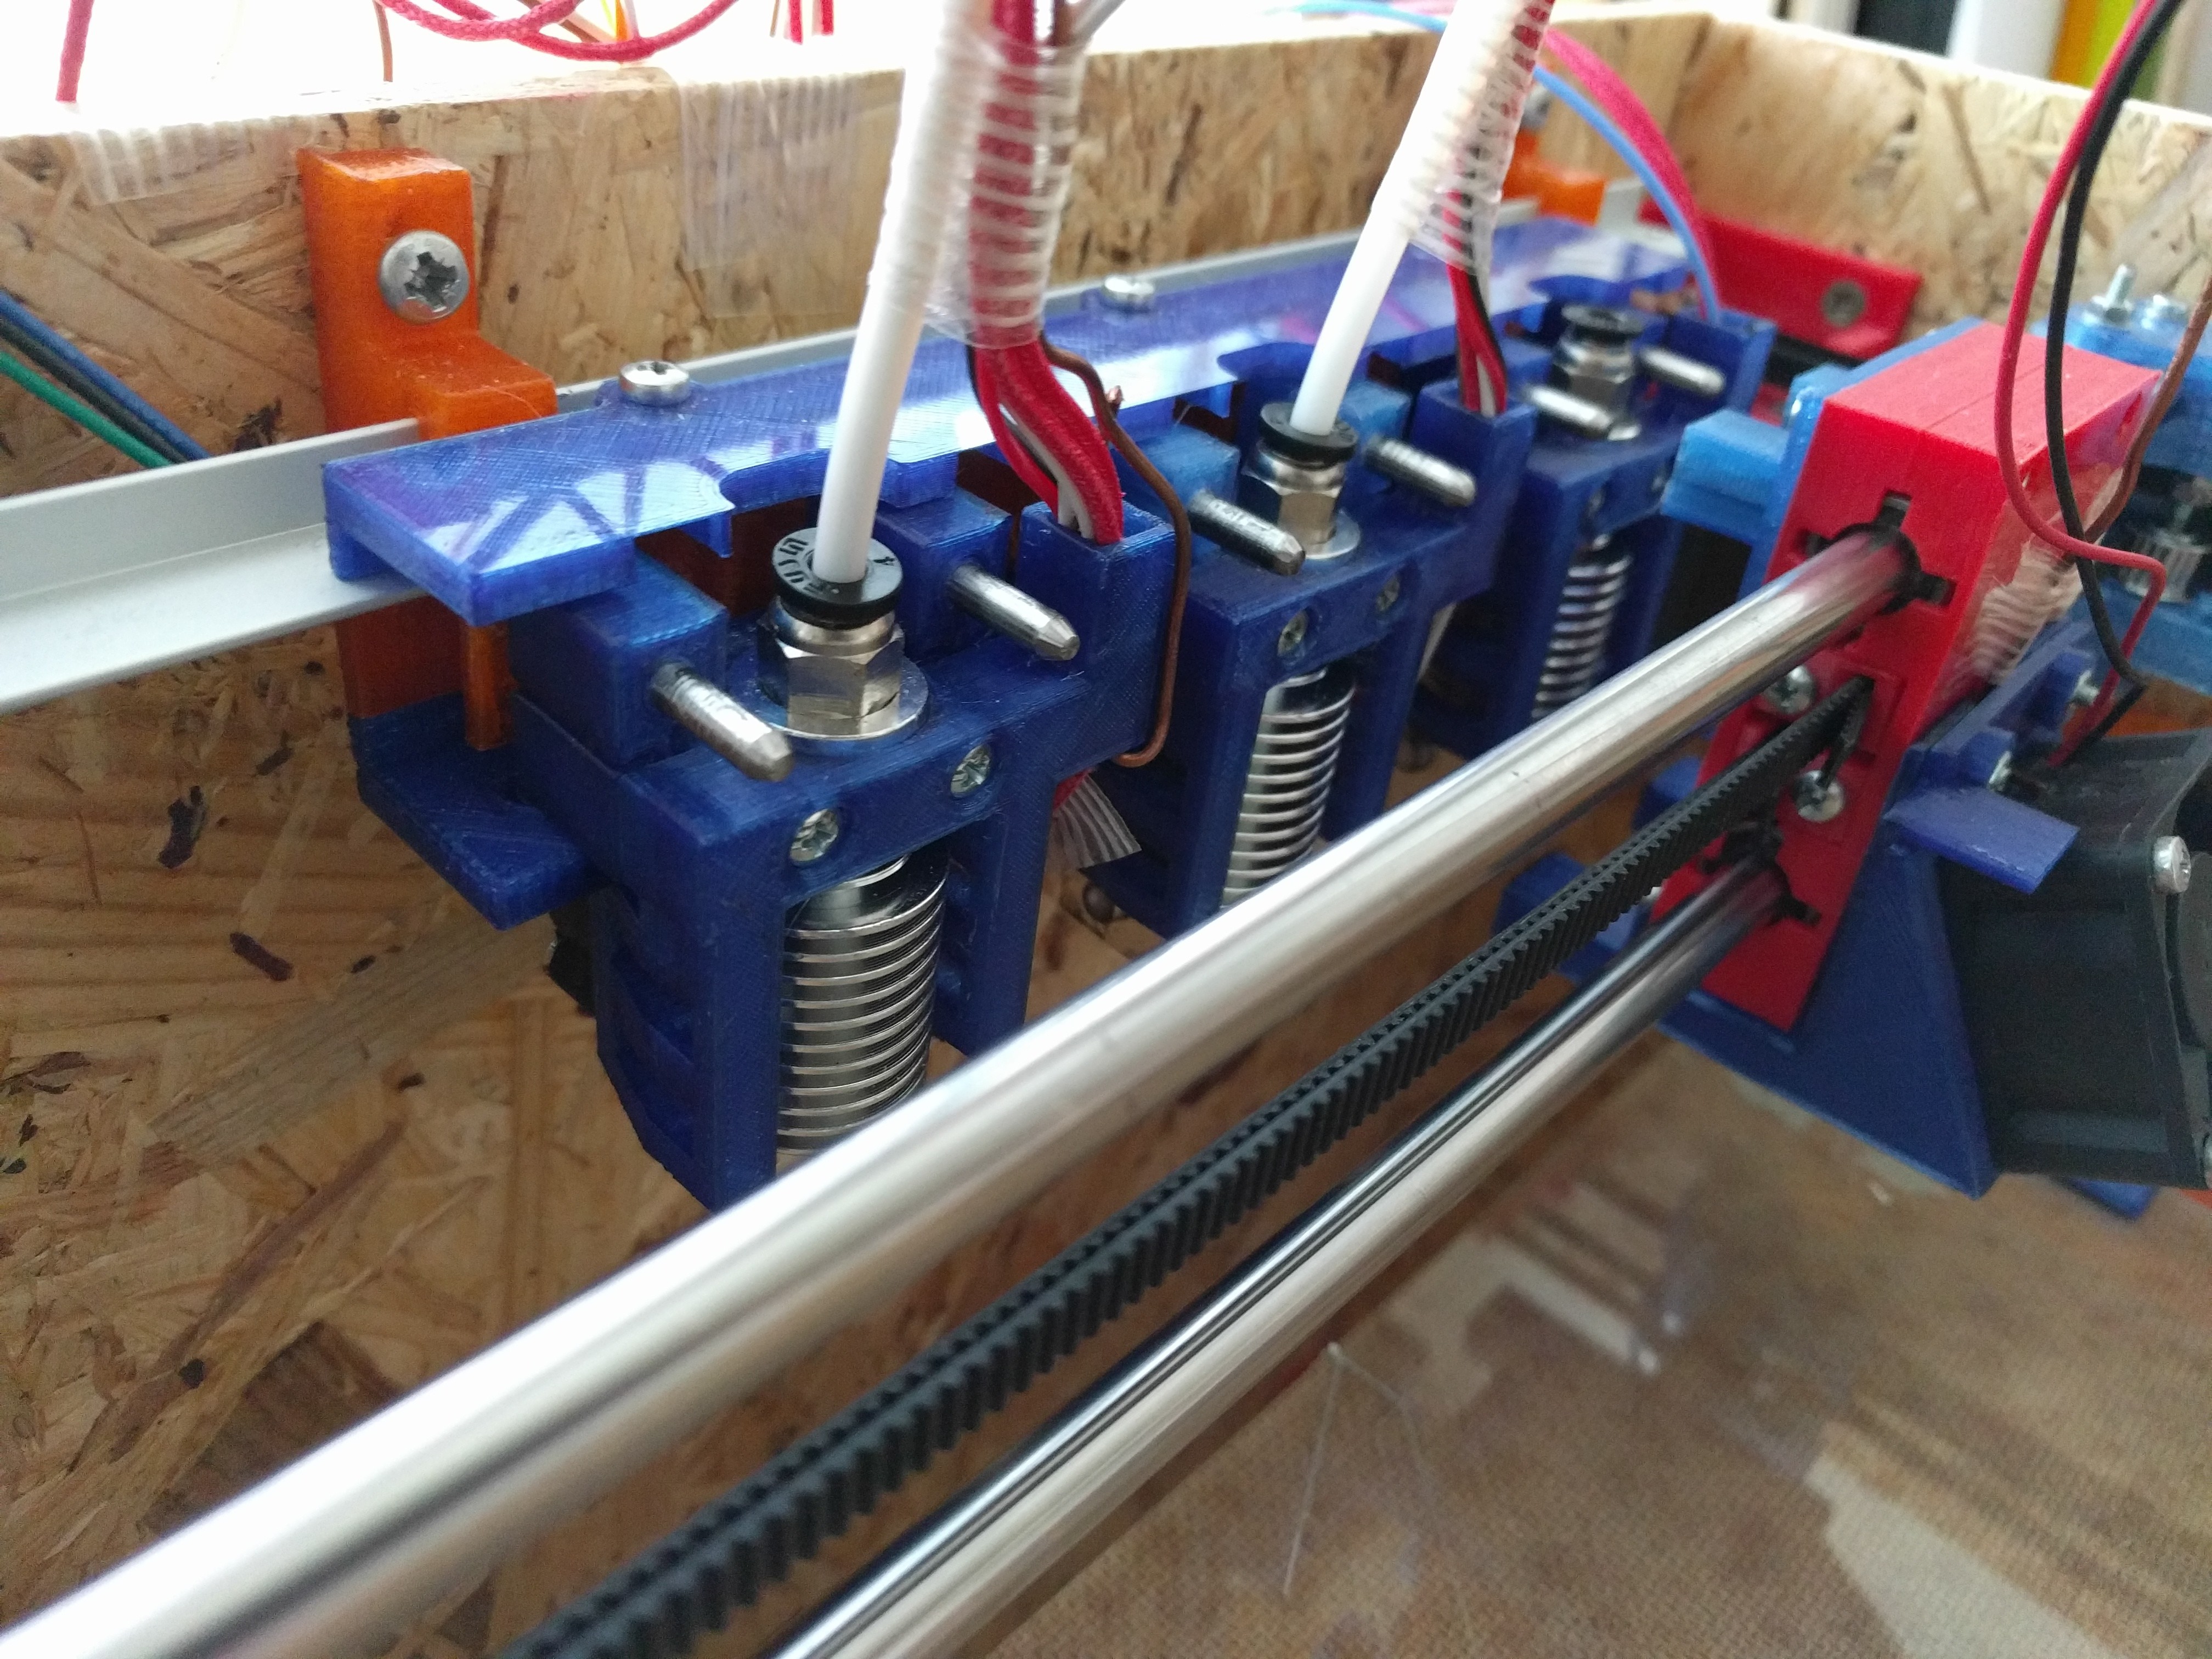
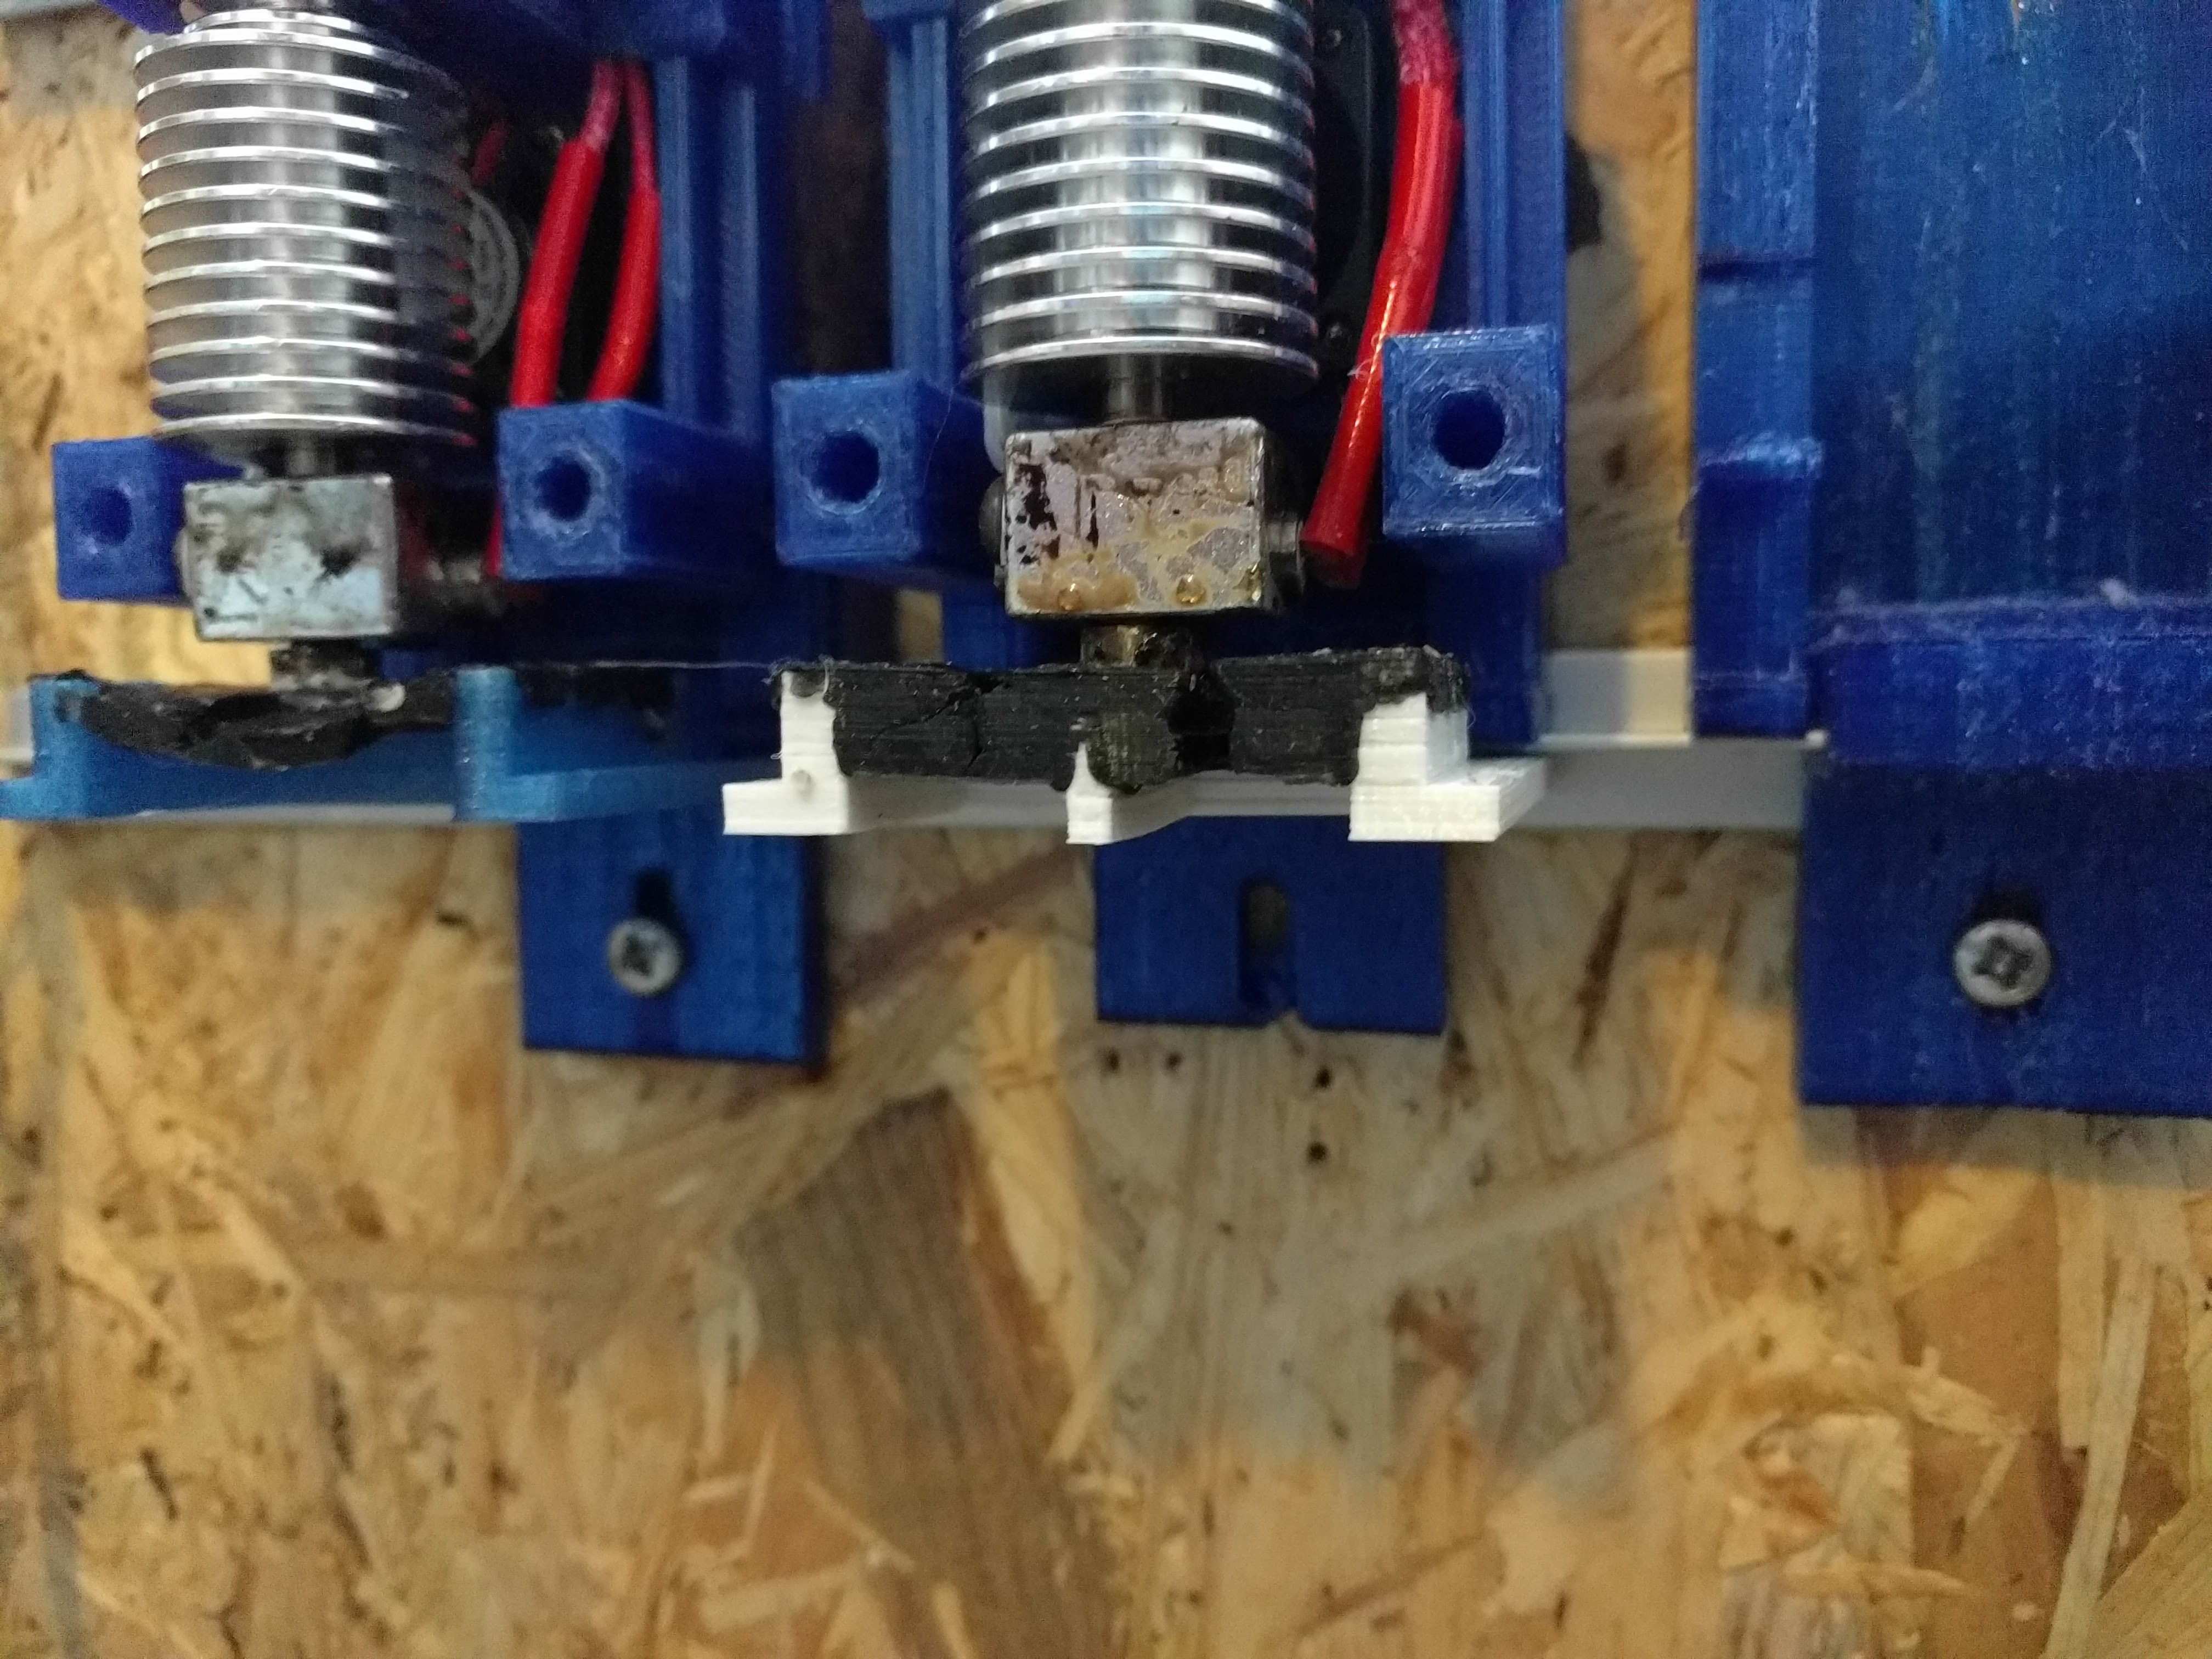
    Four pins and holes are now used to provide a enough support for unused hotends sitting in the rest. It is possible now to block the nozzles with a silicone wiper and prevent oozing. Additionally, the hotend is now moving in only one direction over the wiper, which reduces the chance of picking up previously removed filament.


    This is how printing looks like now. The short stops after loading are because Cura reduces the hotend temperature (15°C) while it is unused and then needs to wait for the hotend to heat up again. In between the code has been fixed and the pause happens while the nozzle is blocked.

    https://youtu.be/NvcBKoBVFjo

    This is the finished part. No prime tower and cleaning. I'm very pleased with the result.

  • hotend fixture redesign - first moves

    rolmie08/08/2017 at 13:12 0 comments

    Otherwise, still fixing minor design issues and busy printing parts.

  • WIP - hotend fixture redesign

    rolmie08/01/2017 at 07:10 0 comments

    One issue that became apparent during the first dual print was oozing. No matter how much I retracted the filament while the hotend was parked, there was always a tiny string oozing out. The dual print only finished because Cura distributes the starting point on the prime tower in each layer. Adding a really large prime tower with thin walls finally did the trick.


    The current design clearly lacks a feature that stops oozing by blocking the nozzle in the parking position. The hotend fixture only provides close control of the pin positions but leaves a lot of slack for the nozzle, which makes it hard (impossible?) to block it. Experiments revealed that entering and leaving the parking position at the same location gives a high chance of picking up oozed filament that was wiped off the nozzle before. 

    Other issues with the current design are

    • the nozzle is slightly deflected by forces applied to the bowden tube
    • no space for part cooling fan(s) left

    Time for a redesign to address all of these issues. 

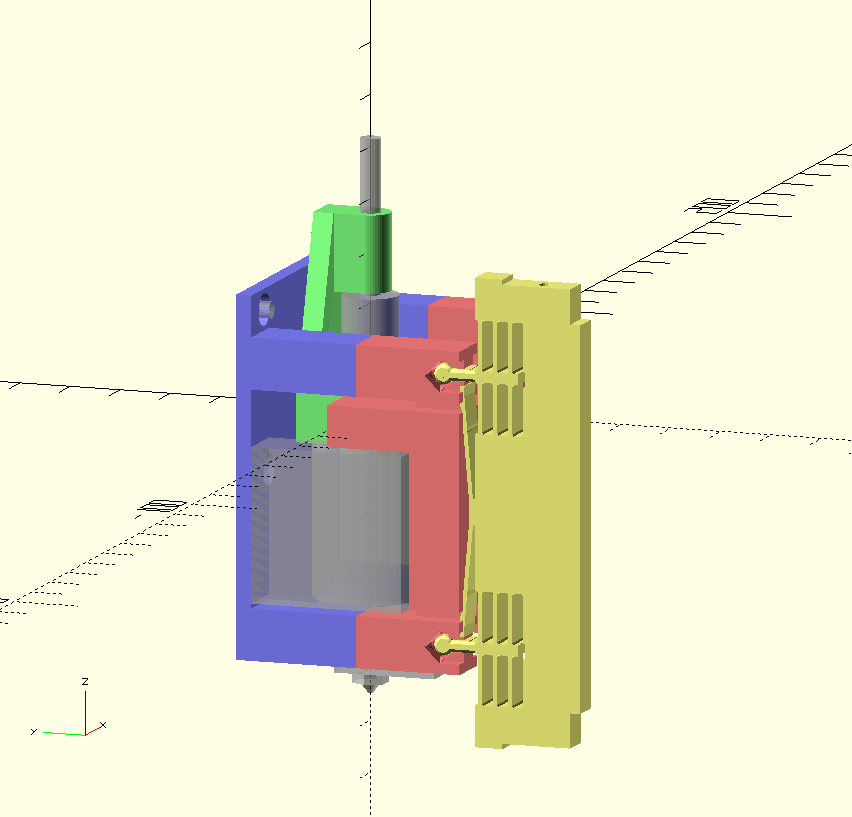
    • unidirectional (left to right) load/unload, no risk of picking up oozed filament while unparking
    • the parking fixture (yellow) now provides support at the top and bottom
    • four instead of two pins/bushings to register the hotend to the carrige
    • stress relive for the bowden tube
    • space for two 30 mm part cooling fans


    A small plug made out of 350°C silicone should block the nozzle. Not sure if I'm able to cast (more like squeeze) this type of silicone in a mold, if so, adding feature to wipe/clean the nozzle should be easy.

  • Nozzle offset calibration

    rolmie07/24/2017 at 09:57 5 comments

    The first thing to think about when talking about precision is what is actually required. Finally the precision of the whole process is limited by nozzle size and the viscosity of molten plastic. The smallest usable nozzles are 200µm, 1/4 (50µm) of this seemed like good choice of what is required in X and Y. The requirements for Z can be derived from minimum layer height. Objects printed better than 100µm layer height are hardly seen. Again using 1/4 gives 25µm precision in Z.

    Neither the printed parts nor off the shelf hotends are manufactured precise enough for these requirements, but Slicers as well as printer firmwares have options to compensate for such errors.

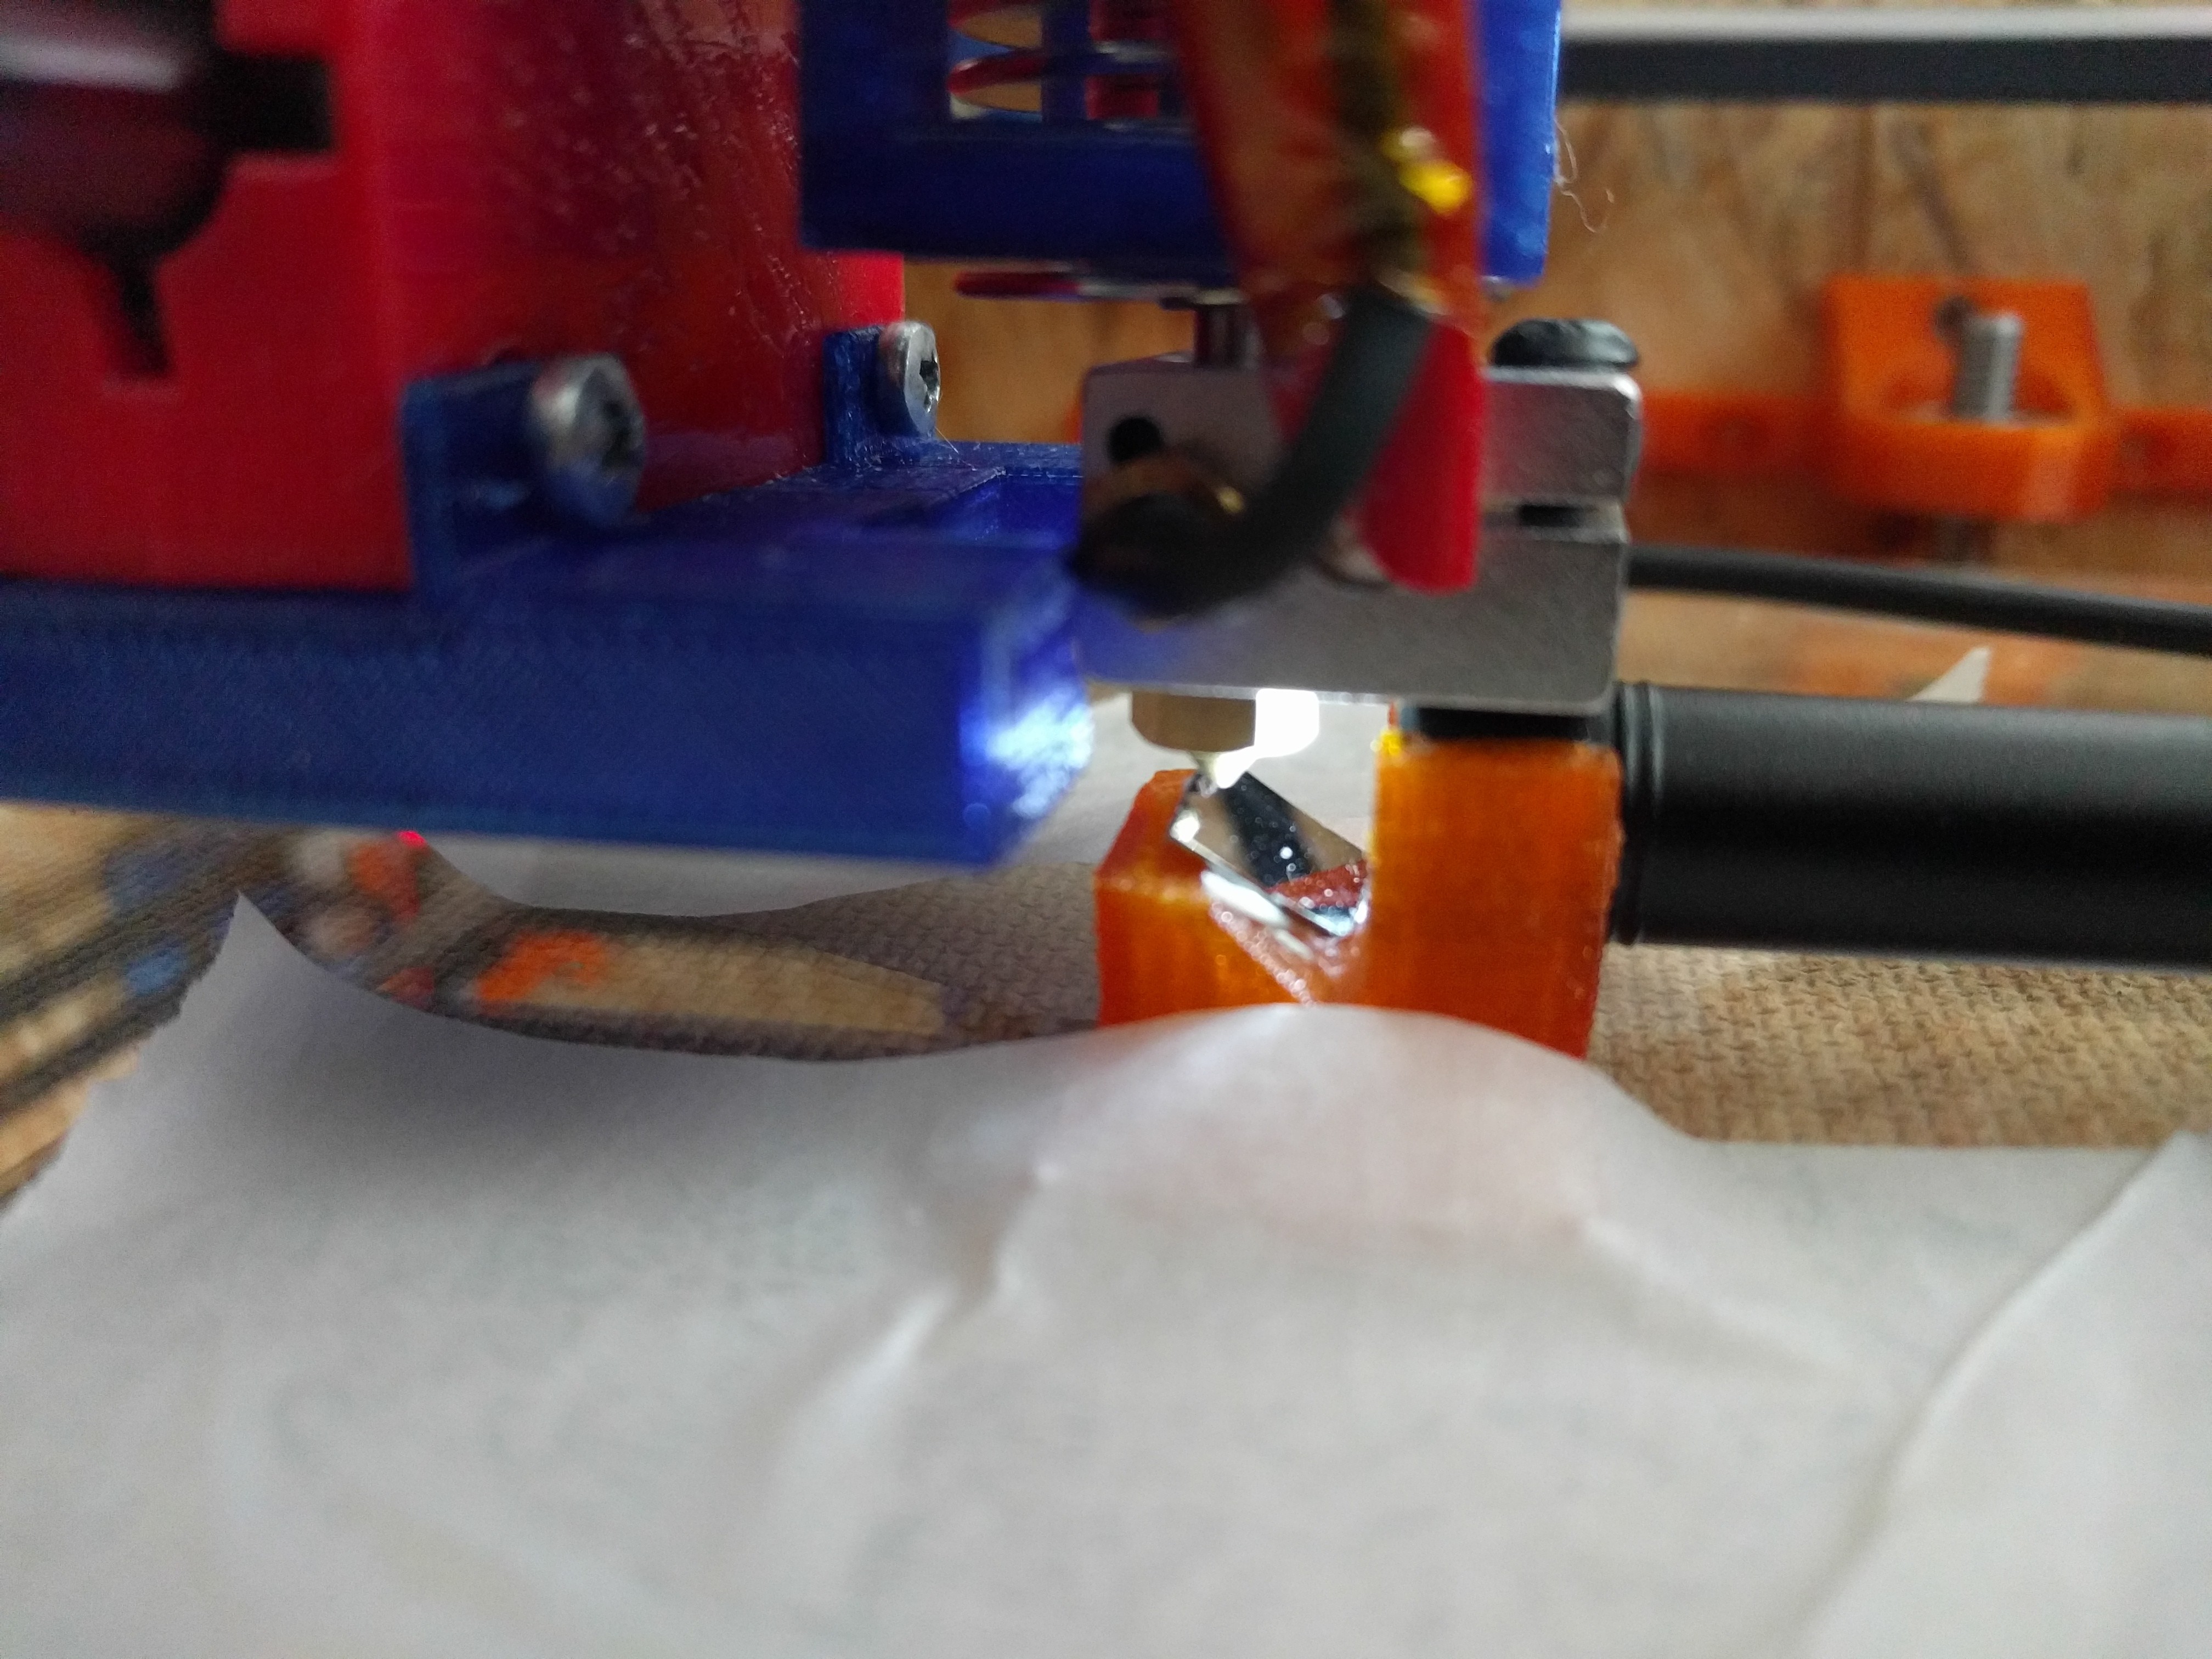
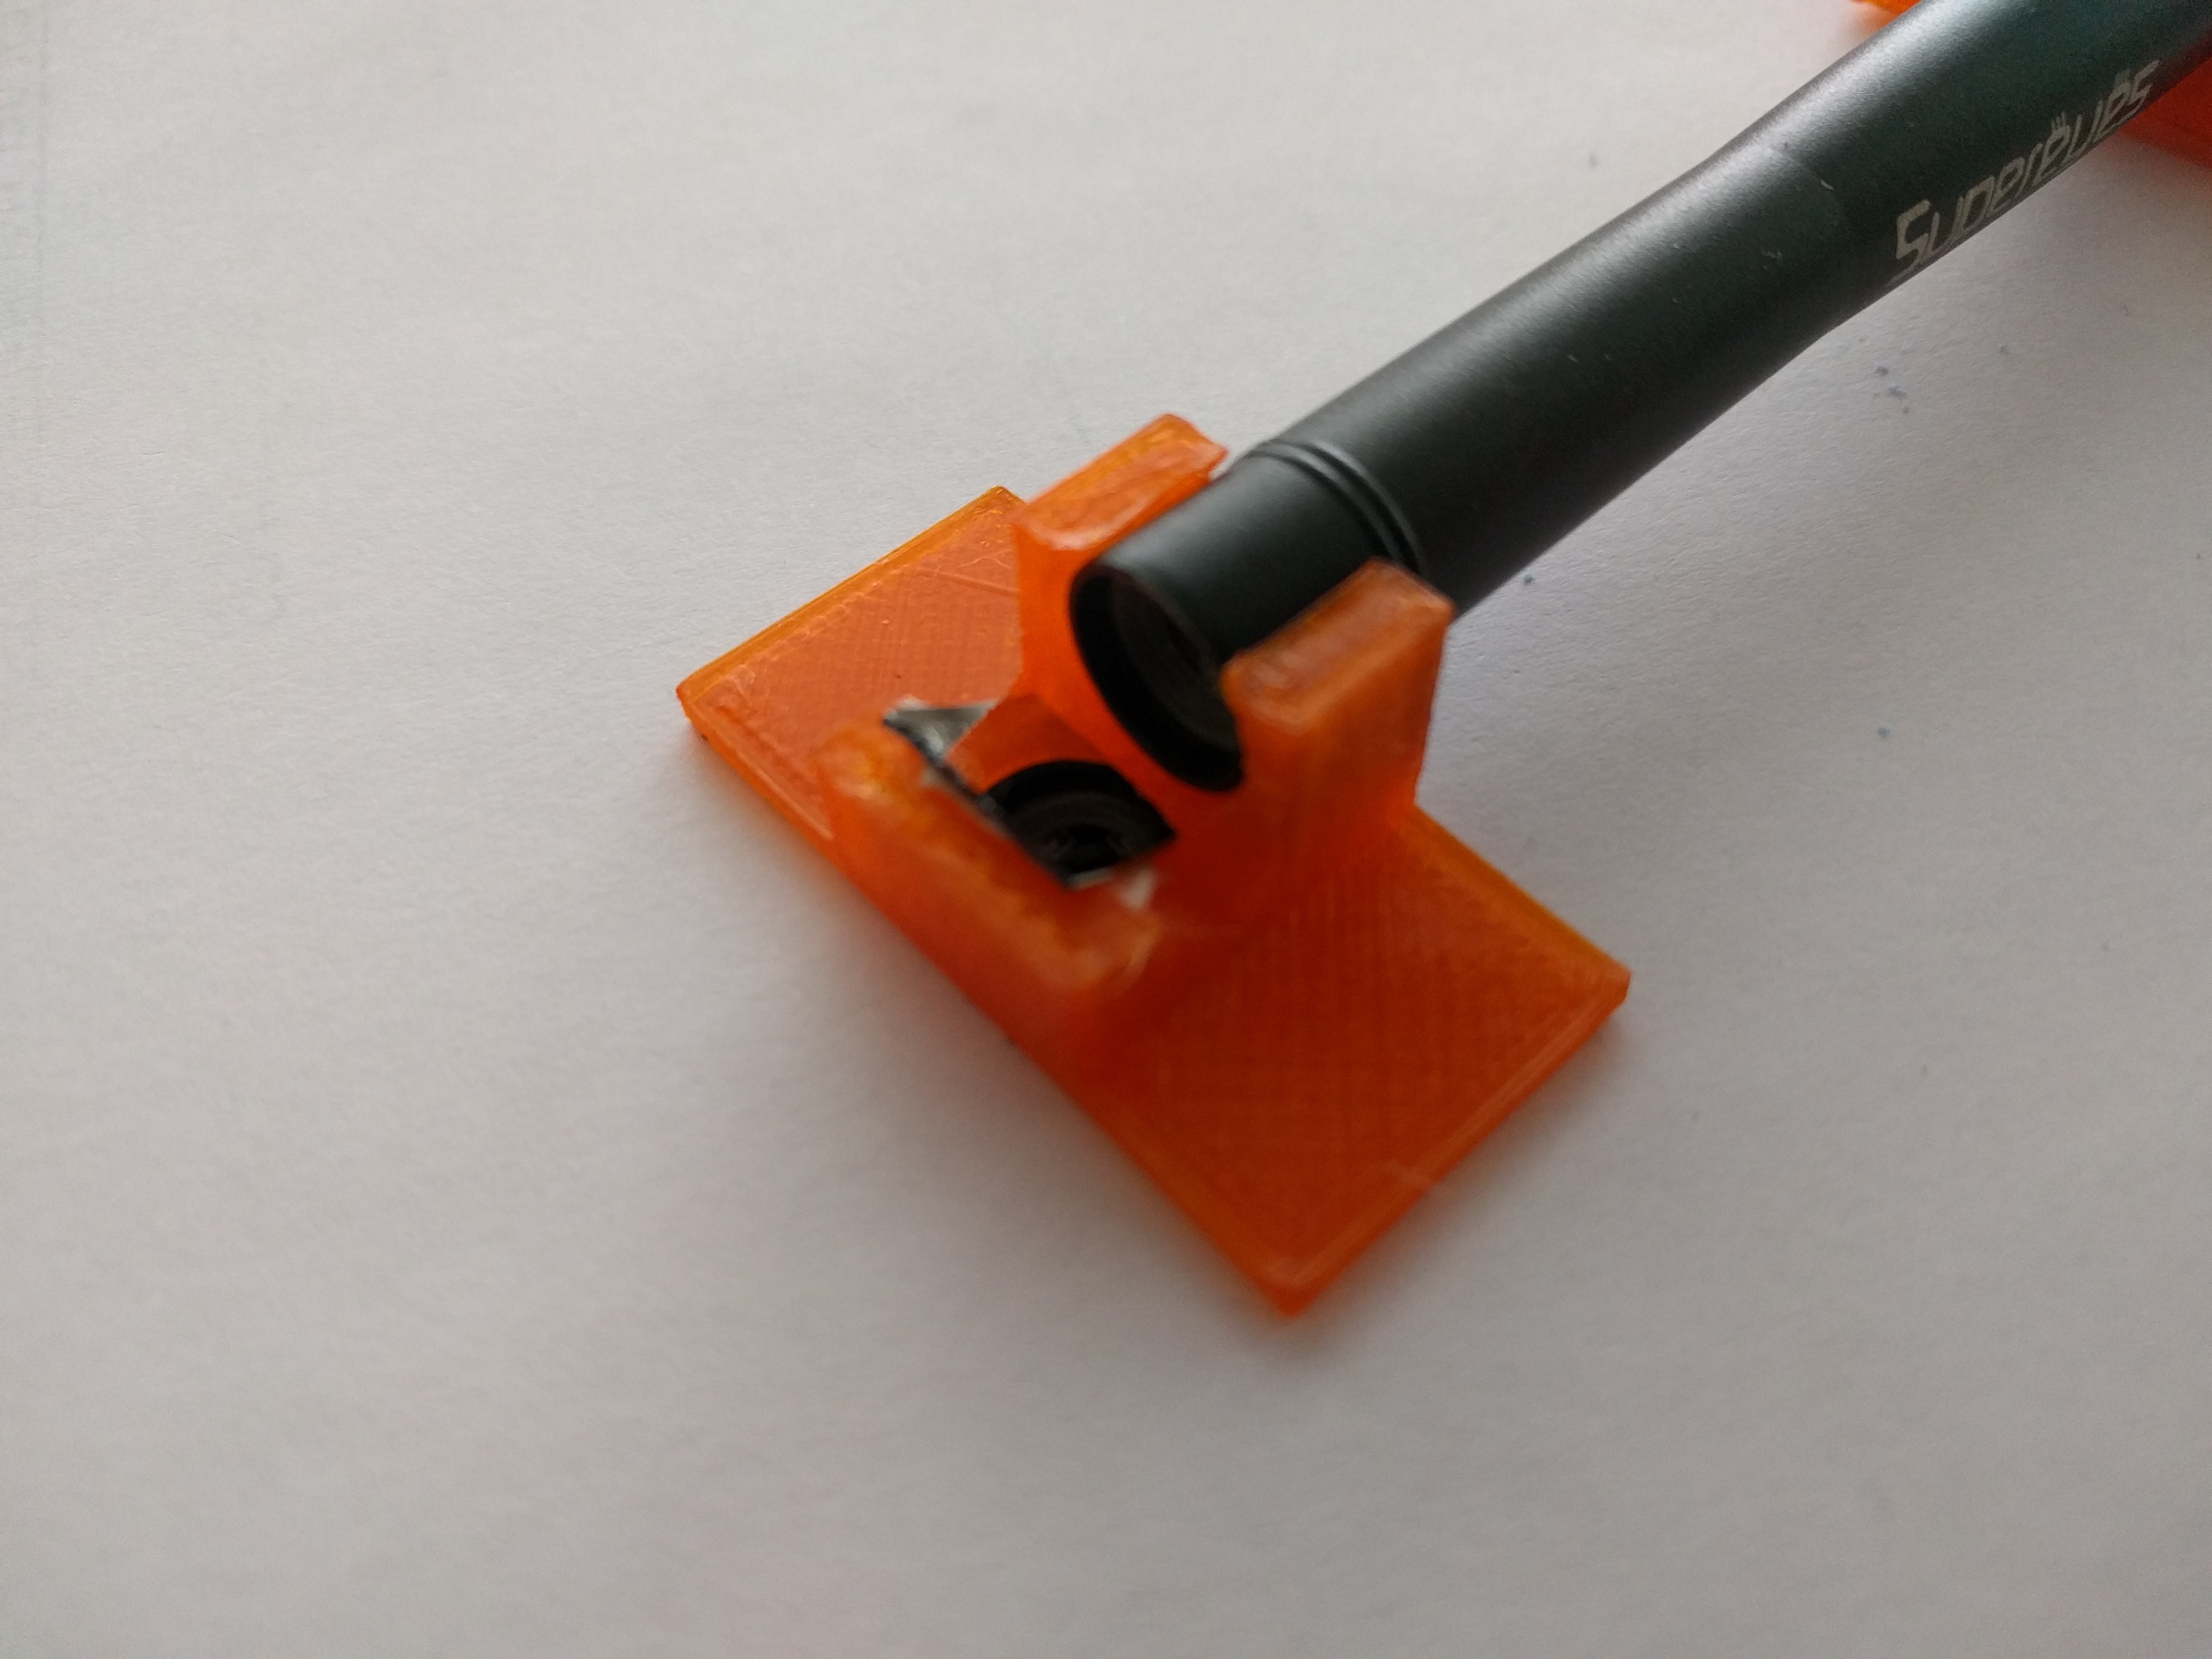
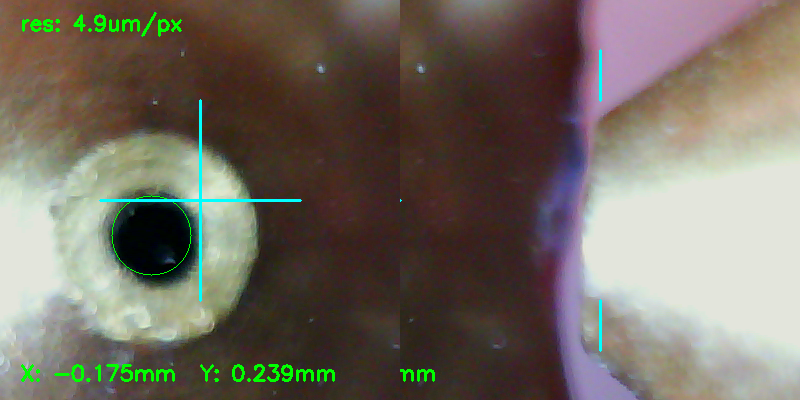
    I'm using a low budget USB microscope attached to the build plate to measure the offset of each nozzle. The resolution is in the range of 5µm per pixel, good enough for the requirements.


    A mirror at an angle of 45° is used to get an upwards pointing field of view in the left half of the image, this allows calibration of XY. The right half of the image has a field of view that allows for Z calibration. 


    OpenCV and some python scripting are used to extract XY offset and estimate for Z. Instead of relying on camera perspective and resolution, gantry movements and bed height adjustments are used to move the nozzle onto the respective reference points. The calibration is repeatable to about 10-20µm in all three axis.


    Side by side comparison of two hotends after offset calibration (rotated view).


    The process of offset calibration is still a bit tedious, but faster, more reliable and accurate than using thickness gauges and printing variations of vernier scale patters.

    Areas for improvement are

    • A microscope permanently mounted to the printer, to eg. allow inspection before starting a job.
    • Software that closes the loop between loading/unloading tools, measuring offsets, gantry and bed motion

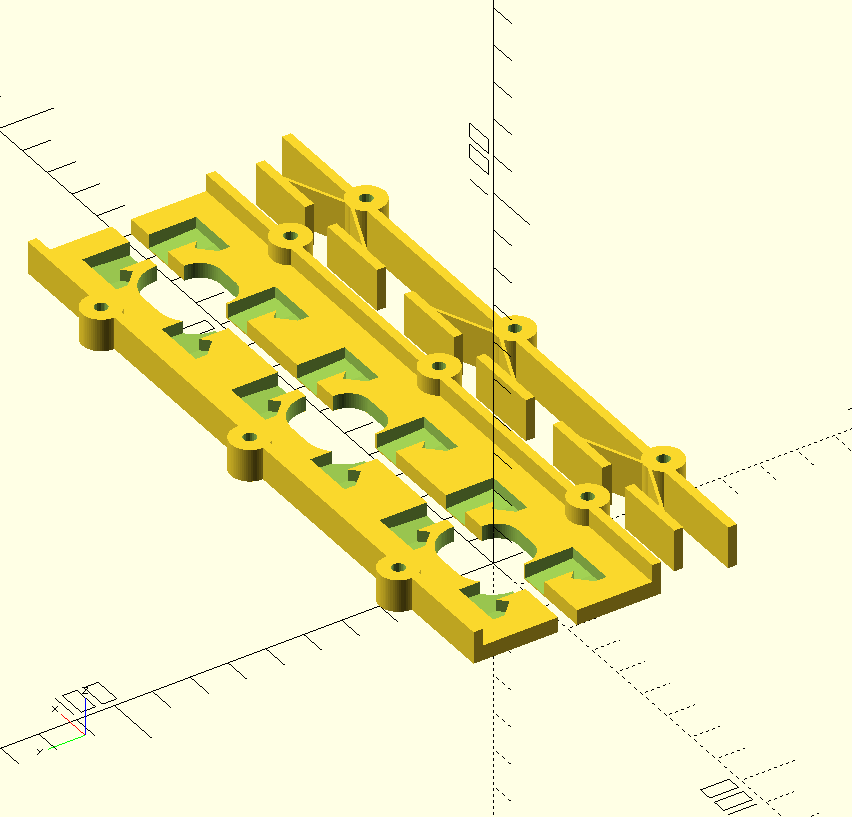
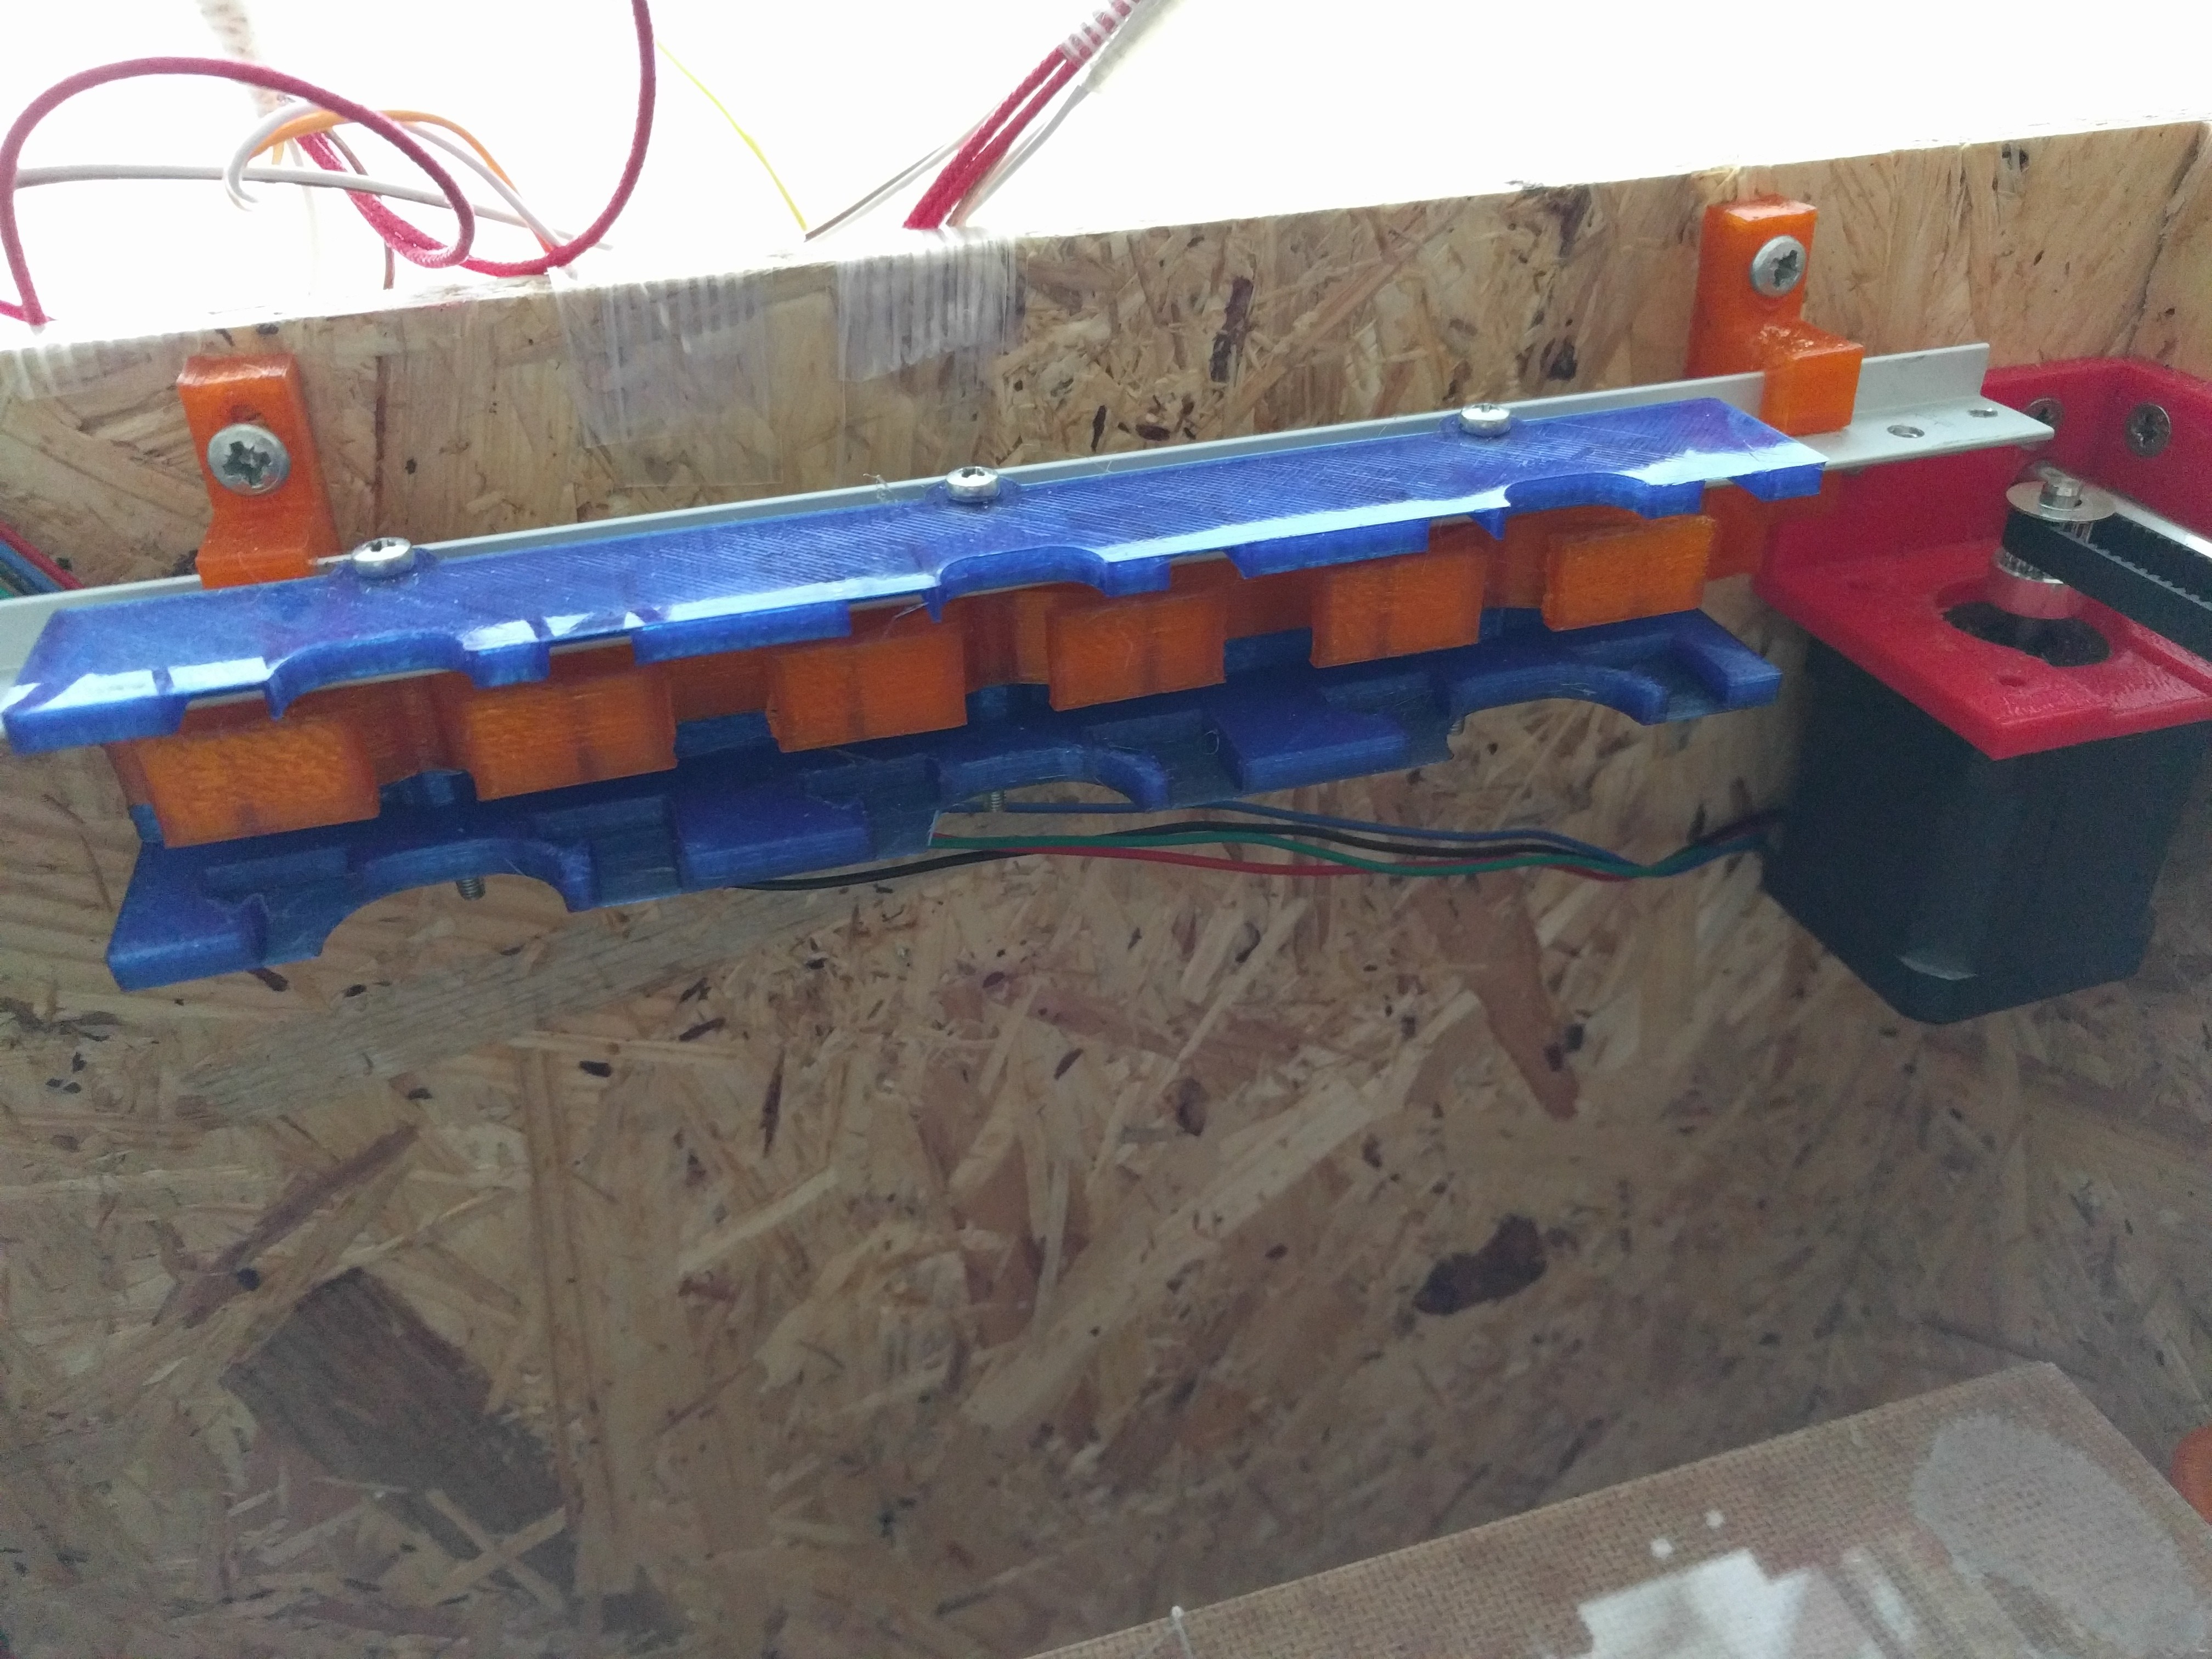
  • Rest assembly

    rolmie07/23/2017 at 15:28 0 comments

    Required parts

    • print all parts provided in hotend-rest.stl, PET-G is recommended 
    • M3 hexnuts and M3x30 bolts as needed
    • Aluminium T-Extrusion 15x15mm 1.5mm thick

    ToDo's

    • height adjustable mounting clamps that fit your specific printer

    A parametric design for OpenSCAD with arbitrary amount of positions will be available soon.

    Assembly should be pretty self explanatory, the distance between the screw holes is 60mm.

    Adjust the height of the rest such that it matches the height of the carriage over the whole distance.

View all 13 project logs

  • 1
    How to use Cura for slicing

    I've created a plugin for Cura version 2.6.2 and 2.7-BETA. To use it download ToolChangePlugin.tar.gz, unpack it in the appropriate folder (eg. $HOME/.local/share/cura/2.6).

    An example definition for a printer with 3 hotends is provided with the plugin. If want to use a different number of hotends open the file definitions/toolchanger.def.json with you preferred editor, change the machine_extruder_trains section.

    "machine_extruder_trains":  {
        "0": "toolchanger_0",
        "1": "toolchanger_1",
        "2": "toolchanger_2" },

    Copy/delete extruders/toolchanger_0.def.json as needed and change extruder_nr::maximum_value in each file accordingly.

    "extruder_nr": {
        "default_value": 0,
        "maximum_value": "2"
    },

    In any case the following values should be changed for every extruder definition (eg. extruders/toolchanger_0.def.json). Cura needs to know the start and end coordinates for every tool to avoid traveling across the printed object. 

    "machine_extruder_start_pos_abs": { "default_value": true },
    // tool X - lock
    "machine_extruder_start_pos_x": { "default_value": 146 },
    // tool Y - clearance
    "machine_extruder_start_pos_y": { "default_value": 255 },
    "machine_extruder_end_pos_abs": { "default_value": true },
    // tool X + lock
    "machine_extruder_end_pos_x": { "default_value": 160 },
    // tool Y - clearance
    "machine_extruder_end_pos_y": { "default_value": 255 }

    (Re)start Cura and add a new printer. You will find the example in the section Local of the "Add Printer" dialog. You should now have a new printer with, among others, Configure Tool Changing and Machine Settings buttons in the Manage Printer dialog.

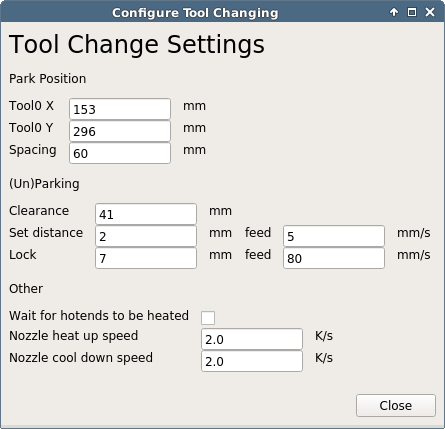
    The plugin assumes that your tools a located equidistant from left to right along the X axis of your printer. Tool0 X/Tool0 Y are the coordinates at which the XY carriage just mates with this hotend in the park position. Spacing is the distance in X between two hotends. Clearance is the amount of travel that must be mad straight in Y to avoid running into other hotends, or in other words, the depths of your print area should not be more than Tool0 Y -  ClearanceSet distance is an additional travel in Y made while loading a new tool, to ensure it is proper loaded (the tool rest is somewhat flexible in Y for exactly this reason). Lock finally is the travel in X to unlock/lock a tool to the rest. 


    The given example will create the following Gcode:

    ; load tool 0
    G0 X153 Y255 F7200  ; move to the edge of print area, center to the tool
    G0 Y296 F4800       ; pickup the tool
    G0 Y298 F300        ; ensure proper fit
    G0 Y296 F4800       ; move back to reduce friction while unlock 
    G0 X146 Z0          ; unlock
    G0 Y255 F7200       ; move straight back to the edge of the print area
    ;unload tool 0
    G0 X160 Y255 F7200  ; move to the edge of print area
    G0 Y296             ; move straight to the rest
    G0 X153 F4800       ; lock the tool to the rest
    G0 Y255             ; back out carriage from the tool 
    ; load tool 1
    G0 X213 Y255 F7200  ; X coordinate is the only difference 
    G0 Y296 F4800
    G0 Y298 F300
    G0 Y296 F4800
    G0 X206 Z0.3
    G0 Y255 F7200
    

    The last step is setting the correct Nozzle offsets per extruder in Machine Settings. X and Y offsets are handled by Cura, but Z offset must be managed by the printer firmware. Dealing with offsets in two different places sounds complicated, but is actually a feature. If X and Y would be managed by the firmware, the code to load/unload would need to account for the offset, but having Z offset known by the firmware makes it easy to calibrate the bed with every tool head.

    Nozzle offset calibration is beyond the scope. I've written about the way I'm doing it, but my tooling isn't yet good enough to be released. My plan is to add camera support for offset calibration to the plugin.

  • 2
    Assembling a hotend

    Required parts

    • Prrint hotend-v2-single.stl or hotend-v2-dual-PETG.stl and hotend-v2-dual-POM.stl. I used 3 shells, 0.2 mm layer height, 4 top/bottom layers and 30% infill for PET-G part and one shell, 0% infill 0 top/bottom for POM.
    • 2 M3x20mm round head screws
    • 2 M3 square nuts (hex works as well)
    • 4 3x15mm wooden screws
    • J Head long range hotend
    • 25x25x10mm fan

    Special tool

    • 4mm-H7 reamer

    Clean the printed parts as needed, use drill bits to clean the screw and bowden tube holes. I used a 4mm-H7 reamer to widen the holes of the bushings to the correct diameter (I'm using 4mm-h6 pins). A 4mm drill bit might work as well. 

    Screw in the fan from the back

    Insert the hotend. Run the heater and sensor cables on opposite sides. Twisting the heater block slightly makes it easier to access the sensor screw once the hotend is fully mounted. 

    The hotend usually fits very tightly and the gap between the two printed parts is to big for the screws to grab. Use a vice to gently squeeze them together the first time and tighten the screws. Longer bowden tubes are sometimes a bit wobbly, warping around 1.5mm² cooper wire helps with this issue.

  • 3
    Molding a nozzle plug/wiper

    The nozzle plug/wiper is made from a high temperature (350°C/650F) sealant/gasket silicone used eg. in the automotive industry (eg. K2 Black High Temp Silicone, sells for $6 on Amazon). Neither of PLA, PET-G or POM seems to stick to it, and I assume that this is true as well for almost any other plastic used in 3D printing.


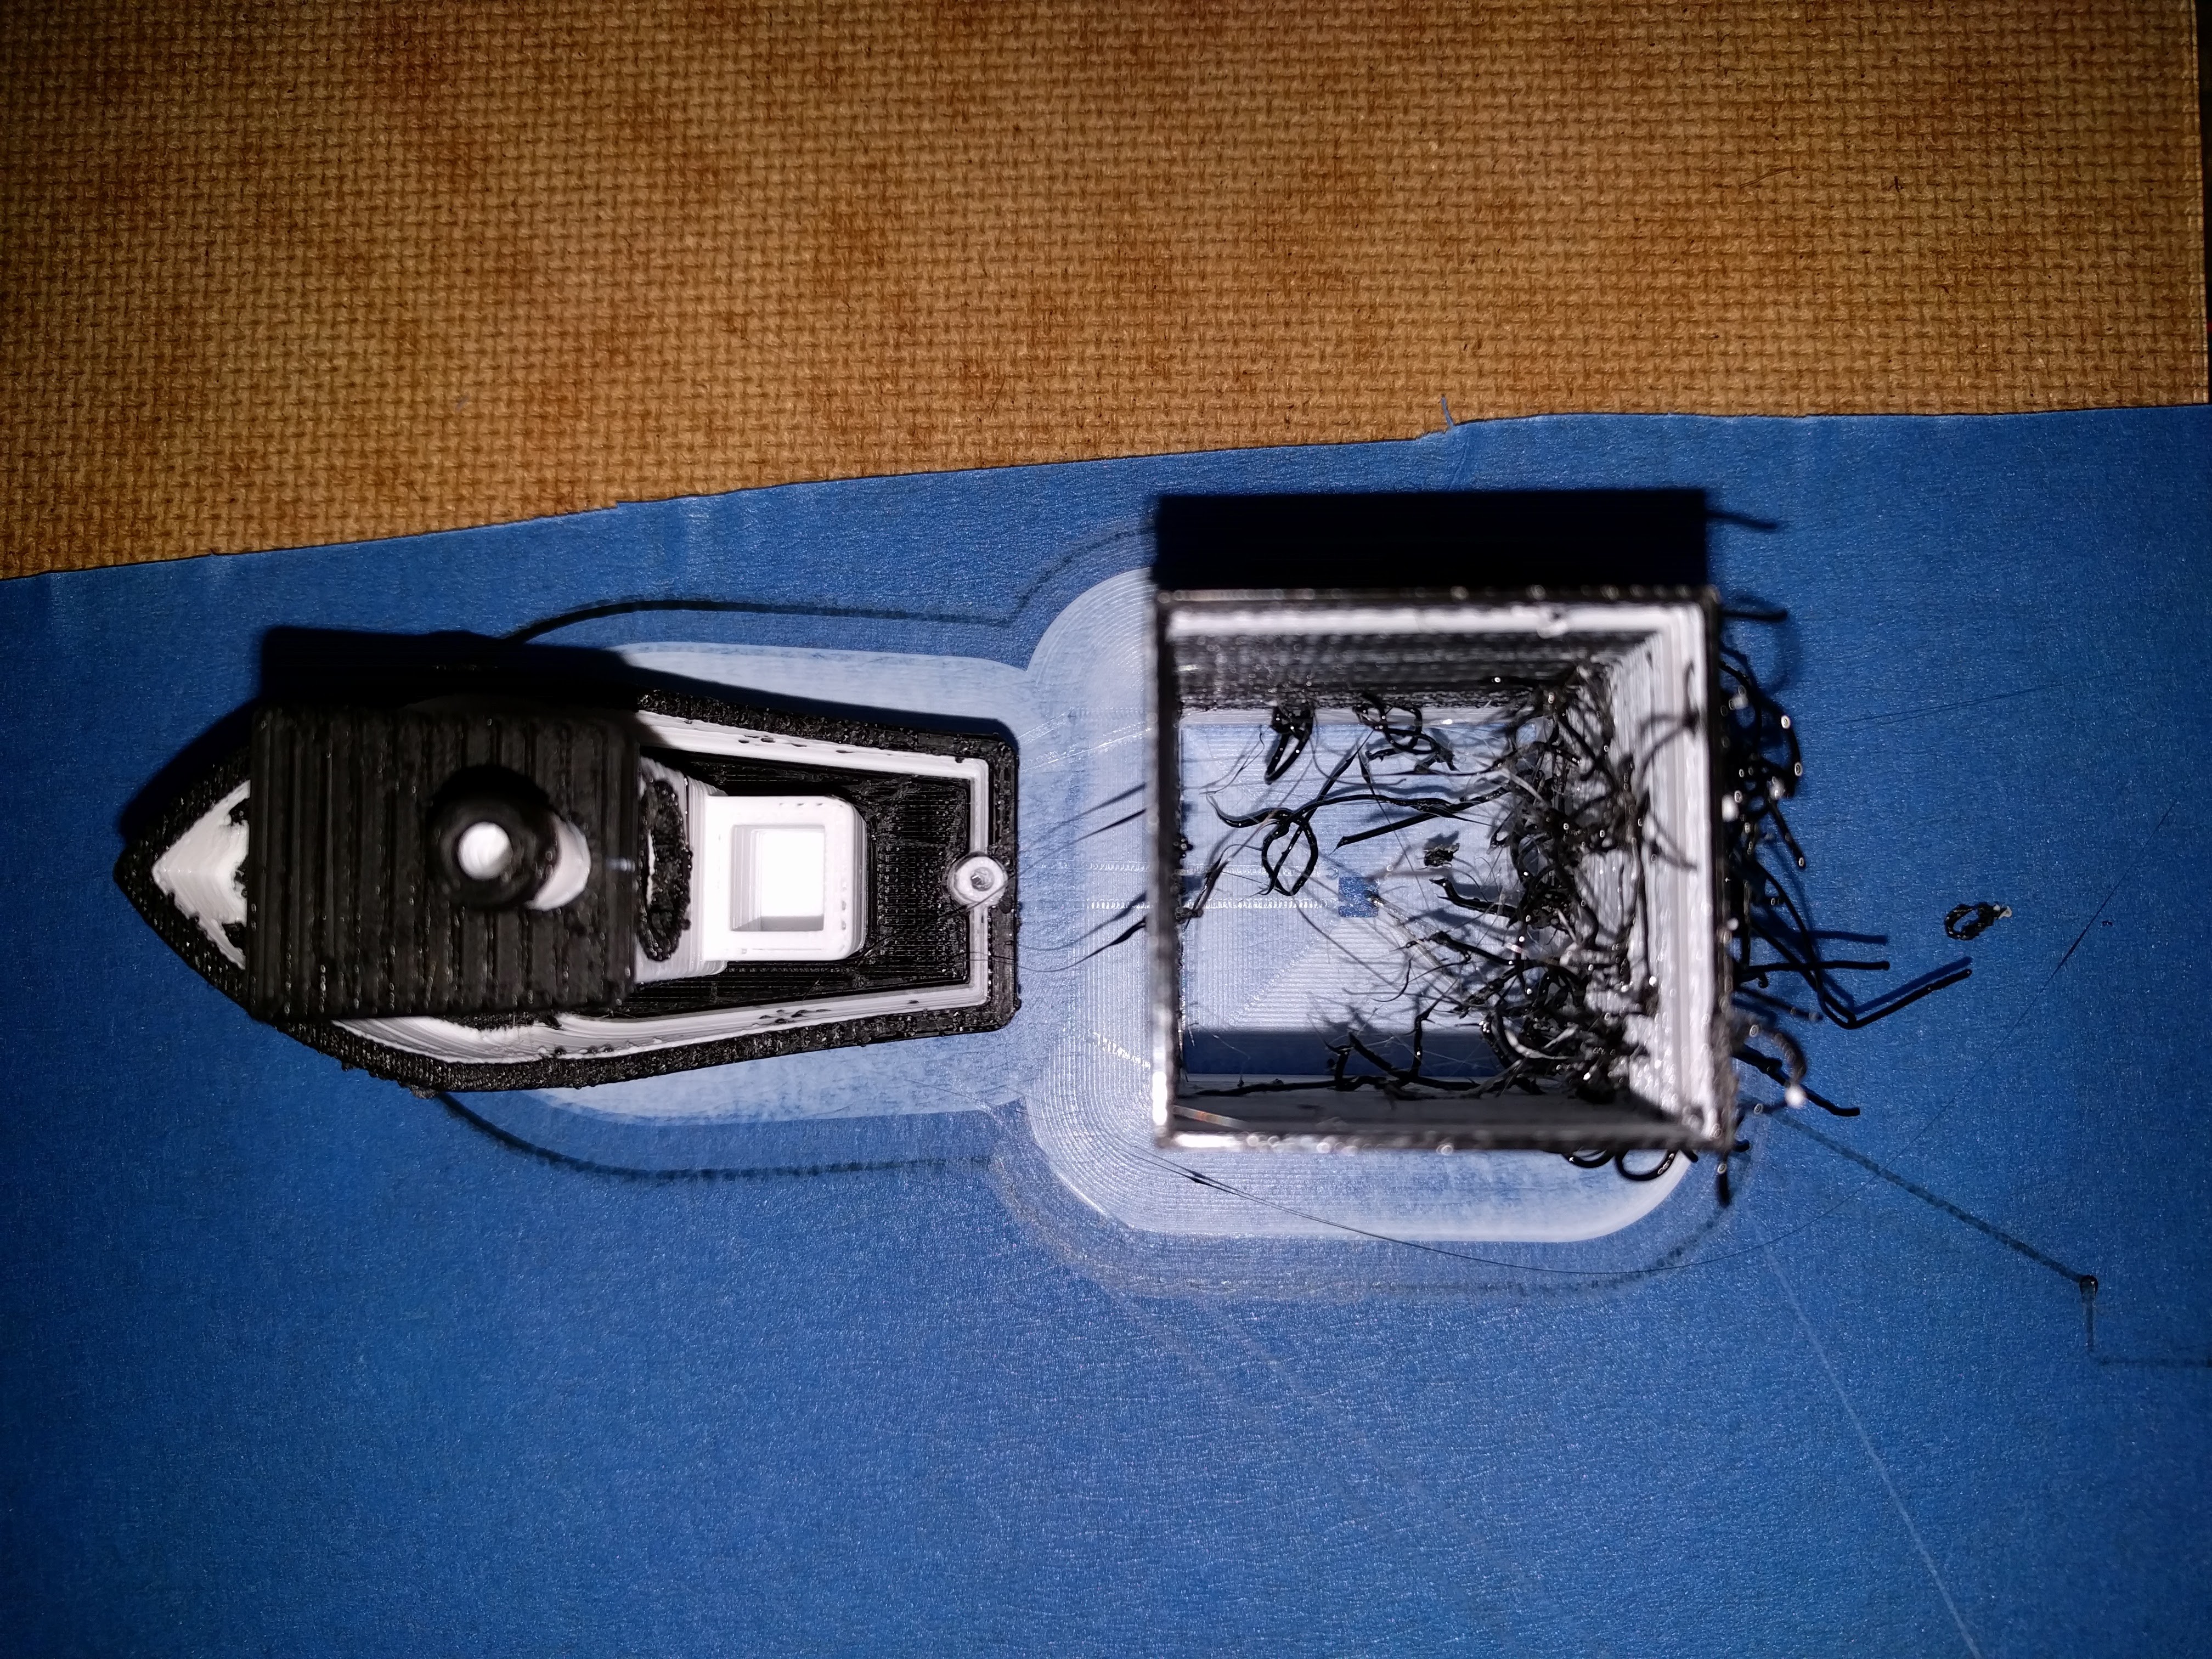
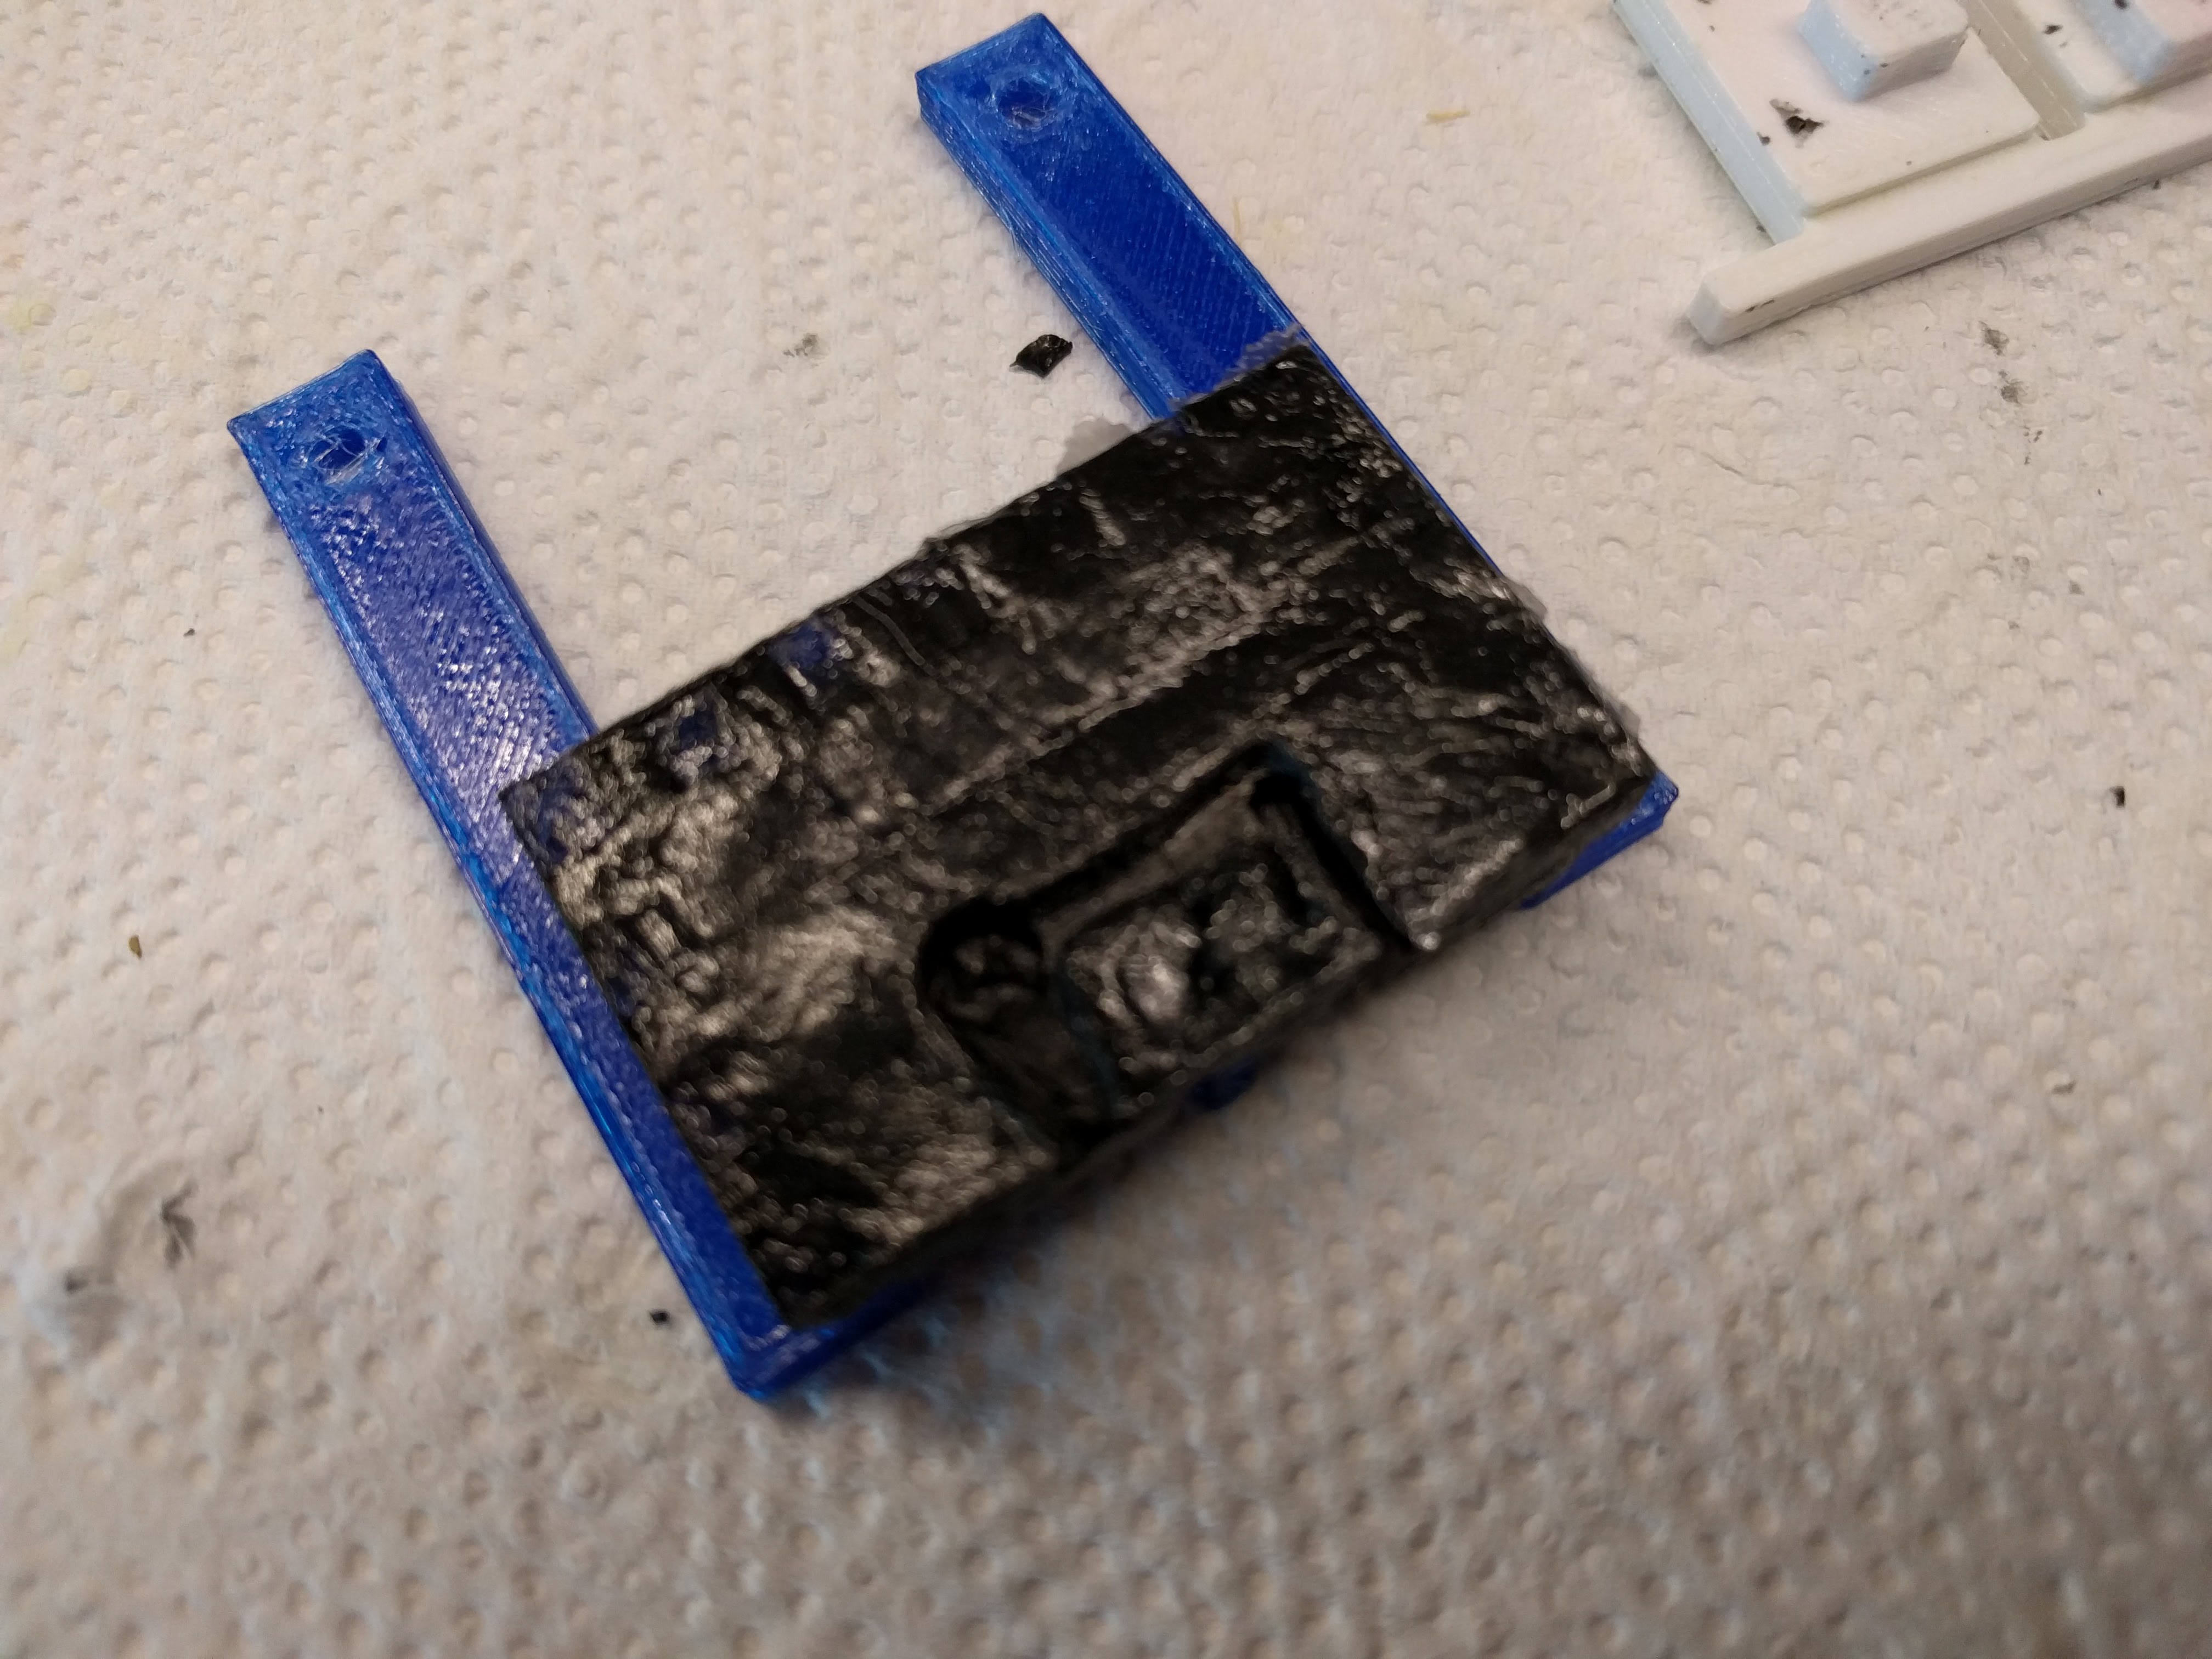
    The process is very straight forward. Print wiper-v2.stl (blue parts) and wiper-mold.stl (white parts, printed with 0.1mm layers). Soak both mold parts in a mixture of water and dish soap and assemble all as show below. The dish soap prevents the silicone from sticking to the mold (release agent ) while the water provides the humidity to cure the silicone. Keep the wiper part as dry as possible.


    Squeeze a big blob of silicone in the center, preferably in one go to avoid trapped air bubbles and use a spatula to spread it out towards the features and edges of the mold. Let it sit for at least 18 hours to cure.

View all 3 instructions

Enjoy this project?

Share

Discussions

chernogorsky wrote 03/13/2019 at 20:19 point

Amazing idea with the camera. 've been wanted to do it manually with my setup, but with that tools it should be much more precise and easier. 

  Are you sure? yes | no

amgsimmons wrote 12/04/2018 at 13:00 point

Hi Rolmie, thanks for uploading the offset calibration tool. Is it possible you could re-upload the tool change plugin as it can't be downloaded anymore. I am halfway thru a build of a printer to use this method of multiple extruders and the software will help.

  Are you sure? yes | no

Patrick Ryan wrote 10/11/2018 at 04:09 point

Looks great! I'm looking for good ways to incorporate cutting lasers, light duty CNC spindle to be able to work on trimming prints before and after they are being made.

  Are you sure? yes | no

Googliola wrote 06/27/2018 at 21:41 point

It's a shame that this project is stalled (no activity for 6+ months) . Nice approach and thanks for the idea anyway....

Still hoping for the creator to get back for a status update! 

  Are you sure? yes | no

Googliola wrote 06/23/2018 at 13:25 point

Please share your code (especially the offset tool), saves me from a rewrite. 

Thanks in advance! 

  Are you sure? yes | no

rolmie wrote 11/18/2018 at 09:22 point

  Are you sure? yes | no

amgsimmons wrote 12/04/2018 at 13:00 point

thanks!

  Are you sure? yes | no

Max wrote 04/22/2018 at 06:11 point

Any chance we can get the ToolChangePlugin files re-uploaded or pointed to the source code?

  Are you sure? yes | no

marinescud85 wrote 12/19/2017 at 19:44 point

Hi,

 the ToolChangePlugin.tar.gz is not working, the arhive is not there anymore...

  Are you sure? yes | no

johann.wilhelm wrote 12/10/2017 at 22:25 point

Hi there!

Quite an interesting idea. Since I now upgraded from an i3 clone to an H-bot, I'm thinking about tool changing.

But I would prefer a solution in firmware since tool changing seems to be quite repeatable.

There are defines for HOTEND_OFFSET_X, HOTEND_OFFSET_Y and HOTEND_OFFSET_Z in marlin... so it should be a rather simple hack to make these dynamic.

Btw, I found another approach to the machanics here: 

Regards

  Are you sure? yes | no

hunterschade wrote 09/07/2017 at 20:20 point

Do you have a tutorial on adding the plug in to cura? Ive been trying and can't seem to get it to appear on my plugins menu.

  Are you sure? yes | no

rolmie wrote 09/08/2017 at 05:38 point

The plugin is only available for printers that support tool changing, to make it easier to use Cura for multiple printers. If you are curios take a look at definitions/toolchanger.def.json, apart from the additional fields and the extruder trains, it defines '"supported_actions": ["ToolChangeConfig"]' which controls if the config button is available in the machine settings dialog.

The easy way out is to add a new printer, the template can be found in the section Local

  Are you sure? yes | no

hunterschade wrote 09/08/2017 at 05:42 point

I have added a new printed in cura because I am currently building my own so I just added a few extra hot ends. I will take another look tomorrow and get back to you. 

  Are you sure? yes | no

jack riddell wrote 08/31/2017 at 17:03 point

one down side to this design is you need a new extruder stepper motor and new drivers for each new filament extruder. have you thought about using one stepper motor and having the exchangeable tool heads interface with a singe extruder motor mounted on the carriage?

  Are you sure? yes | no

rolmie wrote 08/31/2017 at 20:05 point

Not much, but it came to my mind while thinking about direct drive hotends. 

One issue would be the alignment of the motor shaft to the extruder during coupling if eg. a hex shaft is used. If the steps per mm are know to the slicer it could track the state of each extruder and add the required extrusion length after decoupling to align the motor shaft to the next extruder. I have no idea how to find the initial alignment of all extruders in the start code.

Another issue could be printer firmware, the typical assumption is that each hotend is driven by a dedicated stepper motor, which breaks this use case (haven't checked it).

  Are you sure? yes | no

jack riddell wrote 09/02/2017 at 05:29 point

there is a drive called a flex3drive that uses a flexible drive shaft to get all the benefits of direct drive without the added weight on the head. The benefit of this style of drive is the gear ratios could allow for a very weak connection/coupling I was thinking you could combine that with a magnetic coupler that way you could minimize the issues with alignment 

  Are you sure? yes | no

Scott wrote 08/28/2017 at 05:03 point

Which board are you running for all of this?

  Are you sure? yes | no

rolmie wrote 08/29/2017 at 05:42 point

MKS Sbase with Smoothieware. I'll switch to RADDS + 3 stepper extension board soon.

  Are you sure? yes | no

MasterOfNull wrote 08/27/2017 at 16:57 point

You had me at OpenSCAD.  :)

  Are you sure? yes | no

Luke Albers wrote 08/27/2017 at 14:40 point

This is awesome, nice work.  Would be great w/ custom offsets for each tool, or a method of automatically determining it, so that different sized hotends/tools could be used.  I'm thinking of some extruders having volcano heater blocks for quickly doing infill with ~1mm nozzles.

  Are you sure? yes | no

rolmie wrote 08/27/2017 at 17:00 point

Custom Offsets per hotend are possible, writing about it is on my ToDo list :)

Both, slicers (at least Cura) and printer firmwares (at least Smoothiware and 32-bit Repetier) can handle it.  My recommendation in short: X an Y should be handled by the slicer but Z from the firmware. The created G-Code to load/unload tools adds a move in Z to force the firmware to actually correct the offset, while no tool is over the build plate.

The only thing that needs to be changed is either lowering or raising the nozzle wiper.

  Are you sure? yes | no

Similar Projects

Does this project spark your interest?

Become a member to follow this project and never miss any updates