Close
0%
0%

Wikit: programmable hardware with flowchart

Making Hardware with Simple Drag and Drop

Similar projects worth following
Hardware is not hard with Wikit.

Wikit round is a downcost version for starter co-work with iPAD
Wikit rectangle is an FPGA based platform co-work with iPAD.

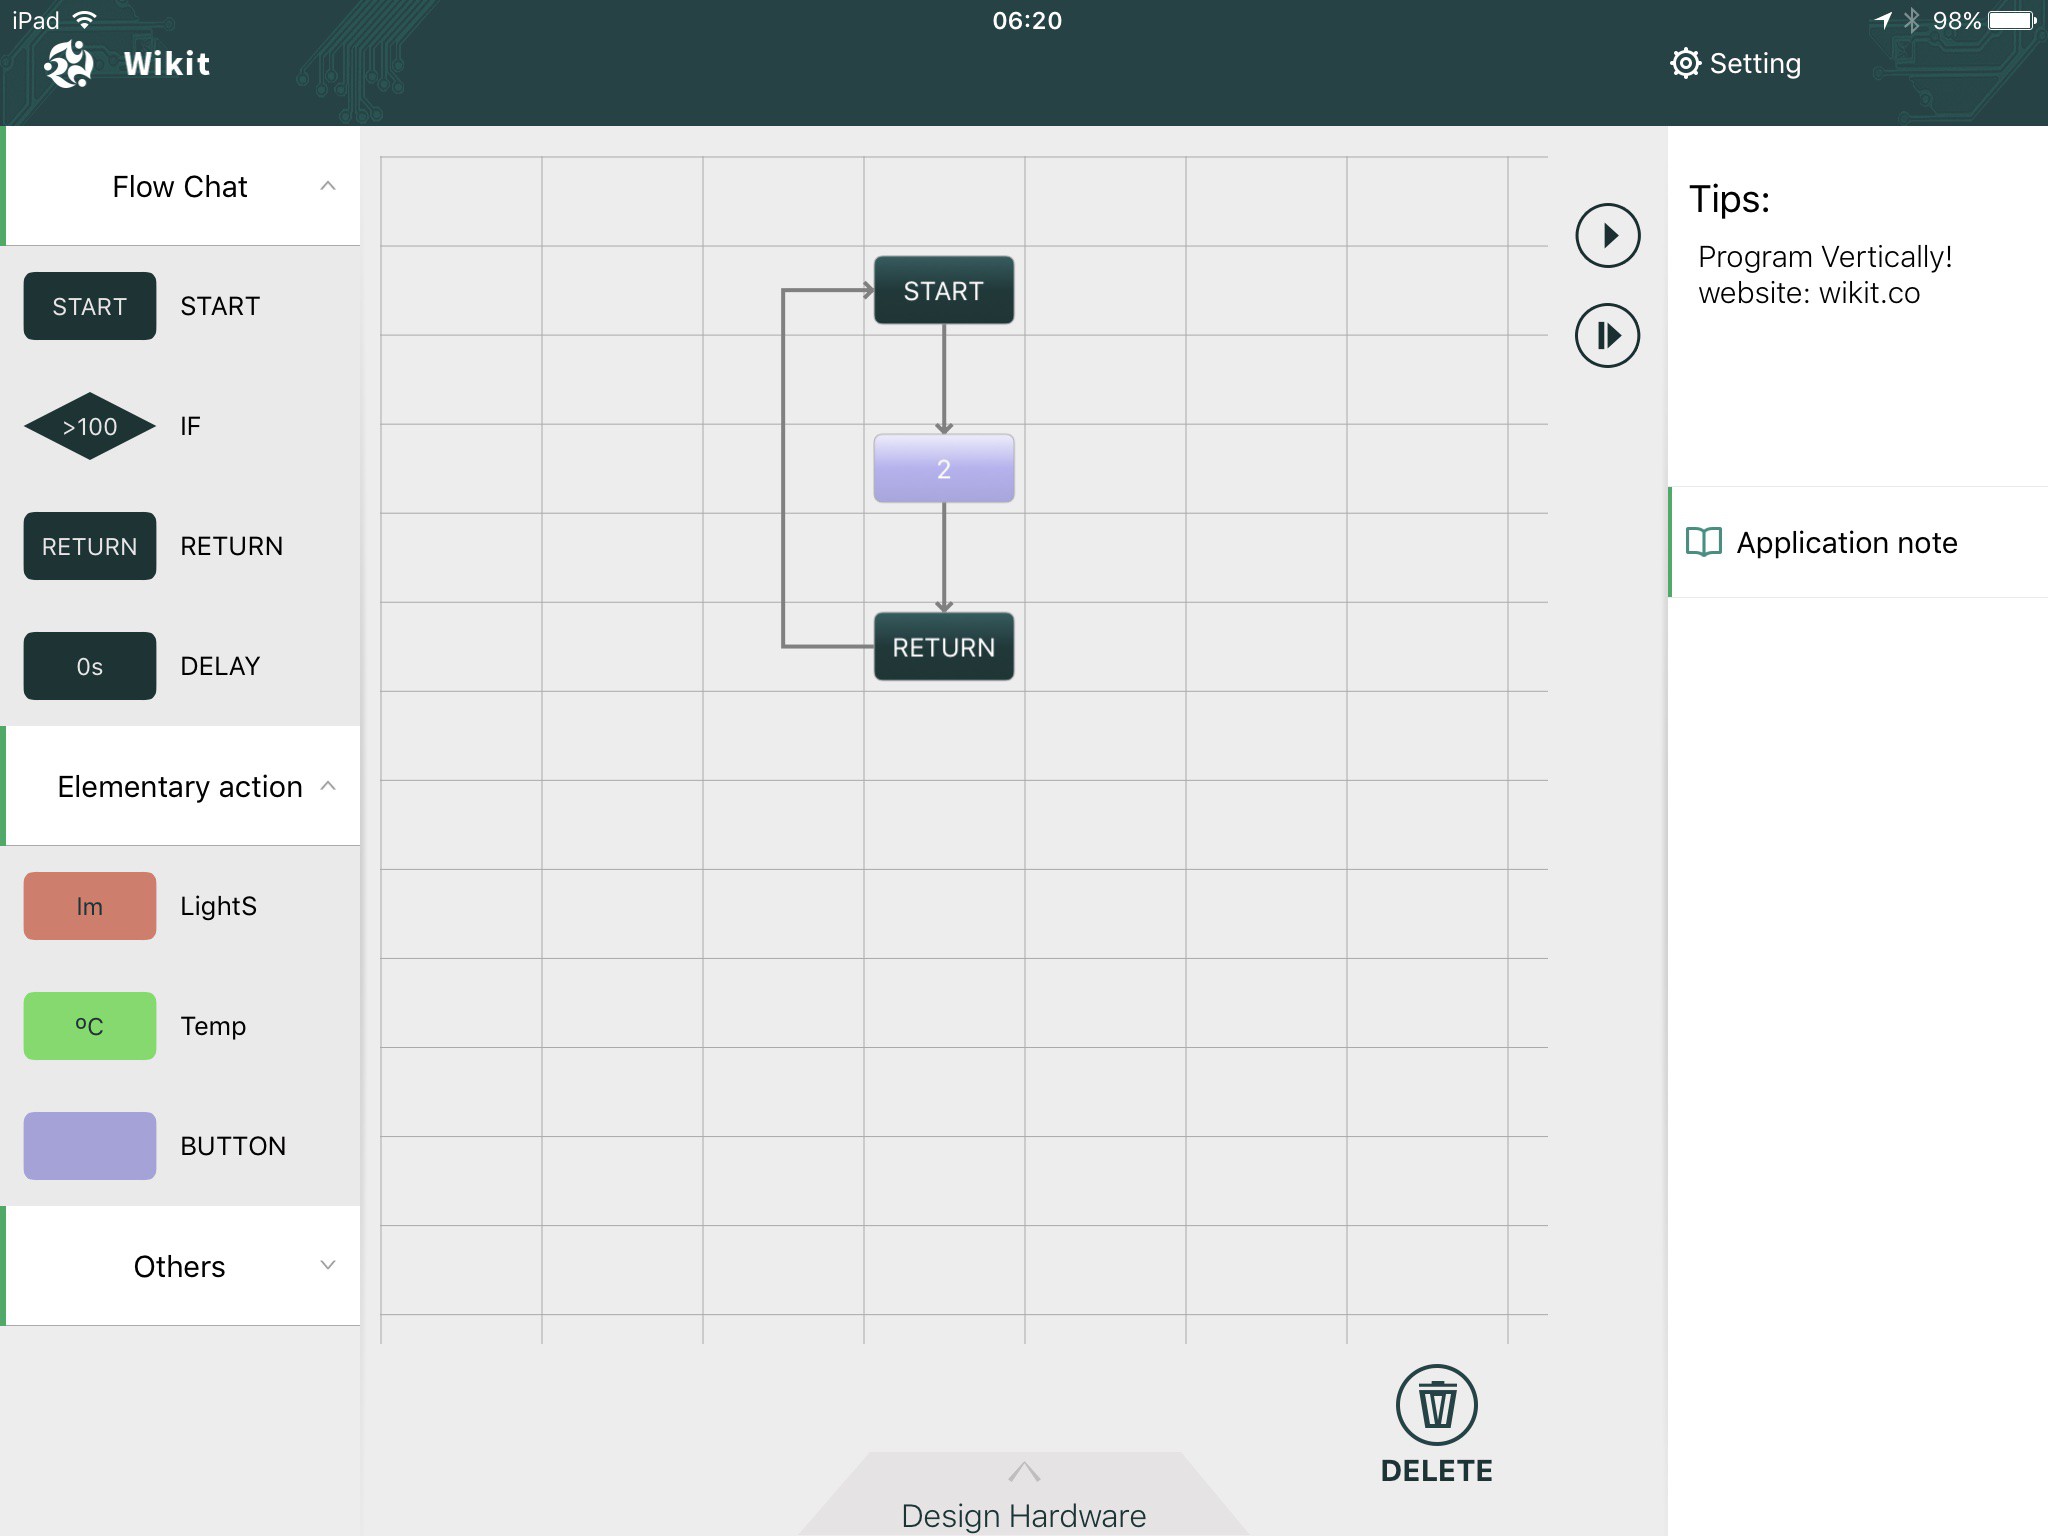
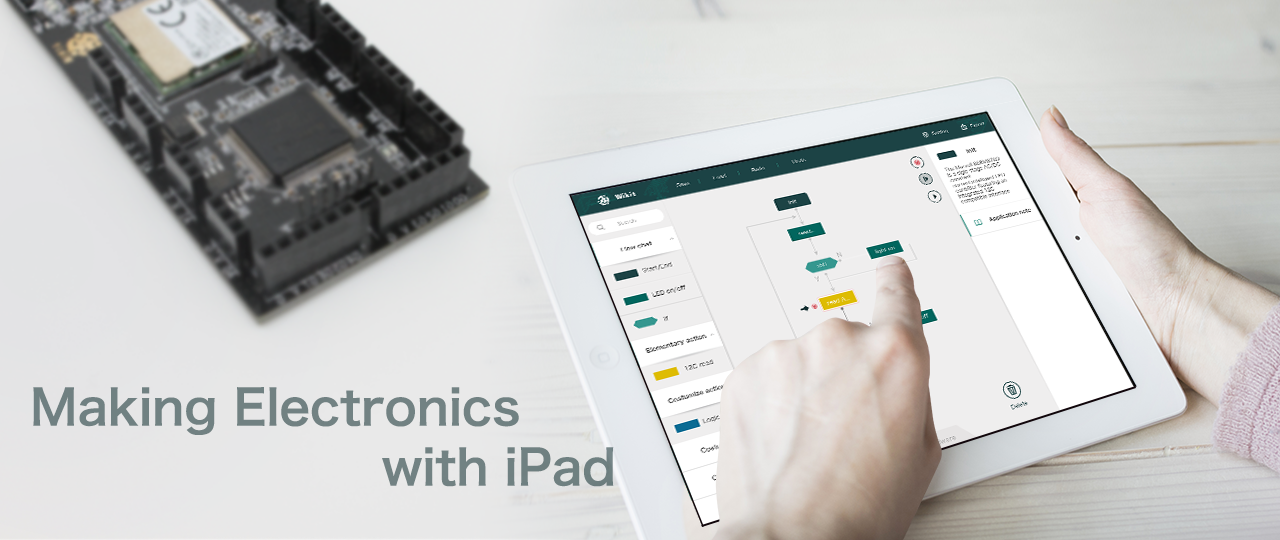
Making hardware electronics will be as easy as simple drag and drop with wikit

Feature:
1.Program with flowcharts. No programming skills required --- Wikit round/Wikit rectangle
2.hardware self testing -- Wikit Round/Wikit rectangle
3.Support transform Arduino code into Flowchart block -- Wikit rectangle
4.support over 200 modules on Sparkfun and Adafruit (keep growing) -- Wikit rectangle
5.support over 150 modules on grove interface hardware module-- Wikit round
5.Support Flowchart code transform into different platform design ready code. --Wkit rectangle


Milestone

1. wikit round start kit --- a downcost version of wikit with BLE ONLY for everyone trial

a.support flowcharts programming

b.support flowcharts step debugging

c.support hardware configuration with simple drag and drop

d.support hardware self-testing

e.support limited modules

2.wikit recctangle design -- backward compatible with wikit round with more professional function

a.support flowcharts programming

b.support flowcharts step debugging

c.support hardware configuration with simple drag and drop

d.support hardware self-testing

e.support arduino code import to flowcharts

f.support flowcharts export to other MCU platform design ready code.

g.support over 100 modules


Key Technology for Wikit

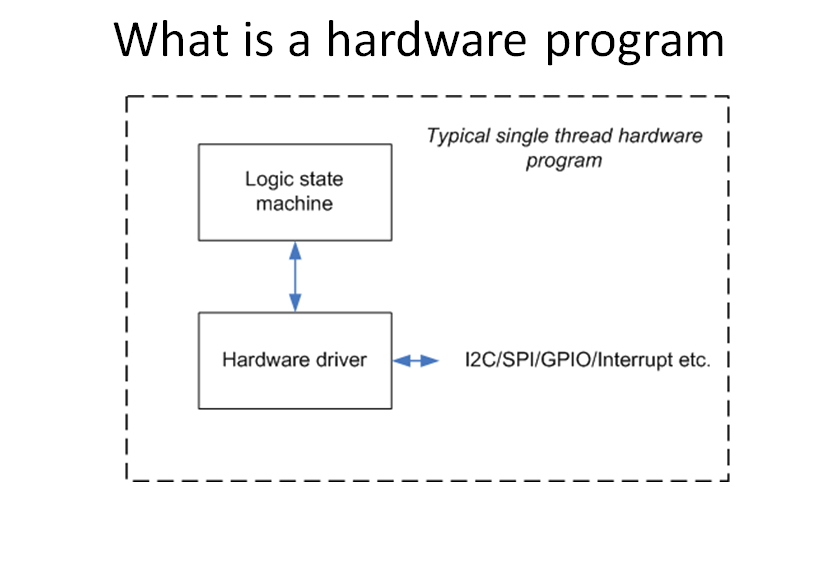
1. How hardware works
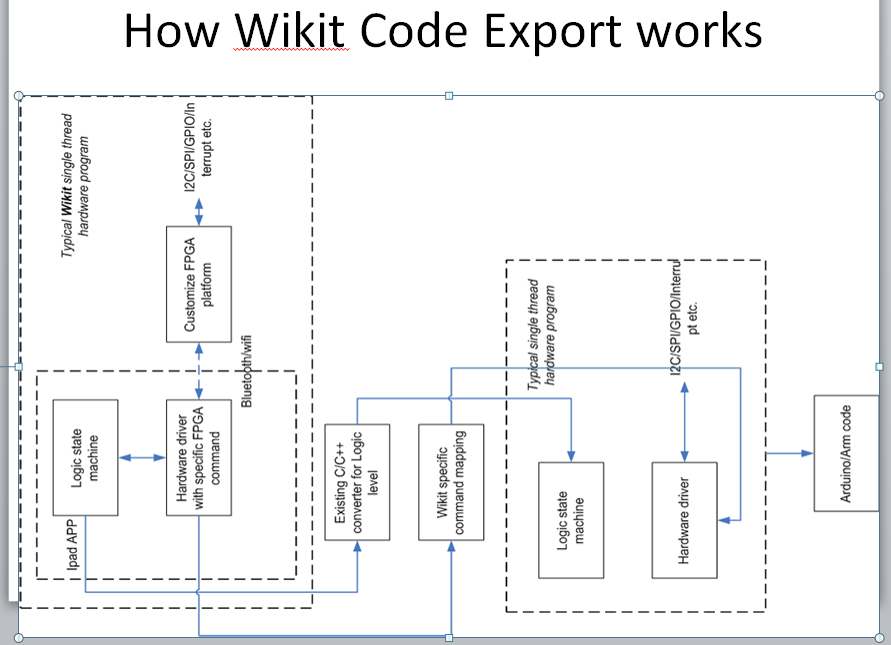
2.How wikit works
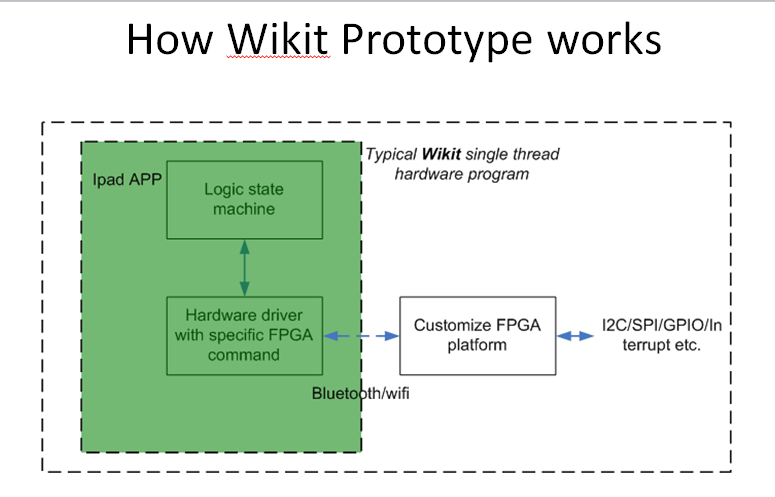
3 Arduino code import to Flowcharts
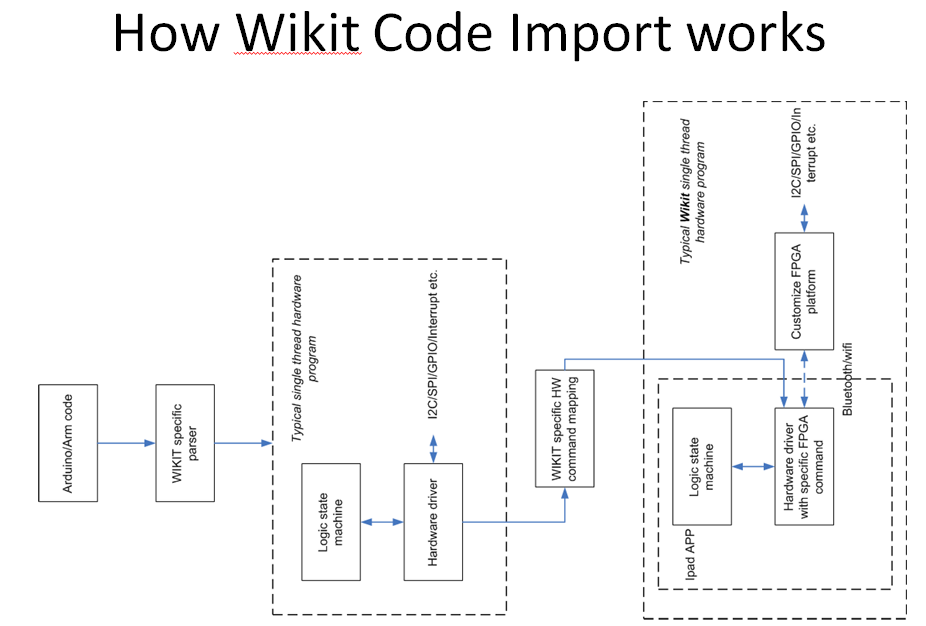
4.flowcharts export to other MCU platform design ready code

Other Creative Tech for Wikit

1.hardawre self testing -- https://youtu.be/enwGYyO7cUA


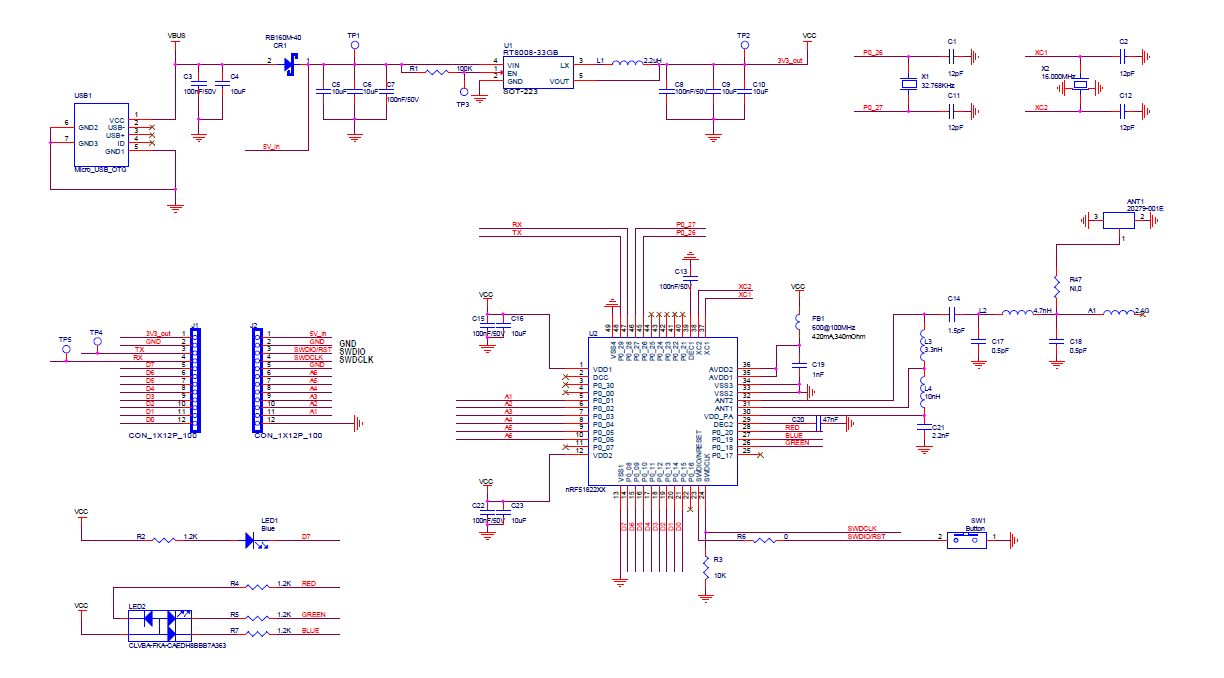
Schematic for wikit round
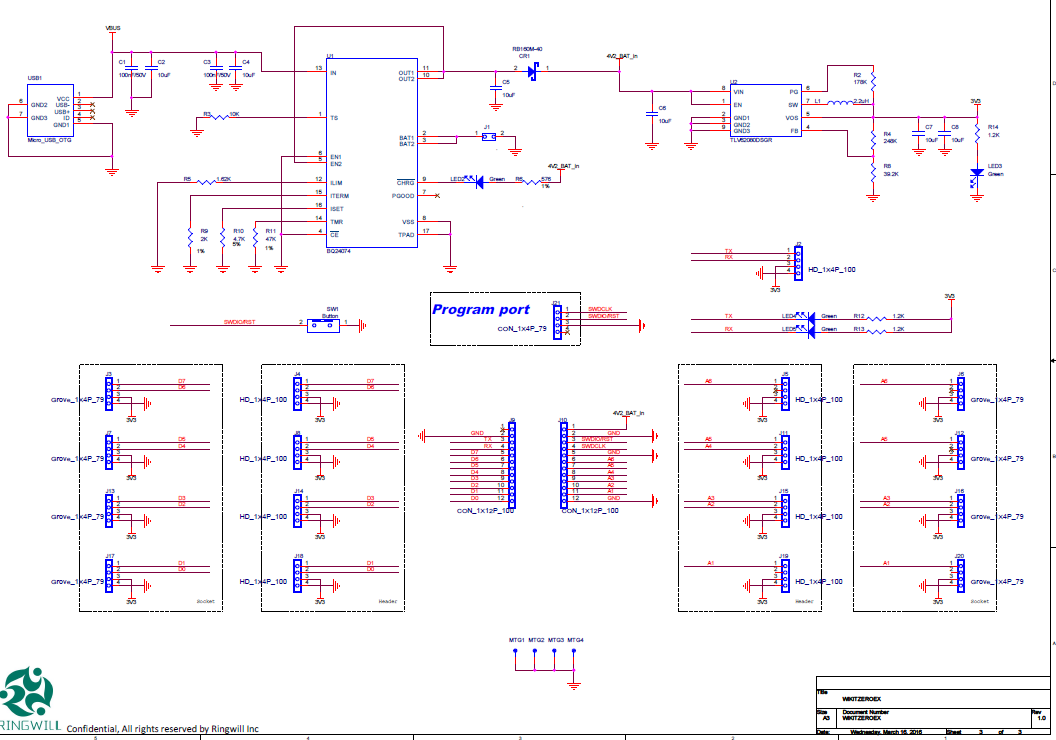


Schematic for wikit rectangle(update later)


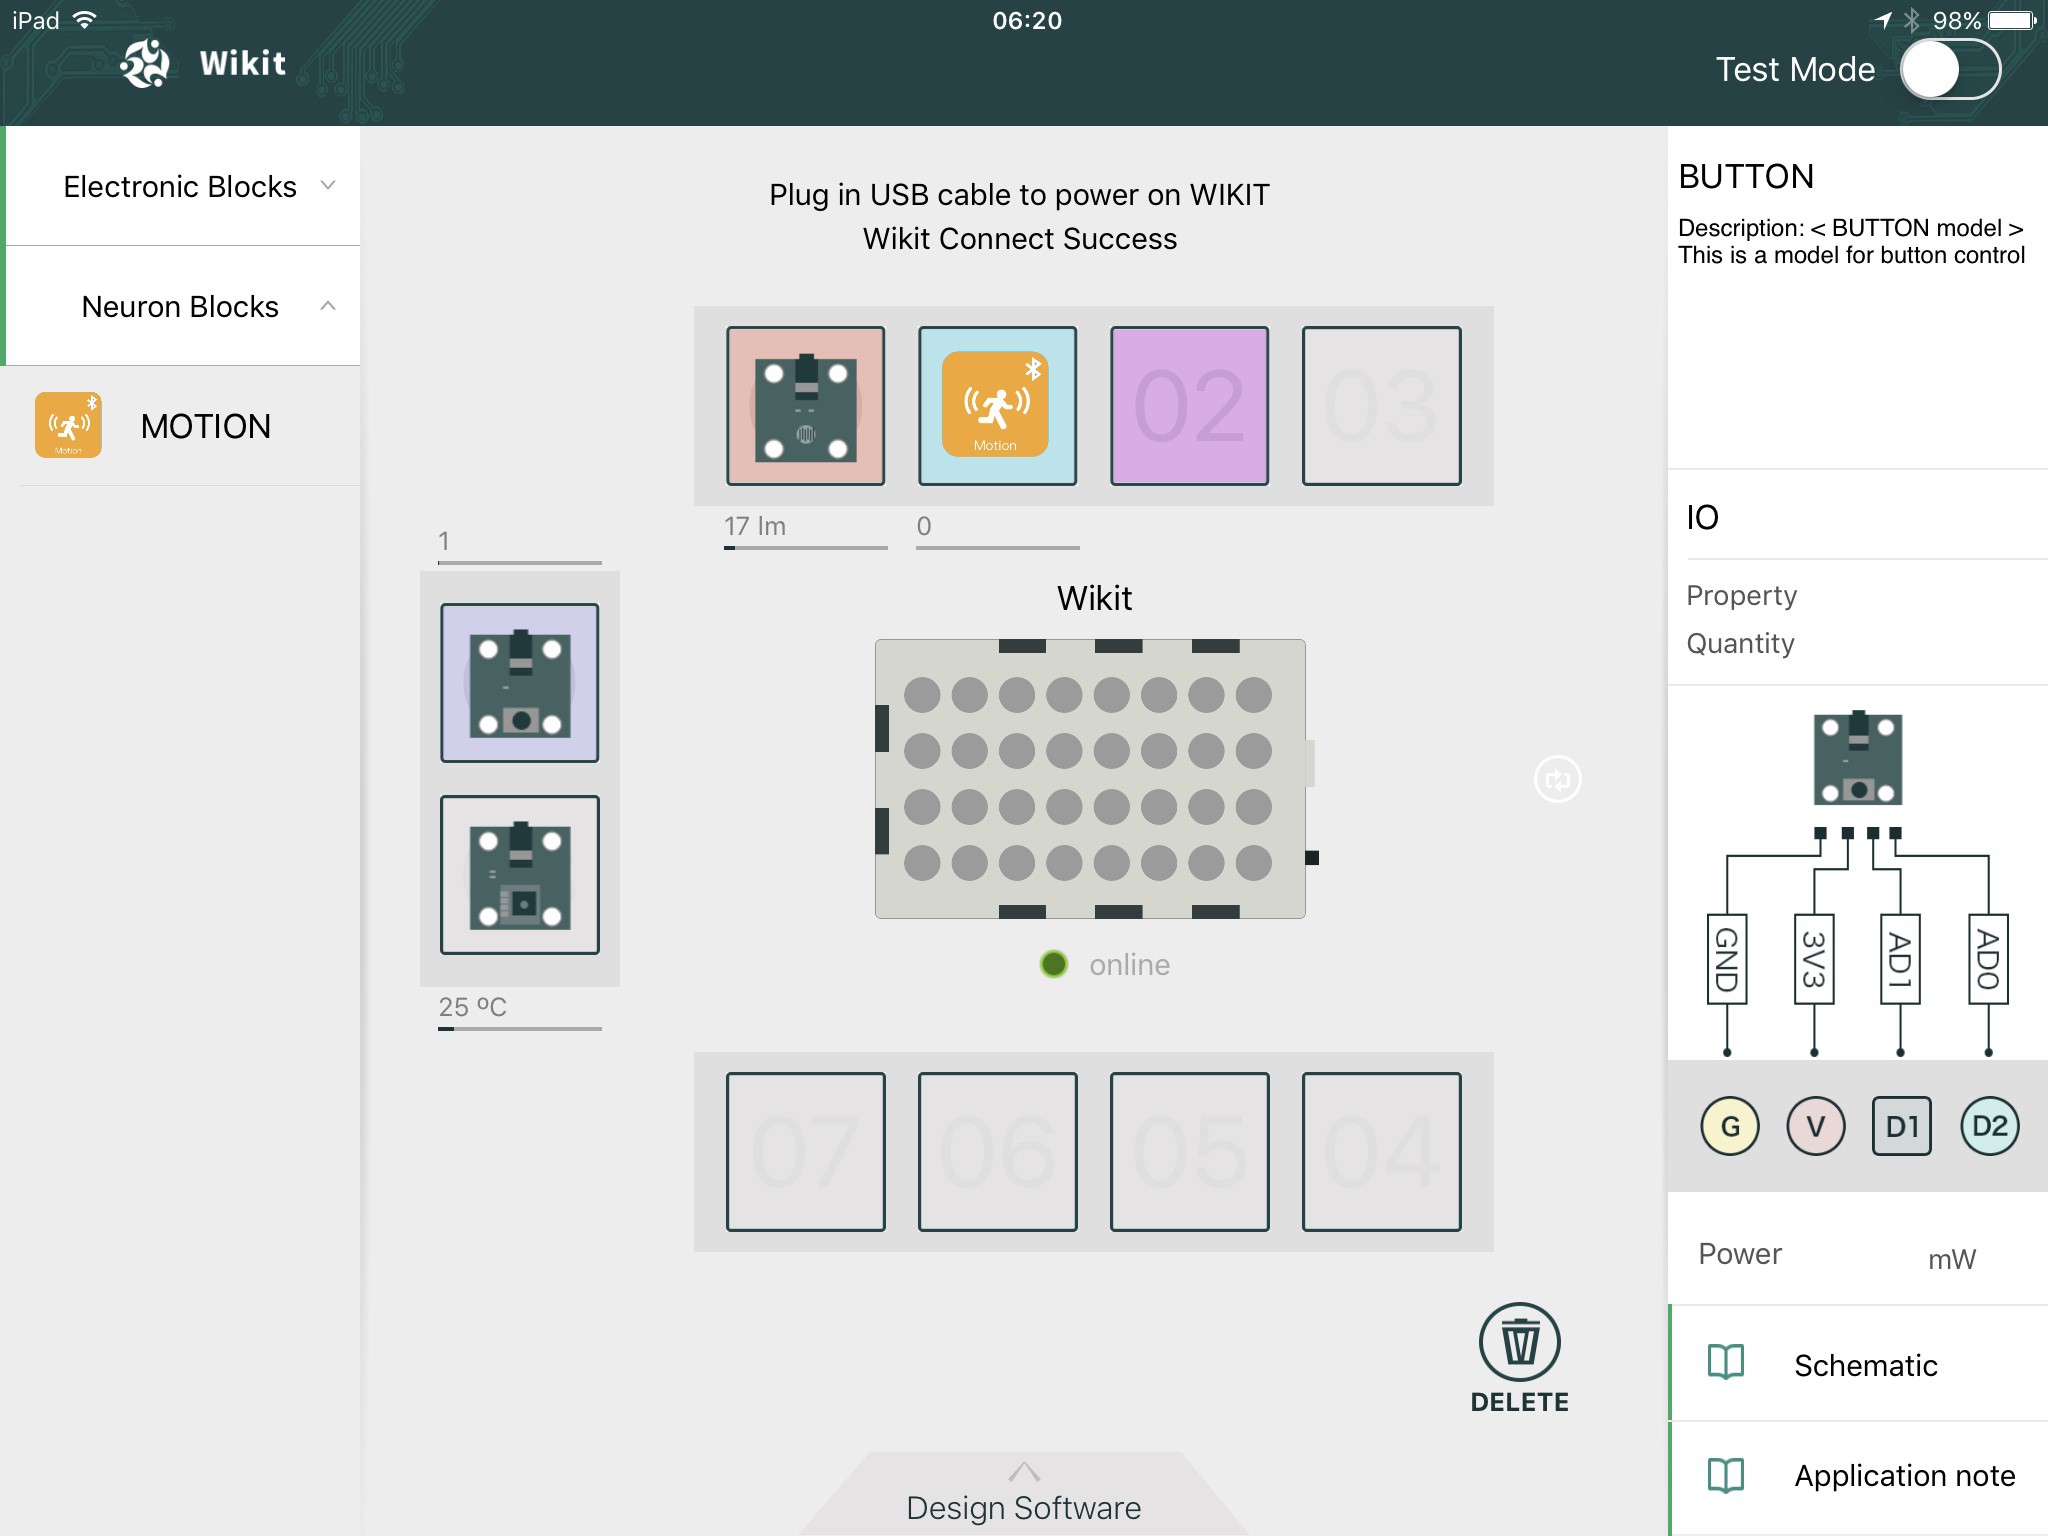
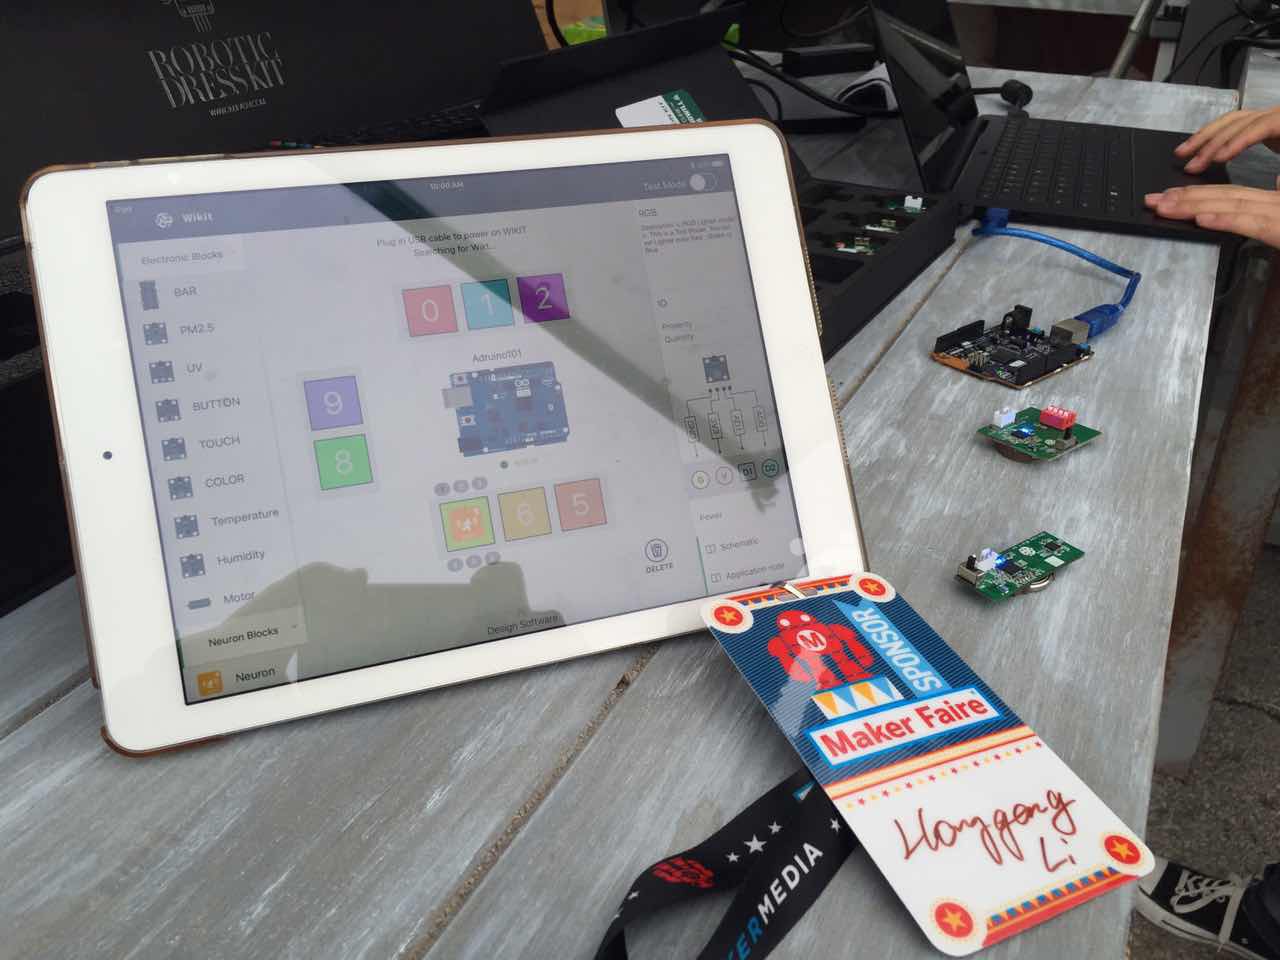
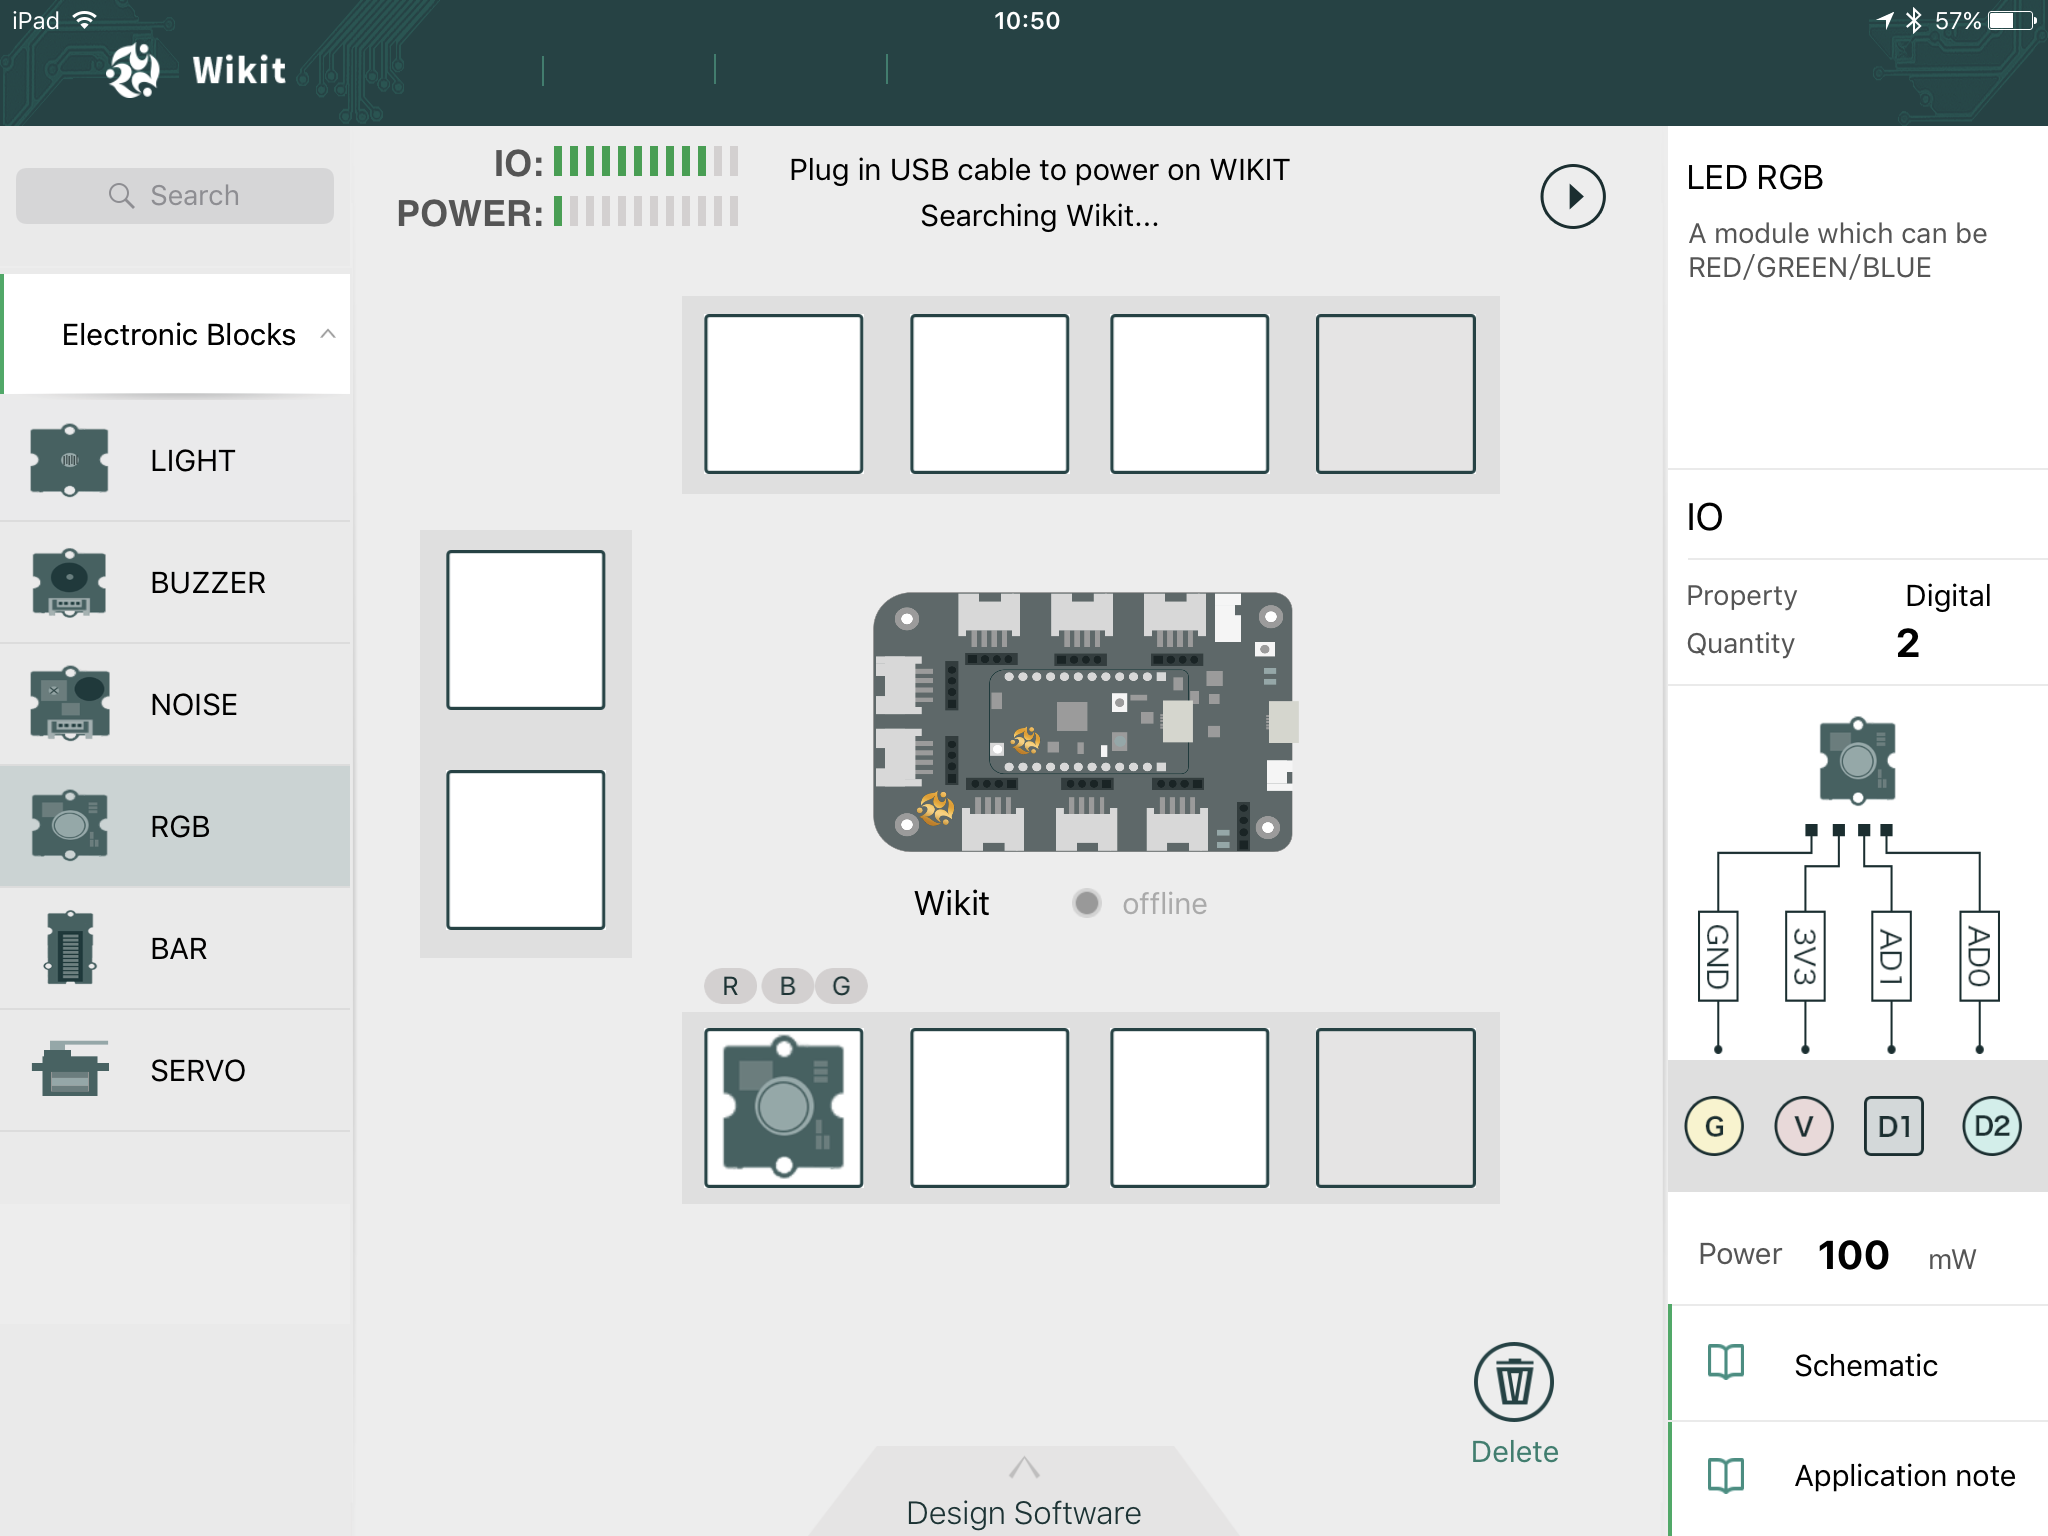
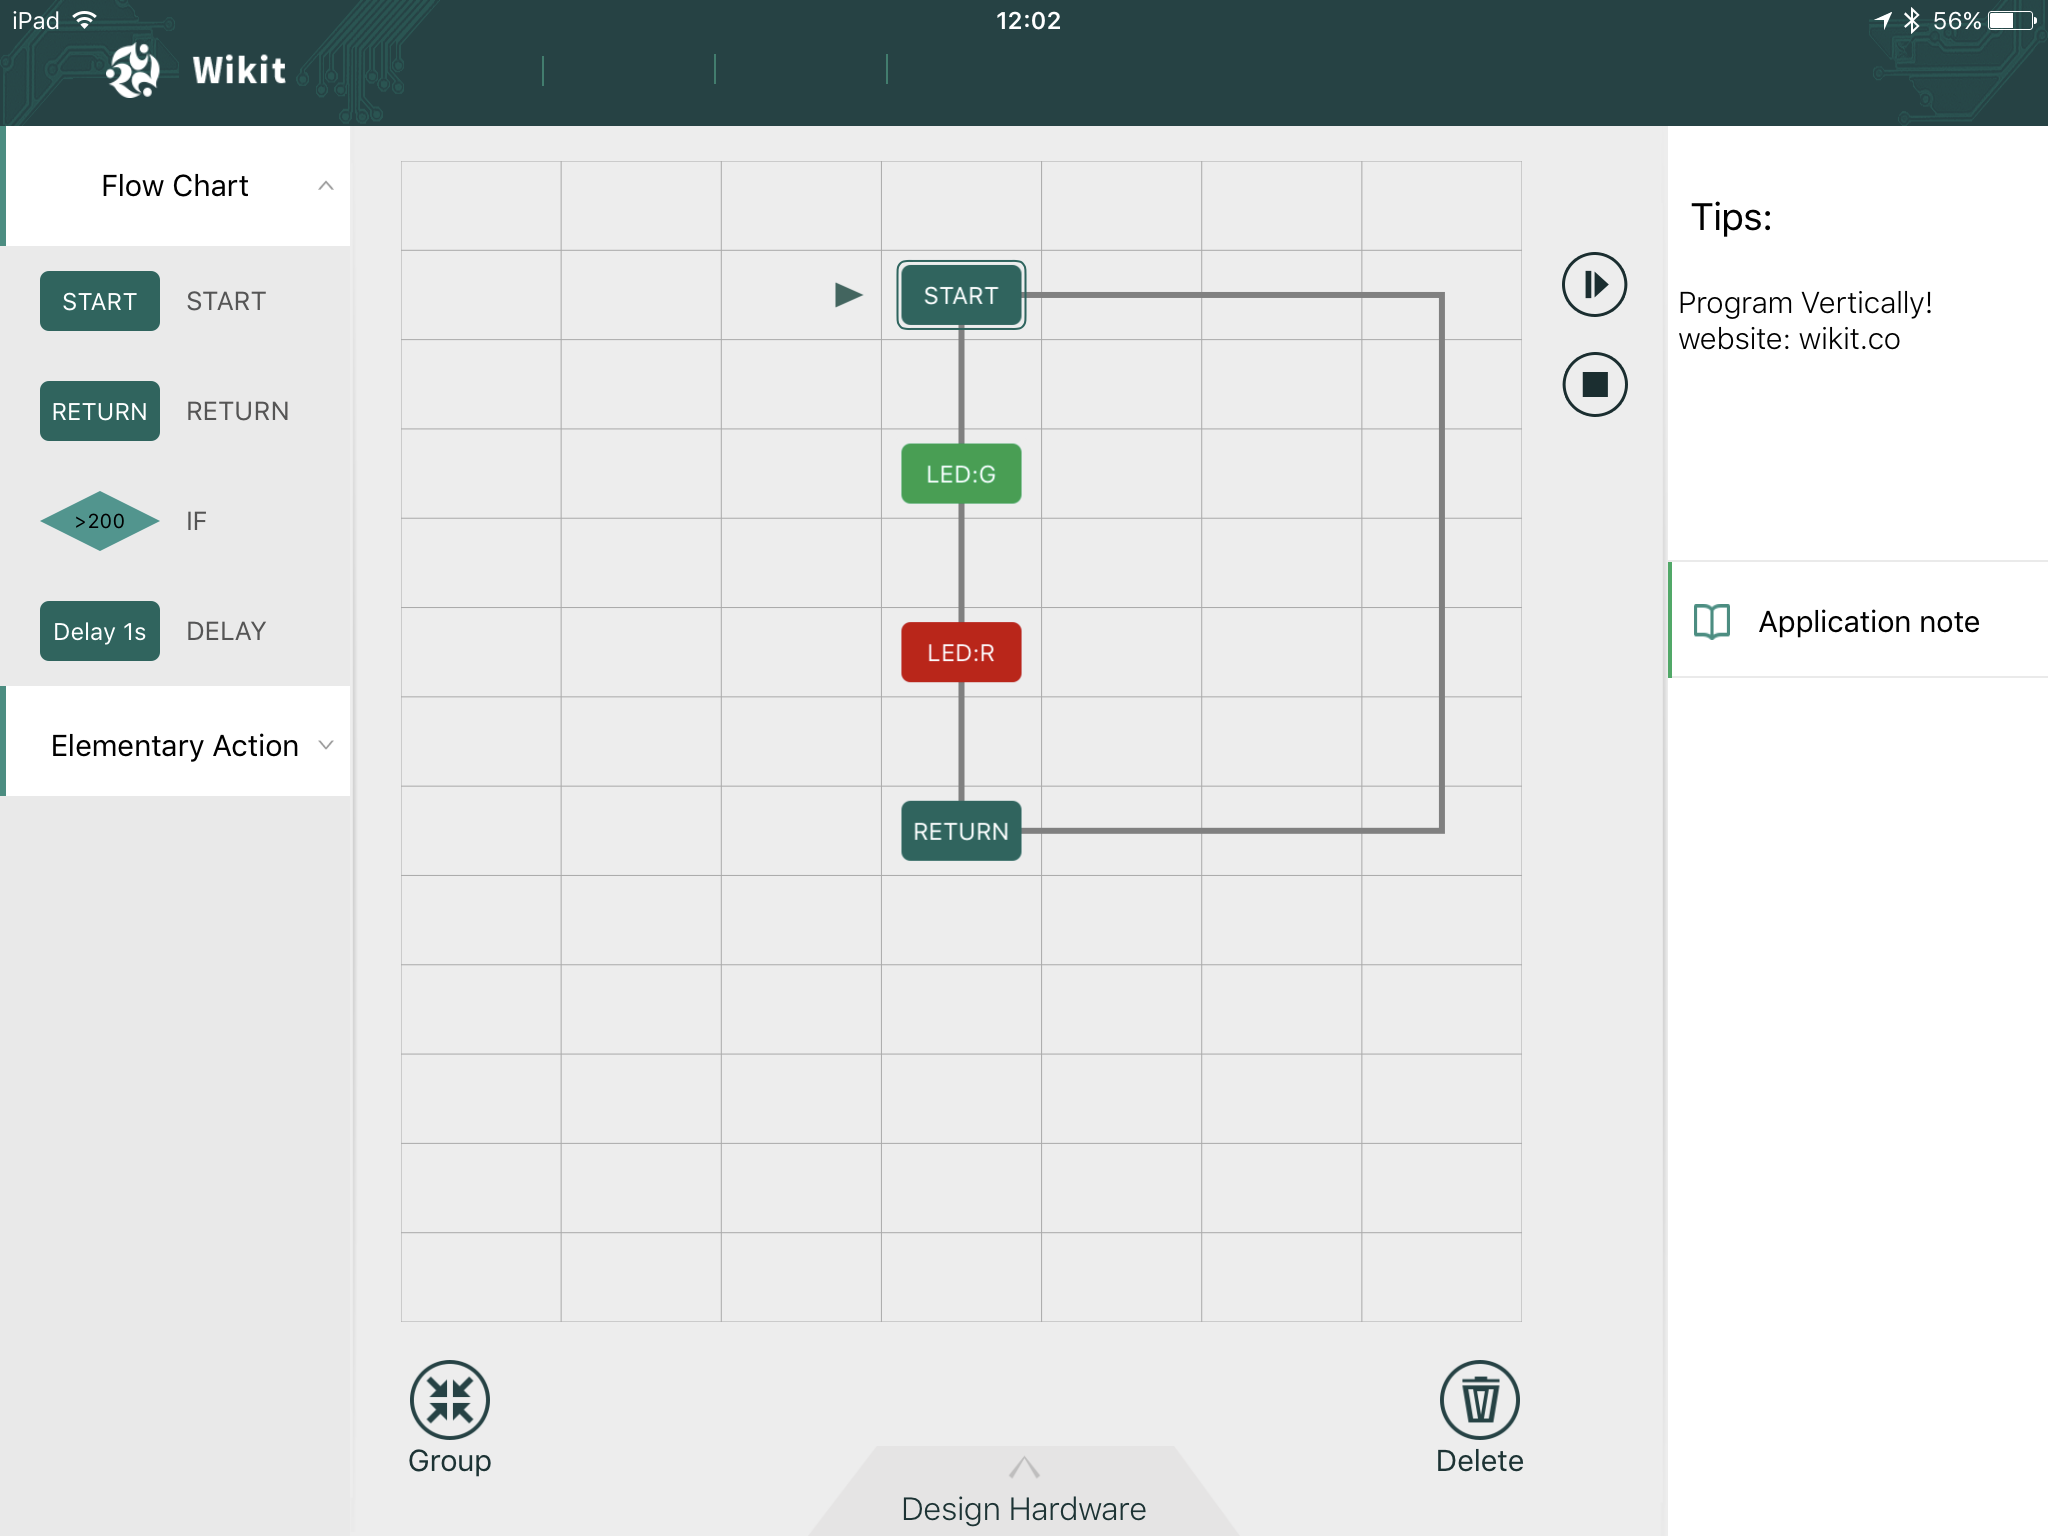
IPAD app for wikit

Search "Wikit IDE" in app store with IPAD

https://itunes.apple.com/us/app/wikit-ide/id1086637628?l=zh&ls=1&mt=8


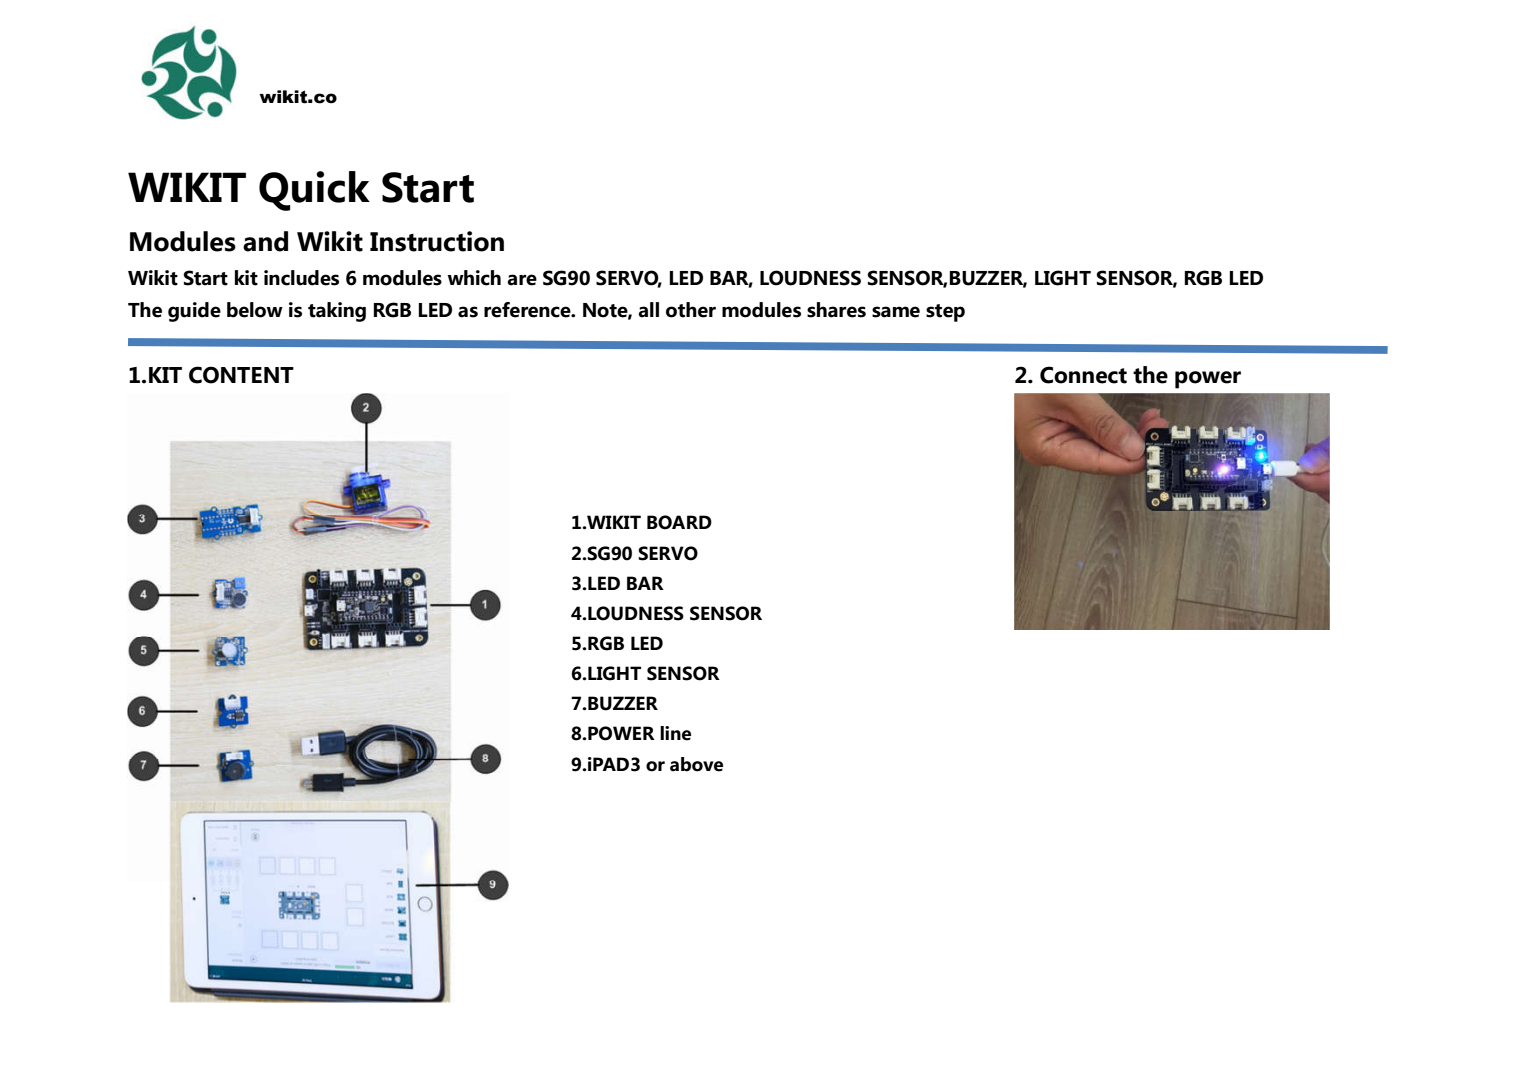
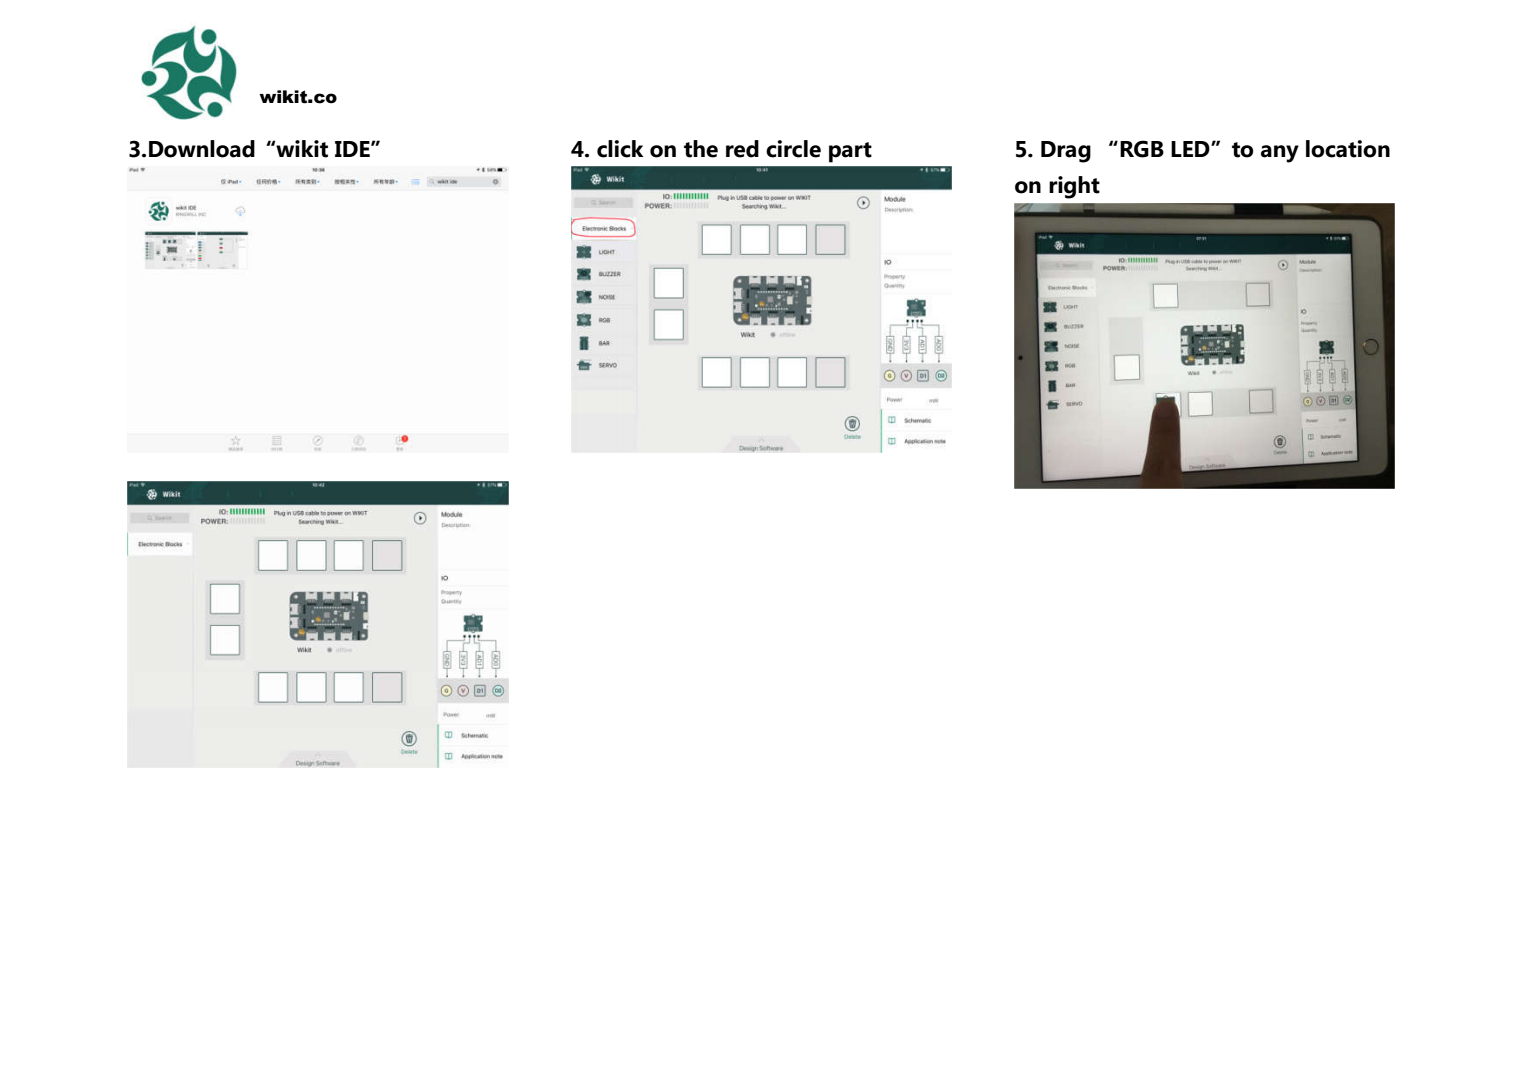
wikit quick start.pdf

General wikit IDE usage. see instruction 2 for those who do not have wikit board

Adobe Portable Document Format - 344.03 kB - 05/20/2016 at 05:41

Preview

wikit_firmware.1.2.6.hex

nordic firmware co-work with sd. It is designed for wikit IDE app 1.2.6

hex - 72.84 kB - 05/20/2016 at 05:11

Download

s110_nrf51822_7.0.0_softdevice.hex

nordic nrf51822 softdevice. co-work with wikit_firmware.hex. Note, the SD side is 88K and you need to dowload it before wikit_firmware.hex. Let me know if you have any problem on it "minqibao@ringwill.com"

hex - 232.36 kB - 05/20/2016 at 05:10

Download

sch of wikitround.pdf

wikit round schematic

Adobe Portable Document Format - 125.72 kB - 03/16/2016 at 15:32

Preview

  • 1 × Wikit IDE on iPAD
  • 1 × nordic bluetooth nrf51822 (wikit round)
  • 1 × 2.54 mm connector for common module on adafruit and sparkfun
  • 1 × 2.54mm/2mm adaptor for seeed grove series

  • wireless AI hardware with visual programming is coming

    minqi bao11/10/2016 at 14:56 0 comments

    Hi All

    As deep learning as become a trend with the effort of giant tech company such as Intel and Nvidia, it would change your way of thinking greatly in the next several years.

    With deep learning, people can easily build up machine with human-like intelligent.

    (self-driving car/smart home device based your own custom etc)

    With wikit AI starter kit (powered by intel curie), you can easily join the trend and start to build your own AI hardware.

    smarter home device? complex gesture control wearables?

    Everything is easily with wikit AI starter kit

    Please visit http://wikit.co and sign up if you gonna interested

    Simple three steps to build your own AI

    1.power on module

    2.drag and drop on iPAD (search wikitIDE on iPAD app store)

    3.run

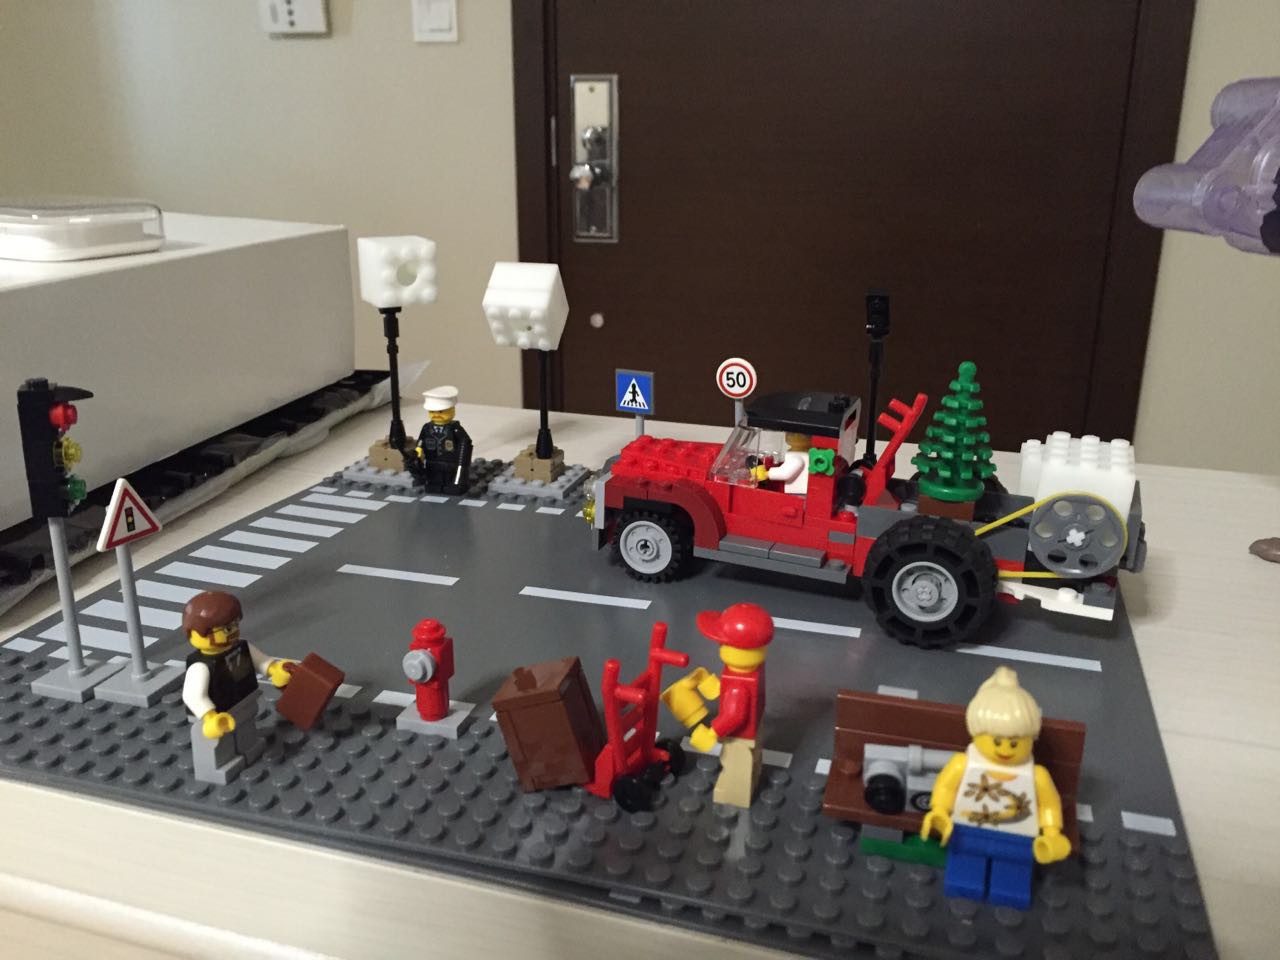
  • Application2: technology Lego compatible bricks with wikitIDE

    minqi bao10/20/2016 at 21:53 1 comment

    With wikitIDE, we can build tech bricks to make your original Lego move.

  • open a new project for wikit arduino101

    minqi bao10/15/2016 at 16:31 0 comments
  • wikit program road map

    minqi bao10/14/2016 at 15:10 0 comments

    wikit IDE has been very powerful after this entire year's development on iPAD.

    It might be confusing for simply introducing the app itself. We need to put this program in real use!

    Thus, besides this blog, i would add two separate application blog focusing on arduino101 A.I. and zero-wire kit

    for aruidno101 A.I. , you can refer to the following link for latest github code and demo.

    https://hackaday.io/project/16355-wikitide-program-arduino-101-visually

    for zero-wire kit, we would publish the blog soon

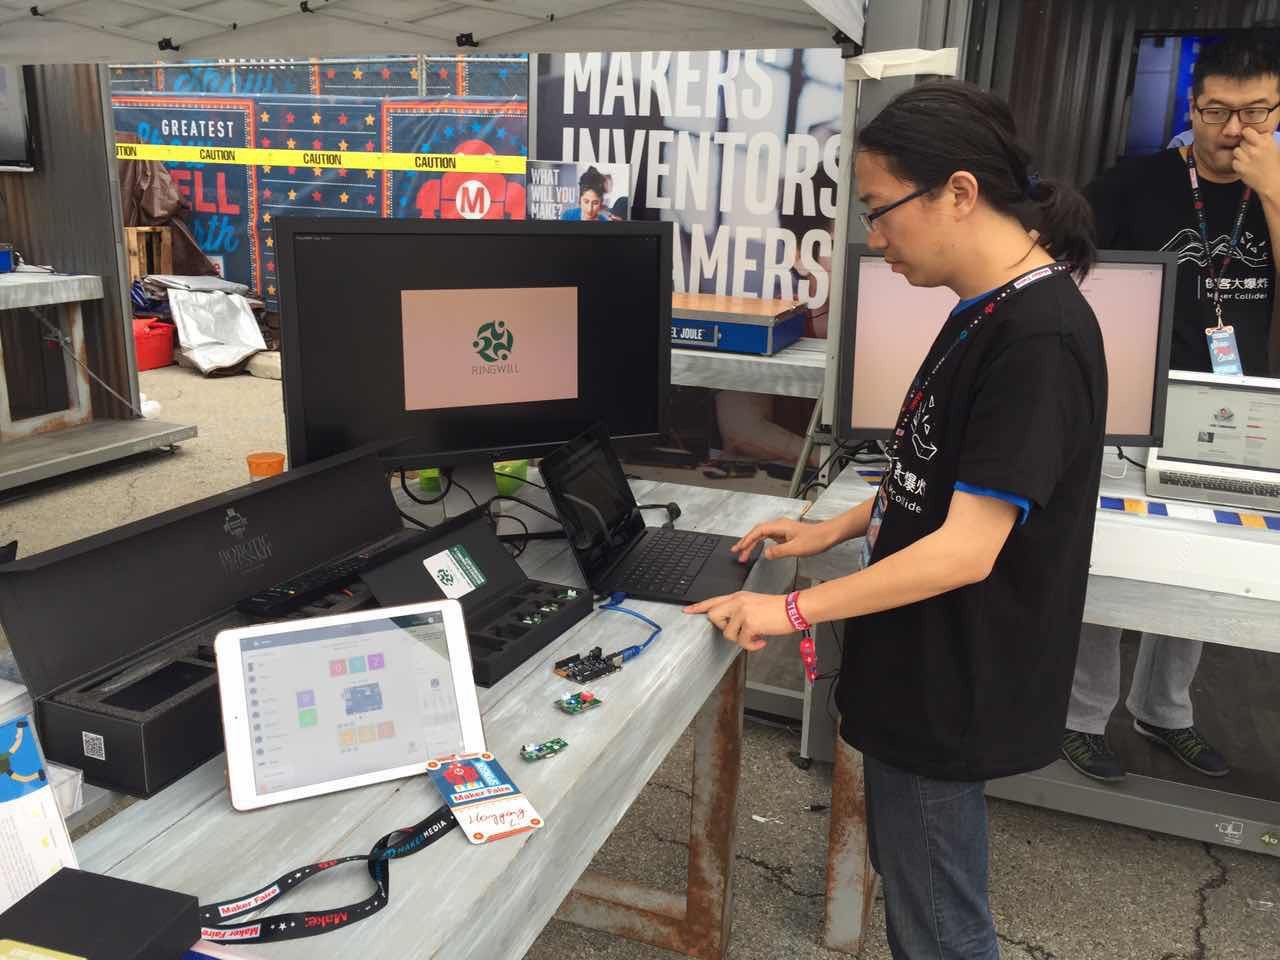
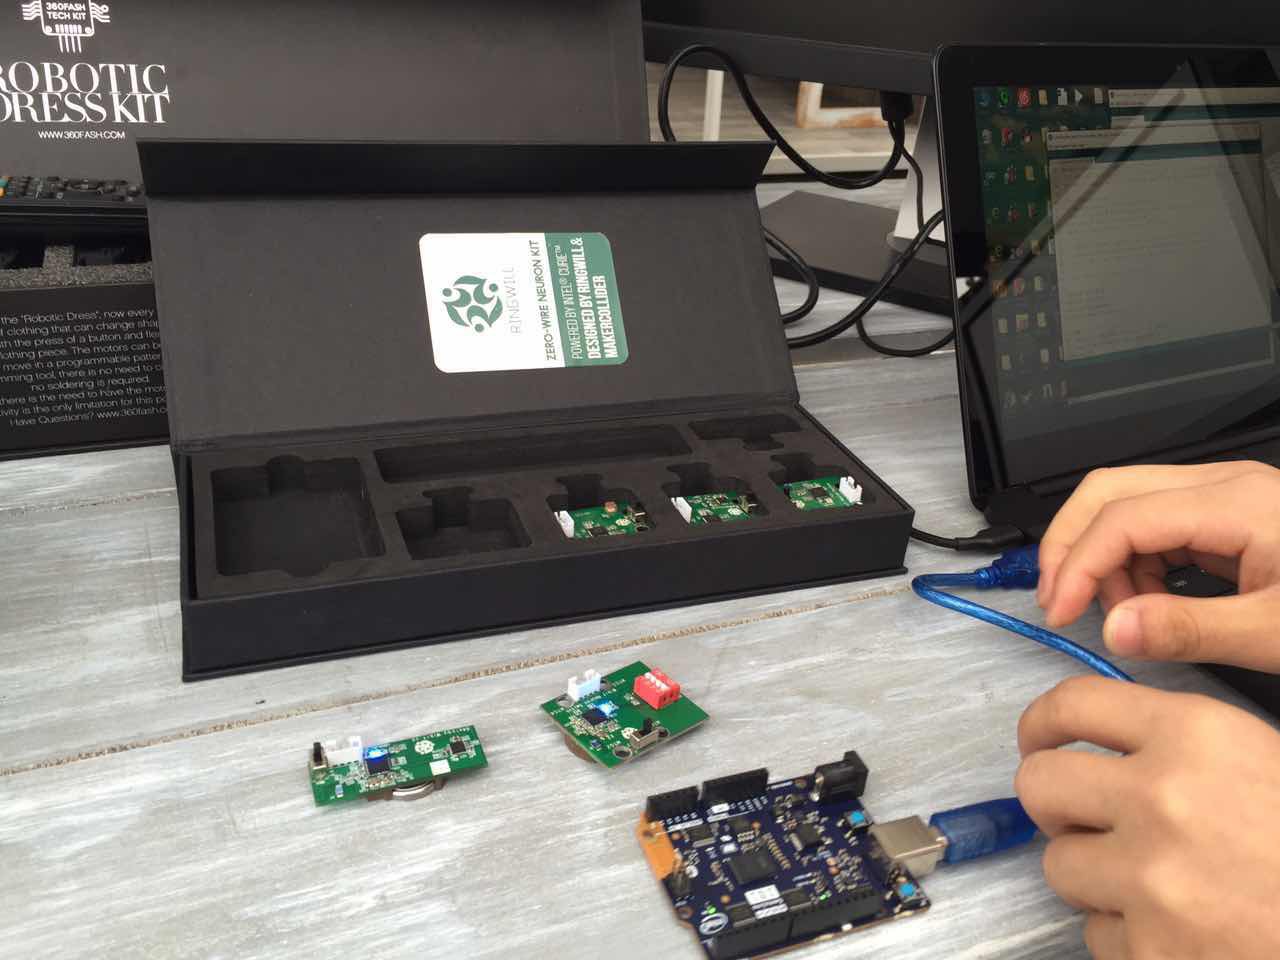
  • wikit 0-wire neutron kit @maker faire NYC 2016

    minqi bao10/02/2016 at 14:33 0 comments

    MEET US for wikit program at NYC Maker Faire 2016

  • wikit app 1.3.4 update for aruidno101 and 0-wire kit

    minqi bao10/02/2016 at 14:26 0 comments

    wikit app 1.3.3 released while 1.3.4 is under internal testing

    major feature update

    1) more Ui improve

    2)add support for aruidno101 with the following firmware code

    3) add support for 0 wire aruidno101 kit

    #include <DHT.h>
    
    
    /* 
     *  ===============================================
      Example sketch using the Intel CurieIMU library and the General Vision CurieNeurons library 
      for Intel(R) Curie(TM) devices
    
      Motion is converted into a simple feature vector as follows:
      [ax'1, ay'1, az'1, gx'1,gy'1, gz'1, ax'2, ay'2, az'2, gx'2, gy'2, gz'2, ...] over a number of time samples
      Note that the values a' and g' are normalized and expand between the running min and max of the a and g signals.
    
      After calibration is made,
      Use the serial monitor to edit the category of a motion, 
        (ex= 1 for vertical, 2 for horizontal, 0 for stillness or anything else),
      Start moving the Curie in an expected direction,
      and when you press Enter the last feature vector is learned.
      
      Note that this "snapshot" approach is simplistic and you may have to teach several times
      a given motion so the neurons store models with different amplitudes, acceleration, etc.
      Ideally we want to learn consecutives vectors for a few seconds.
      
      ===============================================
    */
    /*firmware version 1.1.6*/
    /*enable RGB function/pwm vibration/temperature*/
    #include "CurieIMU.h"
    #include <CurieBLE.h>
    #include <CurieNeurons.h>
    
    #include <Adafruit_NeoPixel.h>
    
    //RGB
    // Which pin on the Arduino is connected to the NeoPixels?
    // On a Trinket or Gemma we suggest changing this to 1
    #define PIN            5
    #define DHTPIN 3     // what digital pin we're connected to
    // How many NeoPixels are attached to the Arduino?
    #define NUMPIXELS      1
    // When we setup the NeoPixel library, we tell it how many pixels, and which pin to use to send signals.
    // Note that for older NeoPixel strips you might need to change the third parameter--see the strandtest
    // example for more information on possible values.
    Adafruit_NeoPixel pixels = Adafruit_NeoPixel(NUMPIXELS, PIN, NEO_GRB + NEO_KHZ800);
    int delayval = 50; // delay for half a second
    //
    const int ledPin = 13; // set ledPin to use on-board LED
    const int ledPin_wikit = 14; // set ledPin to use on-board LED
    int neuron_count = 0;
    //WIKIT FUSIONWIRE NETWORK
    #define MP6050_DATA_TYPE 0x80
    #define LIGHT_DATA_TYPE 0x84
    
    //WIKIT bit position
    #define WIKIT_HEADER 0x0
    #define WIKIT_LIGHT 0x5
    #define WIKIT_MOTION_NEURON 0x8  // the bit used in apps
    
    #define NEURON_MOTION_LEARNING_MODE_1 0x0A
    #define NEURON_MOTION_LEARNING_MODE_2 0x0B
    #define NEURON_MOTION_LEARNING_MODE_3 0x0C
    #define NEURON_MOTION_LEARNING_MODE_4 0x0D
    #define NEURON_MOTION_LEARNING_MODE_5 0x0E
    #define NEURON_MOTION_LEARNING_MODE_6 0x0F
    #define NEURON_MOTION_CATAGORY_MODE   0x10
    #define NEURON_MOTION_DELETE   0x3F
    
    volatile bool WIKIT_MP6050_UPDATED = false;
    volatile bool NO_FUSIONWIRE_MP6050 = true;
    volatile bool WIKIT_LIGHT_UPDATED = false;
    
    volatile bool WIKIT_LIGHT_REQUIRED = false;
    volatile bool WIKIT_LED_ON_REQUIRED = false;
    volatile bool WIKIT_LED_OFF_REQUIRED = false;
    
    volatile bool WIKIT_RGB_R_REQUIRED = false;
    volatile bool WIKIT_RGB_G_REQUIRED = false;
    volatile bool WIKIT_RGB_B_REQUIRED = false;
    
    volatile bool WIKIT_MOTION_NEURON_CAT_REQUIRED = false;
    volatile bool WIKIT_MOTION_NEURON_SEND_CAT_REQUIRED = false;
    
    volatile bool WIKIT_MOTION_NEURON_MODE1_LEARN_REQUIRED = false;
    volatile bool WIKIT_MOTION_NEURON_MODE2_LEARN_REQUIRED = false;
    volatile bool WIKIT_MOTION_NEURON_MODE3_LEARN_REQUIRED = false;
    volatile bool WIKIT_MOTION_NEURON_MODE4_LEARN_REQUIRED = false;
    volatile bool WIKIT_MOTION_NEURON_MODE5_LEARN_REQUIRED = false;
    volatile bool WIKIT_MOTION_NEURON_MODE6_LEARN_REQUIRED = false;
    
    
    volatile bool WIKIT_MODE1_LEARNING_FINISHED = false;
    volatile bool WIKIT_MODE2_LEARNING_FINISHED = false;
    volatile bool WIKIT_MODE3_LEARNING_FINISHED = false;
    volatile bool WIKIT_MODE4_LEARNING_FINISHED = false;
    volatile bool WIKIT_MODE5_LEARNING_FINISHED = false;
    volatile bool WIKIT_MODE6_LEARNING_FINISHED...
    Read more »

  • wikit IDE on IPAD released new version

    minqi bao05/20/2016 at 04:29 0 comments

    The latest version 1.2.6 has been released. Feel free to download it to have a try.

    We will upload an instruction about quick start to let you get the "wikit IDE" working even without our hardware!

    In this version,

    1) add new modules supports (SG90)

    2)fix bug in flowchart running when double click return at the end of editing

    3)add GPIO aware betwwen hardware and software to elimiate hardawre connection limitation for better user experience

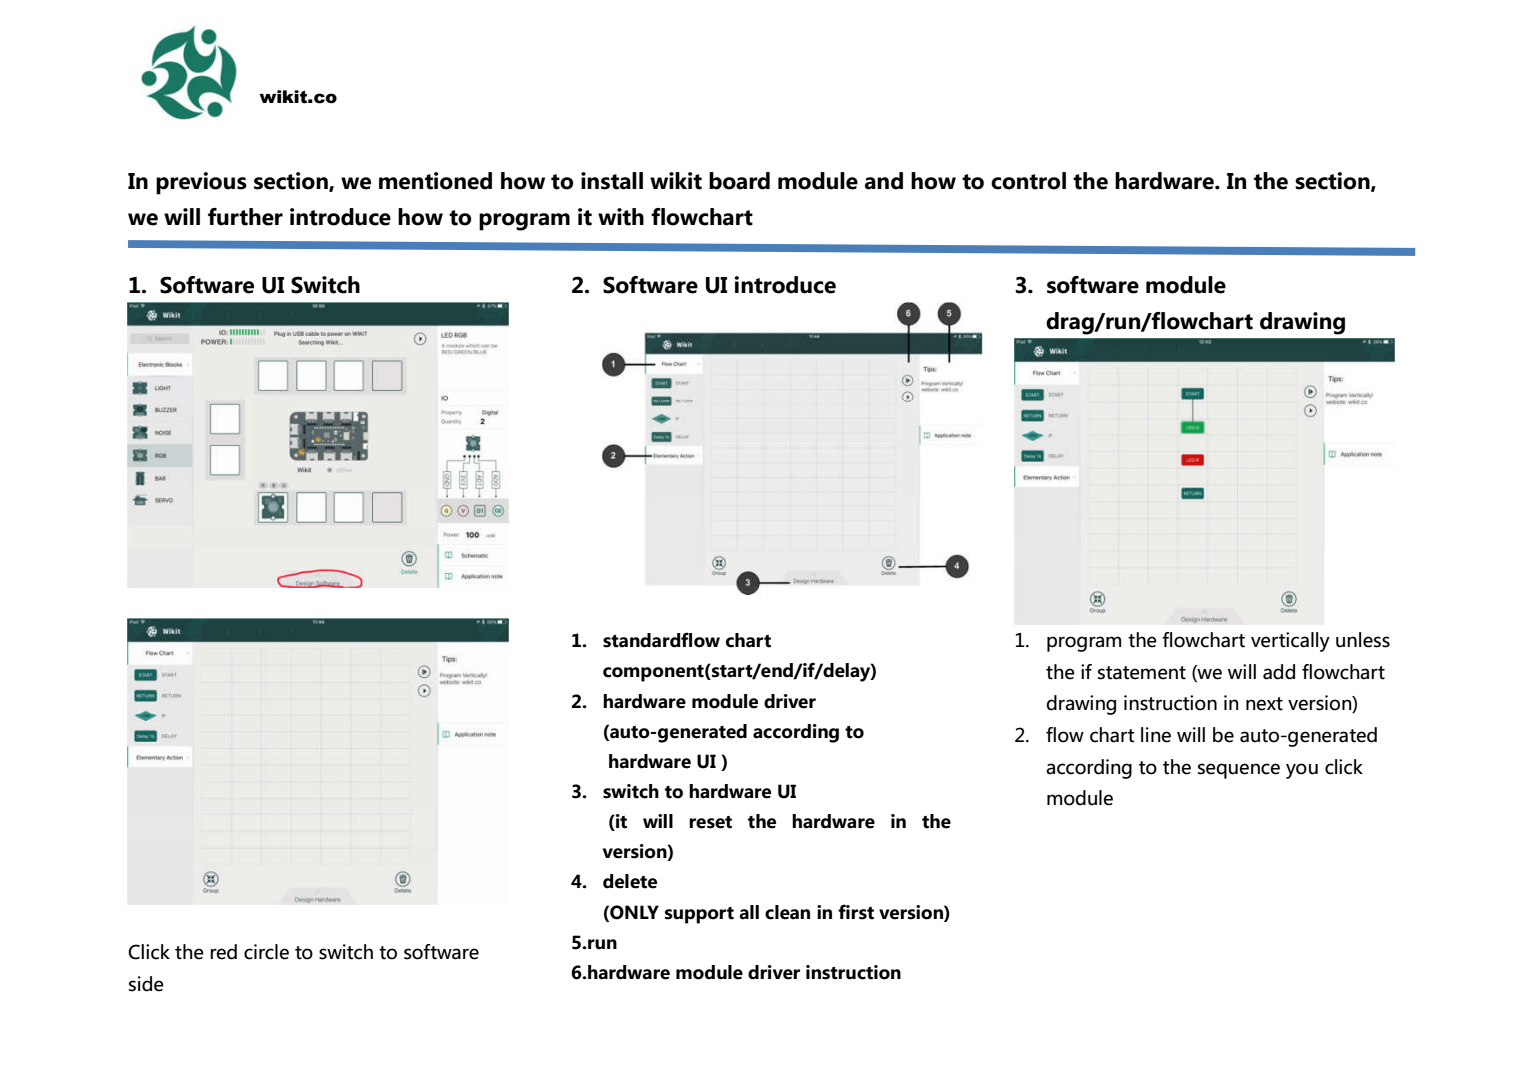
    4)add software driver auto-generated based on hardware you picked

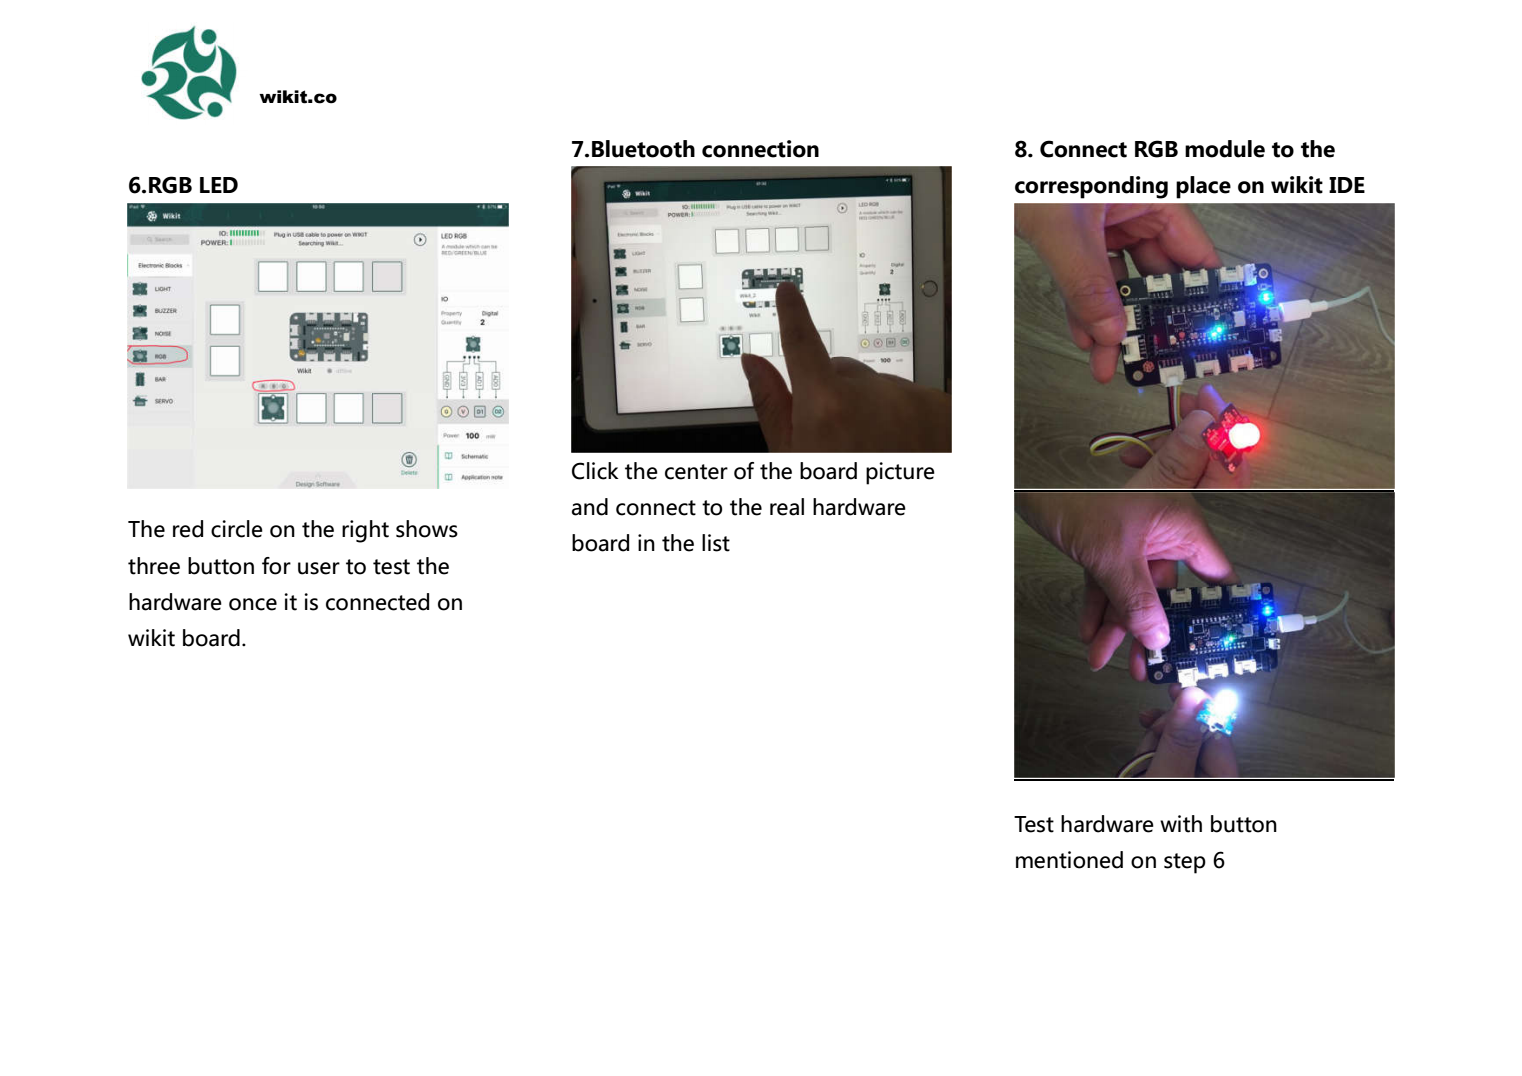
    in hardware page, we can simply test all hardware with drag and dropno coding on software page. all function works once you finish the logic flowchart

  • redefine wikit features

    minqi bao11/18/2015 at 02:24 0 comments

    We just redefine some of the wikit features based on makers feedback.

    It would be more helpful in this way. Do let us know if we miss anything which you wanted most

    With wikit, you can make real complex hardware projects without any technical barrier!

    1. Arduino code import to visual flowchart block makes you using arduino resources without coding knowledge

    2. Detail hardware connection guidance with self-testing function help you get rid of any hardware trouble before programming

    3. More than 100 build-in flowchart hardware module driver blocks give you a quick start

    4. build-in elementary access flowchart blocks allow you to D.I.Y your own function

    5. Unique compiling algorithm provides you a chance to export design ready code to some specific MCU platforms for production

  • How wikit prototyping works

    minqi bao11/06/2015 at 13:49 0 comments

    Note this demo is trying to show my current understanding of the interactive during making electrnoics

    To have better video demo, I am using simulator on MAC with desktop screenshot. Hope you could give me some feedback on such interaction for this prototyping. Anything will be great

  • wikit popcorn demo

    minqi bao11/06/2015 at 13:41 0 comments

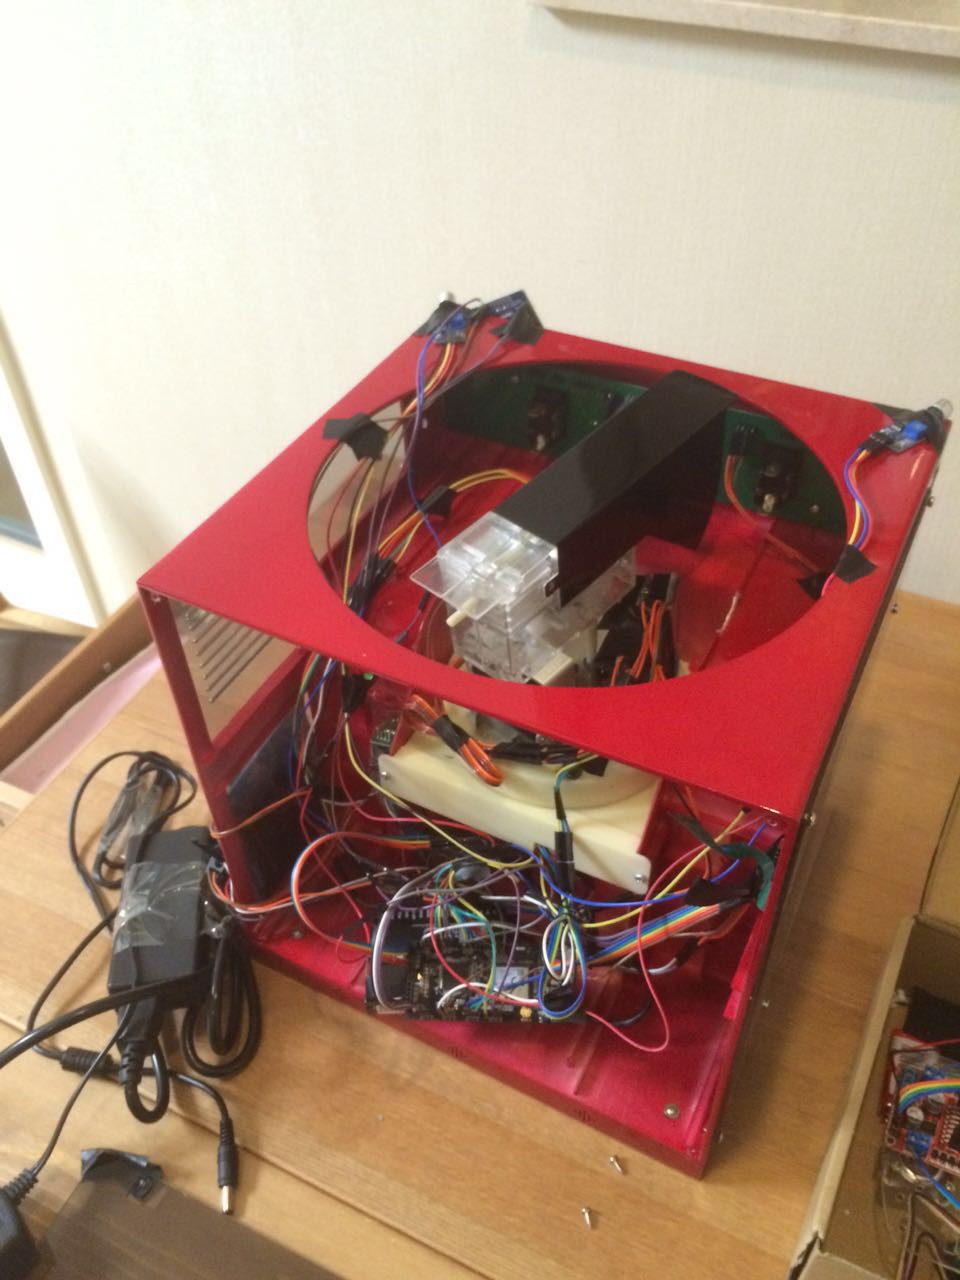
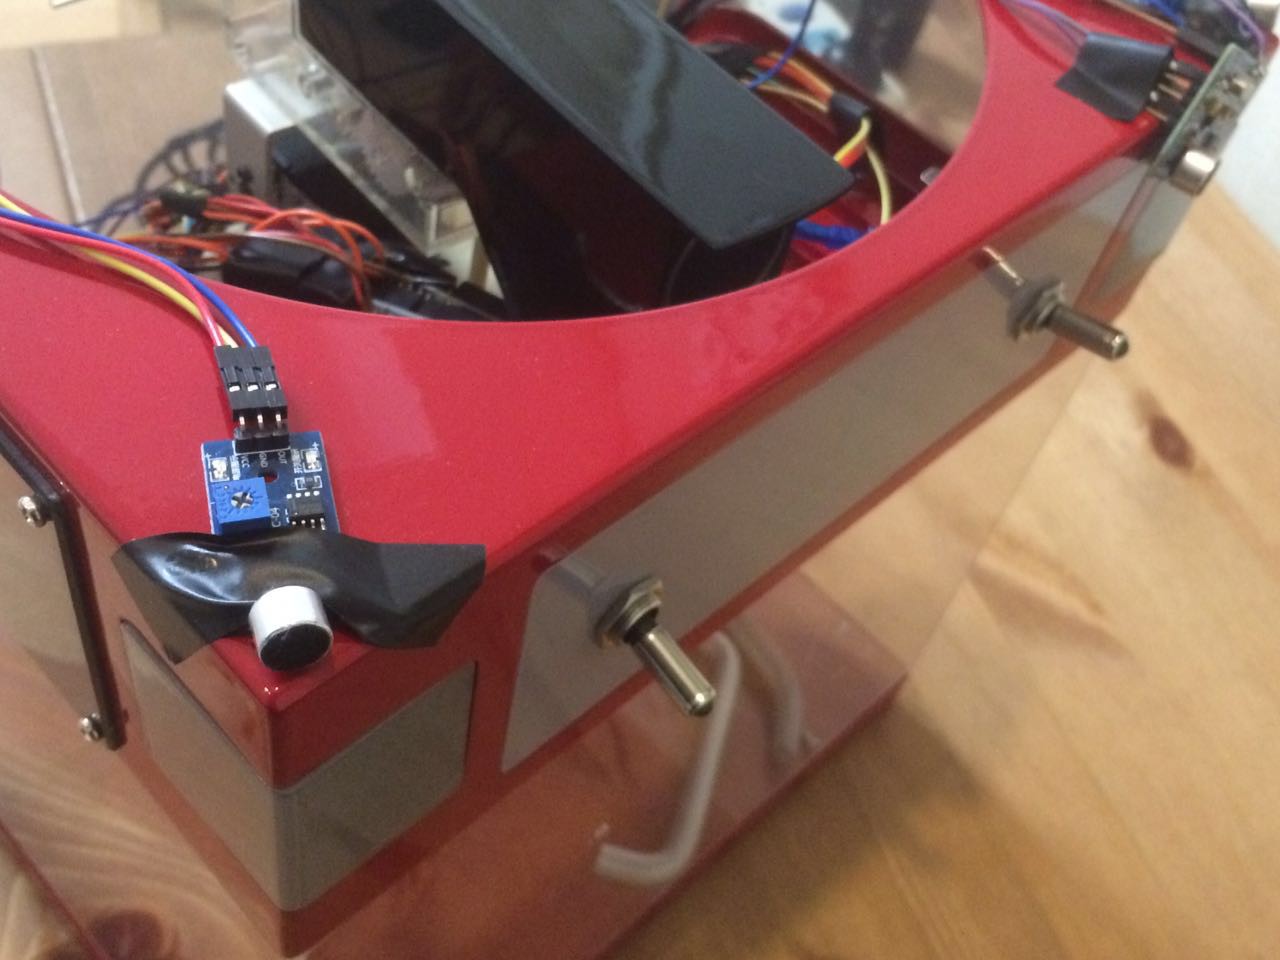
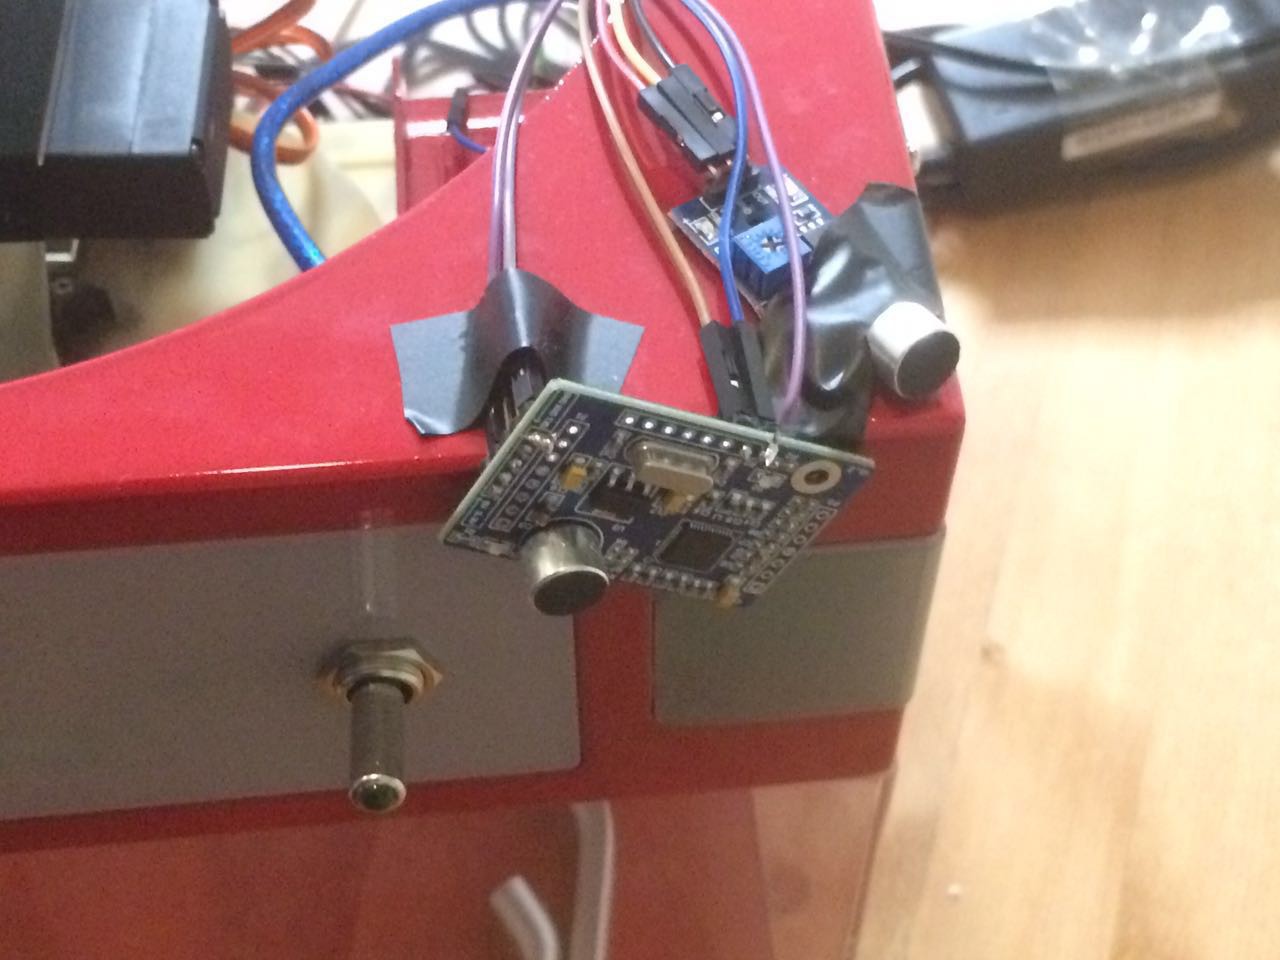
    Visual programming has been mainly used in education side. When it comes to complex hardware design, it is not very useful. Although currentlty we ONLY enable the GPIO read write. We enabled a popcorn robot with sound positioning and voice recognition.

    See how powerful wikit would be with flowchart programming!

    additional electronics device list

    microphone x 2

    resistor

    transister pnp 9014 x 1

    op LM393 x 1

    YS-LDV7 voice recognition x 1

    motor x 1

    toy gun x 1

    Here is the scheme

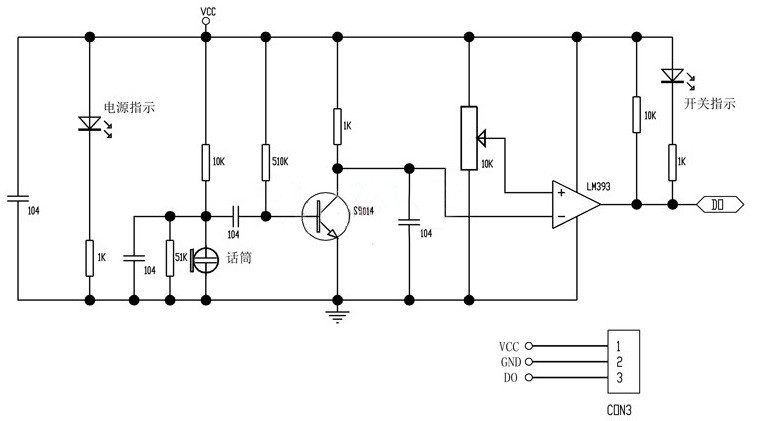
    microphone --> analog to digital detection circuit --> pulse signal -- > wikit sound positioning

    YS-LDV7 voice recognition ---> level signal -- > wikit read

    Finally, wikit controls motor by using SW spi interface

    Video Results

    Here is the circuit for analog to digital detection circuit. It would take the analog input and output pulse when sound is beyond a specific threshold

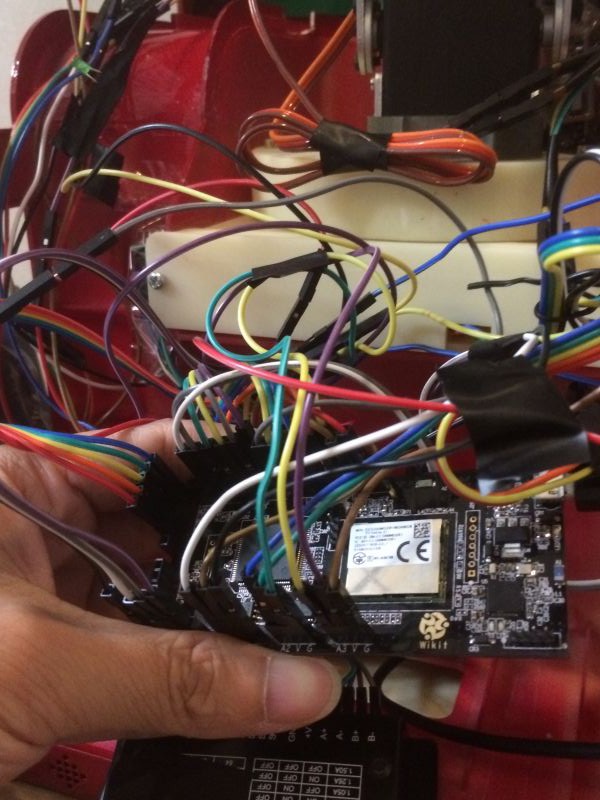
    wikit board

    emit system from toy

    microphone with digital detection circuit

    voice recognition YSL

View all 12 project logs

  • 1
    Step 1

    With Wikit Board

    Without Wikit Board(trial version instruction) will in the next step

  • 2
    Step 2

    Without Wikit Board

    Still want a try?

    You need to take the following steps to make it work.

    1) You need to have one nrf51822 board (any kind)

    2) Dowload the firmware and softdevice in project attachment part

    3) put it into your nrf51822 board

    4) get one buzzer ready for first trial. open IDE and put it on leftmost location

    5)connect buzzer with p0.14/gnd/vcc on your board

    6)Then enjoy your flowchart programming :)

    Talk to us if you want more with your own board. We will help you to make it work

    "minqibao@ringwill.com"

View all instructions

Enjoy this project?

Share

Discussions

Similar Projects

Does this project spark your interest?

Become a member to follow this project and never miss any updates