Close
0%
0%

PCB word clock

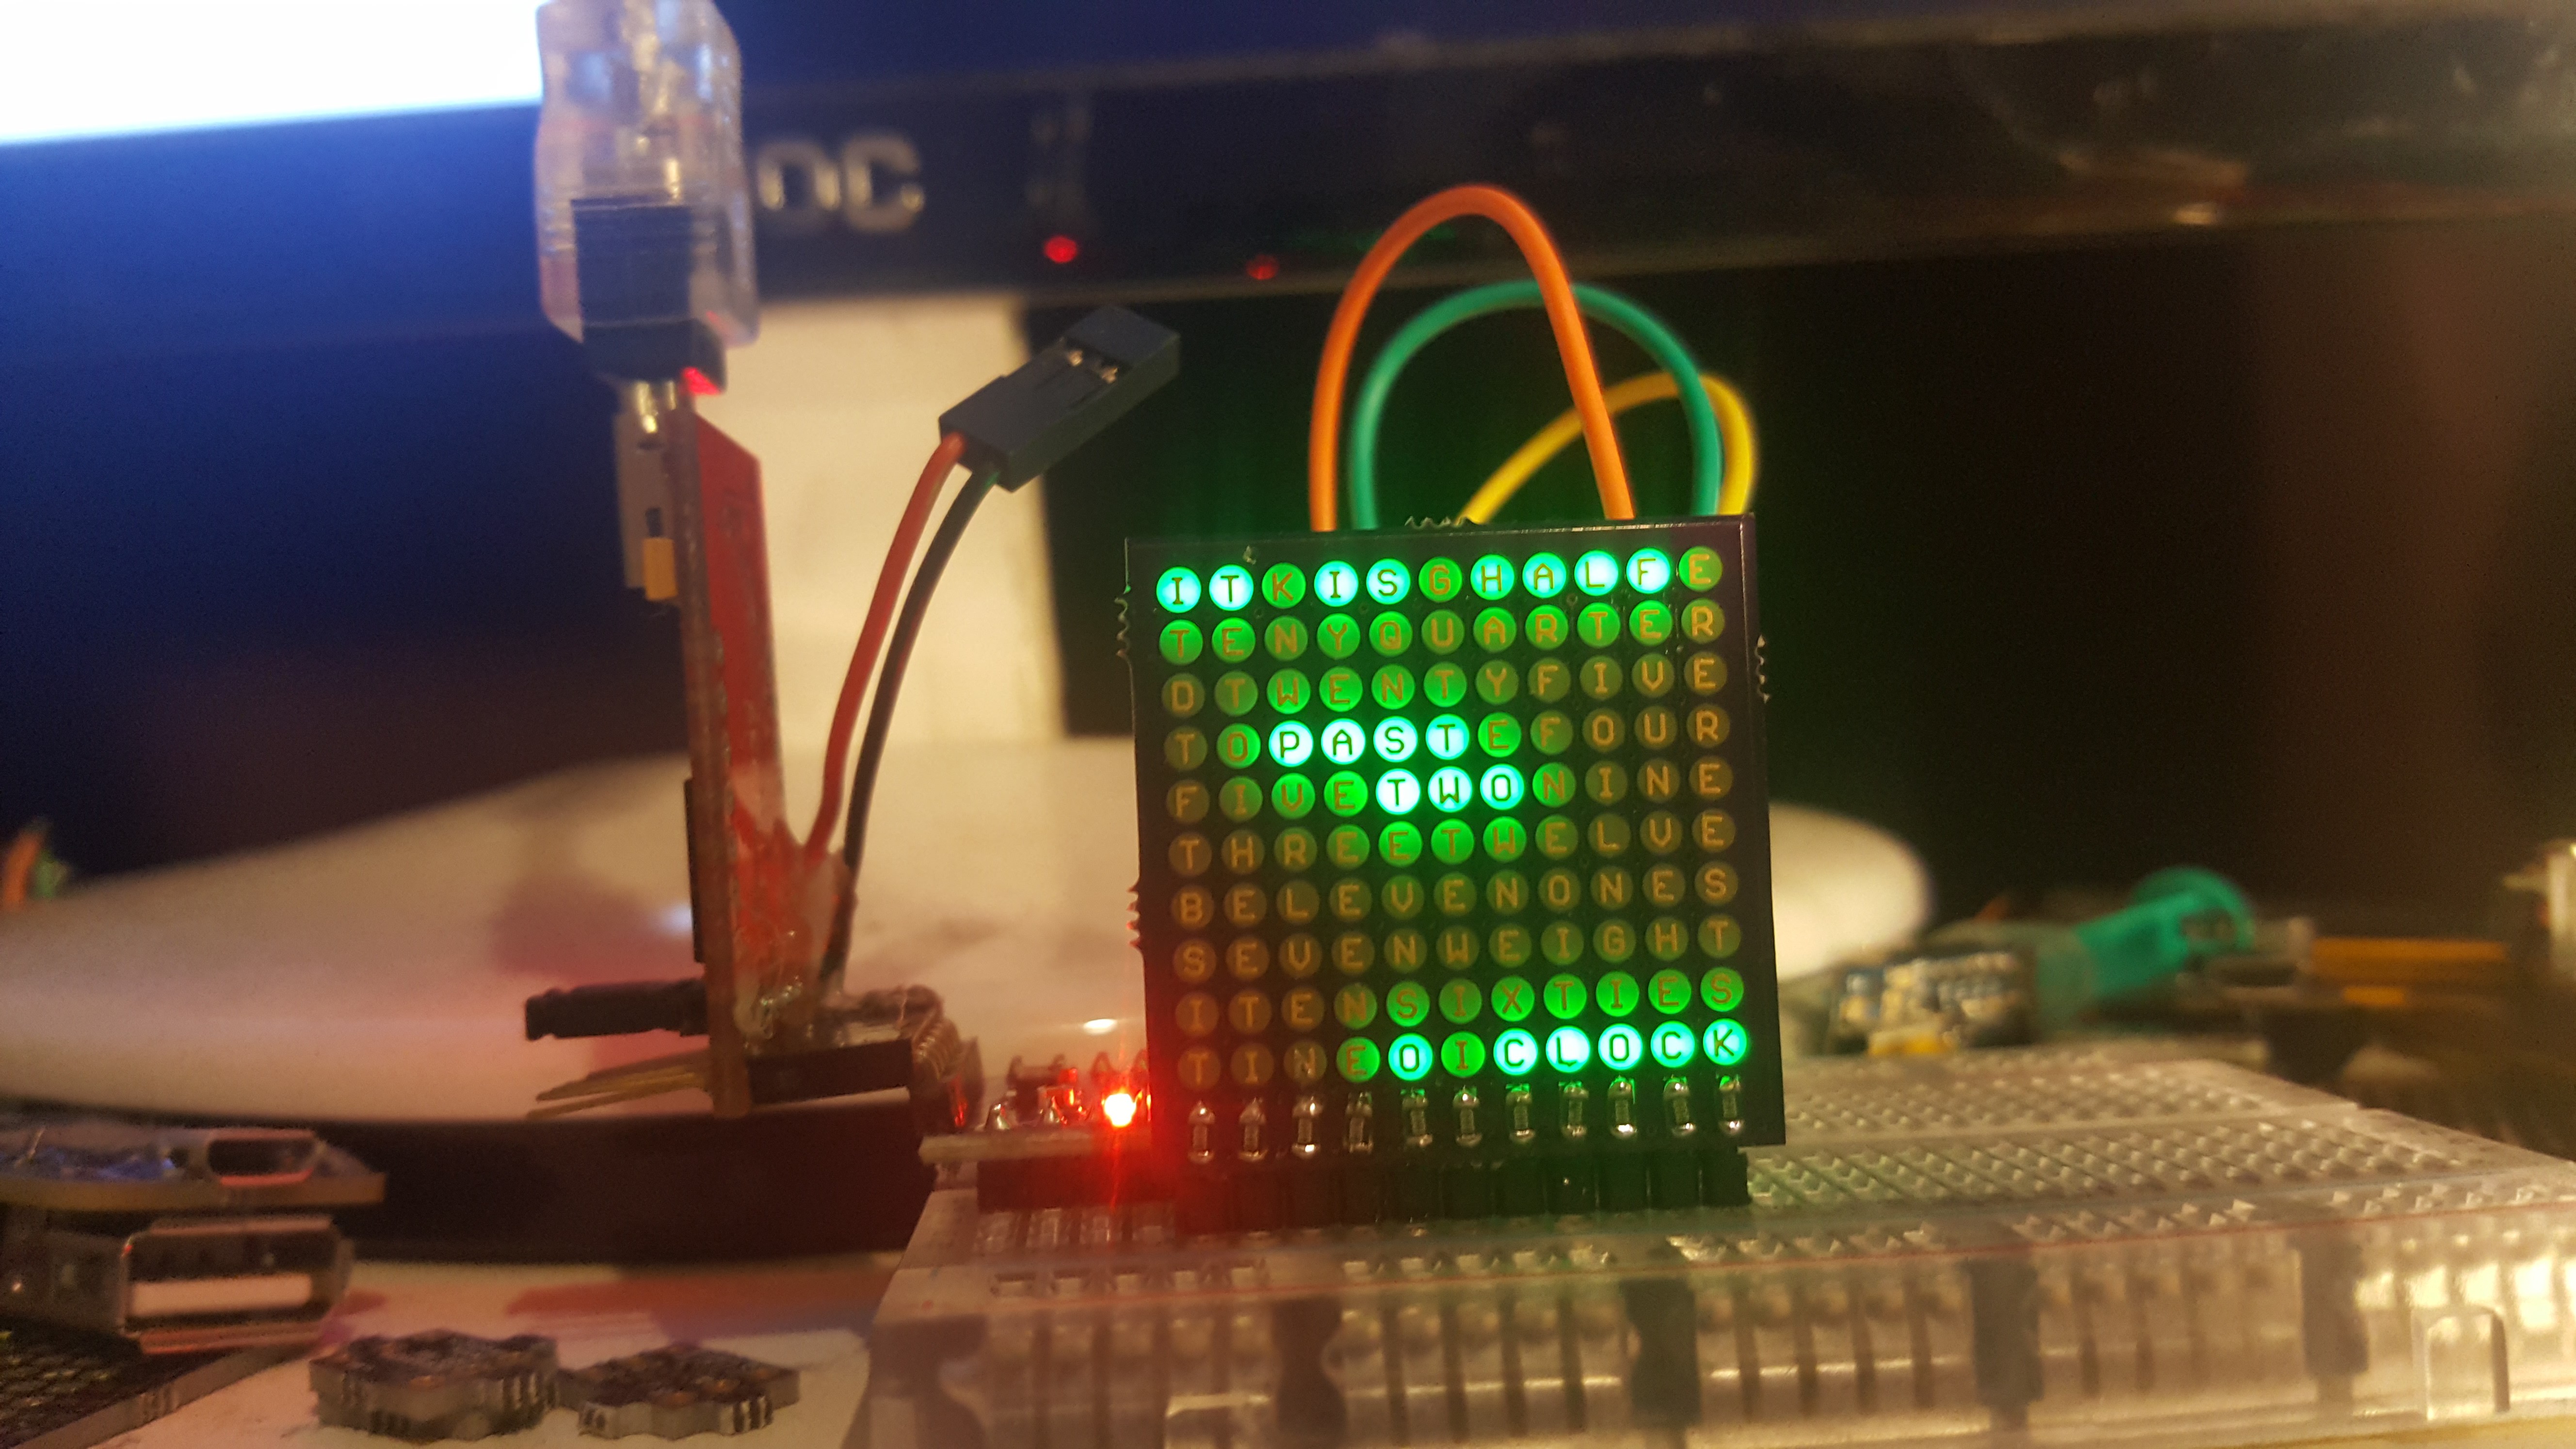
charlie-plexed 11x10 LED matrix, perfect fit for a word clock. Also LEDs soldered on upside down.

Similar projects worth following
Charlieplexing LEDs in a 11 x 10 matrix is a perfect match for a word clock! You don't have that many LEDs to turn on. The hassle with a good case stopped me from building one for the longest time. I couldn't decline this challenge!

GER layout Order from OSH Park
ENG layout Order from OSH Park

General Idea

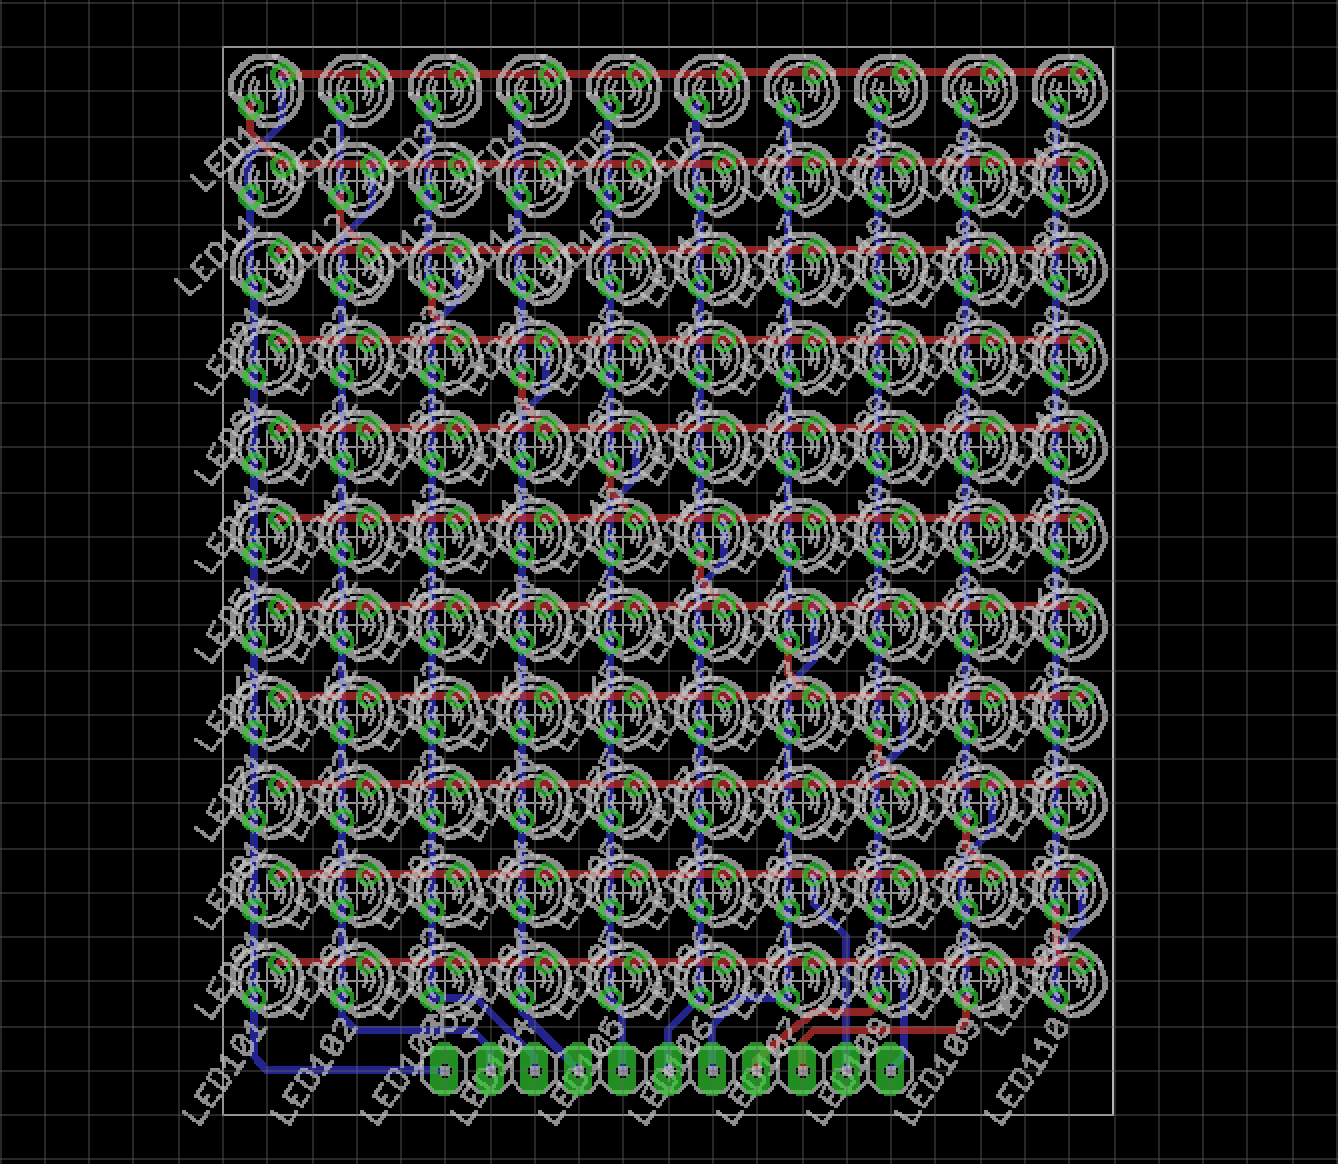
@Radomir Dopieralski mentioned in #Hacker Channel that one could use LEDs backwards to shine through the PCB and at this point I'm not sure if he mentioned charlie-plexing and word clock as well, but let's just say I was inspired to design a board like this. At this point I already had a board prepared, a 10x11 LED matrix with 5mm charlieplexed LEDs. Charlieplexing can get very confusing, but I found a trick online [research link], that helps a lot to layout a matrix. Instead of controlling it with 10+11 pins this will take only 11 pins.

LED footprint

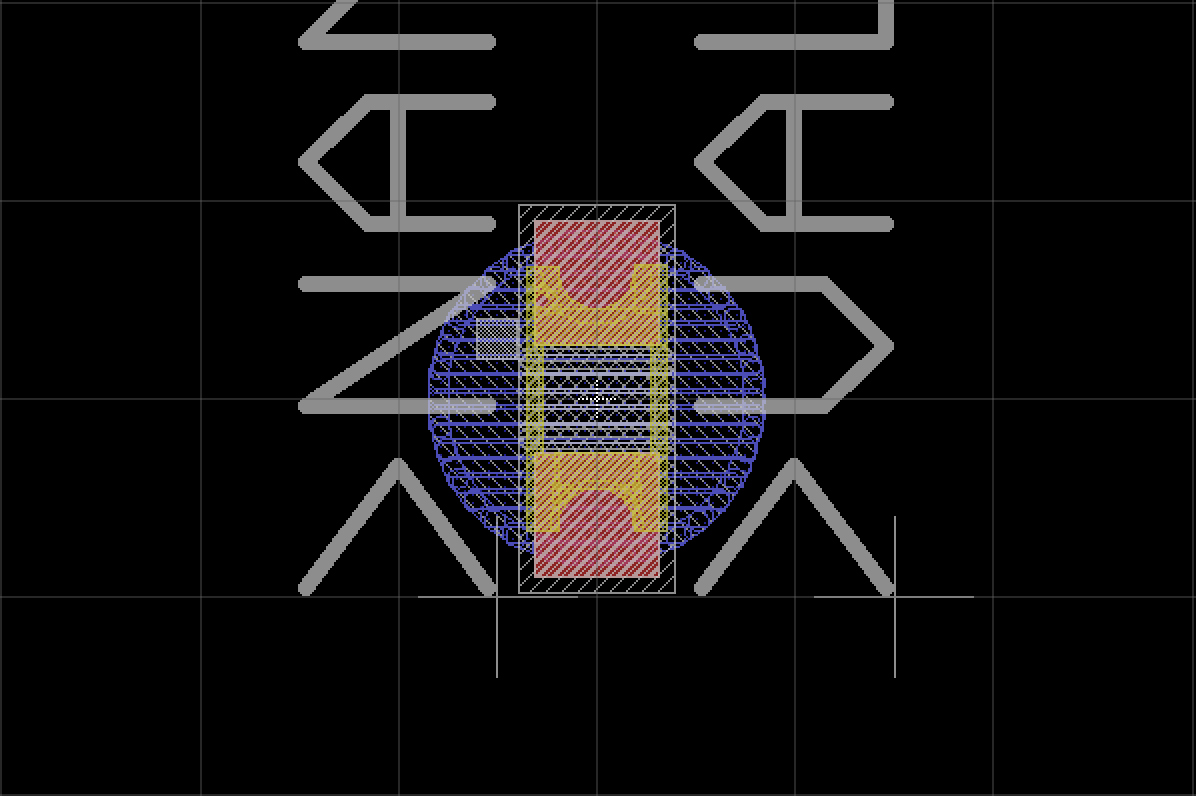
From there I've edited an LED footprint in EAGLE so that I was able to just change the LEDs without rewiring the schematics. The blue circle is on the layer "42 bRestrict" - this will stop the polygon on the bottom layer from putting copper there. At the same time the copper will frame the letter. Since I'm an expert in soldering LEDs the wrong way by accident, I will use standard 0603 LEDs, instead of special "bottom mount" LEDs. On the top Layer of the LED footprint is a smaller, rectangular shaped Object on "41 tRestrict" that's supposed to let the light through as well. The letters where placed on the bottom layer.

What's Charlieplexing

It's always good to try to explain stuff in your own words, legally speaking as well. Blinking LEDs is always awesome, because it's wysiwyg. Connect the anode to 5V, the cathode to GROUND and it explodes. Add a resistor and everything is great, as long as it's the right value. The other way around they do cool stuff too, but not important for this project. Here it's important that they're not glowing.
The cool thing about ATMEGA chips is, that they can source/drain enough power to make LEDs blink and that they're on Arduino boards. You can even put two opposing LEDs on the data pins and and make them blink depending on the OUTPUT of the pins.
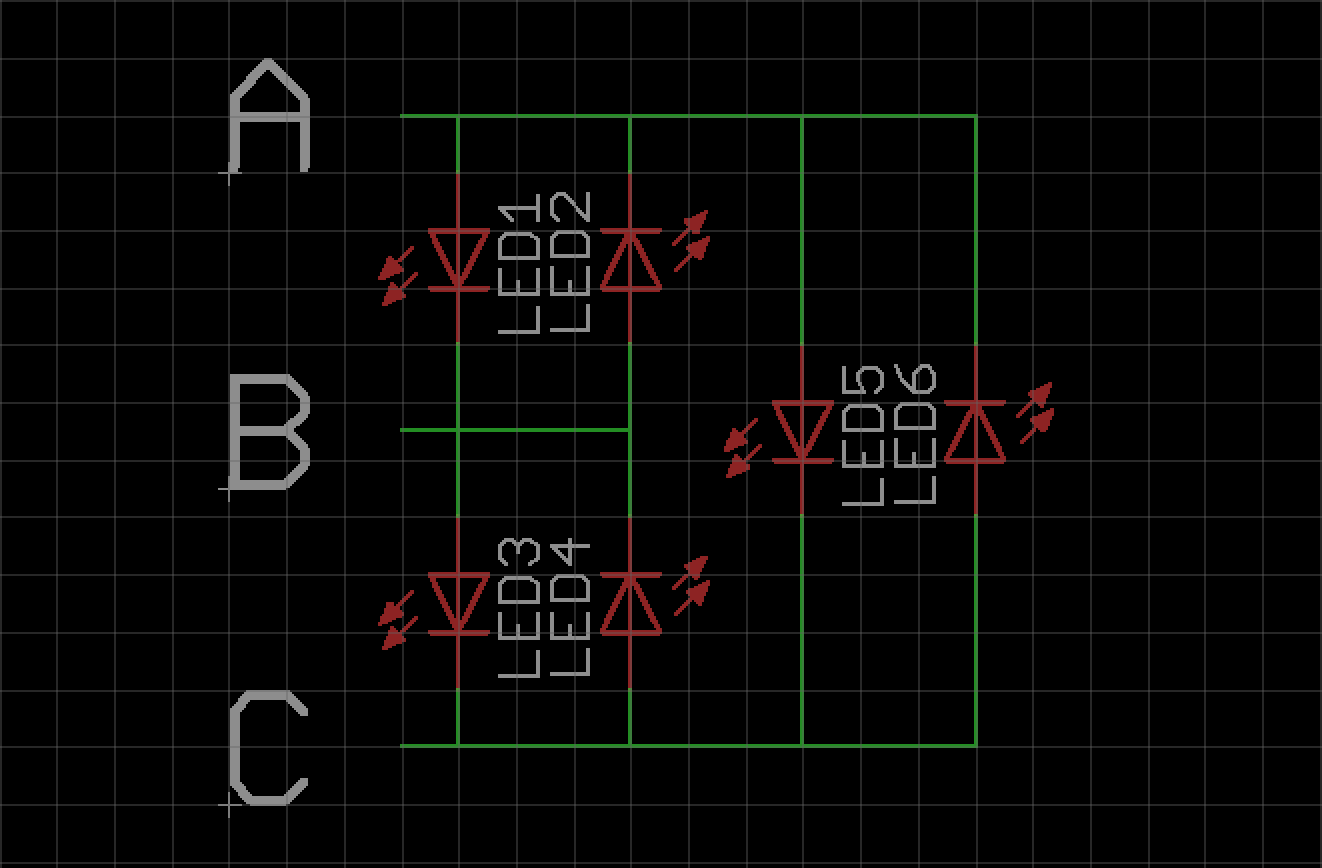
Given this schematic and you only have ground and power, then this would be your truth table. Adding more LEDs would only add more LEDs that shine simultaneously.

A B C LED1 LED2 LED3 LED4 LED5 LED6
0 0 0
0 0 1
ON ON
0 1 0 ON ON
0 1 1 ON ON
1 0 0 ON ON
1 0 1 ON ON
1 1 0 ON ON
1 1 1

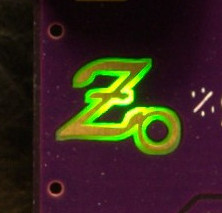
Luckily the ATMEGA has a third state, a high impedance state - also called Z state. You can achieve that by turning the pin to an INPUT pin. The following table only shows how to activate the LEDs.

A B C LED1 LED2 LED3 LED4 LED5 LED6
1 0 Z ON
0 1 Z ON

Z 1 0 ON
Z 0 1 ON
1 Z 0 ON
0 Z 1 ON

Pros and cons

So why all this? It saves pins and doesn't take much power! But I will have to worry about brightness and programming it, once the boards are here.

11x10_GER.brd

brd - 117.67 kB - 01/12/2017 at 15:18

Download

11x10_ENG.sch

sch - 164.66 kB - 01/12/2017 at 15:18

Download

11x10_GER.sch

sch - 164.66 kB - 01/12/2017 at 15:18

Download

11x10_ENG.brd

brd - 116.40 kB - 01/12/2017 at 15:18

Download

  • Version One :)

    davedarko02/17/2017 at 02:06 7 comments

    Update fun fact: analyzing a charlie plexed matrix for bugs is so much easier when the LEDs are upside down - because of the markings :)


    I finally got my LEDs and took the time to hand solder a PCB :) it bleeds a bit in the picture, but in real life it's quite good. The code so far is only a mock up, but there is scanning and matrix stuff involved already.

    #include <avr/pgmspace.h>
    
    const int leds[]  = {2,3,4,5,6,7,8,9,10,11,12,13};
    
    const int matrix[10][11][2]  = {
      {  {1, 0},  {0, 1},  {0, 2},  {0, 3},  {0, 4},  {0, 5},  {0, 6},  {0, 7},  {0, 8},  {0, 9}, {0, 10} }, // 0
      {  {2, 0},  {2, 1},  {1, 2},  {1, 3},  {1, 4},  {1, 5},  {1, 6},  {1, 7},  {1, 8},  {1, 9}, {1, 10} }, // 1
      {  {3, 0},  {3, 1},  {3, 2},  {2, 3},  {2, 4},  {2, 5},  {2, 6},  {2, 7},  {2, 8},  {2, 9}, {2, 10} }, // 2
      {  {4, 0},  {4, 1},  {4, 2},  {4, 3},  {3, 4},  {3, 5},  {3, 6},  {3, 7},  {3, 8},  {3, 9}, {3, 10} }, // 3
      {  {5, 0},  {5, 1},  {5, 2},  {5, 3},  {5, 4},  {4, 5},  {4, 6},  {4, 7},  {4, 8},  {4, 9}, {4, 10} }, // 4
      {  {6, 0},  {6, 1},  {6, 2},  {6, 3},  {6, 4},  {6, 5},  {5, 6},  {5, 7},  {5, 8},  {5, 9}, {5, 10} }, // 5
      {  {7, 0},  {7, 1},  {7, 2},  {7, 3},  {7, 4},  {7, 5},  {7, 6},  {6, 7},  {6, 8},  {6, 9}, {6, 10} }, // 6
      {  {8, 0},  {8, 1},  {8, 2},  {8, 3},  {8, 4},  {8, 5},  {8, 6},  {8, 7},  {7, 8},  {7, 9}, {7, 10} }, // 7
      {  {9, 0},  {9, 1},  {9, 2},  {9, 3},  {9, 4},  {9, 5},  {9, 6},  {9, 7},  {9, 8},  {8, 9}, {8, 10} }, // 8
      { {10, 0}, {10, 1}, {10, 2}, {10, 3}, {10, 4}, {10, 5}, {10, 6}, {10, 7}, {10, 8}, {10, 9}, {9, 10} } // 9
    };
    
    const boolean img [10][11] = {
      { true,  true, false,  true,  true, false,  true,  true,  true,  true, false},
      {false, false, false, false, false, false, false, false, false, false, false},
      {false, false, false, false, false, false, false, false, false, false, false},
      {false, false,  true,  true,  true,  true, false, false, false, false, false},
      {false, false, false, false,  true,  true,  true, false, false, false, false},
      {false, false, false, false, false, false, false, false, false, false, false},
      {false, false, false, false, false, false, false, false, false, false, false},
      {false, false, false, false, false, false, false, false, false, false, false},
      {false, false, false, false, false, false, false, false, false, false, false},
      {false, false, false, false,  true, false,  true,  true,  true,  true,  true},
    };
    
    void setup()  { }
    
    void loop() {
        for (int y=0; y<10; y++) 
        {
          for (int x=0; x<11; x++) 
          {
            if (img[y][x]) charlie_matrix (x, y);
        }
      }
    }
    
    void charlie_matrix (int x, int y)
    {
       int cx = matrix[y][x][0]; 
       int cy = matrix[y][x][1]; 
      
      digitalWrite(leds[cx], LOW);
      pinMode(leds[cx], OUTPUT);
      digitalWrite(leds[cy], HIGH);
      pinMode(leds[cy], OUTPUT);
      delayMicroseconds(65);
    
      pinMode(leds[cx], INPUT);
      digitalWrite(leds[cx], LOW);
      pinMode(leds[cy], INPUT);
      digitalWrite(leds[cy], LOW);
      
      delayMicroseconds(5);
    }

  • some documentation added

    davedarko01/15/2017 at 13:46 0 comments

    Since someone on twitter pointed out that the project documentation is an epicfail, I felt compelled to edit the details and add informations on charlieplexing and the general idea. I first was a bit annoyed, but mostly because the entity was right :) I tend to not document my projects very well, mostly because it's easier to write about it afterwards and laziness. Now it feels more complete though.

  • boards are ordered

    davedarko01/12/2017 at 15:19 2 comments

    So for science I've also added the german layout and ordered this one on 0.8mm boards.

View all 3 project logs

Enjoy this project?

Share

Discussions

deʃhipu wrote 07/15/2018 at 10:34 point

Do you maybe still have that "[research link]" from the description somewhere?

  Are you sure? yes | no

davedarko wrote 07/15/2018 at 12:56 point

I think it was this (very useful anyway), it's all about that diagonal where you jump a row or col.

http://wealoneonearth.blogspot.com/2013/03/design-note-charlieplexing-led-matrices.html

  Are you sure? yes | no

deʃhipu wrote 07/15/2018 at 19:32 point

I think that's not it. This one is about multiplexing several ready matrices, and not about making your own matrix out of single LEDs.

  Are you sure? yes | no

davedarko wrote 07/15/2018 at 20:30 point

@ꝺeshipu  I basically image googled charlie plexed matrix and found something very clean looking. Turned out it's basically the same matrix the person used here, where the diagonal (black) is a no no zone and you take one of the triangles and push it down / up.

  Are you sure? yes | no

Jarrett wrote 12/13/2017 at 19:48 point

I wonder if a 4-layer board and buried traces in a circle around each digit would help reduce bleed-through.

Other than that, the ring of vias is a neat idea, but somewhat prohibitive on space if the minimum ring is 0.4mm

  Are you sure? yes | no

davedarko wrote 12/13/2017 at 21:28 point

the vias are actually necessary for routing the charlie plexed LED matrix :) @al1 did a similar project with bigger leds, an 8x8 matrix with a lot more vias and it looks better. But I liked the idea of 0603 upside down soldered LEDs more.

  Are you sure? yes | no

Simon wrote 10/10/2017 at 11:58 point

Great idea! Can you post a picture of LED side o the PCB, I'm wondering if you flip LED to touch PCB by lense. I would consider to use copper instead of silkscreen. I did experime with this type of PCB and LED and result was better to have copper on the top of the PCB. View o the letter would be much more sharper. Congrat!

  Are you sure? yes | no

davedarko wrote 10/10/2017 at 12:27 point

Hi Simon, thank you :) I don't have them with me, but yes they're flipped to shine through the pcb. The letters are in fact copper (higher resolution than silkscreen). 

  Are you sure? yes | no

Simon wrote 10/11/2017 at 08:21 point

You could also use negative gerber data, I mean put number like they are, but order negative. Then you will avoid highlight around all PCB. Any way great explanation o logic and source code. Thank you.

  Are you sure? yes | no

Stefan-Xp wrote 03/02/2017 at 23:35 point

Another awesome project! Congratulations!

I only wonder why i had to find this on OSHPark and not here...

Have a nice Weekend, Best regards, Stefan

  Are you sure? yes | no

davedarko wrote 03/03/2017 at 00:13 point

Thanks :) I was about to test it first and maybe experiment with it, but now I just shared it. Have I forgotten to add the links?

  Are you sure? yes | no

davedarko wrote 03/03/2017 at 00:22 point

also: there's no time software yet, no RTC integrated.

  Are you sure? yes | no

Ted Yapo wrote 01/12/2017 at 19:09 point

I like the idea of using "normal" LEDs for this!  They used to make larger SMT LEDs specifically for inverse mounting:

https://www.digikey.com/product-detail/en/osram-opto-semiconductors-inc/LS-T776-R1S1-1-Z/475-2699-1-ND/1938866

It looks like they're being discontinued, though.  I used them to backlight a logo on some boards before:

But, they were big and more expensive than standard LEDs.

I found that the fiberglass diffused light very well - possibly enough to cause bleed-though to neighboring symbols in a tight array.  Maybe a ring (or grid) of plated-though vias around each symbol would block some of the light if this becomes an issue.

  Are you sure? yes | no

davedarko wrote 01/12/2017 at 20:13 point

that looks nice! I was wondering what color I will use and green was on the top of my list.

  Are you sure? yes | no

K.C. Lee wrote 01/12/2017 at 21:24 point

There are 7,529 search results (300+ pages) on digikey if you search for 

Mounting Type: Surface Mount Bottom Entry

  Are you sure? yes | no

davedarko wrote 01/12/2017 at 21:51 point

any in 0603, that don't look like normal LEDs?

  Are you sure? yes | no

K.C. Lee wrote 01/12/2017 at 23:56 point

0603 is a small package, so likely are the LED dies are bonded to a substrate with an epoxy lens cover and cut down to the size.  i.e. the all going to look similar may be slightly different lens shape/thickness.

Not sure what exactly you are looking for.  Best bet is to go to a particular vendor's catalog to choose a style.

  Are you sure? yes | no

davedarko wrote 01/13/2017 at 10:42 point

No no, I'm fine with normal 0603 SMD LEDs from eBay, I think. I felt snappy because you've placed your search results so "dry". I'm not really looking for something, I'll just put them the other way around and hope for the best, since searching with your recommended terms for LEDs in the size of my project, I noticed that they all looked like good old LEDs to me :)  

  Are you sure? yes | no

danjovic wrote 02/17/2017 at 20:31 point

Awesome, a glowing logo on the PCB! Never tried that trick!

  Are you sure? yes | no

Sean Hodgins wrote 01/12/2017 at 18:39 point

how will you make the LEDs bridge the small gap to the board(from the lens gap? Or do you know something I don't know? Haha can't wait to see how this works! 

  Are you sure? yes | no

davedarko wrote 01/12/2017 at 18:50 point

a lot of solder :) in the case of 0603 LEDs it can't be much, I hope...

  Are you sure? yes | no

deʃhipu wrote 01/12/2017 at 16:46 point

Can't wait to see it in action.

  Are you sure? yes | no

Alex wrote 01/12/2017 at 16:43 point

This is really nice looking. 

  Are you sure? yes | no

davedarko wrote 01/12/2017 at 18:18 point

yay, nice words from an LED matrix master :)

  Are you sure? yes | no

oshpark wrote 01/11/2017 at 23:50 point

Very intresting!  We look forward to seeing more

  Are you sure? yes | no

davedarko wrote 01/12/2017 at 09:39 point

Thanks :) @Radomir Dopieralski was talking about stuff like that over on the #Hacker Channel and I just had to try it!

  Are you sure? yes | no

Similar Projects

Does this project spark your interest?

Become a member to follow this project and never miss any updates