Tim Wilkinson
-
Thrusters
01/26/2016 at 22:50 • 0 commentsThe ROV has 12 thrusters. That means I need to make cheap thrusters - buying 12 Blue Robotics thrusters would cost $2000 which is quite a lot of money. What can I say ... I'm cheap. Also, I want to be okay with a motor failing and being replaced, which also means they need to be cheap.
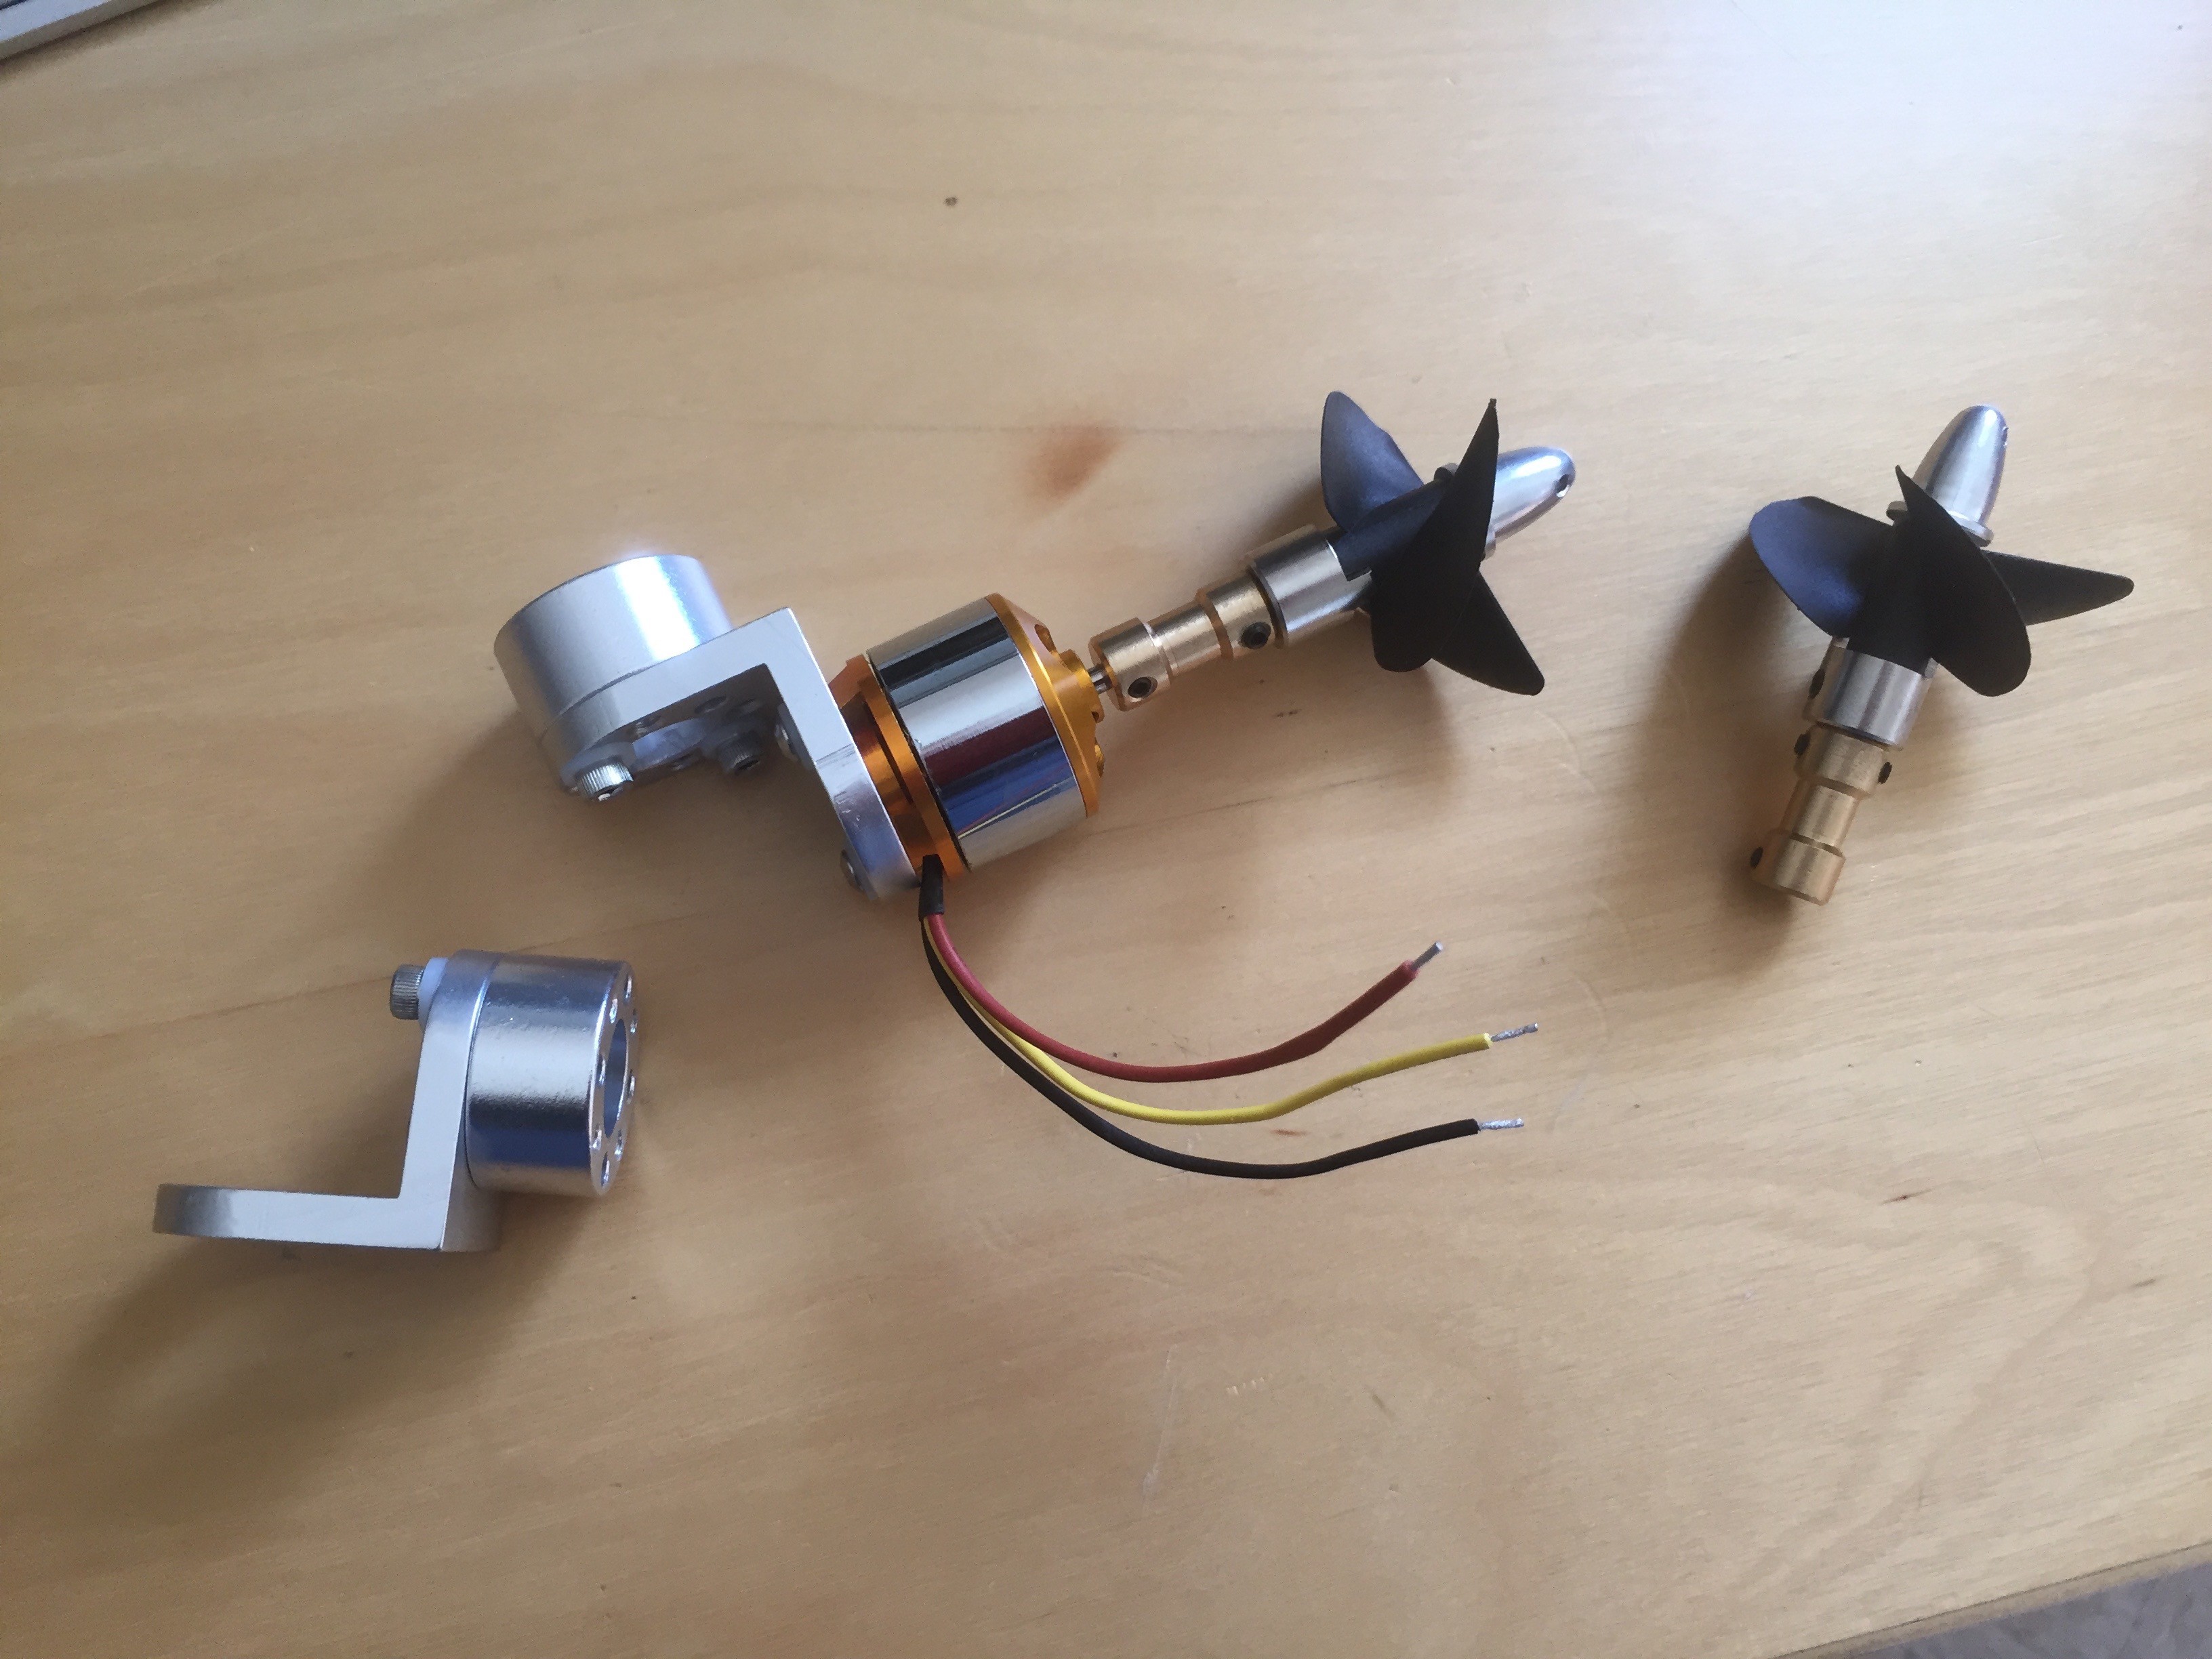
To this end I bought twelve A2212/13T 1000kV motors for about $6 per motor. If a few $6 motors fail, I'll be okay with that. To turn them into thrusters I needed to add propellors. I chose P40D47 Three Vanes RC Boat Propeller. This may turn out to be a bit small (time will tell). Also, I couldn't find clockwise and anti-clockwise version, which again may end up being an issue. To attach one of the props to the motor I used shaft couplers and double ended stainless steel threaded studs. The assembled thruster is below:
In this picture you can also see the aluminum mounting bracket made using a 90 degree hub mount and an aluminum spacer. The motor screws to one side of the hub, and the spacer is screwed to the frame ... like this:![]()
![]()
Right now the propellers are unprotected. I intend to add some sort of cowling, mostly so I don't hurt myself on them. The final step with them will be write them to the ESC board; but waiting on some connectors to finish that step.
-
Main Daughter Board: Update 2
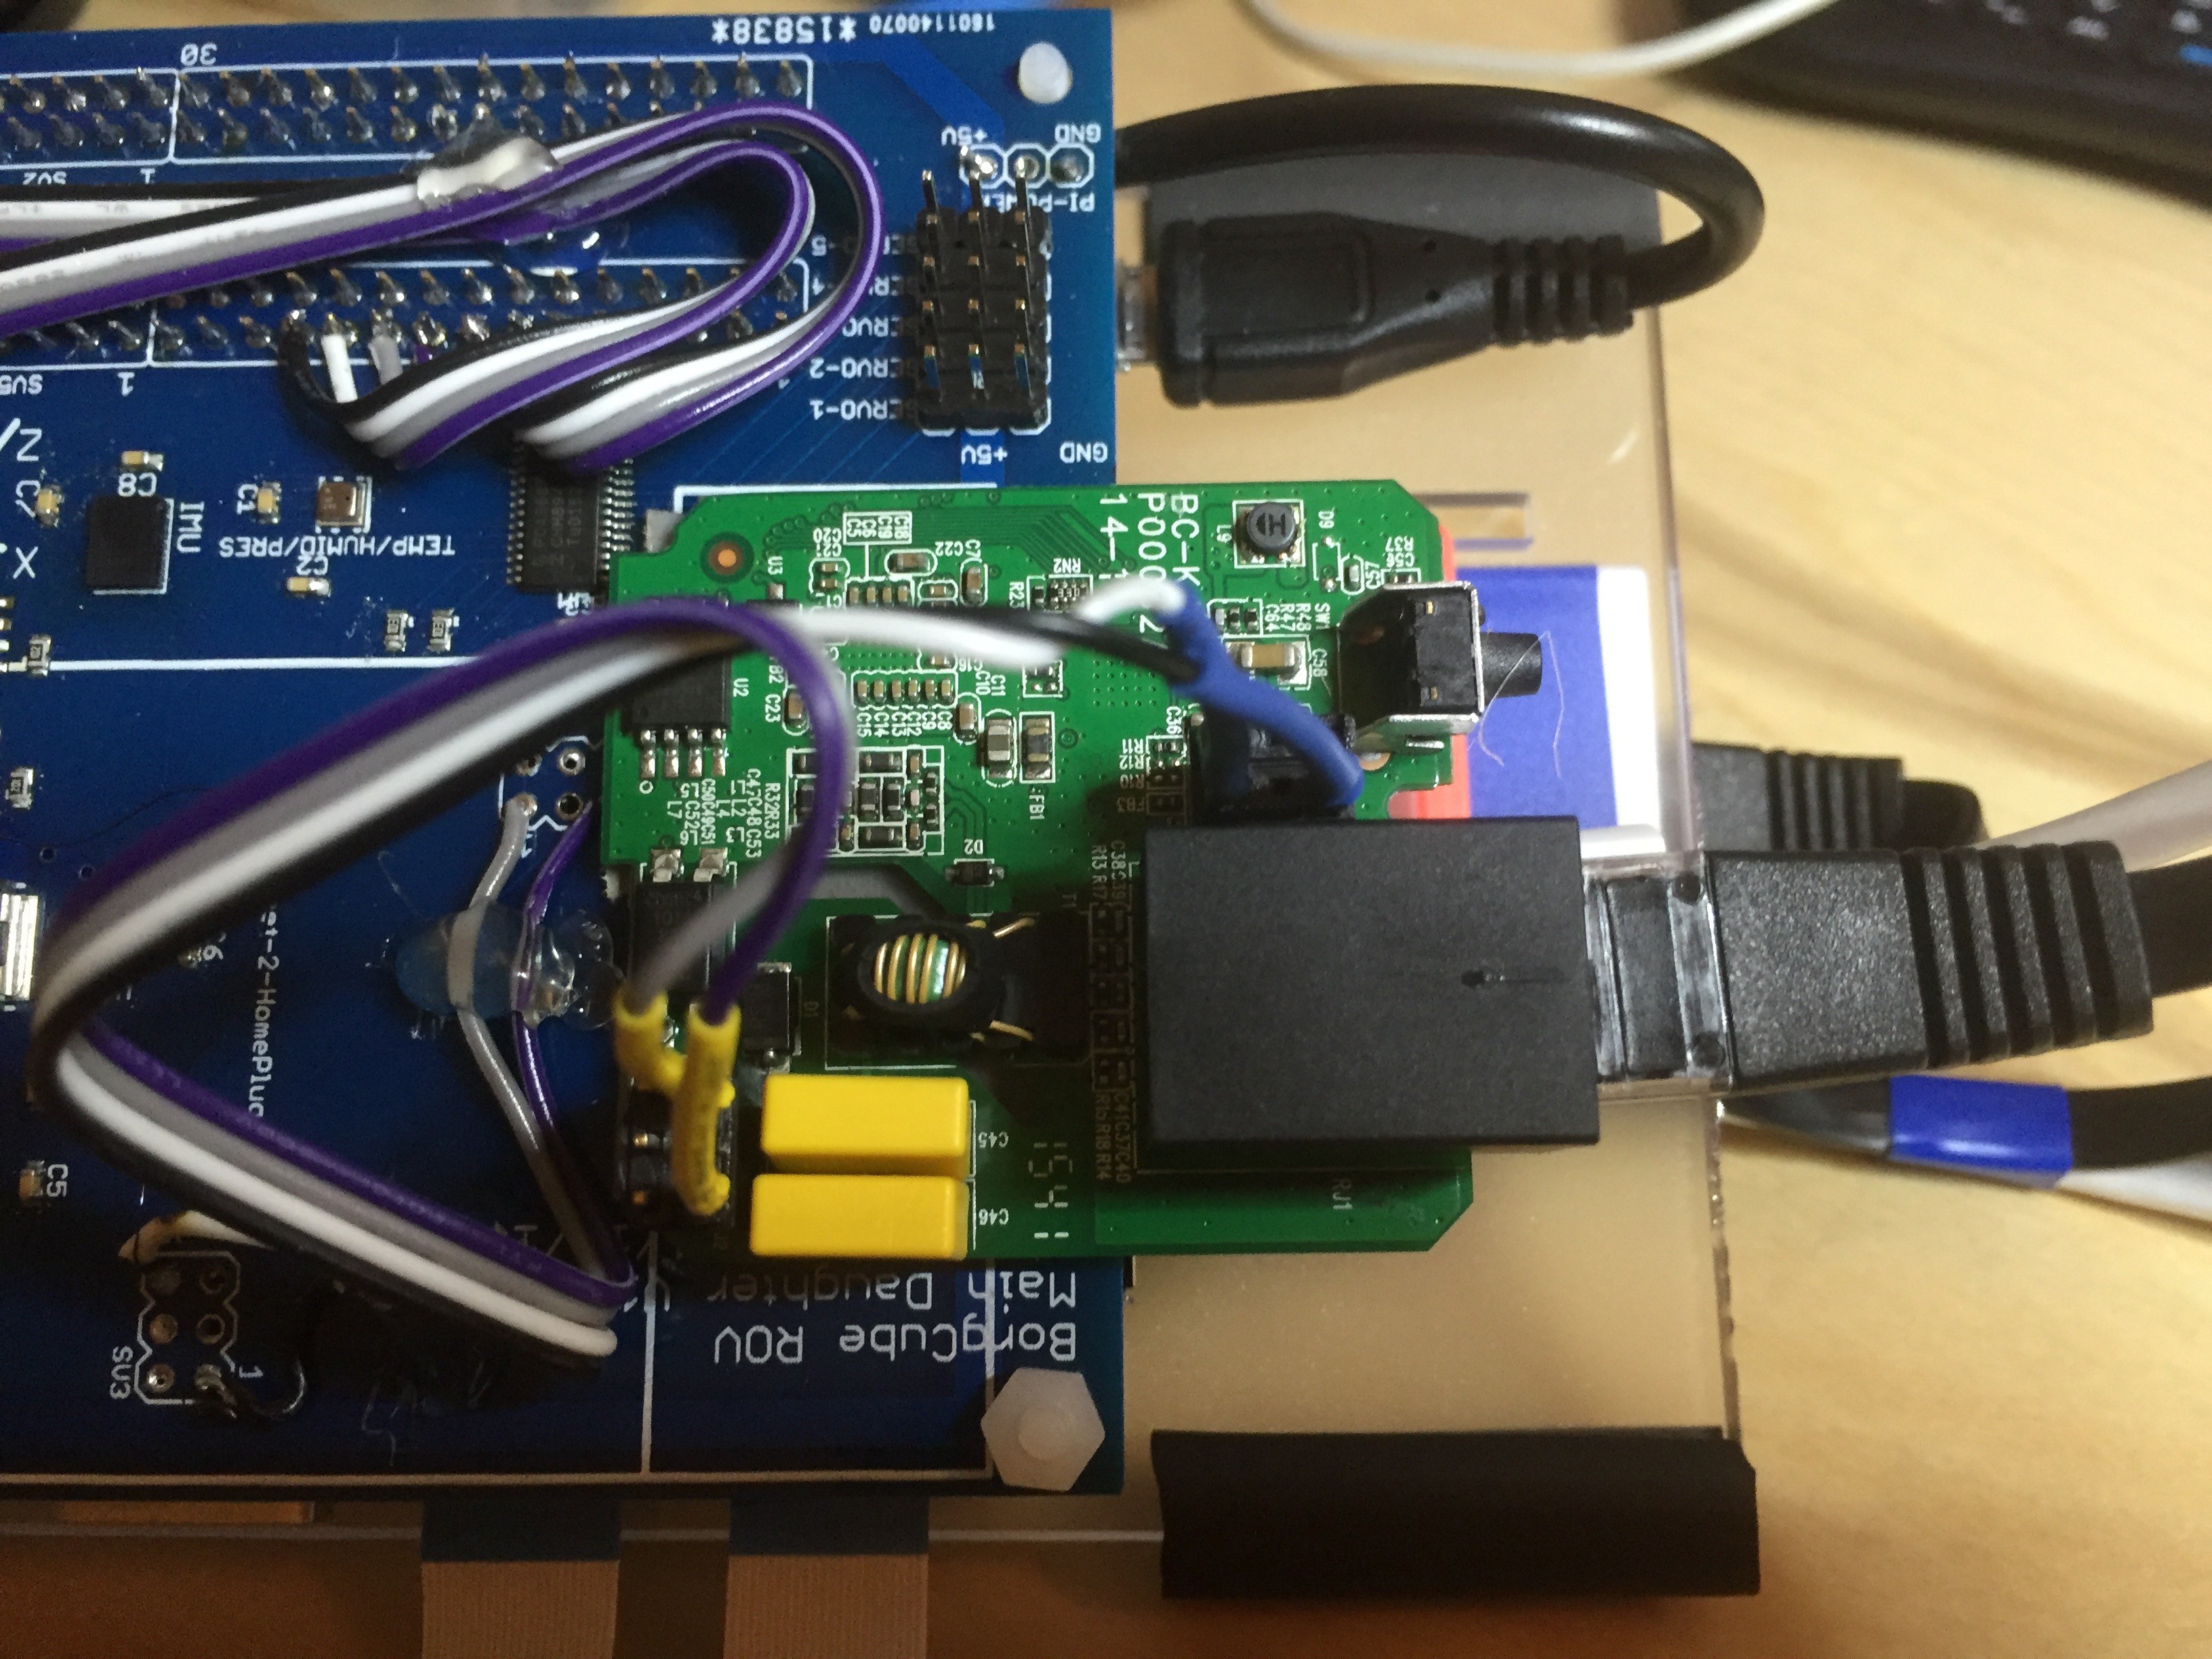
01/25/2016 at 07:15 • 0 commentsHad chance today to sit and debug the Tenda Homeplug interface. All the work for this was previous done by the OpenROV folk, so I just had to copy it. As previous reported, I managed to position the Tenda board too near the end of the daughterboard and had to use cables to connect to it. It also turned out that I put the GND pin on the wrong side of the connector. An easy fix since I was already using cables. It also turned out that I'd routed a tiny wire to bring power to the Tenda board; so I had to use an extra wire to bring power in since that proved insufficient.
That all done, the Tenda board in the ROV now talks to the test board in my workbench which is fabulous. I've also tried running power over my test tether, and that all works too.
![]()
-
ROV bus cable penetration
01/23/2016 at 01:35 • 0 commentsI'm using IP68 8-contact connectors to connect external systems (e.g. robot arm) to the Raspberry Pi board. To do this I need to run these connector from the wet side into the dry pressure vessel. Do do this I'm using the Cable penetrators from Blue Robotics which mate with their enclosures. The cables are epoxied into the penetrators to keep out water, and attached to an 8-pin header for easy attachment/detachment from the daughter board. Currently I need three of these (see the photo below):
![]()
The endcap still has plenty of holes for the tether and lights. The other holes I'll fill with blanks (so their available for another day).
-
PCBs
01/22/2016 at 19:05 • 0 commentsFinally have chance to put the current PCB up on GitHub. You can find them at https://github.com/aanon4/borgcube-rov/tree/master/pcbs
-
Power regulation
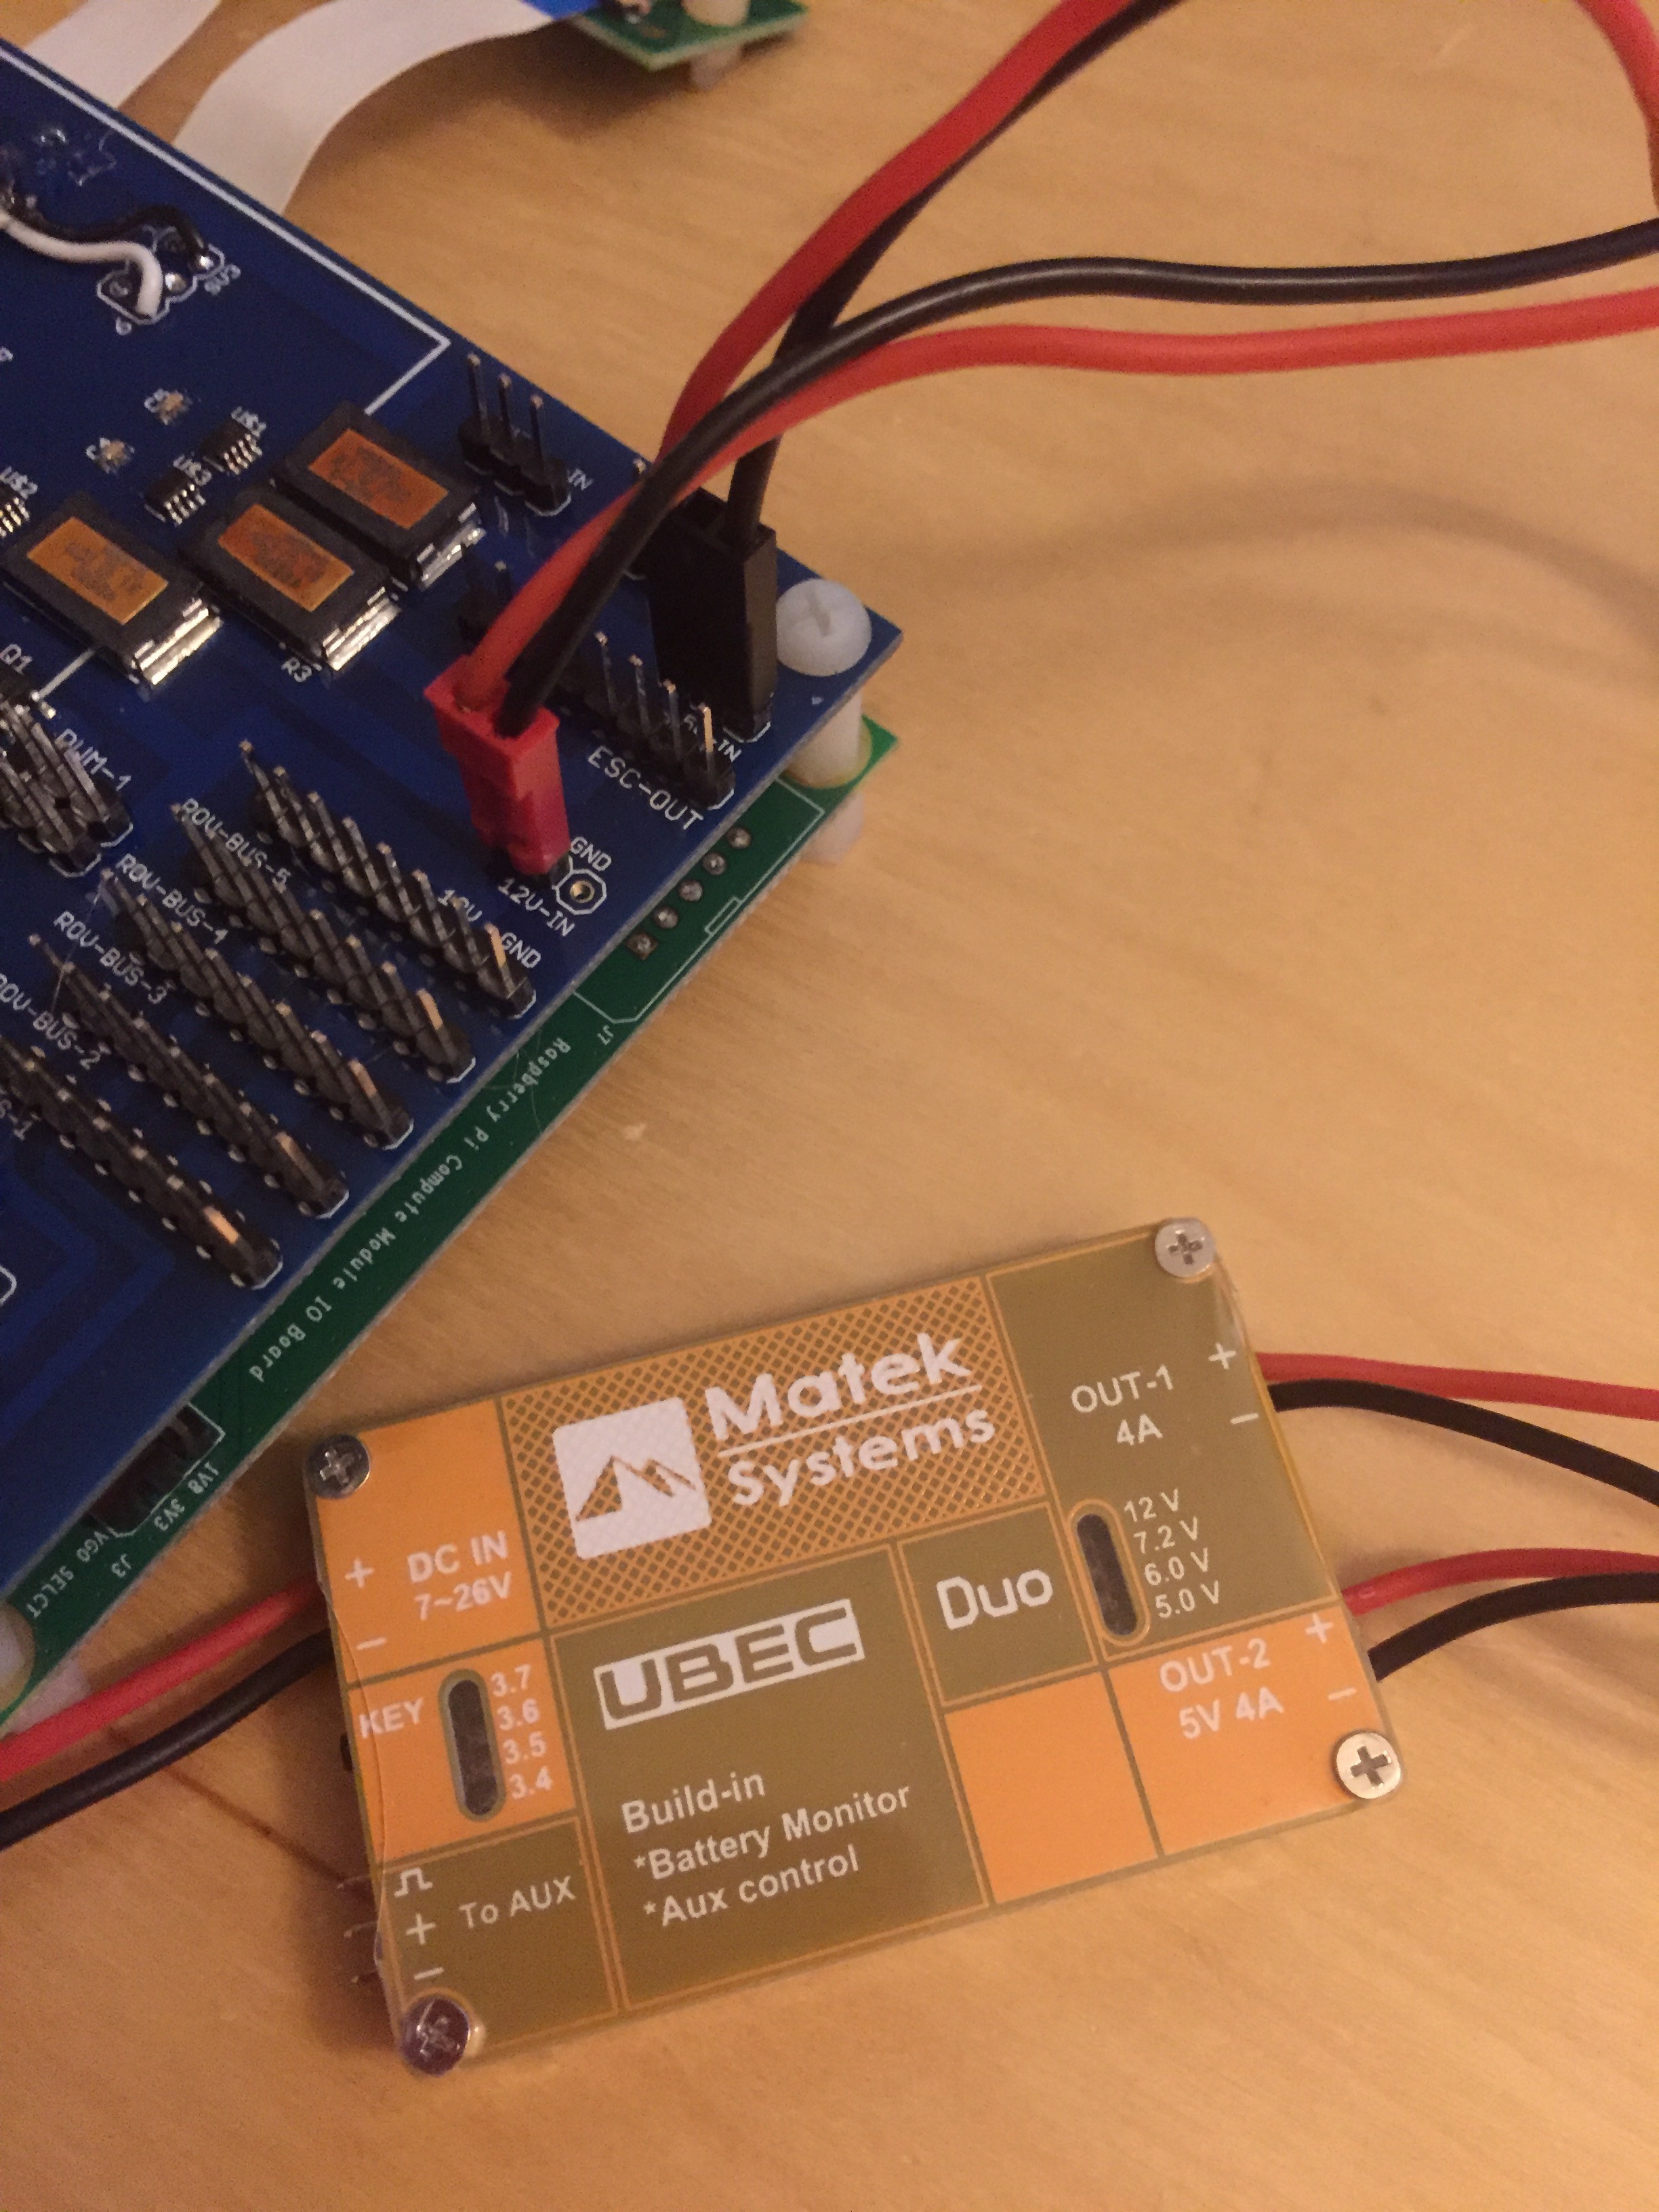
01/22/2016 at 01:39 • 0 commentsThe ROV uses three voltages: 3.3V, 5V and 12V. Of these, 5V and 12V must be provided to the main boards externally. I'm planning to provide power over the tether which means the voltages must be regulated once they arrive at the ROV. To keep the tether simple (2-wires) I intend to provide a voltage between 12 and 26V on the tether, the generate a stable 12V and 5V supply locally. Rather than build something to do this, I purchased a dual-voltage UBEC from Matek Systems. Below you see it powering the mated daughter and Raspberry PI boards.
![]()
-
Main Daughter Board: Update 1
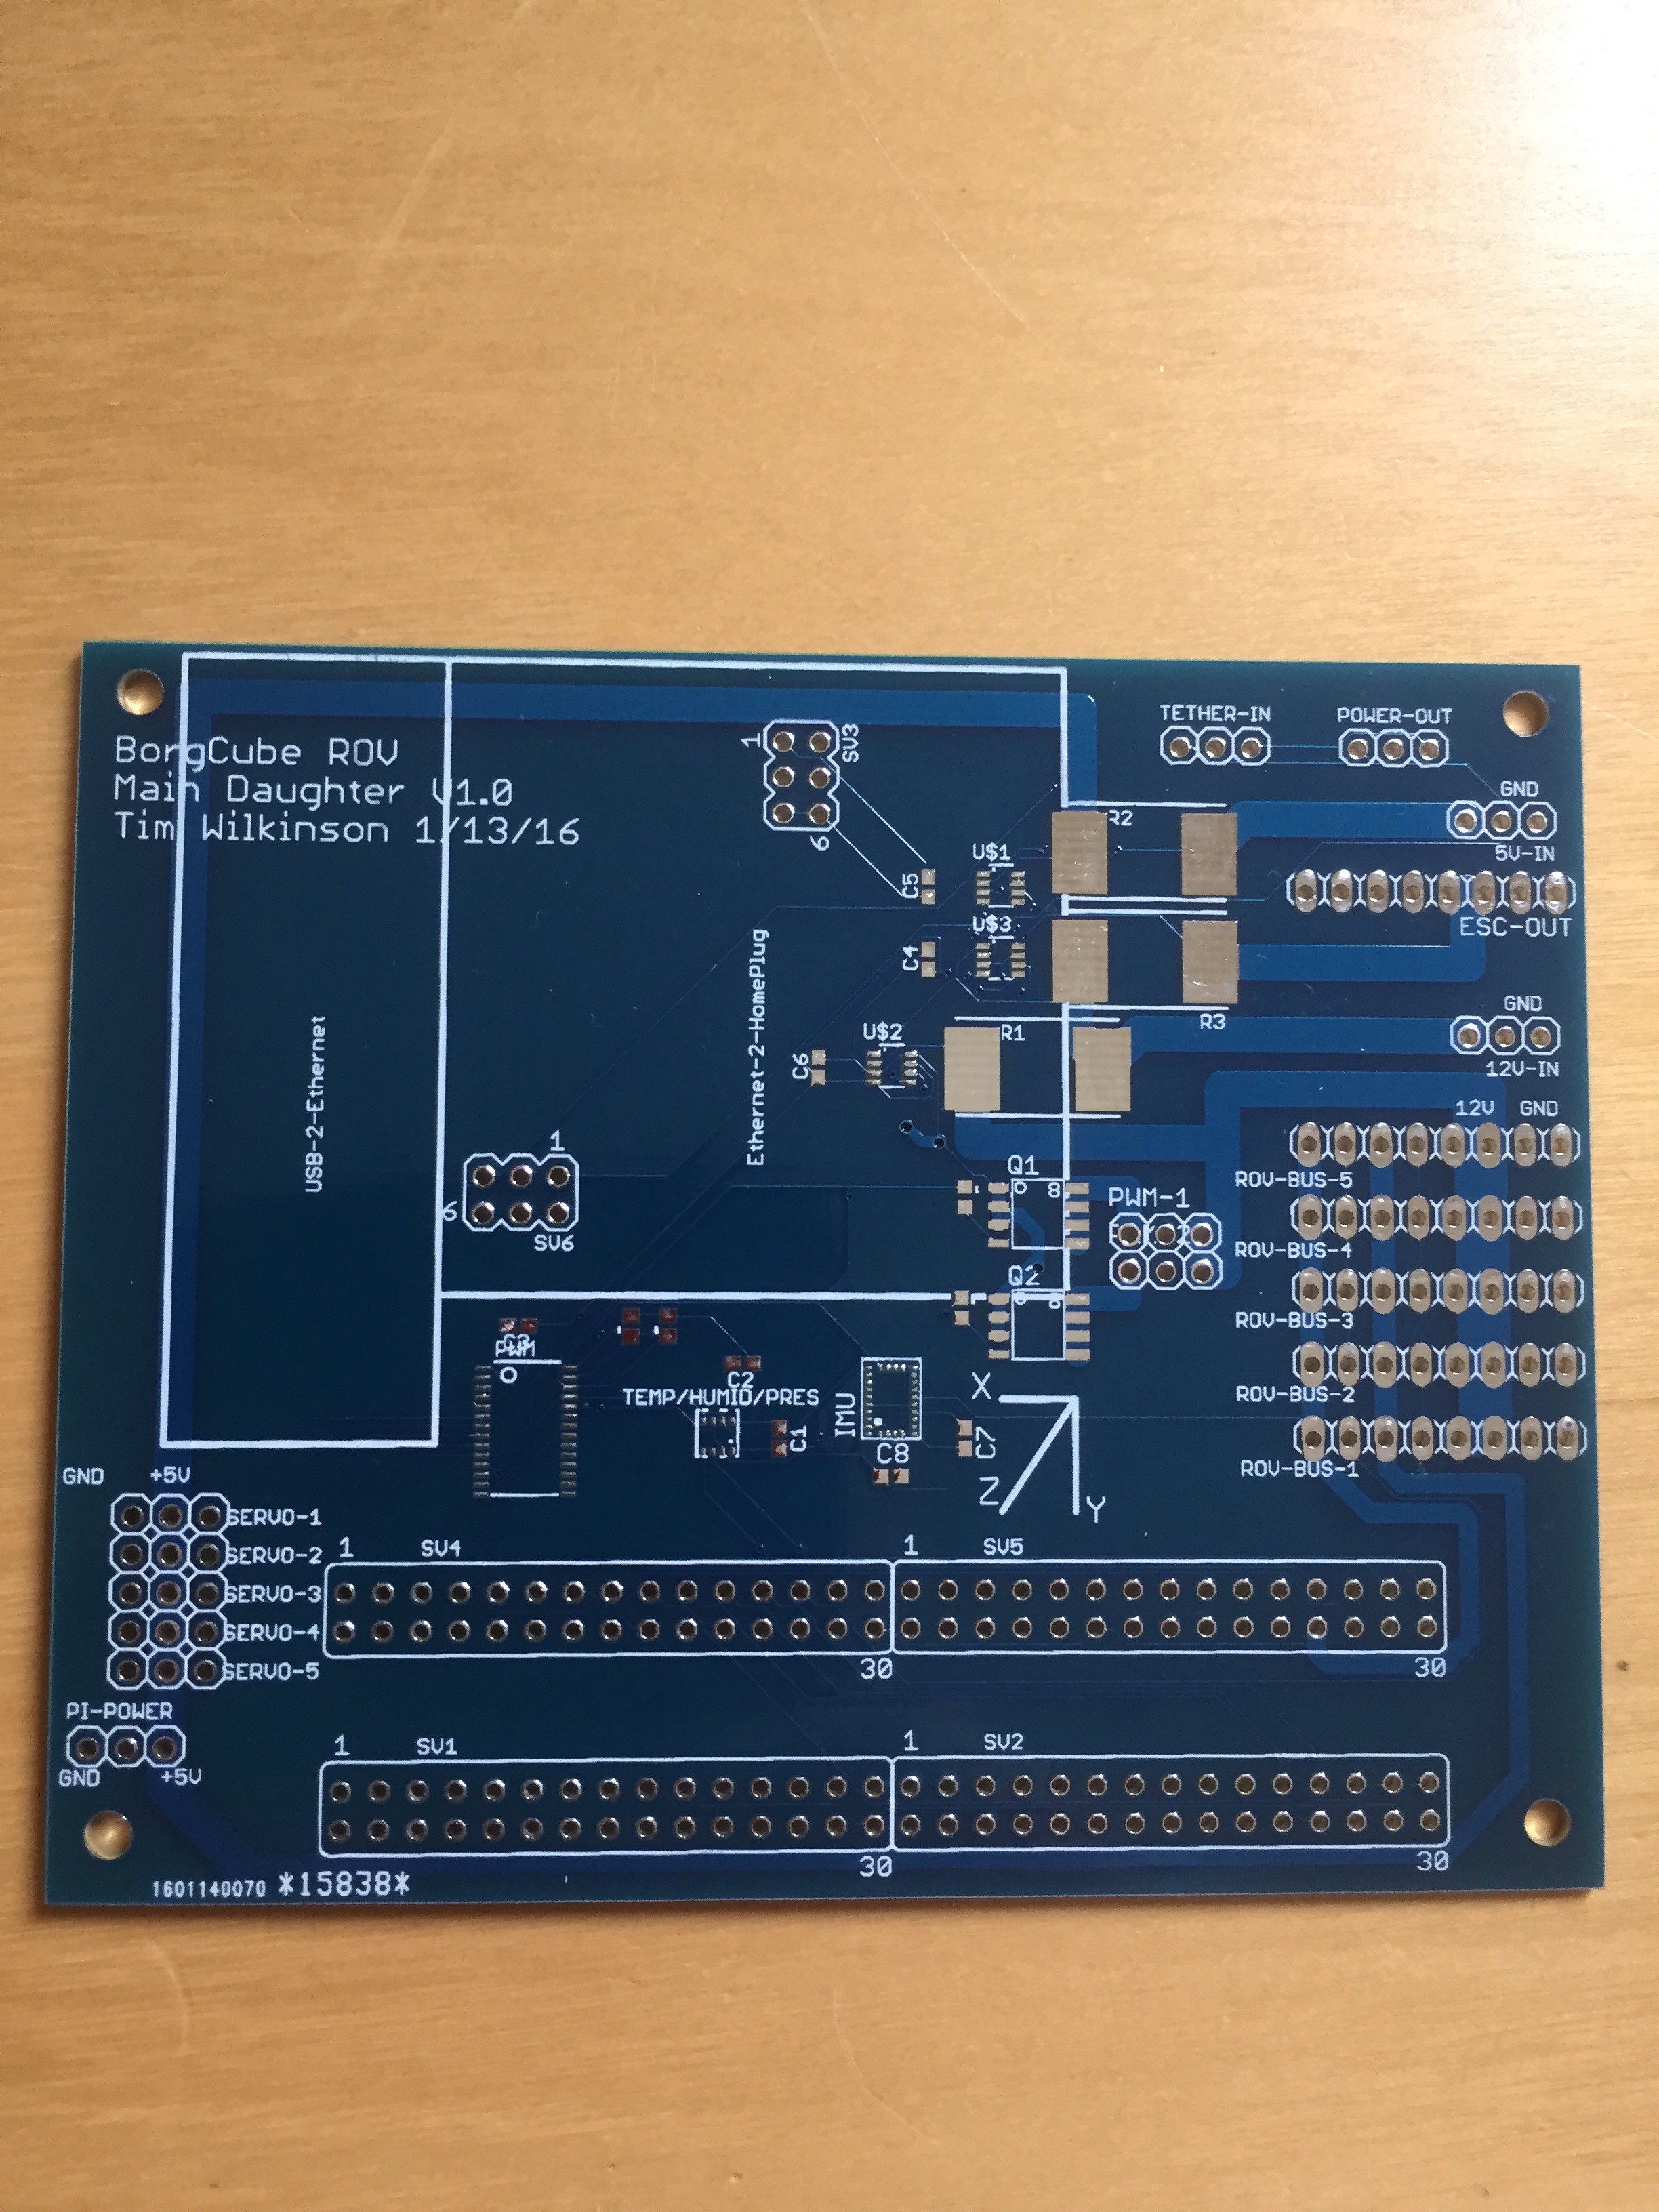
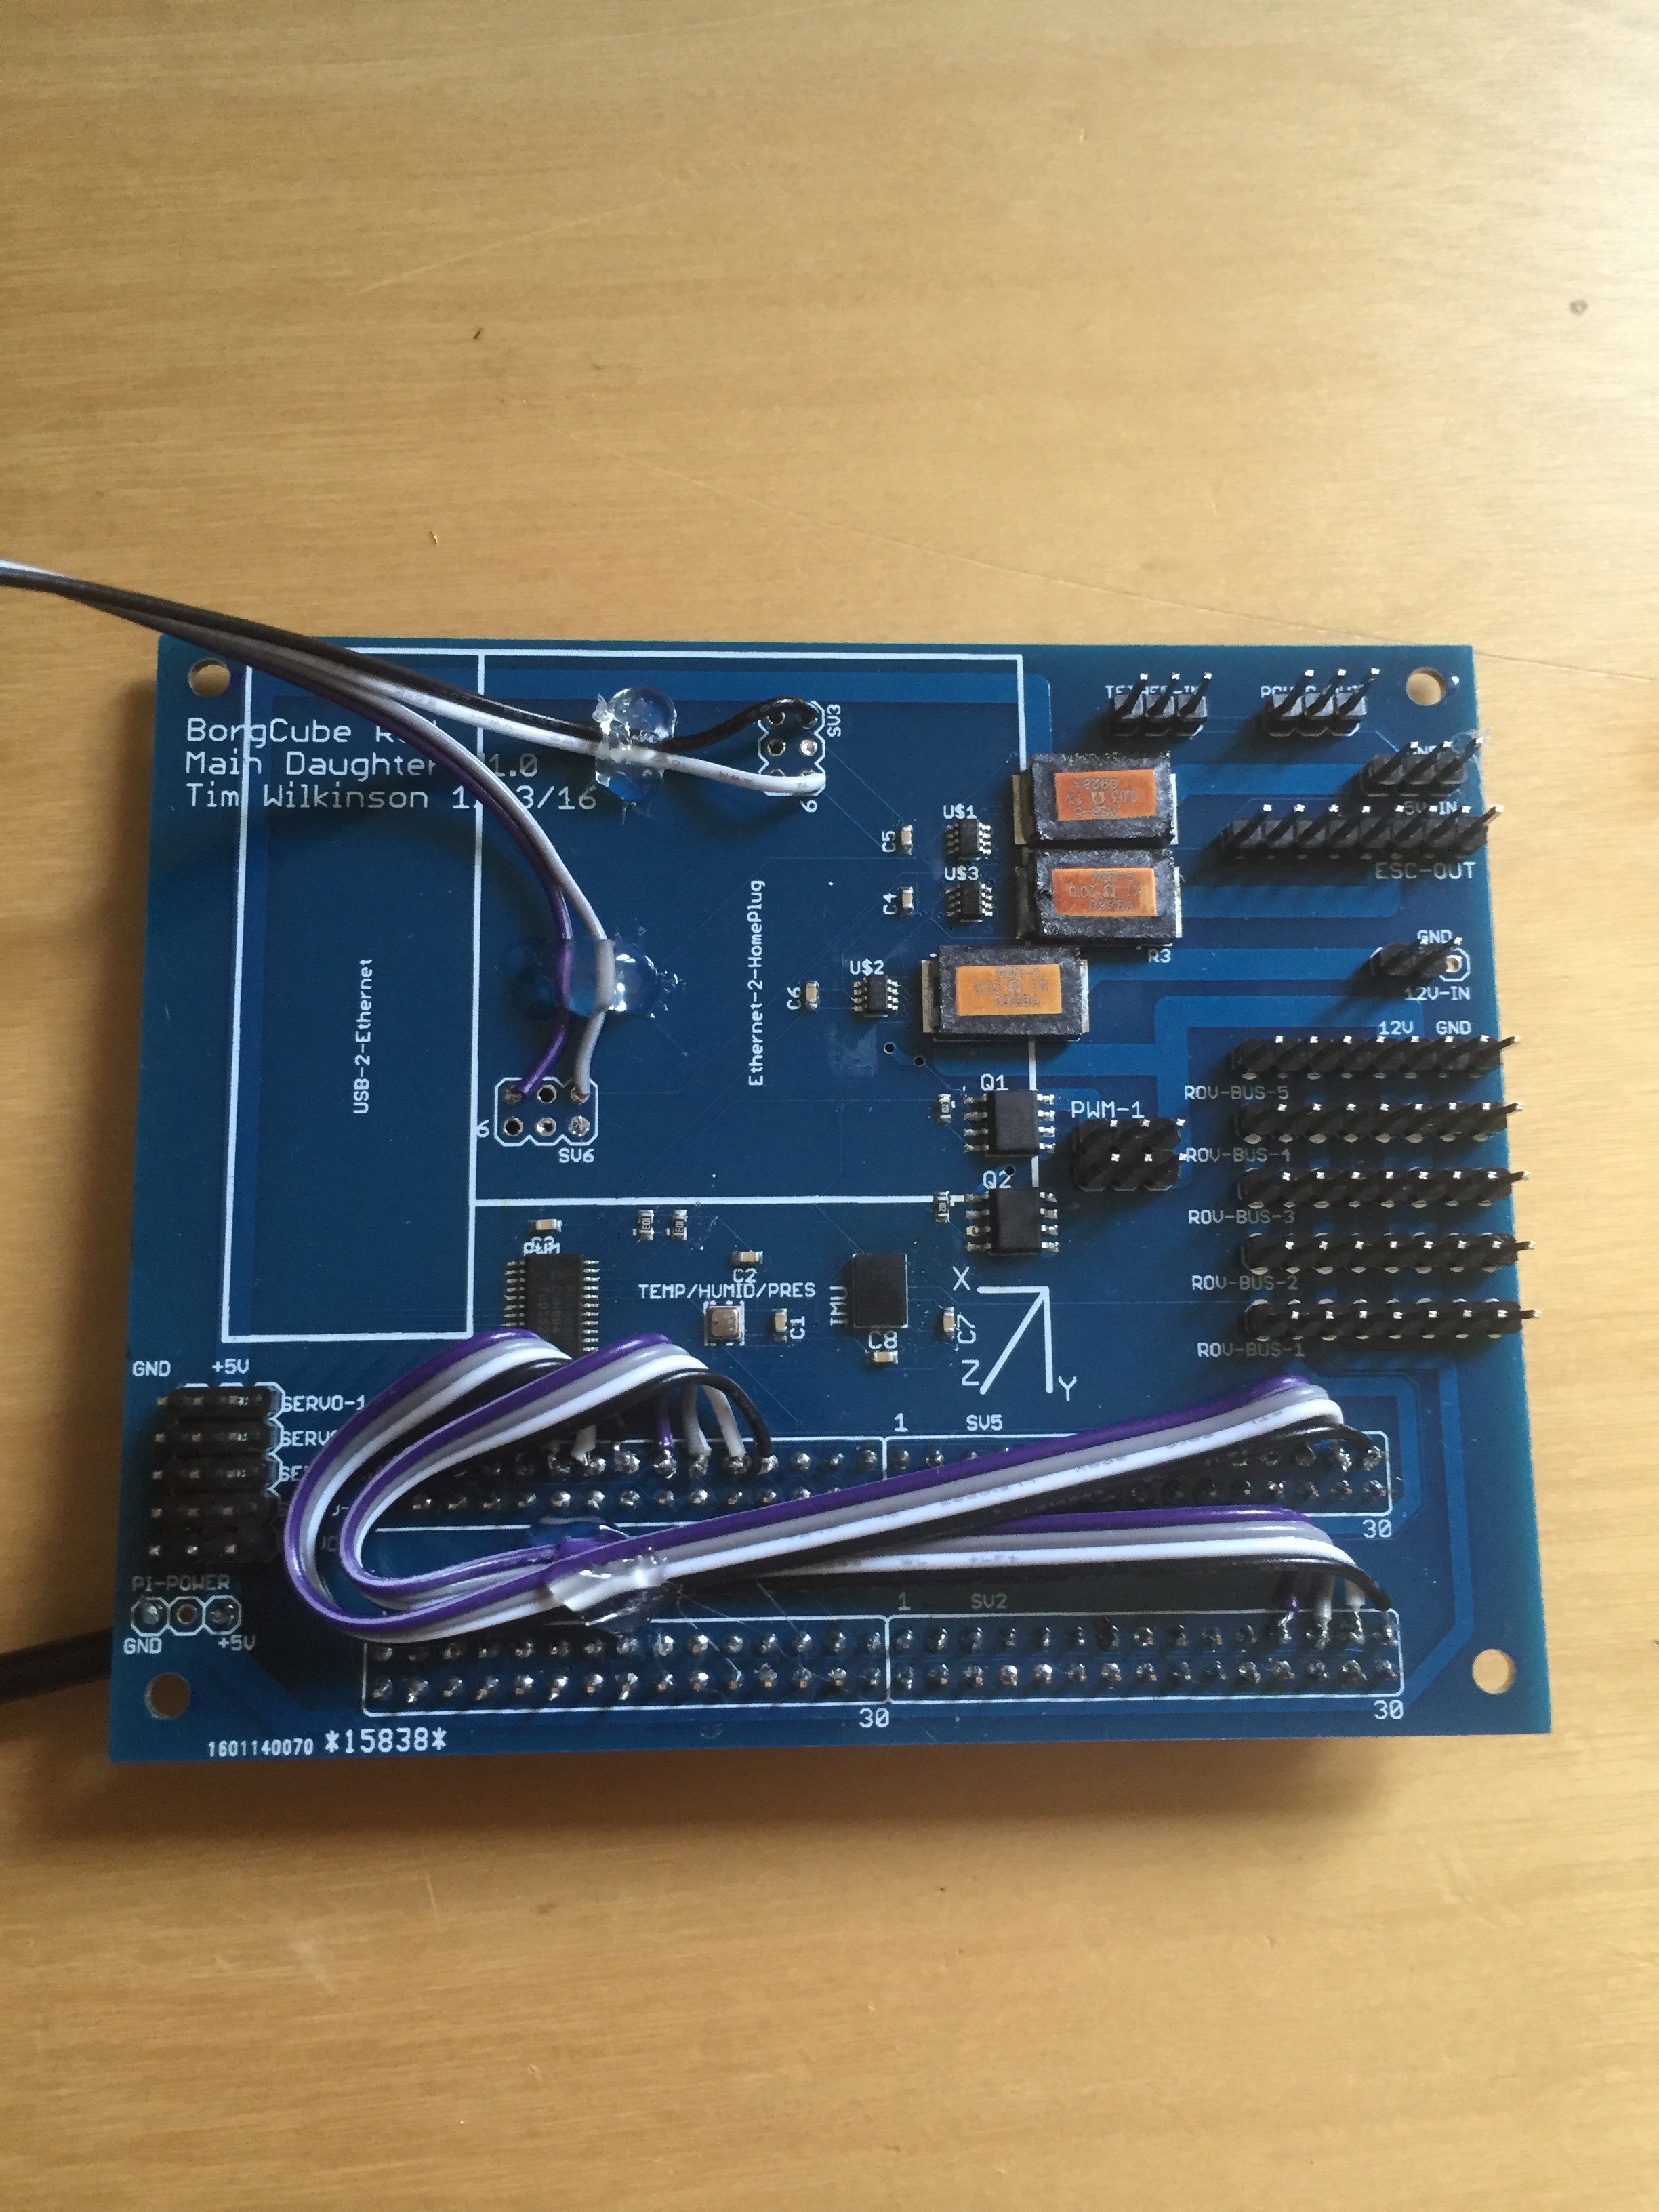
01/21/2016 at 22:20 • 1 commentReceived the main daughter board PCB yesterday:
![]()
And here it is populated:
![]()
There were a couple of mistakes on the board (hence the wires you can see):
- I reversed the camera connections which link various edge-connector pins on the Pi. I cut the tracks and replaced with the ribbon cable you can see bottom/middle.
- The Tendra port didn't allow for the length of the ethernet plug. Once that's plugged in, the board will no longer fit in the 4" pressure vessel. I will rotate this 180 next time, but for now I'm connecting using the jumper cables you can see top/left.
Otherwise everything checks out, including all the power monitors, temperature/humidity/pressure sensor, IMU and PWM controller for the vision servos and lights.
-
LED Lighting: Update
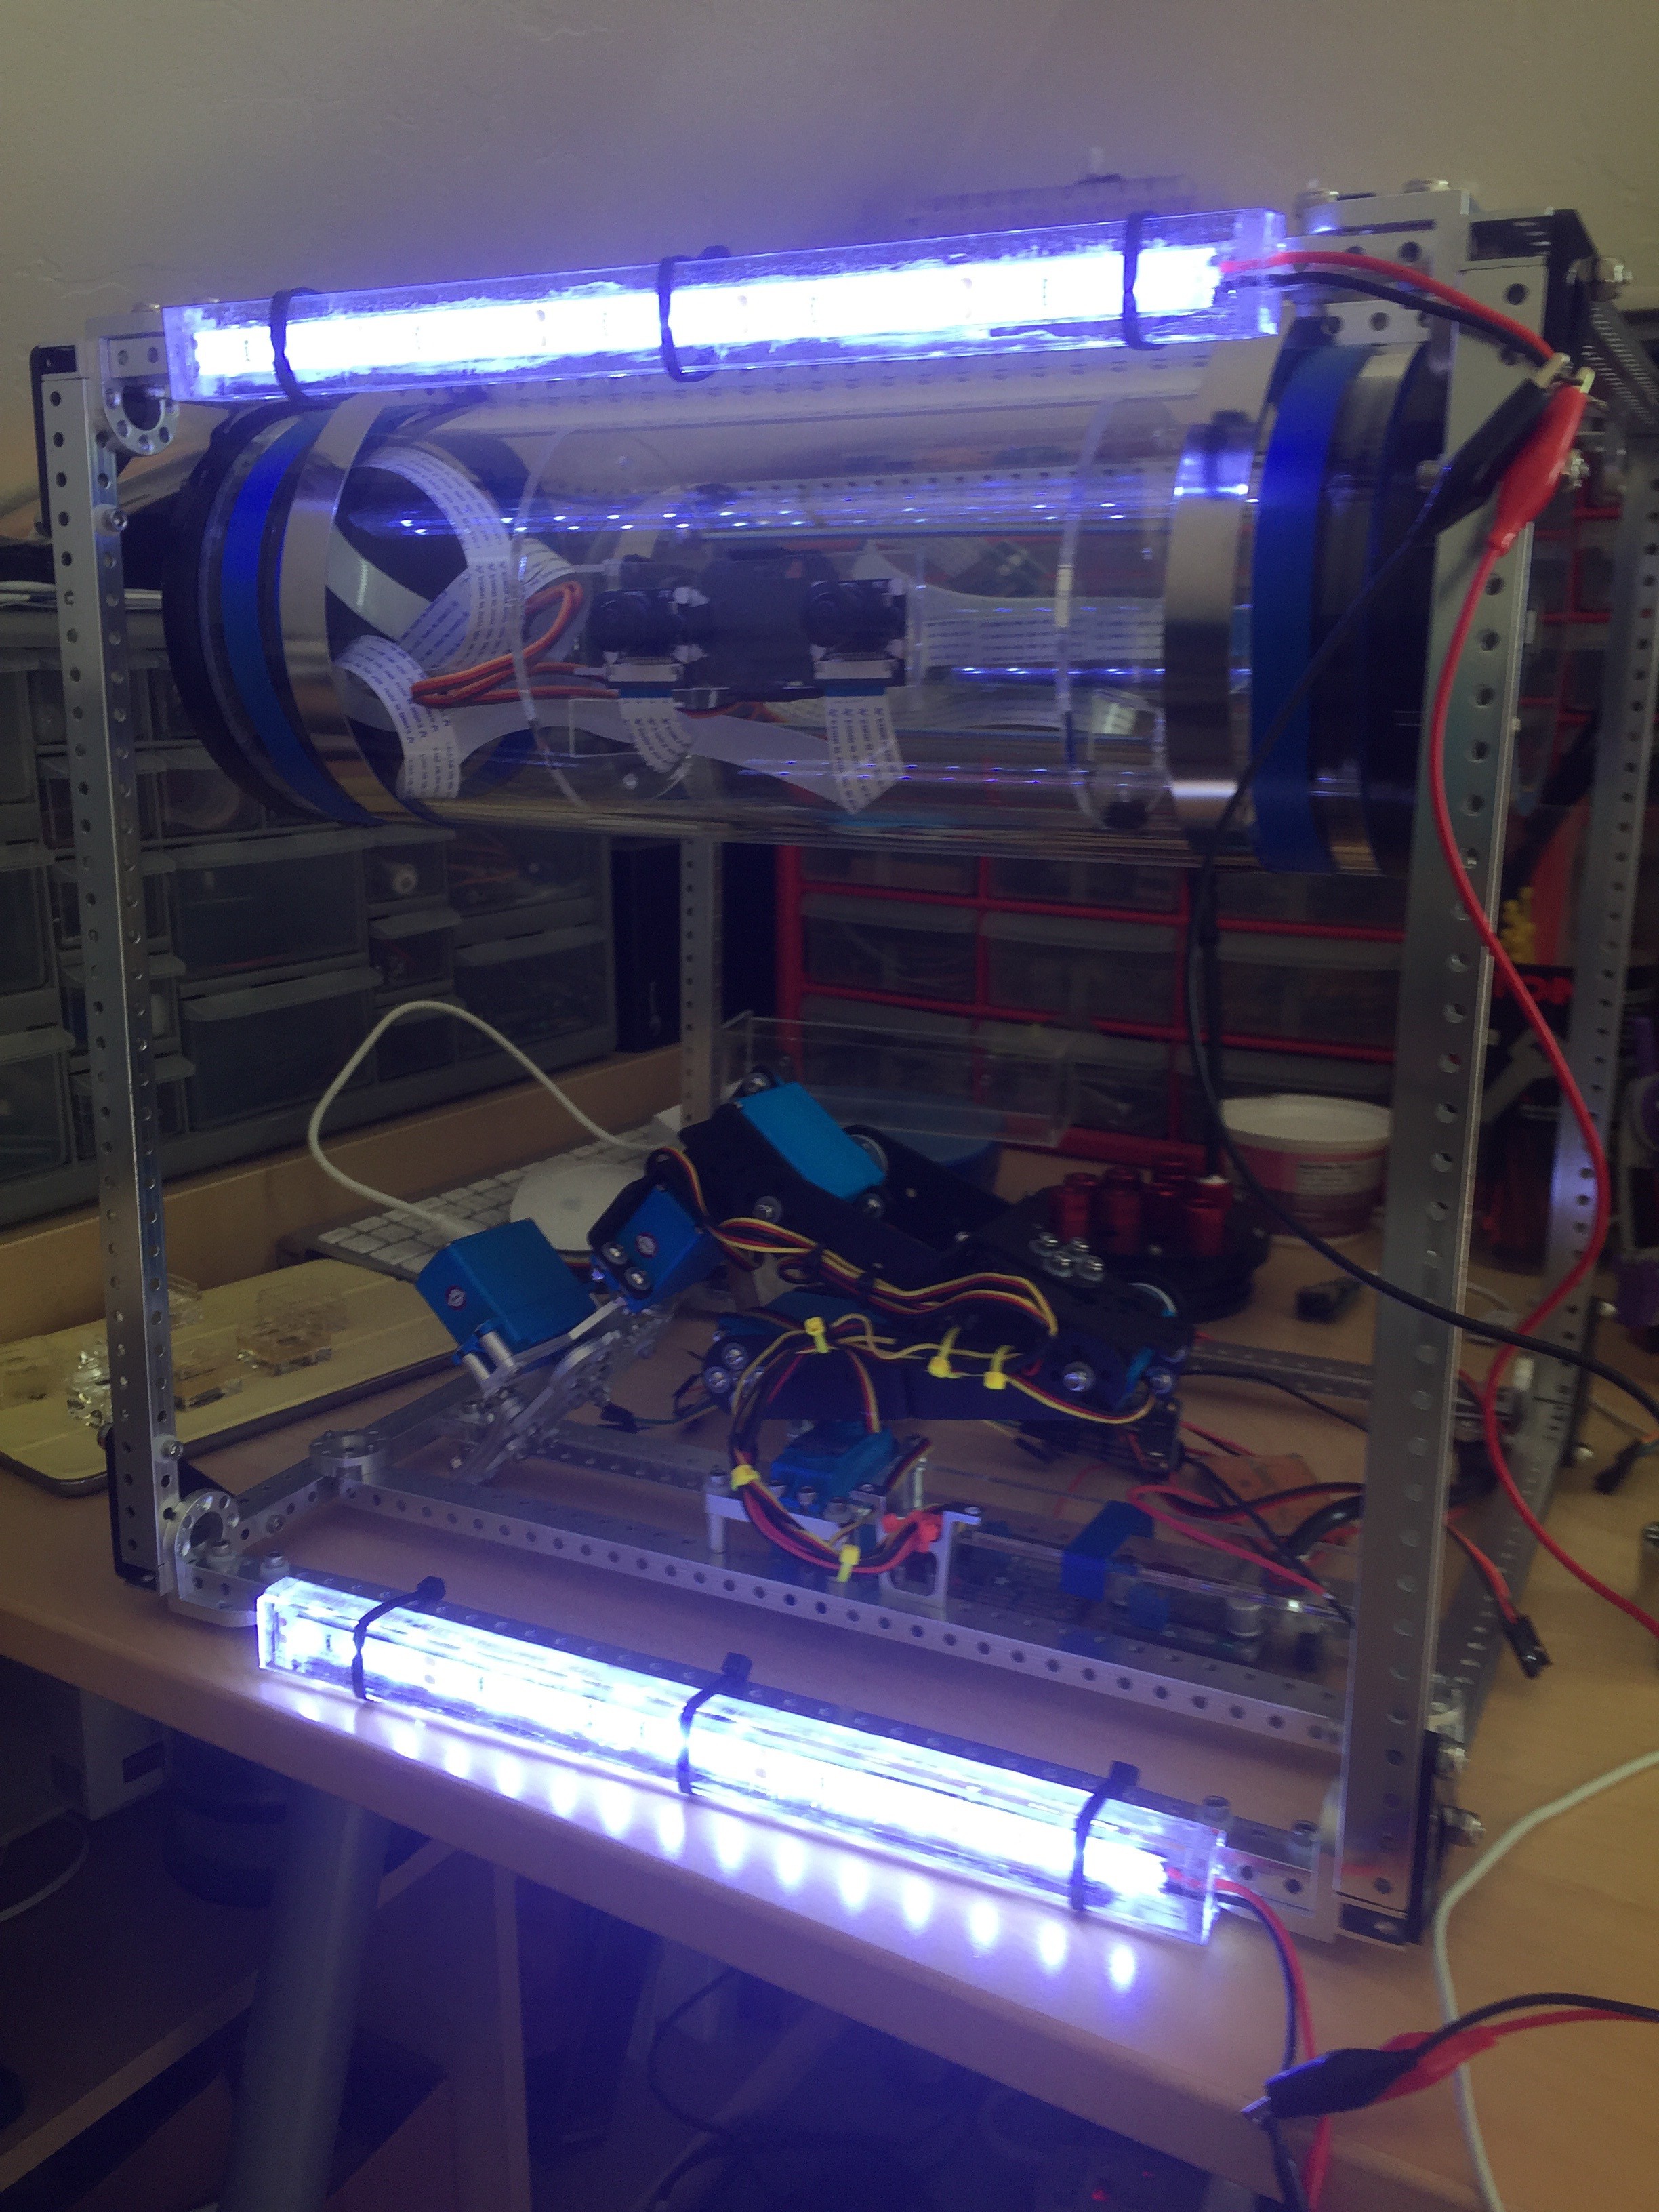
01/19/2016 at 21:58 • 0 commentsHere are the waterproofed lighting strips mounted on the front of the ROV:
![]()
However, I'm somewhat disappointed by the lumens this is generated. The two strips are only consuming about 4 watts, so I'm guesstimating the lumens is in the order of 400 rather than 1,500 I'd hoped for (based on the LED specs). Although this is probably good enough for now, I need to work out what happened here.
-
LED Lighting
01/16/2016 at 06:04 • 0 commentsOnce the ROV gets a little way under the water, it's going to get dark. Obviously I'll need some sort of underwater lighting.
My first though had been to include lights inside the camera tube (in a similar way to those used in the OpenROV project). However, I think this could easily result in glare on the inside of the acrylic tube; so it would be better to mount the LEDs outside. To do this I needed some way to encapsulate them.
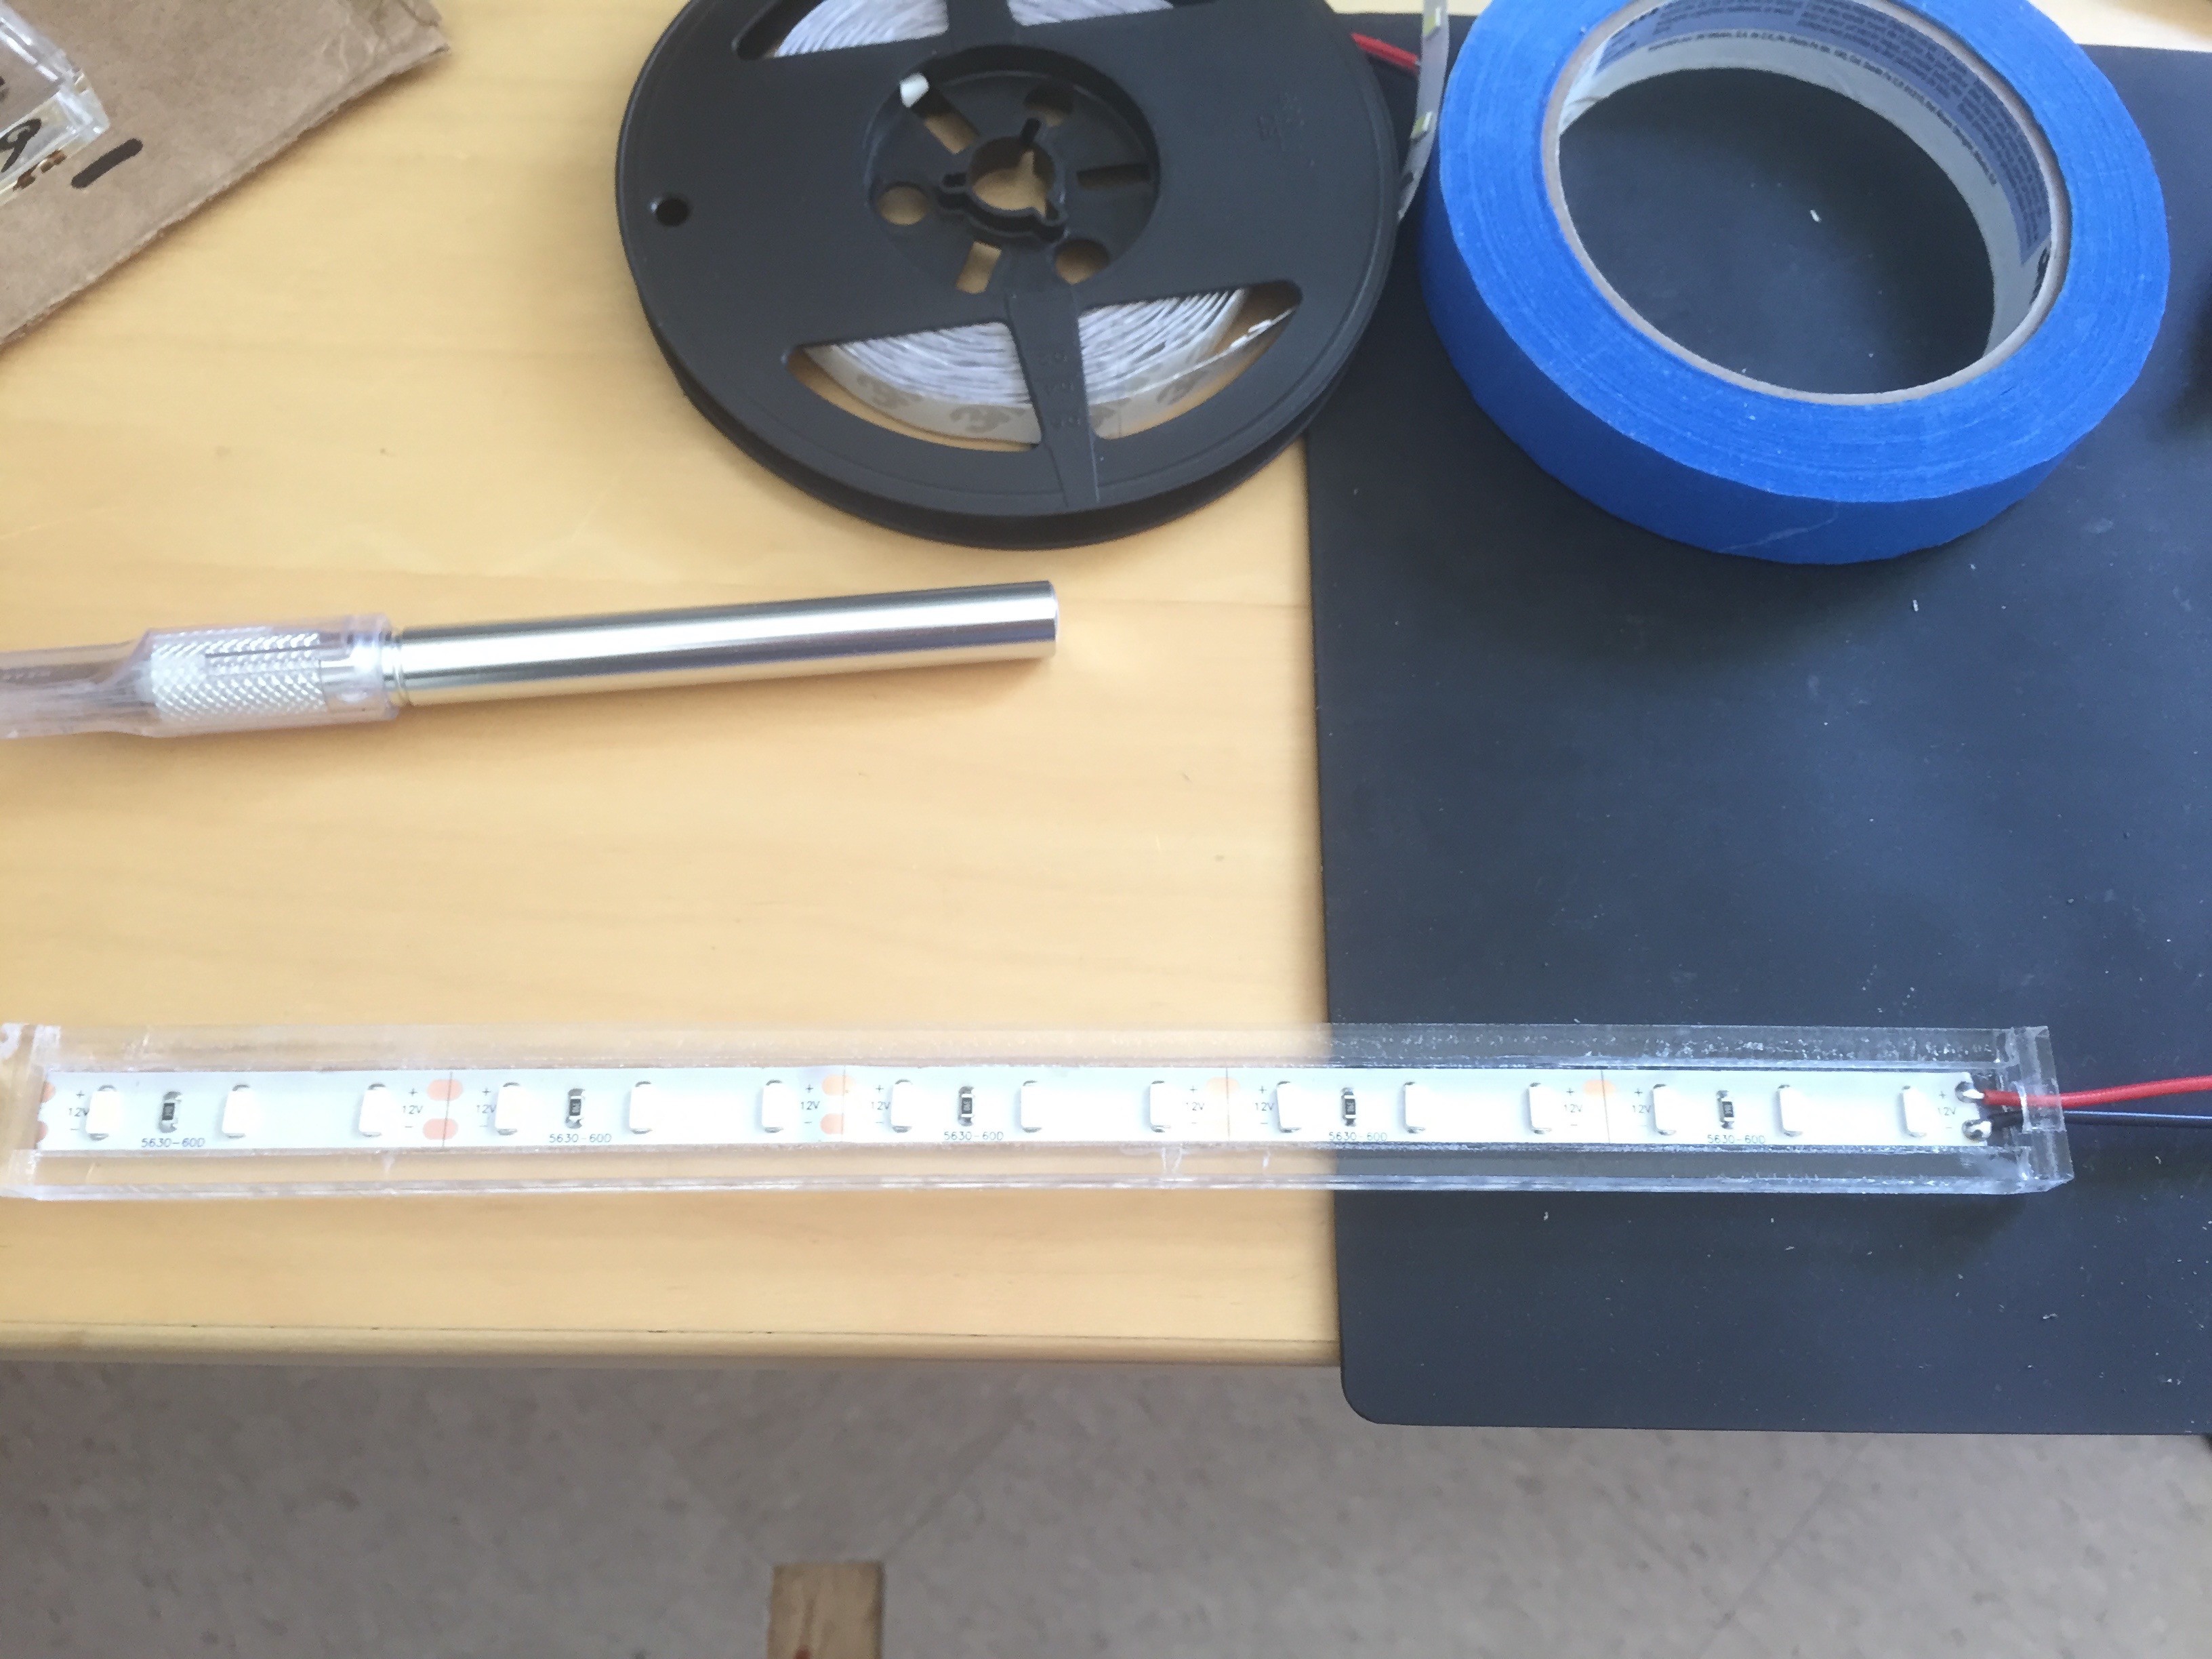
For simplicity, I've chosen to use lengths of LEDs lights from eBay. These cost about $0.03 per LED (super cheap!) and each LED produces 50 lumens. I mounting 2 tubes of LEDS, which each tube holding 15. This gives me a total of 1500 lumens of light.
My first attempt was to mount the LEDs in vinyl tubing, and then encapsulate them inside the tubes using epoxy.
![]()
This was a bit of a failure for a number of reasons. First, its very difficult go get these tubes to be and stay straight. Second, the LEDs come with glue to make them easy to mount - but that's not useful inside the round tube. Finally, because you have to pour the epoxy in one end of the tube, its very difficult to remove the bubbles.
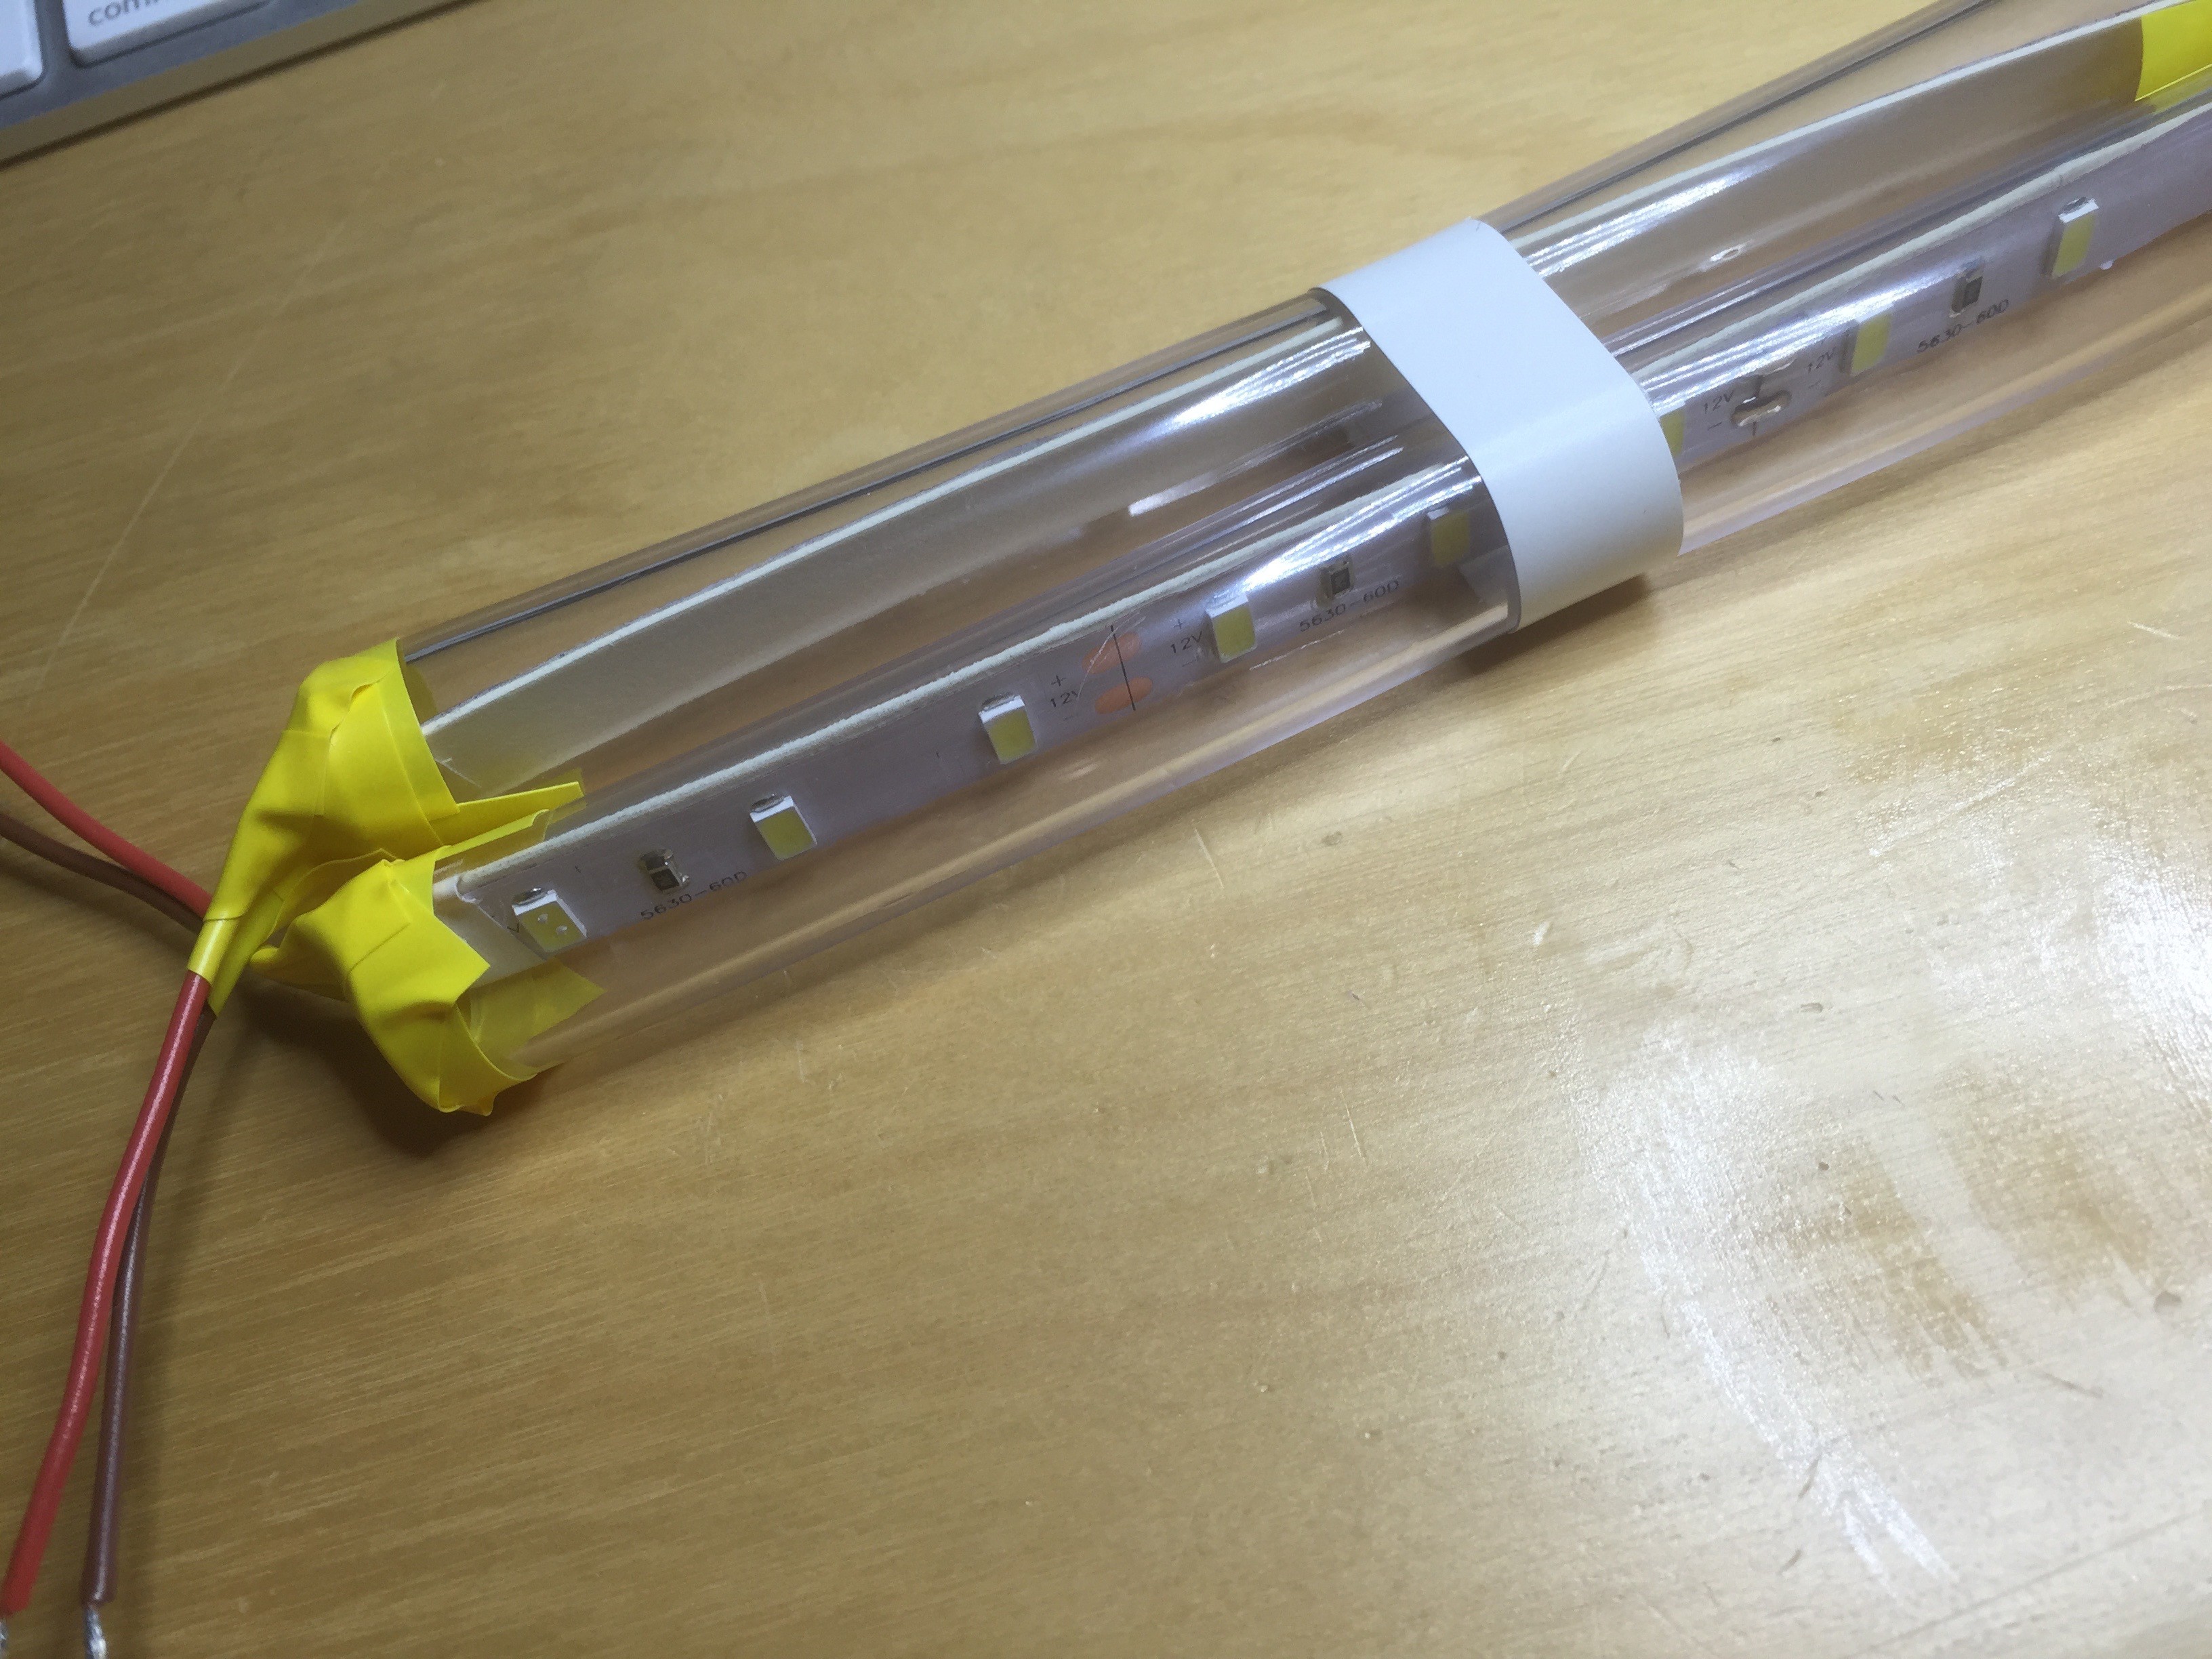
My second attempt was more successful. For this I made an acrylic case using a laser cutter. This is flat, which is better for mounting and better for sticking the LEDs to. I can also fill it with QSil to waterproof the LEDs by pouring into the open contains (ie. not from the end). I can then close and seal the acrylic case - once the air has escaped the QSil - for a good, waterproof seal.
![]()
The result is 750 lumens of waterproof LEDs for less than a buck.
-
Epoxies
01/16/2016 at 01:26 • 0 commentsSome of the ROV components need to be encased in epoxy to protect them from the water (e.g. the lights, the electronics for the manipulator, and the ESCs). I tried out three different epoxies:
- MG Chemicals 832C
- West Systems 105/205
- QSil 216
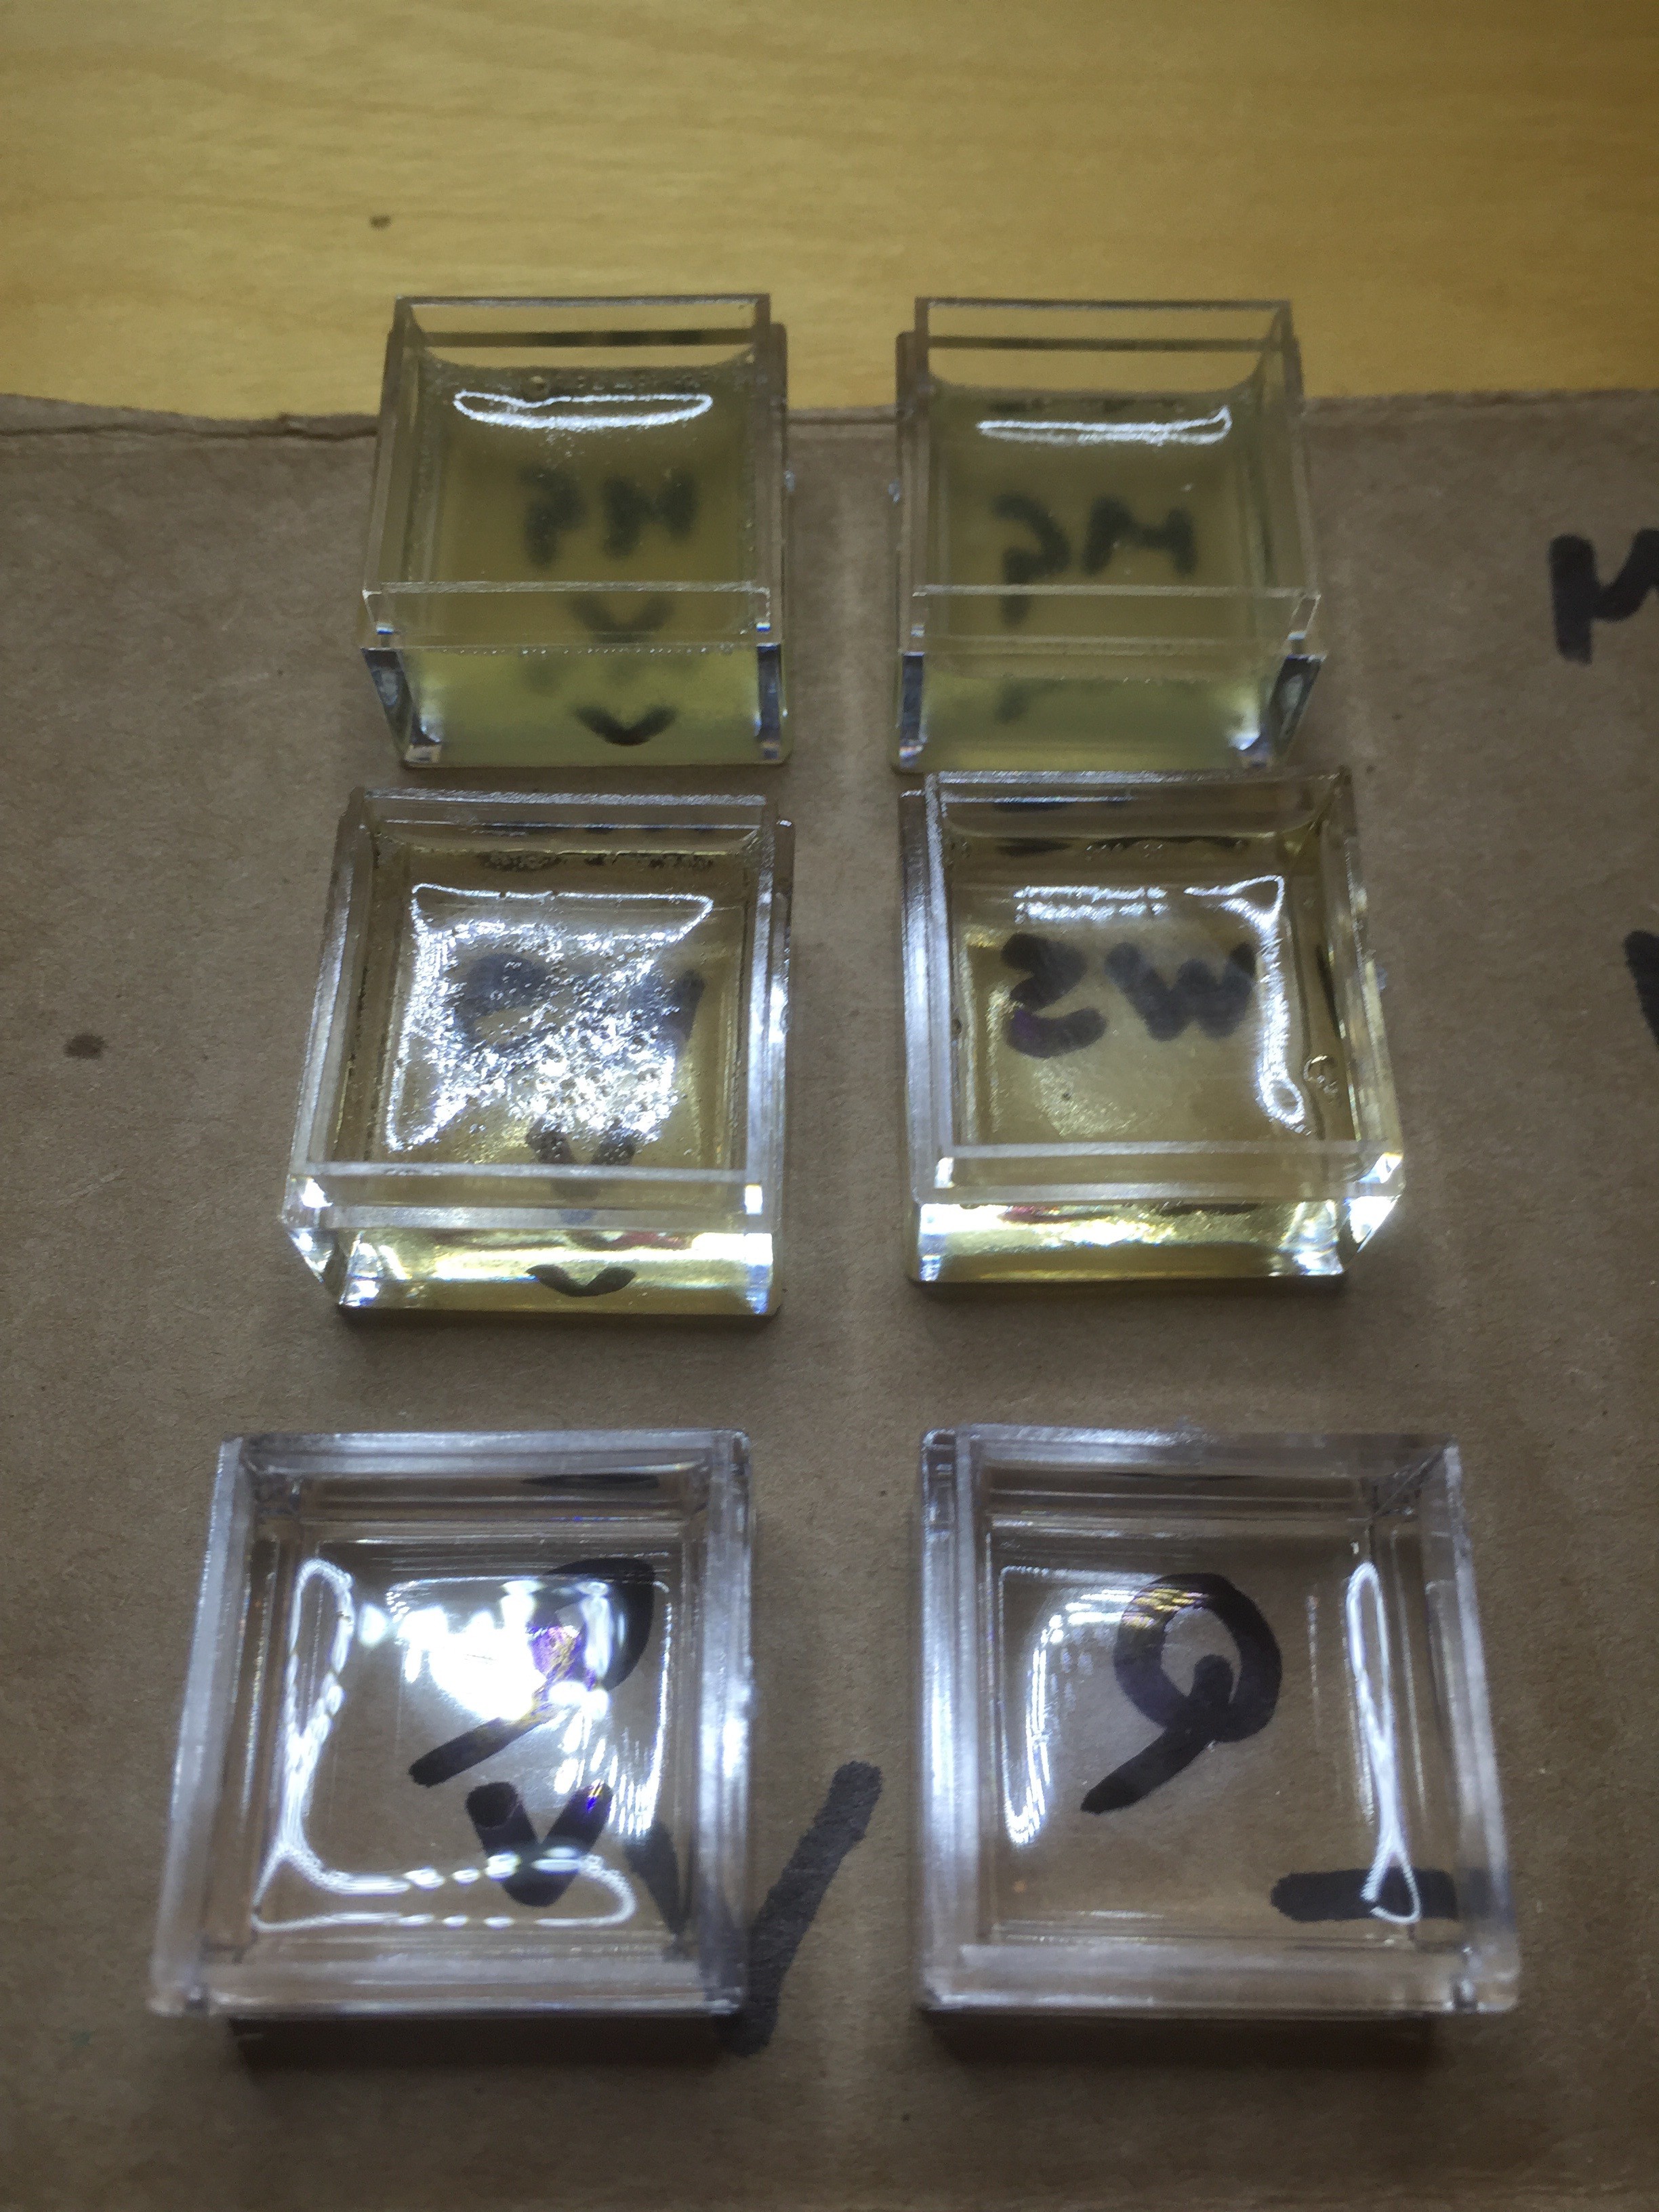
My ideal is something that's transparent, thermally conductive, electorally insulating, easy to mix and pour without bubbles forming, and - in case of problems - reversible. To try these out, I mixed up each epoxy and cast a small amount in acrylic boxes. I also mixed each epoxy again, but this time I vacuumed the epoxy before pouring in an attempt to reduce bubbles.
The photo below show the results:
![]()
On the left are the vacuumed samples, the non-vacuumed on the right. From top to bottom the epoxy are MG, West, and QSil. For my purposes, the QSil is the best: it's completely transparent and pours, even without vacuuming, without bubbles forming. As an added bonus (hopefully!) it forms a hard gel but does not go completely solid; in theory and with work it should be possible to remove. The only, minor, downside is that it takes over 24 hours to fully cure. Don't be in the rush.
-
Main Daughter Board
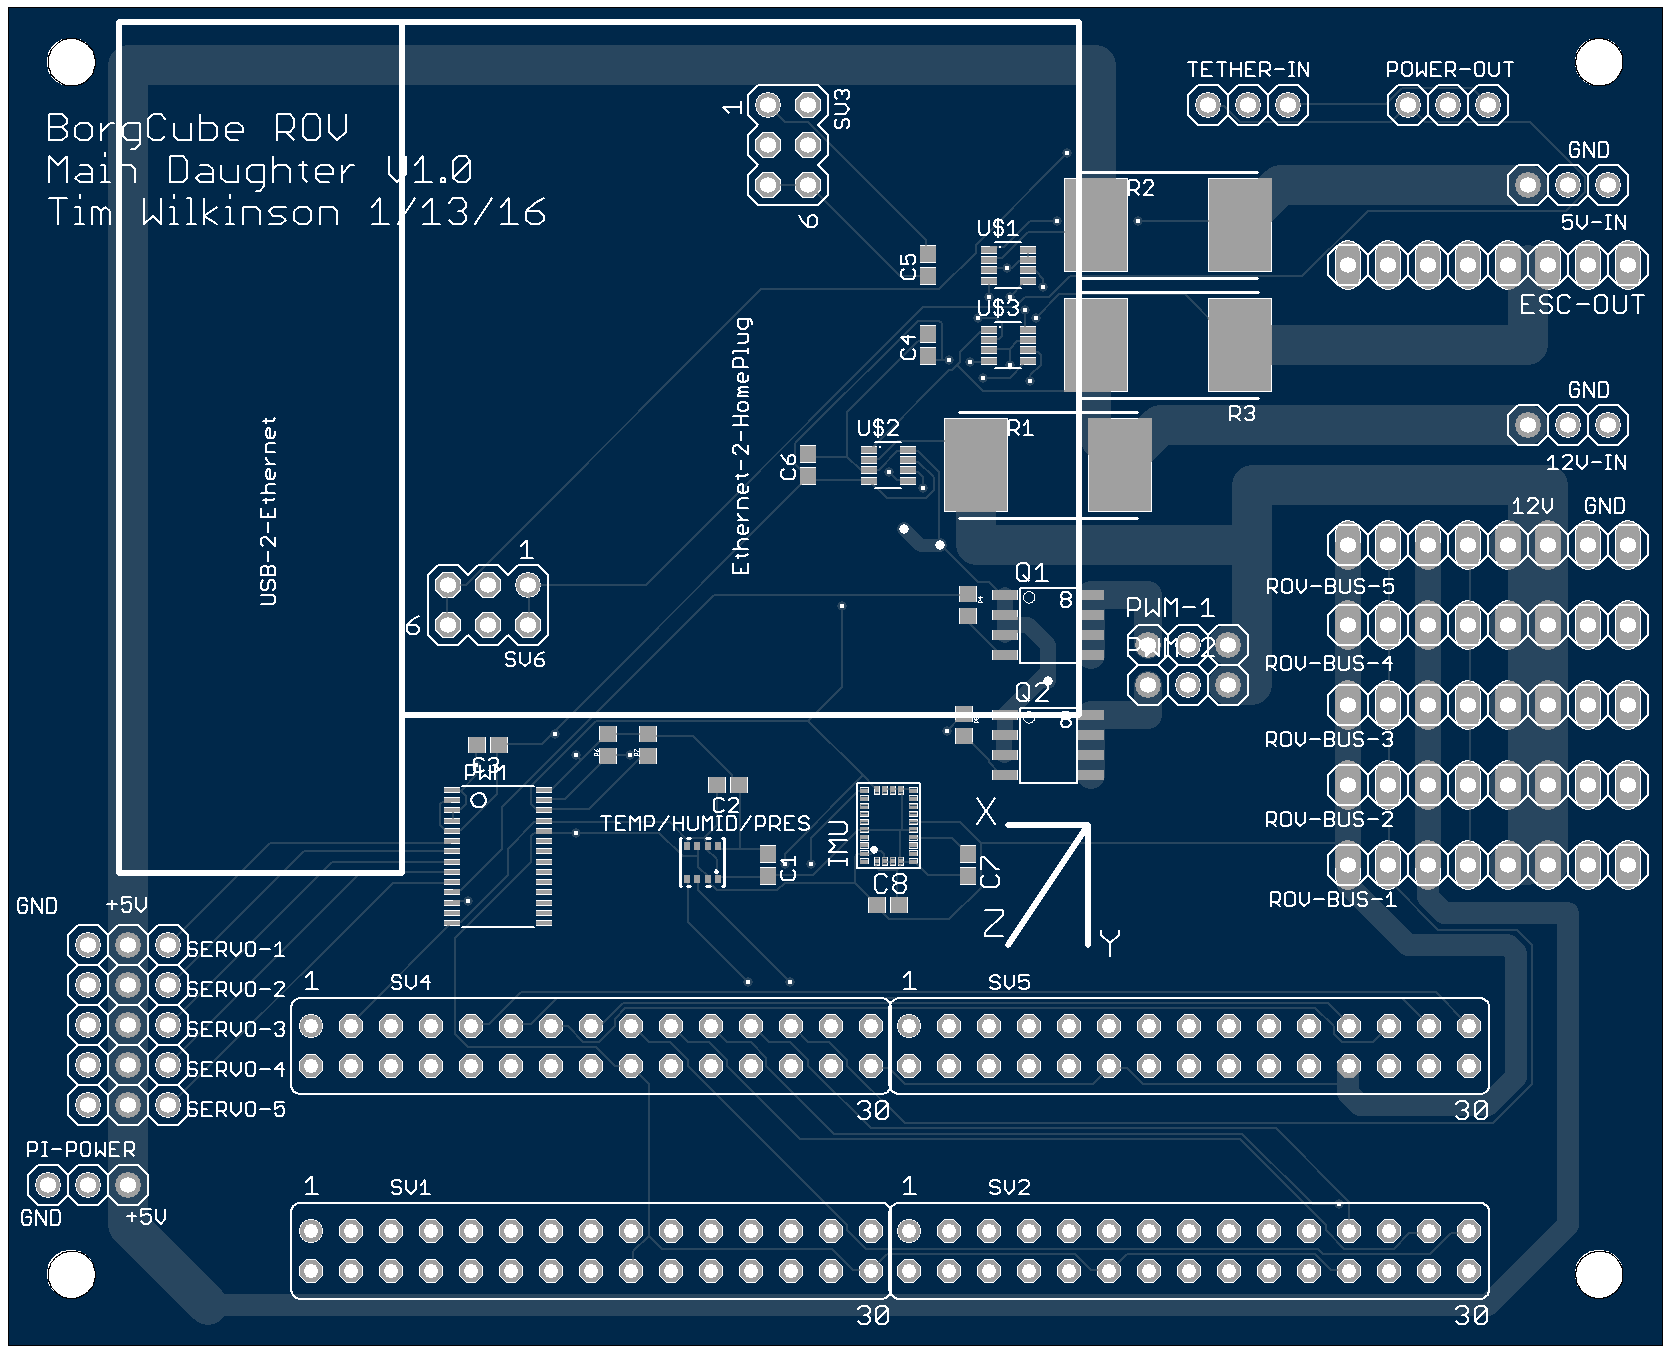
01/14/2016 at 07:15 • 0 commentsA quick update. Sent off the first version of the main daughter board via DirtyPCB this evening. Here's a little screen grab from their submission tool:
![]()
This board contains the main electronics to control the camera, camera servos, rov-buses, power input and monitoring, LED brightness, monitor humidity, temperature, vessel pressure, and IMU. There's also some tidy space to mount the usb-to-ethernet and ethernet-to-powerline adaptors.
Much more about this board next week ... assuming it works.