Close
0%
0%

TRS-80 Model 1 on a PIC32

TRS-80 Model I emulated on a PIC32MX processor; VGA, PS/2, and SD for tape and disk images. Oh, and glourious cassette sound.

Similar projects worth following
TRS-80 Model I emulated on a PIC32MX processor. It provides VGA video and PS/2 keyboard so as to be usable with commonly available hardware to-date (well, PS/2 keyboards are becoming rare, but it works with a USB-to-PS/2 adapter as well).

I did this project to keep myself occupied while recovering from some surgery in 2015, for which I would have limited mobility for about a month. I didn't think I'd be up to doing bench work, so I used some existing PCBs to allow me to focus on the firmware, which I could do lying down (both literally and figuratively). I used a UBW32 (from Schmalzhaus) as a CPU 'breakout board' and also a UBW32-MCC (from Dontronics) to provide the VGA, PS/2 keyboard, SD card, and power connectors.  Later, I supported another board:  the Olimex Duinomite-mini (and reportedly the Duinomite with the IO board).  The Olimex boards are much easier to come by, inexpensive, and ready to use out-of-box.  But no color :(.  But, hey, the TRS-80 Model I was a monochrome, anyway!  (I just like the green screen effect.)

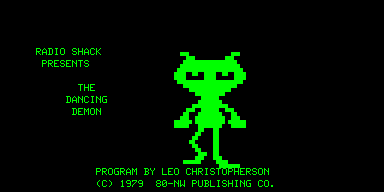
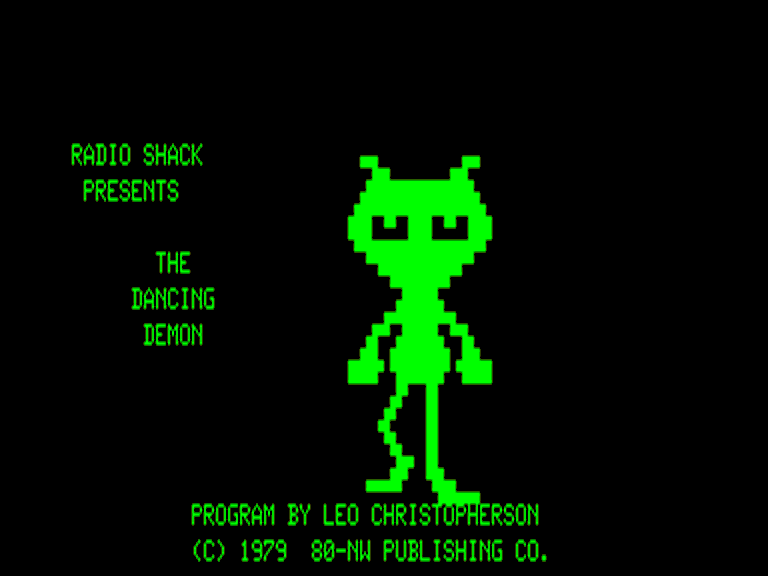
Q.v. a little demo from early on running the famous dancing demon:


"If I have seen farther than others, it is because I have stood on the shoulders of giants." -- Newt.

There was a lot of existing code that I relentlessly twisted to my own twisted porpoises, so it's appropriate for me to give a shout-out to those who wittingly or unwittingly helped in some way.

Props to Geoff Graham, who allowed me to pilfer his Maximite code for the video and keyboard 'drivers'. And also indirectly to Lucio Di Jasio, for describing the clever 'SPI and DMA as a video generator' technique, which was used in Geoff's project (and by extension, mine). I am very jealous that I can't claim to have invented that myself! Brilliant!

Props also to Tim Mann, a developer of software for the TRS-80 (actual) back in the day, and also creator of the 'xtrs' emulator for unixian systems. I used the Z80 CPU emulation code (which I modified a bit for my purposes). (It, in turn, is derived from another source which I cannot name, or else I'd cite it as well. Clarendon Hill? Either way, the license seems functionally public domain.)

Props also to Matthew Reed, author of TRS32, an excellent (albeit non-open-source) emulator for Win32 systems. I use it sometimes for comparison, and also the TRSTools are quite useful for extracting files from floppy images.

Props also to all those others who helped kept the memory of the TRS-80 alive; otherwise I would have had scratch to work with when starting this out.  In particular those who have supplied rare software and manuals, so that I could realize exotic things like the 'high-resolution' graphics HRG1B modification, and the Orchestra 80 sound.

Thanks also to those who have helped by indulging me in testing builds on boards that I do not have in my possession to get those working.  Debugging by text messaging is even less efficient than printf() style debugging.

Anyway, I've derived a lot of entertainment from it.  I can't believe I'm still hacking on this 3 years and augmenting it 3 years hence.  It's kind of remarkable what we thought was cool in those days looking back from the present.

trs80sd-20180727a.zip

****added hrg syscalls feature**** SD card filesystem contents; unzip into the root of a microSD (up to 32 Gb), to have requisite files in place for the emulator to be useful. Firmware images and the boot loader exe in 'doc'. These are not required for the emulator of course (the image has to be burned onto the chip!), but I put them in here for convenience to causally interested parties, to avoid downloading the source, setting up the toolchain, and building. Operation of the bootloader exe (Windows) is intuitively obvious. It's HID-based, so no drivers are needed. It does not appear to be usable on XP alas, so you'll need win 7 and up. There is also a 'README.txt' in the 'doc' folder which explains things in more detail.

x-zip-compressed - 29.41 MB - 07/27/2018 at 19:12

Download

trs80sd-20180526a.zip

****added bitmap screen cap feature**** SD card filesystem contents; unzip into the root of a microSD (up to 32 Gb), to have requisite files in place for the emulator to be useful. Firmware images and the boot loader exe in 'doc'. These are not required for the emulator of course (the image has to be burned onto the chip!), but I put them in here for convenience to causally interested parties, to avoid downloading the source, setting up the toolchain, and building. Operation of the bootloader exe (Windows) is intuitively obvious. It's HID-based, so no drivers are needed. It does not appear to be usable on XP alas, so you'll need win 7 and up. There is also a 'README.txt' in the 'doc' folder which explains things in more detail.

x-zip-compressed - 29.40 MB - 05/26/2018 at 17:20

Download

trs80sd-20180515a.zip

****adds screen cap capability**** SD card filesystem contents; unzip into the root of a microSD (up to 32 Gb), to have requisite files in place for the emulator to be useful. Firmware images and the boot loader exe in 'doc'. These are not required for the emulator of course (the image has to be burned onto the chip!), but I put them in here for convenience to causally interested parties, to avoid downloading the source, setting up the toolchain, and building. Operation of the bootloader exe (Windows) is intuitively obvious. It's HID-based, so no drivers are needed. It does not appear to be usable on XP alas, so you'll need win 7 and up. There is also a 'README.txt' in the 'doc' folder which explains things in more detail.

x-zip-compressed - 29.40 MB - 05/16/2018 at 02:09

Download

trs80sd-20180510a.zip

****adds traps for Level I, and sundry config enhancements**** SD card filesystem contents; unzip into the root of a microSD (up to 32 Gb), to have requisite files in place for the emulator to be useful. Firmware images and the boot loader exe in 'doc'. These are not required for the emulator of course (the image has to be burned onto the chip!), but I put them in here for convenience to causally interested parties, to avoid downloading the source, setting up the toolchain, and building. Operation of the bootloader exe (Windows) is intuitively obvious. It's HID-based, so no drivers are needed. It does not appear to be usable on XP alas, so you'll need win 7 and up. There is also a 'README.txt' in the 'doc' folder which explains things in more detail.

x-zip-compressed - 29.36 MB - 05/11/2018 at 03:32

Download

  • 1 × Olimex Duinomite-MINI Alternative board; no soldering. If you go this route, you only need the SD card, and optionally the audio amplifier.
  • 1 × 2 GB microSD card this project is barely useable without cassette and floppy disk images. I think 2 GB is the max that the MicroChip firmware can support. EDIT: no, I have used it successfully with 8 and 32GB cards.
  • 1 × Audio amplifier; e.g. LM386 and speaker for convenience, if you want sound. Commodity board via eBay.
  • 1 × UBW32 If you're gong to do it my original way, you'll need this and all subseqently listed parts. CPU breakout board; Schmalzhaus, various retailers
  • 1 × UBW32-MCC connectors board; dontronics UBW32-MCC-PCB-Letter

View all 9 components

  • Screen Capture 002

    ziggurat2905/26/2018 at 17:35 0 comments

    Summary

    OK, so I implemented bitmap screen capture.  (I also fixed some bugs since last post regarding the Help screen)

    Deets

    I had recently implemented a Screen Capture feature that captured the TRS-80 screen in text mode.  It was a bit of work to get that implemented -- mostly because of infrastructure needs (e.g. generating file names, etc.) -- so I decided to make my life easier then by just doing a text-mode capture.  That was easy, since the TRS-80 is a character device, but that mode doesn't capture hypervisor screens, color, or HRG graphics.  So doing a bitmap capture was left for a separate activity.  Well, I guess now was the time for that.  (Oh, along the way I fixed some Help screen bug reported by a user Mikael ☉. Bonnier -- thanks so much for the detailed info; that really makes it easier to fix.)

    The TRS-80 is principally a monochrome device, but I support some color boards, and so I did want to be able to have color output.  There's a boatload of image formats, but I chose to 'be conservative in what I send', and settled quickly on Windows DIB format as an easy-to-generate-and-widely-accepted format for output.

    DIB itself supports many forms of data representation, from monochrome 1-bit-per-pixel to 32-bits-per-pixel.  The TRS-80 was natively monochrome, so 1bpp was natural, but I did want to capture my glorious colour extensions, so I wanted a color form.  4bpp made a lot of sense, but then I'd have to fiddle with a color look-up table ('CLUT'/palette) and I just didn't want to fiddle with that, so I decided to unconditionally emit a 24bpp image.  This simplified coding, though it made file size much bigger than it strictly needed to be.  But who cares?!  You've got huge SD to store it!  So I carried on with 24bpp in all cases for now.

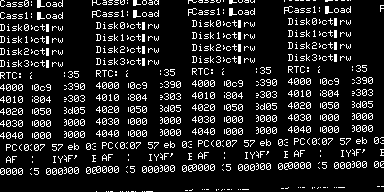
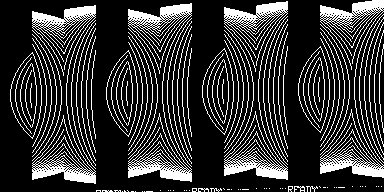
    So I started coding.  At first I got some images that were plausible, but nonsensical:

    examining these I could tell that I had flubbed up byte offsets into the screen buffers and some other bugs.  Hacking a little further, I got:

    This looks sensible, but I know it's not right because the colors are wrong.  Red and Blue were switched, so I fixed that:

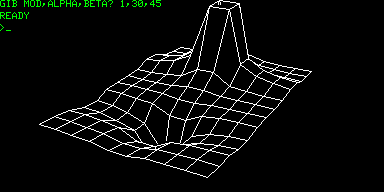
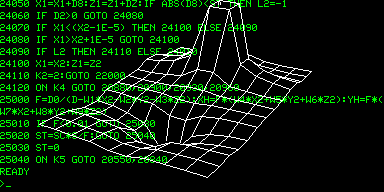
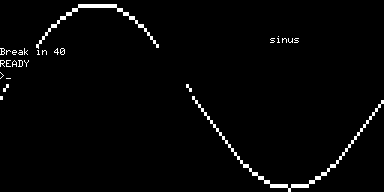
    Now,! we're there!  I also added in support for the HRG mod, which is technically a separate overlay frame buffer:

    who can forget sinus?


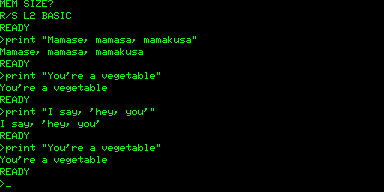
    But one thing to note is that these bitmaps are in the native resolution of the TRS-80 -- i.e. 384x192 -- and does not consider that those pixels are not square.  For most anticipated uses (e.g. documentation), this is probably fine, but strictly it is not aspect-ratio-correct.  I leave it as an exercise for the user to translate in their own programs to do that correction.  E.g. here is a native cap:

    but here is how it looks on a real screen, as fixed up in Photoshop:

    The needed transformation is simple:  2x horizontal and 3x vertical.  I could have done this in the emulator code, but it would have made the file size even bigger, and incurred more CPU, so I left that as a post-production exercise when needed.

    The file writing activity seems to take a lot of time.  On my UBW32 device, a screen cap takes about 3 sec(?!?!!).  So understand that the entire system will be non-responsive during that time.

    The default key binding for screen cap is aF8, but it can be altered in the config file, as with the others:

    textcap= F8            #capture text screen buffer (ansi)
    textcapu= sF8          #capture text screen buffer (unicode)
    bmpcap= aF8            #capture bitmap screen buffer

    Future

    Maybe I'll implement 4-bit indexed color, and 1-bit monochrome formats.  This should conserve the I/O bandwidth, making of snappier snaps.  The images currently are 200k, but a monochrome would be 9k, and a 4bbp color would be 36k, so there's a real savings.  If it turns out to save execution time, then...

    Read more »

  • Screen Capture 001

    ziggurat2905/16/2018 at 02:07 4 comments

    For a while I've wanted to be able to capture various outputs of the emulator to files for offline use.  My prior filesystem corruption problem took precedence over any features that involved writing to the filesystem, but since that got resolved, I feel more free to implement some of these other things.

    Most of these capture features are imagined to dump to an automatically named file based on a prefix and sequence number so as to avoid overwriting existing stuff, and keep it ordered.  This would require some machinery to be created find the highest sequence number to use within the context of a prefix and for a given directory.  Since directory enumeration is rather slow, I wanted to keep a persistent 'index' to give a hint as to where to start the numbering.  When a new file names is to be generated, it can start at the value in the 'index', and then bump the number.  The index is not required, but it speeds up the generation process by giving a start point that is likely to work, thereby avoiding a bunch of directory traversal.  Since I had just finished implementing a config file reader, and which has writing capability, I decided to simply reuse that format for the 'index' file.

    Since the TRS-80 display is a character array (as opposed to a pixel array), it is very straightforward to dump the video buffer to a text file.  However, there are a couple quirks:

    1. the TRS-80 (allegedly due to a bug) oftentimes puts chars 0x00-0x1f instead of 0x40-0x5f in the video buffer.  Visually, this is not confusing, because they render the same, but from a binary standpoint of course this looks like gibberish.  I fixup those character ranges so they read sensibly in a text editor.
    2. the character array implicitly word-wraps at col 64, so I add linefeeds at the end-of-line so again it looks sane in a text editor.
    3. the character set of the TRS-80 contains a few unusual characters (e.g. arrows), and then of course all the semi-graphics characters.  These aren't going to render at all without some help.

    The first two quirks were easily coded around, but for the third I found a font which contains the TRS-80 Model I semi-graphics characters (actually they have the full TRS-80 Model I character set).  This is the AnotherMansTreasureMIB64C2X3Y.ttf TrueType font, to be had at:
    http://www.kreativekorp.com/software/fonts/trs80.shtml
    (along with many others).

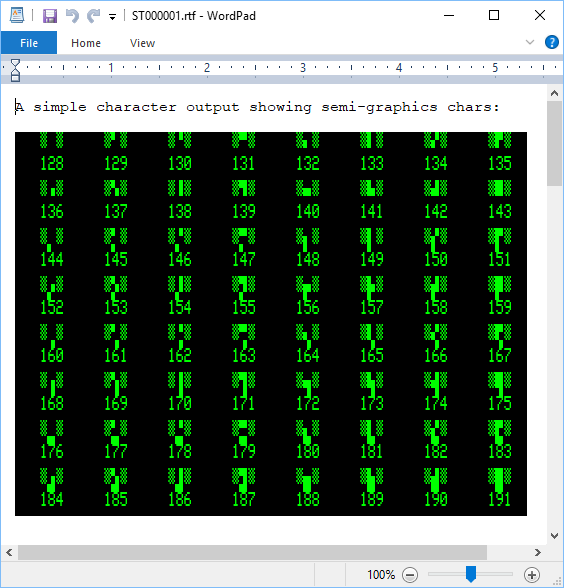
    To pull this off, I have another screen capture mode which emits a UCS-2 LE file, and which translates the semi-graphics and special characters into the Unicode range e000-e0ff.  So, for those screen captures, you can open them in some editor that allows you to choose the font, and you can now see the TRS-80 screen in it's normal state.  Also, since this is text, instead of a bitmap, you can cut-paste the text for your cut-and-pasting pleasure.  If your editor has the ability to 'embed fonts' (e.g. Word, LibreOffice), then they can be viewed correctly on other machines even if they don't have the particular font installed.

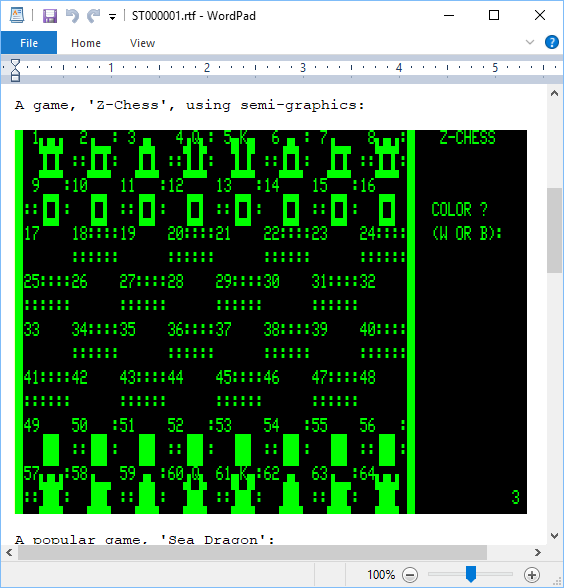
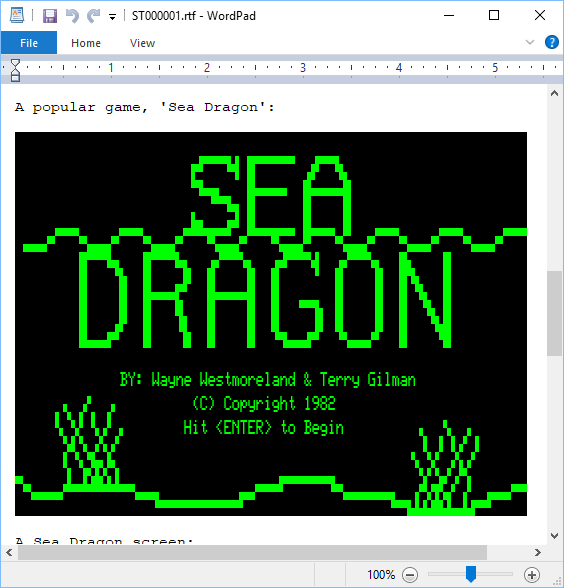
    Here's a few sample captures:

    I have to post these as png because I can't embed the fonts on the web such that plaintext would make sense, but as you can see, I highlighted some of the text (the blue stuff) so that you can more easily see where the character boundaries are located in the textual screen capture.  (The green and black obviously is just my specifying the text foreground and background colors, for visual effect).

    Anyway, I imagine this will be helpful for when I get around to producing some sexy documentation.  If nothing else, I can stop using my phone cam to take pics of the screen for these logs!

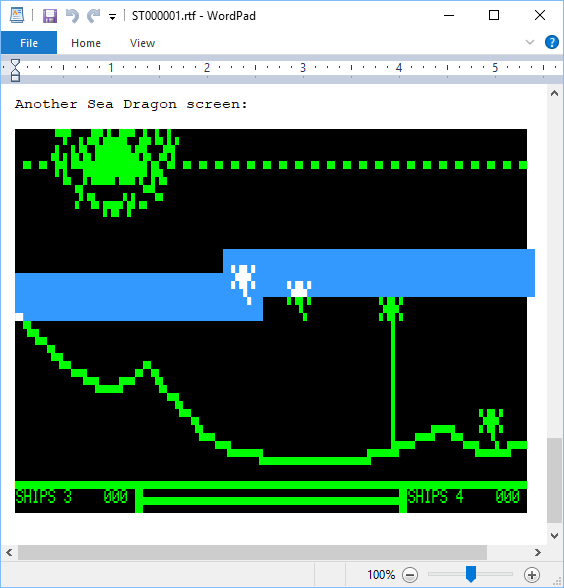
    Here are a few others for your retrocomputing viewing pleasure.  This is how we did it in the 1970's:

    The screen cap function is bound by default to F8 for plaintext, and shift-F8 for unicode translation (for use with the special font).  Like the other bindings,...

    Read more »

  • Config File and Features Controlled Thereby

    ziggurat2905/09/2018 at 15:27 0 comments

    I've long wanted a config file for this project, but never got around to actually implementing one.  I decided to give it a go.  I found a useful opensource (apache 2) INI file reader project: "minIni", which is designed for embedded (and moreover already had IO bindings to the MDD filesystem library I am using), so this made support much easier with not having to write the parser myself.

    My main motivation for the config file was to specify some useful parameters such as:  

    • auto load a floppy so I don't have to go through the hypervisor every boot
    • specify an alternative ROM to use, instead of always Level II BASIC

    Other less critical but nifty parameters are:  

    • control how long the splash screen art is displayed
    • support alternative splash screens with ease
    • change foreground/background colors on the color board
    • alternative key bindings for various hypervisor functions

    There is been a placeholder file in the root of the distribution SD card image for some years now, named 'trs80.cfg'.  Up to now, it was zero length, but now it has various entries coincidentally set to the baked-in defaults.  It should be self-evident how it works, but there are some caveats:

    The file contents should be treated as case-sensitive.  'Splash' is not the same as 'splash', and changing it will not result in the desired setting having effect.

    Related in particular, is specifying key bindings.  This is a limited feature, but you can assign the 'F' keys to various functions listed in the file.  They must be named like 'F10', not 'f10'.  The keys may be preceded by any of three modifier characters: 's' for shift, 'c' for control, and 'a' for alt.  So, 'sF10' means 'shift-F10' and 'scaF9' means 'shift-control-alt-F9'.  There are also a couple special keys named:  'Pause', 'SysRq', 'PrtScn'.  I don't really anticipate using the keybinding feature that much myself, but I've always been concerned about the 'Pause', 'SysRq', 'PrtScn' buttons, because keyboard manufacturers have a tendency to move those and sometimes make them hard to get to (sometimes requiring yet another 'shift' key).  Also, if you have a habit of accidentally hitting the reset button, maybe you want to make that harder by also requiring 'alt' or something on it.

    The ROM feature is for loading a custom ROM.  There are two baked-in ROM images, referenced by the well-known (and case-sensitive!) name of 'level1' and 'level2'.  Otherwise, it is assumed to be a filename of a file in the 'rom' directory of the SD card.  Also, a custom ROM cannot easily have cassette traps of the same sorts as I have implemented for 'level2', and plan for 'level1', but if you know your ROM is derived from either the level1 or level2 rom (e.g. System80, or maybe something you hacked yourself), and that the cassette routines are in exactly the same place, then you can 'force=level2' to make those traps be applied, anyway.  (Later, I plan to implement some 'syscall'-esque mechanism for truly custom ROMs; e.g. perhaps supporting a CP/M build).

    There will be other features added over time that will likely extend the file's content beyond what I have described here.  E.g. 'media' only preloads the first disk drive at present, but I'll probably extend that for all four, and also the two tape decks.

  • Minor Cassette Enhancement

    ziggurat2905/06/2018 at 14:46 0 comments

    The cassette I/O functionality has, since the beginning, been realized with traps in the ROM routines that are serviced on the host side of the emulator.  This saved me the trouble of trying to emulate the pulses with the correct timing for the Z-80 code, and had the side benefit of being some 160x faster than native cassette.

    A user had reported that EDTASM did not seem to do anything useful when trying to save and load programs from the cassette, and it was hypothesized that it might be doing it's own I/O directly, without using the ROM routines (and thereby my traps did no good).  A quick disassembly verified that this was the case.  In fact, it also has it's own copies of the keyboard, video, and printer device drivers, and it doesn't use any ROM routines!

    Upon closer inspection of the disassembly, I noticed that the routines were very similar to the same ones in ROM.  At a source level, they were identical except for a very few omissions that were pertinent to the BASIC environment.  One would think this is wasteful, since they are right there in the ROM, but it occurred to me that EDTASM may have been produced /before/ the ROM was created, and that the device drivers may have been platform-specific code given to Microsoft to integrate into their BASIC codebase to result in what became "Level II BASIC".

    In any event, because the code was so similar, it occurred to me that it might be possible to simply patch EDTASM to forward the key parts of the cassette implementation to the ROM, and then it would benefit from the existing traps.

    This plan was underway until I noticed a snag:  while at a source level, the code is identical, the machine code is not.  In particular, there is a state variable stored in RAM that is placed differently between the EDTASM and the ROM.  (a software copy of port 0xff).  For most of the cassette implementation, this doesn't matter, but it did for the cassette on/off, and for the video functions which are also on port 0xff.

    I could have said 'Hail, Mary', and just hoped for the best -- I suspect it would have been OK -- but then again it might not have.  After a while, it dawned on me that I could patch most of the code -- the data I/O, and leave the cassette on/off code unmodified, and avoid there being changed assumptions about the location of the state variable (in ROM, at 4028, in EDTASM, at 403d).

    In the emulator, I had already virtualized the cassette relay bit, and also the drive select latch at 37e4, but I had never provided implementation.  So, this update provides implementation for those two things, allowing me to make my patched EDTASM.

    I tested it out by entering a small program (the example from the manual), saving the source to tape, clearing memory, loading the source back in, assembling and saving the binary to another tape.  The resulting tape images looked fine, so I conclude that works as-expected.

    I placed my modified EDTASM in the SD image under the name 'edtasm-p.cas' ('p' for 'patched').  You load it just as you would the original.  It is derived from version 1.2.

  • Orchestra 80/85 Support

    ziggurat2904/28/2018 at 01:49 2 comments

    The PWM has been in-place for quite some time (and is used for the 'cassette sound' feature that many games use), but I had never gotten around to implementing the Orchestra 80 support, even though it should be simple.  Part of the reason was that I didn't have any software or files for it, and part was just that I had forgotten about it.

    Since I had a little time today, I decided to do a little research on the web, and found a copy of the ORCH85/CMD and a few music files.  Also, I found a copy of the manual for Orch 80.

    I have no idea how to run this program, and it seems I would need a minor in musicology to understand a lot of the stuff in the transcription setting, but I think I can manage loading a file and playing it.  It turns out there is a command, 'GET', which loads, 'scores', and plays the music files, so that is good enough for my testing, I think.

    The hardware was trivially simple:  two I/O ports (0xb9 and 0xb5 -- seems unusual) write an 8-bit sample to a DAC for left and right channels.  The rest is all done in software.  So I coded a connection from those I/O ports to the existing PWM.

    For the Olimex board, it required a little thinking:  that board only has one PWM channel.  I decided to simply average the two channels' values in that case.  Since the channels are written one at a time, I needed to store the last written value for each channel, and average those to create the effective setting for the PWM.

    The initial sound output sounded pretty bad, but was recognizable.  Could it have really been this bad back in the day?  Or was it my crappy amp and speaker (a couple bucks on ebay based on an LM386, and an equally cheap speaker element probably intended for a toy)?  Or was it the output filter on the boards?  Maybe a combination of all these things?

    I figured it would be best to start, if possible, with just one note.  Ideally generating a sine wave, but I couldn't figure out how to get that fancy.  But I did figure out that I could enter the music of 'W0' which meant 'a whole note of middle C'.  Then I captured that signal.  It looked like crap (sorry, I should have captured the scope trace, but I didn't), so there definitely was a weird signal going into the audio amp.

    I added a little testing code to write all the values sent to a file, so I could analyse the data stream.  The data at first glance did seem to look like it probably would have generated that waveform, so I started to guess that it is a signed/unsigned problem.

    I loaded the file into a waveform editor as a 'raw' file, and started with 'unsigned' (since that is the way I was interpreting it), and visually the waveform did look like the scope trace.  I re-imported it as 'signed' and then it looked much more sane (with an apparent fundamental, and some lower amplitude harmonics riding on top of that).

    So, changing to unsigned is just a simple matter of an offset of 128, and that seemed to do the trick.  The scope trace looked sane, and the output was improved.  I wouldn't go so far as to say it sounds great, but it was not as bad as it was.  Maybe it would sound even better with a better amp, speaker, and filter than I am using.

    The copy of the orch85 software I have on-hand is for disk, so I created a floppy image 'orch85.dmk' which has that, and some music files.  If you want to try the software, know that you need to specify some parameters on startup:

    'speedup' indicates that a speedup modification was installed on the TRS-80.  Answer 'no' to this.  (much as I would like to speedup, the 80 MHz PIC32MX doesn't have enough free cycles to do it).  

    Then it asks for number of voices 3/4/5.  I suggest picking '4' since that is the default and seems to be what most files are configured for.

    Lastly, it asks if you want to 'save program'.  This creates a copy of orch85/cmd that has the above options...

    Read more »

  • Bugthzs 002

    ziggurat2904/26/2018 at 00:01 0 comments

    There has been a known issue for quite a while that cassette writes can cause filesystem corruption on the SD card.  Usually, I approach bugs from a 'surely it's something I did' standpoint (and in truth, I prefer if it's something I did, because then I'm in a position to fix it), but sometimes it's not, and you have to be prepared that you might have to prove it one way or the other.

    Long story short:  there appears to be a bug in the Microchip MDD library specifically when opening a file in the "r+" mode, and when the file length is 0.  If you do, you will incur file system corruption upon subsequent writing.  If the file is of non-zero length, then "r+" works as expected (and thank goodness for that).

    I am using the latest libraries, to wit 1.4.4, which interestingly contains a fix to "r+" mode (though apparently unrelated to this issue).

    Anyway, because of the nature of the problem (only with 0 length files), what I do is translate "r+" to "w+" when the file length is zero.  This incurs some otherwise unnecessary file operations on opening, and has some consequences regarding position in the filesystem and timestamps (because in "w+" mode the file is deleted and then re-created), but I think this is minor enough to disregard - especially relative to alternative:  filesystem corruption.

    So hopefully this is the end of this issue.  It was a long and painful journey.

  • HRG1B Support

    ziggurat2904/23/2018 at 02:04 14 comments

    There were a very few 'high-resolution' modifications available for the TRS-80 Model I.  Some were downright weird, such as the 80-GRAPHIX board, which worked though the character generator.  One of the more sane ones was the HRG1B, which was produced in The Netherlands .  It worked by or'ing in video dots from a parallel memory buffer, and this buffer was sized at the TRS-80's native resolution of 384x192.

    This was on my 'to-do- list of things to implement, but [harald-w-fischer], actually had one of these on-hand from time long past.  He also had manuals, some of the stock software, and some extensions he his self wrote!  This was needed to be able to faithfully reproduce the behaviour, and some of my initial assumptions were proven false by it.

    Since my emulator already has framebuffer(s) at the native resolution, my thinking was that this would be easy to implement.  However, I was mistaken.  It was mostly easy to implement, but there were several challenges.

    • merging
      At first I planned to directly set bits into the 'master' frame buffer(s) when writes to the HRG1B happened, but after disassembling the 'driver', it was clear this wouldn't work.  For one, there needs to be supported reads from the HRG buffer that don't reflect merging, so a separate backing buffer would be needed to do this.  Second, the HRG supports a distinct on/off capability, so again the separate buffer would be needed, but also the case of when to merge the buffers arises.  Lastly, the computational overhead of doing the merging on-demand caused overload and required some legerdemain.
    • memory
      Whereas the Olimex Duinomite-Mini board (which Harald is using) can easily accommodate the 9K frame buffer required, my color UBW32-based board is just too memory constrained.  The color boards already have 3 frame buffers, and this makes a fourth.  Initial experiments were done on the Olimex, where the memory was not a problem, but I really wanted it to work on color, too.

    The first experiment I tried was to just see if there would be enough time to merge the image during the vertical blanking interval.  Since I am upscaling the TRS-80 native 384x192 to 768x576, and then padding with blanking around to get to 800x600, there is a bunch of vertical retrace time where I could do the buffer merging.  Maybe the processor is fast enough to do it on-the-fly?

    Well, no, it's not.  The buffers are small (9K), and the operation is simple (or'ing on the hi-res buffer onto the main buffer), and the operation is done on a word basis on word-aligned quantities, but it's not enough.  The major problem is that the vertical blanking interval is driven in software by a state machine that is in turn driven by an Interrupt Service Routine (ISR) at the horizontal line frequency.  The vertical state machine is mostly line counters for the vertical 'front porch', sync period, and 'back porch'.  So, although the vertical blanking period is a long time in toto, it is comprised of a bunch of short times.  The naive implementation requires all the work to be done actually during a horizontal line period.  In my first iteration, I wound up dividing the work into chunklettes, spreading out between several horizontal line intervals.  I generated a test pattern, and this scheme appeared to work.

    Having received the HRG1B driver and sample apps from Harald, I naturally had to immediately disassemble them.  I have to say, the driver is a little piece of art.  The goal is to extend the existing BASIC with some new keywords, and what they chose to do was hook a routine that is sometimes used during the basic execution process (it is rst10h, used to skip whitespace to the next token).  The hook observes if it is coming from the interesting places, and either leaves if not, or carries on with it's shenanigans.  The shenanigans consist of...

    Read more »

  • Bugthzs 001

    ziggurat2903/31/2018 at 03:01 0 comments

    OK, after quite some time of quiescence on this project, some bugs were brought to my attention.

    First, rather embarrassingly, a character generator bug resulted in to graphics characters being incorrectly rendered.  [harald-w-fischer] had pointed this out over a year ago, but due to ever-present-and-multitudinous weirdness in this platform, I did not receive notification of his posting until recently, when [Mikael ?. Bonnier] observed similar consequences.  Thank you guys, and apologies for not having corrected it until now.  (And extra special thanks to Harald for digging into the code to effect the fix himself!)  I also reflected this fix into the 'wide character' font, and along the way noticed that character 0x7f didn't look quite right, and fixed that too.

    Second, and perhaps more embarrassingly, Mikael discovered that saving to cassette tapes did not function.  I guess I have never actually tried to save to a cassette, because Lo! and Behold! it is true it did not work.  This ultimately was due to a trivial logic error of inversion:  the cassette write routine is meant to verify that a cassette is selected, before writing data.  In fact, the opposite was done, and if a cassette was selected, it would abort writing.  Heaven's knows what would have happened if you tried to save with no cassette selected (Heavens does know:  crashy-crashy).  Anyway, that logic error is corrected.

    So those two bugs are fixed, and I have updated the 'files' section with images I have tested.  I left previous image in place just in case this for some reason doesn't work, but I'm quite confident of the fixes.

    Lastly, Harald has a rare-ish piece of hardware:  a modded Model I with the HRG1B board.  There were a very few 'high resolution' boards for the Model I back in the day, but most were farcically unusable.  The HRG1B seems to me to be the only sensible implementation, which is a dot addressable pixel array (of the impressive 384x192 resolution!) that overlays the native resolution.  I can only guess as to how much such a thing cost back then.  Anyway, I've never found any documentation on such, much less software, but Harald has a vintage copy of the graphics kernel driver and some sample programs, so I'm now eager to implement that support.  I haven't spent much time on the software, but a cursory disassembly of the kernel and a glance at the BASIC source looks like might be some interesting things are in there! 

  • USB to PS/2 keyboard adapter improvement

    ziggurat2909/22/2016 at 19:57 0 comments

    PS/2 keyboards are getting rarer, and I knew I had successfully used one of the USB to PS/2 adapters before, but for some reason it no longer worked. So, out came the oscilloscope again.

    What I found was that the keyboard (or probably it was the adapter) was continually sending the 0xaa value every 600 ms. That value, 0xaa, is the 'Basic Assurance Test' (BAT), meaning that the keyboard passed the power-on self-test. But why was it sending it repeatedly, and not sending any key codes?

    I hazarded a guess that it want some interaction from the host, so I sent the 'set LEDs' code upon reception of the BAT. Doing so seemed to take the adapter out of whatever state it was in, and restored relaying of keycodes from the USB keyboard.

    While I had my probe wires soldered to the board, I tried a USB wireless keyboard through the adapter. This did not work. Unlike as with the wired USB keyboard, in this case the adapter simply remained silent.

    So, I've checked all that in, and you should now be OK to use one of those adapters with the emulator, with a more modern USB (wired) keyboard if you don't have a native PS/2 one on-hand.

  • 2nd Platform Support -- Olimex board

    ziggurat2909/20/2016 at 20:42 0 comments

    "...O frabjous day! Callooh! Callay!' He chortled in his joy."

    Today I finished porting the code to the Olimex Duinomite Mini board, so now you can have your emulator for about $25 USD (for what we paid upwards of a couple grand in the day), and soooo much more reliable. (and no soldering for the Olimex board).

    I have tested video, keyboard, SD card (cassette/floppy), and sound. I believe the porting task to be complete.

    I have updated the project-related file to now contain both firmware images, one for the UBW32 (based) board, and also the aforementioned Olimex board.

    The Olimex board does imply some limitations:

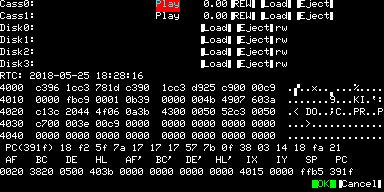
    • it is a monochrome only VGA board. Since the original TRS-80 was monochrome, this isn't the end of the world, but you won't be able to simulate the green screen filter. Also, pay a little closer attention to the controls states in the 'hypervisor' since you won't have color cues to guide you. But I think the reverse video does an adequate job of letting you know what control has the focus.
    • this board does not have a battery-backed RTC, alas. I haven't really been using that feature yet, anyway, since OSs needed to be patched to use the aftermarket RTC's of those days. I guess it would affect the file modification date on the SD card, but who cares?
    • this board only has one PWM channel, so you won't get Orchestra-85 stereo. I arbitrarily selected 'right' as the available channel. The cassette-based sound is directed there, so you can play all the games just fine. Do note that the PWM channel on this board is not capacitively coupled.
    • this board can be run from USB power, or from adapter by selecting a jumper near the jack. YOU MUST USE ONLY 5V REGULATED ADAPTER with the Olimex board. Not even 7v. Get a cheap 5V switcher wall wart off ebay or something. There is a zener on the board to help a little with booboos, but mr zener gets pretty hot and cranky when he's made to work.

    I guess what I have left is serial emulation, maybe hard disk, maybe some sort of printer, and maybe a 3D printed case might be nifty.

View all 19 project logs

  • 1
    Get a Supported Board
    Either
    1. get a UBW32 for the CPU. plenty of online retailers for this.  proceed to step 2, or
    2. get an Olimex Duinomite-mini (which I use), or Duinomite with the IO adapater (which I do not have, but reportedly it also works).  If you use these boards, you won't have to solder anything, but you will be limited to monochrome (small loss, as the TRS80 was monochrome, but I do like my green screen).  If you do this, you can skip ahead to step 3

  • 2
    Add Required Support Hardware for UBW32 (if you are using that board)

    get a UBW32-MCC for the jacks. assemble it. It's a fairly simple board. I do highly recommend buying a CR1616 solder tab (search 'gameboy' on ebay) battery that you can wrap in electrical tape and stuff underneath the mounted UBW32. Anyway, you'll need the connectors. The parts list enumerates the peculiar ones; the rest are commodity parts, so I didn't list them. Alternatively, you can make your own PCB, of course. Mostly, it just provides mounting for the connectors.

  • 3
    Get an LCD monitor capable of 800x600 with VGA (db25) Adapter

    get a monitor. I am running just fine on a modern LCD flat panel

View all 8 instructions

Enjoy this project?

Share

Discussions

7FFFH wrote 07/23/2022 at 04:38 point

Still checking back into this project every so often to read the discussion notes and hope that there is enough interest to explore/develop more features perhaps including perhaps a serial port in some way...?   

Wondering how many of these emulators have actually been built by people around the world? If the postings of people on this forum are just a fraction, then I would say quite a few... I am still impressed and my Olimex duinomite-mini is still working amazingly rock solid with this project.

  Are you sure? yes | no

ziggurat29 wrote 07/23/2022 at 16:43 point

I'm pleased that you are pleased!
I'm interested in your thoughts about what you would like having serial be able to do.
wrt expanding it with hard serial, I'm currently working a job and so don't have the cycles just now, but maybe towards the end of the season, I can carve out some time.

  Are you sure? yes | no

Jim Bailey wrote 05/20/2022 at 05:18 point

Thank you for a great emulator, it only took about five minutes to set it up and going back to 1980... now I only need a 110 baud modem and Compuserv!

  Are you sure? yes | no

ziggurat29 wrote 05/21/2022 at 15:23 point

Sweet!
Yes, a Compuserv simulation was something I had hoped to produce as a companion project, but life gets in the way, and anyway I can't find enough historical records to even start to design something that would look alike. I do remember that 'CB Simulator' was more-or-less their killer app.
My hope was to go Emulator->USB->DesktopApp->Internet->Cloud-hosted CompuServe Simulation. Then you should be able to 'log in' with a terminal app on the emulator and chat with other people live (a count of which I expect to realistically be zero at any given moment, so I'd probably also have an Eliza-esque chatbot there so folks aren't completely lonely), and then also bridge to some RSS feeds for actual up-to-date real news stories to view.

  Are you sure? yes | no

Jim Bailey wrote 06/02/2022 at 05:53 point

The funny thing is, one has to wonder just how much disk space did their content really take up.  By today's standards... would it fit an SD card, it just might!  :-)

  Are you sure? yes | no

Frank N. Stein wrote 08/23/2020 at 20:47 point

Thank you very much for this fantastic emulator! It is really great! It was one of the first computers I programmed on in the early 80s.

Can you tell me how to activate Orchestra Sound? Or is there a demo at the cassettes?

HRG Graphics worked out very well after a bit of trial and error! :-)

I have your emulator running on a DUINOMITE-eMEGA and it works really great! It would be great if the BluePill SPO256 would work with it!

  Are you sure? yes | no

ziggurat29 wrote 05/21/2022 at 15:31 point

Orchestra Sound should be ready to go immediately. It comes out on the same pins as the cassette port, and is 8bit PWM.  I don't remember if the demo disks have an app that drives the Orch85, but those are readily discoverable in the various existing software archives; e.g.
http://cpmarchives.classiccmp.org/trs80.php
Back in the actual day I did make SP0256 synthesizers for folks and I attached them via the printer parallel port.  I didn't get around to physically realizing the parallel port on this project despite its being relatively easy to do so.  Food for thought.  Then again, I might could merge that project into this one.  The thing is, though, that the SP0256 synth was never an official peripheral, so it would be a highly bespoke application. But it might give me an excuse to write some Level II BASIC apps! lol!

  Are you sure? yes | no

7FFFH wrote 04/23/2020 at 09:42 point

Hi there, 

Is anybody still interested in this project,... or who has built one recently or interested in further developing the software, printer port, RTC etc? I found that it works amazingly well. Let us know your experiences?

  Are you sure? yes | no

ziggurat29 wrote 04/24/2020 at 03:36 point

the RTC /should/ be functional right now, at least for newclock80, etc. To wit the various *DOS have to be patched to make actual use of it, though.

As for printer, I had contemplated it. One approach is hardware -- to use the GPIO of the host board.  This should be easy to do, but it would almost certainly be board-specific in the details of the pin assignments.  The other was to simply printer capture to a file that is saved to the SD.  Both seem to have merits.

Serial support was what I had planned to do next -- both physical UART (board-specific, like printer), but especially USB emulation.  With the serial support I had hoped to enable dialup capability to a companion project that would provide things like simulated services of old, e.g. Compuserve, BBS, etc.  The USB serial has a challenge in that the project is really strapped for CPU cycles, and the MicroChip library code really eats them up.

The big challenge I perceive at the moment is board support.  When I originally did the project, I used a 'UBW32 MCC' which was a labor of love from some guys in AUS who have since retired, and either way those PCBs are not sold anymore.  It was a somewhat costly option, and assembly was required.  I then ported to the Olimex DuinoMite to have a new platform option, but very shortly thereafter those became difficult to find, too; sigh, lol.

One other user found a board that looked very suitable, though I thought the USD $60 price tag to be a bit steep.  I stumbled across another board about a year ago that was in the $20 range which looked really good.  Alas, I lost my notes, and cannot remember the part numbers/vendors for either of those boards.

I could lay out my own bespoke board, but that's probably more $$ & time that I want to sink into it right now.  If I did, I'd probably go with the MZ series or maybe even an STM32.  The 80 MHz PIC32MX can juuusst barely pull off a timing-accurate 1.77 MHz Z80 with a little overhead for the peripherals, and even then it cheats a bit here and there (especially disk IO; the emulator plays catch-up when it gets behind -- mostly you don't notice but I guess some low-level utility software might detect there being a glitch in the matrix).  The MZ chip was quite buggy when it first came out, though I think this project would not be affected.  The STM32 are so very cheap, though I don't know if the DMA/SPI shenanigans used for the VGA skulduggery are possible on those parts.

Anyway, the project is still alive, though I'm not actively working on this one at the moment.  I'm please to hear it is working for you, and it would be my pleasure to support more boards to continue to give life to this important piece of computing history - klunky though it was, it by far outsold PET and APPLE II in its day!

  Are you sure? yes | no

amacuser1 wrote 12/23/2018 at 10:45 point

Hi - To all the forum members. I've had a go at the TRS-80 on a PIC32 over the weekend and have a slight issue. I'm using the Olimex Mini which has flashed ok with the hex file provided. I notice when using Newdos 3.0 in Hypervisor and loading drives 0 through 3 with virtual dmks, that when i try to list the files on disks 1 through 3 with Newdos - that Newdos does not respond with files on those disks however - if i type FREE from Newdos, all drives are displayed and if I have a single file on either virtual disks 1 to 3 and the disks are named the same as the files on them, then the programs will run ok. I've tried TRSDOS but the same is happening.  I've think Dir,1 is the correct syntax to load and list Drive 1 in Newdos but all I get is a listing of Drive 0. Is this a timing issue or just my bad syntax. Cheers and thanks -  KingKappa   

  Are you sure? yes | no

amacuser1 wrote 12/29/2018 at 01:32 point

Hi all - I've gone to Dosplus3.1 and all is good. Sorry for the previous post. Cheers KingKappa

  Are you sure? yes | no

m.kabbedijk wrote 12/11/2018 at 11:58 point

Looking for a 3D case for your Duinomite-mini? https://www.thingiverse.com/thing:928034

  Are you sure? yes | no

ziggurat29 wrote 12/11/2018 at 15:39 point

oh, nice; thanks for the link!

  Are you sure? yes | no

Jim Bailey wrote 05/20/2022 at 05:30 point

Thank you I ordered two of these to be printed... 

  Are you sure? yes | no

Jim Bailey wrote 06/02/2022 at 05:59 point

I had PCBWAY print two of them and both of them fit the boards perfectly.  The tops and bottom half of the cases mate very well.  Thanks for the tip! 

  Are you sure? yes | no

george bright wrote 12/06/2018 at 19:41 point

did you ever release the source or does anyone know if it will run on the Olimex Duinomite eMega?

  Are you sure? yes | no

ziggurat29 wrote 12/08/2018 at 04:30 point

the repository link is on the left side near the top.  It has a star next to it (might be easier to search the page for 'Repository' to locate it quicker).

  Are you sure? yes | no

7FFFH wrote 11/28/2018 at 12:21 point

Thanks you so much to all the contributors of this project. I have been following for quite a while and eventually acquired a DuinoMite-Mini and joined in the fun... but alas there is no case readily available for this board leaving it a little exposed on the desk ? ... Using recycled sheet metal from an old Pentium PC tower case,  I made my own, cut, folded, soldered in the cornes, with slots and holes cut and filed for the various ports, + hammertone grey/silver spray, I allowed enough internal room for the Olimex RTC extension (maybe a later contribution is to acquire the tool chain and develop an option to support this RTC). For a dev board the DuinoMite-Mini with this software is amazingly stable, possible more so than I remember the original model I hardware to be.

Photos are here:

https://1drv.ms/f/s!ArIXOWl4gMlivRyfJv2TsjqQXIc8

  Are you sure? yes | no

ziggurat29 wrote 12/01/2018 at 15:06 point

Oh, that's neat.  Nice metalwork.  And I wasn't aware of the RTC extension, perhaps I should support it in the firmware as I do with the UBW32 version.  (At the same time, I don't have any TRS-80 software that actually uses the RTC, so I guess it's not so much a priority relative to some other things).  But if you want to try your hand at it, I'll give you some pointers where to look.  This project source is rather kludgy; I wouldn't want you to go blind reading it cold.
I myself had considered doing a 3D printed case, but never got around to learning how.  (I did notice there is silver-grey filament available for those that might want the 'authentic' look.)
It certainly is more stable than the original.  My 'actual' eventually would not stay running for more than a couple minutes before crashing (damned that card edge to the EI), so I tossed the lot of it into the dumpster back in 1990, I think.  In some ways I regret that, but in most others I do not.  I had been lugging it around already for 10 years at that point, and I got 'out' of computers in 1984.  Lol; "Just when I thought I was out, they pull me back in."

  Are you sure? yes | no

Mikael ☉. Bonnier wrote 05/24/2018 at 06:47 point

It would be good if one could use the GPIO and UEXT pins and LEDs on DuinoMite and DuinoMite-Mini using Z80 ports, because then it would work from all programming languages e.g. MMSFORTH v2.0. Perhaps one could also use the serial ports, including the one connected to USB.

  Are you sure? yes | no

ziggurat29 wrote 05/24/2018 at 15:03 point

serial, both hardware and usb, have long since been planned. The USB currently takes a bit more processing away from the emulator than I would like, though I am hopeful that with some effort I can improve that to usefulness. Time is, alas, the elusive commodity to both man and machine.

Controlling gpio pins via port I/O seems a bit application-specific (and board-specific), so it's unlikely that I would do that any time soon since it doesn't reflect the actual TRS-80 hardware, and this is an emulator that hardware, after all.  I do intend to support one hardware serial port, which will use some external pins, and have contemplated a physical presentation of the printer port, though that's been low on my list.  Serial will come before printer, and printer will probably start as file capture to disk.

Similar with the LEDs.  The DuinoMite (mini, at least) seems to only have one useable LED (the green one), whereas the UBW32 has 4.  I currently use them for debugging, since I've never been able to get the JTAG working on these boards (I suspect the bootloader is doing something that interferes with that, but I don't know for certain).

However, redirecting some of the IO space for new functionality definitely doable, and all the source is there to hack on.  There's a well-defined 'ports' module where 'in' and 'out' are handled, so you can make those calls do whatever you like.  I have also implemented 'traps' which use some unimplemented Z80 instructions.  Some traps are used for the existing ROM patches, but other traps are used for 'syscalls' which are intended for custom ROMs or OSs.  One day I hoped to make a CP/M, which to wit never existed for the Model I for a bunch of technical reasons.  At the same time, that aspiration is a bit off the beaten path of the scope of this project, and probably is best suited for an entirely new project from ground up, though you lose the charm of the perversity in running a CP/M on the Model I.  I suspect that similar arguments could be made regarding creating hardware extensions for the Model I (e.g. the GPIO functions):  it doesn't represent the reality of the Model I being emulated, so does that make more sense for a separate project altogether?  But maybe it does.  Anyway, all the source is there, and the changes needed should be surgical enough that you could easily merge them into any ongolng changes and bugfixes that are released in the upstream codebase (except maybe if serial or printer happened, which risk colliding with pin assignments).

  Are you sure? yes | no

Mikael ☉. Bonnier wrote 05/24/2018 at 21:56 point

I cannot compile it myself, because I can't get the right compiler. I asked this before: "I could not find MPLAB IDE v8.22 on http://www.microchip.com/development-tools/pic-and-dspic-downloads-archive . The closest are v8.20a and v8.30. Why are you using this version and not the latest?"

About GPIO and LEDs one might say this is a partial emulation of "Expansion Interface" for TRS-80 Model I: http://www.trs-80.org/radio-shack-expansion-interface/ . That had a parallel port that might have had a Z80 PIO and I believe those have pins you can set to be in- or outputs: http://www.z80.info/z80pio.htm . Maybe one can find GPIO-pins that are common to Maximite and DuinoMite.

  Are you sure? yes | no

yeti wrote 05/25/2018 at 09:04 point

  Are you sure? yes | no

Mikael ☉. Bonnier wrote 05/25/2018 at 09:45 point

It's possible to run CP/M on TRS-80 Model I using a modification, see http://www.vcfed.org/forum/showthread.php?51162-CP-M-mapper-for-the-TRS-80-Model-I-its-here!

  Are you sure? yes | no

yeti wrote 05/25/2018 at 11:58 point

CP/M with less then 64k RAM is no fun and every serious CP/M program expects an 80 chars per line display. I had CP/M on a TRS-80 clone with 64k RAM in the early 80s and the 64x16 screen was a major pain!

If patching in 64k RAM support and an 80x24 or 80x25 video mode could be done, it would be a nice system. I'd even be happy about it if it were a CP/M only emulator dropping the TRS-80 features. ;-)

  Are you sure? yes | no

Mikael ☉. Bonnier wrote 05/25/2018 at 13:39 point

There is already CP/M for DuinoMite and DuinoMite-Mini (PIC32). I made a video about it in 2013, but the video description is probably more interesting than the video:  'COMAL-80 in CP/M-80 2.2 (Z80-SIM) on DuinoMite-Mini (PIC32/MIPS)' https://youtu.be/p_MXmeJkYmg


I don't use that CP/M much because its terminal emulation (VT52?) doesn't work with COMAL-80.

I think the character set and sound of the TRS-80 are funny and the hypervisor also makes it easy to switch diskettes.

About the TRS-80 parallel port: At least it gives 4 input and 9 output pins even though they are not bidirectional.

  Are you sure? yes | no

ziggurat29 wrote 05/25/2018 at 14:42 point

Lol; a bit more response than I expected!

re: printer/expansion interface - yes, the plan was to find a (common, if possible, but if not it's not the end of the world) 8 bit out port and 8 bit in port to emulate the printer.  But it just hasn't been a priority for me up to this point, figuring people probably are less interested.  But that might satisfy your (Mikael) I/O needs, while keeping faithful to the 'TRS-80 emulation' intent.  And Yeti is right, of course, it was just a simple latch on the actual device.  The TRS-80 didn't use the various Z-80 family support chips.  The Model II, did, and I wouldn't mind making an emulator for such, but it seems that is a machine lost to time as far as documentation and software go.  Anyway, if and when I get around to implementing the hardware printer port, I think it would be fine to make the 8-bit printer port bi-di as a undocumented non-feature, because that shouldn't break any TRS-80 software assumptions.

re:  compiler.  I believe I am using the latest tools for MPLab - 8.92 to wit.  The real caveat is 'not MPLabX', though you're welcome to try.  This caveat arises from two sources:  a) I originally used code from Geoff Graham's Maximite, which had that caveat.  But very nearly all that code has over the years been removed through natural evolutionary processes.  b)  Microchip has a delightfully 90's-era retro-business sensibility in charging $$ for their toolchains, and I'm simply not going to pay.  I'll go to STM first (even with the horrible java based IDE and rather poor library code.  But hey, at least I have the source there, and could debug into, say, strtol(), which is quite buggy on C32 incidentally; grrr.)  But this project arose on a lark, and I happened to have a UBW32 PIC32MX board on-hand at the time, and that's how it came about the way it is.  I have from time-to-time thought about making a custom board with a chip of my own choosing, which will give me much more speed and storage and video (and hence a wider range of emulation targets), but somehow I feel that might be a fool's errand.

re:  CP/M.  My motivation for even contemplating it was simply because as a child I couldn't afford a CP/M machine, so I thought it might be a fun perversity to put one on this TRS-80 platform.  But as Yeti points out:  CP/M really expects an 80 col display (and probably 25 or so lines), which the TRS-80 definitely didn't have.  There is also the problem of the memory holes where the devices go.  In the real world the ROM would be a problem, but it's not here because the ROM is implemented in RAM, anyway.  I just needed to implement the 'syscall' to switch it out.  But anyway, trying to implement the CP/M then becomes such a customization that really is it a TRS-80 emulator anymore, and is it just better to make a new project.  I could totally make one for this physical platform, but as Mikael has pointed out, hasn't that already been done?  But maybe I should take a peek at the other project, and if there is something that can be improved upon, I might take a swag at it.  Creating as it's own project, loooots could be improved (e.g. video, keyboard, disk -- pretty much everything!) over trying to wedge it into the TRS-80 hardware assumptions.  Coincidentally, about a year ago I helped with another project which involved my disassembling the OS, which was CPM 2.2 based, so I have fairly recent carnal knowledge of it's innards.

But it will not be a particularly fast machine.  The 80MHz PIC2MX can just keep up to make a 1.7 MHz Z-80 (and even that is only possible thanks to it's 70's era CISC design - 4-23 T for an instruction!).  There is an undocumented debug feature in that the green led (on the Duinomite-mini; white on my UBW32) is turned on when the emulator is wasting time to throttle back to the 1.7 MHz speed.  As such, it is effectively a PWM LED showing computational load in the emulator.  E.g. when disk I/O happens, that sucks up time from the emulator and the LED goes dark because there's no time to waste.  And when the hypervisor dialogs are up, it goes dim, because of the extra processing incurred by the message loop of the dialog manager.

  Are you sure? yes | no

Mikael ☉. Bonnier wrote 05/25/2018 at 17:18 point

You wrote you used MPLAB C32 v2.02a, but on https://www.microchip.com/development-tools/pic-and-dspic-downloads-archive I can only find "v2.02a upgrade". Is this enough or do you need an original "MPLAB C Compiler for PIC32" to upgrade from?

  Are you sure? yes | no

ziggurat29 wrote 05/26/2018 at 00:24 point

it might be fine to use that as-is, but it might have been an upgrade from whatever before.  It was many years ago that I set up my build machine; but regardless, I think the main point is 'use the latest stuff relevant to the MPLab 8 product line (and /not/ MPLabX'), which includes the MPLab IDE and various compilers.  In this case, we only care about the PIC32 compiler.  You'll be fine.  Jump into the pool.

  Are you sure? yes | no

yeti wrote 05/26/2018 at 01:57 point

I tried https://github.com/TheCodeman/z80pack-1.17-ksd-pic32 but I did not get far with it. And when it finally ran, I did not get the applications configured to the needed terminal sequences.
And having only some fixed disk image files, file handling really is ugly.

http://www.mathematik.uni-ulm.de/users/ag/yaze-ag adds finer control over keyboard mappings, a commandline editor and commandline history at the emulator level. That makes using it really nice! 

https://schorn.ch/altair.html emulates 8080, Z80, 8086 (and the beta version adds 68000). So CP/M archaeology on different CPUs is easy with it.

https://github.com/MockbaTheBorg/RunCPM runs on several microcontrollers, DOS, Windows and Posix and maps file access to the host's filesystem. That might break some really picky software, but so far I do not have problems with it on Linux. RunCPM optionally adds Lua  and accessing GPIOs of e.g. the ArduinoDUE is supported too. This project is alive and problems typically get fixed really fast.

  Are you sure? yes | no

ziggurat29 wrote 05/26/2018 at 17:19 point

hmm; the more we write about it, the more it makes be believe that really any notional CP/M should just be a separate project, instead of my perversely trying to get it to run in the emulated TRS-80 Model I environment.  I just don't know if I should do it, since as you pointed out there are already so many existing ones in the wild.  Is it worthwhile for me to bother?  Plus, all my other other non-profitable babies are crying and starved for attention.  When will I ever get back to my cryptographic calculator; lol?

  Are you sure? yes | no

Mikael ☉. Bonnier wrote 03/17/2018 at 21:36 point

This works on DuinoMite-Mini, but I could not get it to work on DuinoMite. It then complains about there being no file system on the SD-card even though the same SD-card works well in DuinoMite-Mini. Other systems work with SD-card in DuinoMite e.g. MMBASIC 4.5. There must be some small patch you could apply to the TRS-80 emulator so that it works on DuinoMite too.

  Are you sure? yes | no

ziggurat29 wrote 03/18/2018 at 00:00 point

Thanks so much for playing with the emulator!  I apologize for not having responded to any of your prior questions -- for some reason this site never gave me notifications of such until just today.
Give me a moment to study them all, and I'll reply forthwith....

  Are you sure? yes | no

ziggurat29 wrote 03/18/2018 at 00:52 point

Issue with semi-graphics

I noticed another poster (who I also neglected, a year ago!) found what he reports as a bug in the font images for characters 0x86 and 0x97, which are in the graphics range.  I still need to study those.  But being off in the font would definitely create visual issues like you saw.  Since this is an emulator, and is running the original code, it is more likely something I did (font) than something the author did (Bill Gates, haha).

Saving to Cassette

This really should work fine.  I am pretty sure I have tested writing -- especially because testing is pretty boring when you can't save your programs!  I will need to fire up my board (it's been a while!) and verify, but I'm pretty sure that works.  I also think floppy works.  Floppy was the last thing I implemented.  Admittedly, most of what I tested was reading, to run programs, but there are no special restrictions that I remember regarding writing, so it should just work.  But I really need to do some hands-on testing before I can assure you of that.

Basic Level 3

Why not?  I do have a copy of the cassette version of Level III, and it mostly just hooks vectors like DOS does, which works, so I would /think/ it would be fine.  But I'll have to test, and I admit I've never tried to run it.  Though it would be interesting if it doesn't work.

DuinoMite-Mini vs DuinoMite

This is an interesting question.  I have a DuinoMite-Mini in-hand, but not a DuinoMite.  There is possibly a hardware difference that would need to be taken into consideration.  I need to look at the schematics.  It's possible that the firmwares that you mention detect the platform and switch, say, gpio lines to accommodate.  SD is pretty easy:  it's just SPI with a few control lines.  So it should be accommodable with a some mods to init code.

I have to admit some disappointment that the various off-the-shelf boards have incrementally become unavailable.  The UBW32 version I developed on is now unobtainium, and the DuinoMite-mini that I ported to provide an alternative cheap platform went off-the-market about a month after I completed the port! lol!  Sometimes I think I should just make my own board.  After all, that was the point of the Maximite to begin with:  just a demo of the then-new PIC32MX to make an 80's style machine with minimal support components.  But it's a labor of love, and not of money, so it's hard to justify dumping in the costs.  On the other hand, the retrocomputing really is a lot of fun.  This was it!  This is how we did things once-upon-a-time!

  Are you sure? yes | no

Mikael ☉. Bonnier wrote 03/18/2018 at 05:17 point

I noticed the sine-plotting program works in a TRS-80 emulator for Linux that's included in e.g. Ubuntu 16.04: xtrs.

I can save to diskette using LBASIC called BASIC in ld531.dmk. If it is possible to save to cassette it would be good if you could make a video about how, or write it down in detail, because I think I've tried every way. 

The last GPL-version of MMBASIC i.e. DMBASIC can also use the microSD-card in both DuinoMite-Mini and DuinoMite with DuinoMite-IO:
https://github.com/OLIMEX/DuinoMite/tree/master/SOFTWARE/DMBasic/src

VGA already works with the TRS-80 emulator in both. 

You can still buy DuinoMite-Mini and DuinoMite with DuinoMite-IO from Olimex and also here where I live:

https://www.olimex.com/Products/Duino/Duinomite/DUINOMITE-MINI/

https://www.olimex.com/Products/Duino/Duinomite/DUINOMITE/

https://www.olimex.com/Products/Duino/Duinomite/DUINOMITE-IO/

https://www.electrokit.com/duinomitemini.49379

https://www.electrokit.com/duinomite.49405

https://www.electrokit.com/duinomiteio.49381

If some local reseller sells other Olimex boards one could probably ask them to import a DuinoMite-Mini.

  Are you sure? yes | no

yeti wrote 05/07/2018 at 06:53 point

https://www.olimex.com/Products/Duino/Duinomite/_resources/DuinoMite-UM-1-03.pdf on page 13: """As DuinoMite, and DuinoMite-Mega are designed to be low power boards there is provision for the SD-card power supply to be shut down, this is done with FET2 connected to STB_E on RB13 port of PIC32."""

  Are you sure? yes | no

ziggurat29 wrote 05/07/2018 at 12:53 point

That's a great observation. Knowing that's there, I can see it in the schematic. You might have cracked the case.  I'll see about making a modification, and then hopefully Mikael can kindly validate, since I don't have a board to test with myself.

  Are you sure? yes | no

ziggurat29 wrote 05/07/2018 at 19:04 point

FYI, it does look like that was it, so 1000 thanks for knowing of that passage in the manual.  Mikael validated it on his board, so there will be an update forthcoming...

  Are you sure? yes | no

yeti wrote 05/07/2018 at 19:20 point

I remembered that RetroBSD toggles a port on Duinomites to access the SD card and then it was easy to find in the manual.

—▷ https://github.com/RetroBSD/retrobsd/blob/9d8ad7ccf588d08bfa7eb7063ed1920fa19116f5/sys/pic32/duinomite/Config#L45-L47

  Are you sure? yes | no

ziggurat29 wrote 05/09/2018 at 16:47 point

Oh, I've long been meaning to give RetroBSD a whirl; thanks for reminding me of it!

  Are you sure? yes | no

Mikael ☉. Bonnier wrote 02/23/2018 at 17:28 point

Would it be possible to get BASIC Level 3 (III) in the emulator?

  Are you sure? yes | no

ziggurat29 wrote 03/31/2018 at 03:05 point

seems to work as is.  I have loaded it, and it hooks in correctly.  I haven't actually run a Level3 program, but I have no reason to think it will not work perfectly as-is.  Maybe I'll fiddle with this a bit later.  Just load it as any other system cassette program.  Don't forget the filename 'system' requires is case-sensitive!  It also only requires the first letter, so I just use 'L'.

  Are you sure? yes | no

Mikael ☉. Bonnier wrote 02/23/2018 at 17:27 point

How do you save a BASIC program on a virtual cassette? I tried to load test.cas and then enter a program and csave "hello" and also csave hello but nothing seems to save on the cassette. Is it not possible to save on cassette using this emulator? How do you save a BASIC-program on floppy disk using this emulator?

  Are you sure? yes | no

ziggurat29 wrote 03/31/2018 at 03:12 point

There was an embarrassing bug on cassette saving that I have fixed in the firmware image I just posted.  Short story:  I had a logic inversion testing that a cassette was selected.  I meant to bail if no cassette was selected, but in fact I bailed if a cassette /was/ selected.  Whoops!
Note:  the 'new' feature does not work, so you currently need to have a blank tape file already on the disk.  I don't know why I didn't implement 'new' but I can see I didn't and I need to look into that.  In the updated file, I included 10 blank tape images for your saving convenience.  Big picture:  they're simply empty files, so you can make as many as you like as needed.
Some things:
*  don't forget you need to put the cassette into 'record' mode!  In the hypervisor, you'll see the word 'play'.  This is actually a button, and if you 'click' on it with the spacebar, it will toggle to 'rec' for record.  This reopens the file for writing, and you can save programs.
*  I saved your 'sine.cas' using the feature.  Now you can plot a beautiful sinusoid in glourious 128 x 48 resolution!
*  The Microchip provided FAT source code seems to be bad.  I might look into replacing it with a 3rd party (4th party?) implementation that is more reliable.

  Are you sure? yes | no

Mikael ☉. Bonnier wrote 03/31/2018 at 13:02 point

I can save to cassette now using e.g. CSAVE "SINE.BAS" on TEST008.CAS in REC mode, and I can use NEW and CLOAD it again after changing TEST008.CAS to Play mode. The first time I tested this the whole microSD-card was blanked and even the volume name was blanked. Then I saved it using csave "mobluse" to TEST008.CAS i.e. lower case and without extension. I had to reformat and copy all files to the SD-card again. When I reformatted it I used FAT32, before it was probably just FAT. I did have a backup of all files on SD-card. This is just a small SD-card of 128MB. I don't know if it was lower case, lack of extension, or non FAT32 that caused the SD-card to be erased.

  Are you sure? yes | no

Mikael ☉. Bonnier wrote 03/31/2018 at 13:06 point

A feature request would be to see if the CAS-file is binary or BASIC-programs in the list, because now one doesn't know if a file should be loaded with SYSTEM or CLOAD. E.g. I tried to load MUSIC.CAS with both methods, but without getting anything to run.

  Are you sure? yes | no

Mikael ☉. Bonnier wrote 03/31/2018 at 19:41 point

It would be good if there where a command-line program for e.g. Linux that could export and import BASIC-programs (both Level 2 and 3) as text-files in UTF-8 to and from CAS-files. The TRS-80 graphics characters are not part of UTF-8, but there are UTF-8 fonts that have them, e.g. teletext2 and teletext4, see https://github.com/mobluse/semigraphics .

The CAS-format of this emulator seems to be the same as the CAS-format of "xtrs" emulator for Linux, and that has a program "cassette" to handle CAS-files and CPT-files. Unfortunately the "cassette" program in Linux can't export and import text-files from the cassette-files. (Both "xtrs" and "cassette" are in Ubuntu in e.g. Microsoft Store.)

However, one can load the CAS-files using "cassette" and then use CLOAD and LLIST in "xtrs" to list the program on stdout. 

In order to input programs into the emulator one can use a system https://pyautogui.readthedocs.io/ that reads files and simulates keypresses in the emulator, and then one use CSAVE "FILENAME.BAS". Then one can use the resulting CAS-file in this emulator for PIC32.

  Are you sure? yes | no

ziggurat29 wrote 04/01/2018 at 00:05 point

(hopefully this reply will show up correctly; this site only will nest replies so deeply)
Lol!  Coincidentlly I had just written a utility to dump a 'cas' file to a text dump for BASIC a few hours ago.  It was pretty trivial to do, though I hadn't considered retokenizing plaintext text back to cas form.  Generating binaries for the myriad systems out there is probably impractical for me, but the good news it's it's just a single C++ file, so compiling from the source should be really easy to do on an as needed basis.  I should test that it still compiles clean on gcc, since I myself am using Dev Studio.

I have long planned a feature to direct line printer to a text file on the SD, and also to read a text file into keyboard.  The former should be straightforward, and the latter a little tricky with character pacing to keep the reading reliable.  Maybe you've motivated me to finally implement those!

Regarding your filesystem issues, I am beginning to think there may be some issues with the FSfs library that I am using that does the FAT I/O to the SD card, or perhaps I am failing to do something to cause it to write the modified directory structures out.  I don't know what that would be, but I did notice there is no 'flush' capability on files, and I emulated that by closing, then re-opening, the cassette file when the writing is finished.  I need to spend some time on this, and perhaps just switch to a different library that I have had better luck with in other projects (FATfs), so stay tuned for that.

I have to go back to work just now, so it will be a few days before I can dig into these things (alas), but hey, you're plotting sine waves now, lol!

  Are you sure? yes | no

Mikael ☉. Bonnier wrote 04/01/2018 at 09:55 point

Printing to and reading keypresses from files is a good idea. There is also the USB-serial port that one could LPRINT and LLIST to and receive keypresses from using e.g. Tera Term because that has configurable delays for characters and lines when pasting code. I saw BASIC Level III has support for output to serial port, so one might use the serial port for that instead. The DuinoMite-Mini and other PIC32-boards also have other serial ports that use pins. 

I just want to remind you that the new version still doesn't work on DuinoMite with DuinoMite-IO. Actually it works a bit worse now since in the old version from 2016 you got a screen with text that the SD-card didn't work, but now you only get a blank screen. I think you should be able to get a free DuinoMite with DuinoMite-IO from Olimex to test with, because this project could increase their sales. One advantage with DuinoMite-IO is that it has connectors for speaker sound -- the DuinoMite-Mini only has pins for sound, but I have connected them to a speaker.

  Are you sure? yes | no

ziggurat29 wrote 04/01/2018 at 14:43 point

Yes! on serial.  That is a long standing planned enhancement.  Actually, the boards do enumerate as USB serial even now, I just haven't hooked the stream up to anything yet. (I wanted to get floppy working first, and that was a /lot/ of work.  Then I had to go back to work!)  It's still on my to-do.  One potential challenge is that device code (from Microchip's libraries) mostly works in a polling scheme, which I suspect might be too much for the main emulation loop to deal with, so I need to study the source and profile the execution.

Just now, I am trying to understand the filesystem corruption issue, which seems to be a critical issue.  I have re-read the Microchip application notes, and don't seem to be missing anything, but I have to thoroughly review.  Slightly related to that is the issue with the other board.  I studied the schematics, so there doesn't seem an electrical reason it shouldn't work, but clearly something is awry.  I wish I had one on-hand.  Maybe I am just clocking SD too fast, though I don't think so.  But maybe.

  Are you sure? yes | no

Mikael ☉. Bonnier wrote 04/06/2018 at 20:30 point

The reason it works with DuinoMite-Mini and not with DuinoMite might have to do with an old library for SD-cards, see this post on Olimex forum:

https://www.olimex.com/forum/index.php?topic=6098.msg25177#msg25177

  Are you sure? yes | no

ziggurat29 wrote 04/07/2018 at 14:58 point

Thanks for the feedback regarding the SD code.  I'm already using a later version of the filesystem library code than the official maximite codebase (well, at least the copy that I have); maybe I should revert?  I'm reticent to do so except experimentally, because there are clearly bug fixes that were introduced in the later version that I have integrated.

Also, being as the Duinomite and the Mini are electrically the same (for SD at least), my mind is still blown as to why there is a difference.  But there it is, your problems indicate that there is /some/ difference.  My thoughts then started to wander to SPI clock speed.  However, I am using the same configuration as the MM-BASIC, so this feels like a shot in the dark.

Some other interesting things are your notice that not having a card inserted no longer presents the 'please insert a card' message.  There haven't been any changes to that code (that tests and presents the message), however the way it works is:

1) test for SD card presence
2) init the SD card
3) test for various required directories
4) create them if needed
5) purge the 'temp' directory

If any of those fail, they have their own distinct error message.  Since you have no error message, that almost certainly means the board is 'hung' in the SD card library, though it could be any of those steps, since there is no output message prior to those steps.  I'm guessing #1 or #2, but not with certainty.

Perhaps I need to implement some boot time messages.  Currently there is a 'splash' screen for artistic purposes, which would need to go away, but science must take precedence over art, alas....

  Are you sure? yes | no

ziggurat29 wrote 04/07/2018 at 15:10 point

coincidentally, I did the other day implement a basic-to-cas translation program, and it seems to work correctly.  Next time I release a package, I'll include that.  As mentioned, it will be in source code form, rather than compiled, because it will be too much for me to attempt to maintain binaries for all the platforms out there.  On the other hand, it is a trivial program -- just one source file, and only standard library dependencies -- so it should be trivial to compile on an as-needed basis.  I'll do a trial compilation on gcc beforehand, since gcc and MSVC have different interpretations of the language and cautionary warnings, and I like clean builds.

  Are you sure? yes | no

Mikael ☉. Bonnier wrote 04/07/2018 at 20:12 point

I just want to clarify: I have a microSD-card (FAT32 128MB) that works in the DuinoMite-Mini in the DuinoMite and now the screen is just black. With the old version you got a message: "No Filesystem on SD Card!". You still get this message on the DuinoMite-Mini, if you boot without SD-card. Maybe you could send some message on the USB serial port during boot, so that one knows it works a little. The same DuinoMite works well with e.g. MMBASIC 4.5.

  Are you sure? yes | no

Mikael ☉. Bonnier wrote 04/10/2018 at 12:12 point

I have problems with the CAS-files I saved to. I tried to copy them from microSD-card to HDD, but xcopy complained and stopped copying, and recommended chkdsk on the SD-card. I did that, but then the files that I had saved to were 0 bytes long.

C:\Users\pi\Downloads>chkdsk d: /f
The type of the file system is FAT32.
Volume DUINOMITE created 2018-03-31 14:30
Volume Serial Number is F814-531B
Windows is verifying files and folders...
The size of the \cass\test001.cas entry is not valid.
The size of the \cass\test008.cas entry is not valid.
File and folder verification is complete.

Windows has made corrections to the file system.
No further action is required.

  121 715 712 bytes total disk space.
        1 024 bytes in 1 hidden files.
        8 192 bytes in 5 folders.
   23 476 224 bytes in 76 files.
   98 229 248 bytes available on disk.

        1 024 bytes in each allocation unit.
      118 863 total allocation units on disk.
       95 927 allocation units available on disk.

  Are you sure? yes | no

ziggurat29 wrote 04/10/2018 at 18:27 point

Yes, that is the filesystem corruption I had mentioned before.  For some reason, the FAT is not being flushed when the file is closed.  I need to dig into this some more.  In a way I hope it's simply my bug, because I can fix that.  Debugging can be a bit slow-going since I don't have JTAG on these boards, though.  But obviously this really needs fixing.

  Are you sure? yes | no

ziggurat29 wrote 04/27/2018 at 17:09 point

note for posterity on this thread:  I did work around the filesystem corruption issue, which seems to be a bug in the MDD library specifically when opening zero-length files in "r+" mode.  There is a separate log post on that issue, and the firmware image has been updated to include the workaround.
The workaround has the side effect of moving the filename in the directory listing and changing the case (because of the way MDD implements the "w+" mode, which I am using in the special case of zero-length files).
These side effects do not occur with non-zero length files, so an alternative workaround is simply to put a single byte in any zero-length files.  That byte will get overwritten when you save, and it avoids the MDD bug.

  Are you sure? yes | no

Mikael ☉. Bonnier wrote 02/23/2018 at 17:25 point

I have tested this TRS-80 emulator on DuinoMite-Mini and it works well, but there are some issues with semigraphics characters, see my video on https://youtu.be/_GjVNnPW9Zs .

  Are you sure? yes | no

ziggurat29 wrote 03/31/2018 at 03:13 point

Thank you so much for your meticulous work.  Harald Fischer discovered the same problem (unfortunately, I did not see his post until a year later), and I have corrected this in the current image.  Now your sines look...  Sinusoidal!

  Are you sure? yes | no

harald-w-fischer wrote 03/05/2017 at 11:48 point

I like this project and are about to add support for the HRG1B graphics extension. In the meanwhile I would like to note that there is an error in the graphics character font for characters 0x86 and 0x97 in file trs80font_alt.c as follows:

//{ 0x0007, 0x0007, 0x0007, 0x0007, 0x0007, 0x0007, 0x0007, 0x0007, 0x0007, 0x0007, 0x0007, 0x0007 },    //0x86 wrong HF
  { 0x0007, 0x0007, 0x0007, 0x0007, 0x0038, 0x0038, 0x0038, 0x0038, 0x0000, 0x0000, 0x0000, 0x0000 },    //0x86 correct HF

//{ 0x003f, 0x003f, 0x003f, 0x003f, 0x0007, 0x0007, 0x0007, 0x0007, 0x003f, 0x003f, 0x003f, 0x003f },    //0x97 wrong HF
    { 0x003f, 0x003f, 0x003f, 0x003f, 0x0038, 0x0038, 0x0038, 0x0038, 0x0038, 0x0038, 0x0038, 0x0038 },    //0x97  correct HF

I will post again when have made some progress with HRG1B extnsion.

Regards

  Are you sure? yes | no

ziggurat29 wrote 03/18/2018 at 00:09 point

Thanks so much for the feedback!  I apologize for not having responded for now over a year, but this site has never given me notifications until just today (despite my having been on here several times over the past year).  I will take a gander at your bug fix and integrate.

I am interested in the HRG1B extension, and had considered implementing it myself since you've got the framebuffer right there, but I never found any software that used it, so I never got around to it.  I'd love to see some software run that uses it.  (similar with the Orchestra80 emulation, and hard disk)

Cheers!

  Are you sure? yes | no

ziggurat29 wrote 09/09/2016 at 14:58 point

@Hacker404:  re descenders, yes, for the most part you should be able to simply move them up a pix and have them look correct.  'p' is the exception because it has two lines of descender in the image I have sent, so you need also clear the last line (making it look like a reversed 'q')

I have sent you the data (too long to post here), but as an example, here is image of the the lowercase 'p' with 'descender':

{ 0x0000, 0x0000, 0x002c, 0x0032, 0x0032, 0x002c, 0x0020, 0x0020, 0x0020, 0x0000, 0x0000, 0x0000 }, //p

to convert it to 'no descender' you would remove the top row (the first 0x0000) and stick a blank row at the bottom (the last entry); i.e.

{ 0x0000, 0x002c, 0x0032, 0x0032, 0x002c, 0x0020, 0x0020, 0x0020, 0x0000, 0x0000, 0x0000, 0x0000 }, //p

and in the special case of 'p' clear row 7 to zero.  (the others don't require this, they only have one descender row)

{ 0x0000, 0x002c, 0x0032, 0x0032, 0x002c, 0x0020, 0x0020, 0x0000, 0x0000, 0x0000, 0x0000, 0x0000 }, //p

The characters affected are:

'g', 'j', 'p', 'q', 'y'

Notes:

1) I explained separately why these are 16-bit quantities -- a technical need for my emulator.  Only the lower 6 bits are significant, so disregard the 10 leading bits.

2) Similarly, this bit image is for the full 6x12 character cell (I do graphics through the char gen as well).  If you are generating the signals via hardware, and only need the character images with no descenders, you probably want to drop the last 5 entries (raster lines) since they are always blank in that case.

3) Lastly, these image include the inter-character spacing in bit 0 (hence why all the even numbers).  If you generate that part of timing electronically, then shift all values down one, and there will only be 5 significant digits, so less logic (maybe; I guess the compiler will figure out that bit 0 is always 0 and there's not a lot of logic needed to generate for that case!)

4) Oh yes, 'lastly' lastly, as mentioned separately, if you are generating your video signals in hardware, you probably don't need the images for the graphics characters (0x80-0xff) and the first 32 which alias the uppercase characters (0x00-0x1f -> 0x40-0x5f).  Maybe that saves some logic for you.

Doing the things above will yield a 5x7 char gen array that should be accurate for the TRS-80 Model I second versions chargen (no-descenders, corrected bug for 'flying 'a'').

Cheers!

  Are you sure? yes | no

Hacker404 wrote 09/07/2016 at 23:40 point

Hi, I love the project. 

I would like to ask a favor. I am making a hardware clone, It's here - 

https://hackaday.io/project/5565-trs-80-compatible-clone

I had a system crash and i lost the pixel data used by the character ROM (generator).

Can you send a link to where you found it or a copy of your data? I would save me so much time. I am especially wanting the very simplified model I character set that hasn't been modified because I want to fit into the computational logic of a CPLD if possible so I don't have to include an expensive fast FLASH chip just for this function. 

Thank, Rob.

  Are you sure? yes | no

ziggurat29 wrote 09/08/2016 at 14:56 point

Absolutely.  Send me a PM with where I can send it (email or whatever).

System crash sucks!  I myself have a little stack of harddrives with long lost projects.  One day I may become bold enough to take the soldering iron to them....

Where I got it:  I found a TrueType font for the characters.  I then wrote a Windows program to emit text with the font, followed by code to pluck the pixels from the resulting screen image and assemble the binary image for the character generator.  This was straightforward, if boring code.  Also, the TrueType font was not absolutely correct, so there was an intermediate correction step (minor; characters 00-1f alias 40-5f, and c0-ff alias 80-bf).

The output I generate is (now) a simplified format; an array

const unsigned short g_abyFontData_00[256][12]

of binary pixel data.  Each of the second subscript 0-11 is successive rows, and each of the first is obviously characters.  The values are row data, msb = first pixel, with the value right justified, i.e. there are leading zeros for unused pixels; the trs80 character cell is 6x12 pix.  So why did I use unsigned short instead of unsigned char?  For my software generator, I generated two fonts, one for normal and one for the wide characters, hence I needed more bits for the latter.  I'm sure you wont need that for your hardware-based system, but I wanted to explain why the extra bits are there.

As simple as that array definition is, I suspect you can use it as-is, perhaps with some textual massaging for getting it into the form you need for your CPLD.  If it's more handy for you to have it in a different form, let me know; I could tweak the fontmaker program output for you to save you some time in the text editor.

Final note:  this image represents the last character generator rom -- i.e. the one with the glourious one-pix descenders.  There were two prior:  the second had no descenders, which made some chars look goofy, and the first had a bug where the @ was raised one row.  If you wanted to have those for historical accuracy, you could tweak the font generator (or really just hand edit the binary since the change is trivial) to create them.

Anyway, let me know where you what me to send whatever and I'll do so.

Cheers and good luck!  I think your hardware replica is very cool, too!

-dave

  Are you sure? yes | no

Hacker404 wrote 09/09/2016 at 05:30 point

Hi,

I tried a version with descender and that was too complex to fit into the small CPLD that I am using so I am really after a version with no descender. Can I just lift the descender characters up a couple of pix or are they different in other ways?

Thanks.

  Are you sure? yes | no

mauroxavierneto wrote 01/18/2016 at 22:02 point

I tried to write your hex in my  Colour Maximite from Altronics (K9555), but it doesn´t work (black screen). Can you give me any tip to compile from the source to run in my board?

PS.: Sorry about my bad english.

  Are you sure? yes | no

ziggurat29 wrote 01/18/2016 at 22:33 point

Hmm, I would /think/ that it would work as-is with the colour maximite, but I did toss out a lot of maximite model-specific stuff, so maybe I rendered it more bound to the UBW32 version.  (e.g. I'm pretty sure the original monochrome model is not supported).

On second thought, I believe the major difference between the 'classic' colour maximite and the UBW32 version has to do with the linker script, to accomodate a different boot loader.  If that's true, then the prebuilt hex file for the UBW32 version could easily be expected to not work for different hardware (well, different memory layout).

As an initial sanity check, I would flash back your original firmware to prove the board is good, and not bricked, then we can look at what needs to be done here.


So, are you able to compile at all now?  The project should be self contained, (I think).  It is created for the older Microchip stuff (i.e. pre-MPLABX).  Coincidentally I had just set up a new build VM, so I can see I installed:
*  MPLAB IDE v8.92
*  MPLAB C32 v2.02a

I'm pretty sure that  is all you need insofaras toolchain.  You may want to do this in a virtual machine (as I do) because you really want to compile with -Os, which you only get for 60 days.  It will work at -O1 (supported by the 'Lite' version), but the extra optimization really helps having more free CPU overhead for the emulation.

OK, also let me know if you can get the code from the repository (linked on the project page).  That's a Fossil-SCM repository; if you log in as 'anonymous', then you will be able to download a zip file of the current source snapshot.  On the other hand, if you have trouble or just don't want to bother, then PM me with, say, and email, and I'll zip up my project workspace and send it to you.  At least then you'll have a chance at futzing with it to see what's up.  Actually, I'd like to know, too, since it really should run on the 'classic' colour maximite just fine, but I don't have one in my possession to test with.  I'll do a little googling on the model you mention to see if there is anything obvious about it's implementation.

Your English is surely better than my Portuguese.

  Are you sure? yes | no

mauroxavierneto wrote 01/18/2016 at 22:46 point

My board are working ok, I reversed to original firmware and it´s fine. I´m curious about the fact that in the Geoff´s Projects site are saying that the UBW32 and Colour Maximite share exactly the same firmware...

http://geoffg.net/ubw32.html

When I saw your site in 2015, I tried to compile the firmware without success (has generated a .elf and have the same black screen). In any case, I´m glad that you answered me so fast.

I will gonna try to compile it again...

  Are you sure? yes | no

Mikael ☉. Bonnier wrote 05/07/2018 at 16:21 point

I could not find MPLAB IDE v8.22 on http://www.microchip.com/development-tools/pic-and-dspic-downloads-archive . The closest are v8.20a and v8.30. Why are you using this version and not the latest?

  Are you sure? yes | no

ziggurat29 wrote 01/18/2016 at 23:25 point

(I don't know why I can't reply to your last post, so I am replying to your first; this may make messages out of order).

Yes, hasty words about the bootloader.  I concur that is not it.  I did notice one thing looking at the code, in Main.c::18-21, I have commented-out an include that originally have a bunch of #pragma config items for doing all manner of things like setting up clocks, etc.  I took that out, because the UBW32 bootloader does that beforehand, but maybe it is still necessary for 'classic' colour maximite.  I don't think I have that file in the repo ("Configuration Bits.h"), but I can send it to you if you want to try that.

Some other things:
*  black screen.  Hmm.  Is CPU halted, or is it just unable to generate video?  As a quicky, you can plug your [black screen] maximite into USB, and you should still get CDC enumeration (I have that in the firmware, though I'm not using it yet.  But it will enumerate as a COM port).
*  When I was bringing the board up, I relied upon twinkling the various LEDs to know how far it got in the code.  (I don't know why, I cannot use JTAG to debug this board and firmware).  Things like

    LATECLR = 1<<0; //led 3 (yellow) on

    LATECLR = 1<<1;  //put on the red light

    LATECLR = 1<<2; //led 1 (white) on

    LATECLR = 1<<3; //led 4 (green) on

will turn on the various LEDs, and you can move that code incrementally down to see where things start to croak.  I would start an Main.c:1978 (after setting vectored interrupts)  with the yellow LED, and do a kind of manual binary search up until about 2001, at which point all the hardware should have been initialized successfully, and the video machine cranked up.  If you need to go further, at line 2019, you should definitely have something on the screen, because that's a decorative simulation of the random screen data on boot up that the original machine had.

I do appreciate your trying out the project, and I'm sure we can make it work.

  Are you sure? yes | no

mauroxavierneto wrote 01/18/2016 at 23:42 point

When I flashed with your actual hex, I think the CPU was freezed because when I turn on the Colour Maximite, the keyboard led flashed one time in the boot, and then turn off one second after. I tried some keyboard commands to control de TRS80emu but nothing has happened, no sound, no image, no lights.

Can you send me a new .hex file compiled with the original "Configuration Bits.h"? 

  Are you sure? yes | no

greenaum wrote 01/06/2016 at 19:35 point

If a disk program doesn't load in extra data once running, then a snapshot would be fine anyway. Indeed many of the games for the Spectrum (an example I'm most familiar with) are snapshotted after the copy-protection check has been done. 

The Multiface, btw, was an add-on for 8-bit computers, those that exposed the CPU bus to a connector on the back, at least. Usually paged in it's own ROM, and contained 8K RAM (or early versions used the screen RAM for workspace, messing the screen up til the game re-drew it). Pressing a button tripped the NMI line and paged in it's ROM, from there you could snapshot to any medium it supported.

There was also some nice support software that you could load into the 8K RAM. Stuff that would search for values in the machine's main RAM, for things like life counters, spaceship shield levels, etc. It could alter the code from there, letting you make  up your own cheats. Magazines were full of POKEs back then, Multiface or otherwise, you could always type your own in, after the machine code has loaded but before it runs.

Ah, the good old days! I can see why you're doing this!

On the issue of disk drives, the common controller chips have been emulated somewhere or other, there might be code you can plug in, perhaps if you contacted a friendly emulator author. Sure you know, programmers are usually keen to share code with someone who appreciates it and can put it to use, even if the source isn't publicly released.

  Are you sure? yes | no

ziggurat29 wrote 01/08/2016 at 02:20 point

I can see the Multiface via wikipedia.  I don't think we had one for the TRS-80, but probably could have, at least for the Model I, which had the whole bus pants-down on the card edge (a lot of it's electrical undoing, and part of the reason for the unibody Model III and IV.  Well that and FCC part 15...).

Yes, the existing desktop emulators have plenty of  existing code to use; I would probably use xtrs's at least for reference, if not as-is.  Still, the idea of making a BogoDOS interests me because I'm making new Z80 code for an old machine (and because it might give a better user experience, sort of like with the cassette emulation, which now makes 'cassettes' a delight to work with).  But you never know what I'll do -- I certainly don't -- and I'm eager to get back to my cryptographic calculator project, so I want to close this one up for a while....

  Are you sure? yes | no

greenaum wrote 01/06/2016 at 02:08 point

As far as disk loading goes, you could do what the early ZX Spectrum emulators did, with (originally) .SNA and then .Z80 files. Just take a snapshot (from a PC emulator, perhaps) of the machine's RAM and registers (including hardware ones) while a program is running. Then have a simple menu system, outside the TRS-80 emulation, that loads the snapshot into RAM.

Another way might be to add some pseudo-instructions of your own to the Z80, that load in snapshots. Then patch the DOS / BASIC etc to use them, at which time the hardware takes over and loads a snapshot in.

Or if not pseudo-instructions, have your hardware keep an eye on a certain I/O address, and again, load in a snapshot when it's called. Patch your routines accordingly.

Yes, it's cheating, but easier than emulating a disk drive, and it gets the job done!

Actually snapshotting was done back in the day, the Multiface interface would dump a memory / register snapshot to disk / microdrive / etc, as a way of supporting hardware that the Spectrum's own ROM didn't.

For bigger games that rely on disk access, this won't work, but are there any?

  Are you sure? yes | no

ziggurat29 wrote 01/06/2016 at 03:40 point

You make valid points; I do currently use some unimplemented instructions to facilitate a 'trap' mechanism, and I currently use that to patch the ROM cassette routines to directly read from SD rather than bit-bang in at realtime speed.  Now cassette is some 160x faster -- it's more pleasant than floppy disk, haha.  But I'm hosed if I want to run a program that has it's own low-level cassette loader.  And yes there many that do their own disk IO -- it was commonly done as a copy protection scheme (e.g. non-standard formatted track that BACKUP can't copy).  But, also as you point out, 'who cares'? because this is more of a toy than a saleable product.

As for snapshotting running state, that should be child's play, especially because the entire address space is only 64K, and I've got a 2GB SD card, haha, so room for some 32000 snapshots, haha.  Maybe I'll add that....

  Are you sure? yes | no

Similar Projects

Does this project spark your interest?

Become a member to follow this project and never miss any updates